HOLIDAY DONATION DRIVE - SUPPORT MSW - DO YOUR PART TO KEEP THIS GREAT FORUM GOING!
×


Bill97
-
Posts
2,704 -
Joined
-
Last visited
Content Type
Profiles
Forums
Gallery
Events
Everything posted by Bill97
-
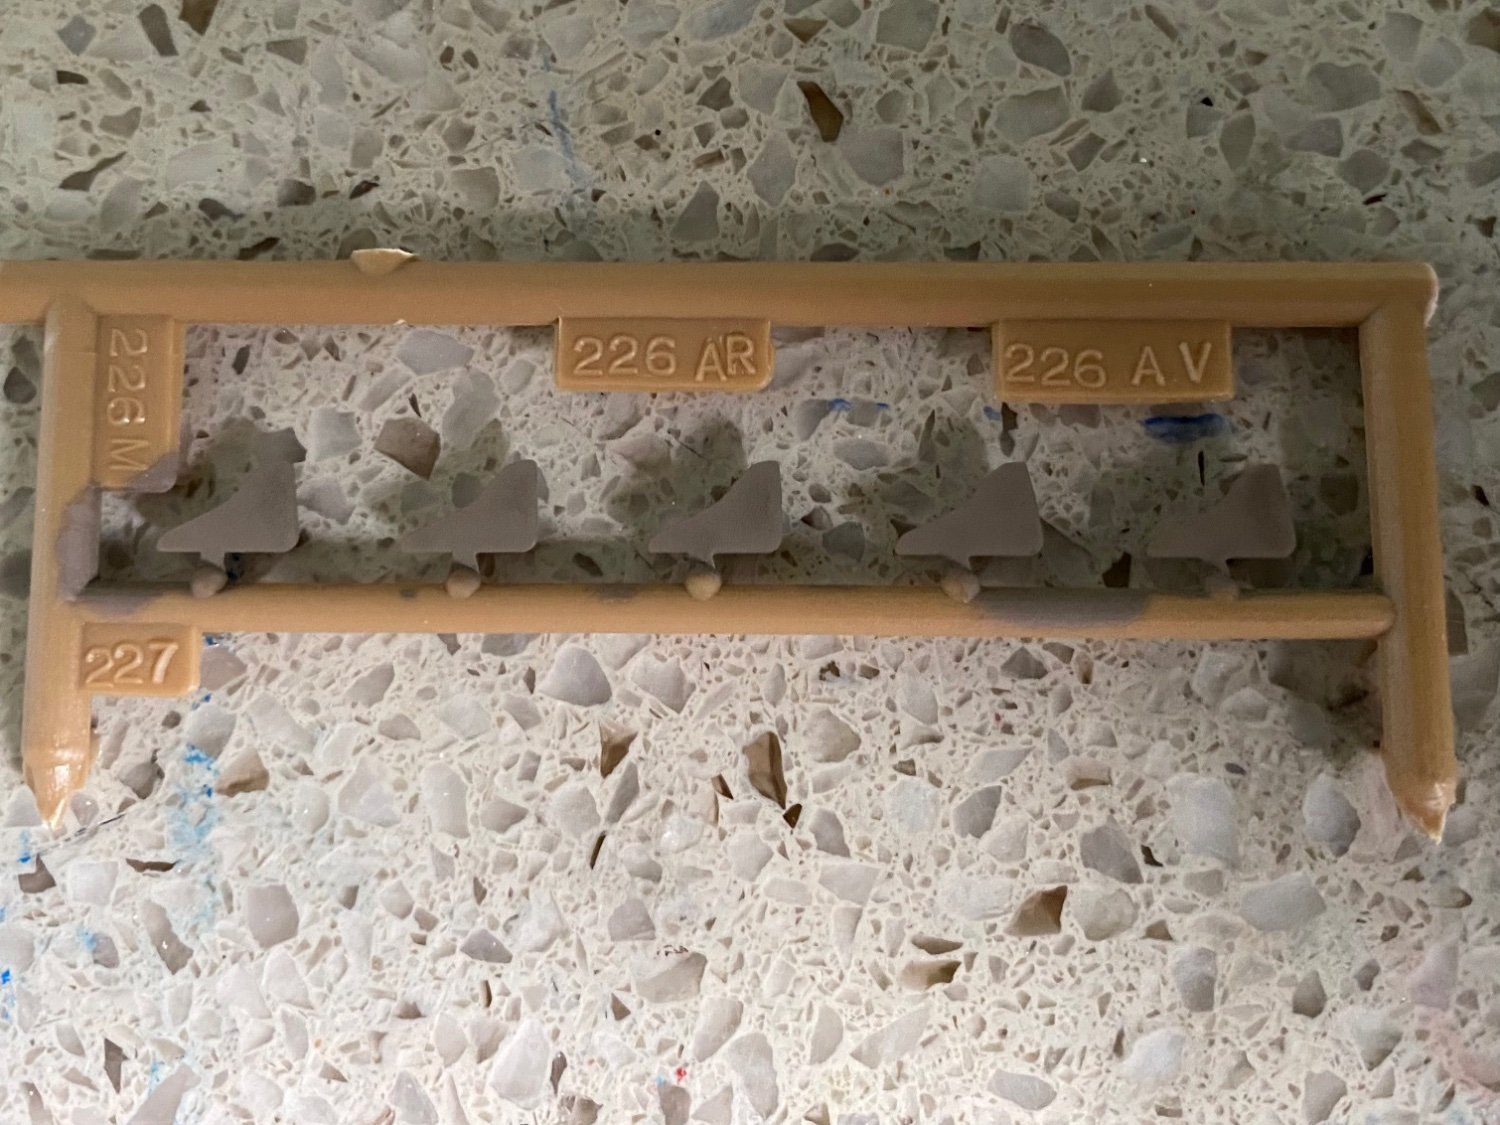
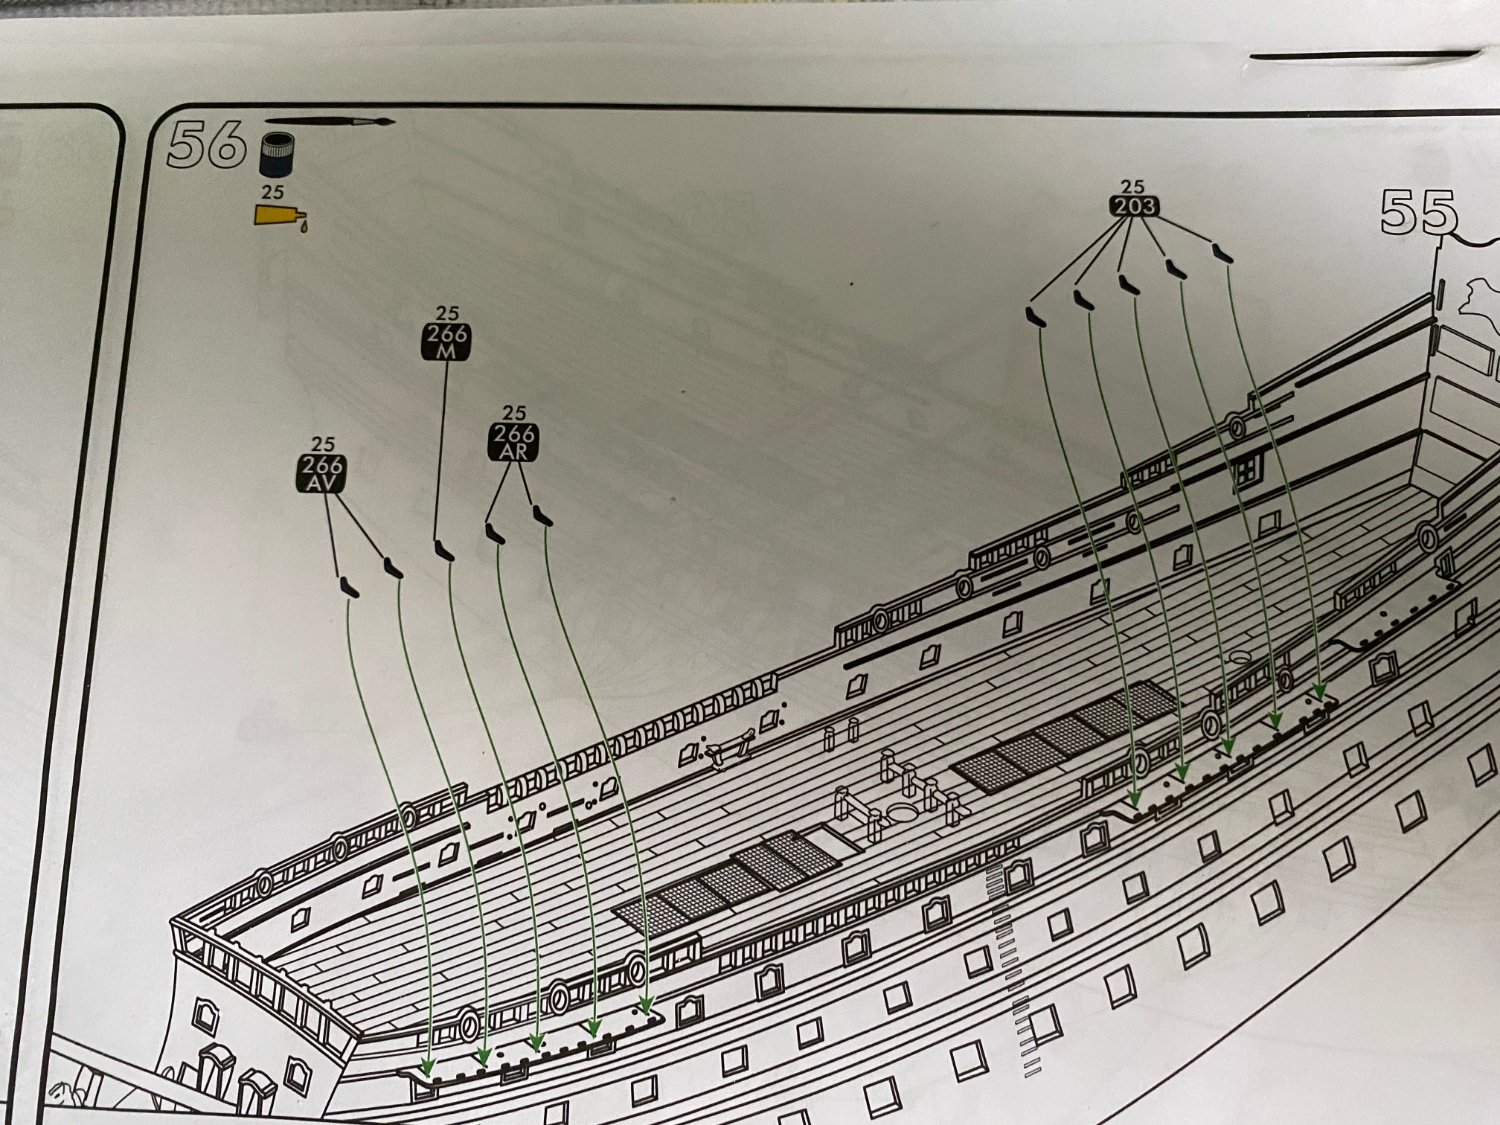
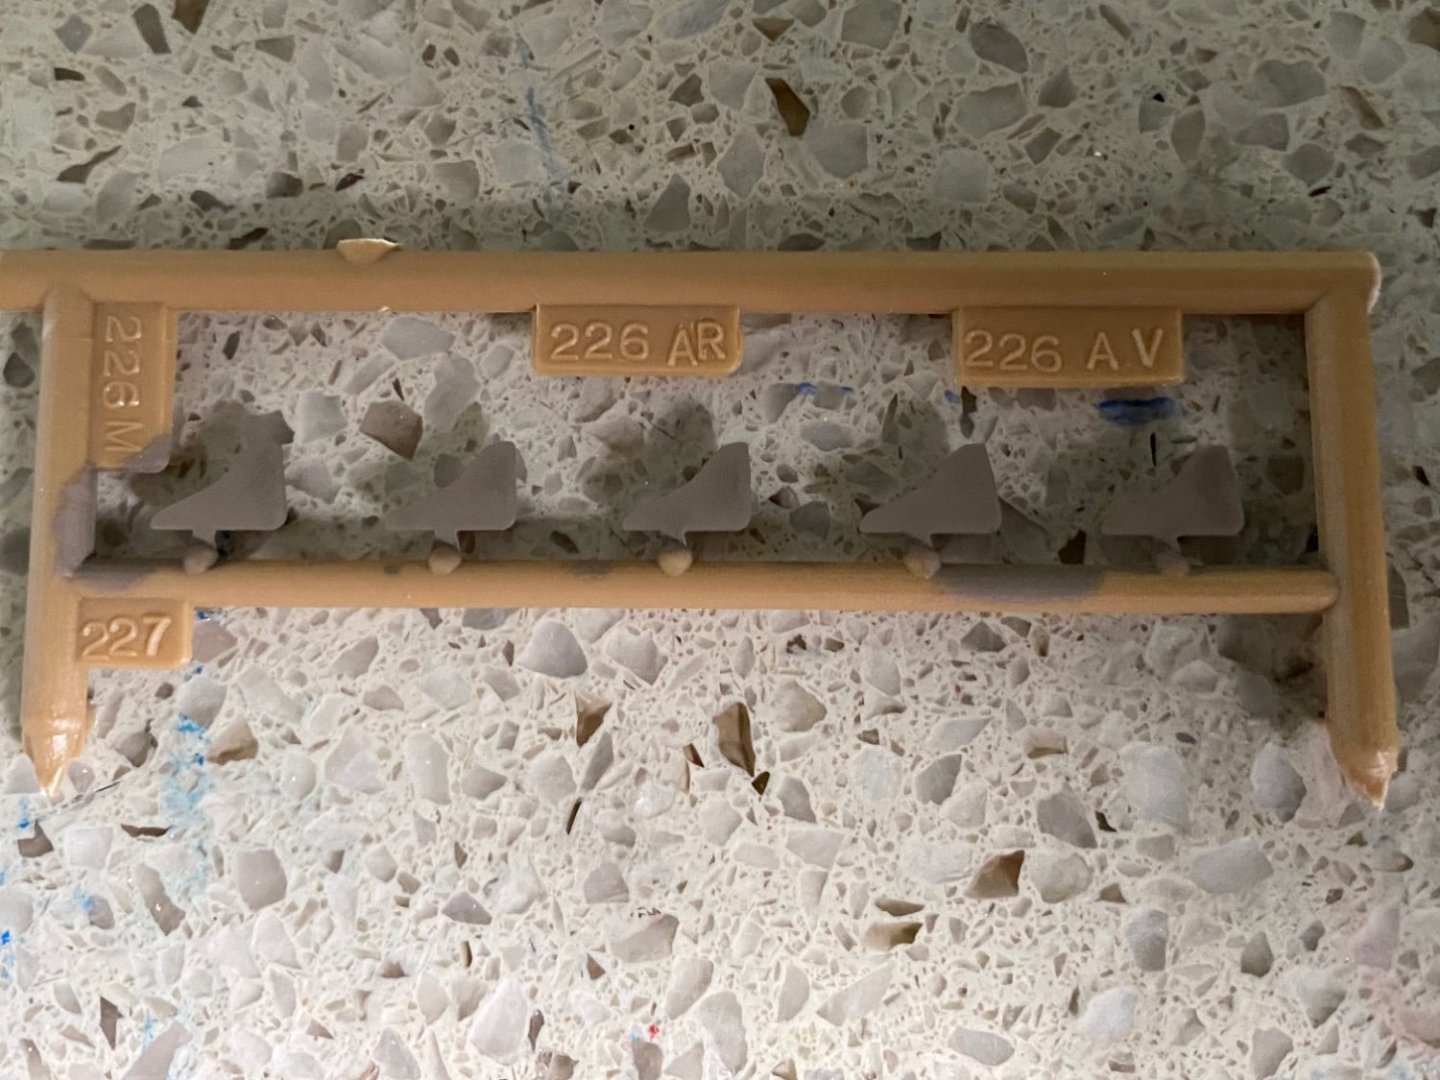
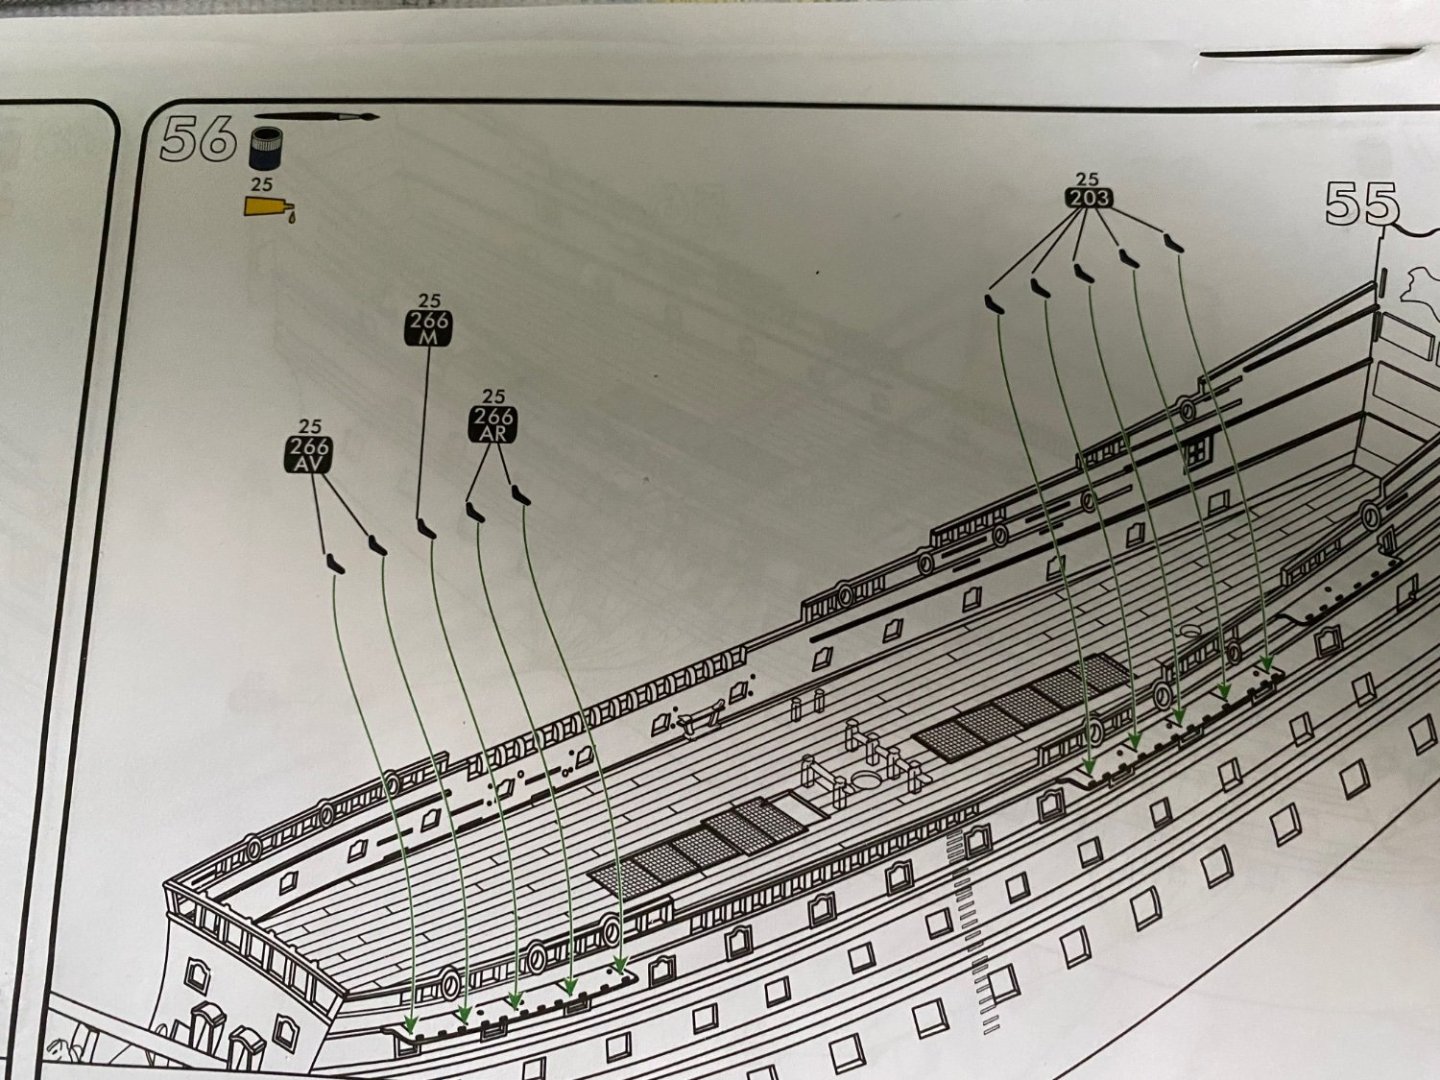
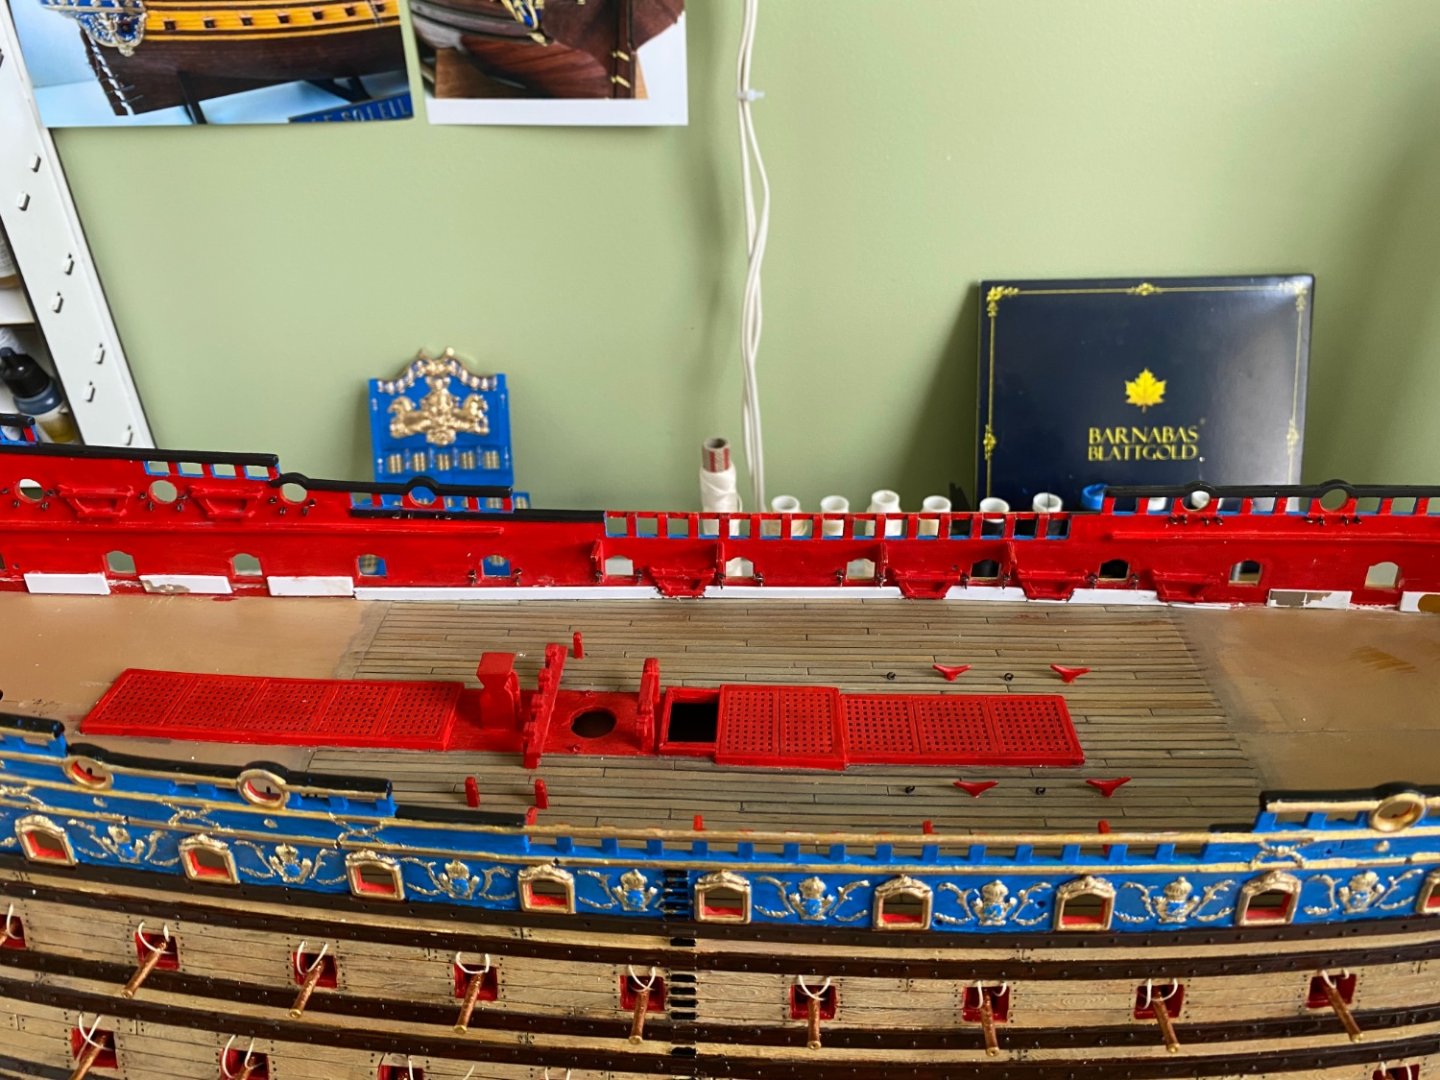
OK FINALLY! I am just about ready to get back to my “shipyard” workbench. One more day on the Star Wars remodels and I will be finished. Got out the channels and the little knee support pieces from the kit and painted them. I discovered that Heller has a set of the little support knees incorrectly numbered. Part 266 AV-M-AR. I searched through the kit for the numbered pieces in accordance with the instructions with no luck. Finally finding them numbered differently than the instructions. Part 226 AV-M-AR. All is well.
-
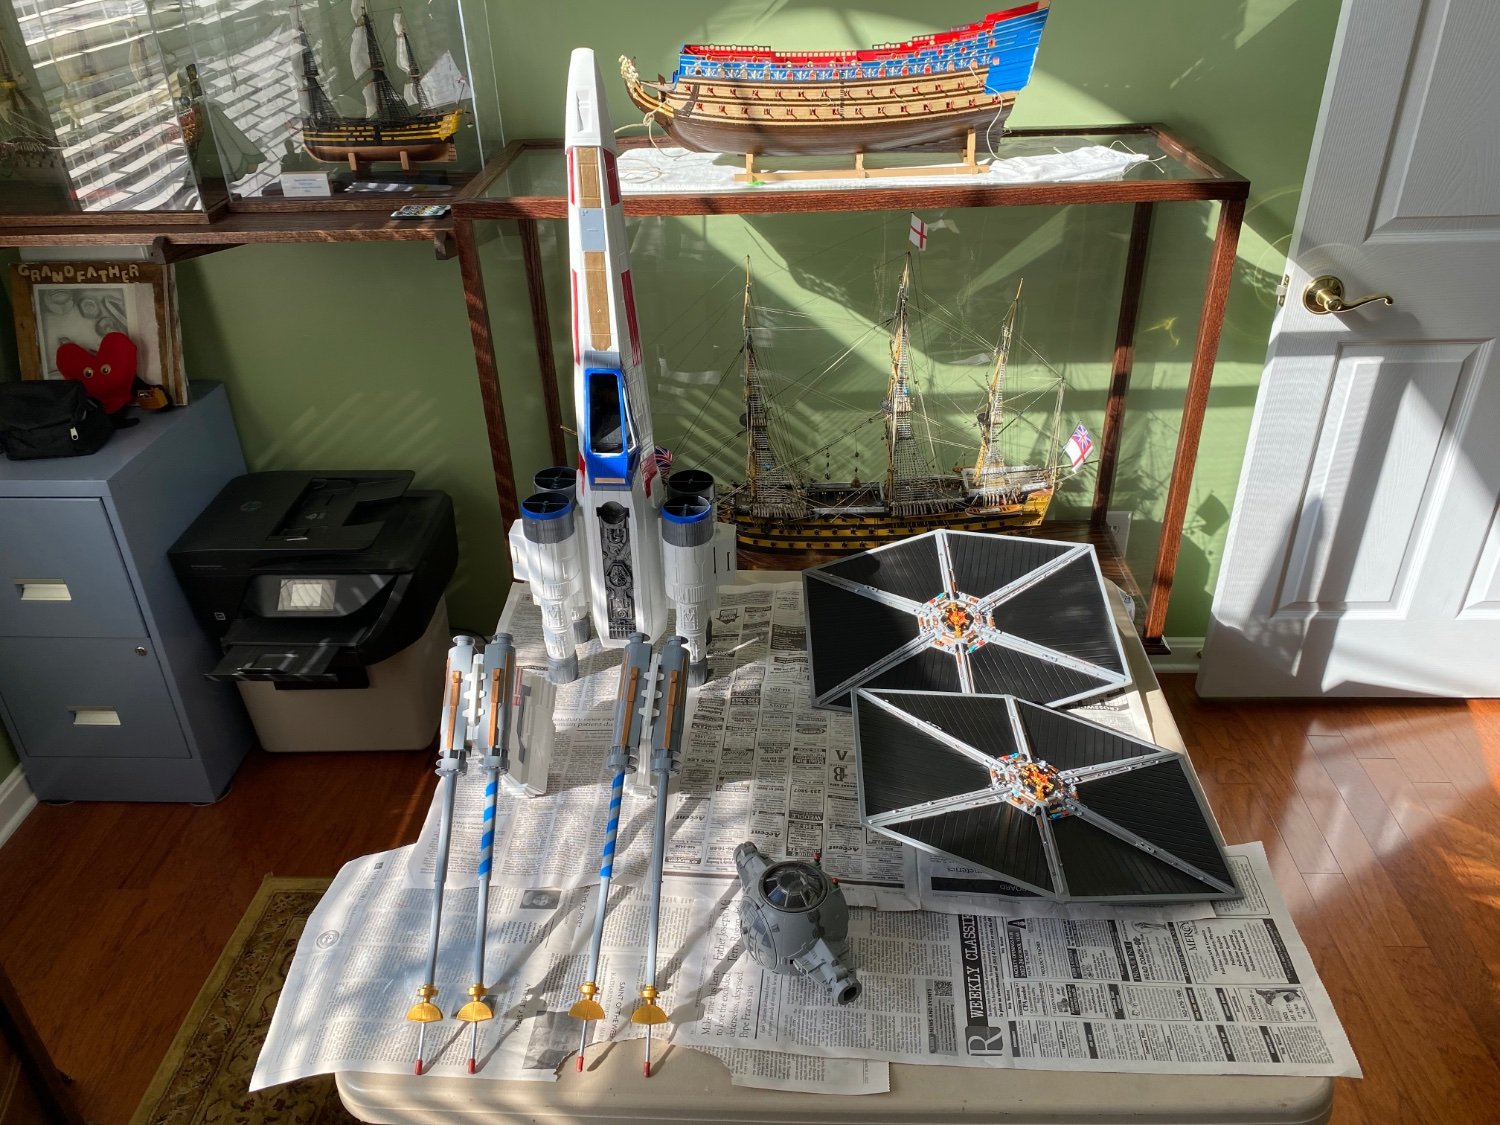
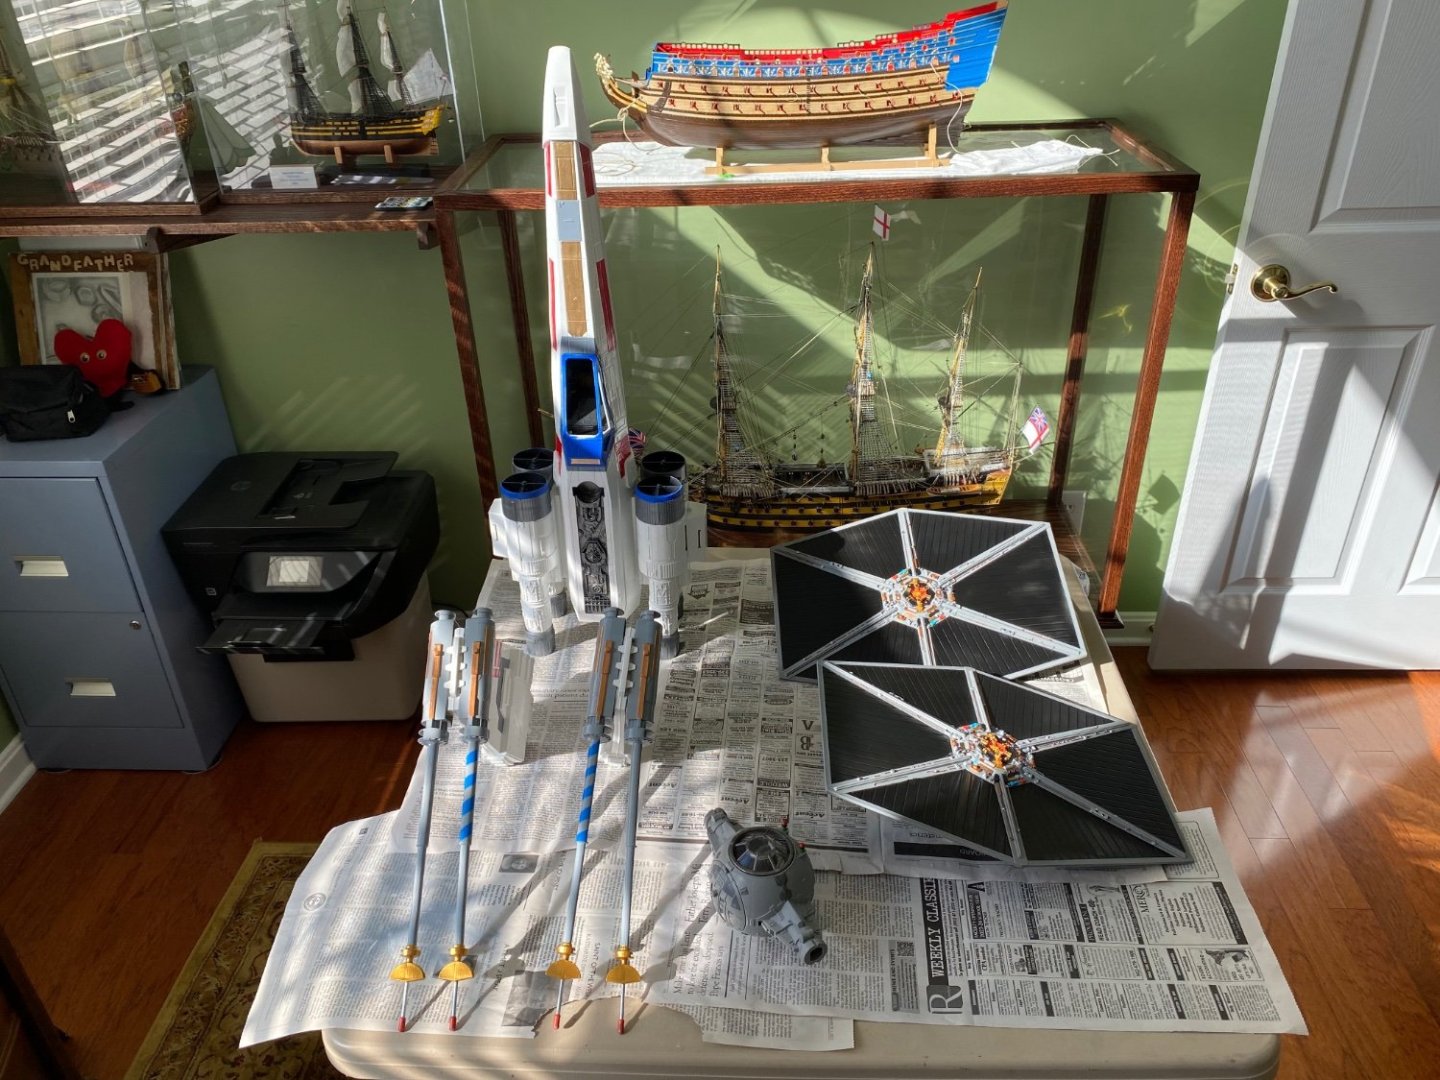
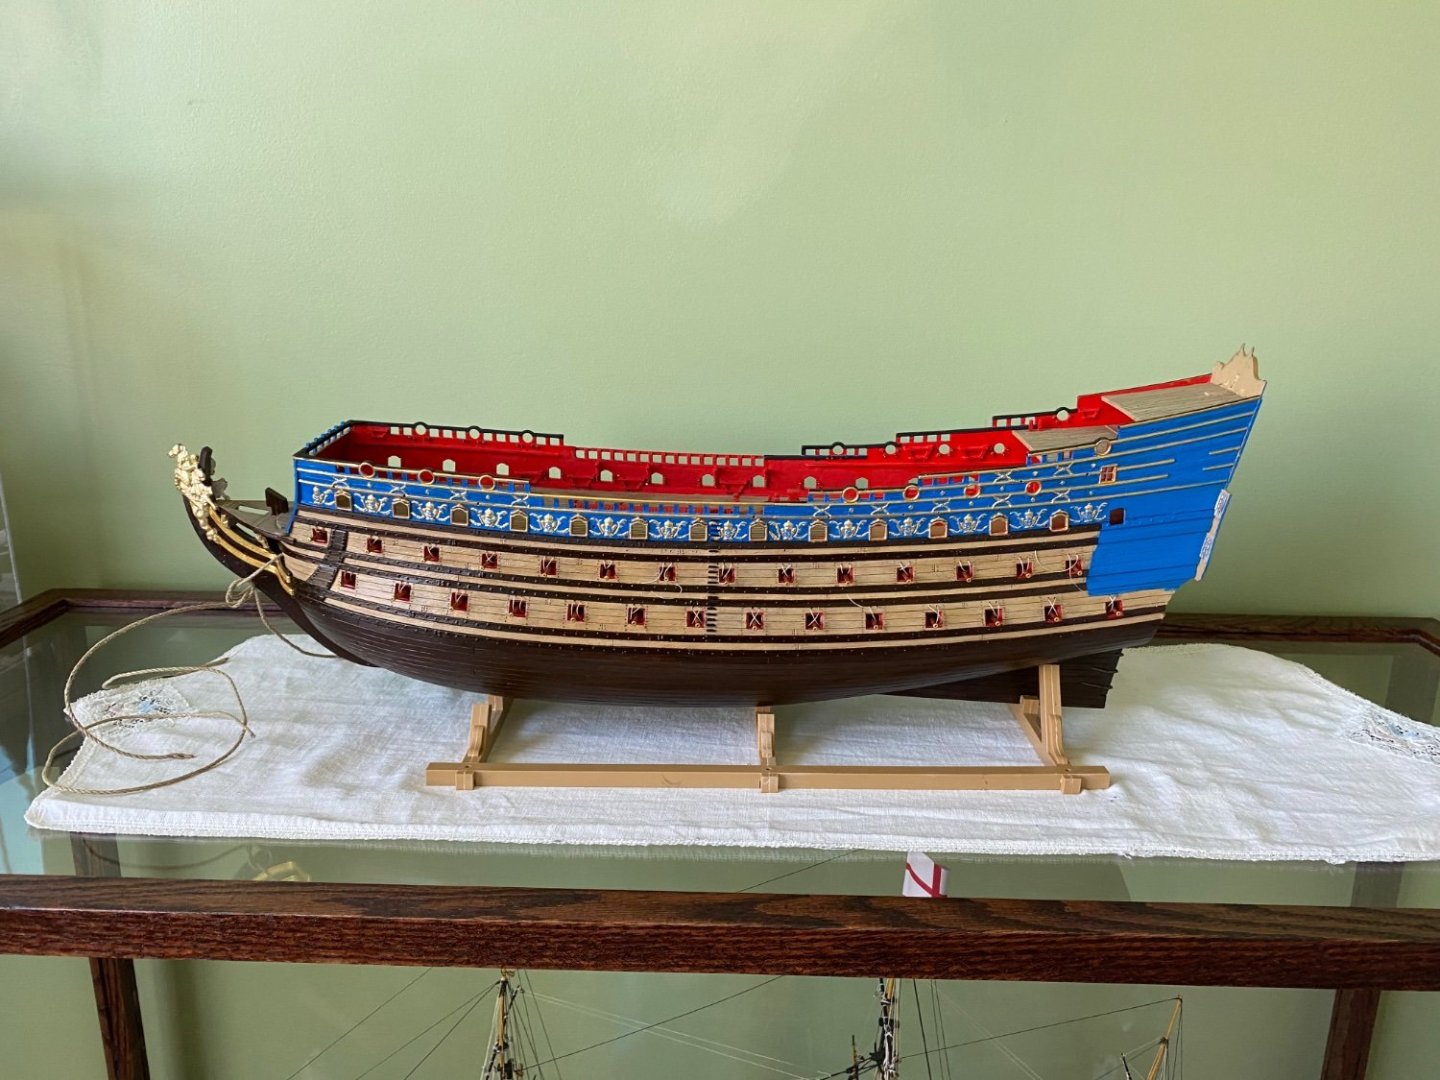
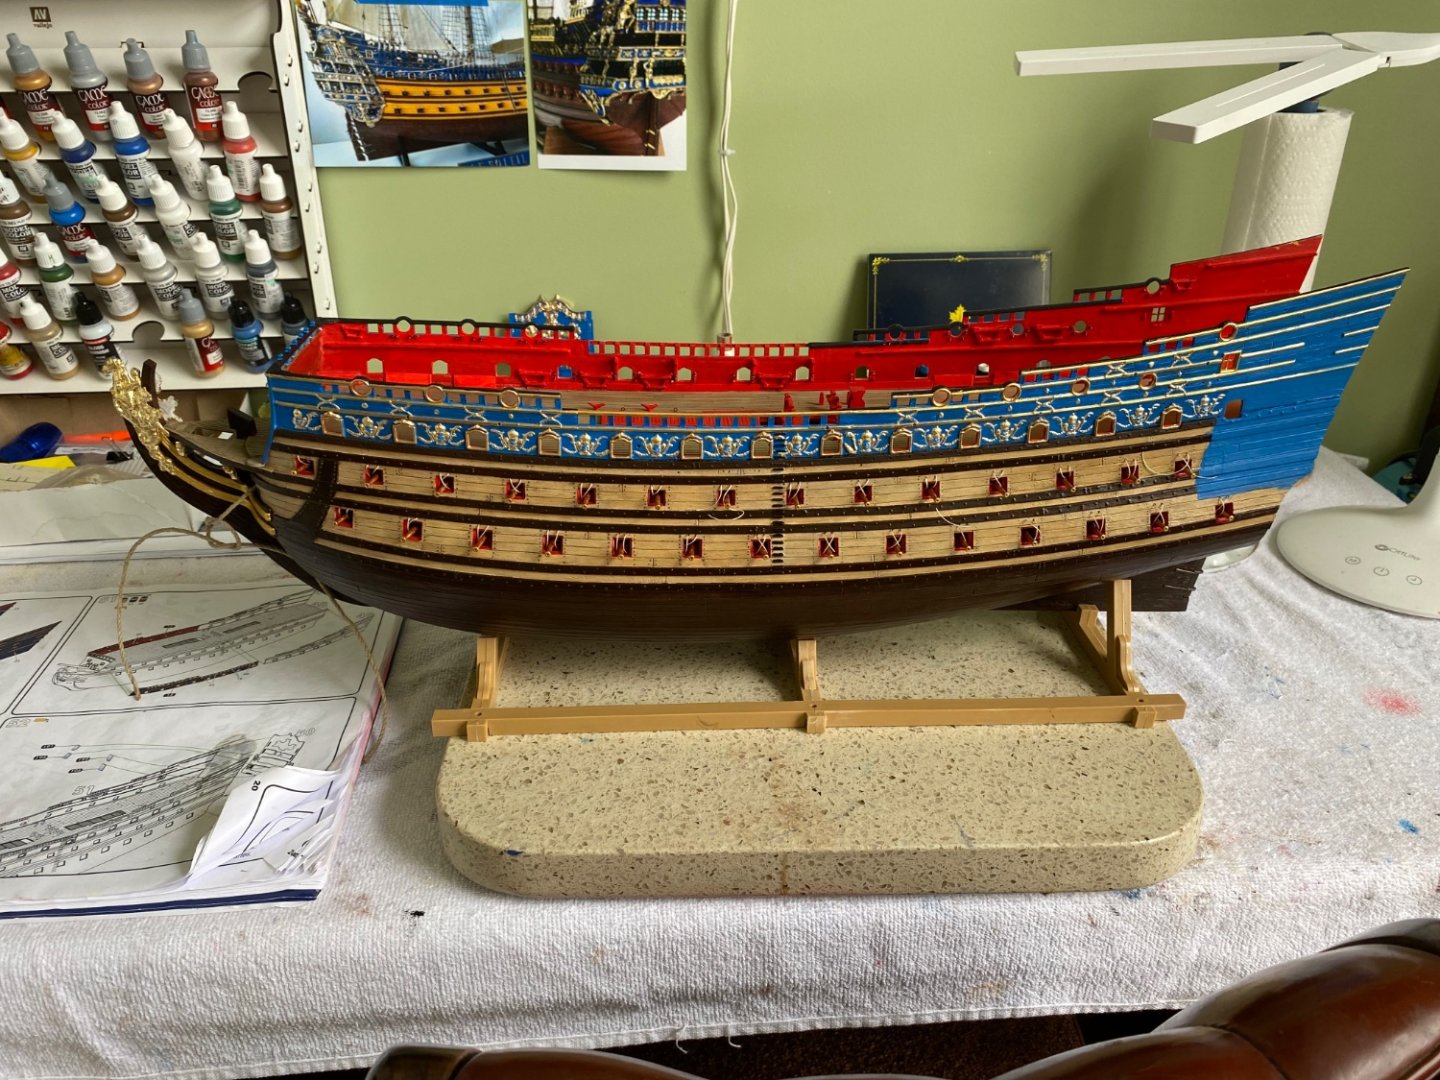
Now here is a space/time continuum! Historic HMS Victory and Le Soleil Royal in the background and Star Wars X-Wing Fighter and Tie Fighter in the foreground! 😊
- 1,508 replies
-
- 1
-

-
- Le Soleil Royal
- Heller
- (and 1 more)
-
Interesting issue here. Thanks guys I will give it thought as I am getting into this area.
-
Marc I got tickled yesterday evening watching one of our local TV channel’s weather man. He gave the forecast as usual then went on to give his social media contact information. His first name is Marc, spelled like your’s. Each time he said it he would add “that’s Marc with a C”. I am sure I have heard him say it many times over the years but never gave it much thought. When he said it yesterday I thought of you and wondered how many times in your life you have needed to repeat that phrase? 😊 PS, I am close to getting back to my SR so don’t you guys forget about me. I will still desperately need your advice as continue moving forward. One small thing I am curious about, and the same curiosity on my Victory build, is the sheet (if I am right) that runs along the inside of the UB. Yesterday I took a break from my other project and was looking at my SR. I decided to do something quick and easy so I added the two sheets according to the instructions. Do these lines lay under the eventually added cannon barrels?
-
Thanks Henry. Will see how it goes when I get there 😊.
-
Henry during this hopefully brief period that I am spending way less time with my Soleil Royal because of another project (see my build), I still read a lot of other build logs in the morning with my coffee and fireplace. Your entire log from around the Spring of 2015 pertaining to your rigging of the ship is fascinating, and I read through it often. Such beautiful work that I intend to refer often when I get to that portion of my build. I am especially looking at your section on rigging the visible cannons. I will soon be working on that task. I have several screen shots saved of your rigged cannons that I can zoom in on to see the detail closely. I have made a “million” tiny blackened eyebolts so I have plenty for the trucks. I already have four eyebolts glued in at each hatch (two each side). For my study purposes in hind sight now is there any advice or recommendations you would make for rigging my cannons? Again let me say all of your rigging section is incredible and I look forward to trying to come close to what you have done.
-
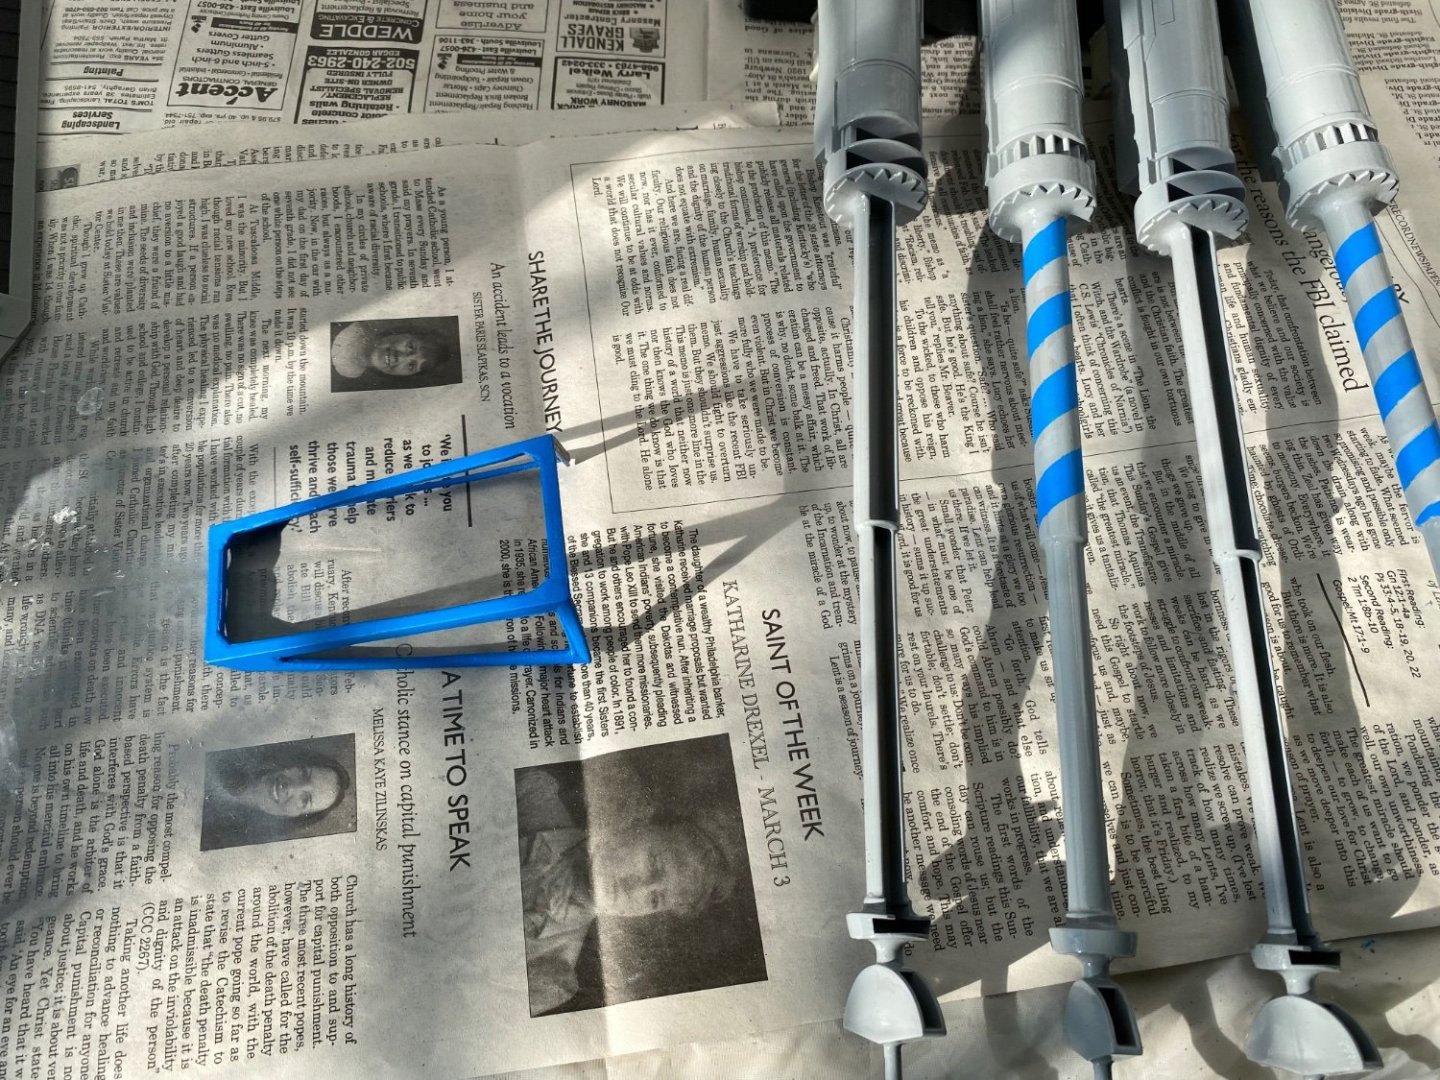
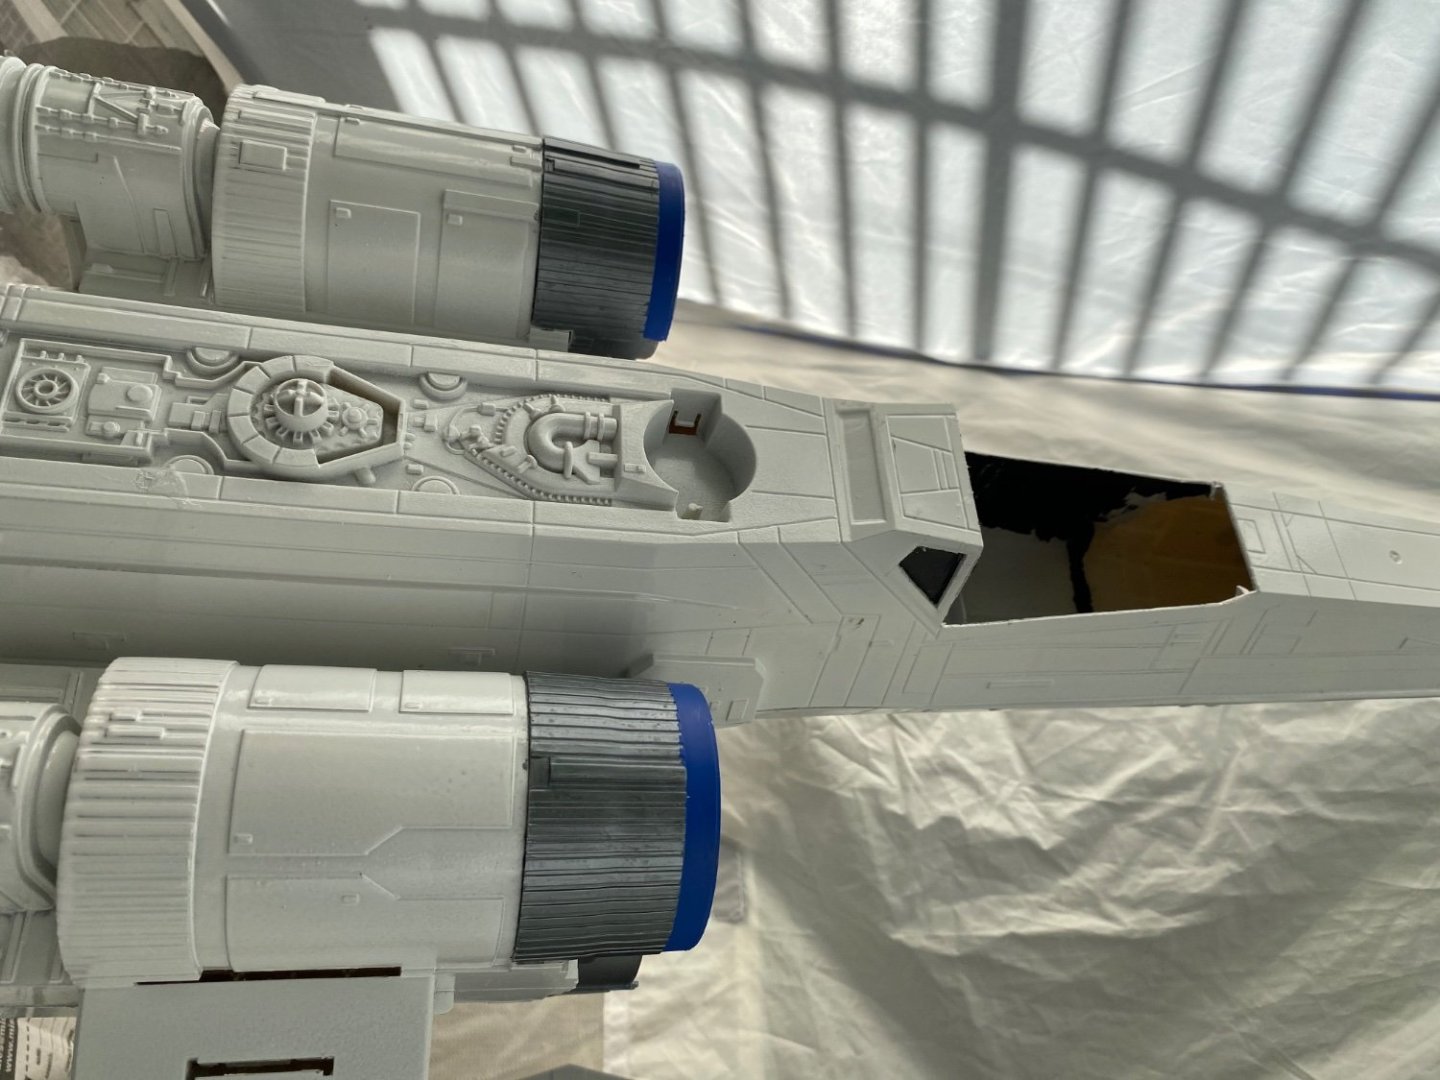
Also a Tie Fighter Ian! The other pictures are of the Tie Fighter Solar panels. You’re right Marc on the enamel primer. The Vellajo Surface Primer I put on initially was acrylic. Had to use acetone to clean it all off. Then start over with enamel.
- 1,508 replies
-
- 1
-
-
- Le Soleil Royal
- Heller
- (and 1 more)
-
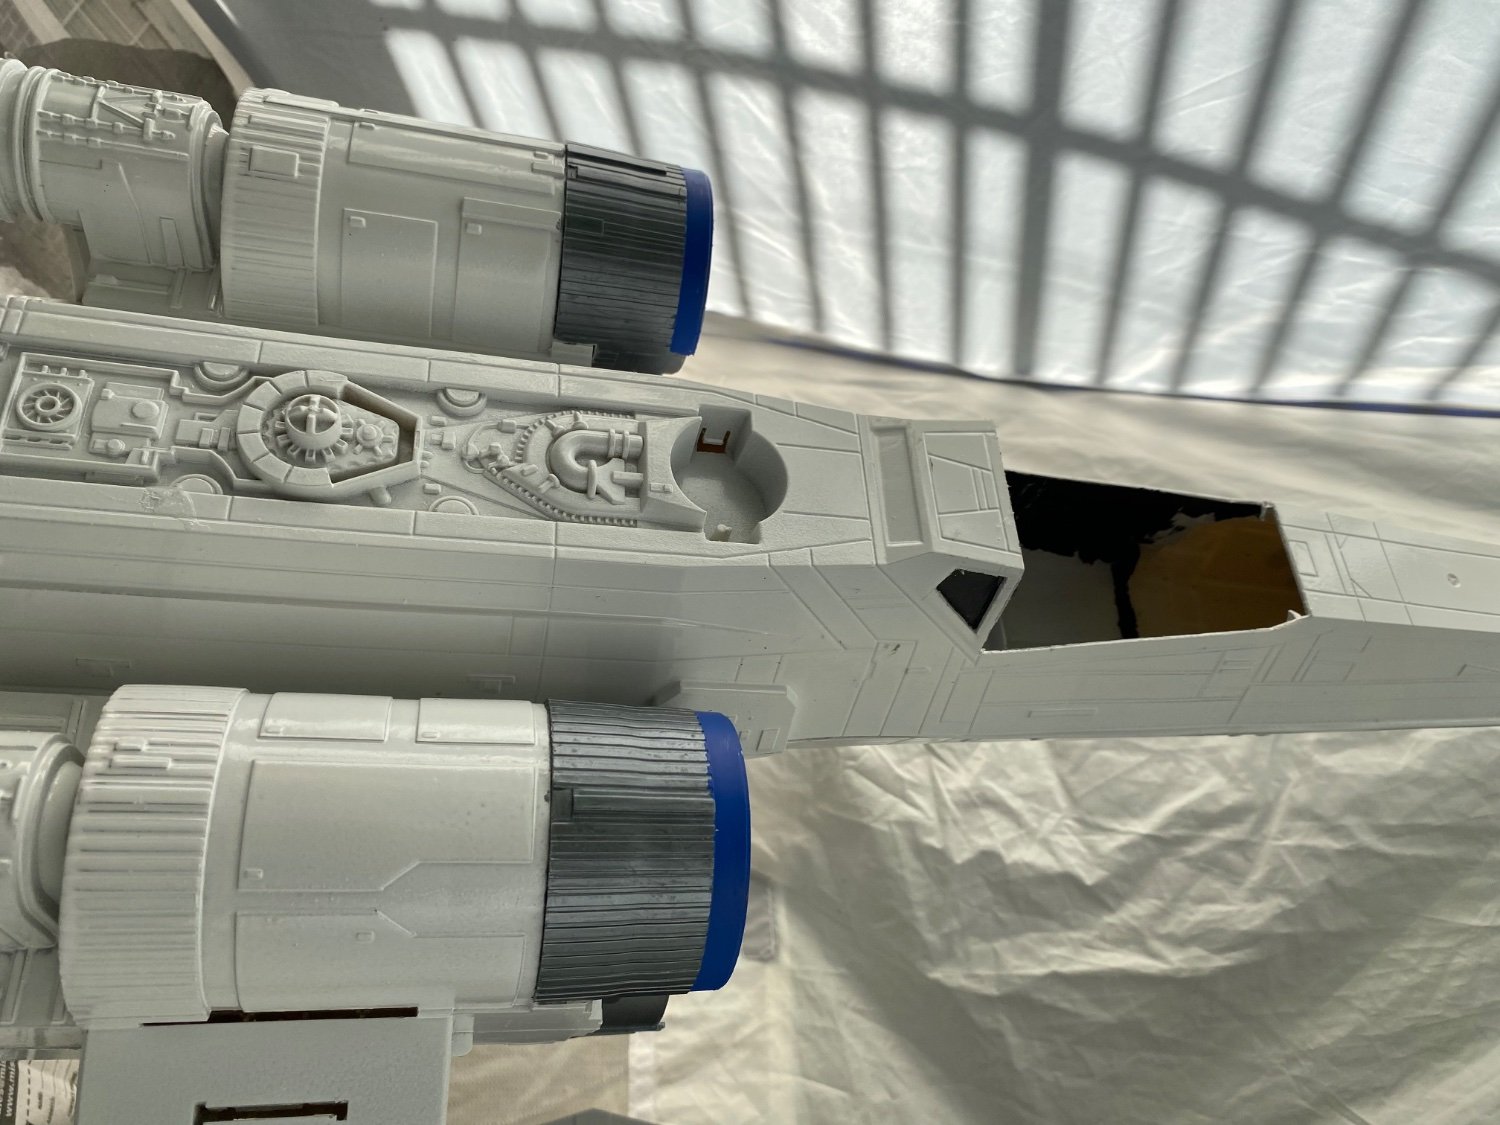
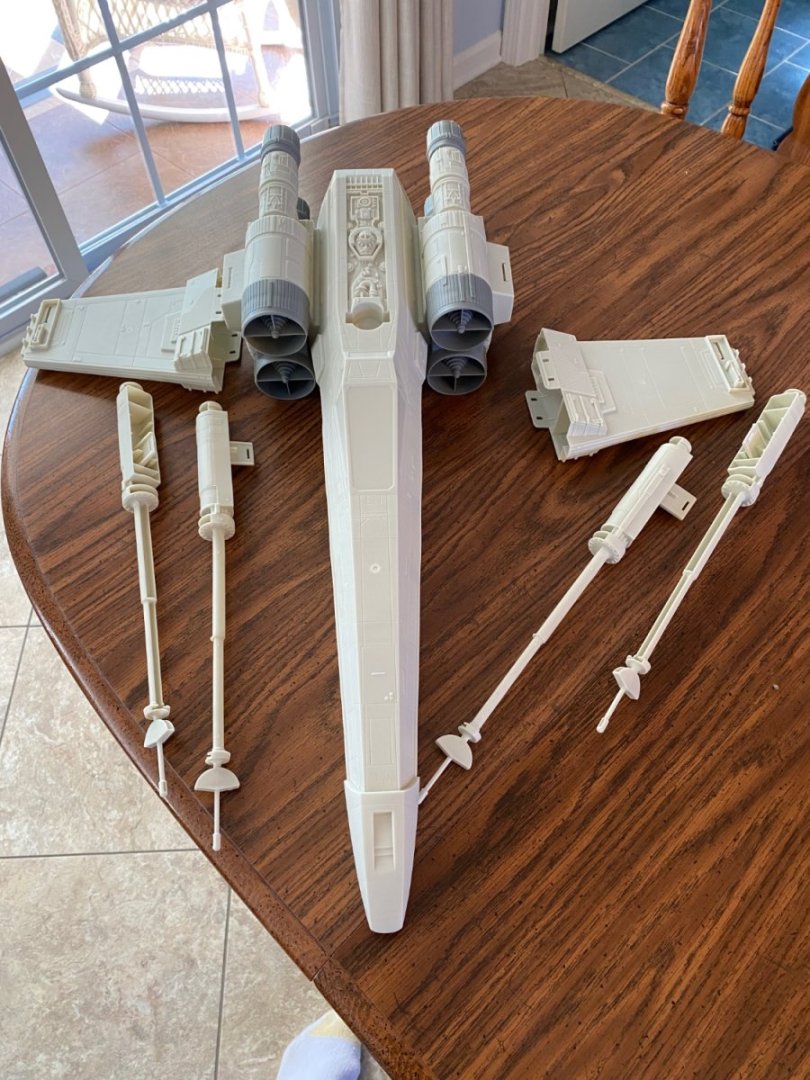
So anxious to get back to my Soleil Royal setting on another work table in my “shipyard”. As I have leaned the pleasures of bashing a model I can not help but have that knowledge slip over into the two Star War’s ships I am renovating for my grandson’s birthday! The original request was just for me to update the paint scheme. However I can not help but go a good bit deeper. I cut off the top to the cockpit. Cut out the plastic molded windows and replaced them with clear plexiglass. Working on fabricating a seat and instrument panel that will now go into the open cavity for the scale Luke Skyswalker bought on line. Using various online available paint schemes I have found to do the painting. One issue that has been extremely frustrating is the plastic that these ships are made from. I have absolutely no problem getting my Vellajo acrylics to stick to the model ships I have built, with or without I using a surface primer. I understand water based paints do not usually adhere to plastic, but as I said I have not had a problem with my ships and Vallejo acrylics. Unfortunately for some reason that is not the case with this X-Wing. I airbrushed an acrylic surface primer over the entire piece. A couple days later I began masking it to prepare for the different colors. As I was working with the masking tape I saw how easily the surface primer just pulled off the plastic. I knew then I had a problem because any paint I applied would pull off 😤. I stripped all the acrylic surface primer off (which was quite a task to get into all the little nooks). I then repainted it with a spray white enamel and will use enamels for the colors. Over on my ship work table I have the 6 channels and the knee braces ready for painting. Installing them is next up in the instructions.


- 1,508 replies
-
- 1
-
-
- Le Soleil Royal
- Heller
- (and 1 more)
-
Stern plate glued in place and fits nicely. I have to reduce the amount of time I spend in the “shipyard” for a bit. I have been tasked with creating a new beautiful paint job for a large scale Star Wars X-Wing that my grand son will surprisingly get for his birthday in a few weeks. This should be fun!


- 1,508 replies
-
- 6
-
-
- Le Soleil Royal
- Heller
- (and 1 more)
-
Thanks Henry. As I said to Marc, glad I have you guys looking over my shoulder 😊
-
Great advice Marc. See, that is why I still need you looking over my shoulder. 😊
- 1,508 replies
-
- 1
-
-
- Le Soleil Royal
- Heller
- (and 1 more)
-
Thanks guys. I am looking at painting and adding gold leaf to the 3 porches (lack of better word) and gluing them to the stern plate before I attach it to the hull. I know I will need to carefully scratch a paint free line for each so I get a good plastic to plastic glue weld for each. That and getting a perfect placement of each will surely be easier with the stern plate flat on my work table.
-
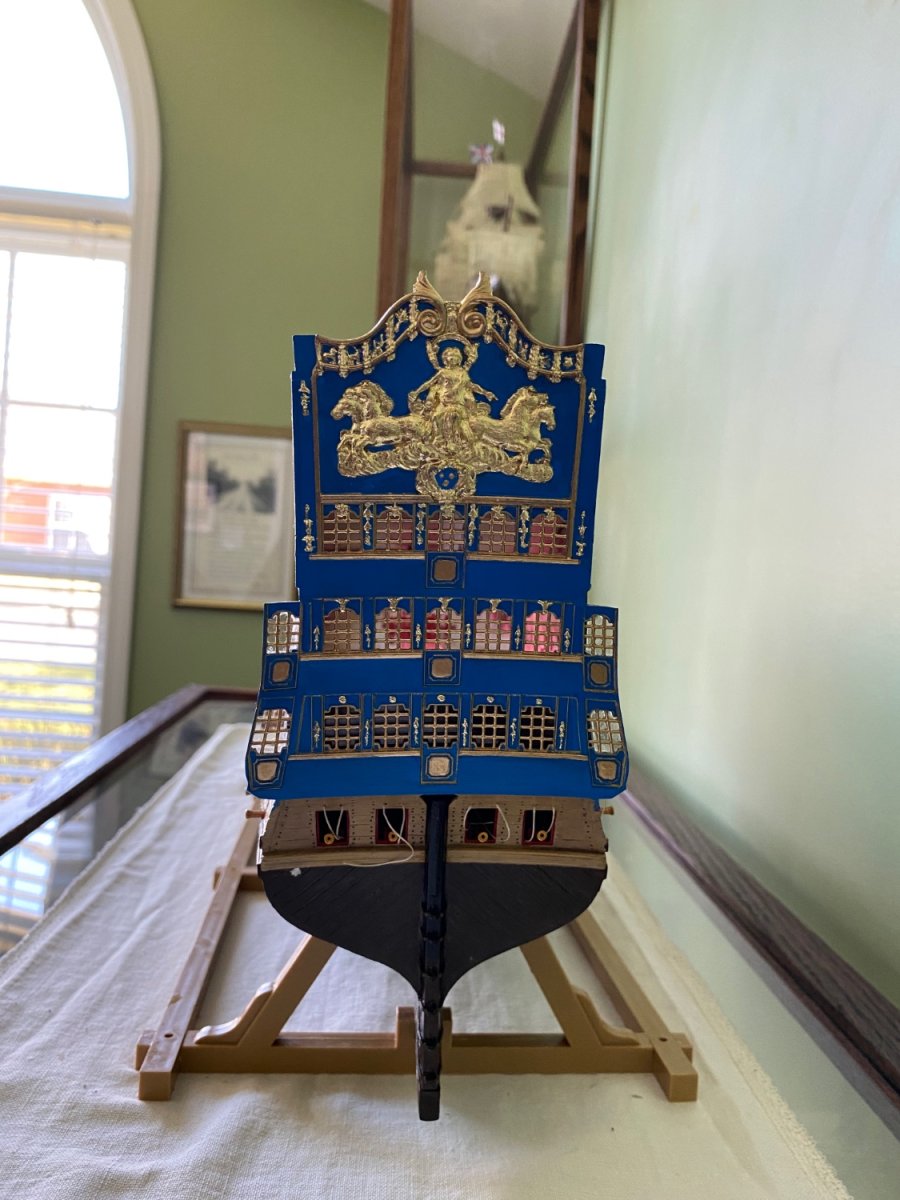
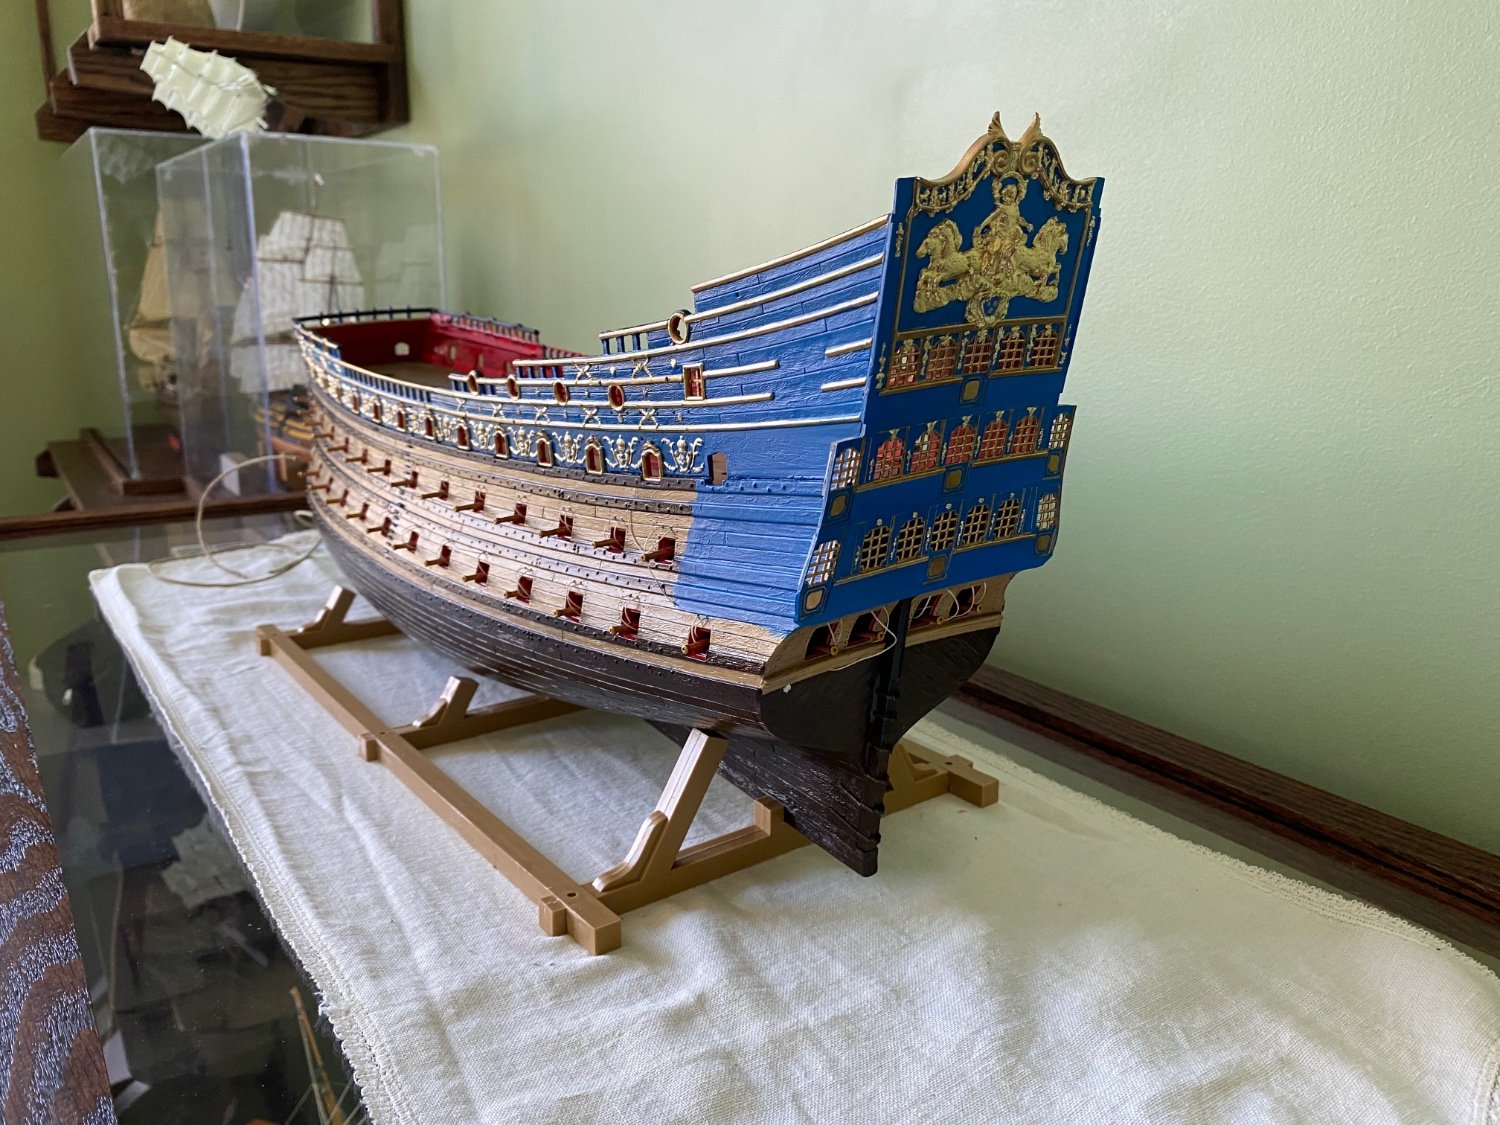
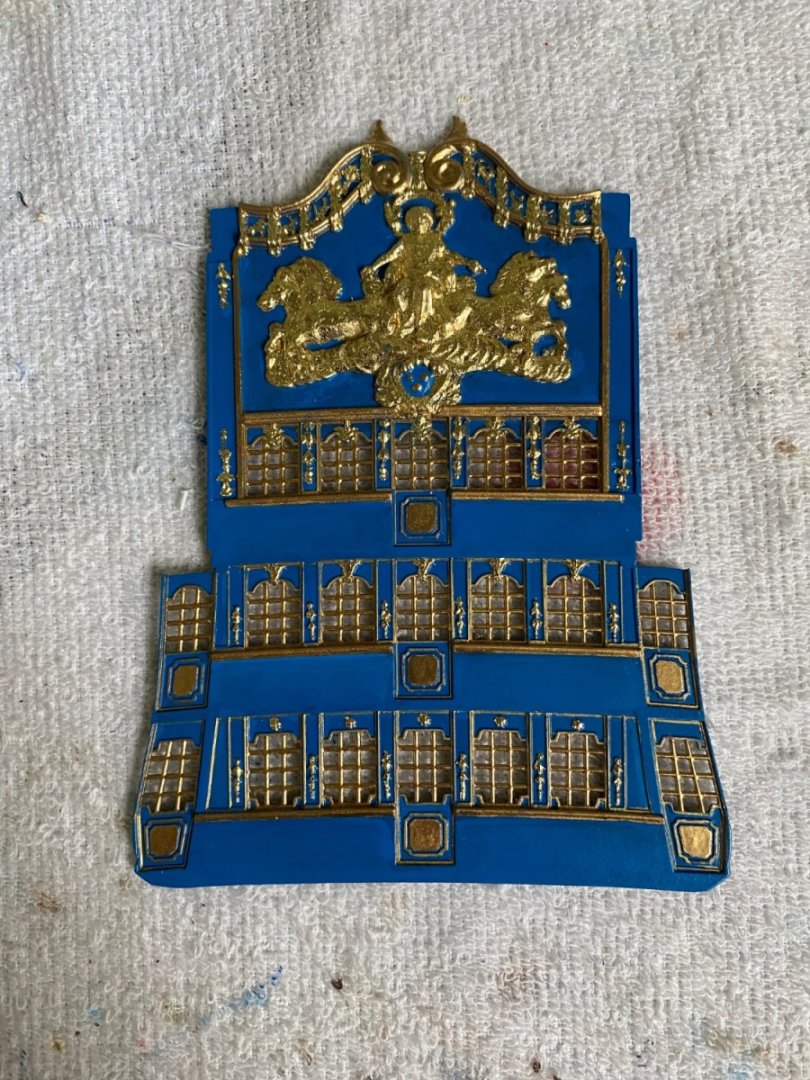
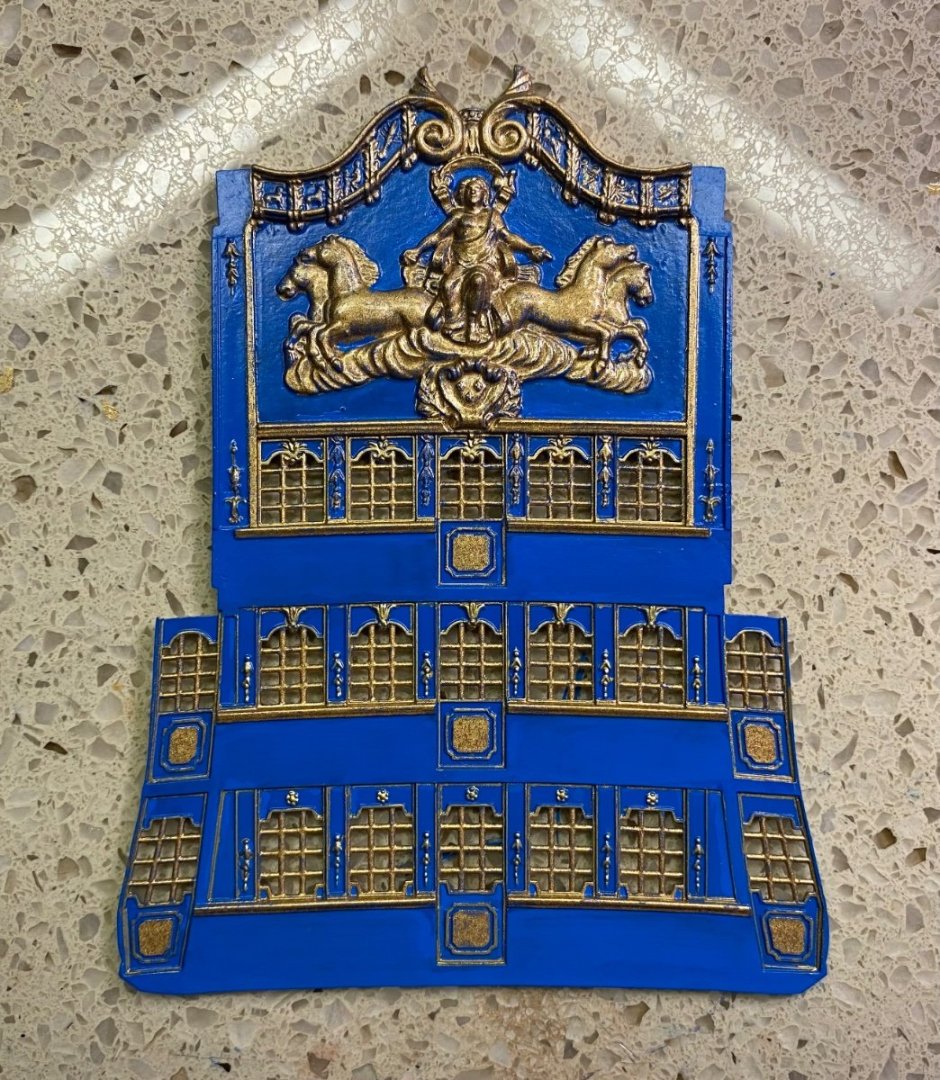
Added gold leaf to the stern. Really like the way it is looking.
- 1,508 replies
-
- 5
-
-
- Le Soleil Royal
- Heller
- (and 1 more)
-
FIVE MONTH mark in this incredible journey! Loving building and bashing this beautiful ship. With all the knowledge I gained from you guys during my Victory build I am able to move along and make educated decisions with confidence. Thanks guys for your help, patience, advice, and friendship. I find myself waking up early each morning thinking about what I need to get accomplished today so I can get to my “shipyard”.
- 1,508 replies
-
- 1
-
-
- Le Soleil Royal
- Heller
- (and 1 more)
-
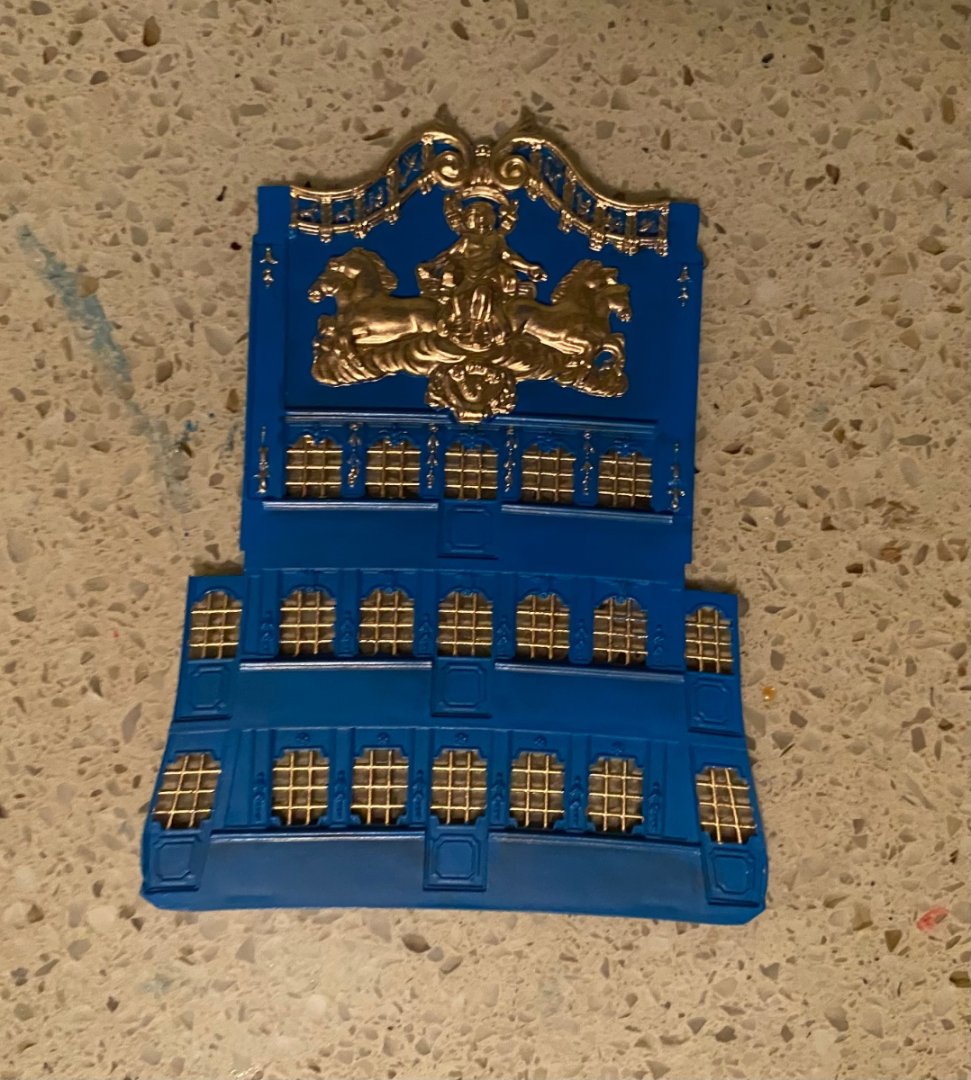
Finished painting the stern plate. Tomorrow I will begin adding gold leaf to the decorations and giving a second coat of gold to the areas not gold leafed. I used Testors gold enamel over the Vellajo blue acrylic. As many have noted painting gold can be trying. Applying gold acrylic over the blue acrylic
- 1,508 replies
-
- 4
-
-
- Le Soleil Royal
- Heller
- (and 1 more)
-
Thanks Henry. It does not appear to make a difference in the build order. Just if I want to risk messing up any of my finish on the side galleries.
-
Ian that was the only reason I was coming up with as well. That and just the overall wear and tear on the beautifully finished stern. I will be adding a lot of gold leaf.
-
Have a curiosity you guys may be able to answer. This is not important in my overall build, but is more of a sequence question. In my Heller instructions the next piece I add is the stern plate (correct nautical term?) once I finish painting it. After that I have many pages of other parts before I am to return to the stern to add the side galleries and the walk ways on the back. It is almost the last thing before I start going vertical with masts. I have studied the instructions to see if there may be a reason why I should not just work my way through the stern construction before going somewhere else. Since I cut open the side galleries I will be making small decking inside. Do you guys have insight why one would not complete this area before moving on.
-
Marc as time goes by you will notice ideas I took from you for additions. Hopefully you consider it, as I surly intend, as a compliment. Not Plagiarism! 🤭 Today, along with the spirketting, I also fabricated out of Evergreen the corner braces at the beakhead bulkhead as you did and added the bolt heads though you can barely see them in the photo. I have slowly rotated my turntable around and around searching for any tiny paint touchups needed. I think I have found them all. Now to spend serious time on the stern. Marc I am still contemplating the skids!

- 1,508 replies
-
- 5
-
-
- Le Soleil Royal
- Heller
- (and 1 more)
-
The spirketting us definitely the way to cover the ugly seam.
- 1,508 replies
-
- 4
-

-
-
- Le Soleil Royal
- Heller
- (and 1 more)
-
You are right Ian. Karate Kid was Daniel and Mr. Miyagi. Wax on and wax off. I do remember Kung Fu. That is where Grasshopper came from. Boy! You are taking us back a few years 😀. I am just a bit older than you. You said you were in your teens in the 70s. I was in my 20s and just started wearing my Army uniform.
- 1,508 replies
-
- 1
-
-
- Le Soleil Royal
- Heller
- (and 1 more)
-
👍 Who would have thought I would start thinking and reacting like a real model ship builder? 😀
- 1,508 replies
-
- 1
-
-
- Le Soleil Royal
- Heller
- (and 1 more)
-
Marc you mean I am actually starting to think like you? 😊 You are finally starting to rub off on “Grasshopper”! Karate Kid reference.
- 1,508 replies
-
- 1
-
-
- Le Soleil Royal
- Heller
- (and 1 more)
-
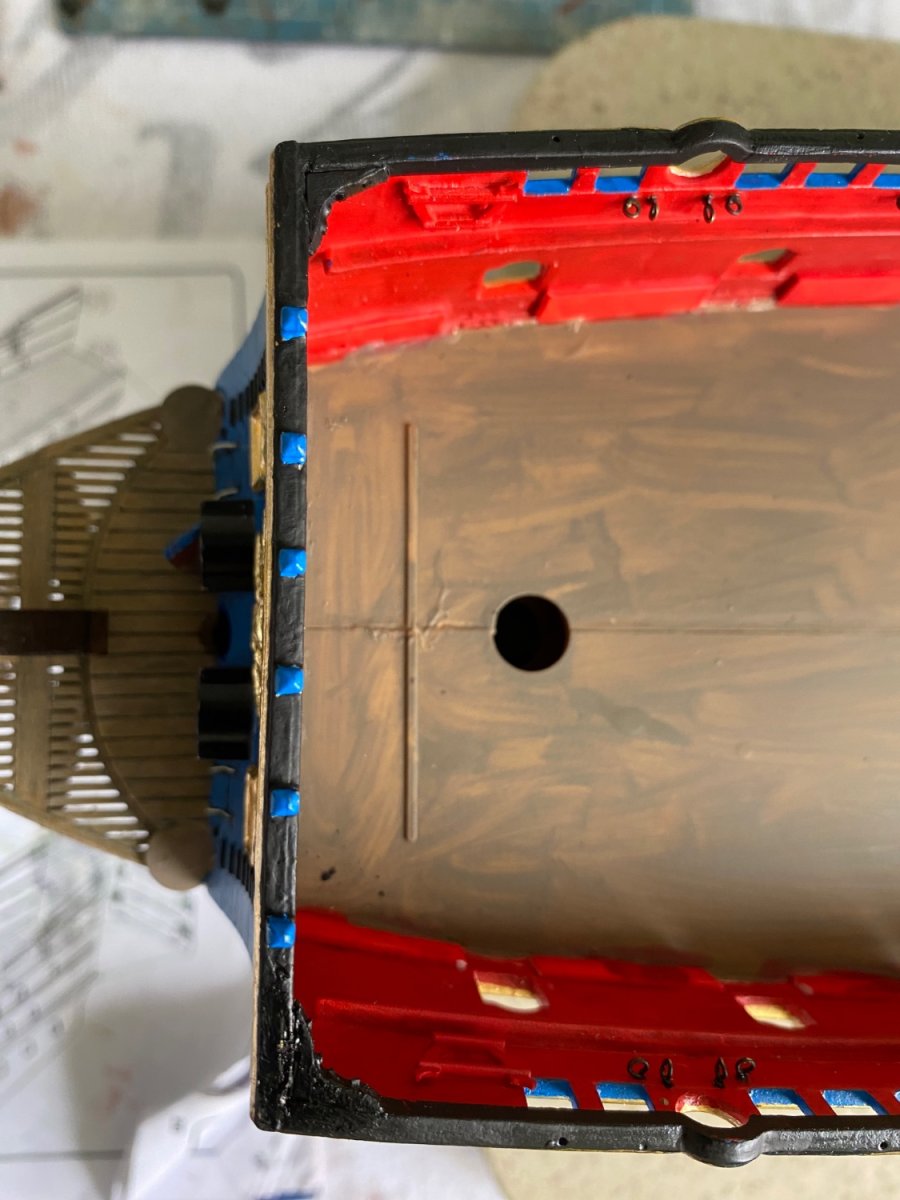
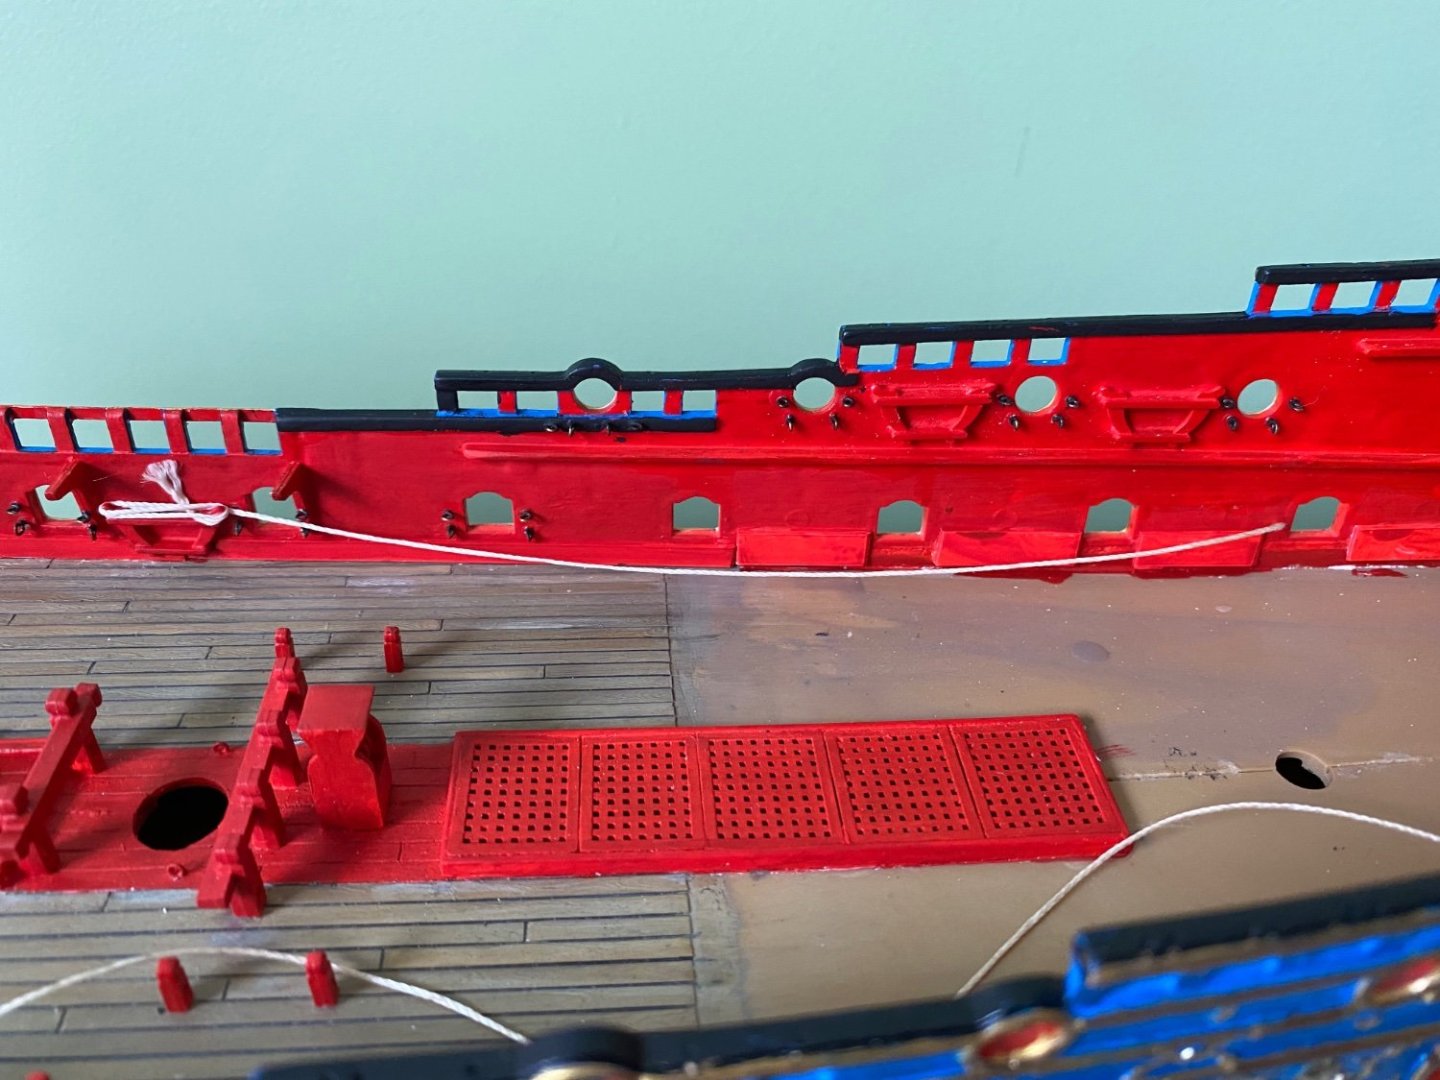
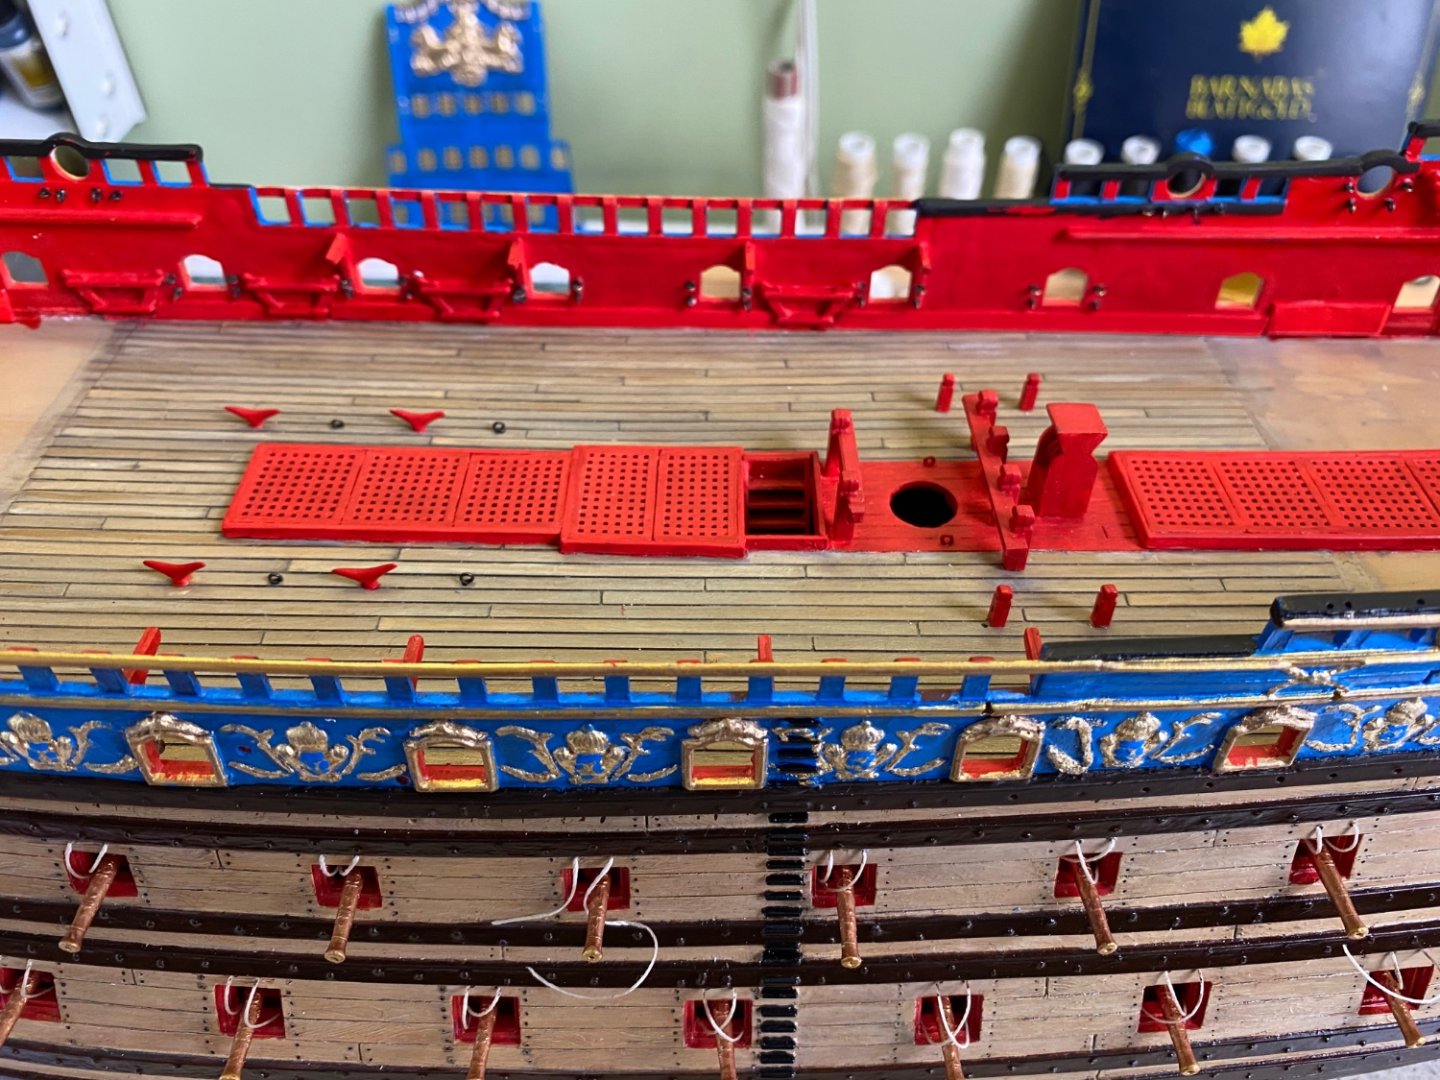
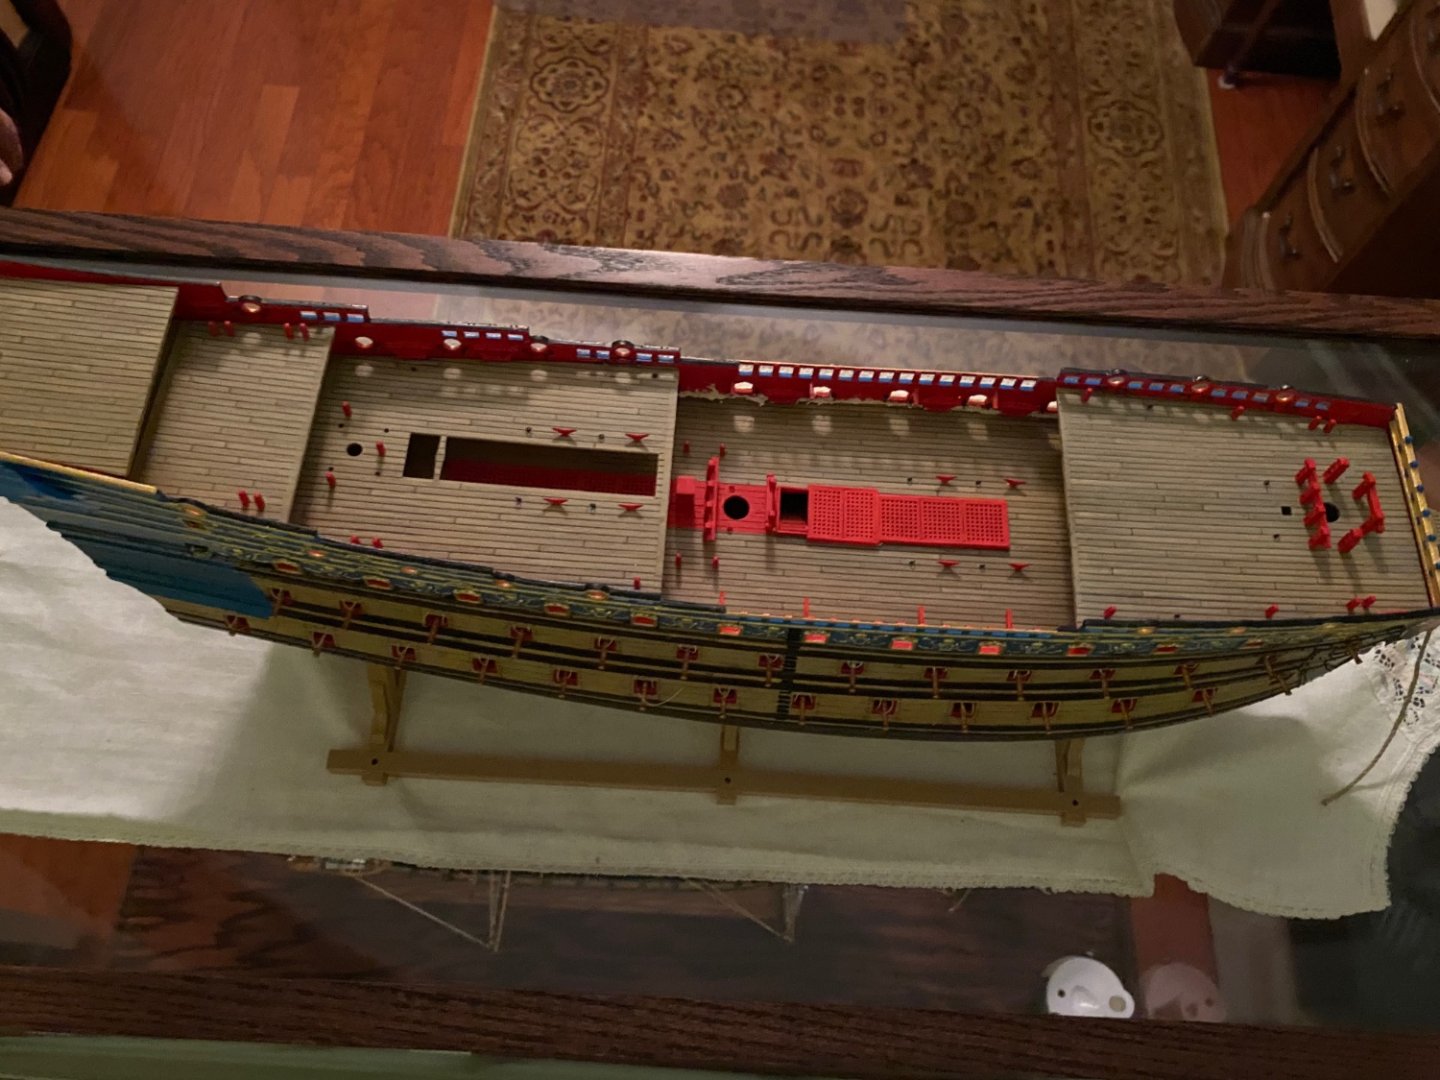
Had some trouble getting a satisfactory puttied and sanded UB seam on the inside. If I had it to do over I probably would not have installed four belay rack (non nautical term) things in each side before gluing the UB in place. On one hand it was good to have a plastic to plastic glue weld, but on the other hand it made it virtually impossible to putty and satisfactorily sand the seam. I added additional strips of Evergreen between the cannon hatches in the sections that will not be seen because of decks above. In the center section that will be exposed I ultimately decided to cover the seam with a basic Evergreen baseboard like you would find in your home. A 4mm strip covers the seam and provides some additional glue surface. It will result in the cannon trucks being set inboard just a slight extra bit. In the photo the pieces are dry fitted. I will take them out, paint them red and then glue them in. That way I do not need to mask my deck.
- 1,508 replies
-
- 3
-
-
- Le Soleil Royal
- Heller
- (and 1 more)
-
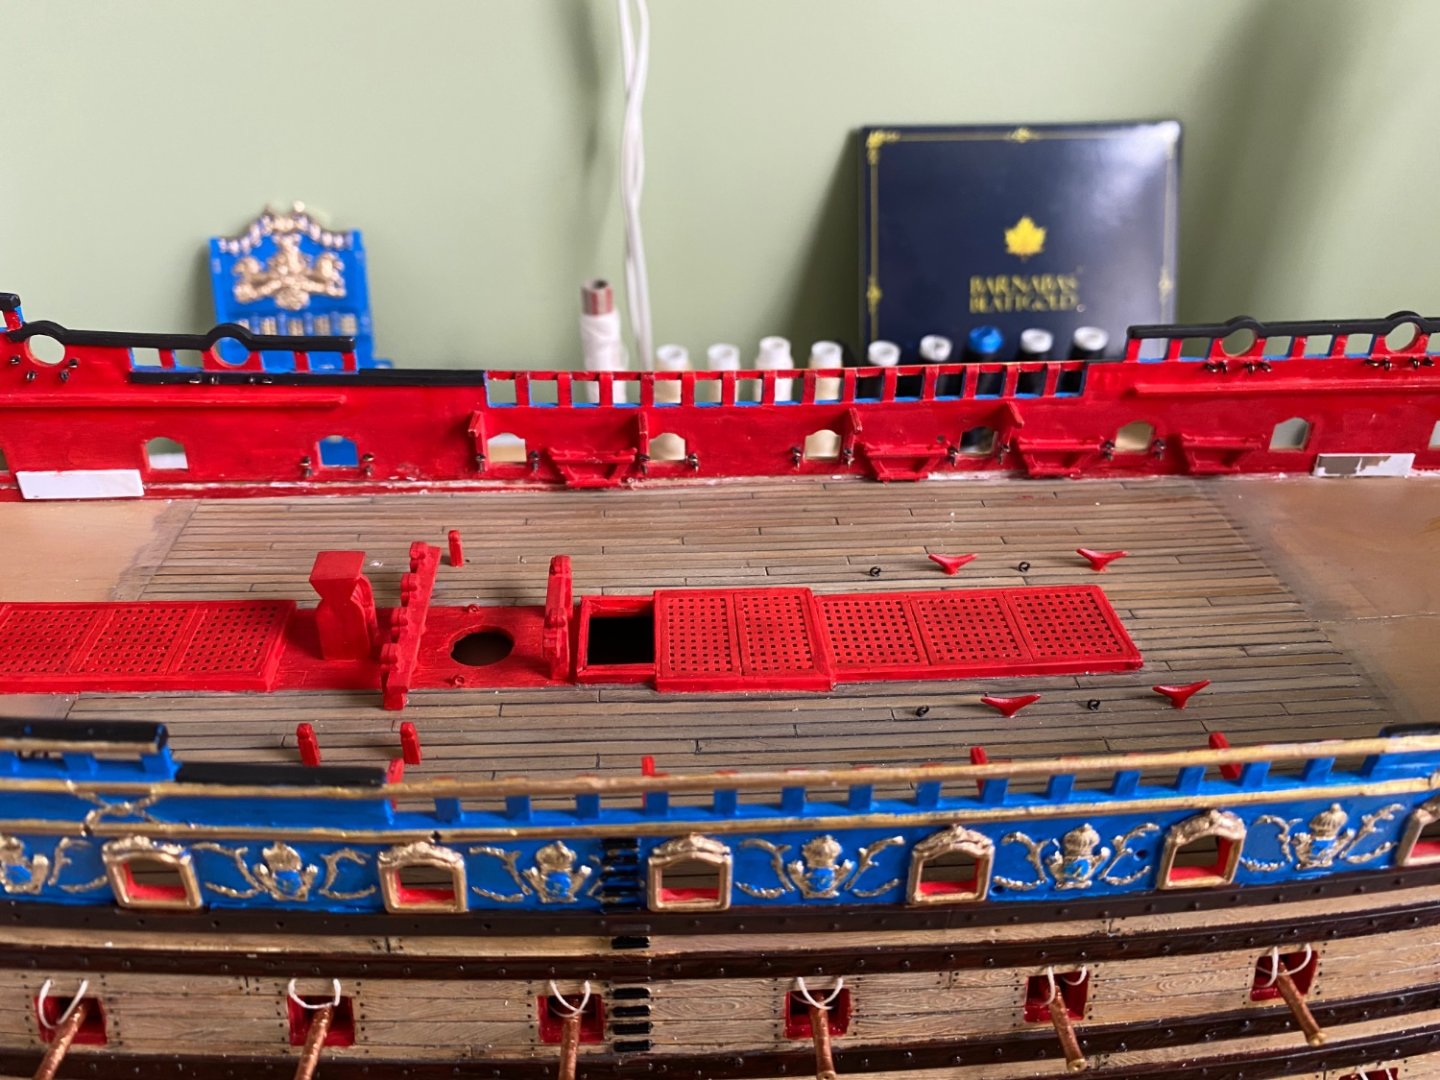
Spent some time fine tuning the UB seam inboard and outboard. The inboard seam took a bead of putty I will sand and repaint. Dry fitted all my deck sections which appear to fit snugly and with out issue. Plan to fabricate knees and beams to support each. Also continued adding gold paint to the stern plate. I am painting everything with a gold enamel that will be gold when the build is finished. The decorations will later be covered with gold leaf. The reason for painting gold first is to hide any chipping or flaws in the gold leaf application. Also made additional barrel hatch enhancements that I will add to the bottom of a number of the hatches in the UB. Will need to see which hatches will have the bottom edge blocked by the channels.

- 1,508 replies
-
- 6
-
-
-
- Le Soleil Royal
- Heller
- (and 1 more)