HOLIDAY DONATION DRIVE - SUPPORT MSW - DO YOUR PART TO KEEP THIS GREAT FORUM GOING!
×


Bill97
-
Posts
2,704 -
Joined
-
Last visited
Content Type
Profiles
Forums
Gallery
Events
Everything posted by Bill97
-
Yeah Marc I saw that in your build. I have the exact one you have (same brand). Had it for years using it in my furniture construction. Fantastic little tool. As far as maring my paint, I would probably need to scratch a fine line off anyway to get good bare plastic for the skid to stick to. Just can’t decide.

-
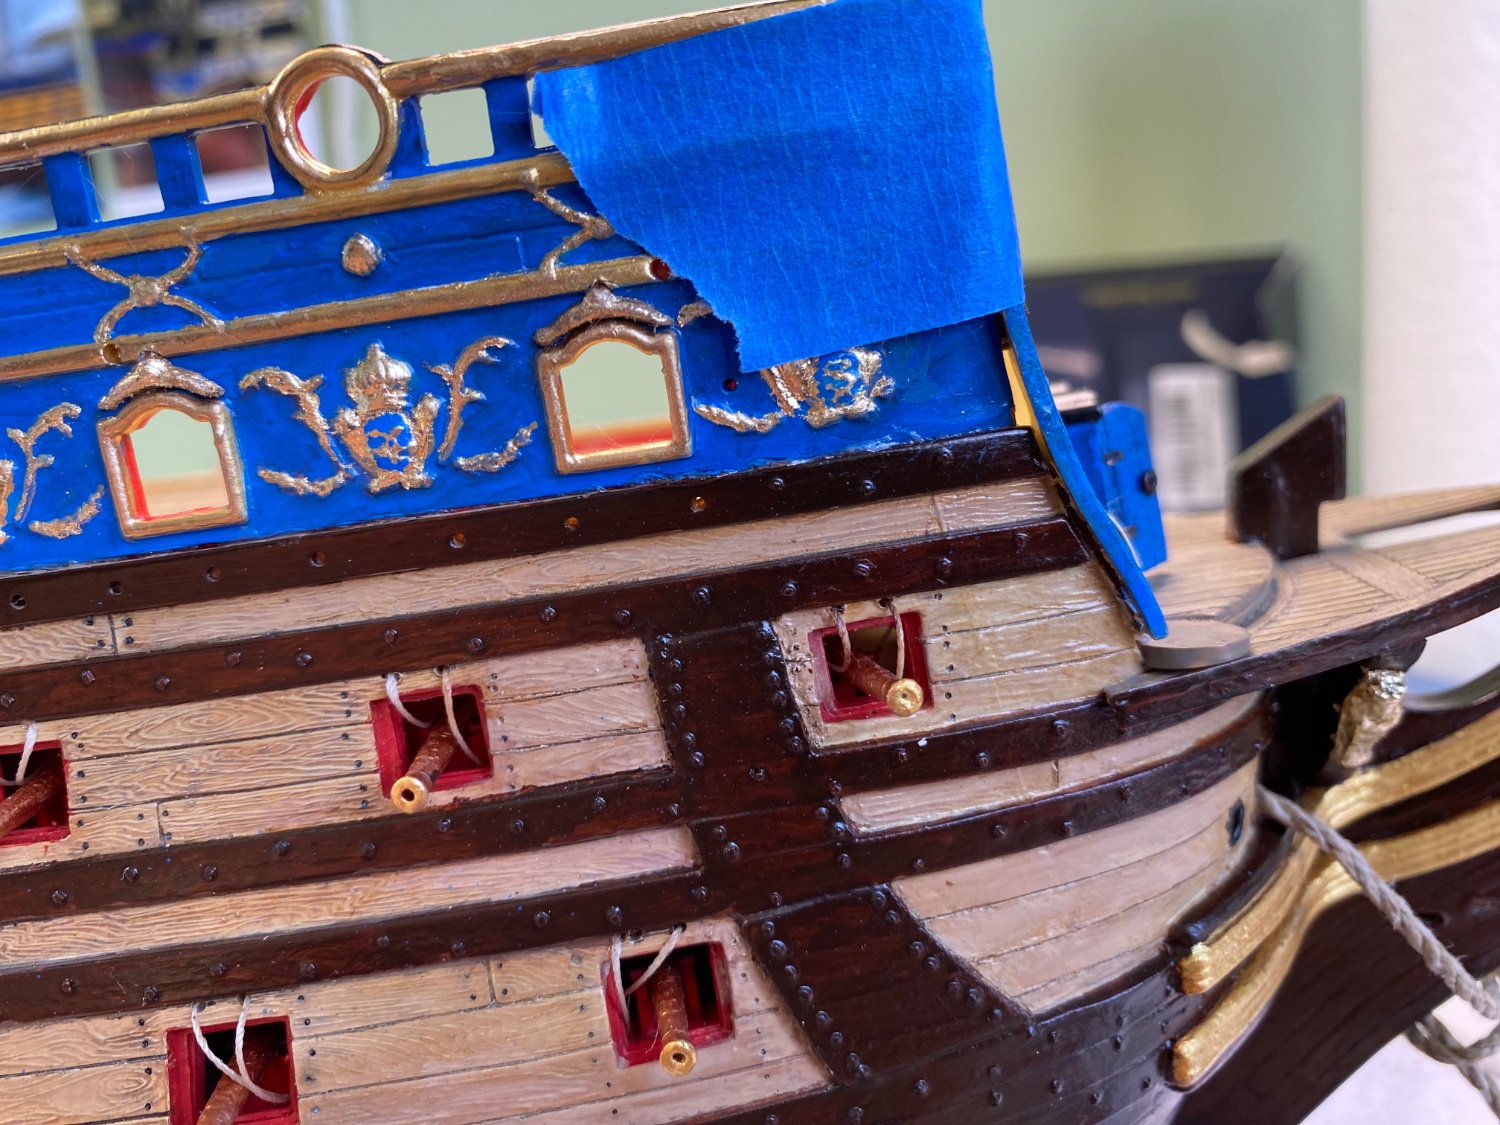
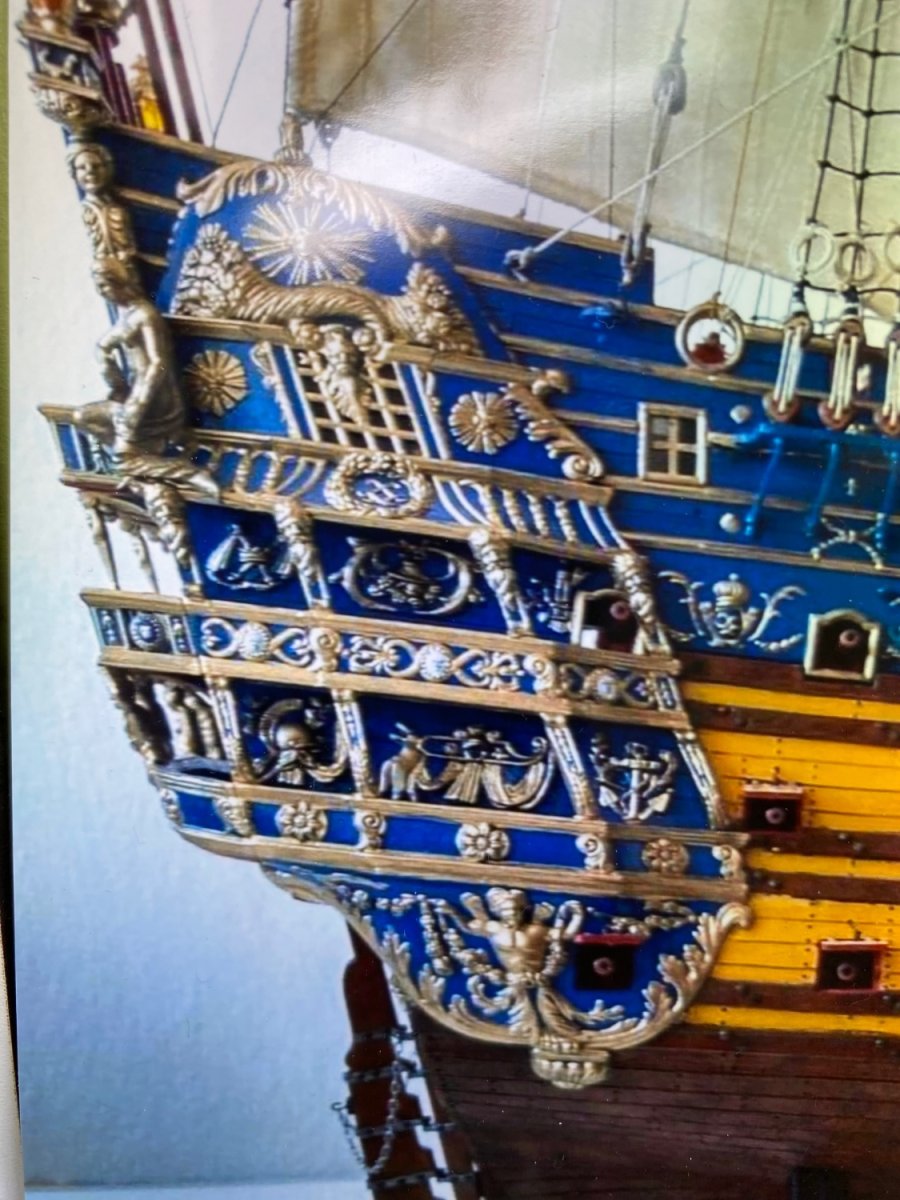
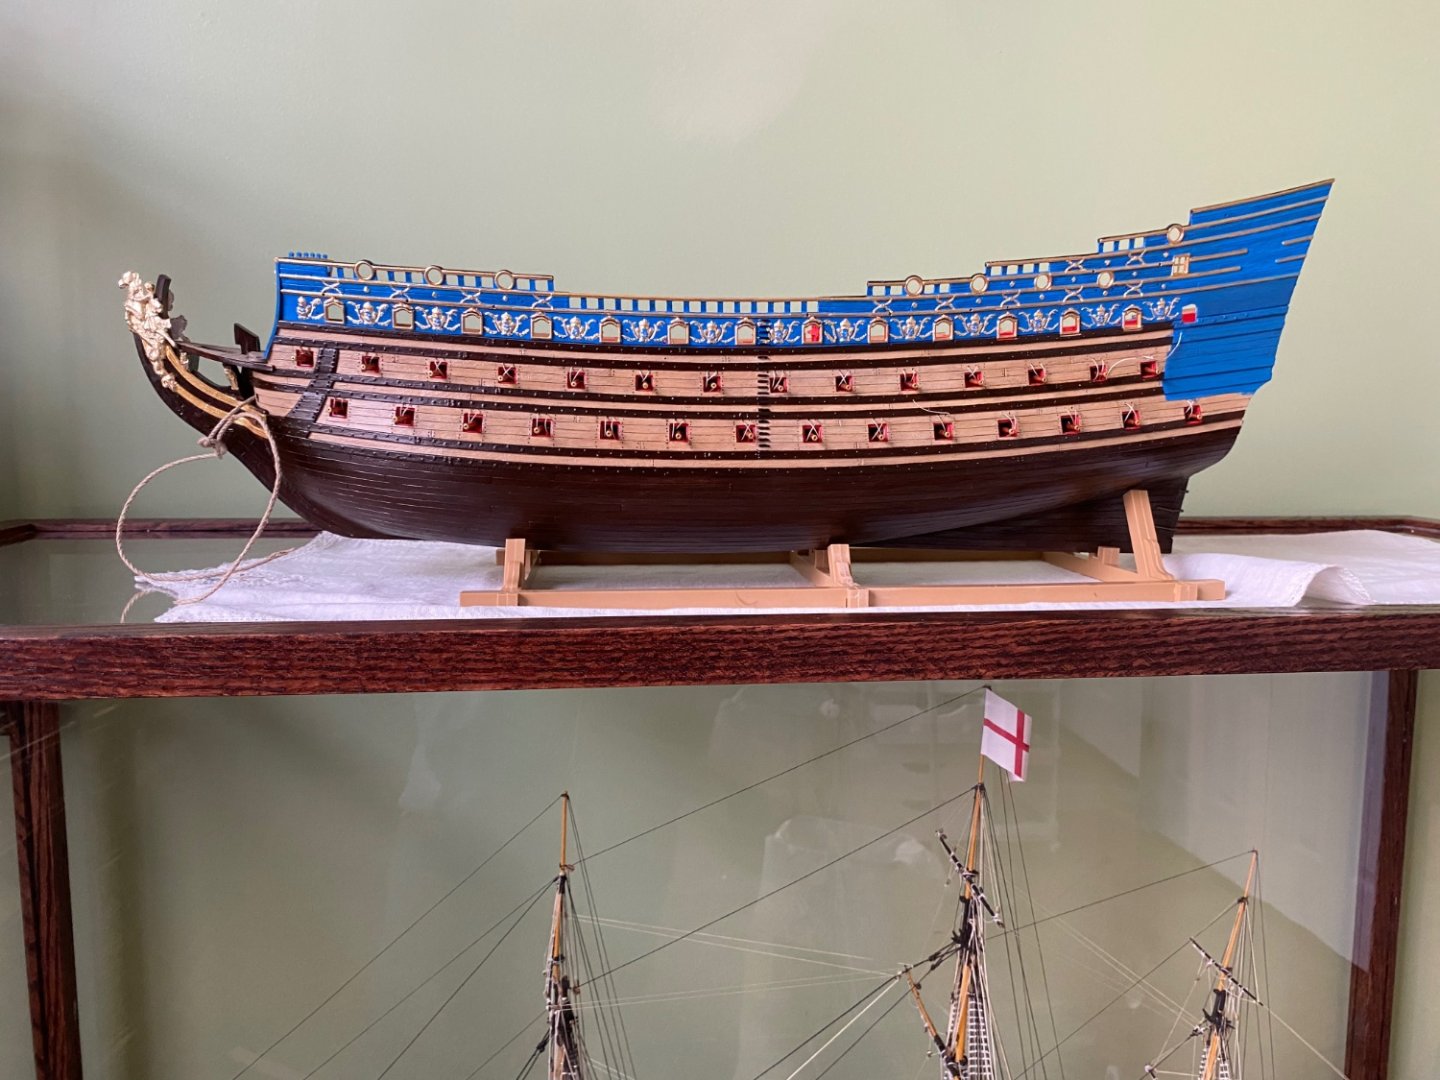
As my shift at the “shipyard” came to a close today I thought I would peek at the stern plate before I clocked out. A good day today finishing the UBs and installing them to the hull. Finished up adding a bit of gold to the stern.
- 1,508 replies
-
- 2
-

-
- Le Soleil Royal
- Heller
- (and 1 more)
-
Thanks Marc. Once I feel sure the glue weld is solid I will start the process of fine tuning everything. A little touch up here, a little gap filling there, etc. I feel pretty sure I am going to make hatch enhancements to go below the hatches as you did and I keep going back and forth on the skids. I know you did them as two separate pieces (the hull section and the UB section). If I do make them they will obviously just be one complete piece. Still not sure. Don’t know if I can get them to look as good as your’s. I would rather not add skids to the sides of the ship that look real amateur both in design and fit. Would rather maybe just add some rope or other idea going up the sides of the steps as I have seen other builders do. Will maybe tinker with some prototypes to see how good of a fit I can get.
-
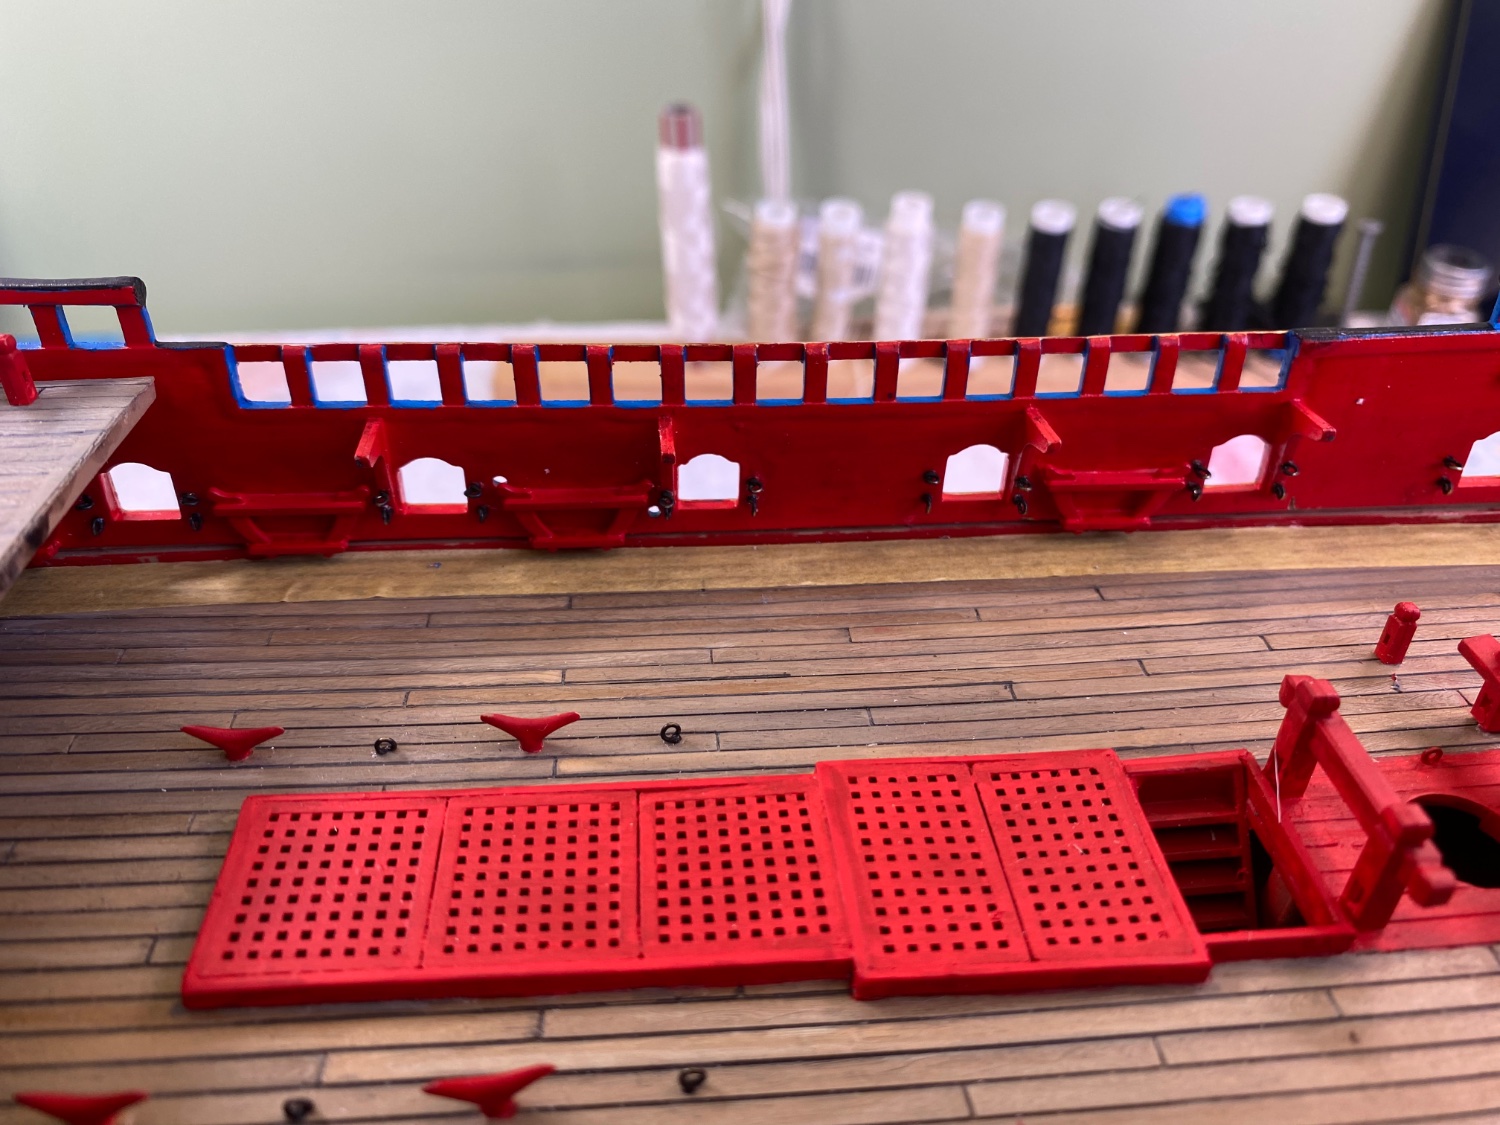
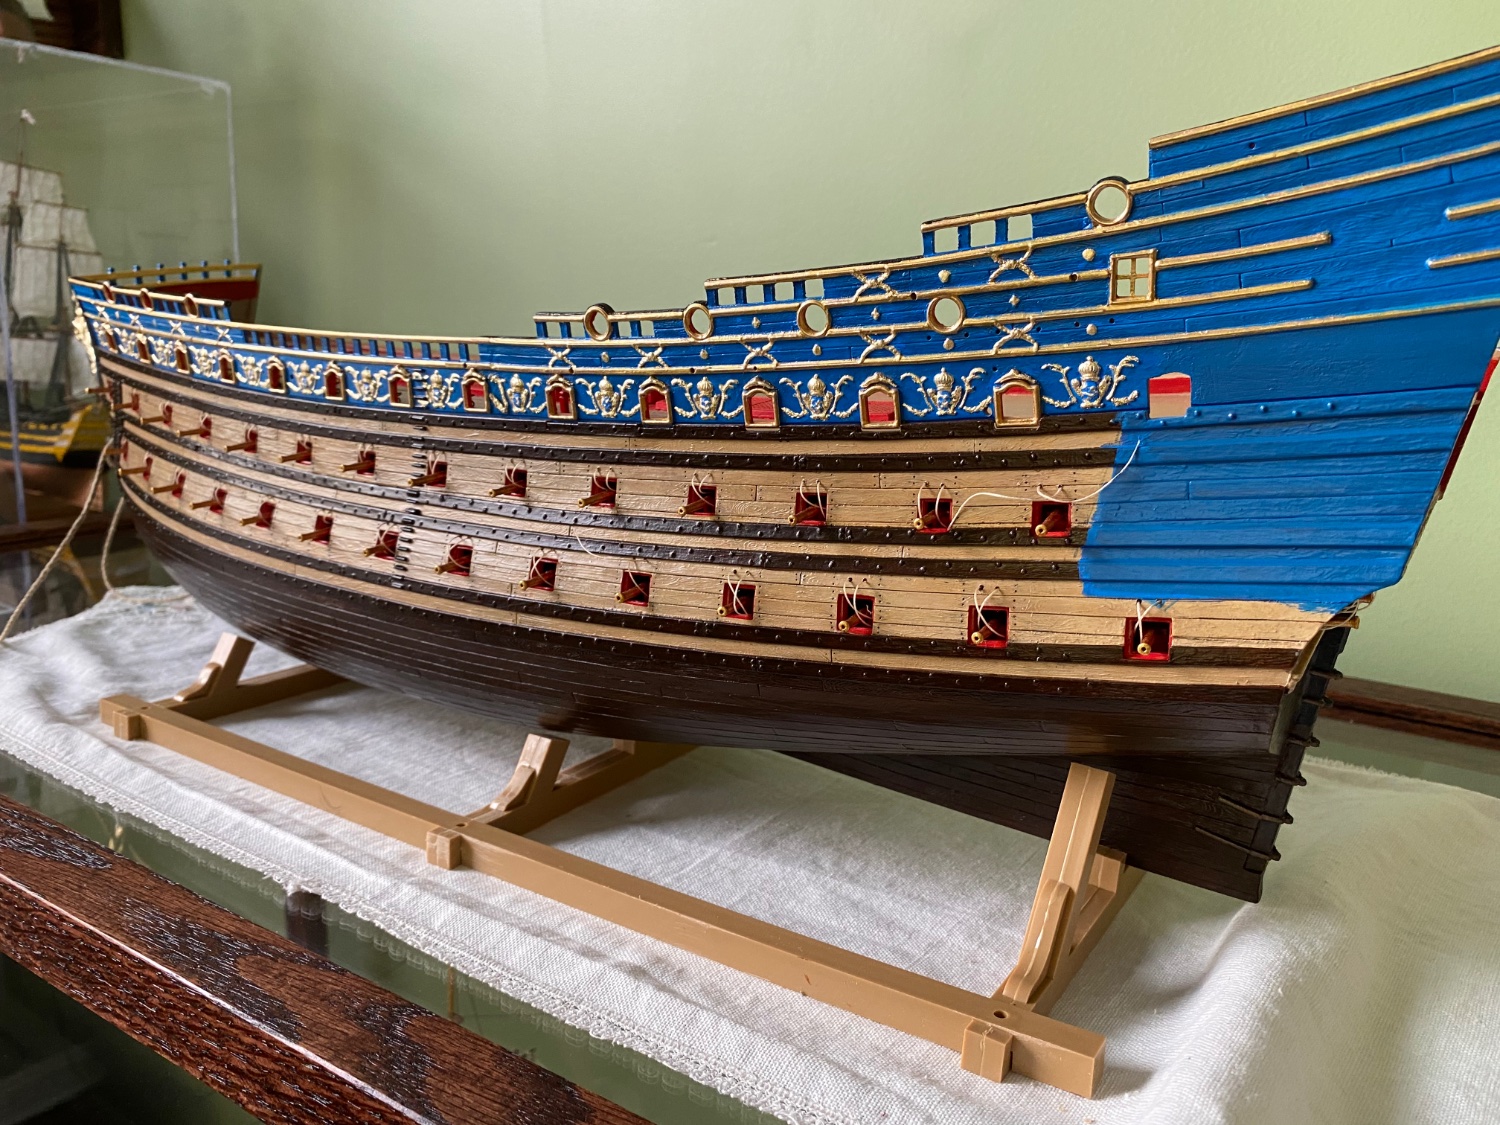
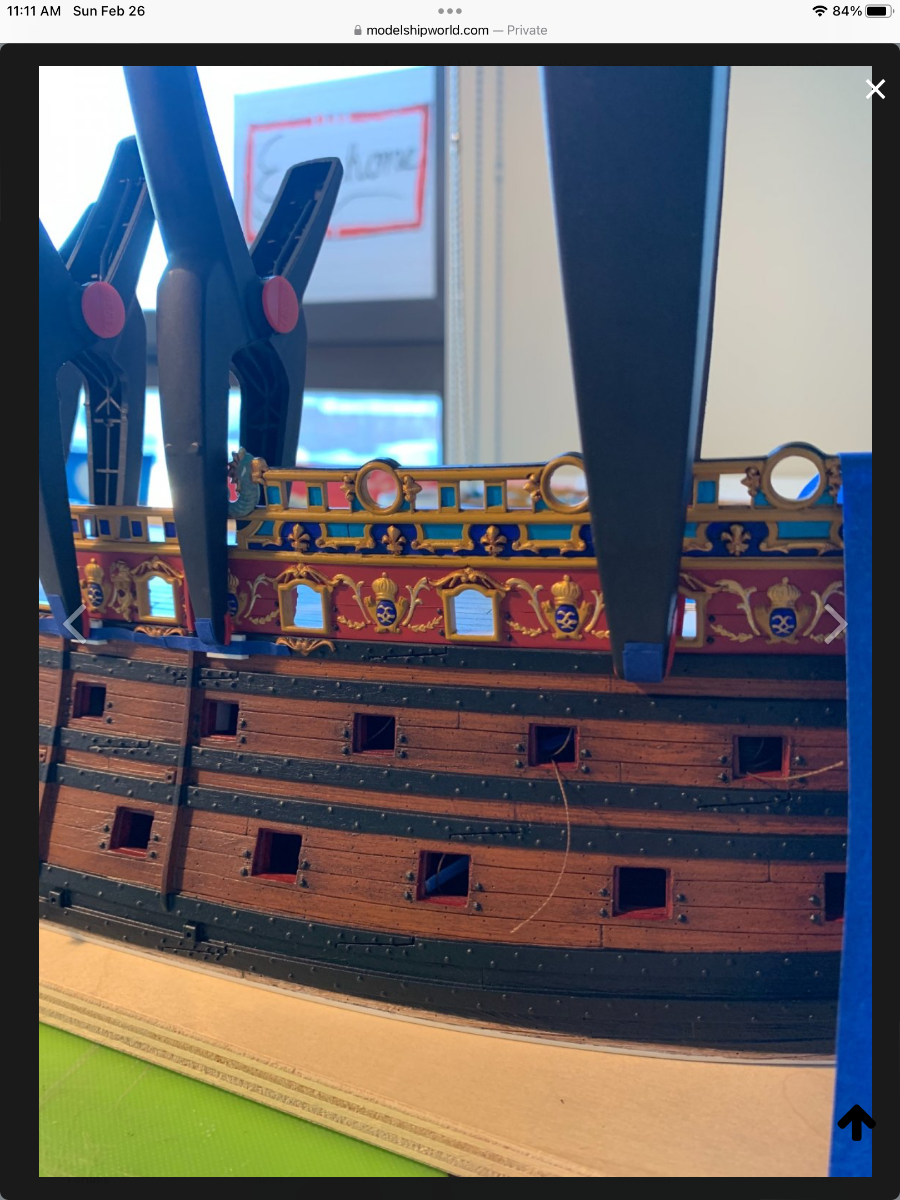
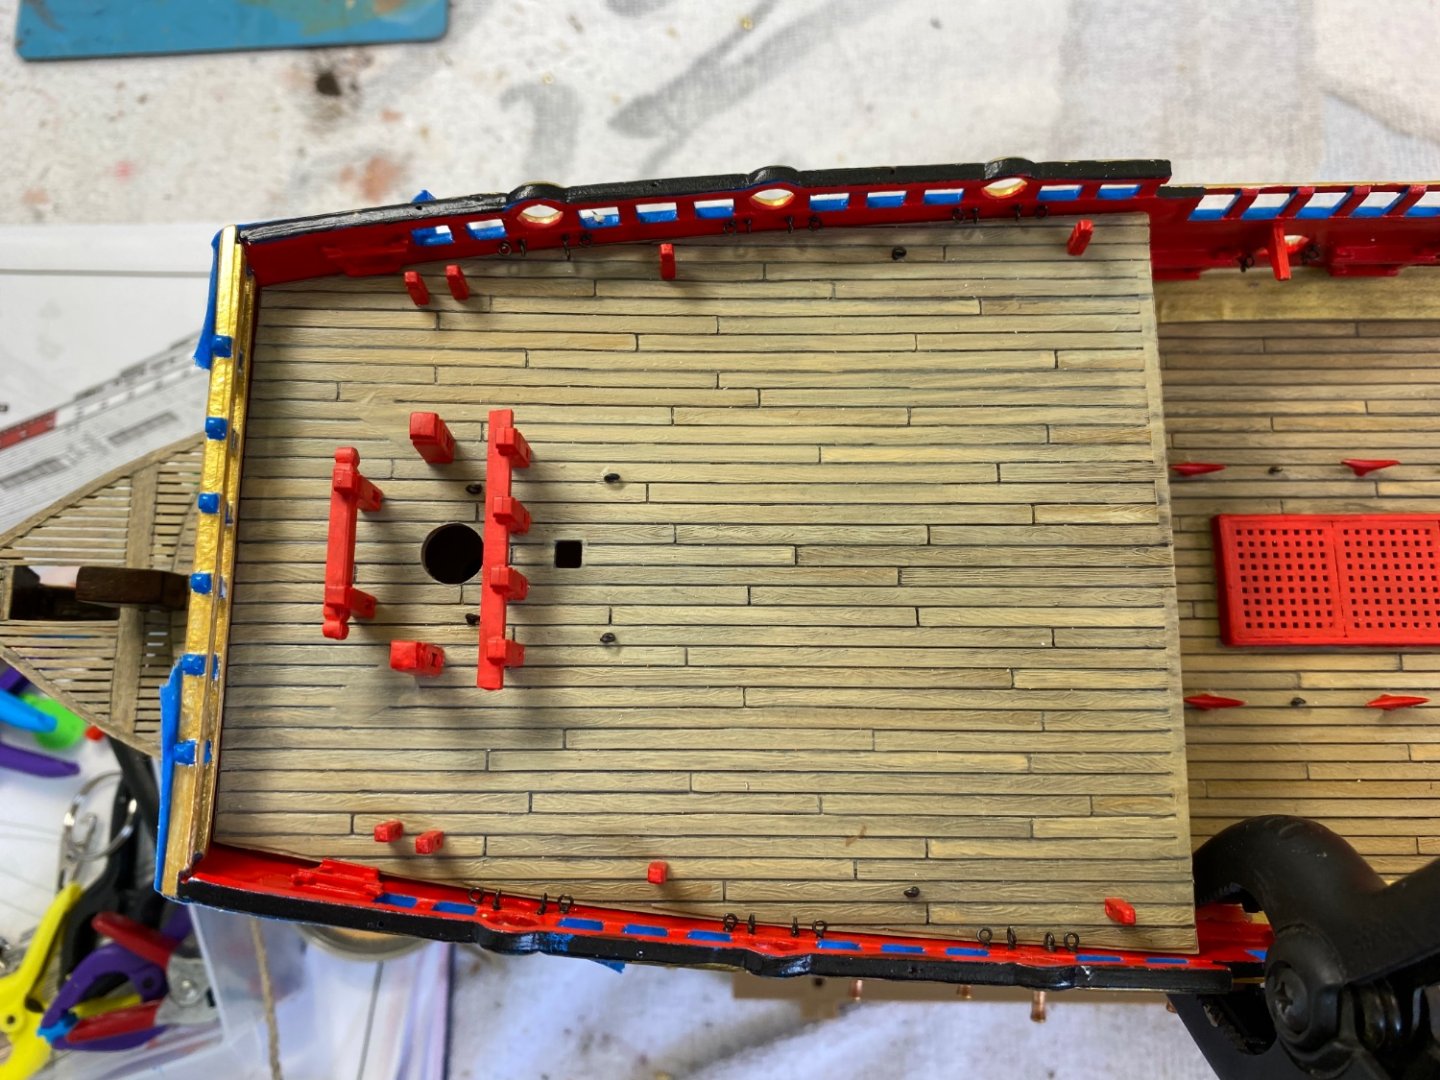
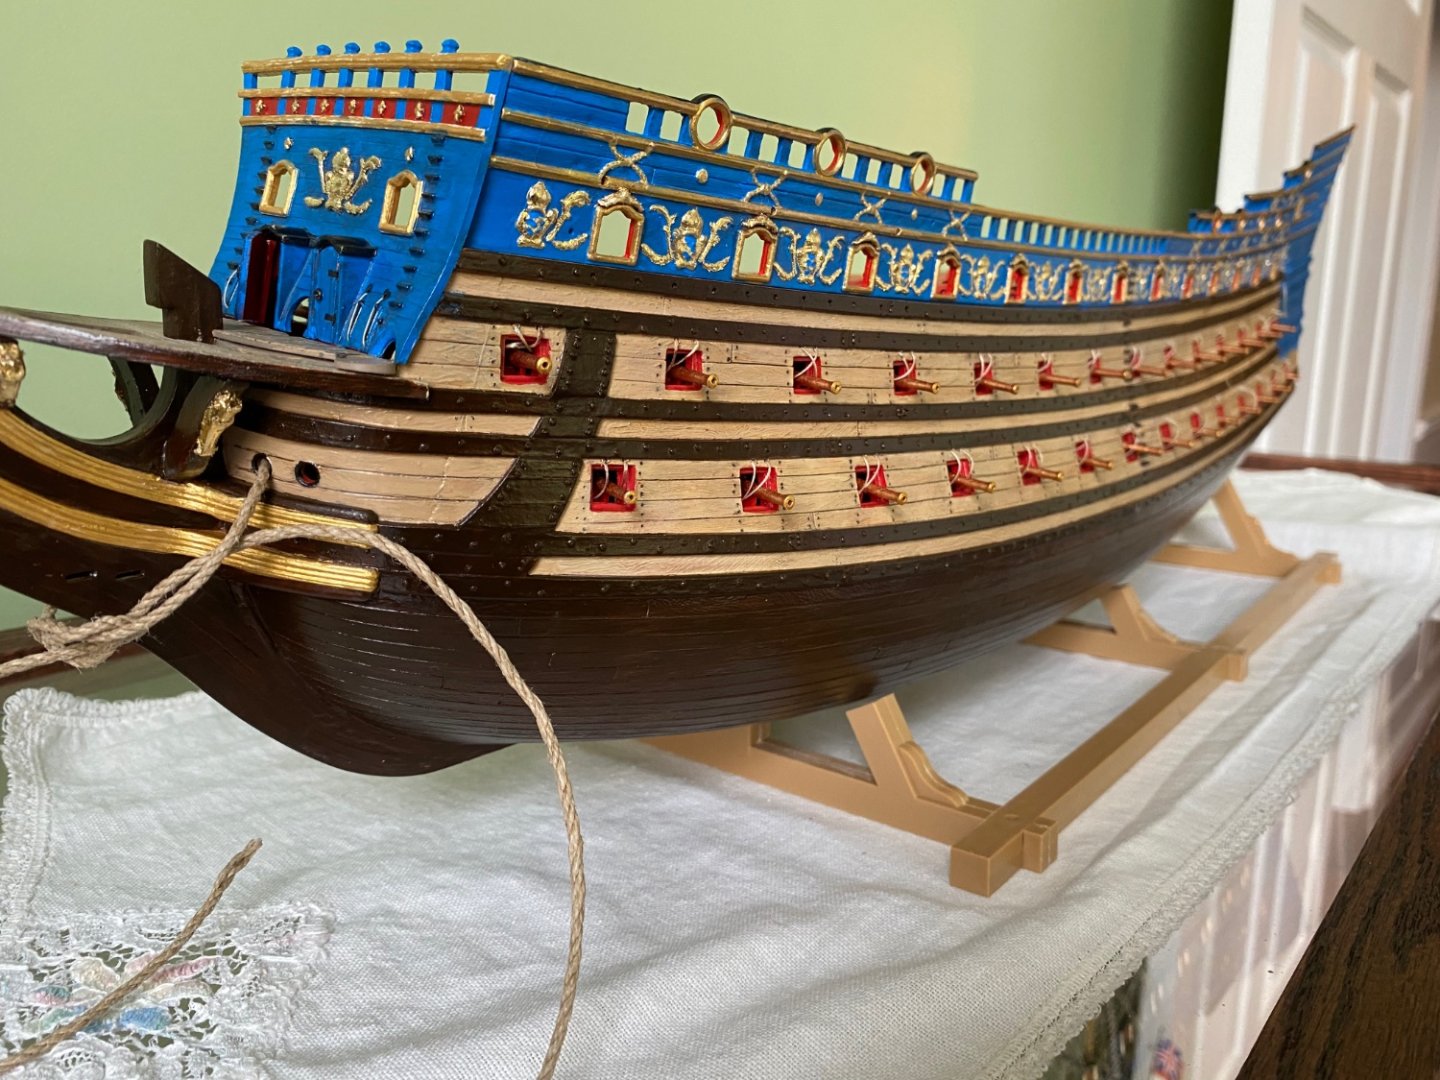
Port side UB glued in. Do not have the small gap on the port side at the beakhead bulkhead. Forecastle deck dry fitted in place and to appears to fit snuggly. I think all is good. I do have about a 1/16” gap on the inside at the front and back, with the gap much thinner in the center where it will be visible. I will need to fill, sand, and touch up the gaps as well. The only way I could have prevented these gaps would have been to shave down the top of the wale, which I did not want to do.


- 1,508 replies
-
- 1
-
-
- Le Soleil Royal
- Heller
- (and 1 more)
-
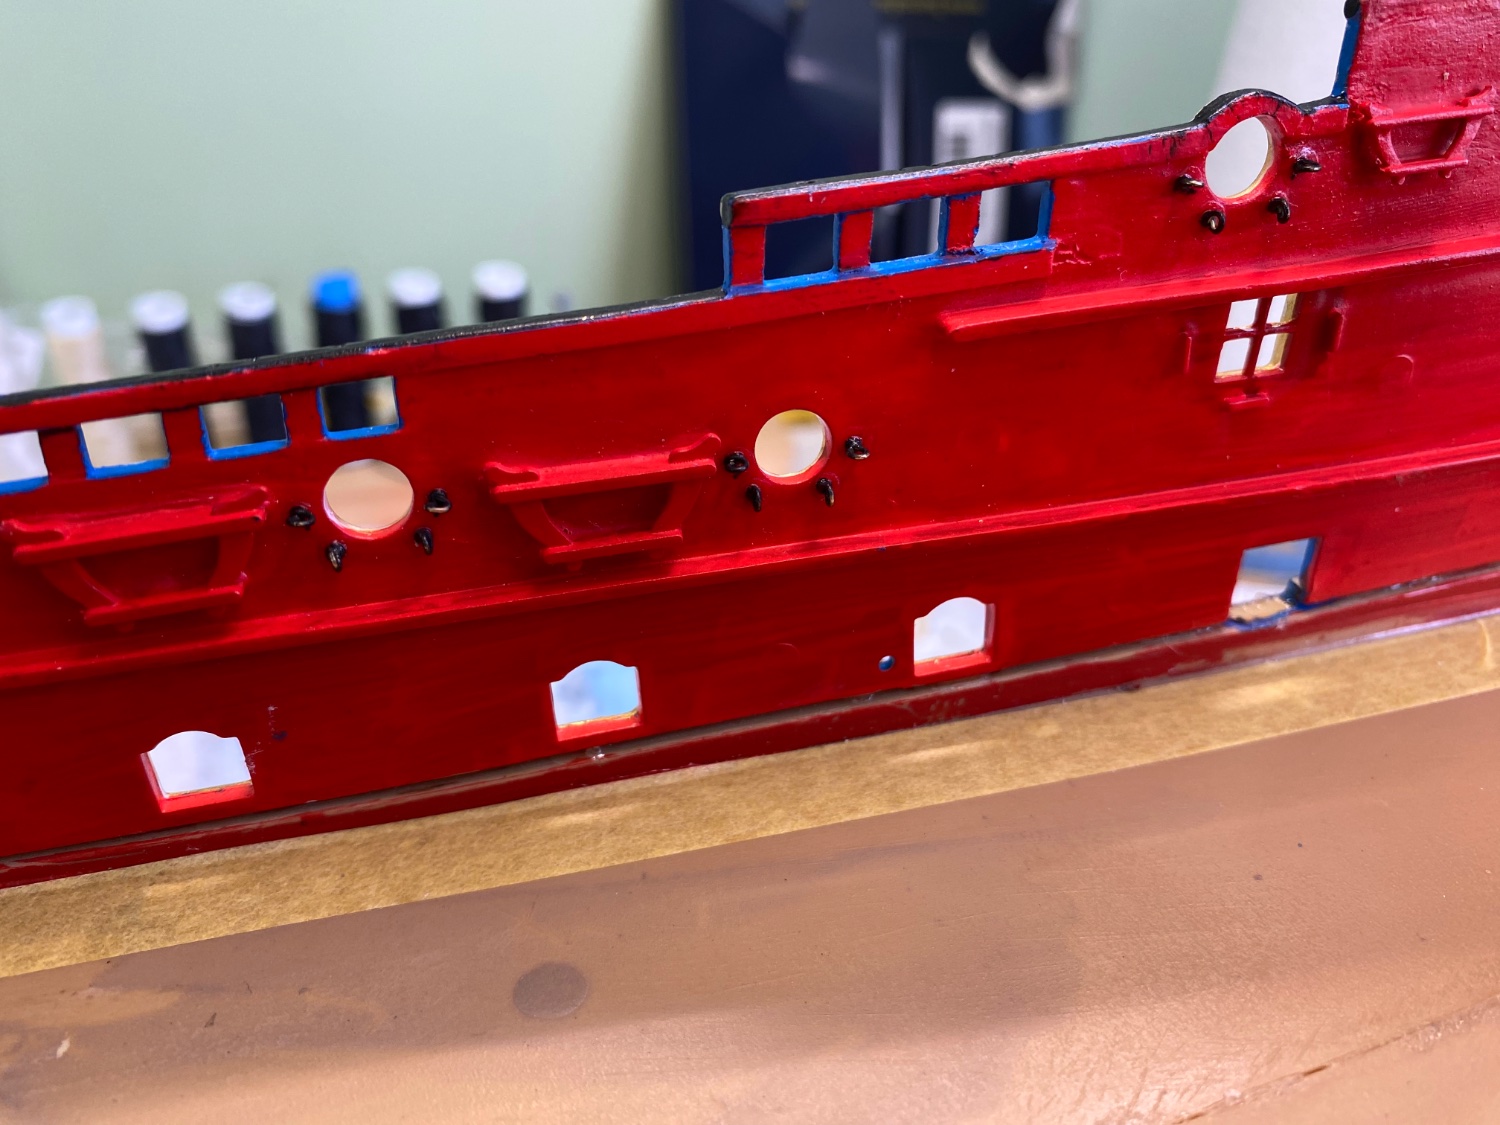
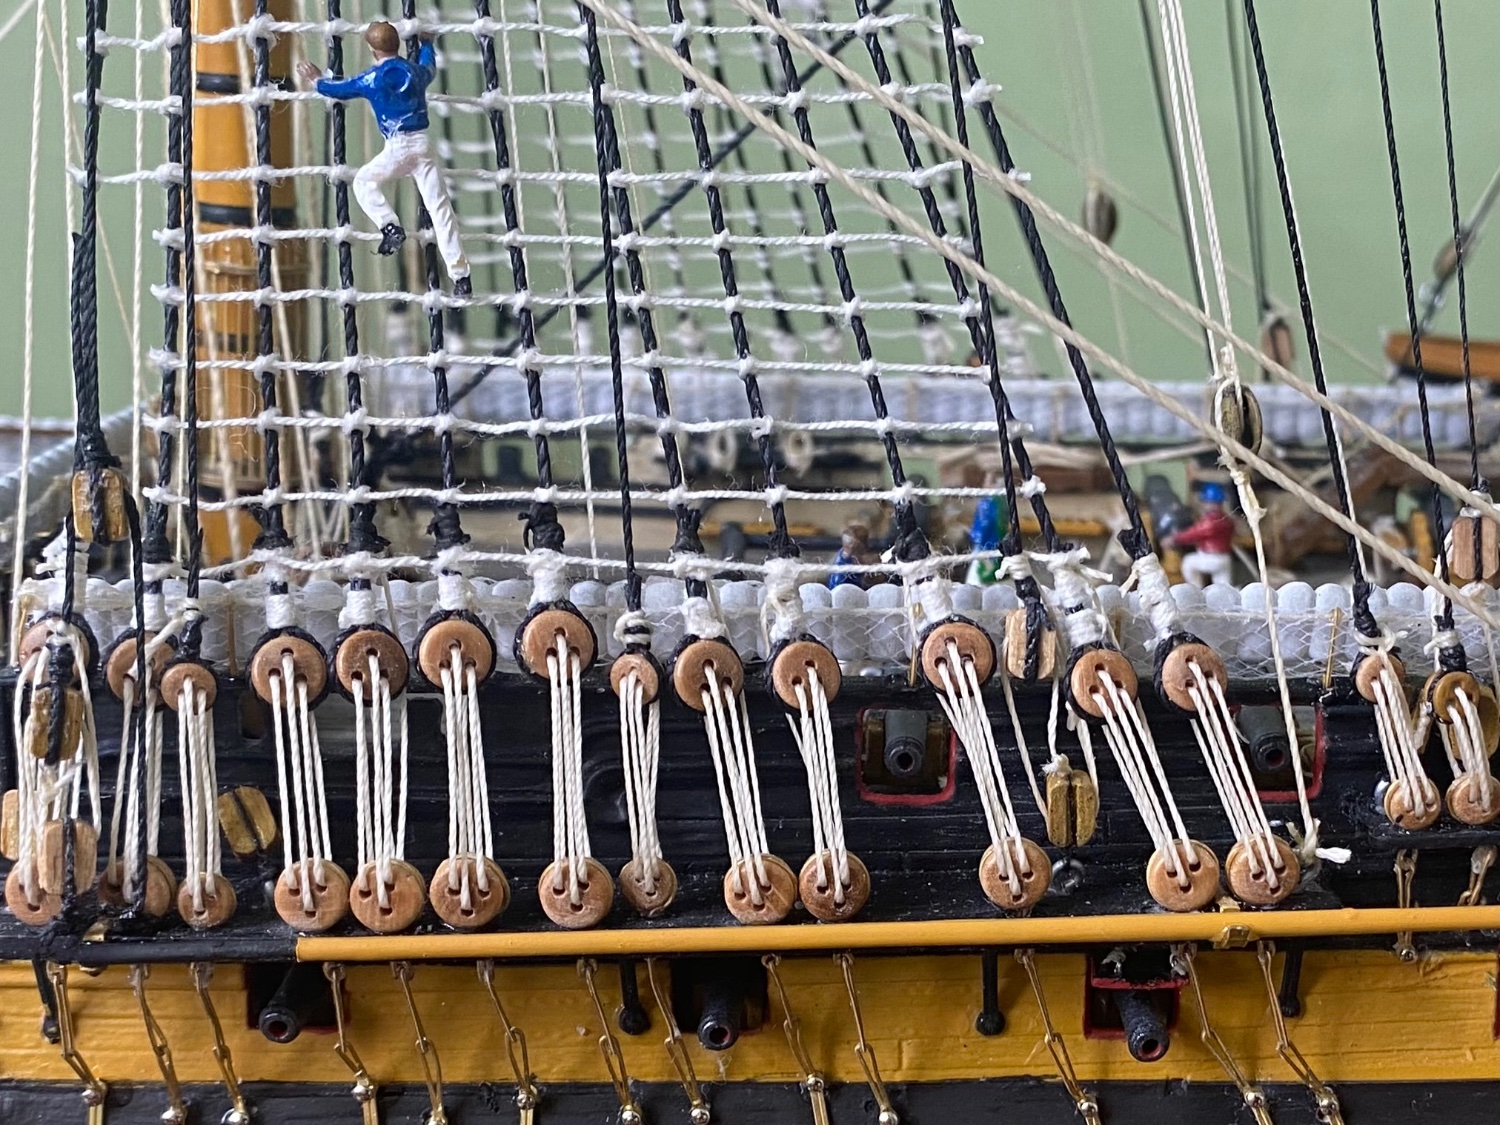
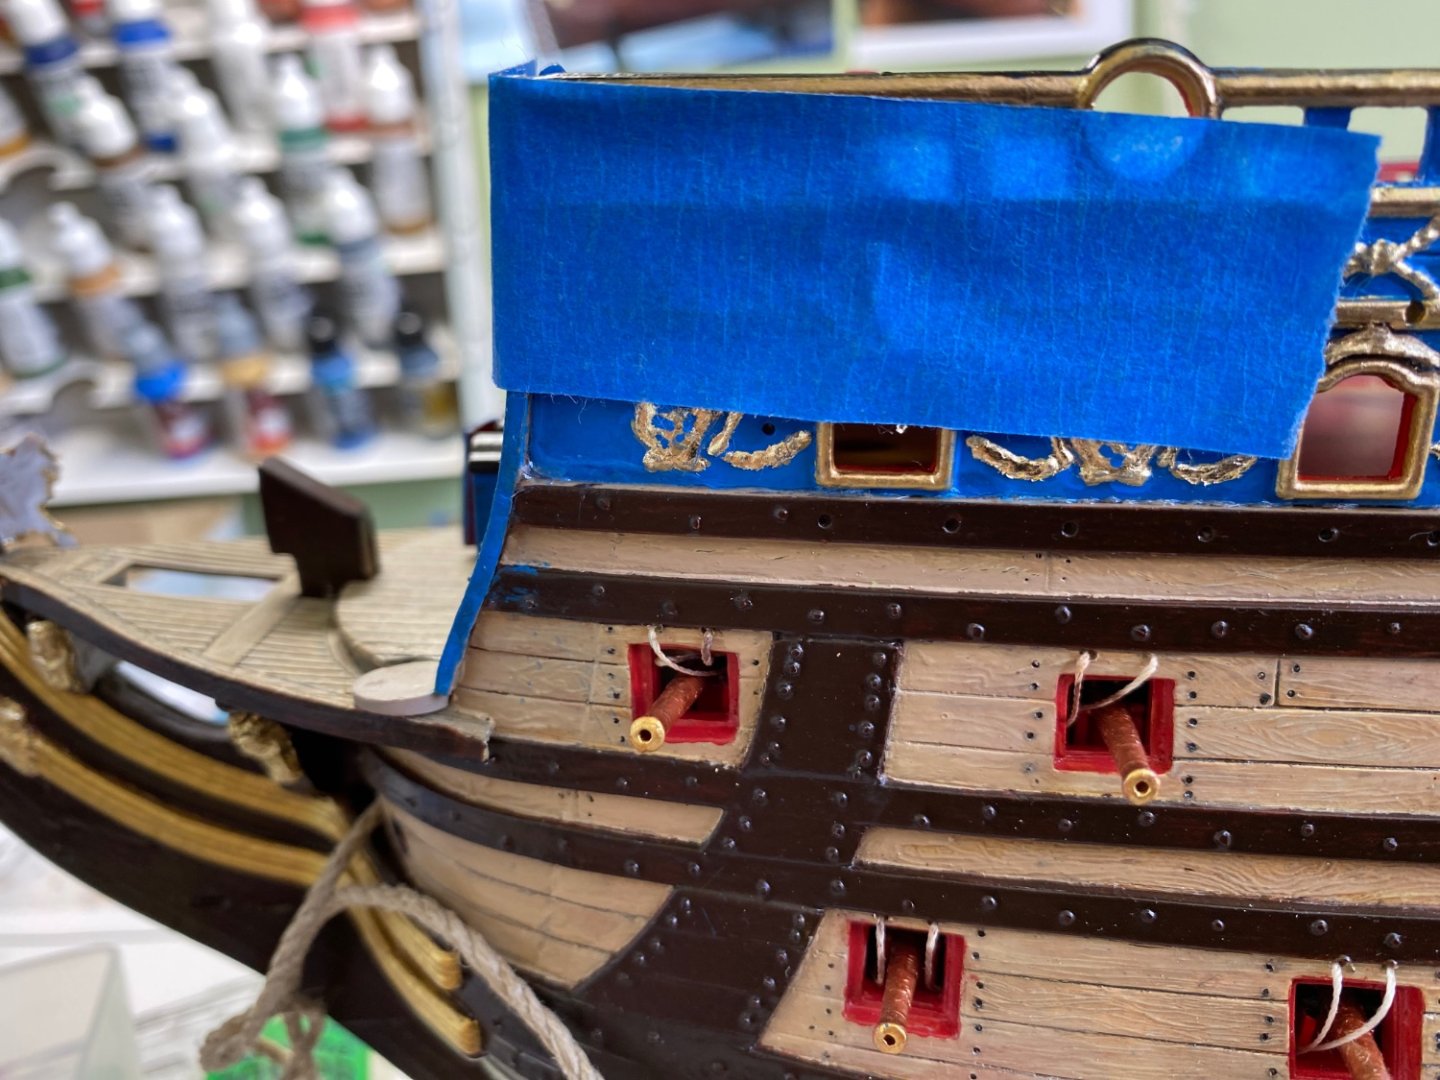
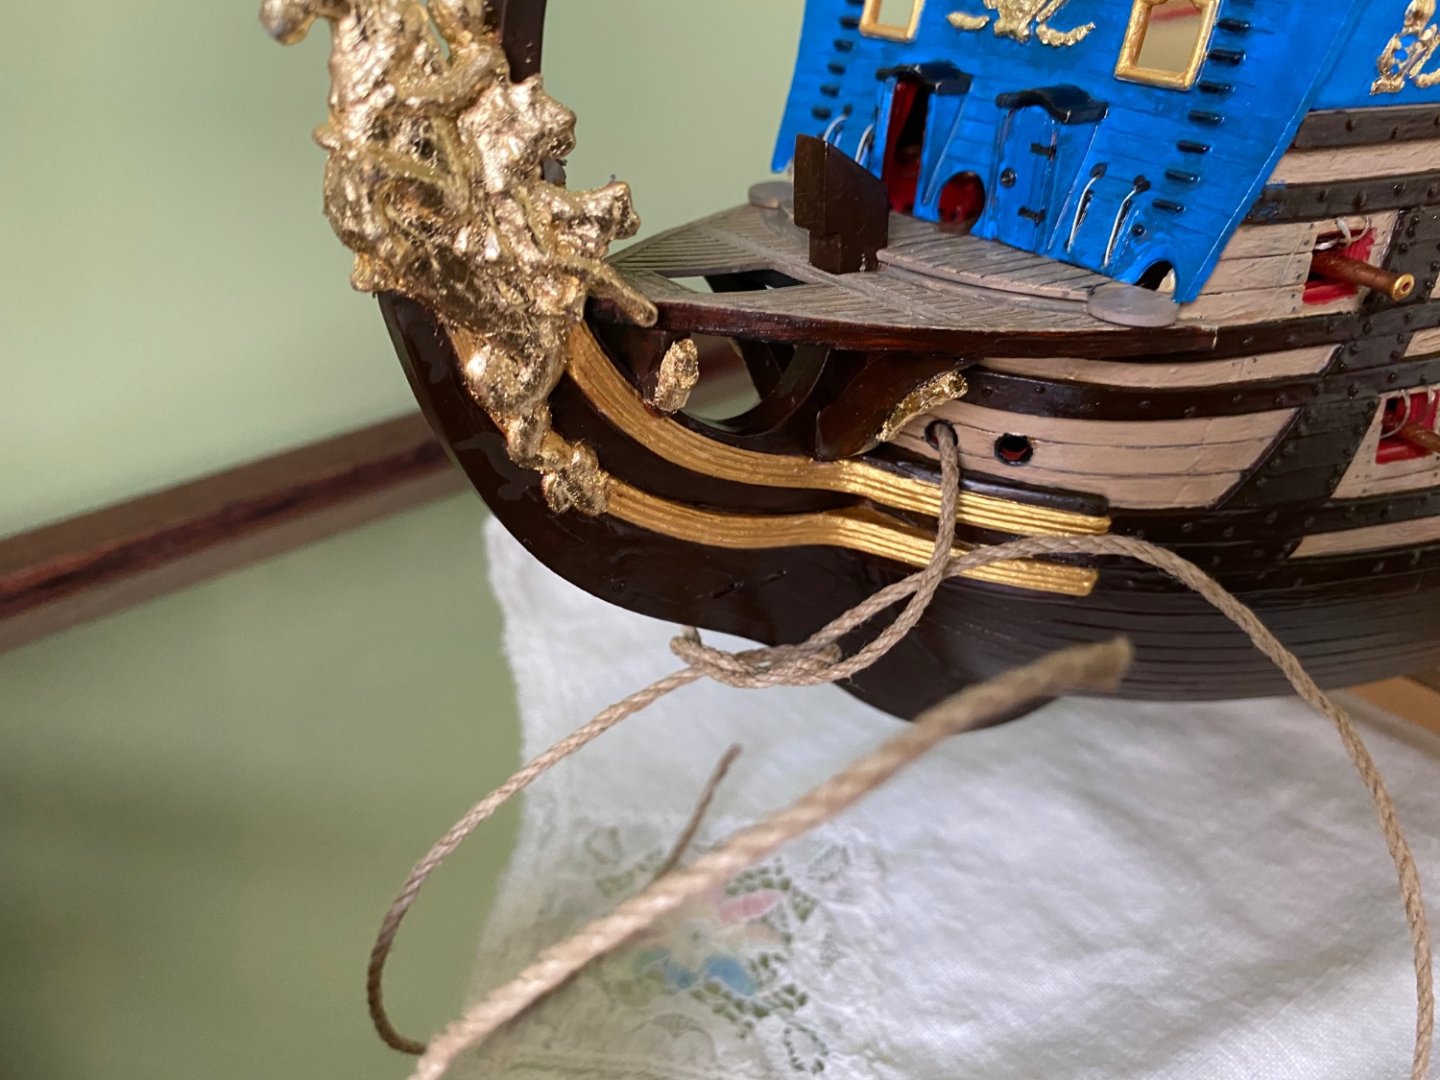
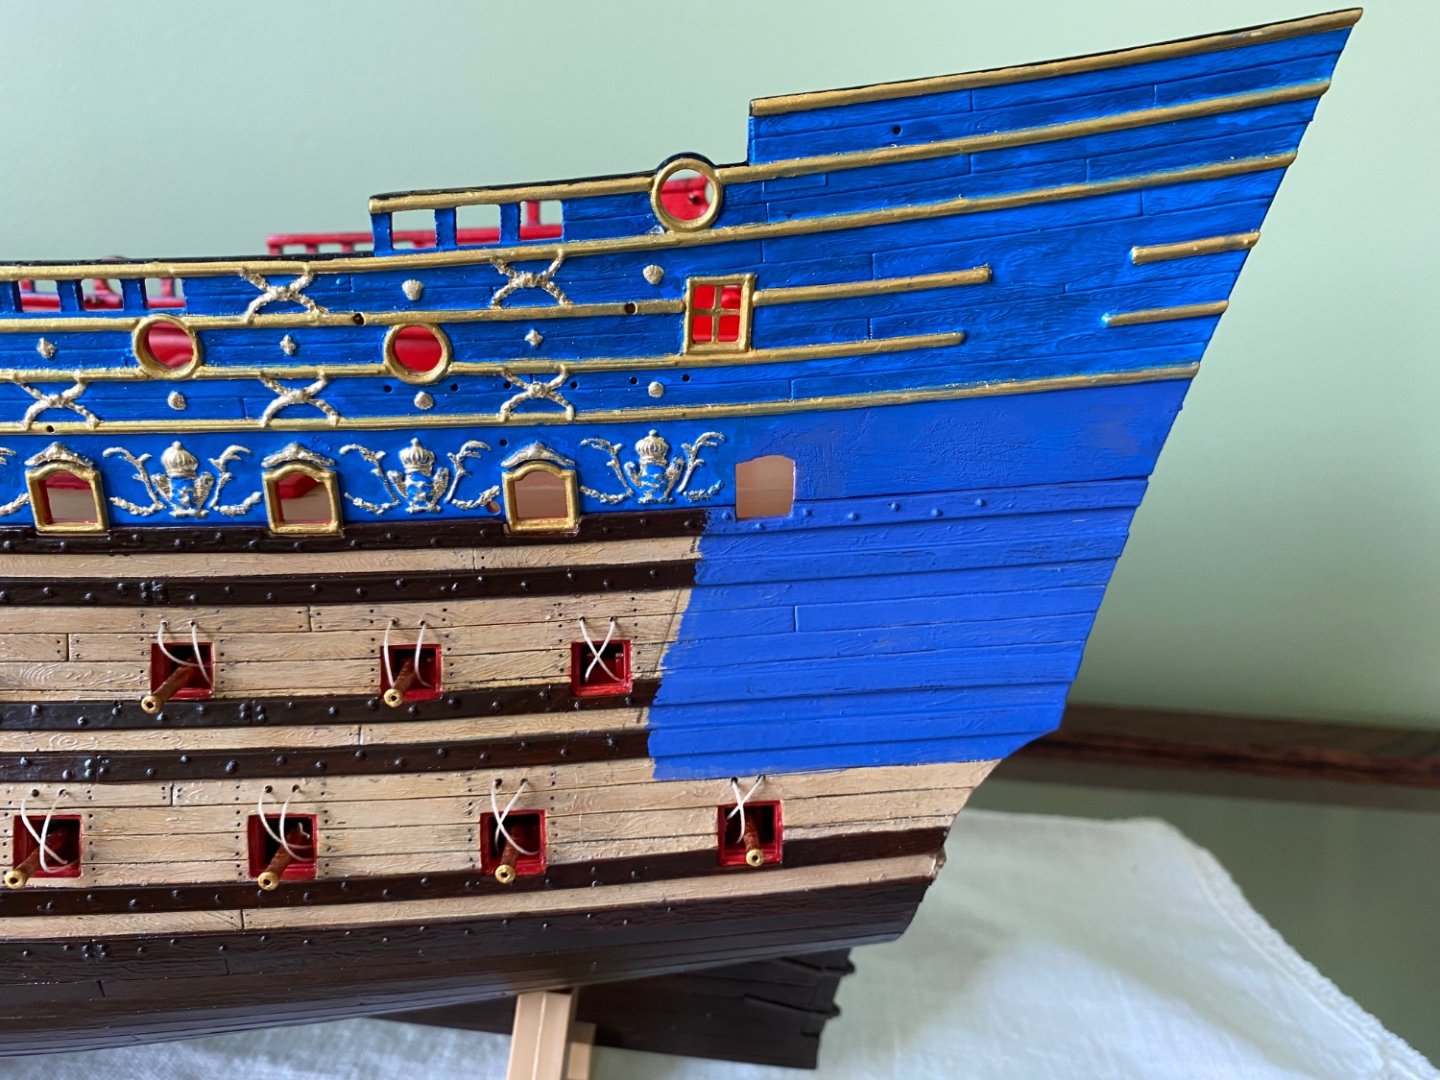
Starboard UB glued in place. Only took 3 clamps to hold it in place and tape at the bulkhead. Do notice I have a small gap at the beakhead bulkhead I will need to fill sand and touch up. I could not slide the UB any further forward to close the gap because the five hatches at the back of the UB have a notch they fit in on top of the wale. I appear to have an adequate amount of glue squeeze out to confirm I have a solid joint. Will see after I let it set for a while. Fingers crossed. Then to the port side if no issues. Ian in fact scraped the paint off the top of the wale in hopes it would improve my bare plastic to plastic joint. Did not know if paint on top the wale would decrease the strength of my joint. Henry that is a great idea for my wayward anchor rope. Still no idea how it came untied and pulled out. Retied the one still in extra tight.

- 1,508 replies
-
- 1
-
-
- Le Soleil Royal
- Heller
- (and 1 more)
-
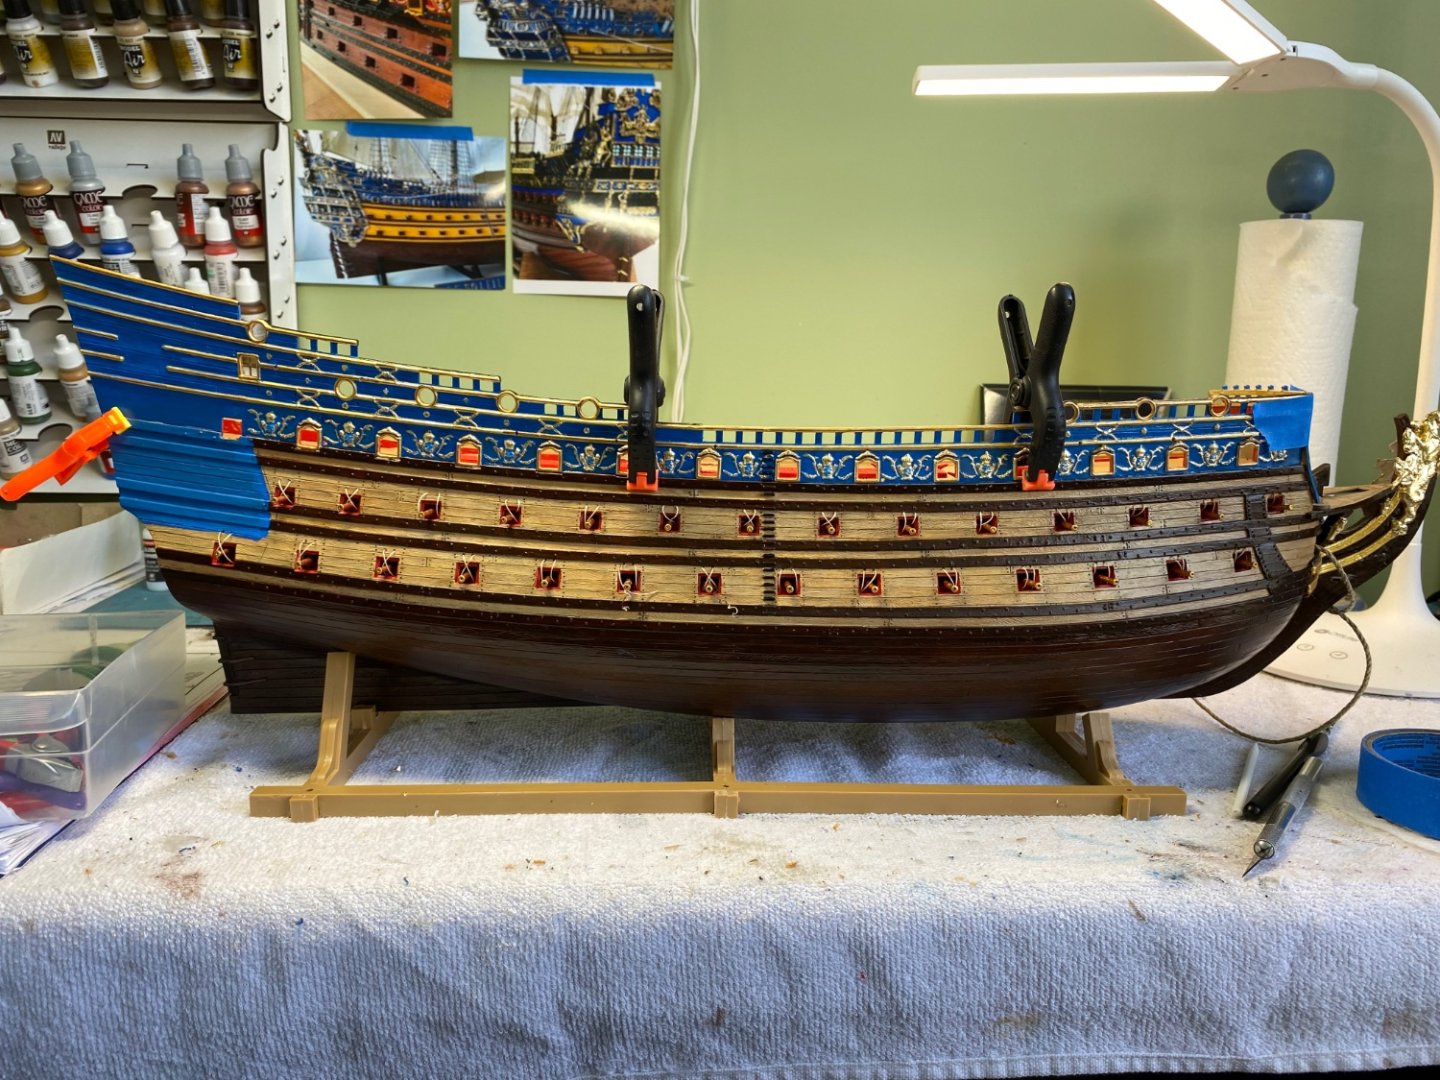
This is the view of the port side UB just setting there dry fitted. No clamps. May be a good sign.


- 1,508 replies
-
- 1
-
-
- Le Soleil Royal
- Heller
- (and 1 more)
-
Thanks guys. Appreciate your kind words. I read in a number of your builds that attaching the UBs can be a challenge because of the stress on the curve. Mine just set perfectly in place during dry fitting. Hopefully this is a good sign. Will definitely update once completed. Wish me luck.
-
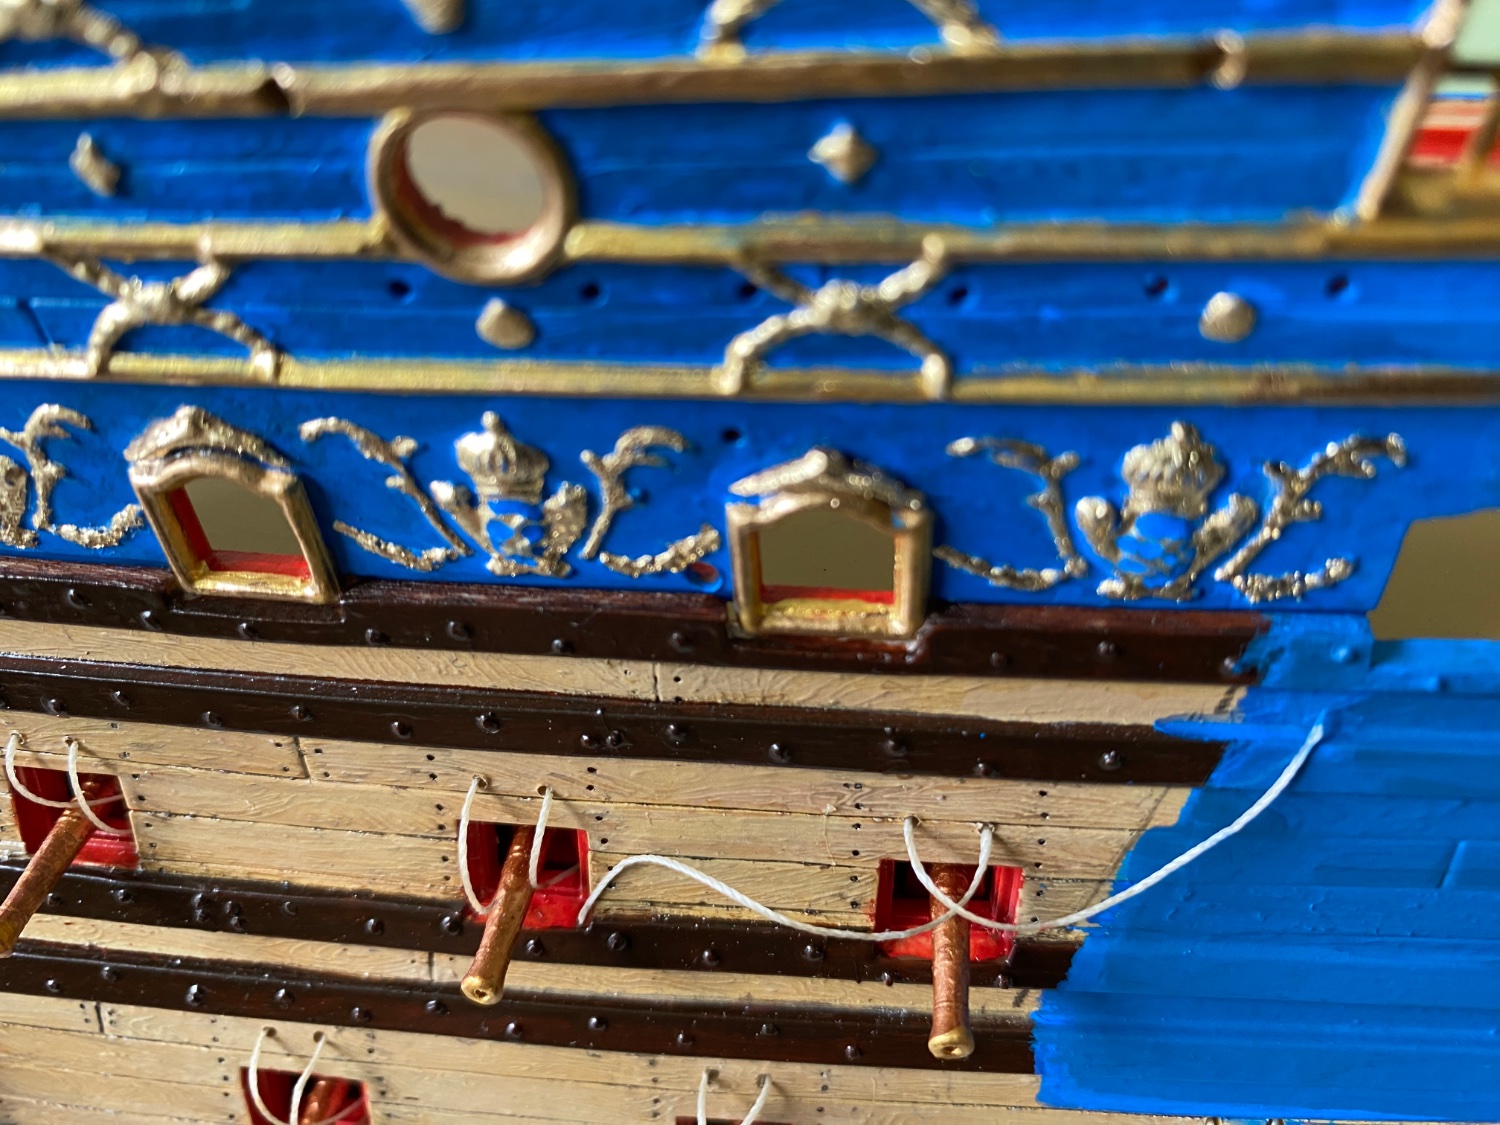
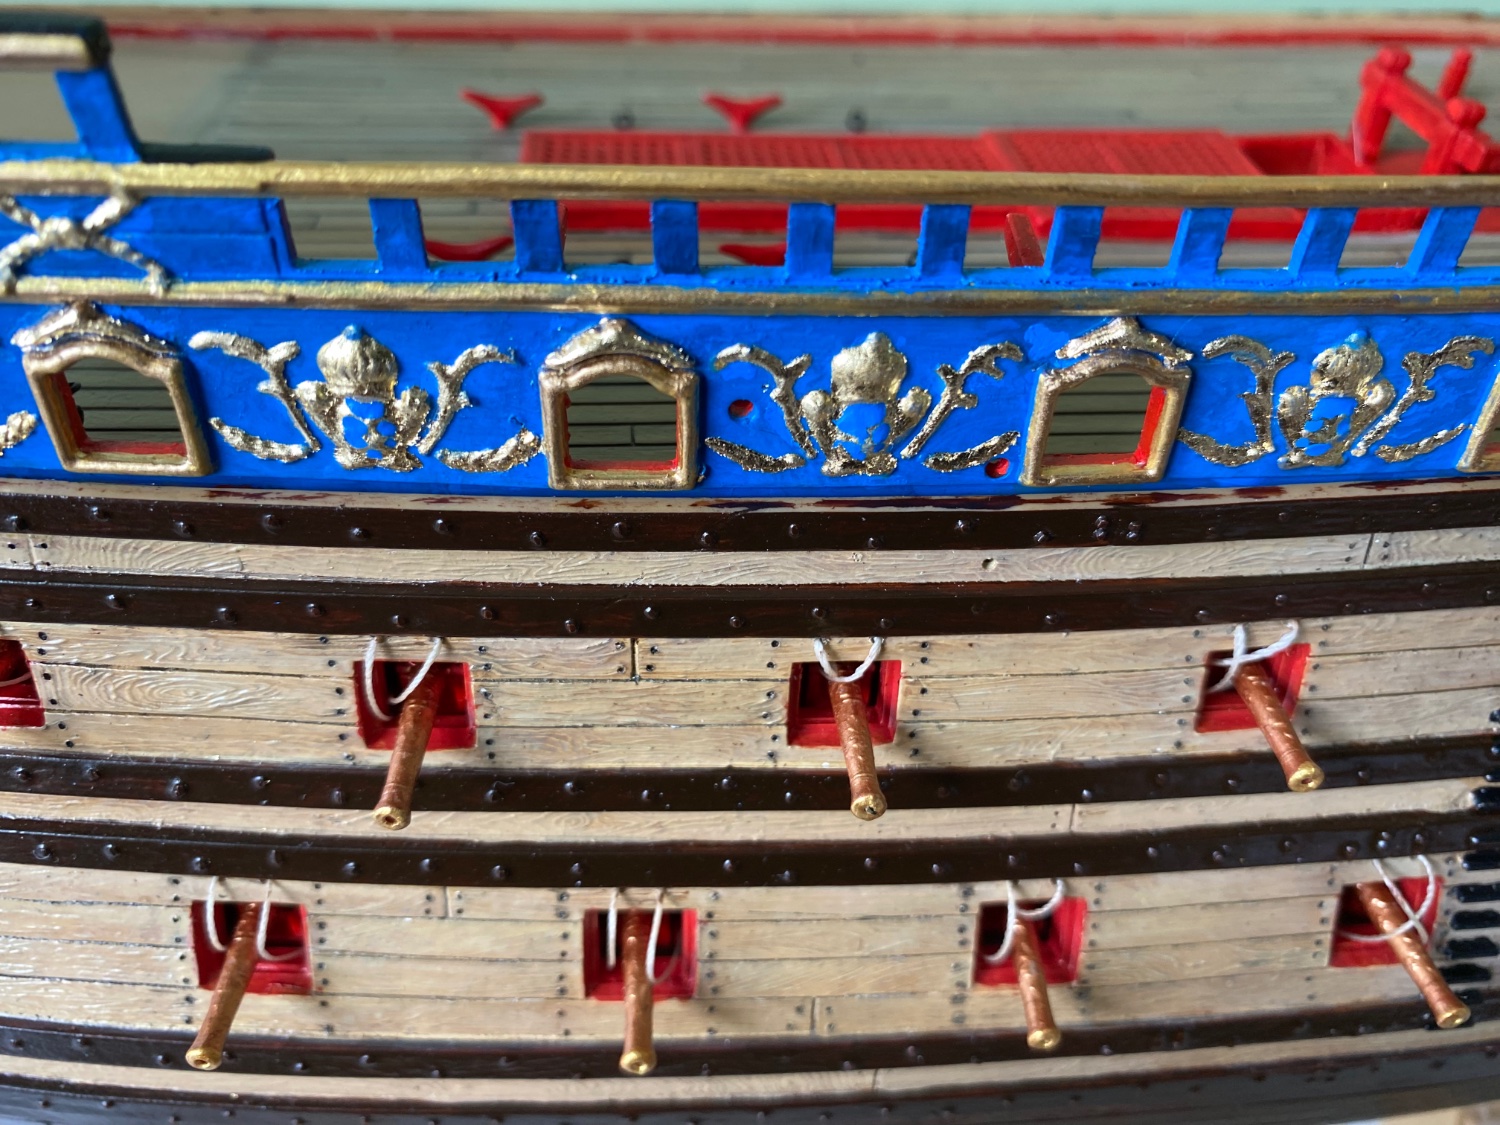
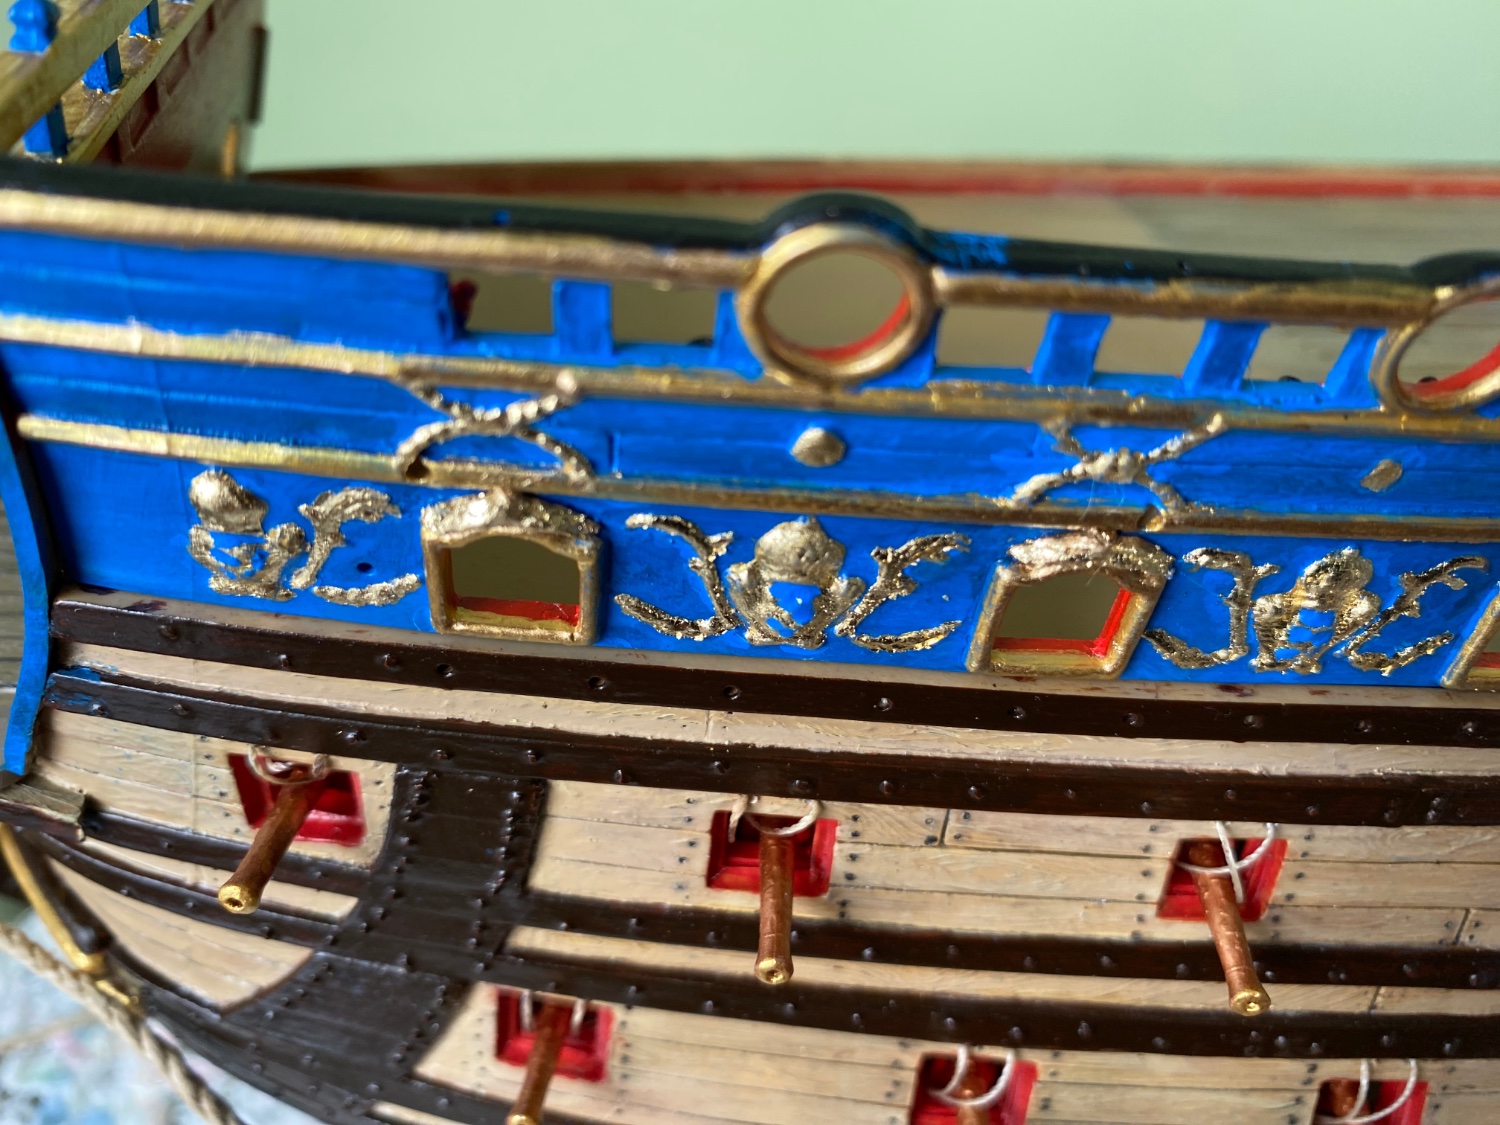
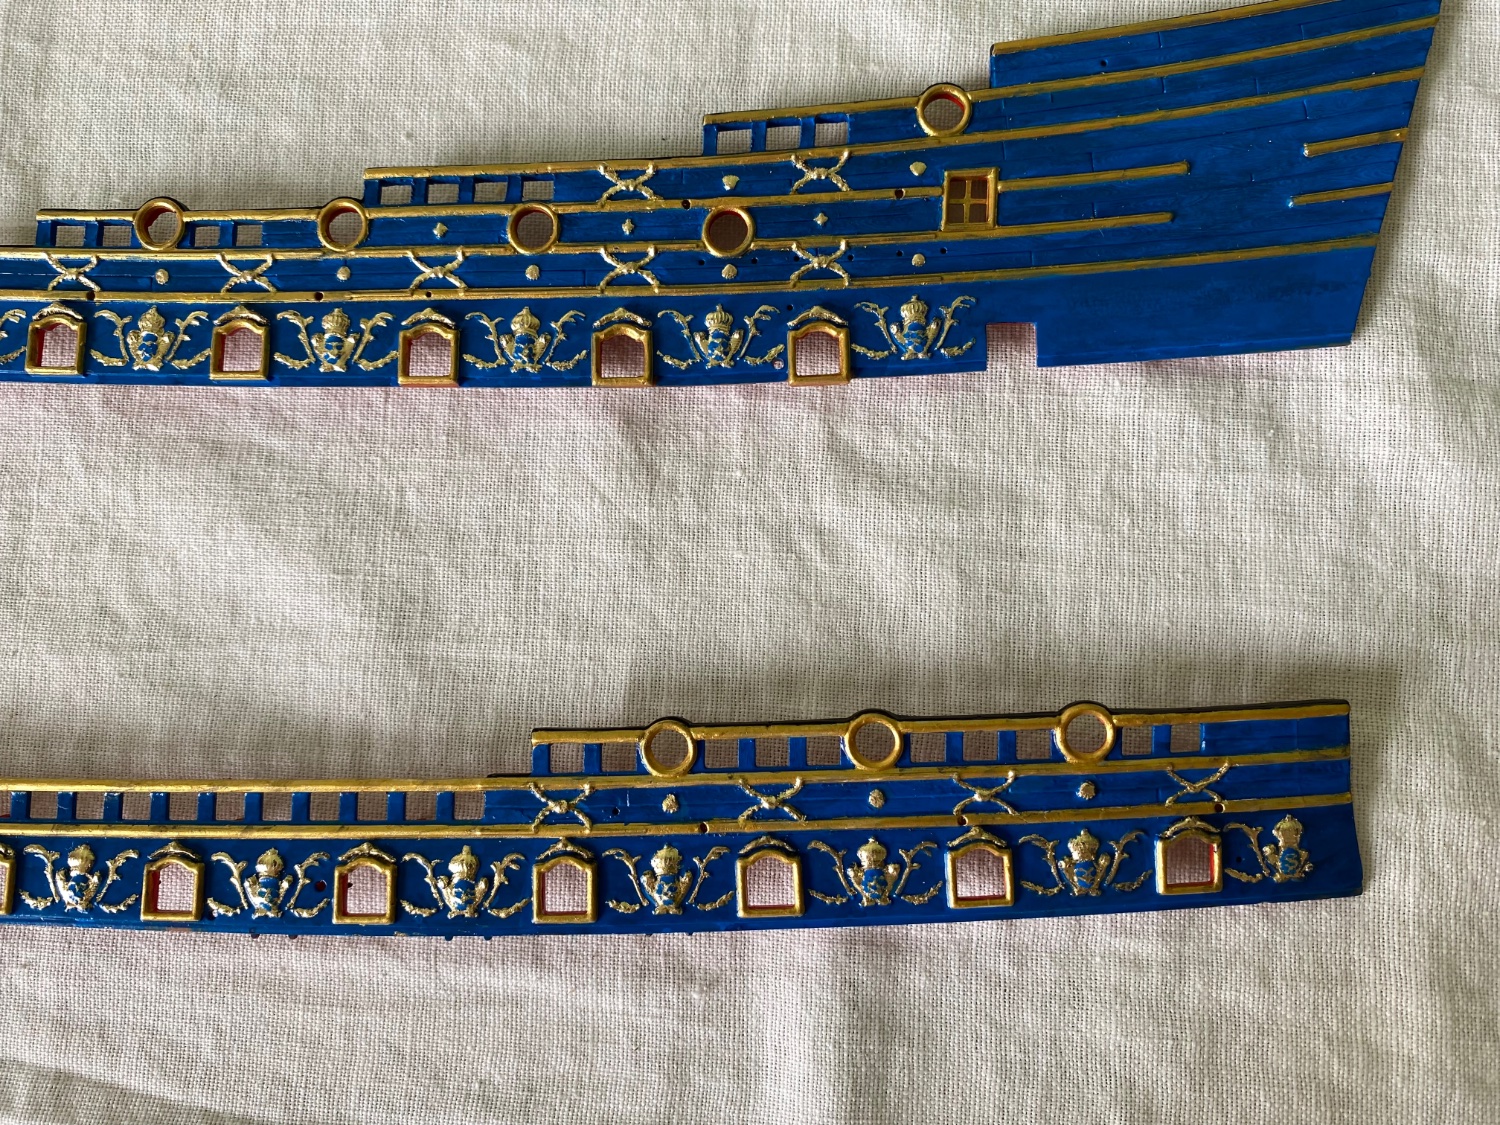
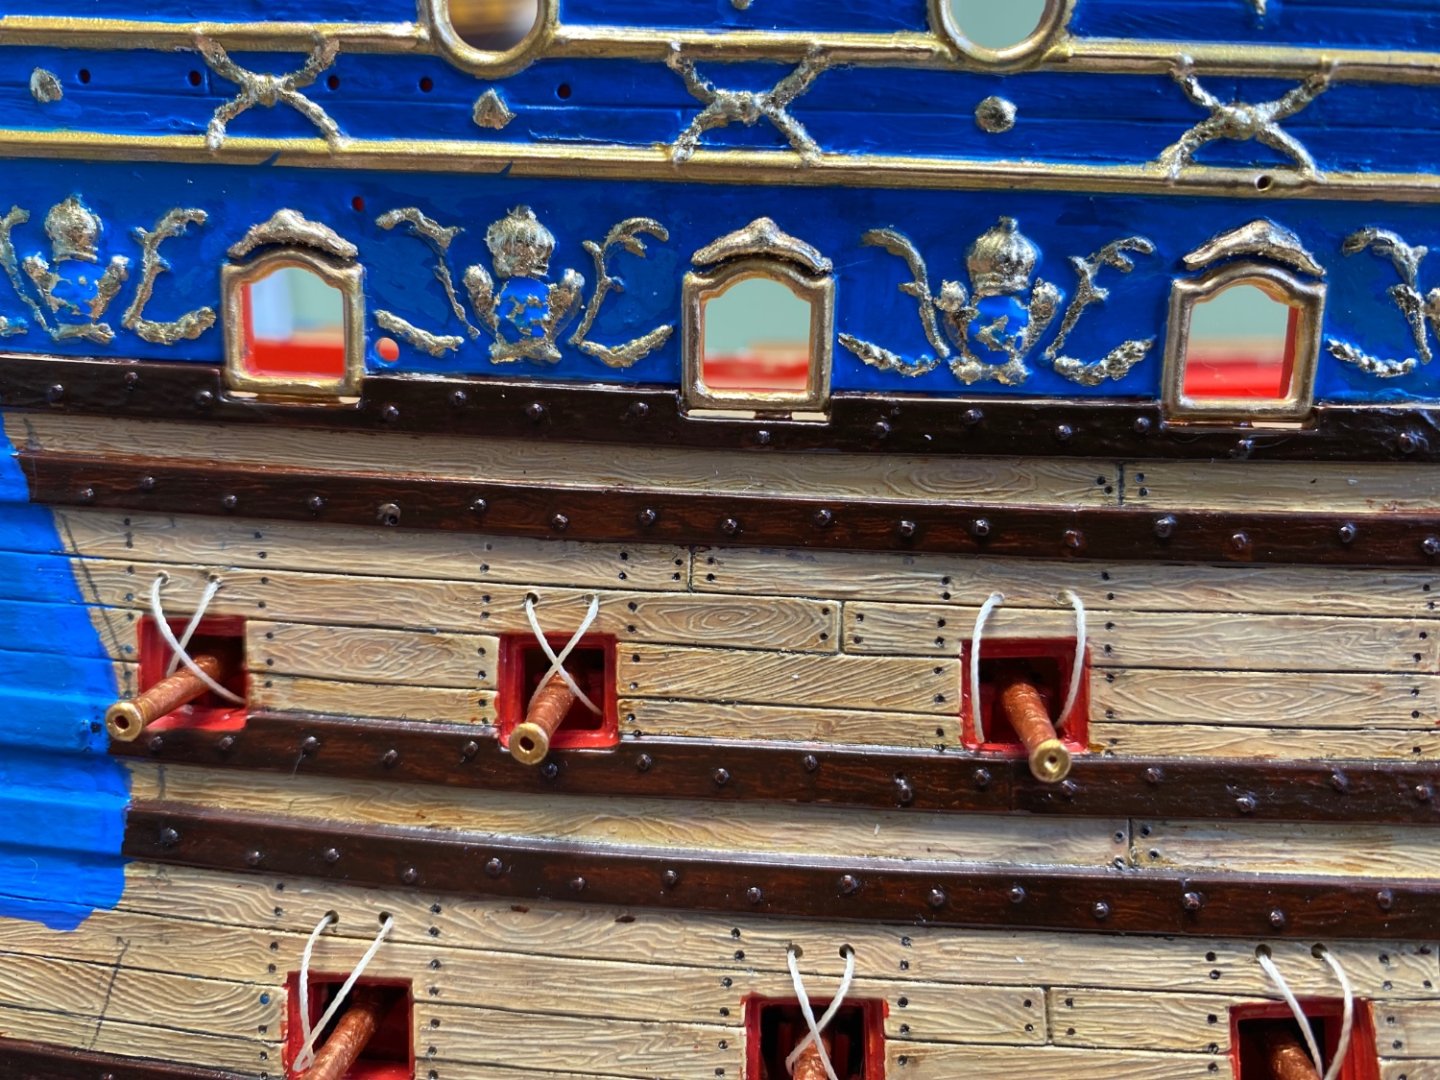
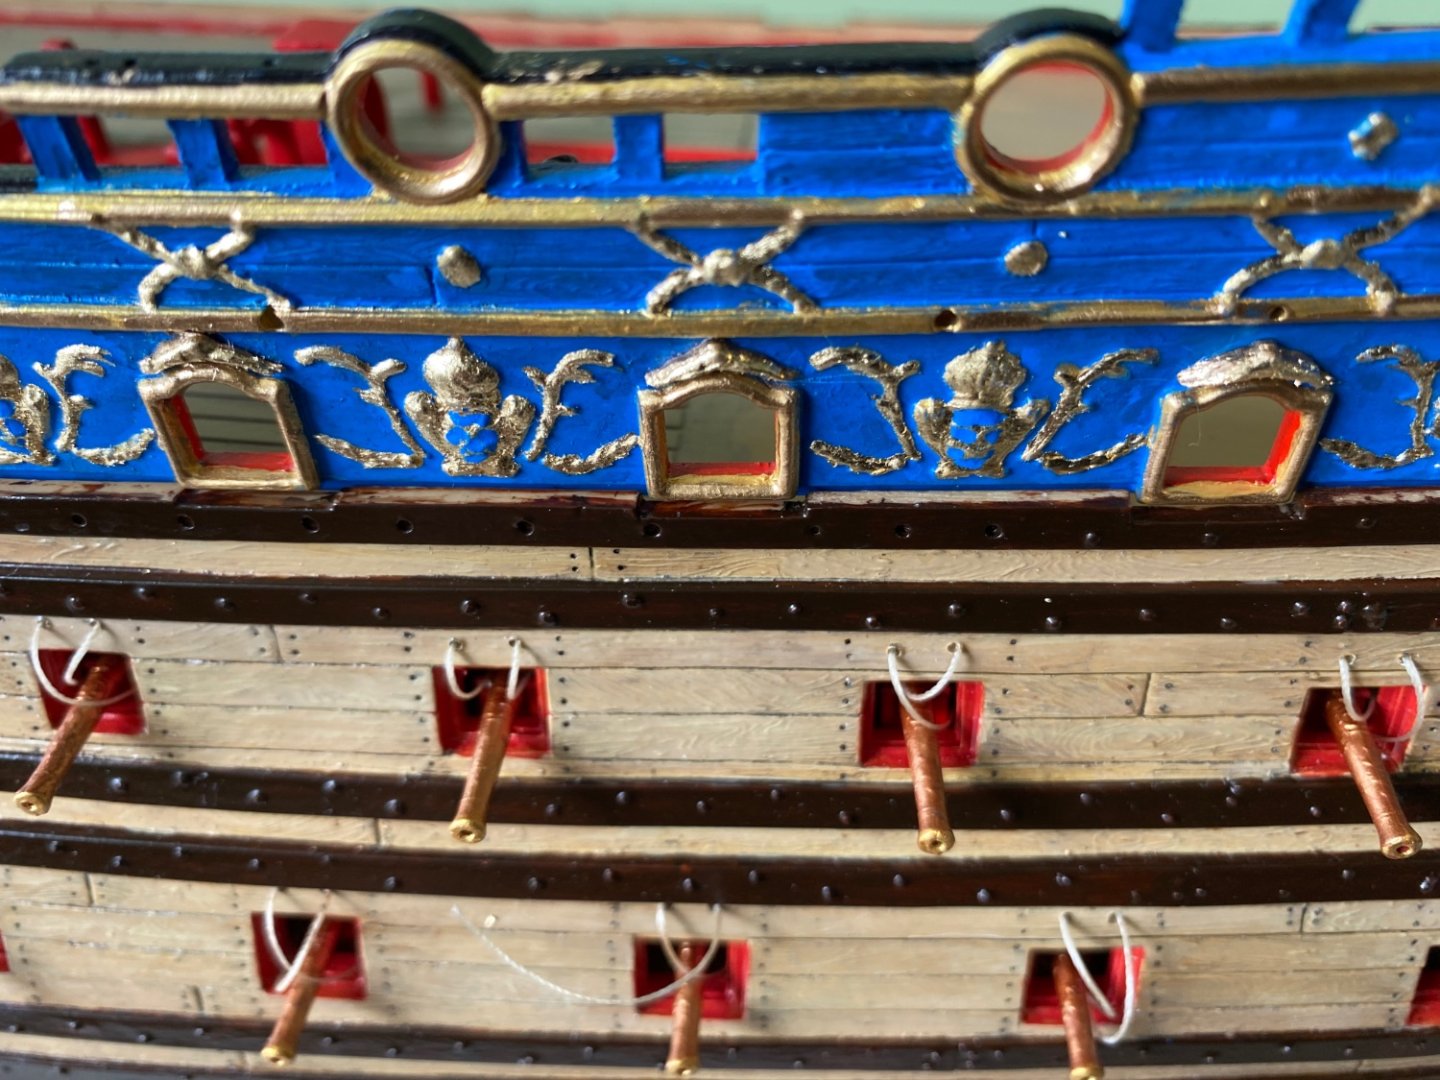
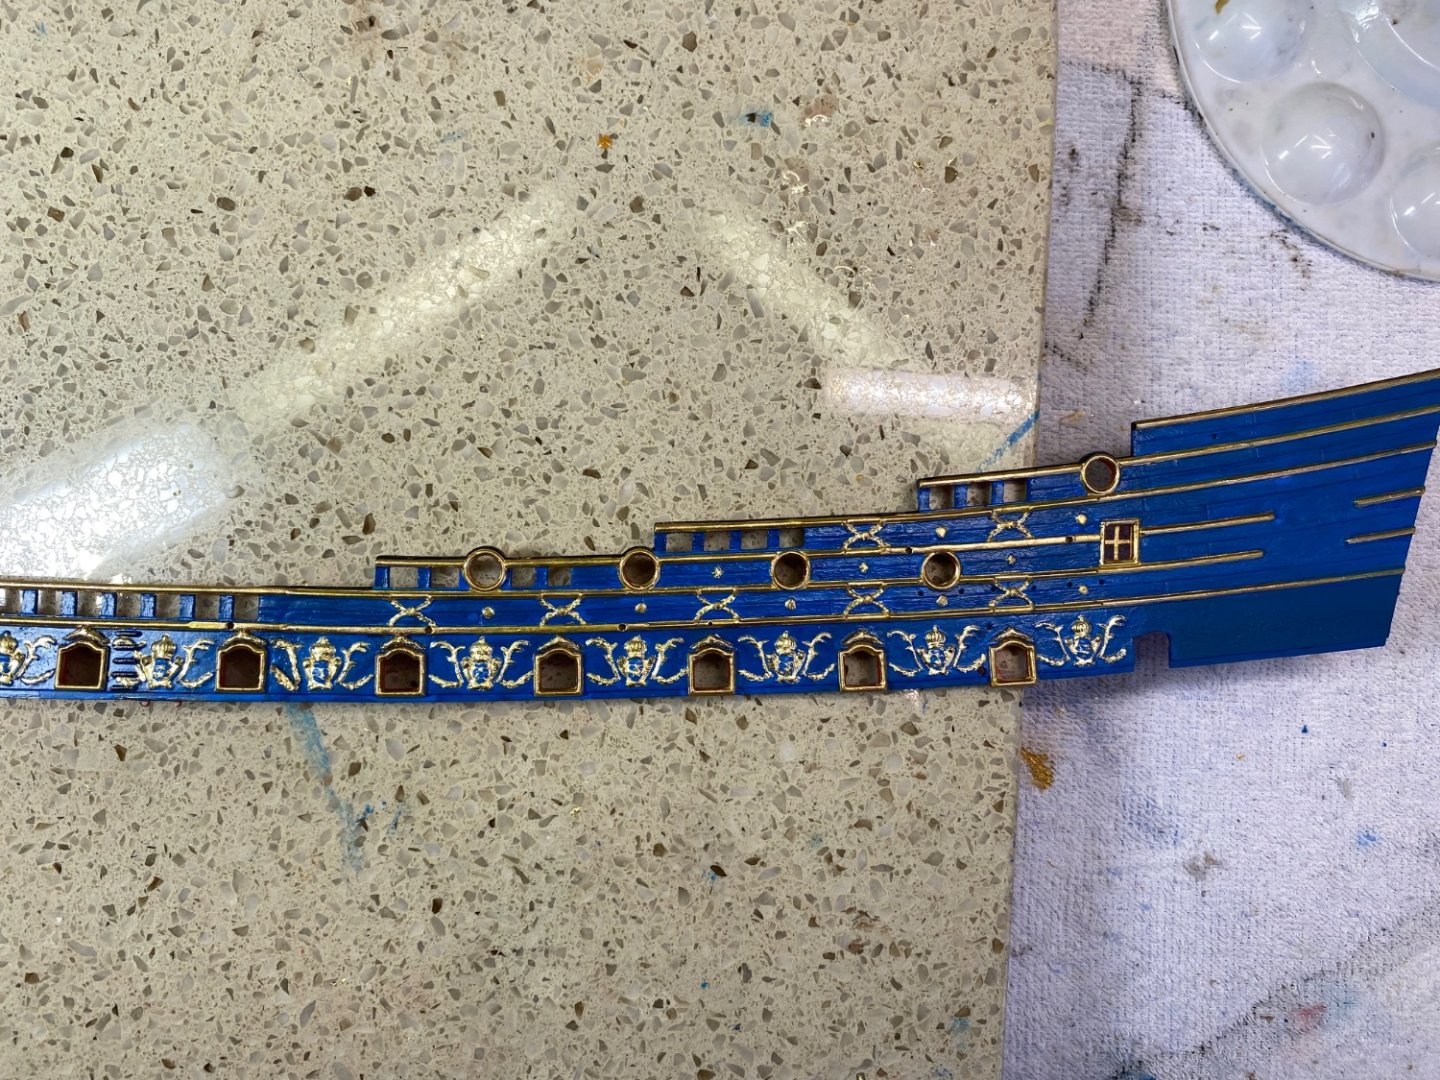
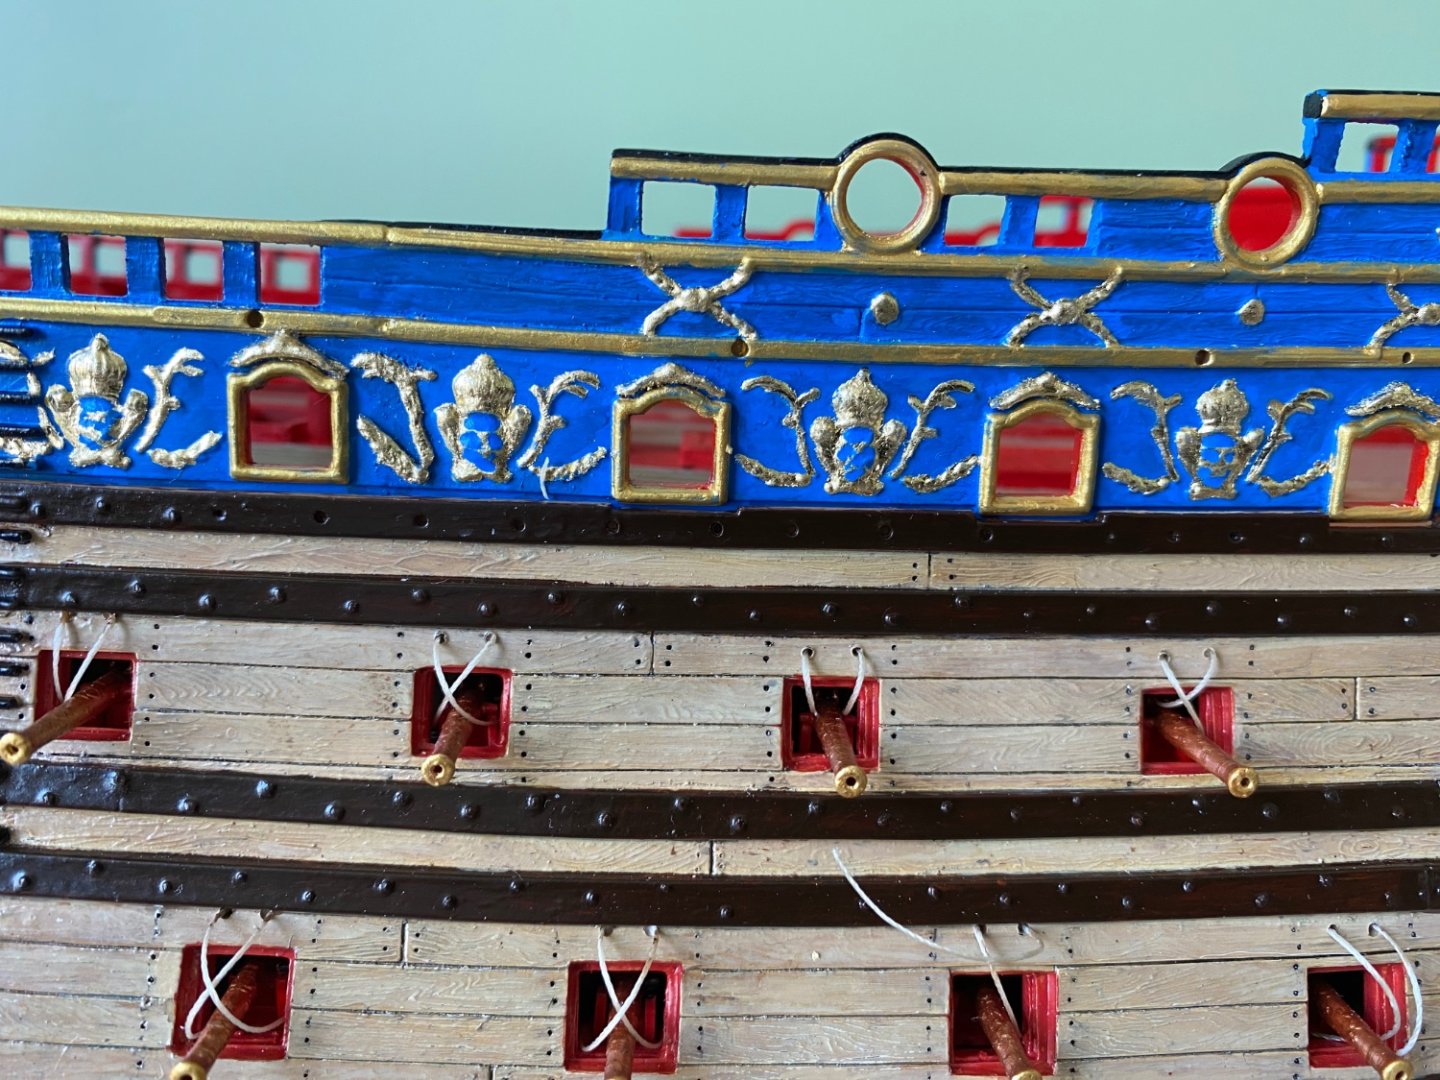
After much ado I have finished making the new resin hatch enhancements and replaced the gummy enhancements already on the UB. Then I applied gold leaf to the enhancements and the decorations between the cannon hatches. I think I am about ready to the UBs to the hull. Have a new “oh curse word” I need to figure out a way to fix. Even though I am sure I had it tied in a knot, I somehow accidentally pulled one of my anchor ropes out. With the deck in I can no longer easily access the holes.

- 1,508 replies
-
- 5
-
-

-

-
- Le Soleil Royal
- Heller
- (and 1 more)
-
Wow! Kevin. I dropped by to see how your build is going. Had no idea you had your ankle fused. Hope you heal quickly and have less pain now from the arthritis. As always I continue to be very very impressed with your CS build.
-
I got a little tickled when I saw the 6 👍 for my last post. Apparently all my MSW friends agree I need to get the gummy garbage off my ship 😀.
-
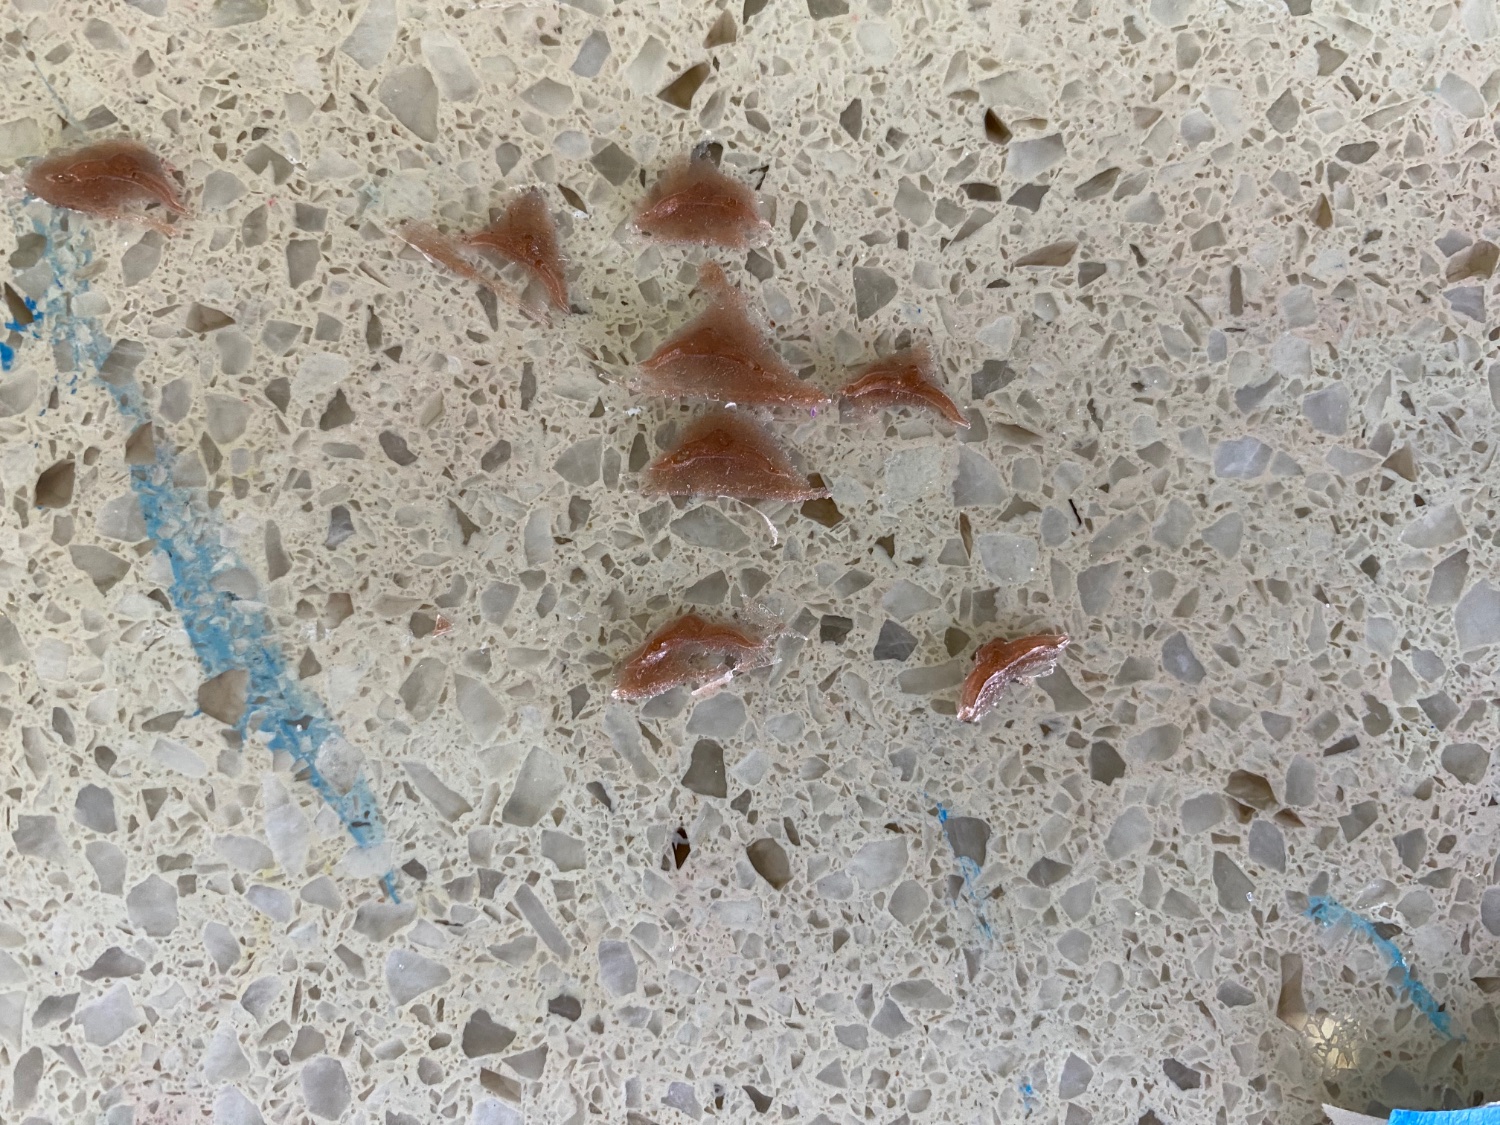
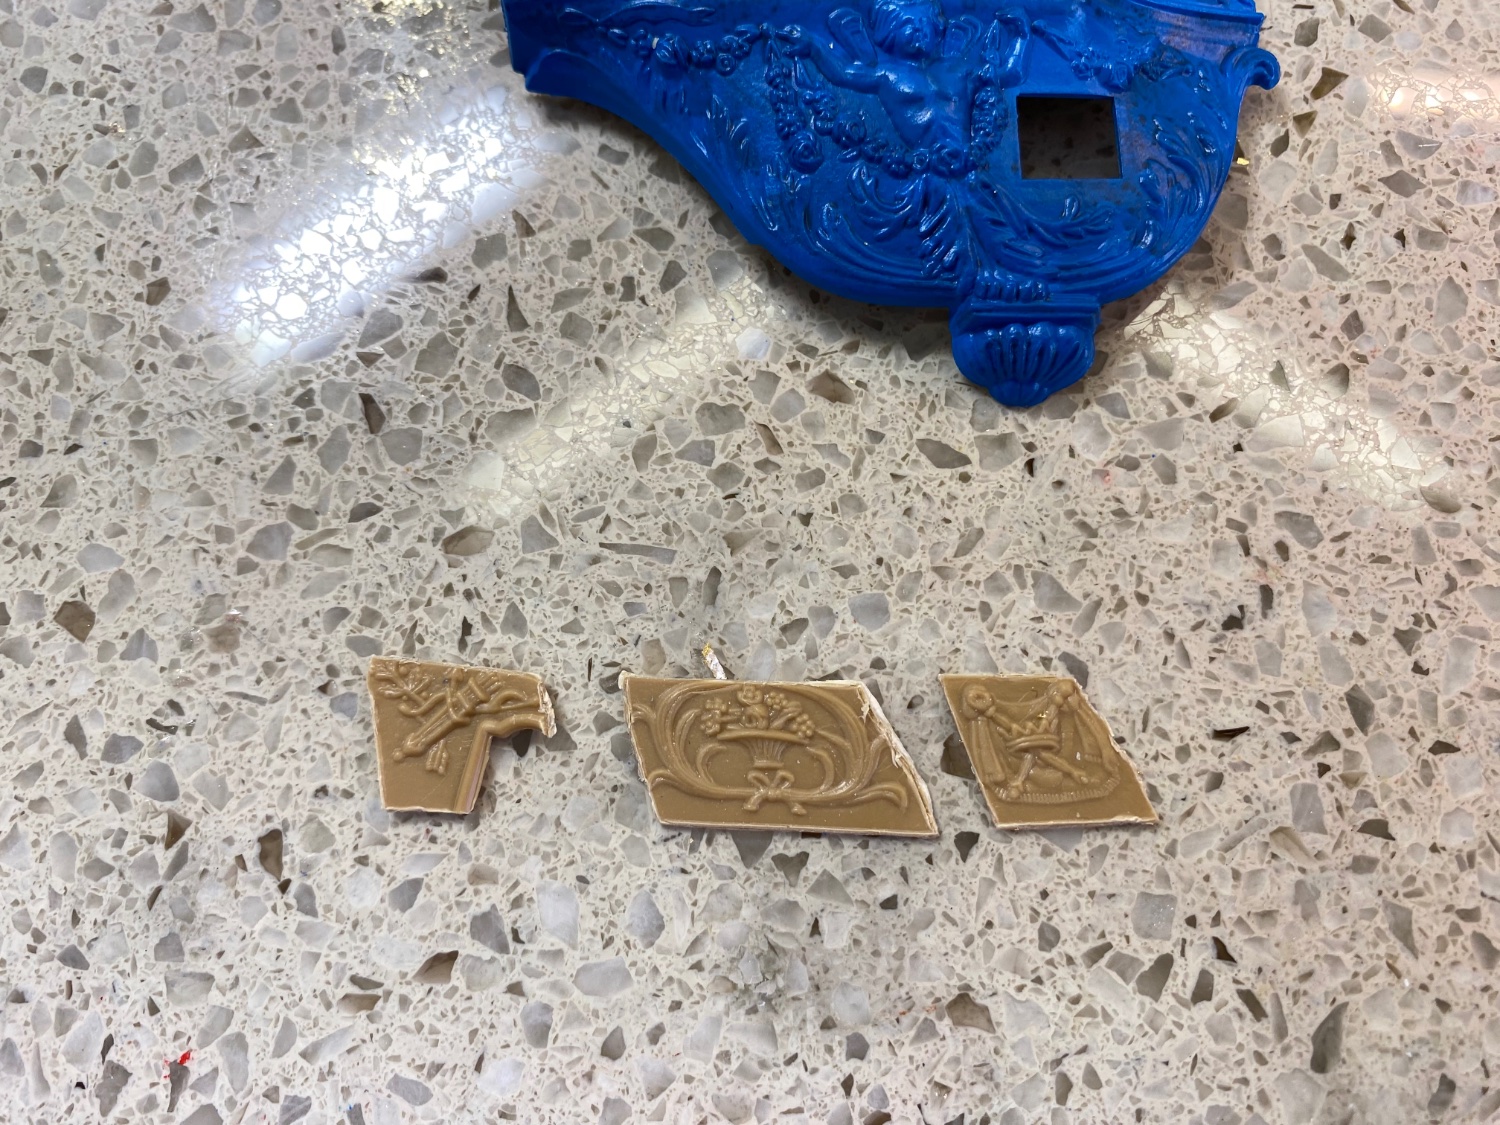
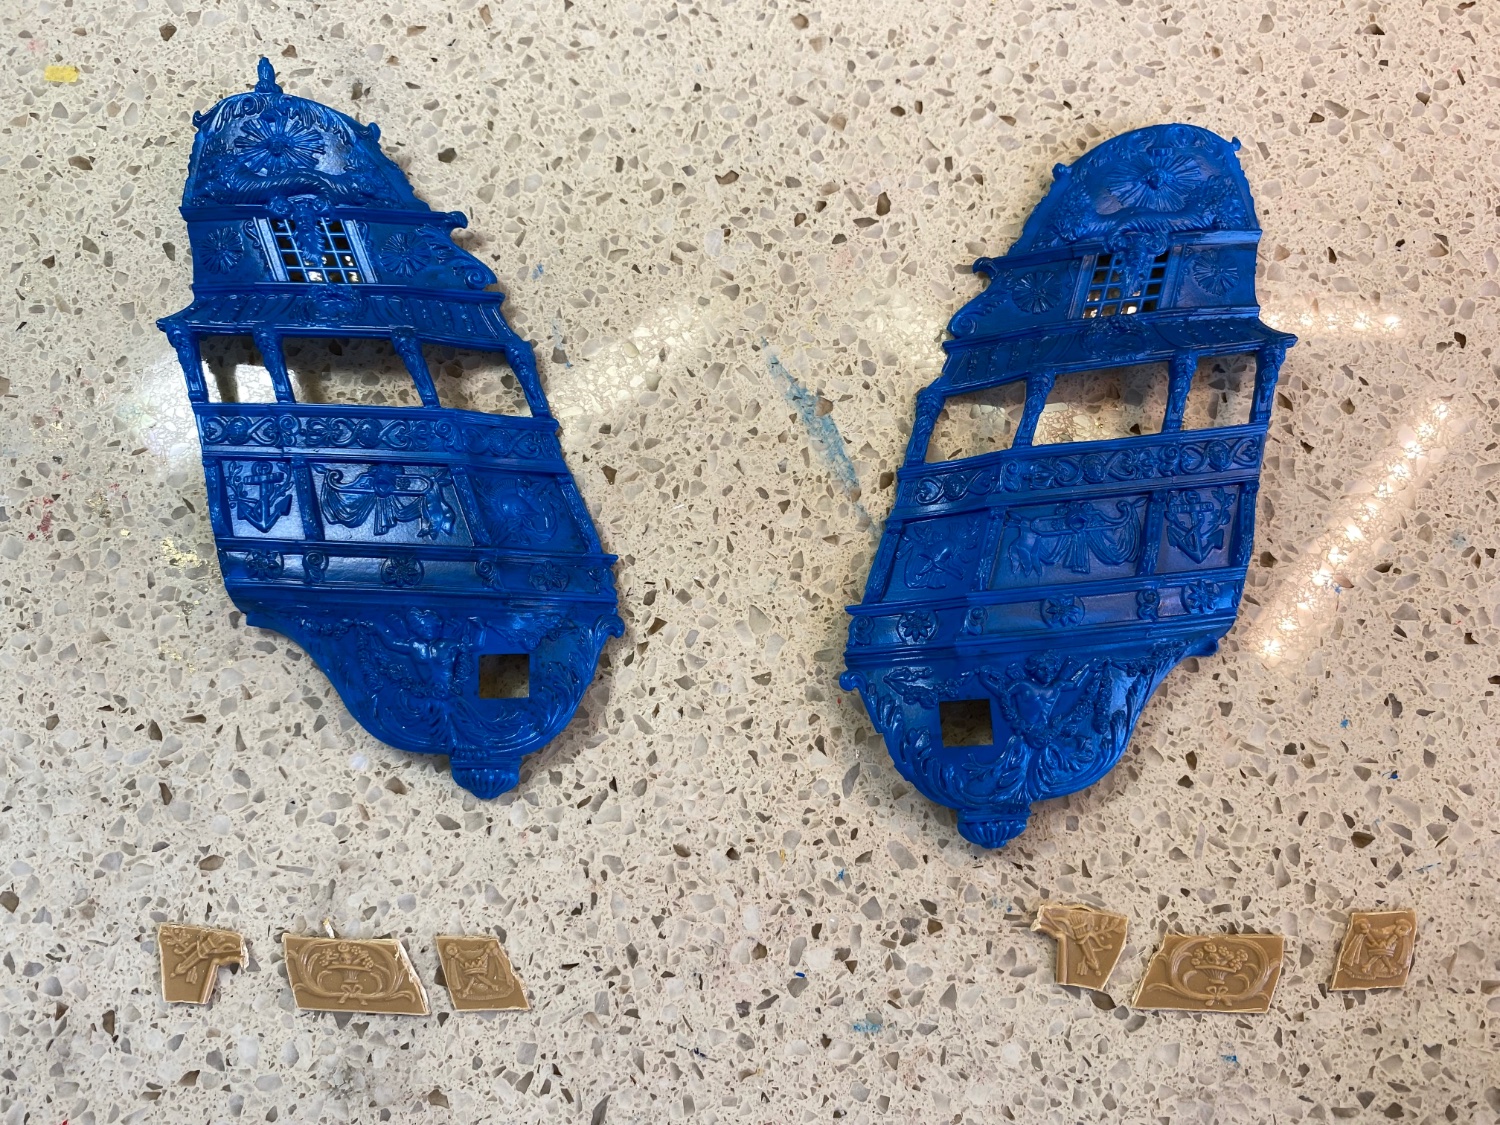
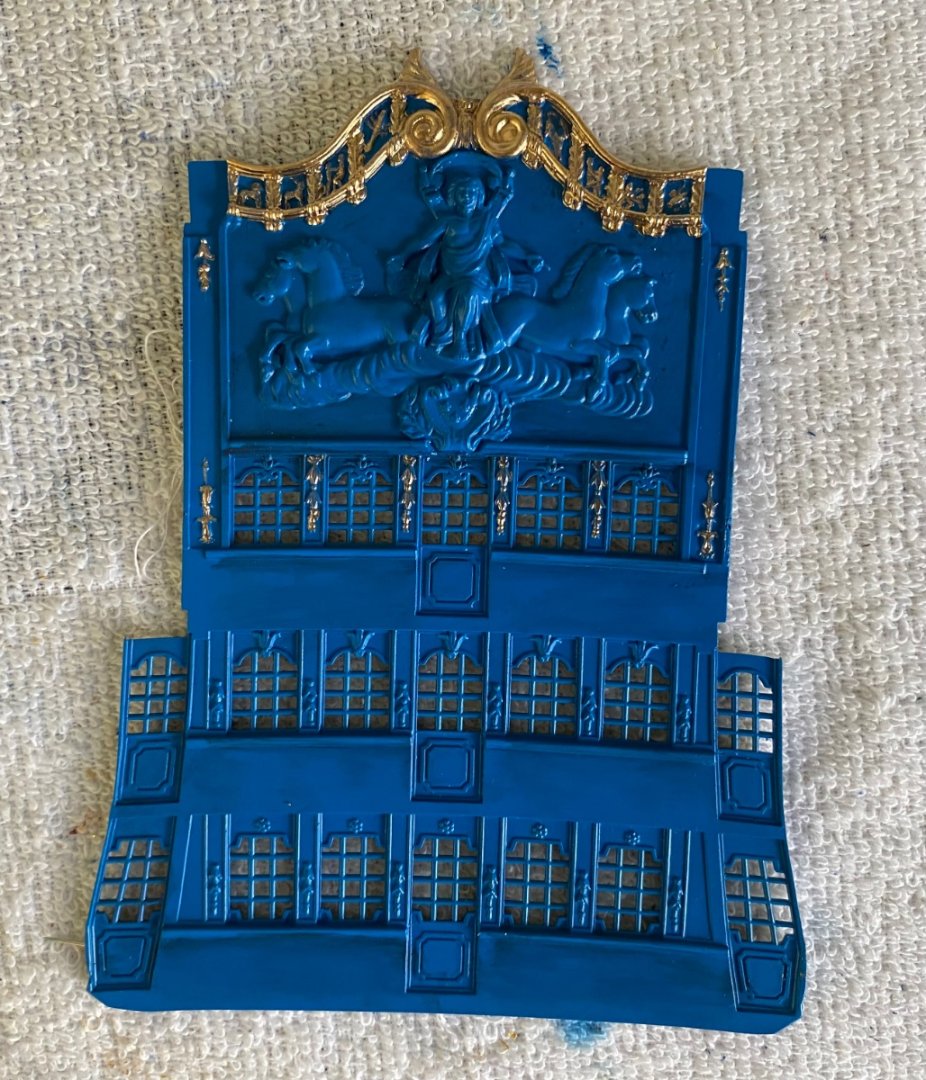
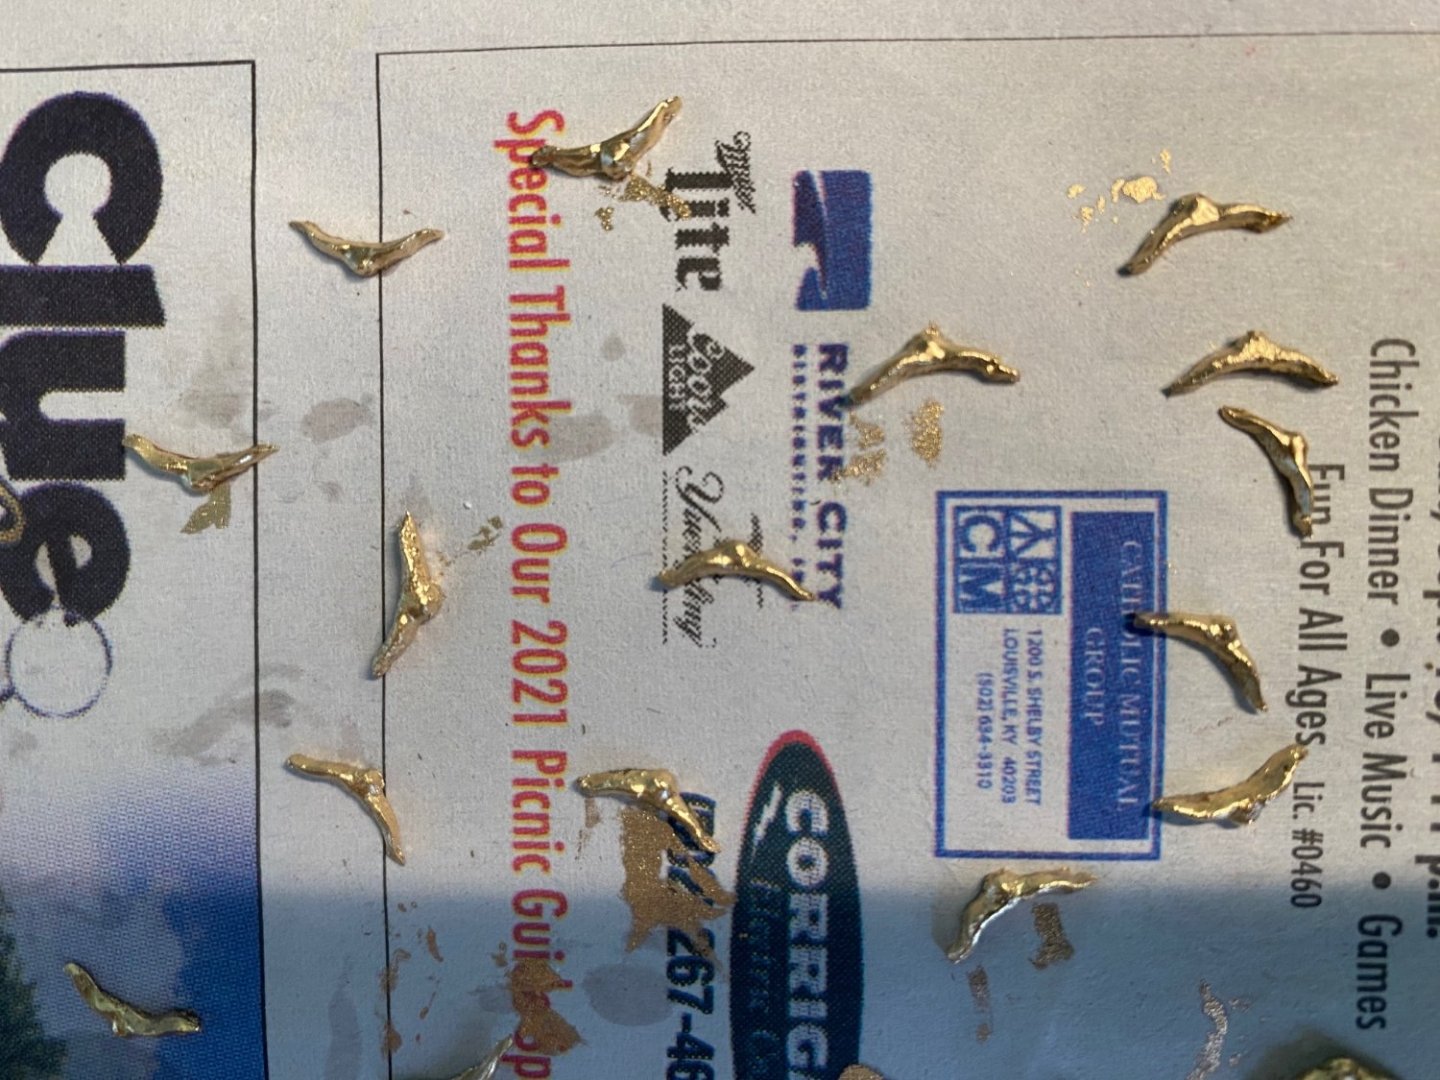
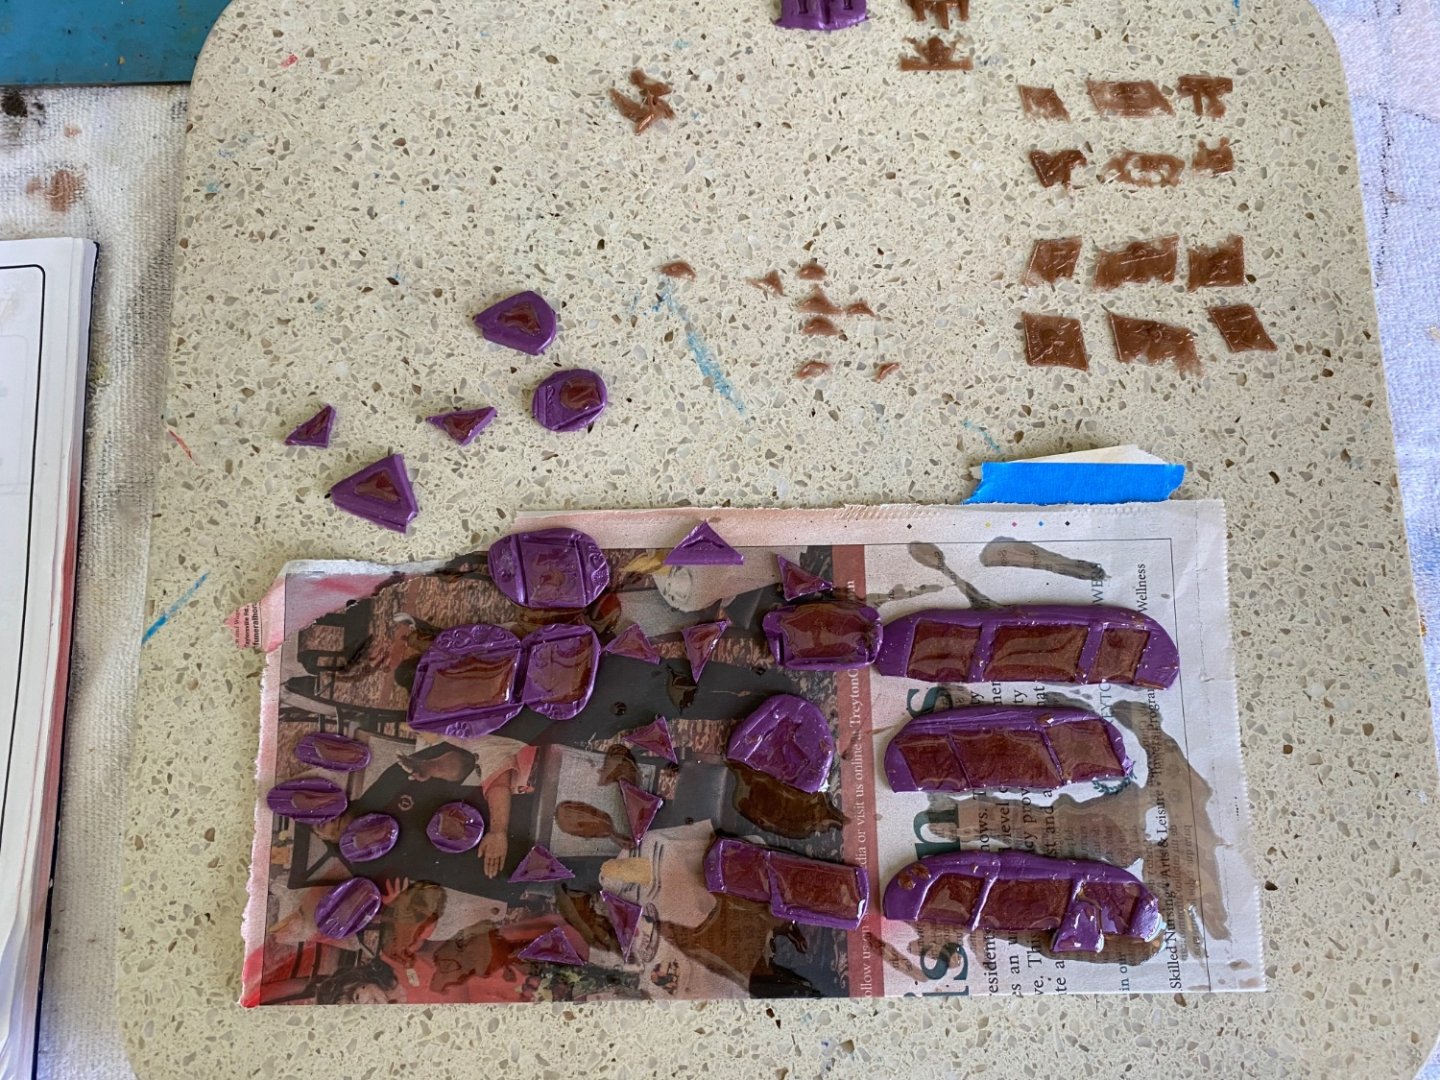
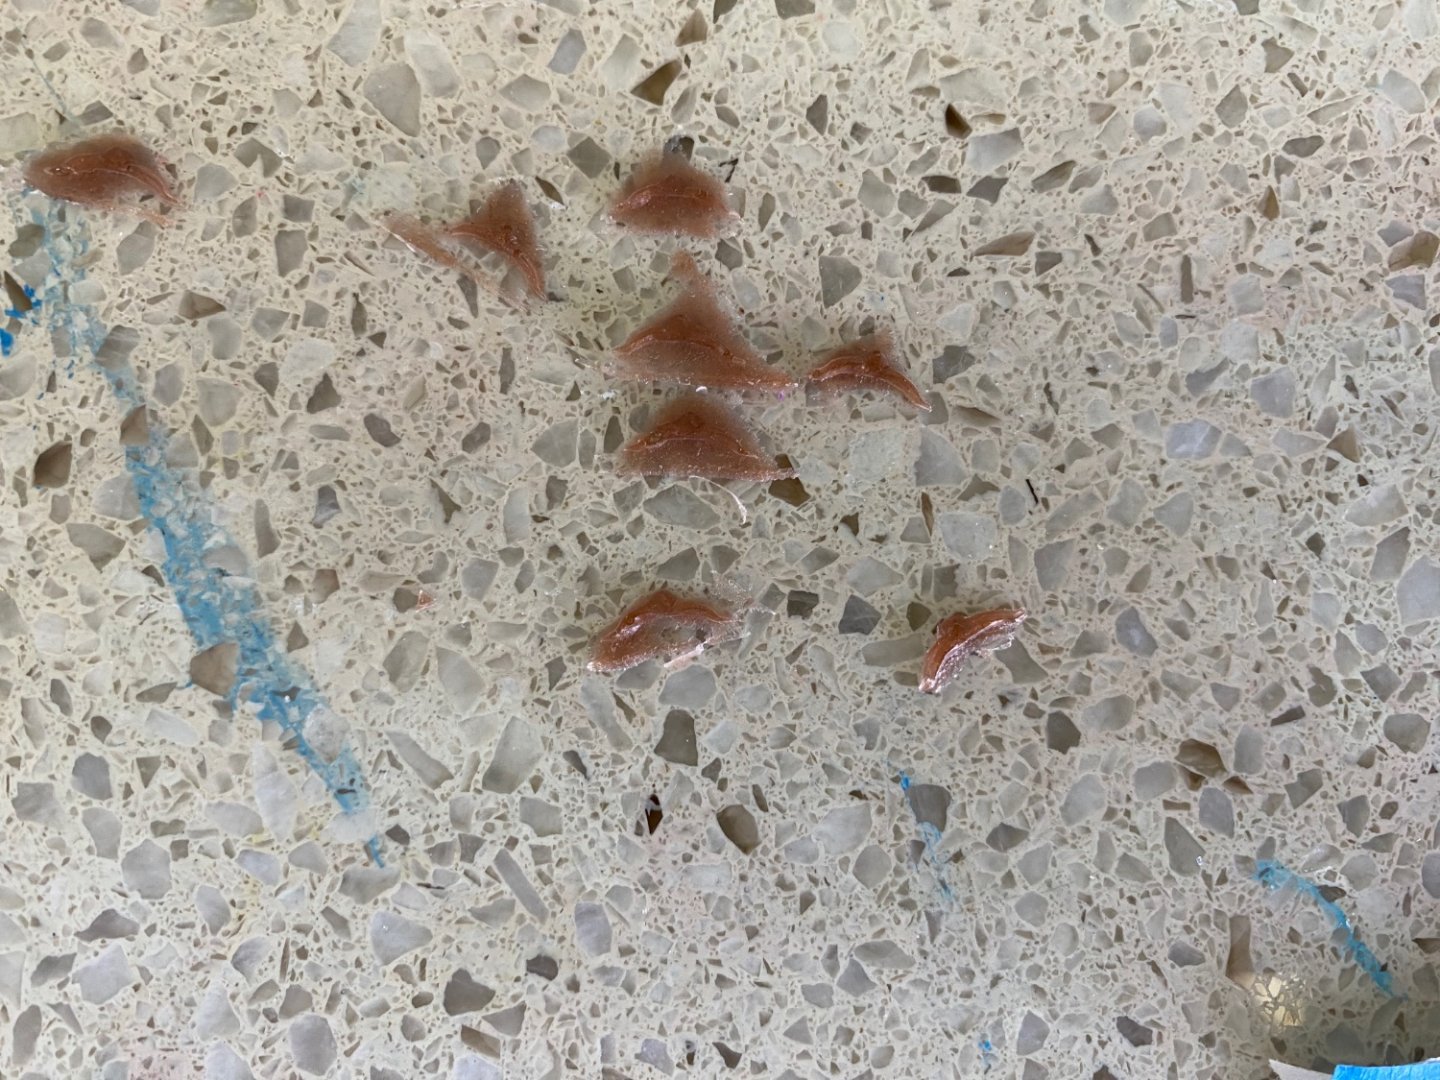
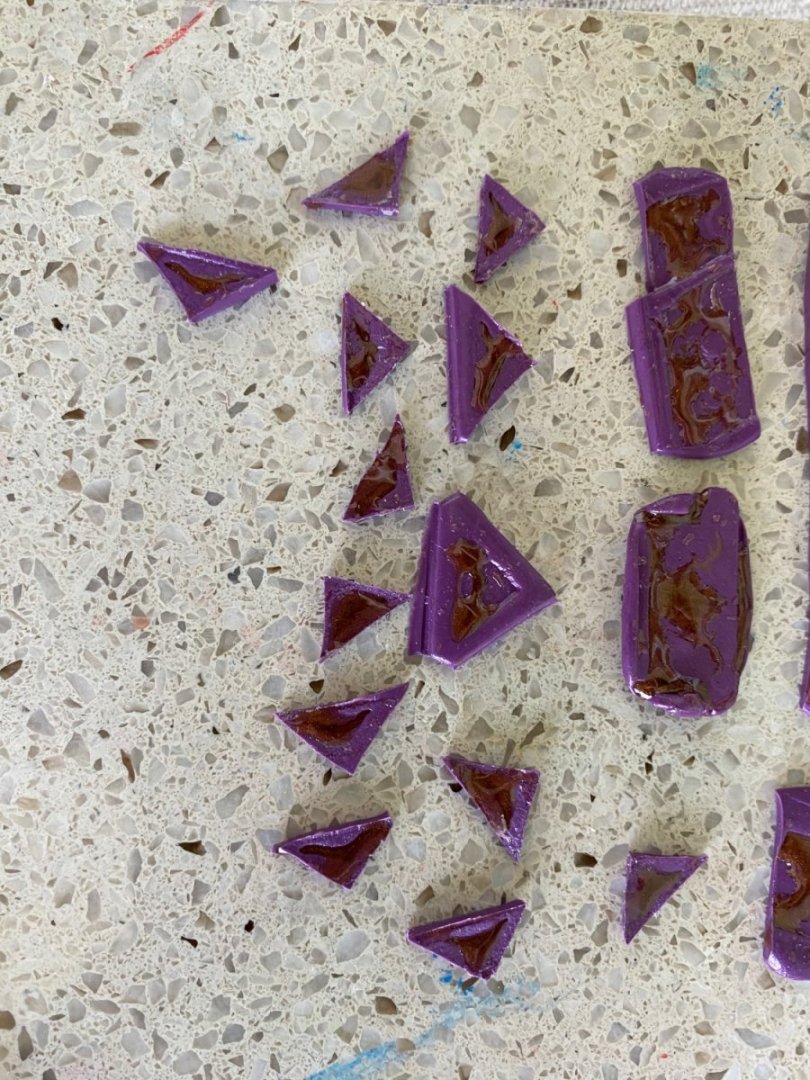
Starting a rather big do over! Since I began casting the many different enhancements I have been adding to the ship I have been less than pleased with the product I was making. All of my different castings were coming out like a stale gummy. They were not hard enough to do a final carve or shape with a knife or sand paper. They were just flexible. For the many enhancements I made for the top of the cannon hatches I did the best I could gold leafing and gluing a gummy above each hatch. Never was completely satisfied! After doing some research and talking with someone who does a lot of resin casting I came to the conclusion I was being my own worst enemy. I was doing everything wrong during the resin mixing process. I was informed I needed to warm the two ingredients to at least 70 degrees, mix the exact same amount of the two ingredients (don’t guess with a tea spoon), and do not use was covered mixing cups. All 3 of these instructions I was not doing correctly. After experimenting with the newly acquired knowledge I got a hard resin cast. Exactly what I have wanted all along. I am now in the process of casting the sections I cut out of the side galleries that will be glued to the hull and UB inside the opening in the galleries. I am also redoing all the hatch enhancements. I need to remove all the gummy’s and replace them with the new hard gold leafed ones.
- 1,508 replies
-
- 6
-
-
- Le Soleil Royal
- Heller
- (and 1 more)
-
Great game against Northwestern yesterday!
-
Disregard the part of my comment above where I ask about doors. After close examination of the stern plate I see there are a number of doors molded into the plastic.
-
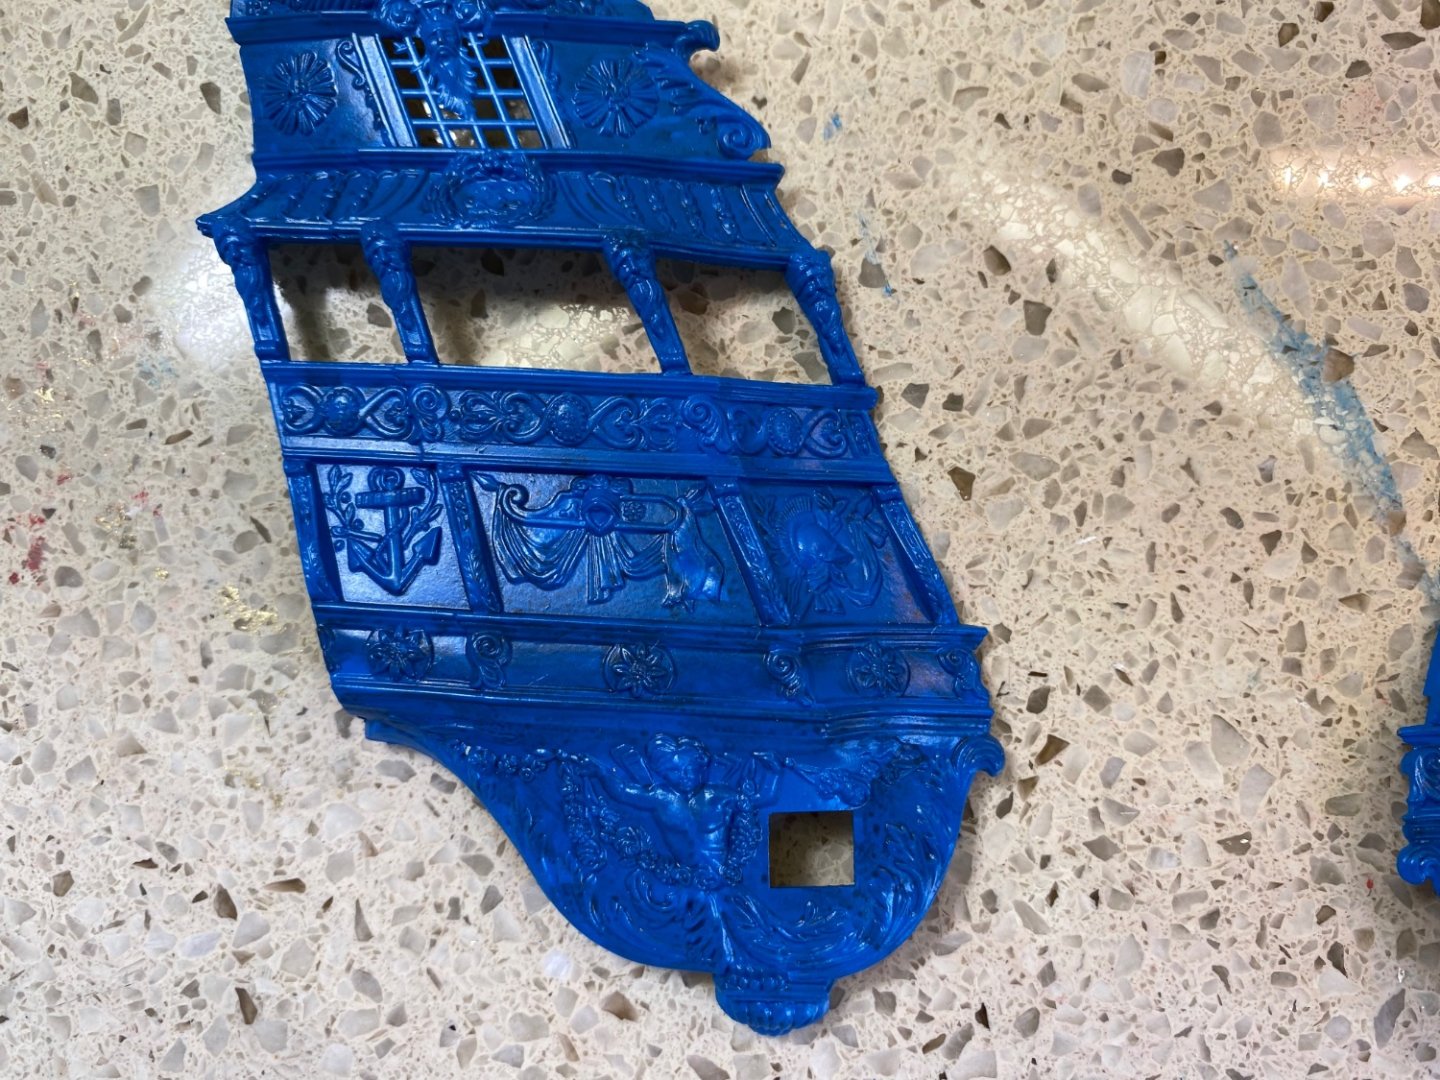
Thanks Marc. I will definitely study this a while before I attempt attaching the UBs. I have finished painting and gold leafing the UBs and have set them aside for now. I want to attach to the stern end the molded decorative enhancements I cut out of the side galleries. Instead of trying to sand away the back plastic so just the decoration remains I will probably just make a mold and cast new pieces to attach to the UB. I initially only opened up the top 3 “windows” but now I am seriously thinking of opening the bottom 3 as well. I would then make casts of all 6 enhancements and attach them to the appropriate place on the hull and UB. I clearly see if I do the bottom 3 I will need to repaint the rear portion of my hull the same blue in the area behind the side galleries. I will also need to fabricate decking for both levels inside the side galleries. Would there have been doors that opened for the side galleries from inside the ship?


- 1,508 replies
-
- 2
-
-
- Le Soleil Royal
- Heller
- (and 1 more)
-
As I am getting close to finishing the painting and guilding the upper bulwarks I am reviewing back through other builds, especially your’s Marc, to see the best way to properly secure them to to the top edge of the hull and the beakhead bulkhead. Marc I see in one of your photos you used a series of clamps with deep throats that would reach over the top of the UB and down to the joint. This I am sure provided excellent clamping for a secure and satisfactory joining of the long length of the hull and UB. Unfortunately I do not have many clamps with that deep of a throat. If necessary i will purchase a bunch but curious in the absence of such clamps what have others done ?

- 1,508 replies
-
- 1
-
-
- Le Soleil Royal
- Heller
- (and 1 more)
-
Jeff the smaller deadeyes are either a 3.5mm or 4mm. I don’t remember. I have a supply of both. My Victory is in a display case and it would be difficult to get to the deadeyes to get an exact measurement. I think more likely 3.5mm. Check your email when you get a chance. I attempted to email you a fantastic spreadsheet Ian made up that lists all the thread sizes you will use for each line by name and block sizes as well. Hope you can open the link.
-
Jeff I need to check my supply to see what size they are. Will let you know as soon as possible
-
Good morning Jeff. I found your build and will enjoy watching it go together. As Ian said, always enjoy following a Victory build. There is so much available here on MSW from other builders to help you. I teased with Ian that I was going to put his name on my Victory name plate as a co-builder! 😊. You should definitely take advantage of it. Again let me recommend Longridge’s book.
-
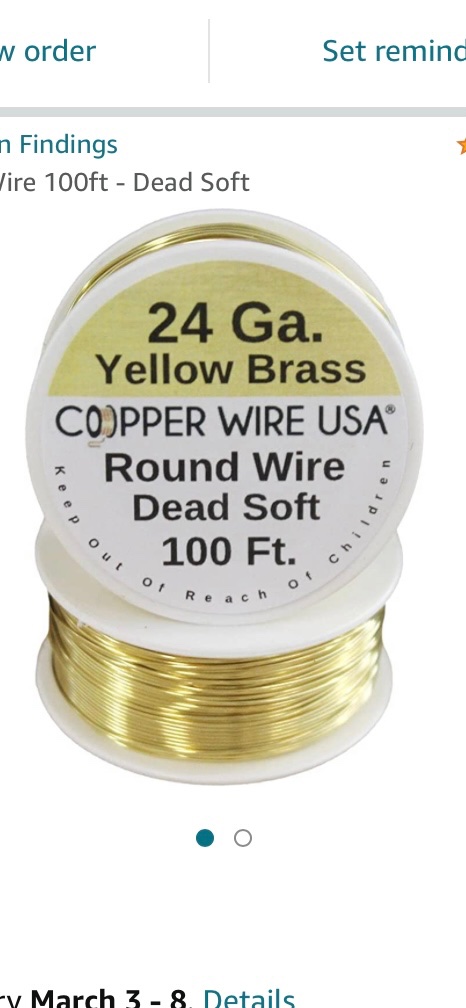
Sure JEFFRAV feel free to PM anytime. This is definitely paying it forward. I am sure I wore out several builders while I built mine. Do you have Longridge’s book? A definite must when you get to the rigging especially if your Victory kit came with the older version instructions. Below is the wire I ordered from Amazon. Reference Lamar and his contact negotiation, I look for information on the Raven’s web site all the time. We will see. I thought the Raven’s were in route to a possible championship earlier in the season before he got hurt.
-
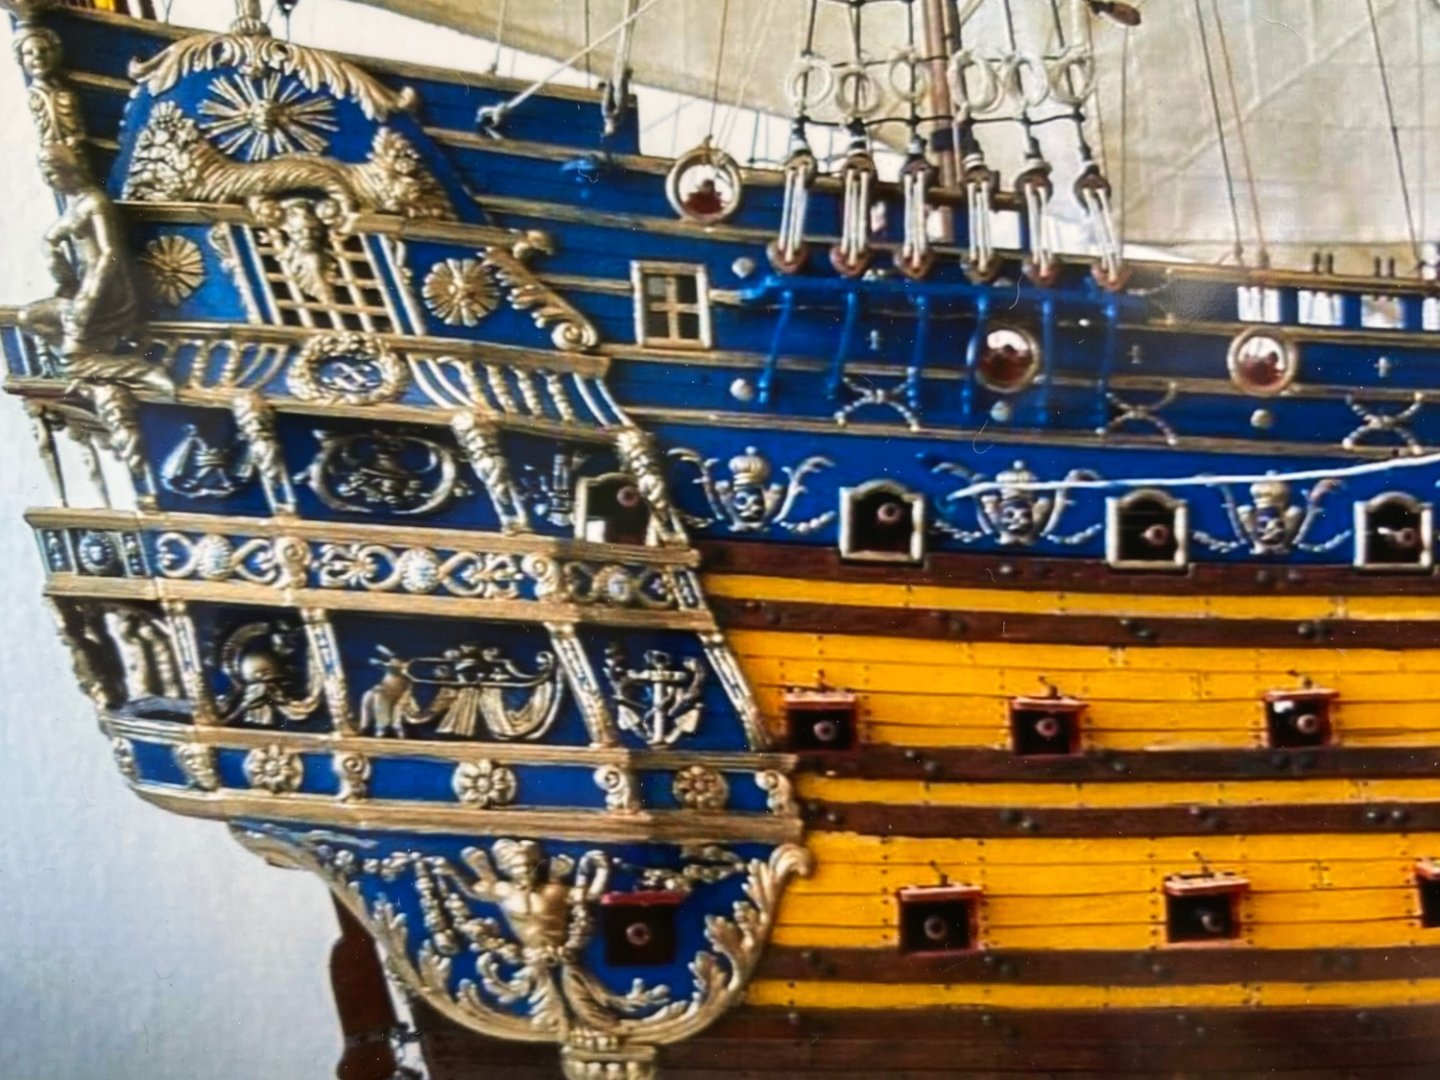
Thanks Kevin for your comment. I do feel a lot more self assured now building the Soleil Royal than I was at this stage of my Victory build. I learned so much from you guys during that build. I was so pensive about each and every step because I had no idea what I was doing and learned as I went along. That often resulted in me having to undo a step and fix it once you guys patiently explained how it was supposed to be done. Fortunately with this build I have continued to read through several builds and have a general plan as to where I want to go, and now understand the nautical terms along with the how and why. The hull of the Soleil Royal is much more ornamental than the Victory hull and as such will require more artistic rendering. But except for some additional enhancements I decided to include, it is pretty straightforward as to knowing my desired outcome. Now actually getting there is another story 😊 I think I have just about made it through my Covid battle. Did not loose to much taste. My main symptom has been congestion and cough. Pretty much spent the equivalent cost of a new car on over the counter medication to get through it. I also continue to check in on your Cutty Sark adventure. Always fascinating to see what you can do with your 3D printer.
-
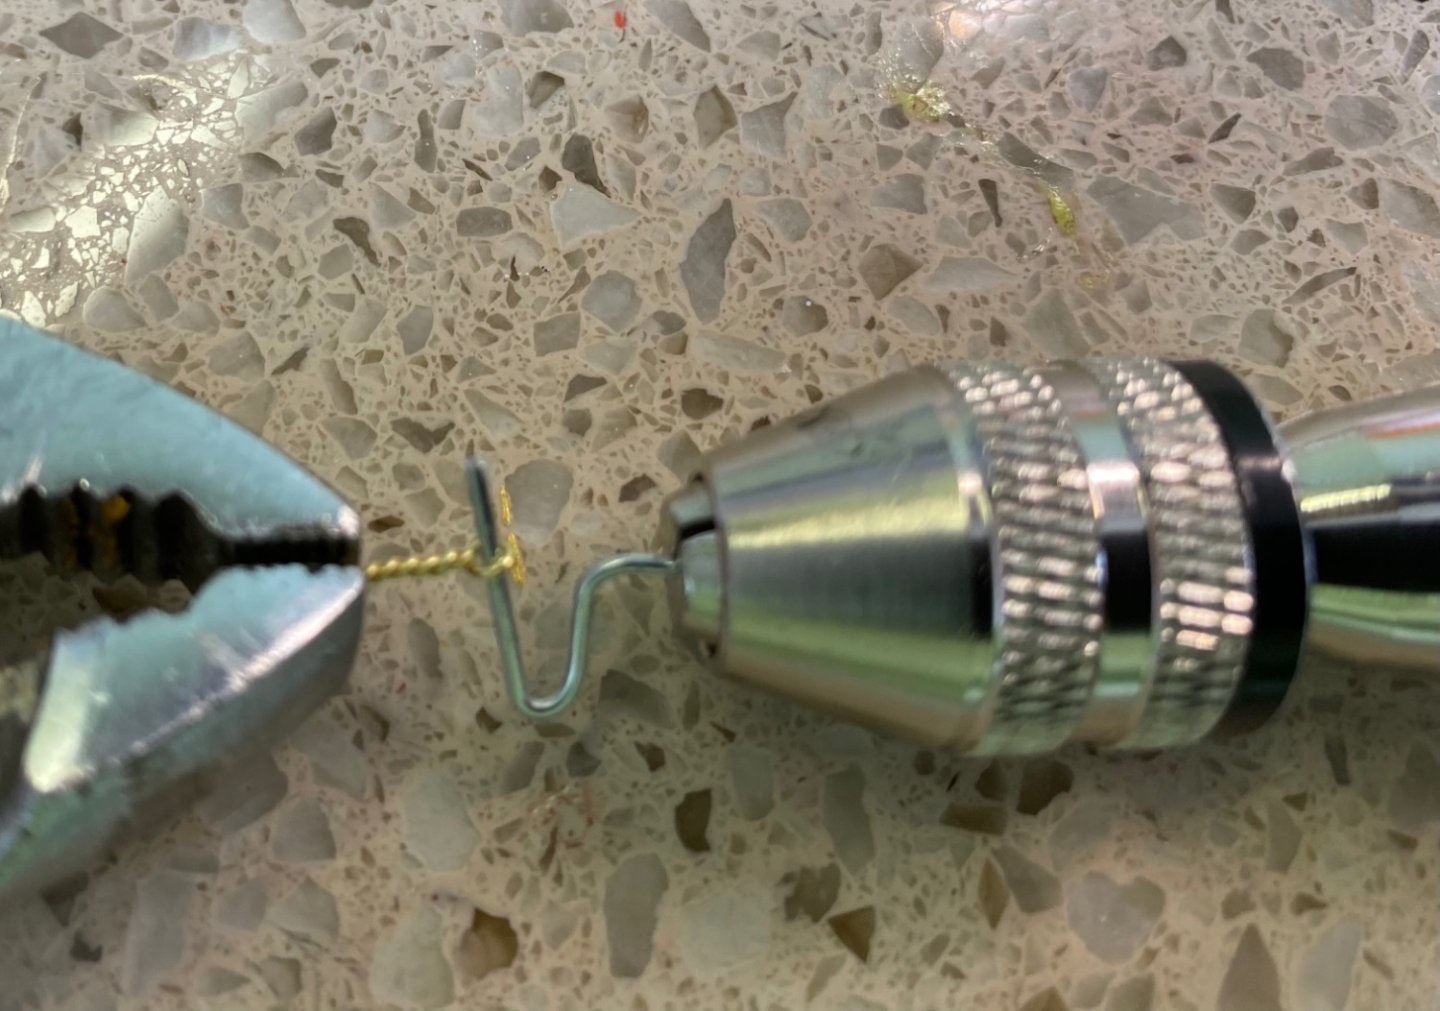
JEFFRAV I apologize for just now seeing your post from the other day. I am using a 24g brass wire and blackening. I selected a piece of stronger wire a bit bigger gauge than the brass wire to bend to the shape you see in the photo. I needed something stronger so it would not bend while I was twisting the eyebolt. Not exactly sure what gauge it is. Not a lot bigger than the brass. PS. Got to get Lamar Jackson back healthy and on the field for the Ravens. He is my hometown quarterback doing good in the NFL! 😊
-
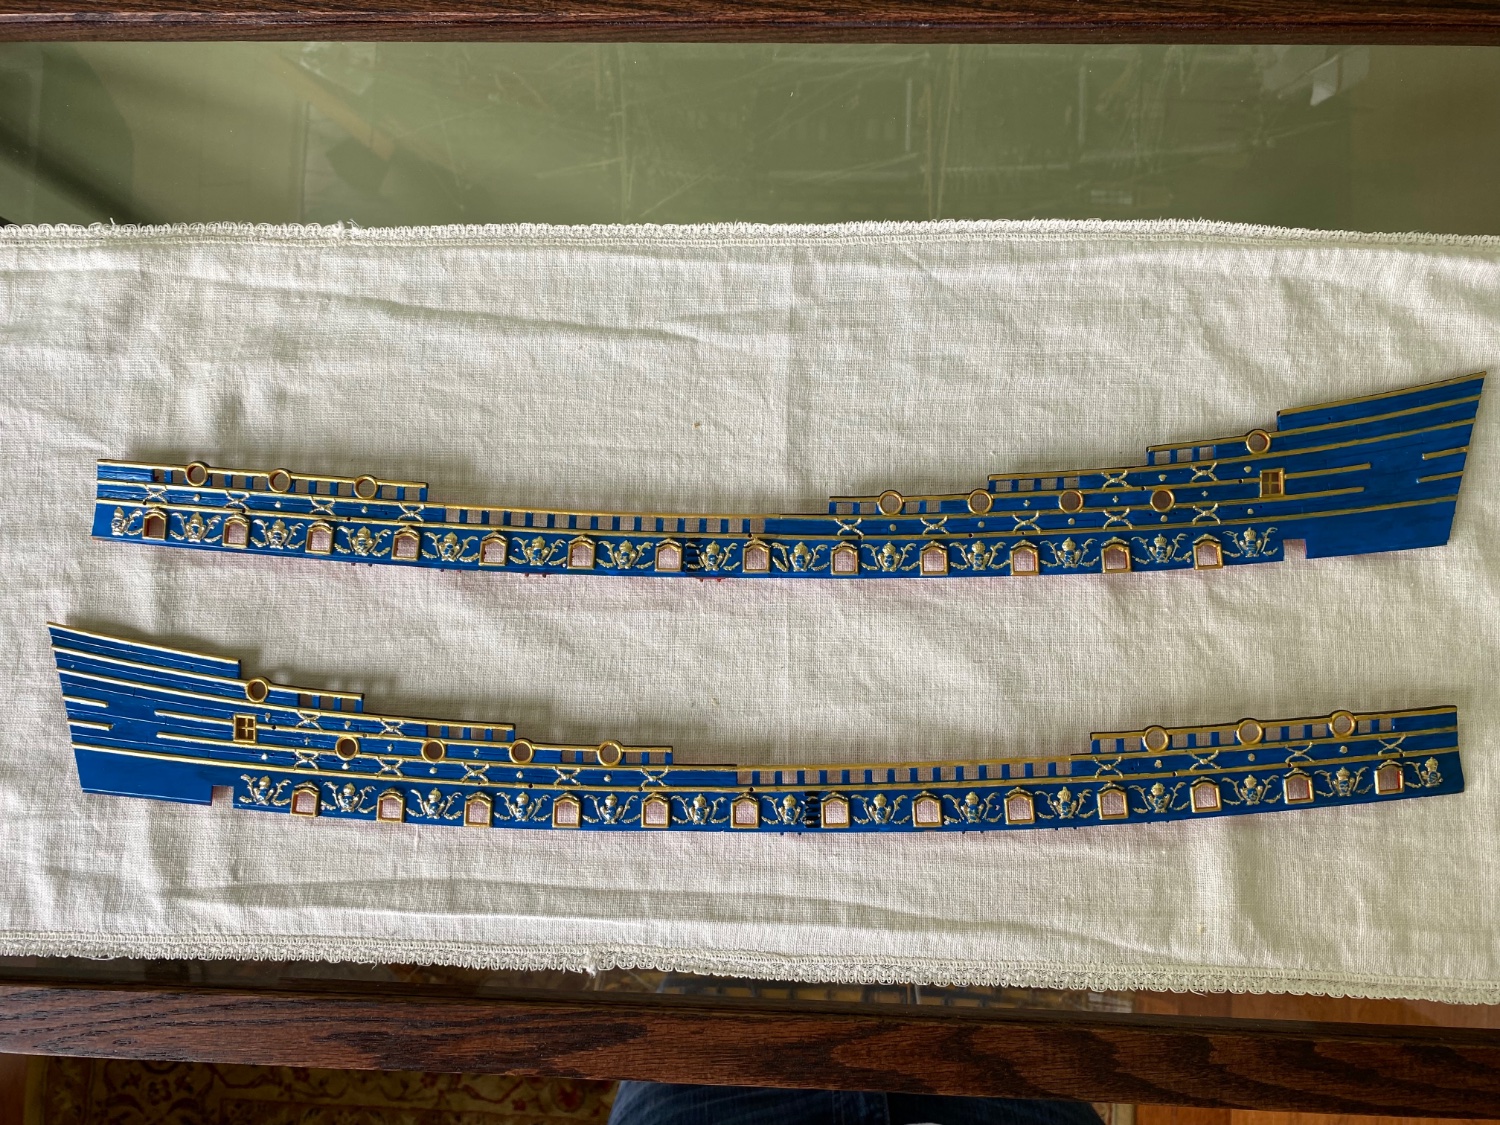
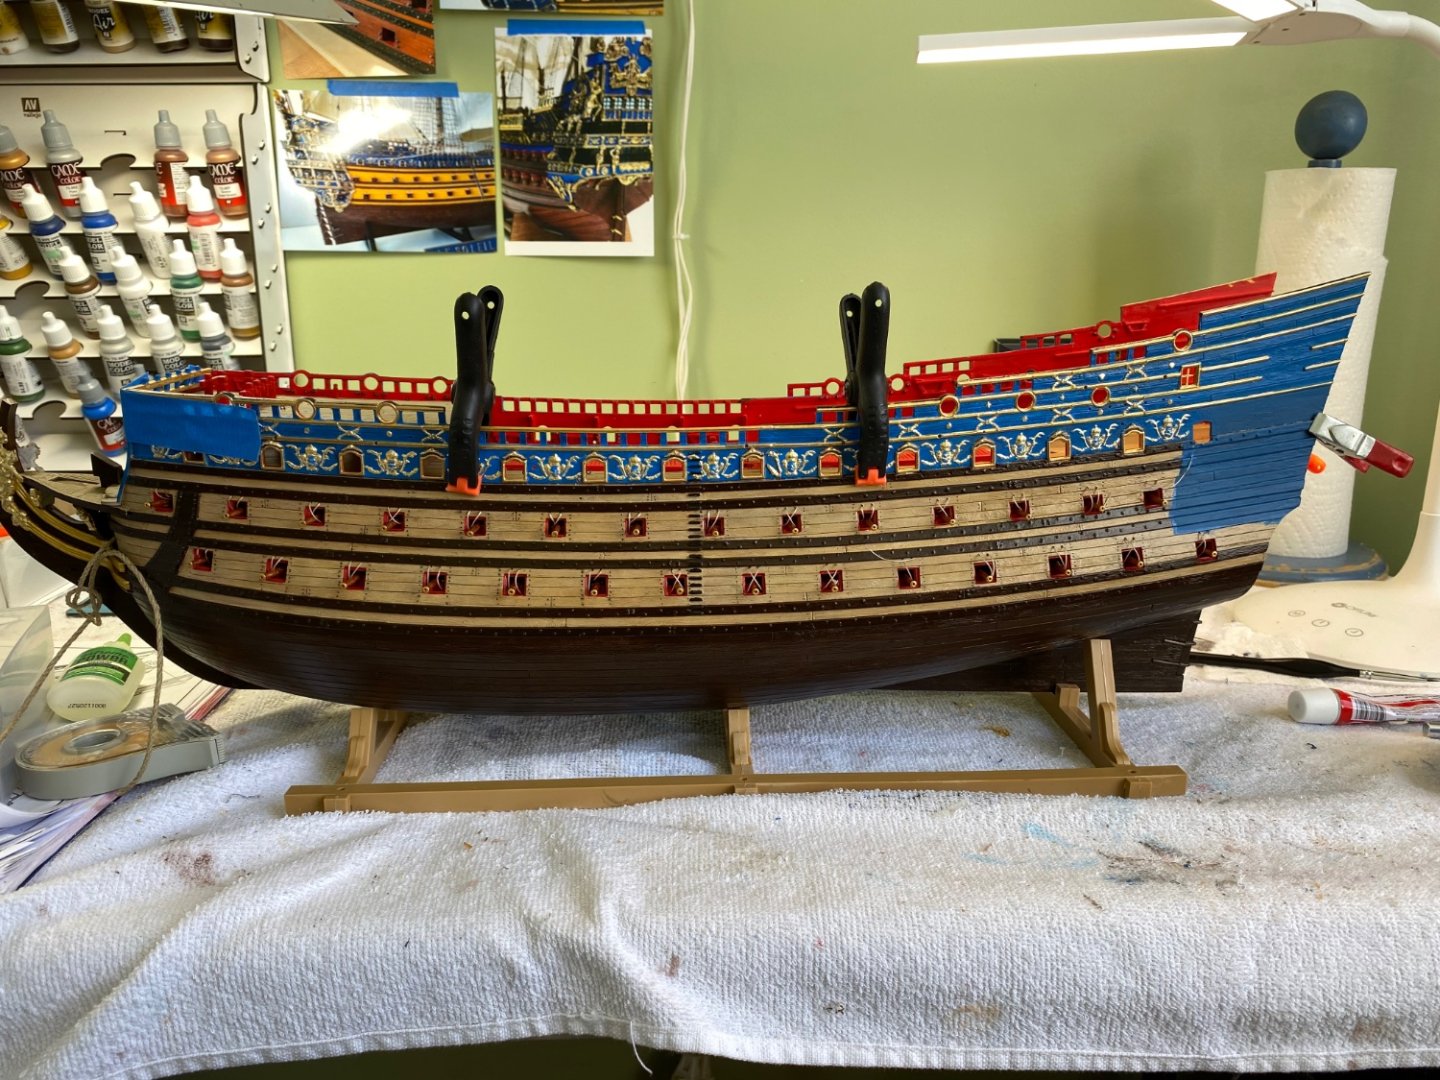
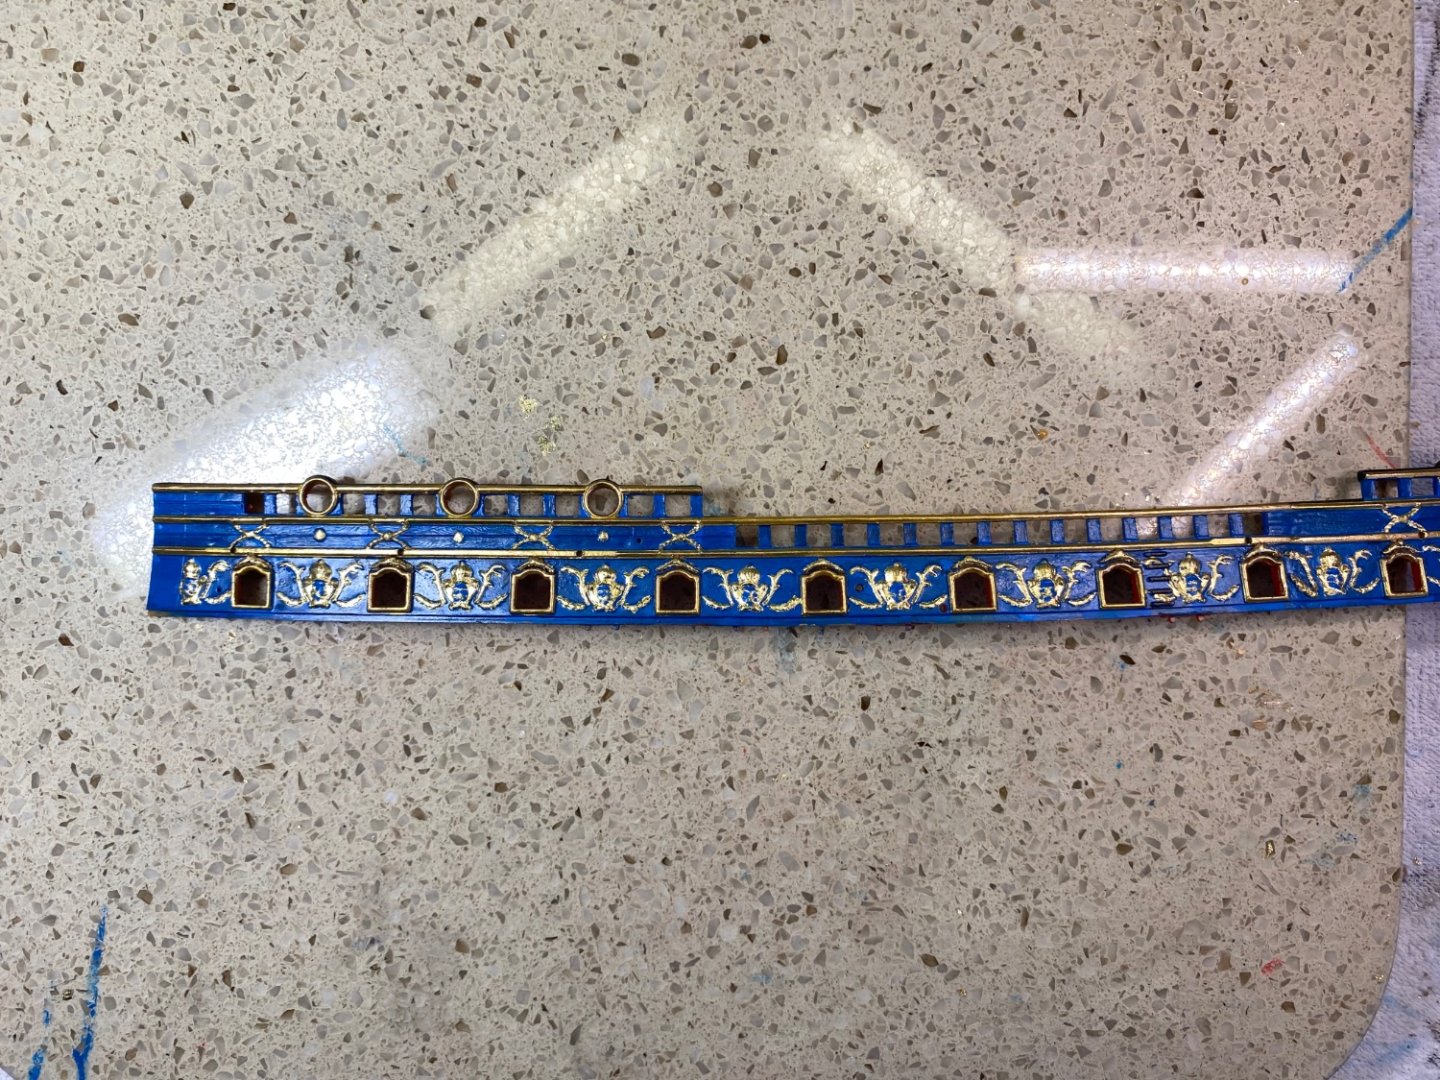
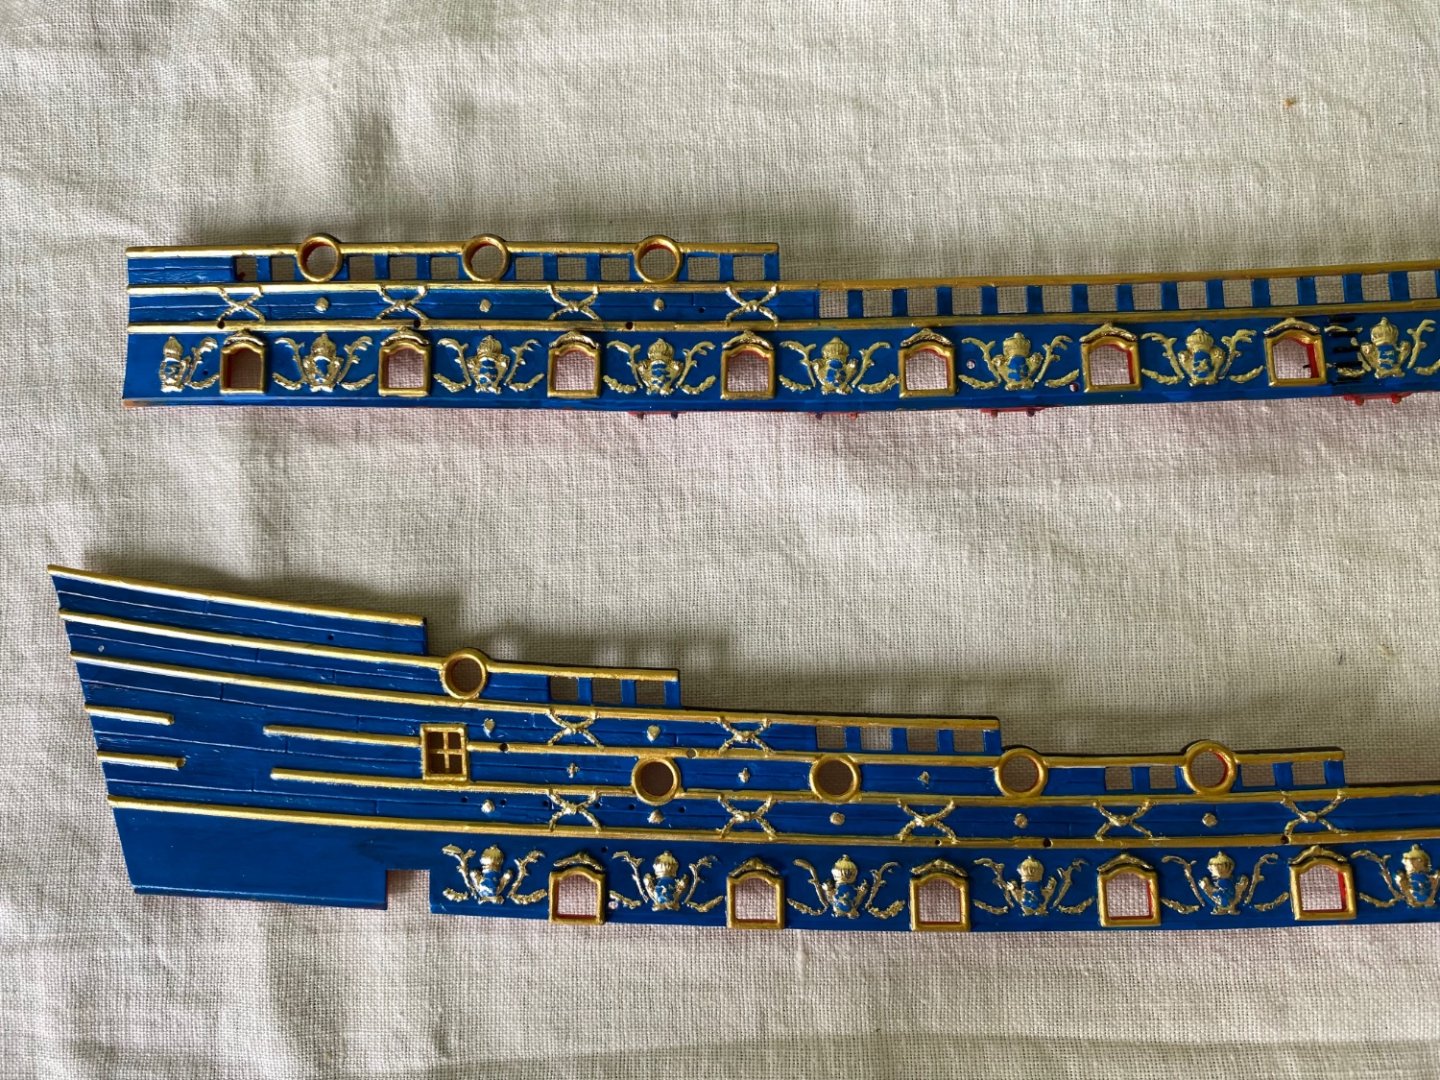
I have continued the process of adding gold leaf to the port side UB. Picked up a few technique ideas doing the gold leaf on the SB side that I am now applying to the port side. Will post photos of the two finished UBs soon. Will then very carefully mount them to the hull and the bulkhead beakhead.