

AnchorClanker
-
Posts
125 -
Joined
-
Last visited
Content Type
Profiles
Forums
Gallery
Events
Posts posted by AnchorClanker
-
-
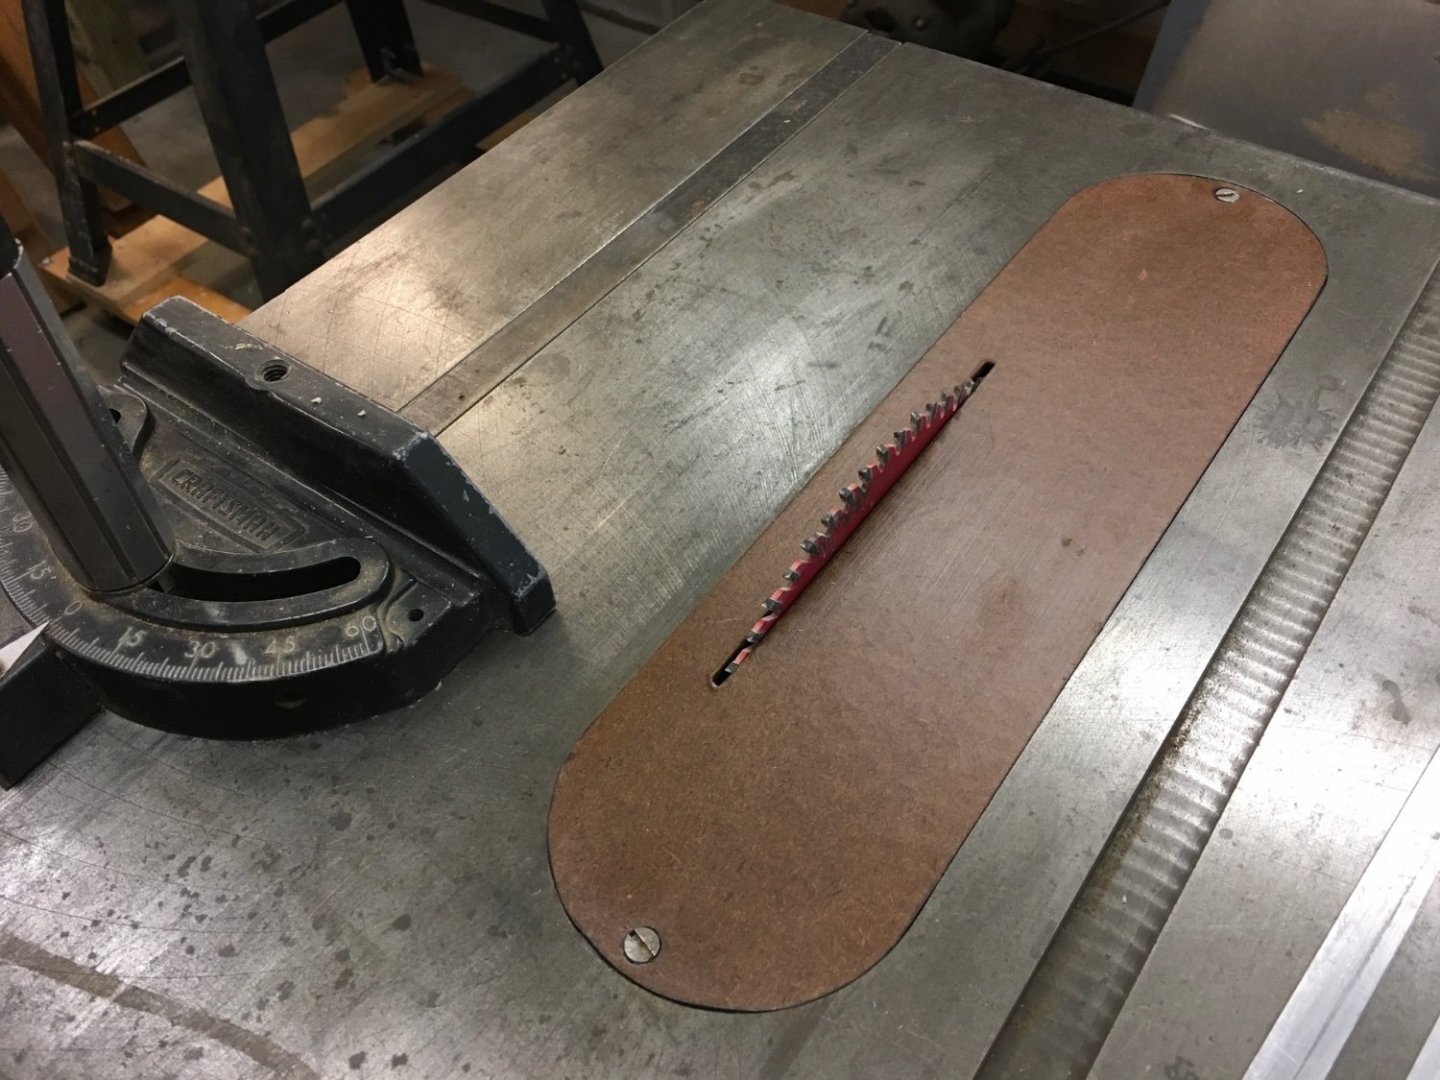
A few years ago in anticipation of becoming a model shipwright, I made this custom table saw throat. With the stock throat, the saw chipped chunks away at thinner pieces of wood. This throat prevents that. Using it provides a nice clean cut.
- Cathead, mtaylor, Louie da fly and 2 others
-
 5
5
-
Interesting information about planking first construction then frames. It seems backwards; but then they built ships. Thank you for the heads up.
- Chuck Seiler and mtaylor
-
2
-
-
Oh! Heavens, no! I decided to continue building the original ship as a means to learn how to do make and attach the strakes, wales, and bottom planks. At the same time, 'start over' with making the 'plywood' frames, stem post, stern post, and keel. I am also looking more closely at how you built your frames and seeing how I was missing some details. Today I will start to redraw my frame plans. So, all is well and not lost.
")
Fair winds and following seas,
Mark
- Chuck Seiler, mtaylor and Cathead
-
3
-
-
-
-
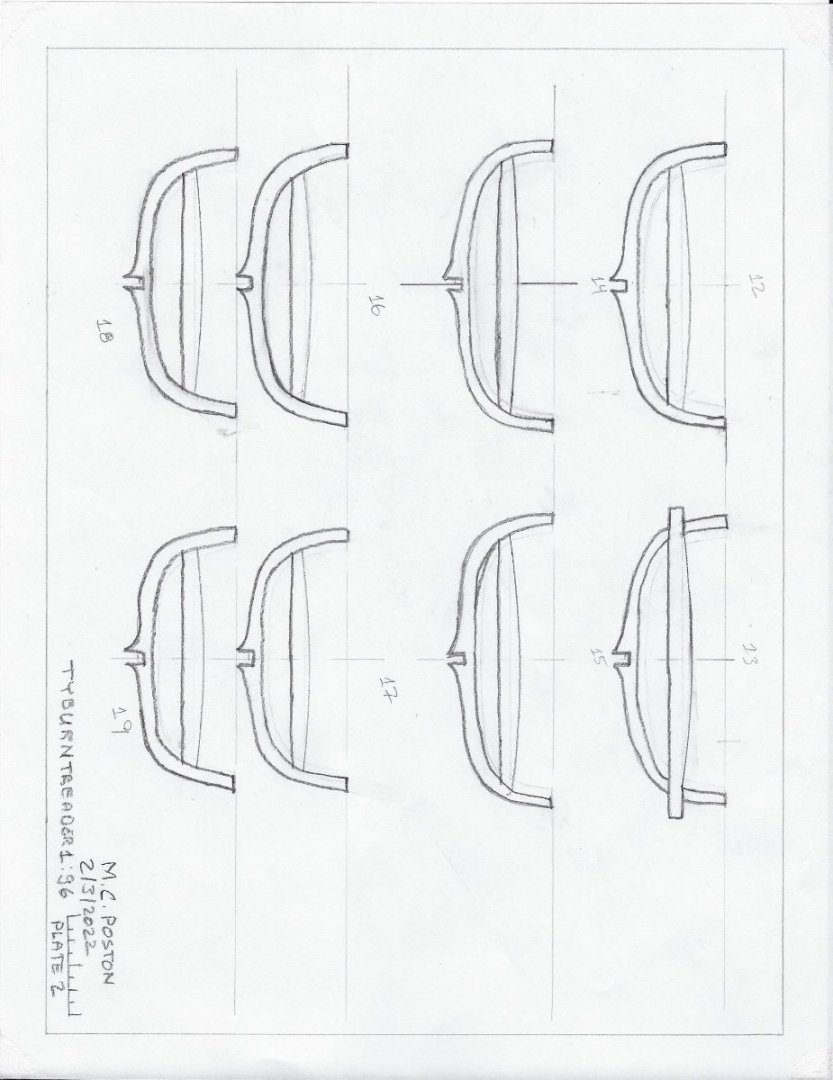
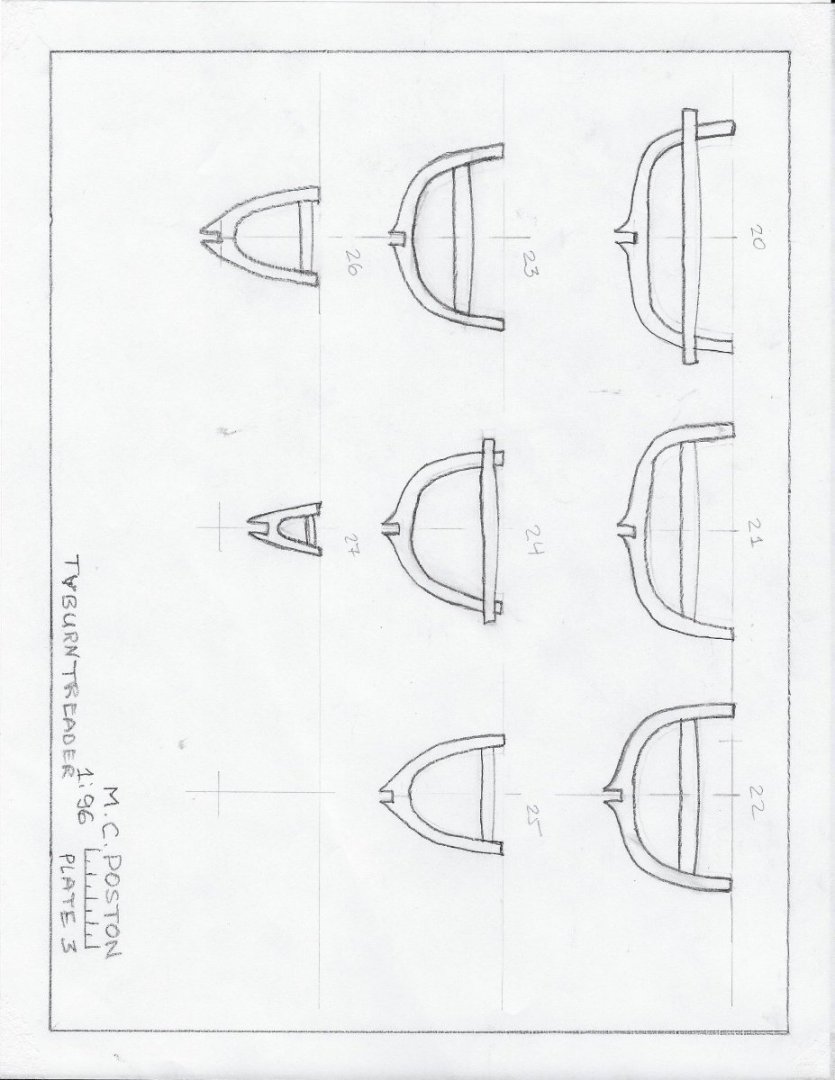
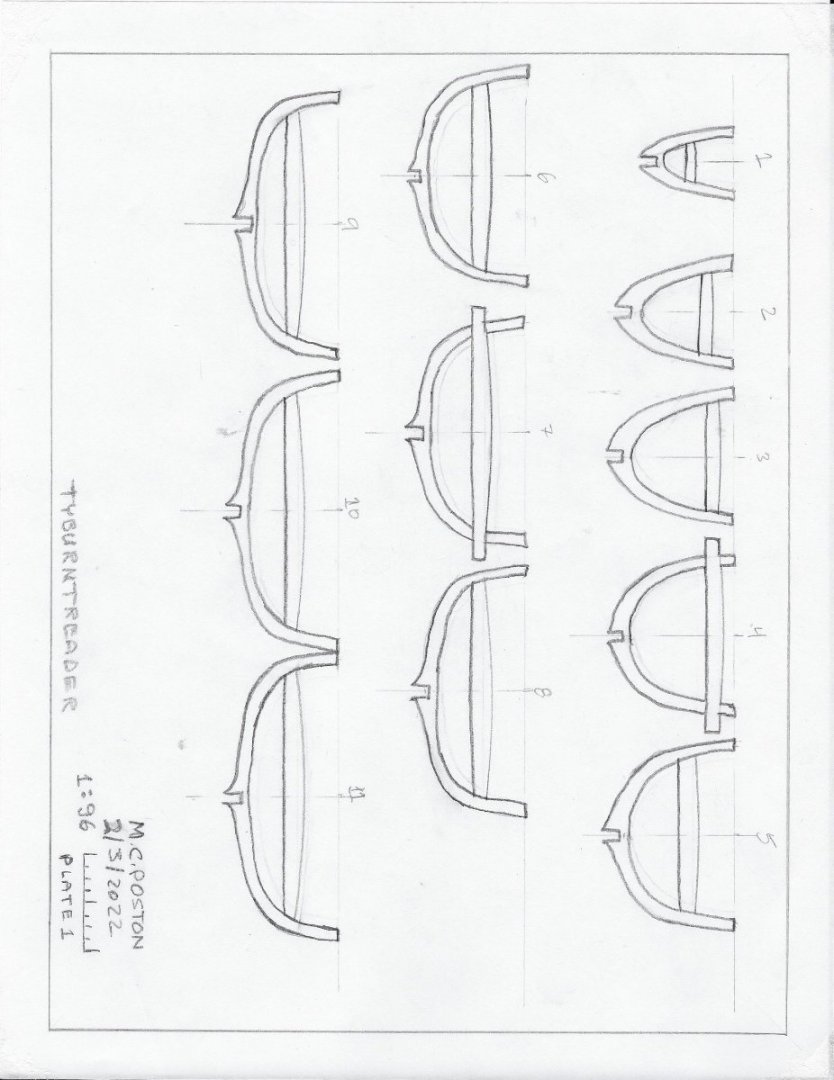
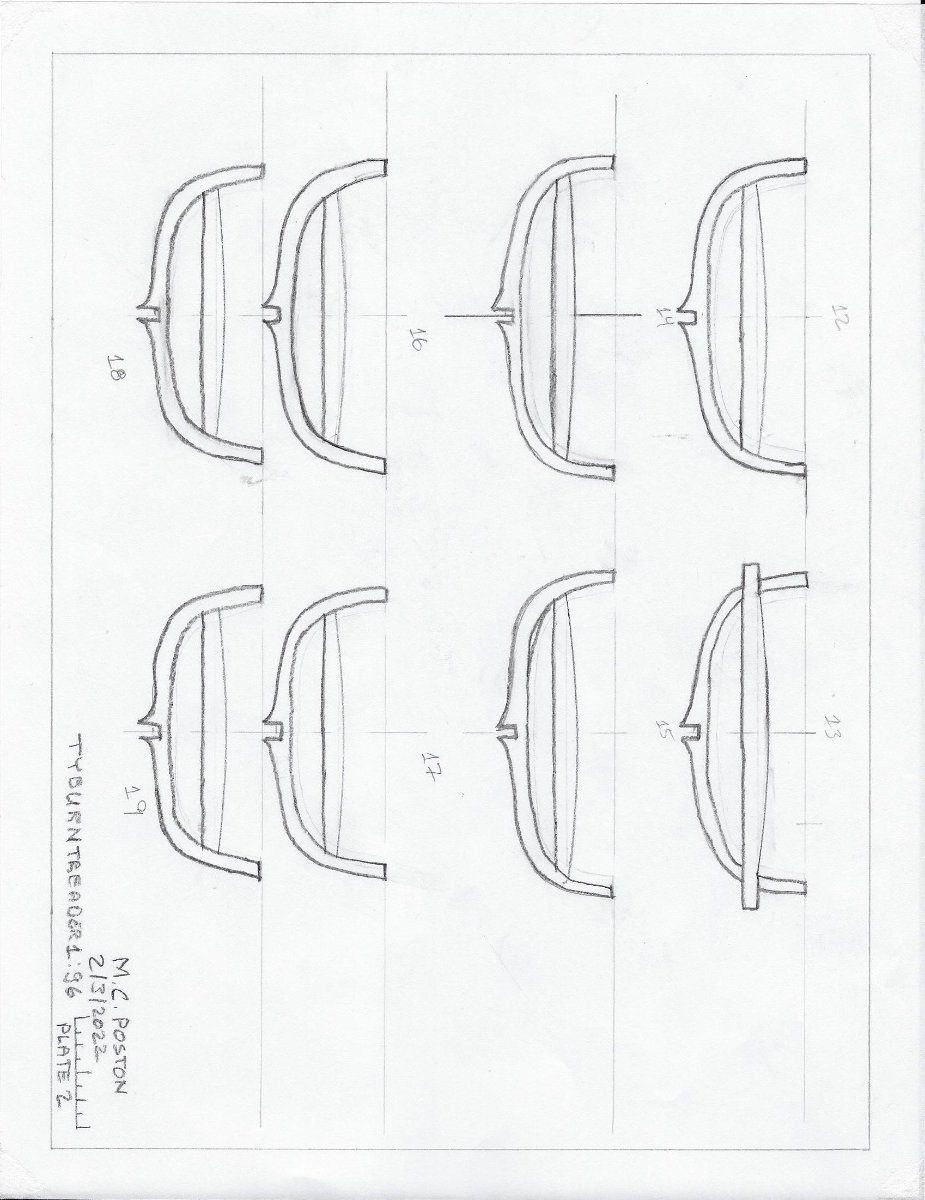
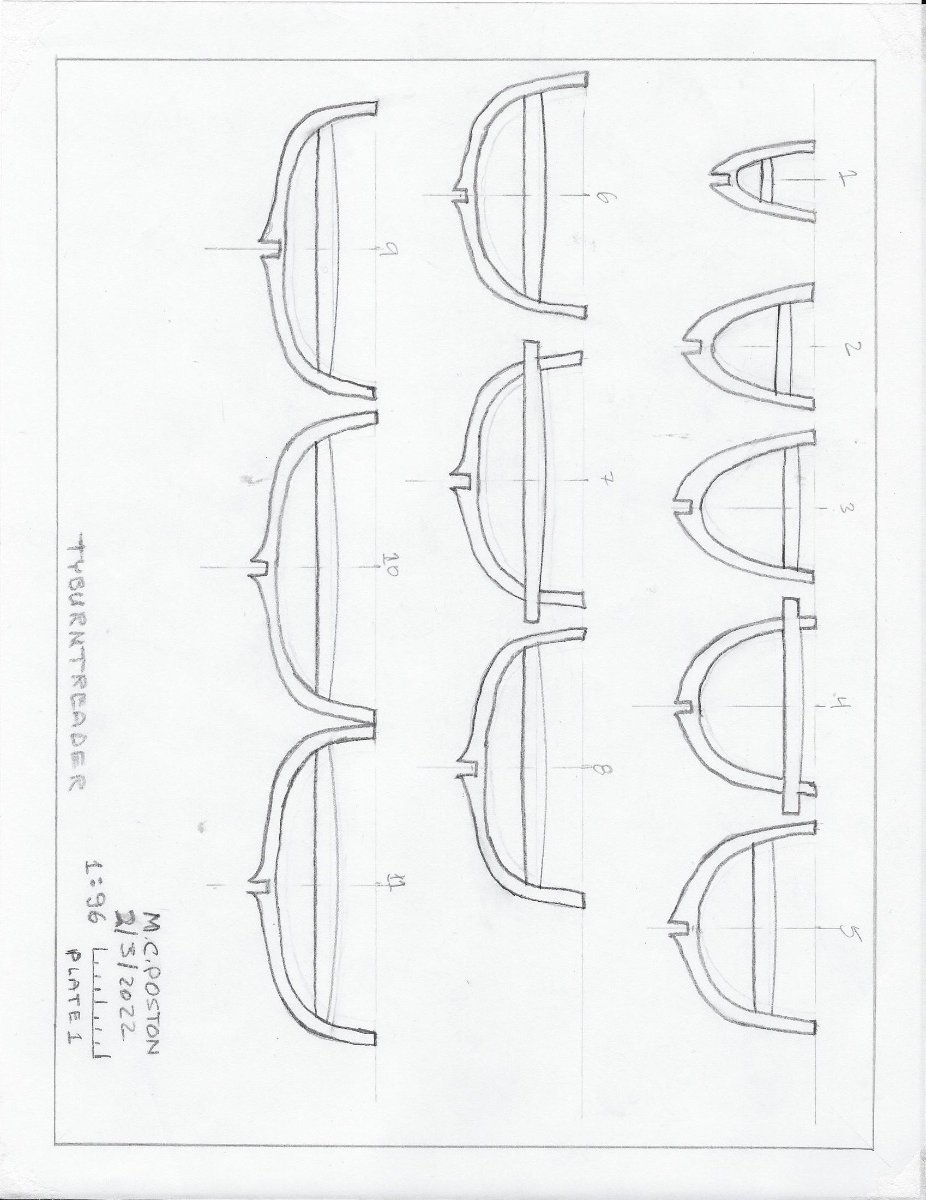
Looking at the drawing of my frames, the grain of the wood is horizontal. The frames are two half frames. The grain of the beams will be oriented longitudinally. Considering the scale, 1:96, I was hoping orienting the grain of the wood in this fashion would eliminate or at least reduce the effects of the grain. It seems to me, I need more advice and to study the frames in the photos and how others have made their frames.
-
I completed drawing the frames with the through and deck beams. Now comes cutting out the deck beams, tracing them onto the woodstock, and cutting them out.
- Harvey Golden, druxey, GrandpaPhil and 1 other
-
4
-
It has been a few days since working on my ship. Today I worked on designing thinner frames and have committed to using my scroll saw to do so. Speaking of the scroll saw, I bolted the auxiliary table top to the table top. I am also redrawing the deck beams to show the camber. Tomorrow, if time permits, the frames and deck beams will be either modified or cut out. Then the process of attaching them to the keel will commence.
In terms of the hull planks, I will try Louie da Fly's method of using a soldering iron to heat the planks to bend them around the frames.
More later.
-
Your model is looking very good! Keep up the good work.
Mark
- mtaylor and Keith Black
-
2
-
Challenges are opportunities in disguise.
- Glen McGuire, Keith Black, mbp521 and 2 others
-
4
-
 1
1
-
Welcome aboard, shipmate! Glad to have another model railroader in the MSW crew!
N-Scale is my scale of choice at this time. I started in HO and may go back to it in a few years. The eyes and fingers are as good as they were in the past.
Scale 1:96 and 1:160 are my modeling choices. 1:96 for most ship models.
- Keith Black, mtaylor and Ryland Craze
-
3
-
Keep up the good work, Greg! This model give me a good idea of what is ahead for me. Good thing I'm tackling a smaller project first.
Current build:
-
On 1/14/2022 at 1:33 PM, Gregory said:
Keith, I came across this when browsing through the drawings at Wiki Commons, and thought I remembered someone commenting in this regard.
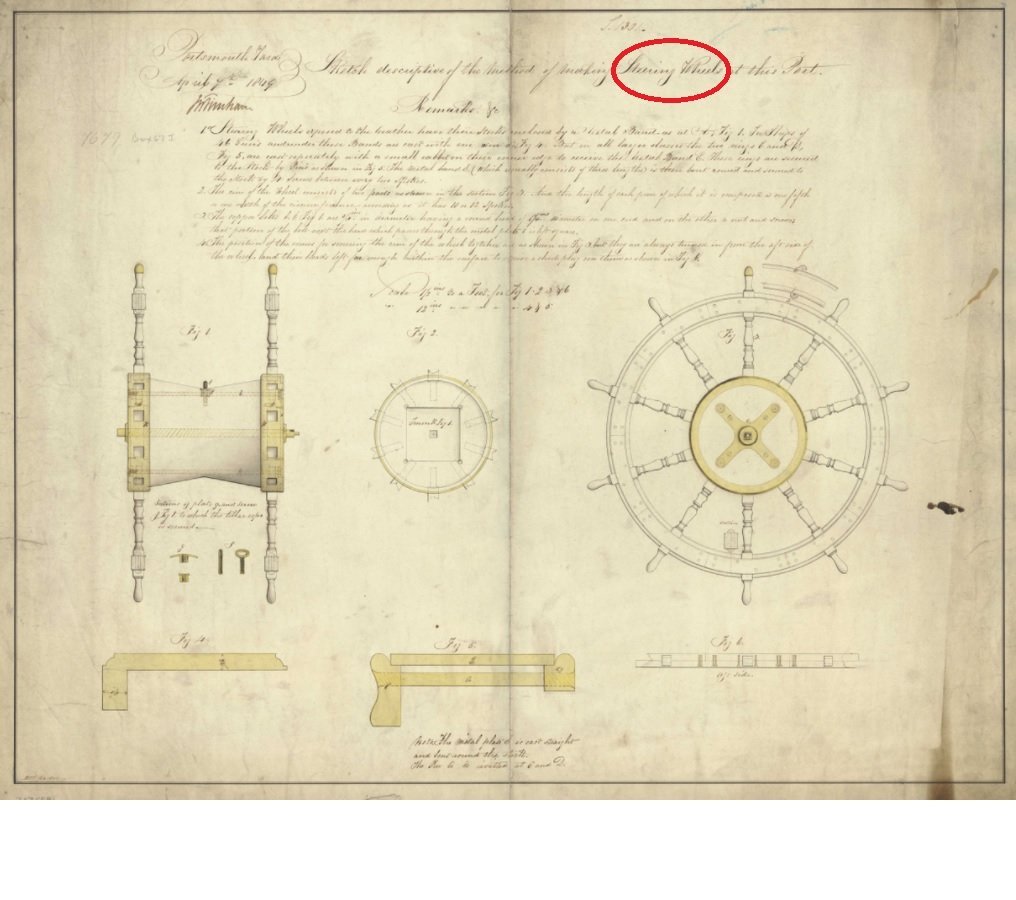
Whoever drew this didn't get the word..😁
One of the correct depictions in this drawing is of the 'king spoke.' It is the top-most handle which is slightly larger and has different shape and feel to it. With the king spoke straight up, the rudder is amidships; the ship sailing straight ahead. In the dark a helmsman can tell in which direction the ship is headed by having his hand one the king spoke.
In commencing on being a model shipwright, keep your hand on the king spoke!
- mtaylor and Keith Black
-
2
-
Ray,
Looks like you have quite a job ahead of you! Keep it up!
- mtaylor and Keith Black
-
2
-
-
Right about the sheer. I was examining the plan view again and am taking the sheer into account. At the moment, I decided how to produce the camber on the decks and will give it a try this coming week. After looking at your model, Steve, your point of making the fore deck and after deck with too steep of a slope is clear. In drawing the deck beams and through beams, the importance of correctly making the camber and slope of the two decks correctly is very important. This is where it might take more than one attempt at making these items is in order. As you said, the final result will be worth the effort.
- mtaylor, Cathead and Chuck Seiler
-
3
-
Last night I was thinking of making the decks convex upward just for that reason. At 1:96 the rise will be very small and was wondering it is really worth it. The convex does not have to be much, just enough. Also, the keel needs some work. The top and bottom of the keel are not exactly parallel, so the frames and deck beams will not be exactly correct. The keel will have to be modified or remade first. I need to think through how ensure the deck beams are at the exact same height. Doing a dry run is a good way to test this.
Redrawing the frames to make each half mirror images of each other came out quite well. Most of the complete frames matched the new drawings. Drawing the deck beams and the through beams is still to be done. About a quarter of the frames need to be separated and re-glued. A Testors Wood Cement was used. I'm not happy with it. For one, it takes 12 hours dry and cure. And it is not very strong. In this case, that is good thing since a quarter of the frames need separating and re-glueing. Going forward I will use a waterproof Titebond II wood glue. As a result, glueing will commence only after a 'dry fit' is 100%. I plan to make my model seaworthy. It's a ship, for heavens sake!
For the ballast I will use something called "Critter-clay". After forming it between the frames at on the bottom of the hull and letting it dry, it will be painted with a dull coat lacquer to make it waterproof and glued in place.
Thank you for you advice, Steve.
-
Right. It is better to correct sooner than later. It is much less 'expensive'! I copied the plans for the frames and redrew the plans by adding the mirror image. The next step is to add the deck beams to the drawings including the through beams. It seems best to do that now instead of trying to do so after the frames are attached to the keel. After that will be copying the frame and deck beam plans and the use the copies to reconstruct the frames and add the deck beams. When the drawings are complete, they will be added to my build log.
Mark
-
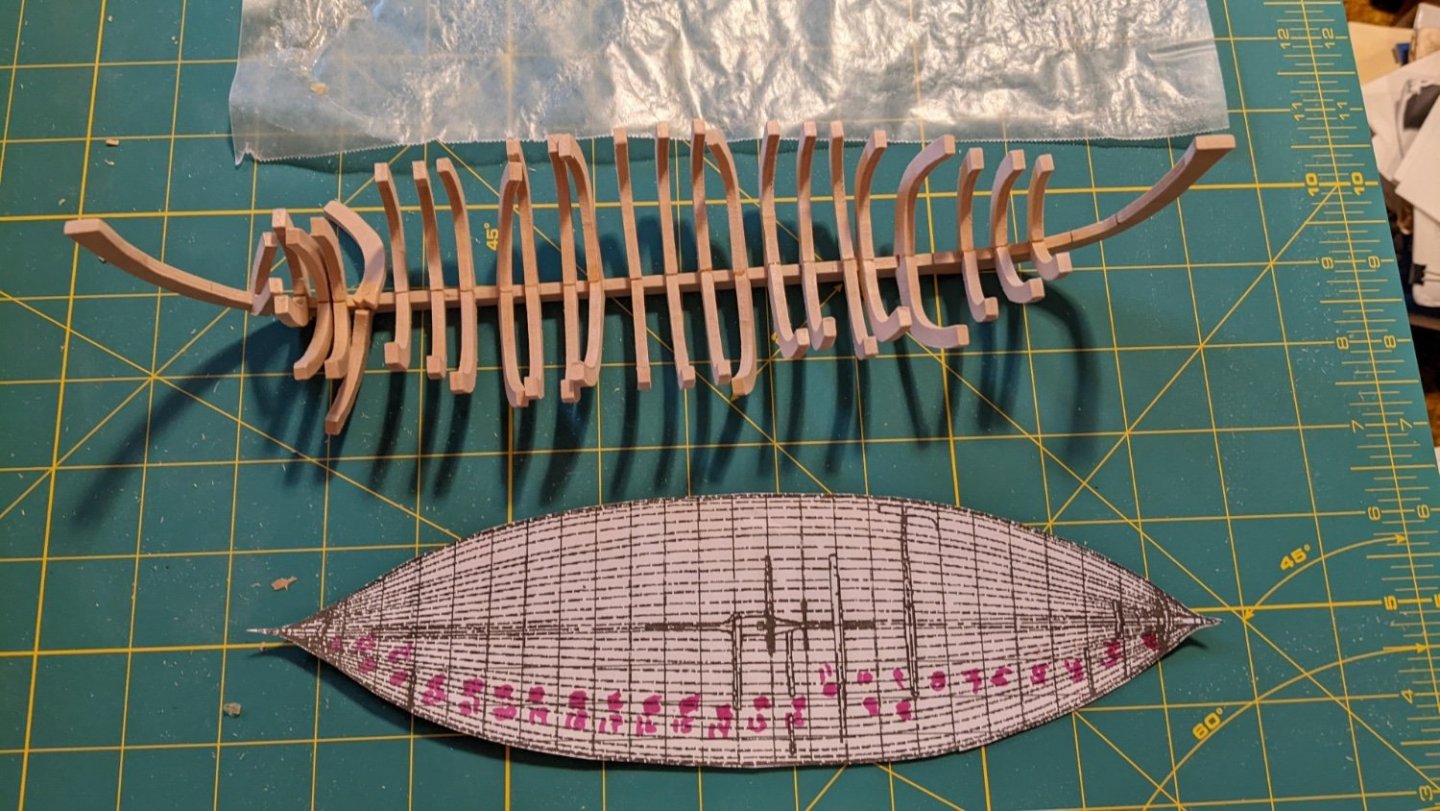
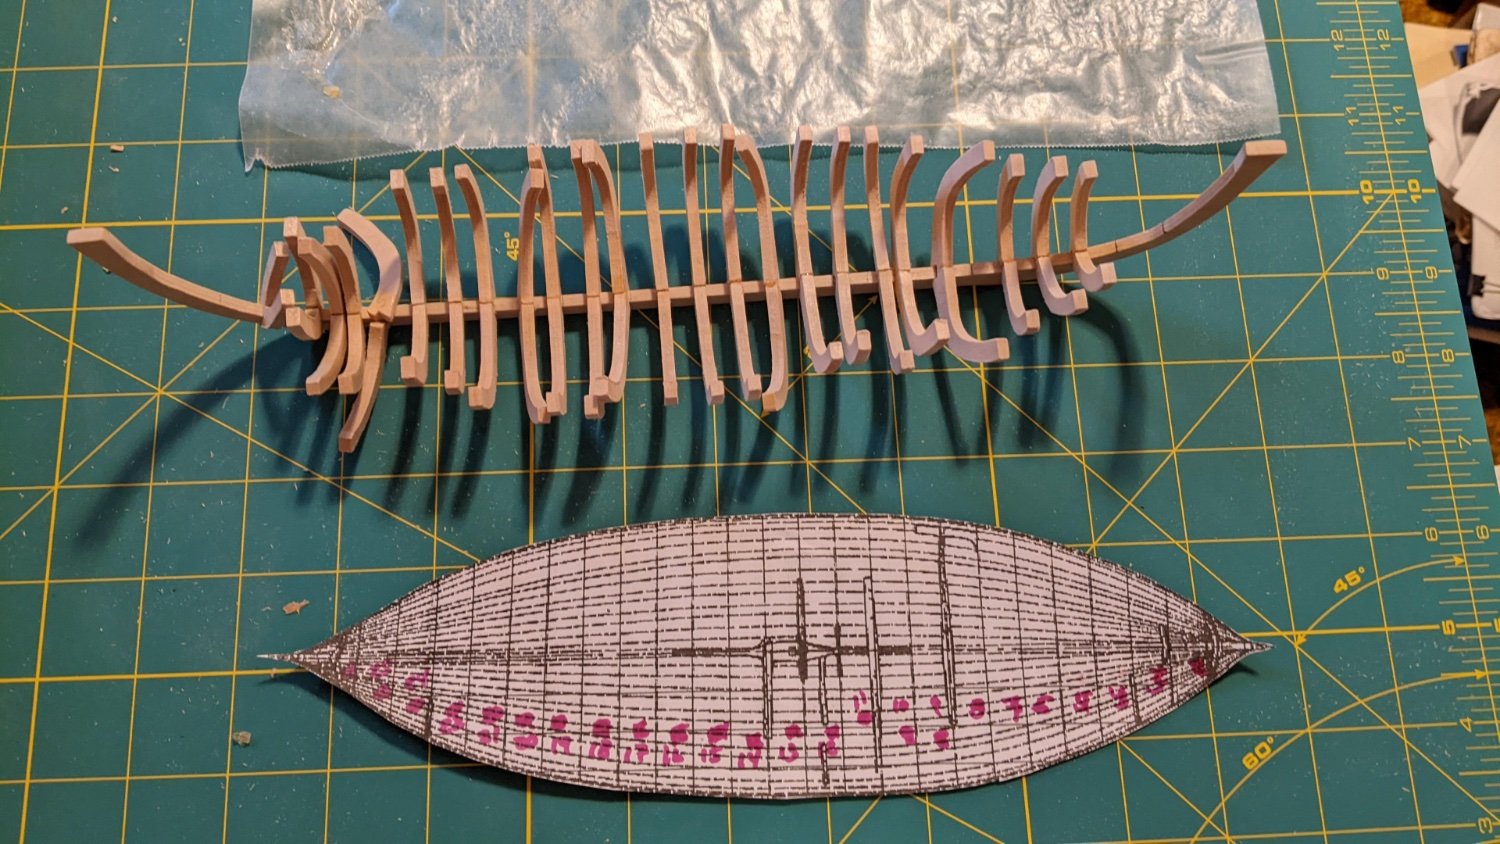
The encouragement to create a jig for attaching the frames to keel is painfully learned. I need to create a jig, or several jigs, for doing so. My first attempt did not turn out as expected. Details, details, details!! I may even remake the keel. The attached photo may show the frames did not line up quite the way they were supposed to. Today I will be making jigs for the frames and a jig for holding the keel and attaching the frames. This process may take longer than anticipated. But, then, maybe not.
- Chuck Seiler, mtaylor, ccoyle and 3 others
-
6
-
-
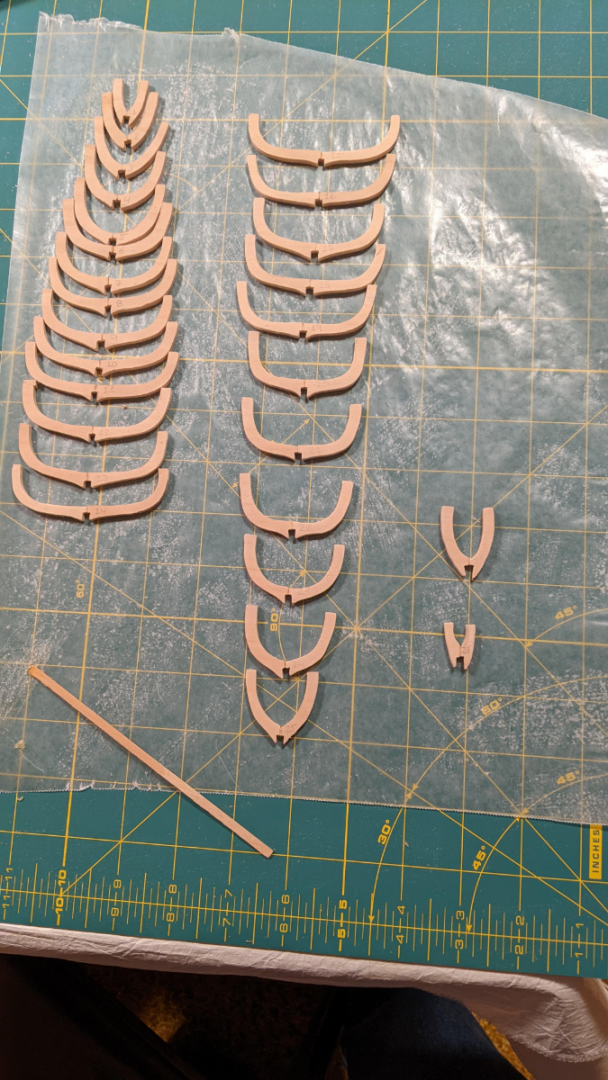
Here are the frames glued together. The glue says to let it dry for 12 hours.
- Chuck Seiler, druxey, mtaylor and 2 others
-
5
-
This afternoon was spent making sure all my frame halves match their mirror pieces. All fit on the keel as they should. Next will be gluing the two halves together. Then it will be tracing the full frames and designing the cross beams. I need to decide on a jig for attaching the frames to the stem post, keel, and stern post.
- Chuck Seiler, Cathead and mtaylor
-
3


_RMG_J0608.png)
Winchelsea Nef by AnchorClanker - Scale 1:96 - first wood scratch build
in - Subjects built Up to and including 1500 AD
Posted · Edited by Chief Mark
After researching how to build keels and frames and asking experienced model shipwright questions, I decided to start over. That being said, I am using my first attempt as a learning exercise before building frames by constituent parts and to build them one frame at a time. This will also allow practice making the planks, strakes, and wales before attempting the start over. I created a jig to hold the model as the frames are put into place. The photo shows the jig and the stem and stern posts and the keel in place.