MORE HANDBOOKS ARE ON THEIR WAY! We will let you know when they get here.
×


Keithbrad80
-
Posts
416 -
Joined
-
Last visited
Content Type
Profiles
Forums
Gallery
Events
Everything posted by Keithbrad80
-
I appreciate the responses, i had the intention of a three butt shift but after cutting my planks i felt to lazy to recut them properly or use more material, this was initially a project for myself to test a few different techniques i was thinking about implementing in my current build, like sanding a lot and using metal fasteners, but thought some might find my technique of painting several planks at time and creating a tarring line useful. However i had never heard the word holy stone so ill look into that, and your right bob, my small example is not an accurate impression. Thanks again for the advise ill keep all of these things in mind next time! Bradley
-
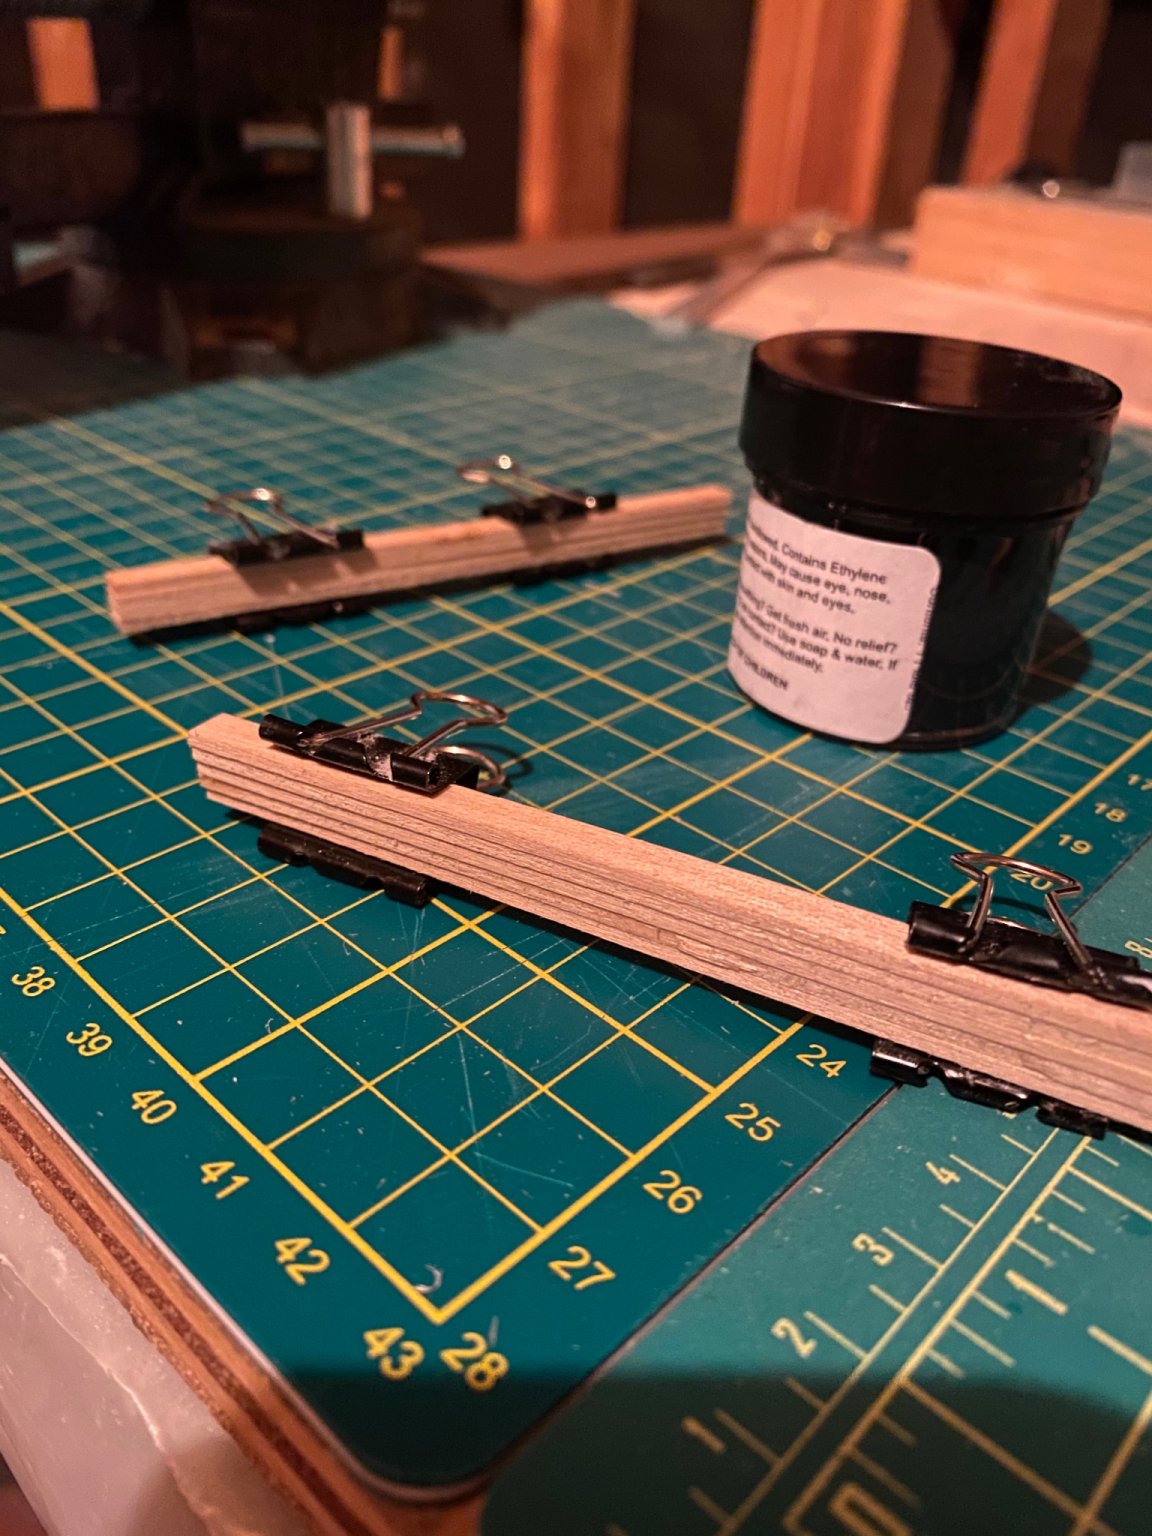
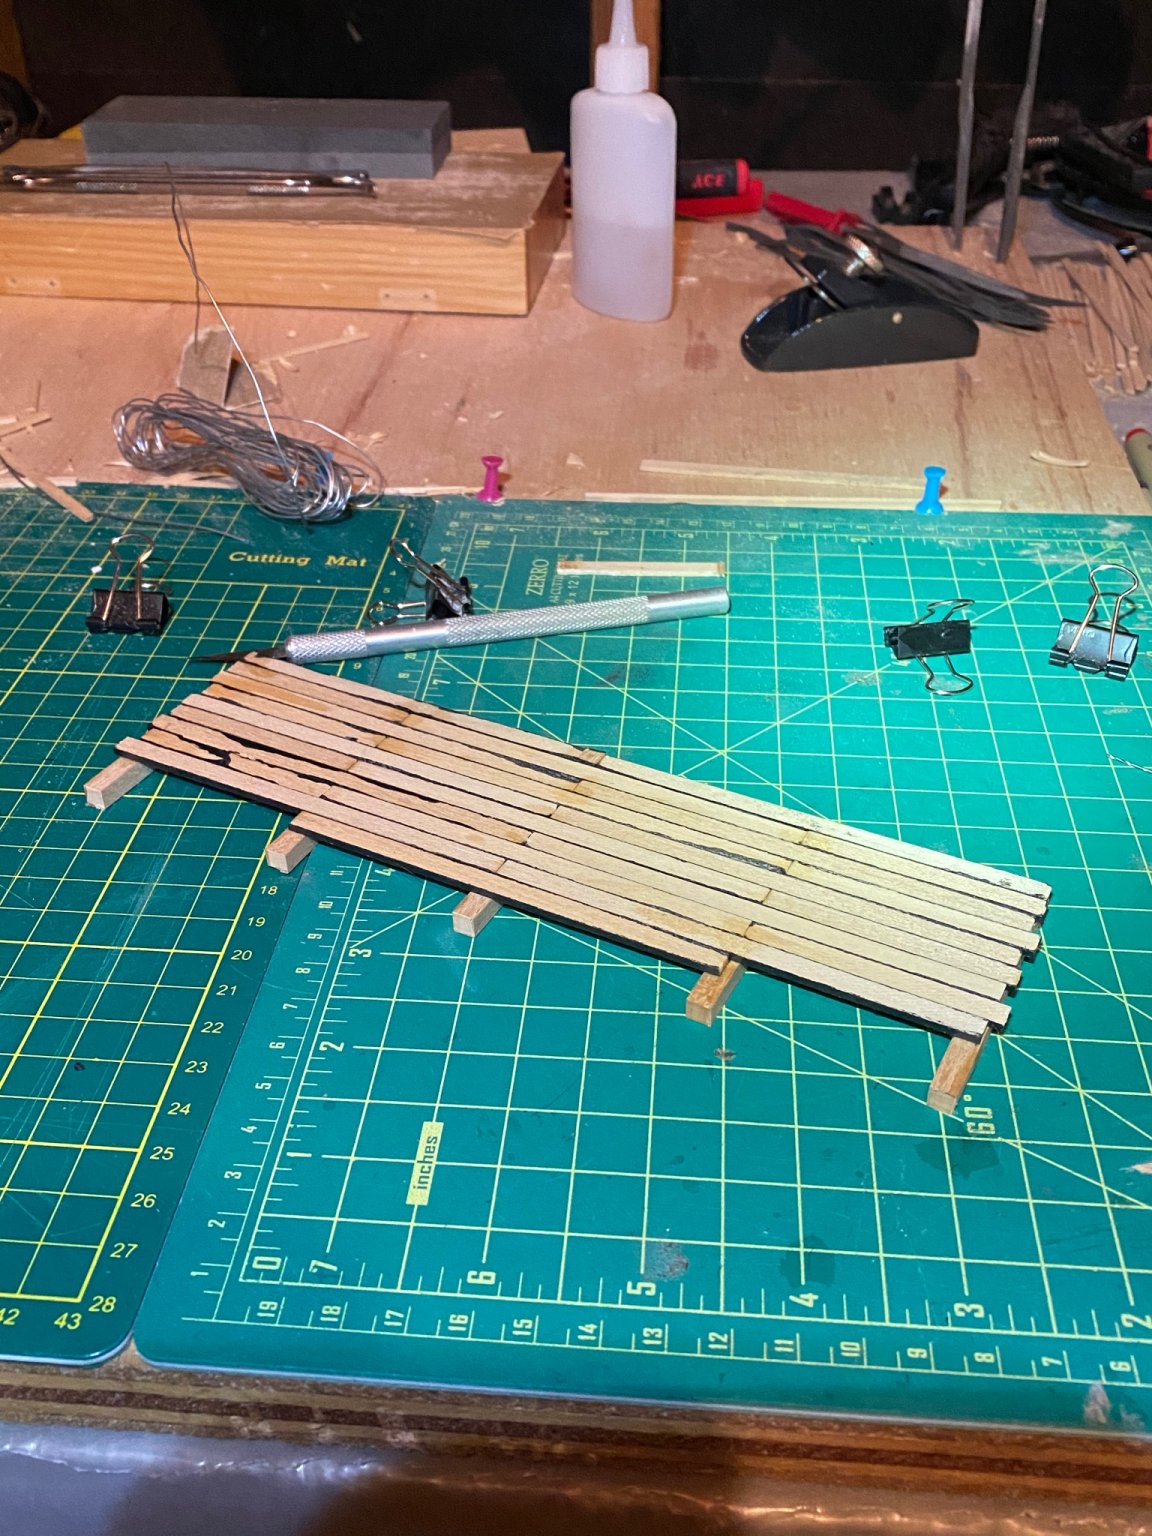
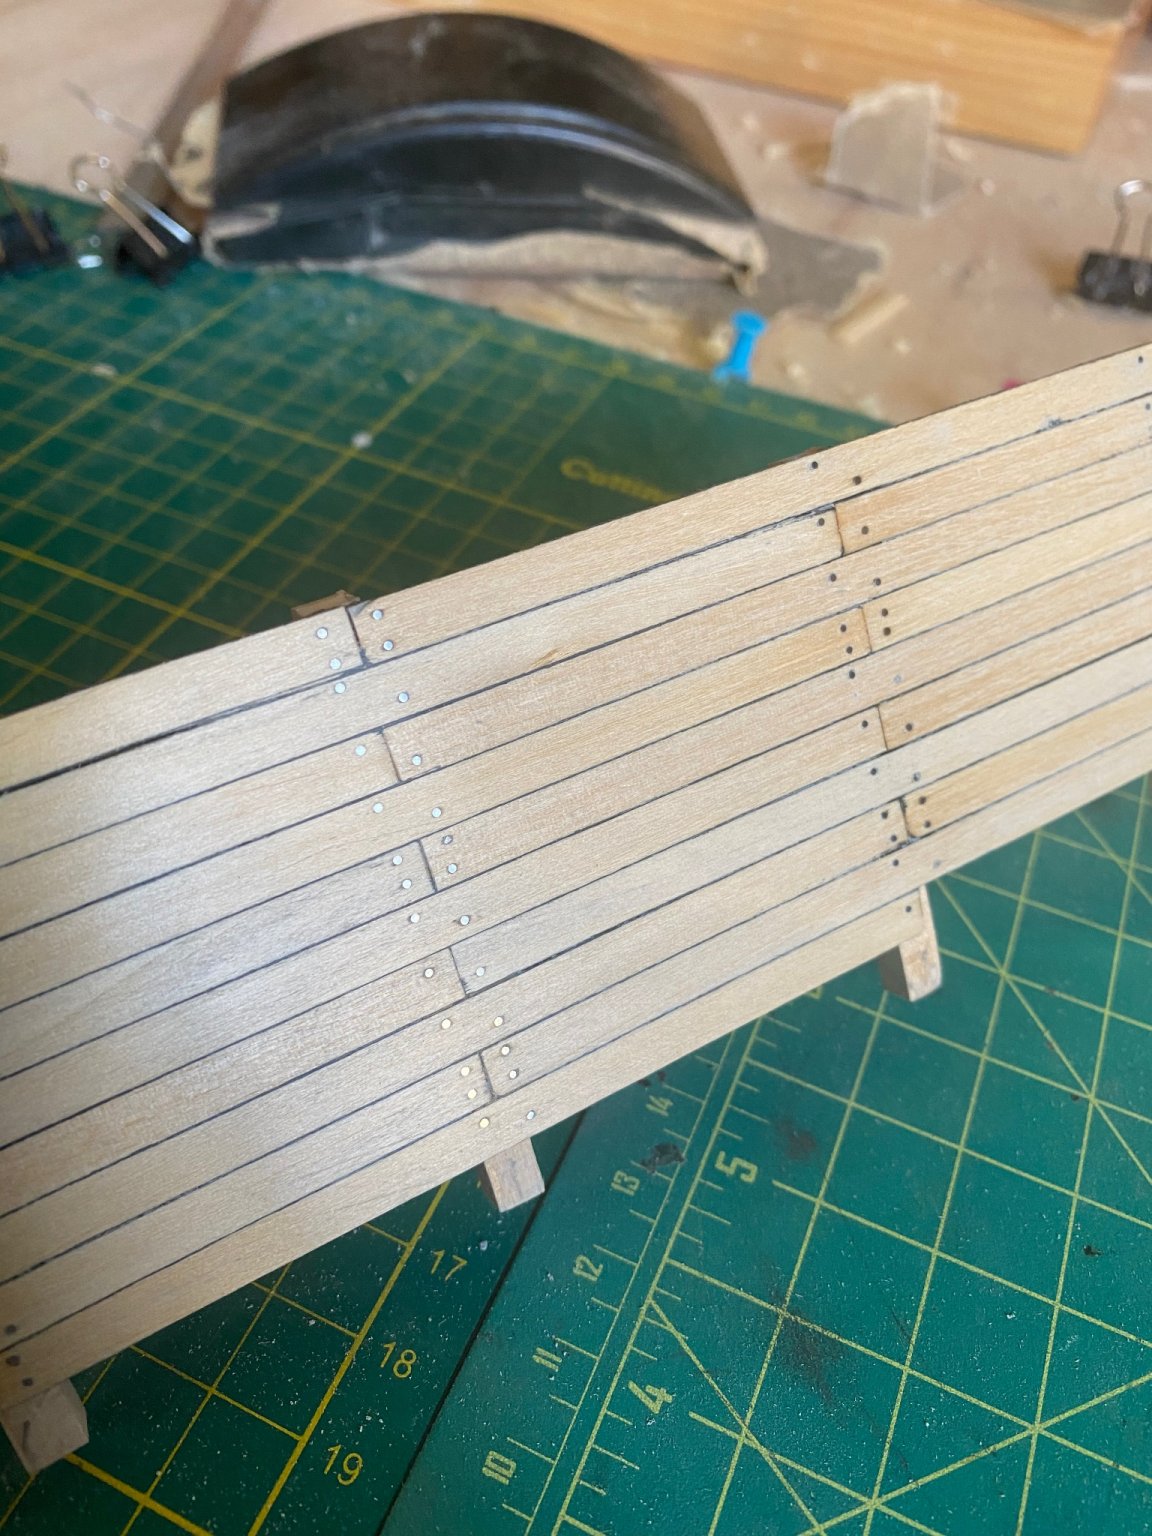
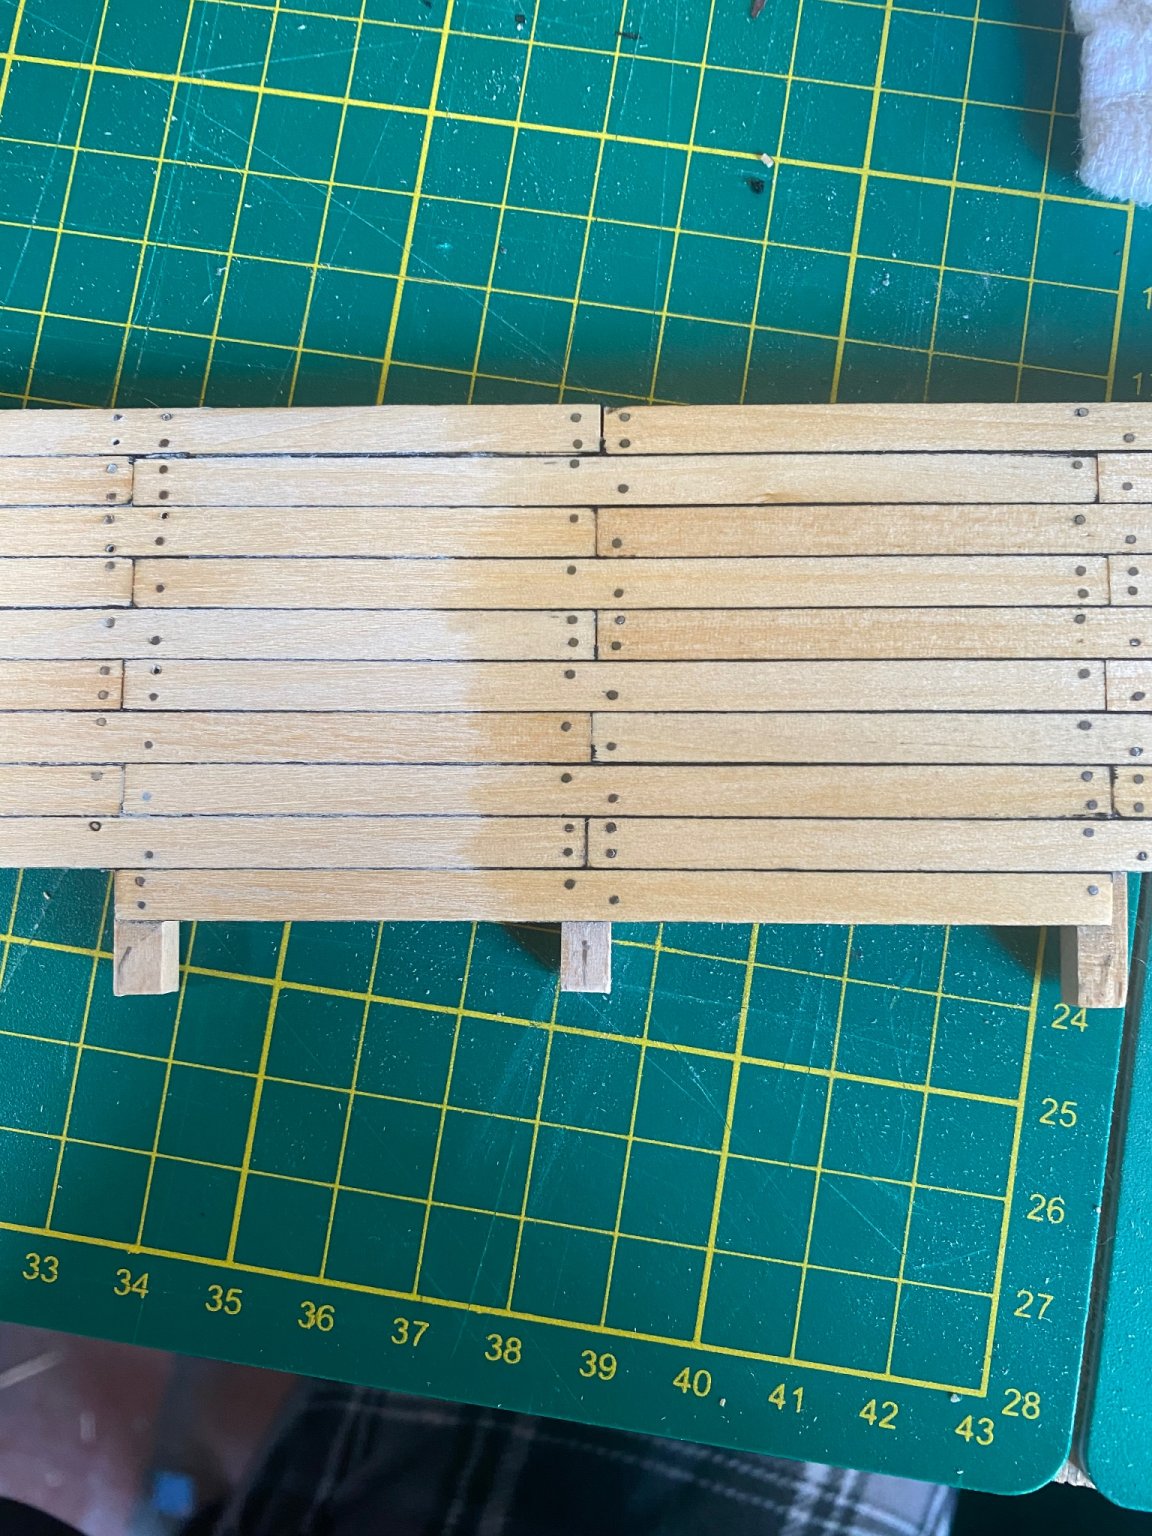
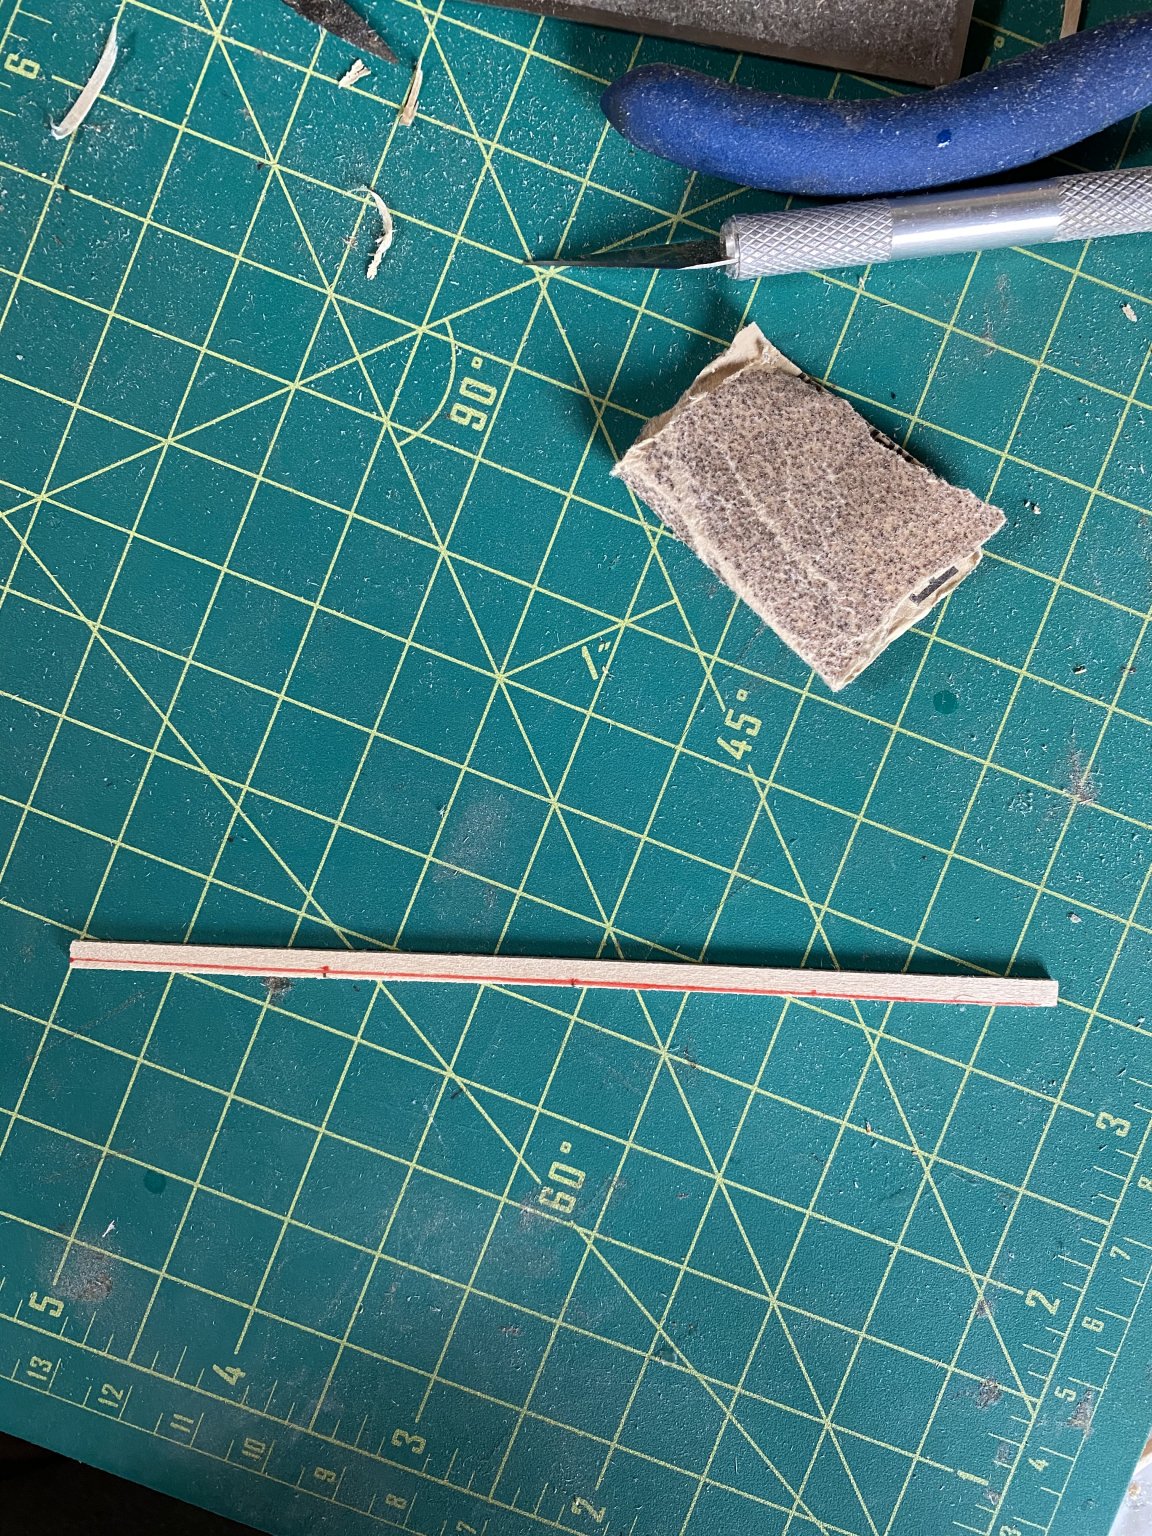
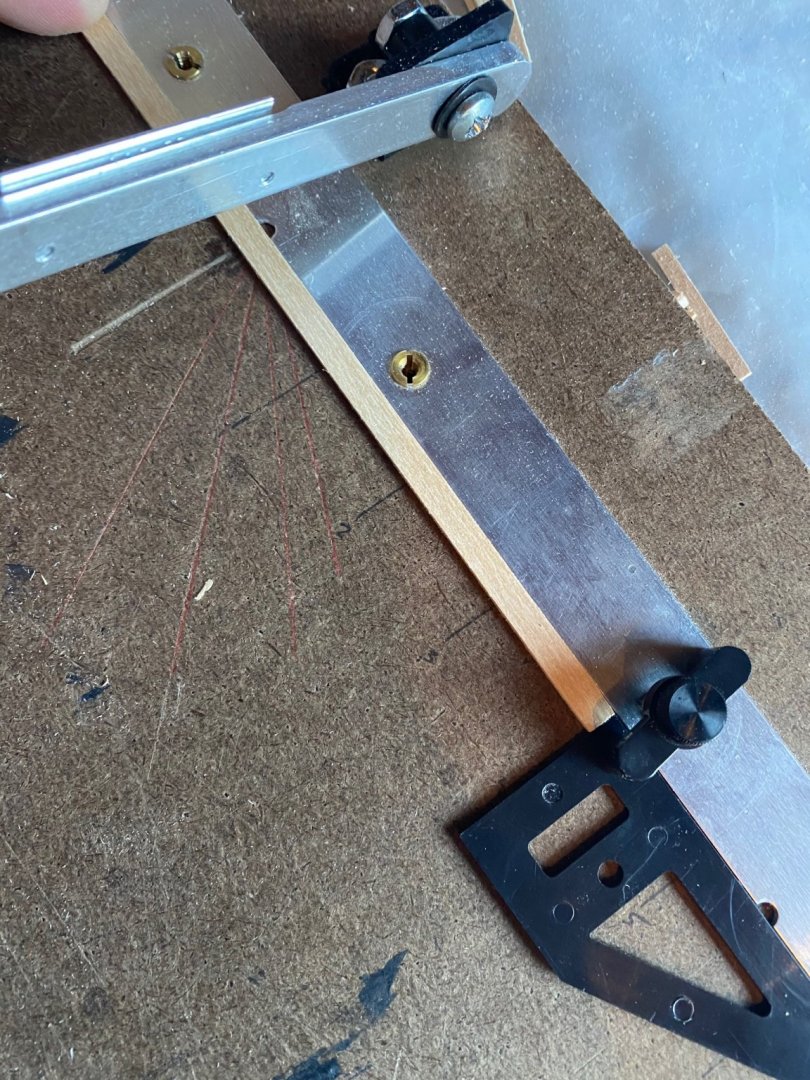
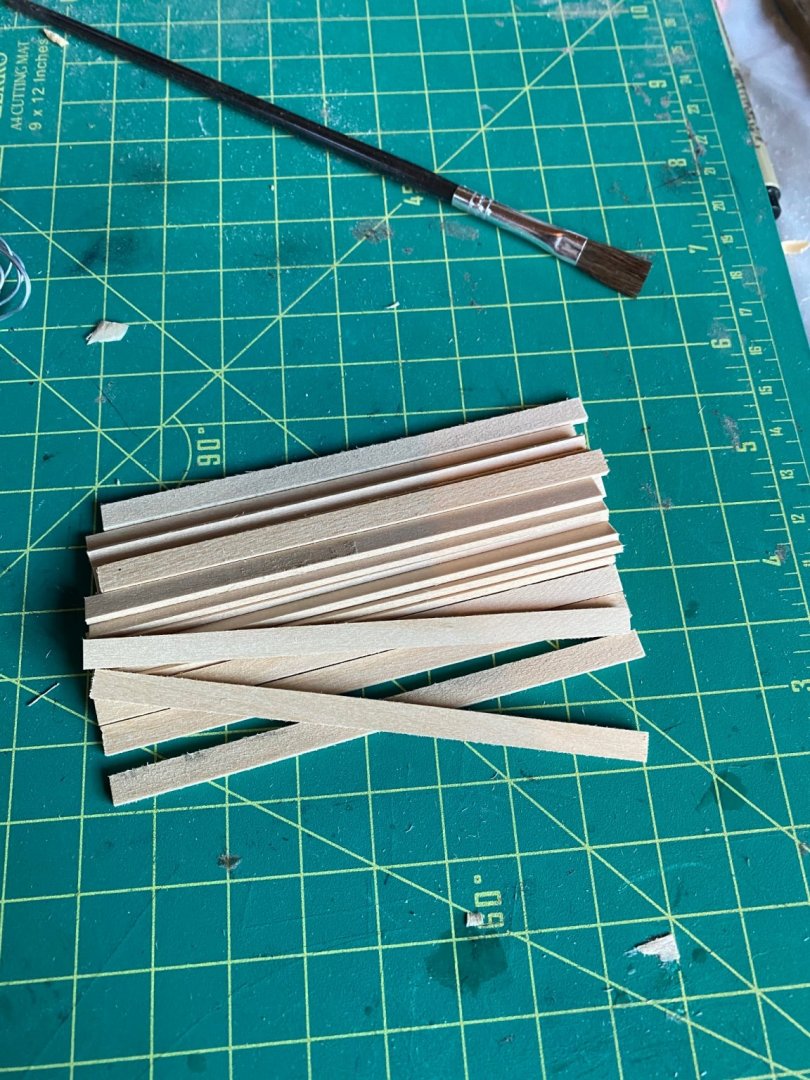
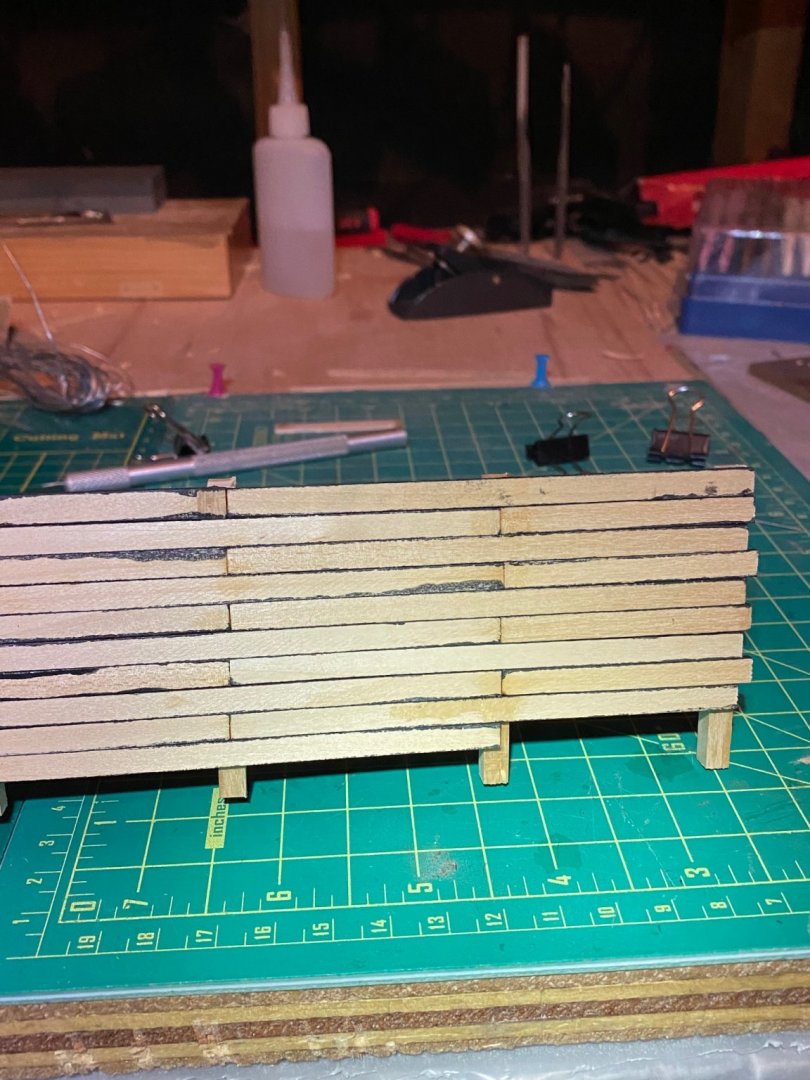
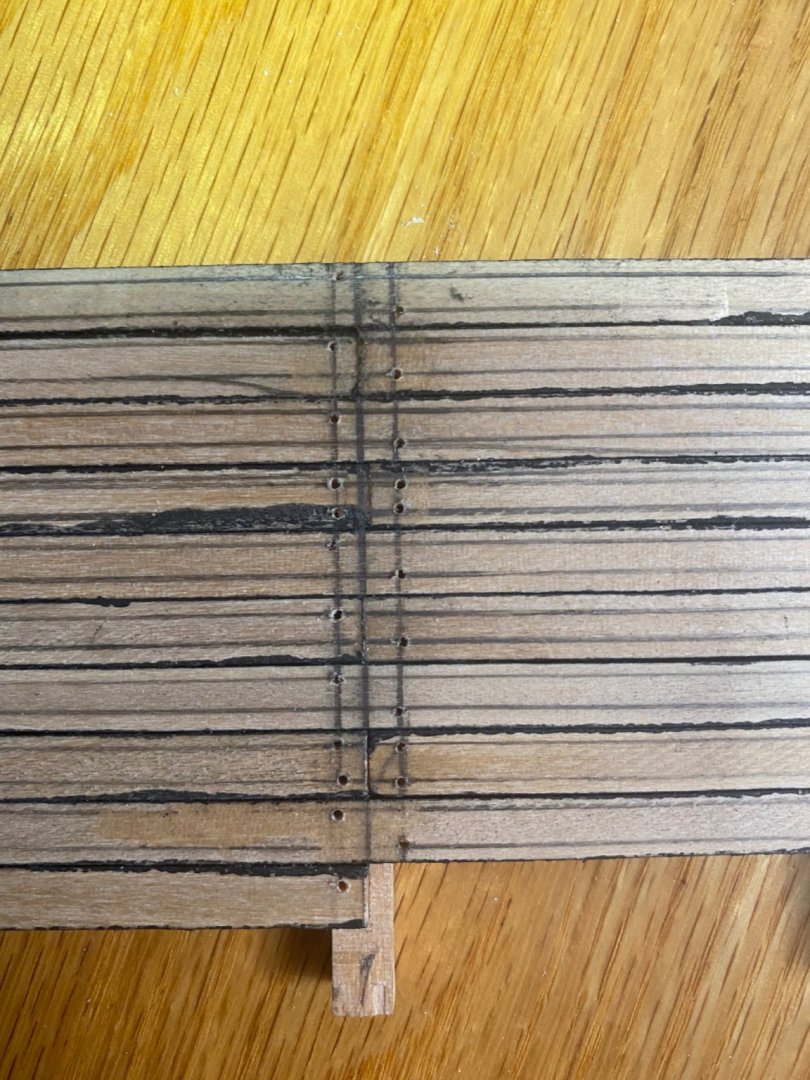
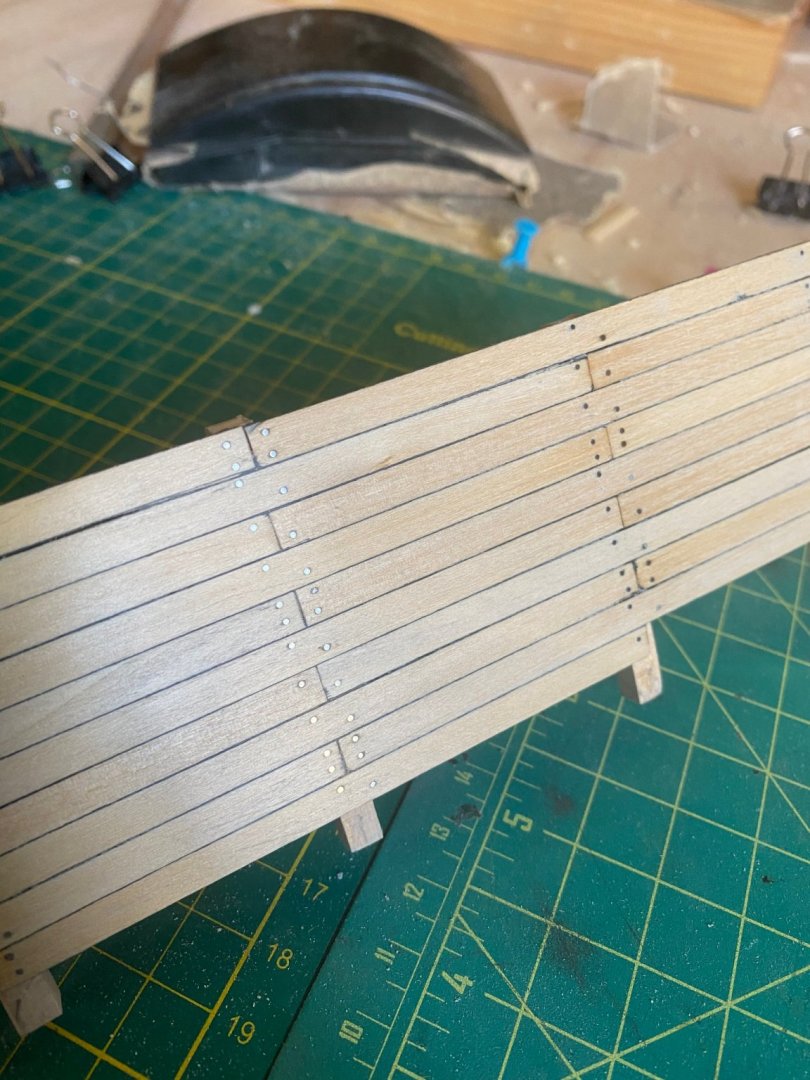
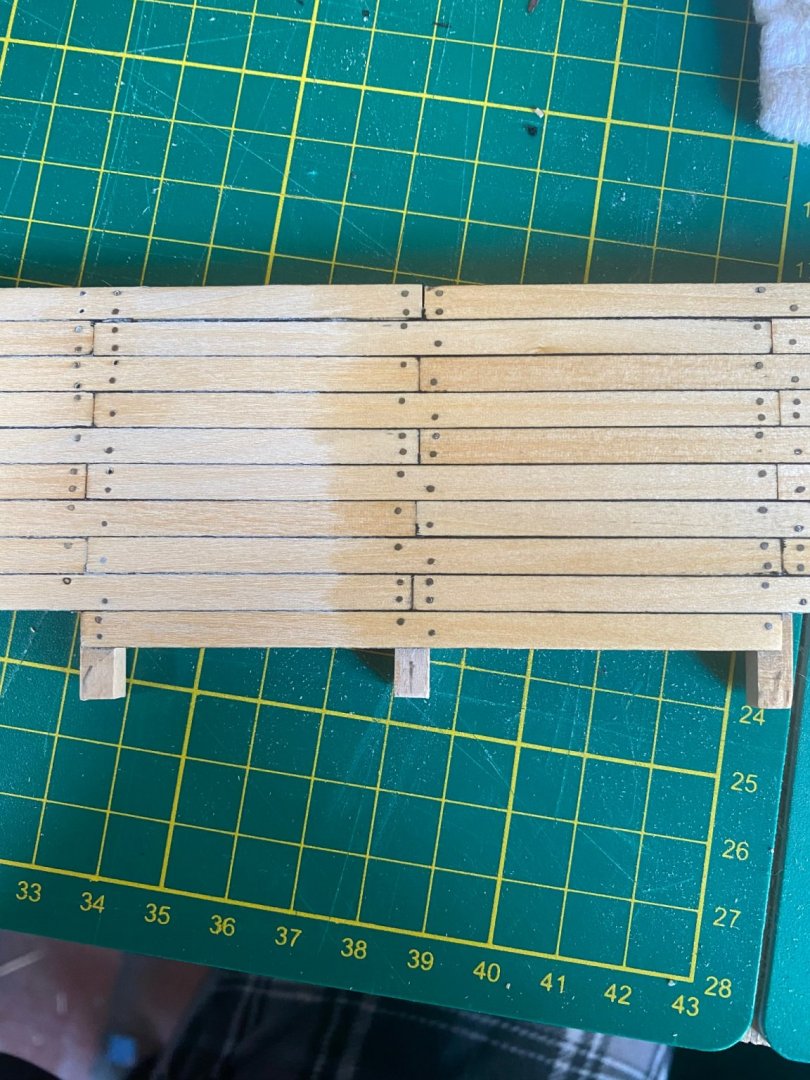
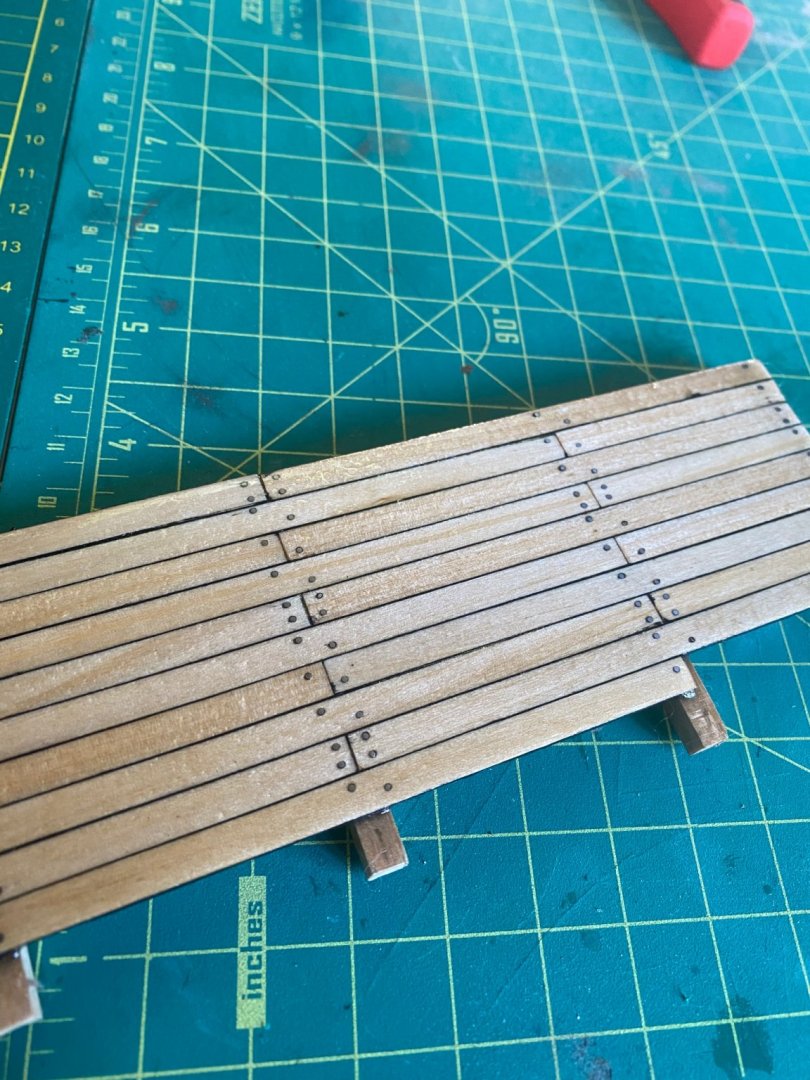
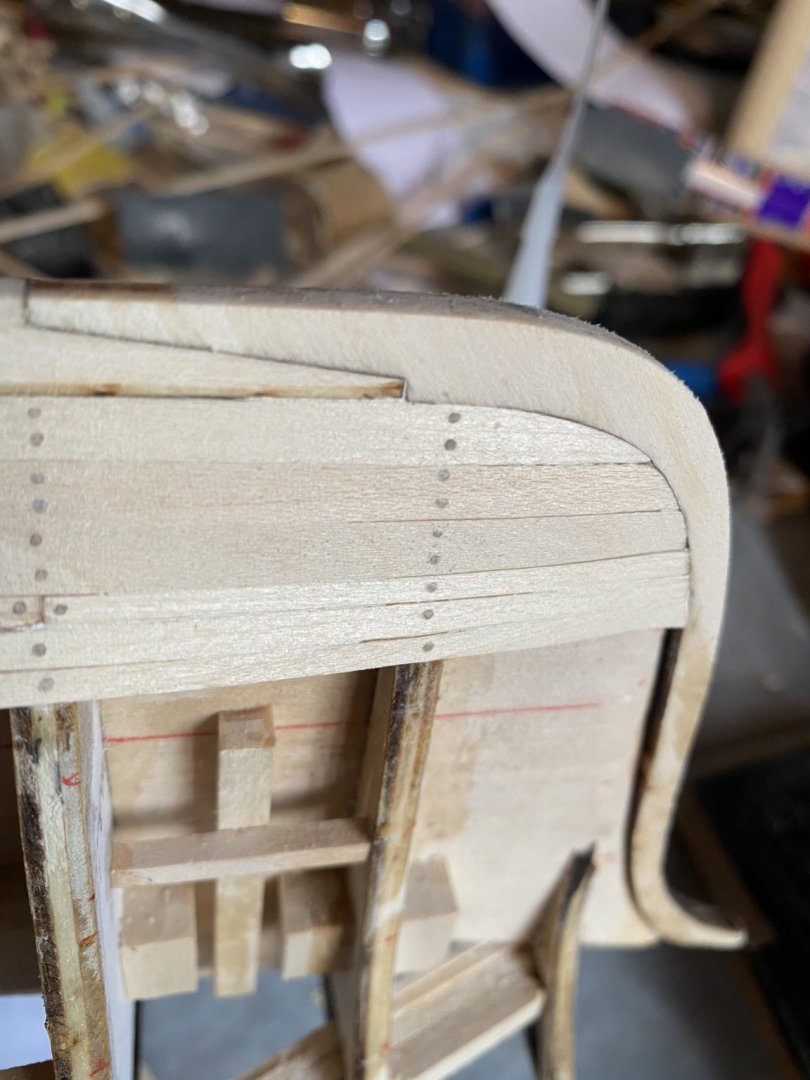
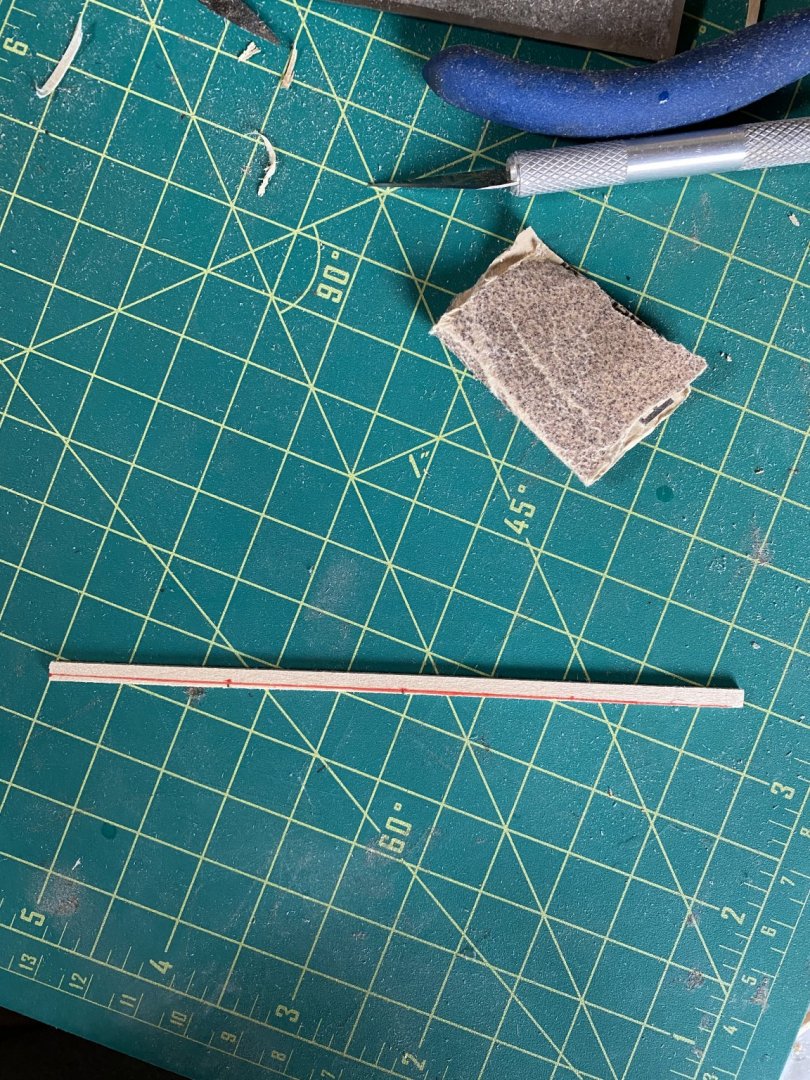
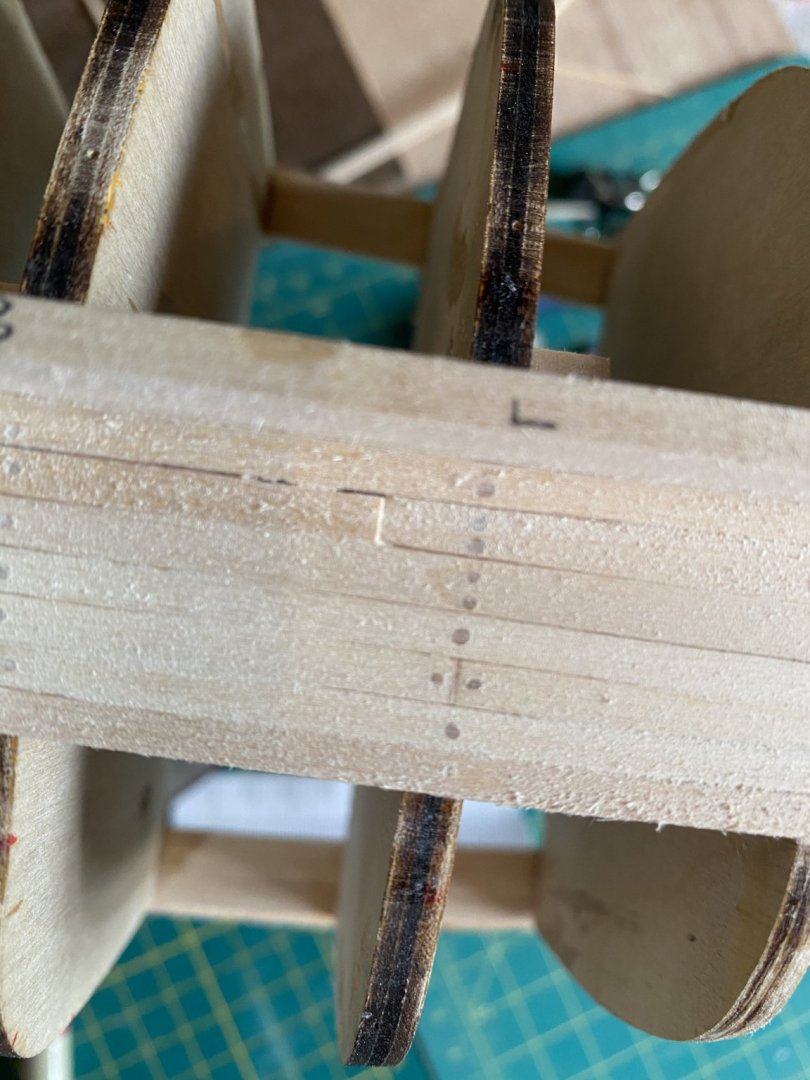
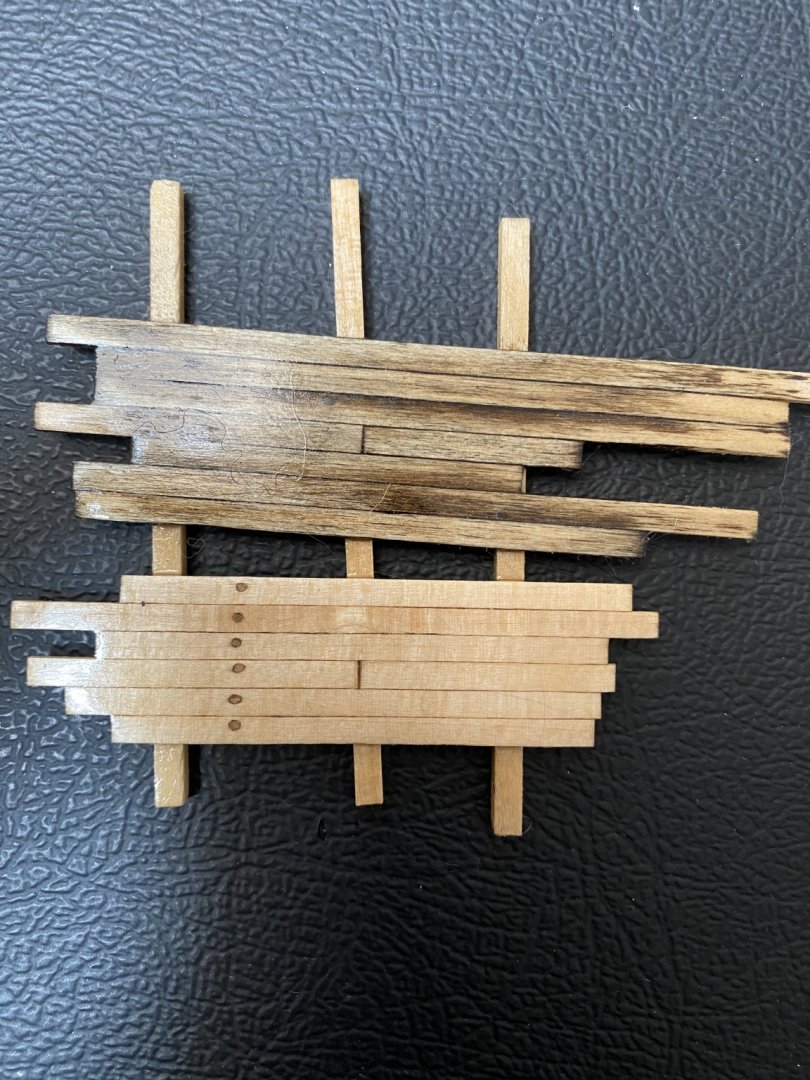
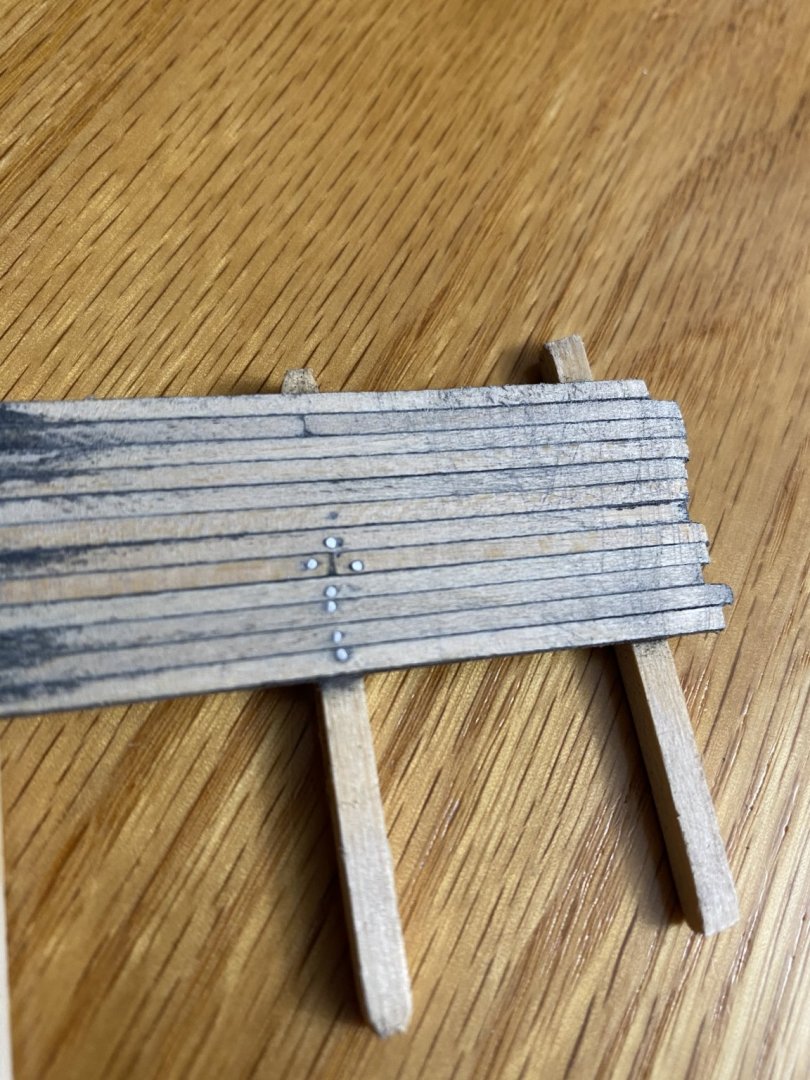
I recently read some posts about caulking deck planks and figured i would share my method with you all that works pretty well for me. right off the bat i start with cutting the planks to equal lengths, for this i chose to cut them at 4 inches a piece. If you don't have one of these cutters or something like this i highly recommend it, it makes cutting lots of planks at the same length very easy and leaves behind a nice clean cut. I got it at my local arts store but they are also online. I have my planks cut and I’m ready to add the caulking effect. I stack up the planks in groups of five which worked best for the clamps i was using for this. I clamp the ends that will be visible when on my model so they wont get very much paint on them. I painted all the edges that were left when clamped and left it to dry. It looks pretty messy for now but it will look much better in a second. So i used metal nails here that i cut from some wire i had sitting around. I measured out each plank and where I’m going to be placing my nails, i tried to get as exact as i could but we all make mistakes no big deal. It may not be that realistic but i have always liked a really smooth almost reflective deck, so i sanded it from 60 grit paper to 5000 grit paper which gives it an almost mirror like finish. This is the difference between mineral oil being used to clean it and not, its a pretty big improvement. You cant really tell from these pictures but from my sanding all my nails have a mirror finish that i could see my reflection in. Afterward i gave it a semigloss clear coat to try and make. The natural wood grain look as good as it could. I hope someone finds this useful and my example here is probably out of scale but you get the idea. Doing it this way doesn’t create any kind of bleeding from ink or indents from pencil lines, it also ensures that every caulking line is as straight as your planks. Good luck and have fun! Bradley


-
Thanks for this, I’m looking forward to reading through this! Bradley
-
Wow these are pretty incredible! Thanks for sharing
-
Very nice! This is an interesting ship, ill be following your build! Bradley
-
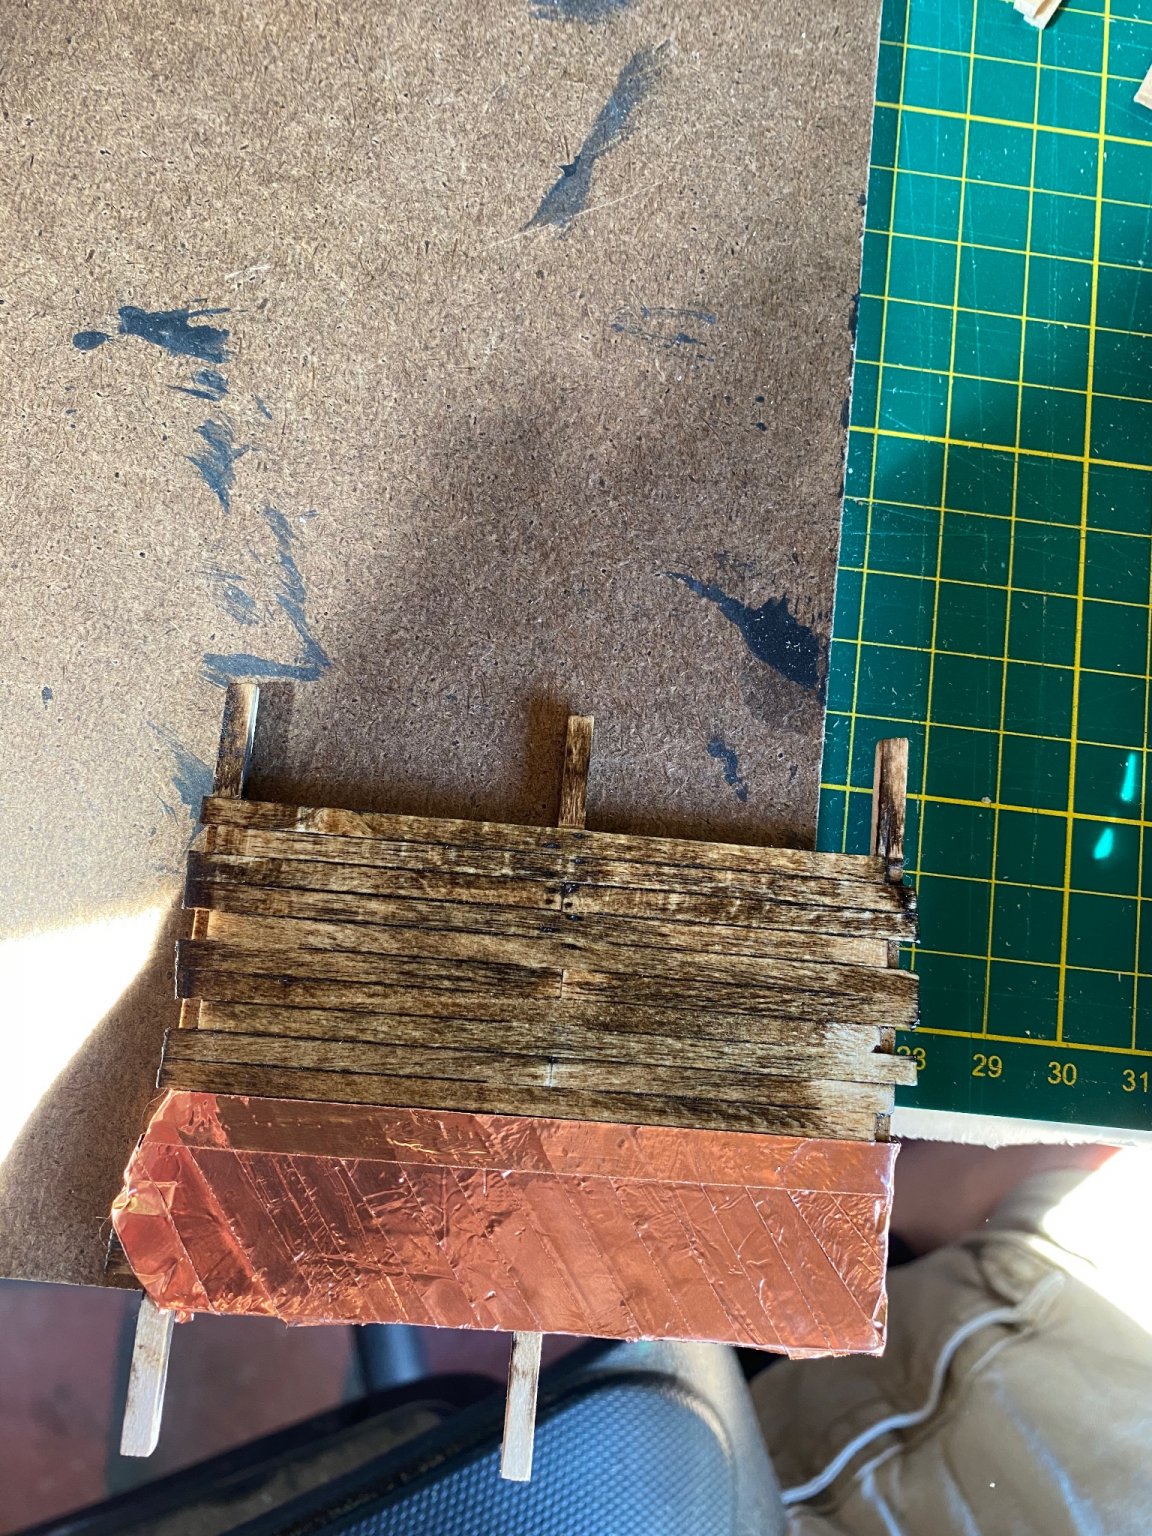
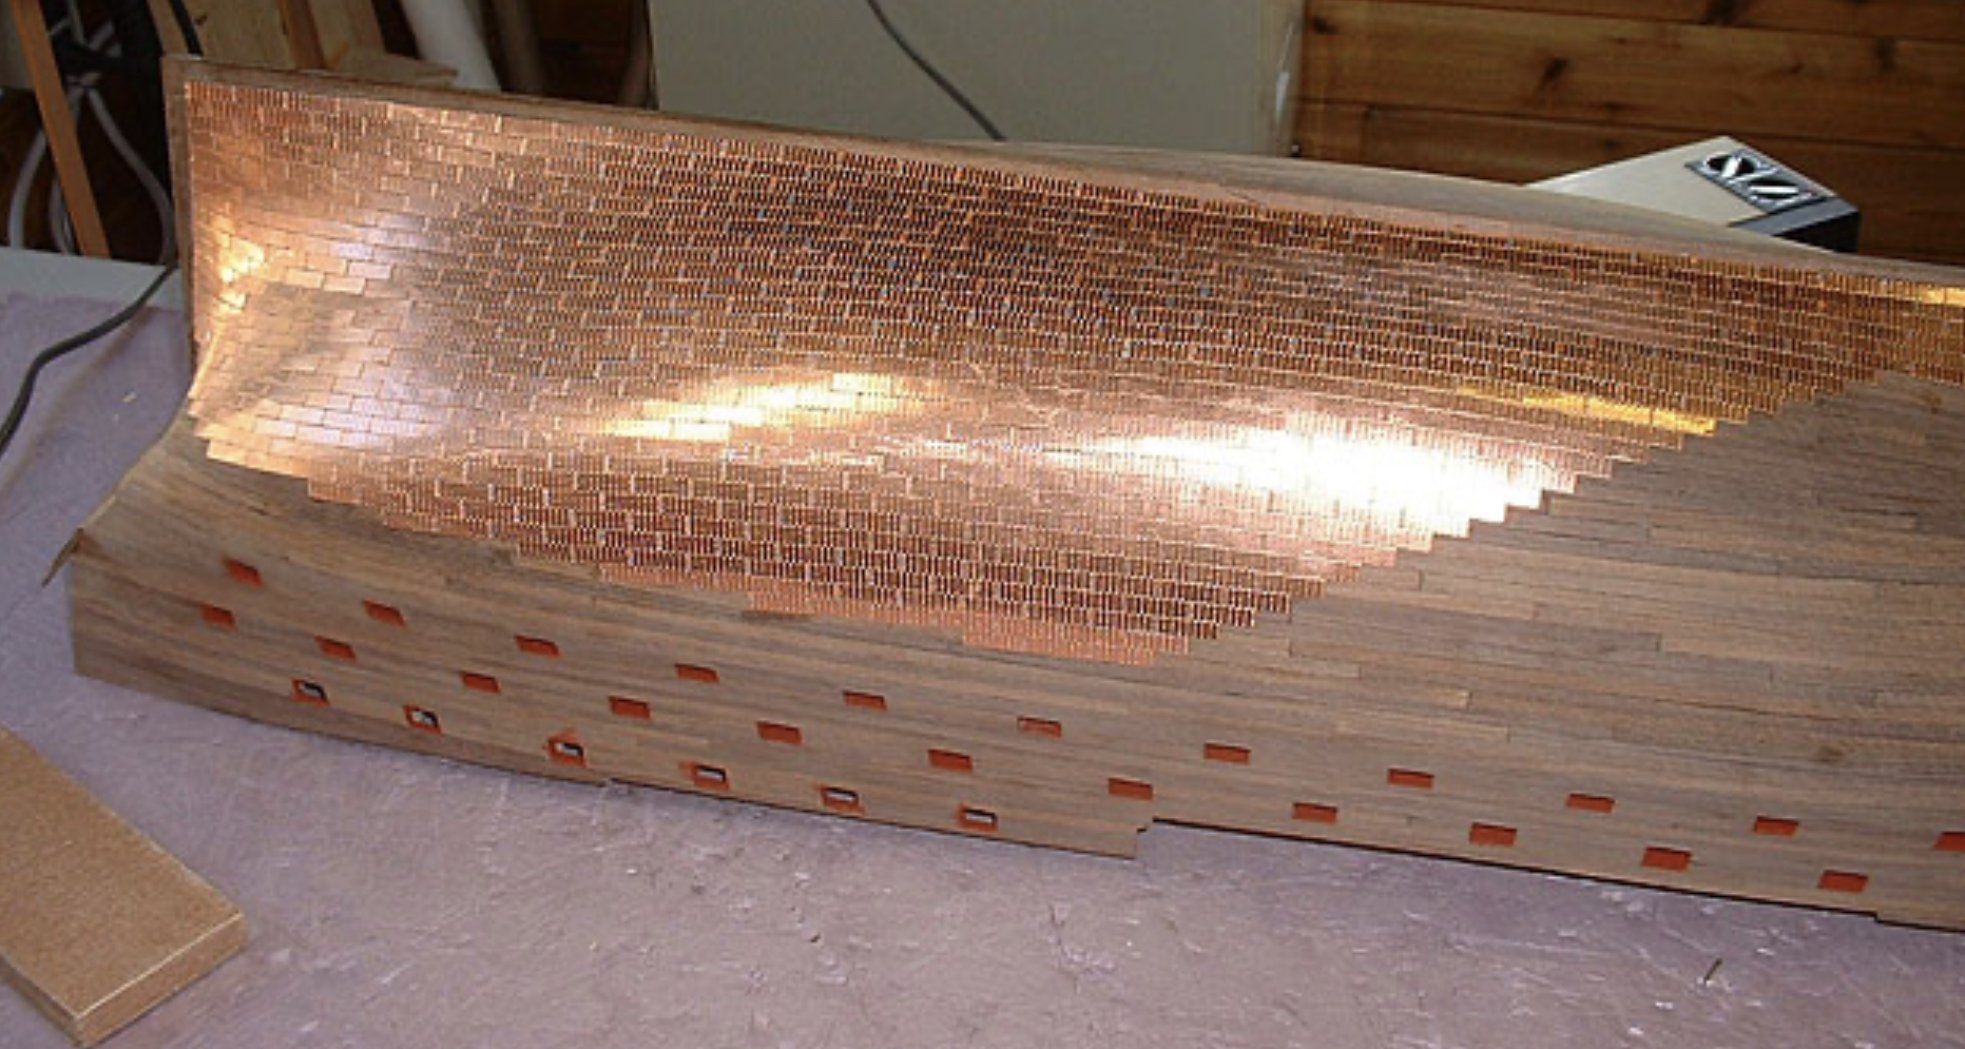
So I have used copper plates in the past and had some trouble with them (specifically having them stay, I was probably using the wrong glue though). My current build is going to have copper and the kit came with copper tape, and I have had nothing but issues with that as well. I noticed when you take the backing off the copper it will bend the copper making basically useless. Has any one else used tape and had it turn out they way the want? I could use some help, I’ll attach a picture of a small sample I made to test the copper tape, as stated in the directions I’ll put them diagonally and then have one continuous piece following my water line. The planking surface of my ship would call for maybe a thousand or so copper plates at 6x12 mm. Would it be easier to precut my tape in this size and put those on individually? Thanks for the help! Bradley

-
That’s a pretty cool picture! I’ve never seen a new plate installation before. Thanks!
- 74 replies
-
- 3
-

-
- mantua
- thermopylae
- (and 1 more)
-
Devil dog, I’m glad to see your progress! I think if you were to finish the planking and maybe even stain or paint the “copper” a lighter color than the planking, i think it will look great. Good luck! Bradley
- 74 replies
-
- 2
-
-
- mantua
- thermopylae
- (and 1 more)
-
Things are looking great! I’m looking forward to seeing how that stain looks after all the planks are installed. I will say that what looks like a minor miscalculation now may stick out like a sore thumb once planks are on. I would say it’s worth the extra time and effort to readjust that piece, unless You think it may damage things then you may just need some shims under the planks. Good luck!
- 34 replies
-
- 1
-
-
- grand banks dory
- bluejacket shipcrafters
- (and 1 more)
-
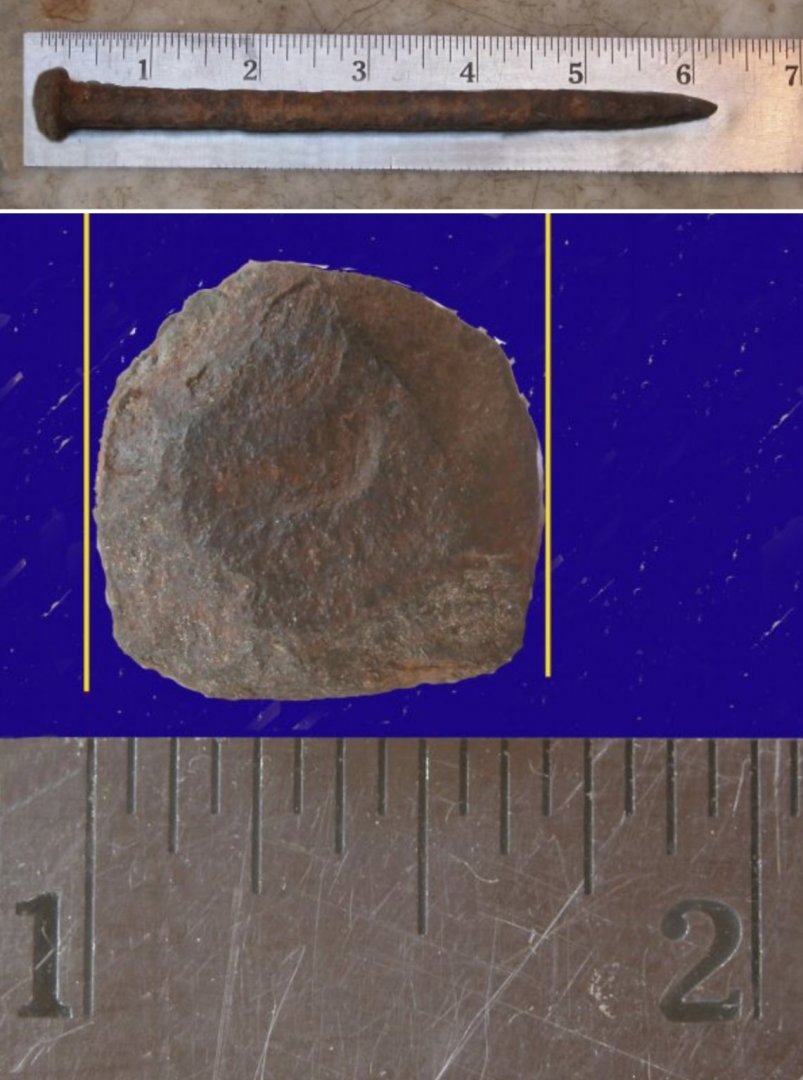
Hello every one, I have been chugging away at planking, my wife and I are expecting our first child within the next few days so things have been slow in the ship building department. I’m up around 5 every morning any way so maybe ill take that time to get some extra work done. I dont have any pictures to show of the ship but wanted to take some time to talk about treenails. Ive been doing some research, trying to figure out how big real tree nails were. I found a few pictures and papers written on ships from this era, I’m sure this information is available somewhere I’m just not sure how to find it. I found a photo of someone holding a treenail from a wooden ship built in the late 1850s in Boston, which happens to be the same decade and place my ship was built. The given width of the treenail in the photo is 1 11/16” which in mm would be 42.8625 mm, converting that to my 1/96 scale i get approx. .5 mm. I Don’t think it would be hard for me to make or install .5 mm treenails where i need to but the question is whether or not i should. I haven’t found a good picture of a ship at 1/96 scale that has treenails, and considering that most will view this from a distance to far from the ship to notice the treenails at all. I have read a few other threads that say at this scale its not worth the time installing the treenails, the plans do provide a schematic of the way treenails should be installed. Thanks for all the support! Bradley


-
Looking forward to following this build, In my book every cut counts, so i try to get as close as i can to exact. Not every cut can be perfect though so wood filler works well, also there is usually no leeway on these types of plans, so precision is key. Good Luck! Bradley
- 34 replies
-
- 1
-
-
- grand banks dory
- bluejacket shipcrafters
- (and 1 more)
-
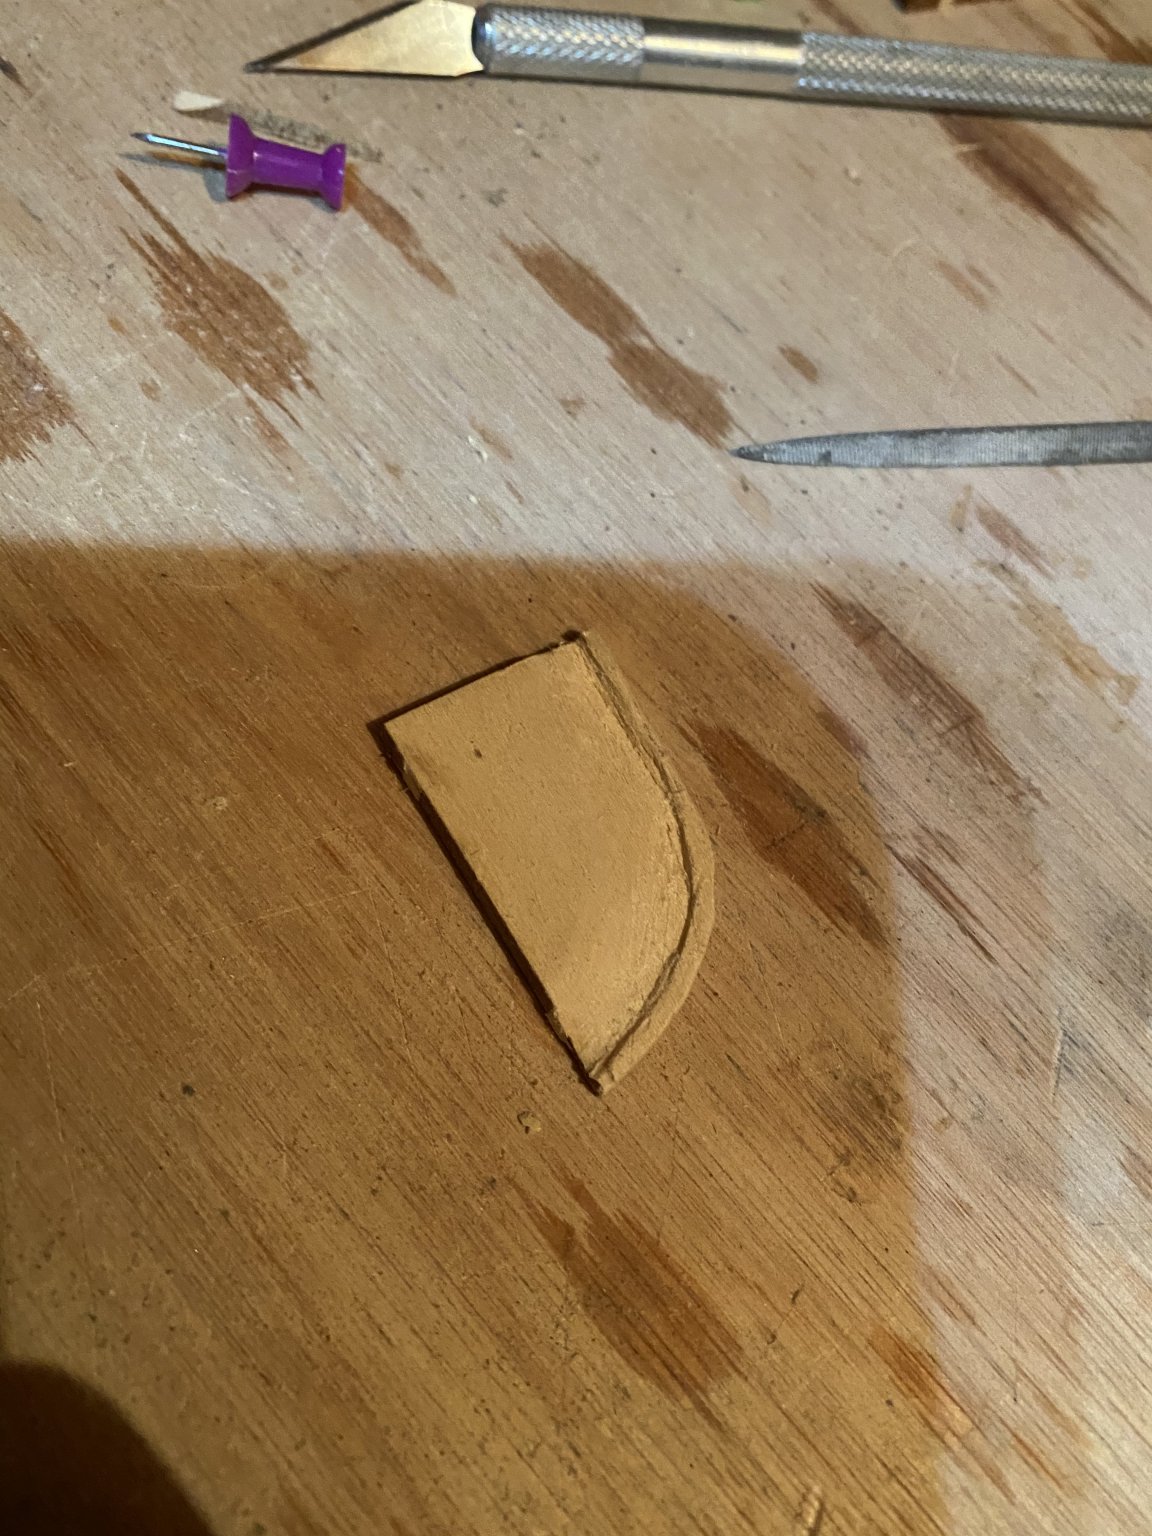
Hello again! Thanks to BobG I realized my scale may be way off and things may need to be readjusted. Thankfully because i started with the Garboard and belt A, i can play around with a few ideas that i have because ultimately this area of the ship will be covered with copper. For any one who is considering using toothpicks for their treenails one thing to consider is that because they come to a conical point, any deviation in pressure when driving them in will result in a different size treenail when you sand every thing down. I added a picture that hopefully shows what I’m talking about, this is just another reason I’m happy Ill be wrapping this part in copper and that people like Bob have great advise. Bradley
-
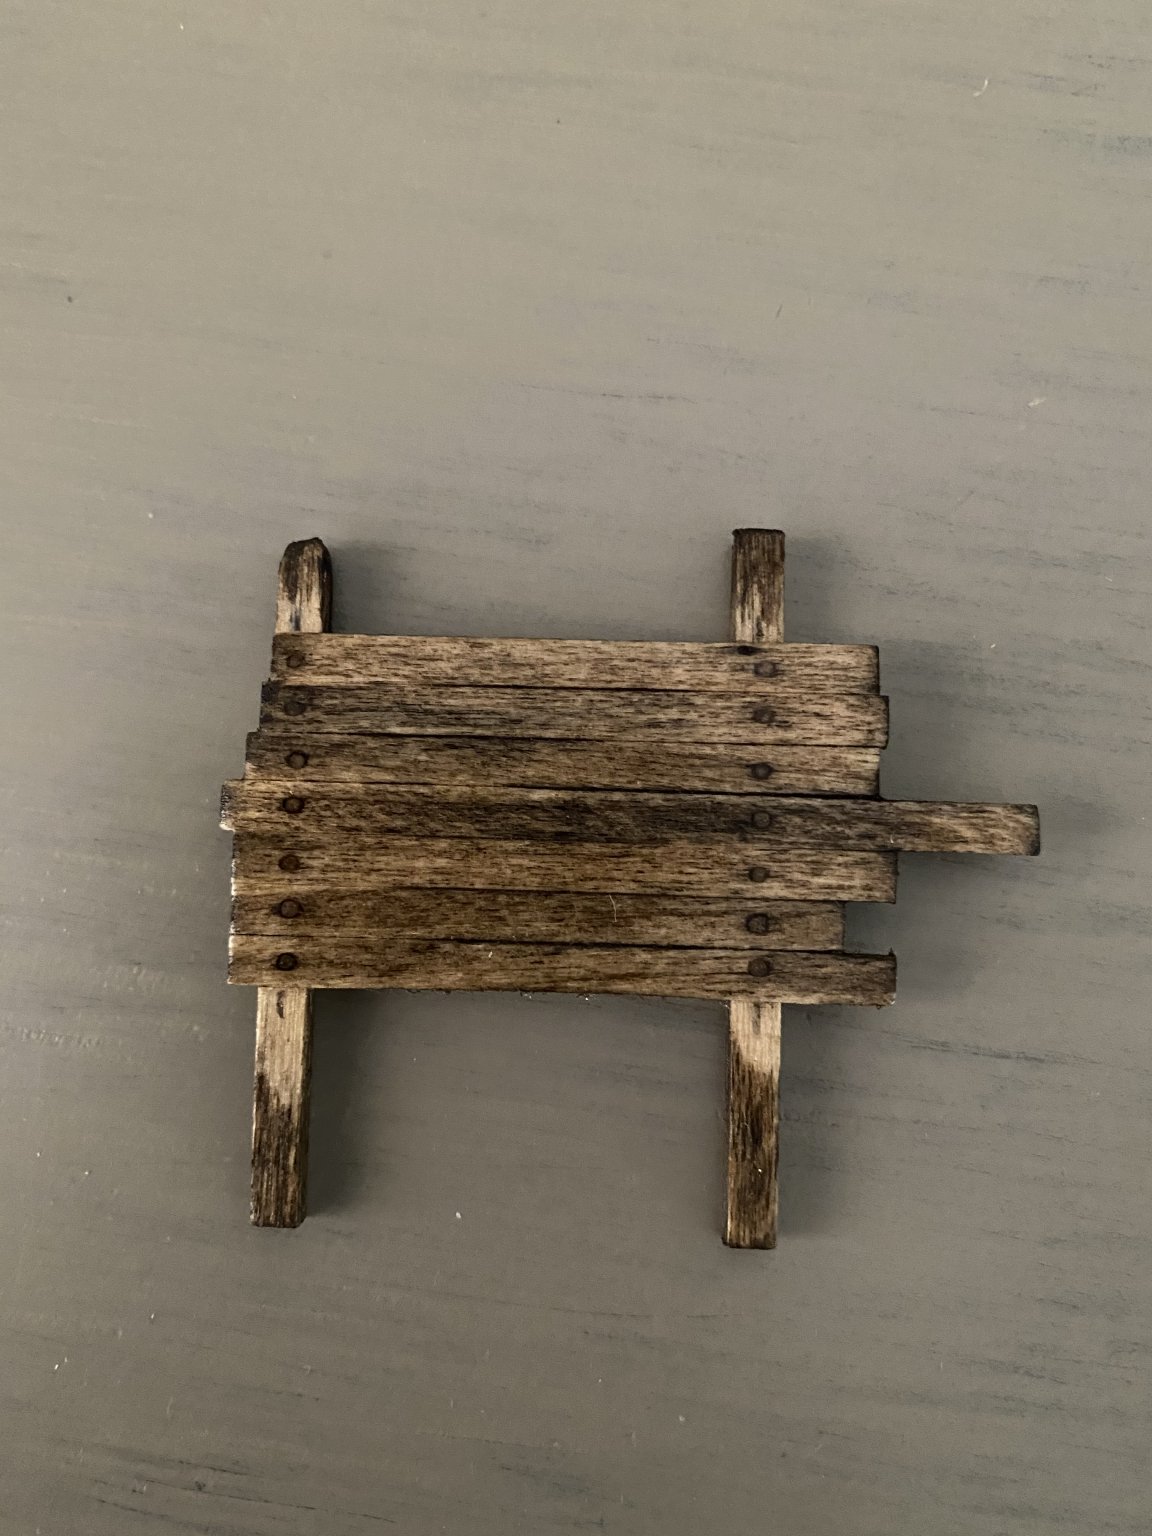
Good morning everyone, I need some advise, as the planking goes along I’m thinking more and more about how to finish the outside of the hull because i don’t want to paint it. I built several small samples as to how i could finish the hull and make it look some what good. This first one is a sample of what an unfinished hull (bottom) and a hull with planks that were stained BEFORE gluing in place. After gluing the planks in place i drilled holes for my wood nails. Afterwards i sanded with 60, 100, 150, 220, 300, 400, 600, 1000, 1500, 2000, 2500, 3000 and 5000 grit sand paper. It may seem like over kill but taking the time to sand properly you can get almost a mirror finish in the wood. I’m sure this is not historically accurate but having a ship that is perfectly smooth and semi reflective is the look I’m going for. Finally a thin clear coat was applied. I know the planking is supposed to be painted black and below the water line is copper plating, I’m not sure if I’m putting the copper on yet and I’m definitely not painting the hull. This is what the deck planking will look like, i dont remember the dimensions of these decking planks but the kit provides me with enough to make this small sample. What i did here is cut the planks to generally the same size (it doesn’t matter for this) and glued them down. I used a very thin steel wire as my nails for the decking. The plans dont specify what kind of fastening devices should be used here so i went with what i thought looked best. The entire deck will look like this. This last one is my personal favorite, it was made the same way as the first one but instead of staining before installation of the planks i stained after i installed my wood nails. I personally think this look the best but i wouldnt mind hearing other thoughts! The only thing i may do different on my ship is install my wood nails after staining the hull, i think the contrast between light and dark wood might be really cool looking. Thanks! Bradley

-
Tuel, Your sails are very nicely made! Ive never attempted hand made sails but i think i might on my current build. Thanks for the quick tutorials! Bradley
-
Hey Devildog36, I’m just reading through your build log for the first time and it looks great! I just wanted you to know that I’m fairly certain this “brick pattern” is actually copper plating, it was used on real ships to help protect the hull and help increase the life time of the ship. It can be bought in packs of precut copper plates or a roll of copper tape that you cut and apply. I found a picture that better describes what I’m talking about here, good luck! btw this picture is certainly not my own build, i found this picture online. Also, semper fi

- 74 replies
-
- 2
-
-
- mantua
- thermopylae
- (and 1 more)
-
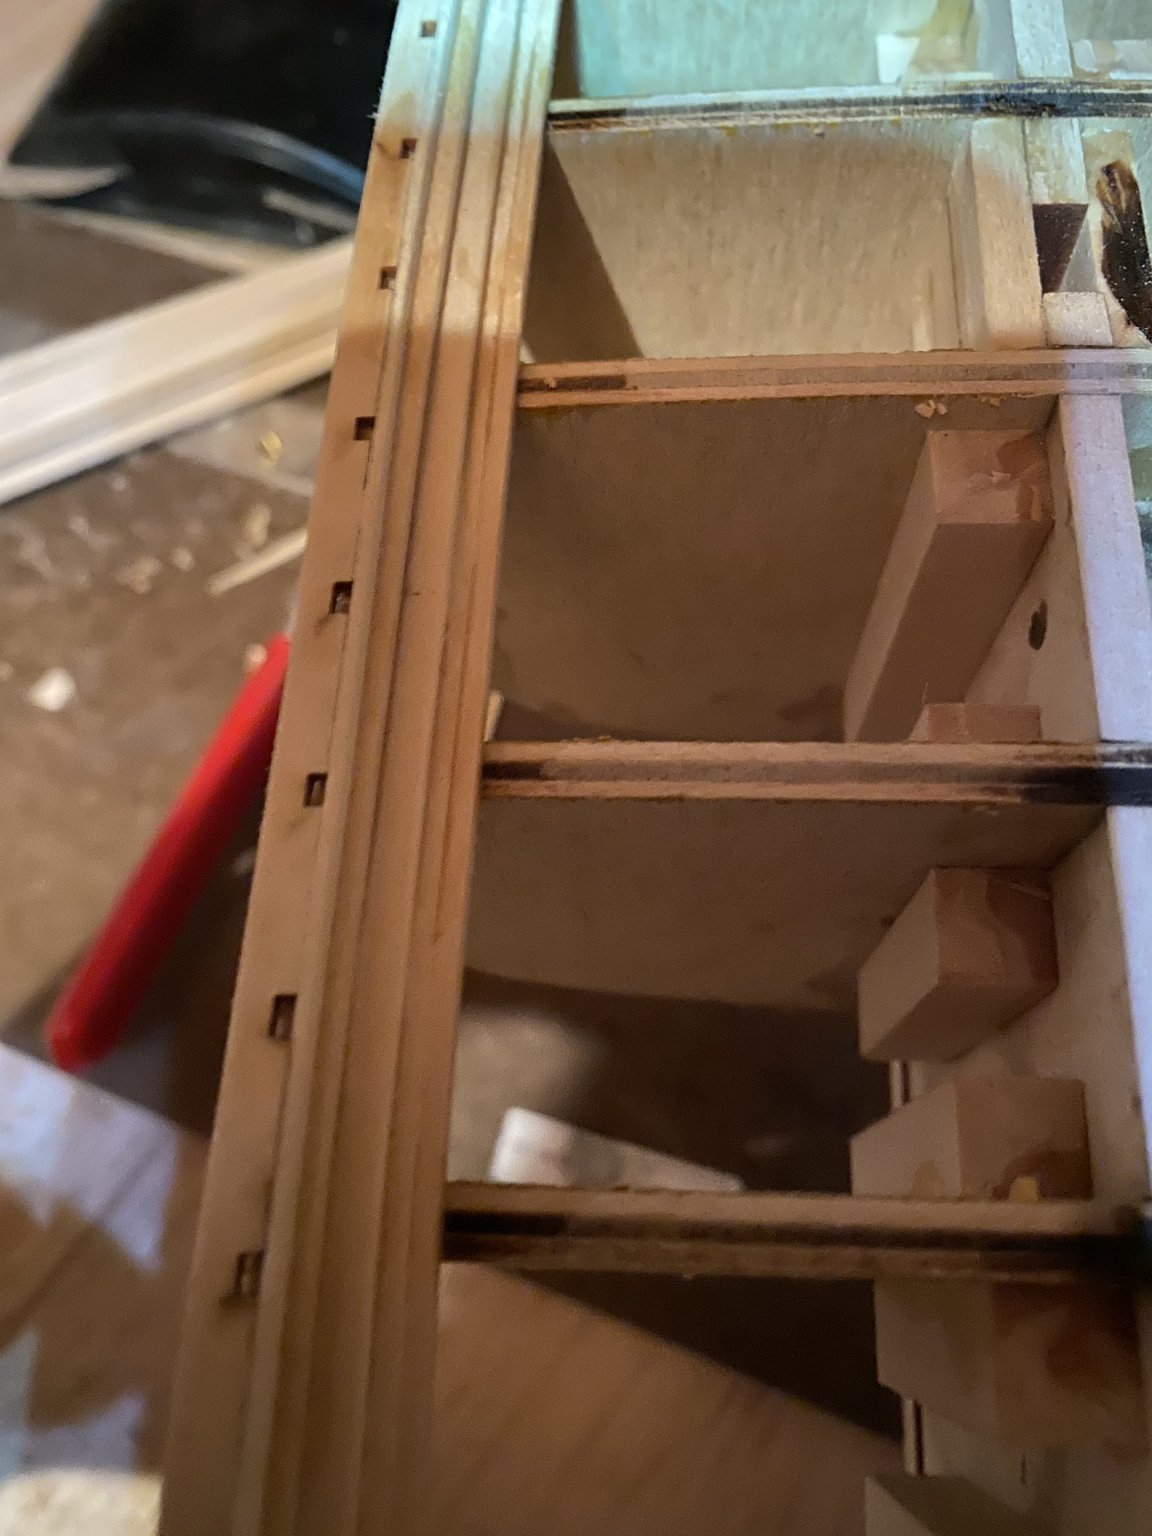
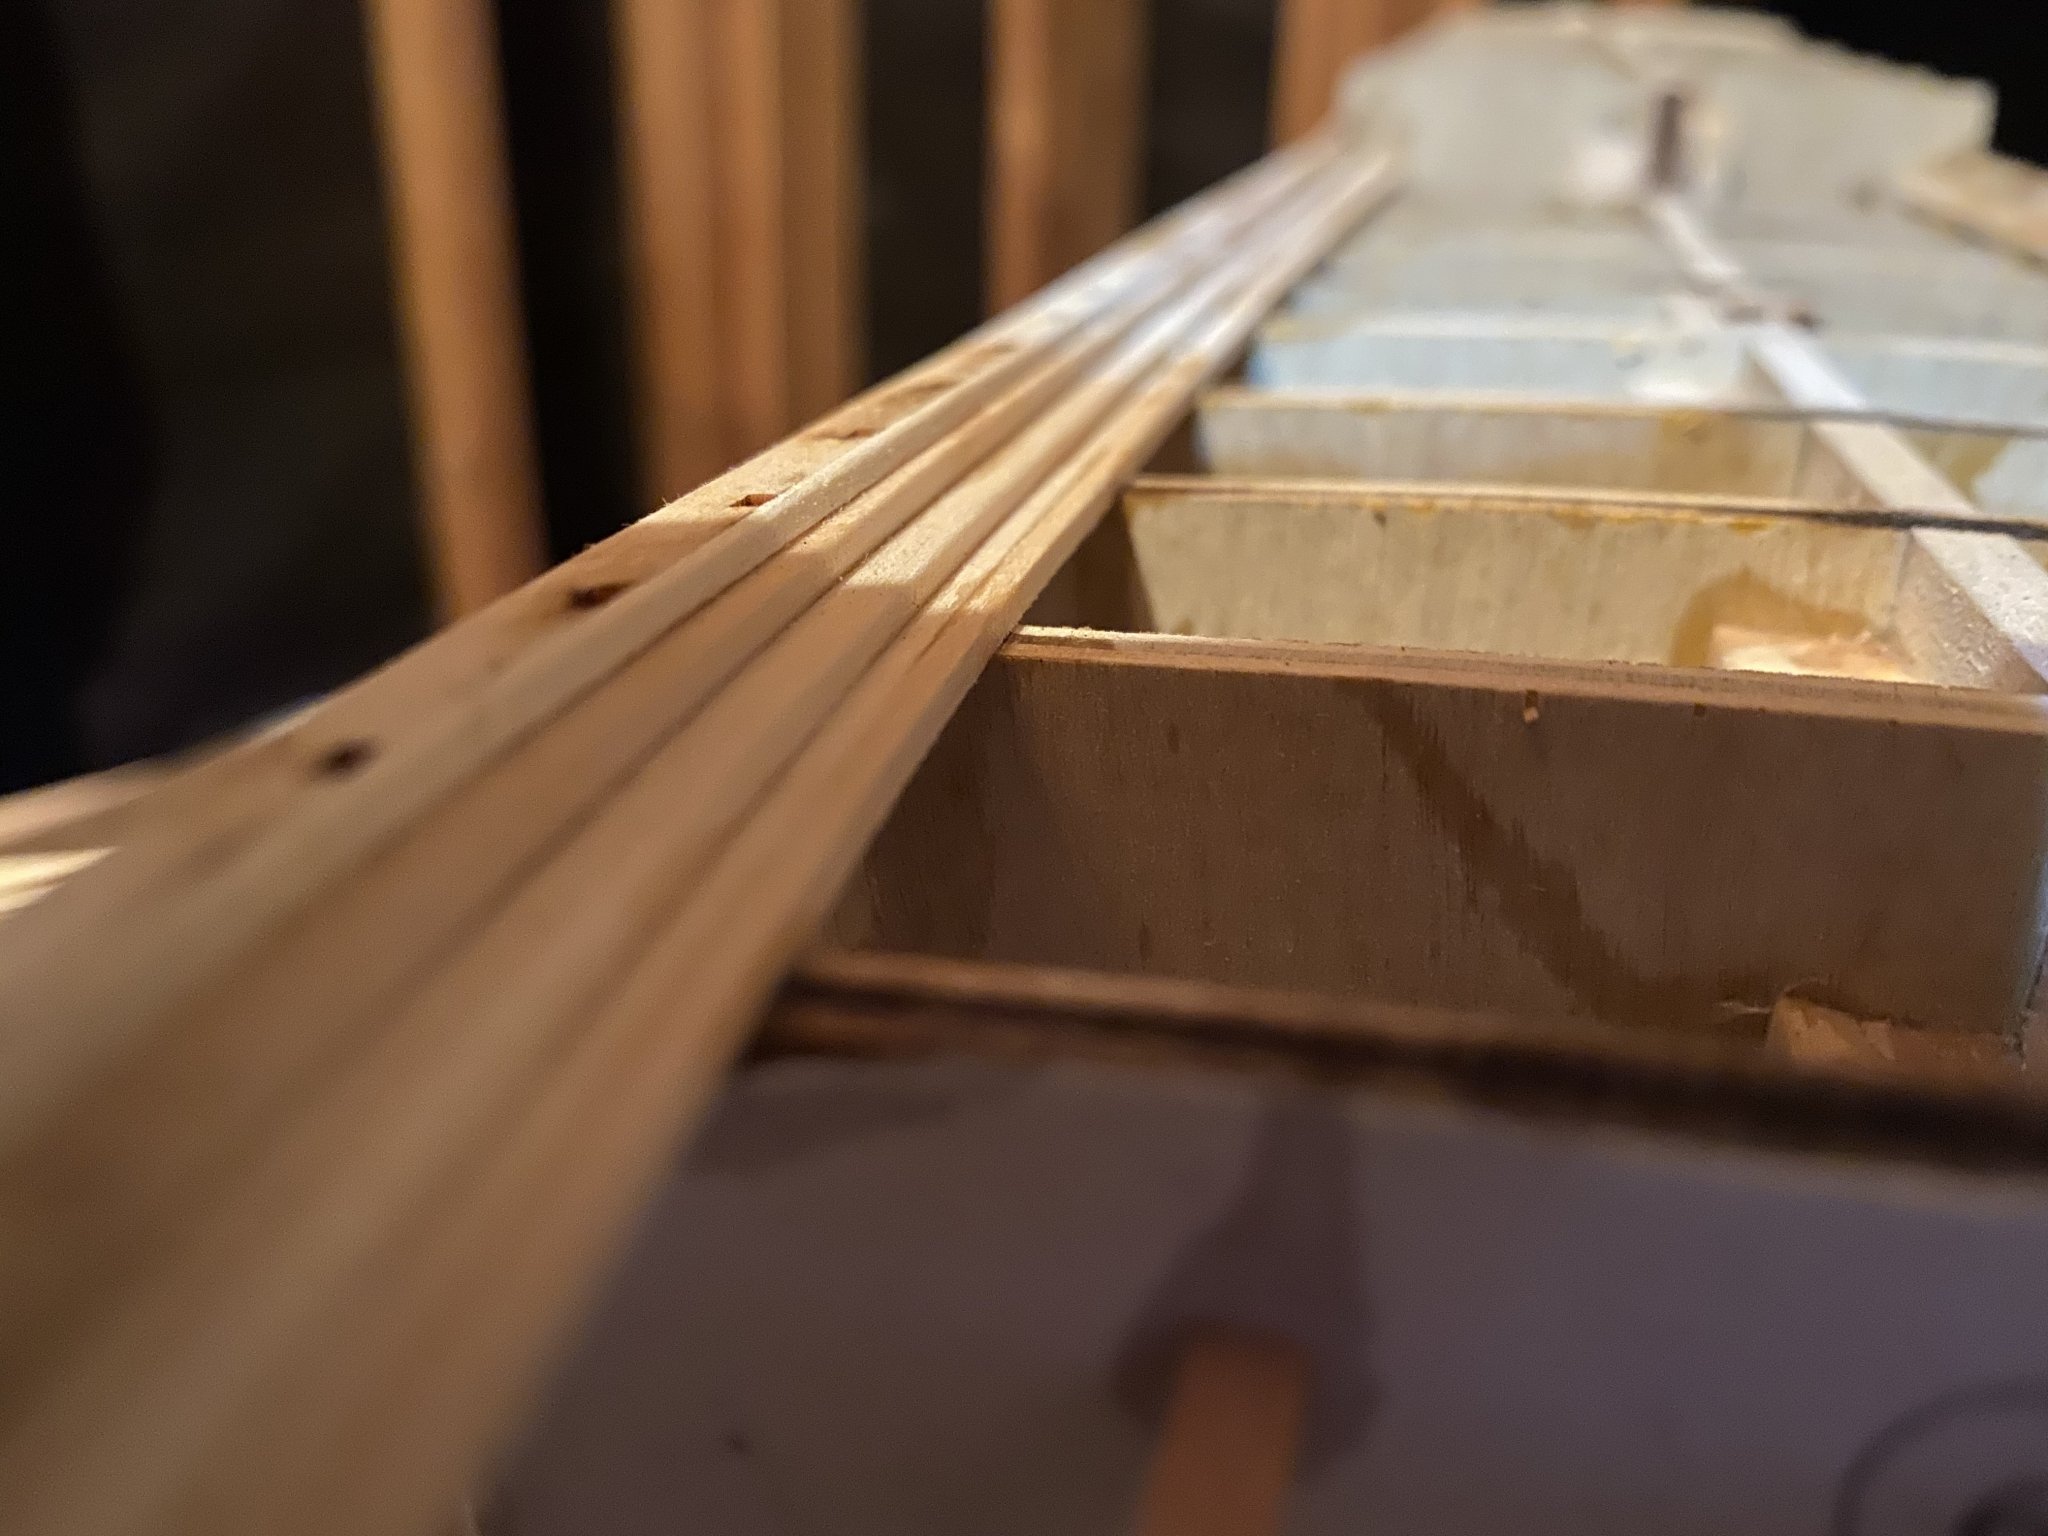
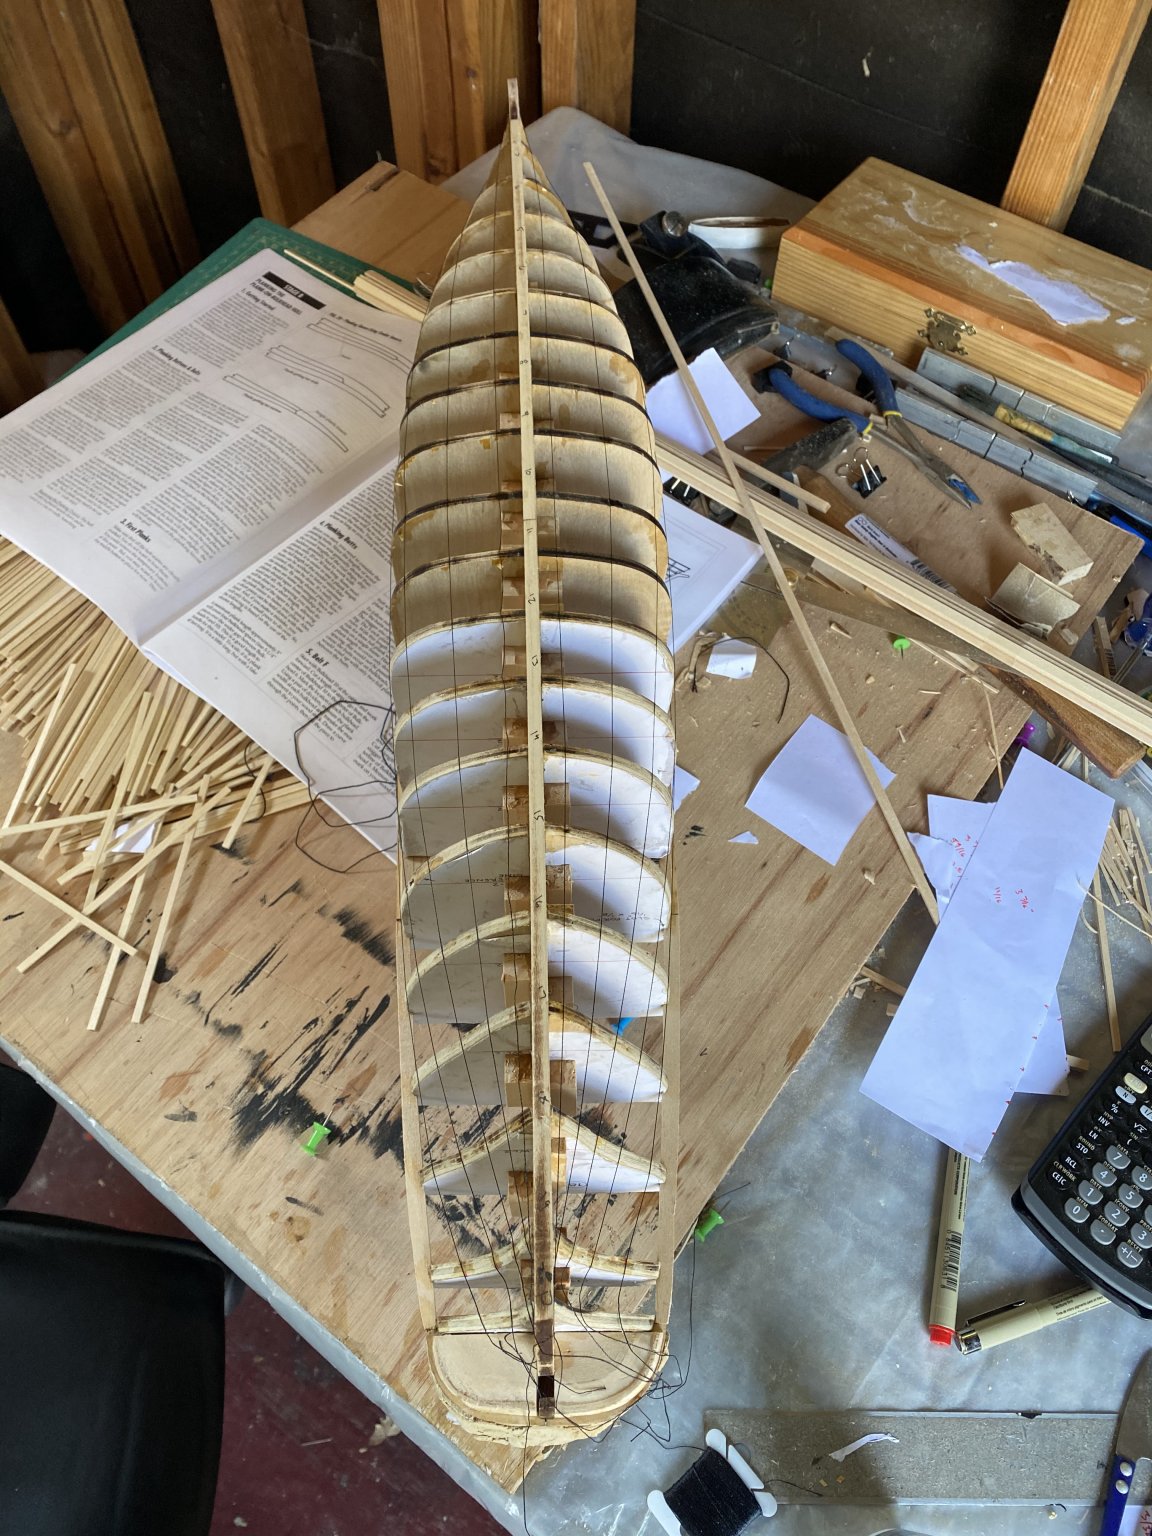
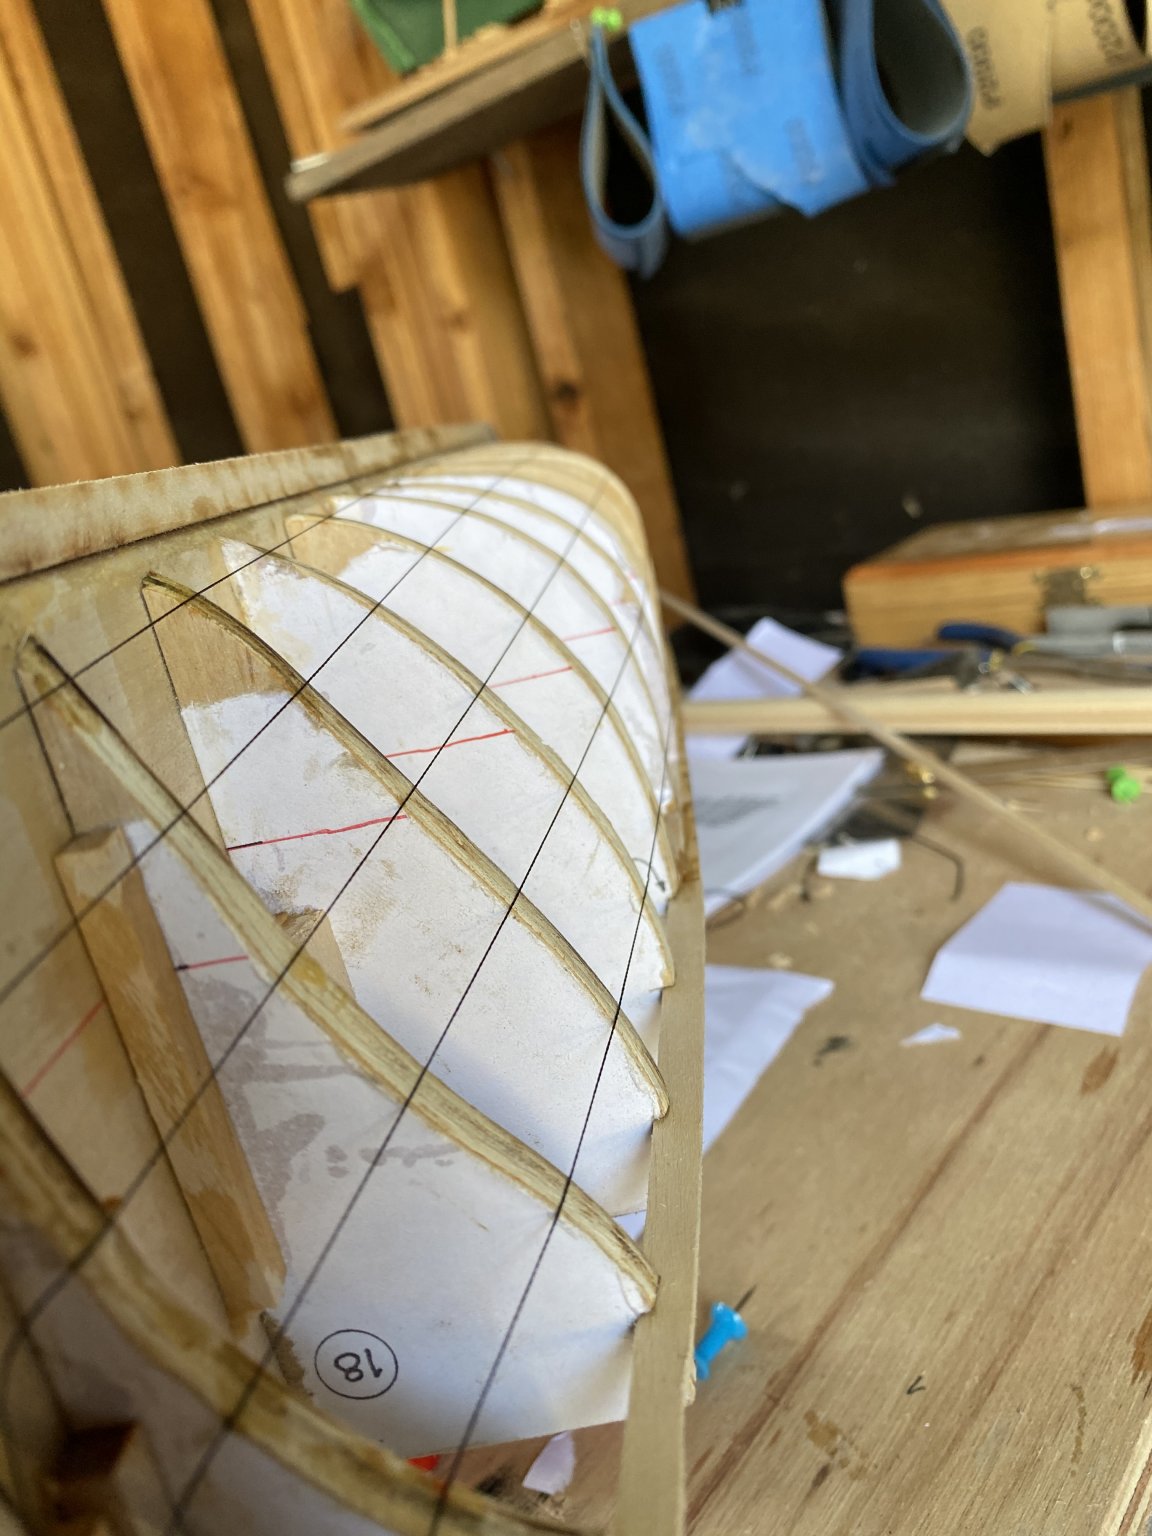
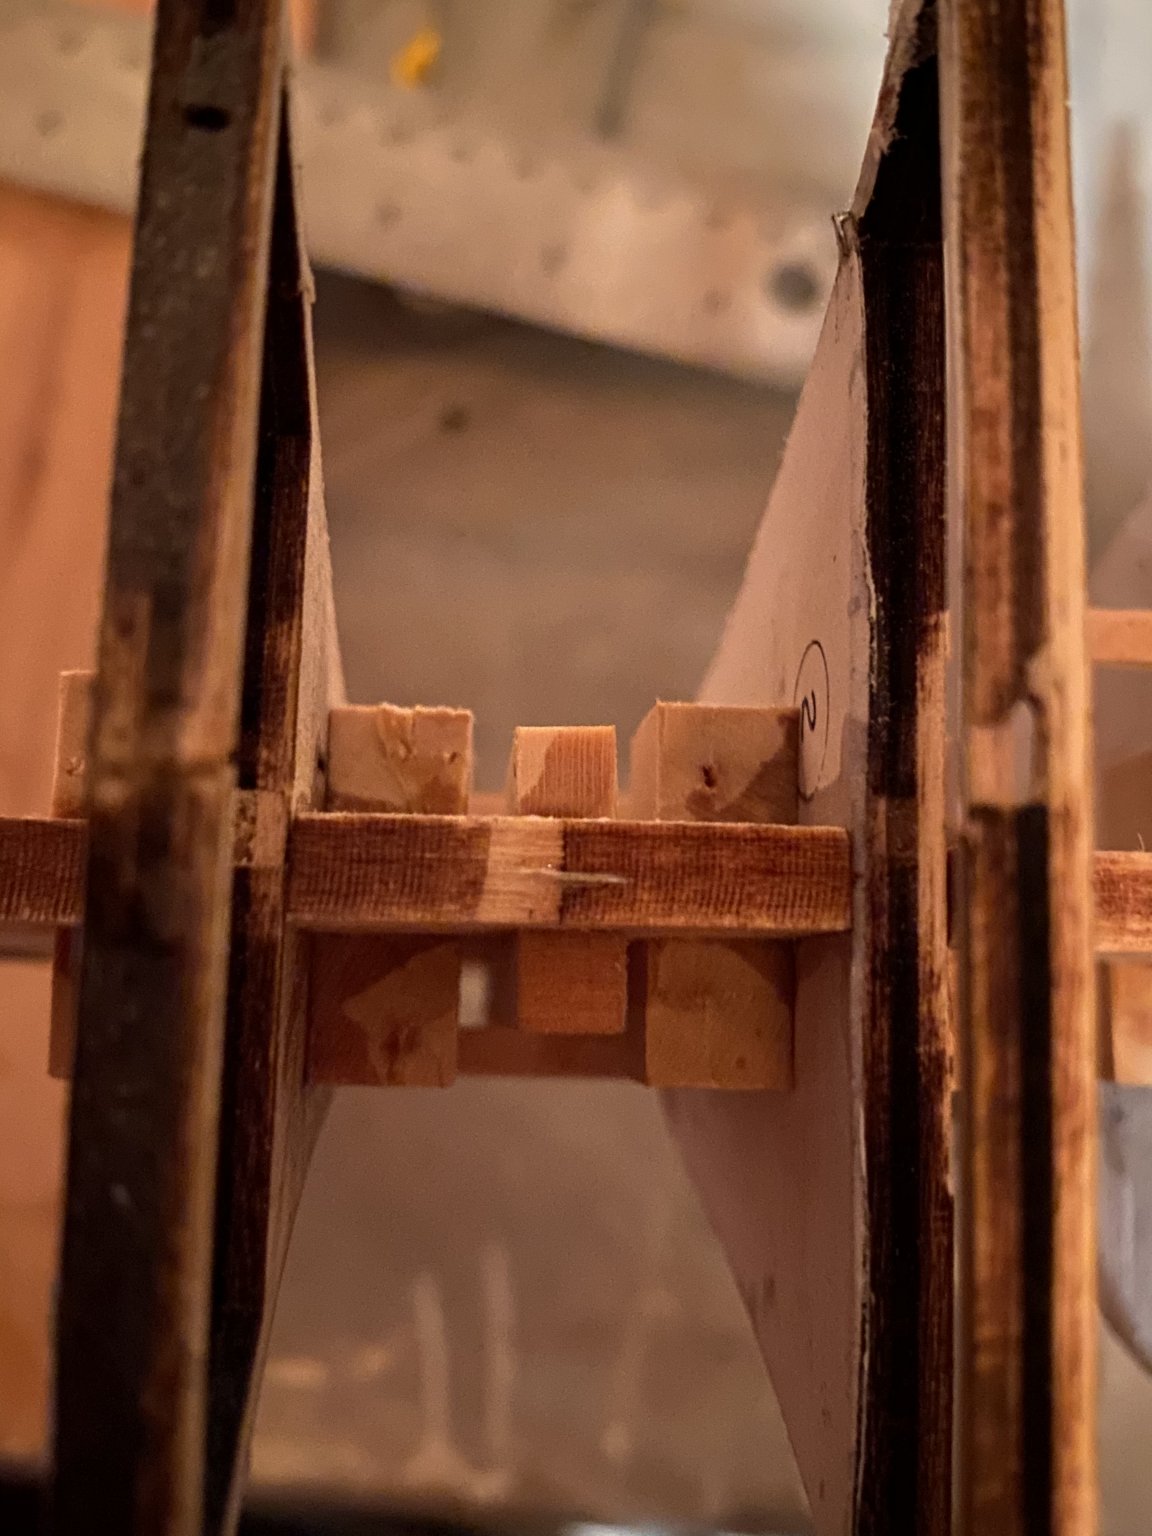
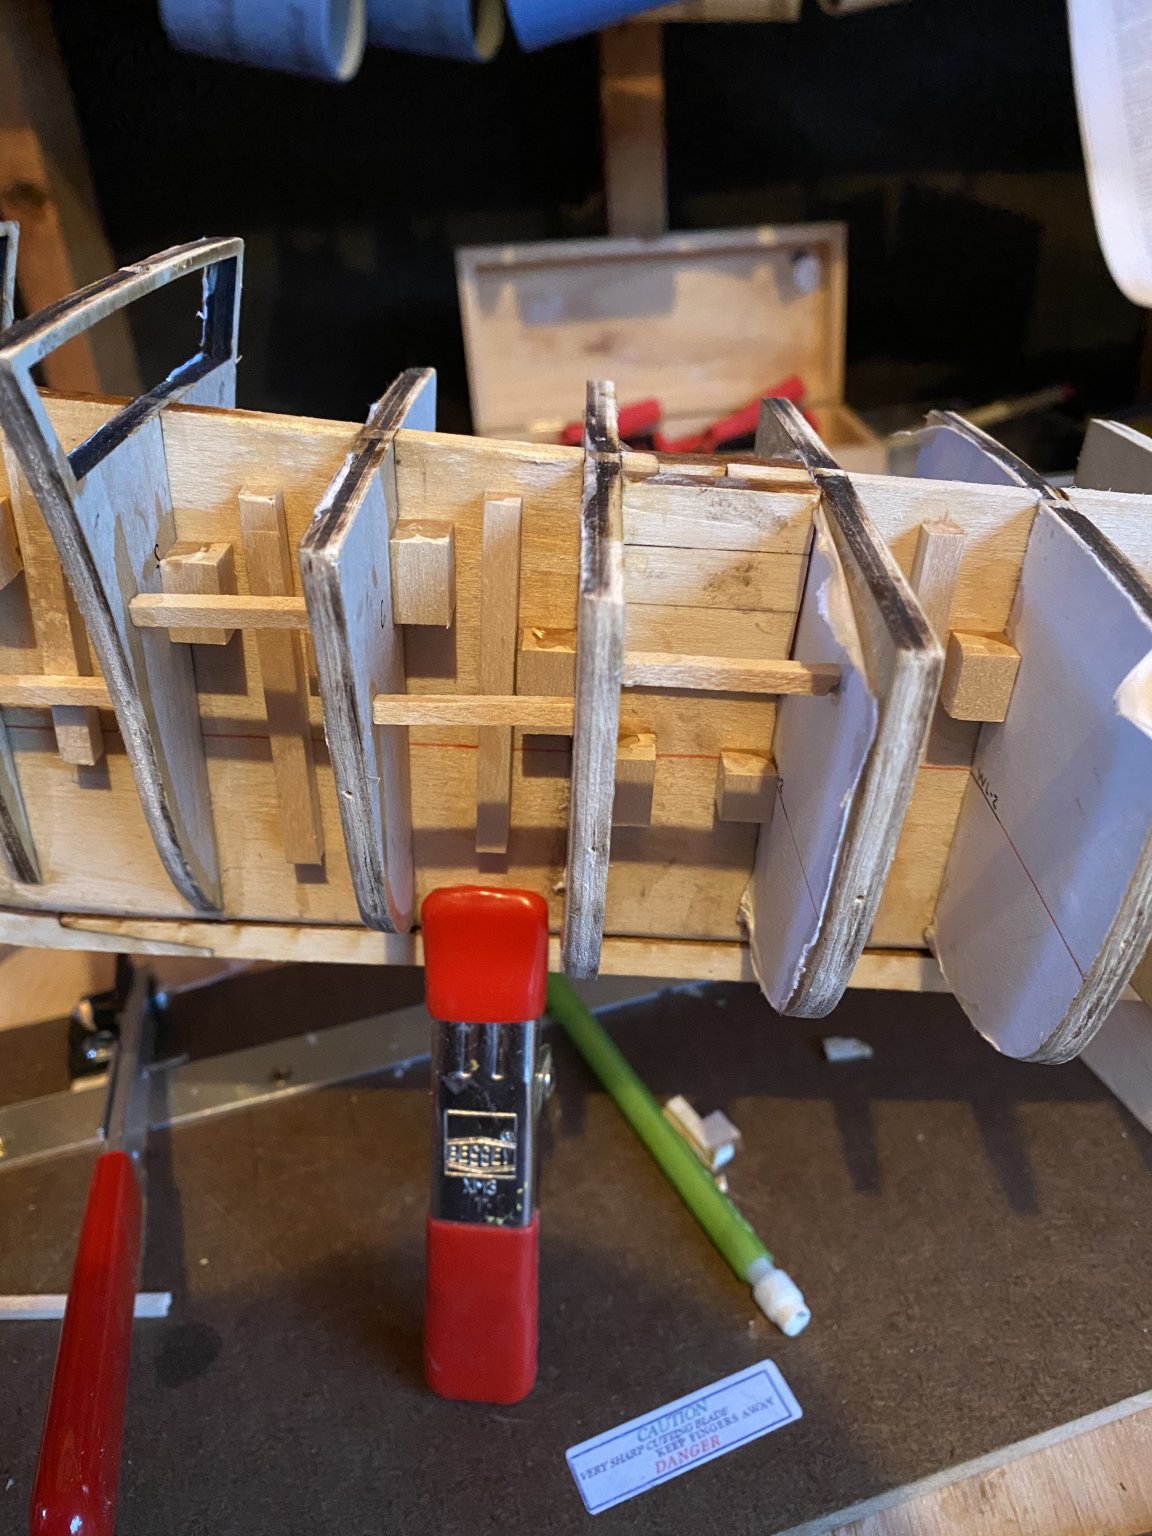
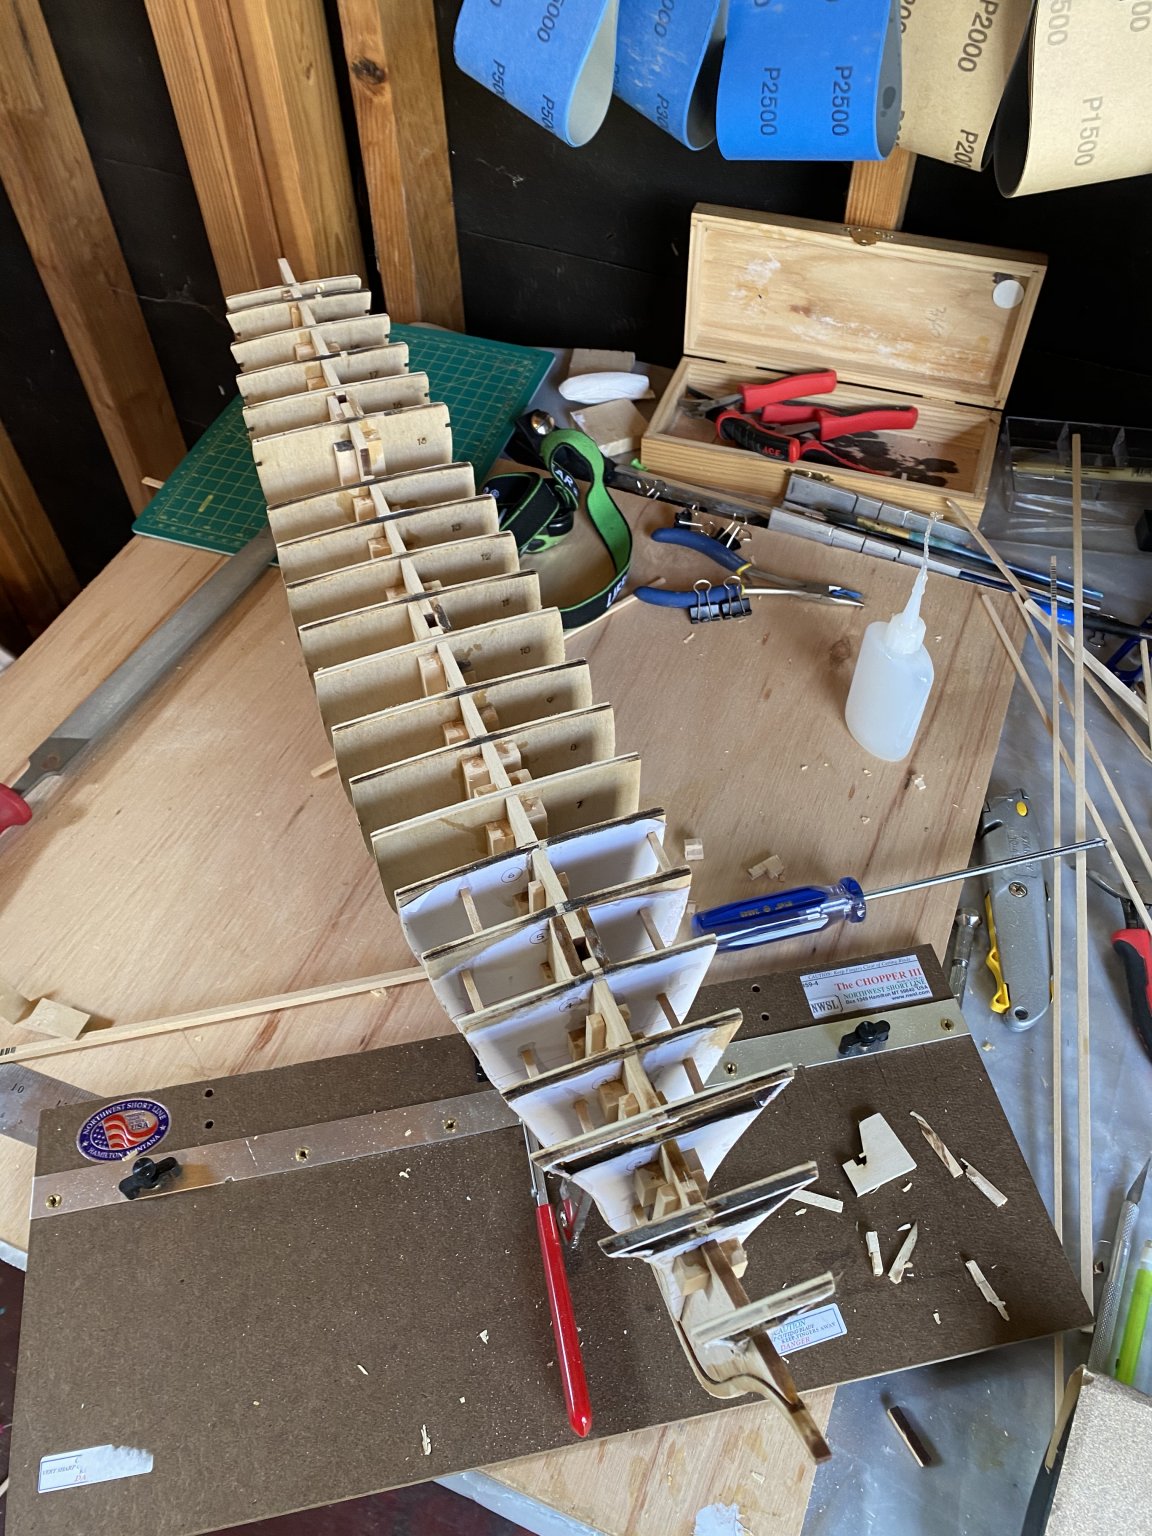
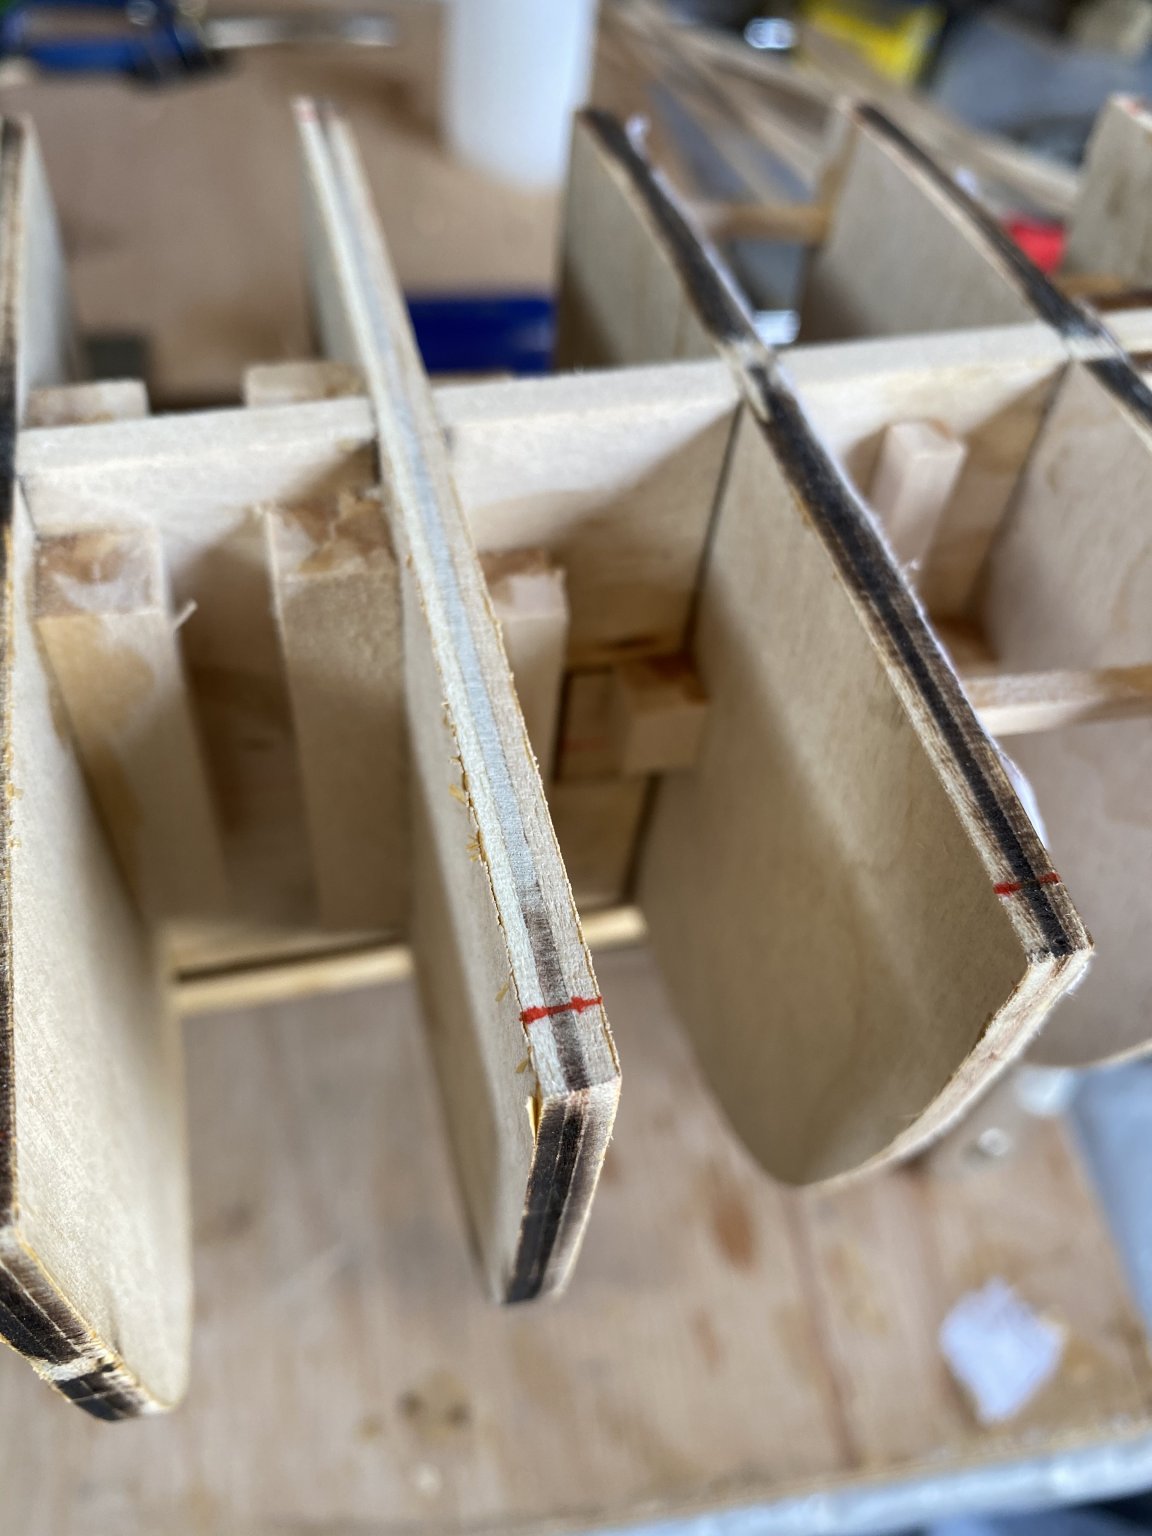
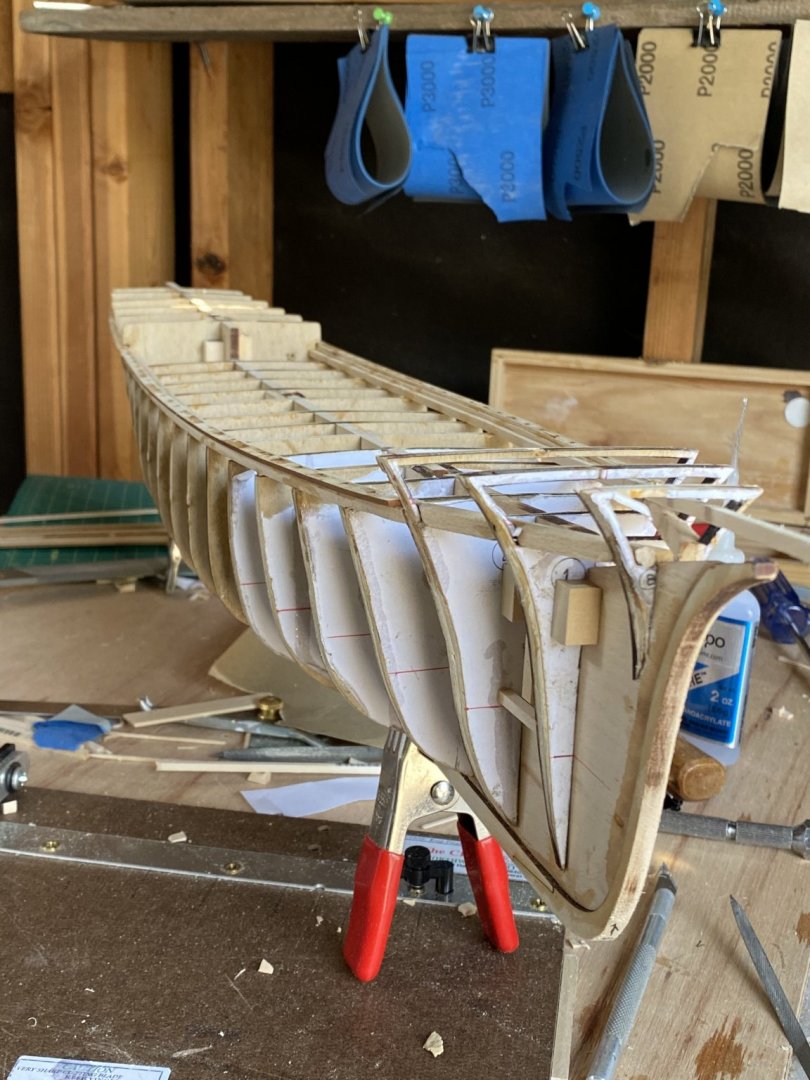
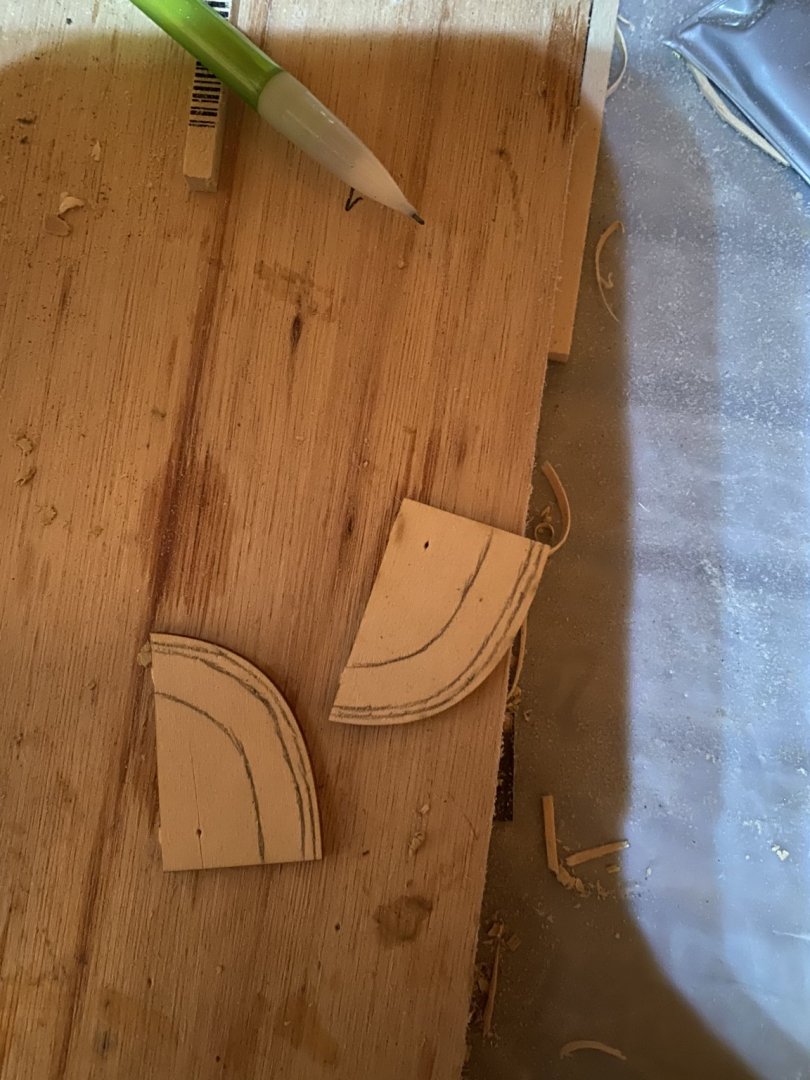
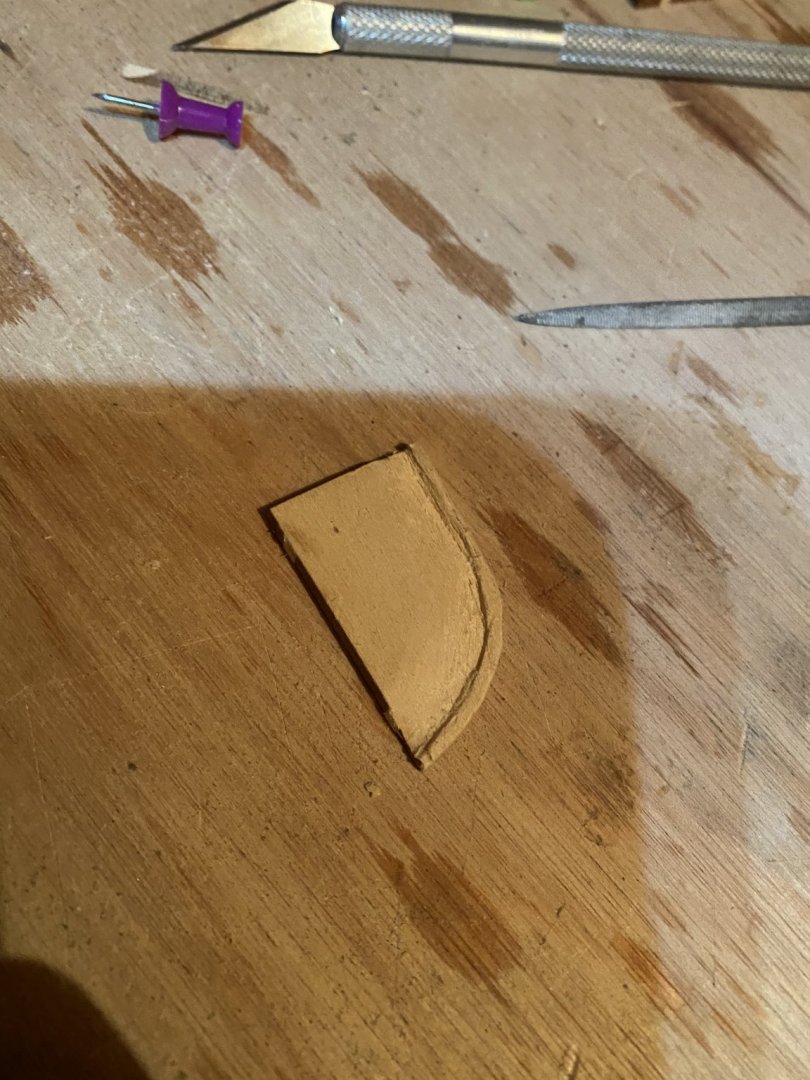
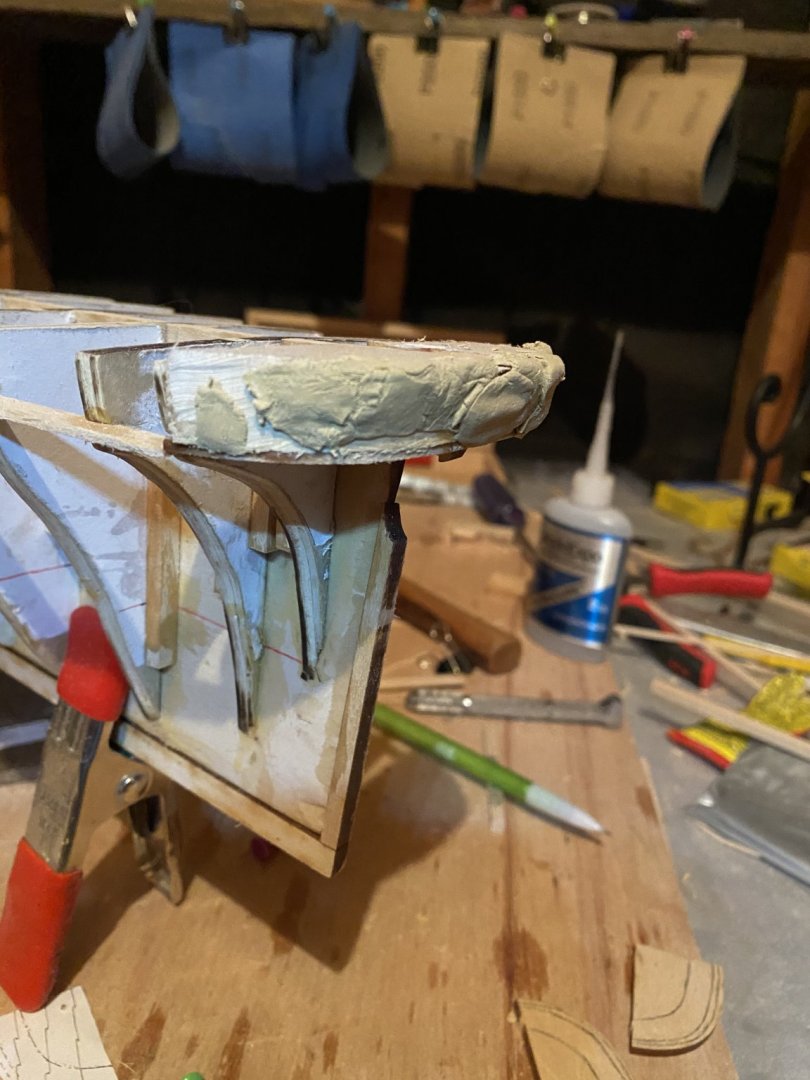
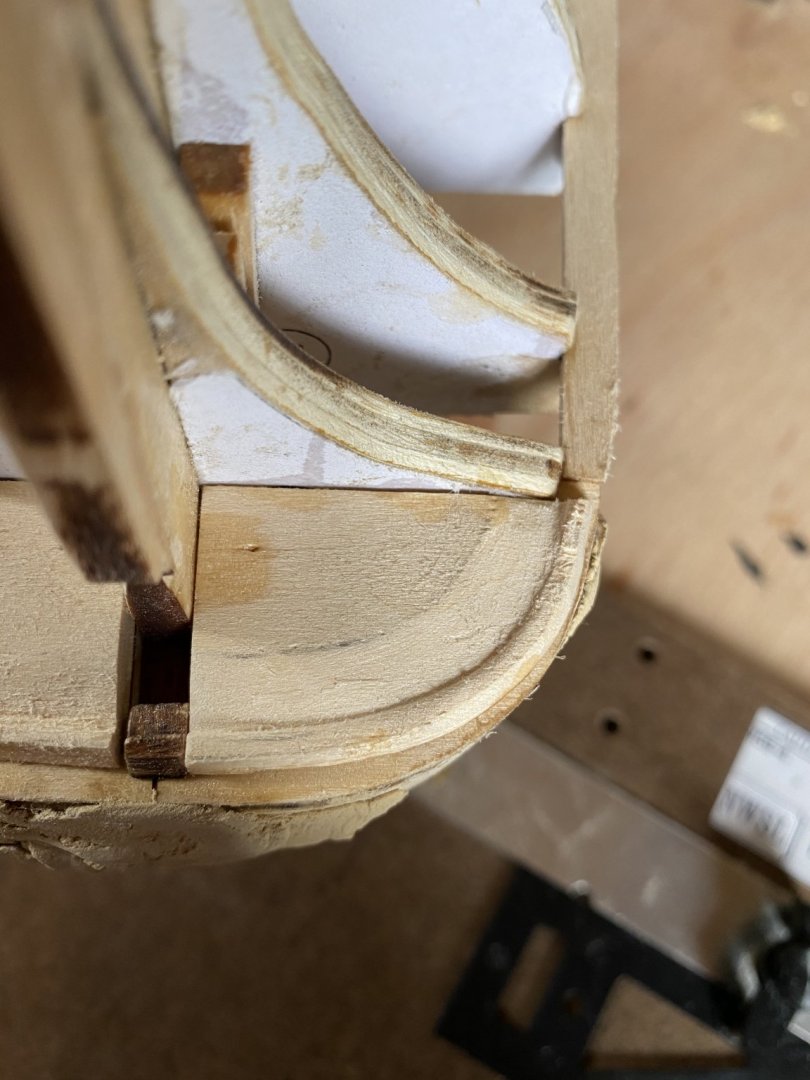
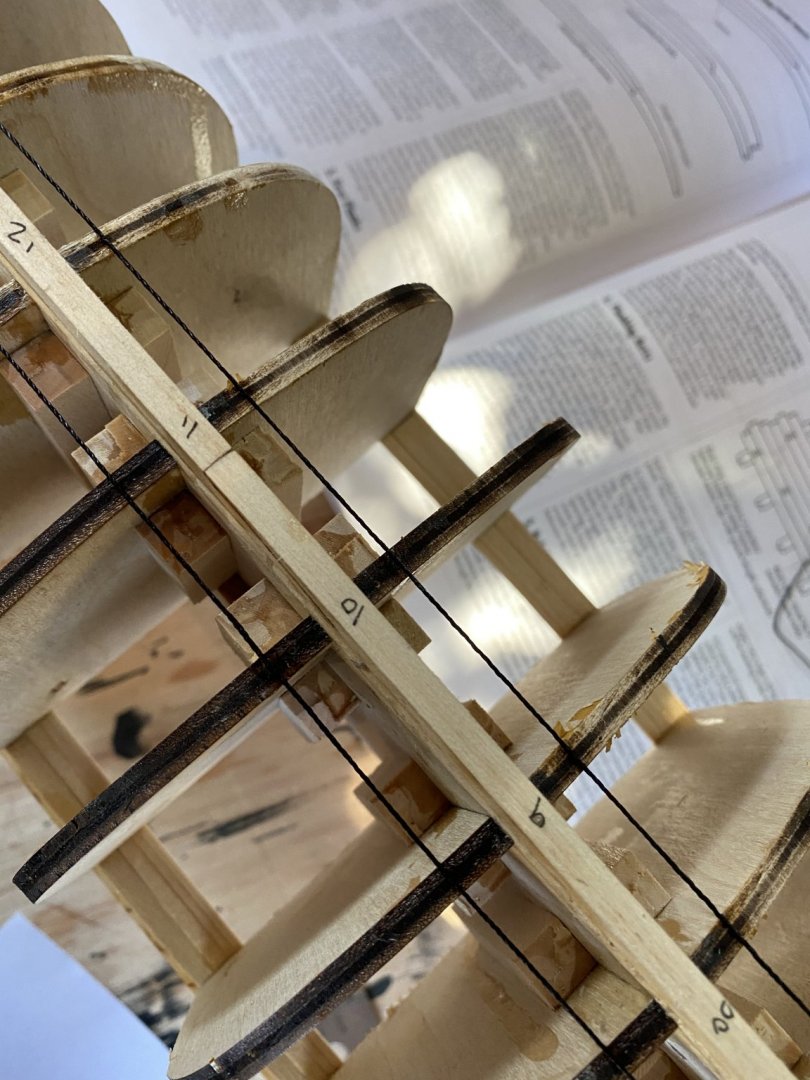
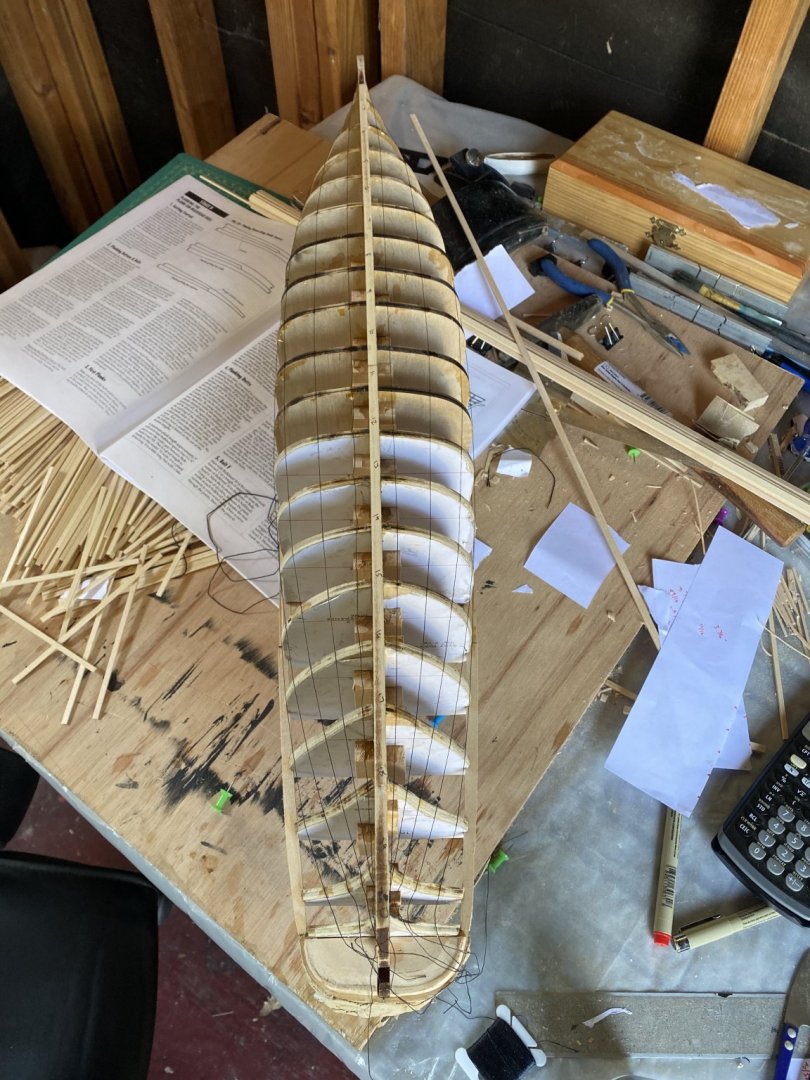
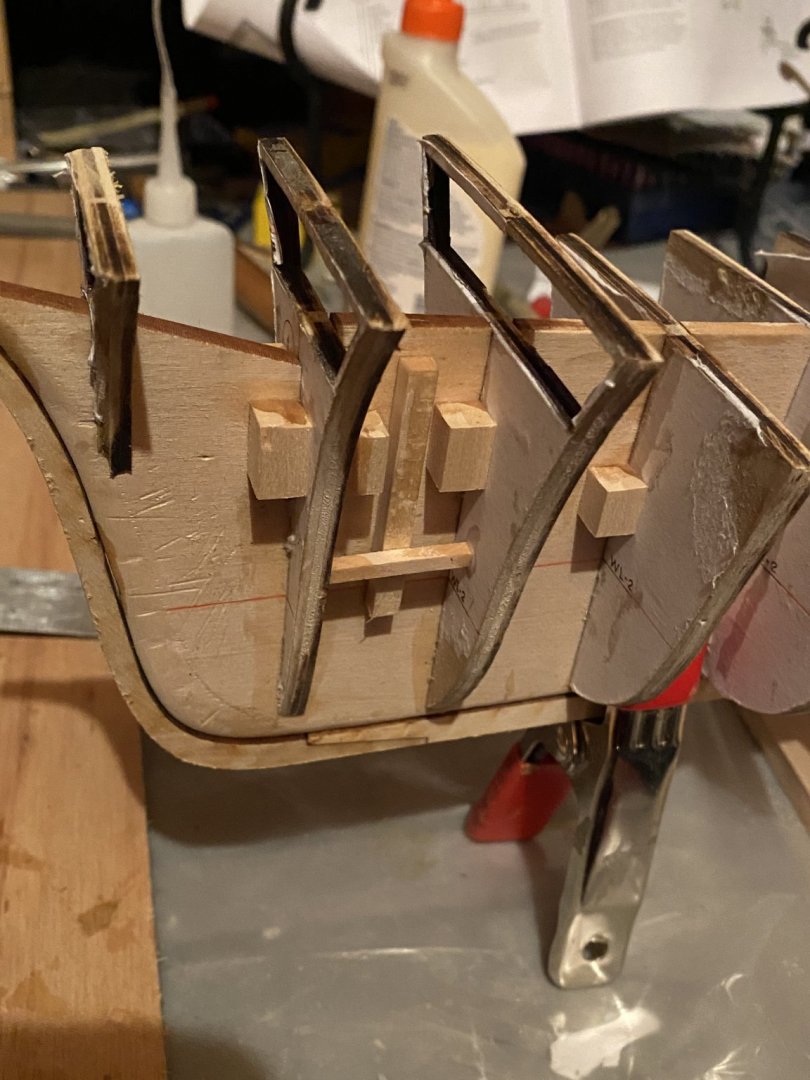
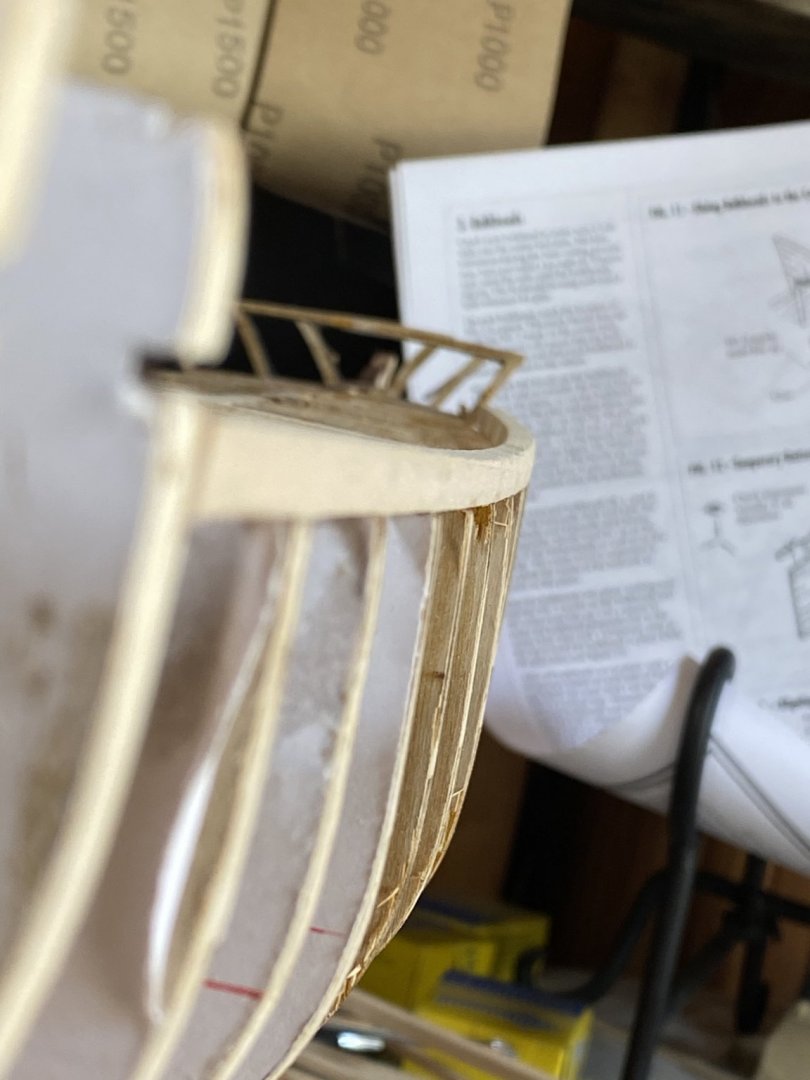
Hey everyone, So, this is where I may lose some, though the ship is supposed to be painted, I’m not going to. I dont have an air brush and have never been great at painting very small things, I started a pride of baltimore 2 build late last year and painted the hull and instantly regretted it, it bothered me for the rest of the build. So instead what I am going to do is put in the extra work so every thing can be sanded and look great without paint, or maybe stain some stuff. I’m not quite sure yet. So this is where i am at, I have put in the waterways and plank sheers and some how corrected a pretty warped false keel. Up to this point I’m happy and I’m really looking forward to planking. I’m not sure why I didn’t get a picture of the carved blocks on top of the plank sheer at the stern before installation but i have one from a little later. This carved blocks gets glued to the underside of the plank sheer and are the points where my planking will come together and end at the stern. I wish i had a better picture of these carved blocks at the stern. I carved these blocks from some bass wood that was provided to me in the kit, I didn’t realize until it was a little late that i cut the angle a little to sharp so i added some wood filler to correct this angle. This is what it those smaller carved pieces look like when glued to the plank sheer. Afterwards i installed the binding strake, the continuous strake, and the nibbling strake, in that order. From experience, I think it would be best if i install the timber heads after planking, i have noticed that when I install the timber heads before planking they break off due to moving it as often as i do when planking. Because of this I focused my attention on the hull of the ship, starting with laying out the different belts. The lower most belt, belt F is the garboard and need to be hand carved from wider planks than the rest of the hull, was the most important because the keel is the only reliable straight line of my hull. After i had belt F laid out i could get started on the rest, this took awhile due to there being 20 bulk heads. I took a small strip of paper and held one side down at the keel and marked where the plank sheer was. Belts A through E have 7 planks each and taper evenly throughout. I did the quick math and determined the width of each plank at every bulk head, and the width of each belt at every bulk head which will be important in a bit. With these measurements written on my piece of paper i then transferred that information directly to my plank head and now have a guide to every plank that i will lay down. I took some rigging line from a previous build and laid a strand down at the location of the belts, I’m pretty sure these would be called battens. Once i had all my battens down on both the port and starboard sides, i did a visual inspection to make sure both sides line up. Ill continue to post my progress as i get more into planking. Bradley


-
Thanks Bob, Yes! The ship is still in production, I hadn’t seen it on their website either for a really long time, just a few weeks ago they had a sale and this ship ended up being about 50 percent off. I think MSRP was 450 and I got it for 215. It should still be on their website though. Bradley
-
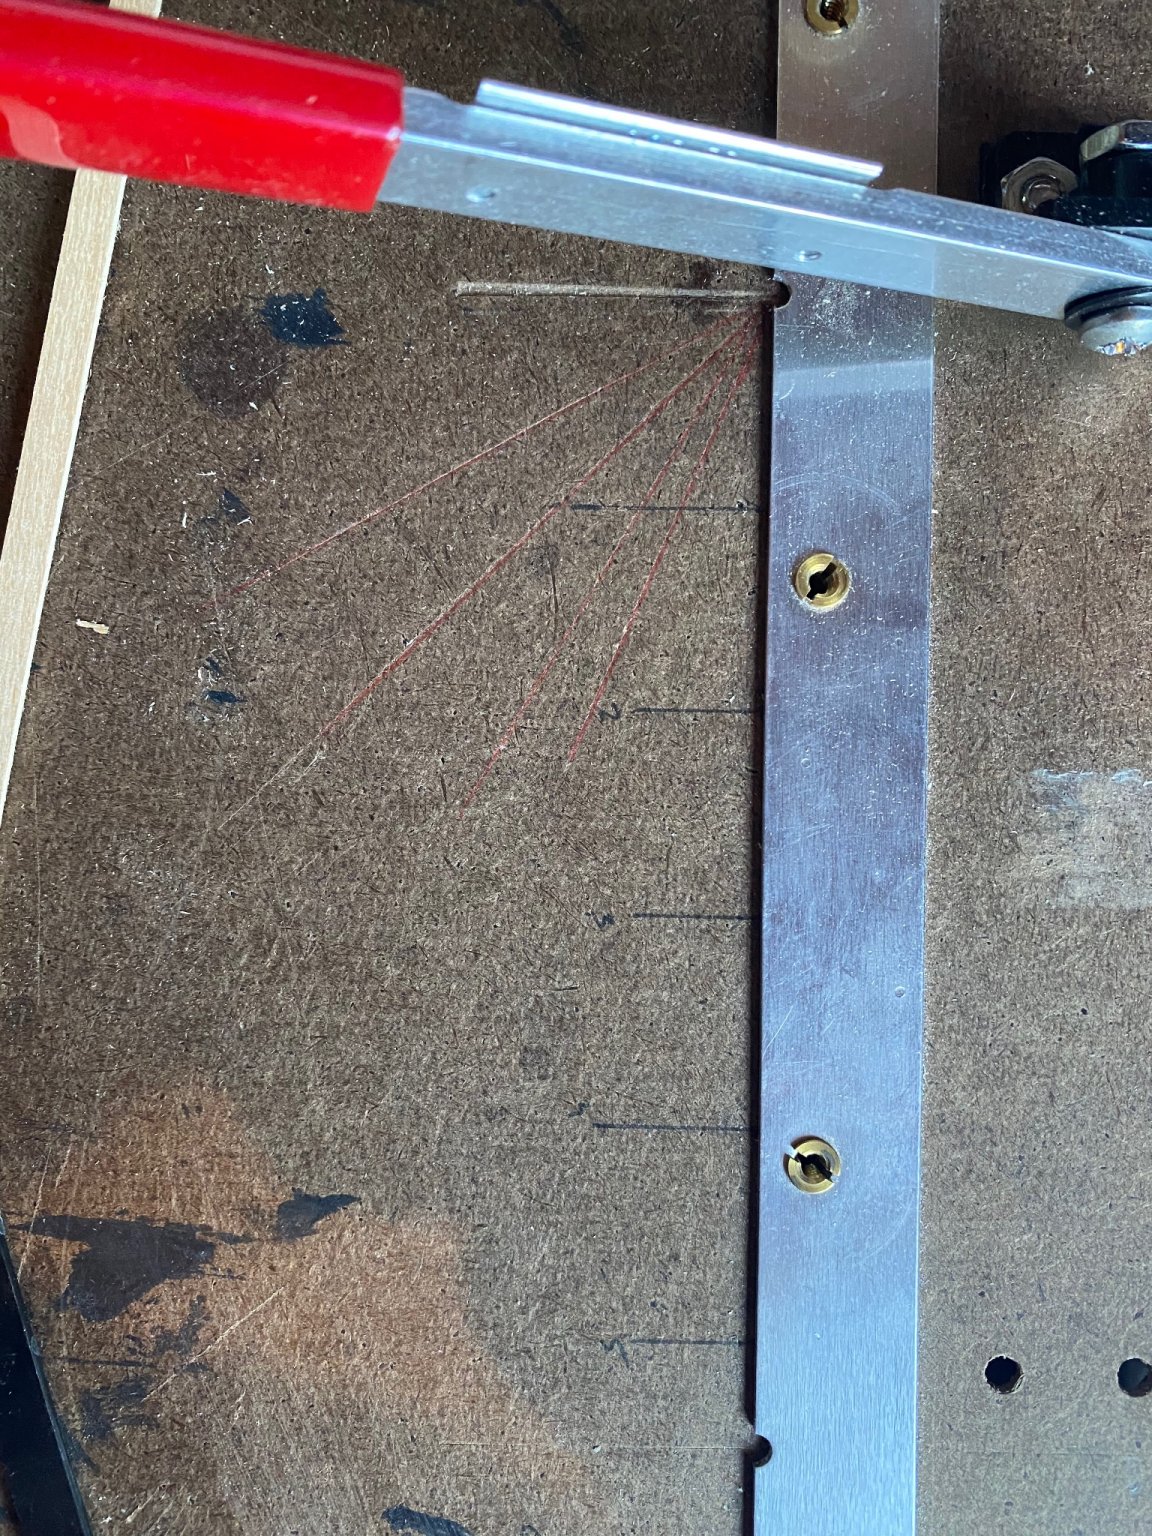
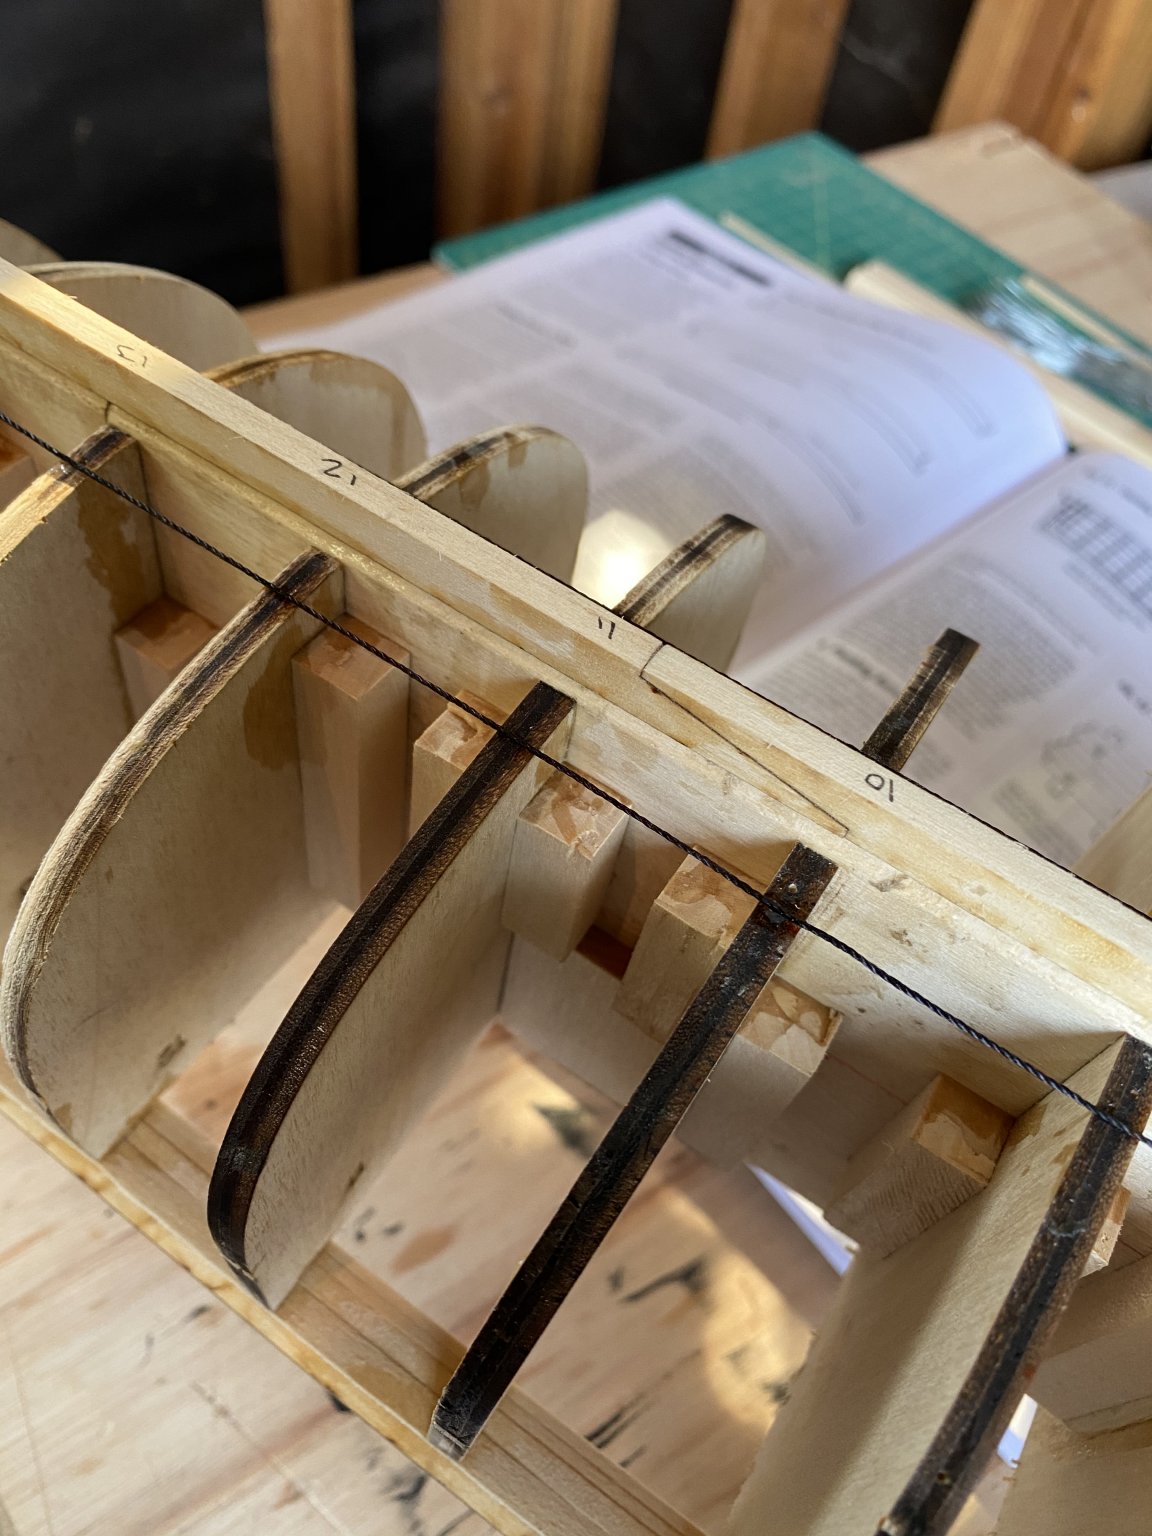
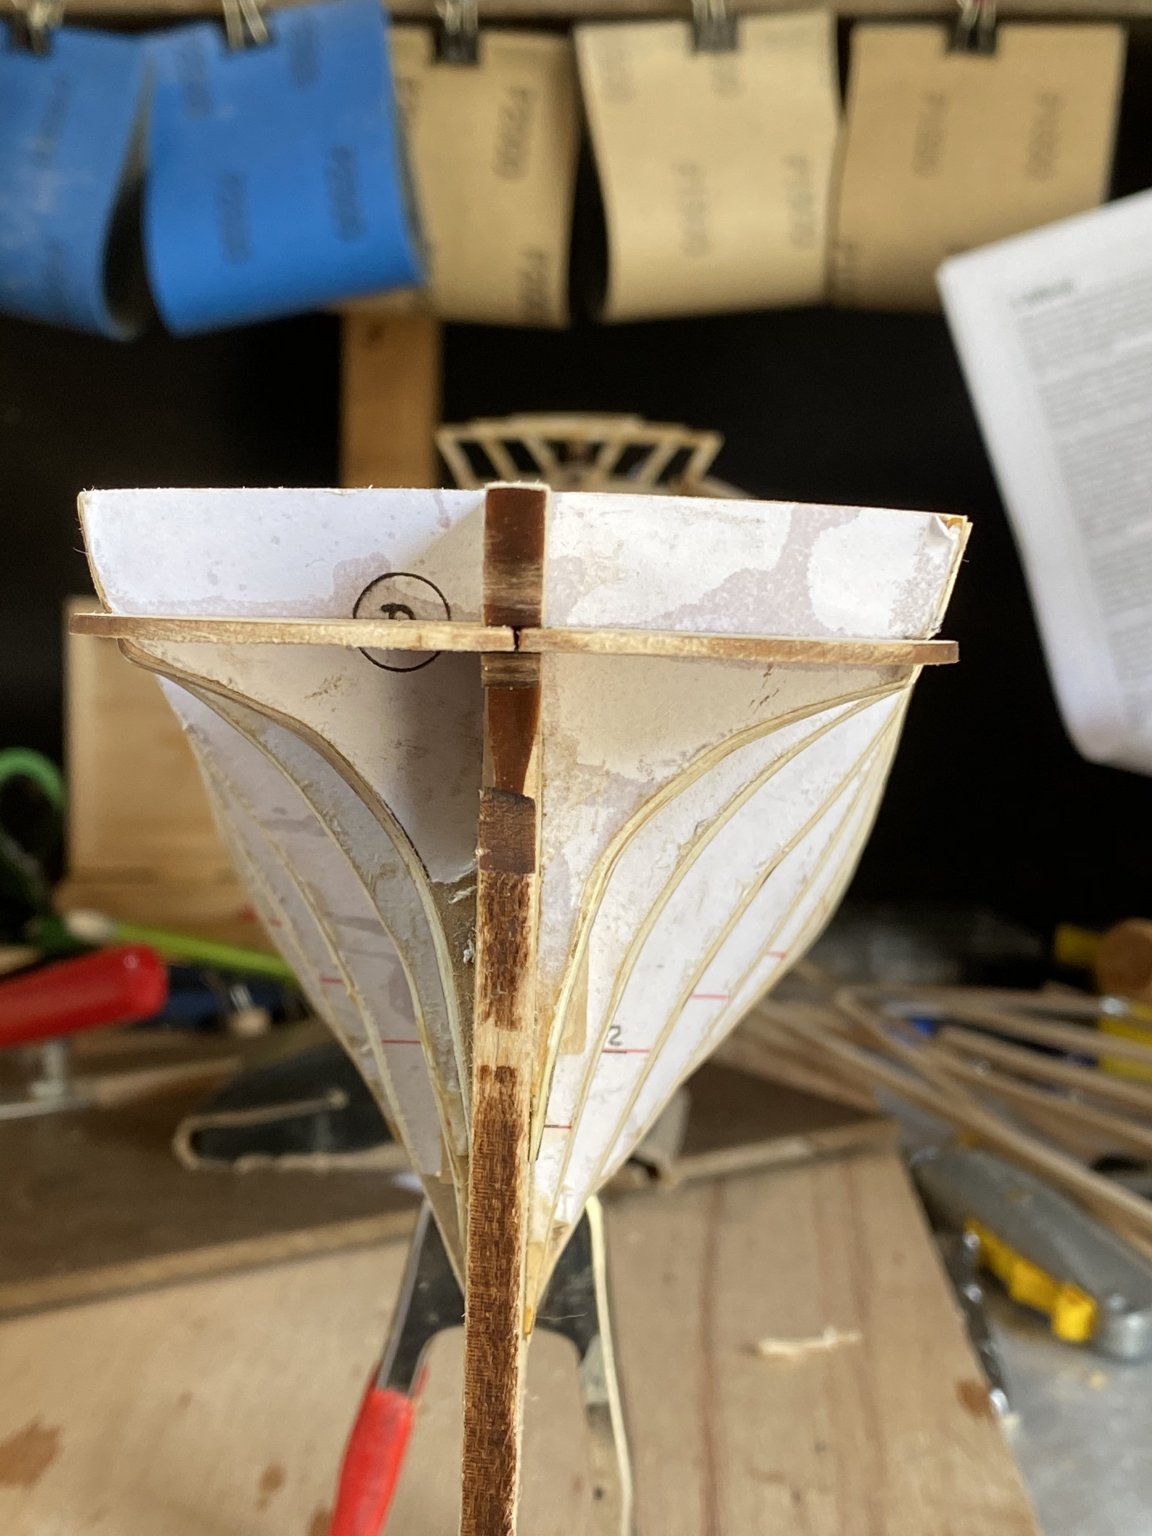
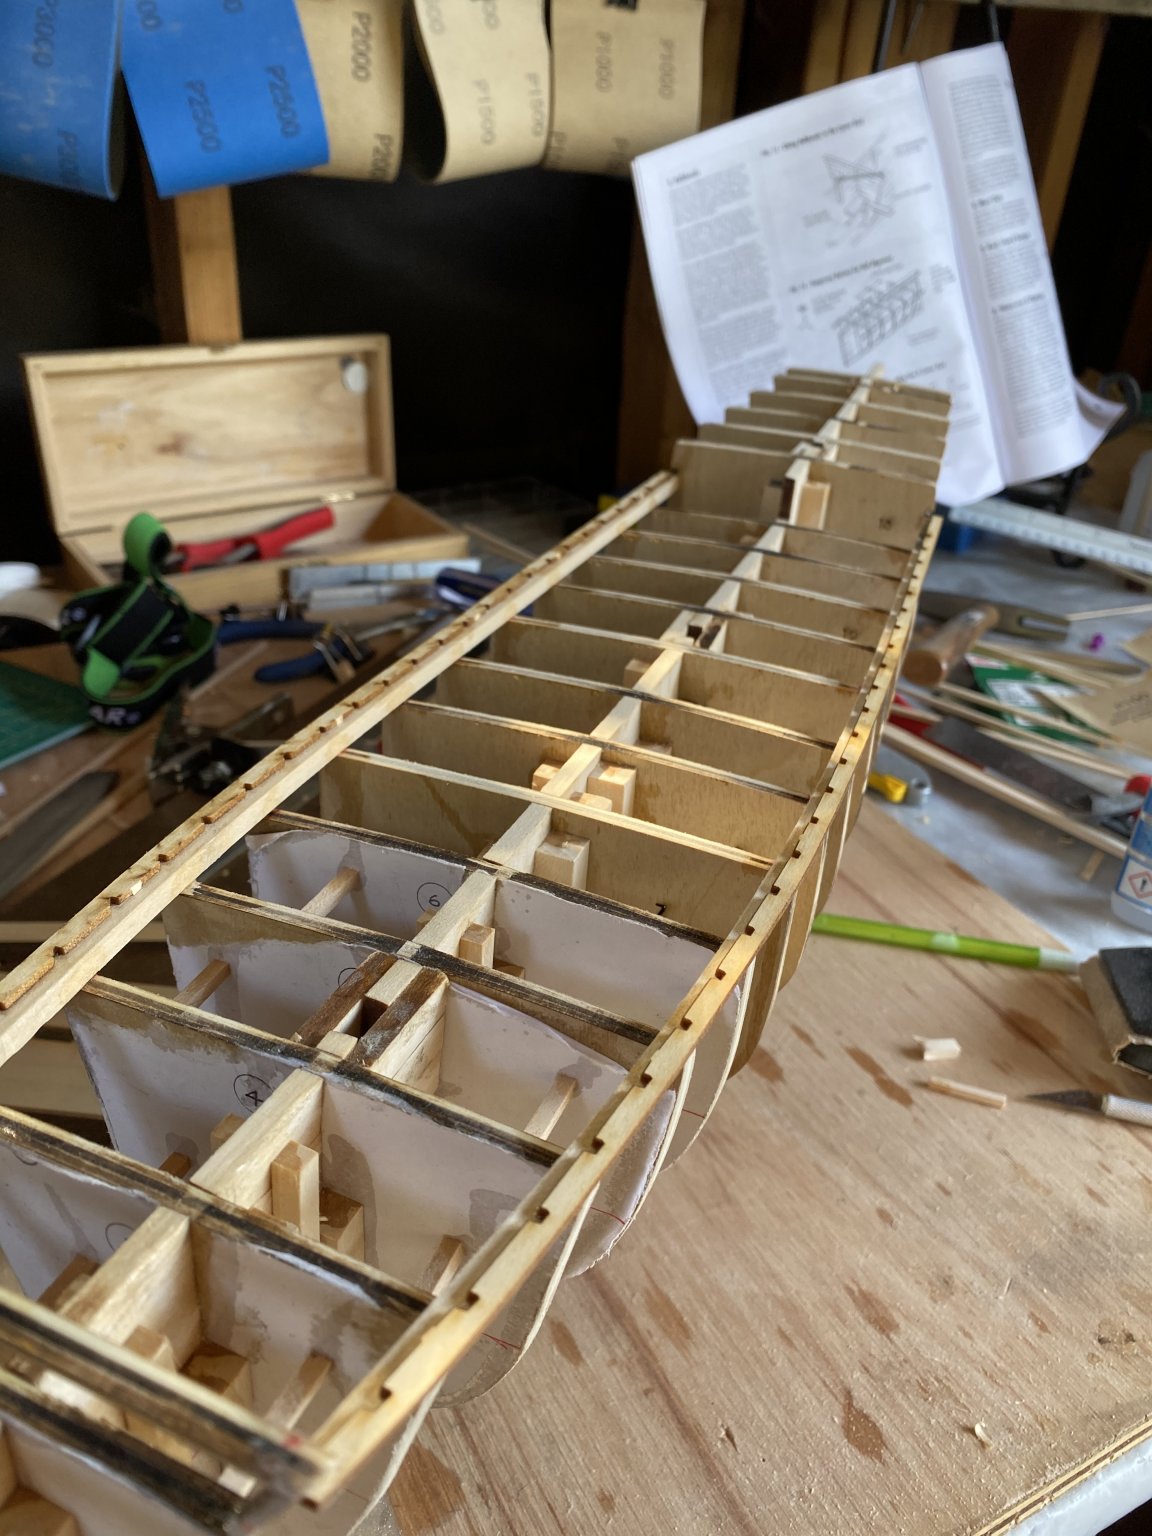
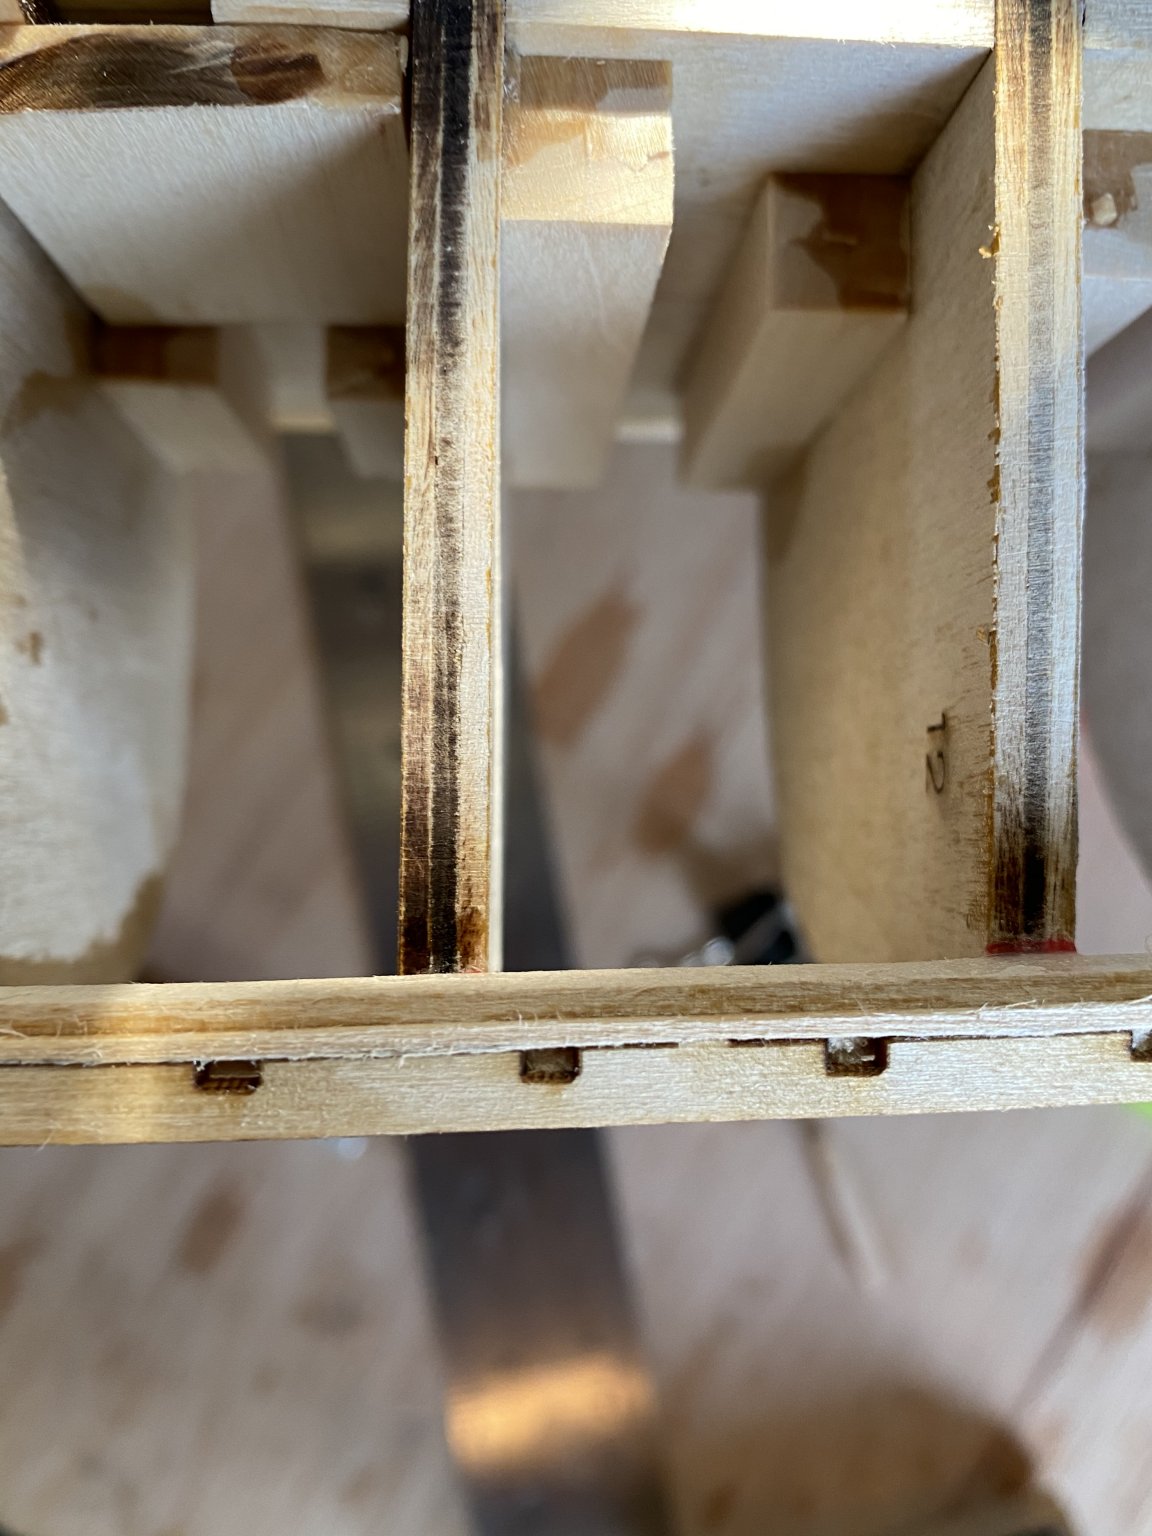
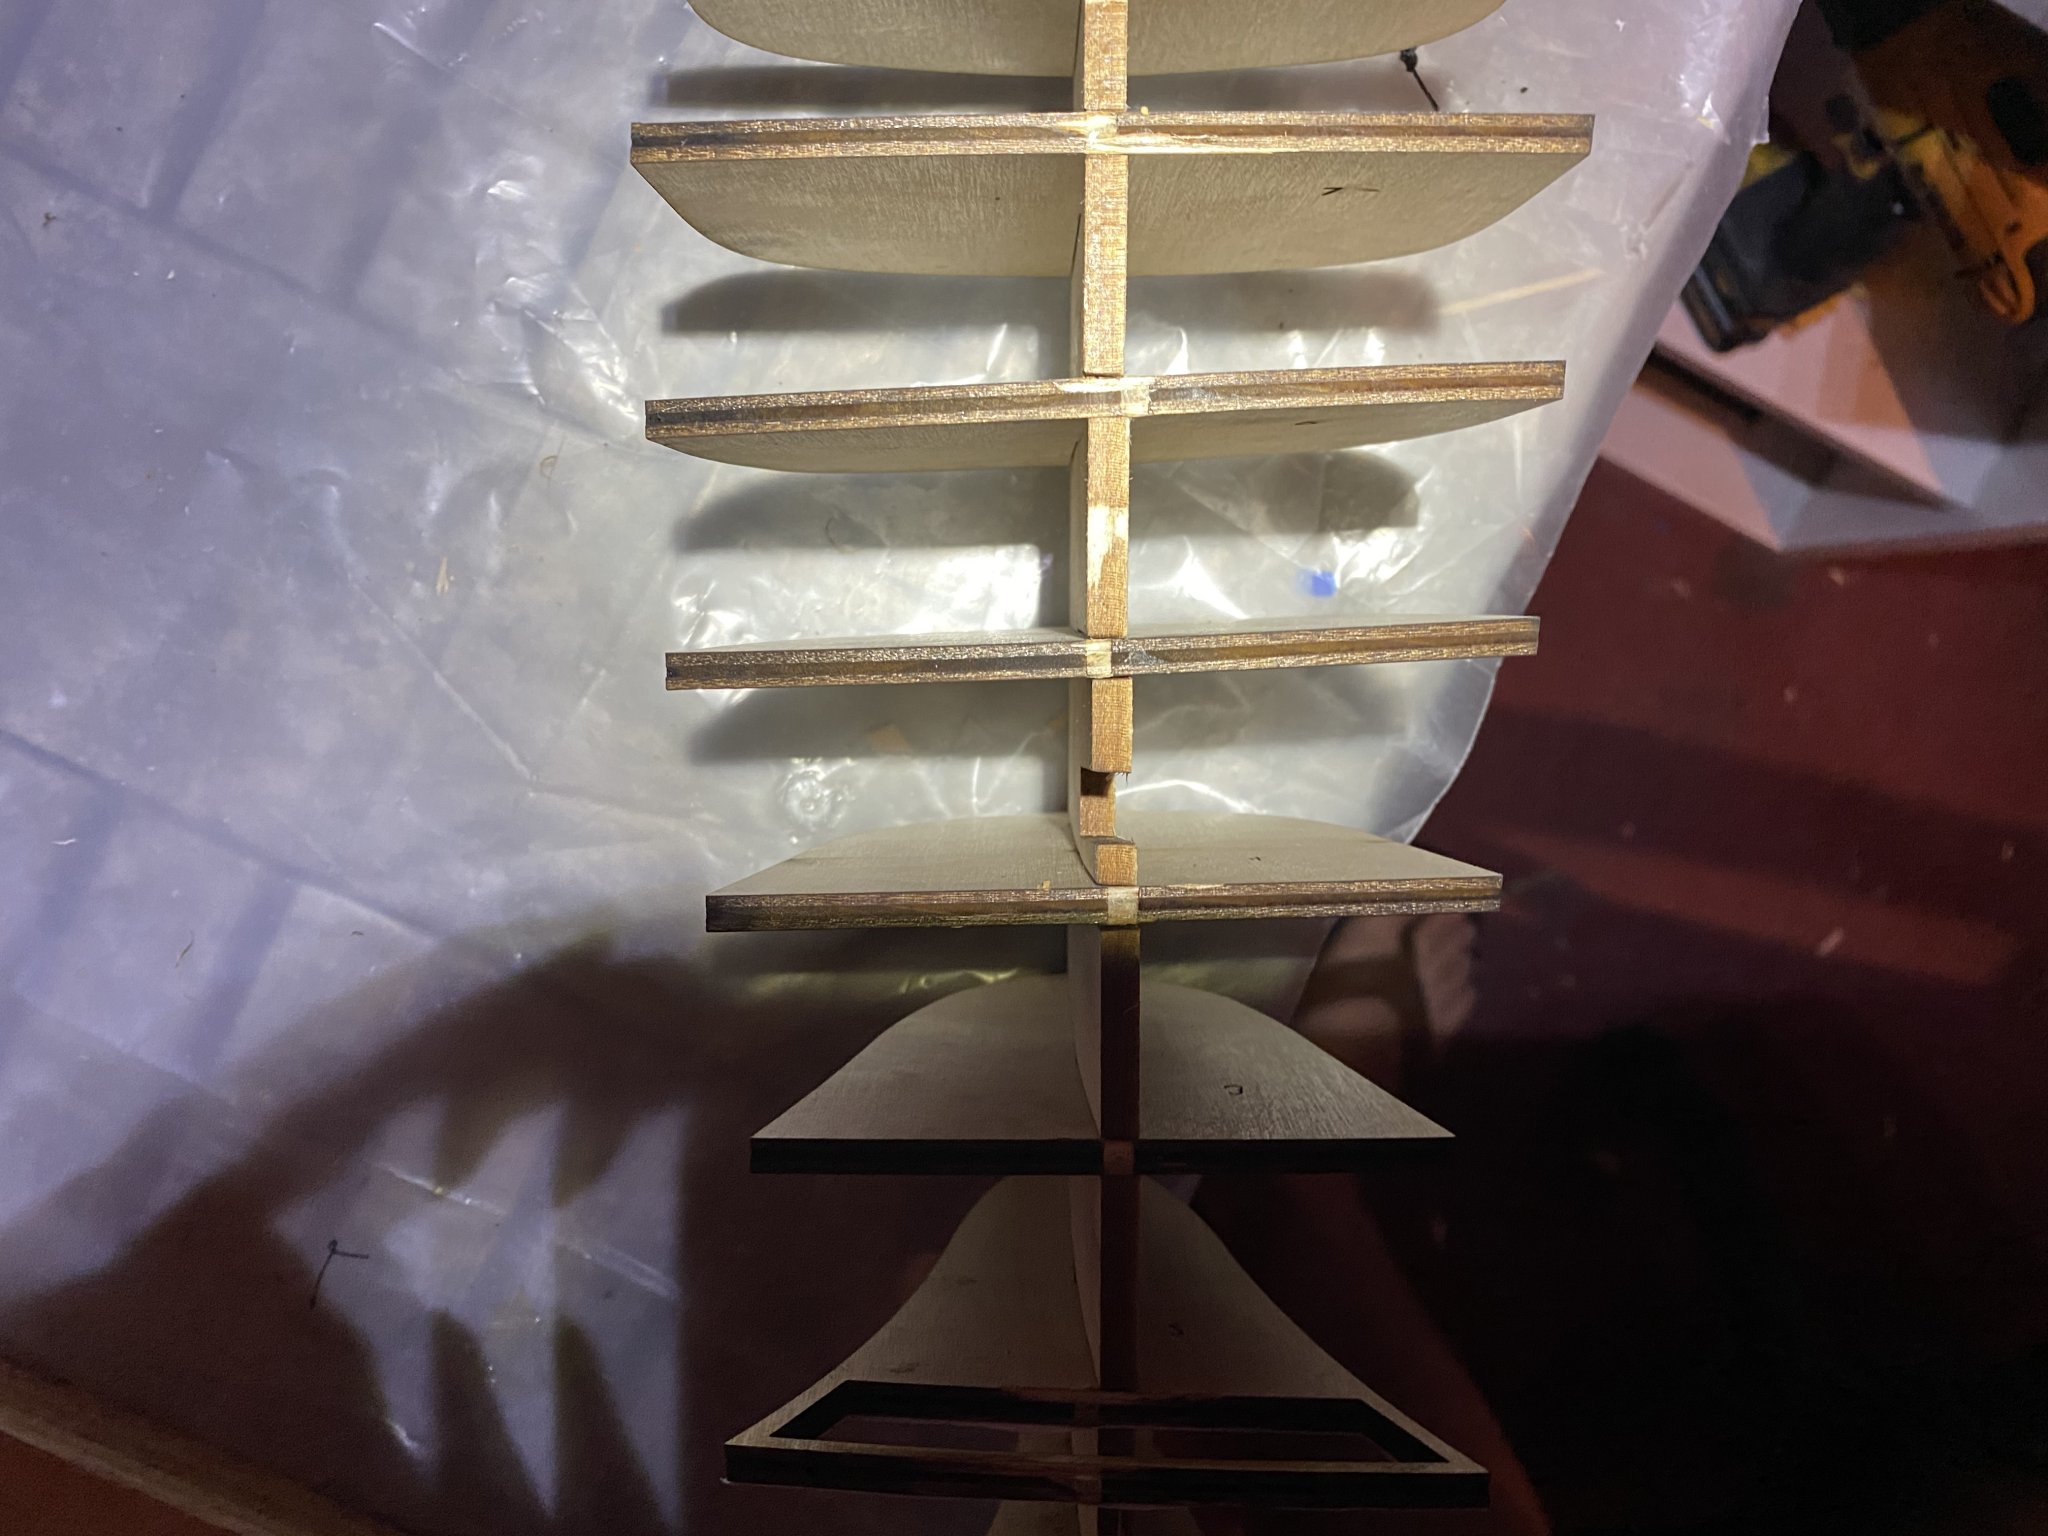
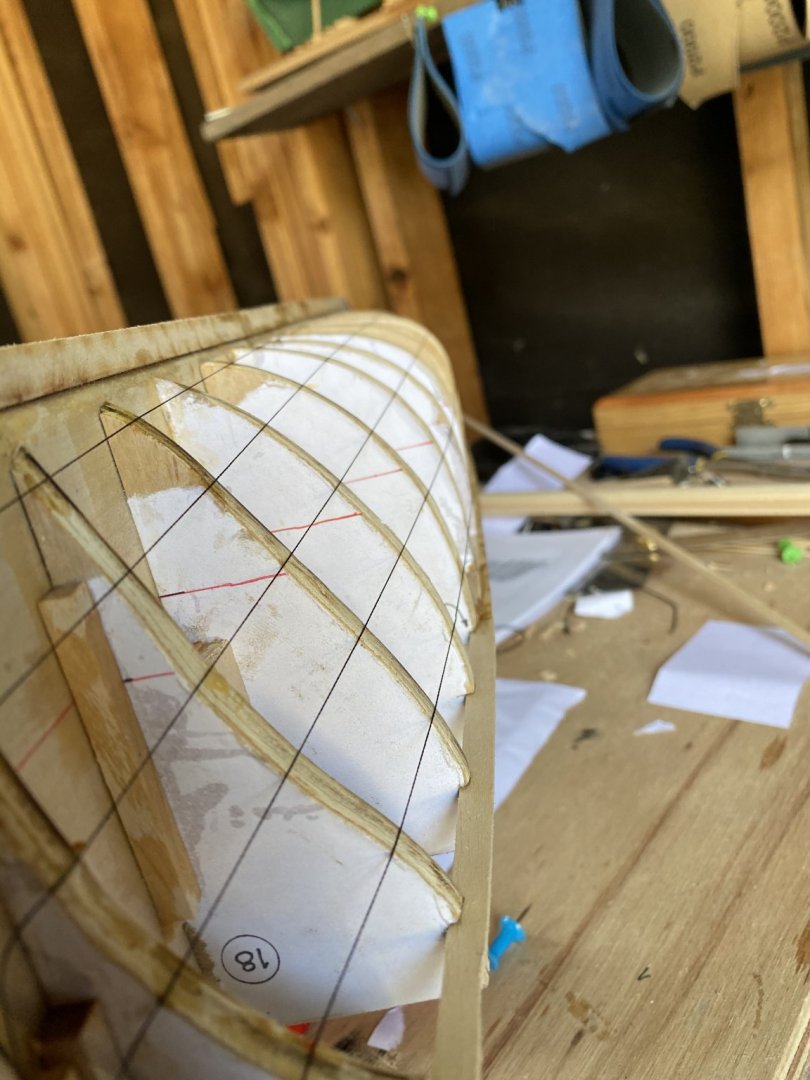
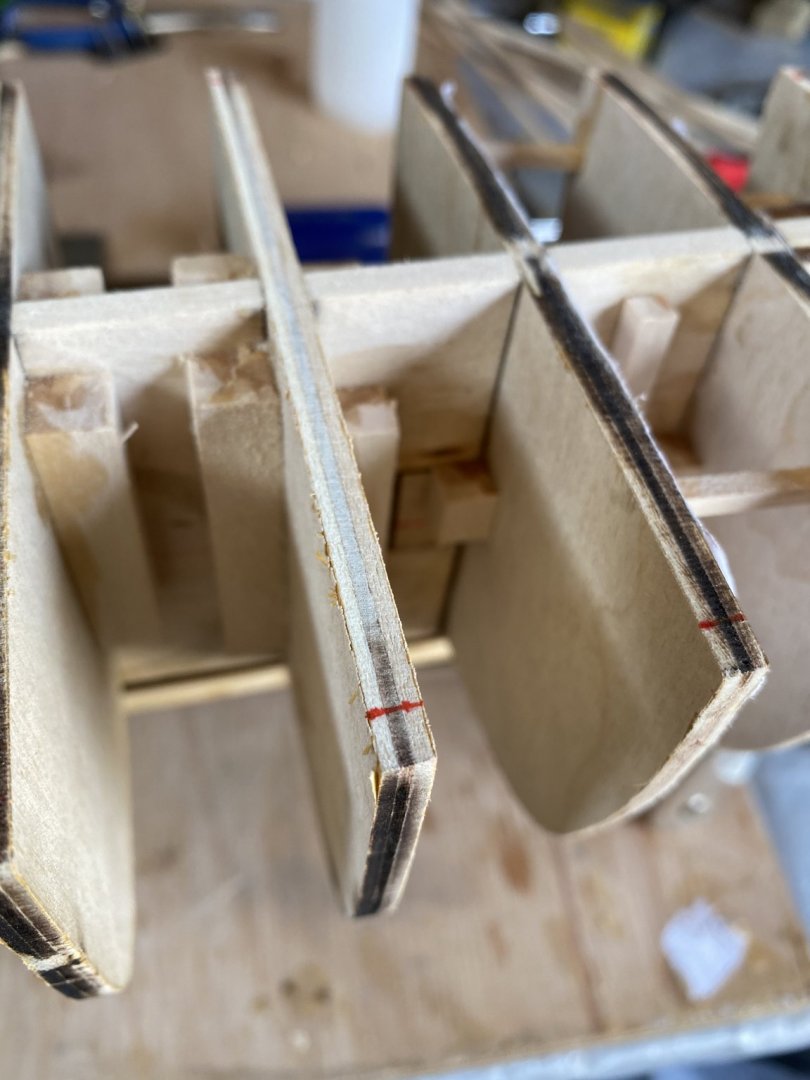
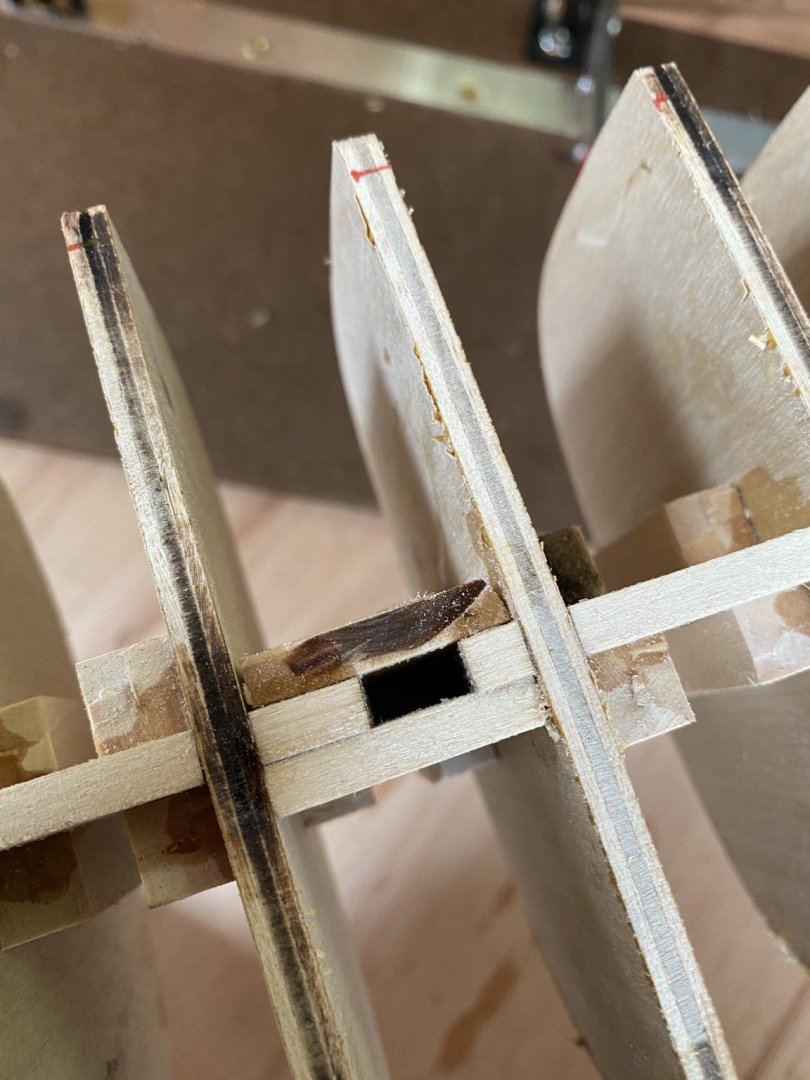
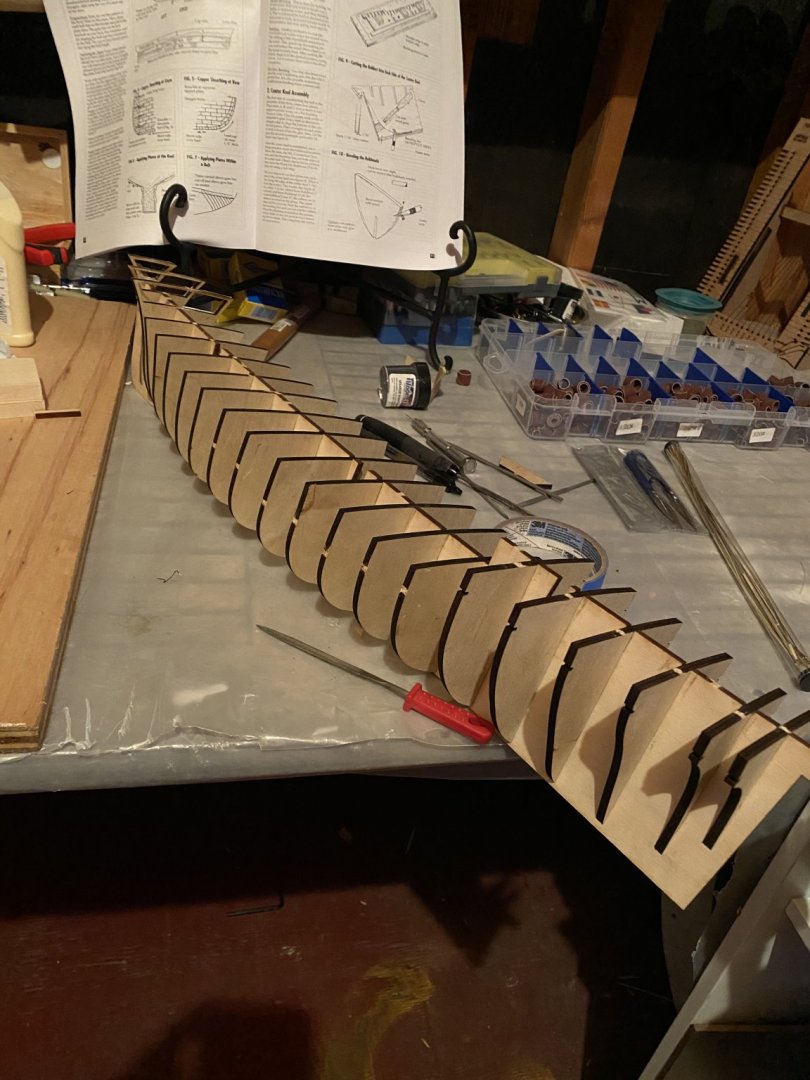
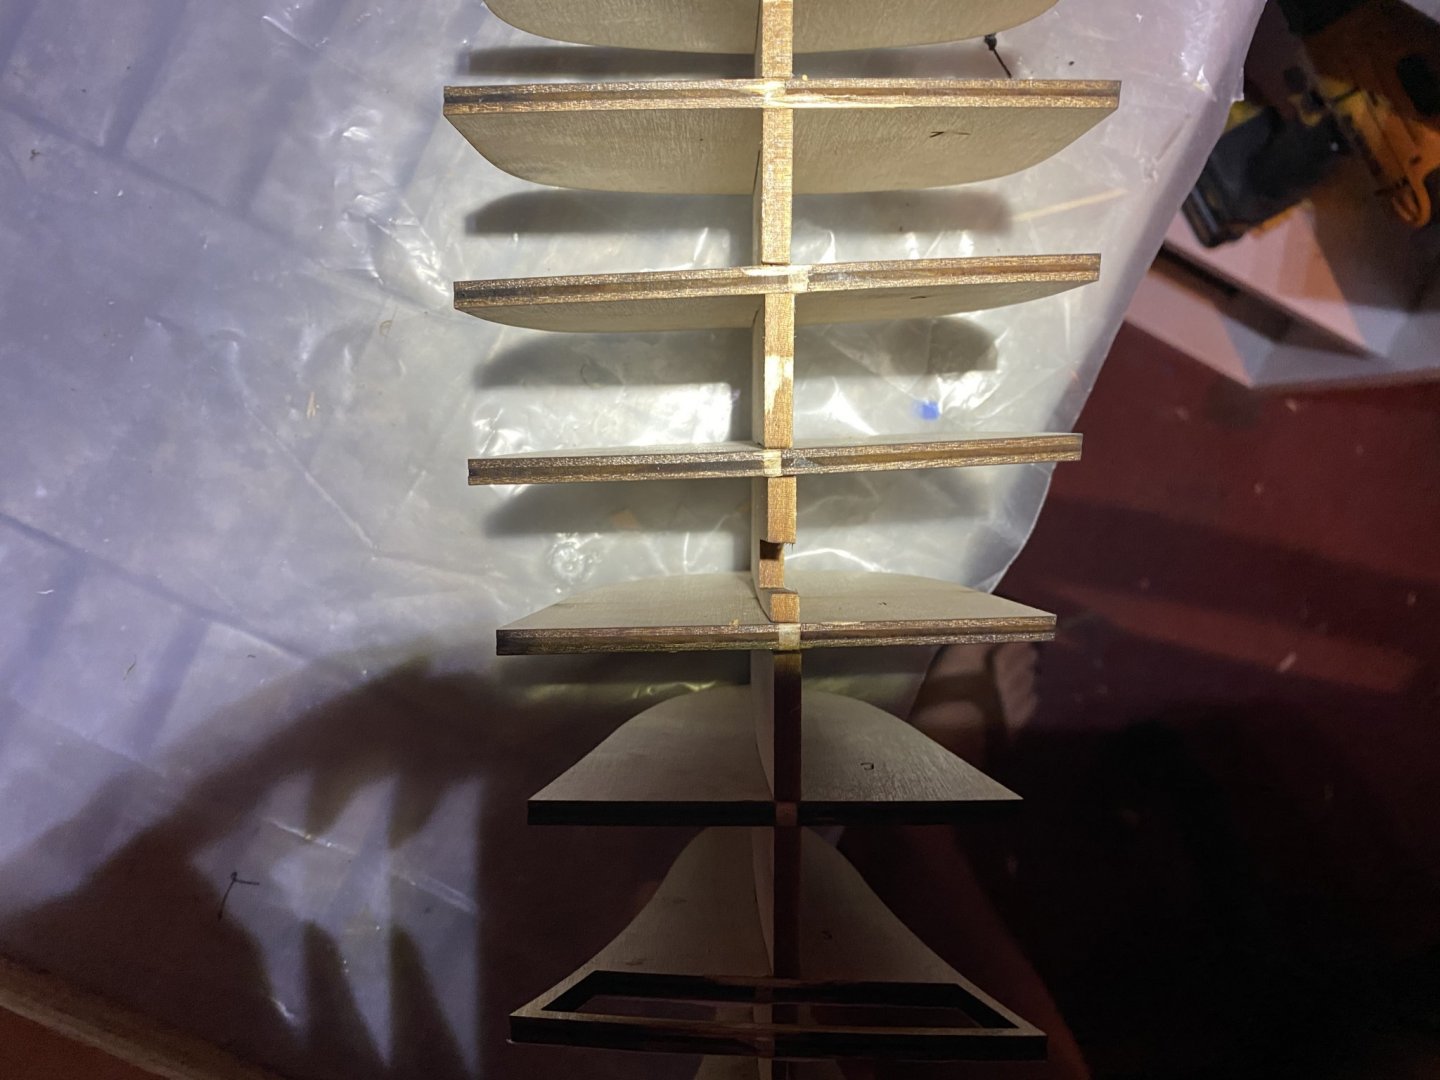
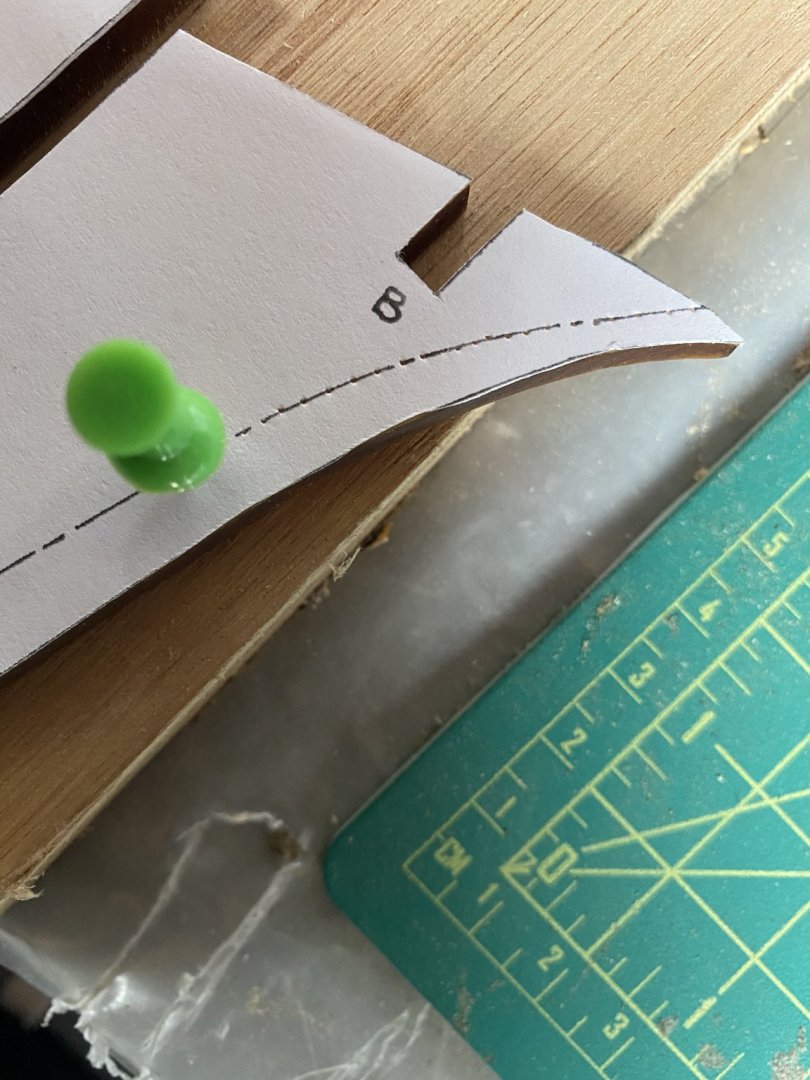
Hello everyone! I feel really good about the progress I have made in the last few days, long story short I got the center keel almost perfectly straight and the bulk heads shaped and put in place on the center keel. I got the water way and the plank sheer put together and I feel like the flying fish is coming along nicely. Long story long; I’m not good at guessing or free handing the contour of the ships hull so instead I cut the bulkhead diagrams from the plans and glued them to each bulkhead using a glue stick. Once i had that done I had a very clean line for my bevel on every bulkhead, afterwards I dry fit again and started to glue some stuff together. Thanks to Nirvana for suggesting blocks be installed on each bulk head. I took the time to cut a .25” square block for each corner of each bulk head, for some of the more fragile bulkheads or ones that were critical to get into the right spot i added a few more support pieces that shouldn’t be in the way later. I used a few scrap pieces of wood to create the support for the masts, later, after I plank the deck, i will go back and get this cut out to the shape it needs to be. I only had to do any of this because of how warped my center keel was, I’m glad that i found a way to fix it instead of having it replaced because I feel I learned a lot about the way the keel is shaped and the importance of every piece. Due to the warping there was a little bit of displacement amongst the bulkheads, some where just a little higher or at a degree off from others, thankfully I have a sanding block, so that made it very easy for me to do some minor reshaping once every thing was right where I wanted it. The plans did not specify which dimension of square dowel to use for the water way so i used my best judgment and went with some square dowels that were 3/16 square, they do specify that the waterway needed to extend 3/16” over the inboard edge of the bulkheads so that’s why i went with that size dowel. The plans then specify that the plank sheer needs to extend 3/32” over the outboard side of the waterway, after some quick measurements I found that the inner edge of the plank sheer was 3/32” from the outside edge and that i could line up the inner edge of the plank sheer with the outer edge of the water way. Sorry if that didn’t make sense hopefully the pictures below make it easier to understand. There are also two laser cut plank sheer pieces that get attached at the stern of the ship, these were easy to install and I dont think i had any problems with them. The last thing I worked on was a very thin strip of wood that hugs the inner edge of the plank sheer. I had to cut and shape another piece to get the intended dimensions, not that big of a deal though. Thanks again every one for the help and support! Bradley


-
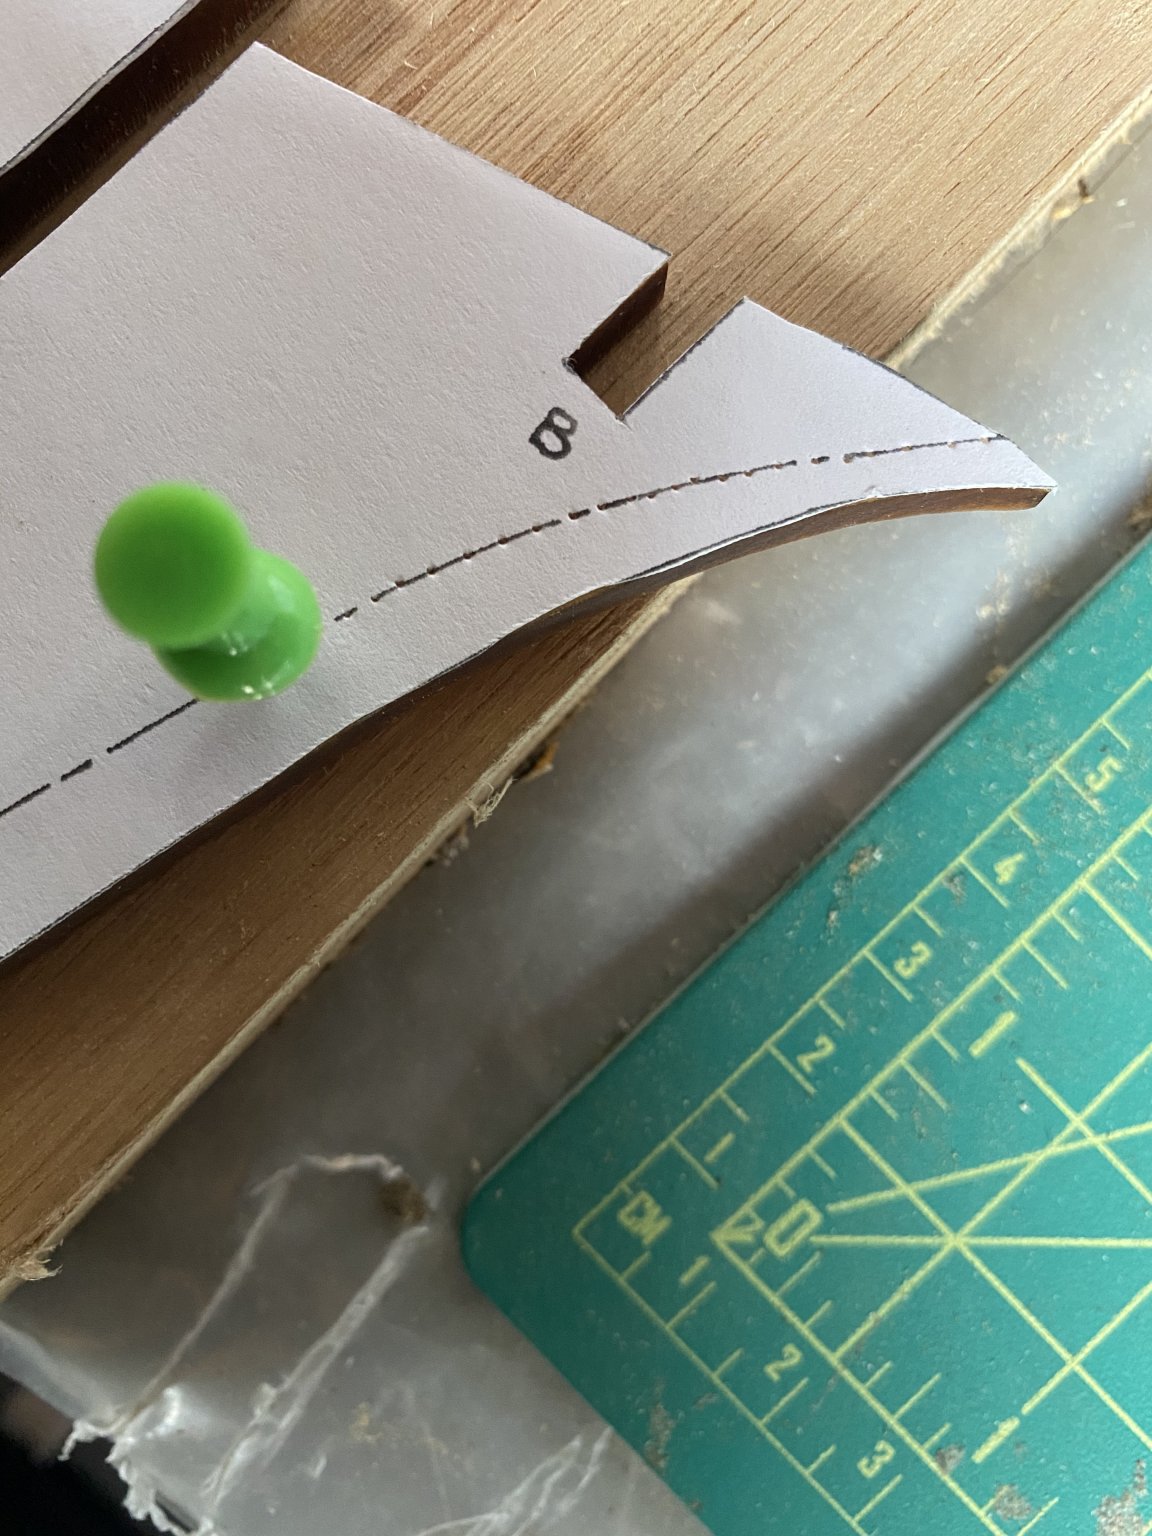
So I had an hour or so this morning to see what I could do about the warped keel. I wanted to dry fit the bulkheads without doing any sanding or shaping just to see how things were going. I read some where that if you take a damp towel and wrap it around the piece then iron it it should straighten out, which surprisingly is exactly what happened. Once i was happy (kinda) with the way things were going I cut out the cross section of the keel from the first page of the plans and placed it over the keel, I then used a thumb tack to lightly mark the bearding line, this is where I stopped for the day so ill update again when the basic frame is complete. Bradley

-
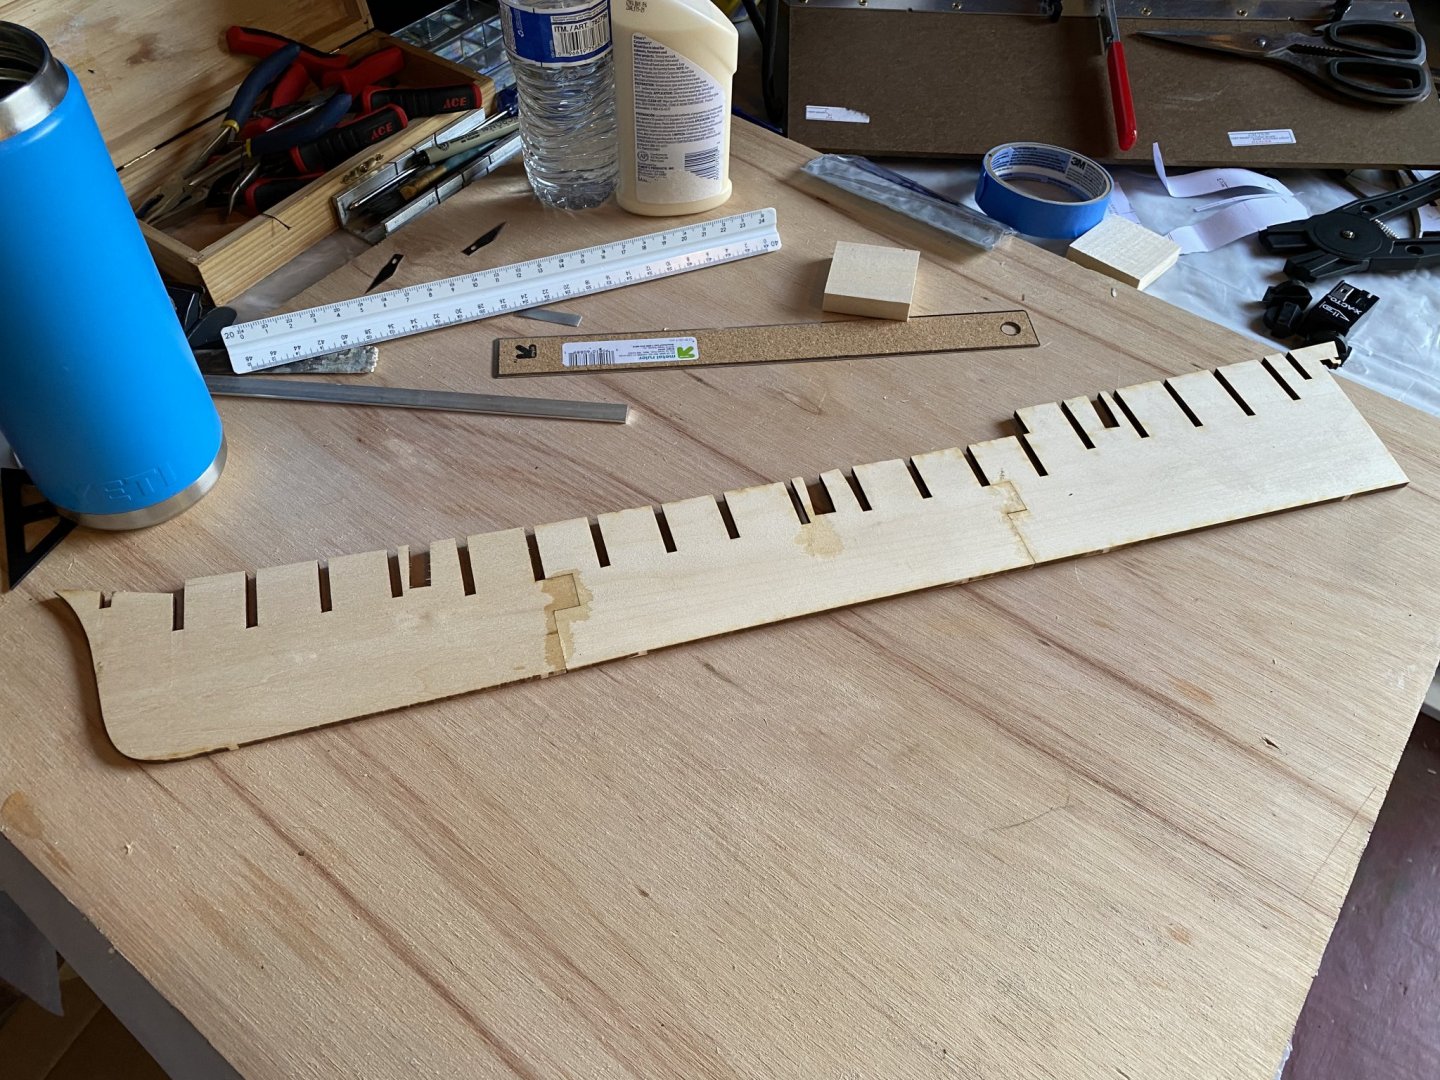
This will be my third Model Shipways build in my life and certainly the largest, I have never once before had any issues with their kits but this time I have already run into issues. I opened the box and did a head count of all my stuff and noticed the second sheet of laser cut keel pieces was really warped. I’ll call them tomorrow and see what they recommend. Other than this issue every thing looks great and was in nice working order, very excited to get started. I cut out all three keel pieces and glued them together, I didn’t think to make this post until after I started the keel so I didn’t get any pictures. I created a jig that pressed them evenly and clamped the whole thing to the table for a few hours. This is when I really noticed the bend, ill get a picture up tomorrow of that bend, I’m pretty sure its unfixable. I will probably post tomorrow as well, with an update from Model Shipways. Thanks! Cheers, Bradley

-
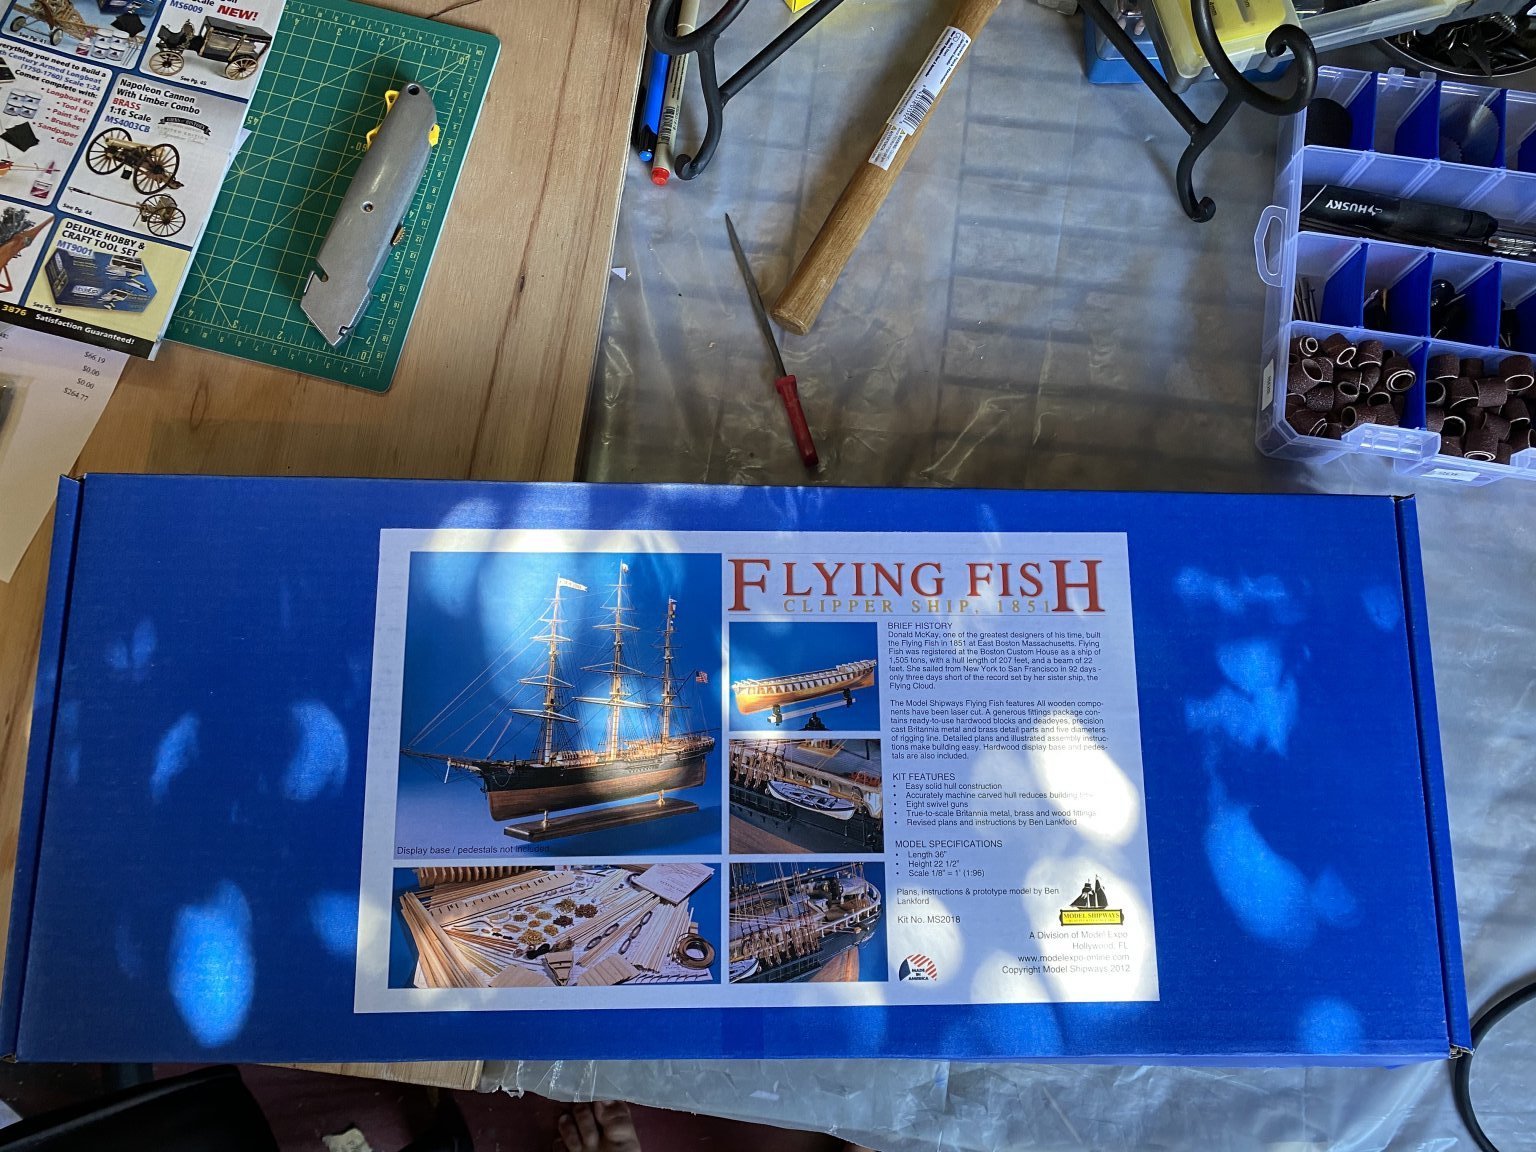
Hello all! This is my first time posting any thing here at MSW, I watch a lot of your builds and have really enjoyed my time here. I figured it was time for me to post my own build log and hopefully get this next build as close to perfect as possible. I plan to post here as often as I can, maybe once a week, hopefully more, as I only have about an hour a day to work on this. Slow and steady wins the race. The model itself is a beautiful model, I’ve seen completed posts and pictures of the completed build and so I have really been looking forward to this. A quick history, the Flying Fish was an extreme clipper designed and built by Donald McKay. Her dimensions were: Wood Ship of 1505 Tons, Length of 198.6, Breadth of 27.1 and depth of 22 feet. She sailed from New York to San Francisco in 92 days which was only three more than her record setting sister ship, the Flying Cloud. Cheers, Bradley