
Keithbrad80
-
Posts
416 -
Joined
-
Last visited
Content Type
Profiles
Forums
Gallery
Events
Everything posted by Keithbrad80
-
It’s a shame that I forget that plastic kits can be just as incredible as wooden kits! Nicely done so far!
- 211 replies
-
- 6
-

-
- prince of wales
- tamiya
- (and 2 more)
-
Wow your planking was perfect. I might have to look into this kit for my self!
- 30 replies
-
- 2
-
-
- master korabel
- avos
- (and 1 more)
-
That second layer of planking is going to look very sharp! Nicely done!
- 222 replies
-
- 2
-
-
- First Build
- Lady Isabella
- (and 2 more)
-
Your progressing through it at a solid pace! Remember to taper your planks at the stern and bow, this will prevent your planks from becoming to cramped and over lapping. Also it looks like you may be missing your sternpost? I would make sure that piece gets on there before you finish the planking! Good luck and have fun! Bradley
-
what is the best hand plank crimper
Keithbrad80 replied to ronald305's topic in Modeling tools and Workshop Equipment
I think thats the key! You have to use lots of closely spaced crimps rather than less crimps further apart. Doing so creates a tighter, cleaner bend. -
New member: an Aussie in Yorkshire
Keithbrad80 replied to Mike_H's topic in New member Introductions
Looking forward to seeing your builds! Welcome to MSW! Bradley -
what is the best hand plank crimper
Keithbrad80 replied to ronald305's topic in Modeling tools and Workshop Equipment
Hmm Ill take a look at those, I’ve been searching for a more efficient method! Thanks Bradley -
what is the best hand plank crimper
Keithbrad80 replied to ronald305's topic in Modeling tools and Workshop Equipment
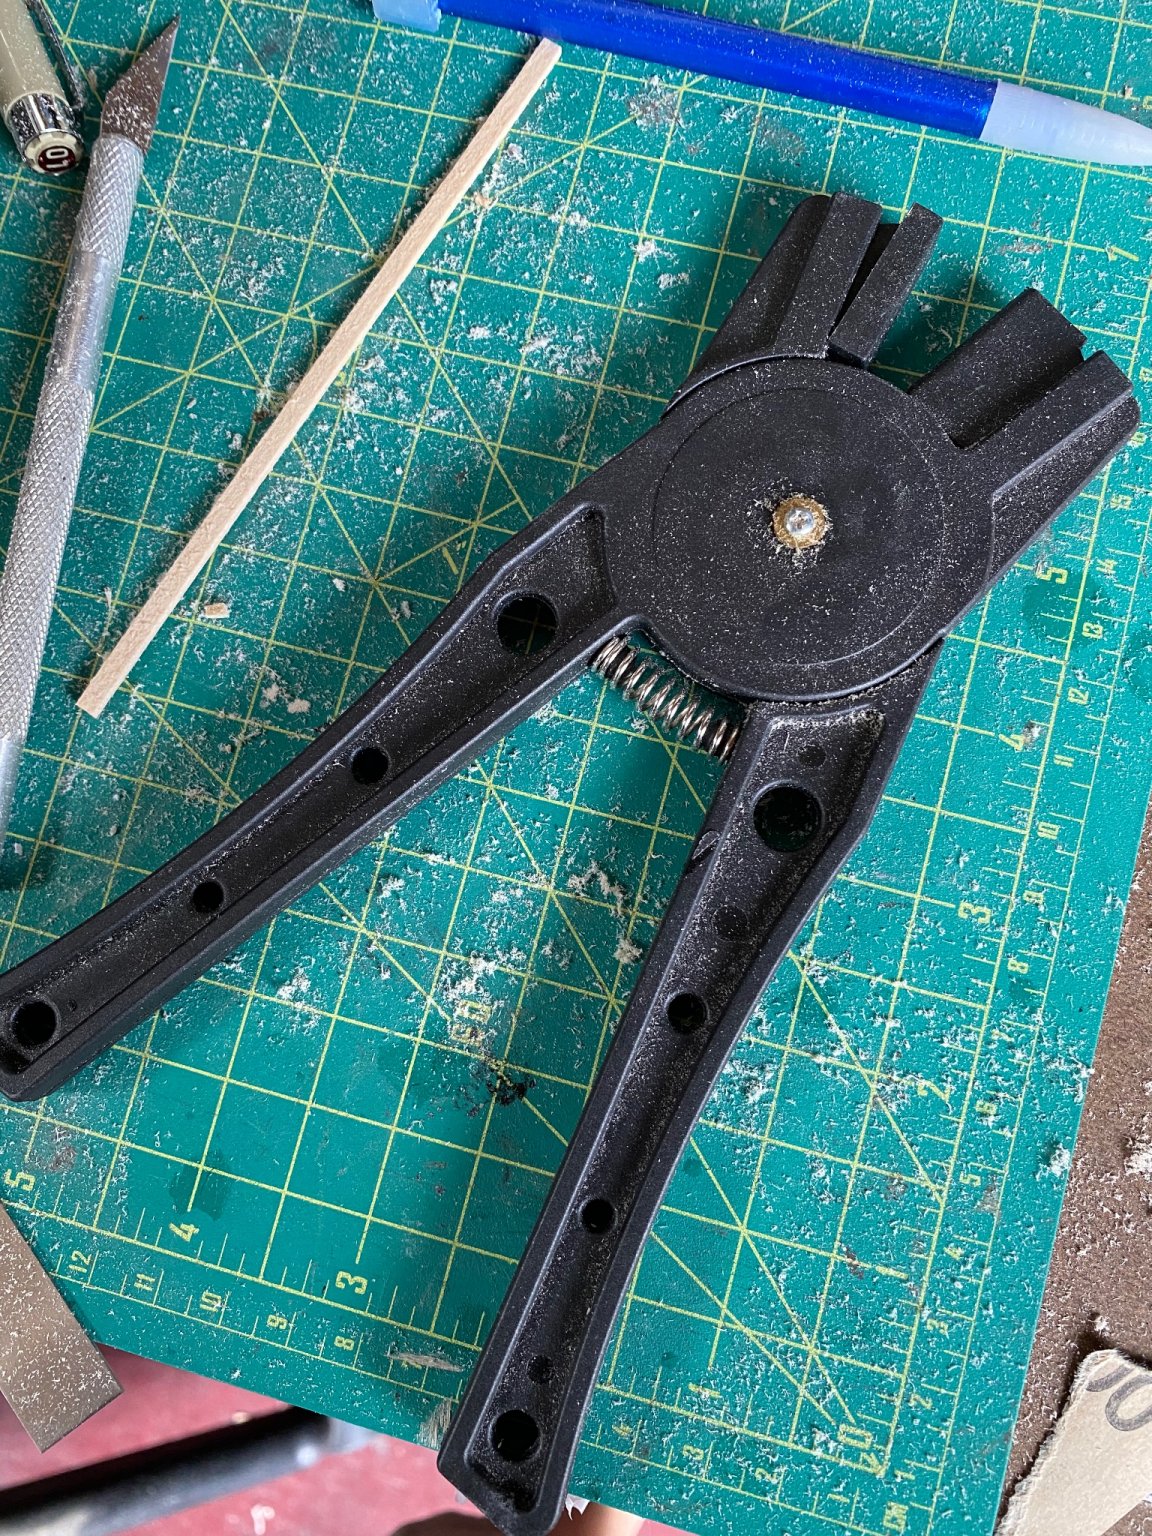
I bought a set of plastic ones from model expo awhile back and I agree with bob, they are pretty much useless. This is the set i bought, I guess they work a little bit but these leave a mark on both sides of the plank that are difficult to hide once the plank is on. There are plenty of excellent YouTube videos online! I usually use some steam but I have noticed that if you use some steam and bend it, then let it dry and then use steam and bend it again and again Eventually you will get very tight corners. It’s time consuming but works for me. Good luck!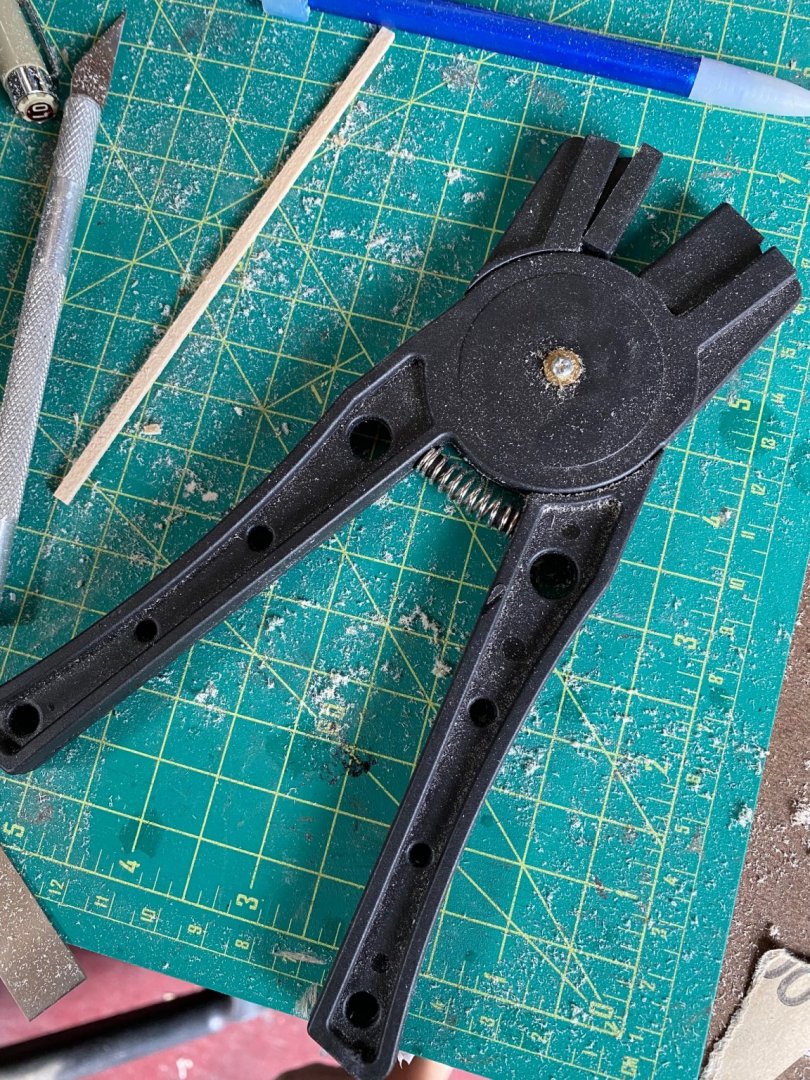
-
I hope you do a build log for your next build! Your Surprise is incredible! Also great video I liked the time lapse.
-
How do you like that Proxxon drill press? I’m thinking about getting one, and the disk sander? I have heard Proxxon power tools are very nice quality. I have a Wen drill press but it’s not the best. Also your build looks awesome!
- 164 replies
-
- 2
-
-
- vanguard models
- flirt
- (and 1 more)
-
Where did you get those cedar nails? Did you make them? They look great! Also great photo quality as well!
-
I was curious as well so thank you! Bradley
-
Thanks everyone this is all super helpful! Bradley
-
For your first time this is fantastic! I’m sure your second planking is going to really bring every thing together. Nice work.
- 222 replies
-
- 2
-
-
- First Build
- Lady Isabella
- (and 2 more)
-
I just bought two of these ships, I’m going to try and build them both before Christmas... ill be using your build as a guide! Looking very good.
-
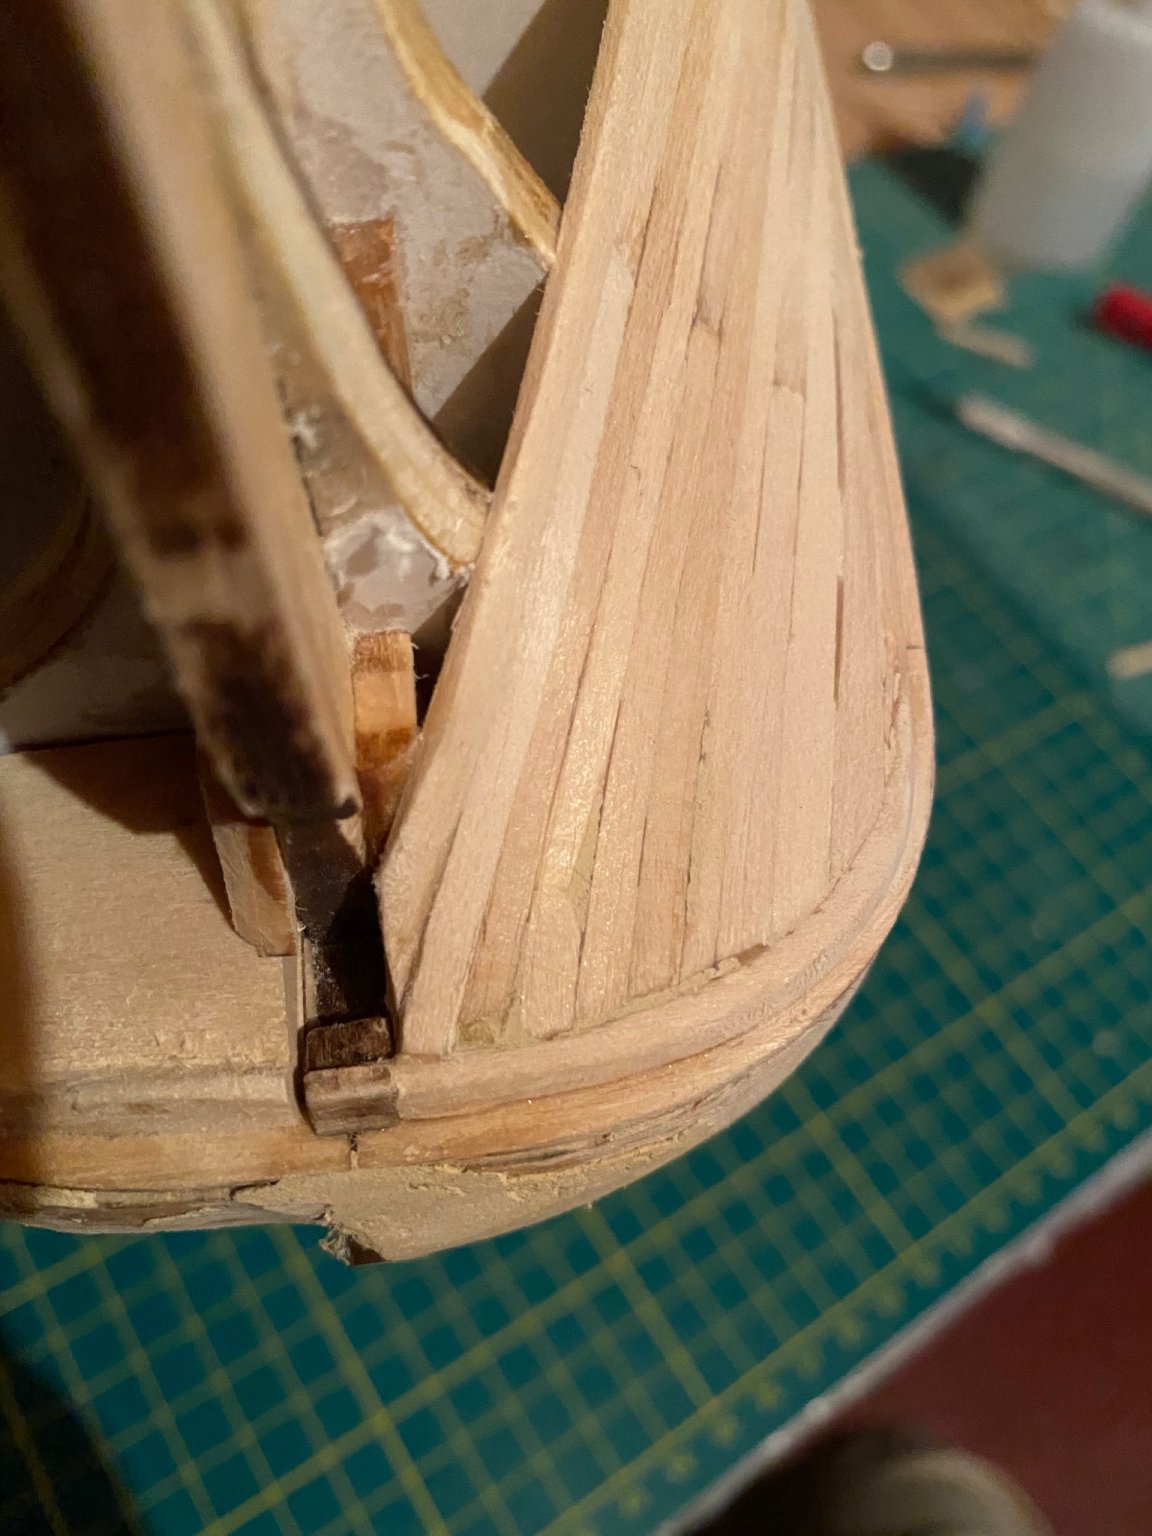
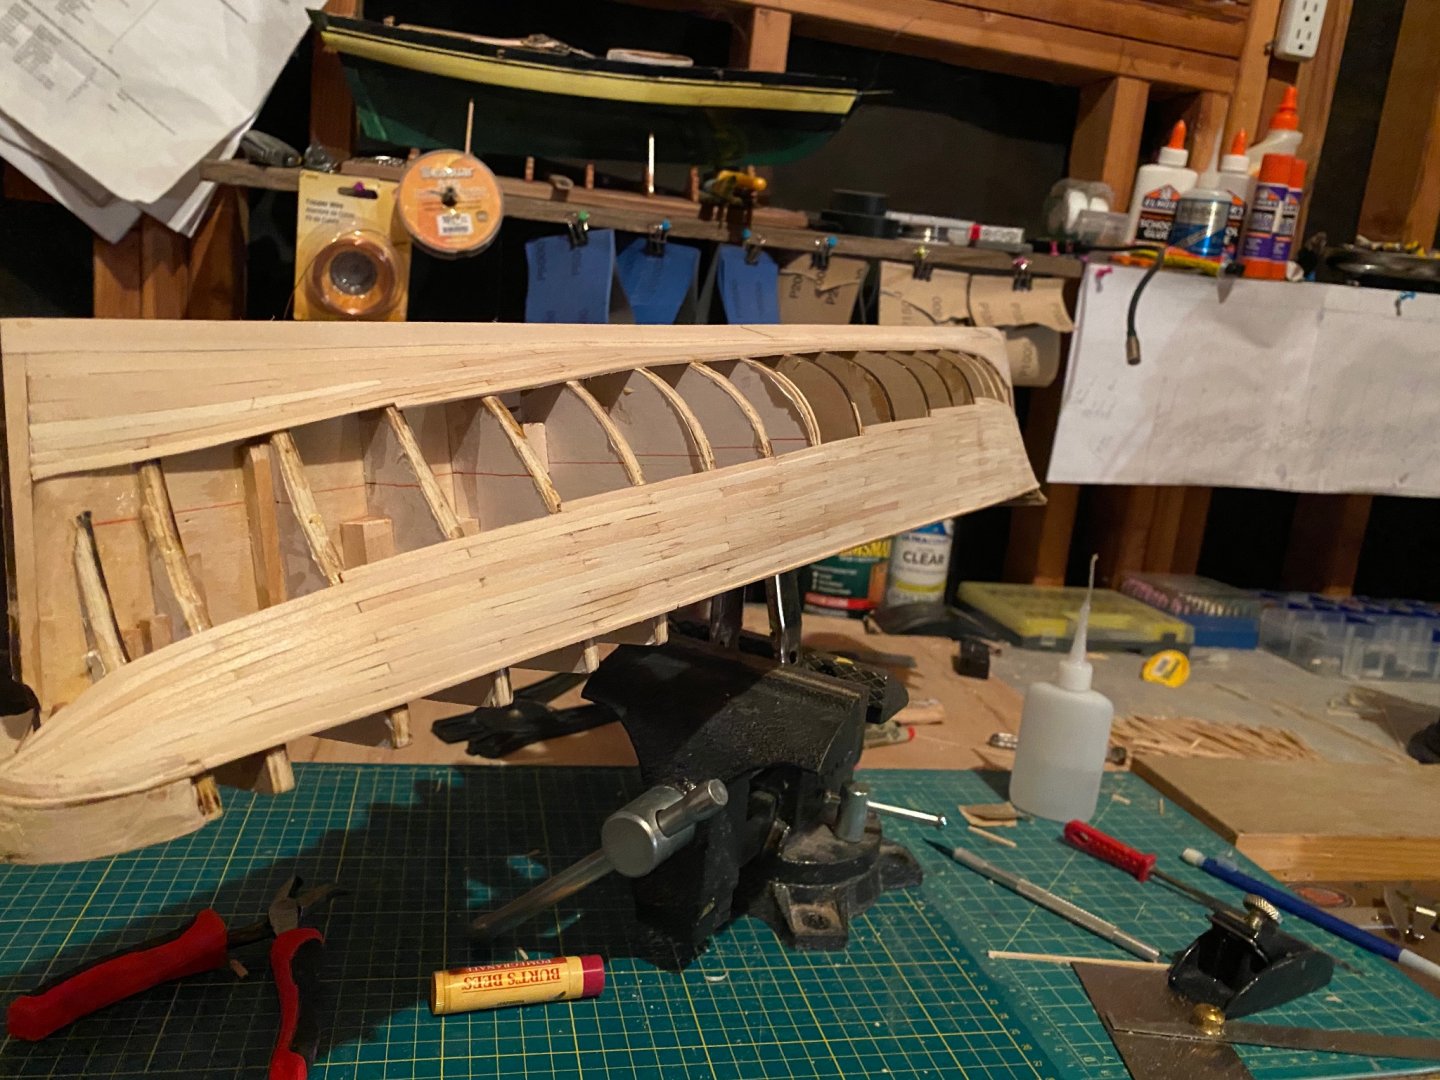
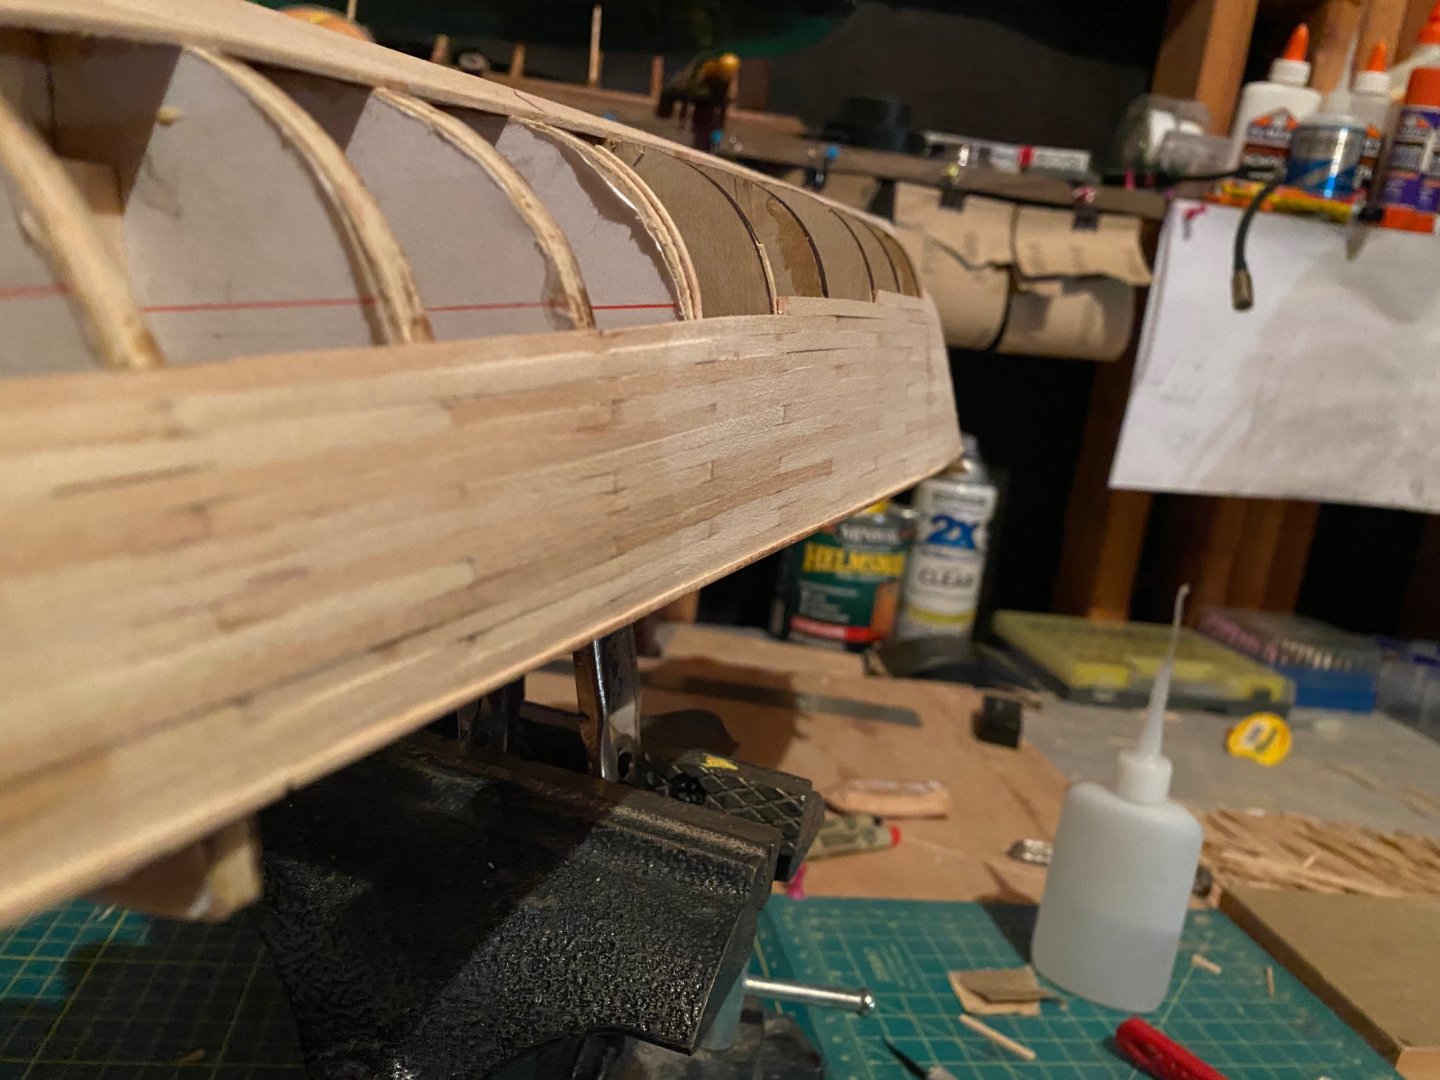
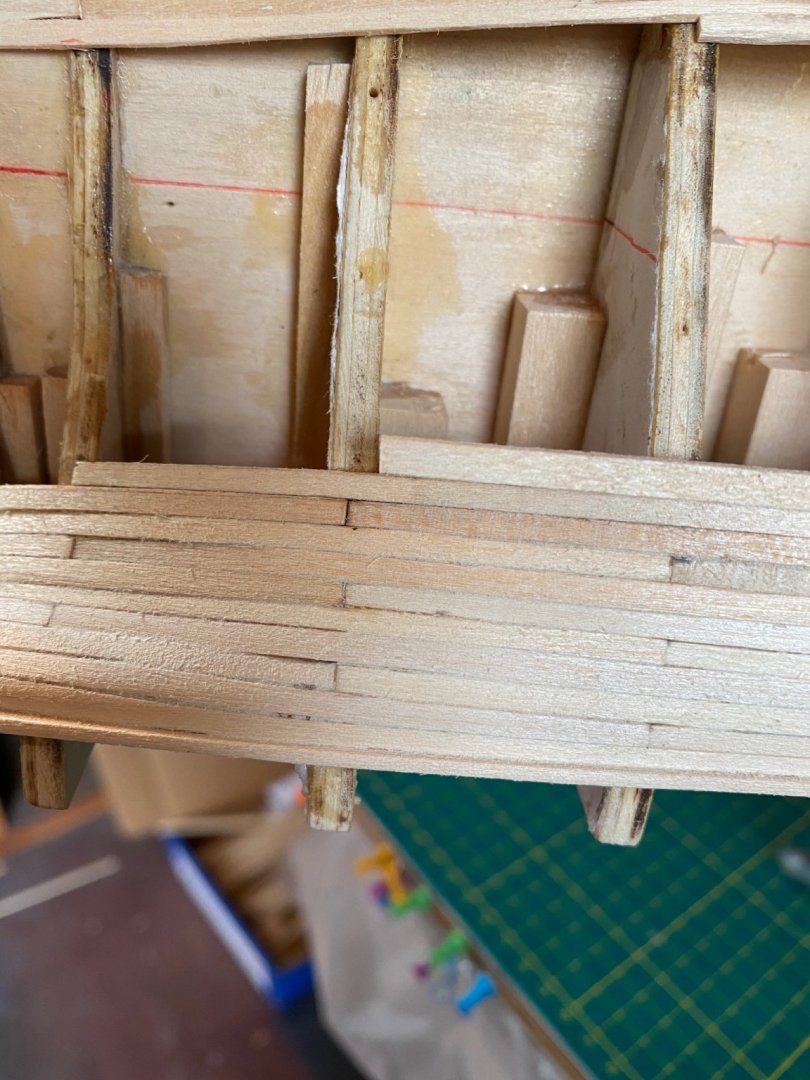
Hello again everyone, I am finally back in the saddle after maybe the most stressful week of my life. Started with being evacuated, then my wife went into labor followed by a pipe bursting in my house and needing a plumber to work on my house for the three or four days while we were in the hospital. Work also got really crazy out of no where so now I’m playing catch up, I’m also about to start another build so watch out for that! Back to the build! So before I left i was working on planking and have quite a ways to go, but thats ok because i really enjoy planking. For some reason i have never been able to correctly plank the stern, I’m almost always disappointed with my results. If any one has any tips for me that would be awesome! I just cant figure out how to properly taper, bend and place the planks against the filler piece i had to install earlier. I had to use a little wood filler but I’m hoping I can hide some of this with paint or staining, still not sure what I’m doing. Here is my over all progress with planking. I have a few issues with the plans though. The original plans were published in 1953 by Mr. H.S. Scott, in 1993 two pages were added to the plans because the transition from a solid hull to POB was made. I think they did an excellent job overall adding these plans and integrating this kit into a POB build. The issue is in the instruction booklet they specifically state that planks need to be 5 inches to obtain realism, at this scale that would be a 40 foot plank which is still a little long but thats ok, The issue is the bulkheads are more than an inch apart. The goal for this length of plank was to have it sit nicely across 5 bulk heads which would also result in a 3 butt shift. Because the bulkheads are more than an inch apart this means the 5 inch plank sits just short of the 5th bulkhead, i had to cut these back to the 4th bulkhead which inevitably led to a 2 butt shift... This obviously is not ideal and its 99 percent my fault for not triple checking before adding planks but once i had the first one on i was committed. This is an example of the plank being just a little too short at the 5th bulkhead. I could have easily fixed this but once i read that the planks should be 5 inches i cut a whole lot of them. Maybe its me or my model but I’m kind of disappointed in my self, i guess we can all be our own worst critics! This 2 butt shift will probably not be noticeable to the untrained eye so thats ok to me. I’m going to continue planking this way and hopefully it all works out! Thanks again for the support. Bradley

-
No problem!! That’s mostly the reason I wanted to do this build log, did you put an additional piece over the filler pieces at the stern? That’s not a bad idea, I might take another look at mine when things cool down around here. If you have any tips for me I’ll gladly accept them!
-
Planking has always been one of my favorite parts! I have heard people say things like I can’t wait to be done with this or build like it’s a job, and that is always disappointing to see because this process is supposed to be fun and relaxing, so I’m glad your enjoying it! Keep up the great work! Bradley
- 222 replies
-
- 2
-
-
- First Build
- Lady Isabella
- (and 2 more)
-
Hey James, Im really enjoying this build! You are certainly more skilled than I! I’m sure you have thought of it all by now but when it comes to planking are your worried at all the weight of the ship might make it really tough to plank? The frame certainly looks strong enough to support its own weight, but personally i like having the ability of moving my ship around while planking, do you think the weight of the ship might make that process harder? I’m looking forward to watching this build, its going to be an absolute masterpiece! Bradley
-
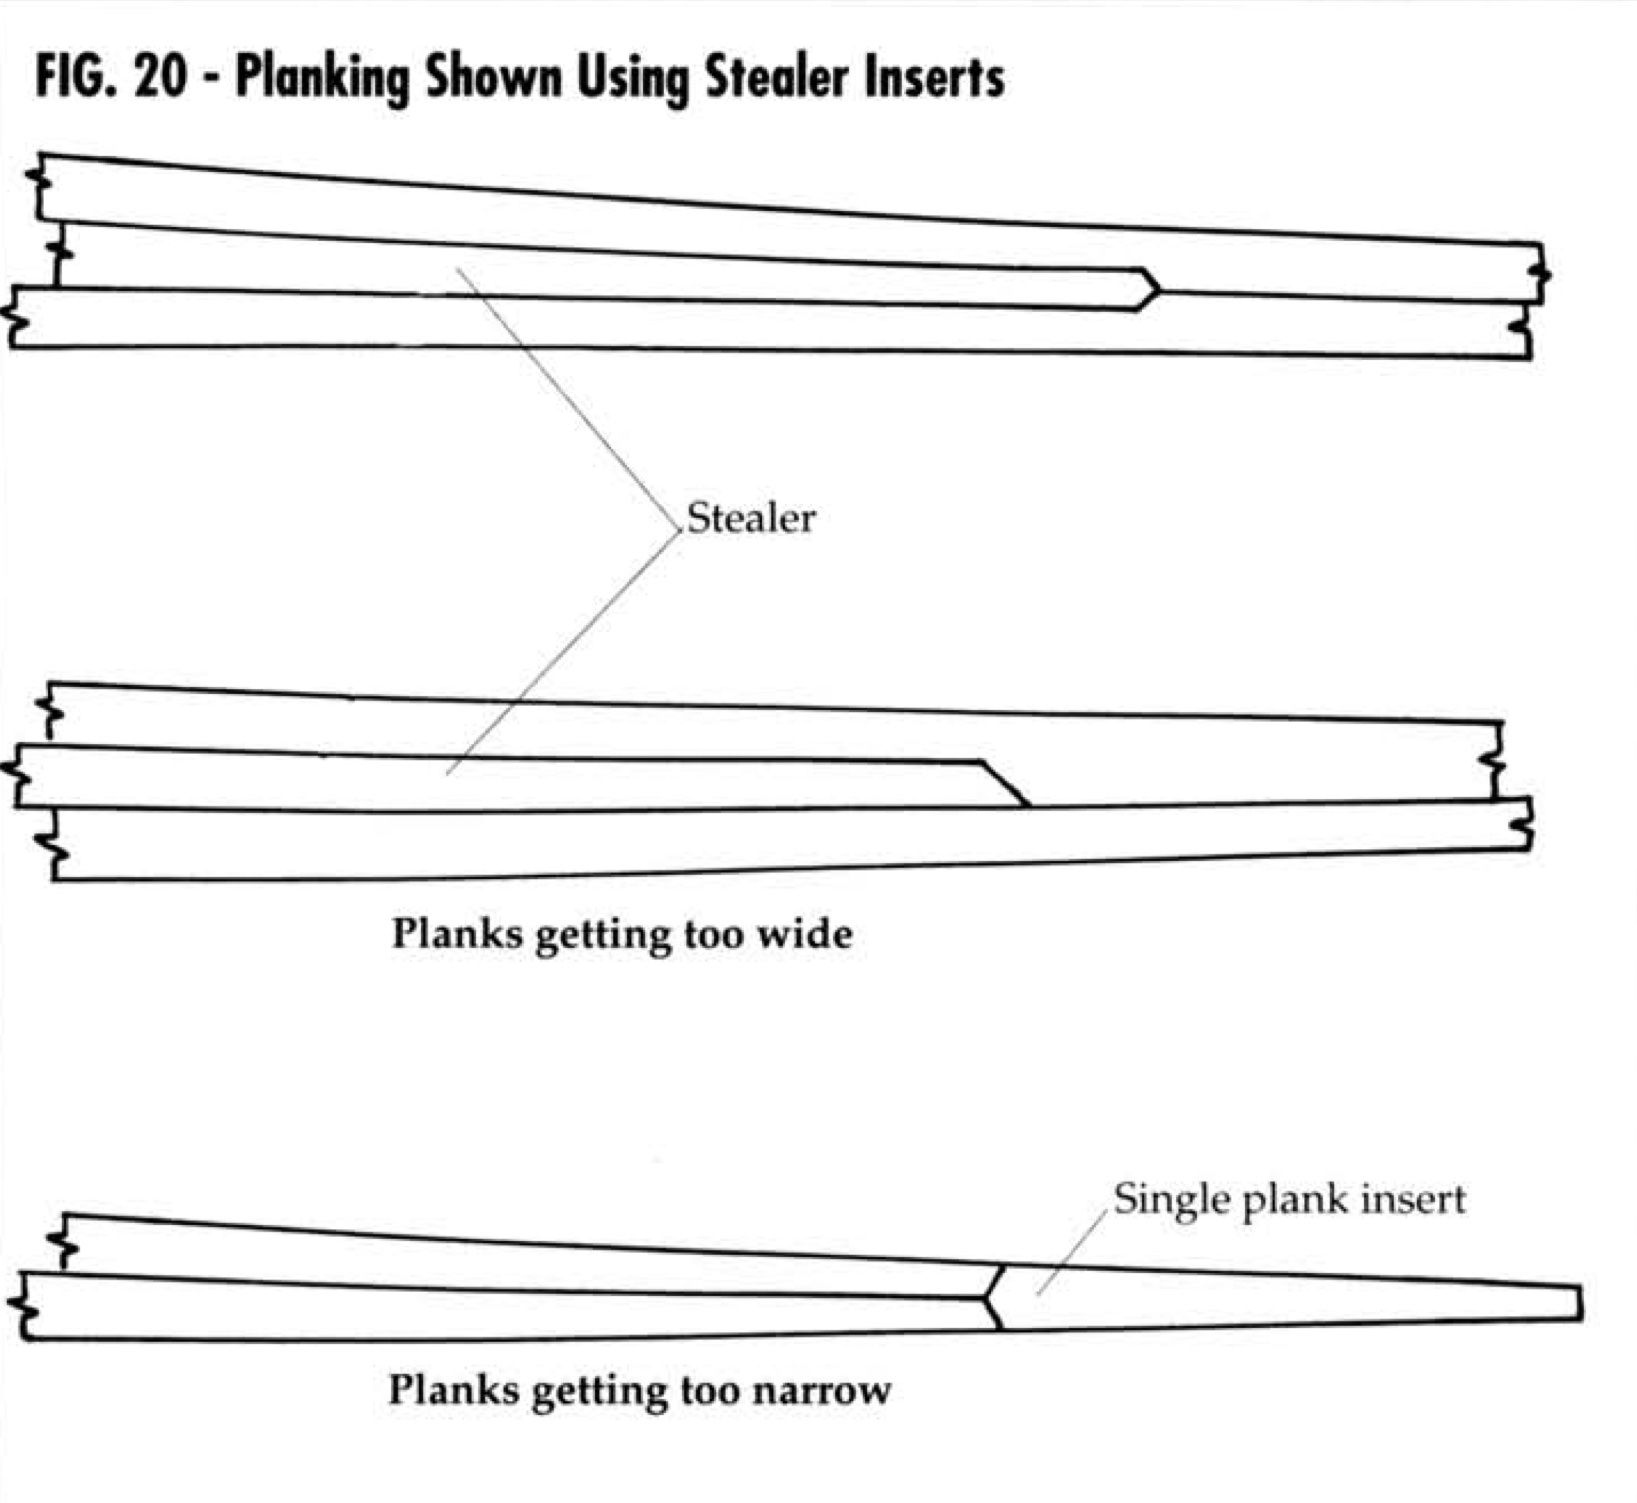
Your planking is looking great! My first time planking I couldn’t quite understand the idea of tapering, so I’m glad to see your planking turning out nicely. So i think the “filler” pieces you are referring to are called stealers. When you have two planks that come together at to sharp of an angle or the tapering isn’t correct then you might find a spot thats way to thin for a standard plank but to wide for some filler, basically you cut the shape of the plank out of the existing planks and fill it with a stealer plank. I took a screen shot from my current builds practicum. This gives a couple different options based on how your planking looks before your stealer plank is inserted. Good luck and have fun! Bradley

- 222 replies
-
- 2
-
-
- First Build
- Lady Isabella
- (and 2 more)
-
Hey Bob, glad to see your doing well. The fires have been insane recently and Santa Rosa is scrambling, but this isn’t the first time and wont be the last. Dillion beach is beautiful, i hope you enjoy it down there. Looking forward to getting back to my build and seeing your progress! Stay safe. Bradley
-
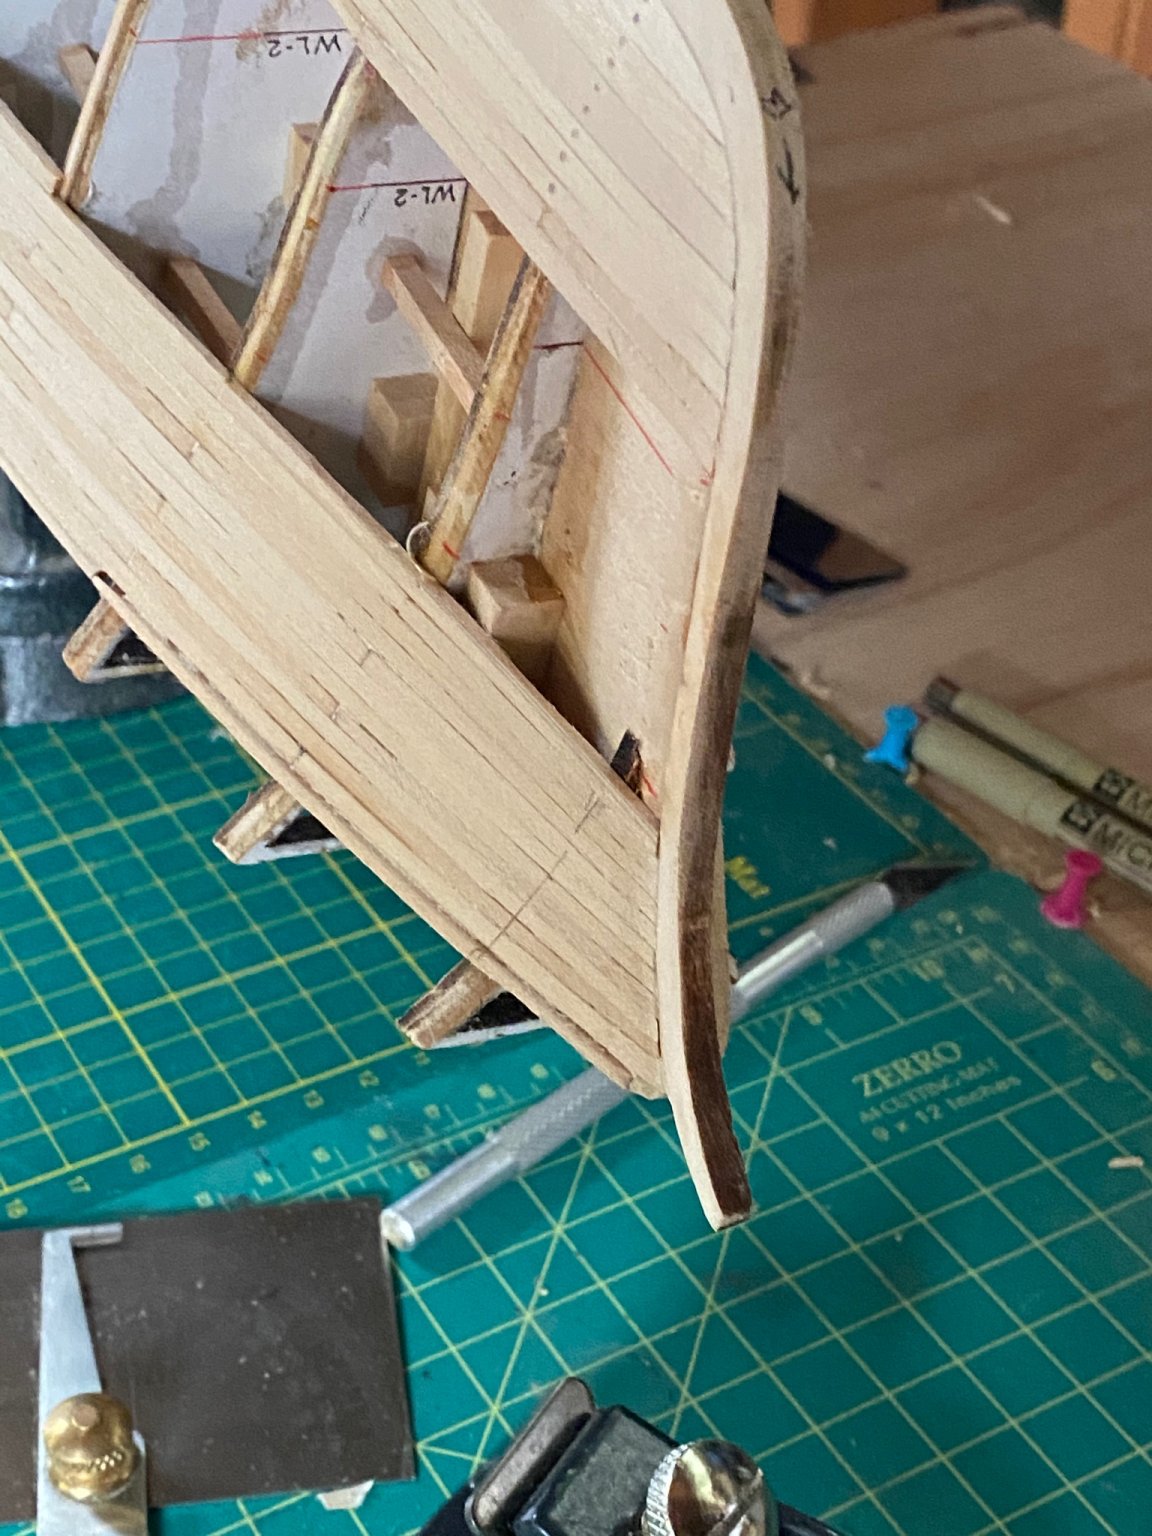
Nothing but chaos here in Northern California, but the build continues on. for some reason every build I have done it takes me a few try’s to get the planking the way I like it so I start with garboards and belt E. I then went and started belt A and B, I did really just for the practice before I started the stuff that will be seen. The garboards and belt E are under the water line and therefore covered in copper. As I type this my wife and I are being evacuated due to a fire so it may be awhile until I post an update on the build. Bradley

-
Your progress looks great! I’ll follow this build and see how things go!
- 222 replies
-
- 1
-
-
- First Build
- Lady Isabella
- (and 2 more)
-
I think the lights on this are going to look really great when every thing is done. Nice work!