
Keithbrad80
-
Posts
416 -
Joined
-
Last visited
Content Type
Profiles
Forums
Gallery
Events
Everything posted by Keithbrad80
-
Some times the effort that goes into fixing something is more than just remaking it. Personally I would try to recut these pieces from a fresh sheet of wood but if I can’t because it would cause damage then I just use a little wood filler. There are a lot of different wood fillers out there, just find one that dries hard and can be sanded and only apply what you need. Once it dries it can be sanded and shaped just like wood, so you may want to try that. Looks good so far! Bradley
- 66 replies
-
- 1
-

-
- Providence
- Artesania Latina
- (and 1 more)
-
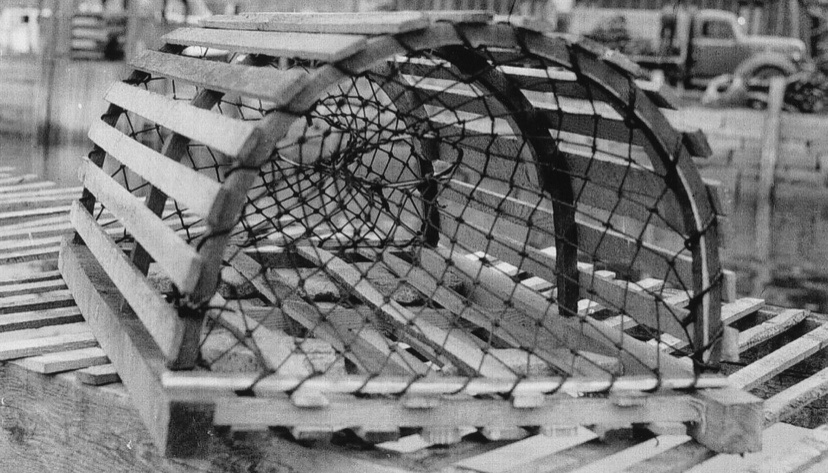
This looks awesome! Nice work scratch building a few things your lobster trap looks great! What did you use for the net?
- 34 replies
-
- 1
-

-
- grand banks dory
- bluejacket shipcrafters
- (and 1 more)
-
Very nice work, it looks great!
-
I’m sorry to hear about your father... It looks to me though that he had fun building these ships, which like Chris said, is probably the most important part. Good luck in finding a new owner and take care. Bradley
-
Nice work getting those planks in, it’s coming along nicely! Bradley
-
Incredible work! I have learned a ton from your log, thank you! Bradley
-
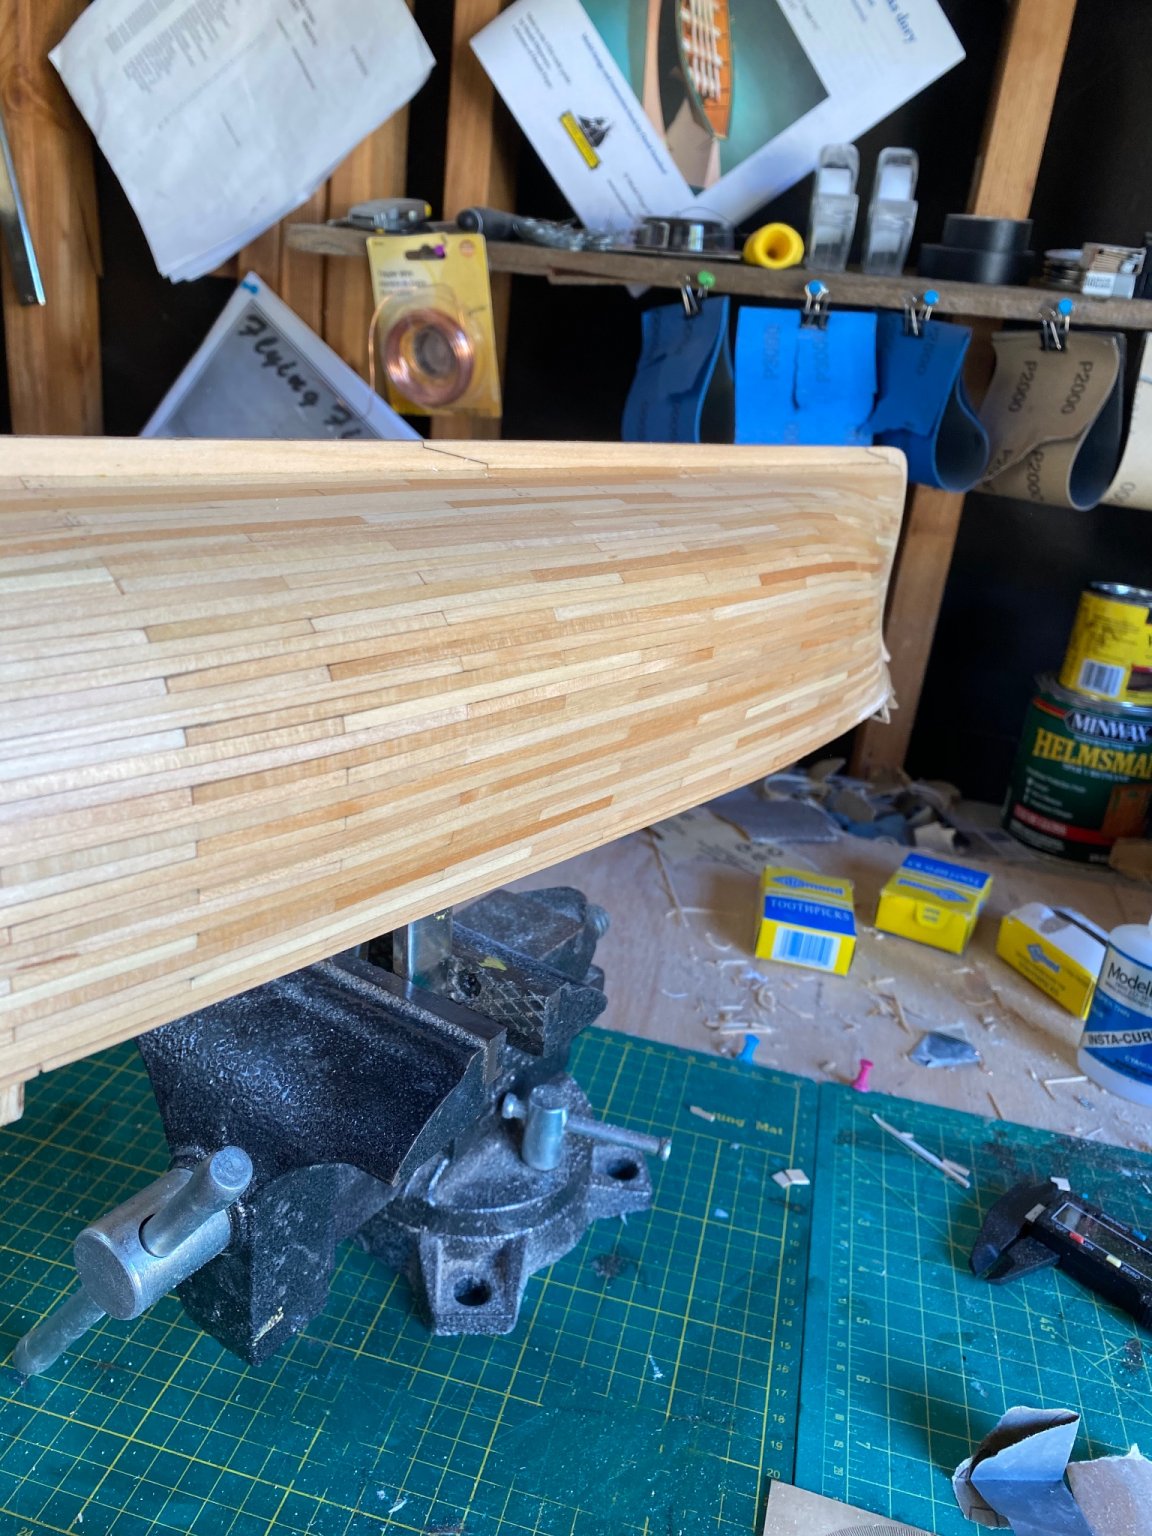
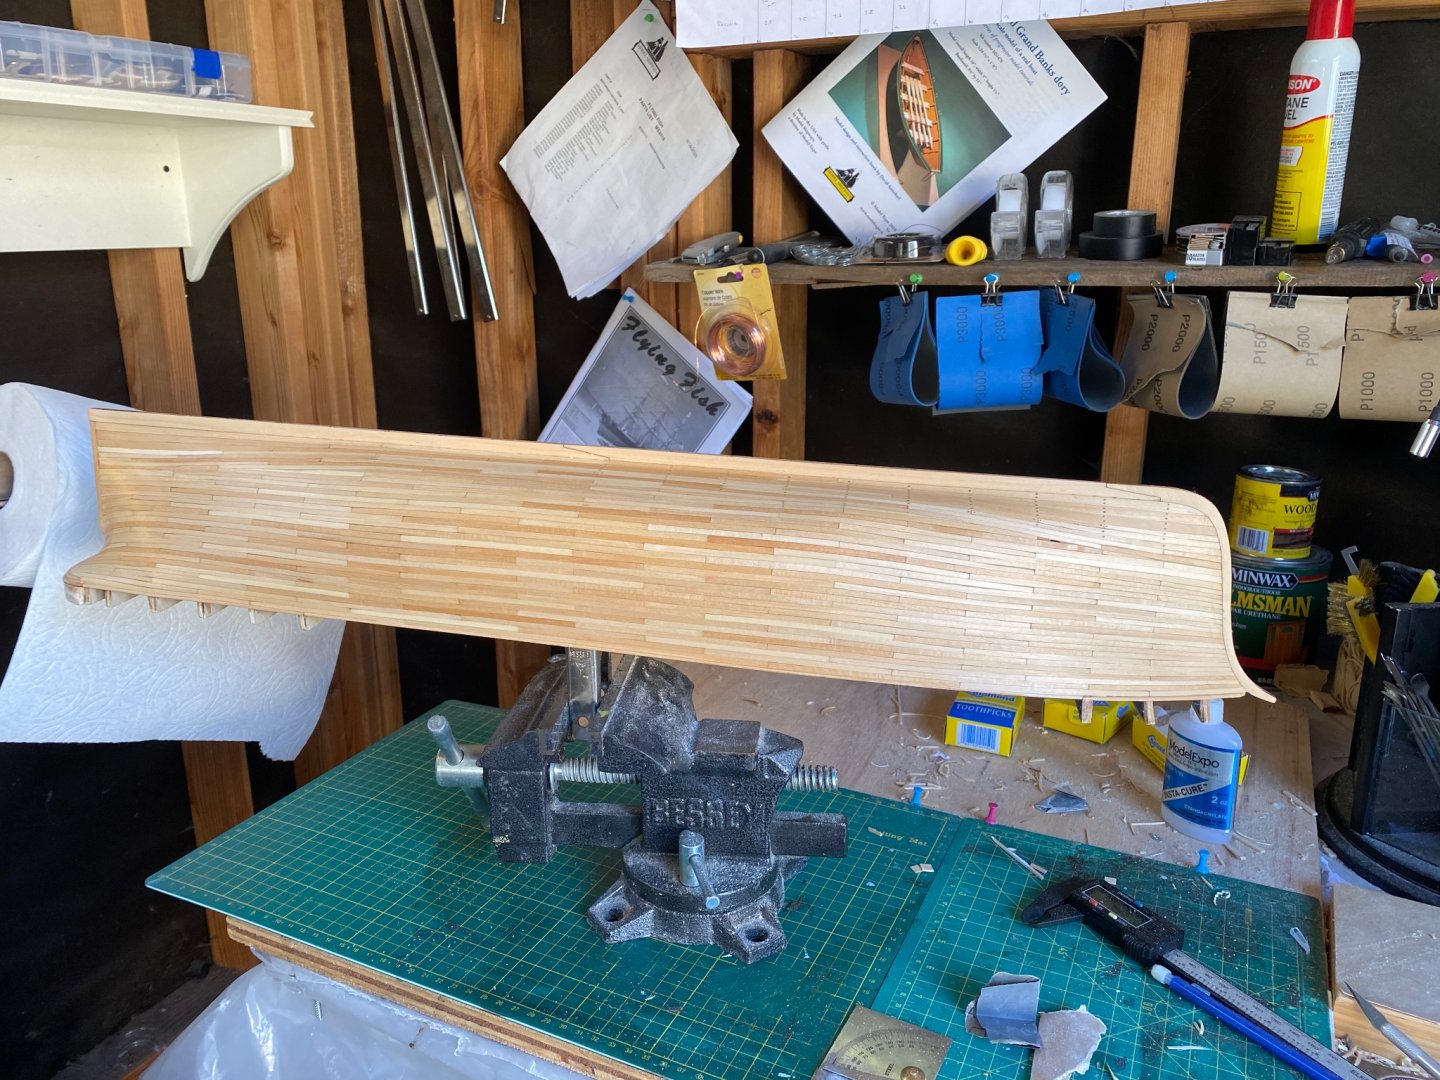
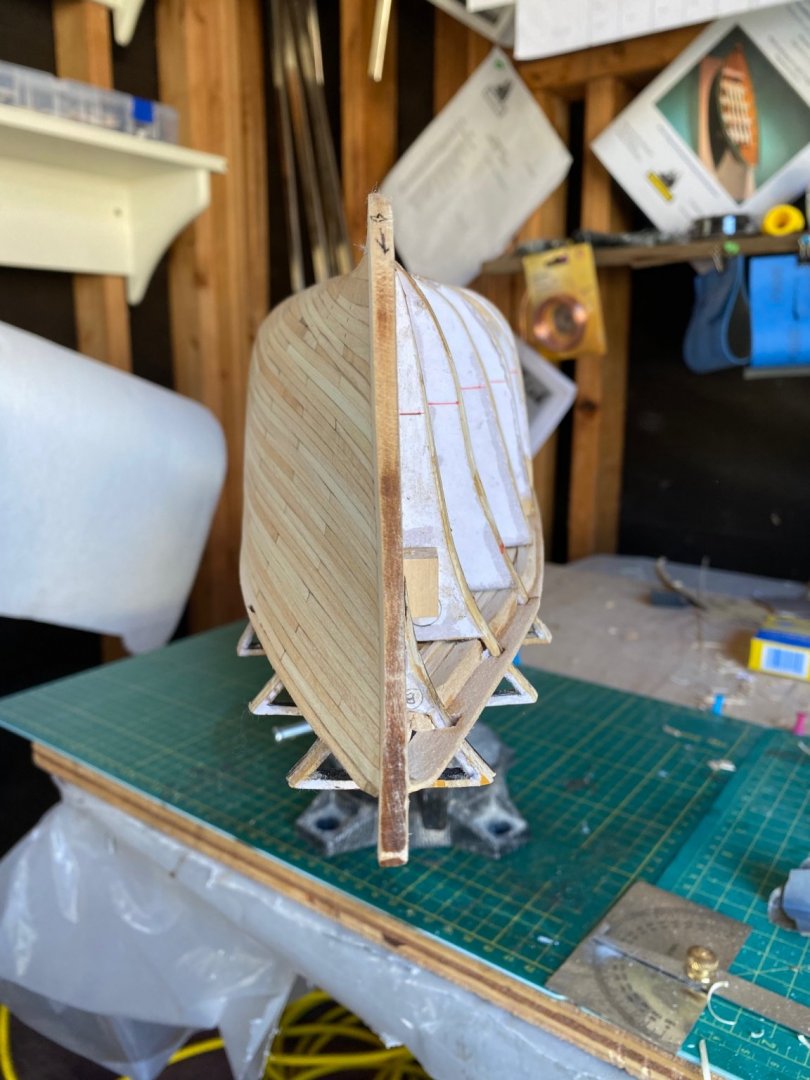
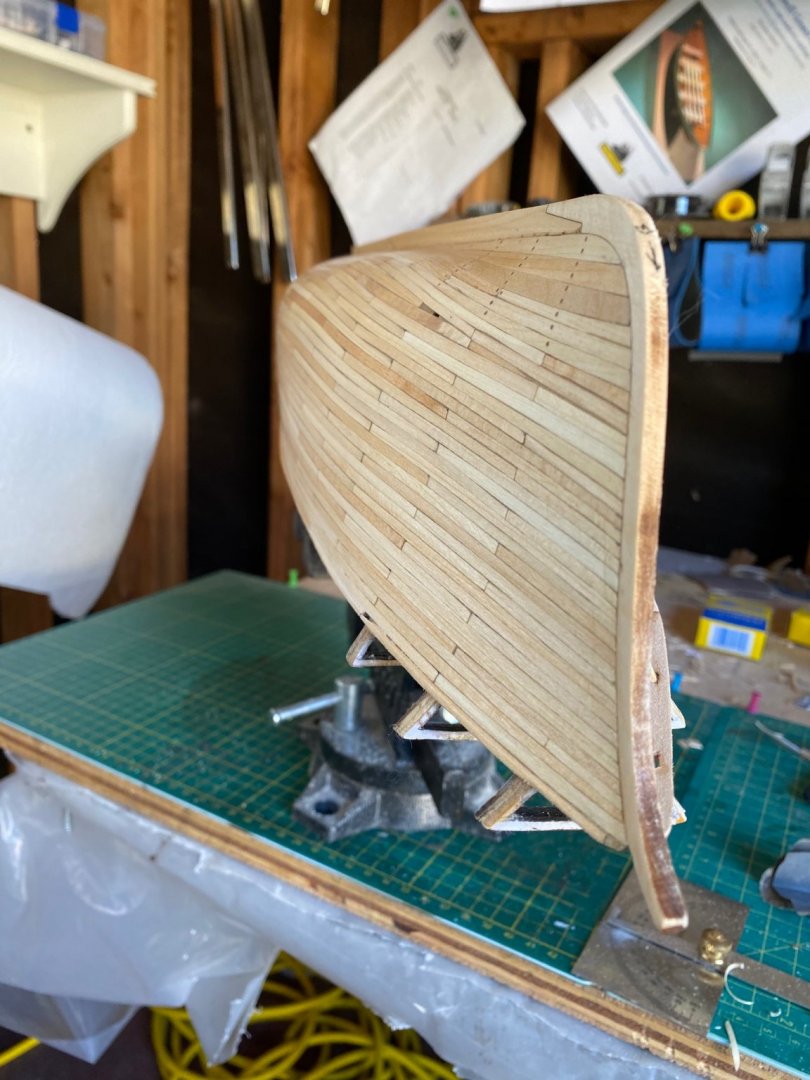
Hello everyone! I have been working on two Grand Banks Dorys recently so I haven’t had much time for the flying fish, that changes today! My two dorys are pretty much both finished, I finish those in the next week or so. Now about the flying fish, I have finished planking the port side, I think it looks pretty good. I wanted to use as little wood filler as possible on this one and it only seems I need it in two or three spots. This ship has been no joke, I would say I cut at least 300 planks for this side alone. Here are a few pics, at this point I have just sanded it to 220 and wiped it down with some mineral oil. this line where my first planking (garboard and belt f) and the second phase of planking meet looks pretty bad to me, shouldn’t be to much of an issue because I’m platting it with copper later. Now on to the starboard side! Thanks everyone! Bradley


-
Shinning the bell was a good idea it looks really great! Bradley
- 950 replies
-
- 1
-
-
- syren
- model shipways
- (and 1 more)
-
Airbrush painting
Keithbrad80 replied to Keithbrad80's topic in Painting, finishing and weathering products and techniques
Thanks for the help dan, when ever I get one I’ll make sure to spend a good amount of time practicing and learning the machine before it touches my model. Thanks! Bradley -
Airbrush painting
Keithbrad80 replied to Keithbrad80's topic in Painting, finishing and weathering products and techniques
Thanks every one! Your suggestions really help! I have wanted a an airbrush for awhile so maybe it’s time to just get one and figure it out lol. Thanks! Bradley -
Hello everyone, So I’m an absolute novice with an airbrush, I have never owned one but am looking to buy one. I’m wondering if any one has some advise on how to get into airbrushes? The start up costs of a generator, cleaning material, and the airbrush seem a little steep for knowing little to nothing about it. I have paints, I typically use acrylic on wood, I’m not sure if that matters. I have found some stuff on using an airbrush and personally I think I’m pretty good with a regular can of spray paint so I’m looking more for suggestions on air brush systems that you would recommend for a total novice. Thanks! Bradley
-
Contact cement can be tricky stuff, assuming you are talking about a different glue than CA glue. With contact cement it works best if you apply a little to both sides of your joint then letting them sit for a second and then joining the two pieces together. This should stop it from being stringy, a blow dryer works well with contact cement as well. The build is coming along very nice! With that bent plank, it could have been because your clamps were too strong for that application. Shouldn’t be a big deal though, you can probably hide it or fix it later. nice work! Bradley
- 66 replies
-
- 1
-
-
- Providence
- Artesania Latina
- (and 1 more)
-
Looks great! Edge bending planks takes some practice but it looks like you got the hang of it, also your repair to that bottom plank looks good, you probably won’t be able to tell when the build is complete!
- 66 replies
-
- 1
-
-
- Providence
- Artesania Latina
- (and 1 more)
-
that’s some good advise, I haven’t had any thing break on previous builds but I could see how this could happen all the time, honestly I might start doing this just because
- 11 replies
-
- 2
-
-
- cutty sark
- Revell
- (and 2 more)
-
That pear wood is going to look awesome when done. Excellent work! Bradley
- 222 replies
-
- 1
-
-
- First Build
- Lady Isabella
- (and 2 more)
-
This is going to be a cool build, I’m excited to see how you solve some problems with limited resources. Good luck and have fun! Bradley
- 14 replies
-
- 2
-
-
-
- card
- flying dutchman
- (and 1 more)
-
Finding solutions to problems like this is why I really enjoy this hobby! I’m glad you figured this out! Bradley
- 66 replies
-
- 1
-
-
- Providence
- Artesania Latina
- (and 1 more)
-
You could try remaking this piece... if you have enough space on the same sheet of laser cut wood that those pieces came from you can trace the piece on a space that will be big enough to create a new one and cut that out, basically starting over. it’s a tough choice just because I’m not sure how visible this piece will be. For any small gaps you can add a bit of wood filler or a shim if it’s larger. here’s what I would do though, read through the instruction booklet and go on other build logs and understand what this pieces is and what role it plays in the overall structure of the ship. If you discover that this piece doesn’t play a big role in the structure of the ship then I would just make it look good, if it is super important then I would make sure it’s in the correct spot if not then it may cause more problems later. Regardless of how it looks I would make sure it’s in the right spot before continuing. your making good progress, good luck and have fun! Bradley
- 66 replies
-
- 1
-
-
- Providence
- Artesania Latina
- (and 1 more)
-
Thanks! Next time I try this I probably won’t go as far with the weathering, I may have over done it in some spots.
-
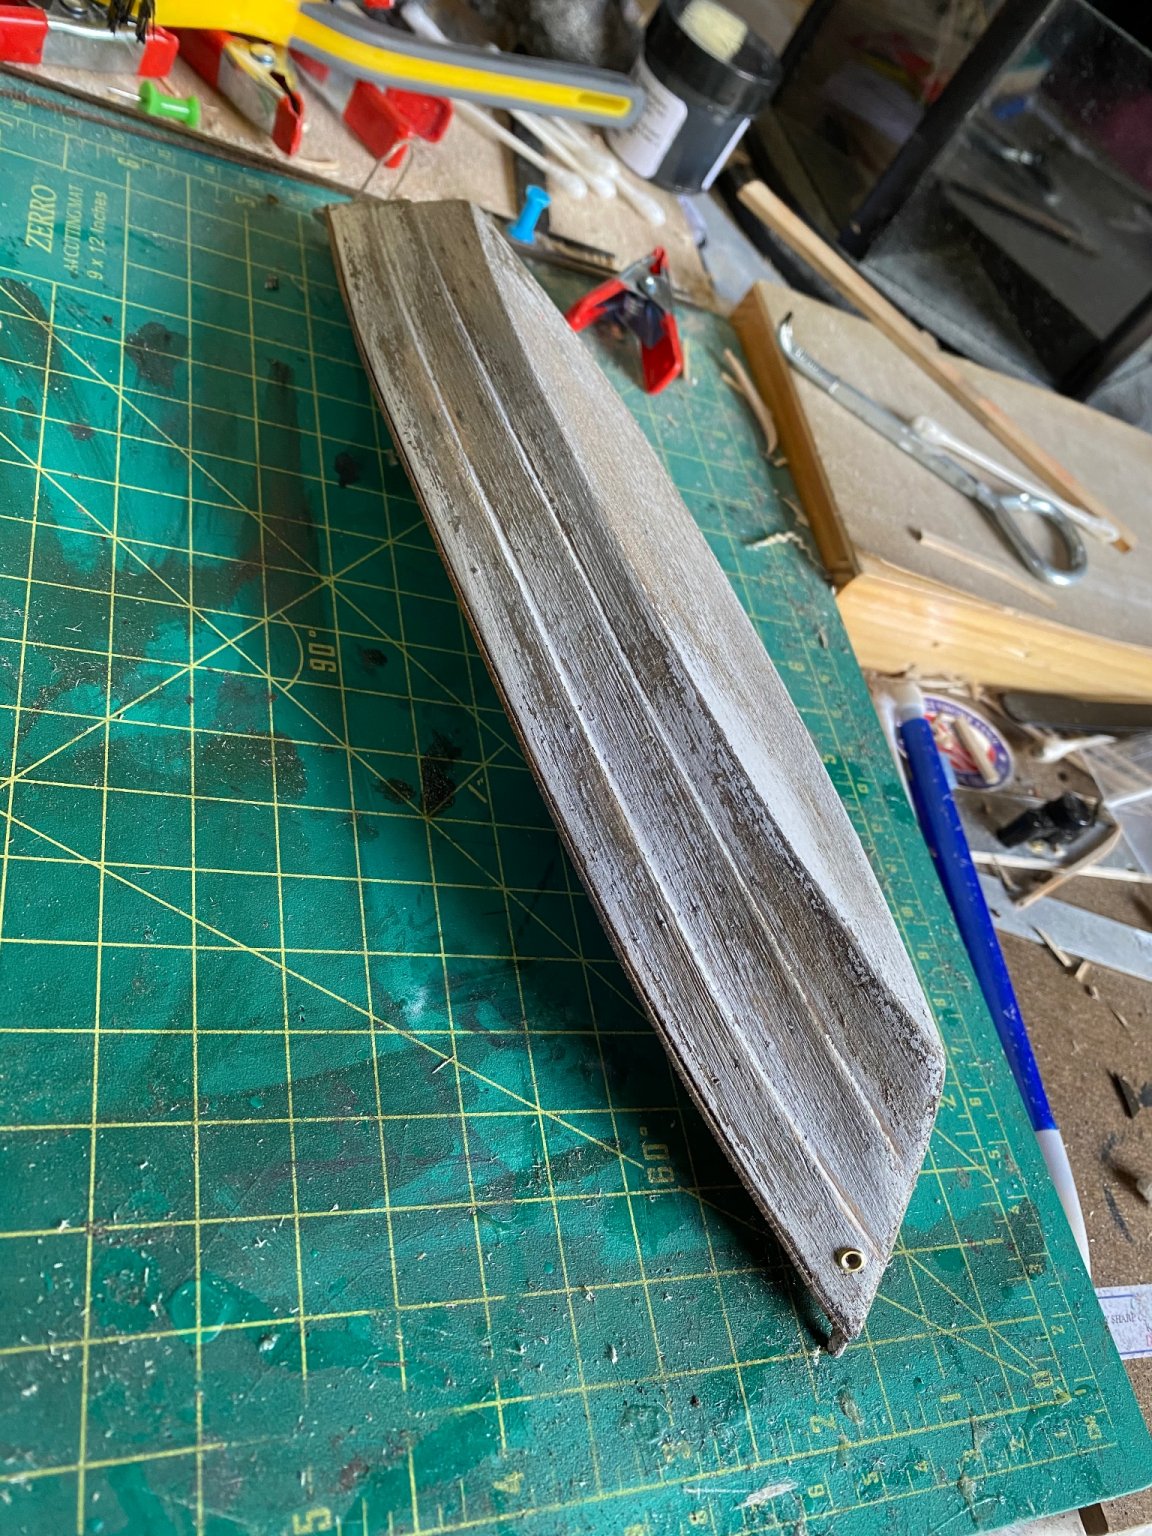
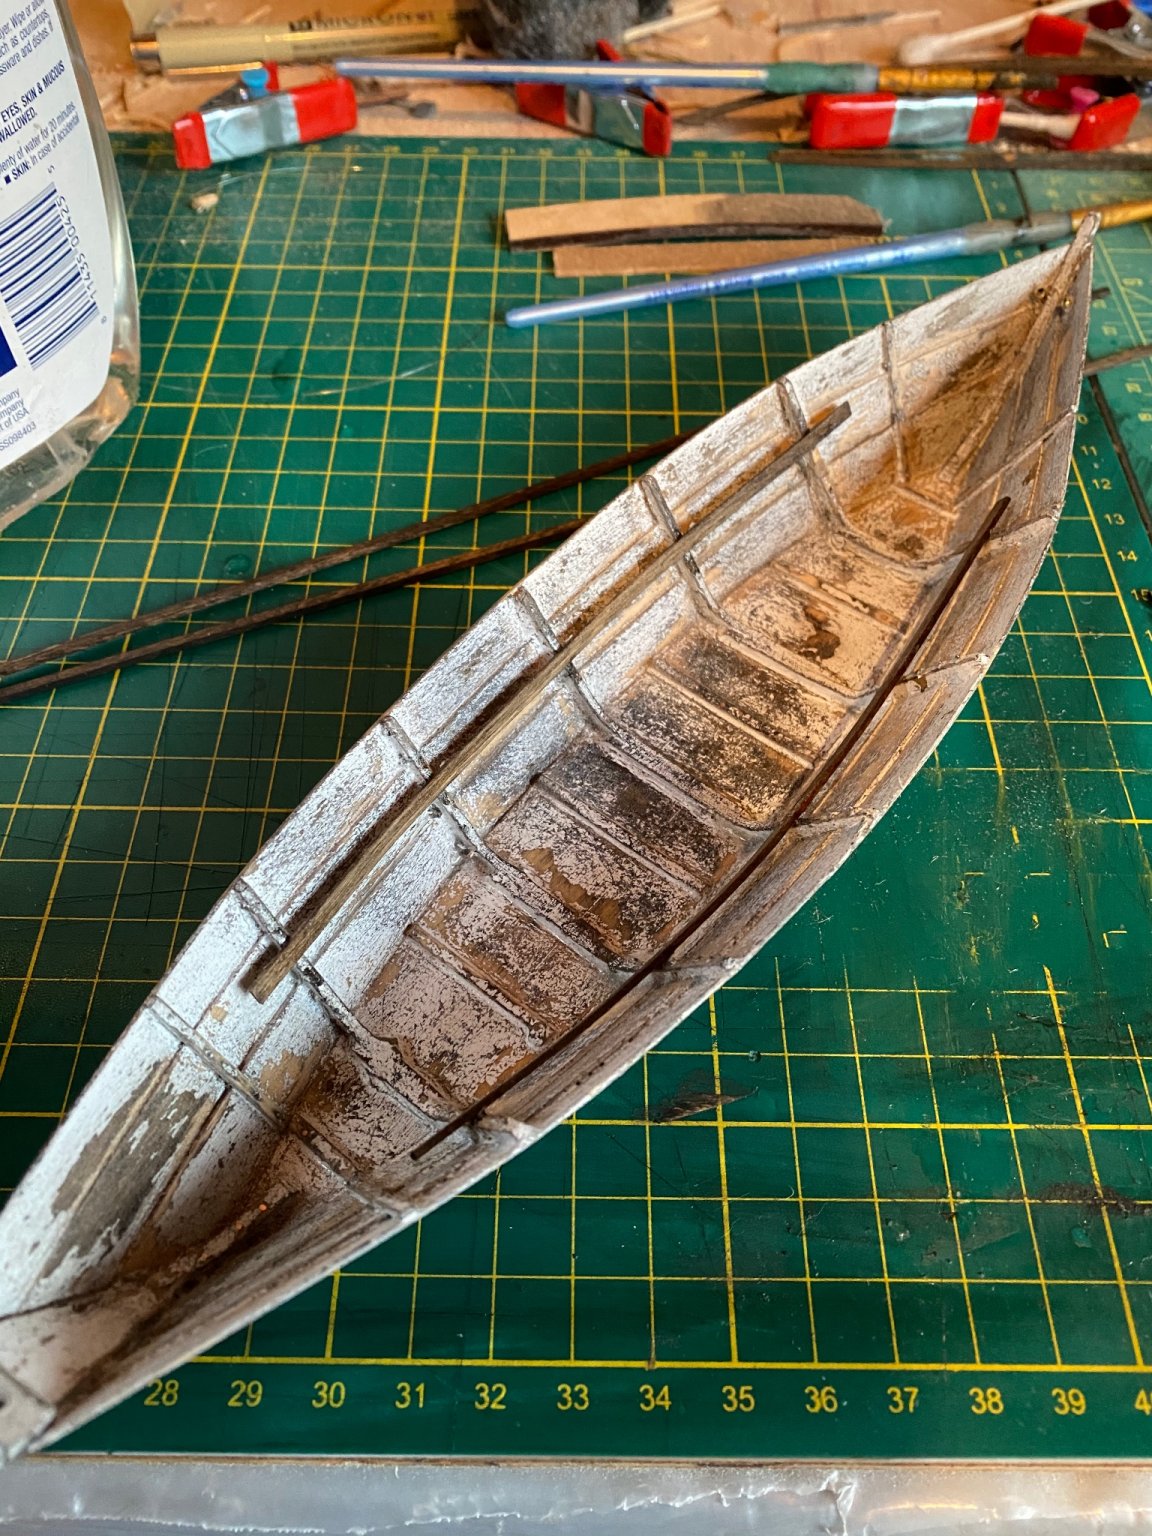
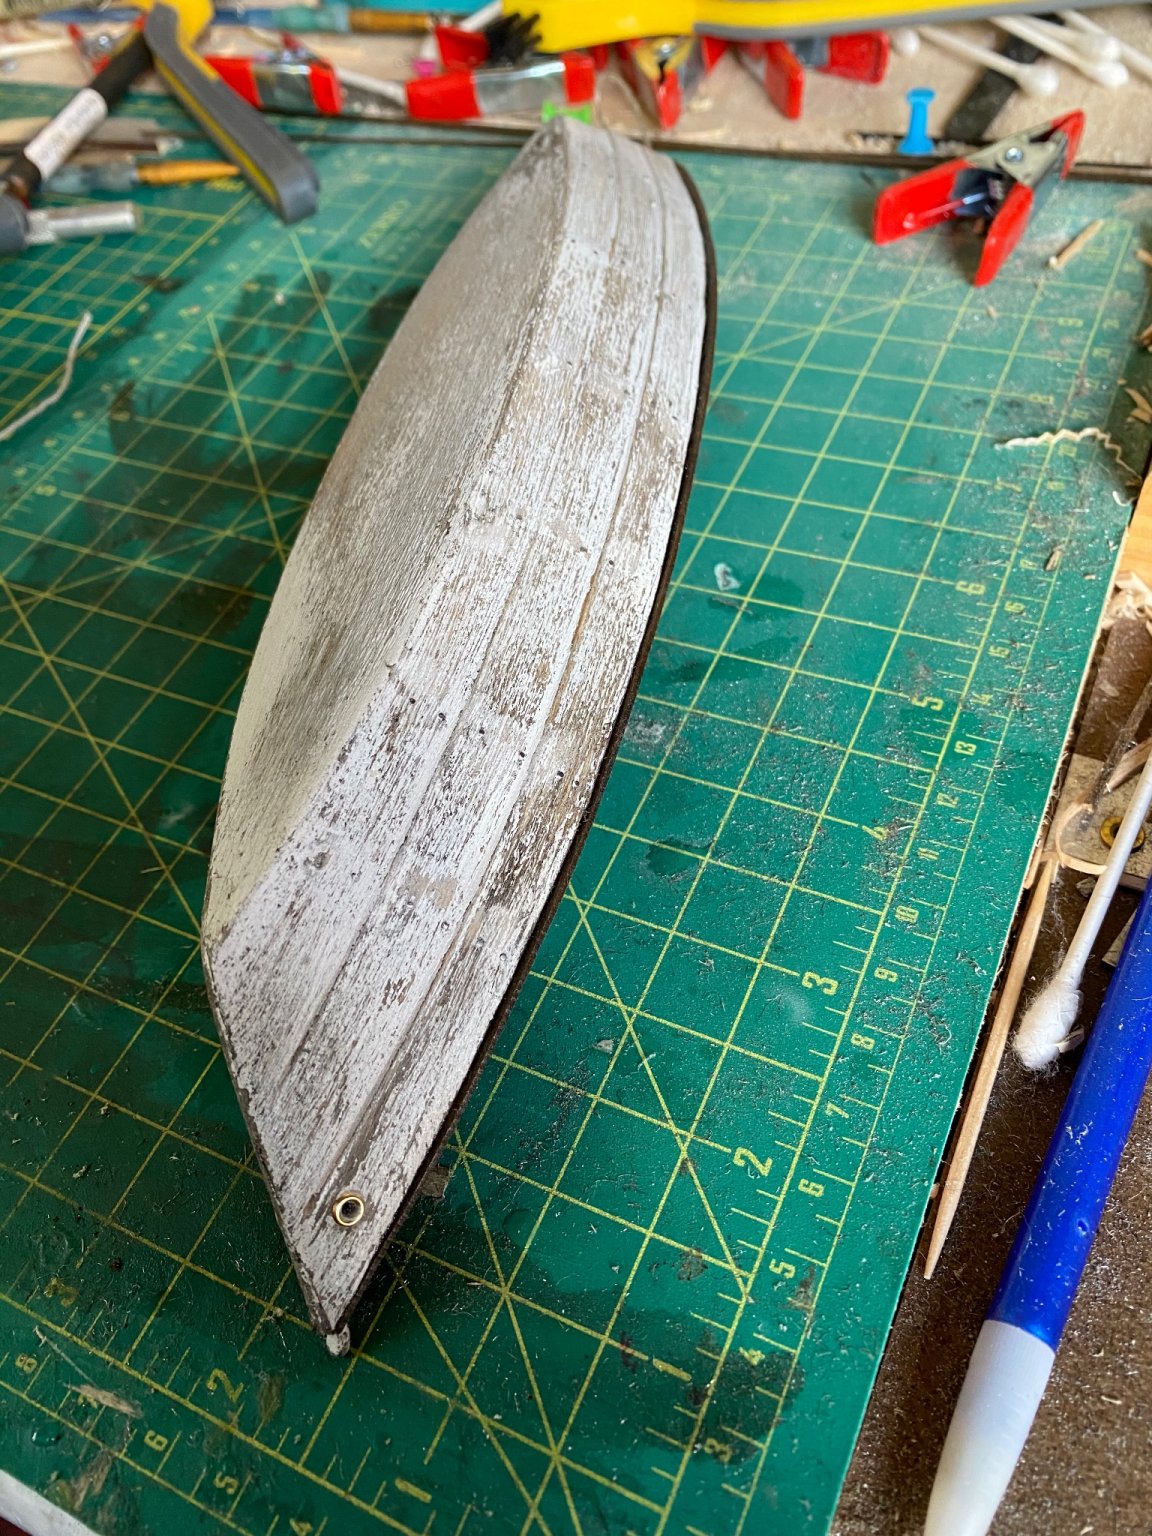
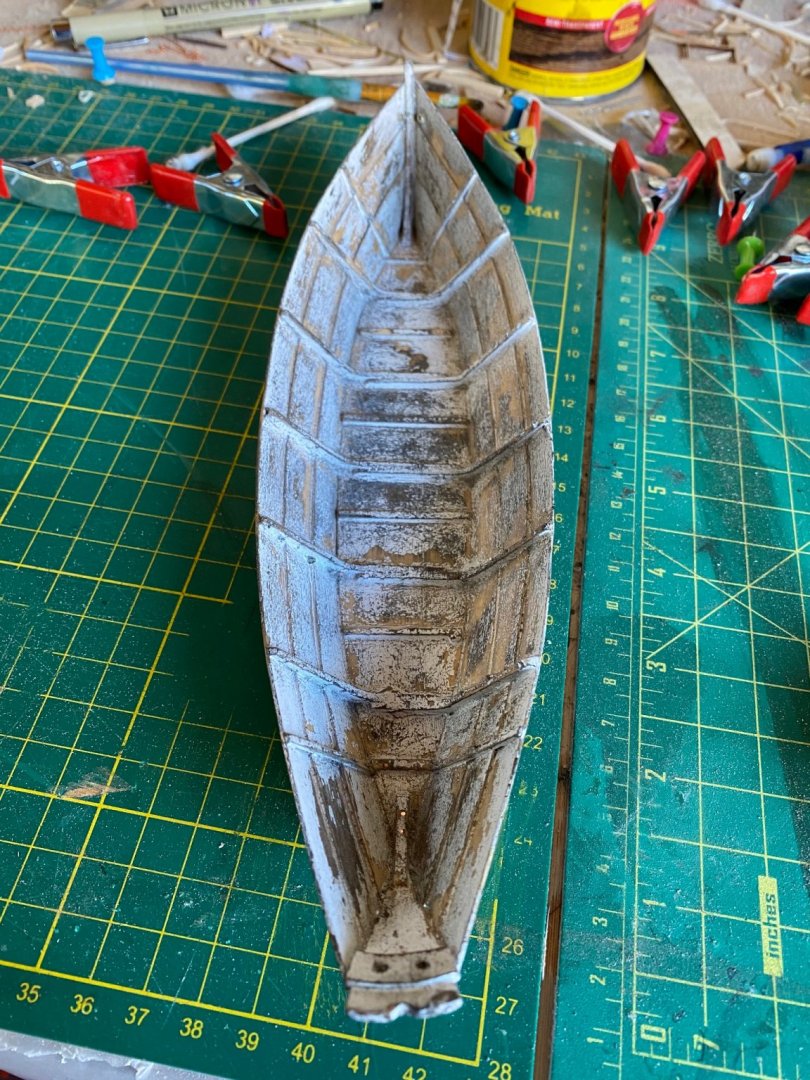
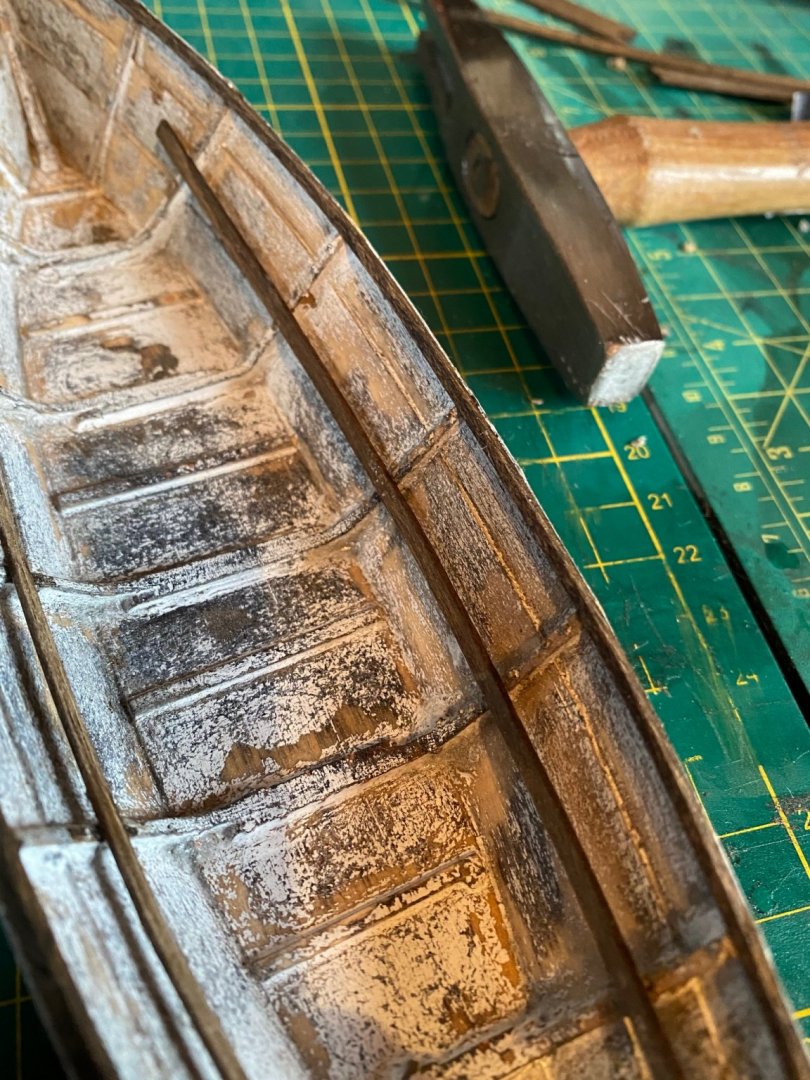
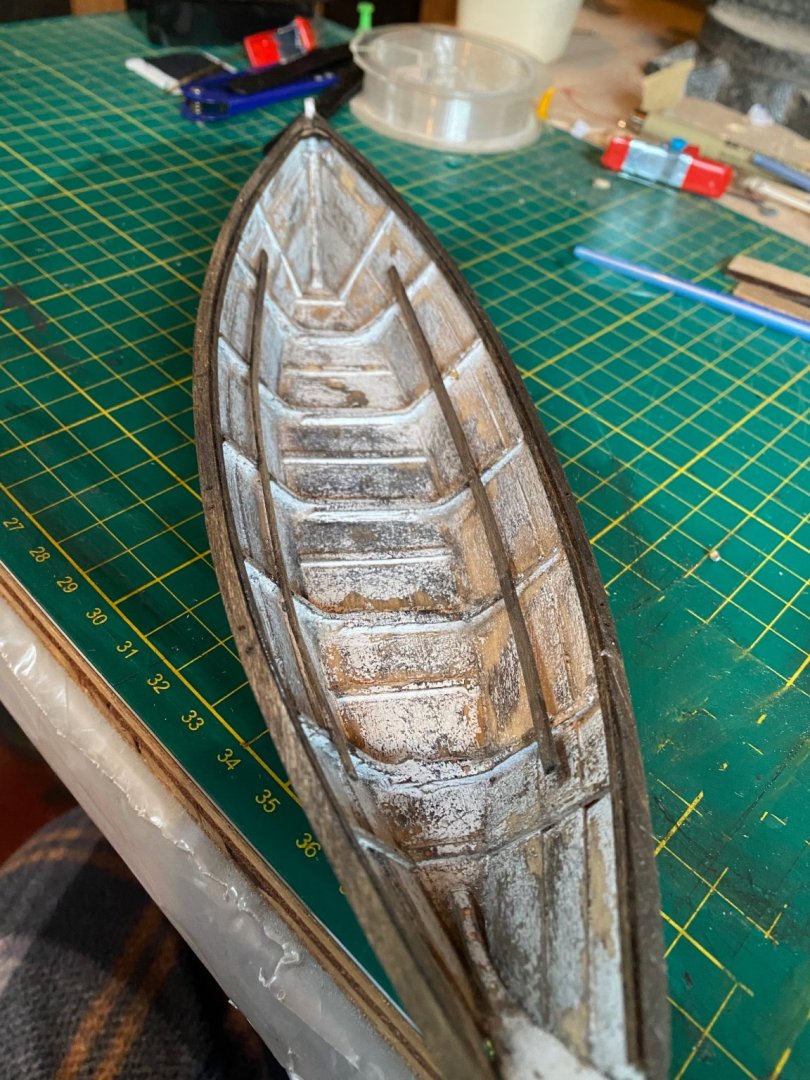
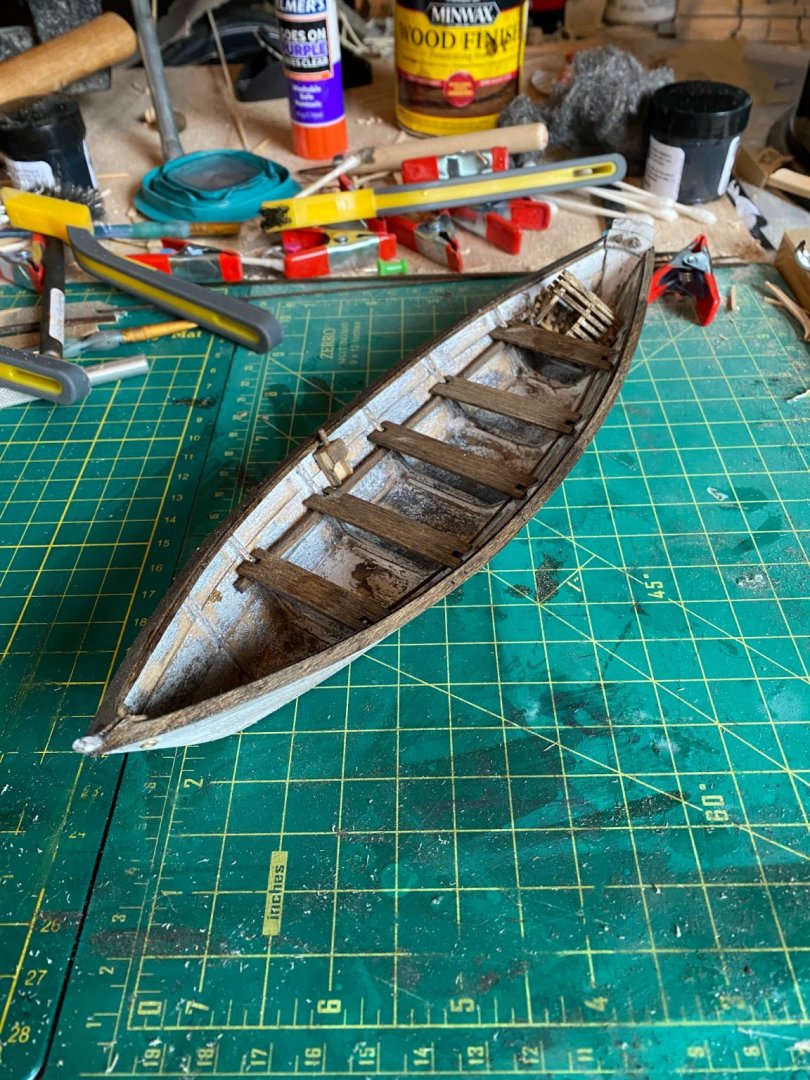
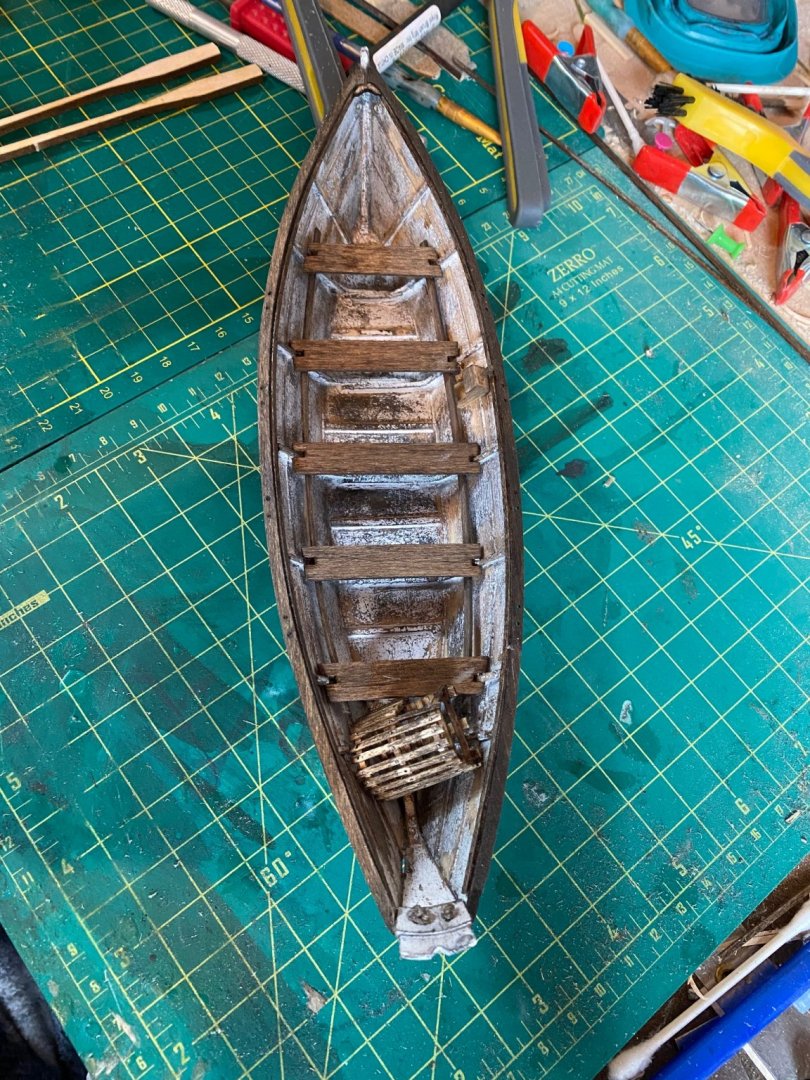
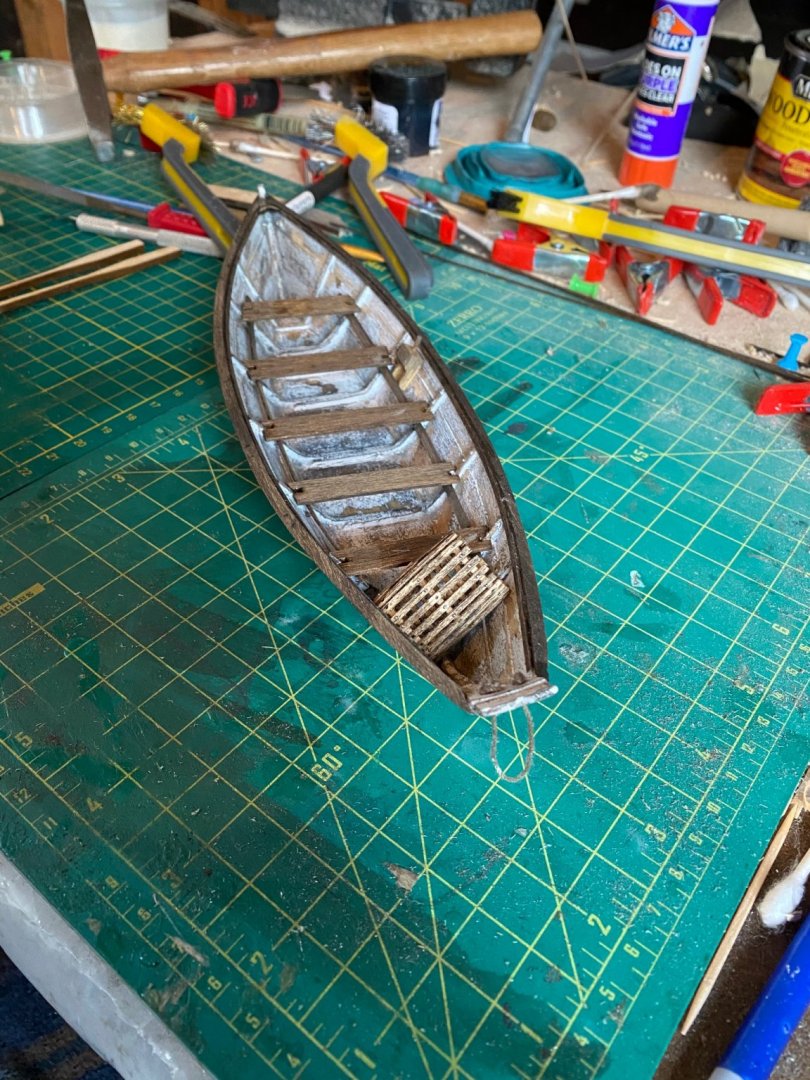
Thanks every one for the suggestions! I ended up leaving the net off, maybe I could add it in later but I don’t have the urge to do it now. So I’m pretty much done with the first one and I’m happy with the results! I started by trying to create a weathering look on the dory before installing the seat risers, I gave it ten coats of hair spray followed by a semi gloss white spray paint. Once every thing was dry I used several different wire brushes and some water to create the look I was after. Here is the first coat of paint: I wasn’t very happy with the results, by the time I achieved the textural lines in the wood I was wanting the paint was almost entirely gone. I mixed some grey paint and water at a ration about 1:15 and painted it on there. I practiced a few times before applying this wash but the results were great, again. I gave it a light sanding with extra fine steel wool and painted it white again, here it is after the second coat: I was pretty happy with the overall result of my paint job, the inside I only painted once and thought it was pretty good, here it is: I installed the seat risers next, but from this point forward I stained and weather any laser cut pieces before glueing them in place. Here are the risers: A small notch is to be cut into the tip of the frames and side cleats to make way for the gunwale, I measured this notch to be .06 inches so I cut those out and got the gunwale installed: The breast hook was next, I didn’t get a picture of it but there was a small gap around the back of the breast hook. This gap was covered by the cap rail so it didn’t end up being an issue. Here is the cap rail: The seats were next, before I glued them down I made sure to weather these more than the rest, I don’t think it made much of a difference in the end, but getting the seats in there really brought it all together. Here is where we are at: I still have a few things to clean up on this model and then I’ll mount it, and move on to the next one. Thanks again for the support. Bradley


-
Beveling can be tough unforgiving work, you will have another chance to fix this bevel once all the bulkheads are on there. I would invest in a small hand plan it’s probably one of my most used tools while planking! Your progress looks great to me, good luck and have fun! Bradley
- 66 replies
-
- 1
-
-
- Providence
- Artesania Latina
- (and 1 more)
-
The lettering looks excellent! I think this method is going to look cleaner than trying to get the letters on the transom directly. Bradley
-
Fantastic work, I’ll be following your work! Also, congrats on getting married! Bradley
-
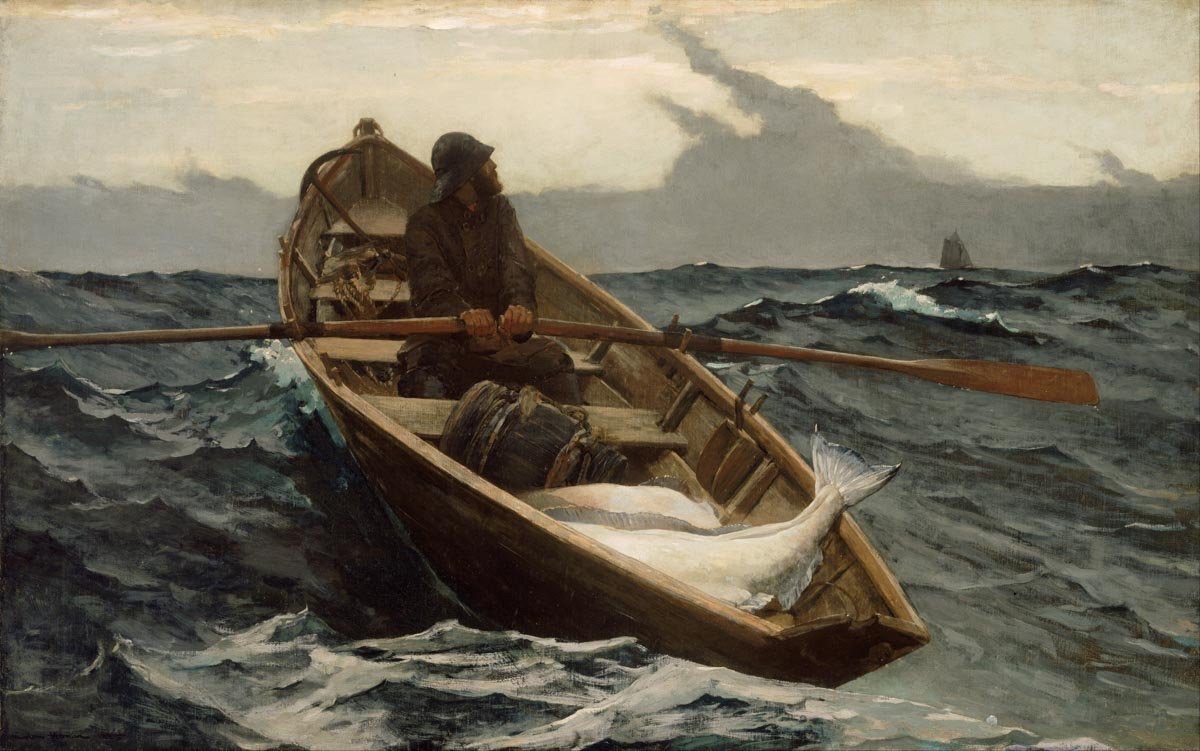
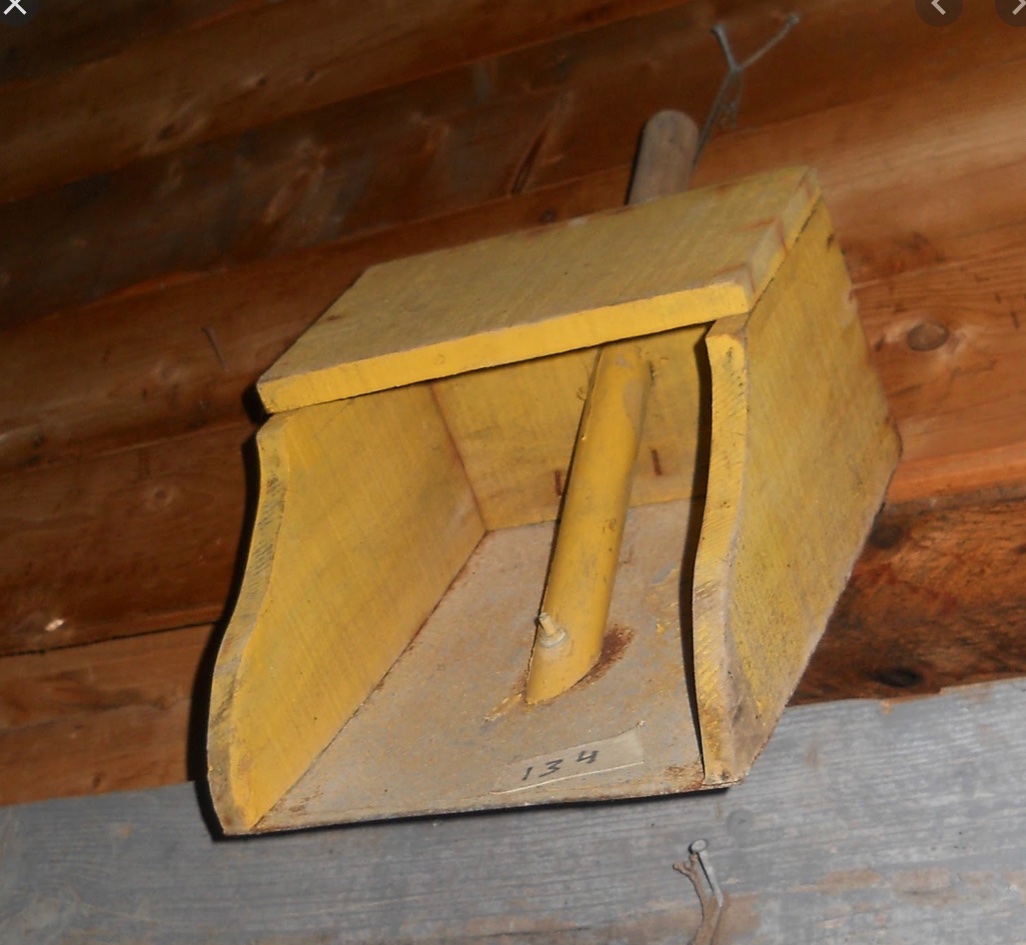
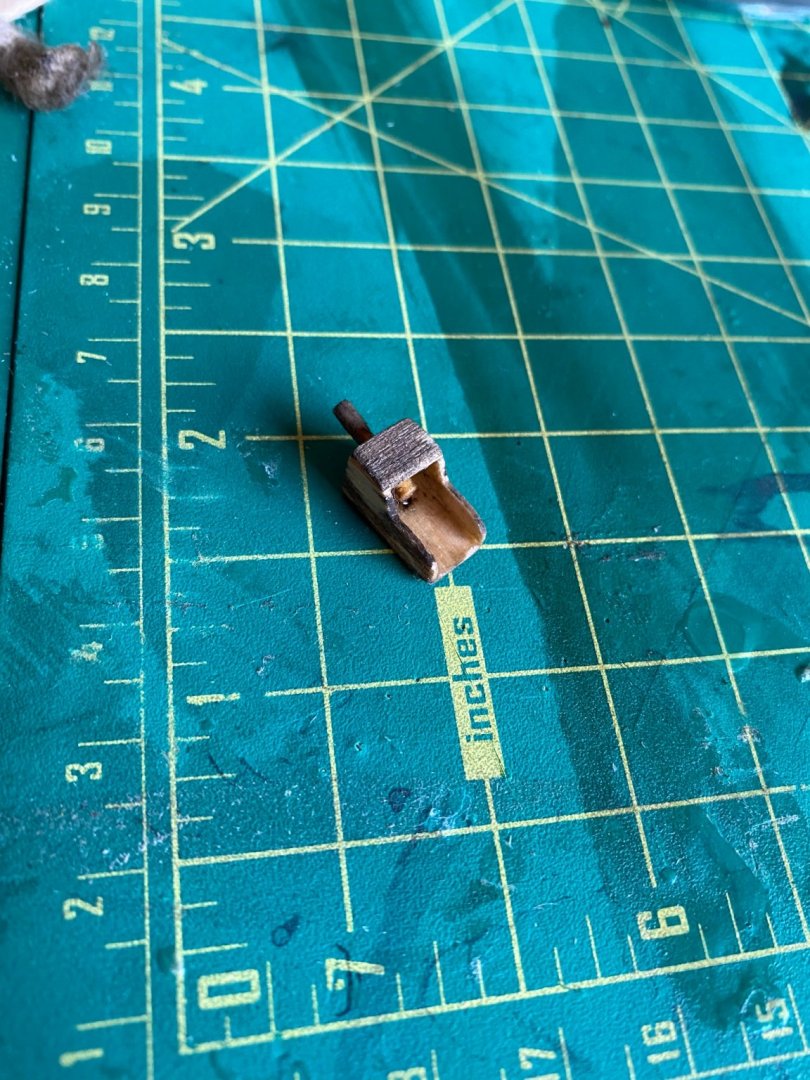
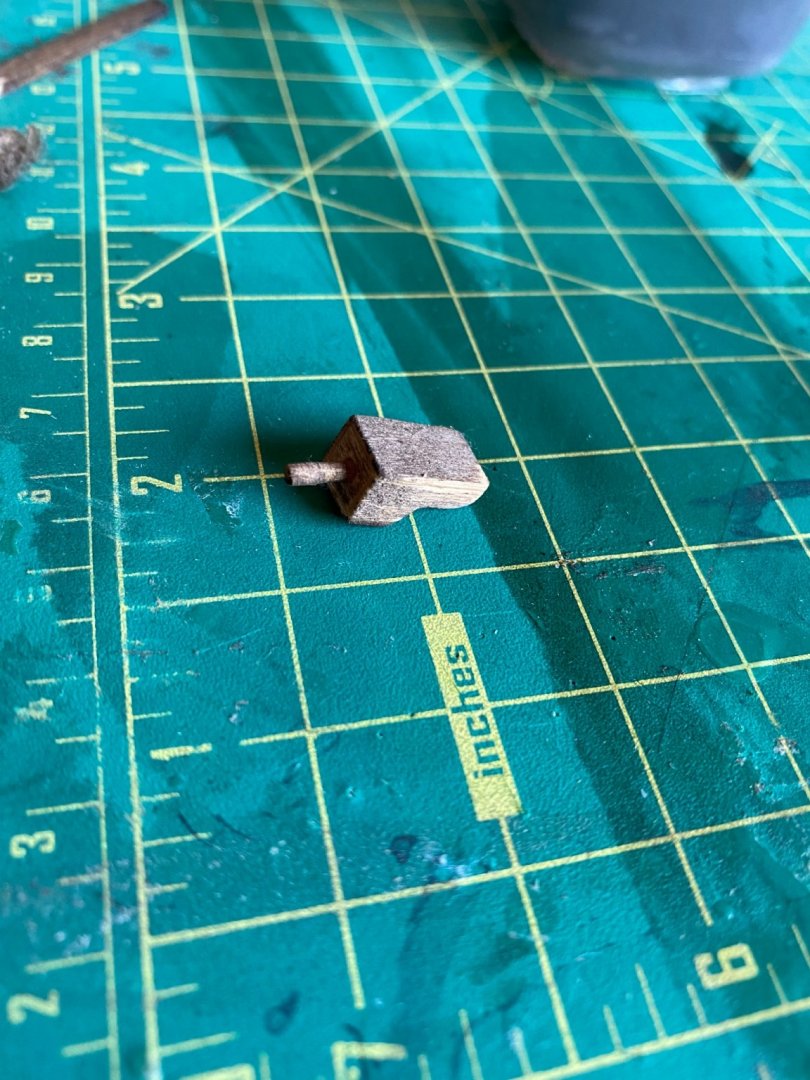
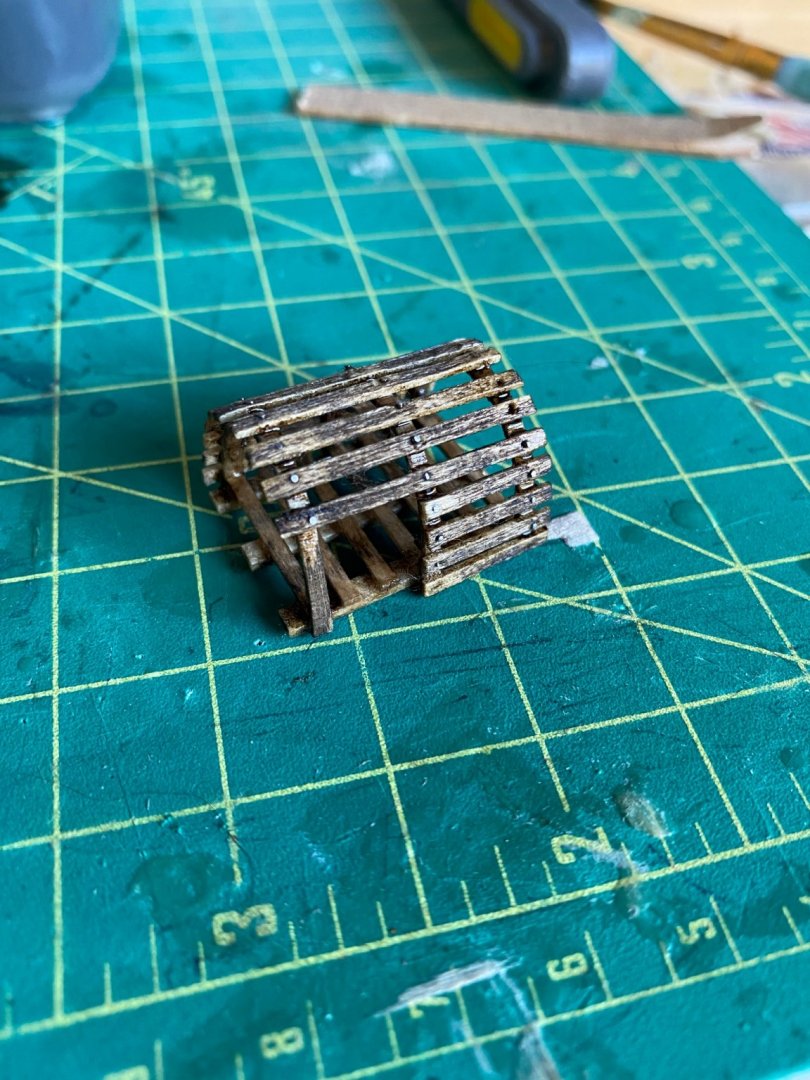
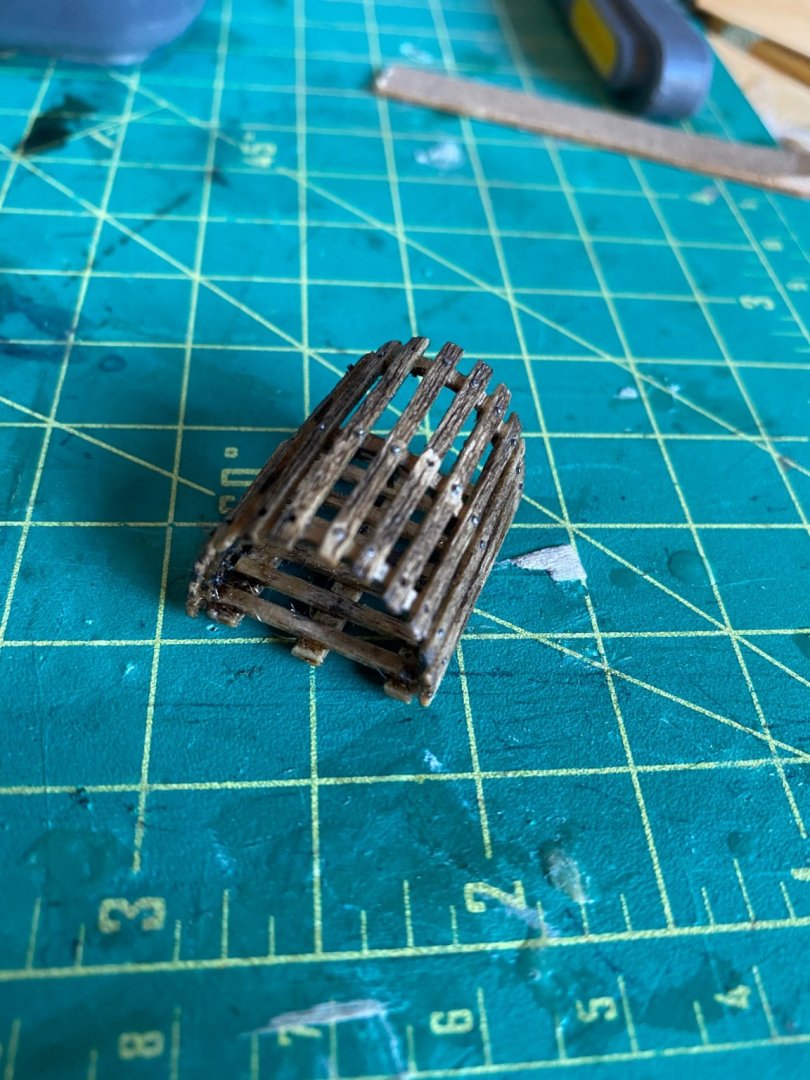
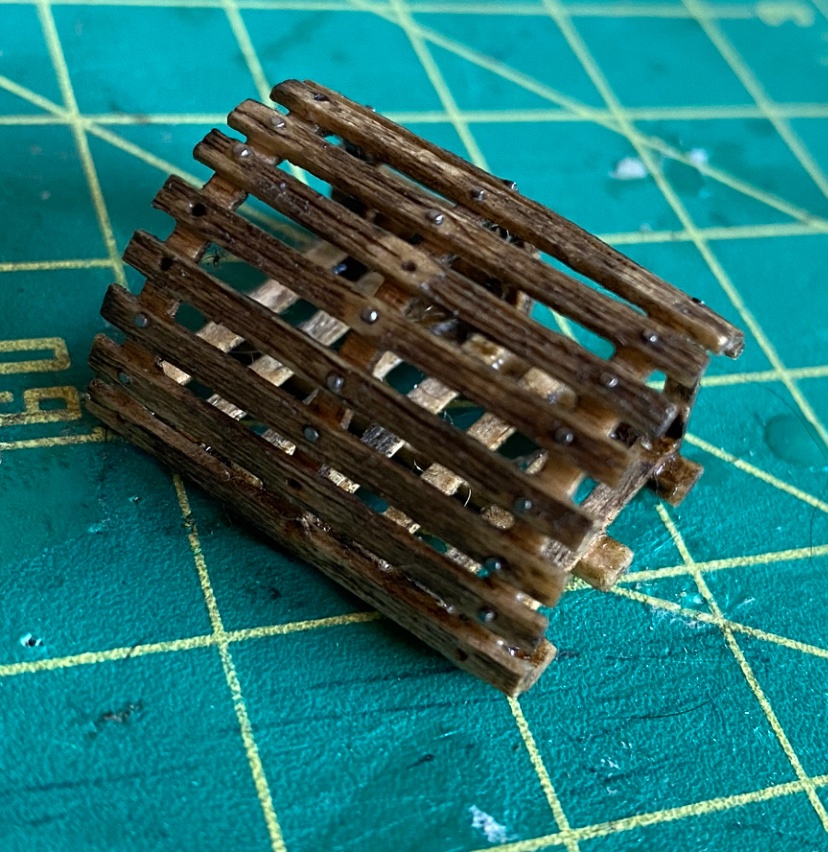
Hello everyone, so not a ton of work on the ship so far but thought I would share what else I’m building for the dory. I saw this painting in another build log, and I decided I wanted to try to make the things you would typically see in a fishing dory in the 1850s. this is the bailer, I’m not certain, but I think these would have been used to scoop water out of your boat. I had a hard time finding dimensions for one of these so I just tried to estimate. below is my attempt at a bailer. The lobster trap was another thing I wanted to make as well. I read through a couple build logs and saw what other did as well as photos and I think mine turned out ok. so I want to add a net to my lobster trap but am not sure how to make it. I tried setting up a jig to make a net with some fine fishing line, but it didn’t go my way. If any one knows how to make a small net that would be great! Thanks again. Bradley