.jpg.2c2c29e54623bd7b752bc2cdab599665.jpg)
Danstream
-
Posts
557 -
Joined
-
Last visited
Content Type
Profiles
Forums
Gallery
Events
Everything posted by Danstream
-
.thumb.jpg.c459ce4140b54c12eddb8eedfd446df3.jpg)
F-86F-30 Sabre by Egilman - Kinetic - 1/32nd scale
Danstream replied to Egilman's topic in Non-ship/categorised builds
It looks very good EG, reflectivity is very credible. Surface details are awesome, I can even see some waviness of stressed skin, am I right? Best regards, Dan -
Aermacchi MB 339A by SigEp Ziggy - Italeri - 1/72
Danstream replied to SigEp Ziggy's topic in Non-ship/categorised builds
Good progress on this graceful plane. In Italy, this jet was quite popular being used as military jet trainer and by the aerobatic team of the Italian Air Force (Frecce Tricolori). One comment/suggestion: please reduce the thickness of the air intake walls, from the picture where your hands hold the wings the walls look very thick. Best regards, Dan -
Yes, these circular sectors are weights to bring the center of mass of the elevator on top of the hinge line. This is one measure to avoid flutter or aerodynamic coupling between vibration of the tail and the elevator. Tabs are on the trailing edge of the elevator. Nice splinter camo, by the way. Dan
-
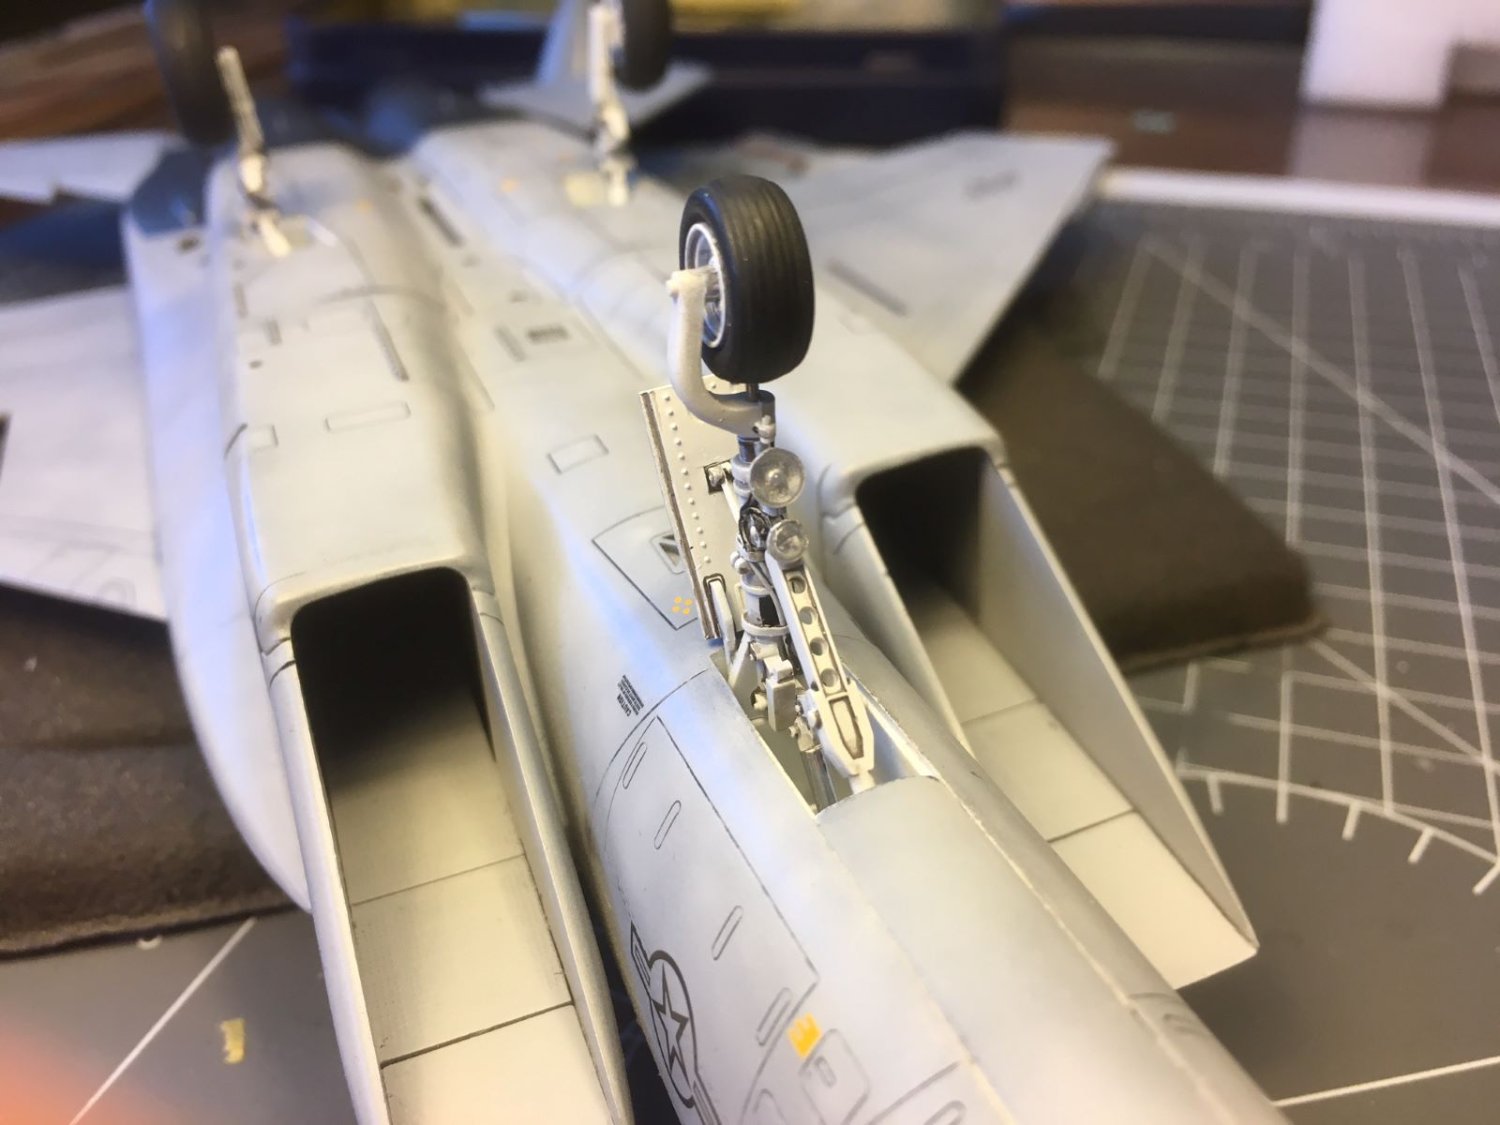
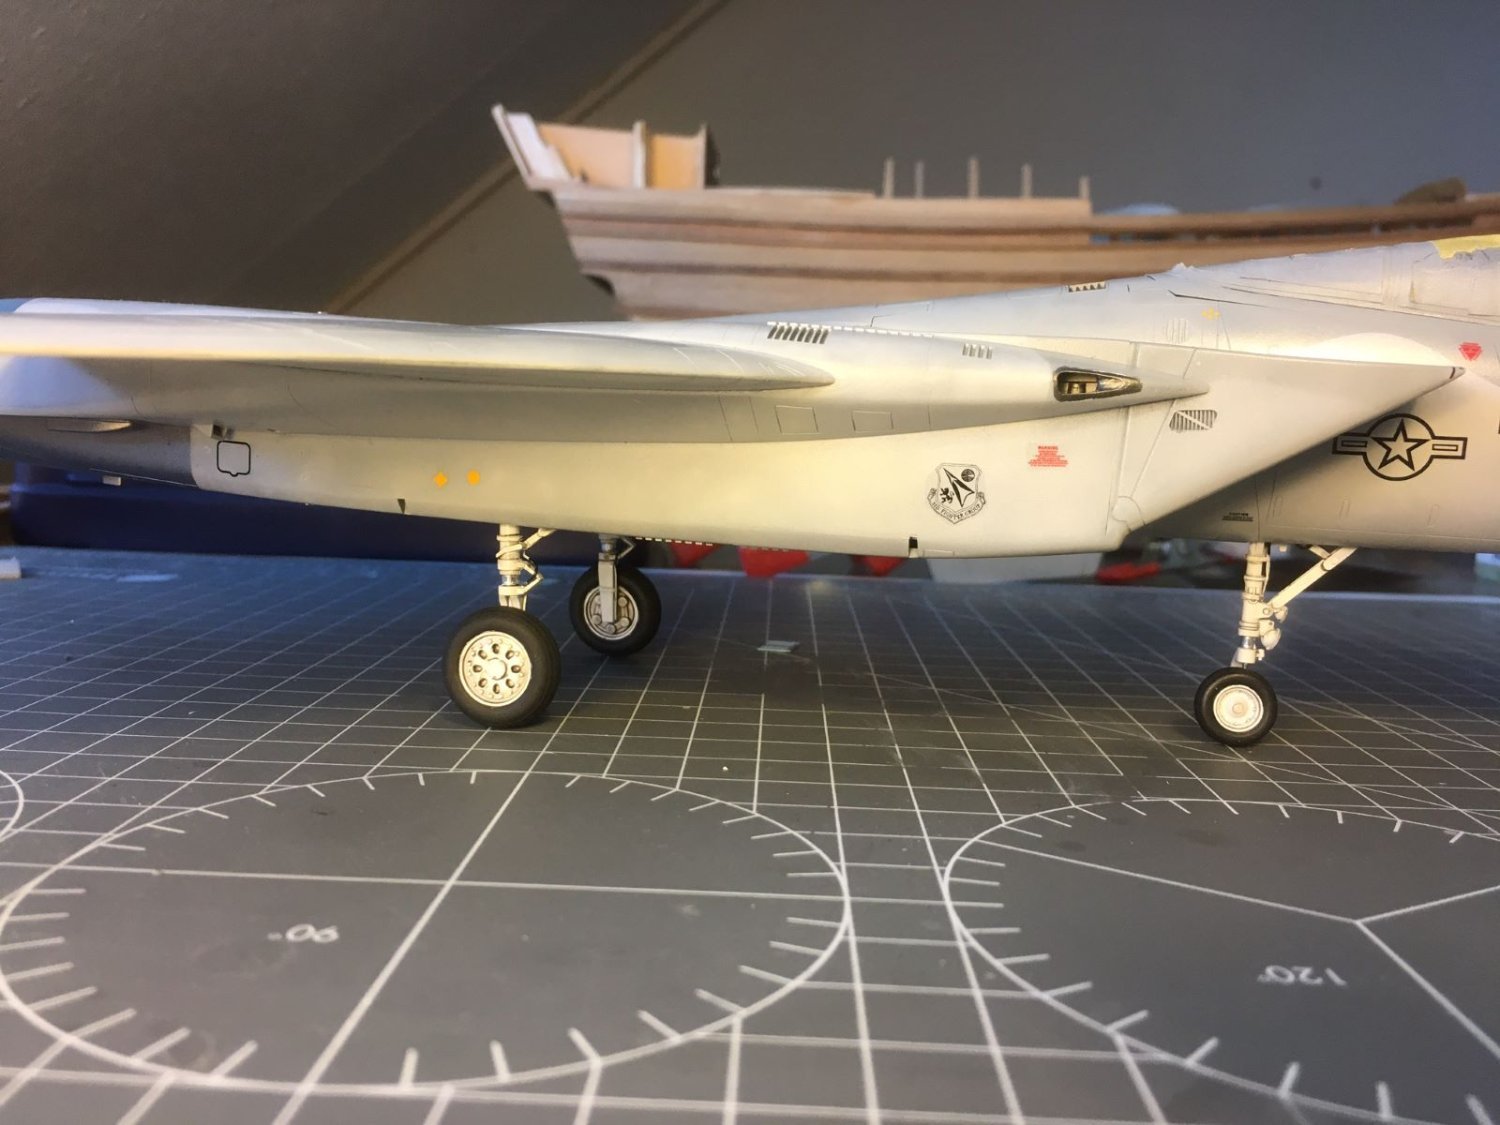
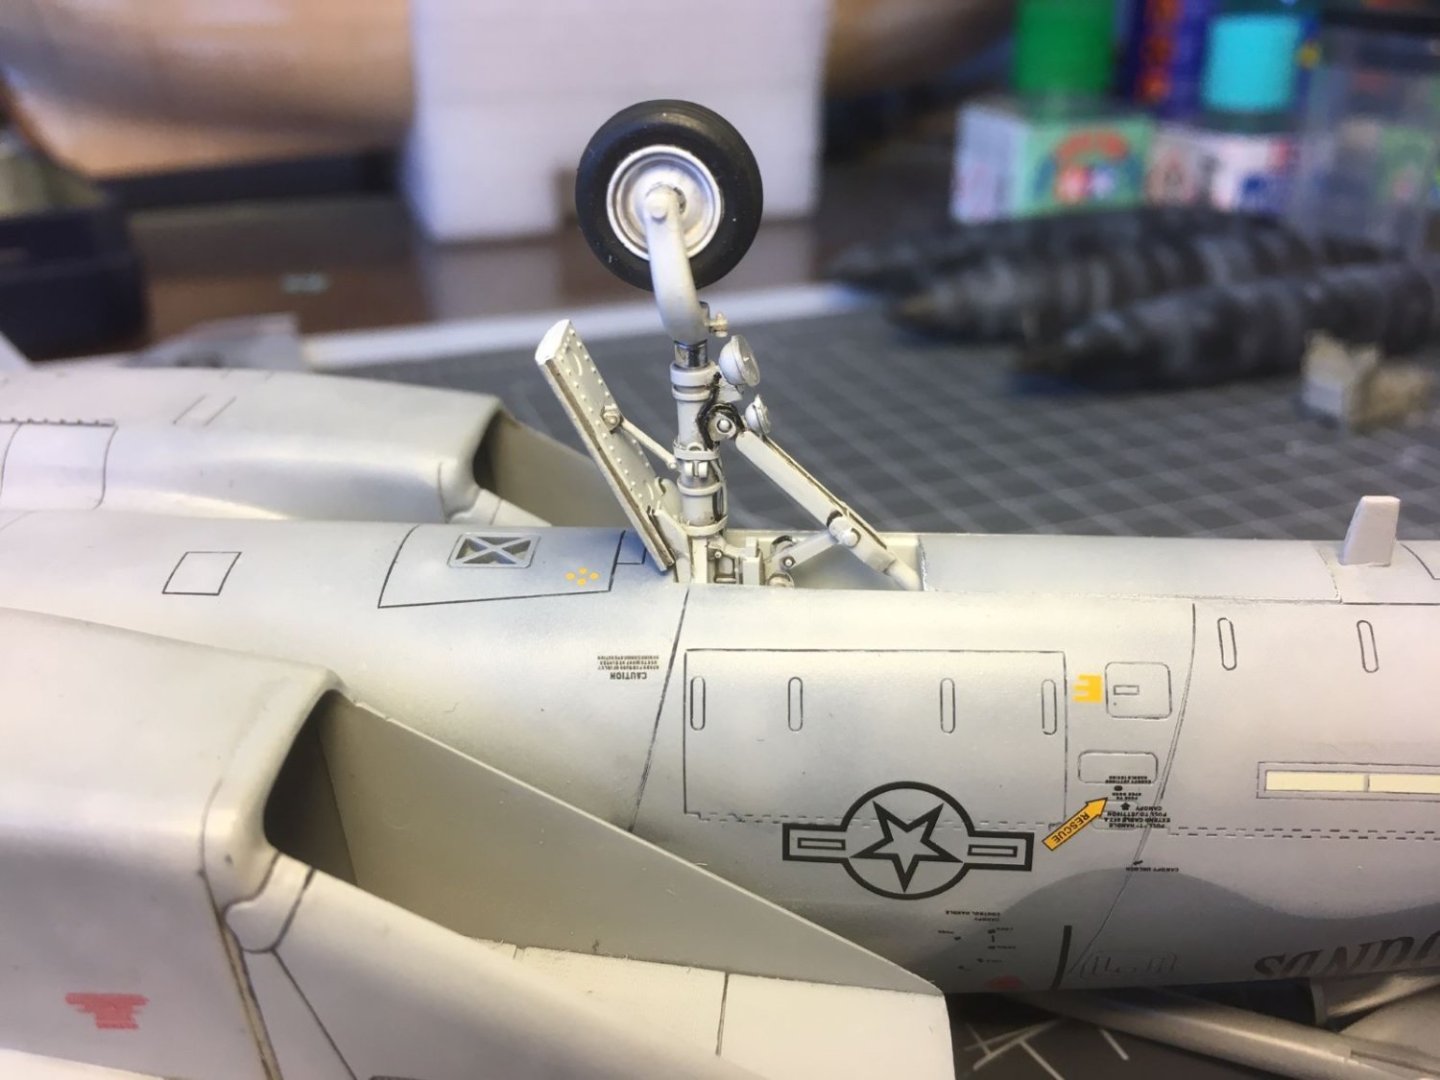
Thanks Javlin and thanks for the 'like's. Small bit and pieces take very long, hence, just small progress at the time. Added black smoke puffs of the starter exhaust on the belly and LG pieces now permanently mounted: Main LG: Nose wheel: Back to tanks and missiles. Kind regards, Dan


- 137 replies
-
- 18
-

-

-
F-86F-30 Sabre by Egilman - Kinetic - 1/32nd scale
Danstream replied to Egilman's topic in Non-ship/categorised builds
Although clearly we have never met, your post stroke me. I hope everything will go well. Give credit to what the doctor said and try to keep up your spirit. Anytime you want playing with our toys, we will be here to have a good talk and to listen to you. I want to see your handsome silver Sabre finished! Take care, Dan -
AVRO Lancaster by Papa - FINISHED - Airfix - 1/72
Danstream replied to Papa's topic in Non-ship/categorised builds
Nice and clean build. About the decals, the shining effect of the decal carrier is called 'silvering' in the plastic model community. It is caused by air trapped between the film and the roughness of the matt paint. I am afraid it will not go away with a matt coating. At this stage what you can do if that really disturbs you is: - paint over the obvious film with the colors of the camo (least invasive). Or: - With patience, if you have not sealed the decals with a varnish, remove the decal with repeated application of decal liquids (or warm water); once removed, you can: - cut and remove the biggest carrier film portions and reapply the remaining parts with decal liquids, or - brush a product like 'Future' over the paint of the decal areas and reapply the decals with liquids; at this point surfaces will show a variation of finishes which will need to be made uniform with a layer of matt coating. Perhaps all this is too cumbersome and not worth the effort, but this is up to you to decide. The model has anyway its own character of an 'old school' model and I would leave it as is. Best regards, Dan -
F-86F-30 Sabre by Egilman - Kinetic - 1/32nd scale
Danstream replied to Egilman's topic in Non-ship/categorised builds
Good fix of the dihedral angle. About that large gap, that needs to be filled with a styrene strip, any other filler will crack with time. Good luck, Dan- 585 replies
-
- 10
-
-

-
Good progress, it's an airplane now. Dan
-
F-86F-30 Sabre by Egilman - Kinetic - 1/32nd scale
Danstream replied to Egilman's topic in Non-ship/categorised builds
Good steady progress, looking forward for more. By the way, speaking of a good filler that can be sanded and even scribed, have you considered using CA glue mixed with talc powder? Best regards, Dan -
Russian T-62A Tank by CDW - Tamiya - 1/35 Scale FINISHED
Danstream replied to CDW's topic in Non-ship/categorised builds
Finely crafted and finished model! I am not an expert of these vehicles, but I can recognize that. By the way, I read today that this old type was just deployed by Russia in Dnepr. Congrats for the nice result, Dan- 67 replies
-
- 10
-
-
Amazing result. Even more amazing thinking that is made by folded paper! Truly enjoyable model. Congrats, Dan
- 150 replies
-
- 12
-
-
F-86F-30 Sabre by Egilman - Kinetic - 1/32nd scale
Danstream replied to Egilman's topic in Non-ship/categorised builds
Good to see you back in action. Good move on replacing the gun ports although not trivial surgery. I am wondering whether it something could be planned at this stage for their finish. I mean, they have typically a shiny metal finish which stands out from the rest of the aluminium finish, hence could it be convenient to cover them with a kind of kitchen or tape foil now, before inserting them in their squared hole? Just a speculation, I never did it before. Best regards, Dan -
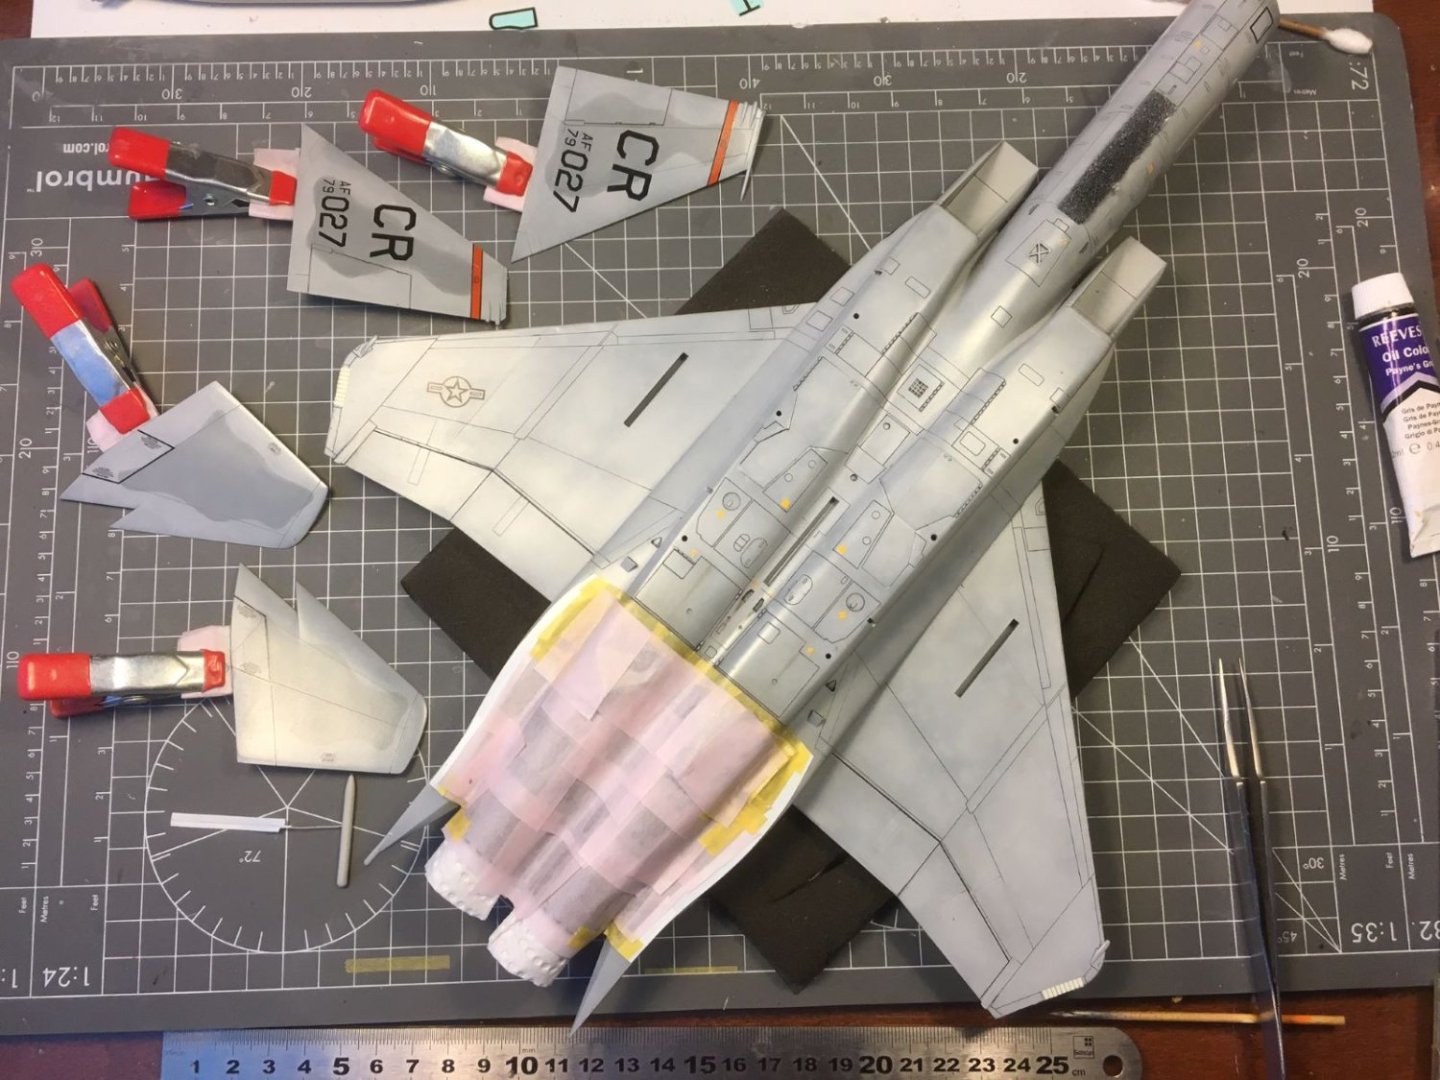
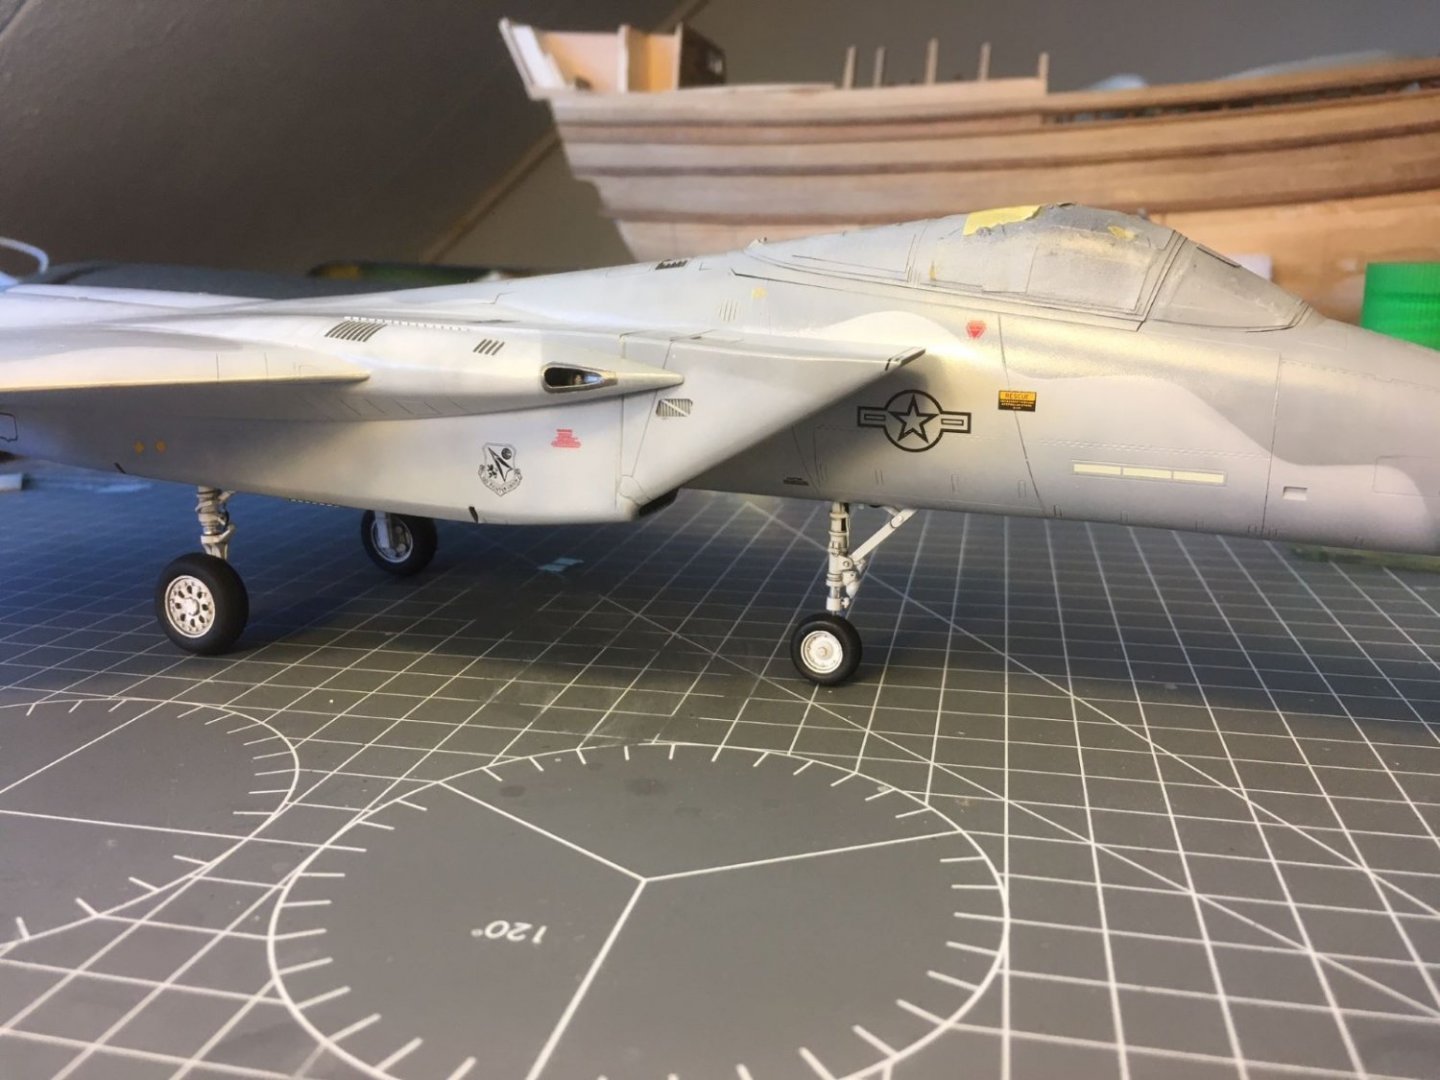
Hi, a small update that concludes the application of the camouflage of the main airframe. I masked again the metallic panels in view of the final coating of matt clear varnish. In fact, I want to retain the shiny finish of the metallic panels: After spraying a thinned layer of Tamiya matt (doped with some drops of gloss), after long time, I can remove all the masking tapes also from the canopy: I am pleased with the variety of finishes of the metallic parts and painted surfaces: Now I will concentrate of the huge drop tanks and on the missiles. Best regards, Dan
- 137 replies
-
- 15
-
-
-
Precise and clean build. It looks like a fine model. Dan
-
Thank you Dave! I appreciate your evaluation. I will remember the 'rivet trails' definition. Dan
-
... and sharp result, if I may say it. Dan
-
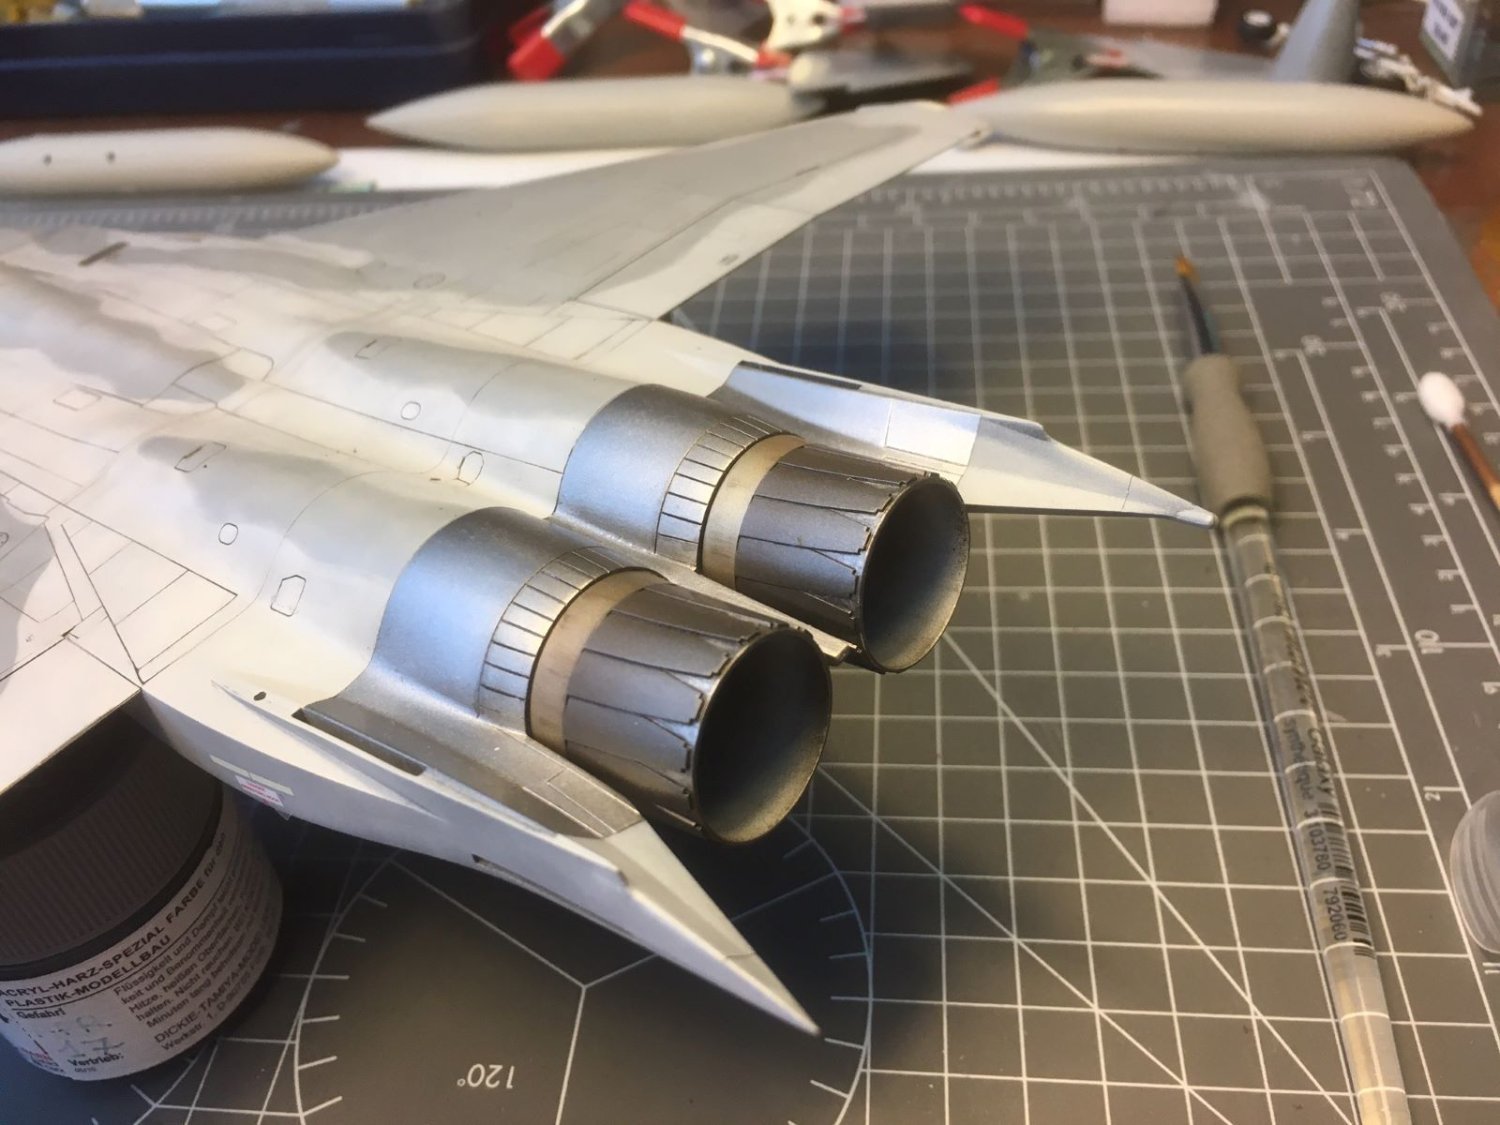
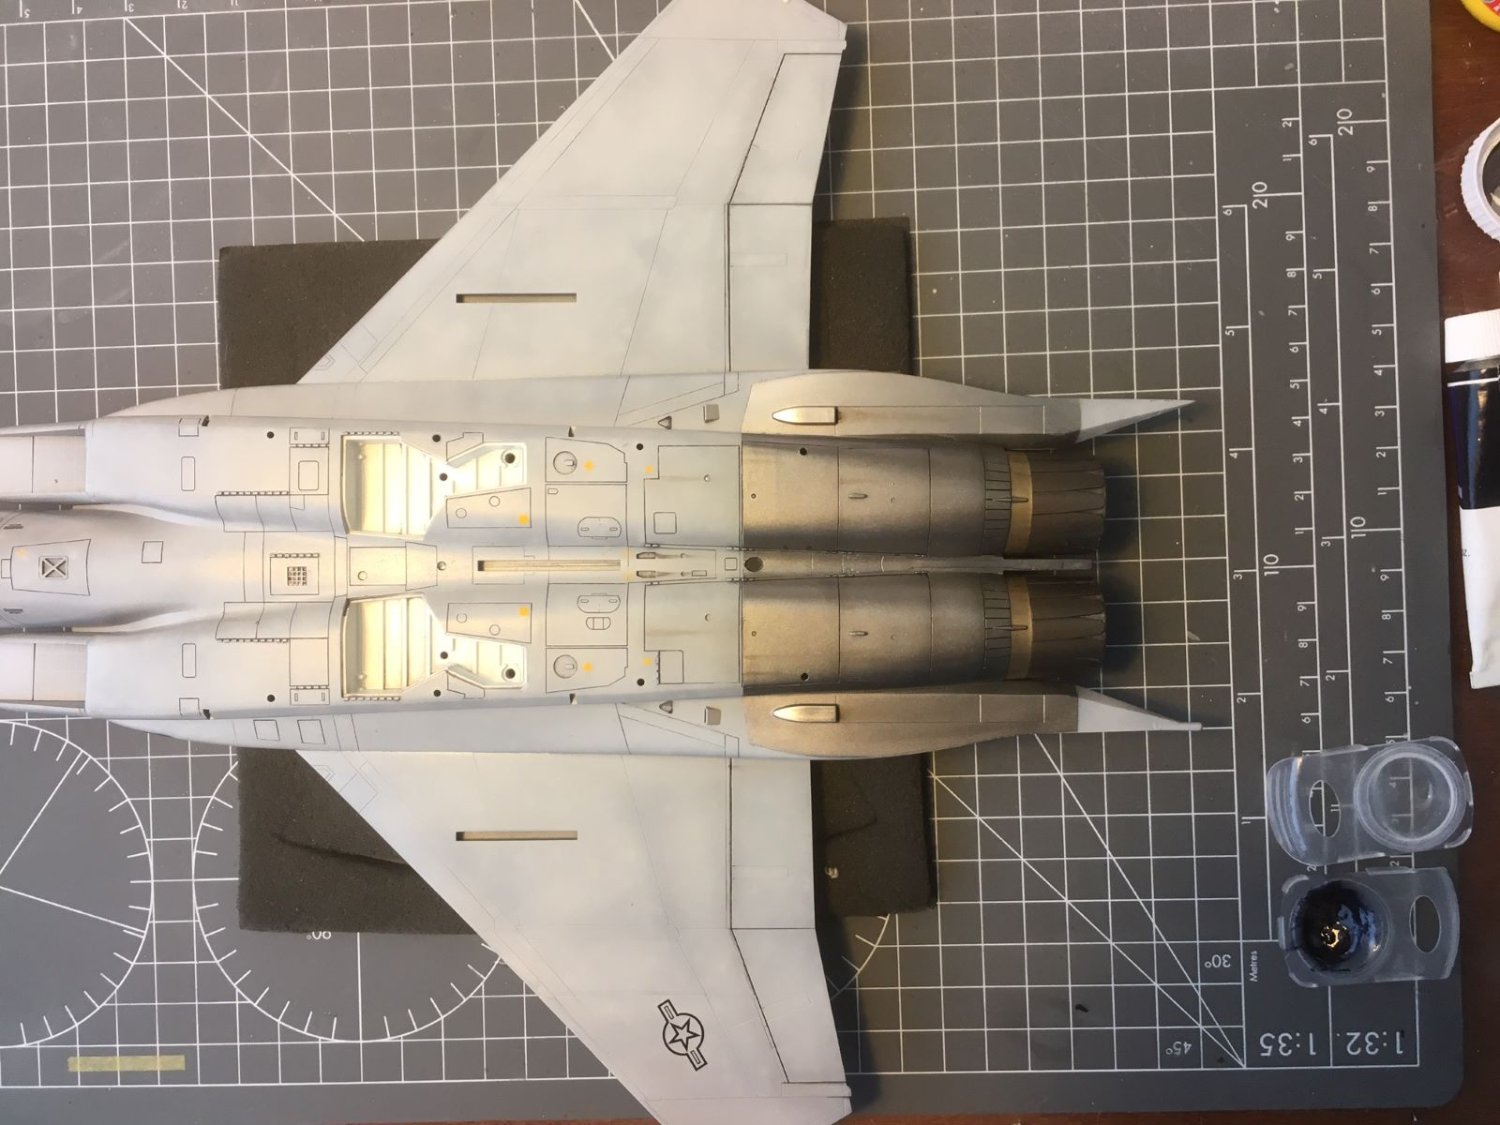
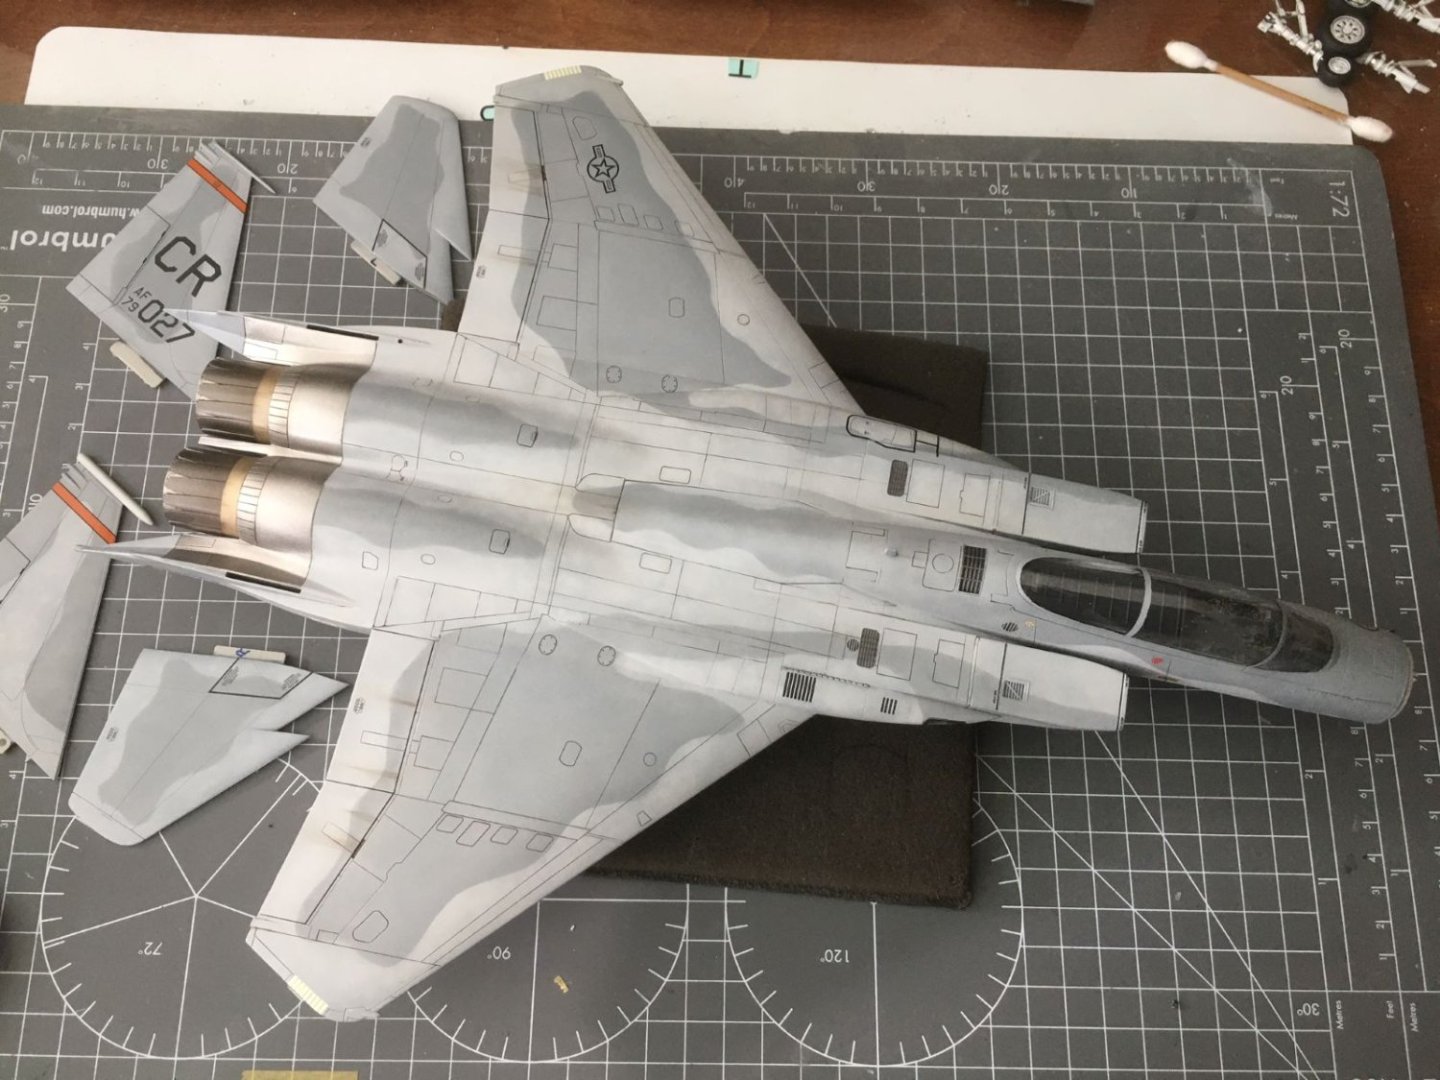
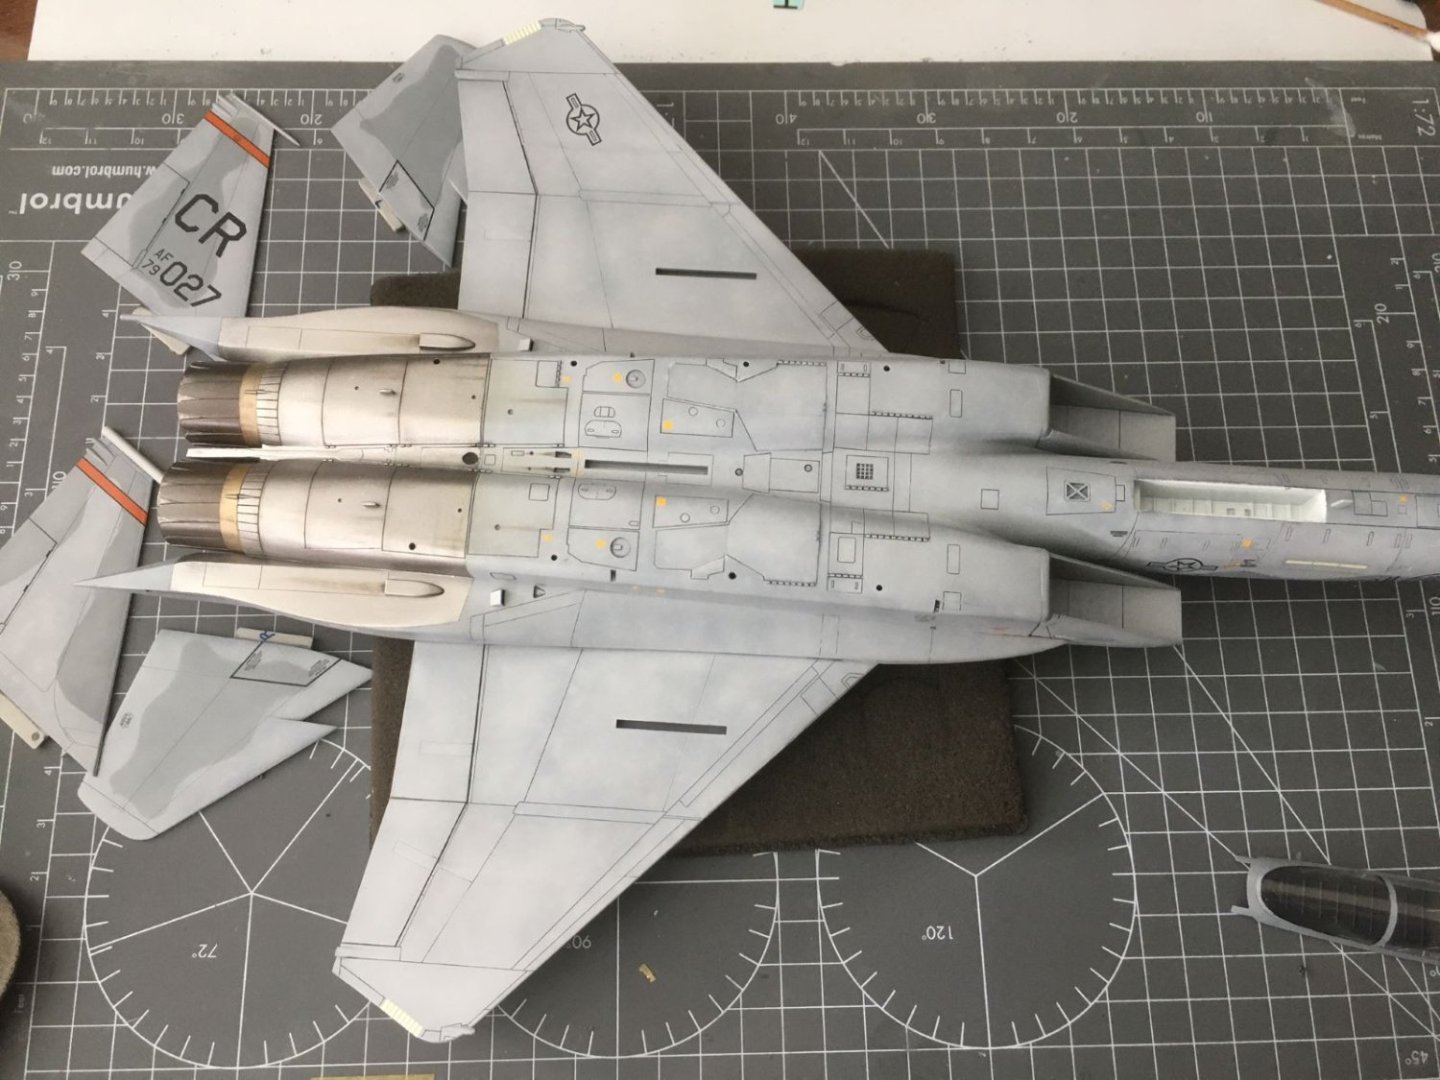
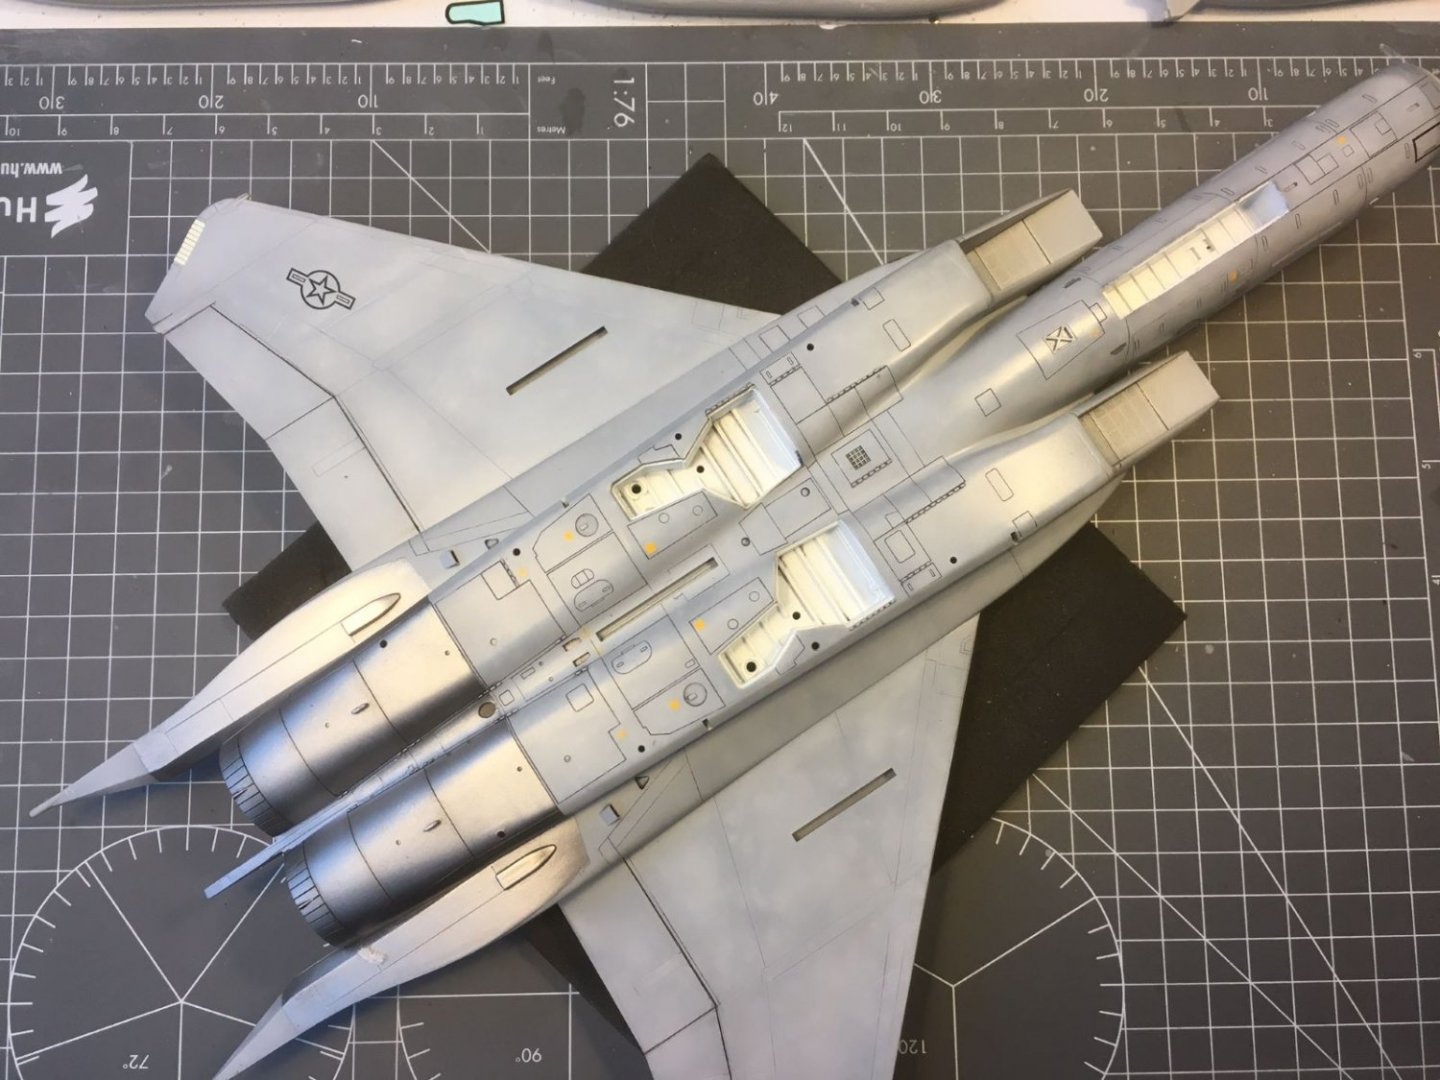
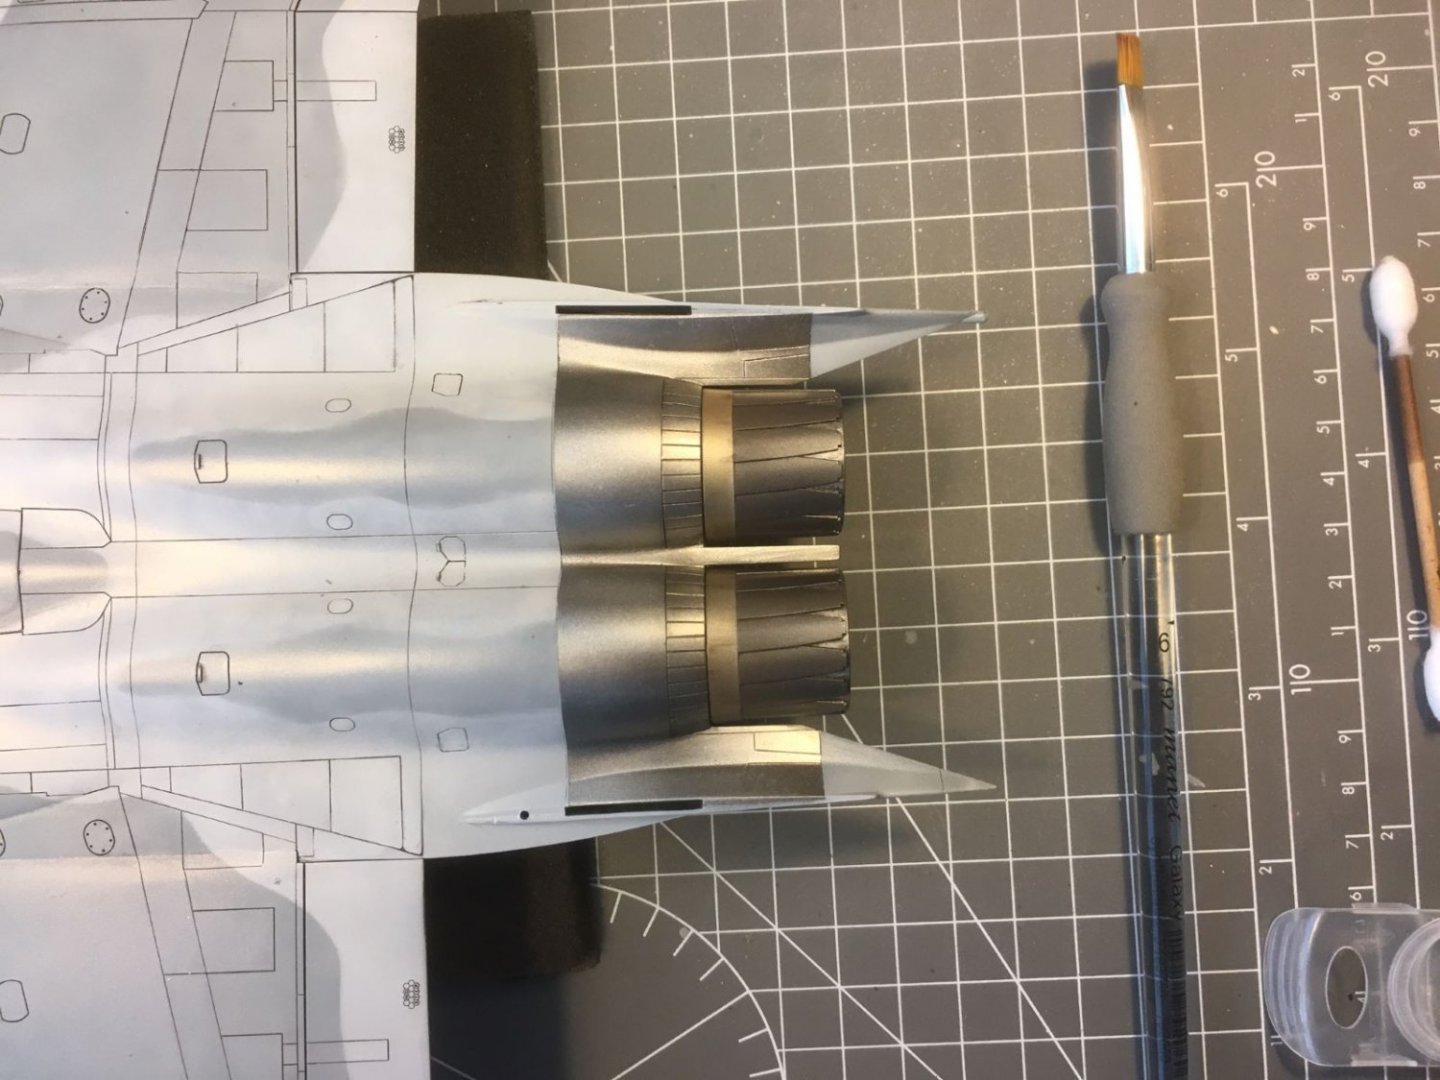
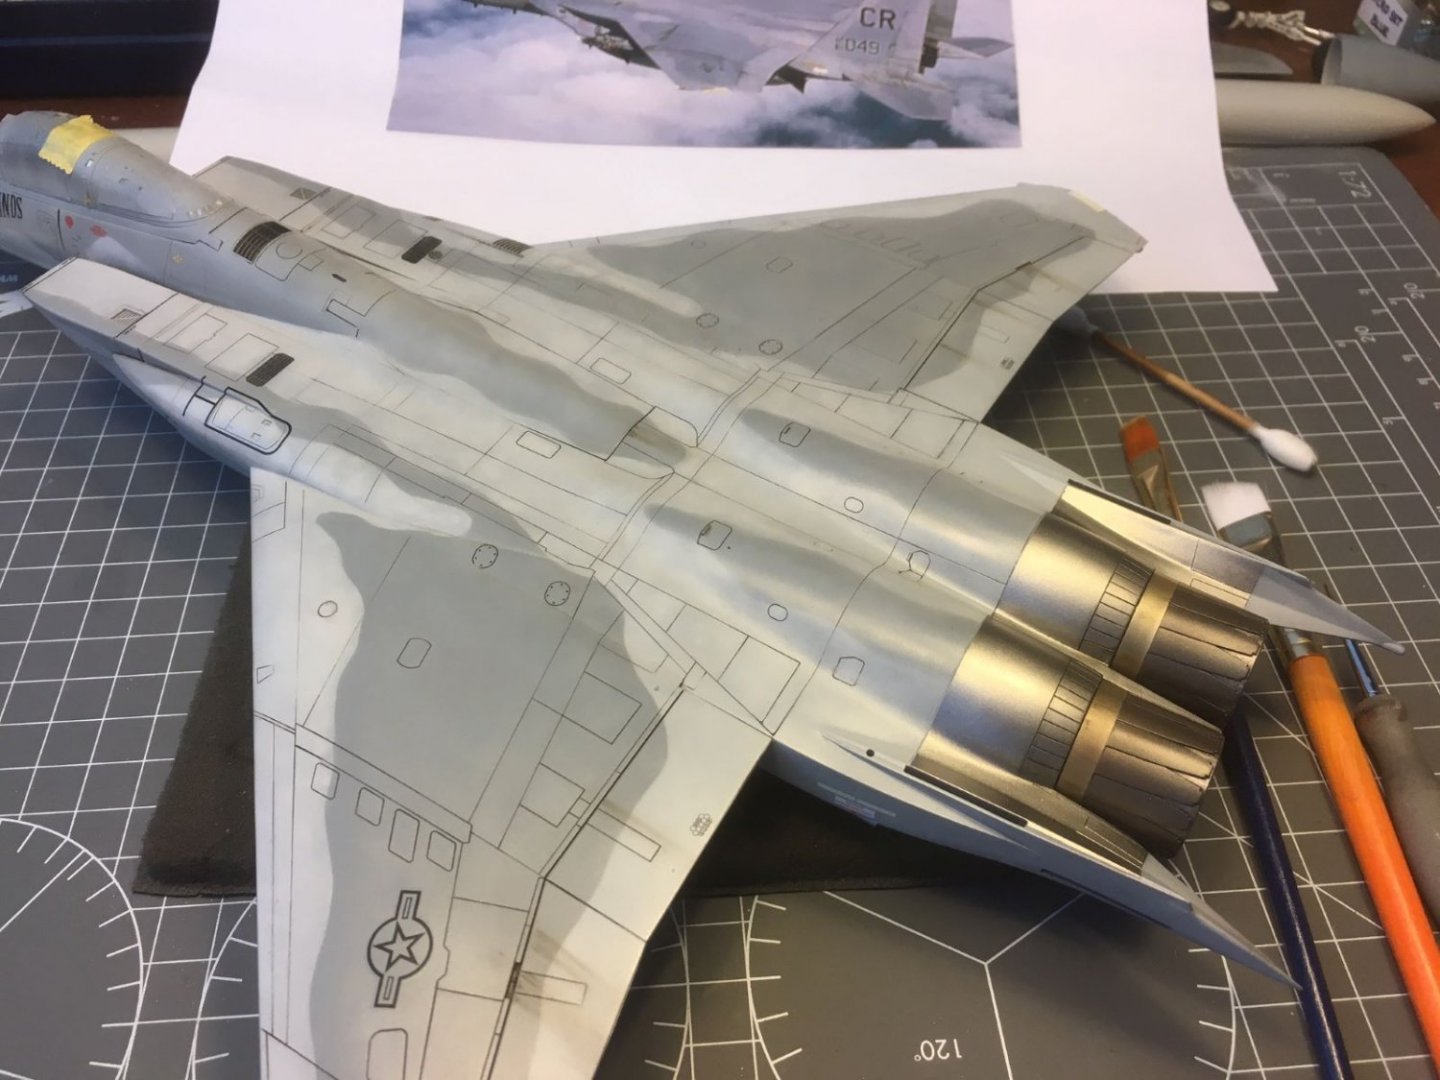
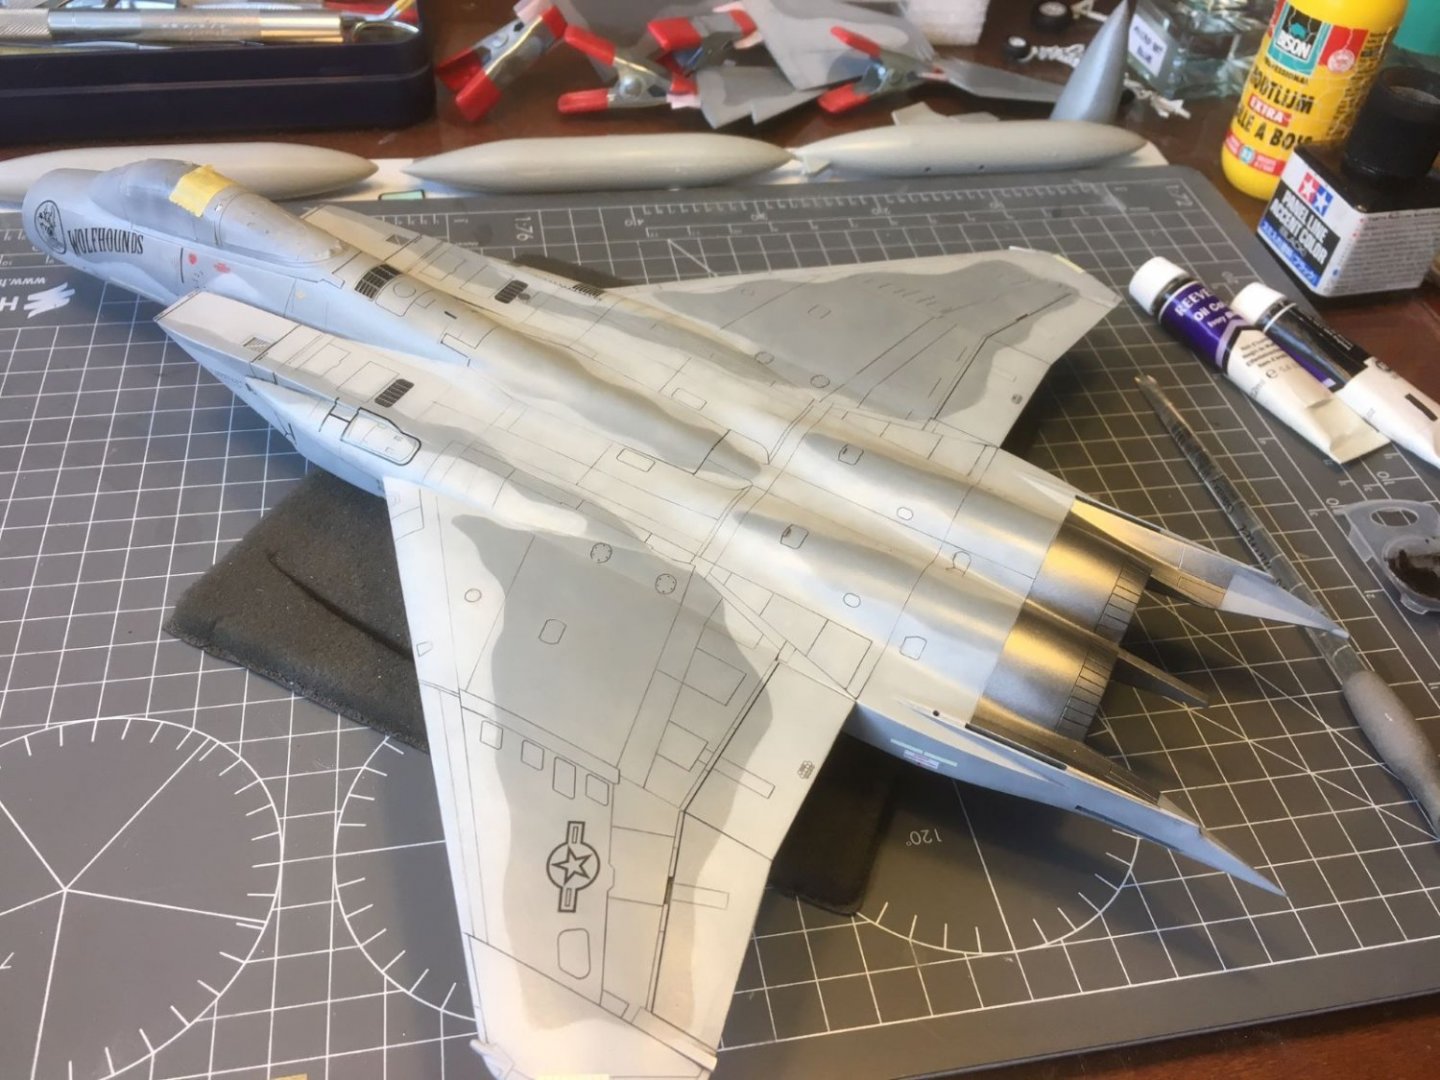
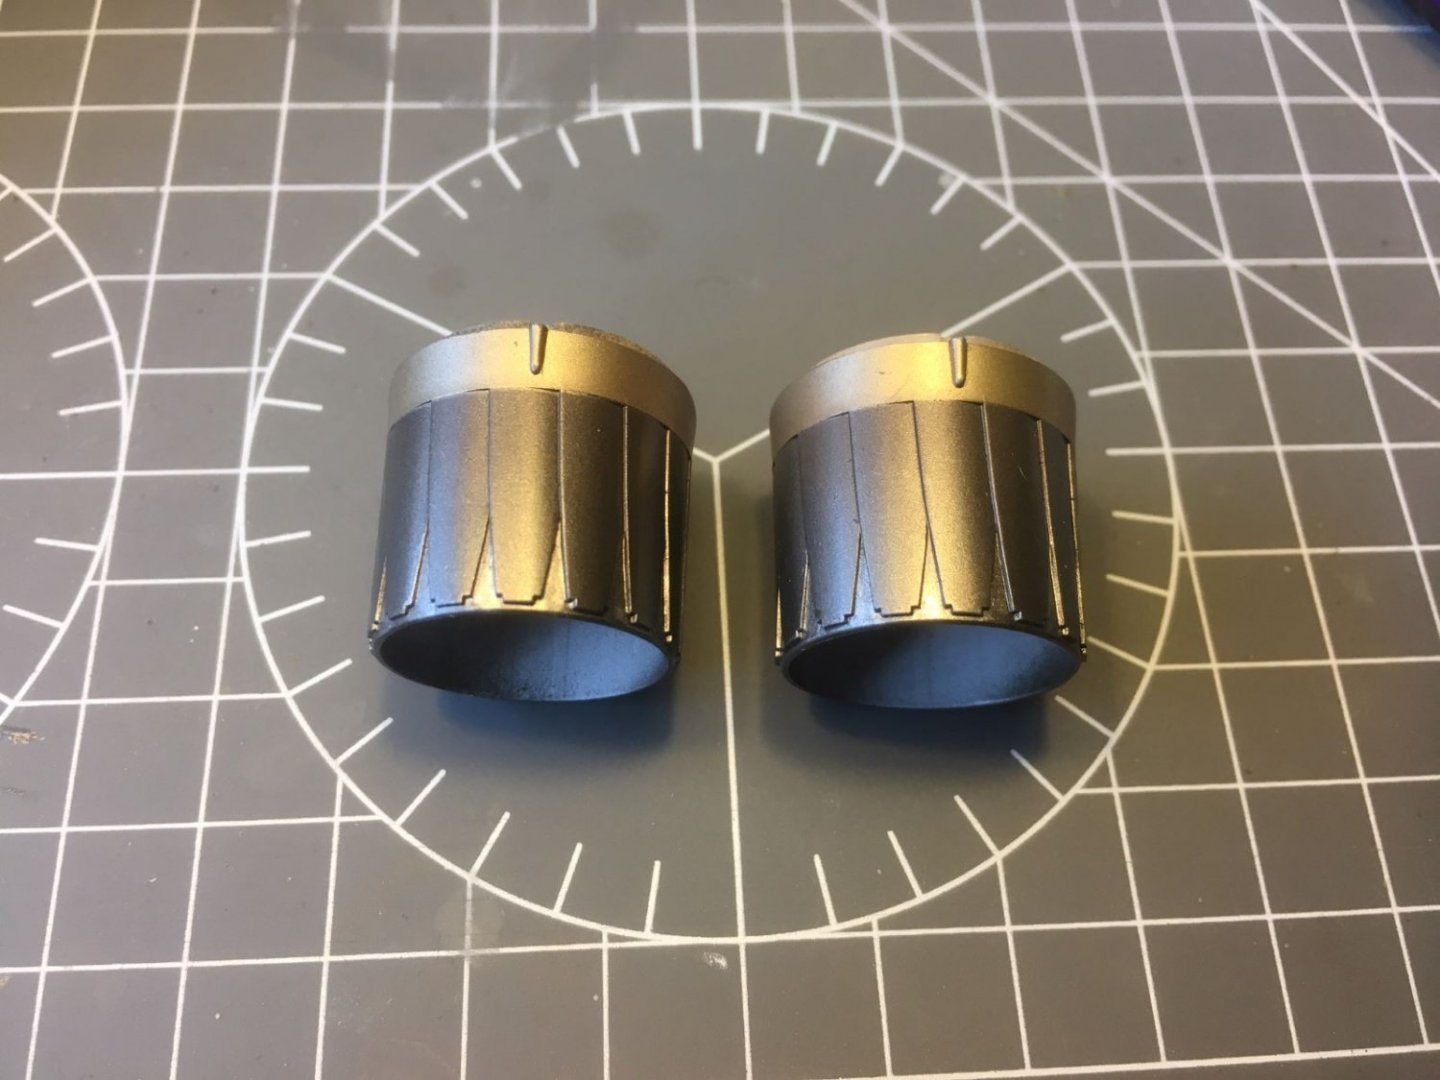
Hi, some progress on my F-15. Similarly to the upper side, the panel lines of the underside of the fuselage were treated with Payne's Grey oil color, while the wings were left natural with the exception of the control surface gaps. I might come back later to the panel lines of the leading edge. Then the jet nozzles were glued on and some stains were added by putting some black oil color dots on panel junctions and smearing them with a flat brush. Also the nozzles were drybrushed with black oil color. The underside engine area of F-15's might get really dirty by gases leaking from the junctions, but I prefer to keep the weathering quite limited. The engine area seen from the above will remain cleaner: A rear quarter view of the jet nozzles area: The jet exhausts of the kit are quite simplified, but I preferred not to replace them and get the best I could by playing with paints and oils. On the upper surface, I added some streaks of color from the hinge lines of the surfaces as suggested by some pictures. Finally, I sprayed a transparent layer of Tamiya Smoke and clear yellow on the underside of the engine area to mimic the discoloration of this area as seen in pictures: That's all for now, I hope you like my weathering effects. Best regards, Dan


- 137 replies
-
- 12
-
-
-
Thank you Alan. I am not a master, but if you have any question on the above that I am able to answer, please do not hesitate to ask. Dan
-
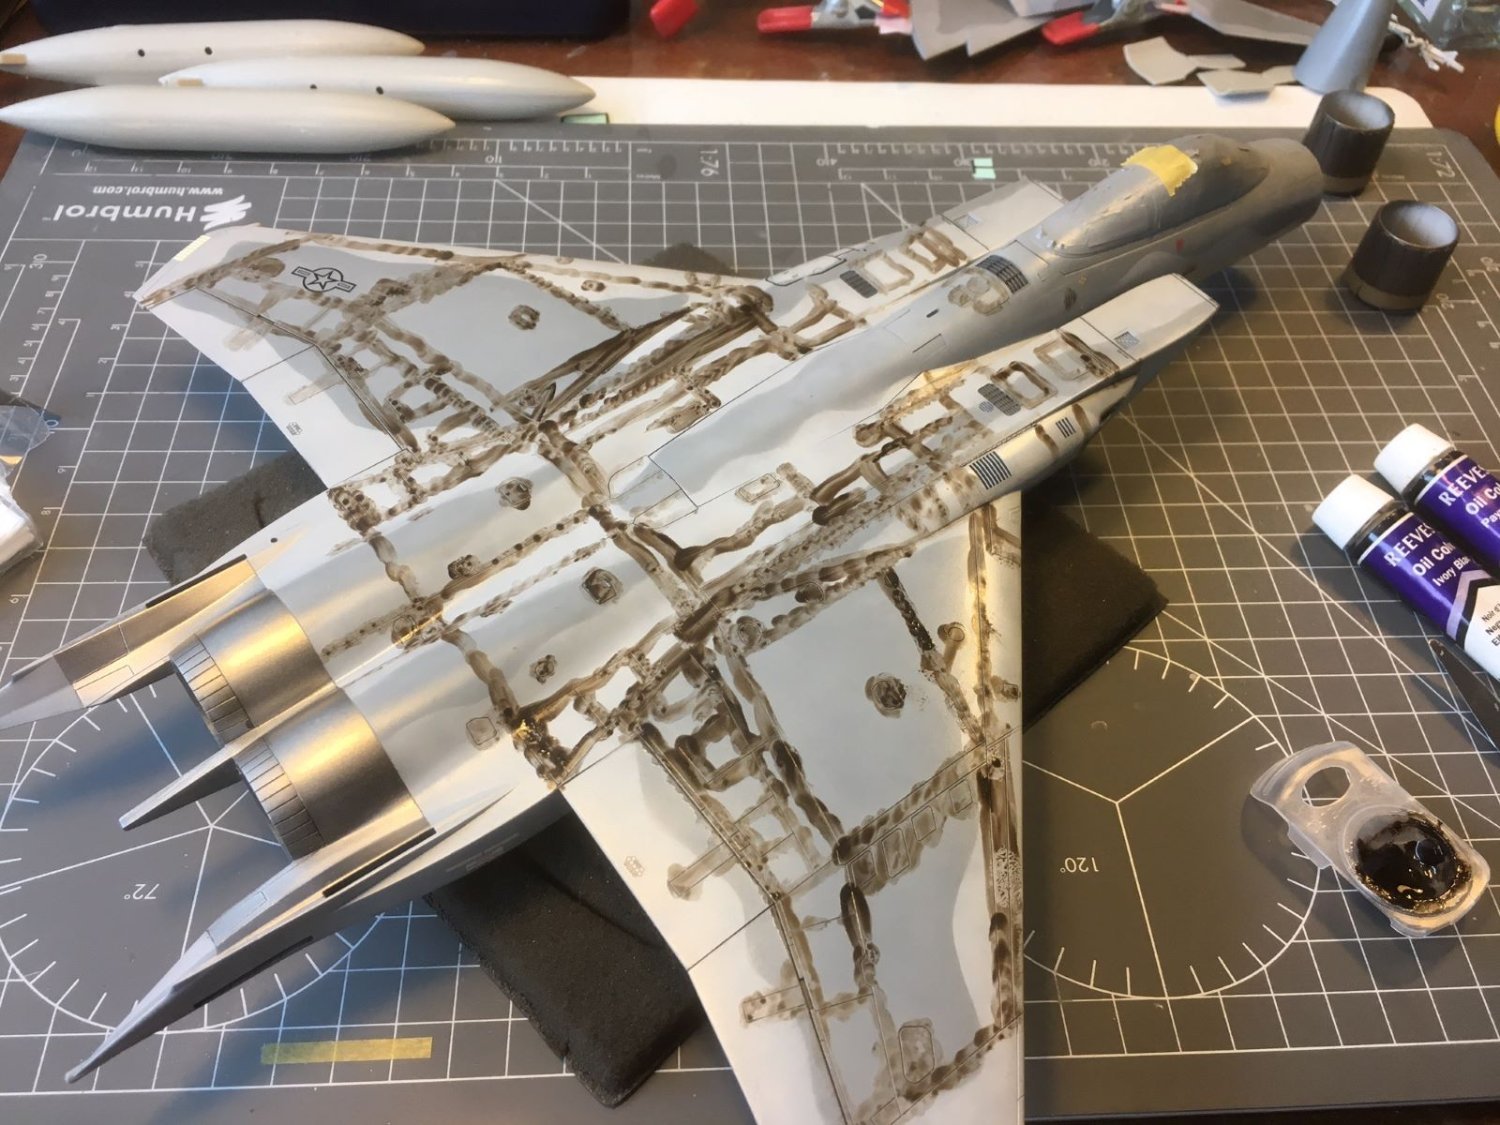
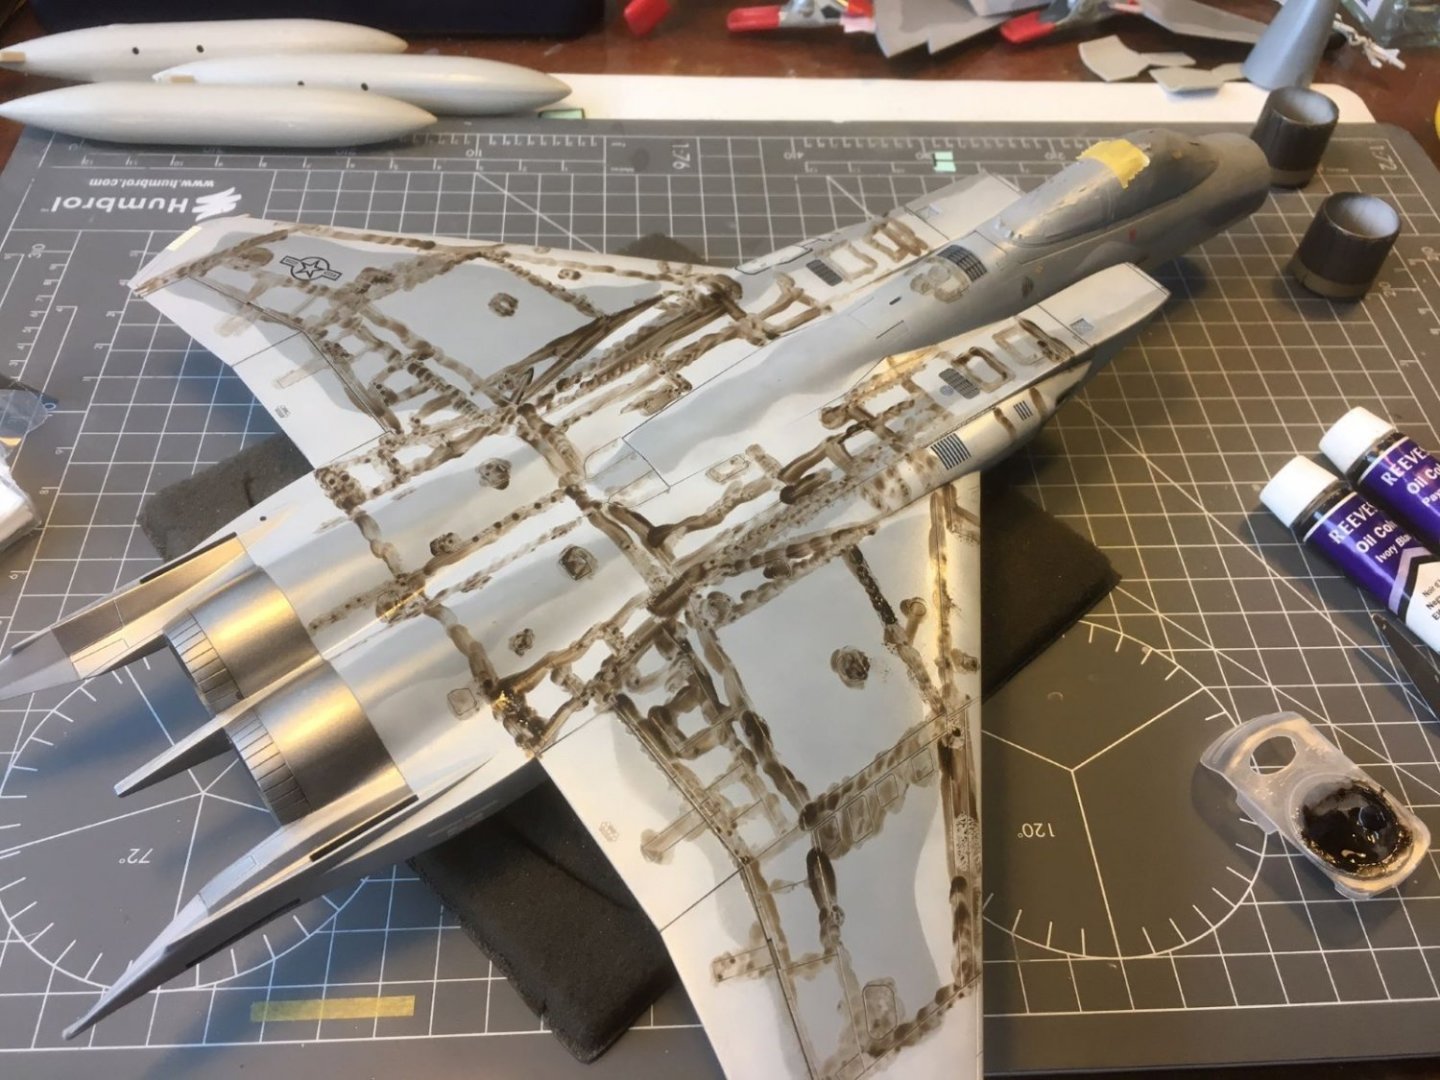
Hi, After having applied (almost) all the decals onto the fuselage, I sprayed the last coat of gloss to seal them. Then, the diluted oil color was liberally brushed on the panel lines of the upper side. This operation is always a bit frightening to me: After 20 minutes, I removed the wash with a cloth damped with white spirit: Next, the underside fuselage will be similarly treated. Meanwhile, I restarted working on the exhaust jet pipes because they will be glued on soon. With a fine brush, I picked few details with aluminium metallic paint and Tamiya panel liner, then I sprayed a mist of flat brown to mute down the contrast of the metallic parts: Best regards, Dan
- 137 replies
-
- 13
-
-
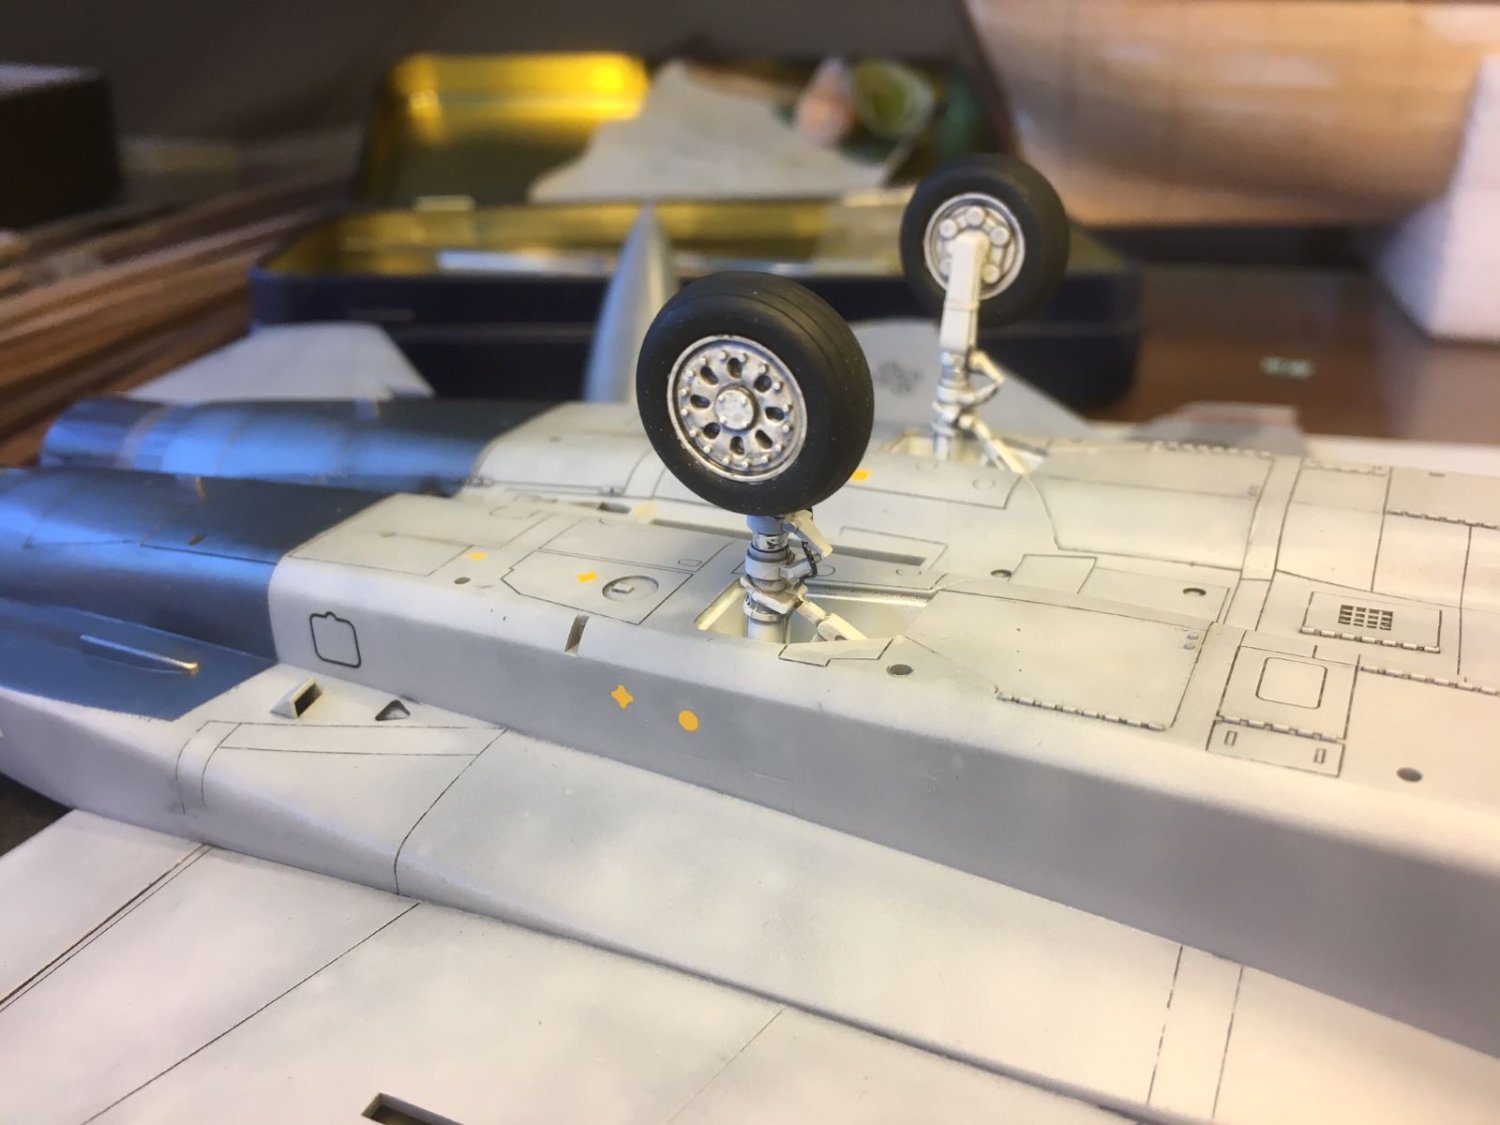
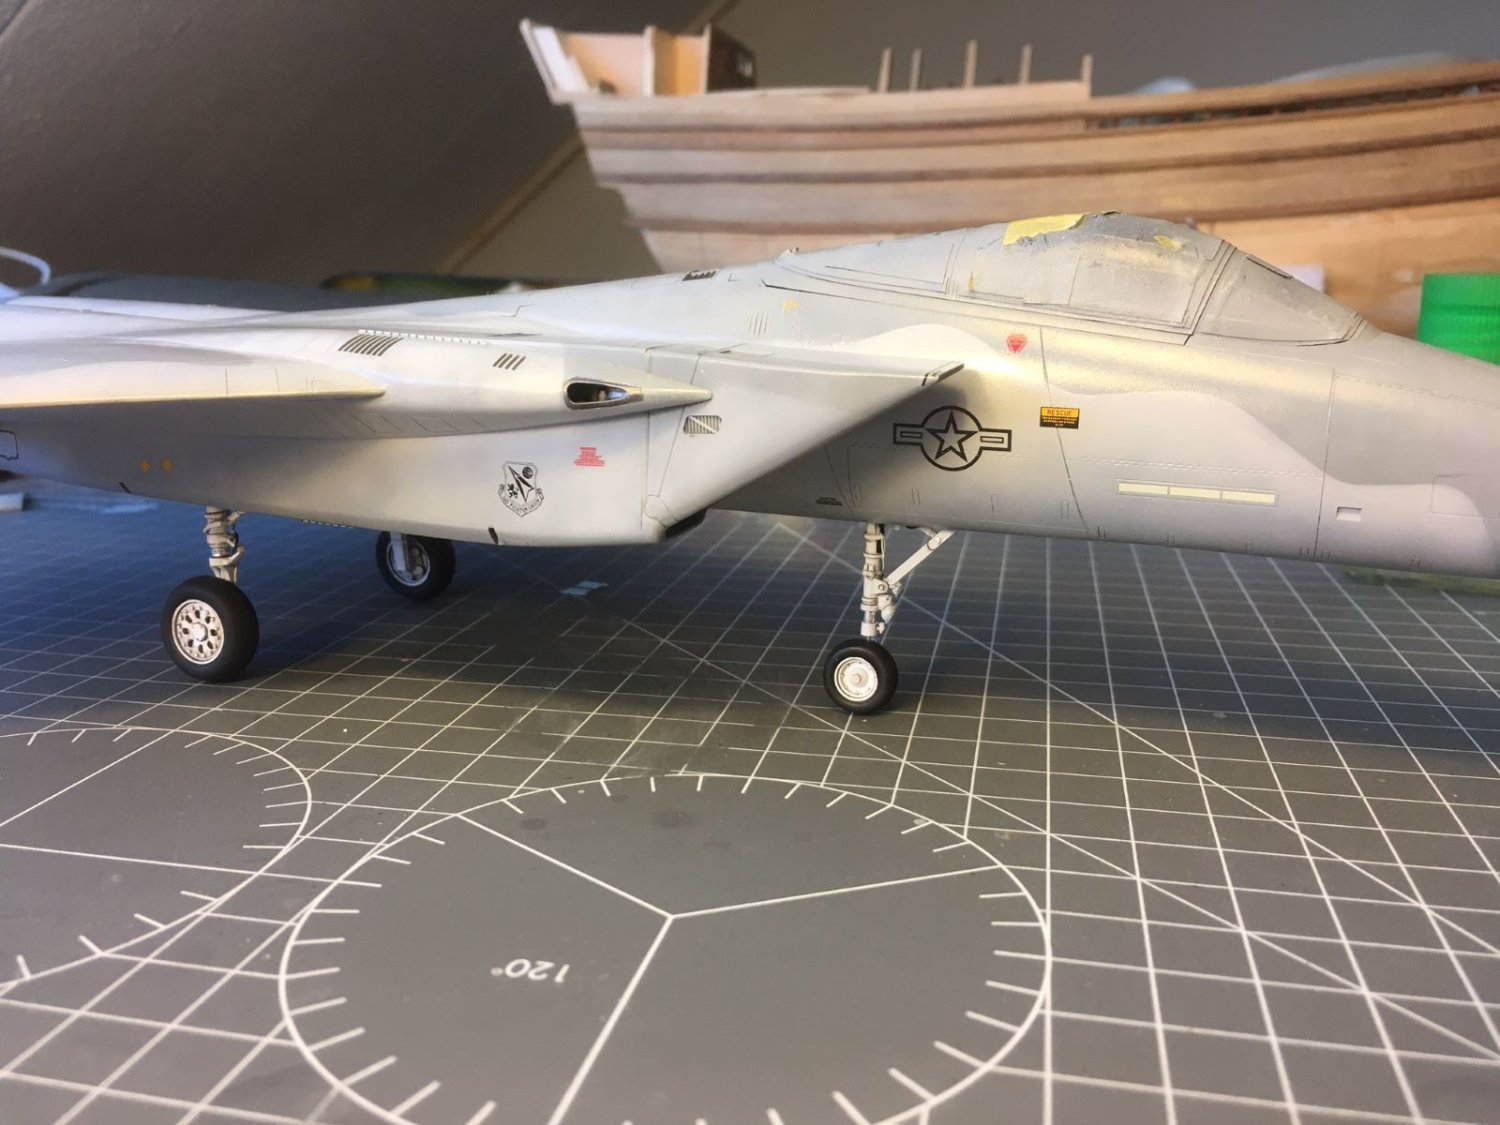
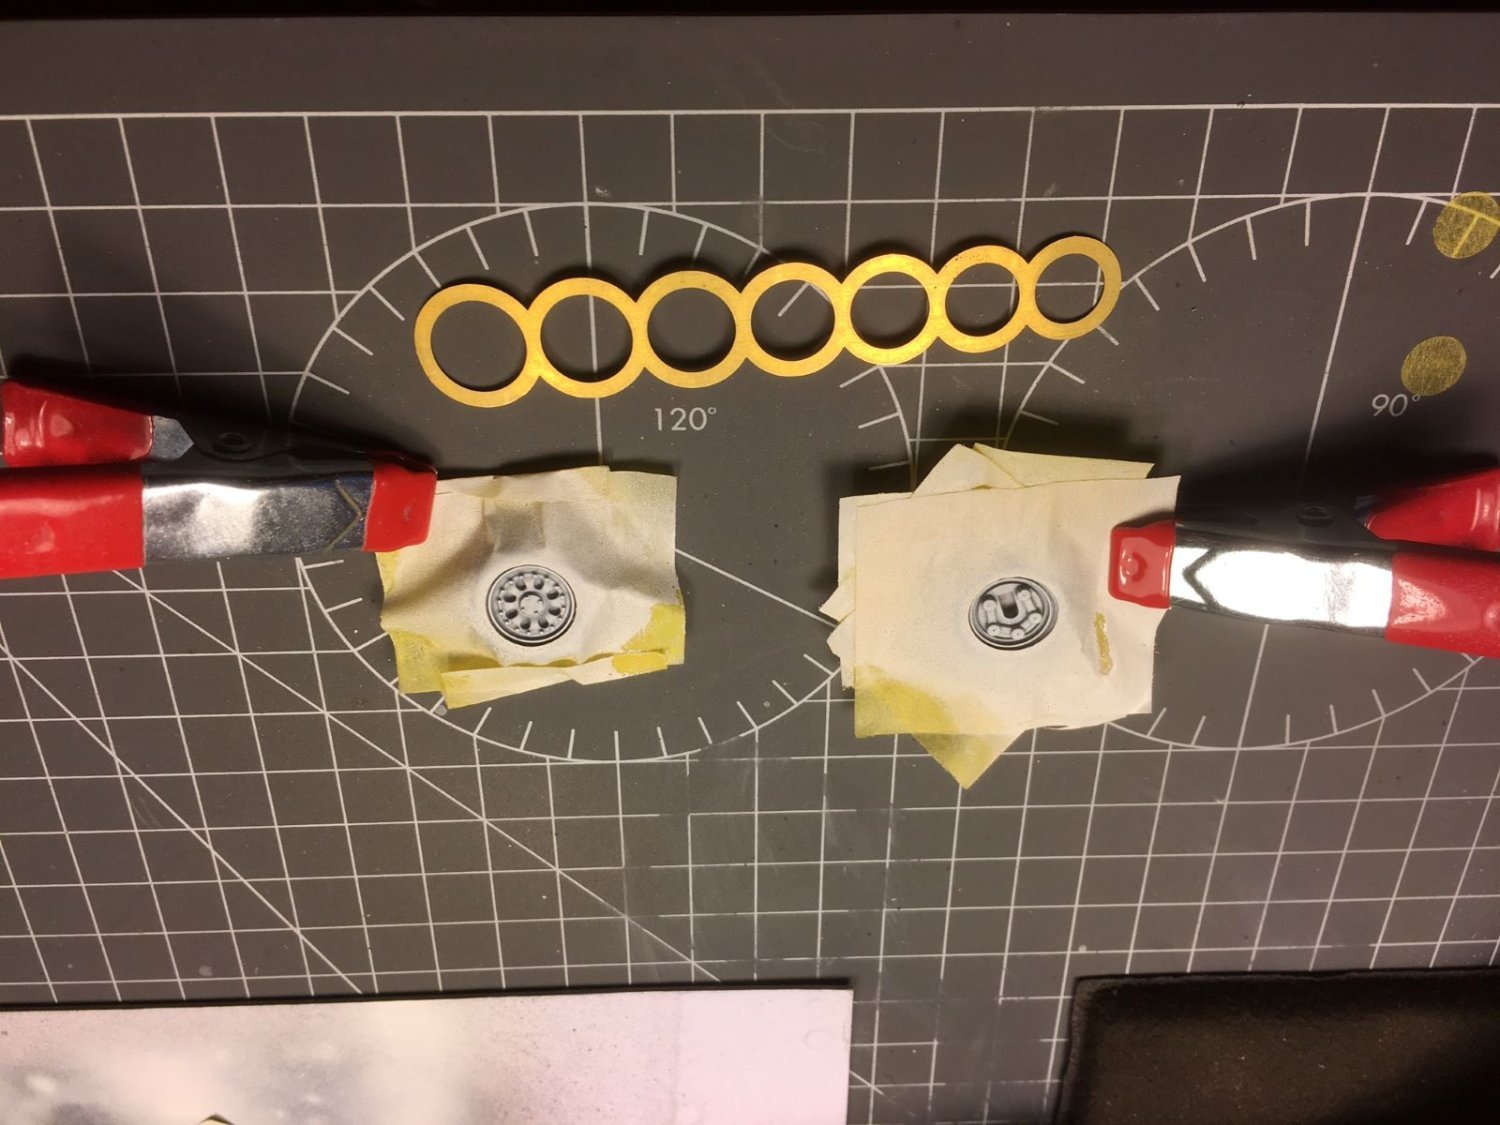
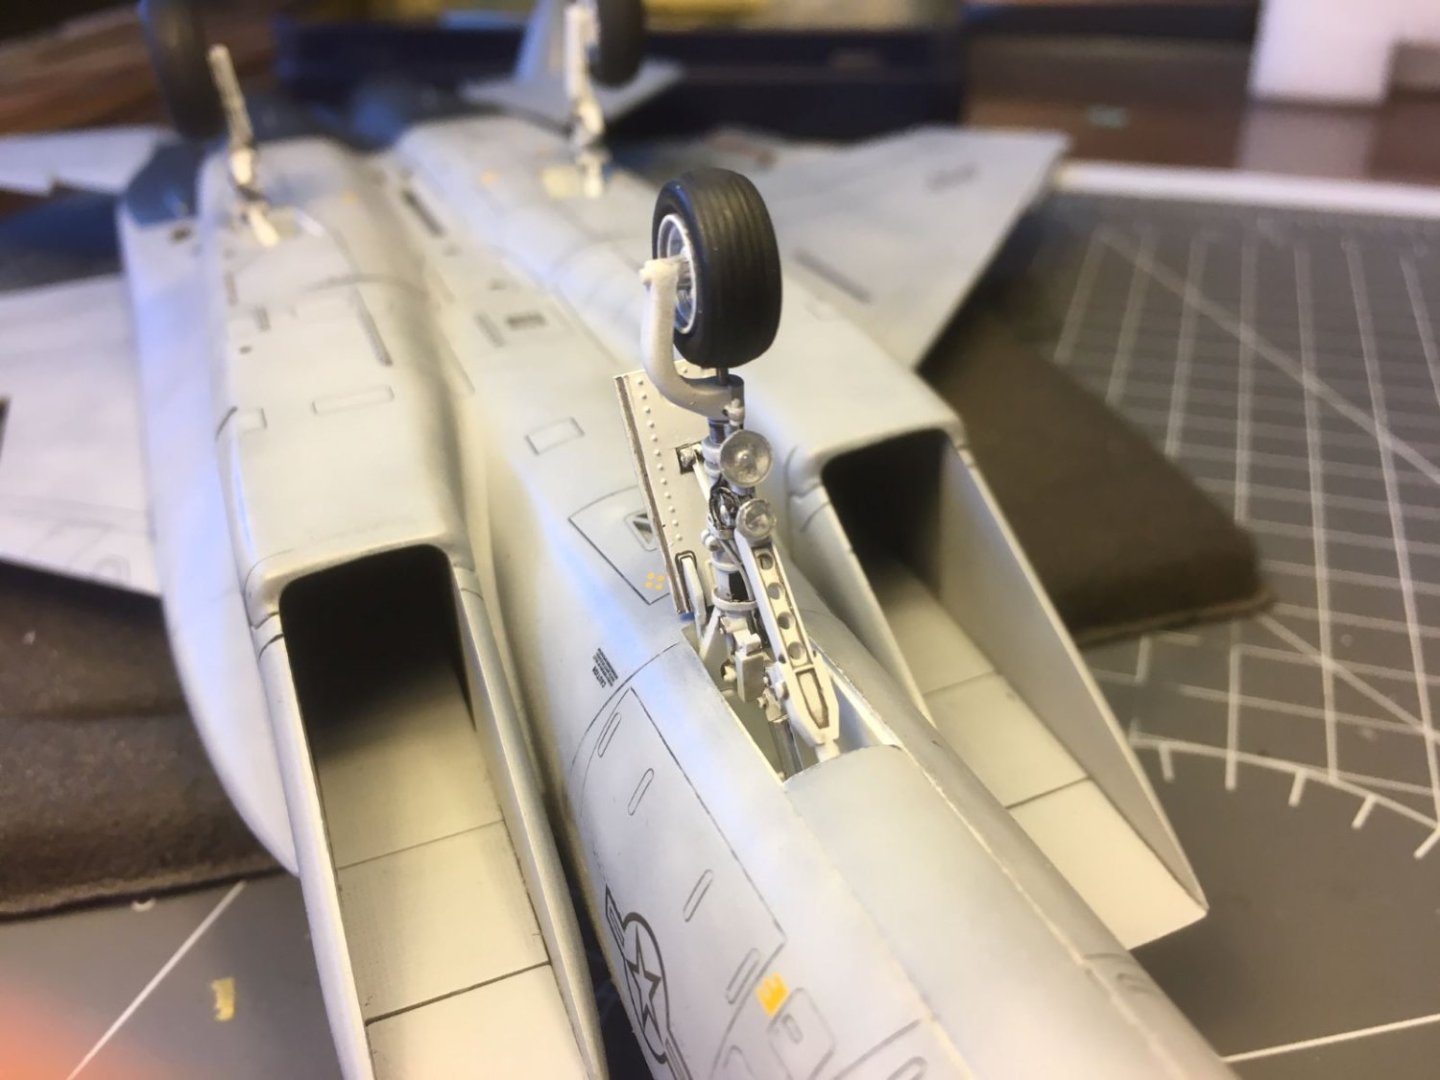
Hi, working on finishing the wheels: Wheels mounted on the LG legs: Finally on its legs (but legs are not glued yet): Kind regards, Dan


- 137 replies
-
- 13
-
-
-
Thank you Alan, I am happy that you like the work done on the LG. As you might have noticed, there were quite a number of steps involved (i.e. a number of different coatings), but, eventually, it is easy to obtain a satisfactorily result. Actually, if the mould is good, most of the job is done by the wash 🙂. Presently, I am repeating all the coatings with the wheels. I have just finished decaling the fuselage, omitting some of the many stencils. King regards and thanks for all the 'like's! Dan
- 137 replies
-
- 11
-
-
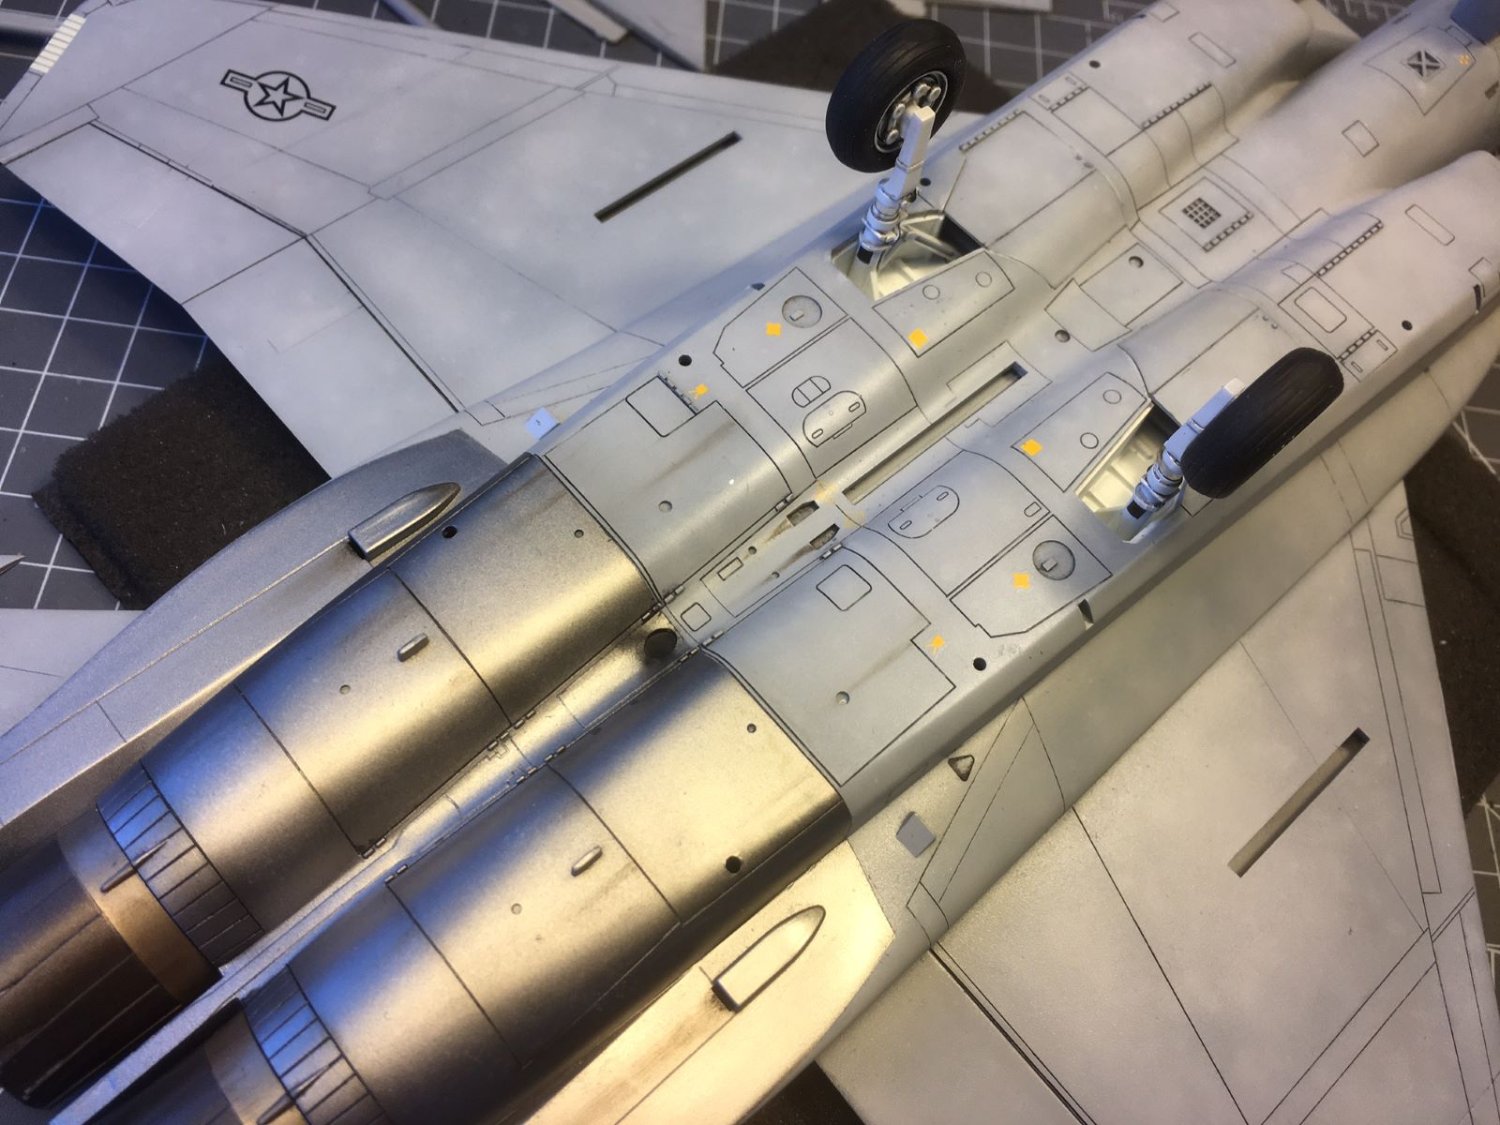
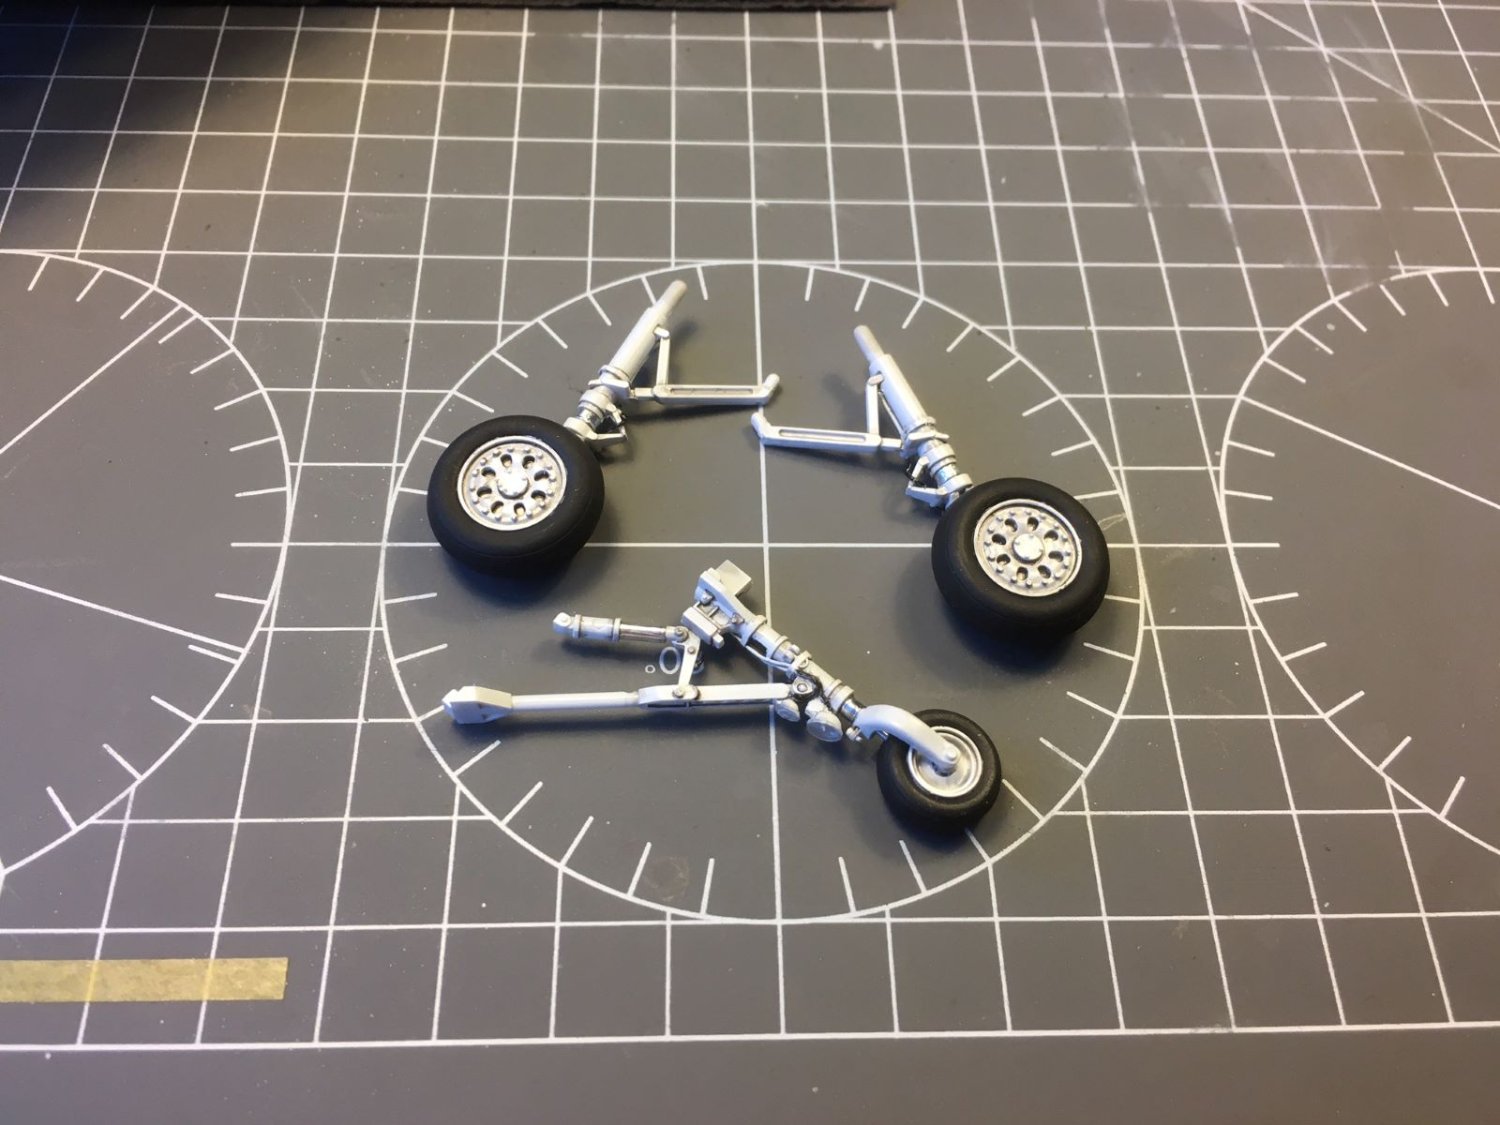
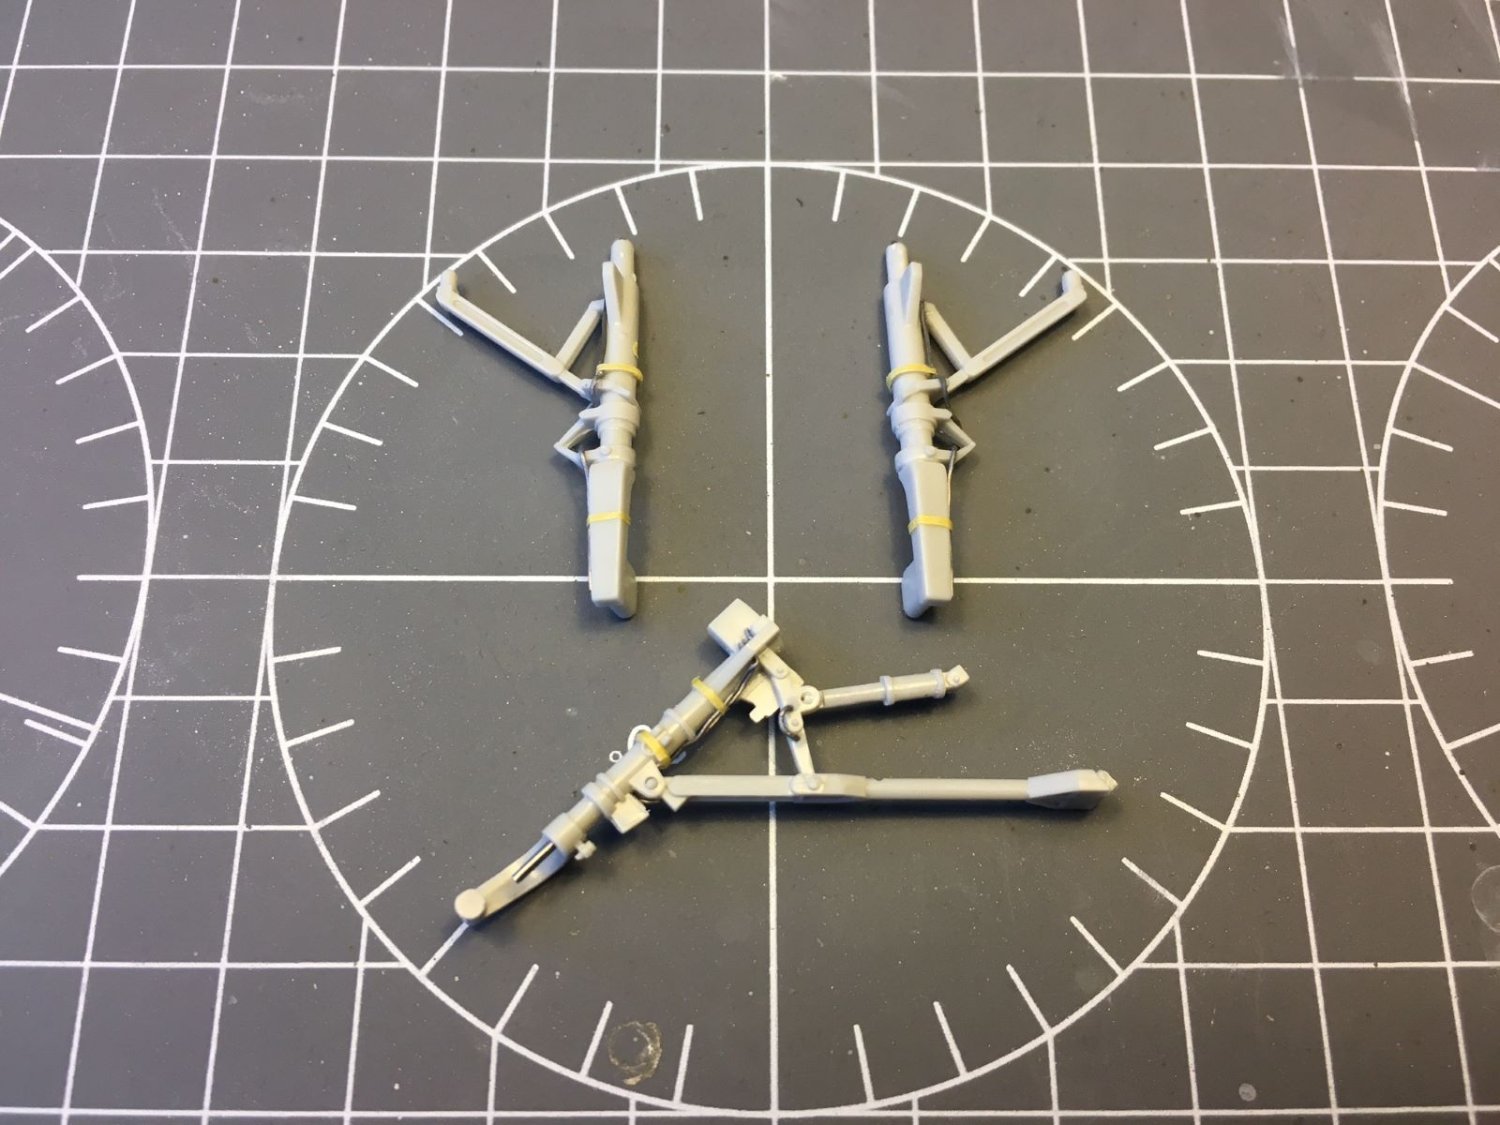
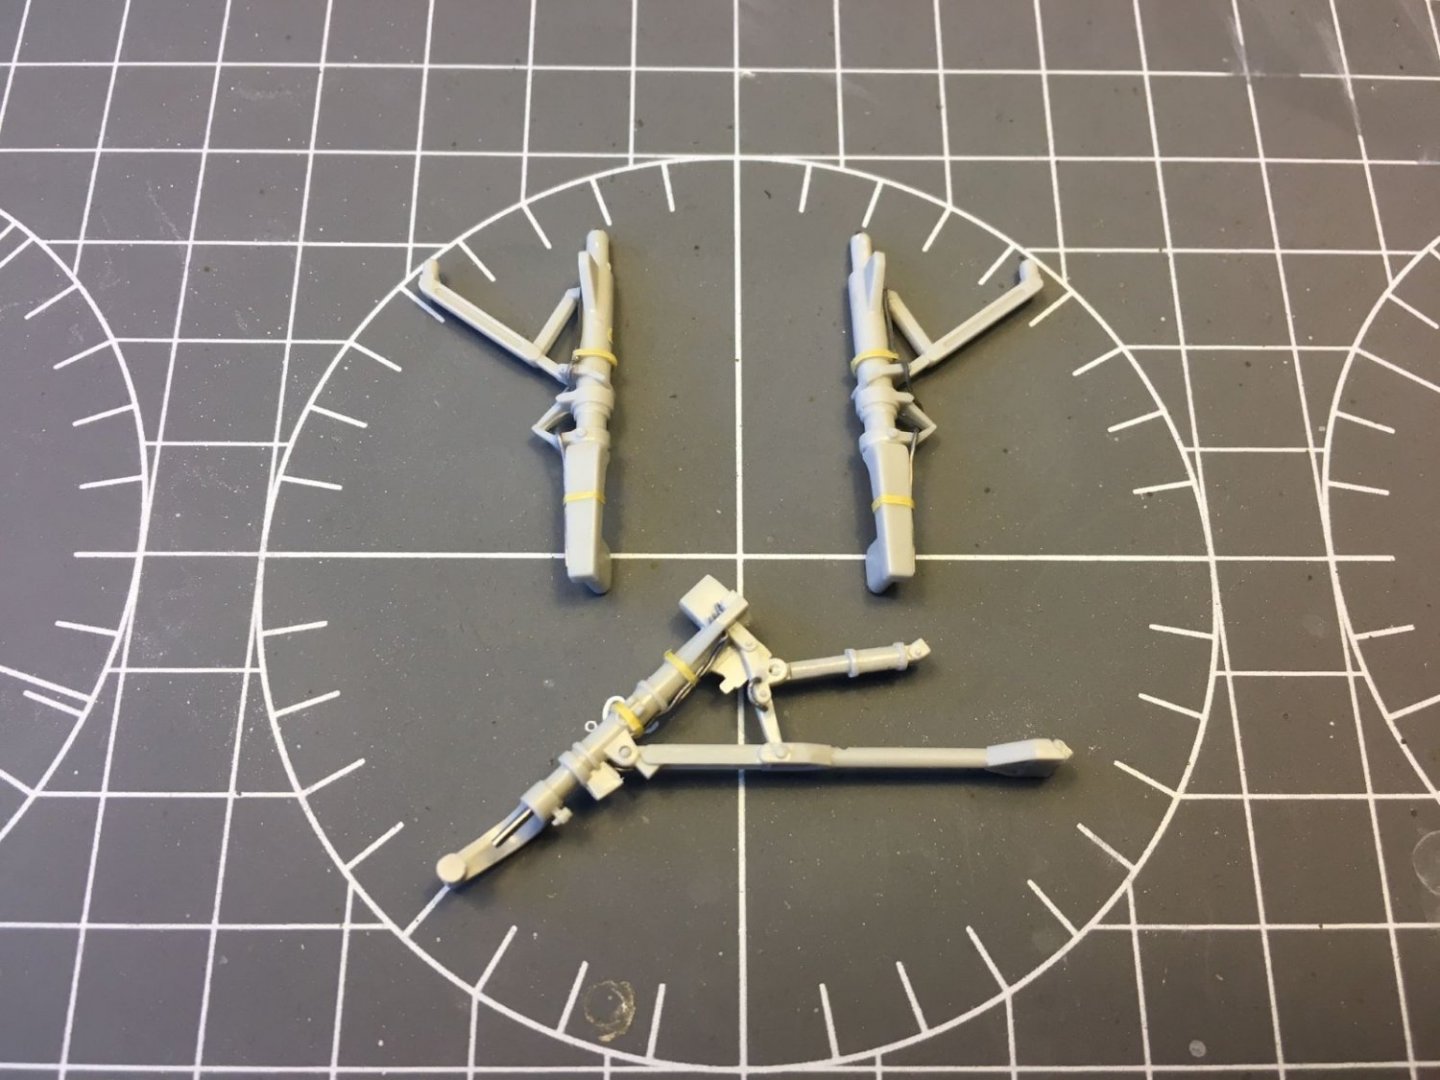
Hi, while going on with decaling, I tackled the modeling of the landing gears. The kit provides a fair, quite accurate representation of the main structural parts. The legs were provided split in half and you have to insert a metallic rod in the vertical element before closing the halves. One end of the metallic rod inside the forward leg protrudes outside and it is supposed to get clamped into the wheel. This is the first time I see such a feature. The first step was to add few lead wires to busy up a bit the parts: Then, I sprayed a light coat of primer followed by a satin white and I glued on the landing lights. To render the shiny struts of the shock absorbers and the oleo, I used a strip of thin self adhesive aluminium foil. The placards are made with small pieces of decal. After that, I painted black some portions of the wires and sealed everything with a coat of gloss clear varnish. At this point, details can be picked up by applying a black wash (Tamiya panel liner): That's all for now, Thanks for following, Dan
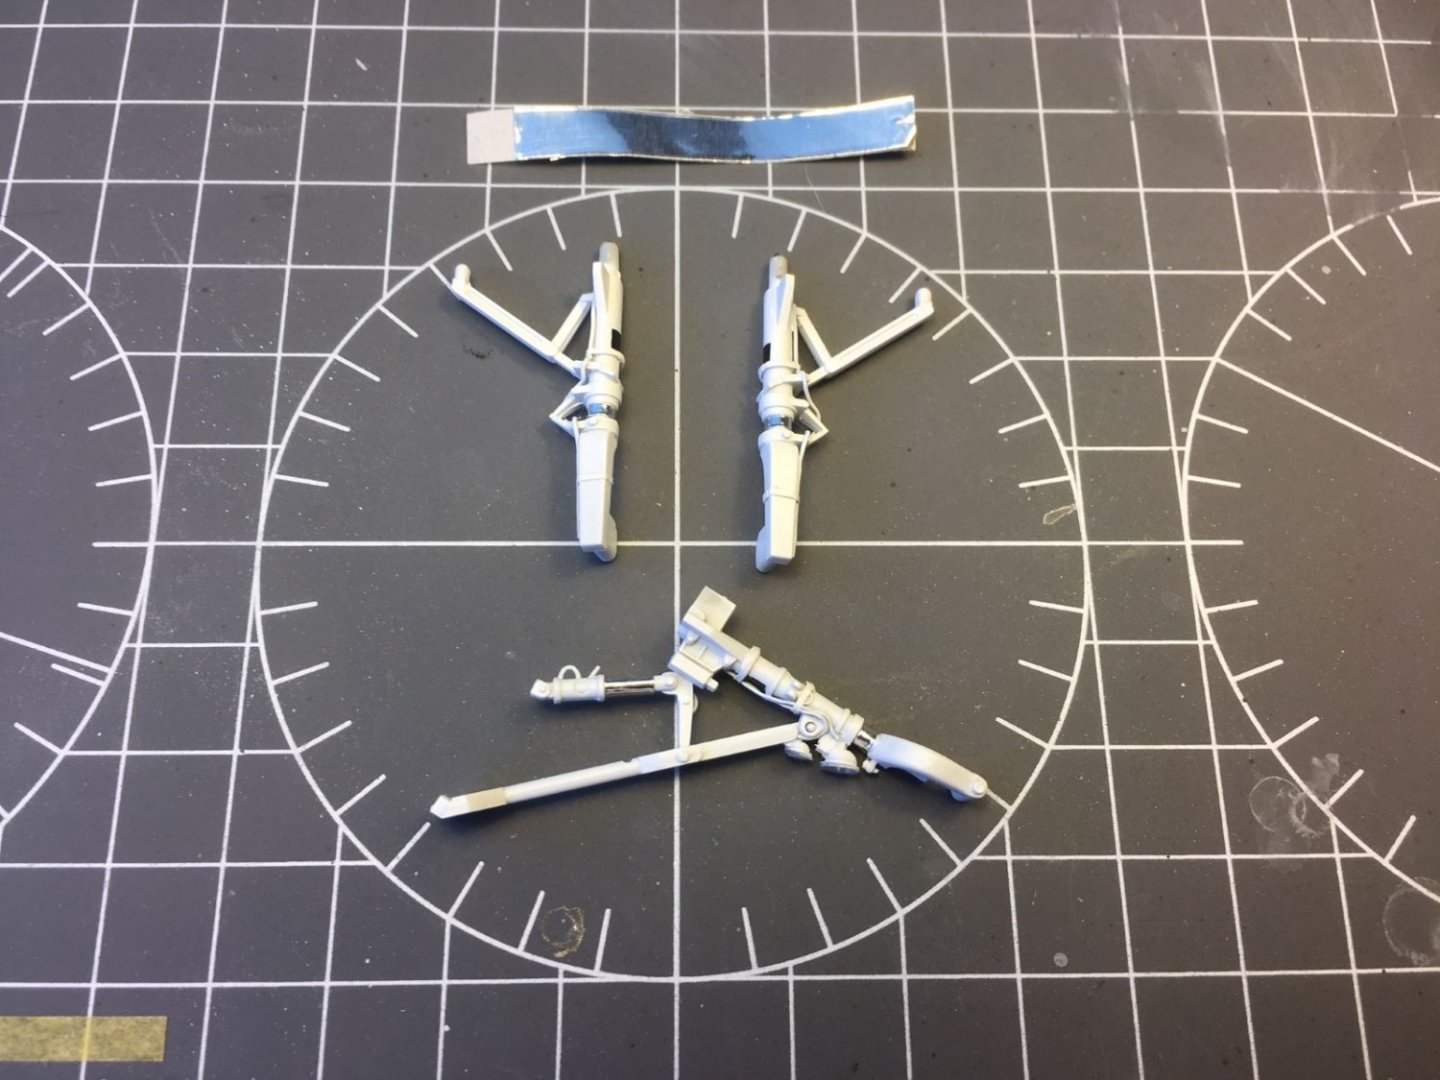
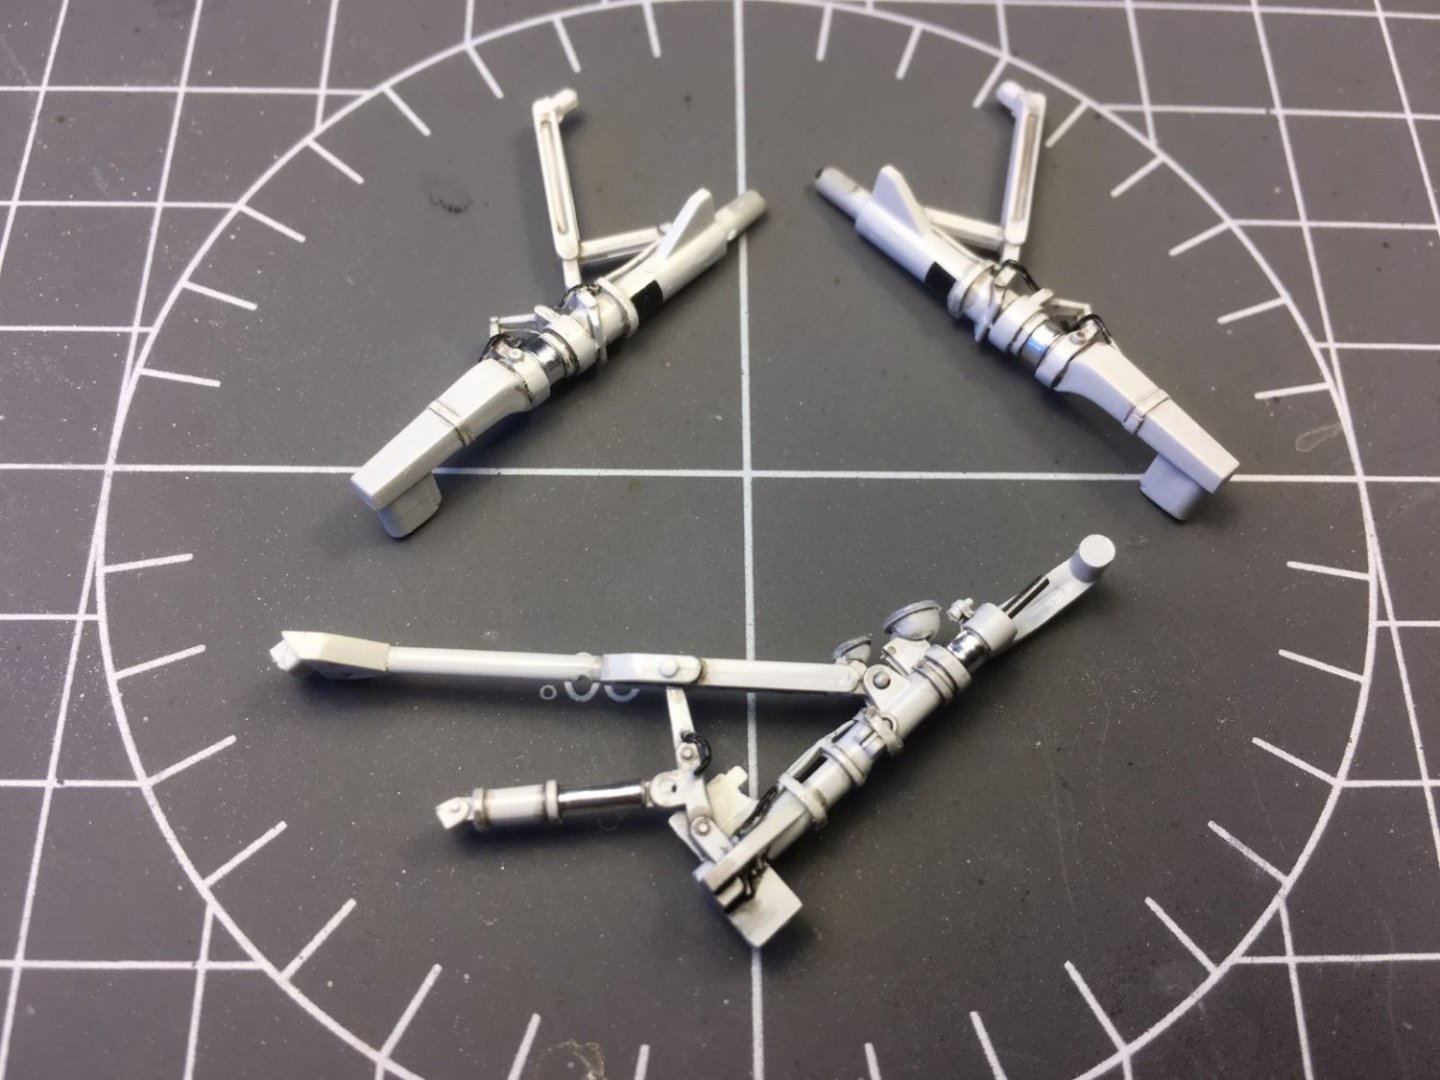
- 137 replies
-
- 14
-
-
-
@amateur, I visited the museum about three years ago, and, yes I could see the thing hanging from the ceiling. I can easily believe that they were noisy planes. What impressed me were the sheer dimensions of the aircraft. Kind regards, Dan
-
Excellent model Javlin! Nicely assembled and finished. The paintwork of an otherwise just drab finish came out very interestingly textured and very realistic. I repeat what I said, the transparent parts are very sharply done. Bravo! Dan