


Josh Williamson
-
Posts
117 -
Joined
-
Last visited
Content Type
Profiles
Forums
Gallery
Events
Posts posted by Josh Williamson
-
-
-
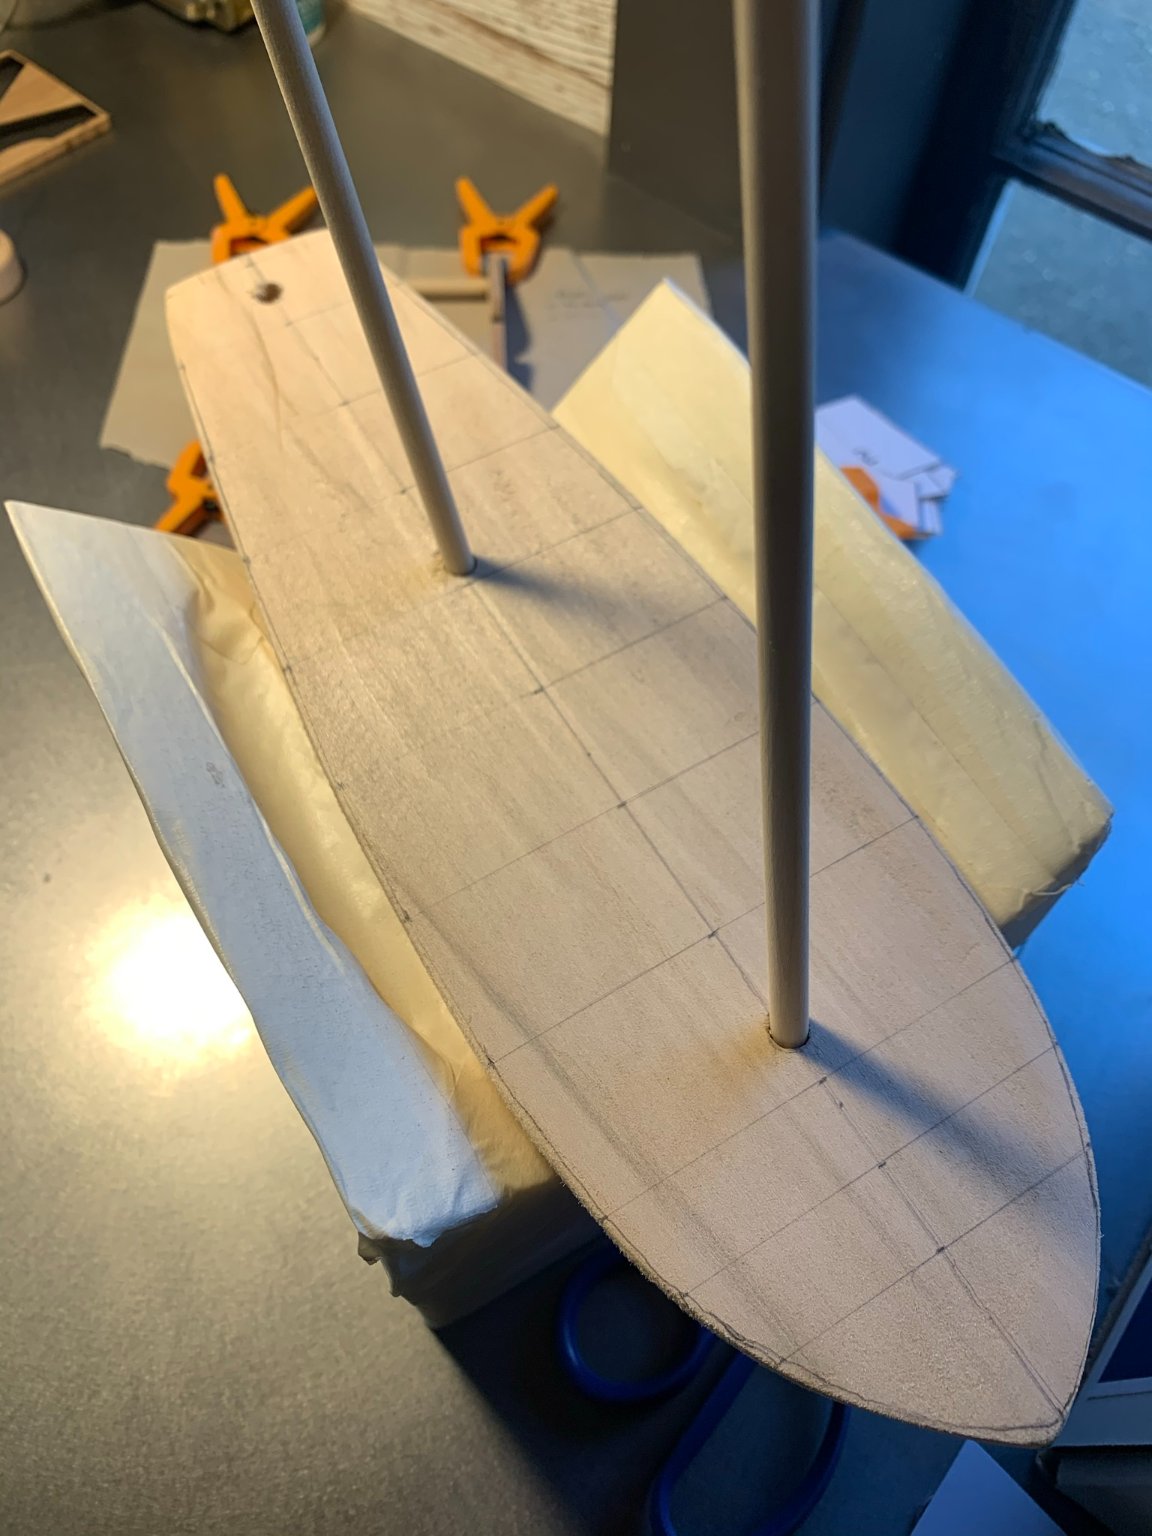
Getting started on the Revenue Cutter.
As per the instructions suggest, I started off with building the cradle and mounting the hull-shaping templates to some card stock. Had to give the cradles a good sanding as the laser cutting leave a pretty good char on the edges of the thicker material pieces. Got them cleaned up and dried - now will be choosing a stain to apply to the mounting cradle (more on that later).
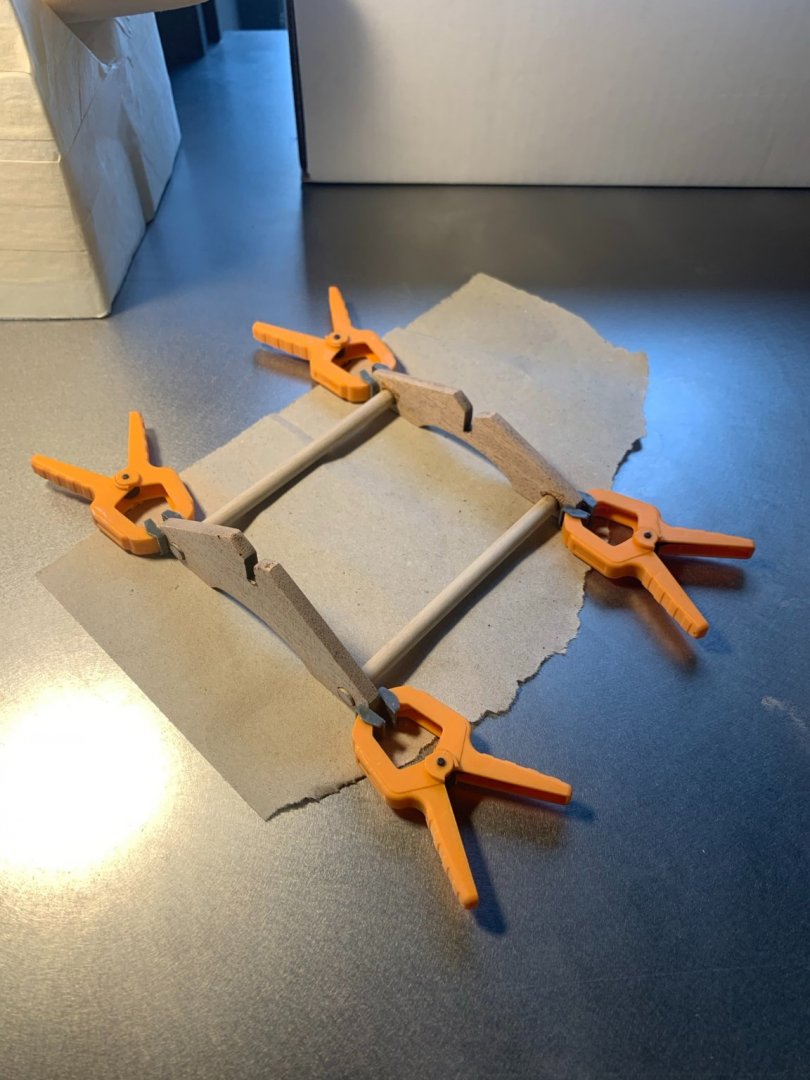
Marking out the guide lines for the hull pattern shapes (as well as marking the center line on deck).

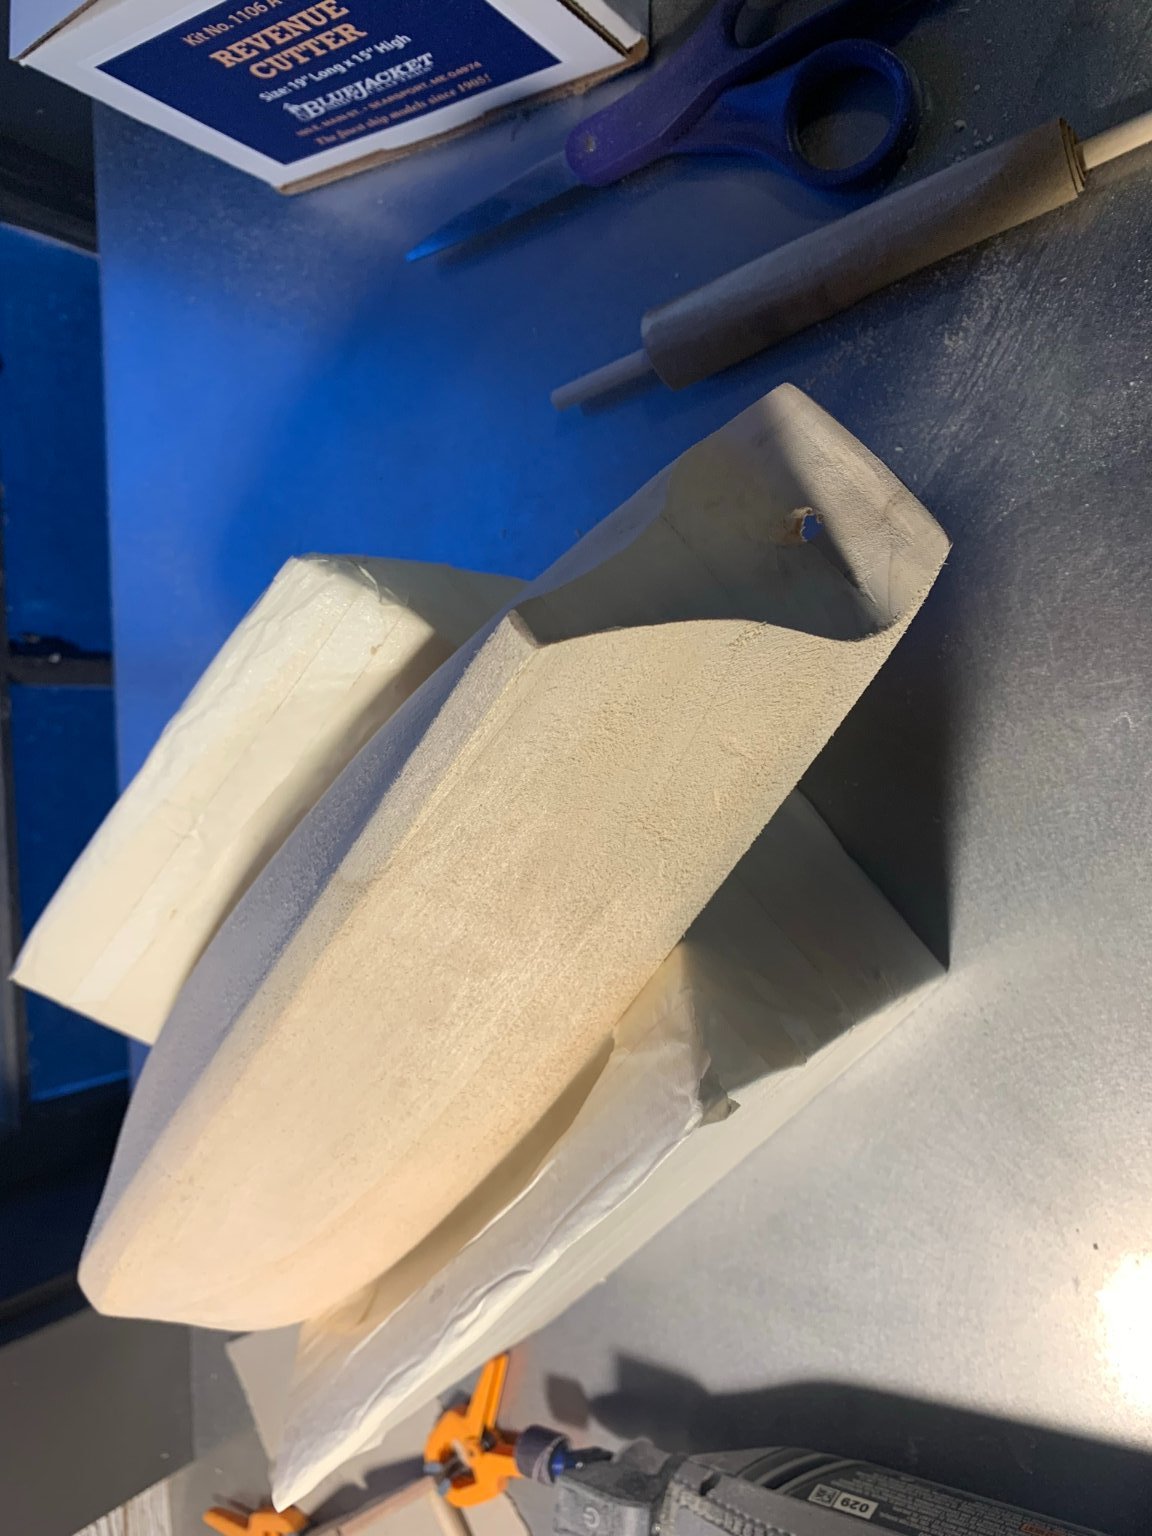
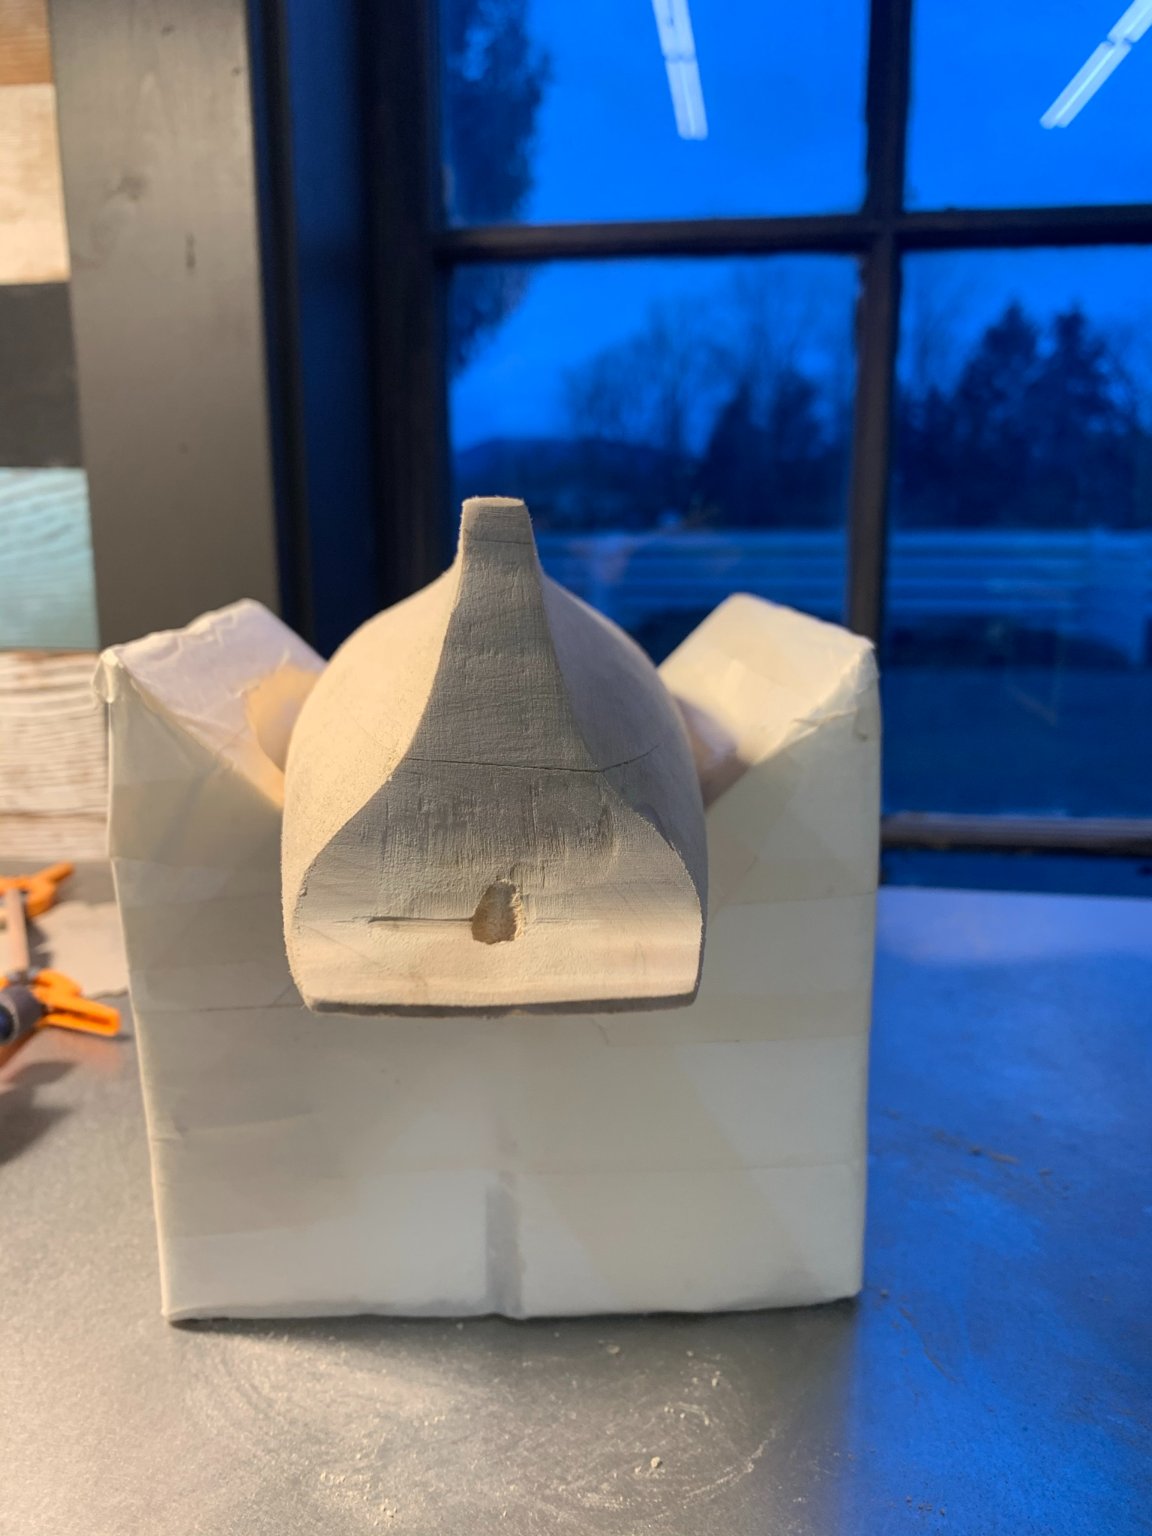
Started some preliminary work on the stern shaping using a Dremel and sanding attachment. I got the shape close, and will likely transition to hand sanding with a fine grit.

I'll need to work out some of these larger pits:

- BobG, GrandpaPhil and CiscoH
-
 3
3
-
Looks fantastic Tom! Good job and congratulations! Really clean build from start to finish 👍
-
You're getting really close! The detail looks great, and it's interesting to see the choices you made with rigging. Looks really logical and functional! Makes me wish I would have seen them before rigging my Spray!
Also - the visual quality on your lines look really nice. Did you use the provided threads, or did you substitute some different rigging?
-Josh
-
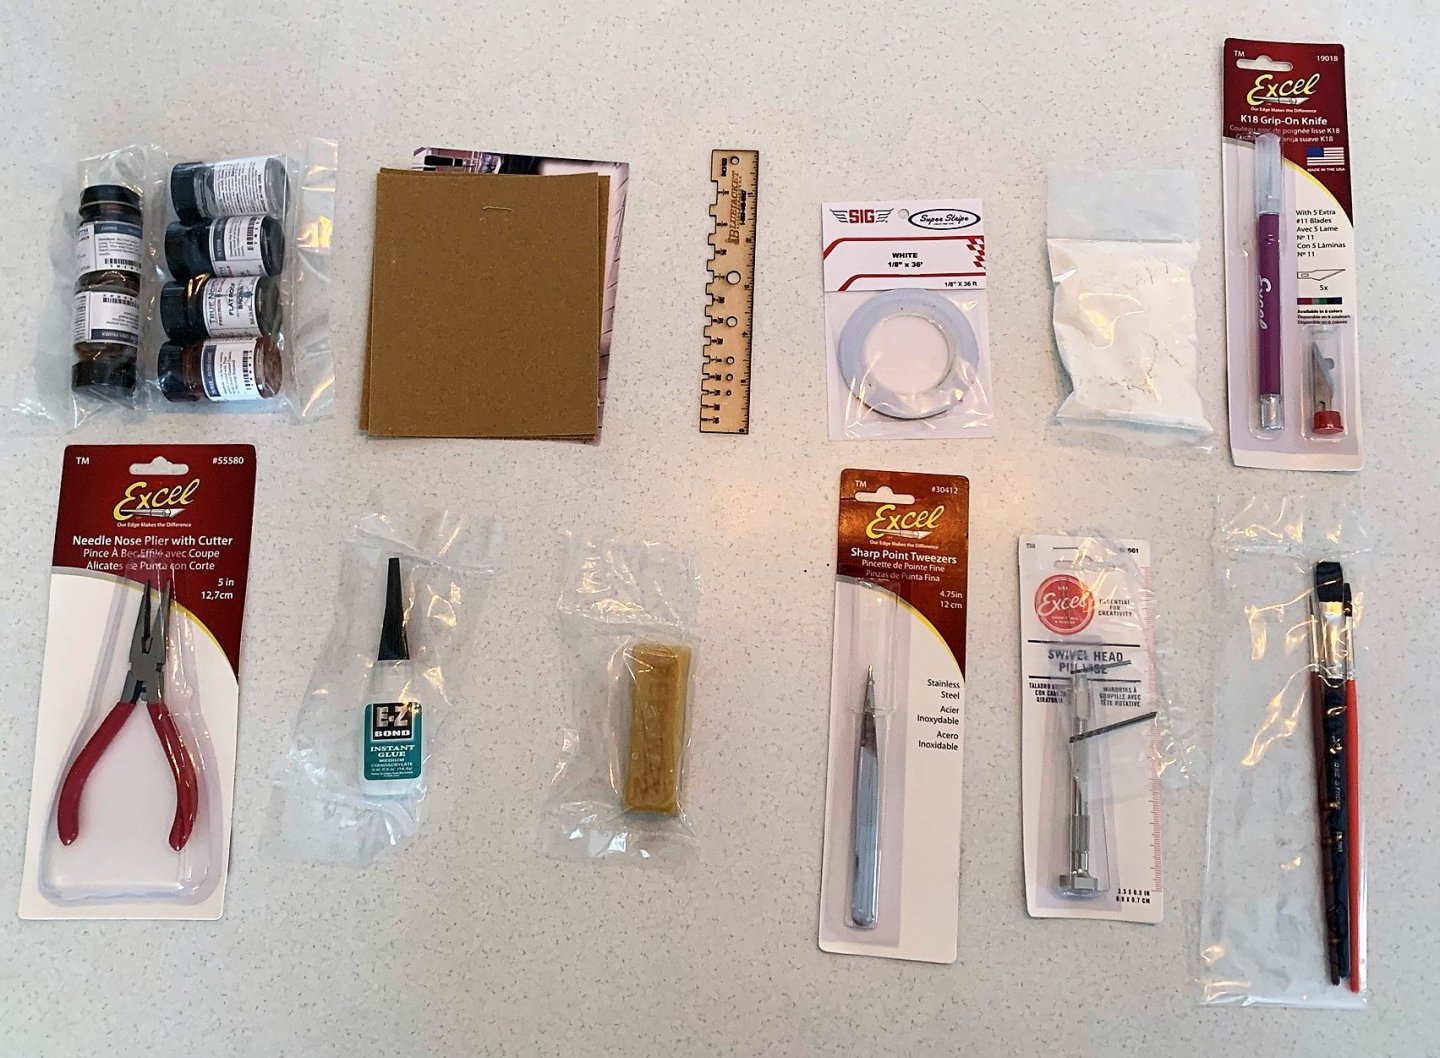
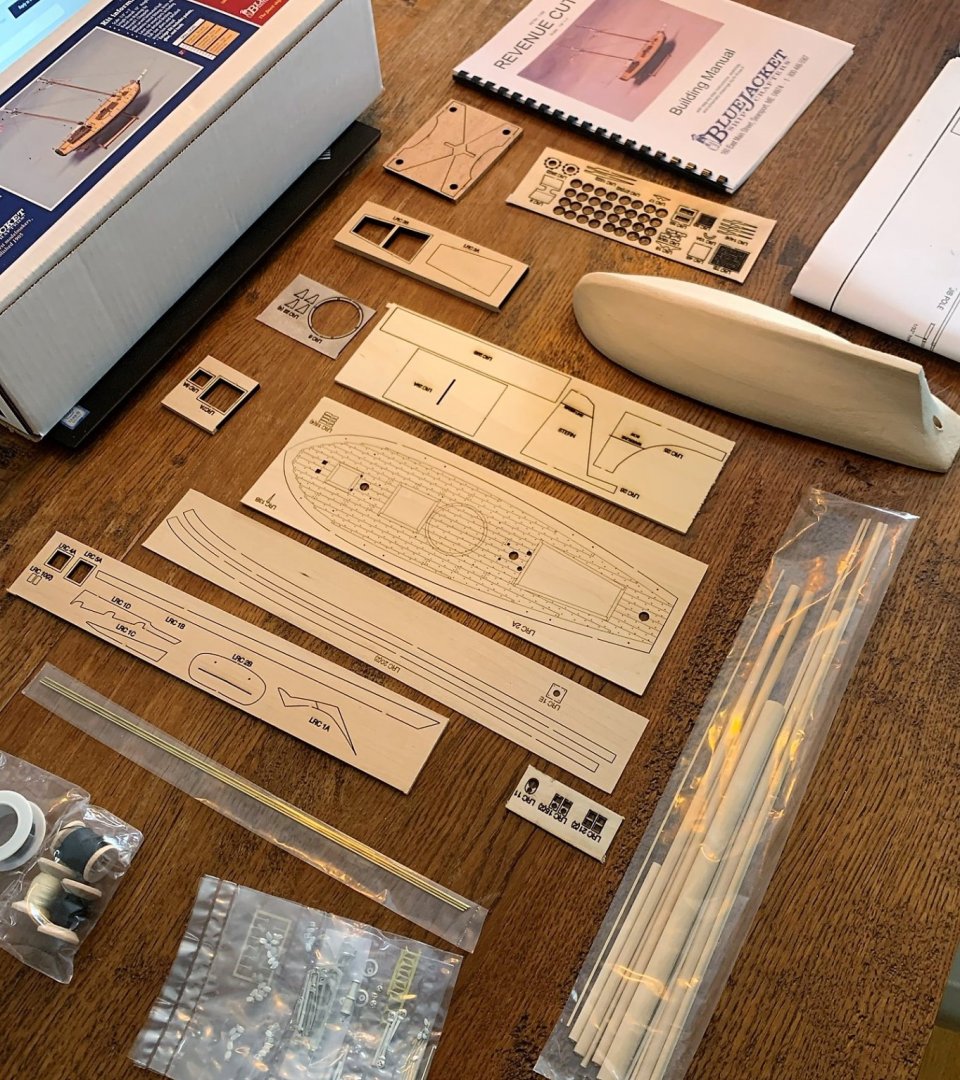
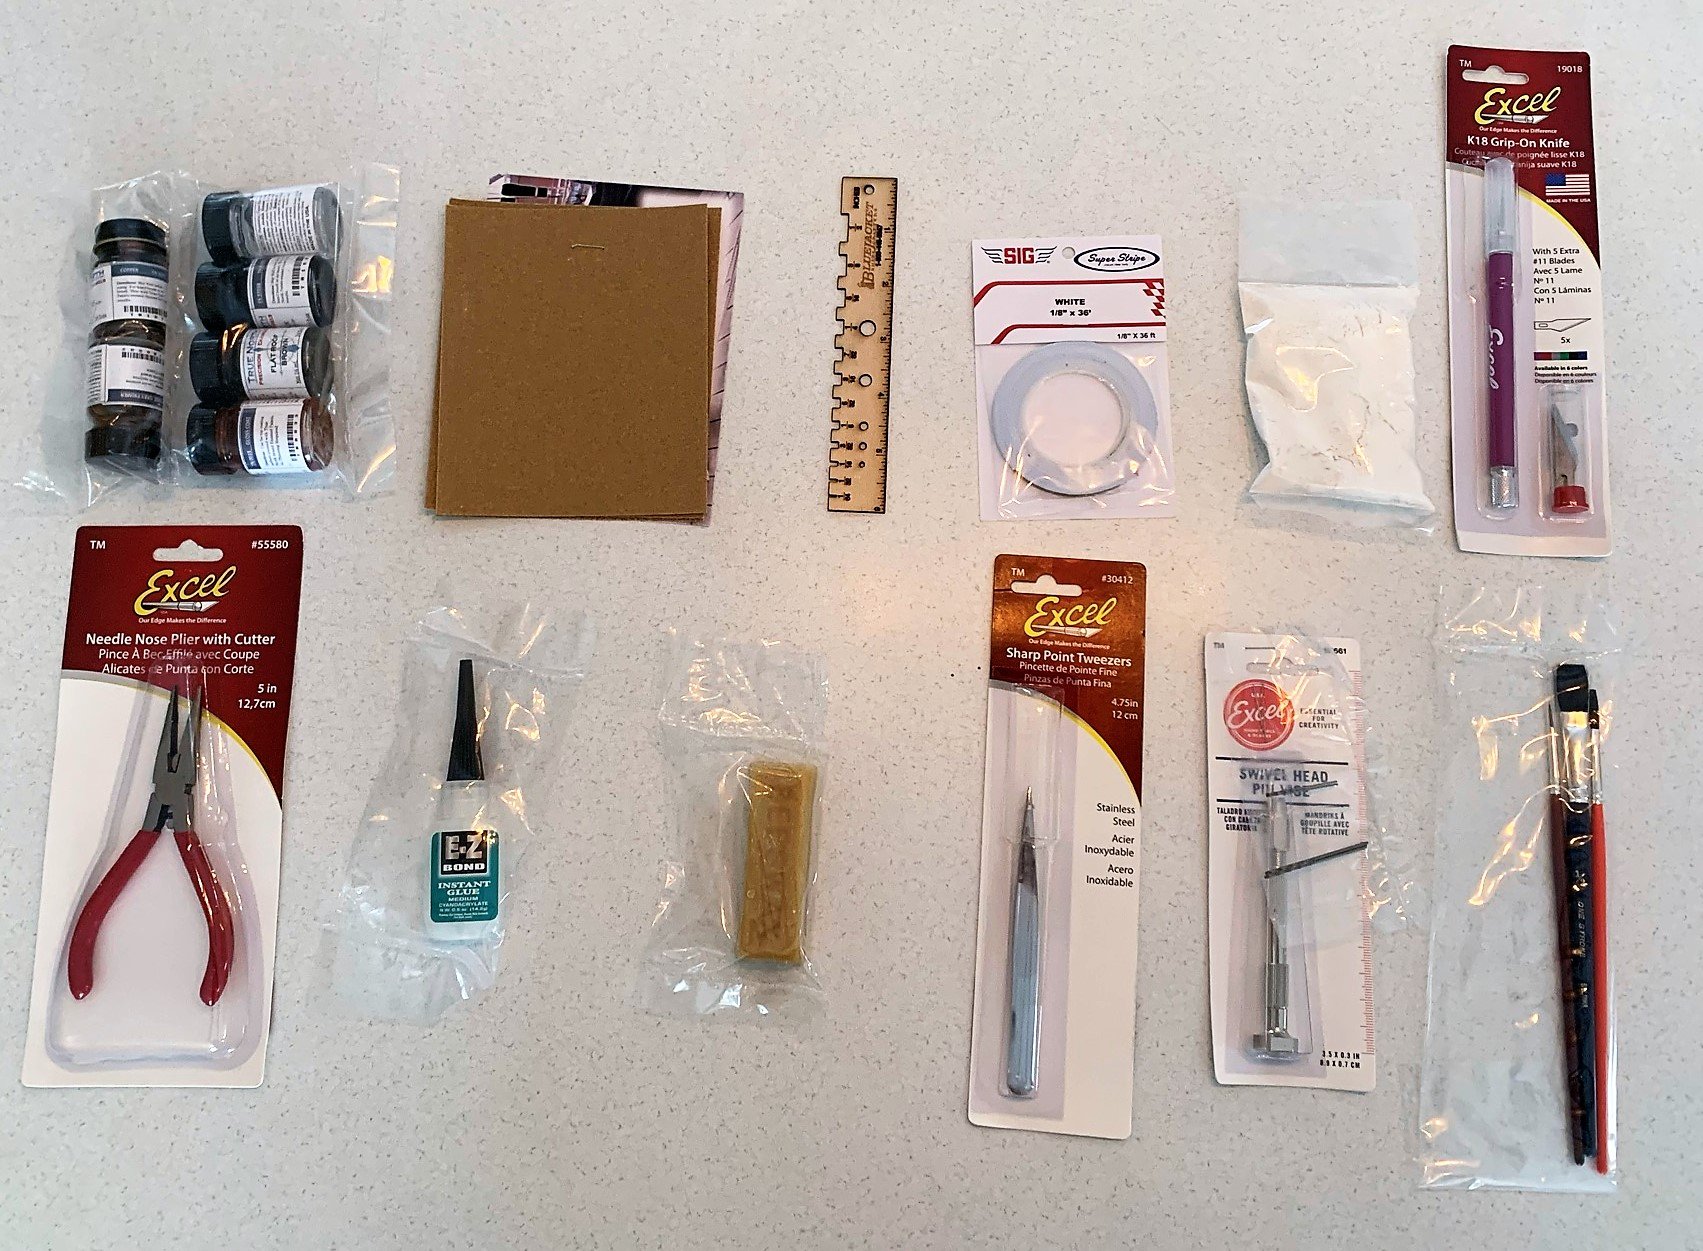
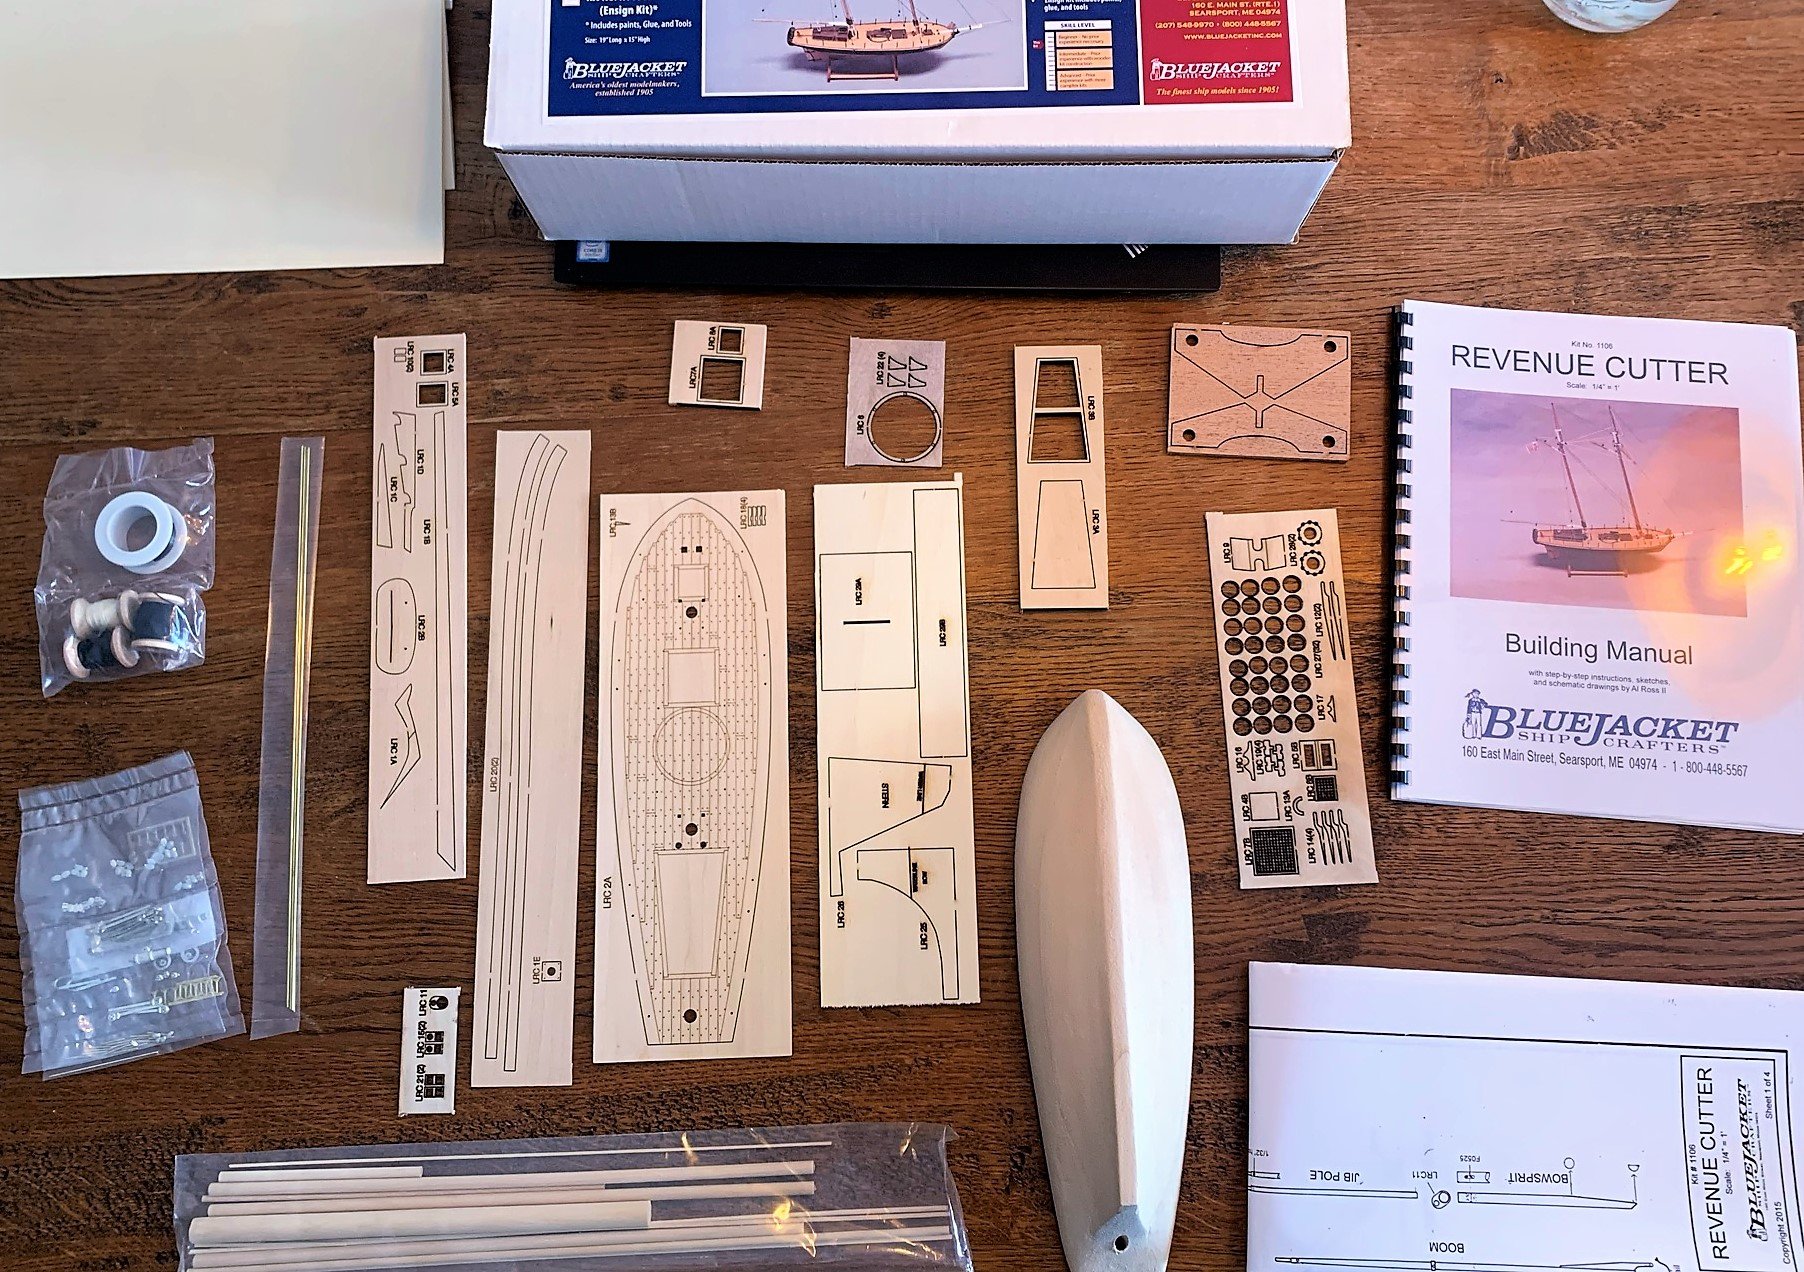
Unboxing day:
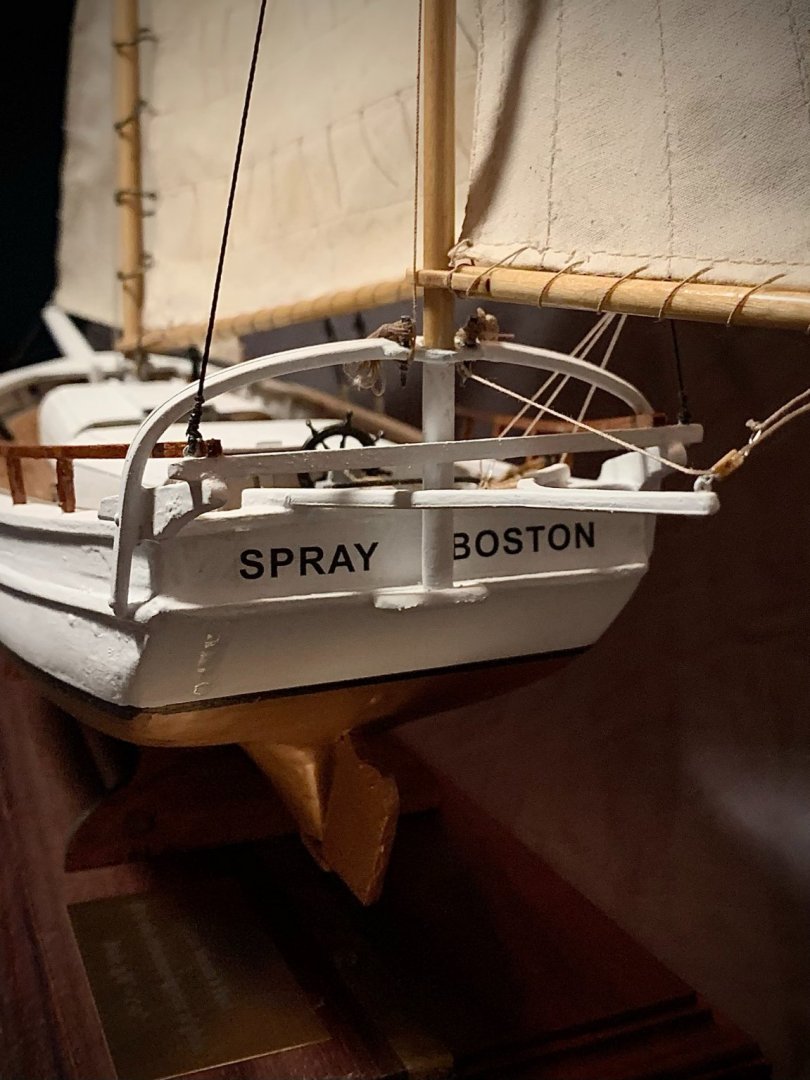
For my second kit model, I chose the Revenue Cutter by Bluejacket Shipcrafters. Was really happy with the Spray model I chose prior, so I wanted to follow it up with something slightly more complex rigging-wise.
No building today, just taking in the kit:
Excited about this one!

- BobG, ccoyle, GrandpaPhil and 1 other
-
4
-
-
-
Really liking how this is coming together. Way to go Tom!
-
-
Tom,
Looking great. The Chartpak product does a really nice job of that waterline stripe... impressive. I'll need to look into that for having on hand for future models.
You came up with a much more convincing gaff jaws than I could. I tried cutting the shape out several times, and kept splitting the basswood sheet. I'm sure their is a technique and/or tool that I am missing. Anyways, that looks very nice how that came together.
Also really liking the eye band solution you came up with. I too found that the supplied eye bands were undersized for the proposed mast diameters at their respective locations.
-
-
Looks like she smoothed out really nicely! I agree with the thought process on the "wooden boat" look vs. fiberglass. Good to see some plank seams in my opinion. Coming together!
-
21 hours ago, dsmith65 said:
Very nice, I hope mine turns out half as good as yours.
Looks like yours is coming along nicely. Good luck with the build!
-
On 11/27/2020 at 5:40 PM, Friday Dog said:
Well that was fast and it turned out very well. The detail on the rigging always impresses me. Nice how you used your interest and knowledge in Slocum and his journeys to inform and motivate your progress. Now I have to make up my mind on if and what on a build of my own! Congratulations, Josh, and happy holidays and a great new year.
Thanks Friday Dog. Happy holidays to you and yours.
-
On 11/27/2020 at 8:28 AM, MrBlueJacket said:
Congratulations, very nicely done. I just made a note in your customer file for 10% off your next kit.
Nic
Thanks Nic! Much appreciated. I'll definitely come back for another one
-
1 hour ago, Tomculb said:
Very nicely done Josh, definitely a build to be proud of. Averaging maybe 5 hours a week, I doubt that I will have finished my Spray before maybe mid-winter, but who knows. Regardless of the pace, she is certainly a fun build. I'll be interested to see what you choose to build next.
Happy Thanksgiving.
Thanks Tom, and Happy Thanksgiving to you as well! I will be following your progress on Spray - your model is looking really great.
-
10 hours ago, Ryland Craze said:
Congratulations on finishing this fine model. Thanks for the detailed build log. This will aid future builders of this model.
The photos turned out really great. I hope you add them to the Gallery for all to see.
Thanks! I am happy with how it turned out, and am looking forward to another build one day 👍
-
2 minutes ago, rshousha said:
Imagine taking on the world in that thing! He sure had vision. I need to read his book.
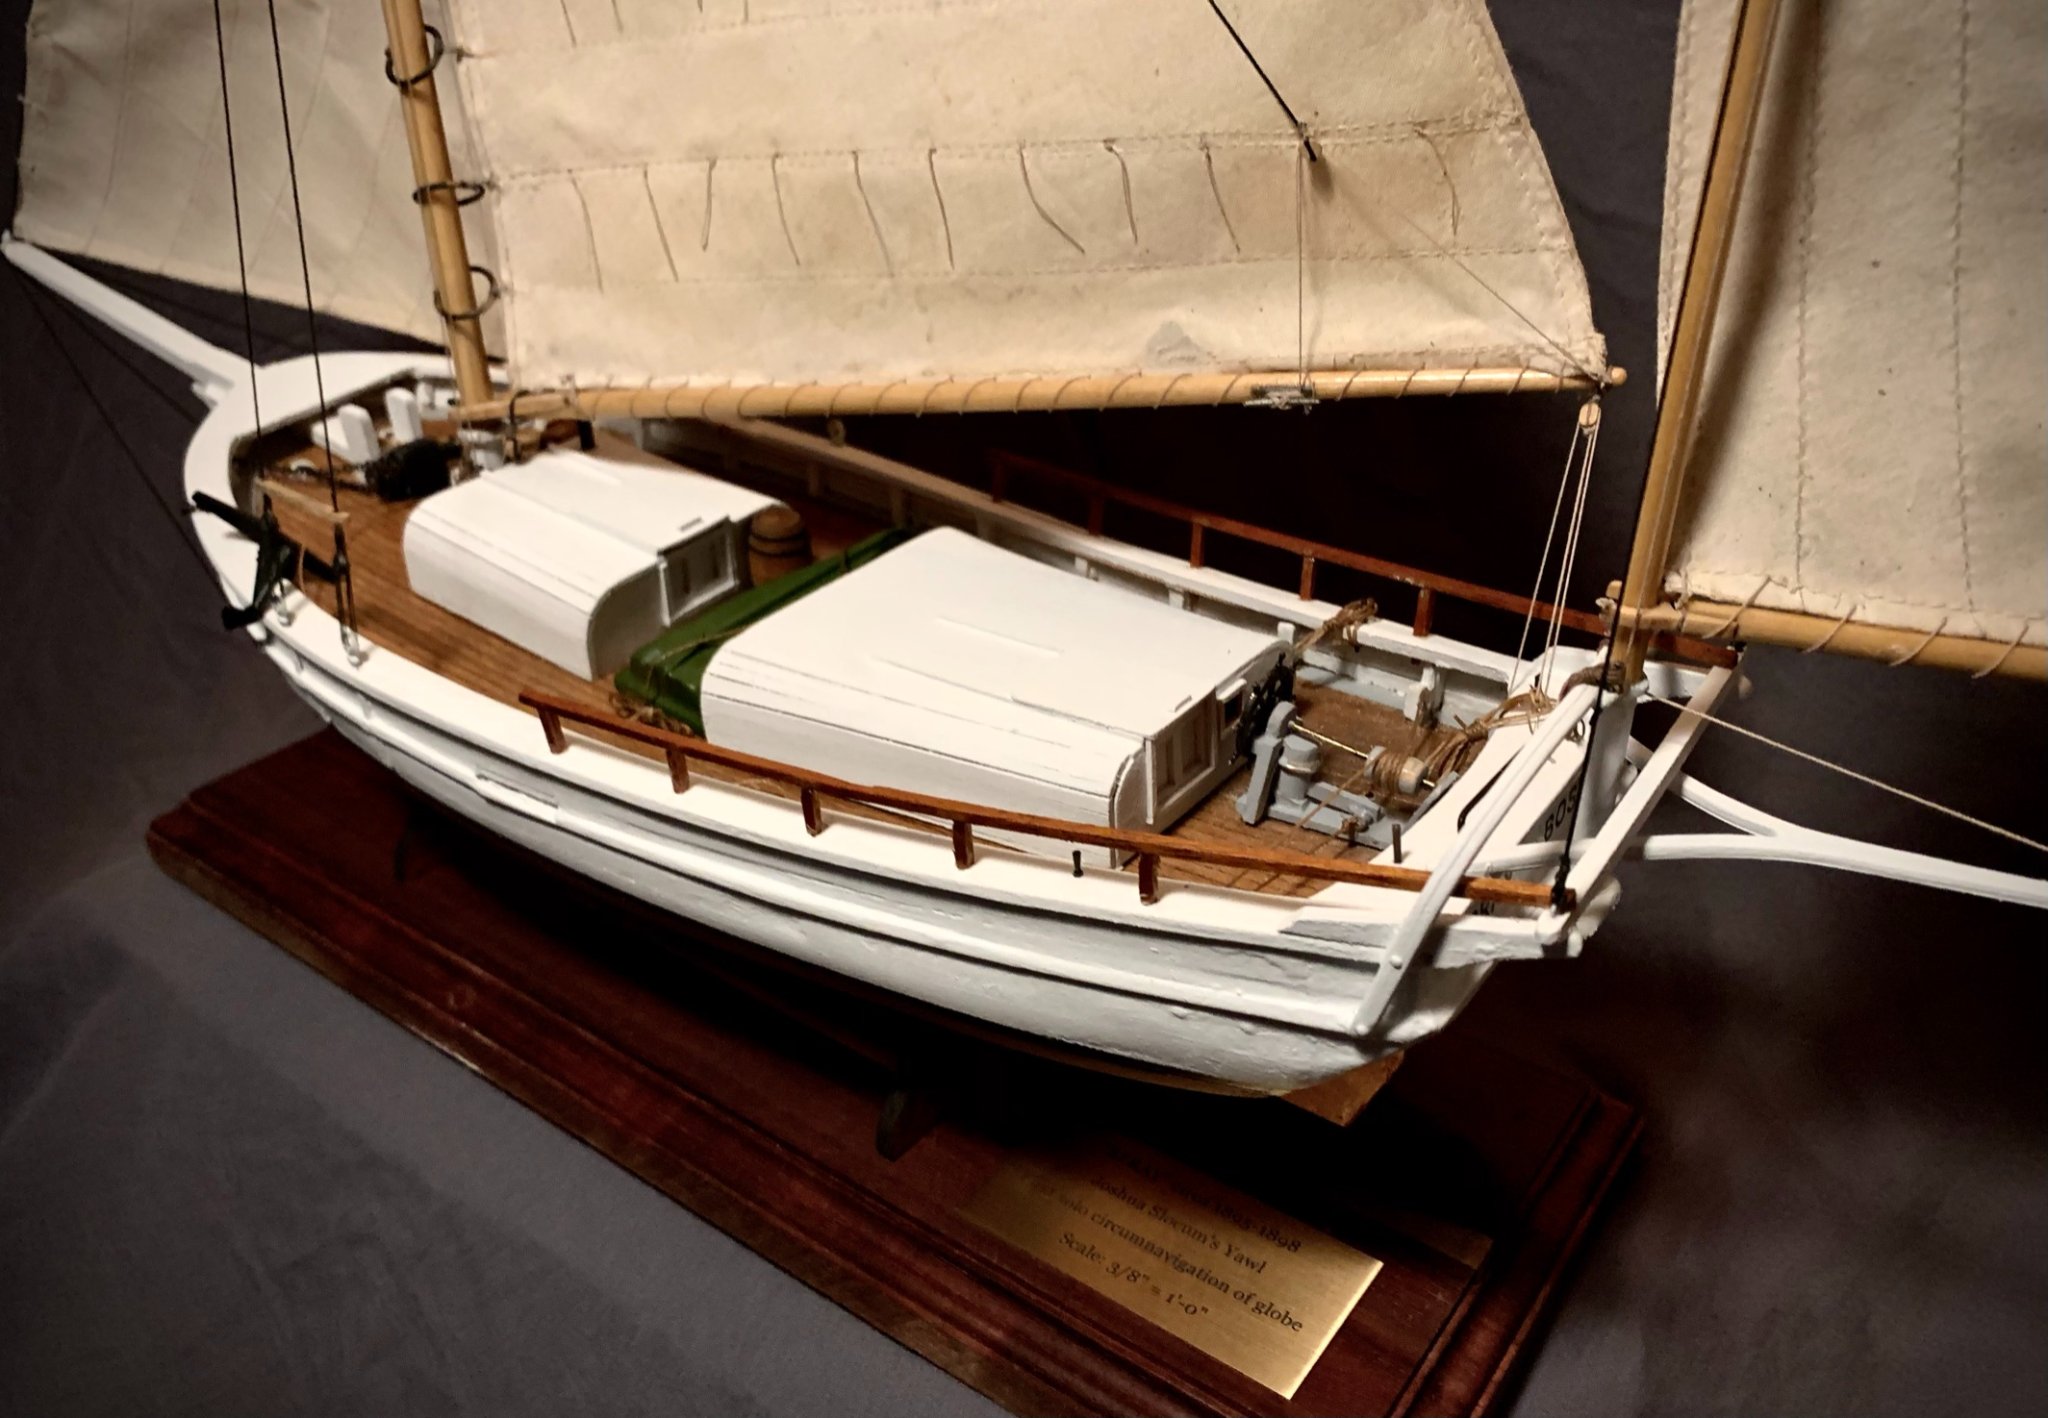
Unreal journey! No doubt some luck played into the successful completion of that trip - but more than that, a testament to Captain Slocum's knowledge of the sea and his vessel. As inspiring now, as it must have been then. I am currently reading the hard copy of "The Hard Way Around," and have "Sailing Alone" streaming audio from the Librivox archive (a good free resource for those who would like to listen to the story).
- BobG and Ryland Craze
-
2
-
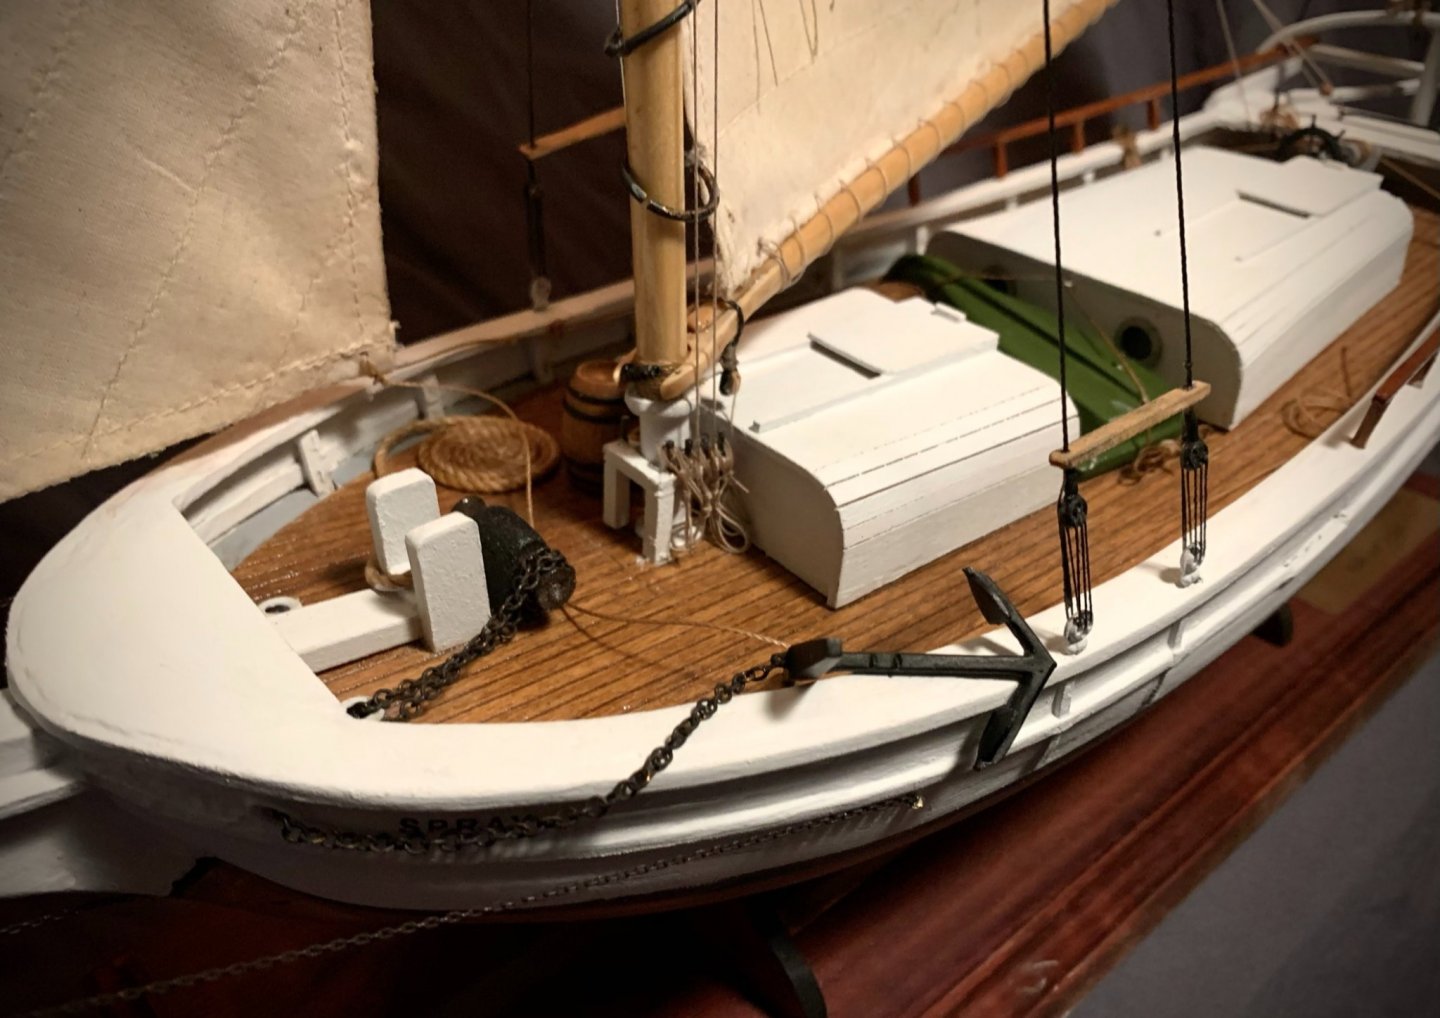
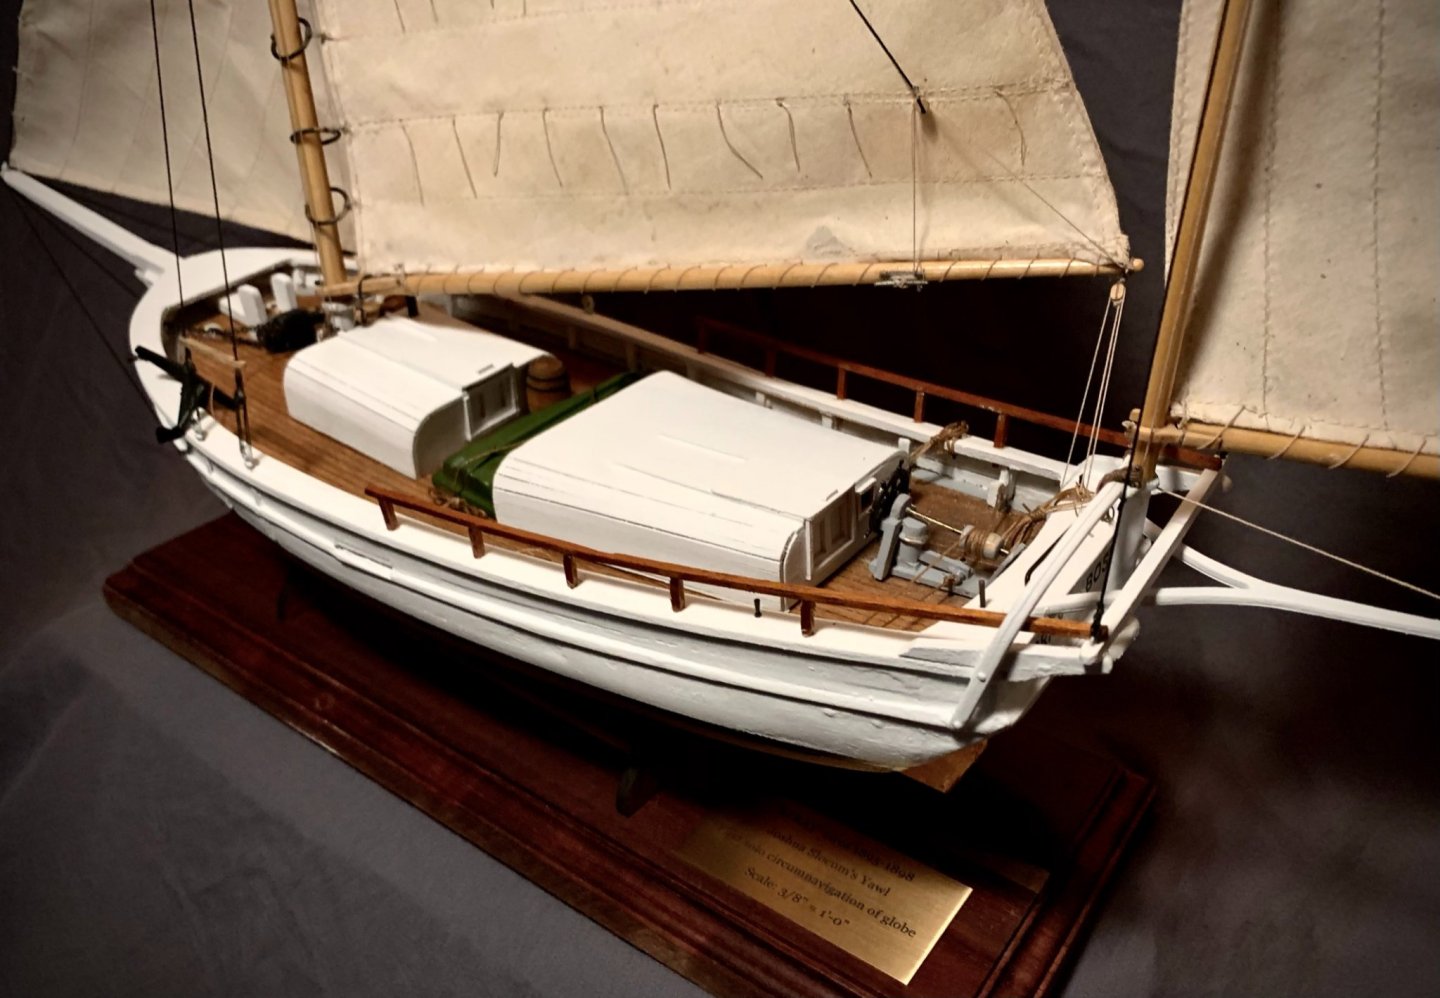
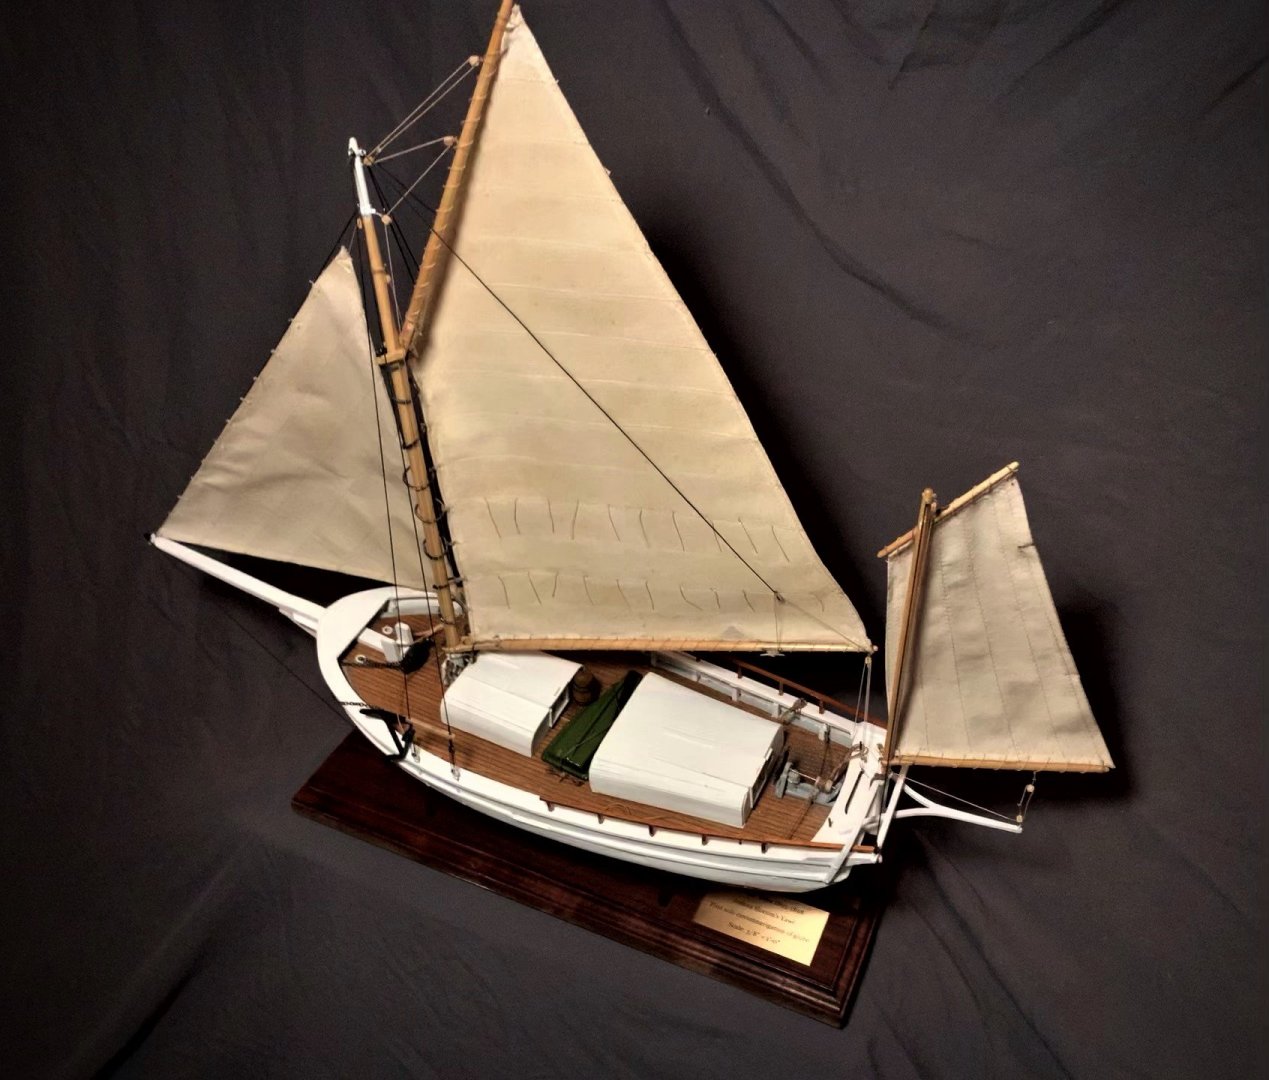
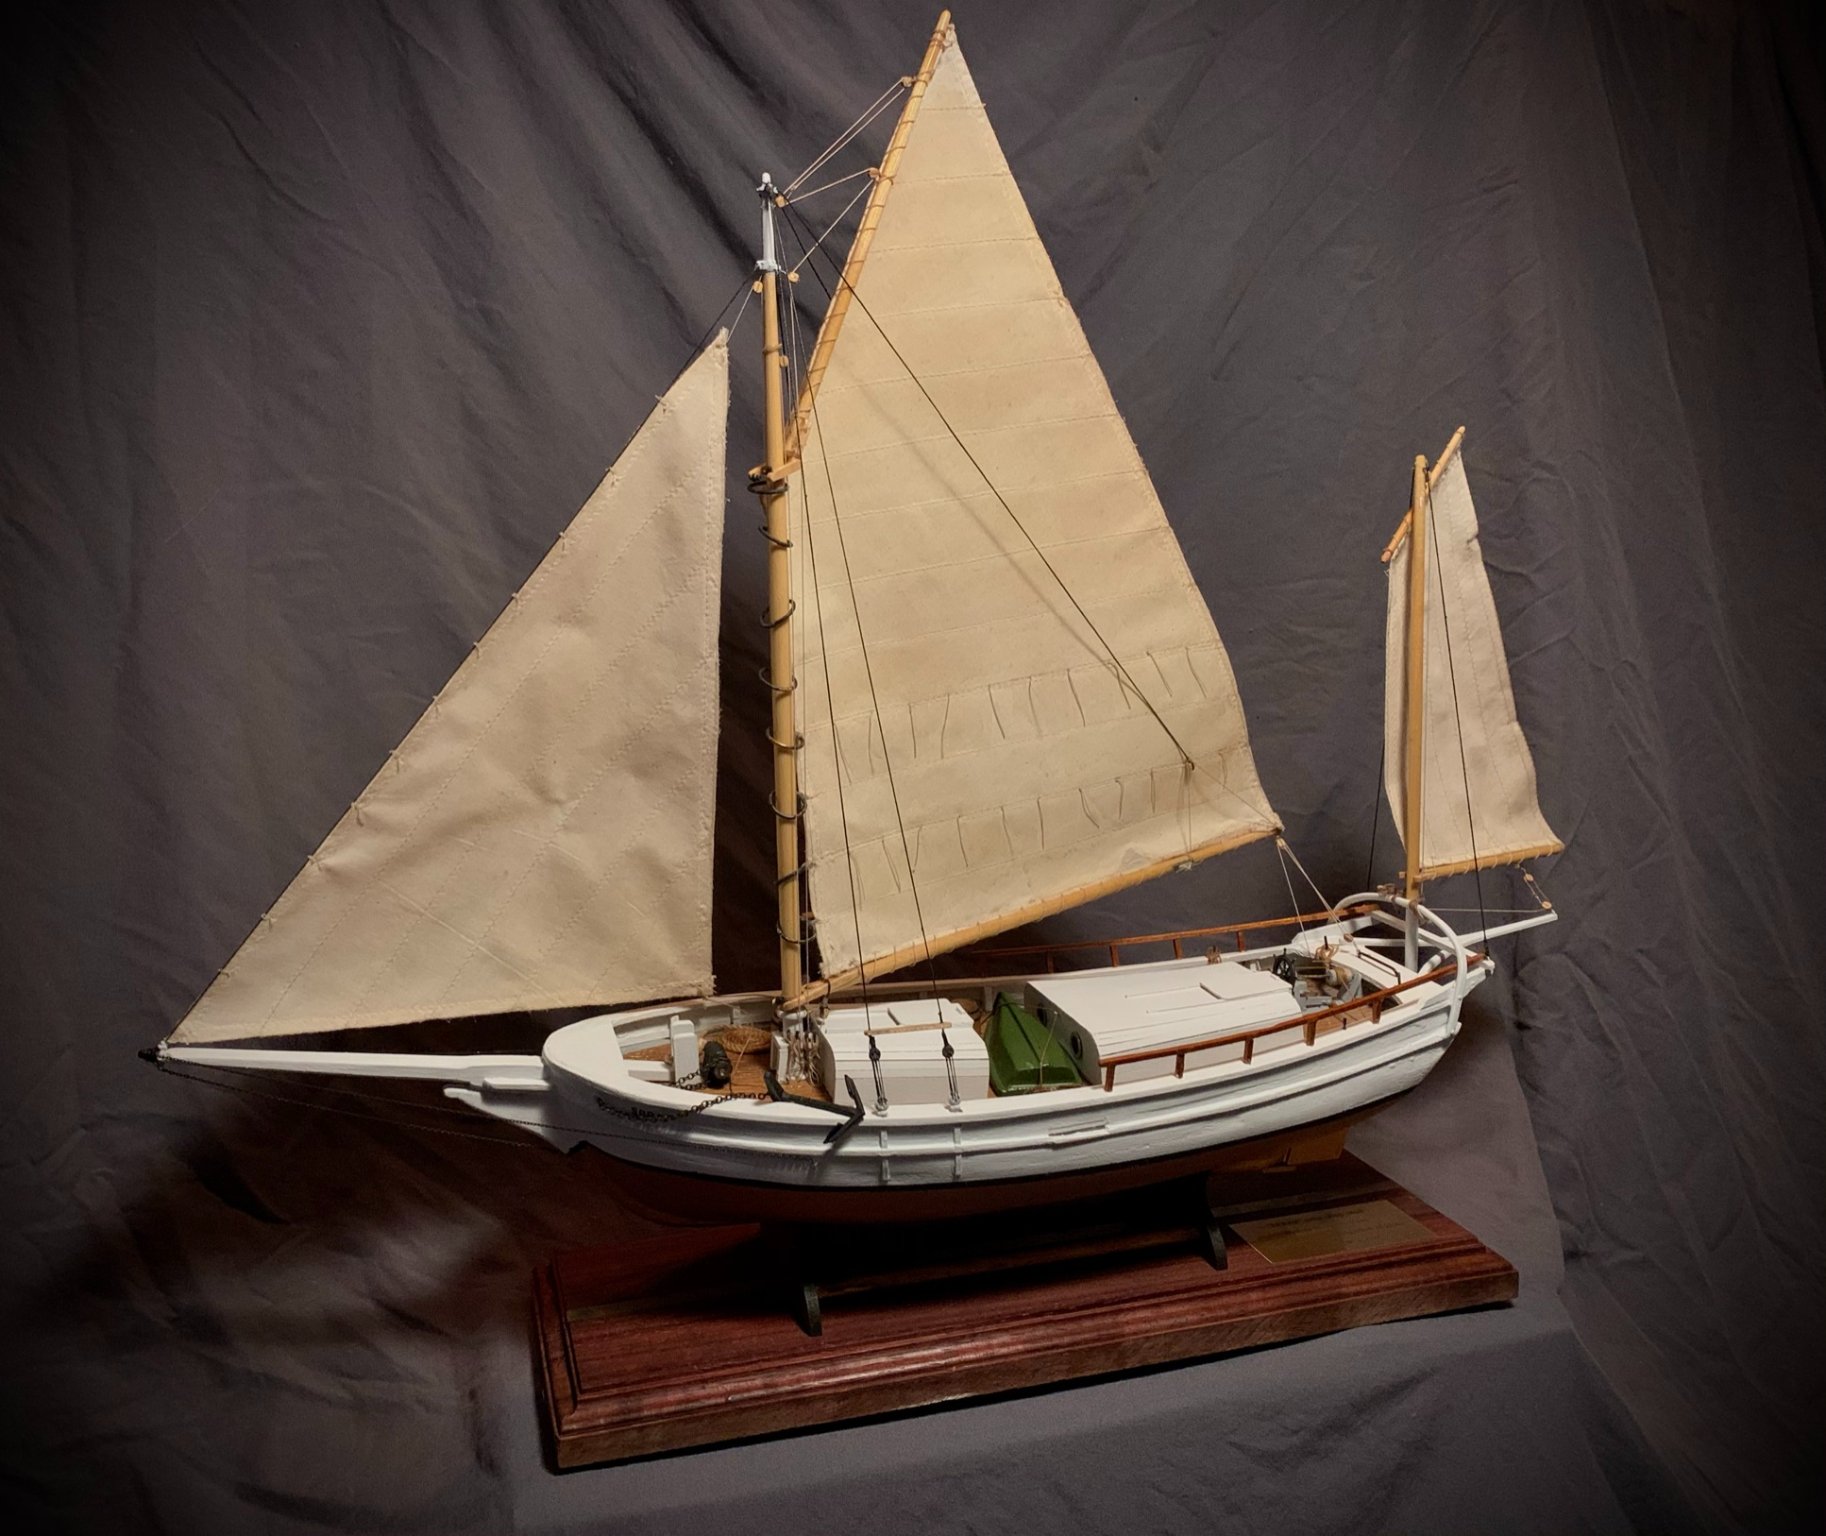
Wrapped up on the Spray build last night. I am really happy with how it turned out, and I certainly learned a lot! I will be thinking about what the next model will be; but in the meantime, I'll be content to peruse the build logs to find another kit that is calling to me (I am seriously considering the Bluejacket "Mary Taylor" or "Revenue Cutter" for next)...
Here are the final pics (my best attempt at a photo studio by using sheets and reading lamp with piece of paper diffuser).


- lmagna, Ryland Craze, Ken_2 and 6 others
-
9
-
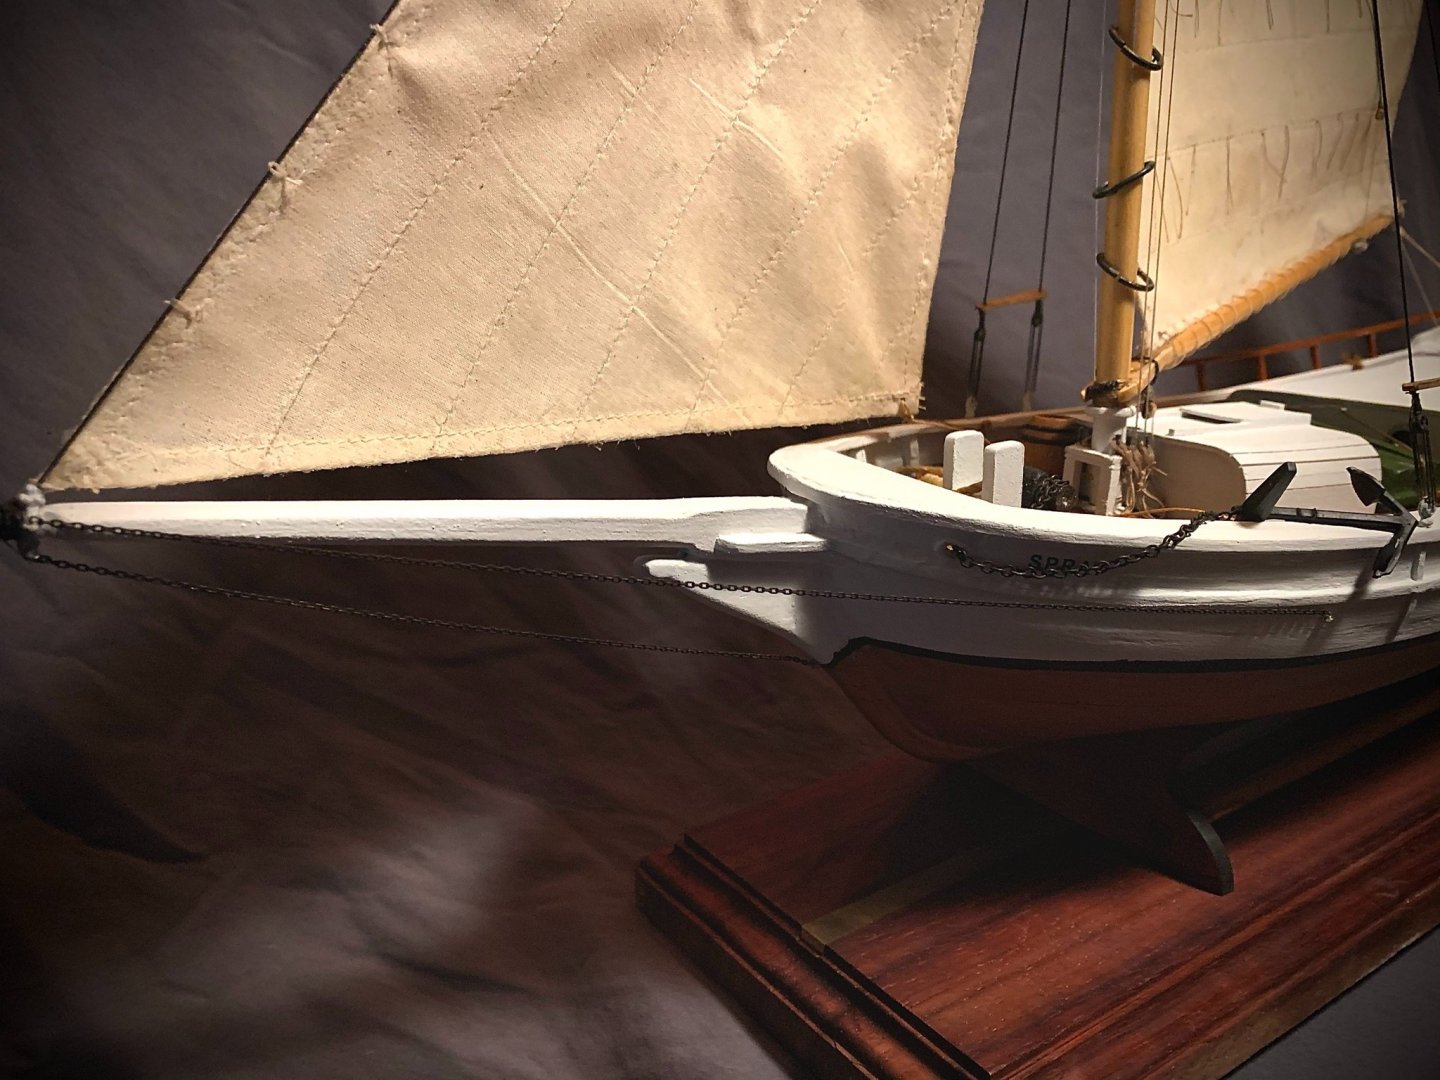
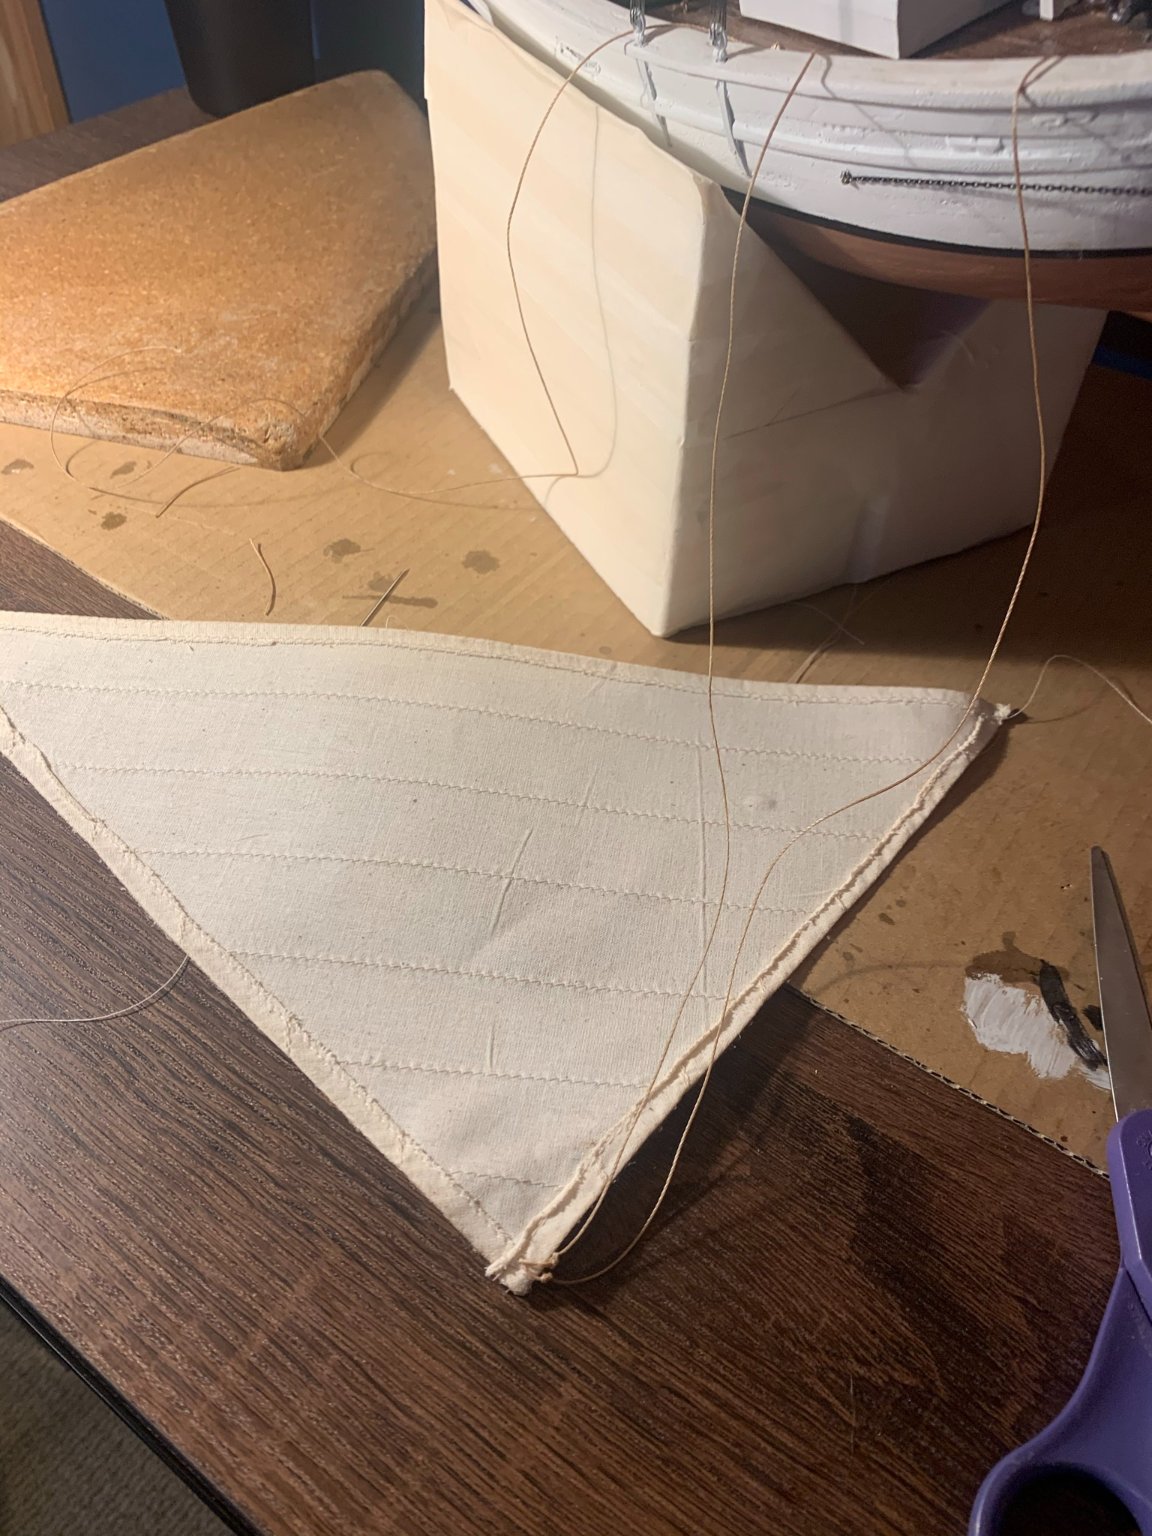
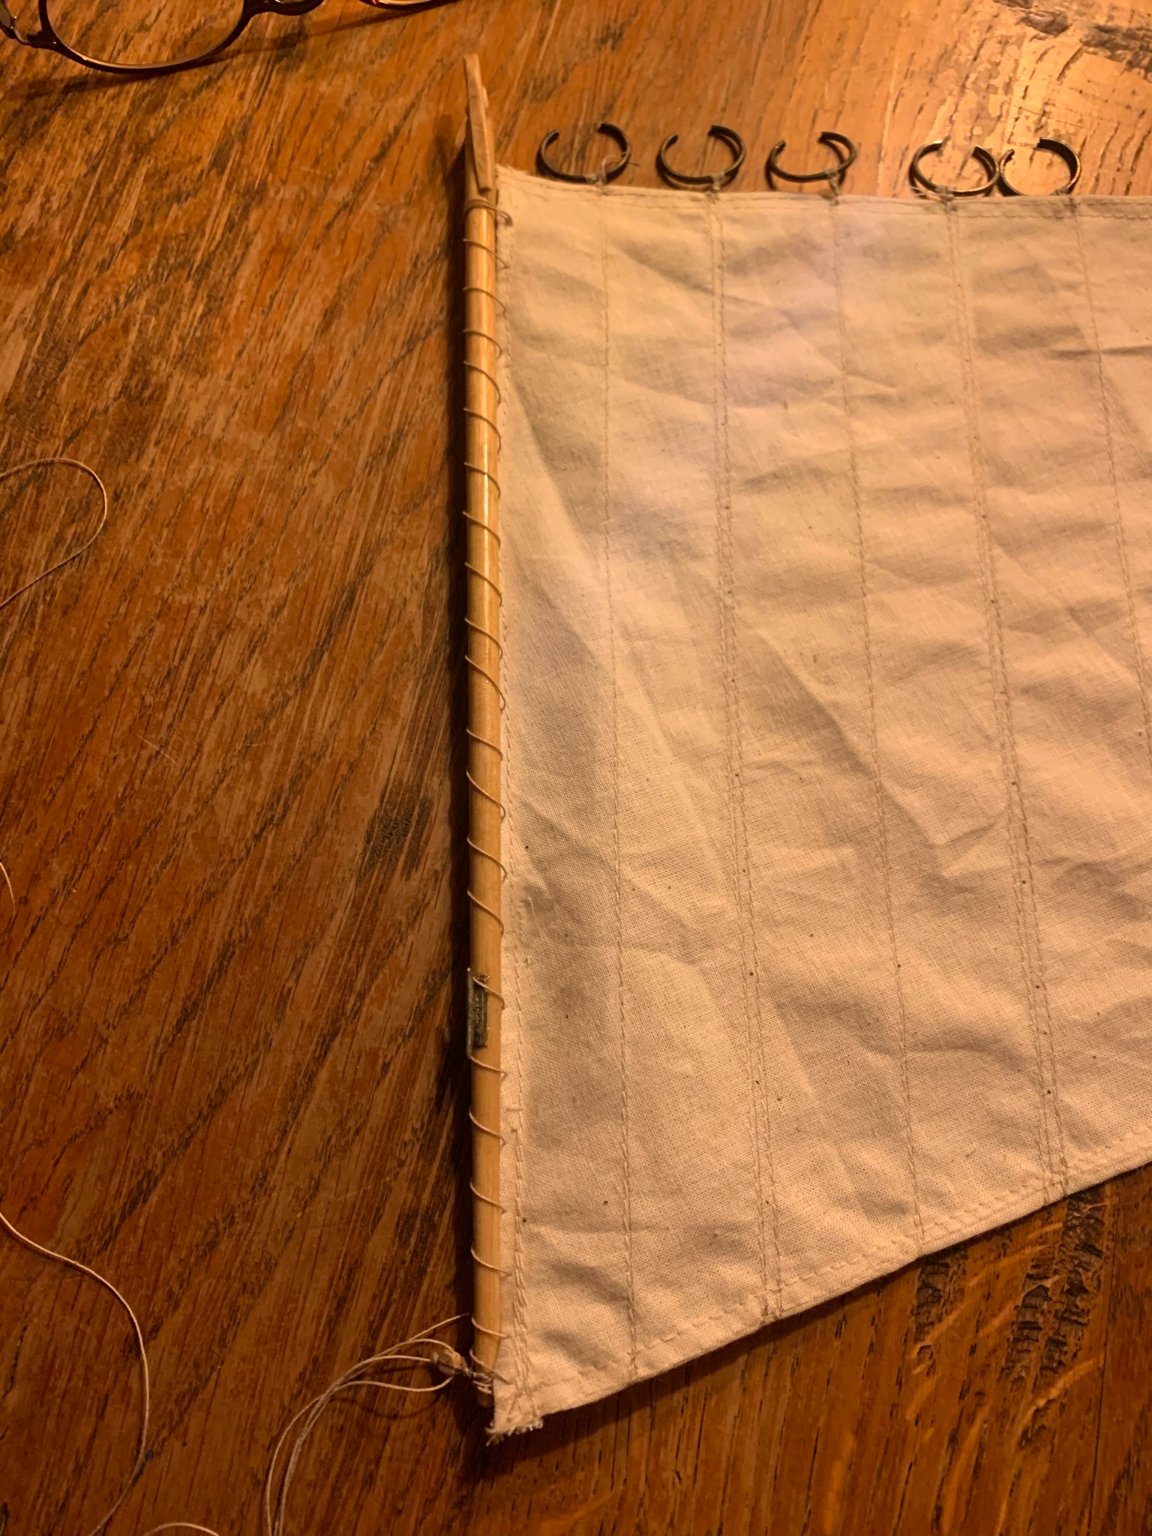
Got to sewing the jib sail the other day, and began the rigging for jib halyard and sheets:

Hoisted the halyard, and temporarily fixed the line while sewing the "hanks."
On these, just did two passes through and back, with a knot at the end. Followed up with the smallest dab of CA glue at the knot to hold fast.
The sail, for some reason, had a shape in the opposite direction it was supposed to have (probably my error in forming it), so gave it a little roll and pinch:

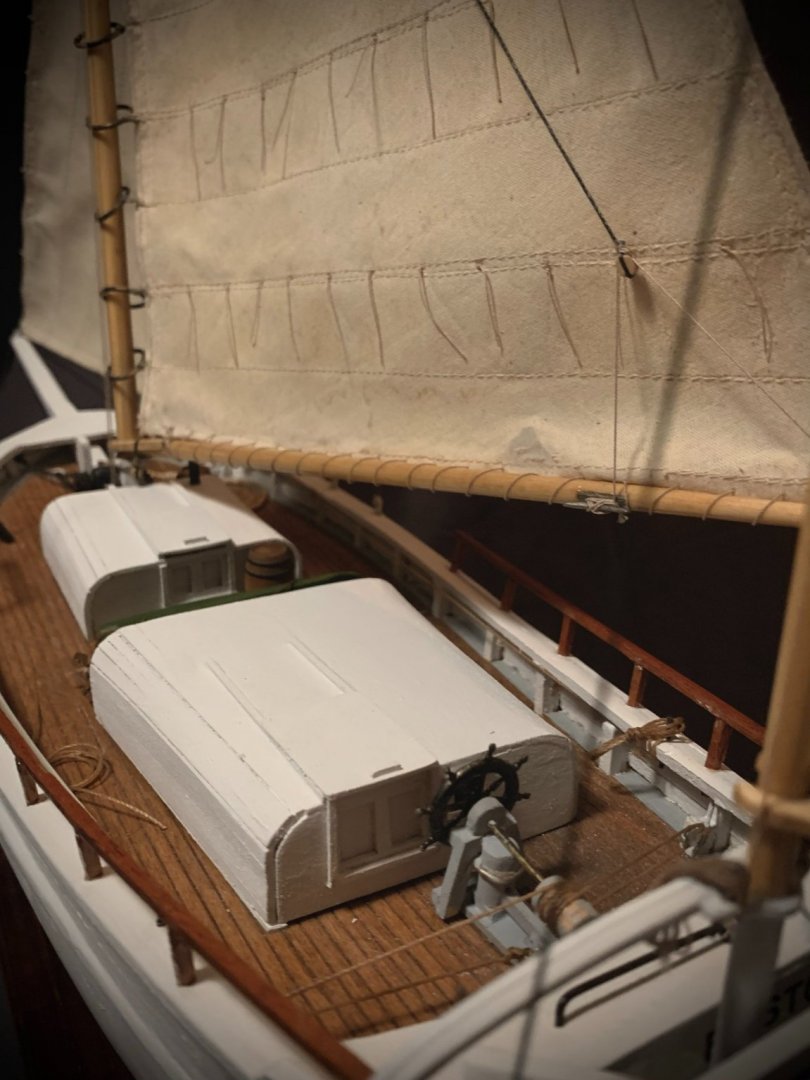
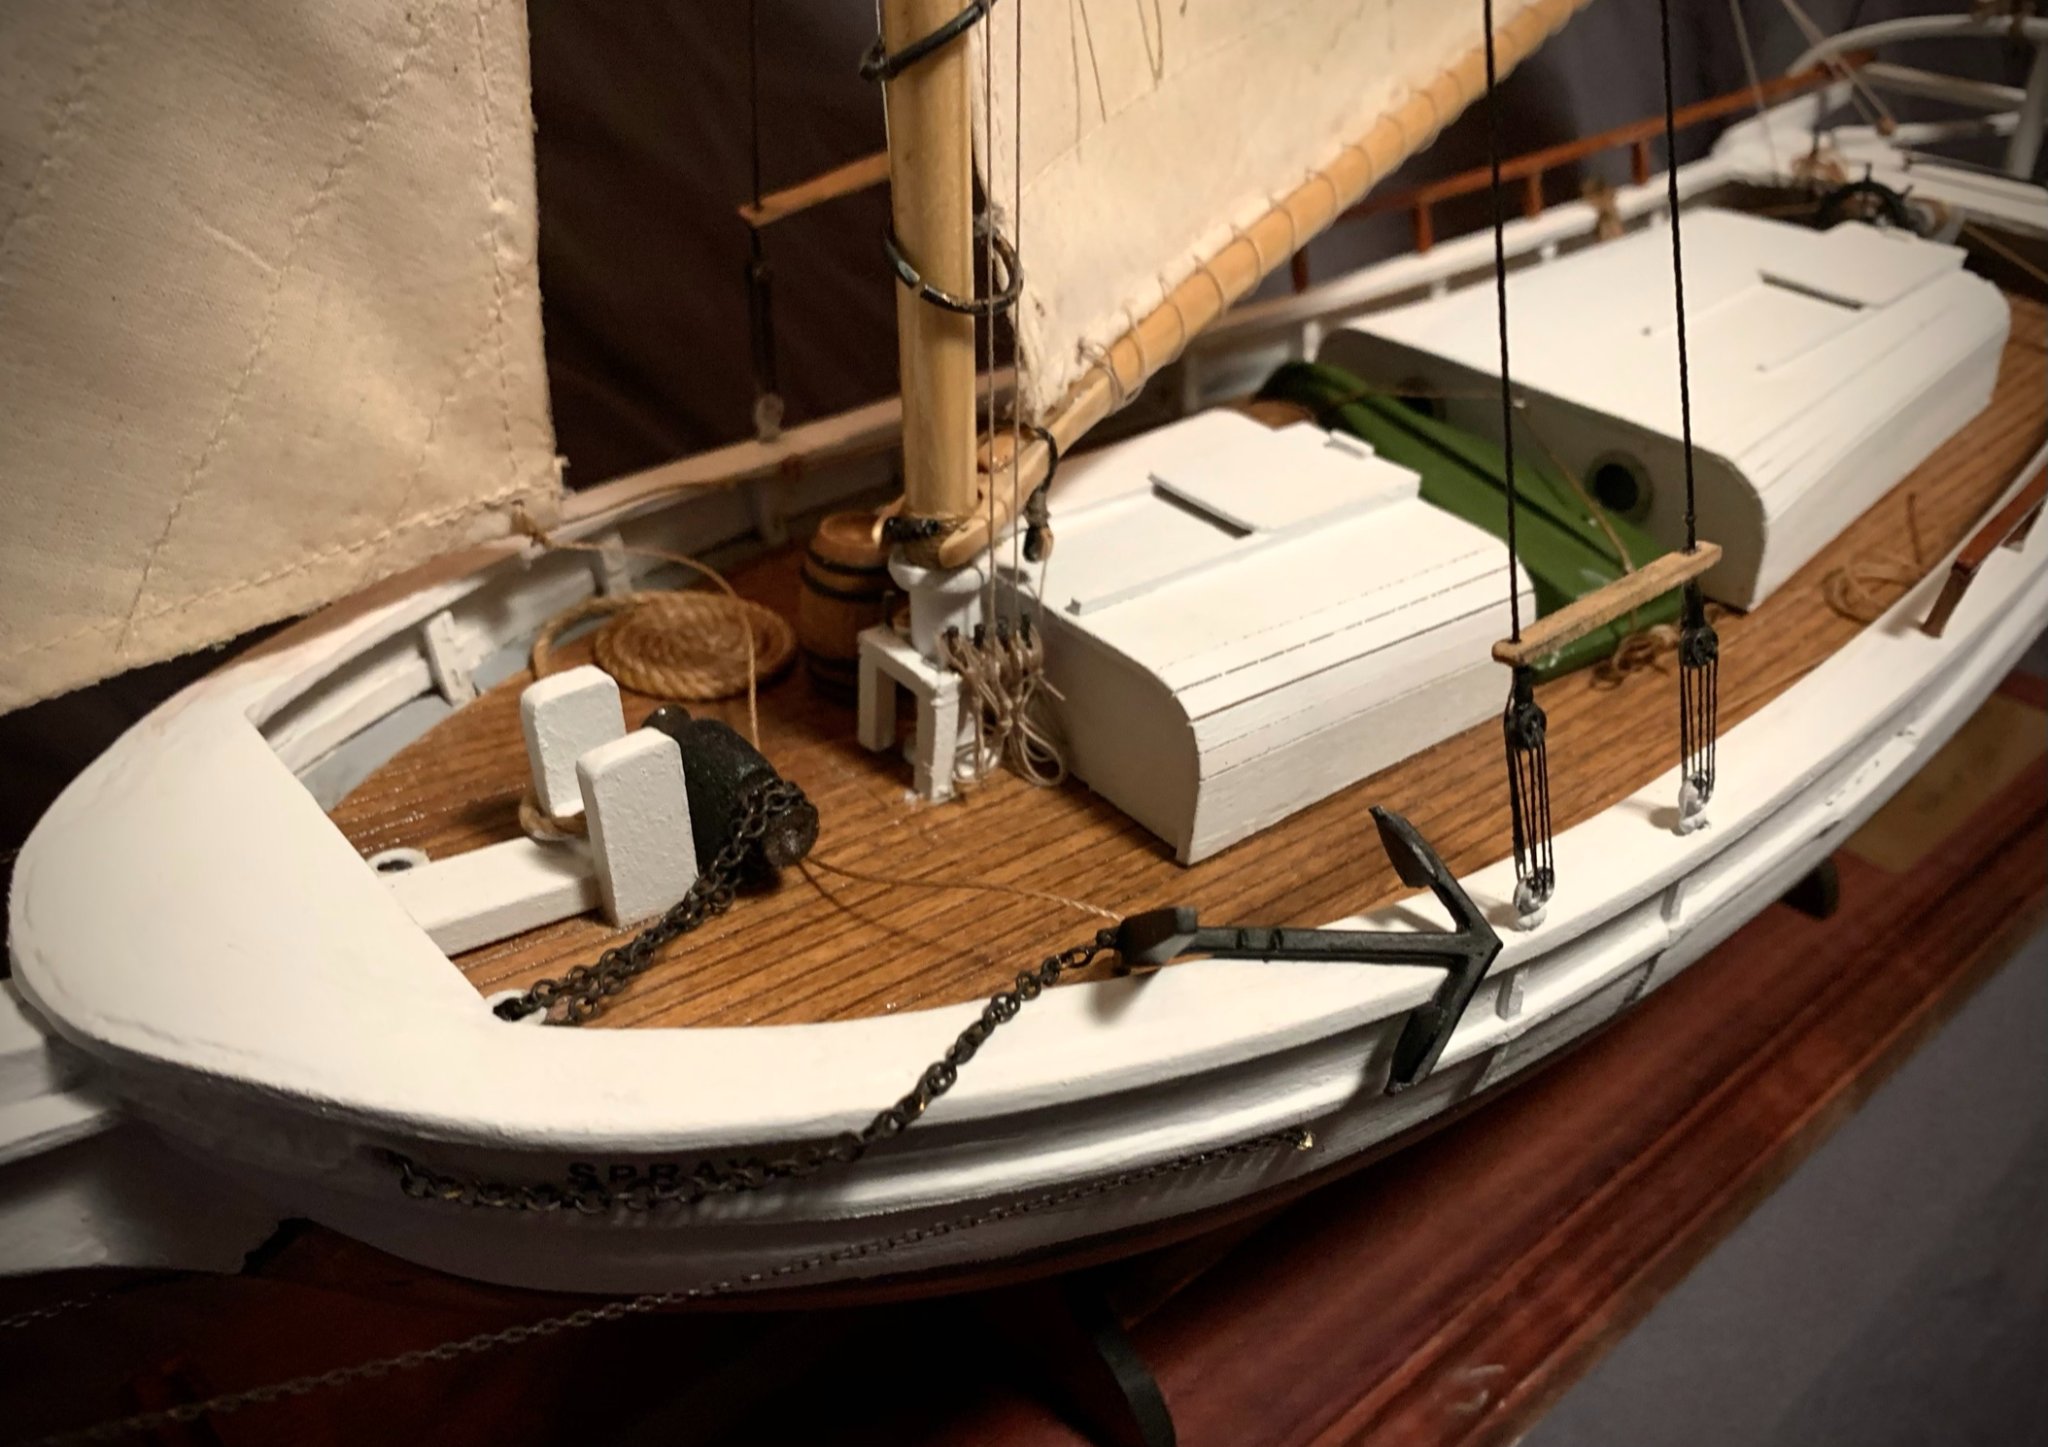
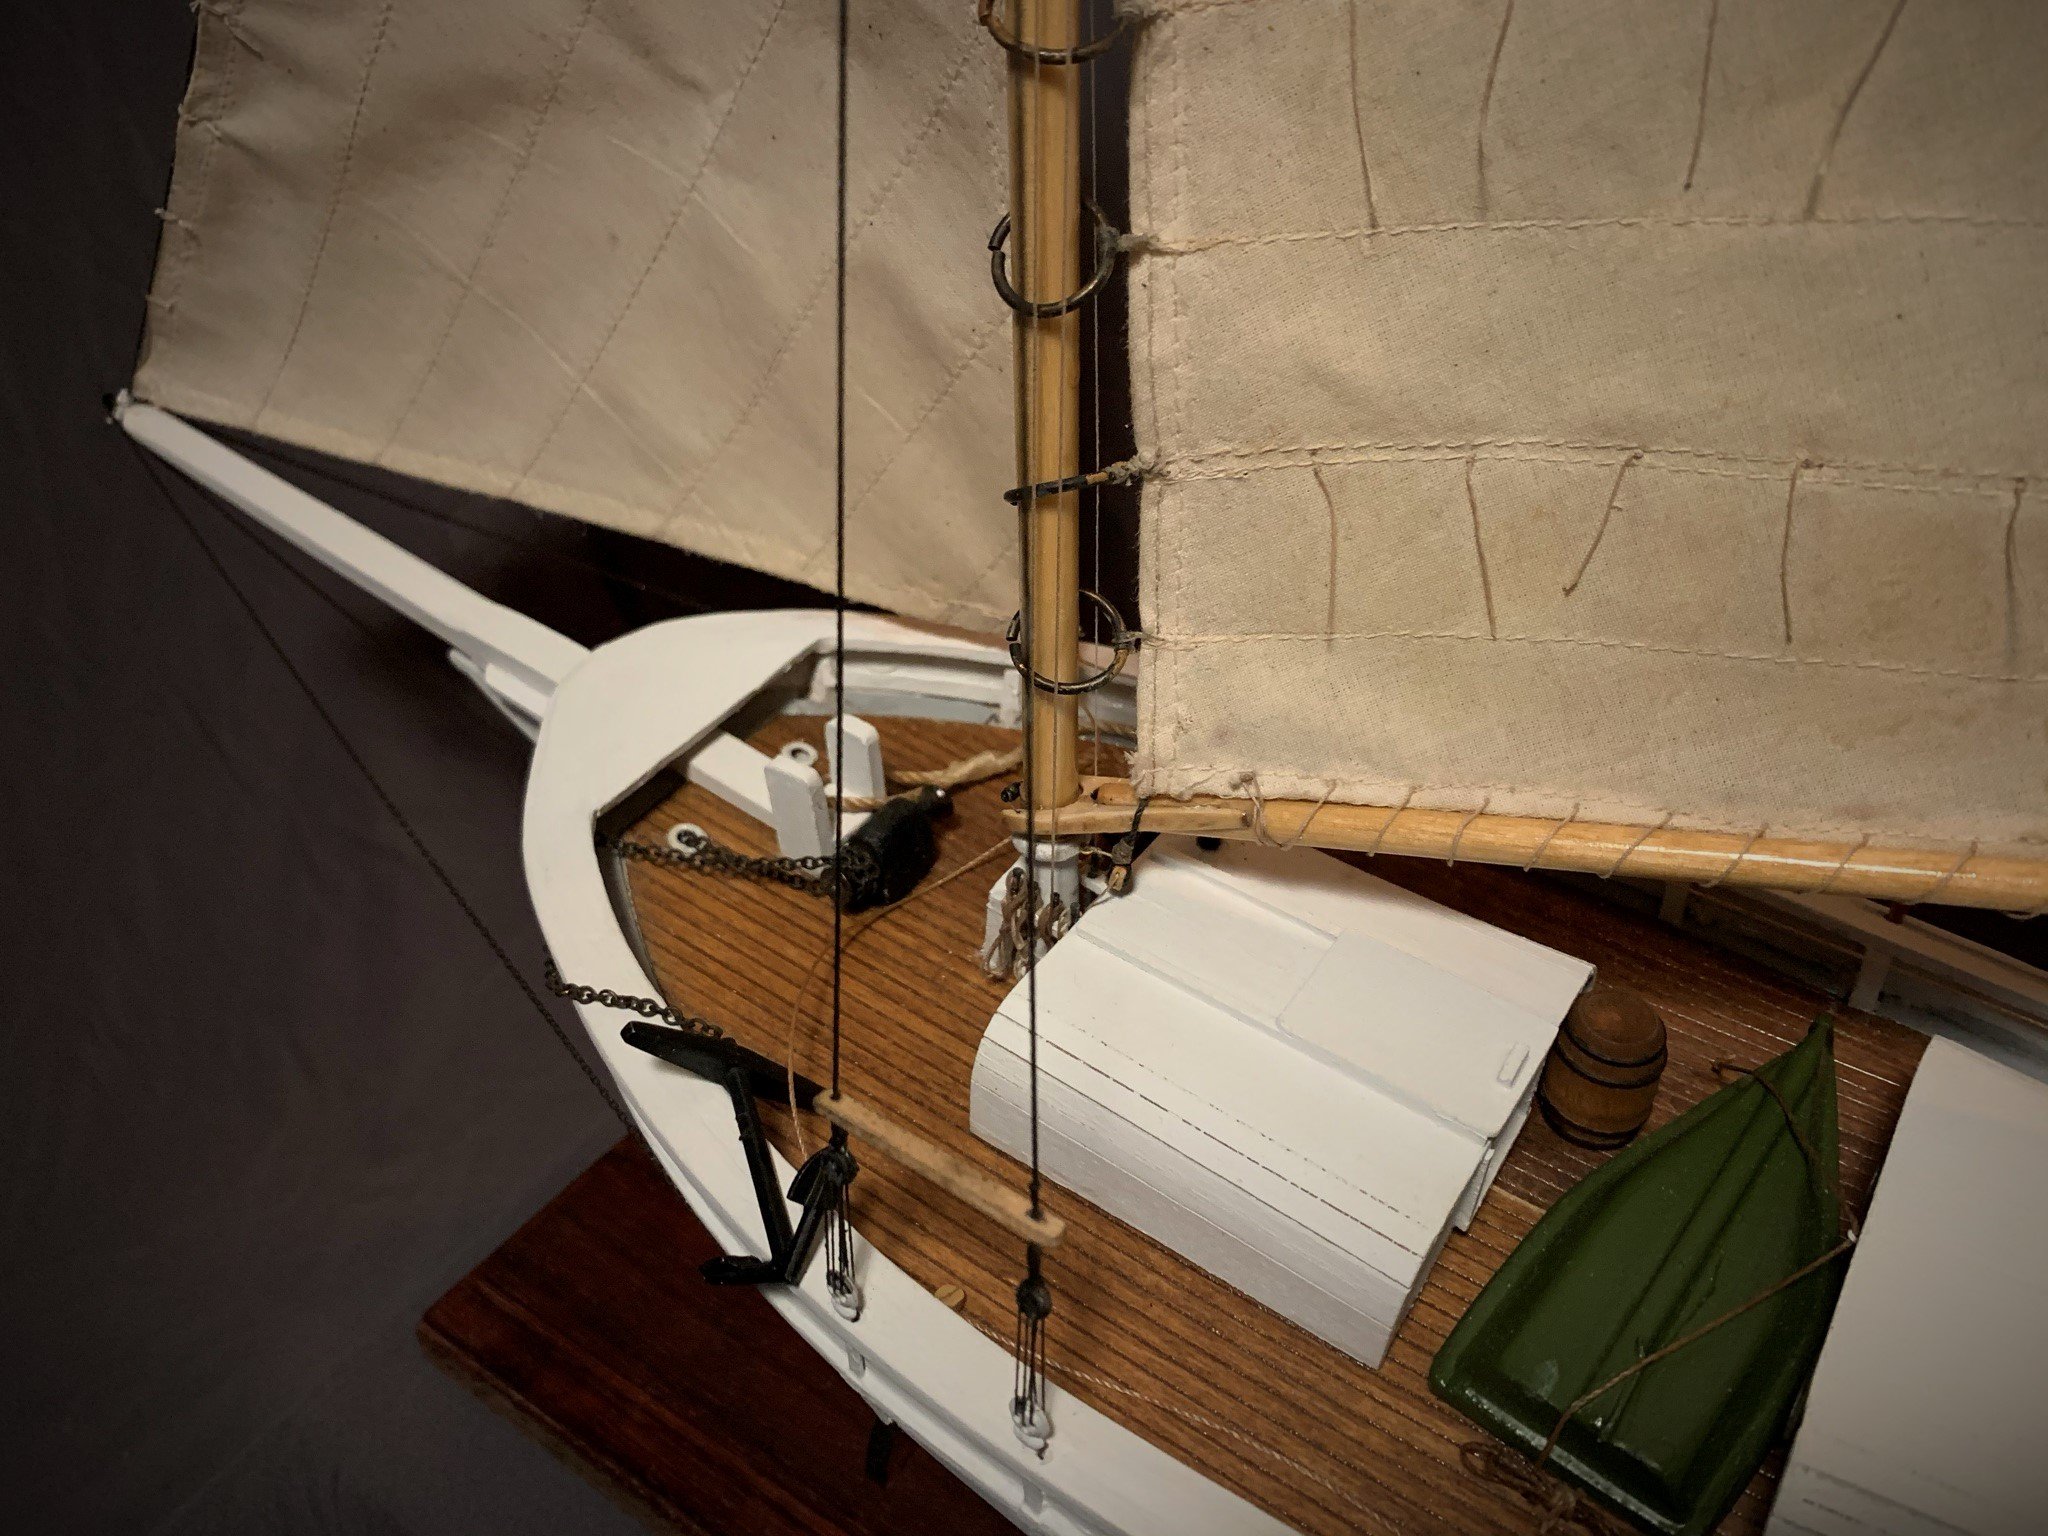
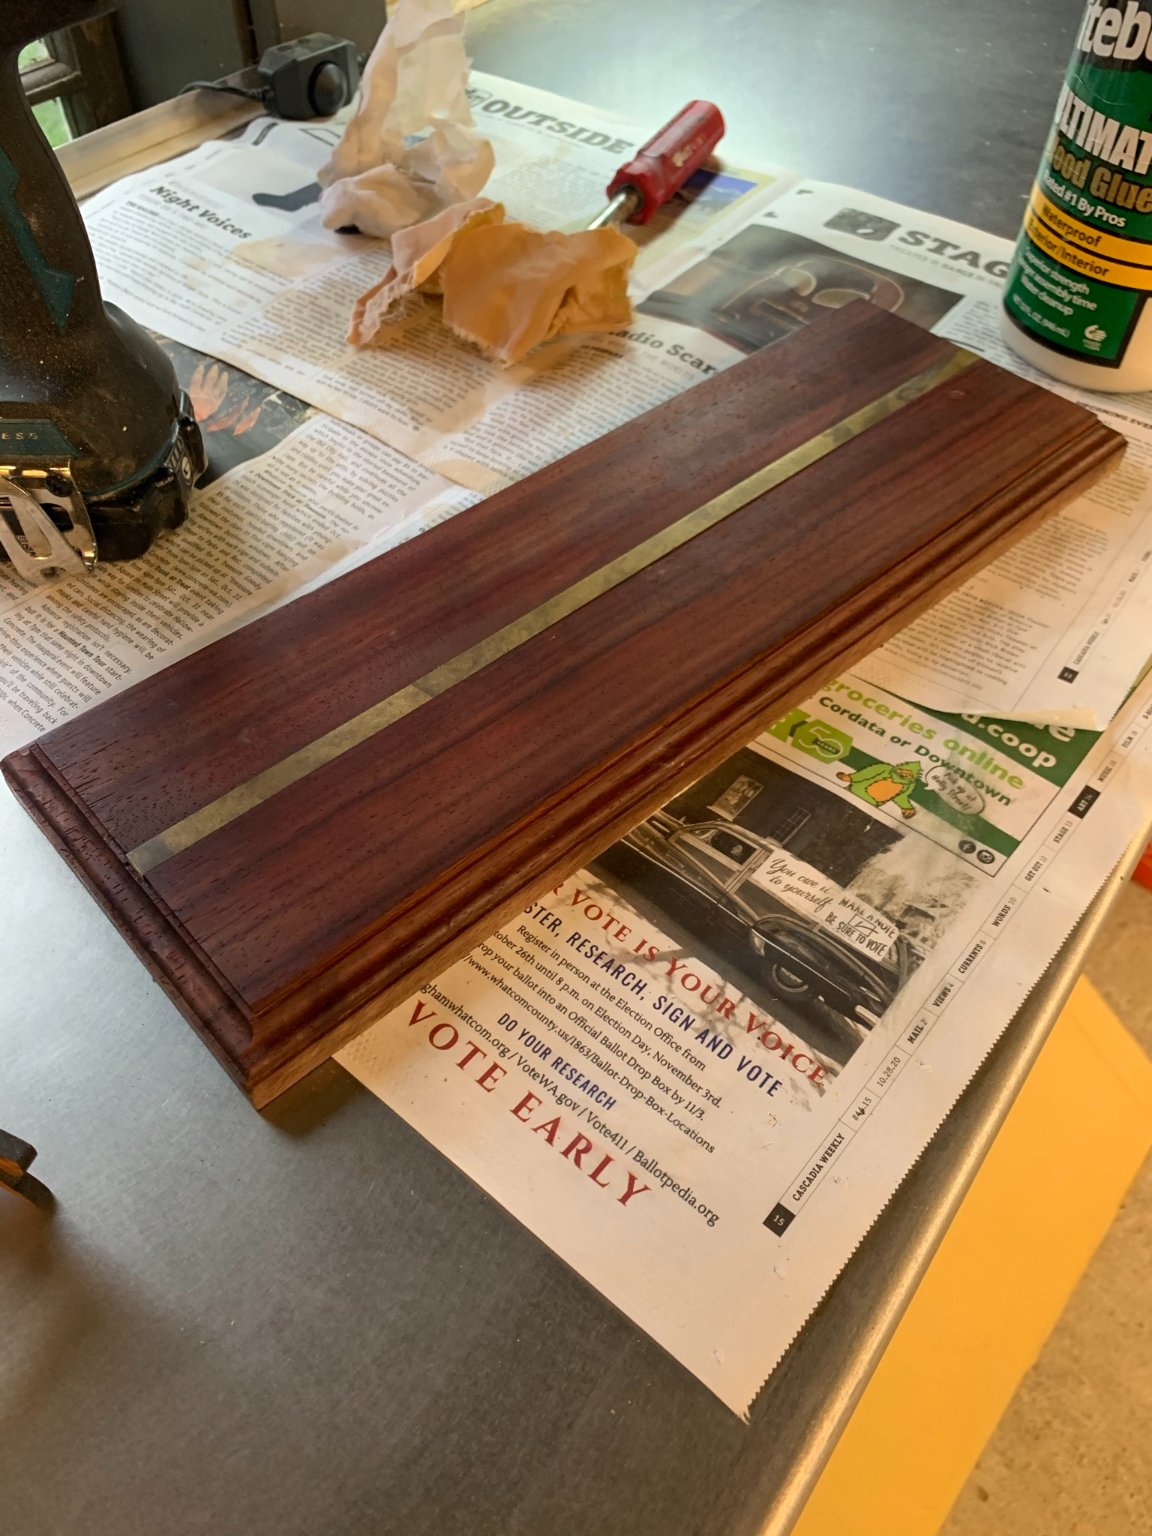
Shifted efforts to the base plate and mounting cradle: Had the advantage of being able to use a cribbage board that was not meant to be ( a gift from my carpenter wife 🙂 ). Cleaned up a bit, and hit with some Poly oil stain.

Installed and glued the dowels into the cradle bases...then flush cut with a pullsaw. Coated with three coats of stain.
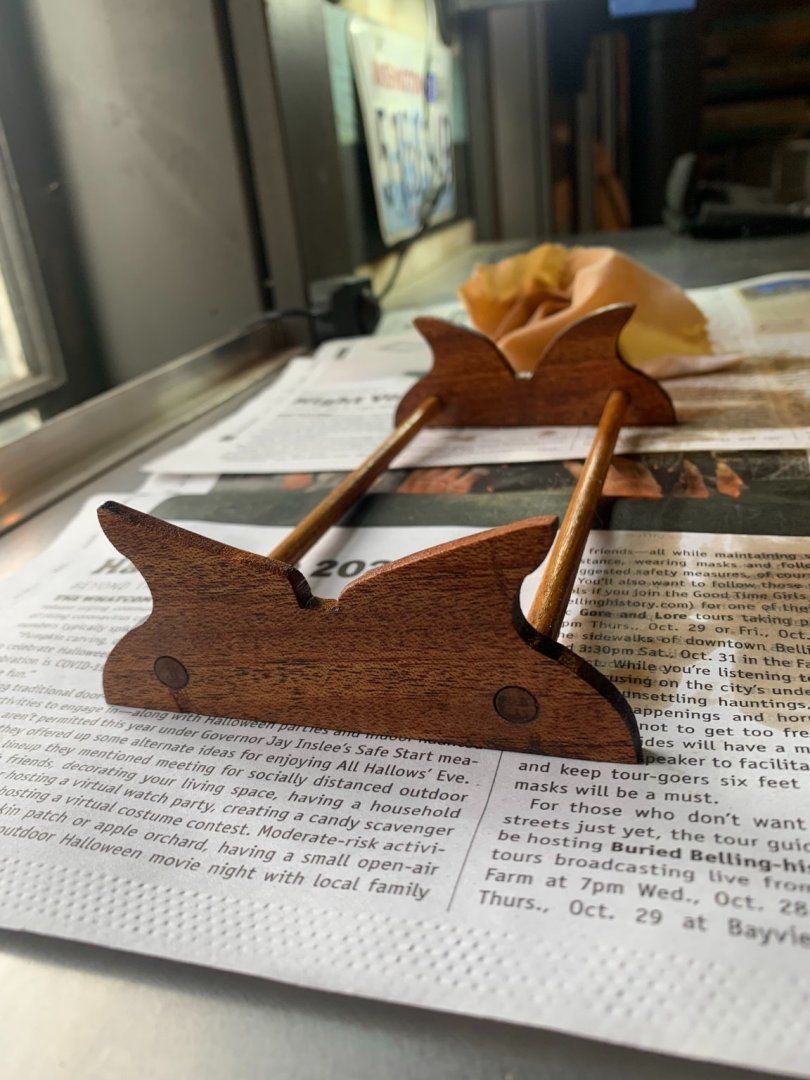
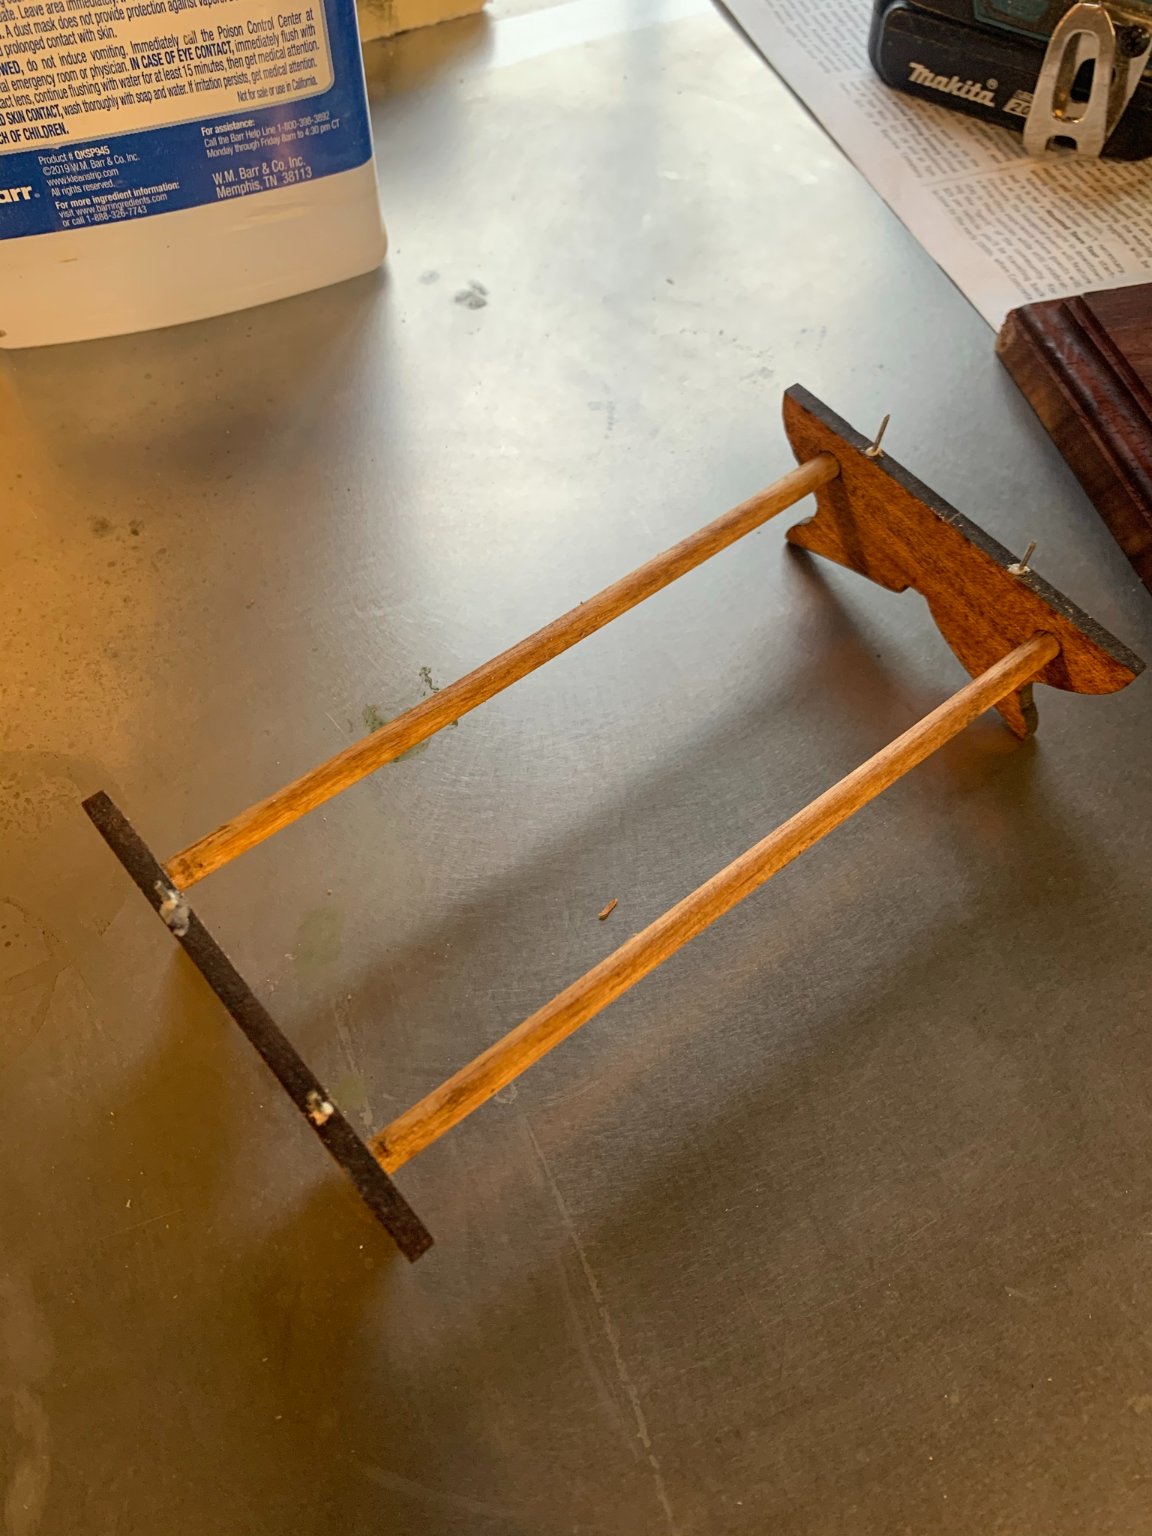
I glued some pins into the bottom of the cradle and drilled corresponding holes into the base plate. It turns out that the friction fit alone was stable enough that I didn't even glue the cradle into the base. I will drill some pins into the cradle where the hull sits (similar to Tomculb's post), and let those pins into the keel for the final mounting.

It's wrapping up pretty soon here.... I am excited to put some finishing touches on "Spray" and take some final photos.
Until then--
-
49 minutes ago, MrBlueJacket said:
At a paint store, you can buy mildewcide to add to your gluey-water slurry.
Thanks Nic. That's really good to know. I like the results otherwise that the gluey-water has on the sails, but not at the risk of forming mildew. Further, I'm not convinced that future models I do will include sails... a topic I am debating and reading up on in this forum.
-
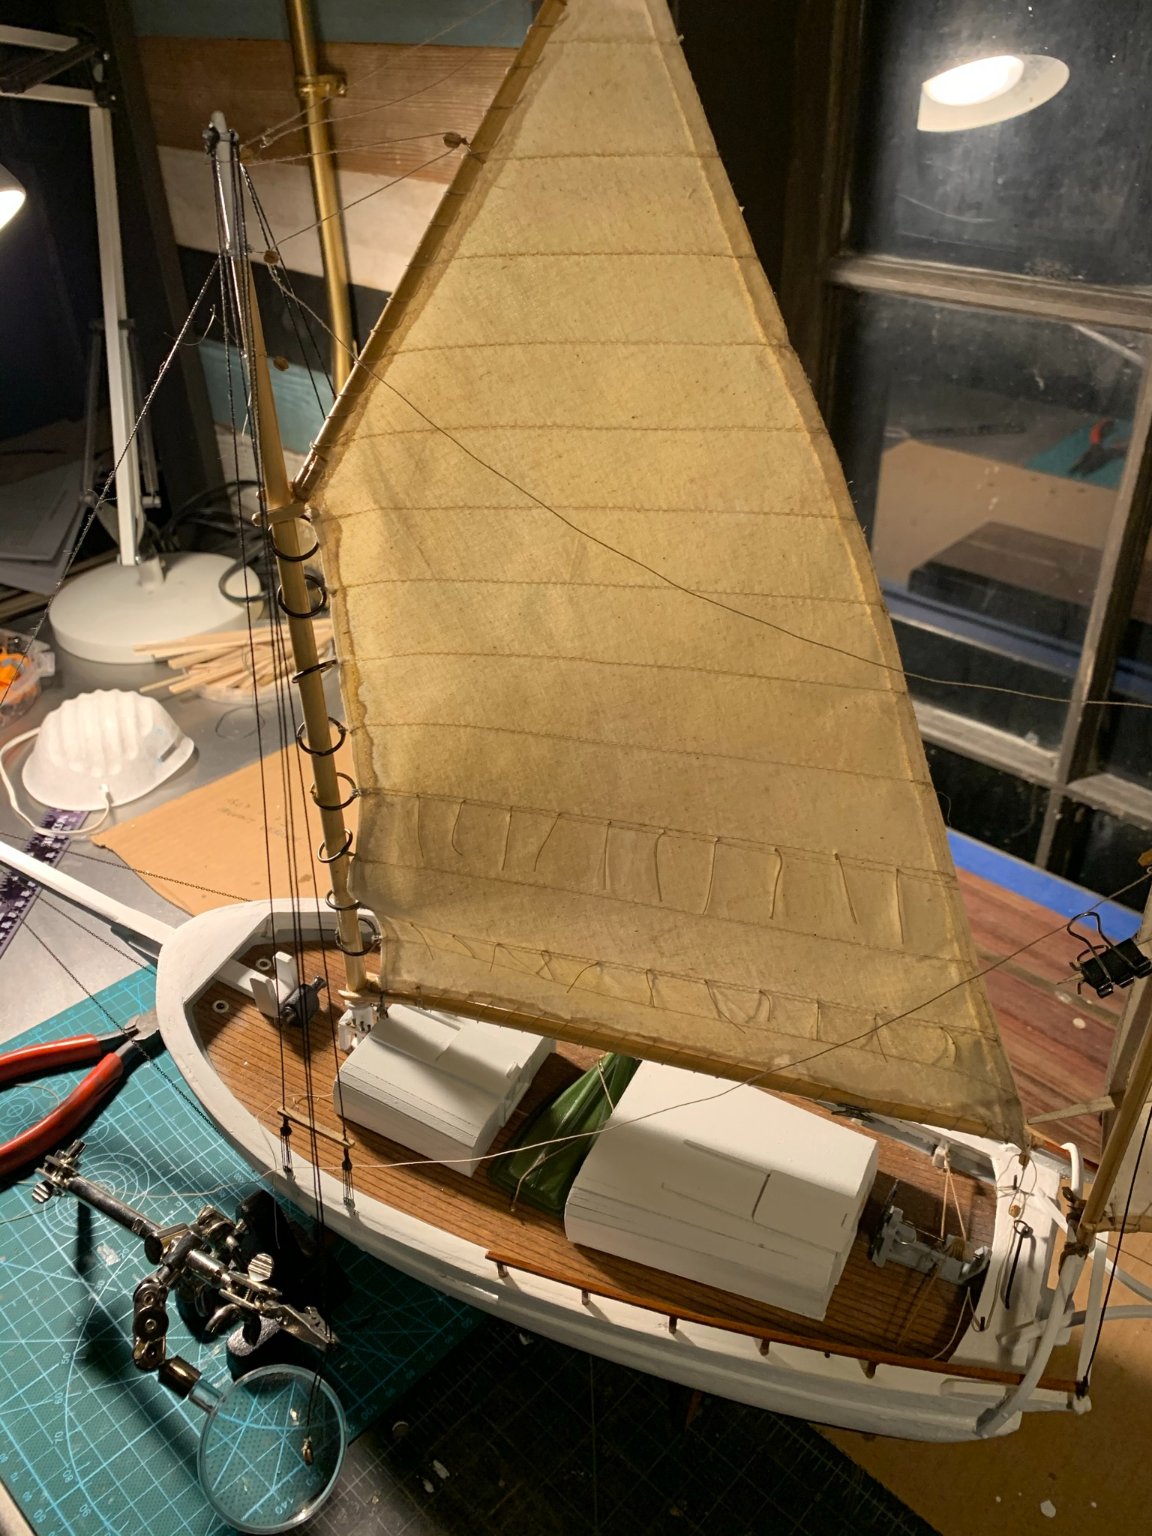
Getting caught up a bit on some progress throughout the last week and a half. I have lost track of where I am at in terms of "days spent" on this, but I suspect this update represents Days 21 through 23... or something like that.
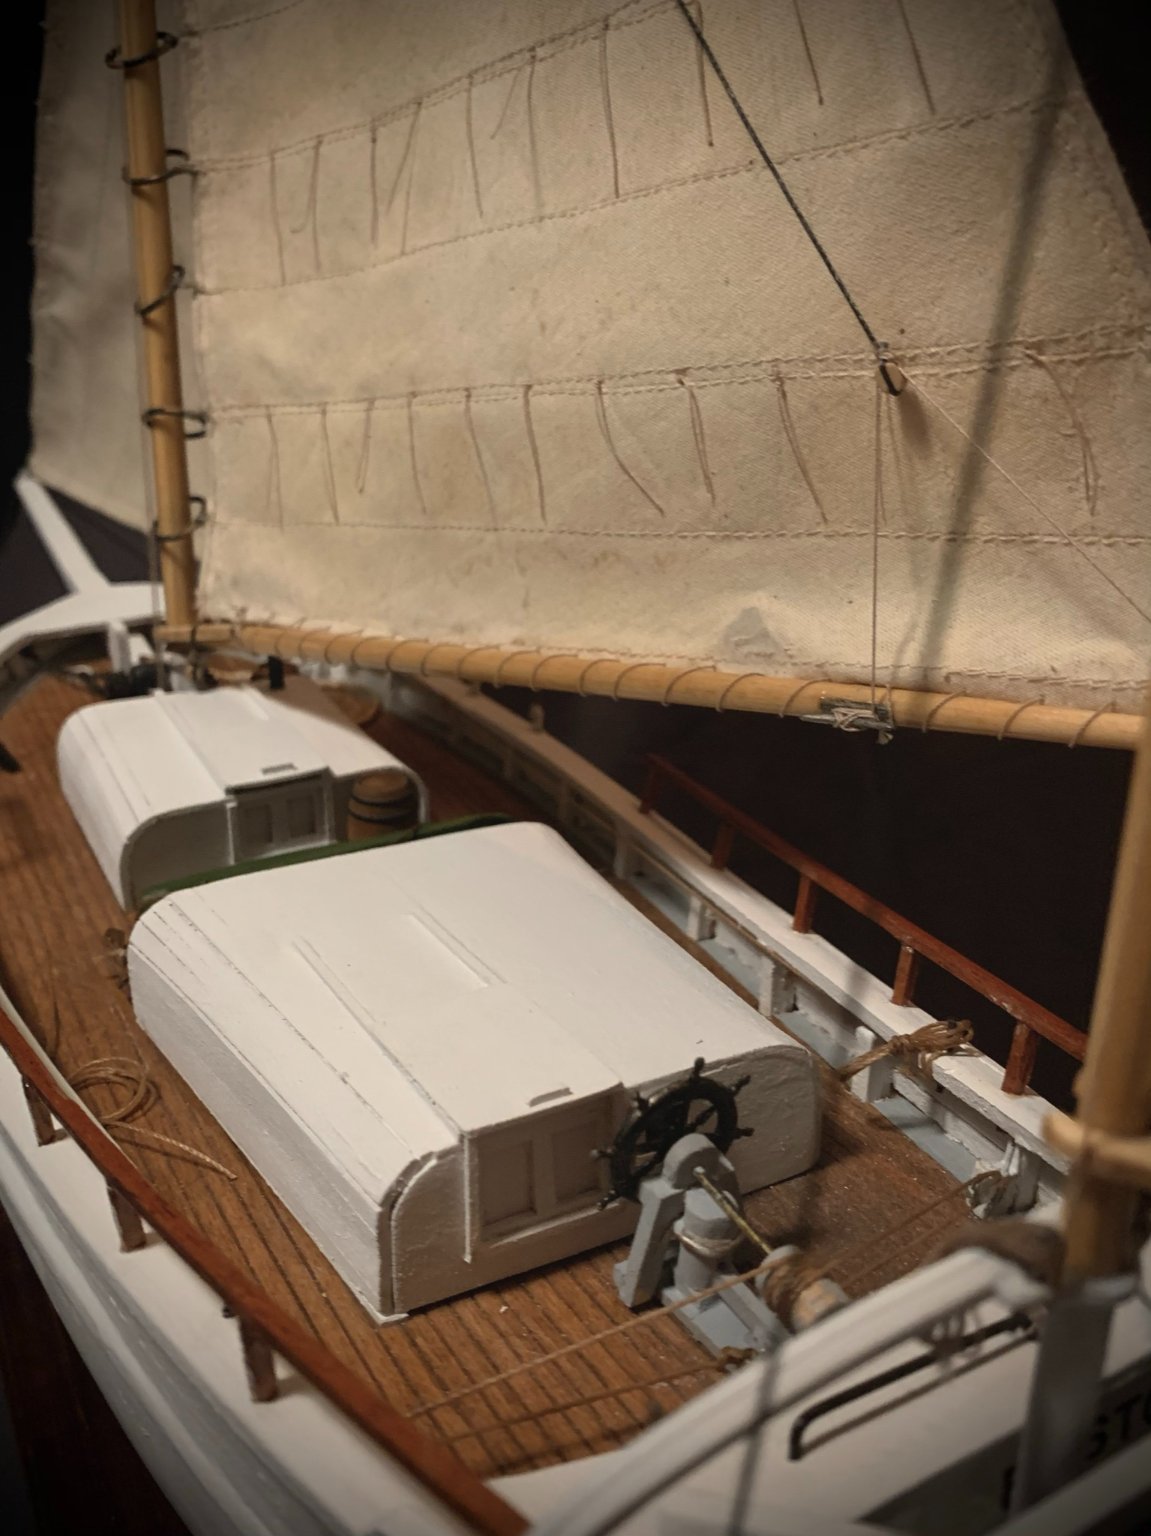
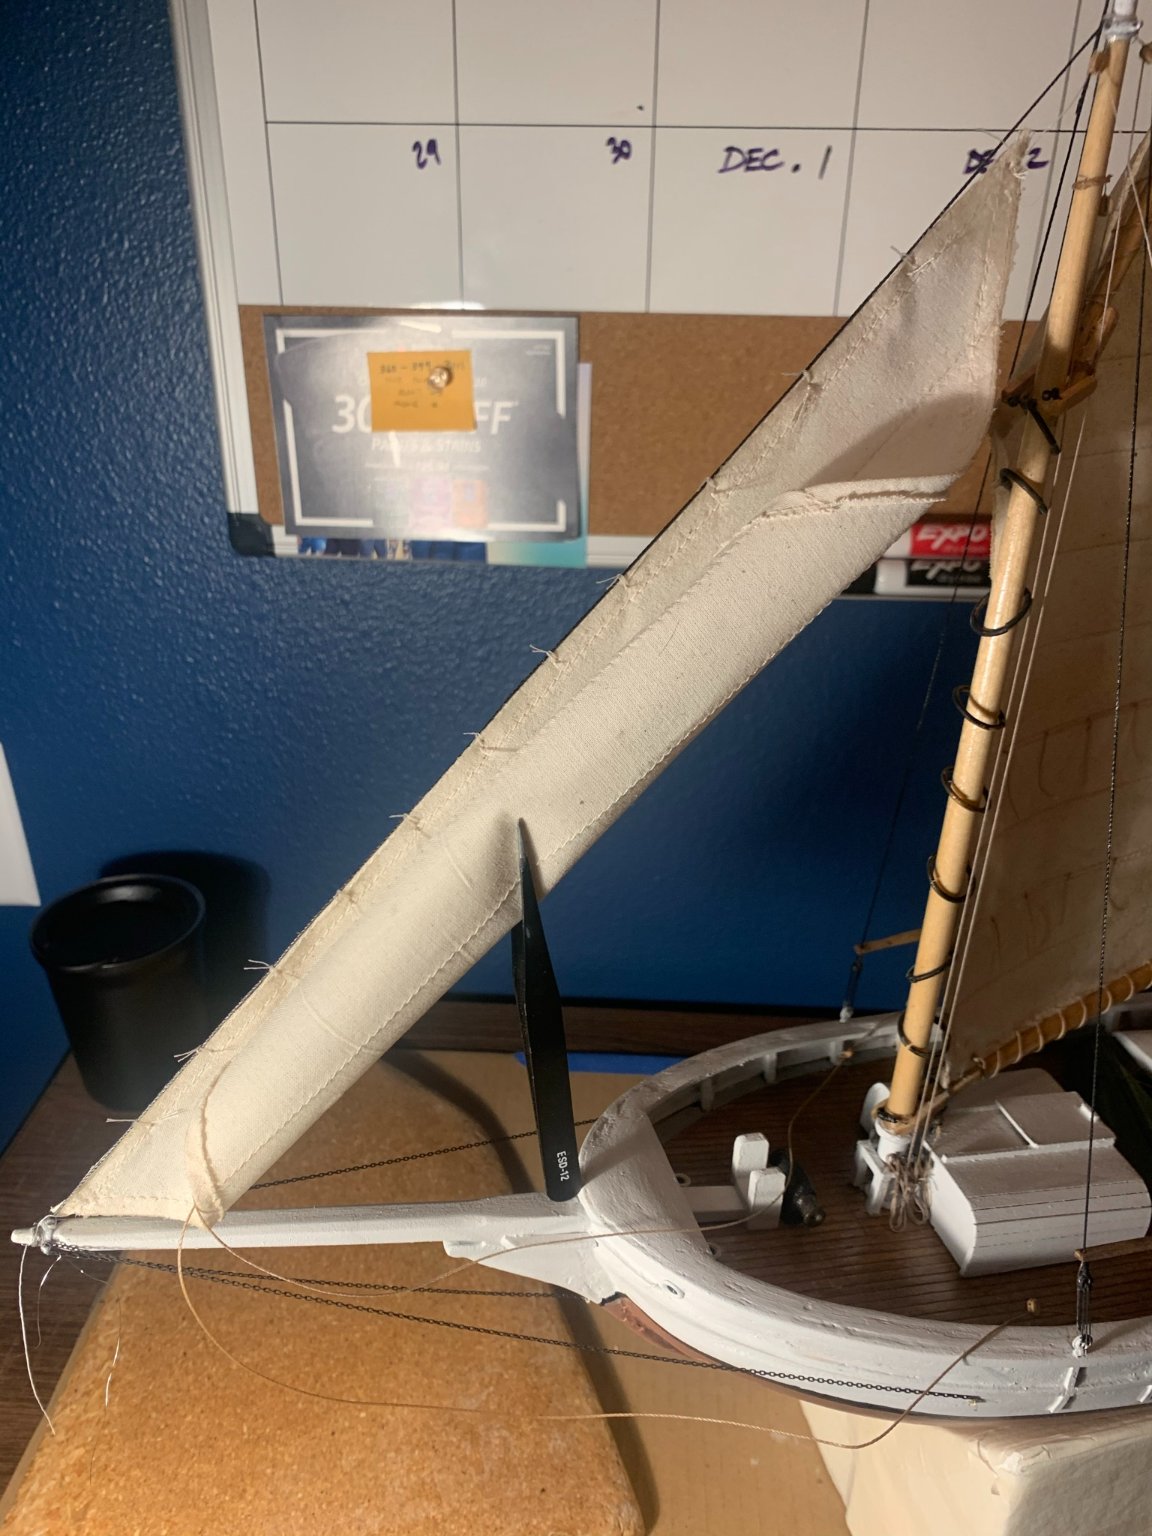
Anyways, started on the mainsail, and used same techniques as previously described when sewing the jib sail.
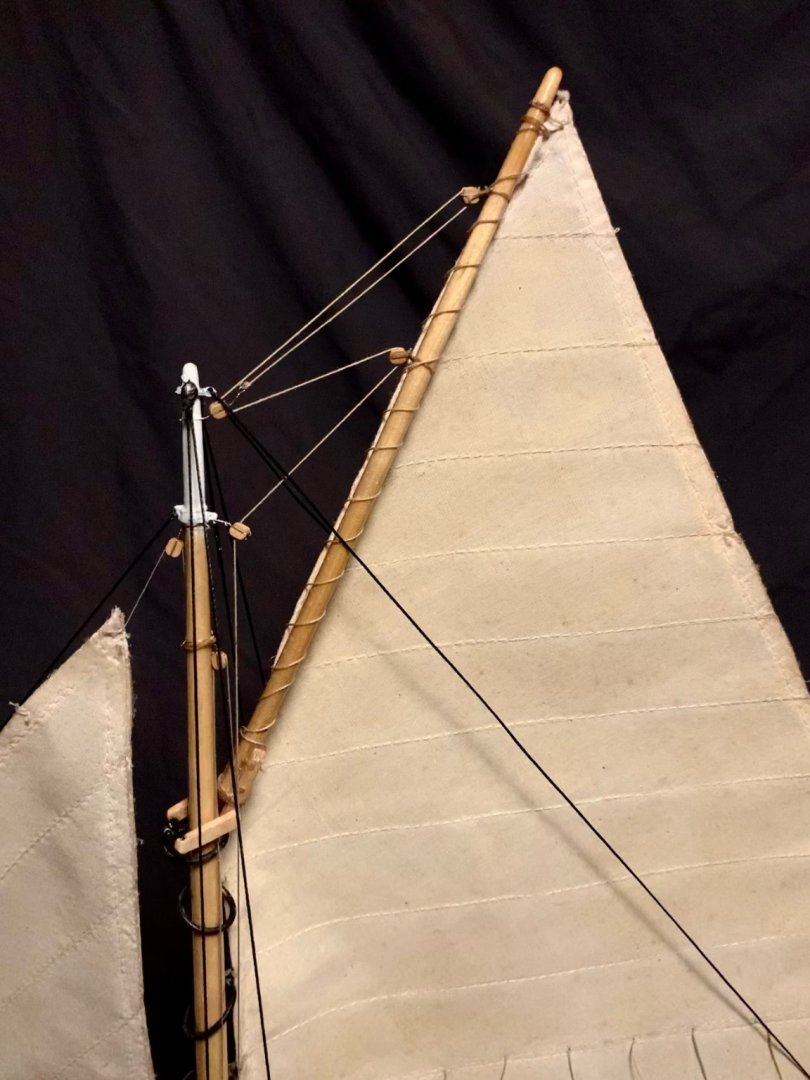
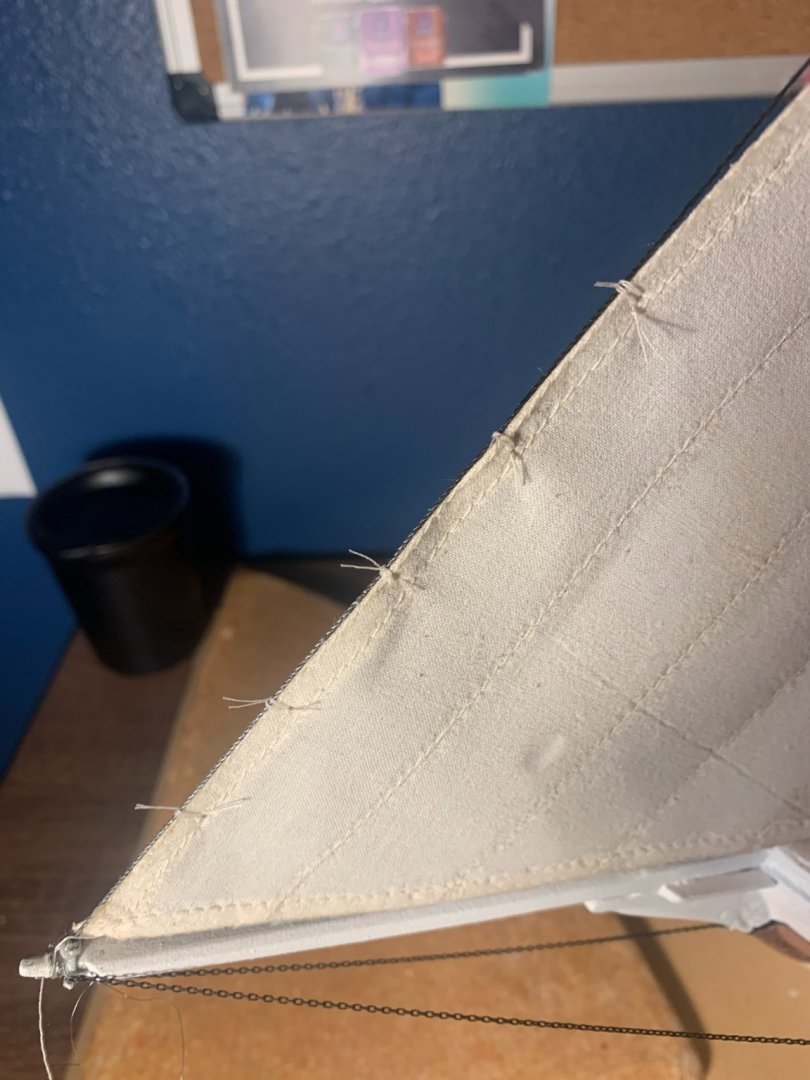
Before starting the hoops, I soaked them in the blackening solution. The attachment of the hoops required a little bit of trial and error, but after a few tries affixing to the luff, I found a good method that seemed to work well. The hoops are malleable enough that they can be bent back into shape after placing over the mast (as the instructions suggest).
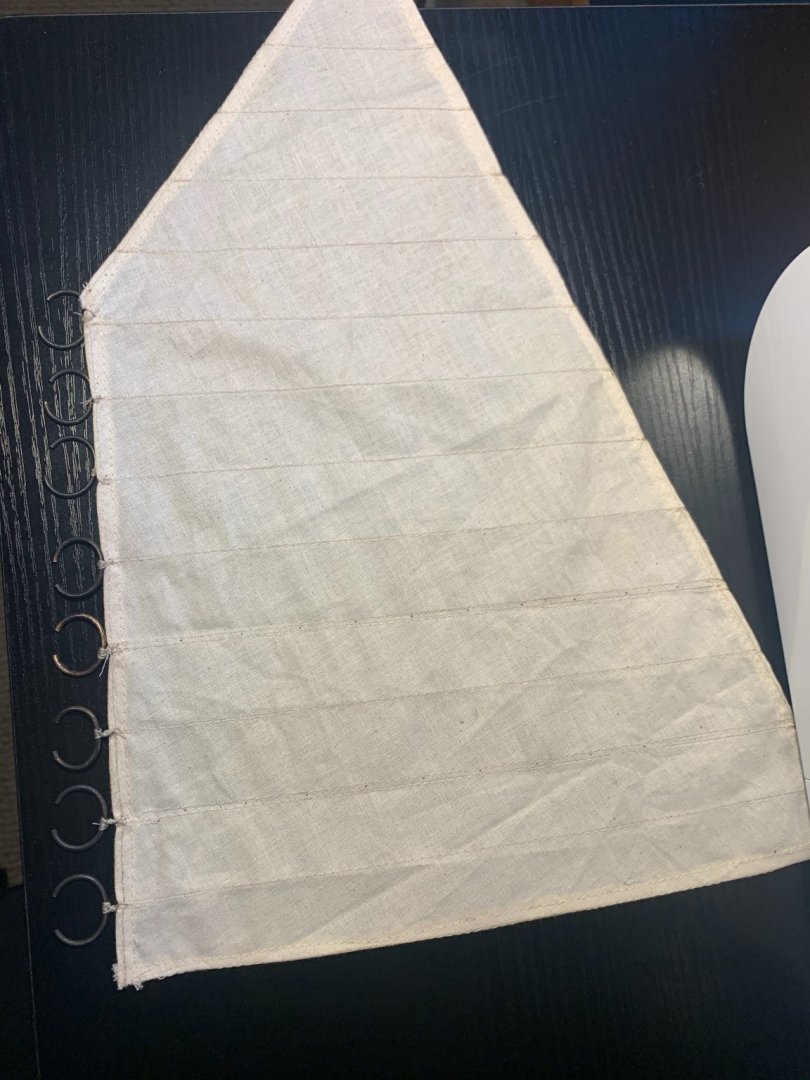
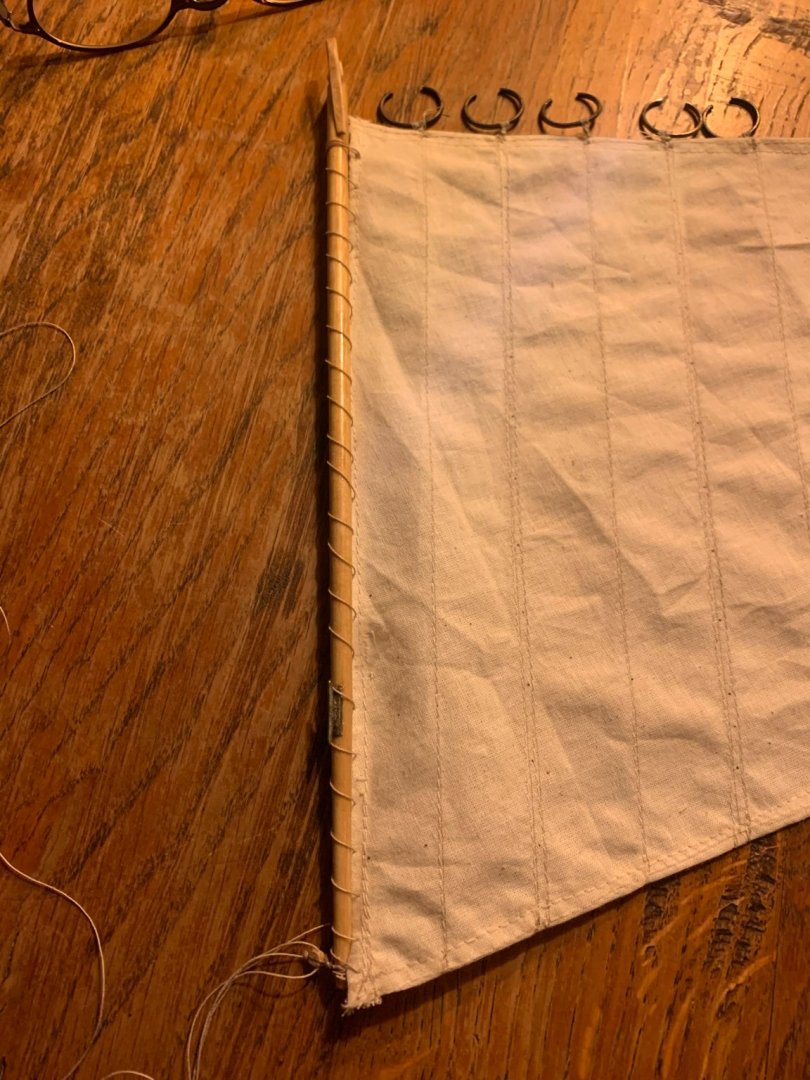
Sewing the boom to the foot of the sail went fairly easily - I would suggest marking out the spacings so that the loops don't unexpectedly increase or decrease in size over the length of the boom. (I just used a basic over/under loop method, but I would suspect there is a more specific "interlocking loop" that is more functional and accurate to how this connection would actually be made?)
At this time, I also attached the main sheet and blocks to the end of the boom.
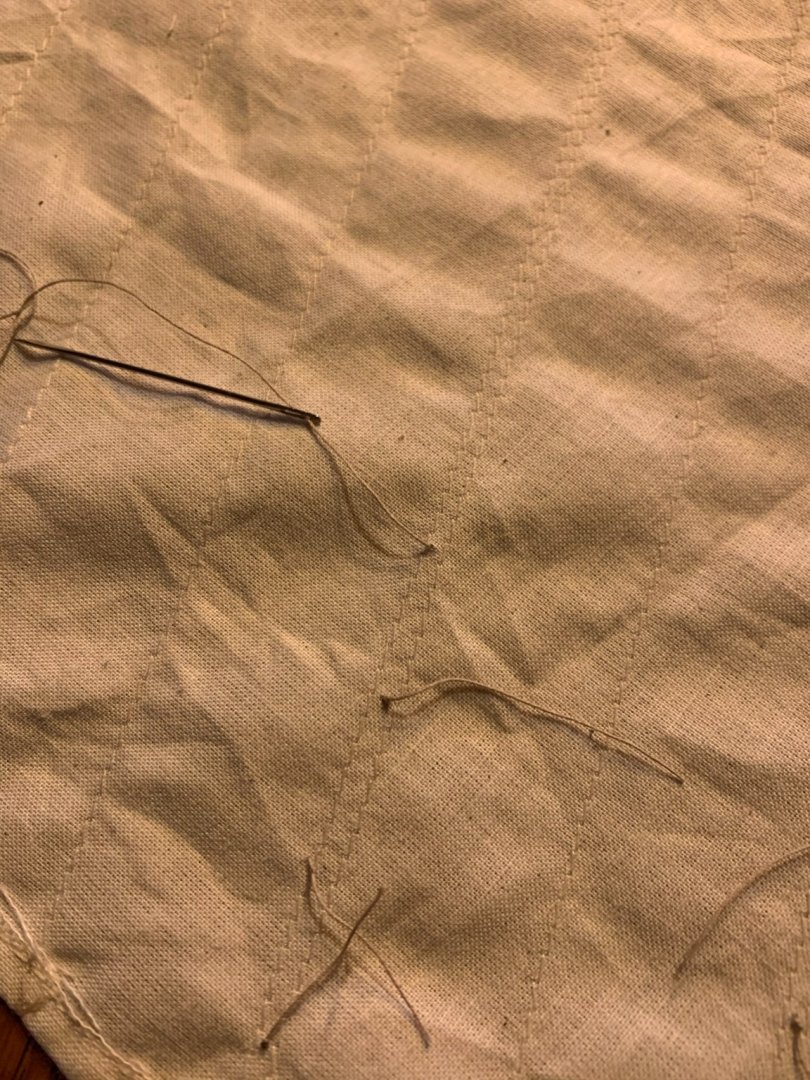
On the reefs, I have read that many just pull thread through and dab some CA glue to keep in place. I learned the hard way on a small tear in the main sail that CA glue will discolor the sail cloth and leave a somewhat translucent splotch where the glue dries. So, reef points were made by pulling a small thread with knot at end, and then knotted on the other side - then trimmed to consistent lengths. This is somewhat more time consuming, but preferable to gluing them in (in my opinion).
I made a similar plywood form as was done for the jib, and wiped on the gluey-water mixture to help form a more curved sail shape. Let to dry overnight...
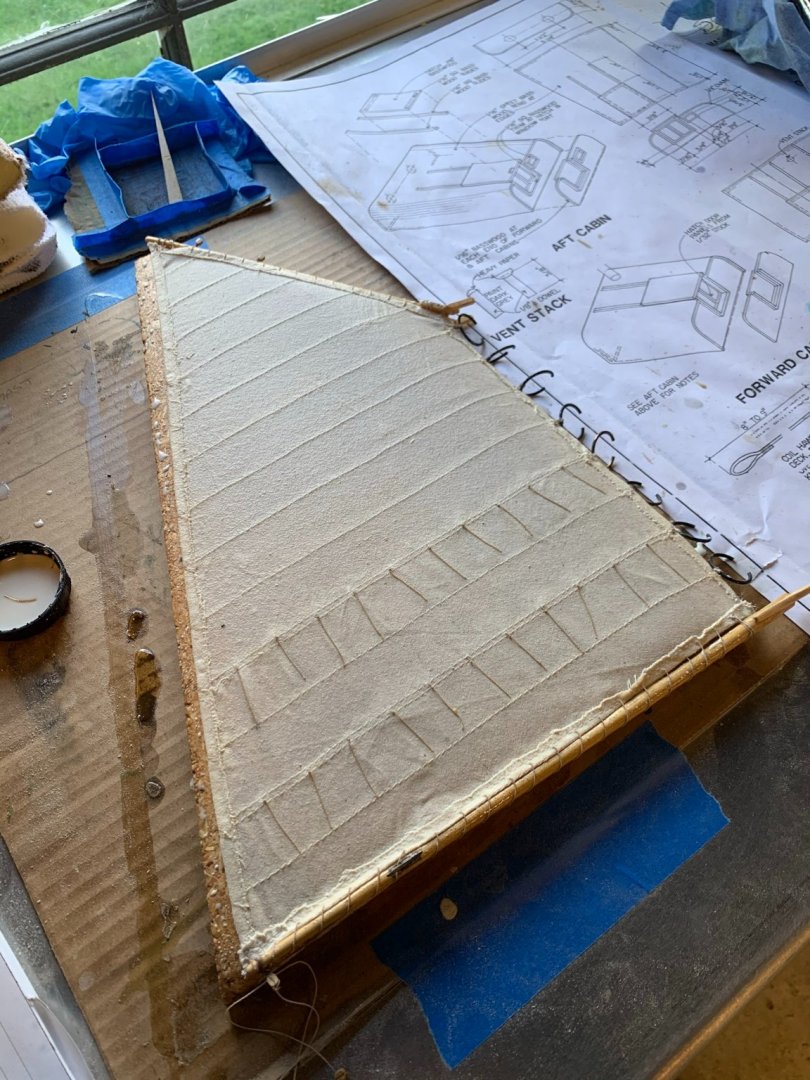
…AND HERE'S WHERE ISSUES BEGAN:
Upon reviewing the dried sail the next morning, I noticed that mildew had begun to grow all over the sail. I don't have photos of how bad it was as I was in damage control mode at this point to try and remove the mildew spots. I took a small toothbrush with some detergent and some water, and scrubbed the whole surface of the sail. Then I set up a drying rack over a heat register in the house, and essentially cooked out the mildew. Washed and dried a few times, and over a few days, the spots did go away... In the process though, the color of the sailcloth somewhat yellowed, and there are still some visible water stains and some splotches. I am going to have to see how everything looks together, and I may end up having to darken the other sails to match a bit more.
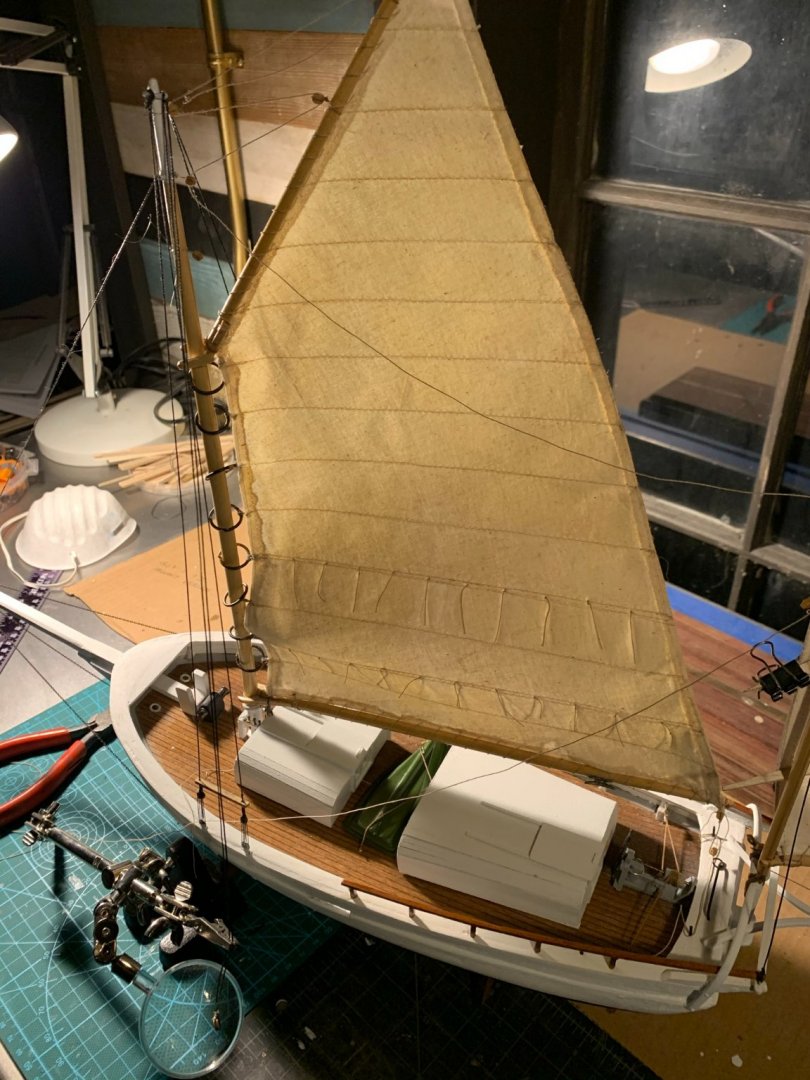
Here's where I am at currently: getting the main sail attached, hoops bent over, and beginning to rig for throat halyard, gaff peak halyard, and topping lift lines.. Still a bit of a mess to clean up, but foreword progress nonetheless.
-
This looks really good Tom. Nice job working through the logic in the steering assembly rigging too. Also really liking the color combo you have for the individual components. 👌
-
On 11/12/2020 at 8:47 PM, Tomculb said:
Nic, thanks from me too, because I was wondering the same thing. The fittings include a couple of large cleats, which I had planned to put on the deck a little forward of where you have the blocks for the steering apparatus. If not that, what are the cleats for and where do they go?
Also with regard to the jib sheet, I had planned to attach a couple of blocks to the clew, start the sheets at the blocks on deck, run them up to the
sheetsblocks on the sail, and back to the blocks on deck before running aft. That jib seems like a lot of sail to pull in without the help of some block and tackle. Do you think I'd be wrong in doing that?Hi Tom,
I believe the two large cleats are for attachment at the main boom for the topping lift? At least that's where mine are now.
I haven't decided yet on the jib clew rigging yet. I like Nic's suggestion to keep it simple (nothing like a simple bowline knot). I have also seen an image from the link below, that seems to show a block attached similar to what you are suggesting.
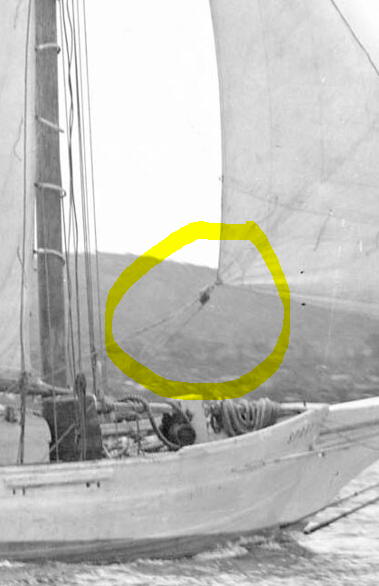


Spray by HIPEXEC - FINISHED - Joshua Slocum's Sloop
in - Build logs for subjects built 1901 - Present Day
Posted
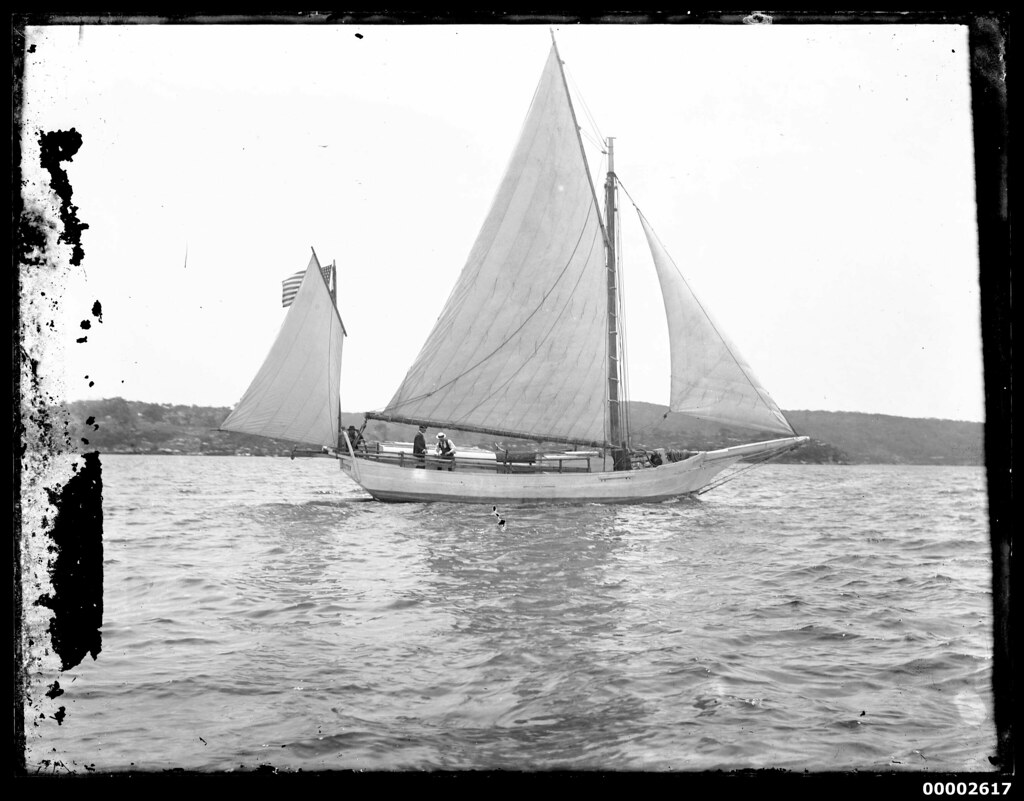
I really like this model Rich! Gives some context to Slocum's long journey and the confines of the vessel. Very well done!