
Toolmaker
-
Posts
236 -
Joined
-
Last visited
Content Type
Profiles
Forums
Gallery
Events
Everything posted by Toolmaker
-
 It’s only slight drift as we are still on milling cutters. You are showing your experience now, using milling cutters as stationary tools, as in your boring bar. When turning small aluminium parts (usually optical instrument housings) we would often plunge with a slot mill and then finish bore with the same tool. No tool change required. Years later they developed specific tools for this. Here is another instance using a stationary milling cutter. I am trimming Syren cannon wheels to remove the char and to true from the centre hole. The parts are just pushed onto a tapered wooden mandrel and fed down past the cutter.
-
Maybe, but it’s a long time past that I did much serious practical work, and there is not much “mere” about either your advice or your machining output. I always enjoy reading your posts.
-
Ron, Great explanation there from wefalck. I’m always grateful that he can be bothered to do the hard work of explaining things fully. Mark (No Idea) would also advocate 2 flute cutters for easier chip removal and he would likely suggest this site for cutters; https://cnc-plus.de/en/End-Mills-266/ For you, being in the US, you should just look for a stateside supplier of quality tools. I tend to use good quality metal cutting tools and having a Sherline miniature mill I am able to run the cutters at multiple 000’s of rpm. If the machine is rigid and the cutters are running true, you can’t go too quick with wood. Guhring is the make I use generally but I have also bought generic cutters from Amazon. The beauty of using sharp tools on wood, whether machines or hand chisels, is that you are not creating dust and you can get a better finish against using sanding methods. btw, a standard end mill is suitable for all those examples you have shown.
-
Terminology has to be learnt and even then can remain confusing when we are writing explanations from different countries. Not all milling cutters can be used to “plunge” cut. In the UK the different types of cutters regarding this issue were known as “end mills” and “slot mills” What is the differences between a Slot Drill and an End Mill? A slot drill is a mixture of a drill and an end mill meaning it can plunge in like a drill then slot across like an end mill. Conversely, an end mill will primarily cut laterally and horizontally. If you want your cutters to be able to “plunge cut” make sure you buy the right sort. Another relevant term is climb/conventional milling. Whether your cutters have right or left hand flutes it will be the direction of travel that dictates whether you are climb milling or conventional milling. This terminology is also known as “up” milling and “down” milling depending where you learn your trade. There is plenty of internet explanation for the different methods. If your milling for a living it’s worth knowing but for hobby milling taking very small cuts on wood it is really not important. Member No Idea has discussed milling cutters on his build log and I think his advice is as good as you will ever need. Good luck with your milling cheers Paul
-
Pulled the Trigger == Lathe coming
Toolmaker replied to kgstakes's topic in Modeling tools and Workshop Equipment
Brilliant! I’ve spent 40 plus years hanging out around machine tools and I had never seen, heard or considered that. I can clearly see it in my head though. It’s the sort of initial alignment check you could do during a rebuild. One approach to working more accurately than the handwheel graduations is to put a dial test indicator (dti) against the slide and take your movement from those. This method is more easily done on larger machines with metal bedways and less size constraints. The dti is usuall on a magnetic block. A good digital readout is even better, thus removing the pesky backlash error. Oh the wish list is endless. -
Pulled the Trigger == Lathe coming
Toolmaker replied to kgstakes's topic in Modeling tools and Workshop Equipment
A simple method of aligning the tailstock is to; place a piece of stock bar between chuck and tailstock centre take a small cut on the diameter of the stock bar at the headstock end measure diameter and set your cross slide dial to zero at depth of cut position repeat the same depth of cut at the tailstock end of the bar and measure the diameter if they are the same you are good to go. If they are different you need to move the tailstock by half the difference in diameter (towards you if the diameter is bigger at the tailstock end) and then repeat the process until they measure the same. Do this with the longest length you can fit between headstock and tailstock and you should be correct with the tailstock at any position along the bed. If parallel cutting varies when you move the tailstock, then the lathe bed is twisted. That can often be corrected by jacking the feet on the lathe. I don’t expect you to have these issues on such a short bed machine. All the above should be done after you have set the headstock/saddle square. Bar in chuck, take a skim cut over say 50mm length and measure for parallel. If it’s not then adjust the headstock until it is. Regarding the cutting tools; The better the ground finish the better the cutting results as with a coarse finish you are more likely to get a “built up edge” if you are machining steels. This built up edge can be regularly removed by dressing your tools with a piece of wet stone. Successful grinding of lathe tools and drills is a skilled task. Approach, side & front clearance, and rake are all different angles that all need to be considered when grinding tools. For drills it is backing off and point thinning etc. I doubt that many people grind/sharpen drills these days and I think it’s right to consider whether it’s worth grinding standard lathe tools anymore. Indexable carbide inserts for turning are so much cheaper now that they might be considered a better alternative to grinding “in house”. I don’t know if indexable insert tool holders are available for your lathe but they are available in small sizes. Certainly 10mm square or less. Worth a thought Any questions, please feel free to ask as I have done a fair bit of lathe work in the past. Cheers Paul -
Pulled the Trigger == Lathe coming
Toolmaker replied to kgstakes's topic in Modeling tools and Workshop Equipment
This might be a useful link for Taig owners; https://www.cartertools.com -
I must apologise for my initial answer as I believed you had received the books but were complaining about the time taken for them to be delivered. It was lost in translation. I think you must try to contact Seawatch and follow the advice they offer. Hopefully it will be fixed to your satisfaction.
-
drilling hole through wire
Toolmaker replied to BETAQDAVE's topic in Metal Work, Soldering and Metal Fittings
Dave, I have that same make and model and it has worked fine for as long as I can remember. Maybe ask for an exchange unit. I don’t use mine for soldering but I like it for hardening, annealing etc. I also use it with that tip you are showing for heating wood planks or the like needing removal. Works a treat for softening the glue. -
I have also ordered books from Seawatch which arrived. Mine only took 2 weeks and not 4 like yours did but mine were not caught up in the Christmas Post, as I ordered them in the summer. I’m not sure what you want help with?
-
Maybe this link will help close that circle. Seems like this is where it originated https://ebts.org/uk/2021/the-best-english-boxwood-is-to-be-found-in-wales/
-
Small Wolfcraft Clamps
Toolmaker replied to Some Idea's topic in Modeling tools and Workshop Equipment
That’s great to know as I have a number of their clamps. I really like them. I thought I might write and tell them that one flew off recently and I haven’t been able to locate it!!! 😂- 1 reply
-
- 4
-

-

-
That’s fantastic Chuck. Is Ed going to be looking in on this forum (in the film)?
-
Soya - Pontos Model- 1:250 - PLASTIC KIT UNBOXING
Toolmaker replied to Johngr's topic in REVIEWS: Model kits
Before I became a wooden ship modeller I was in a period of photo etch heaven. I couldn’t get enough of it. This kit was top of my list at the time. I’ve seen the kit in the box and I have seen it finished and it is a fantastic opportunity. I say opportunity as it is also a major challenge. 👍🏼👍🏼 -
I think it’s safe to look in now Glenn. I’ve just had a nosey around and it’s full of interest for model ship builders (it was orrible before).
-
Ignoring any issues about import and export when buying model ships I think Chris has done more recently than anyone to retain newcomers to the hobby. A few years ago I cut my teeth on a number of Vanguard kits and whenever I see that question about suitable kits for beginners I always advise starting with a Vanguard kit. It makes even more sense if your this side of the Atlantic pond, hence my opening line. Chris has taken top quality materials and used the latest technologies to provide the best chance of fulfilment. Together with those fab instructions put together by James H and you have a truly winning combination. I hope he continues to have belief in himself and in his decision making. Believe it or not, I don’t work for Vanguard 😂. In fact, I don’t build their kits these days but without them I don’t believe I would have got to what I am building now. Cheers Chris, keep going, it’s a fine legacy. Thanks Paul
-
Cheerful build on hold....drop plank phobia
Toolmaker replied to bigcreekdad's topic in Wood ship model kits
I’m in line with OllieS here. It’s likely not an issue with the drop plank in particular but perhaps with enthusiasm for the hobby in general. This hobby enthusiasm ebbs and flows for most people. Some get it back again (sometimes again and again) and some people give up a hobby as, not for them. A hobby is a choice, and one that should be enjoyed. Regarding Cheerful in particular, I am doing the same build. It has been a challenge which is good. It is not perfect, unlike the one in the instruction book which leads to some frustration, but it is a big improvement on my previous build. You could leave the drop plank and go inboard. False deck, inboard planking, deck planking. This might help to restore the passion. I have been building wooden ships for about 4 years and only now do I feel slightly competent. Lastly I mention the hobby working environment. If you don’t like being in the basement then you are unlikely to want to spend time there. Regards Paul -
That’s come up really well Richard. Finished in keeping with the effort put in. Fab. Its impressive that the spindle is tapered and even has a drift slot for tool removal. I’m on the watch out for your next build. Thanks Paul
-
Remington Industries
Toolmaker replied to Roger Pellett's topic in Metal Work, Soldering and Metal Fittings
Those heady days when folks continued the carpeting up the side of the bath! -
Remington Industries
Toolmaker replied to Roger Pellett's topic in Metal Work, Soldering and Metal Fittings
Bob, can you fill me in with a bit more information on the “jeweller’s saw” please. Is it realistic to saw 0.2mm/0.008” wire with the saw. Using a saw relies on at least 2 teeth straddling the material so said material doesn’t fall between the teeth, hence the thinner the material the greater the tpi. If you have the detail, what is the traditional tpi on a jewellers saw or is it a diamond impregnated wire blade? Thanks Paul -
Remington Industries
Toolmaker replied to Roger Pellett's topic in Metal Work, Soldering and Metal Fittings
Ah yes Allen, I see what you mean. The wire I’m showing was more like 26 gauge. Depending on functionality and if painting is an option, you can get lead wire down to, and finer than, 30 gauge. From a modelling perspective, it has all sorts of uses and is easy to work with. cheers Paul -
I would echo what Glenn said above. Here is a link to a typical instruction manual that comes with the Vanguard models. This particular kit is ideal for beginners as the hull shape is forgiving of skill. https://vanguardmodels.co.uk/wp-content/uploads/2020/04/Fifie_construction_manual.pdf I hope that is helpful. Regards Paul
-
Hi Mark, Do you have a link for a supplier of these. The company website is unclear. Thanks Paul
-
Remington Industries
Toolmaker replied to Roger Pellett's topic in Metal Work, Soldering and Metal Fittings
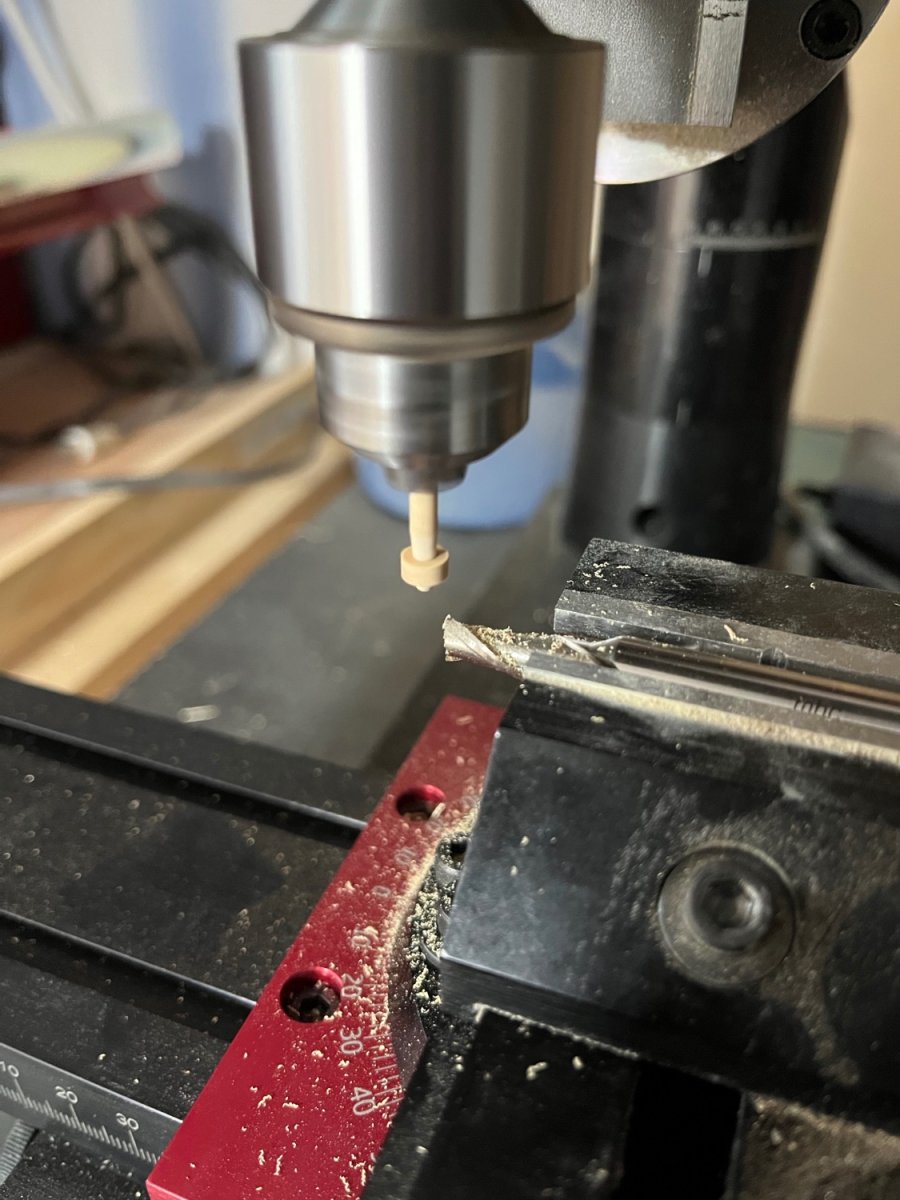
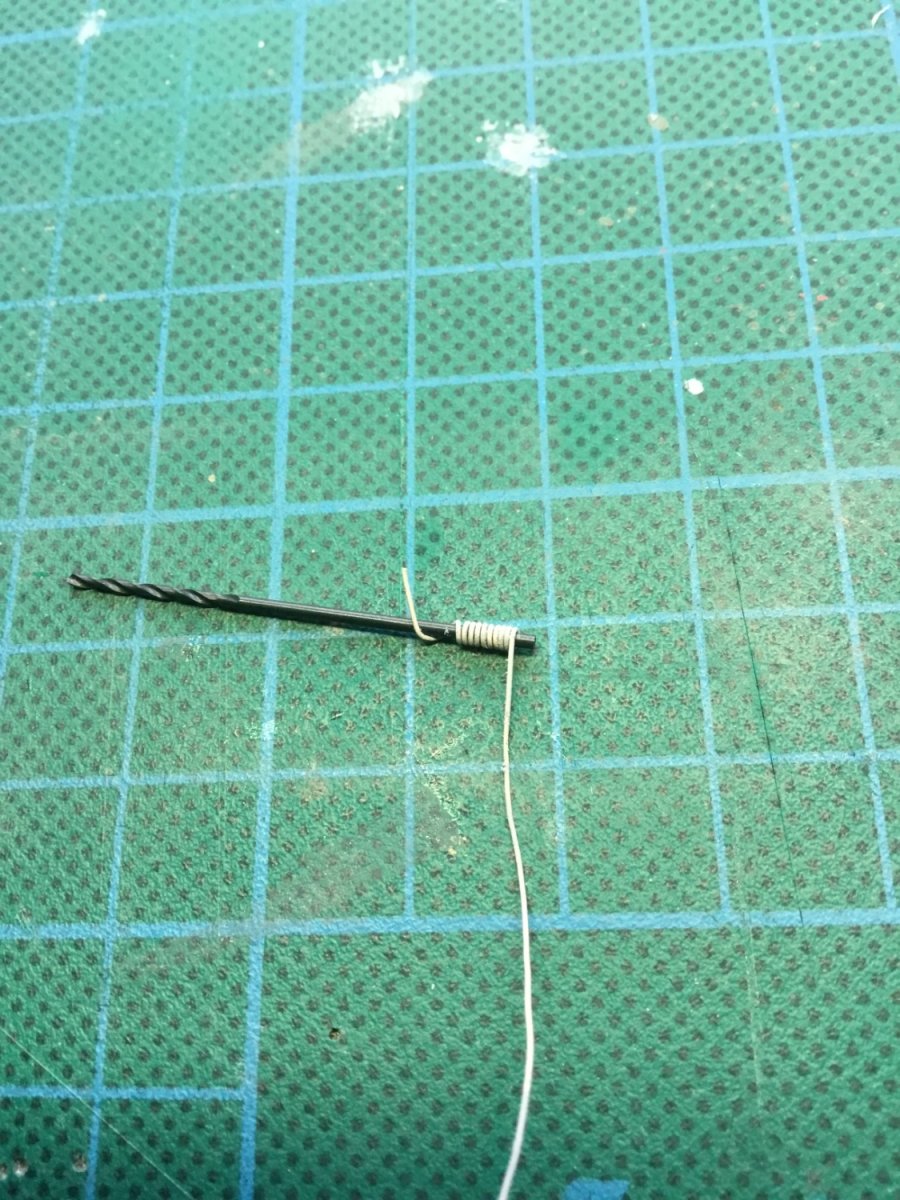
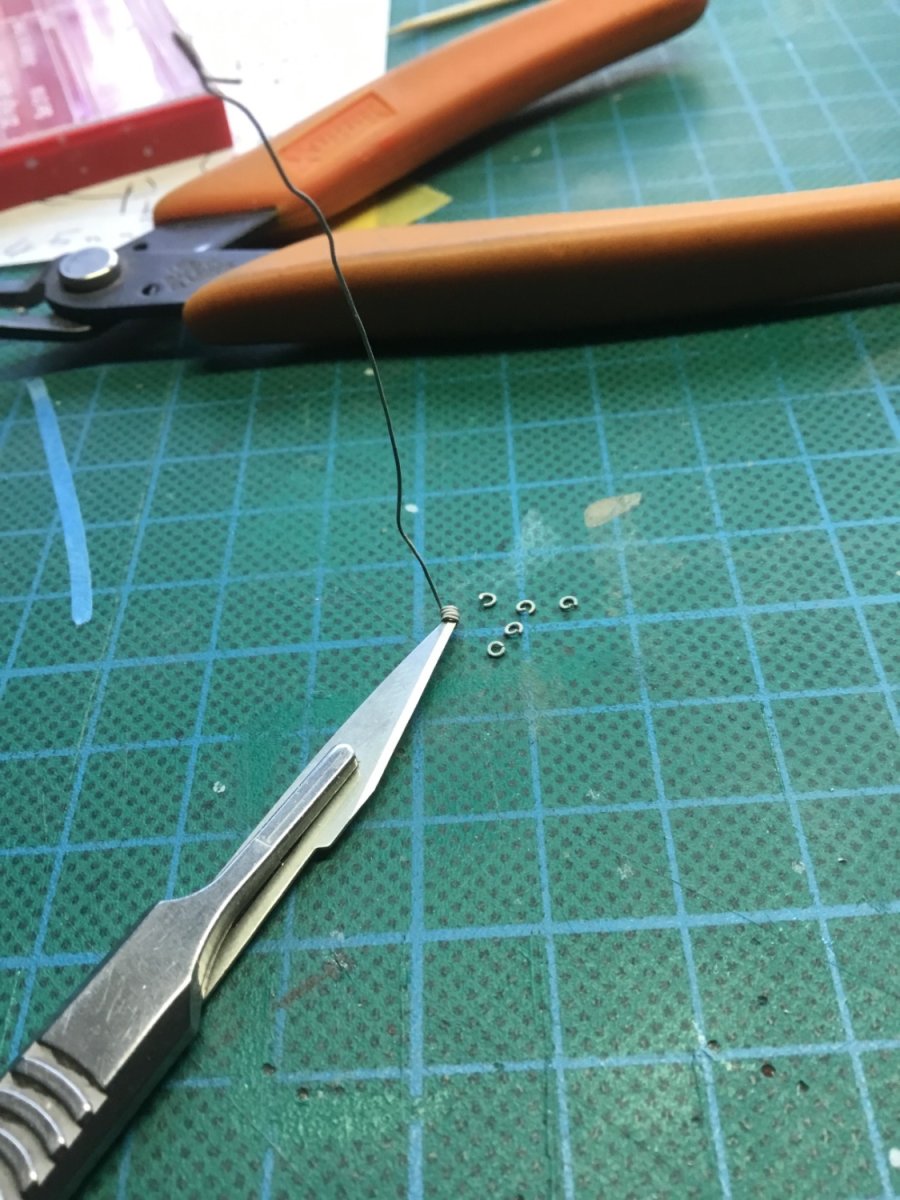
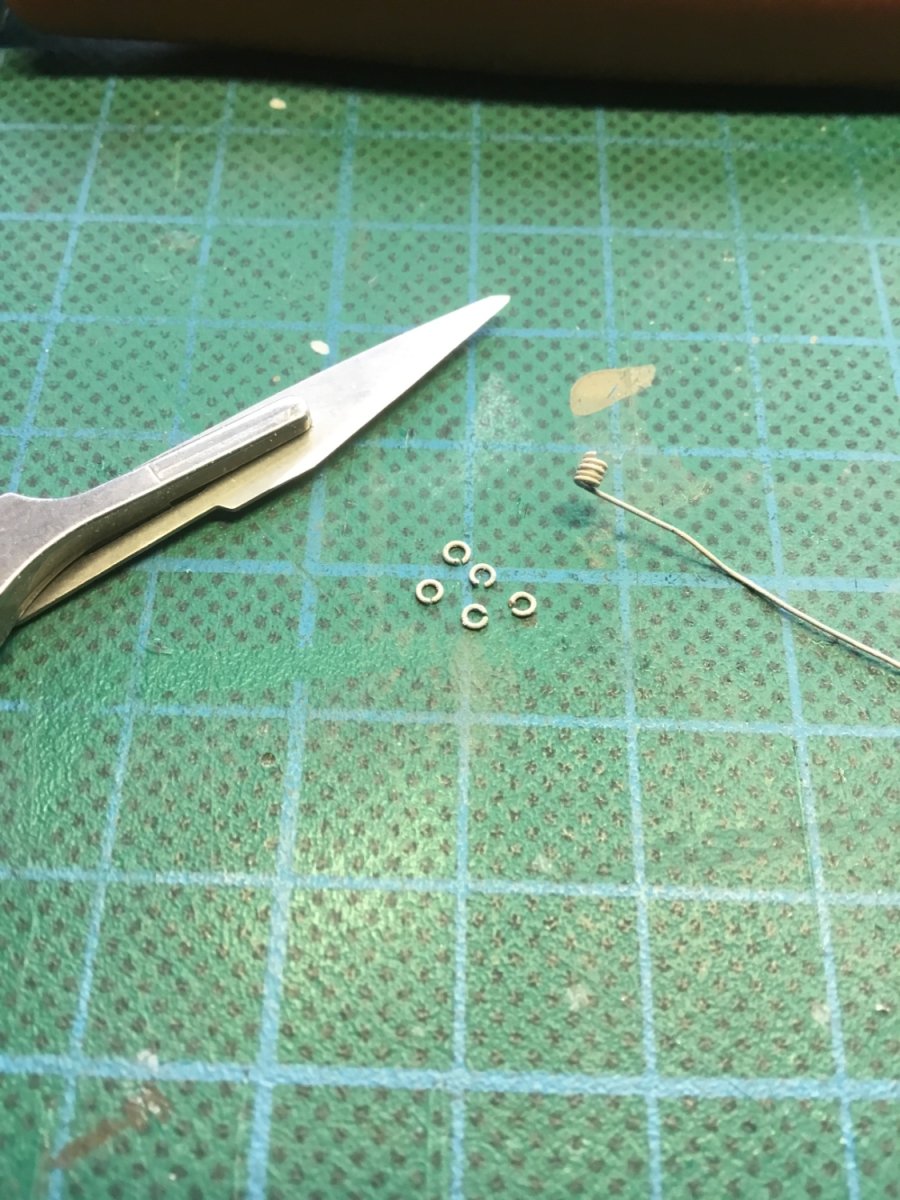
I have used this method myself Allan, as seen here. I was using pre-painted wire. The ship in question was ww2 era, hence the painted wire. The wire was soft enough to cut with a scalpel. I hope the pictures are helpful to someone. Regards Paul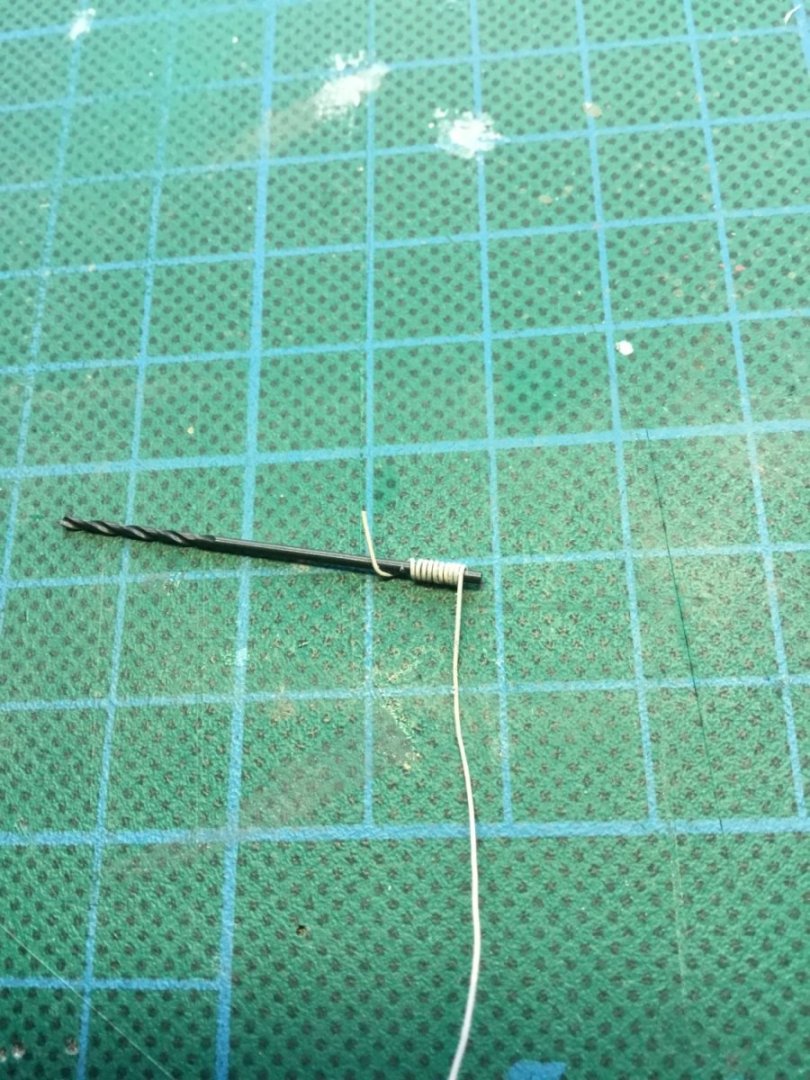


-
How I manage to miss these I will never know. Today is the first time I have spotted this and it’s virtually finished. So well done on your latest machine tool. It’s another beaut. You certainly went to town on the base casting and pushed on from there without too many issues. As for the broken tap, cast aluminium can be a little “sticky”. The only advice I can offer is to make sure that your hole at the top of the tapping size or even a little over and use some switch cleaner or paraffin. Another lovely edition to your miniature workshop. I shall try to keep up and catch the start next time. Regards Paul