


jct
-
Posts
1,519 -
Joined
-
Last visited
Content Type
Profiles
Forums
Gallery
Events
Posts posted by jct
-
-
I don't mind em needing a hand time and again...after all it just goes with the turf, what I trouble with is the procrastination...everything is at the absolute last minute...for me if you aint 10 min early you are 5 min late
I guess they cya by saying if you need a decal on dark surfaces to use white decal paper...but my designs were too complex to cut out each individual letter, I'll get some pics so you guys can see what I had in mind anyway, I think they're kinda cool
Thanks again for the likes and the comments
- mtaylor, popeye the sailor, lmagna and 1 other
-
 4
4
-
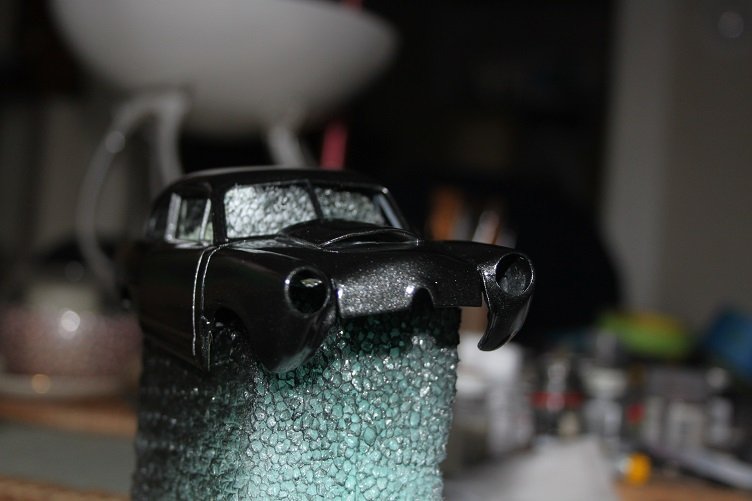
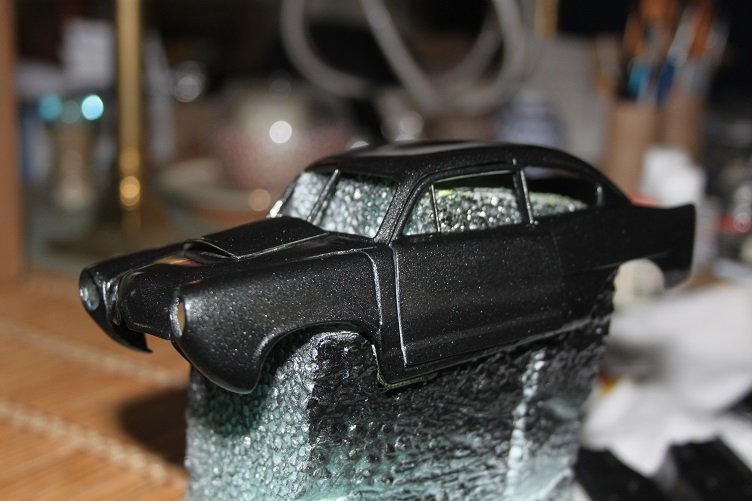
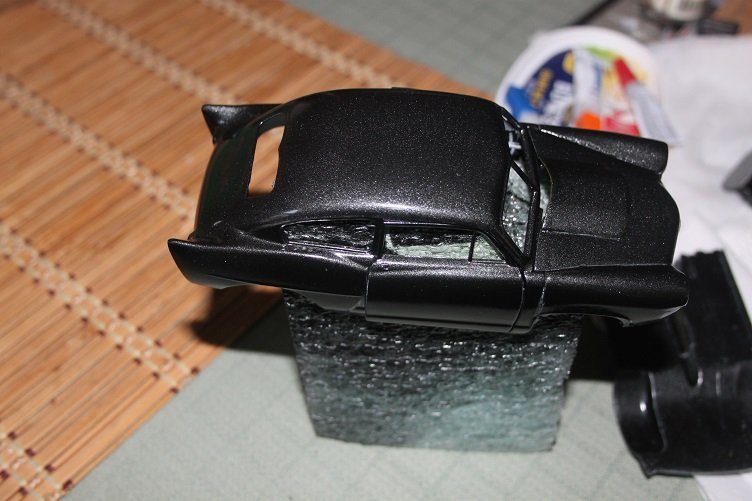
Still working on the finishing details...bit of a set back with the decals...they worked perfectly but were so translucent they all but disappeared on the black body...oh well lesson learned, home made decals need light bodies or white decal paper, guess I should have gone with the green flake after all...
May finish up tomorrow...depends on the youngest...stripped lugs nuts needing removal...one of those jobs that could be 5 minutes or 5 hours...
Thx for all the likes and comments
- Canute, mtaylor, popeye the sailor and 1 other
-
4
-
Dam she is really looking fine. Doing so real nice work here my friend
- src, popeye the sailor, mtaylor and 1 other
-
4
-
58 minutes ago, CDW said:
How the heck did you find it?
Being retired has it's advantages...got a lot of time
 58 minutes ago, lmagna said:
I also agree with Ken on the future. Put a coat down now for the decals to have a smooth surface, then apply another coat after they are good and dry as protection.
Also while your clear parts are still on the sprue, dip them in the Future and allow to drip dry. When dry they will REALLY look like glass!
Thanks Lou...under and over coat
52 minutes ago, popeye the sailor said:metal flake black........nice paint job
")
Thanks Denis
- popeye the sailor, lmagna, Canute and 1 other
-
4
-
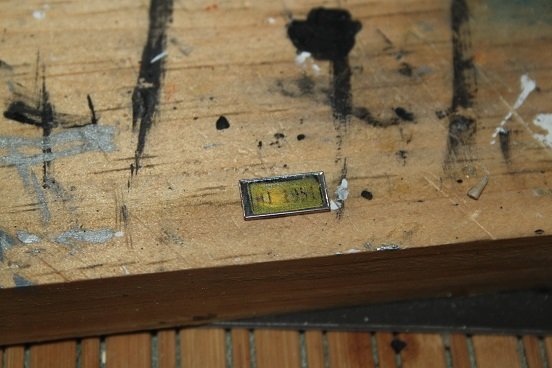
Something I thought you car guys might be interested in...its a site that allows you to make licence plates from different states and from different eras as well...haven't checked all the states but Pa goes back to 1913...should cover any street stuff you want to plate, check it out if you have a chance, pretty cool
Here's a pic of one I made, reduced in size and printed as a decal for the J...should have painted white behind it but I don't think it looks too bad
- GrandpaPhil, CDW, mtaylor and 4 others
-
7
-
-
Thx for the likes and comments...final color coat on the body

Question for those of you who have used the Pledge floor gloss stuff...do you normally apply it now or after the decals go on...I know there are probably as many answers to this as there are users but what is your personal preference.
As I mentioned in an earlier post I've done some laser decals for this build, anyone have any idea how the floor stuff reacts with them??
- Canute, mtaylor, popeye the sailor and 3 others
-
6
-
THX Denis...no grill t speak of...not how we think of them today anyhow...you can see it in this pic
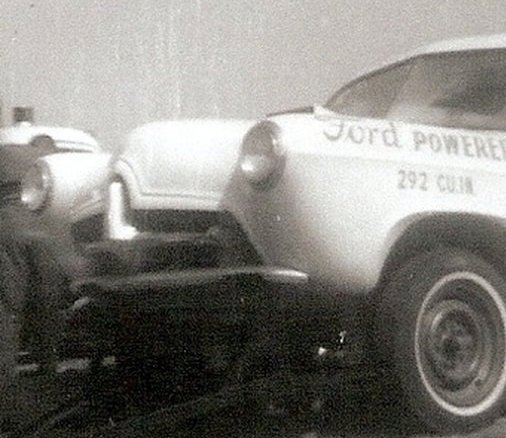
I've got that piece but it 'floats' in the opening...not sure if it's going into the finished ride or not...got to find/build a perch for the moon tank too
Check and see if you can just flip the spindles, that and lift block can get the front end up there, you could scratch a straight axle together pretty quick too
- mtaylor, Canute and popeye the sailor
-
3
-
Another update for y'all...thanks for the likes and comments...
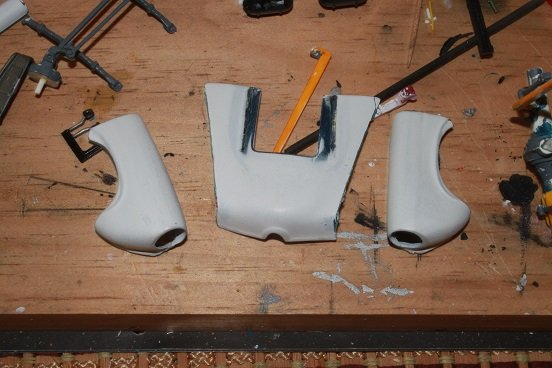
the hood mod needed retaining strips added to keep it from falling through, made these from the same stiffened card the trans tunnel was made from
the hood hinge was glued to the firewall
while that dried I went back to the frame rails...disassembly and striping had removed all the locating pins, so the frame was drilled and pins ca'ed in place, corresponding hole were drilled in the mating parts
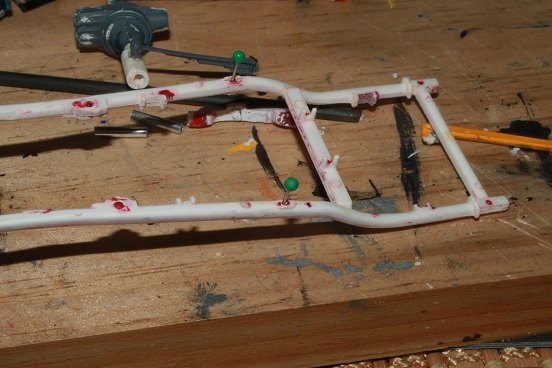
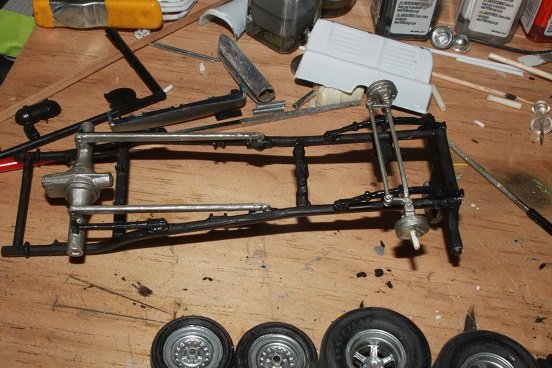
finished the rolling stock...wheels from the spares box, de-chromed and painted

and the suspension and chassis parts mounted and painted out
the new engine and trans set up are longer then the kit supplied pair...so the drive shaft needed sectioned...it was cut and pined


body prep is done and the first color coat is one...more paint tomorrow...that's all for today, thanks for stopping by
-
chopped, channeled, sectioned...all good fun...putty is your friend
- Canute, popeye the sailor and mtaylor
-
3
-
they do get repetitive...way for the companies to save a few bucks...chassis and engine setups are identical...in some cases even the same bodies just different decals...a 40 Ford gasser can be cool, sounds like a lot of scratch building in your future...
7 hours ago, popeye the sailor said:..used to go to the track in Barberville. the good 'ole boys and the 'thunder cars'.......they even had a 'powder puff' class.......women used to get into it too.
6 hours ago, CDW said:Every 4th of July my dad would take us to Daytona for the Firecracker 400. Saw all the great drivers and iconic cars of the 60's and early 70's.
You guys have some solid memories there, never got to the track when I was a short...wrenching on my nasty old rides with my step dad out behind the house though...that was really cool
7 hours ago, lmagna said:(Like an old chunk of drain pipe that happened to be the perfect diameter for the funnel)
That's called innovative thinking Lou...see you thought you was just bein' cheap
 !!
!!
Guess I should throw a few comments on the build while I'm here...nothing major going on, painting sub-assemblies and doing body prep getting it ready for paint
- Canute, mtaylor, popeye the sailor and 1 other
-
4
-
Yep that's the one, just like the overall look of that car...I've had a handful kits that have included all the interior engine detail, always felt a little guilty covering up all that detail by assembling the engine...I came across some in my spares box last week, I think they are from the Polar Lights Ford Torino NASCAR kit...it came with both a 427 and a 428...got to dig around that's another unfinished project and them motors could get used somewhere else!!
I've got a pile of NASCAR stuff I've never finished...some never started...kind of lost interest in that aspect of racing...I enjoyed it when the smaller teams could still be competitive, those days are long gone...same thing with straight line competition I suppose...
I think all the chrome is to get your attention, apparently it worked

I've told my better half time after time I wouldn't have much of value if not for her, she makes a nickel spend like a dime, but I would have ALL THE TOYS IN THE WORLD!!!!!
I'm with you both on the cost of our chosen hobbies though...the kits cost way to much
- Canute, popeye the sailor, mtaylor and 1 other
-
4
-
Thanks Denis...that is a nice small block, lots of options too I see, if it was mine I'd have to lose the chrome though...hummm what would it look the best in...kit prices are defiantly out of control, I haven't bought anything new for a while and am still in a state of sticker shock. Which Sox and Martin ride did you score...I've been lusting after the 67 Belvedere.
I've seen the big engine kits but I've no idea what the scale is, the ones I'm thinking of were stand alone kits...
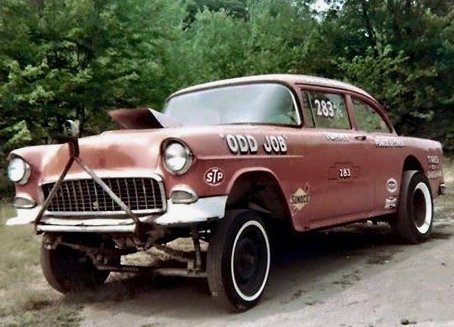
I got it...how about an old school Chevy shoebox gasser...fits right in with the 283...
-
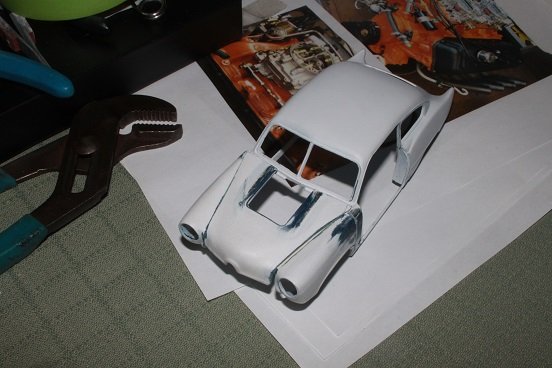
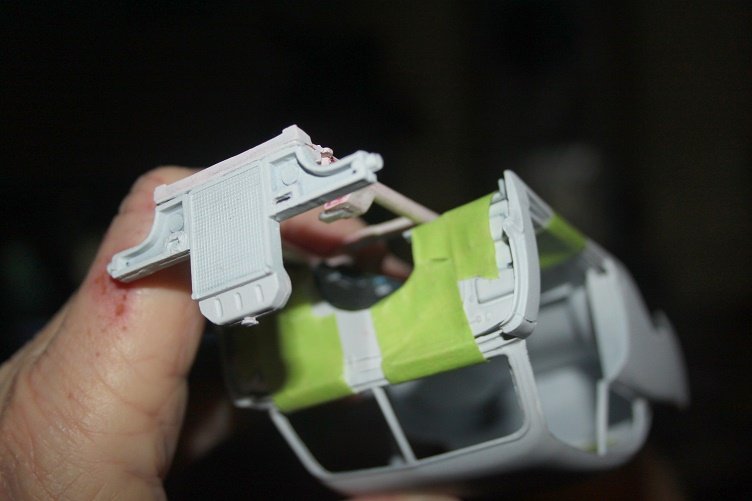
THX for the likes and kind comments...with the engine all but complete I turned my attention to the body...everyone that's ever built this kit knows the flip front end has fitment issues and is sloppy at best...so instead of monkeying with it I decided to mount the front fenders and open the hood...
 they were separated at the hood joint and...
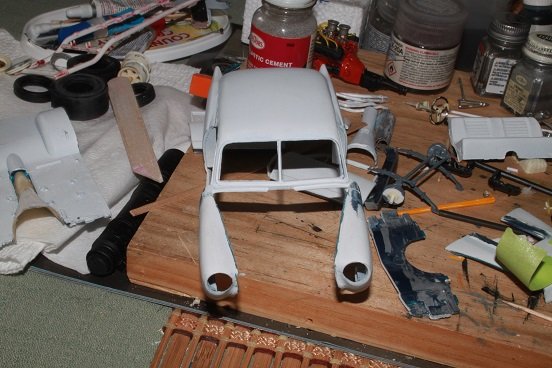 ...the fenders fixed to the body, this was put aside to setup
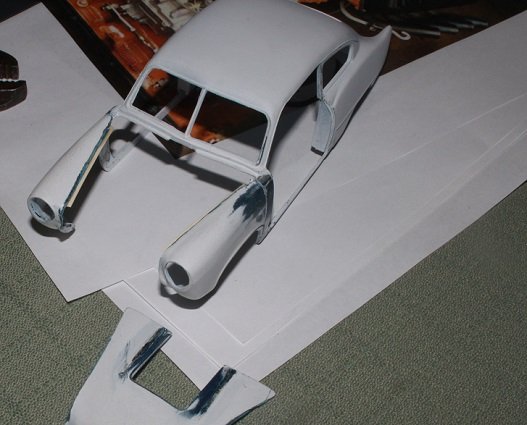
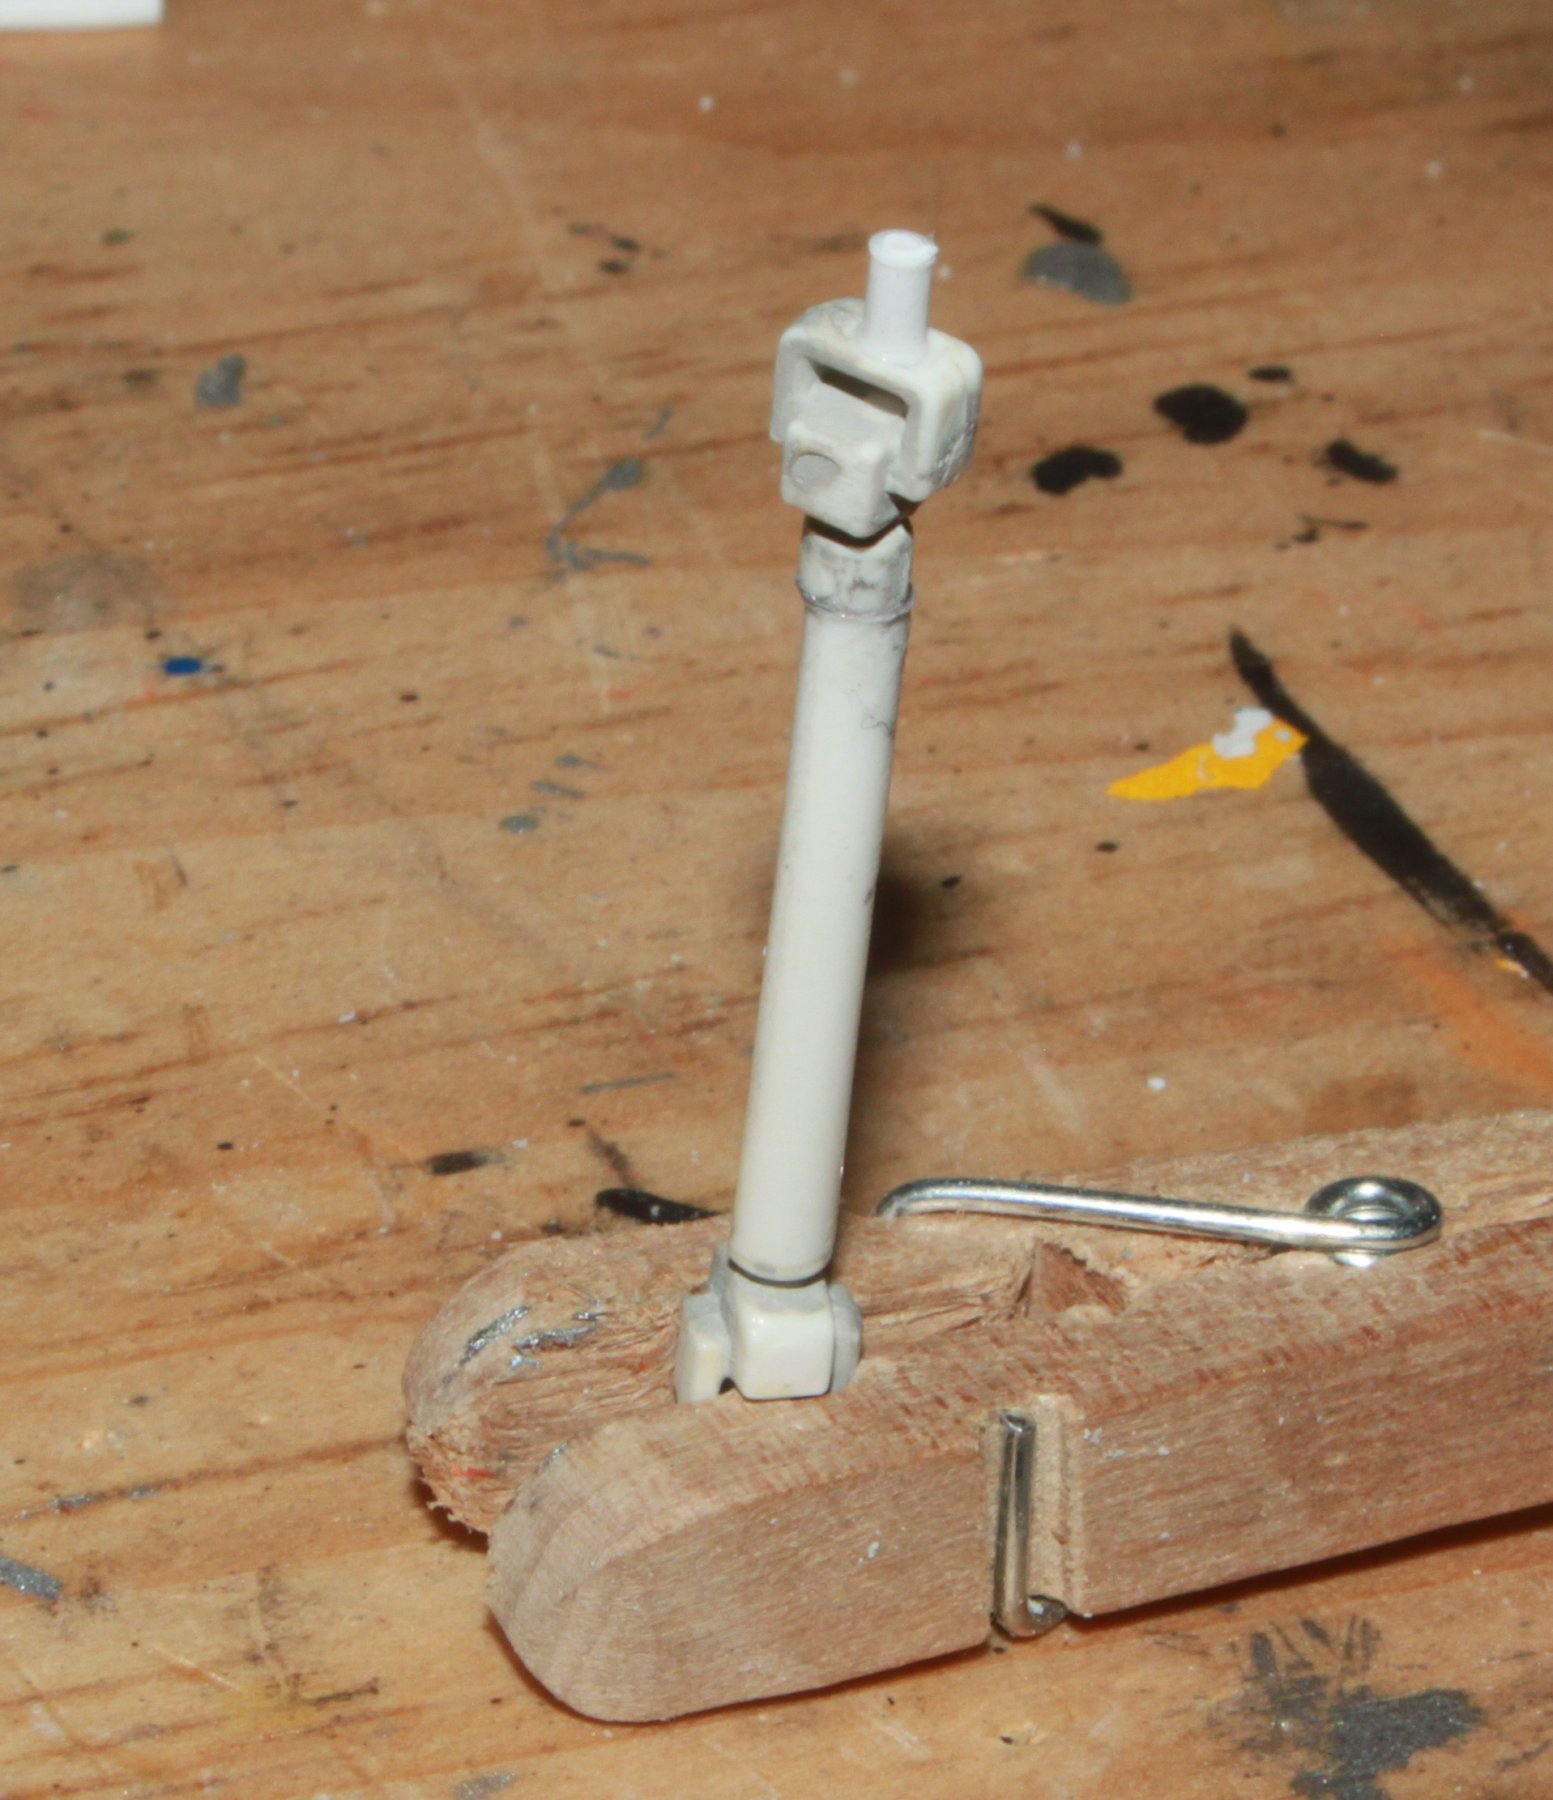
next the firewall was relieved for the hood hinge
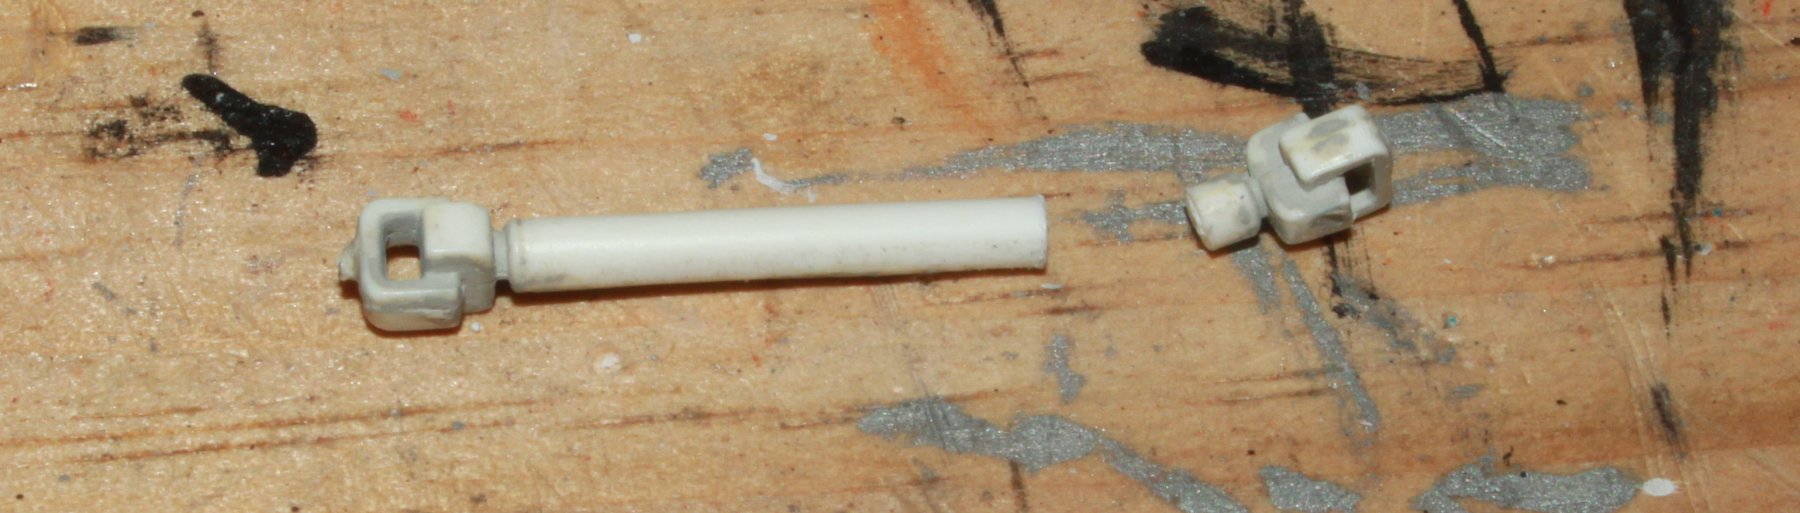
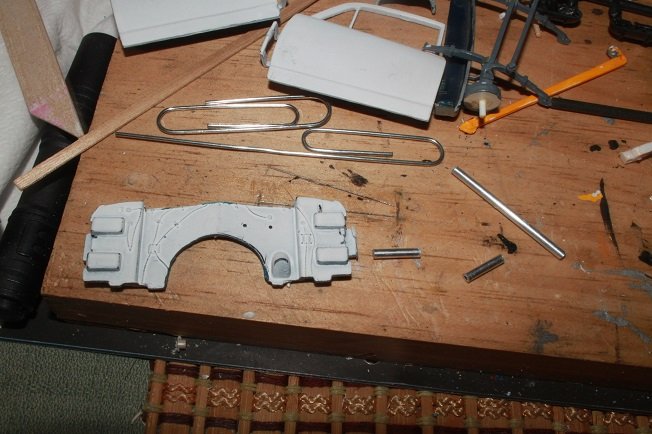 and work started on the hinge mechanism
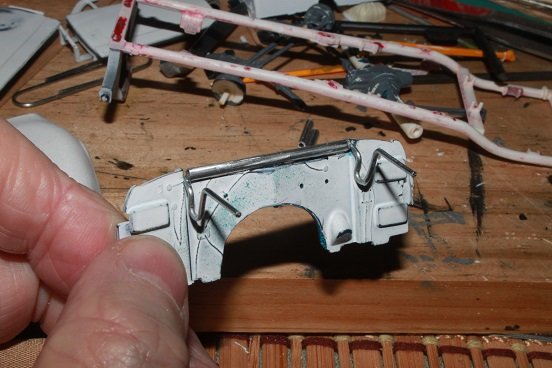
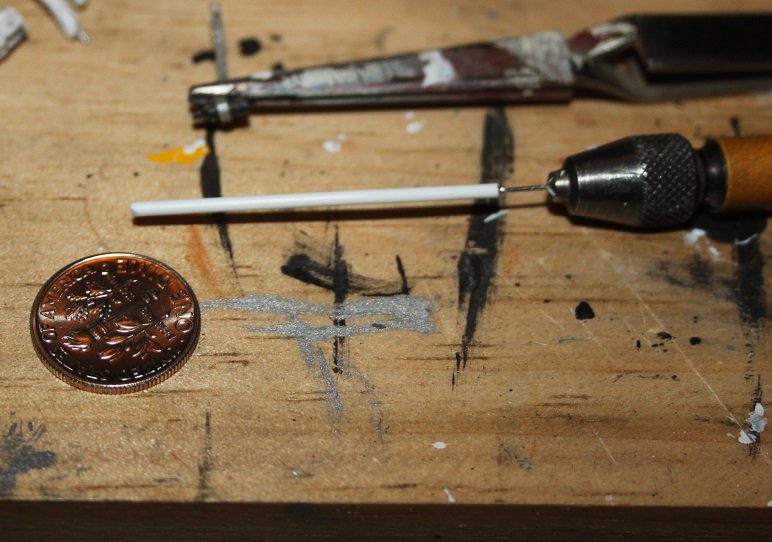
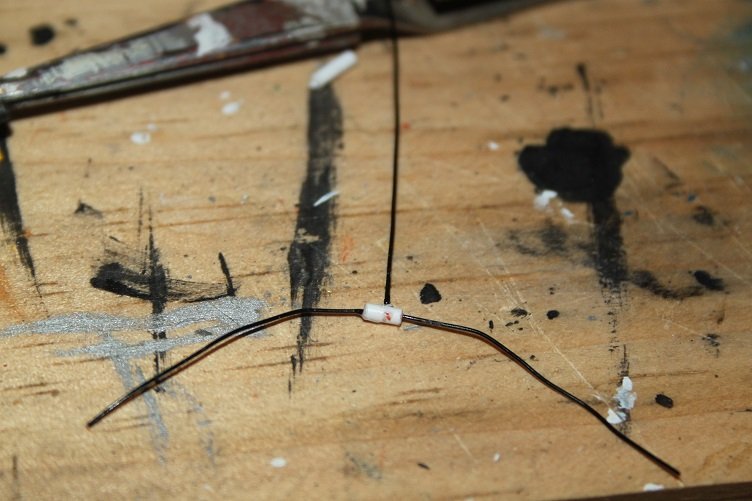
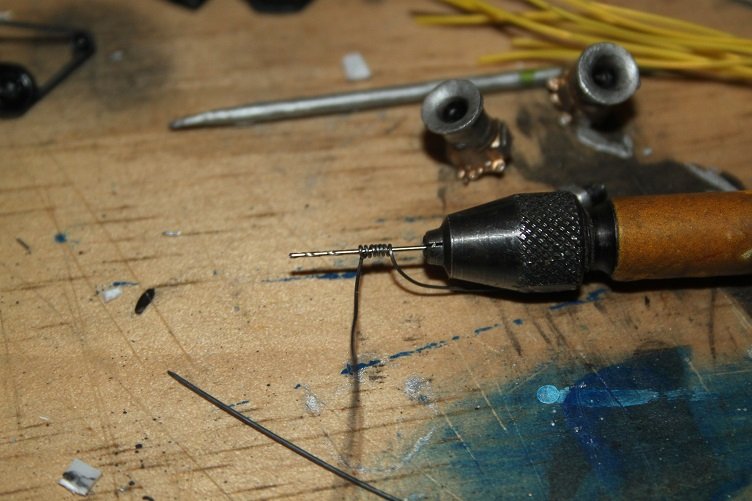
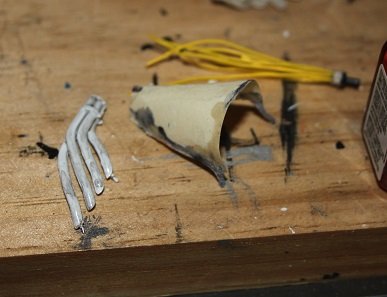
I used aluminum rod and a straightened paper clip for this, you could use plastic tube if you like, this is just what I had on hand, three pieces of tube are required a long one to mount on the firewall and two shorter pieces that will ultimately mount to the underside of the hood
Insert the wire into the long tube and bend both sides to 90 degrees
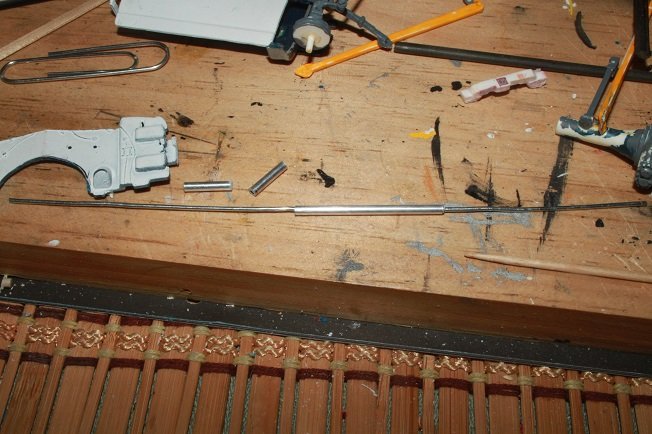
 then turn the assembly and bend both sides 90 degrees these bends are perpendicular to the first bends
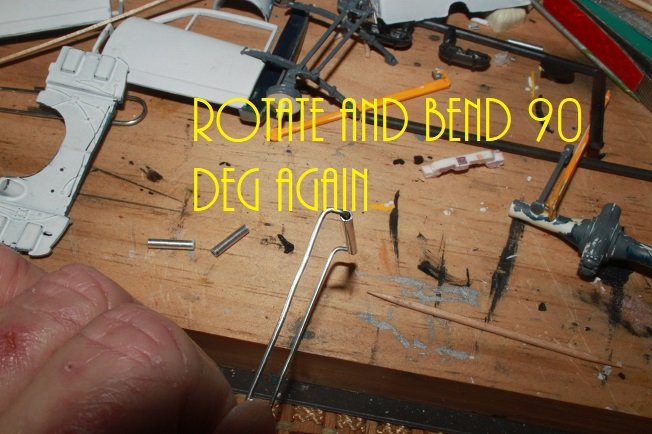 now the hinge loop is formed
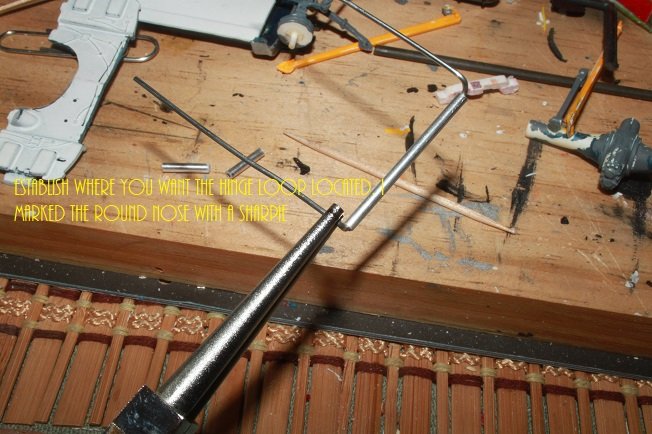
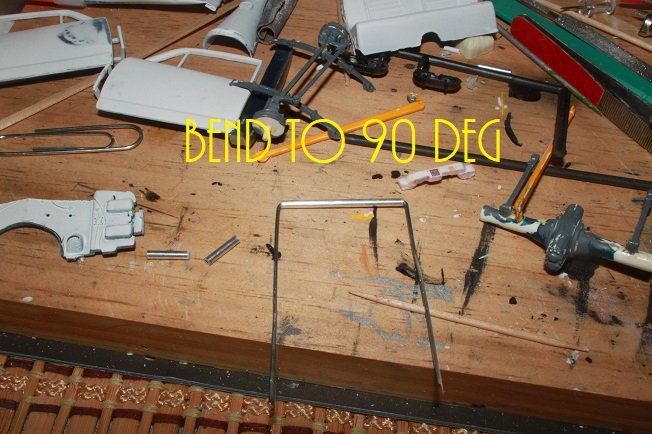
and two more 90 deg bends
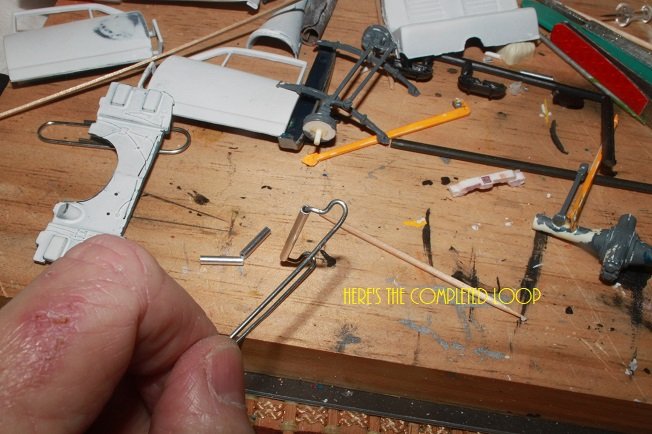
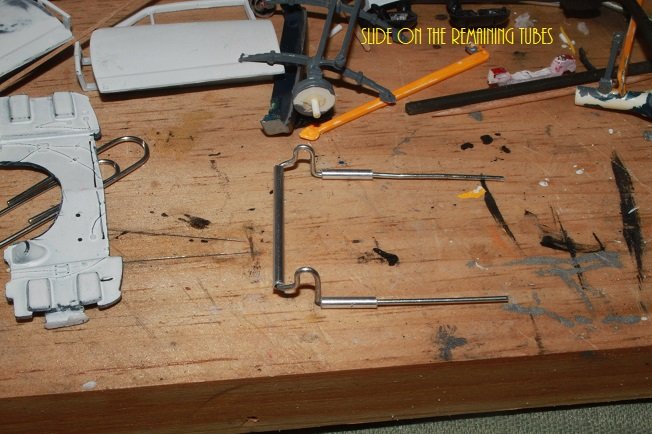 slide on the short tubing pieces and trim the wire to length...
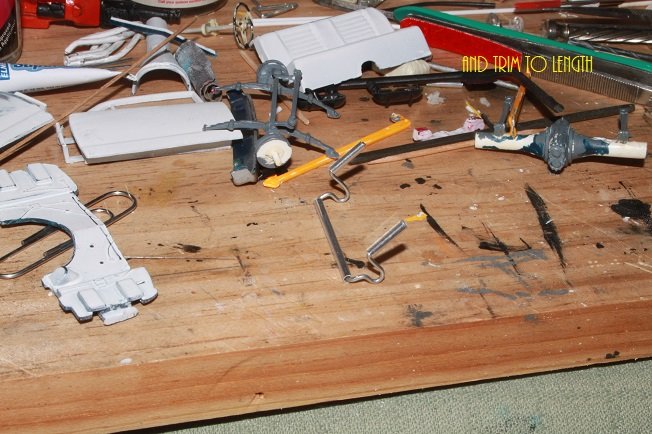
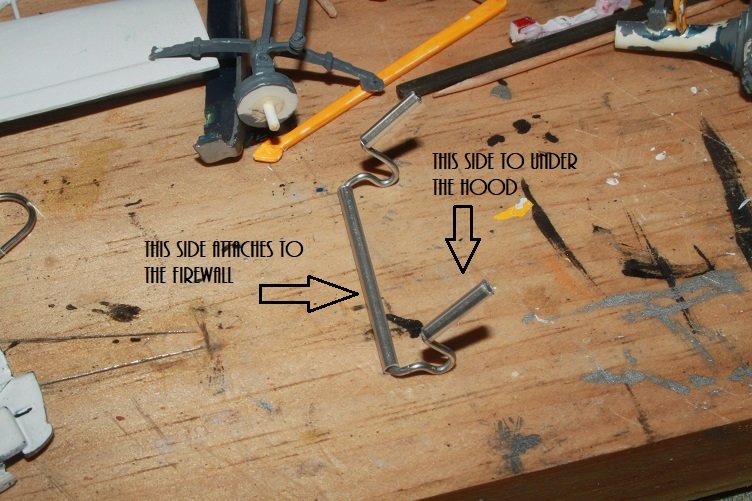
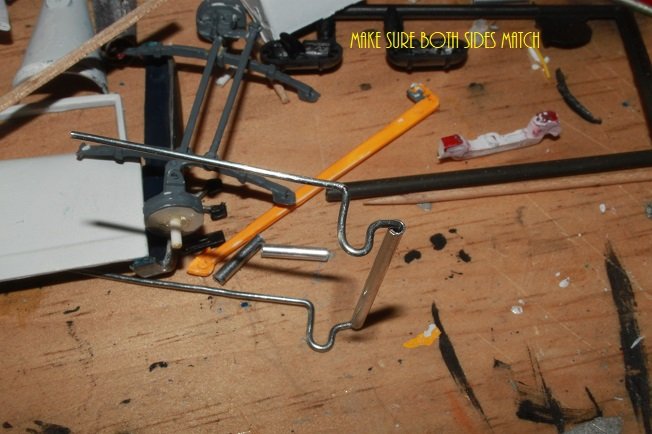
and that's it...I'll be sure to include pics when I mount this so you can see how it mounts...I've used this technique on past builds and it works well, whats critical is the loop size it needs to be of sufficient diameter to clear anybody work above the firewall...on a modern body that would be the vent valance, in my case here the hood ends right at the firewall so they can be fairly tight, be prepared to experiment
- mtaylor, GrandpaPhil, Tom E and 4 others
-
7
-
-
Thanks much Craig
- Canute, mtaylor and popeye the sailor
-
3
-
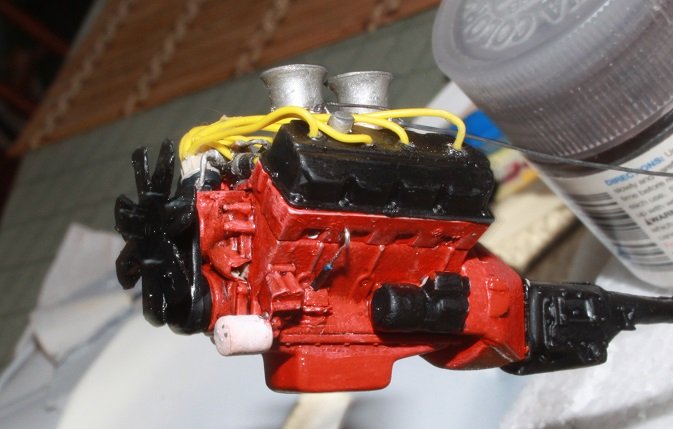
Thx for the likes and comment...more detail added to the engine...
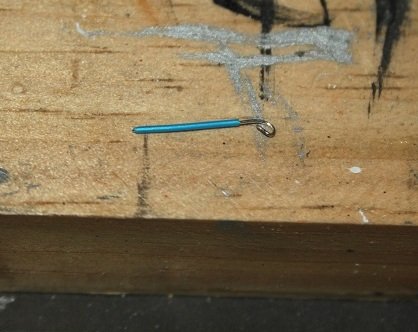
this will become the dipstick

 here it is in place, carbs are mounted too
Next I turned my attention to shaping the fuel rails...
it was then trimmed and mounted
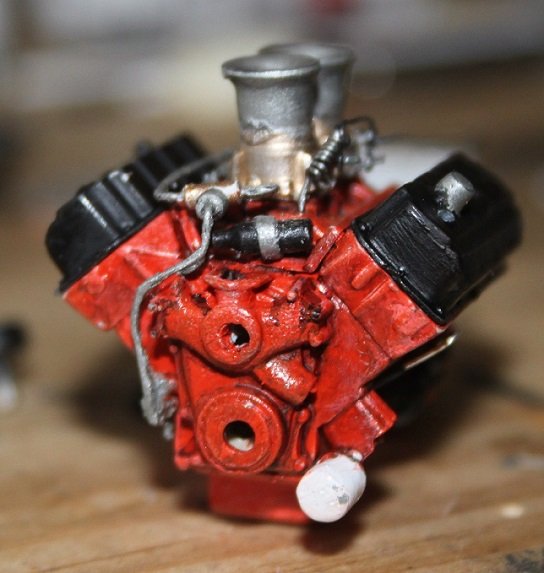
from there the linkage went on....just some bent up wire here, added the return spring as well
then the distributor and plug wires went on...

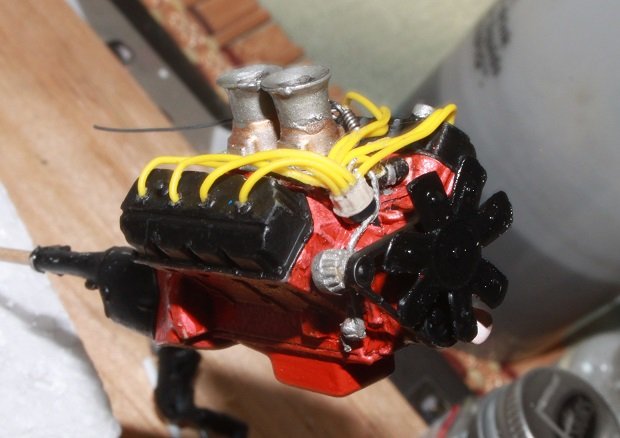
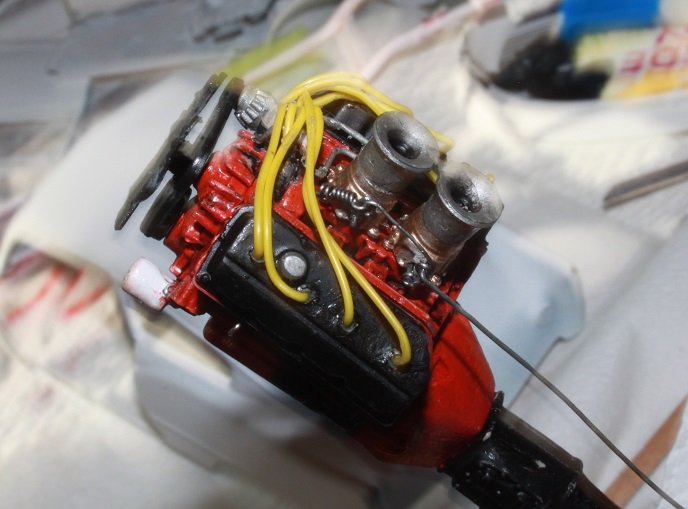
the firewall will be drilled to accept the throttle cable and it will be trimmed to size then, headers will be added after the block is in the chassis...this assembly will sit for a few days...I'll go back in and touch-up when everything has set
-
-
Thanks Craig, I’ll continue to add them as we go
- mtaylor, popeye the sailor and Canute
-
3
-
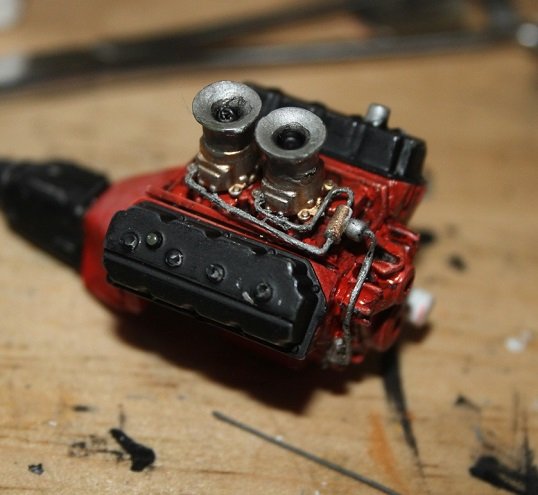
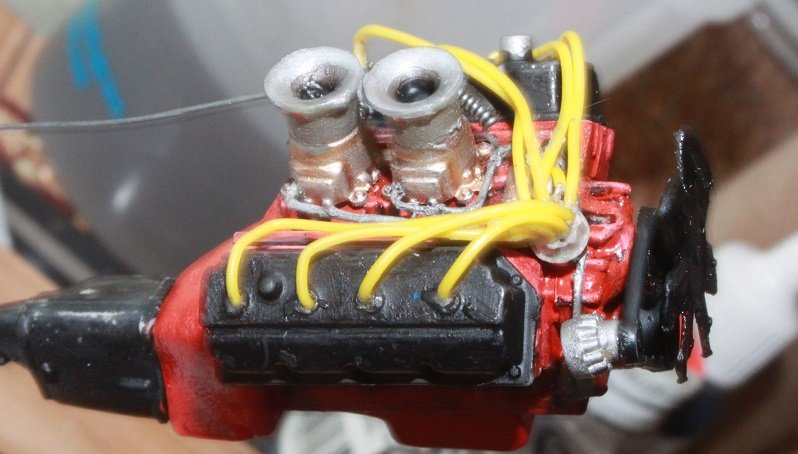
Thanks for the likes and comments...some pics of the engine details...
painted out the base colors
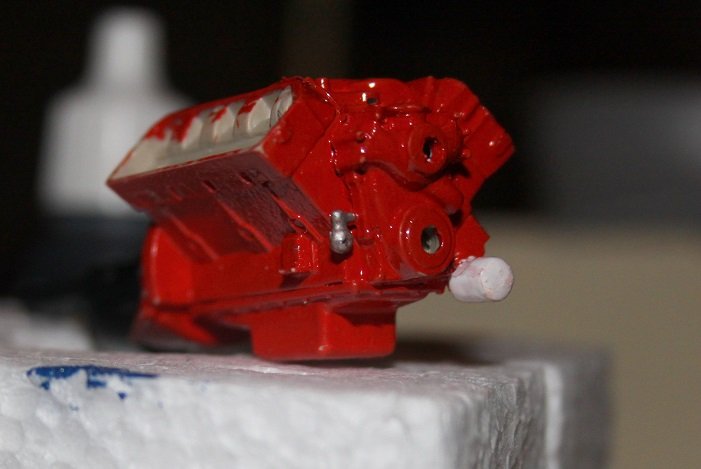

then weathered/grunged up the motor a bit, gave it a wash of black acrylic and dry brushed with substantiate coats of a lighter orange, I want this to represent a small race operation, so the engine should show some use...have to go back in and clean up the details, I'm a little sloppy with the washes.
You'll notice that I went with the inline intake, I had fitted the cross ram I mentioned earlier but found that is was too wide with the carbs mounted, would not clear the hood opening and I think it is wide enough already, so the inline it was. I think it will still look good
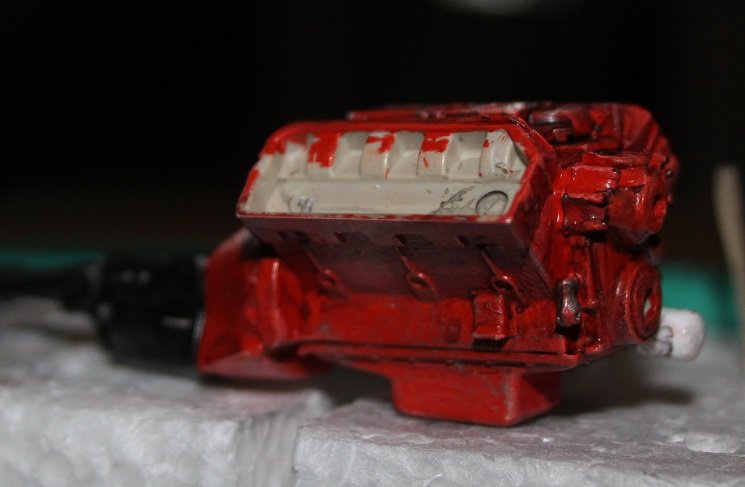
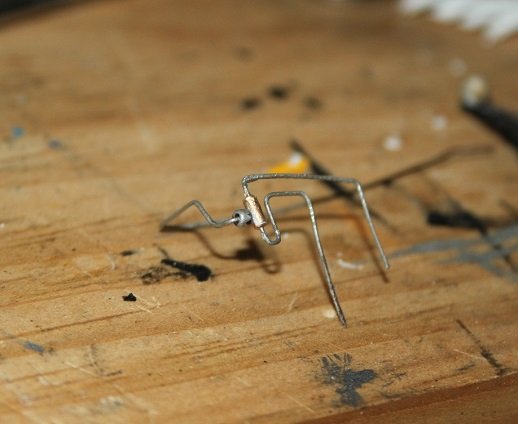
while this dried I started scratching out some details...started by drilling out some plastic rod
this was used to make a distributor coil

this is one piece of rod inserted into the other and a strap added from card stock, paint finished it off
rod was also used to make a fuel distribution block
this piece needs painted...block will be gold and the fuel lines silver.
The carbs received a base coat of gold
once dry these got a dark wash and dry brushed with a silver/gold mix to pop the details
Still have to build up the linkage but the return spring is done, you can see the finish paint of the carbs here as well
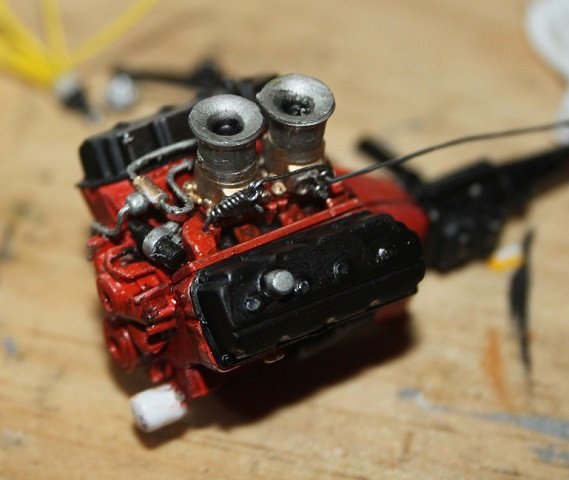
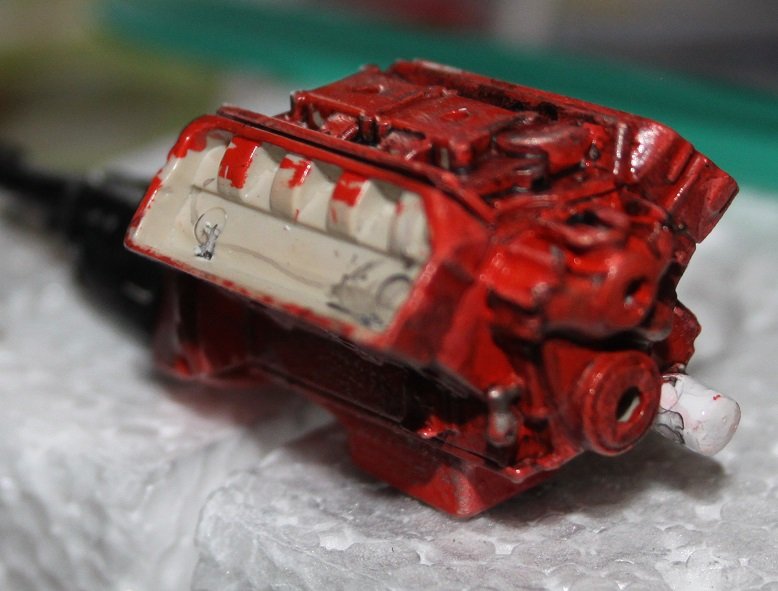
Early on I had test fit the block to the chassis, I was not surprised to find the block and bell-housing to large for the trans tunnel
so it was opened with a rotary tool sander

once the block fit a new tunnel was scratched from card
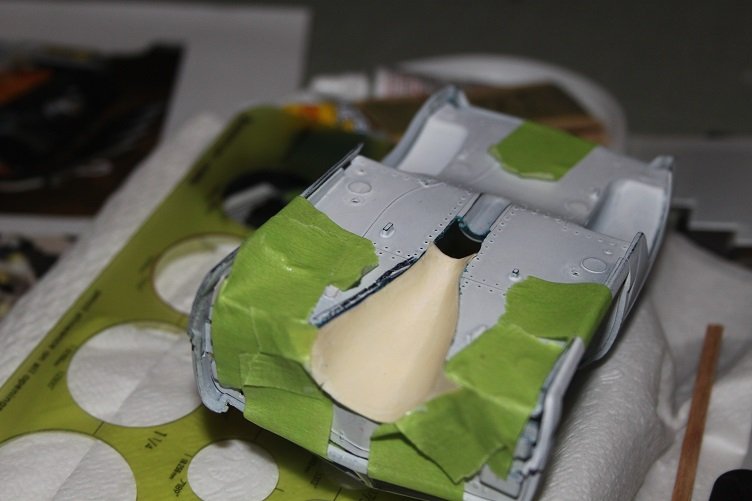
which was stiffened with liquid ca
it will be coated with putty and sanded out before mating with the floor pan
-
Thx much Denis, sorry to hear your under the weather
- mtaylor, Canute and popeye the sailor
-
3
-
Thx for the likes and comments...just doing some detail painting on the engine parts today...pics tomorrow
- popeye the sailor, Canute and mtaylor
-
3
-
-
Here's a couple I'd bookmarked...have not dealt with any of them though so I cant say if they are good or bad
http://www.tedsmodelingmarketplace.com/
https://www.modelcargarage.com/eshop/pc/viewCategories.asp?idCategory=5
https://www.modelroundup.com/Chevy-409-Engine-Kit-p/bnl-103.htm
- popeye the sailor, Canute, mtaylor and 1 other
-
4
Phantom Henry J Gasser by jct - FINISHED - 1/24 scale
in Non-ship/categorised builds
Posted
Not sure if my laser can print white or not...never tried...I guess I could do an outline on white paper and us it as an underlayment for the color decal...I'll have to play with the graphic and see what I can do