


jct
-
Posts
1,519 -
Joined
-
Last visited
Content Type
Profiles
Forums
Gallery
Events
Posts posted by jct
-
-
Thanks Sam, and thanks to those hitting the like button...more painting today...no pics yet
- mtaylor, Canute, popeye the sailor and 2 others
-
 5
5
-
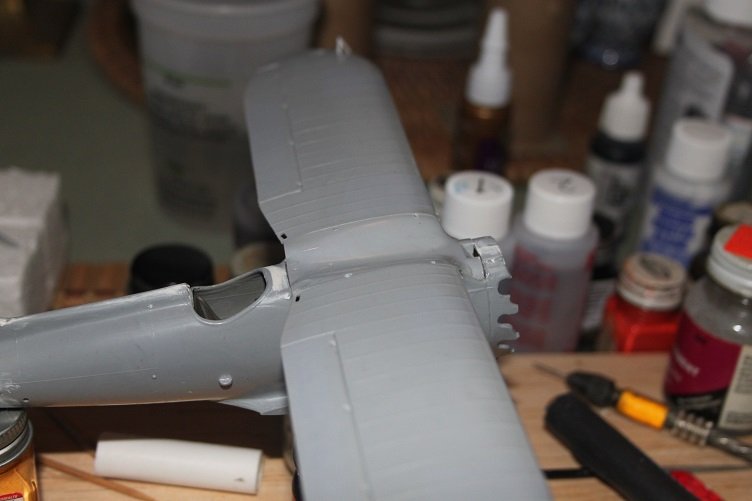
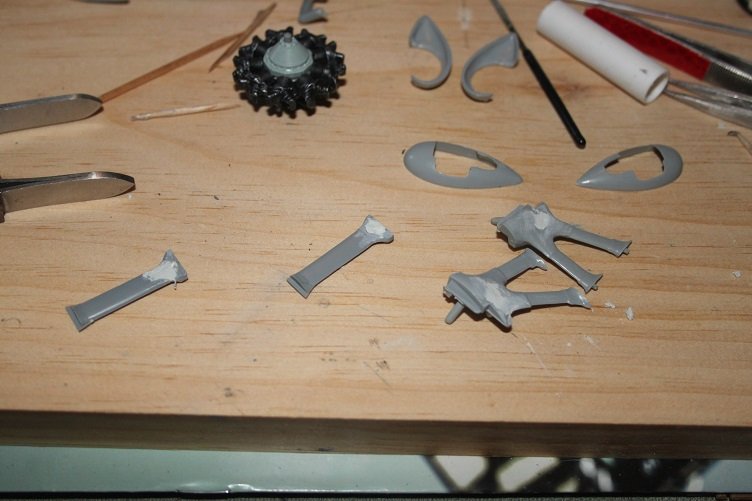
A few small things...gray is on the fuselage, it's baking as I type...
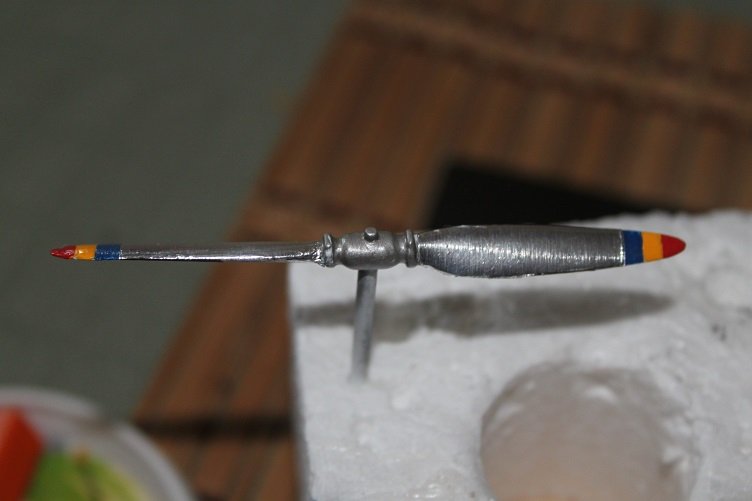
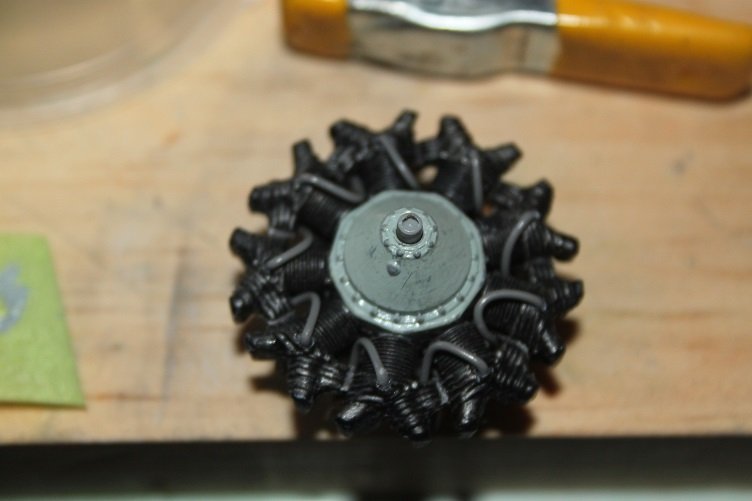
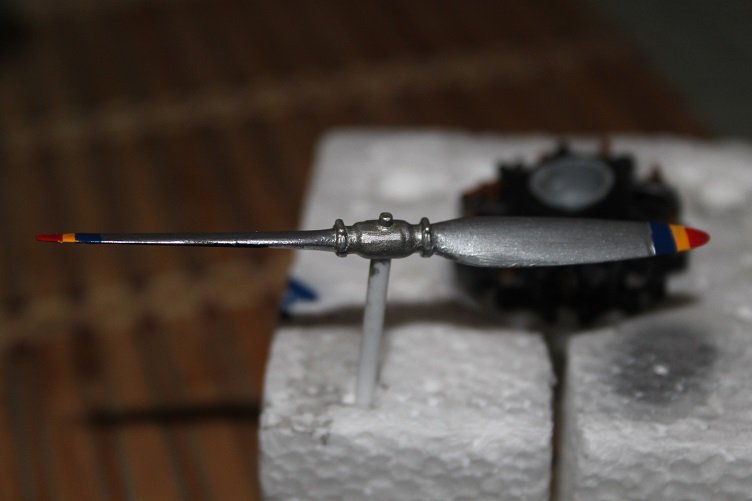
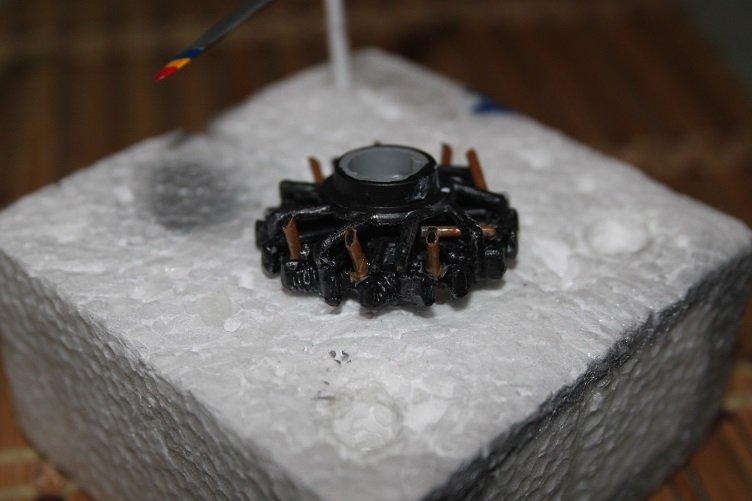
Finished prop and engine
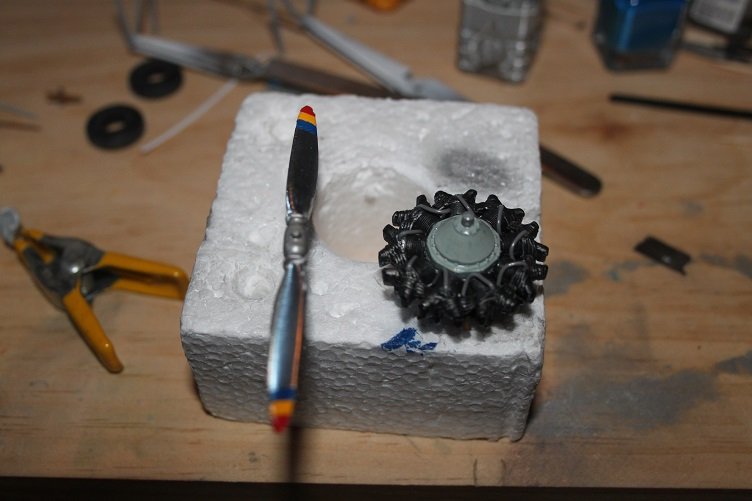
added home-brew foil to the prop, as the 1:1 is highly polished
Added plug wires and a little weathering to the crankcase
the underwing compass
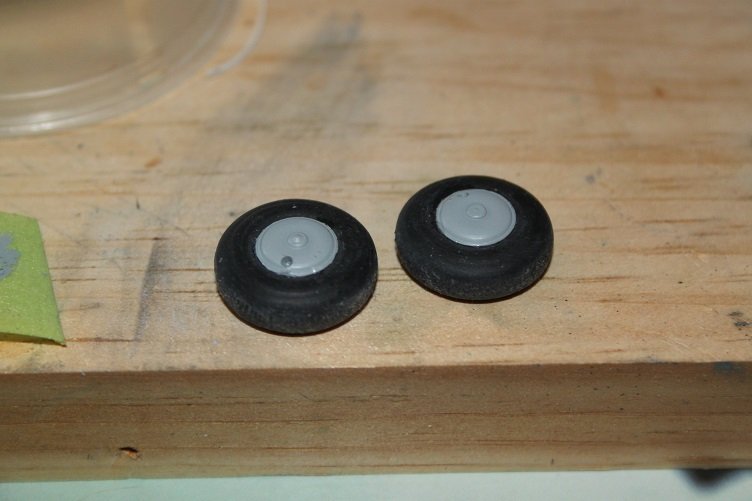
and the main wheels
That's it for today, gonna watch the home opener...thanks for the likes and comments
-
-
the proverbial domino effect...Mr Murphy's right hand man...you'll figure something out...ever notice how none of this s--t shows till its in paint
-
1 hour ago, Tom E said:
Model Expo's stuff runs thick in my eyes.
Some have described it as hose paint...I wont disagree, and don't even try to airbrush the stuff. clod your brush in a New York minute...your technique seems to be working
- Canute, Tom E, thibaultron and 2 others
-
5
-
looking fwd to your build...I sure it will be a fitting tribute to your late father
-
Looking good Tom...what are you painting with...I've never had any luck getting anything to take to metal other then old school enamels?
-
19 hours ago, popeye the sailor said:
.I agree I should have eaten a whale
...but whales are mammals not fishes
 Lots of nice stuff in this one dude
- thibaultron, Canute, lmagna and 1 other
-
4
-
Not much to post today...spent the morning mixing the chrome yellow for the upper wing and the light ghost gray for the main fuselage...started hand painting a lot of the little stuff too pics tomorrow
-
17 hours ago, popeye the sailor said:
what is that thing that's sticking through the canopy....a sight glass?
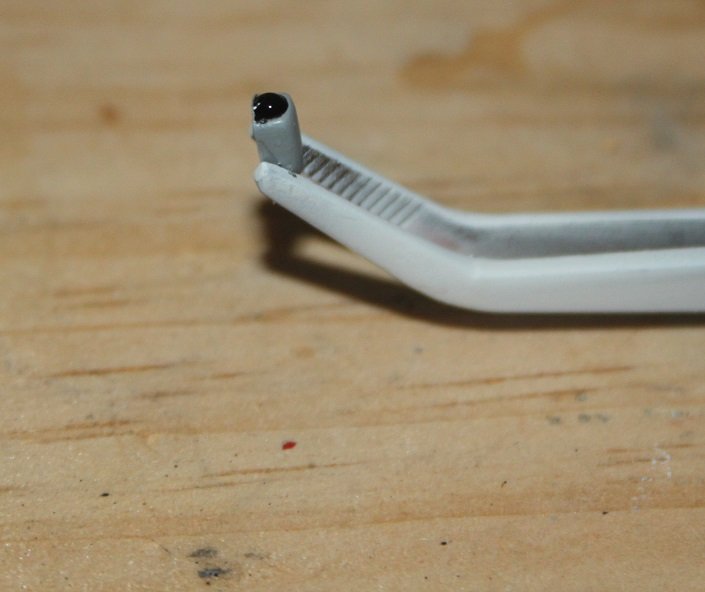
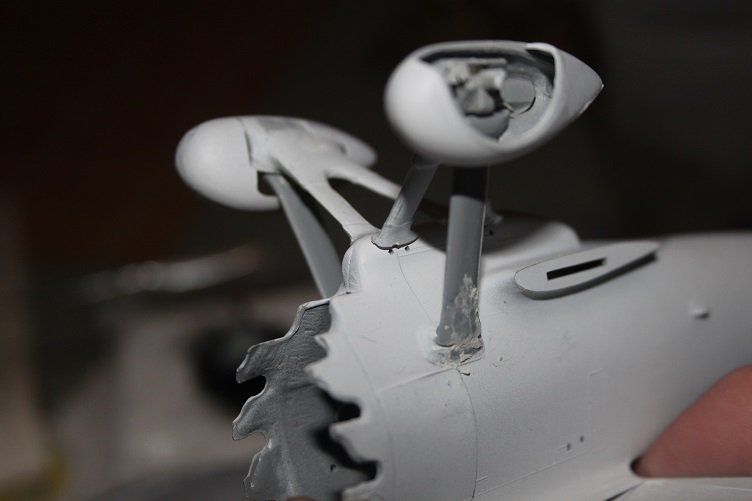
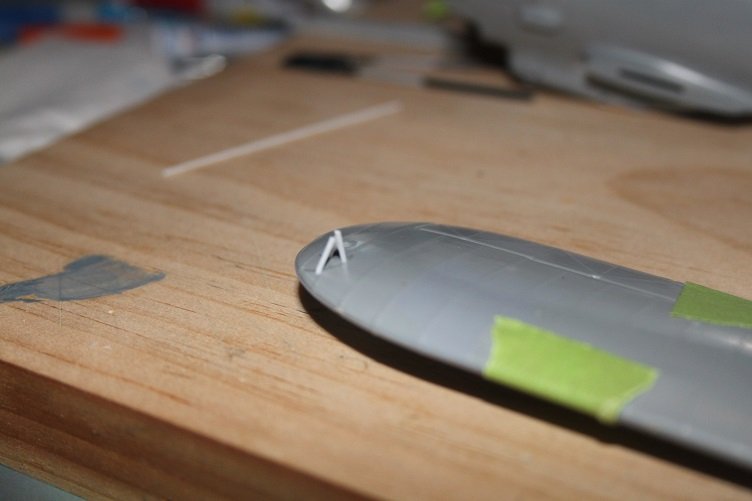
That is the primary gun sight, it will get added in final assembly as well...I'm leaving off most of the sticky out stuff till the end...hoping to minimize the AW $--ts...I did manage to break the prop though, just to fat fingered anymore, its stripped back and on the mend
17 hours ago, popeye the sailor said:I've never had a kit that had it's own disclaimer in it.
First for me as well, this is an interesting kit all the way around, there are the instructions...which are all text, there are no locating pins on any of the parts, and the aforementioned heads up...quite different
-
1 minute ago, popeye the sailor said:
two Haddock plates {the food costs extra}
Arrrrgh

- CDW, popeye the sailor, lmagna and 2 others
-
5
-
Thanks for the likes and comments...much appreciated...today's addition...
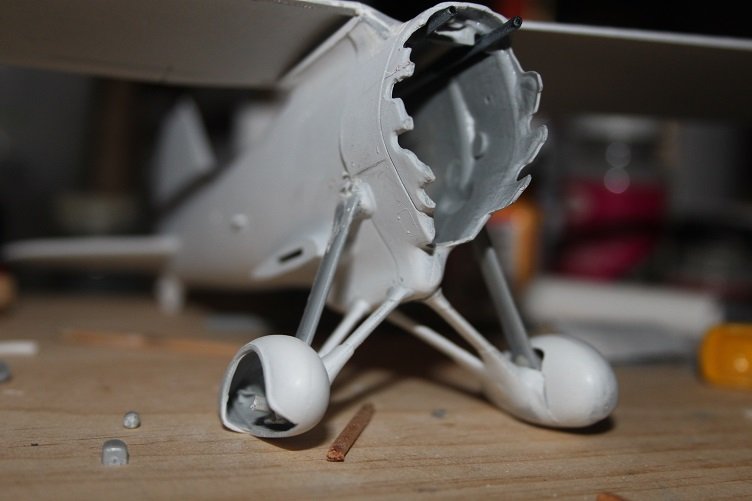
Got the wheel struts on and aligned...the instruction sheet says this will be the most difficult aspect of the assembly...they were not lying, felt like I needed 3-4 extra hands, but they are on and solid
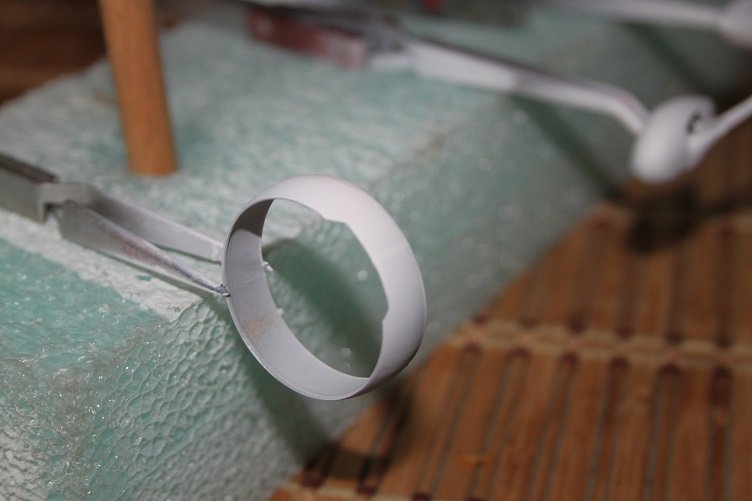
I was going through my reference photos and came across the ones below of the sky hook
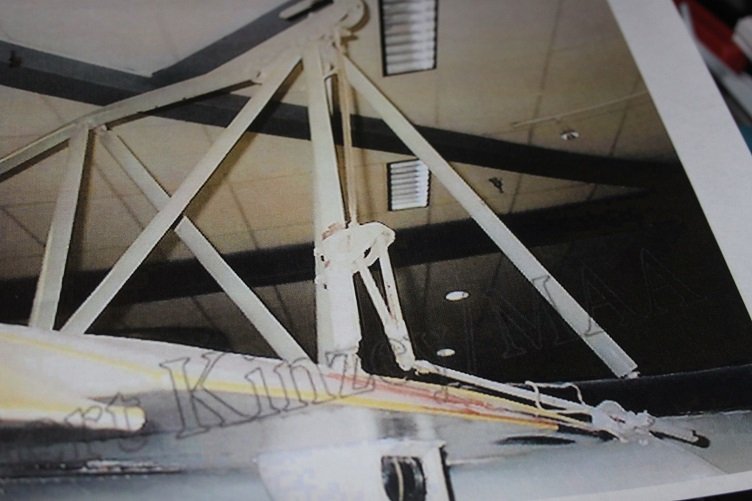
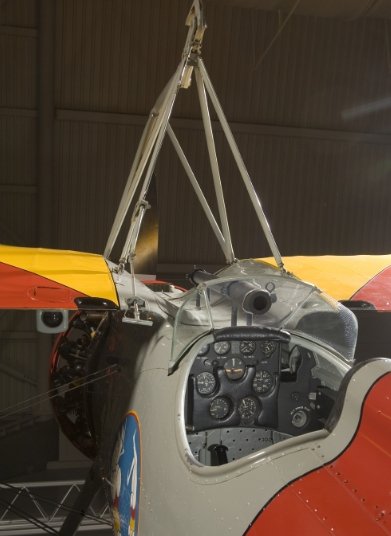
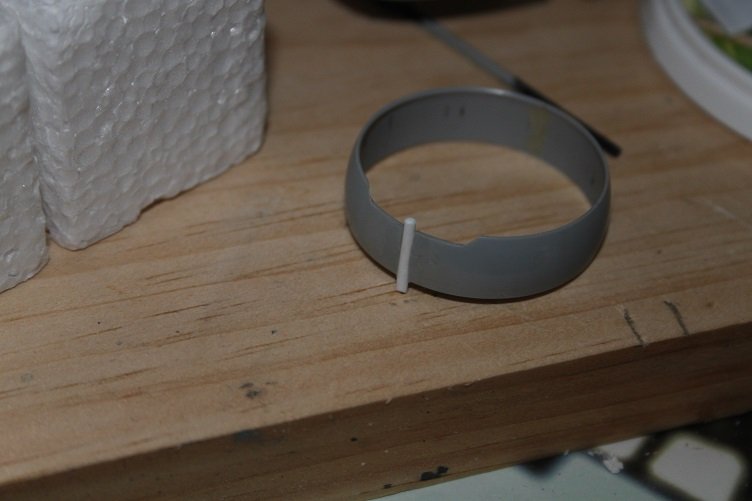
the kit hook assembly has the bracketry attached for the rigging...so, I felt it would be a slight to the kit designers not to take advantage of their hard work.( I know, I know, I said it was gonna be box stock...but what ya gonna do!!)
The shot below shows the parts made to represent the hook disengagement rigging, the vertical pieces are already attached to the sky hook, these are just thin slices of 0.10 styrene to represent the flat stock, the t-bar mounts horizontally through the hoop on top of the wing, that will be part of the final assembly

- Jack12477, thibaultron, druxey and 10 others
-
13
-
8 hours ago, popeye the sailor said:
she's look'in great Sam.......as everyone has said......I wouldn't change a thing!
") while it may seem an eternity work'in on the model, you can be certain, that when you are finally finished, your gonna have one superb look'in model to display nicely done!
while it may seem an eternity work'in on the model, you can be certain, that when you are finally finished, your gonna have one superb look'in model to display nicely done!
DITTO
-
Turning into quite a show piece
- Canute, thibaultron, mtaylor and 3 others
-
6
-
-
THX for the likes...
Got a few sub-assemblies in primer today...
and some detail painting done
That's it for today...or maybe a couple depends on the primer
- Canute, thibaultron, hexnut and 6 others
-
9
-
Hi Ken, I don't know squat about trains but I know good workmanship when I see it...outstanding job
-
3 hours ago, src said:
Nice progress J. I am out of touch with plastic kits, how are they split now?
Sam
Hi Sam...haven't done one in a while myself but some of the last kits I built, 1/48 Monogram, separates along the wing root, it allows a lot of the surface detail to remain intact...in some cases there is no need for fill at all with the separation following the panel lines
3 hours ago, popeye the sailor said:the seams are my biggest peeve.........the older the molds, the worse they are. I'm going through a nasty bout with the train
") good to see the start of this fine model J.........I love the biplanes! the truss wires can be tricky, but when all is done, they are worth the effort. looks really good!
good to see the start of this fine model J.........I love the biplanes! the truss wires can be tricky, but when all is done, they are worth the effort. looks really good!
these haven't proven to be to bad...they've responded to fill very well, plus this will be a color paint, they are a real bear on an all metal finish, super pita
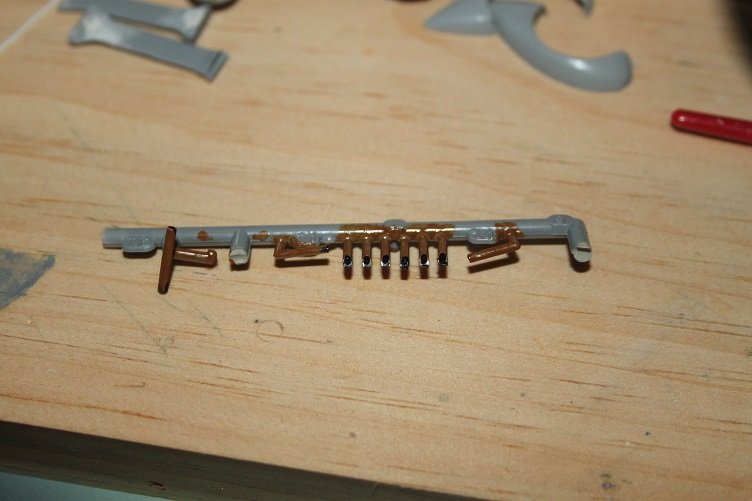
Thanks to all for the likes...today's addition
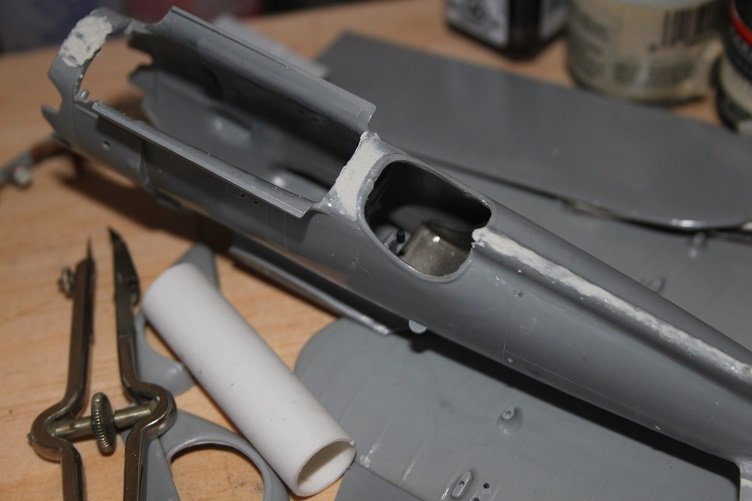
guns are mounted...these will hardly be visible as the gun barrels just clear the engine jugs
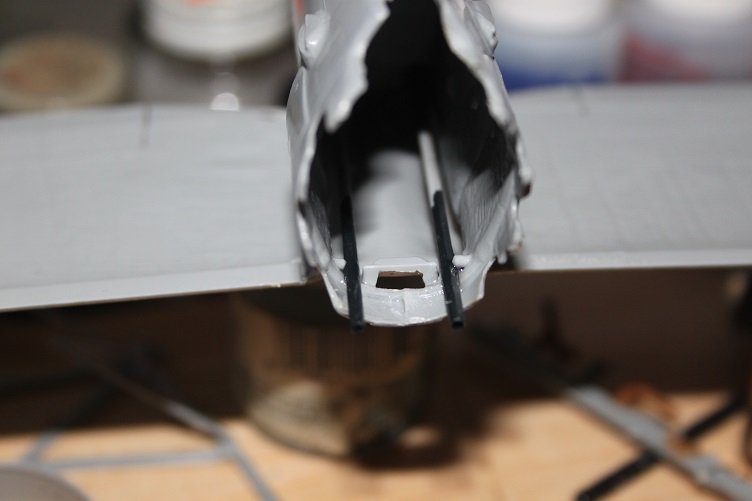
also test fit the cowling and discovered it was a bit to small, was split and a piece of rod glued in, will be sanded down and filled when dry
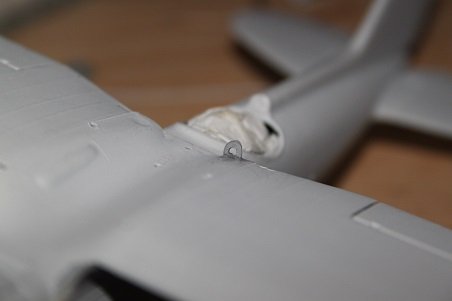
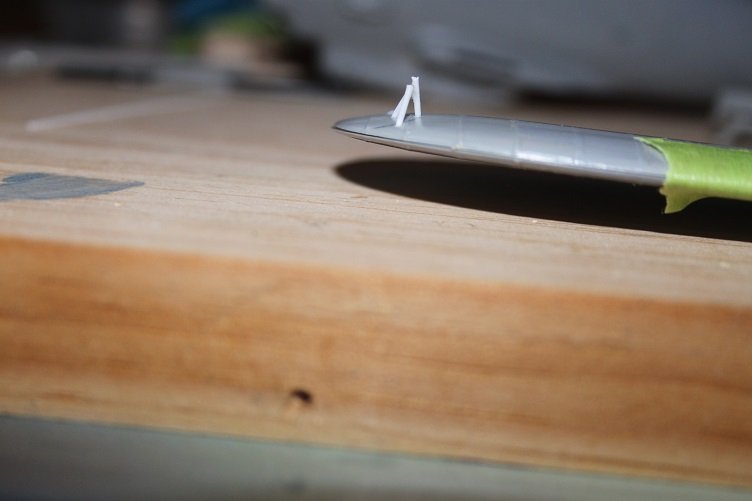
here are shots of the long wire tripods...the space at the top will allow me to tie off the antenna wire
painted out the exhaust pipes...the instructions call for these to be bright metal...I think that is because its based on the last remaining sparrowhawk BuNo 9056...all pics of that bird show a pristine a/c as she would have rolled off the factory floor. I want to represent an a/c that has seen some flight time, so I chose to paint the exhaust a rust color with some interior staining...I'll carry that weathering over to the cowl as well
How best to approach the paint job on this build is something I've been mulling over for a few days, the more masking required the more chance that something is gonna go sideways...with that in mind i decided to paint all of the silver dope parts separately and then add them in during assy
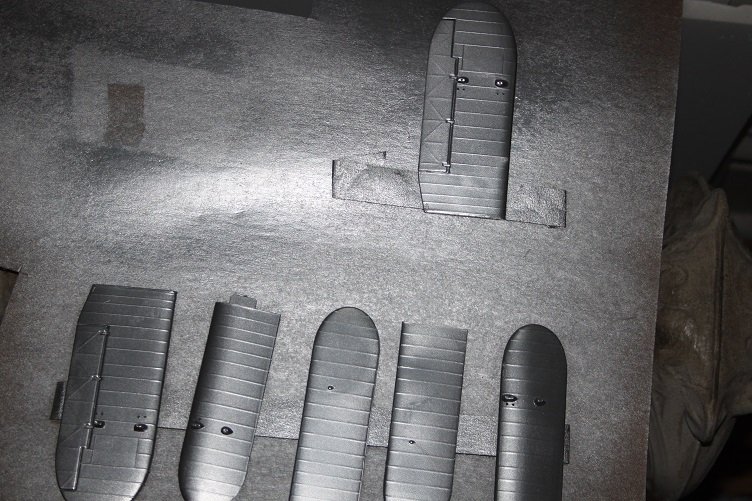
this way I shouldn't have to mask any of the silver
the upper wing top was fitted to check the gaps...it has some so fill will be needed
-
THX Denis...this is a home-brew tint...just skimmed the liquid off of candy apple without mixing
- popeye the sailor, mtaylor, lmagna and 1 other
-
4
-
That’s the neo I have like it a bunch it is east to clean, I made a top for the small cup out of styrene as it one has a cap for the large.
I use a Califonia air cat-5510 we, really quite I can even shoot when the test of the house is asleep with no issues
-
2 minutes ago, Tom E said:
Still doing my homework before a big purchase like that. Trying to stay away from these "starter sets" I see online.
You may want to take a look at the NEO series of brushes...they are made in China but under Iwata's direction, I've had one for a couple years now and it has become my go to brush, and they are very reasonably priced...but no mater what you buy be prepared to practice
21 minutes ago, Jack12477 said:I think it is named after General Charles T James who developed the James system of rifling to convert smoothbore cannon to rifled cannon. See http://www.civilwarartillery.com/calibertopounder.htm
Thanks for the info Jack
- mtaylor, popeye the sailor, Tom E and 2 others
-
5
-
Nice progress Tom...I agree with Denis you'll find an airbrush indispensable once you have one...or six
 a question though why did you name your cannon James
- thibaultron, Tom E, mtaylor and 2 others
-
5
-
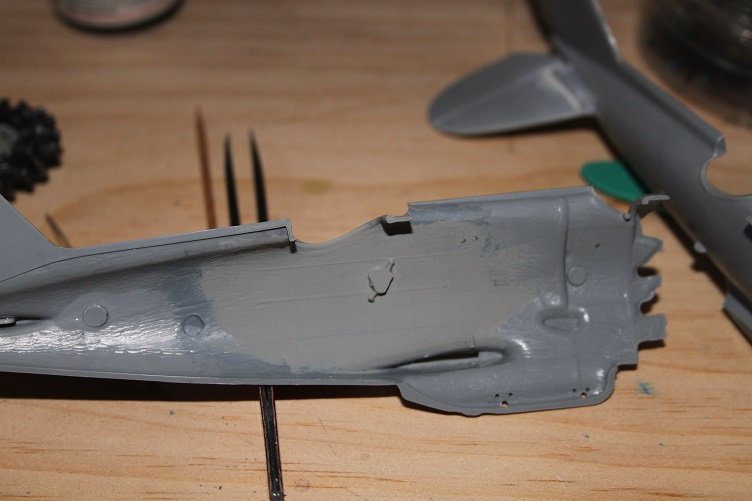
Today's update...thanks for the likes and comments...a few of the parts have some sink that needed filling
so it's fill sand repeat until they're ready for primer
like most older aircraft kits the fuselage is split vertically leaving seams that need attention
so it's the same routine here
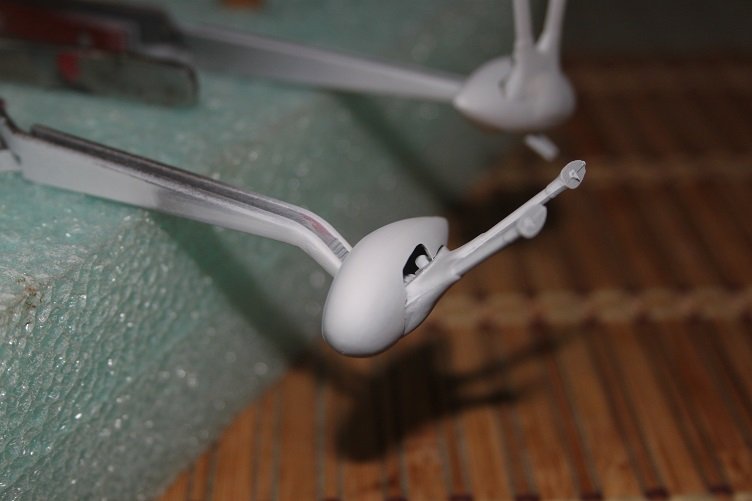
Did get some assemble done...got the sky-hook and it's support structure assembled...I taped the legs to their respective mounting locations on the upper wing to get the alignment right then just used liquid cement on the joints

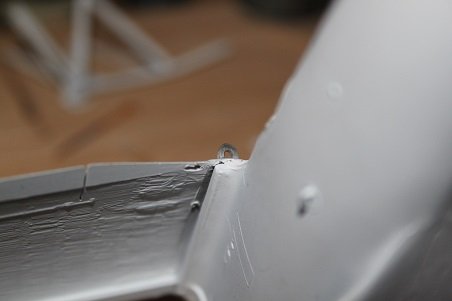
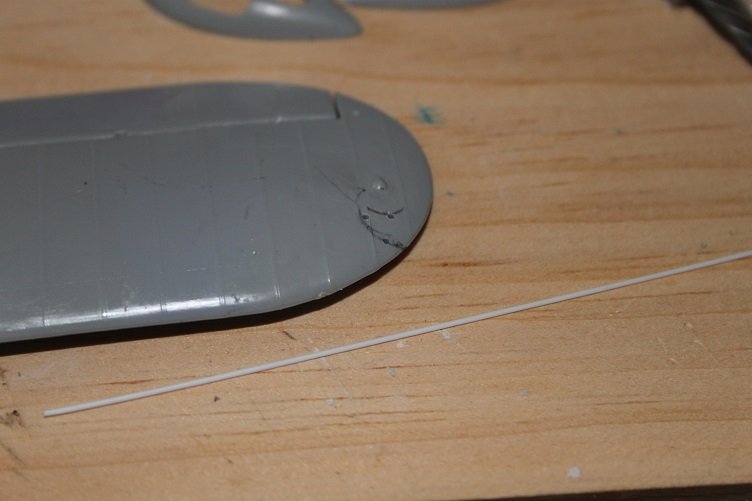
After reviewing my reference pics I decided to add the small tripods to the upper wing that serve as long wire antenna mounts, holes were drilled for plastic rod which will be feed through the holes and formed into the correct shape and glued
Well that's all for today....more tomorrow
-
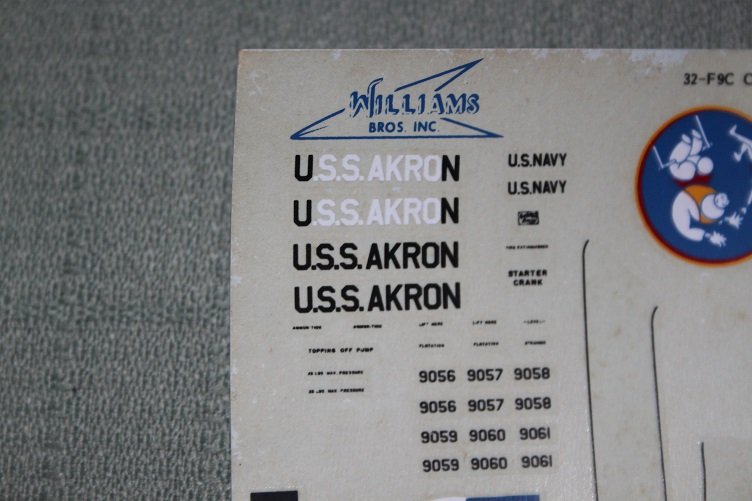
I'm going to replicate BuNo 9058 as it would have served aboard the USS Akron in the early 30s for a couple reasons...first, everyone always seems to model 9056, the red one and second, by the mid 30s Washington demanded that the colorful paint jobs be eliminated, so the tails were all painted a blue-black and the flying trapeze insignia was removed. A bird from the early 30s would carry all the color and markings.
This will be a box stock build, with the exception of scratching the secondary gunsight, which the kit instruction sheet calls for.
The decals have all the bureau numbers, allowing one to build of any of the six aircraft. Each a/c was assigned a different color as well, 9056-Red, 9057-White, 9058-True Blue, 9059-Black, 9060-Willow Green, 9061-Lemon Yellow, the color was applied to the engine cowl, wheel pants, the upper wing chevron strip and the fuselage strip.
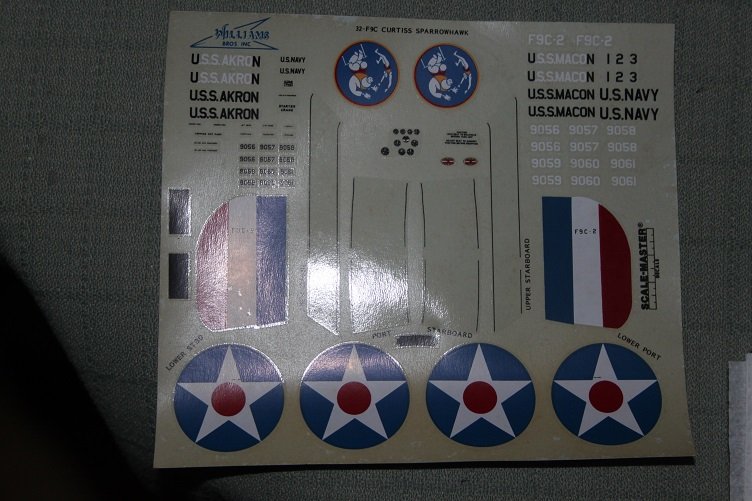
The carrier film was yellowed on these so they spent some time in the window before they were clear coated, turned out ok
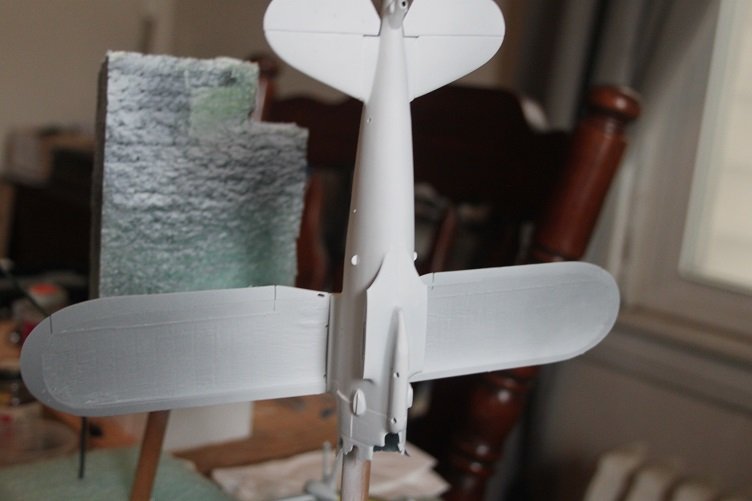
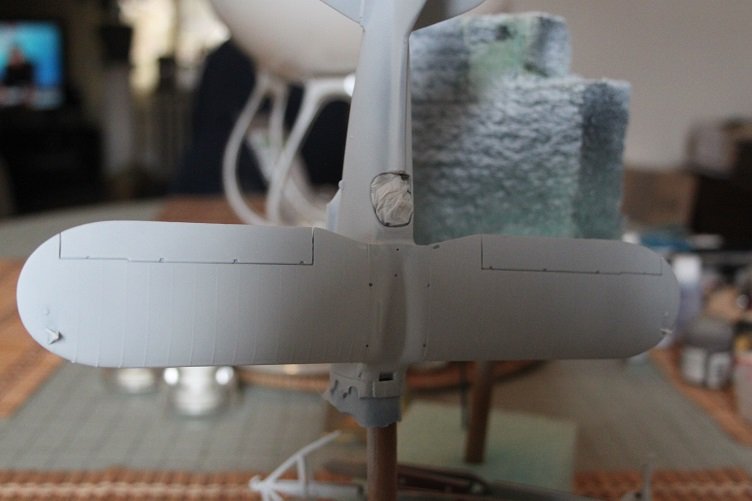
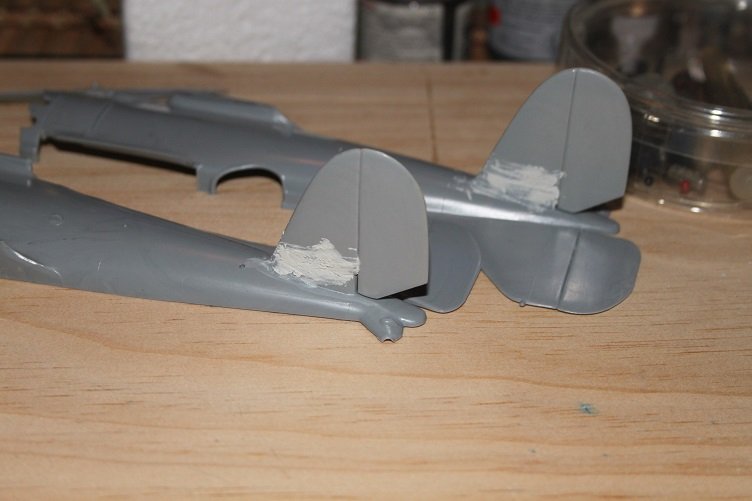
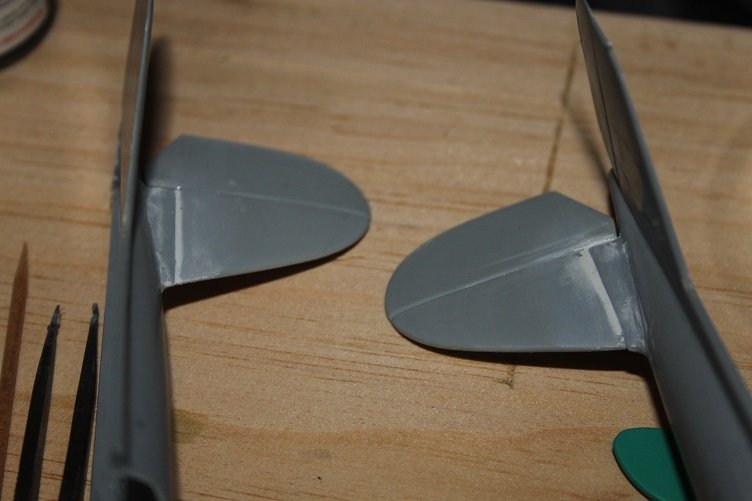
Started assembly by attaching the horizontal stabilizers, so I could get the gaps filled and sanded before the primer coat
Then painted the interior with light sea gray...Testor Model Master color, a coat of gloss will be applied before the halves are joined together
the throttle quadrant needs to be detail painted
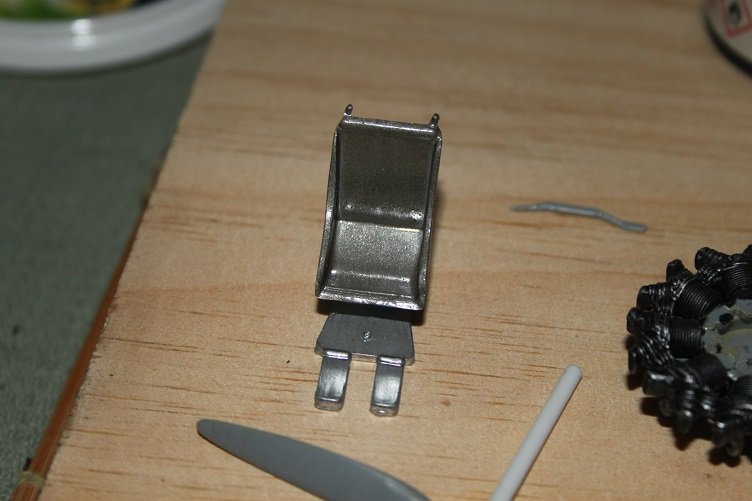
seat assembly was painted natural metal
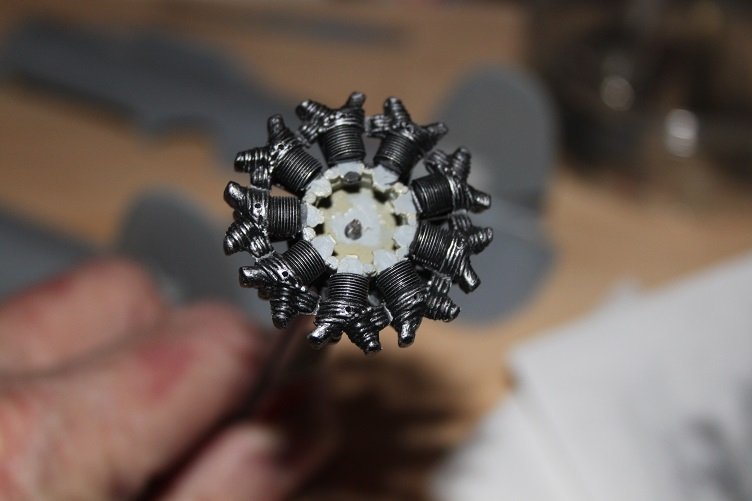
the engine assy was painted black and dry brushed with aluminum
That's it for today
Curtiss Sparrowhawk by jct - FINISHED - Williams Brothers - 1/32 - PLASTIC
in Non-ship/categorised builds
Posted
Thanks D...a change in plan, I always have a tendency to continue research while a build is in progress and in this case I've discovered that the Williams Brothers used the wrong shade of blue on the Sparrowhawks decals...they are done in true blue as opposed to insignia blue, which is darker. My original plan was to model BuNo 9058...blue markings, but thought the markings matching the insignia would call attention to the off color decals, soooo, I'm switching up and doing BuNo 9060...willow green markings...plus it gives me a chance to mix paint
For those interested in pre-war navair color schemes here's a link to a good reference site
Yellow Wings
THX again