


GGibson
-
Posts
1,086 -
Joined
-
Last visited
Content Type
Profiles
Forums
Gallery
Events
Everything posted by GGibson
-
 Be careful what you wish for, @dputzler! LOL Jon has ALL the resources! 👍 Speaking of which, though, Jon, been meaning to ask you... Have you had many of those plans from the USS Constitution Museum reprinted in larger formats at like Kinkos or other places? Any issues with doing that? I assume that makes them more "readable" and useful.
 -
Not surprised that Mustafa noticed it! Ha! I continue to be amazed at both of your skills and your attention to details, gentlemen! Which is why I am following you both with great awe. Carry on, guys! 🏆
-
Nice work on your Sailing Pram, and some good adjustments on the fly. And... this is your build log, and your new actual sailing vessel has a lot to do with your understanding of what you have in your model shipyard. Post your picture here! 👍🏆 Carry on!
- 86 replies
-
- 2
-

-
- Model Shipways
- Norwegian Sailing Pram
- (and 3 more)
-
Nice rail work, Ed! 🏆 I know I am late to the game in following your Rattlesnake build, but this is the first I've noticed how you've got your ship strapped down on the foam cradle! Like you're hauling all of your earthly possessions cross-country in the back of a pickup! Love it! 👍👍🤣
-
Coming along nicely, Dan! Great work! 👍
- 37 replies
-
- 2
-
-
- Model Shipways
- muscongus bay lobster smack
- (and 1 more)
-
Ahhh very good! We have a local shipbuilders' group here in the KC metro. I've only been a part of the group for a few years, but several veteran members have a ton of knowledge they share. We meet the 2nd Sunday afternoon of every other month in KCMO. Next meeting is (I believe) this Sunday, Sept 8. I missed the July meeting, so need to verify. It doesn't conflict with a Chiefs game, so think that's a good date. If it ever works out for you to join us for meetings, we'd love to send you details and have you join us! Keep that in mind!
-
Your portable toolbox design looks pretty cool! Impressive! To where in Kansas did you move? I'm in a KC 'burb on the Kansas side.
-
Wipe On Poly Techniques
GGibson replied to Freebird's topic in Painting, finishing and weathering products and techniques
OK, so... mind if I jump in on this wipe-on poly thread and ask a question? I've read internet articles regarding the general comparisons between wipe-on poly (polyurethane) and polycrylic. Do experienced model shipbuilders have a preference? Certainly, the most striking difference is that polyurethane is oil-based vs. polycrylic, which is water-based, right? With that, I have read that wipe-on poly might leave a bit of an amber tone, which would not be good on a white hull, for instance. Polycrylic, on the other hand, goes down clearer, which is great for lighter colors or for unstained decks, but can supposedly make darker colors appear a bit murky. Thoughts on what to use when? -
Actually, Chuck, was killing time waiting on some glue to dry on my Bluenose, and started looking at the Model Shipways parts list for my Constitution. There are a whole bunch of blocks listed of various sizes! They also have a lot of bullseyes. Any thoughts on doing those?
-
After druxey's mention of a "ruling pen" to assist with sail seams, I had to do a bit of homework on this little tool, since as a relative newbie in all of this, I was unfamiliar. Found this website which seems to do a pretty good job of describing. I'm bookmarking and going to get an education... Quick Guide: How to use a Ruling Pen — Jeea Mirza
-
That's a sharp-looking tool. Andrew!! 😁 I may need a new tool! <shrug>
-
I had not seen this latest SS Klondike II scratch build of yours before, John! How'd I miss this?!? Will follow this one, as well, obviously!
-
I have a supply of both the light and medium texture silkspan tissue from Sig Manufacturing. SIG SILKSPAN TISSUE - Sig Manufacturing (sigmfg.com)
- 184 replies
-
- 2
-
-

-
- Bluenose
- Model Shipways
- (and 1 more)
-
Thanks, Bob! Appreciate the kind words! If we both need inspiration on which way to go, we need look no further than @John Ruy's recently completed Bluenose. He did some awesome sail work to finish his ship! 🏆
- 184 replies
-
- 2
-
-
-
- Bluenose
- Model Shipways
- (and 1 more)
-
Thanks, Mustafa! Always trying to attain the quality of work I see from many of you other guys that continue to inspire me and help to push myself to do better. Appreciate your time, sir!
- 184 replies
-
- 1
-
-
- Bluenose
- Model Shipways
- (and 1 more)
-
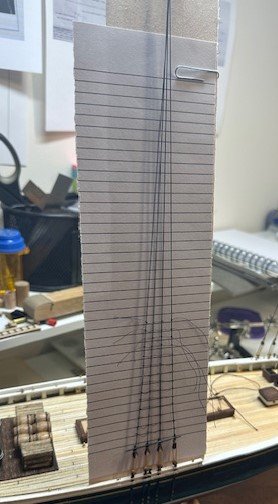
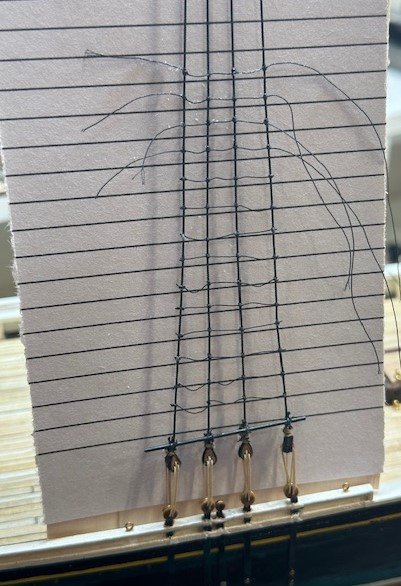
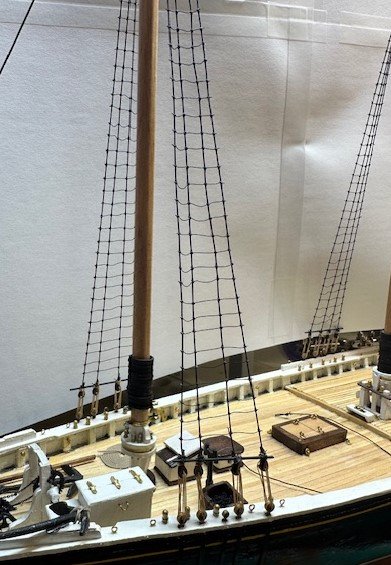
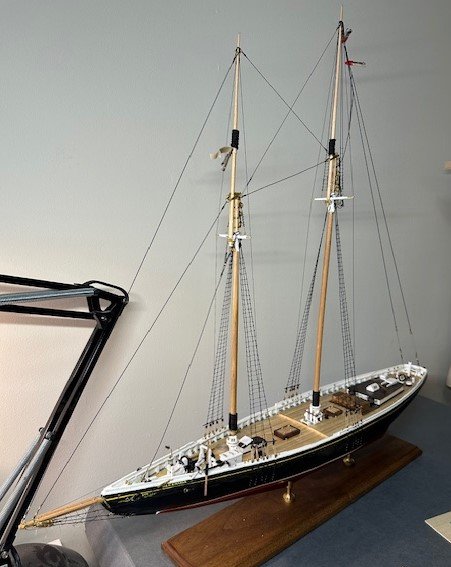
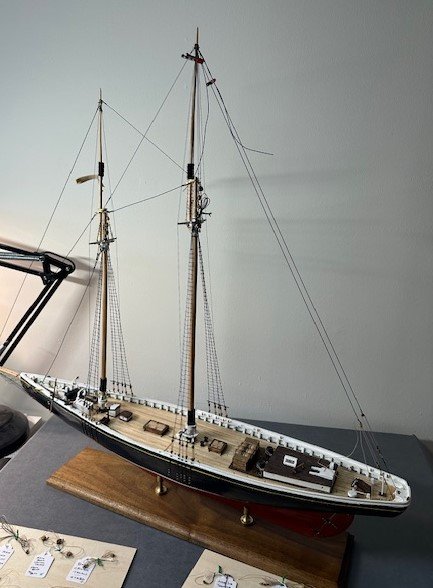
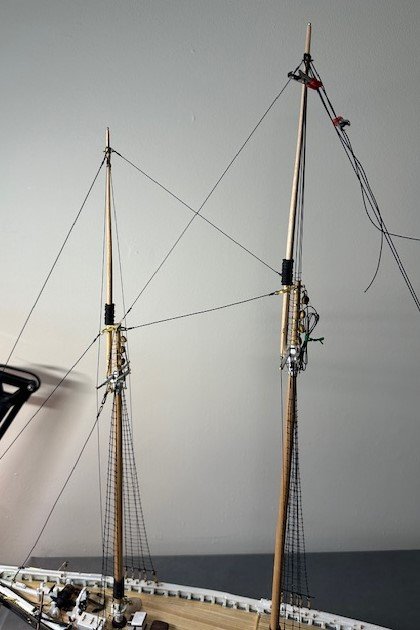
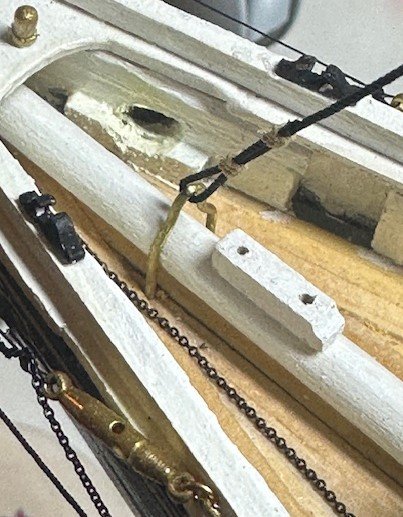
Wow! It's been almost a full two months since I've posted any kind of build log update. I've been in the shipyard here and there over that time, in between a few trips, having all the grandkids for a week's activities here, watching the oldest granddaughter prepare for and then head to her first year away from her home at college some 8-9 states away, and just some general summertime tinkering around the house. Anyways, thought I'd get a small update in. And I took only a few pictures and hardly any detailed notes on these last activities. After getting the lower shrouds placed, it was time to tie in what seemed like a thousand ratlines! Like everyone else does when placing ratlines, I made a lined template in order to have some relatively consistent spacing. I also used some 0.81 brass rods, blackened them, and placed the sheer poles at the base of each set of shrouds. Once you get into a routine of tying clove hitches, it goes pretty well. I would do about 4-5 rows at a time, then hit the knots with a spot of glue and once dried, clip the excess 0.009" line from each end. Then another 4-5 rows, etc., etc., etc... As I said earlier, did not take many notes as I was preparing and installing a lot of the standing rigging, but I will go through what was done fairly quickly. There are several MSW Bluenose build logs that have great detail on their rigging procedures. I relied on them heavily and encourage others to do the same. Spring Stay - Runs from the main mast's spring stay bail to the fore mast's spring stay bail. I used 0.027" black line. Jib Stay - Runs from the fore mast cap to the bowsprit. I used 0.019" black line. Jumbo Jib Stay - Runs from the fore mast to the jumbo jib stay bail. I wish I would have realized way back when I first inserted the bowsprit that this jumbo jib stay bail would be wrapped and secured around the bowsprit. At this point, it was way too difficult for me to come up with anything like that, so I "settled" for shaping a 0.81" brass rod piece so it fit around the top of the bowsprit and was secured into the deck underneath. It's the best adaptation I could come up with. I used 0.027" black line. At this point, it was time to drop the top masts into their places. They still fit snuggly, and with the iron fids in place, it did not seem like the masts needed any additional glue. Main Top Mast Shrouds and Fore Mast Spreader Lifts - The main top mast shrouds run from the top of the mast down to lanyards that then connected to the spreaders. The fore mast spreader lifts run from a band about a third of the way up the top mast down to lanyards that are connected to the fore mast spreader. I used 0.019" black line for the shrouds and 0.009" light beige line for the lanyards. I then tied ratlines to each of the shrouds and spreader lifts, but only did about a dozen ratlines on the main mast shrouds, reaching about a third of the way up the top mast on each side, using 0.009" black line again for the ratlines. Pullback Stay - Runs from the top of the fore mast to the main mast cap. Still having a bit of difficulty shaping a shackle like how John Ruy explained he did his, so I simply used a small jump ring to connect to the bowsprit. I used 0.019" black line. Balloon Jib Stay - Runs from the top of the fore mast to the end of the bowsprit. I used 0.027" black line. Main Mast Top Stay - Runs from top of main mast to fore mast cap. I used 0.019" line. Flying Backstays - Two sets of backstays run from the top of the main mast to either side of the stern transom. The main runs start from the main top mast using 0.027" black line. They run down to a 5/32" double block. This block is then laced with a 5/32" single block using 0.013" light beige line. The single block is connected with a "S" hook to a 0.013" black line tied to an eyebolt on the transom. The beige line then falls to a belaying pin on the rail. I have not permanently secured the top of these backstays to the main top mast or the fall line to the belay pins at this time, as I fear they would get snagged and be in the way when I work on the remainder of the running rigging and the main boom. So, the lines will come down from the main top mast as I do that work. I am going to see if I can get some running lights placed on the two sets of foremast shrouds. Then it is time to get the running rigging that I prepped months ago attached where it belongs on this Bluenose! Those of you who have followed my progress (or lack thereof) on this Bluenose (thank you, by the way!) may recall that I have wrestled with how to finish my Bluenose... with sails, without sails, or furled sails. And I have leaned each of the three ways multiple times over the almost-two years I have worked on her. Well, stand by for my decision...! Thanks to all for taking the time to read, comment and criticize! Appreciate all of the support, whether it's been your input here or my peeking in on your own Bluenose build logs and having one of those "Oh, yeah!" epiphanies. Thanks!


- 184 replies
-
- 8
-
-

-
- Bluenose
- Model Shipways
- (and 1 more)
-
Interesting to hear that they are editing your posts/pictures over on SoS. I didn't think comparison of products or being critical of products was allowed on SoS! A post of mine back in May 2013 was edited by SoS admins because I made a contrast, ironically, between Syren deadeyes and another company, which I mentioned by name... apparently a no-no. Keep doing what you are doing, Chuck! Being successful! 🏆 I'll be ordering a bunch of these new blocks and deadeyes in due time... Thanks, Chuck!
-
Thanks for the pictures and links, Peter. I believe I had seen his build log previously, but did not bookmark it. Thanks for the reminder. And, in the FWIW category, I prefer the painted hull look... <shrug> 👍
-
In preparation of someday soon beginning my Constitution build, I have begun saving/bookmarking/favoriting (whatever you call it) a whole bunch of Constitution build logs here on MSW and even some on another similar forum website. I don't, though, recall any of those build logs having Constitutions with natural finishes. They seem to all have been painted and coppered? Peter, do you know of some existing build logs here on MSW that have not been painted? Would be interested in looking at them and comparing.
-
I have seen Arnot's "USS Constitution 1812-1815: Step-by-Step Instructions..." book advertised on Amazon in both "Used-Very Good" and "Collectible-Good" conditions. Watching your build with great interest, kmart. No idea yet which era I will shoot for once I get to working on this ship. But appreciate all the info from all sides!
-
...when I get to that point on my Constitution! 👍🏆 These look great, gentlemen!
-
If you are truly interested, Peter, give Donna a call at Byrnes Model Machines. You may be surprised by her answer.
-
Looks very good, Dan! Great work so far. I recall doing a ton of sanding at different grits all over the hull, but especially around the stern. And, yes, I loved using the binder clips, as well! Carry on! 👍
- 37 replies
-
- 1
-
-
- Model Shipways
- muscongus bay lobster smack
- (and 1 more)
-
Need belaying plan for Model Shipways Syren
GGibson replied to terry2889's topic in Masting, rigging and sails
Nice looking Syren, terry! Great work, bad puppy! Looks like the 20 chapters of instructions can be downloaded from ME's Syren page, and the plans can be purchased for $70. Model Expo has always been great about replacing damaged parts at no charge if you purchased the kit from them. Maybe they can look at the shredded plans in the same light. In the meantime, if the puppy has a key to your shipyard room, you'd be advised to change the locks! Good luck! -
Looks great, Peter! If I am following your query correctly, will the window frames themselves be painted black? So, you are referring to the "window glass" portion of the window construction? I'd vote for white, then. Good contrast, and with the clear film coverage you place on top of that, it will look nicest, IMO. Awesome work, sir! Carry on! 👍
