


GGibson
-
Posts
1,086 -
Joined
-
Last visited
Content Type
Profiles
Forums
Gallery
Events
Everything posted by GGibson
-
 Well, guess that answers the age-old questions "How many blocks can dance on the face of a penny?".... Oh, wait, that was angels on the head of a pin... Never mind! Looking great, Chuck! I had some 3/32" blocks needed for my Bluenose, which translates to 2.32mm, so close! And those things were itty-bitty. Yeah, I lost a few on the floor! Will definitely take inventory of what I need for the ships in boxes waiting up on the shelf. These look awesome, sir! 🏆🏆
 -
OH BROTHER!!! Those sister blocks look awesome, Chuck! Can't wait to get to my next build and stock up with a bunch of these blocks you have now! 👍🏆
-
If you don't mind me calling it this, Peter... Great recovery work! Looking nice! 👍🏆
-
Oh, well, yeah....! Now it makes perfect sense! <shrug> 🤣🤣
-
Yay! Looks great! 🏆
-
Working on my Bluenose ratlines now. Using a clove hitch knot at a 1:64 scale using 0.009" rope. You get into a pretty steady groove with a set of tweezers in hand to assist in grabbing.
-
Not much input here, Peter, but is it because the pieces are actually placed at an angle, so their lengths are slightly longer than what appears on a two-dimensional plan? First thing I thought of.
-
Looks really good, Jon! Great attention to detail. I need some education, though... what was the actual purpose of the black tubes attached to the posts? Were they just a "protection buffer" for the posts as things were being moved around on the deck? Or was there another purpose? I like your RP Toolz punch & die set! Have you used that a lot? I saw it and thought "Oooh, I need that, too!!" 🤣 Great work, sir!
-
Hi Dan! Just peeking in on the beginning of your Lobster Smack. Great start so far! This was a fun, educational build for me. You should enjoy it! And, as you have already discovered, you can never have enough spring clamps or rubber bands! I think everyone had a challenge in connecting the two sides of the deck to where it looked proper, so you did fine with it. Will continue to follow your progress! Carry on! 👍
- 37 replies
-
- 4
-

-
- Model Shipways
- muscongus bay lobster smack
- (and 1 more)
-
That's a ton of belay pins, John! Appreciate the fact that you decided to go back and improve on something after-the-fact. OCD perfection! 👍🏆
- 165 replies
-
- 2
-
-

-
- Red Jacket
- Marine Model Company
- (and 2 more)
-
Great job, Peter! Challenge accepted and completed well! 🏆
-
Great work, Jon, in using the Dremel to achieve your goals. The ladders look really nice from my perspective. I was also impressed with Mustafa's method in using his Proxxon mill machine and I'm excited to have added that mill machine to my shipyard tools, as well. I have used it several times already with my Bluenose and am sure it will get a workout once I get to my Constitution. Anxious to see your remaining work on your gun deck! Carry on! 👍
-
If you are referring to the product in the original post, that appears to be the OcCre cabinet which can be found on MicroMark's website. OcCre® Workshop Cabinet – Micro-Mark (micromark.com) While it looks nice and tidy, if you plan on spending any length of time in this hobby, I would think you would outgrow this cabinet pretty quickly with more.... STUFF! I know I have! 👍🤣
-
The fiddle blocks look amazing, Chuck! As a "newbie builder" who has not worked on a ship build that has used fiddle blocks, I have to admit I'm clueless on what era/type of ship utilized the fiddle blocks and if they were used for a specific purpose. Appreciate an education from... anybody! 👍
-
This latest one started at $1,200. And yes, like the first one that ended up at $4,250, you won't see hardly any action on it until just hours before it closes. I was watching the bidding on that first one and, within a couple hours of the closing, bids were still at a "reasonable" $1,500. Then two or three bidders got into a bidding tussle and.... boom. <shrug>
-
Chuck doesn't know the specific amount of time, Nirvana. He just blocks some time during the day... 🤣 They look awesome, Chuck!
-
Sails are looking really good, John! Soooooo close to being done! 🏆 Not sure I saw it in any of your recent pictures, John. When you get to actually rigging, for instance, your main gaff and main boom (with sail) to the mast, what are you using to hold them up in place while you connect to the mast? Again, great work, sir!
- 282 replies
-
- 1
-
-
- Bluenose
- Model Shipways
- (and 1 more)
-
Awesome! OK, so the rule now is that neither of you can leave town without providing forwarding address... 👍🏆🤣
-
Welcome, Joanne! I think we all think that way... "What do I really want to build for myself? What piques my interest?" Looking forward to seeing what you decide? Hopefully you'll start a build log here. Good luck! Lots of great advice within these MSW confines! 👍
-
Ha! Just wait until I get to my own Constitution, Jon!! 🤣 Been thinking if there was a way to combine all of your build logs... Peter's, Jon's, Mustafa's... in one giant task-arranged PDF for my own procedure manual when I get to working on mine... <shrug> To the question at hand, makes sense that they could be laid that way on the deck, but definitely not for the hull planks.
-
Sails are looking really nice, Tim! Great job with the rigging. I'm still very apprehensive about doing the sails on mine... You are about done! Congrats!
-
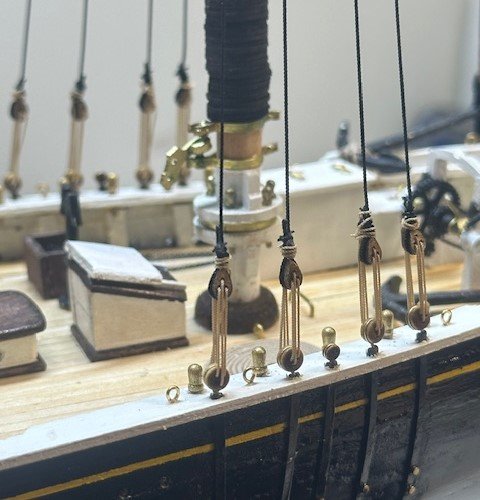
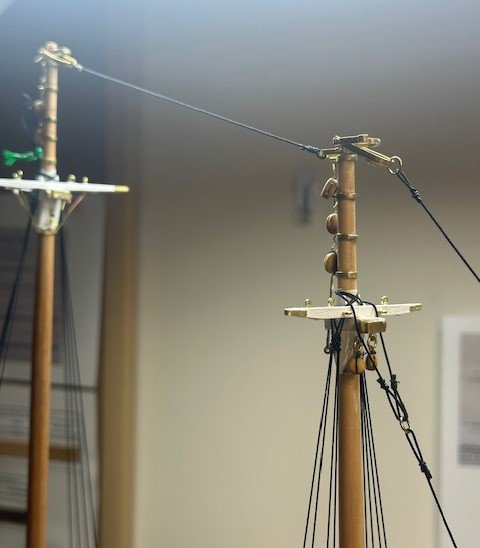
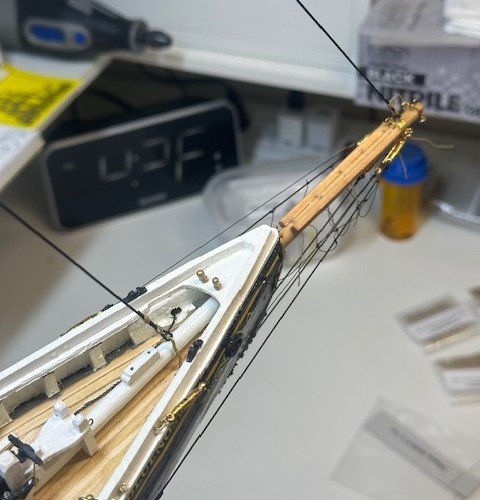
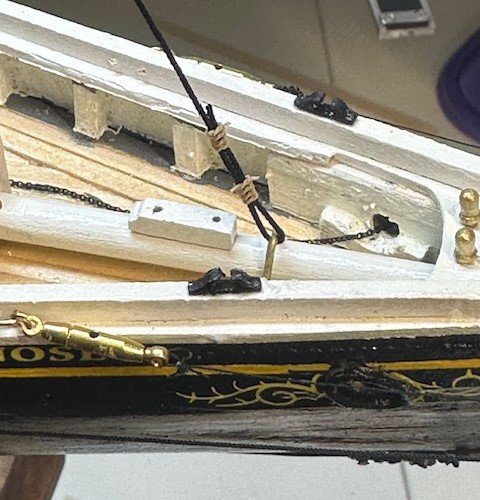
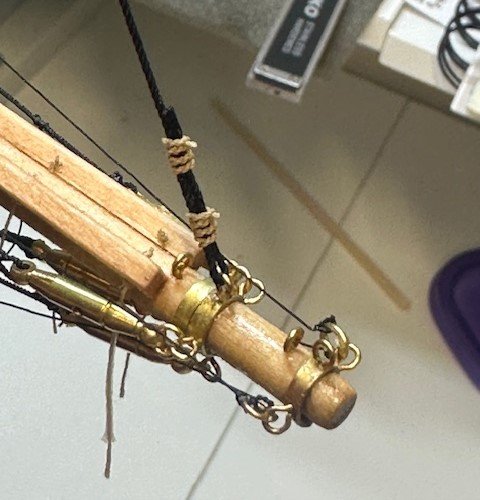
Another small update as I complete different phases of the rigging process (and I haven't even gotten to the fun stuff yet!)... A few weeks ago, I had run the shrouds for the lower masts and had begun to attach the lanyards to each of the sixteen sets of deadeyes. I was pleased in how that all came out, with all of the deadeyes appearing to be spaced well and even with one another. I'll work on the ratlines very soon. With the lower shrouds rigged (short of the ratlines), I then completed the lines for the spring stay, the jib stay and the jumbo jib stay. All pretty much straight-forward runs. I wish I knew how to create nice shackles, as I simply used some brass jump rings in place of shackles where they were called for. Perhaps by the time I get to the builds waiting in the wings, I'll come up with a good method/process. I realized I had not previously prepared and installed the jumbo jib stay bail that wraps around the bowsprit, so I roughly tried to shape one using 1mm brass rod and inserted each end into the deck. I also noted as I was working on running the line for the spring stay between the main mast and fore mast that I had not placed the futtock shrouds (two on each side (port and starboard) that are brass wire pieces starting as eyebolts on the trestle tree spreaders and are bent to the hoops in the futtock band. Inserted those and secured with a drop or two of CA glue. Well, I think other than working on the aforementioned lower shroud ratlines, my next step may be the top masts, and everything associated with securing those. Hope I haven't forgotten anything else that may be more difficult as the rigging process continues! As always, appreciate everyone's time in reading, liking (or laughing), and comments. For those in the USA celebrating the Independence Day festivities this week, please have a safe and awesome celebration with friends and families! God Bless the USA!

- 184 replies
-
- 6
-
-
- Bluenose
- Model Shipways
- (and 1 more)
-
Nice solution, Peter. Except now it would appear you are no longer playing with a full deck... <shrug> 🤣 Enjoy your Fourth celebration with friends and family, sir! 💥🌭🎉
-
Is it a bad thing to say that I like 'em natural, so I can dye/stain them myself based on whatever the rest of the ship has? They look awesome, Chuck! 🏆
-
These look awesome, Chuck! I have enough now to finish my Bluenose, but definitely want to take inventory of what I will need for the ships waiting up in boxes on the shelf! And definitely love the idea of having the slightly larger holes, as we always seem to need to ream out the holes for whatever rigging we are using. Thanks for doing these and keeping us updated!

