ERS Rich
-
Posts
761 -
Joined
-
Last visited
Content Type
Profiles
Forums
Gallery
Events
Everything posted by ERS Rich
-
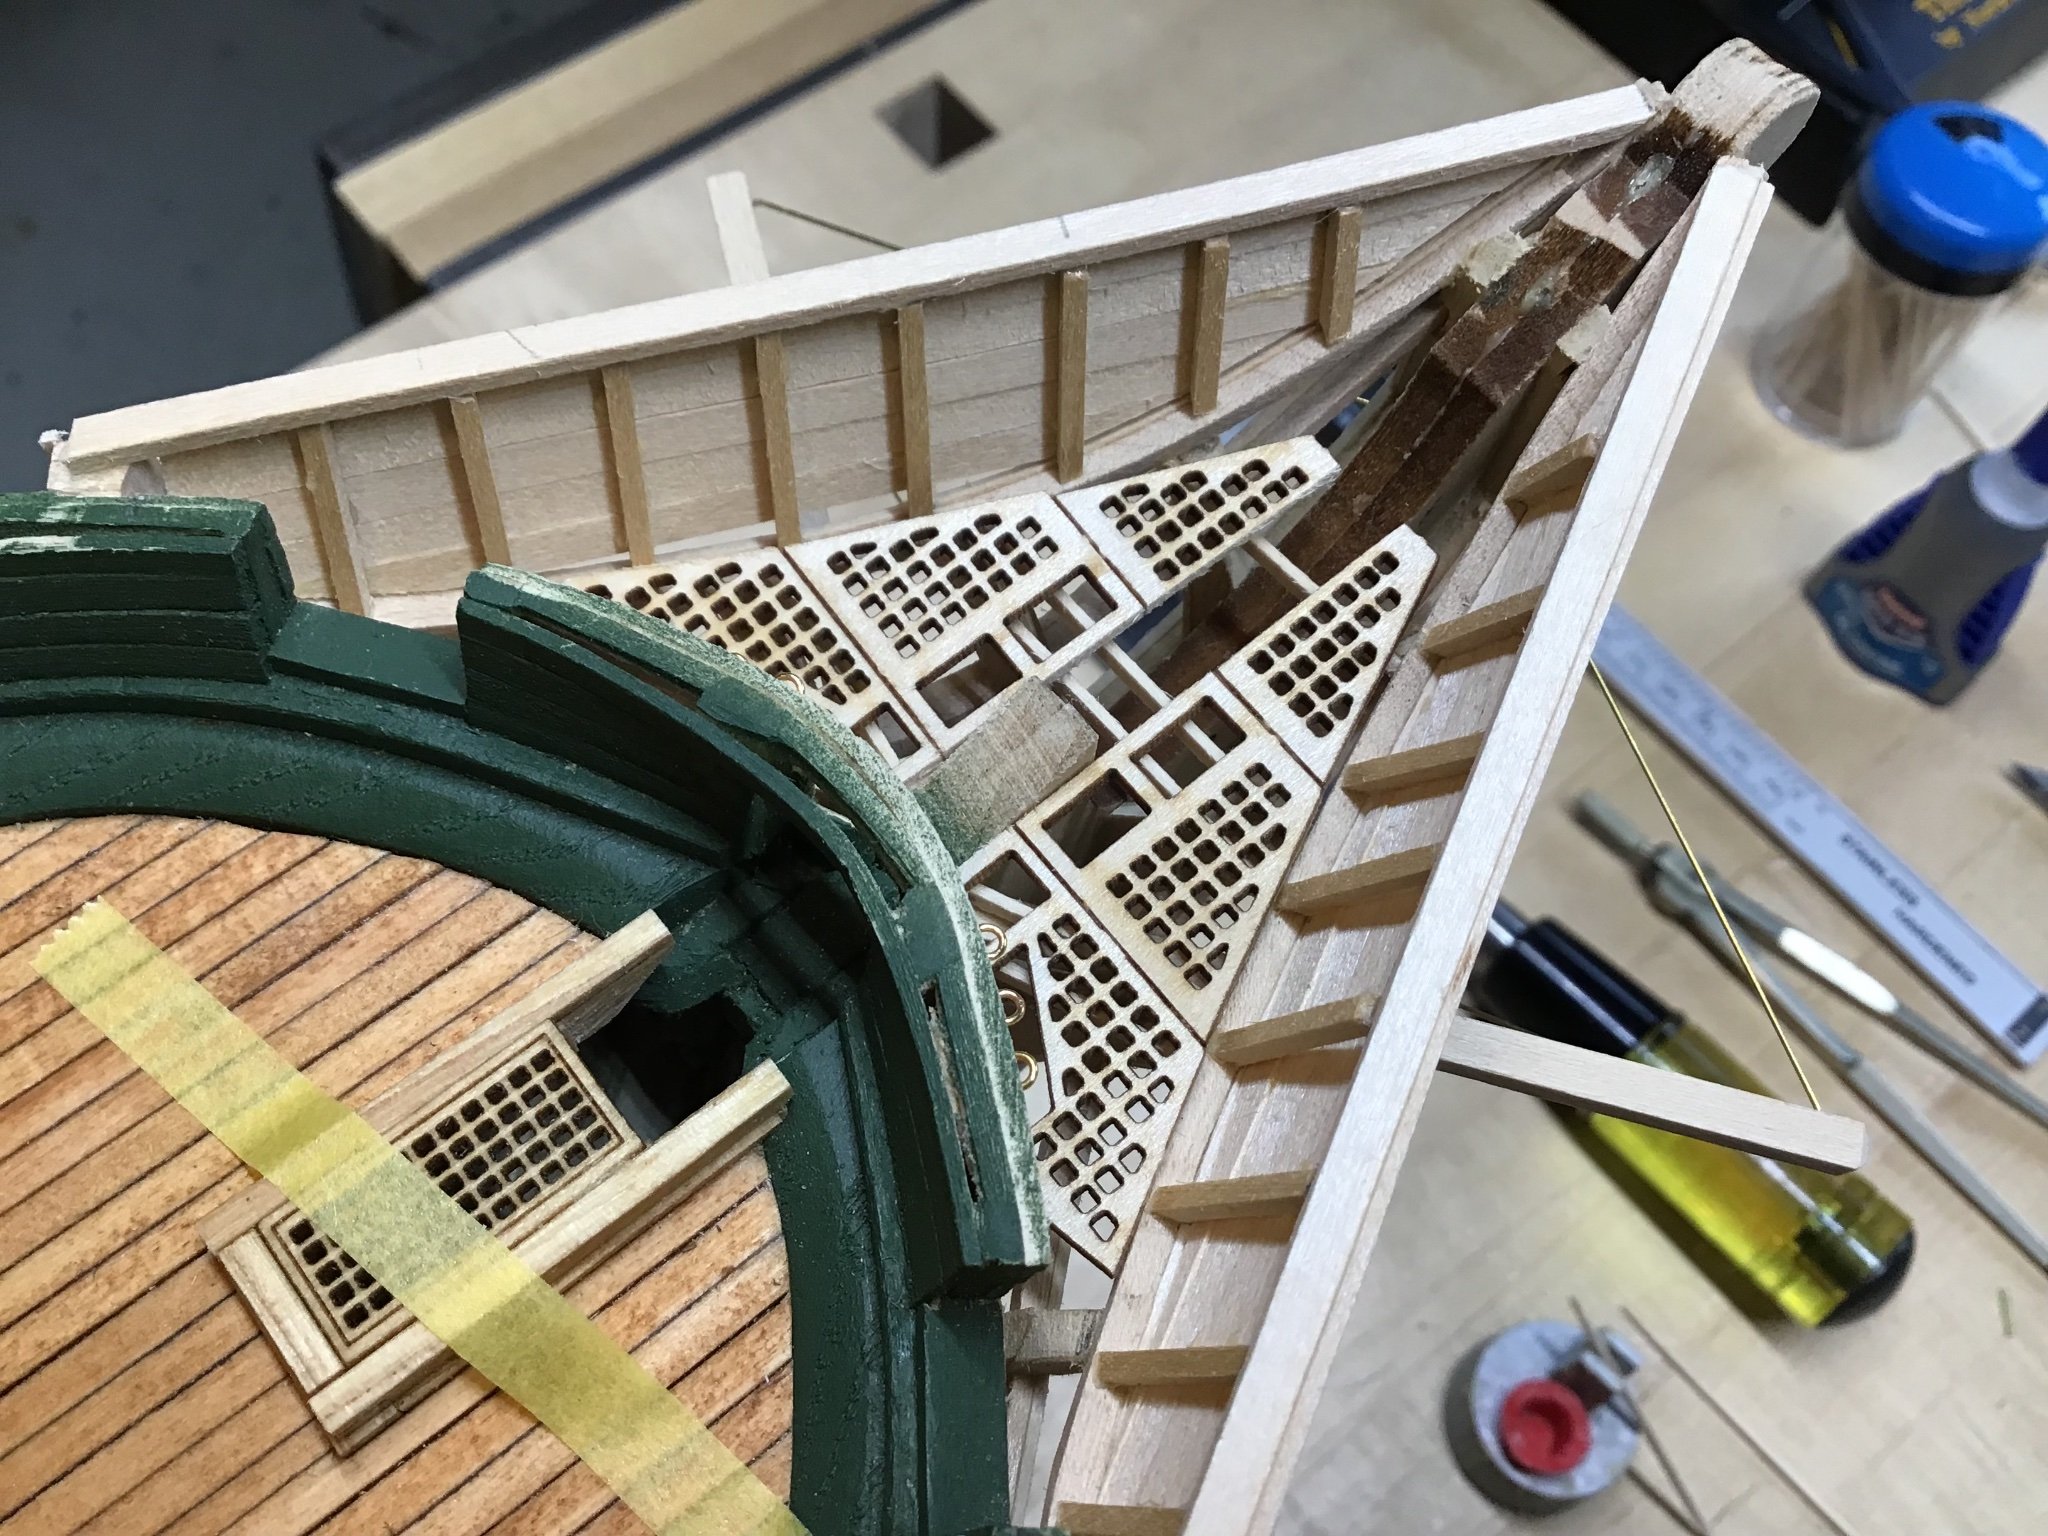
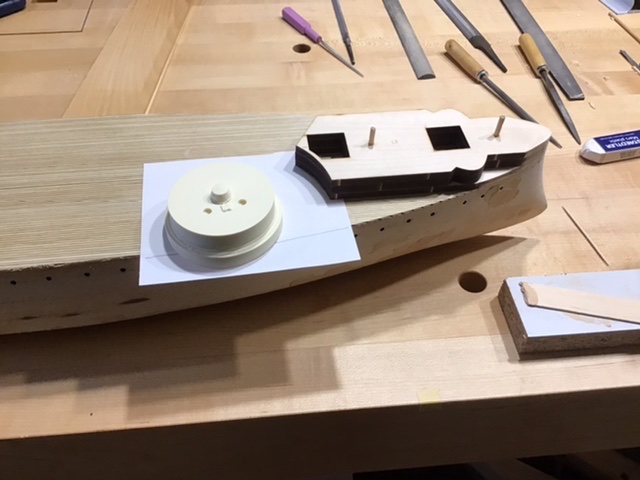
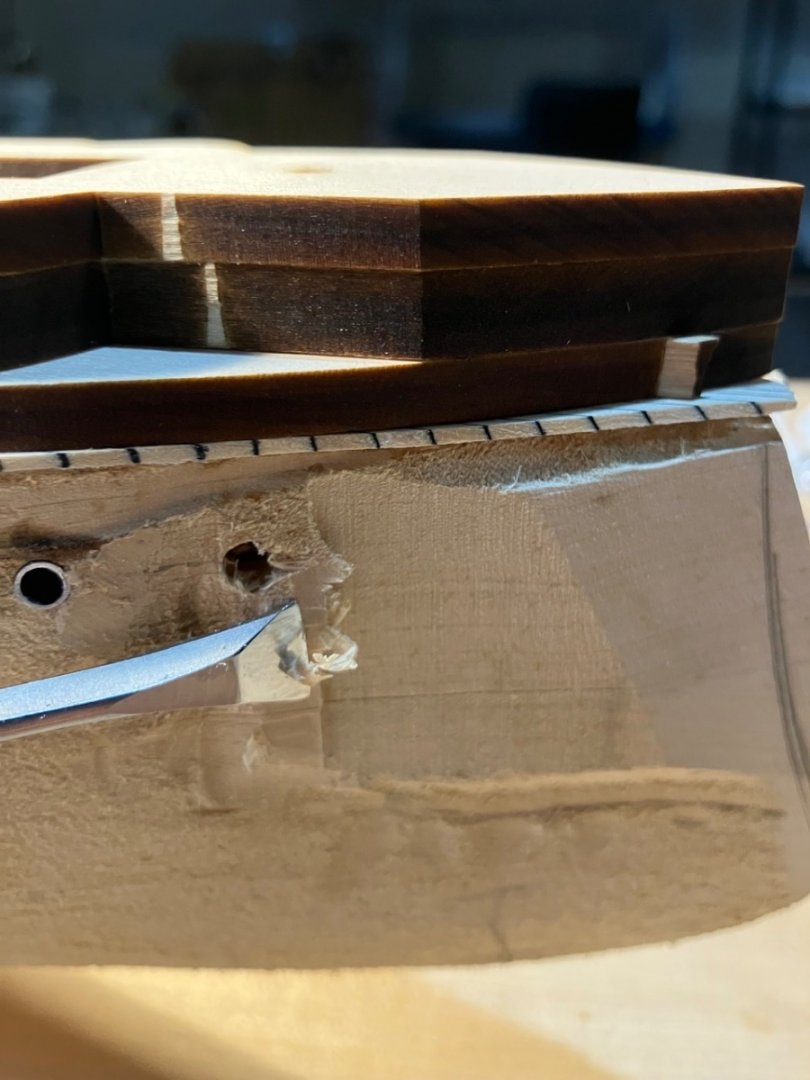
 Final Sponson and Turret Shaping Decided to do the final shaping with the sponson and turrets glued together; with sandpaper attached to the side and deck simultaneously; reasoning was to avoid filling the turret/sponson seam. Found, as the instructions state, it is important to hollow out the underside of the turret and inside the sponson - did this with a Foredom hand piece, initially with a flame bur to get the seam between the sponson and turret, then with a drum sander bit. Resin dust isn’t good for you, so vacuum. Here are the assemblies dry fitted, note a small gap at the deck/hull corner is ok, as there will be 3/16” half-round trim installed along the edge later.


- 166 replies
-
- 8
-

-
- Maine
- BlueJacket Shipcrafters
- (and 1 more)
-
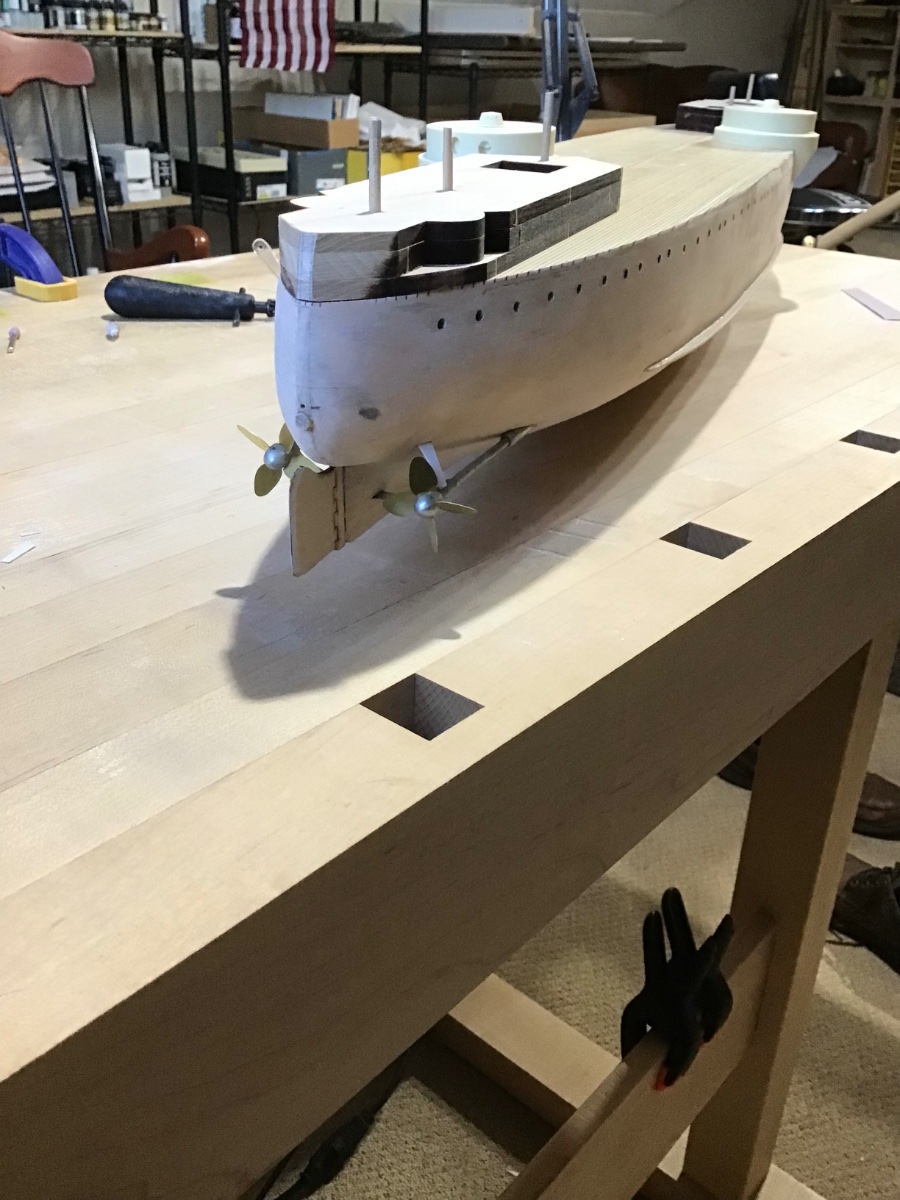
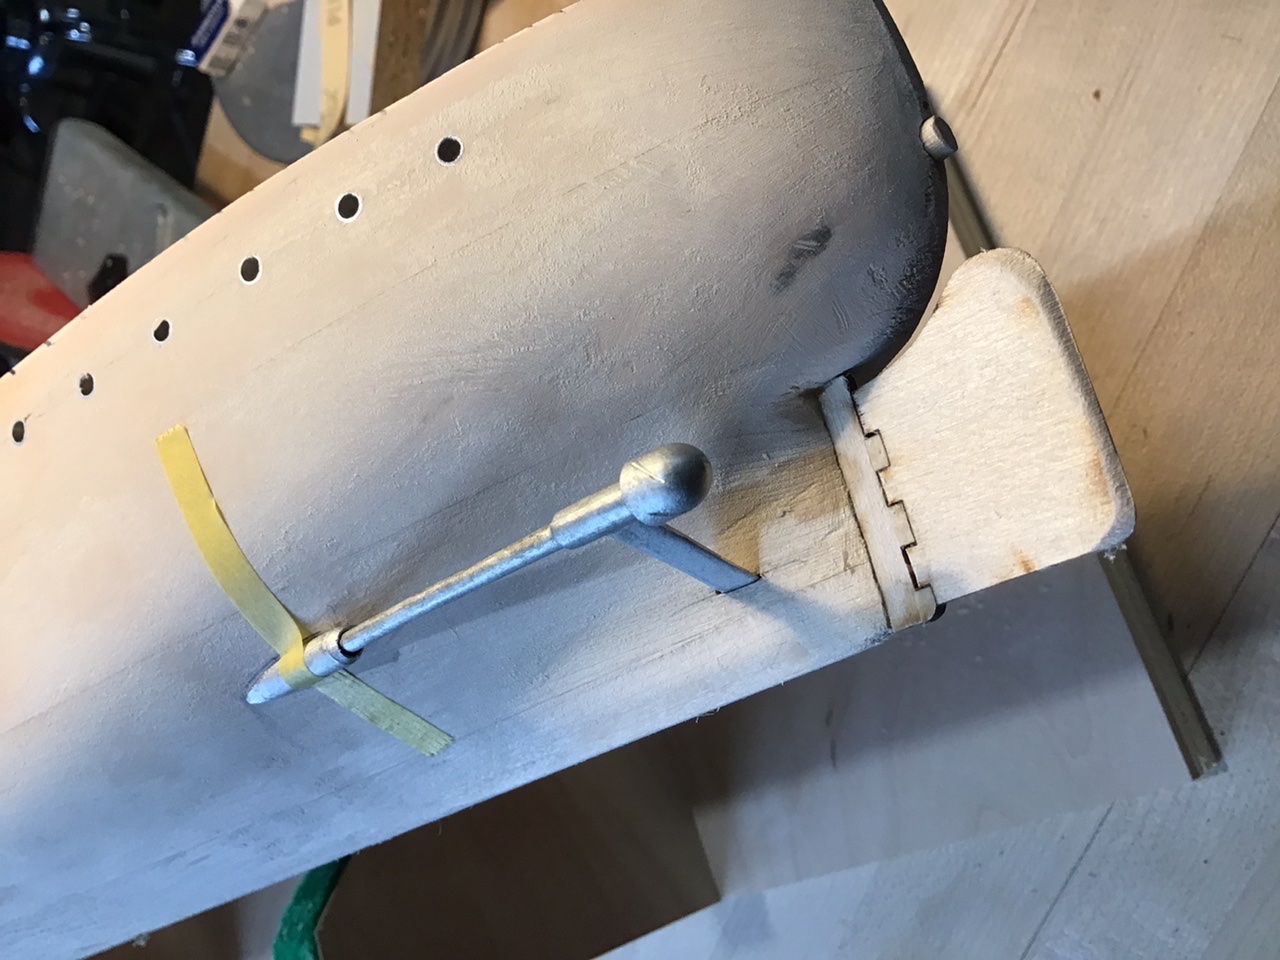
Prop and External Shafting Back to work after finally getting the heat going in the shop. Had to wait many months for the mini split system outside unit. First photo shows installation of a shaft and it’s boss. I used a pair of dividers to establish the boss and strut locations with a measurement from the plans. A slot for the strut was cut with an xacto with a spade bit. Tape is holding the boss position while the epoxy dries. The length of the shaft was reduced to get the position of the prop hub in relation to the stern post. Note I made a mistake, the plan calls for the metal strut hull attachment to be above the shaft. Decided to let it go. Photo 2 shows the stern and the propellers. Initial intent was to assemble with epoxy, but found super glue worked very well. The propeller hub had nice grooves which fit the blades nicely. Notice the bilge keel is also installed.

- 166 replies
-
- 5
-
-
- Maine
- BlueJacket Shipcrafters
- (and 1 more)
-
Priming Prep Over the course of the week been filling small areas with Minwax wood filler and light sanding with strips of 220 to feather in. Just about there and ready for a thin coat of shellac. Note I don’t spend time on the very bottom since it won’t be seen.
- 166 replies
-
- 7
-
-
- Maine
- BlueJacket Shipcrafters
- (and 1 more)
-
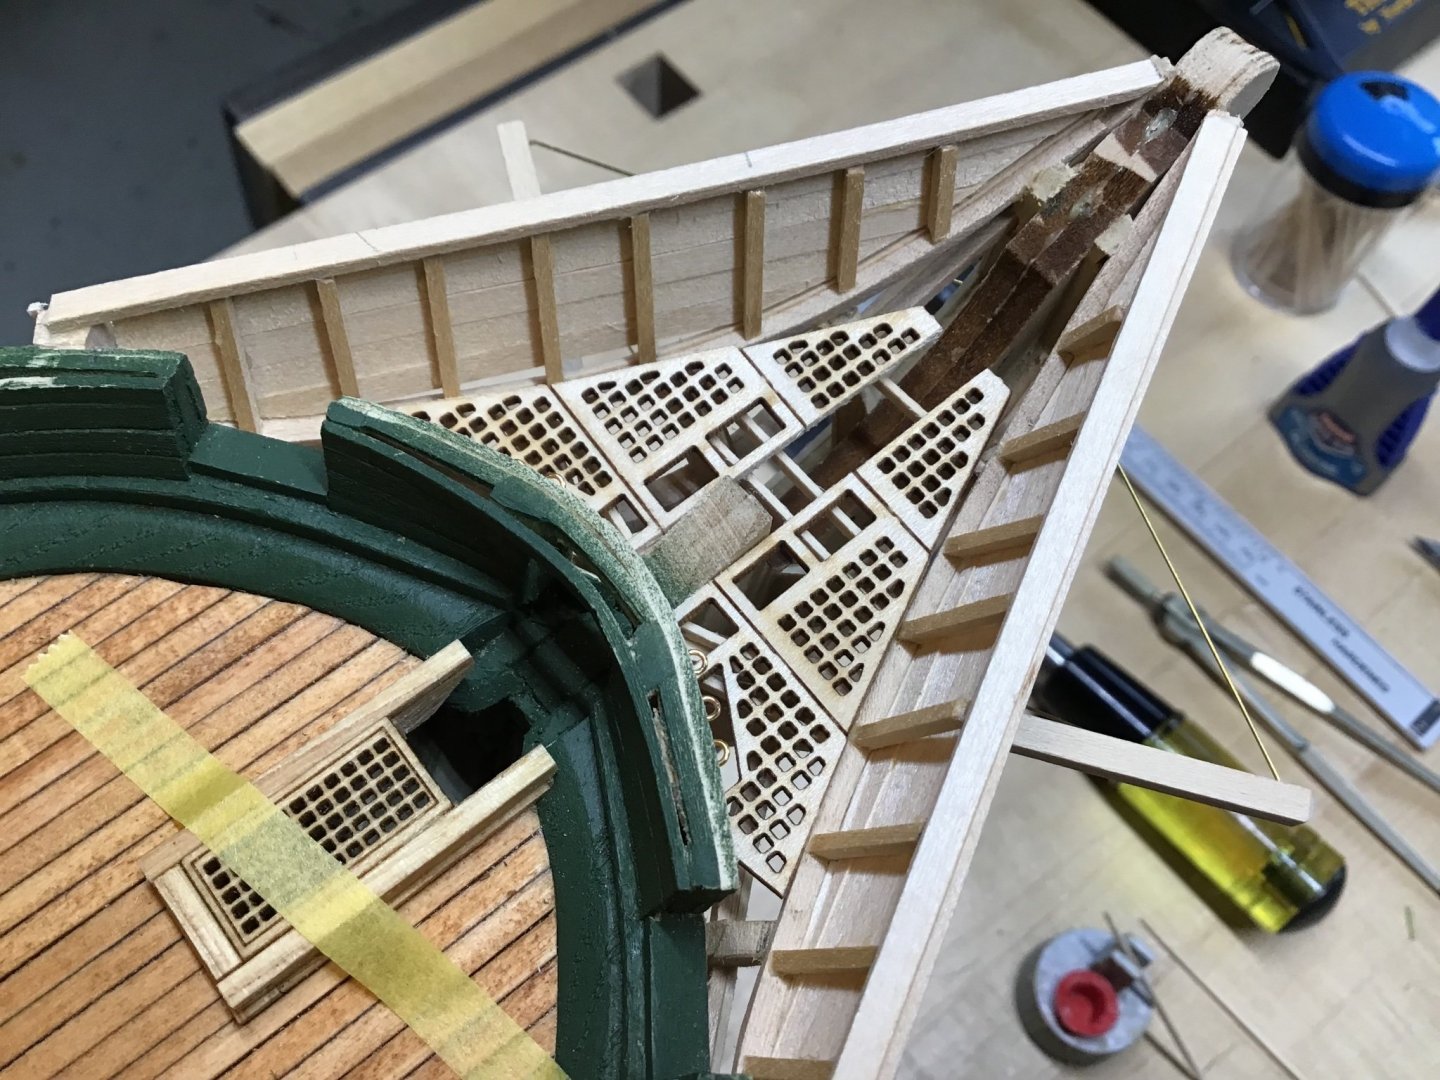
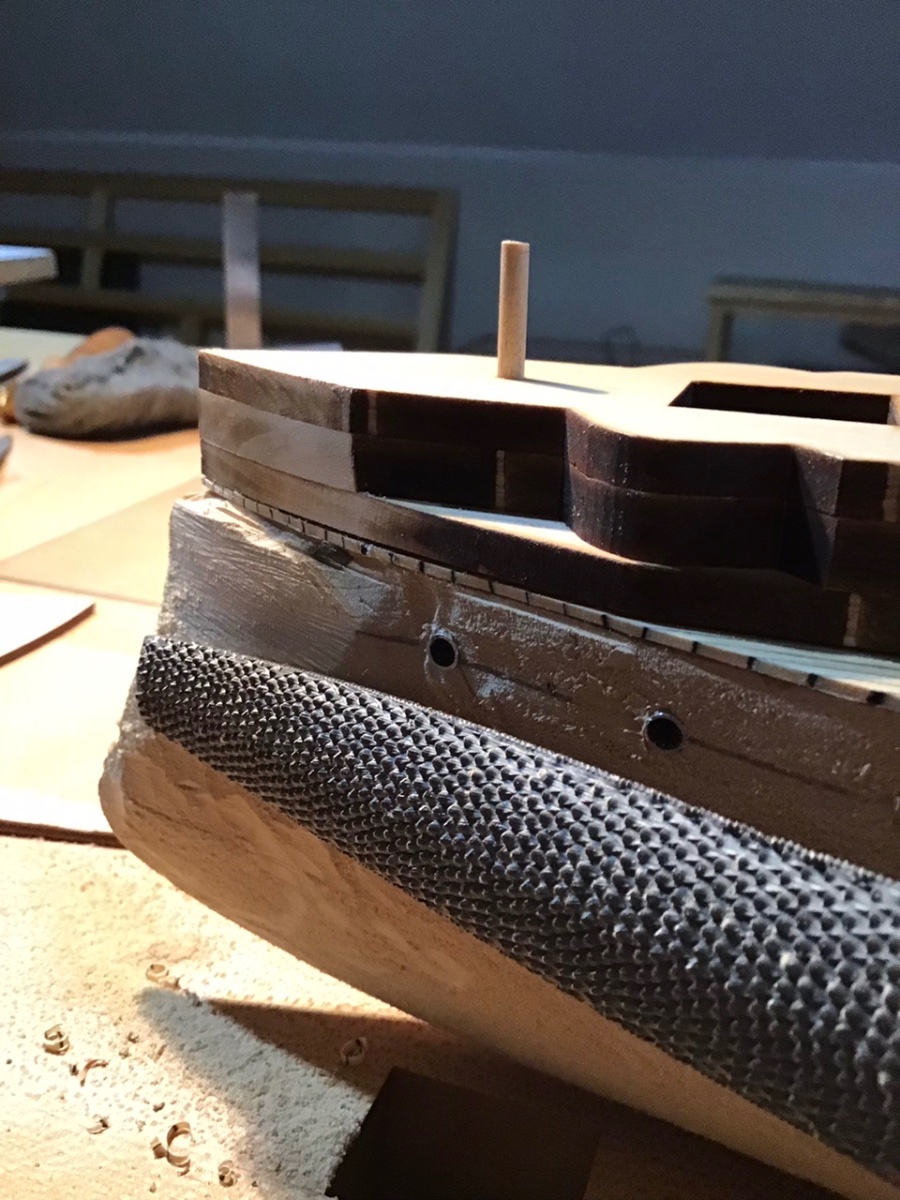
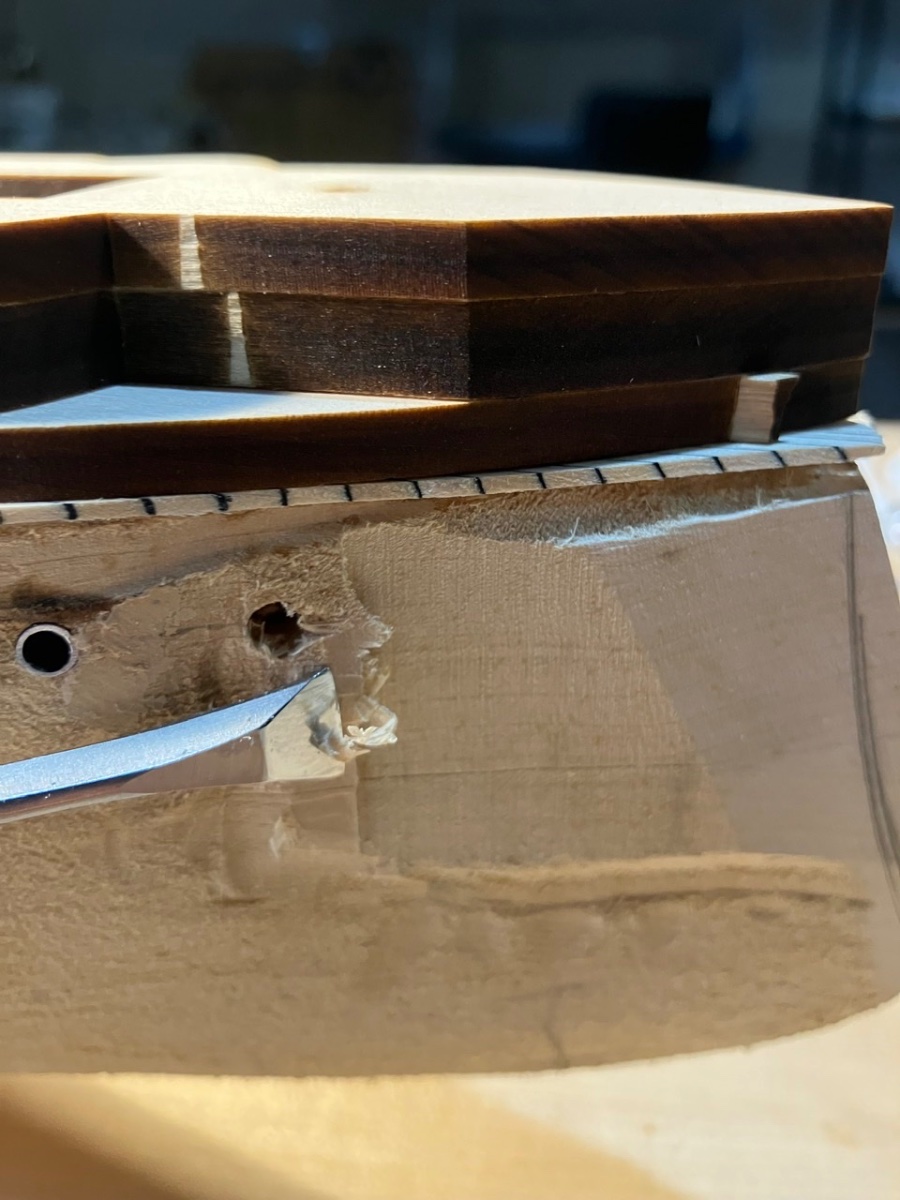
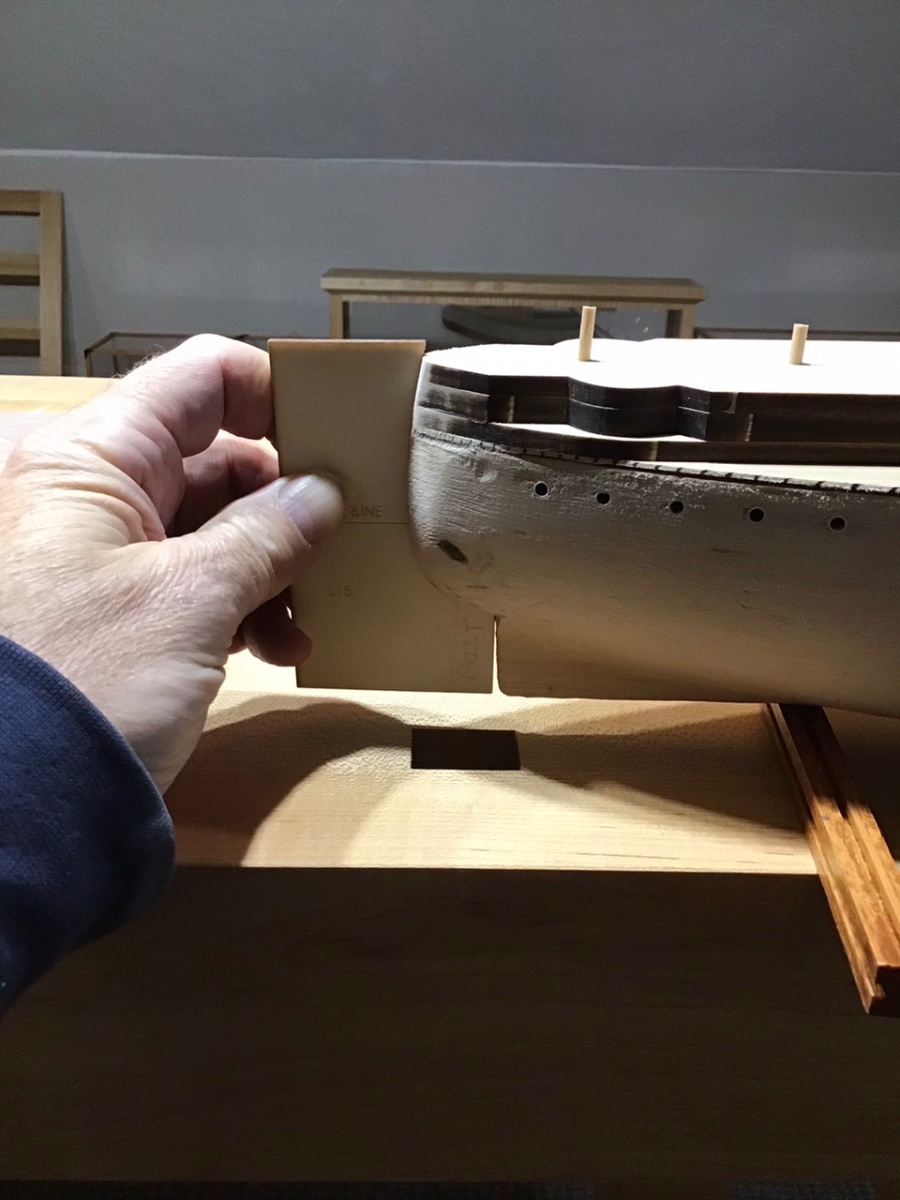
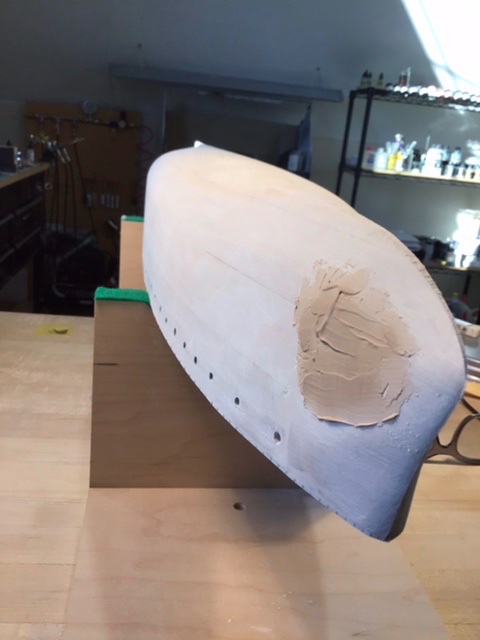
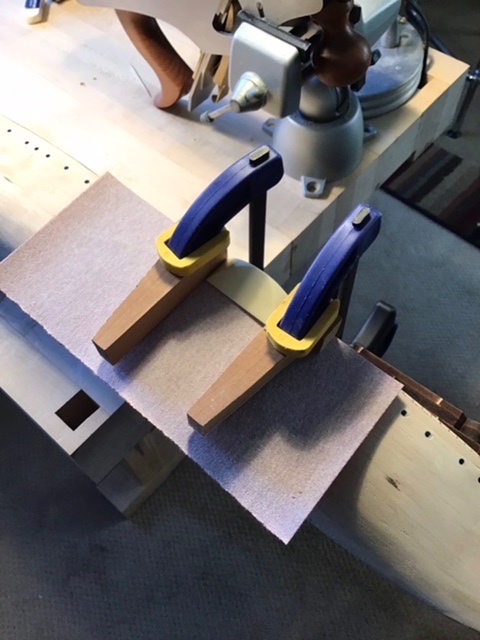
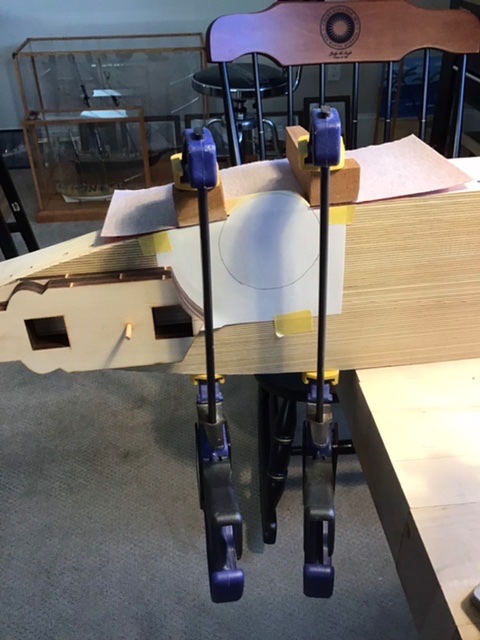
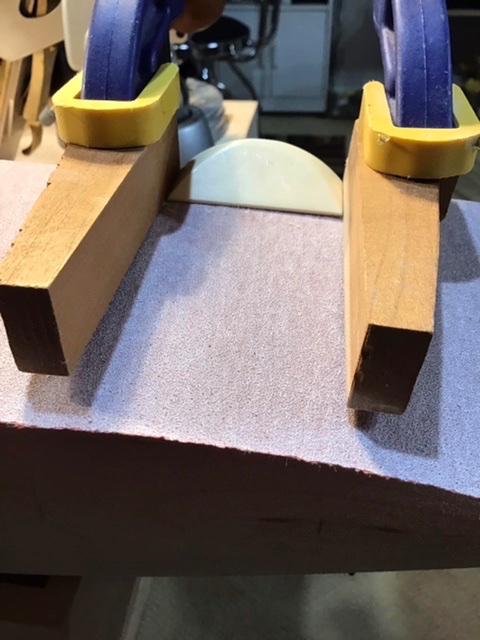
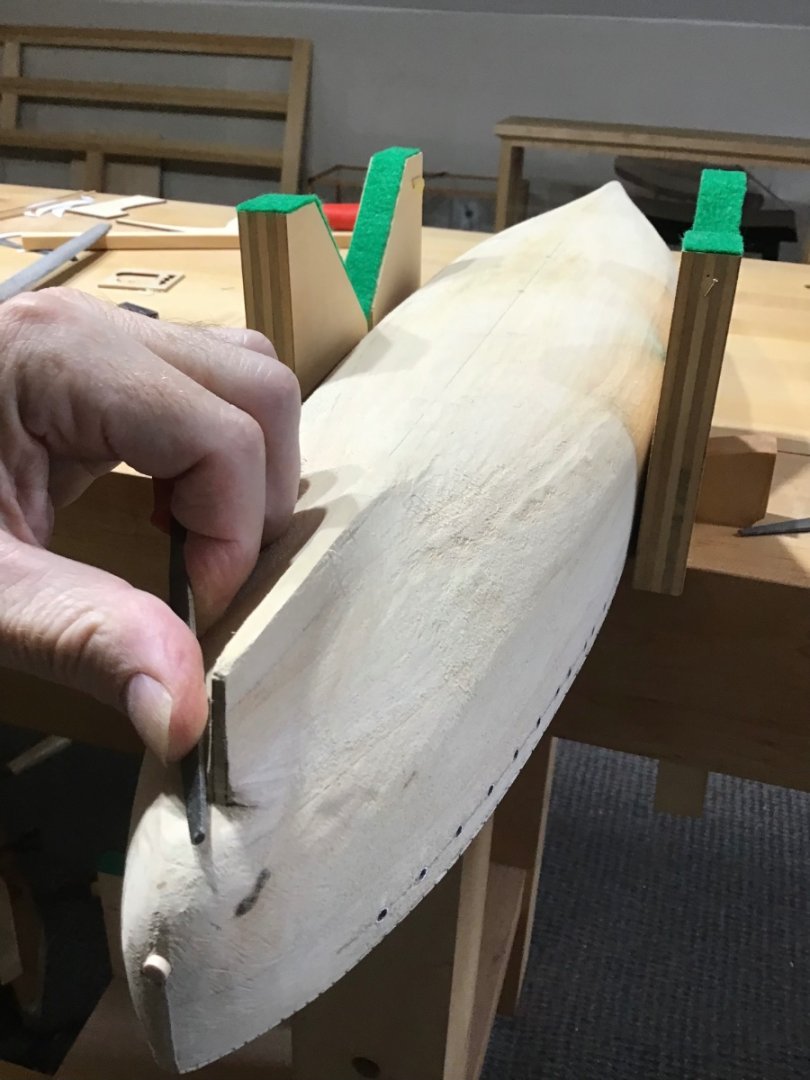
Fitting the Starboard Sponson I made a template off the plan, of the outline of the aft end of the forward superstructure and the outboard side of the starboard turret. Next the template was taped to the hull and the sponson placed in position. The sponson was used to locate two bench dogs, then clamped over a piece of sandpaper to the hull to provide a channel and guide when sanding the sponson. When sanding first applied pressure to he center of the sponson, then to the aft end for the final fit. The result….
- 166 replies
-
- 5
-
-
- Maine
- BlueJacket Shipcrafters
- (and 1 more)
-
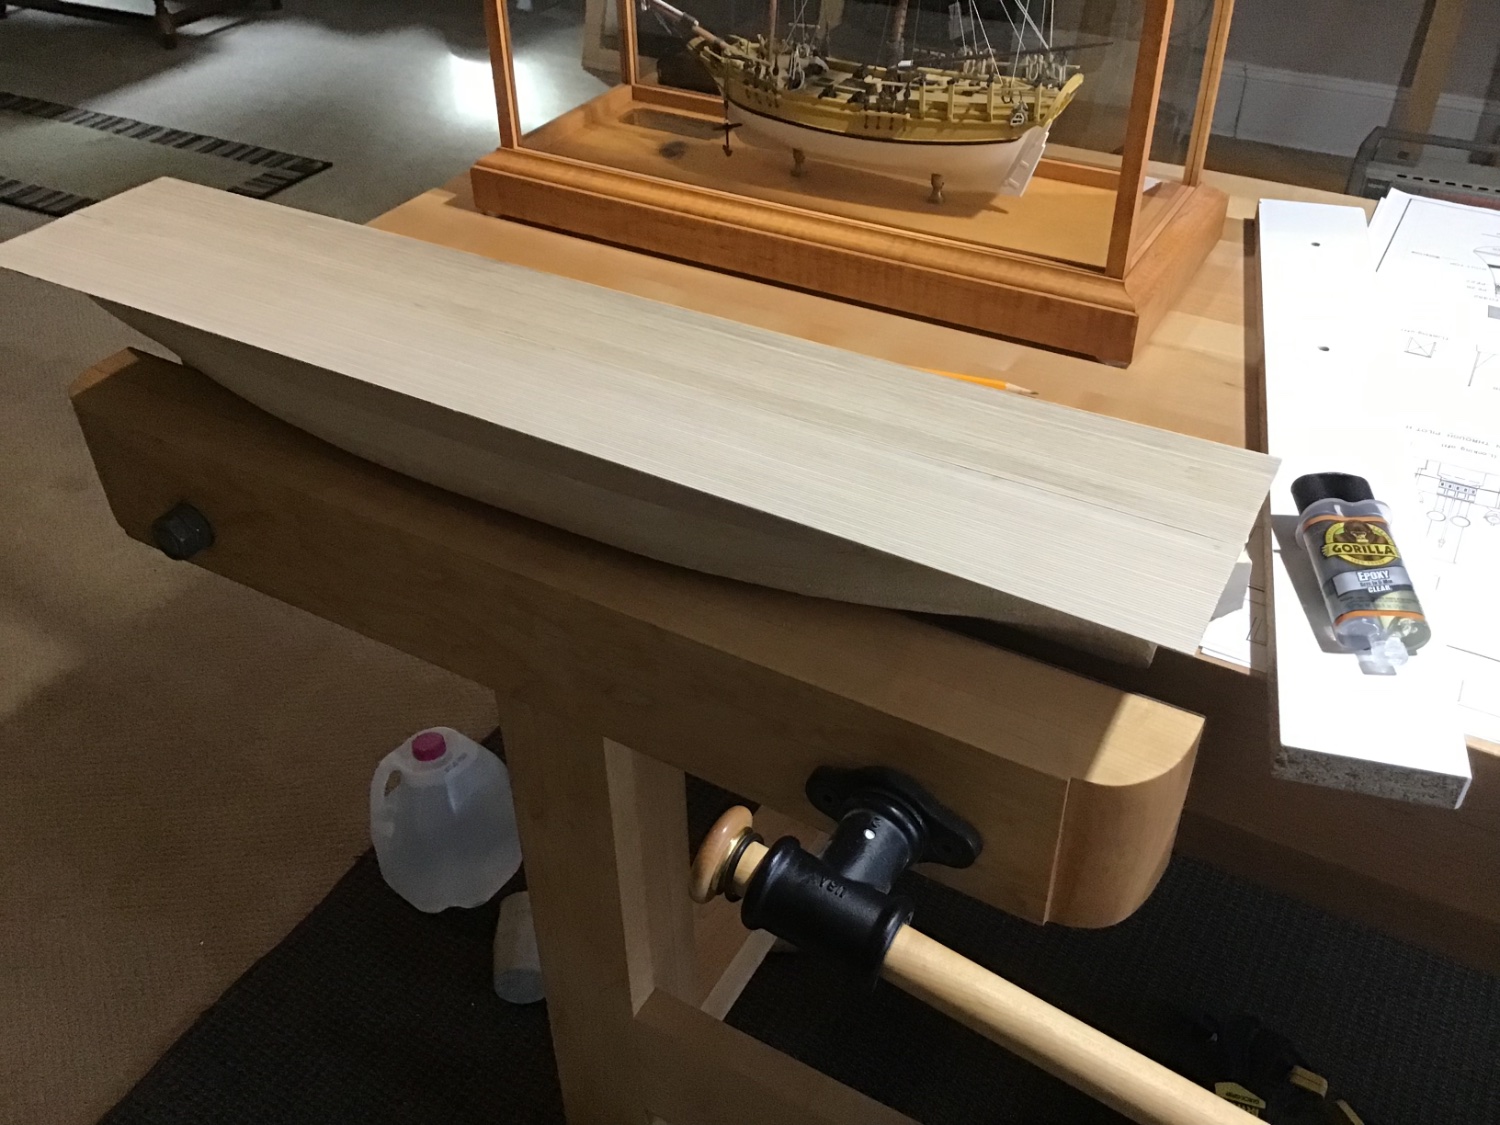
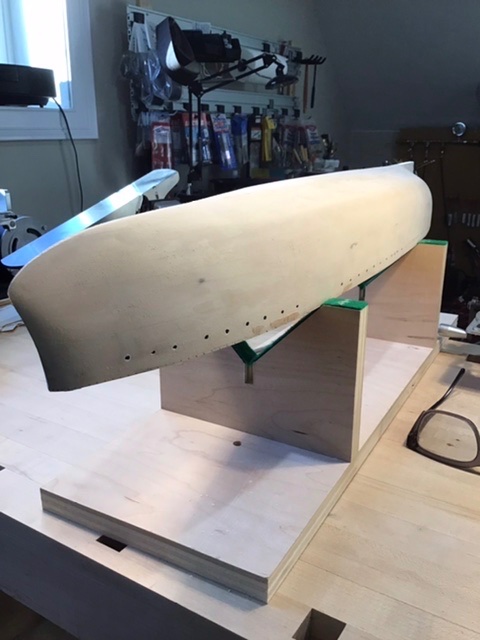
Hull Prep Decided to do the major hull preparation before attaching the Bilge Keel and Prop Shaft, Strut, and Hull Shaft Bearing. Filled in major divots with Minwax wood filler applied with a tongue depressor - with an angle cut in the end. After sanding, will apply several coats of spray can shellac, with a 220 sanding in between. Flexifile helps with the curves…


- 166 replies
-
- 7
-
-
- Maine
- BlueJacket Shipcrafters
- (and 1 more)
-
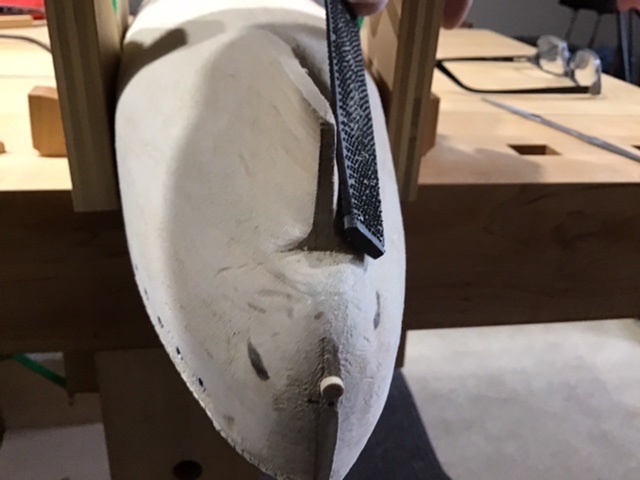
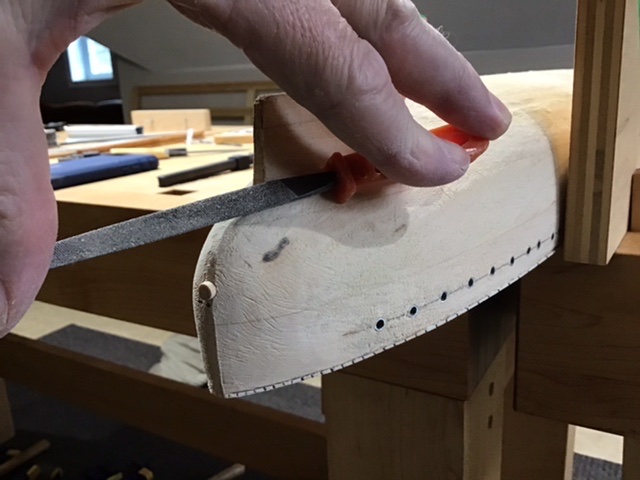
Rudder Post I faired in the rudder/hull interface with the rasp, half round and round files. It’s helpful to have a reference point while filing, in other words to register the file against something while filing. Registering make it easy to make the port and starboard of the hull that lead to the rudder symmetrical. After marking lines for the sternpost sides, start with the rasp - Pic 1. Be sure to rotate the rasp along it’s long axis to prevent gouging the relatively soft pine. Remove material until close to the lines. Next move in with the half round file. Register the file by keeping the handle in contact with the hull when filing in the aft direction - Pics 2 and 3. Getting close - Pic 4. Retrace the rudder post side lines, then move in with the half round file towards the corner. Picture 5 shows how the fingers can be used to register the file against the hull. Finally proceed with smaller round files - where the finger tips can be used to register - Pic 6. Still a little work to go, in the corner, but pretty close….


- 166 replies
-
- 8
-
-
- Maine
- BlueJacket Shipcrafters
- (and 1 more)
-
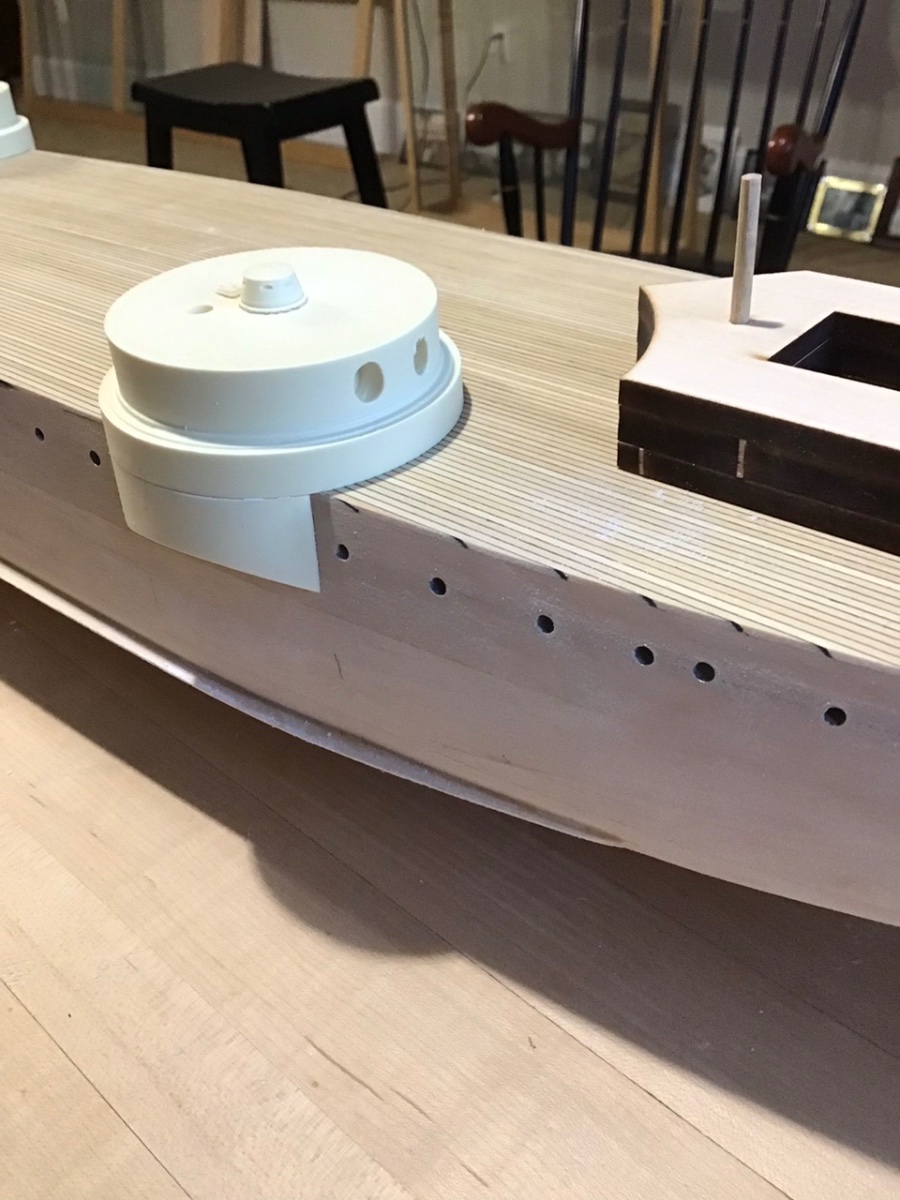
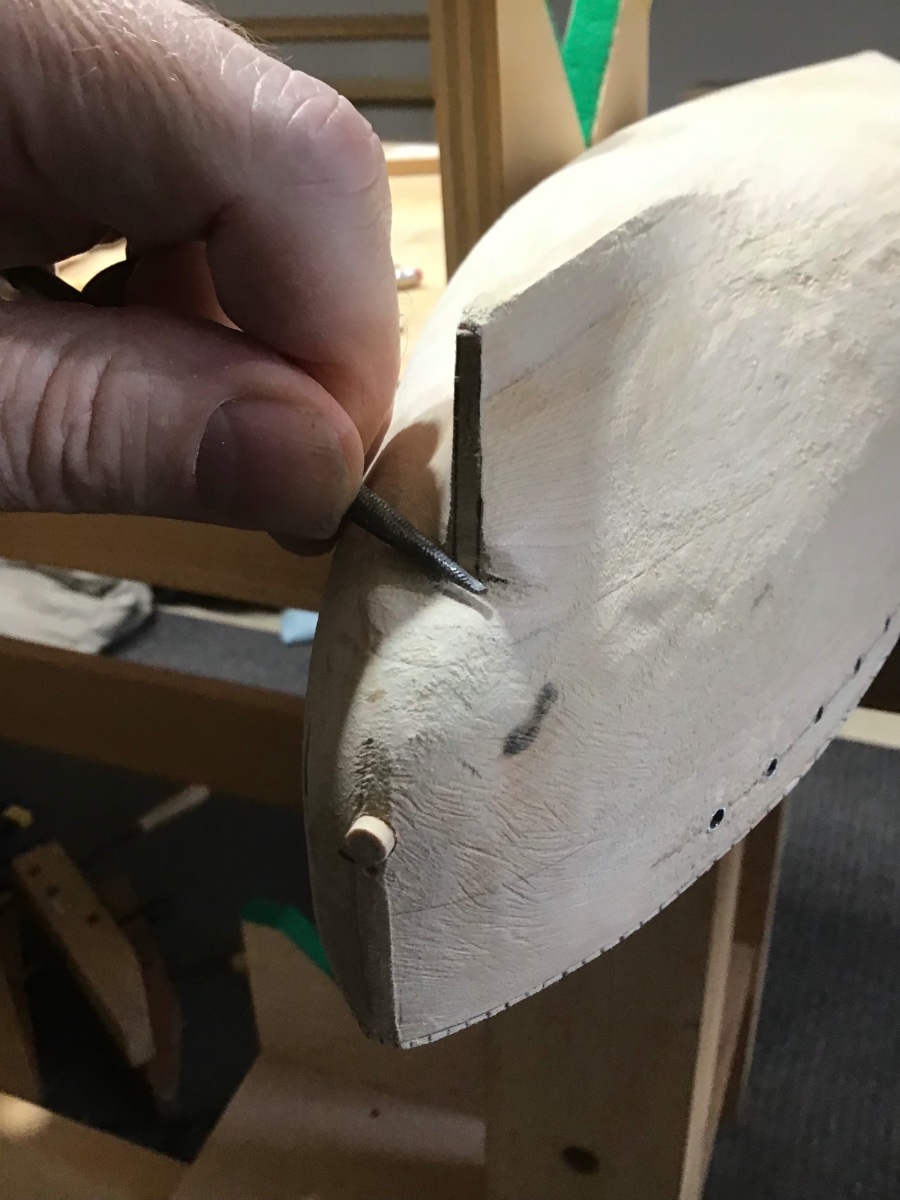
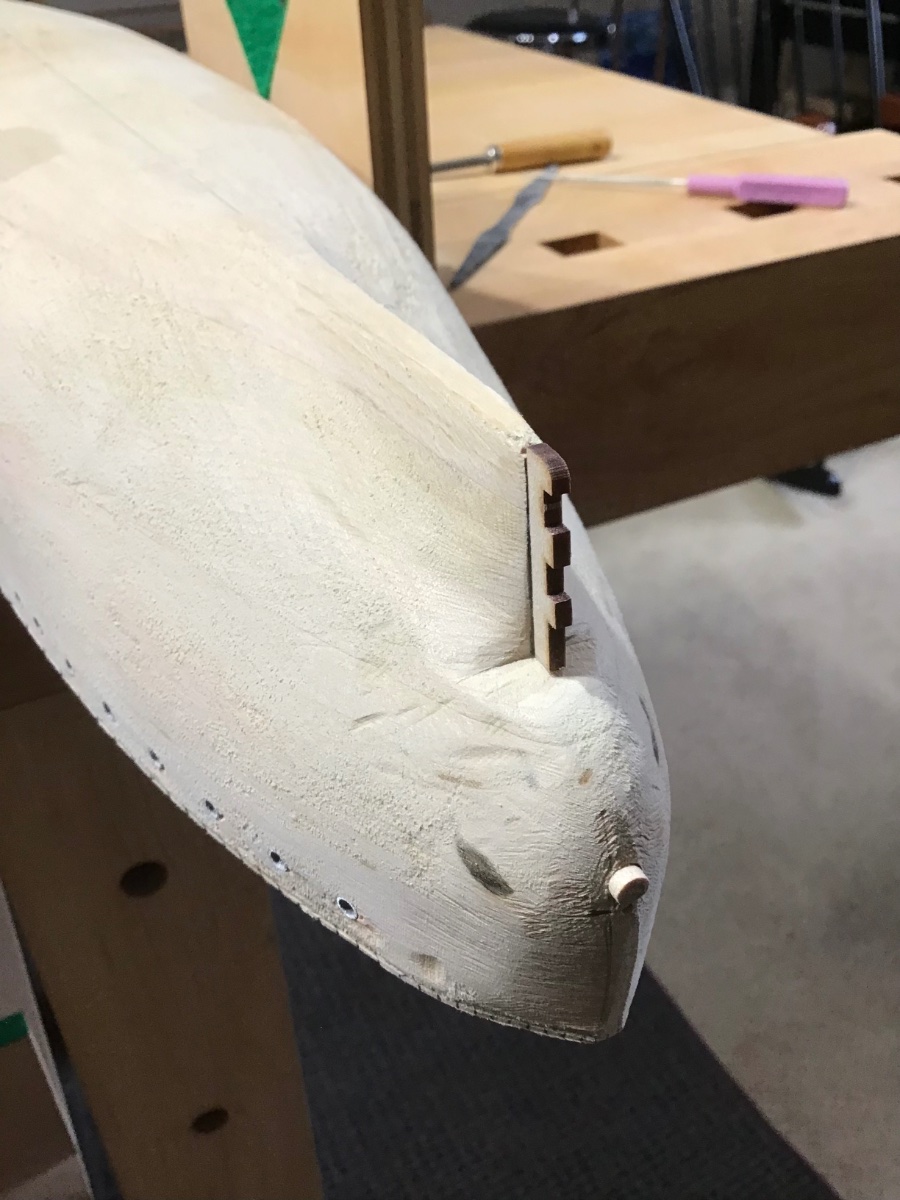
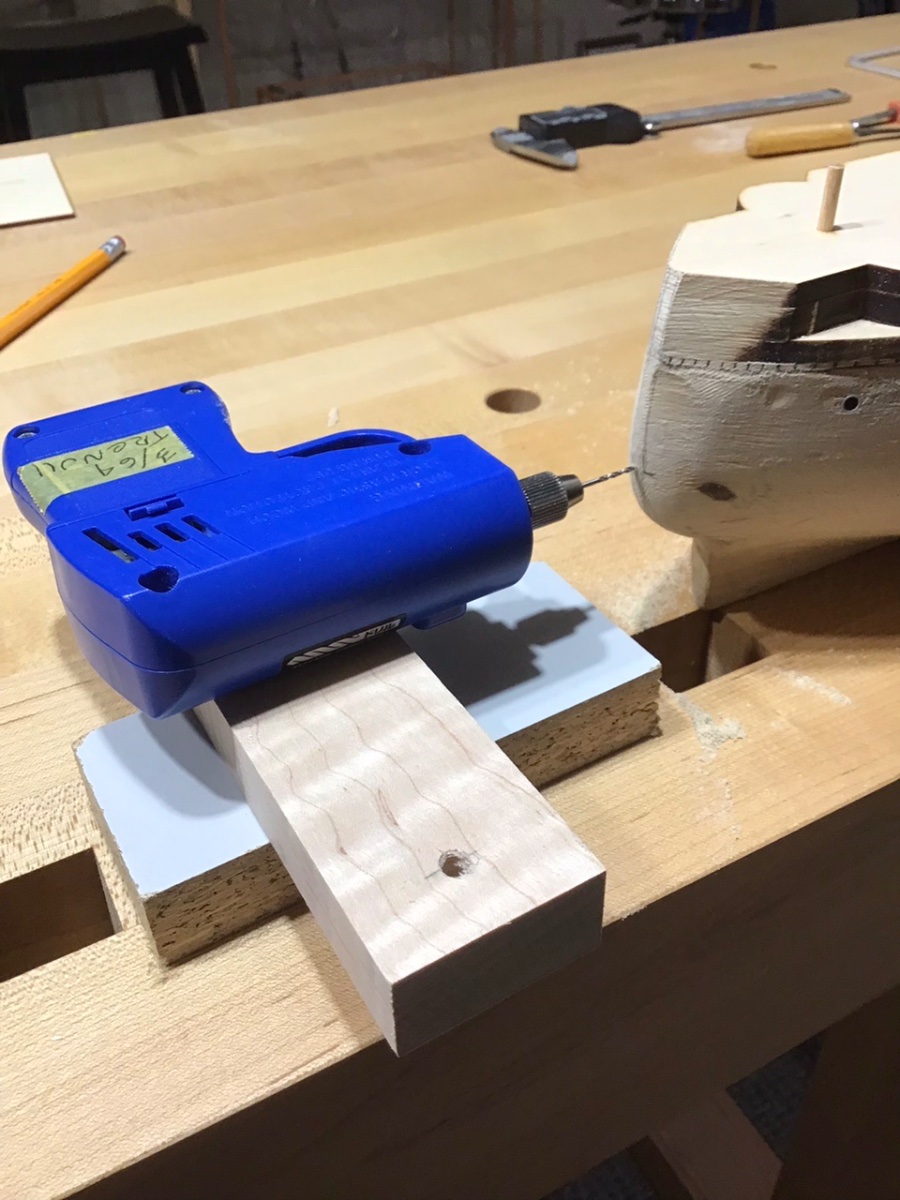
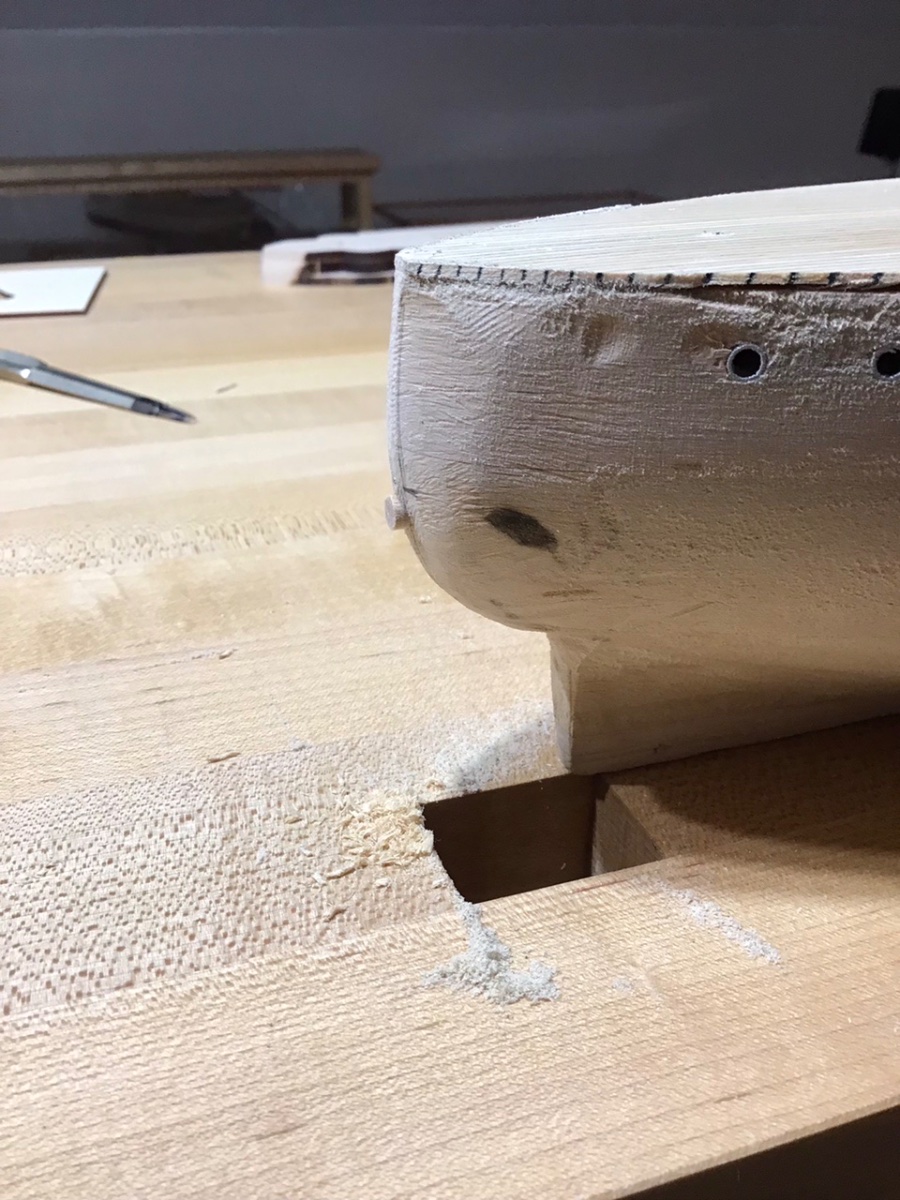
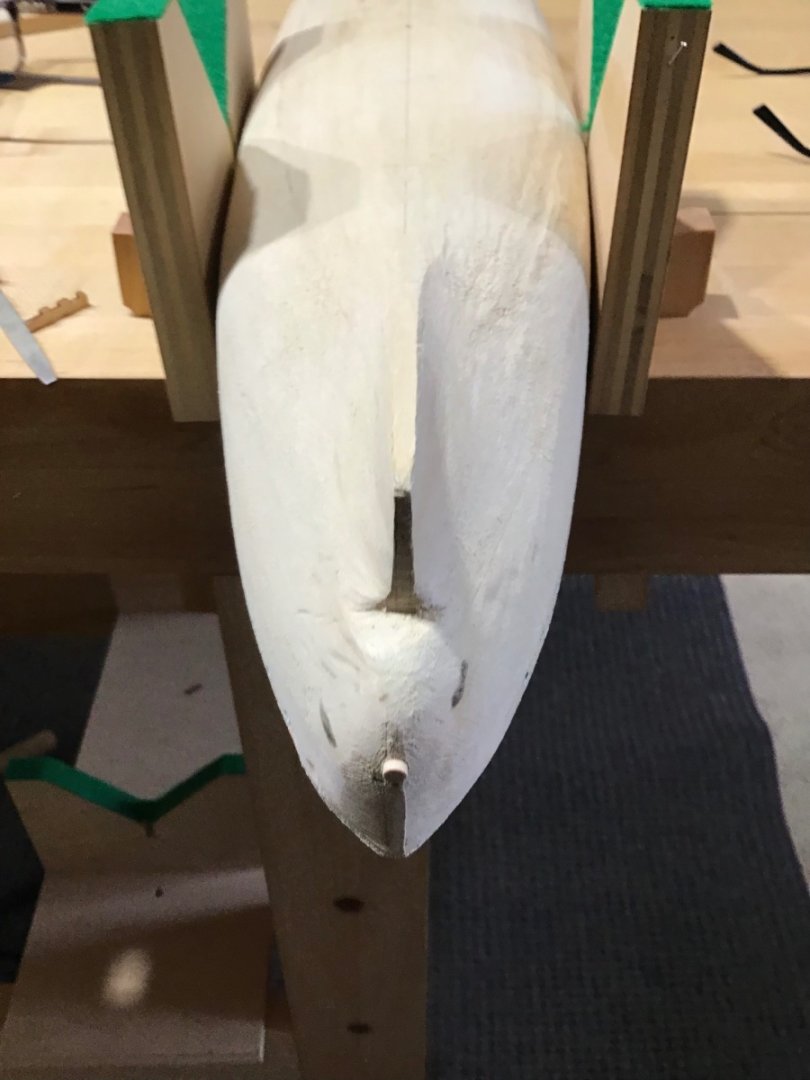
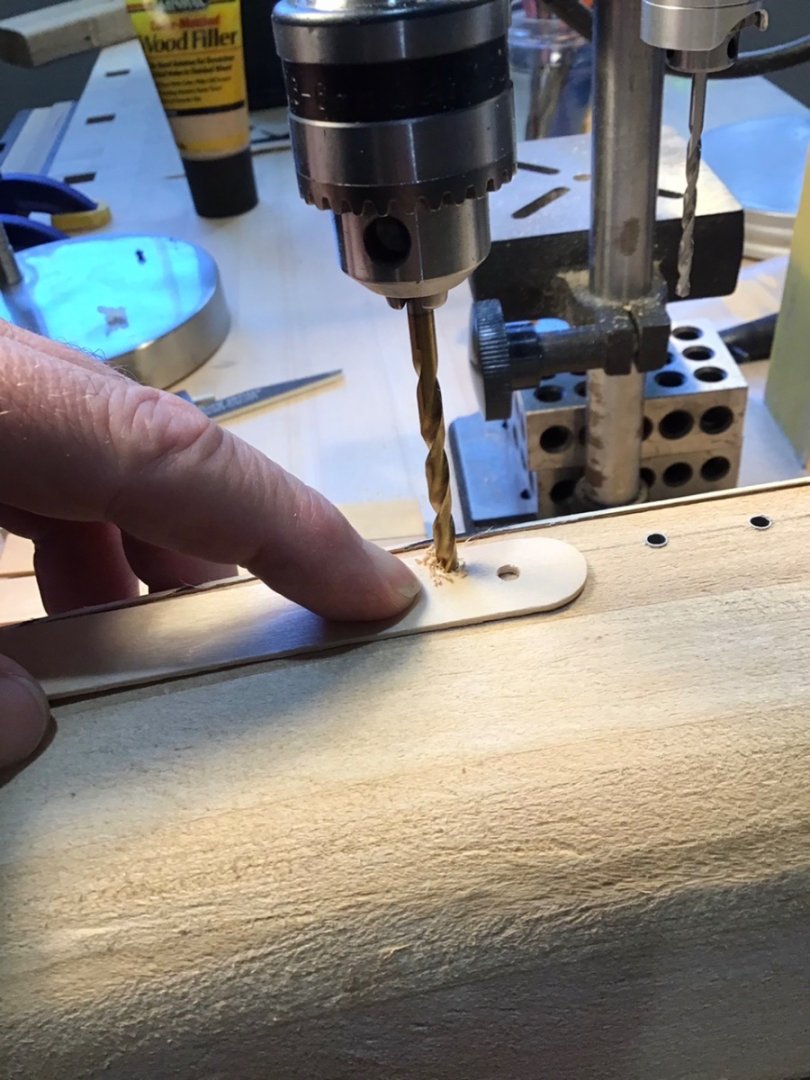
Aft Torpedo Tube We need to make a 3/16” hole to accommodate a dowel that simulates the tube. Marked the location on the hull. As before drilled the hole in 3 stages, pilot hole with a Tamiya hobby drill, then 1/8”and finally 3/16” with a hand drill. Picture 1 shows making the pilot hole, with the drill positioned on blocks. When expanding the hole with the hand drill, start by rotating the bit counterclockwise to avoid tear out along the hole edge. Picture 2 shows the dowel installed.


- 166 replies
-
- 4
-
-
- Maine
- BlueJacket Shipcrafters
- (and 1 more)
-
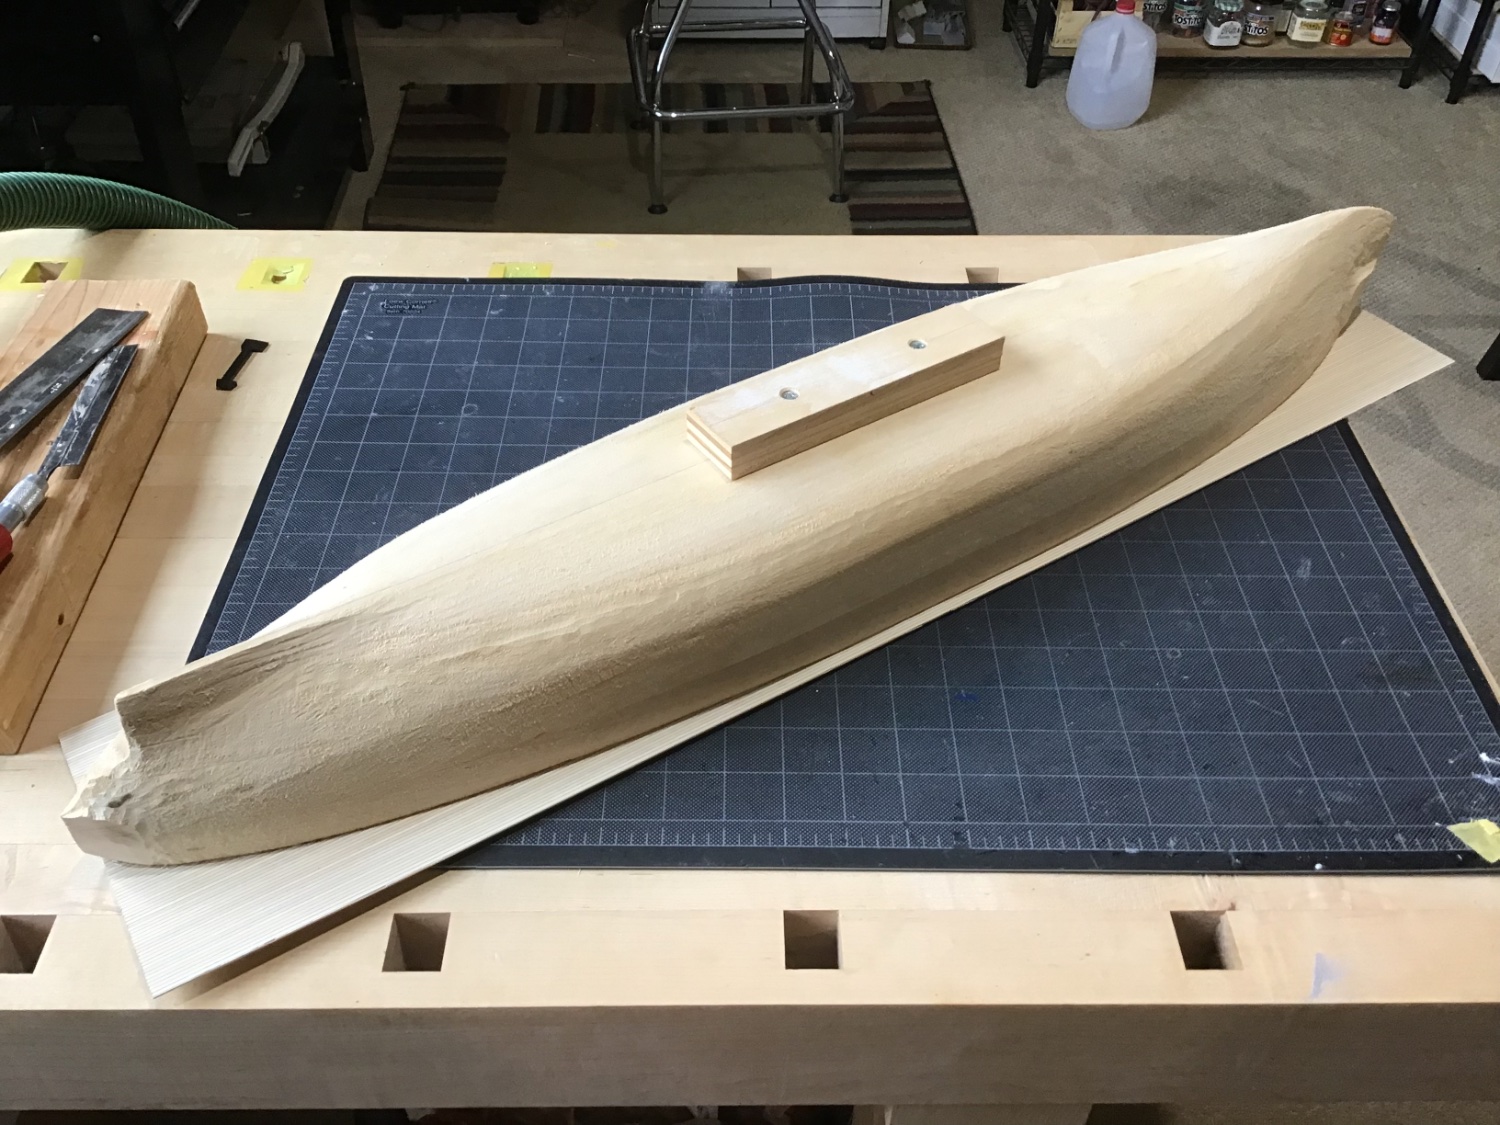
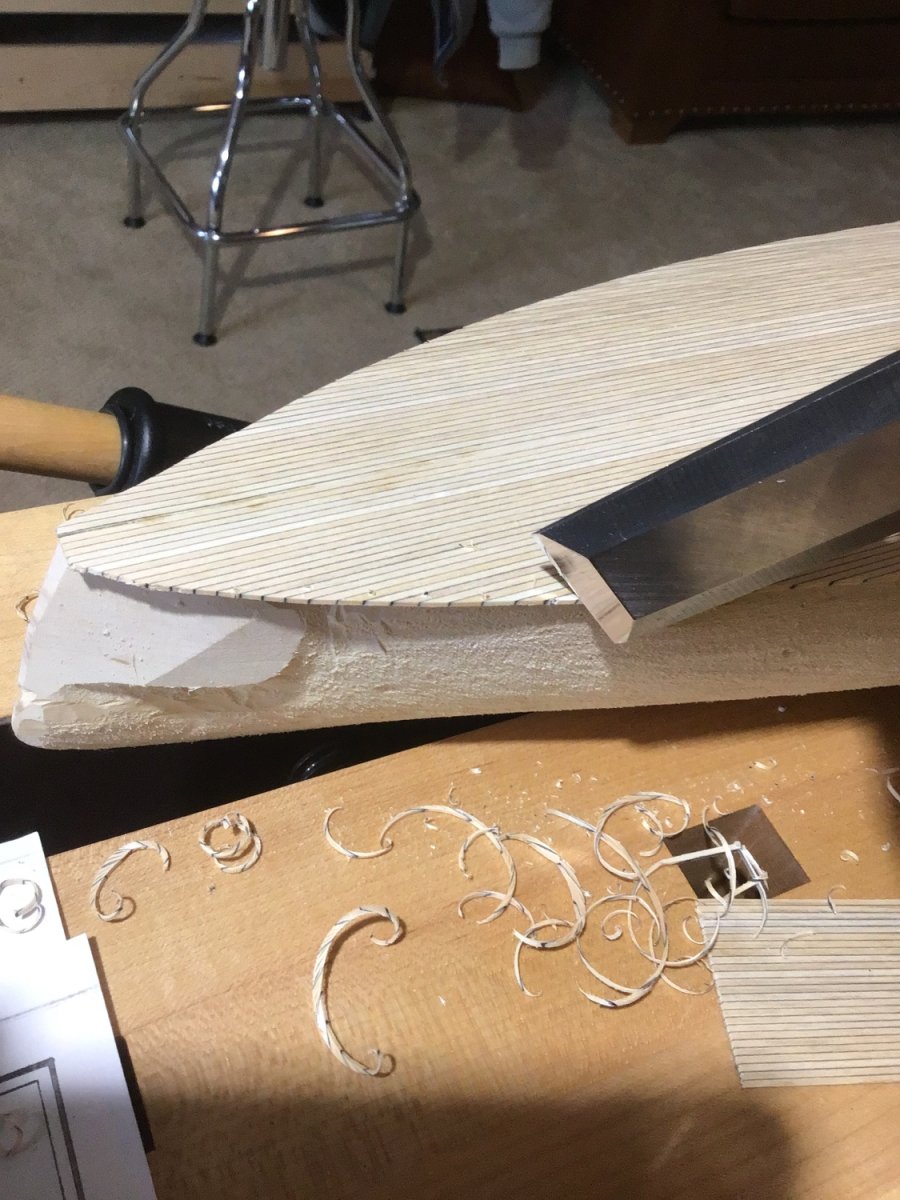
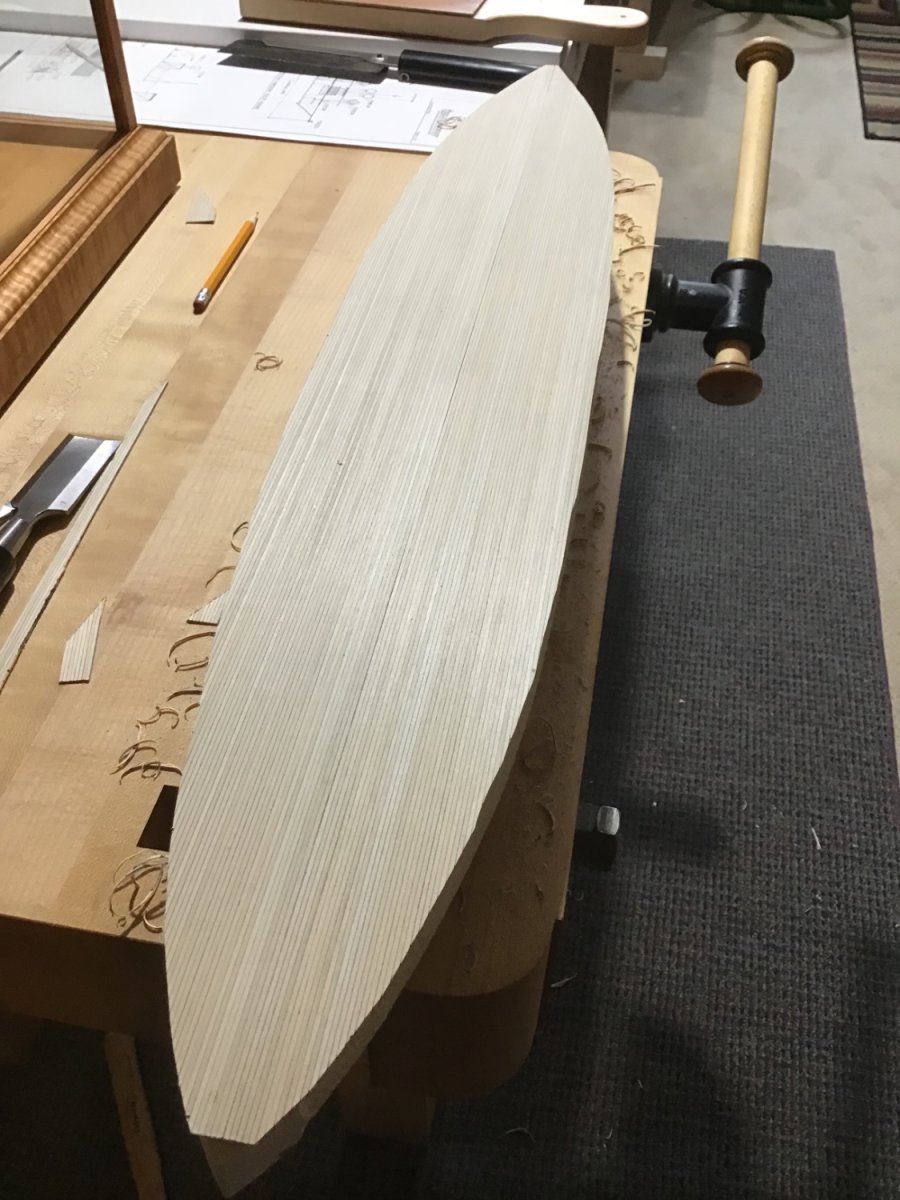
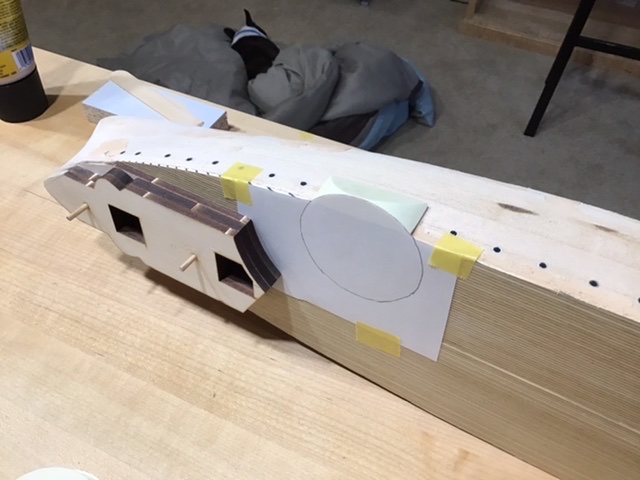
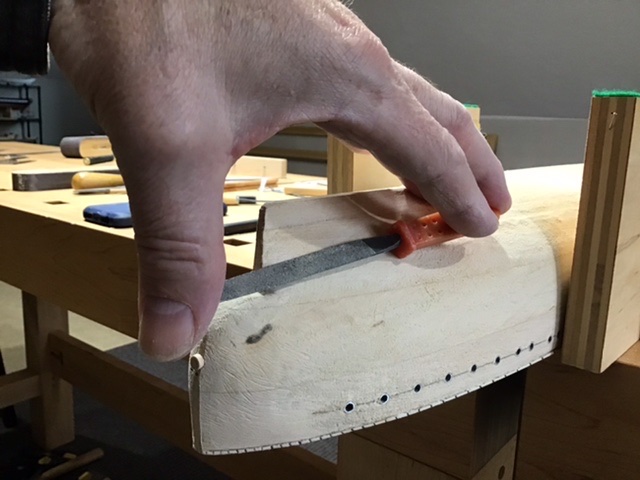
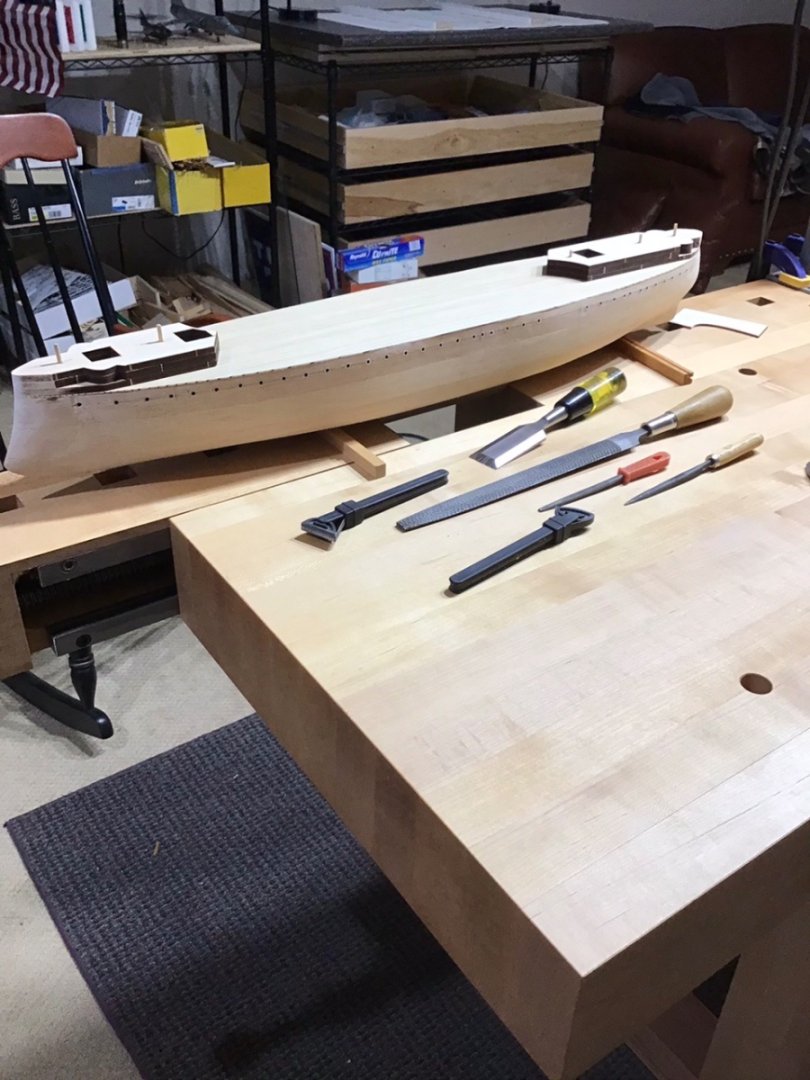
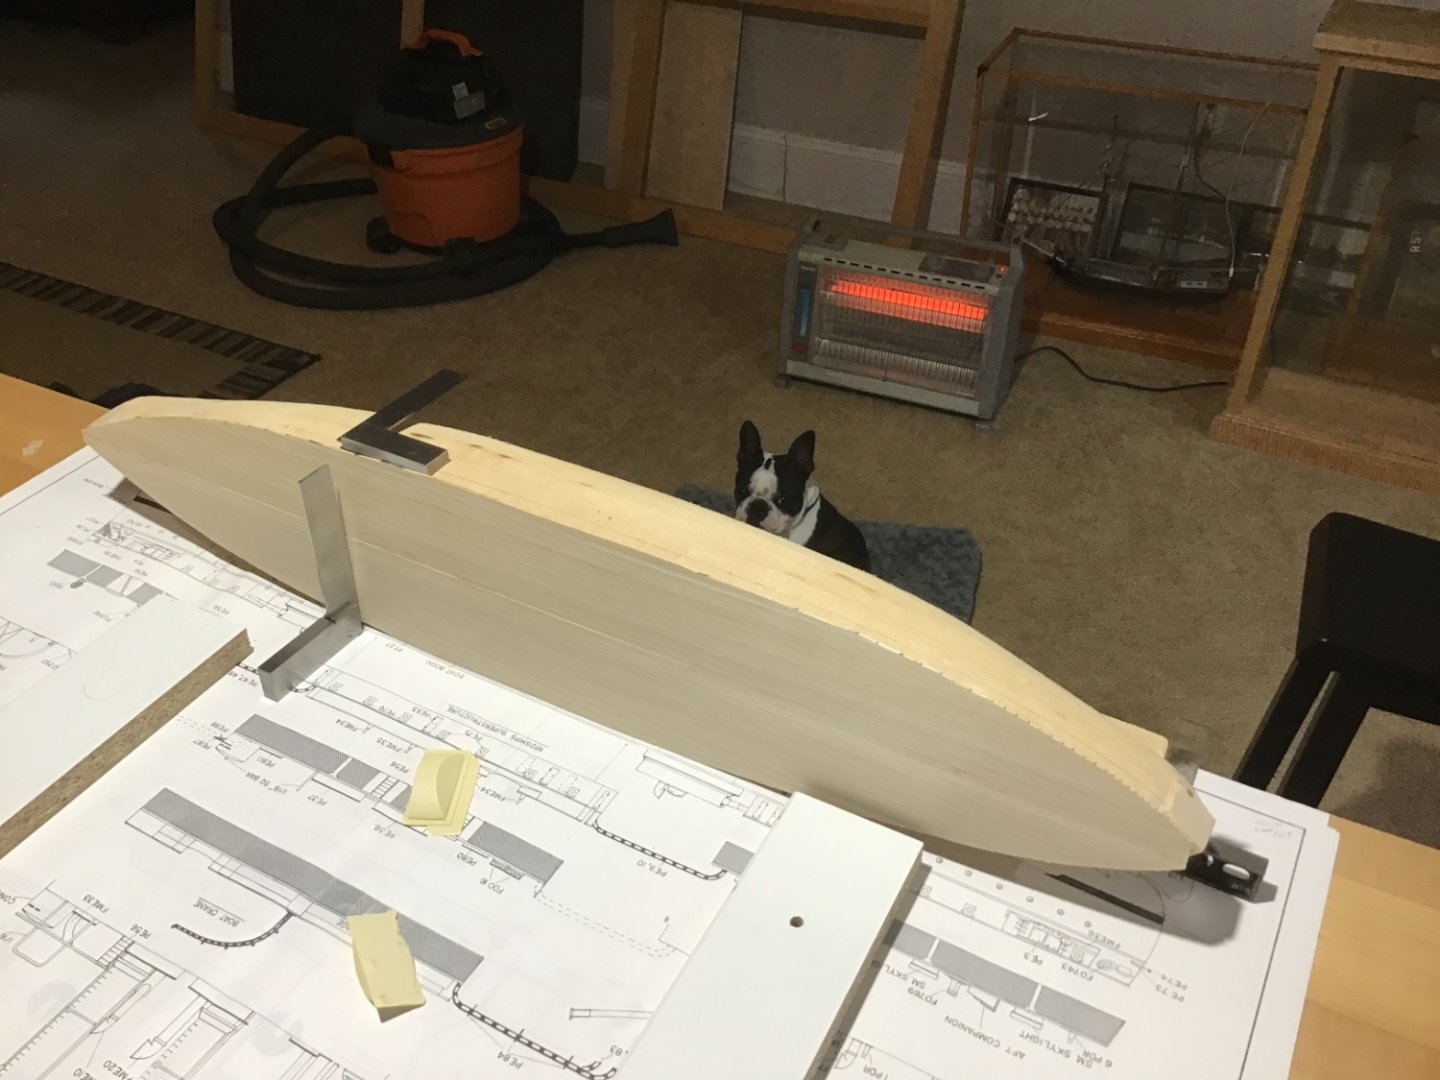
Shaping the Hull Before starting, assembled the forward and aft superstructures by drilling out the alignment holes to 1/8”, then used a 1/8” dowel to align the lifts. Assembled them with carpenters glue and clamps. Then drilled 1/8” holes at the appropriate locations on the deck and dry fitted the superstructures. Gathered the tools needed to do the job: flat chisel, rasp, files, sanding sticks from Amati - Pic 1. At first I was a little uncertain how to proceed. I did trace the hull plan view, made a template and found my main deck centerline off slightly. Did some chisel and file work at the bow starboard side, and went to town with a sanding block - results not the best so on the bow port side and stern, found it best to simply start with the rasp and remove the lugs. I was overthinking it, once the lugs are removed you are practically there. Pic 2 - rasp in action, removes a little or a lot of material depending on the pressure. Pics 3-4. Used the bow and stern templates and the files to dial in the shape. Mark the high spots with a pencil, file them down, repeat. Personally this step is tedious to me…..still have some work to do - to get her ship shape. Enjoying the journey….


- 166 replies
-
- 6
-
-
- Maine
- BlueJacket Shipcrafters
- (and 1 more)
-
Not sure where to go for that….Bluejacket Shipcrafters may offer an Eagle….good luck!
-
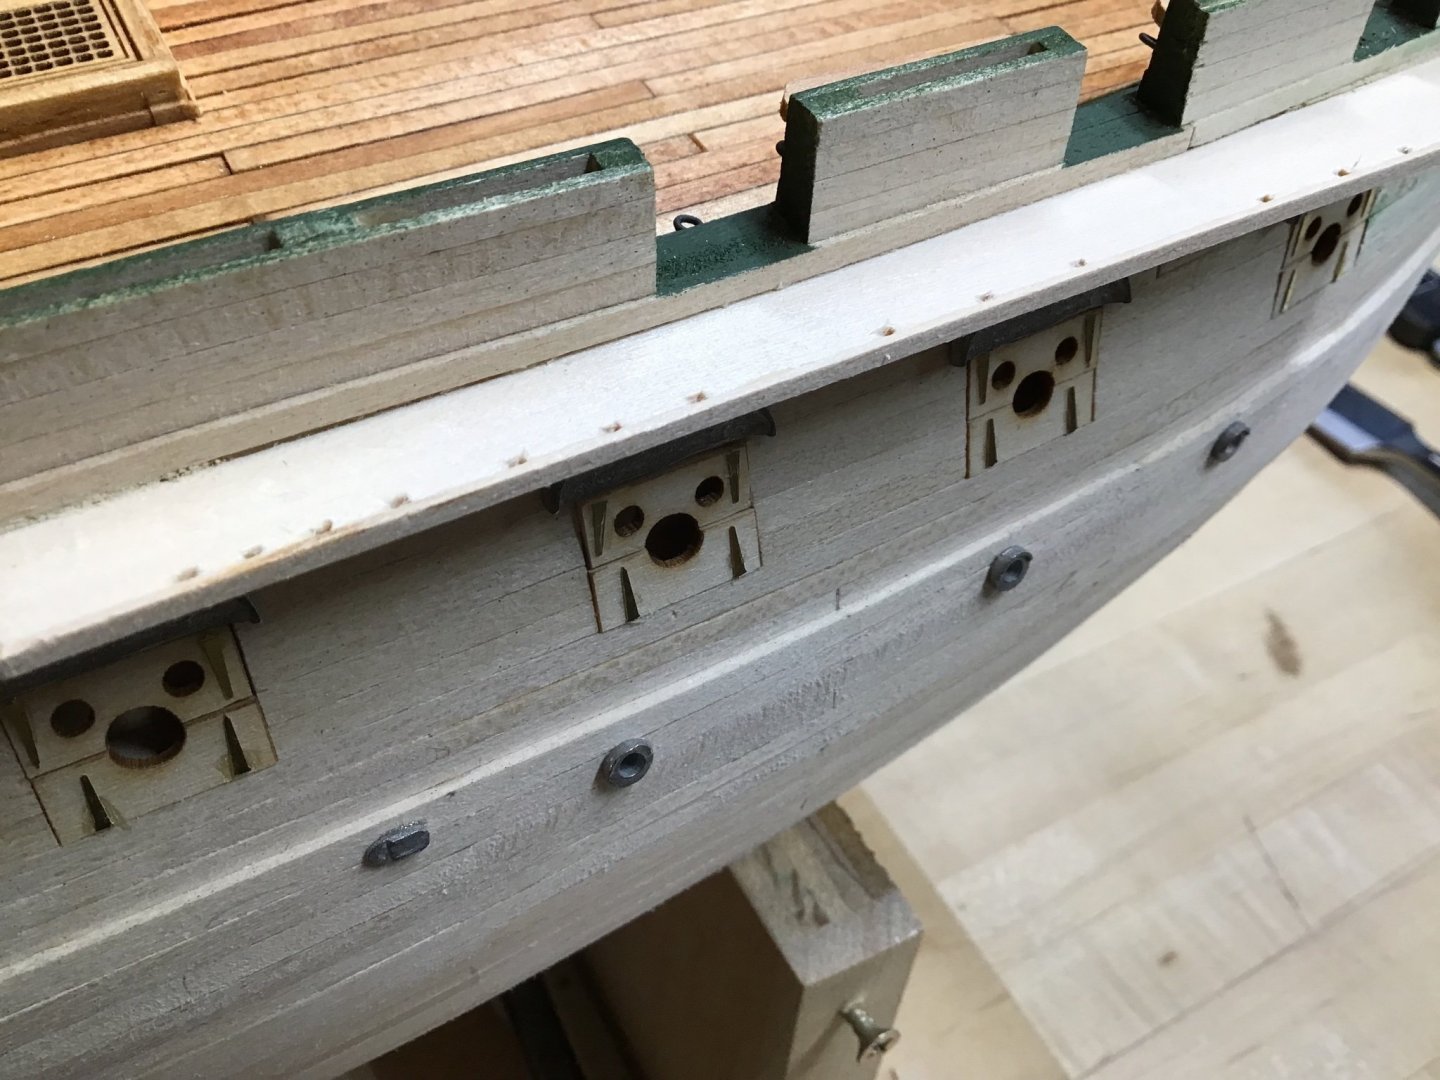
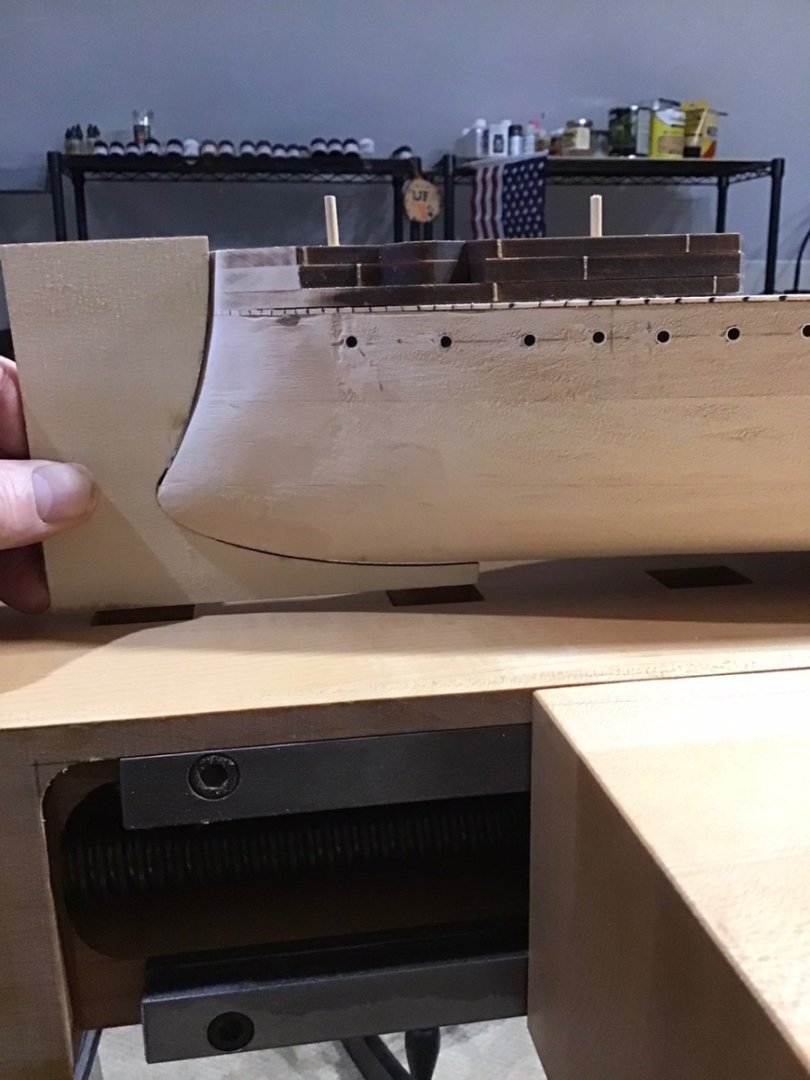
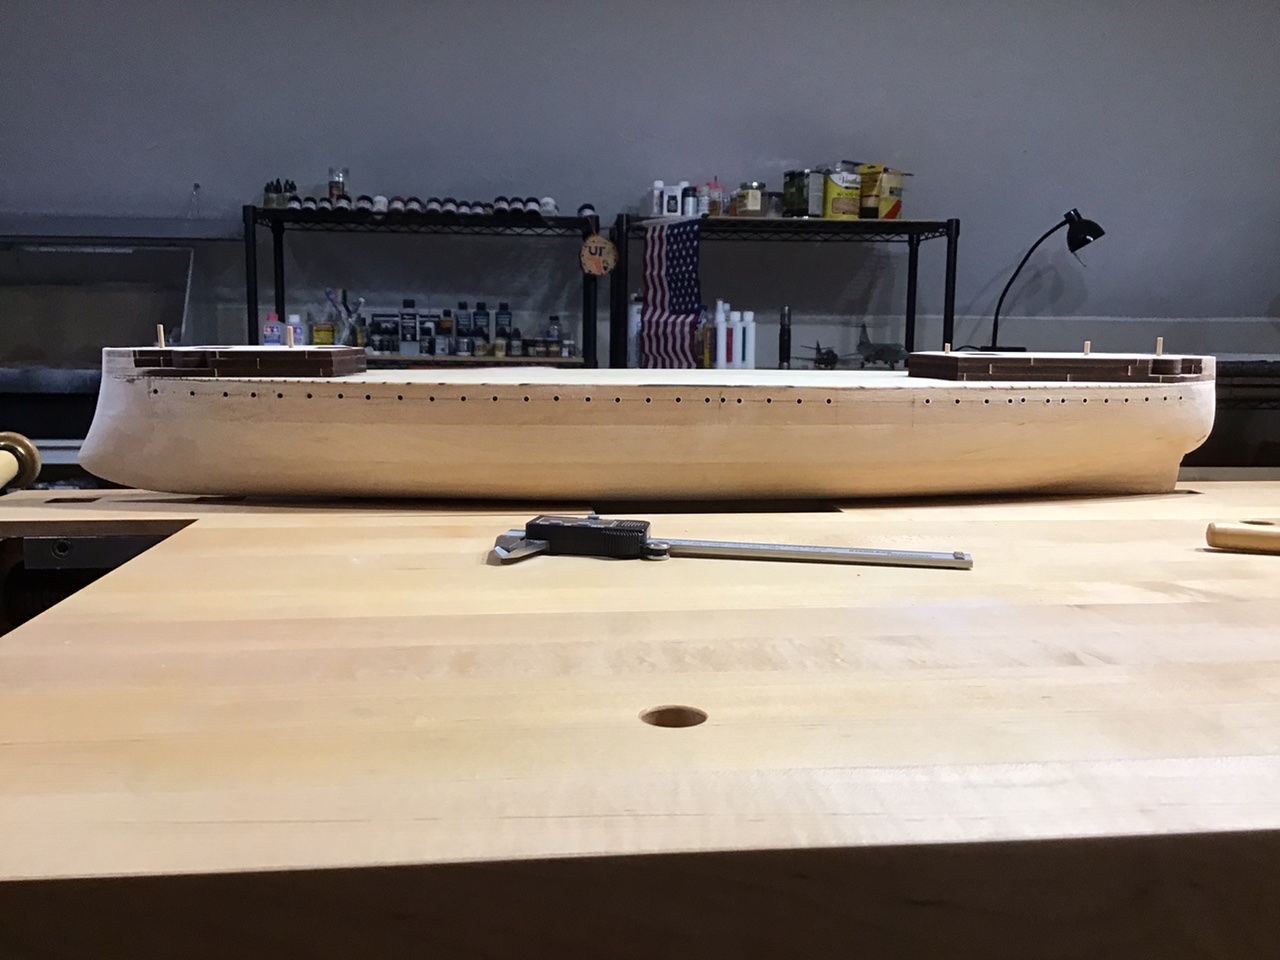
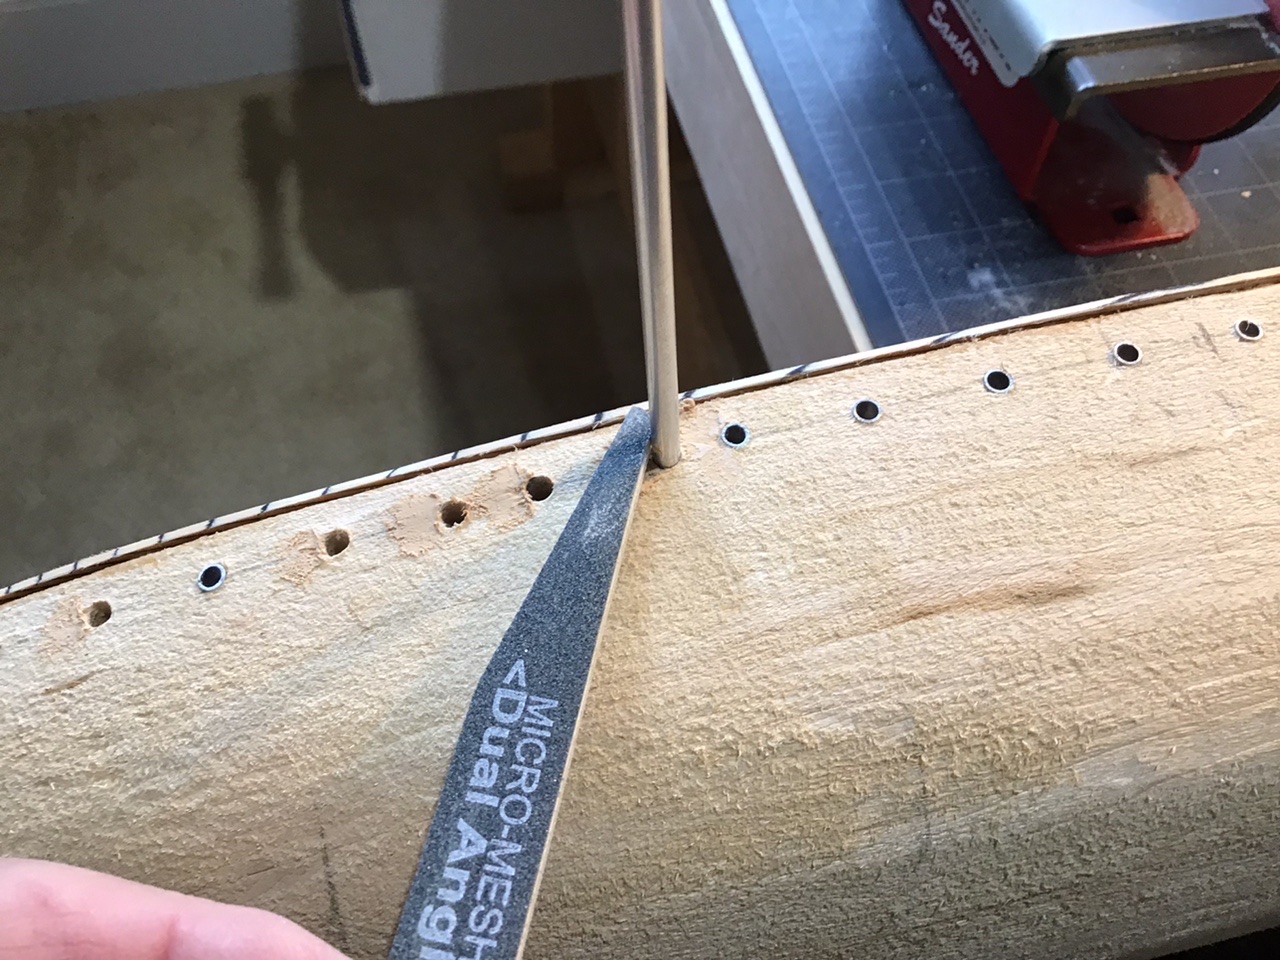
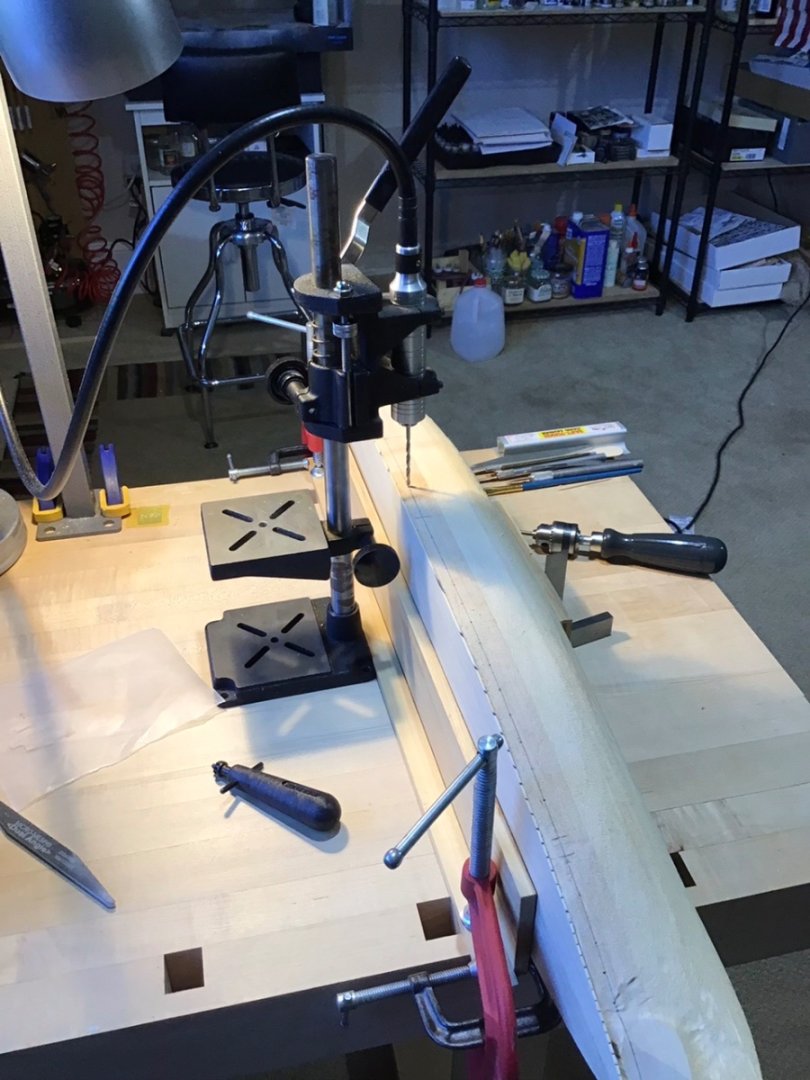
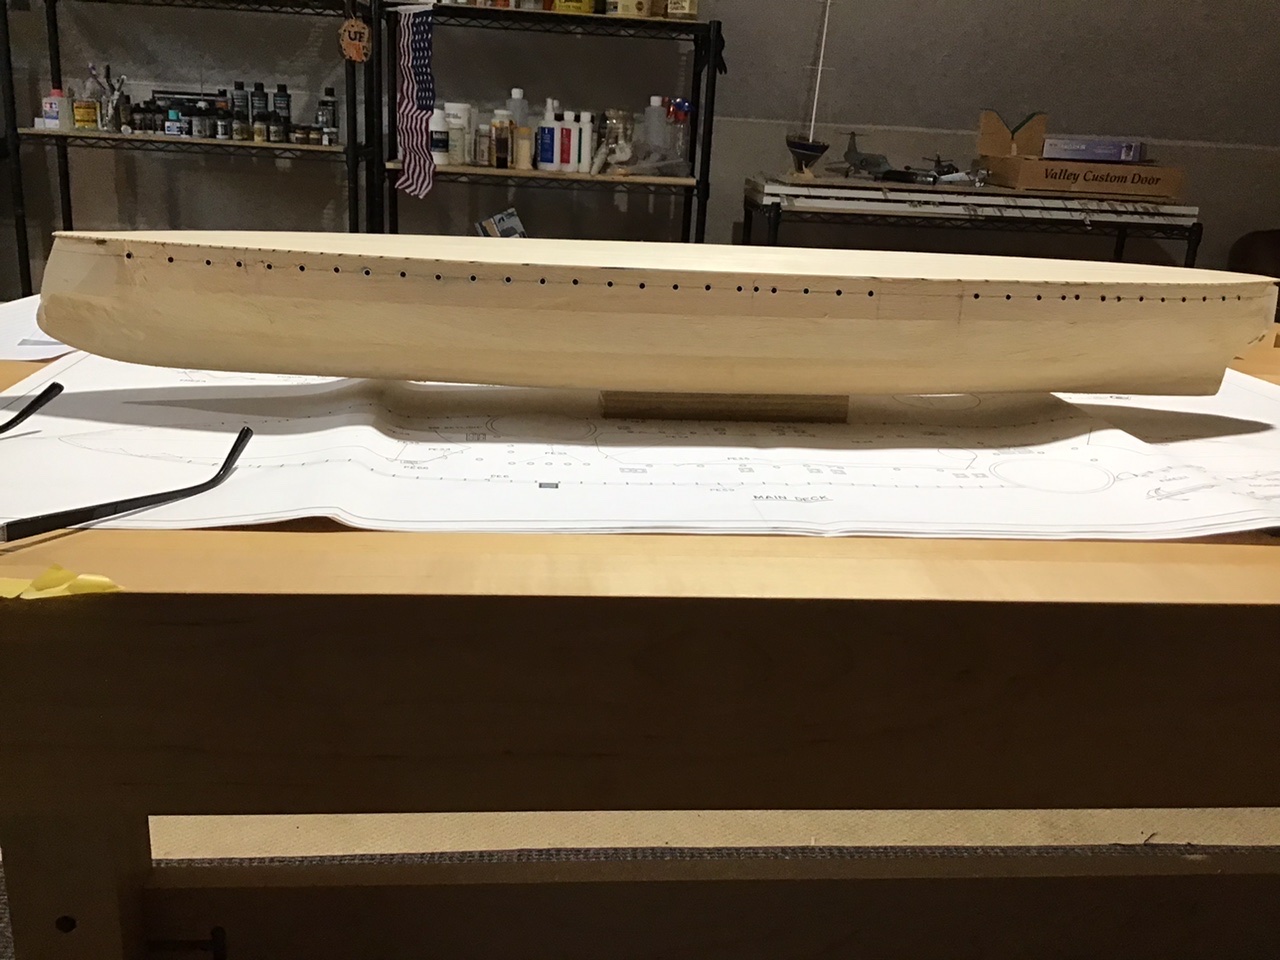
Airport Installation The airport holes were drilled in 3 stages. First a 1/32 pilot hole using a Tamiya battery operated hobby drill. Second a 1/4” bit in the Foredom drill press. And the final 5/32” cut with a hand drill. Picture 1 shows the Foredom setup, with a high fence clamped to the bench. For the ports near the bow and stern, wedges were used to angle the drill base and hull so the bit was perpendicular to the hole. To minimize tear out, the final drill cut was done through a tongue depressor - Picture 2. Also, start the final cut with counter clockwise revolutions until the bit is below the surface, then use the depressor. Deal with tear out divots by inserting rod in the hole, filling with wood filler, and sand around the rod - Picture 3. Round over the edge of the airport going into the hole first with the Ultimation sander - Picture 4. The results….

- 166 replies
-
- 12
-
-
- Maine
- BlueJacket Shipcrafters
- (and 1 more)
-
Marking Airport Locations We need a line along the side of the hull to locate the air vents. The line needs to be 3/8” below the top of the deck. The deck is 3/64” thick. So the line is 21/64” below the bottom of the deck. I made a spacer block 21/64” wide, and the picture below shows making the airport line by sliding the block along the bottom of the deck with a pencil. Next I setup the hull on the plan and marked the locations of the sponsons and anchor bills. Then I used dividers to mark the air port locations.

- 166 replies
-
- 9
-
-
- Maine
- BlueJacket Shipcrafters
- (and 1 more)
-
Hi Avi, What happened is by the end of 2021, after about a year of Constitution, I burned out on wooden shipbuilding. So spent the first 4 months or so of this year building plastic aircraft. Really got the process down. Then after looking for several years, we found a new house, and preparing and selling the old house and moving into the new consumed the summer. So returning to ship building decided to build an iron ship, a project mostly centered around photo etch, for a change. Size also came into play, a full Constitution build requires just too much space……. That being said, with Constitution, I accomplished some big milestones in my ship building, including planking that type of hull, and building the head…. Good to hear from you, -Rich
-
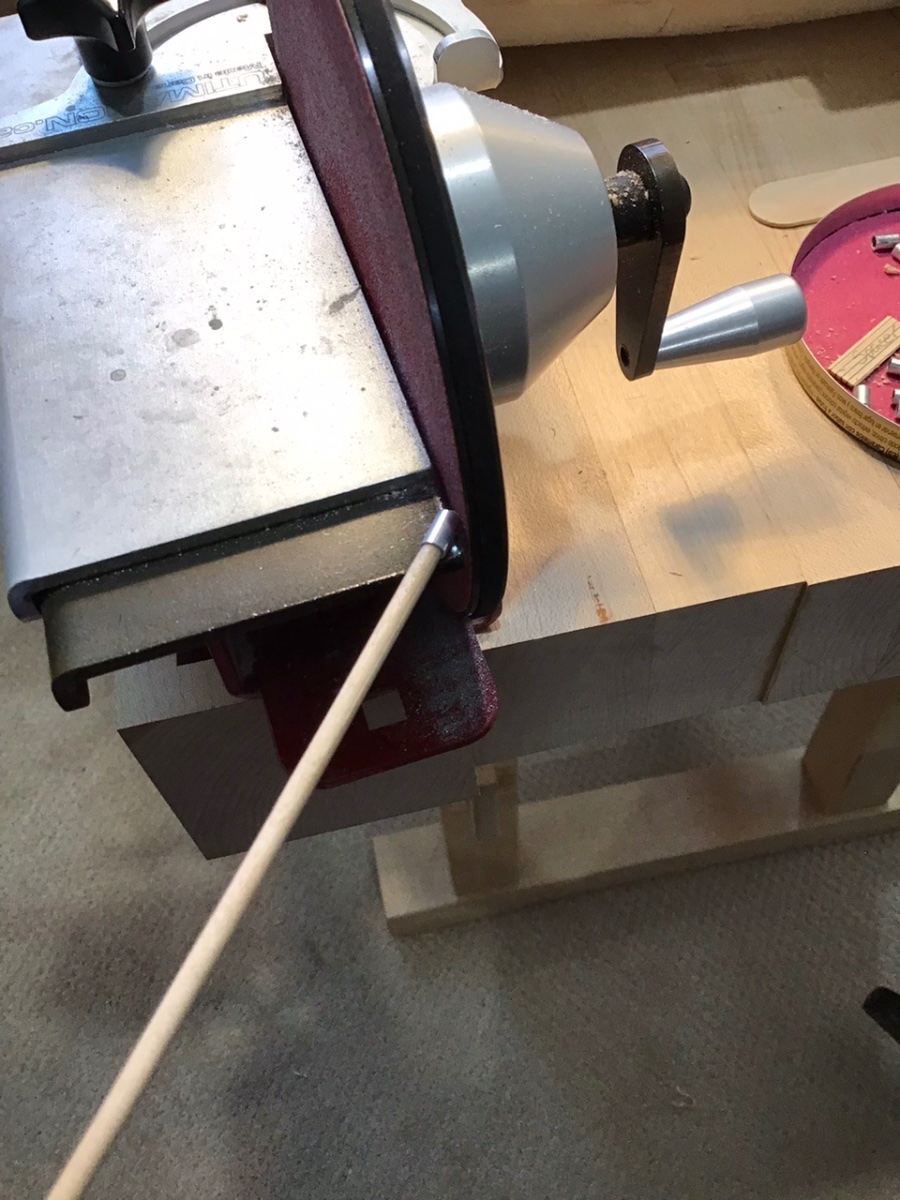
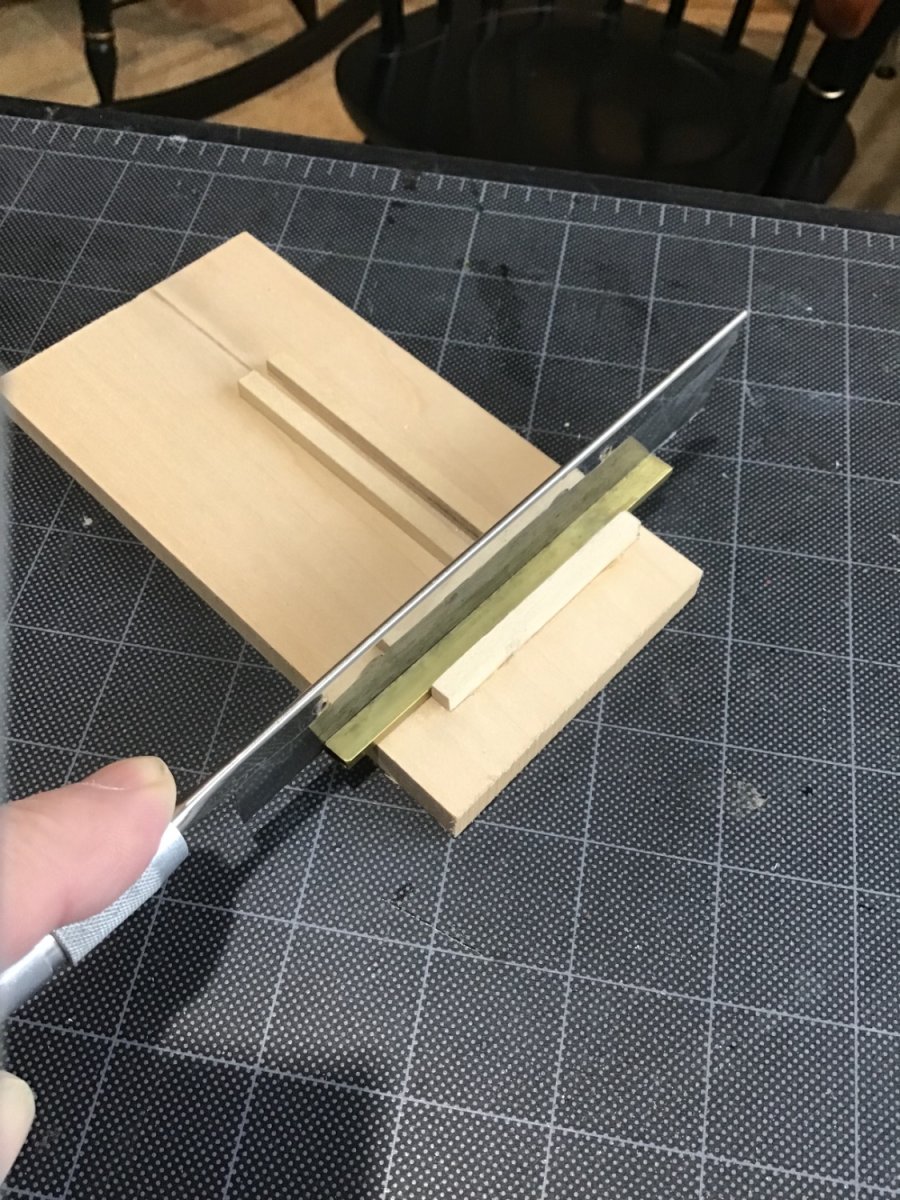
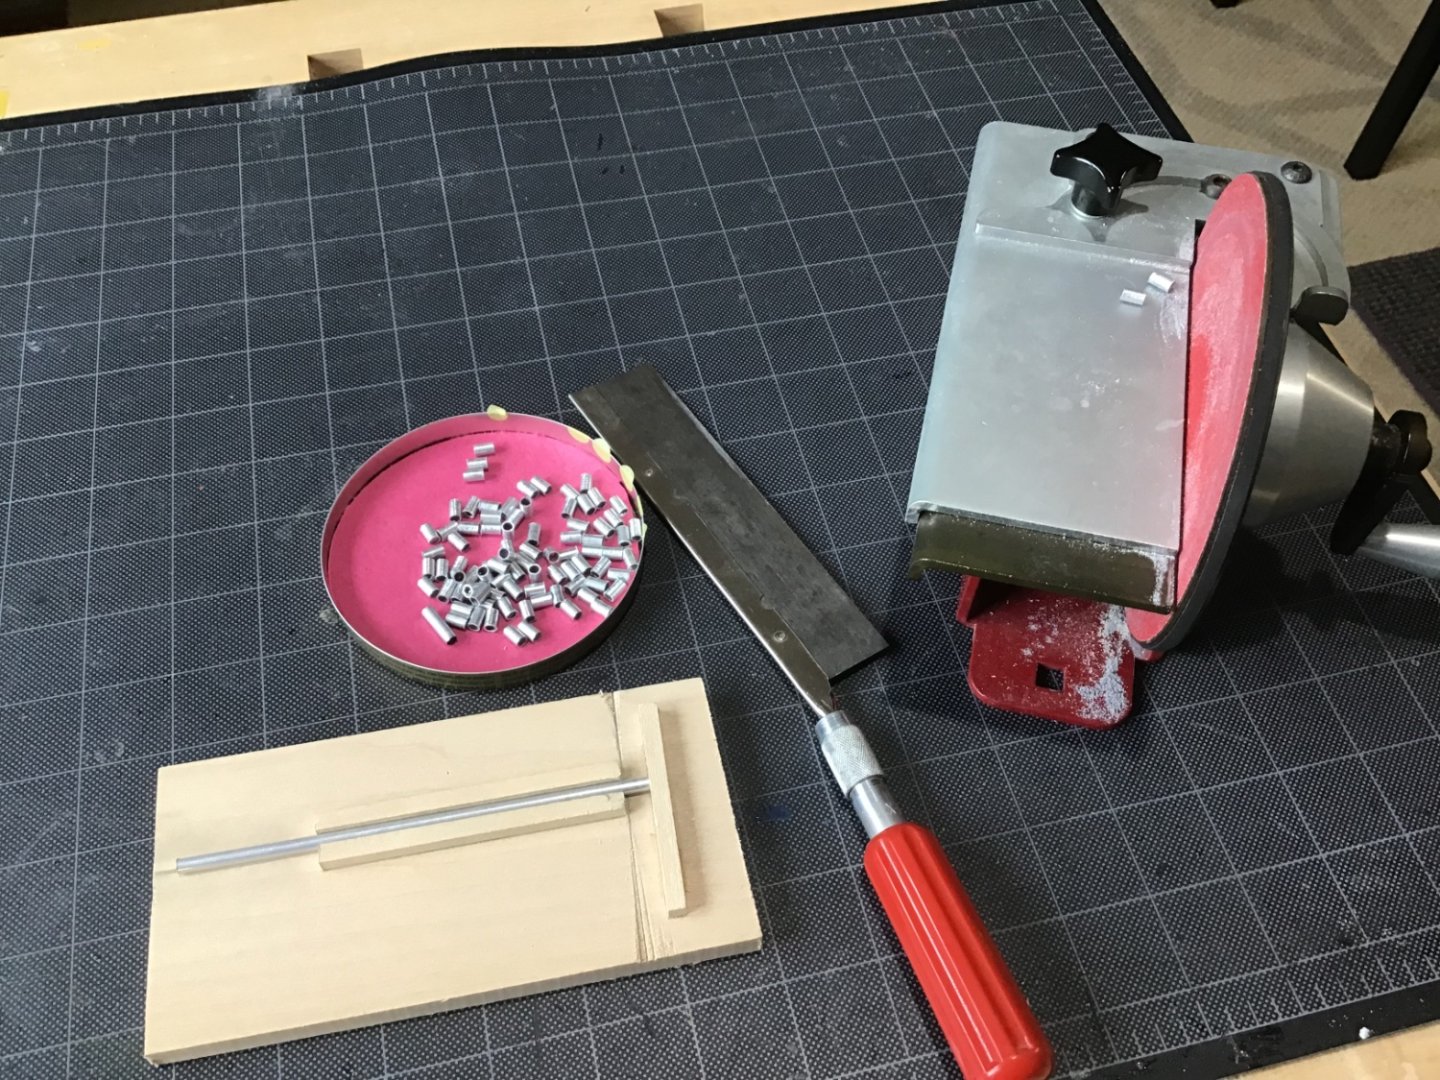
Making the Air Vents We need 80 air vents cut from the 5/32” aluminum rod. Instructions call for 1/4” lengths (-0”, +1/32”). I made a jig with a channel to hold the rod, with a fence, to make cuts with an Xacto razor saw. Picture 1 shows using a 1/4” brass square rod and the razor saw blade to correctly position the fence, when glueing the fence to the base. Picture 2 shows the tools used to make the parts. I was able to make exact 1/4” lengths. First I trued the rod end with the Ultimation sander, then make the cut, last true the cut edge with the sander. Check length with digital calipers.

- 166 replies
-
- 8
-
-

-
- Maine
- BlueJacket Shipcrafters
- (and 1 more)
-
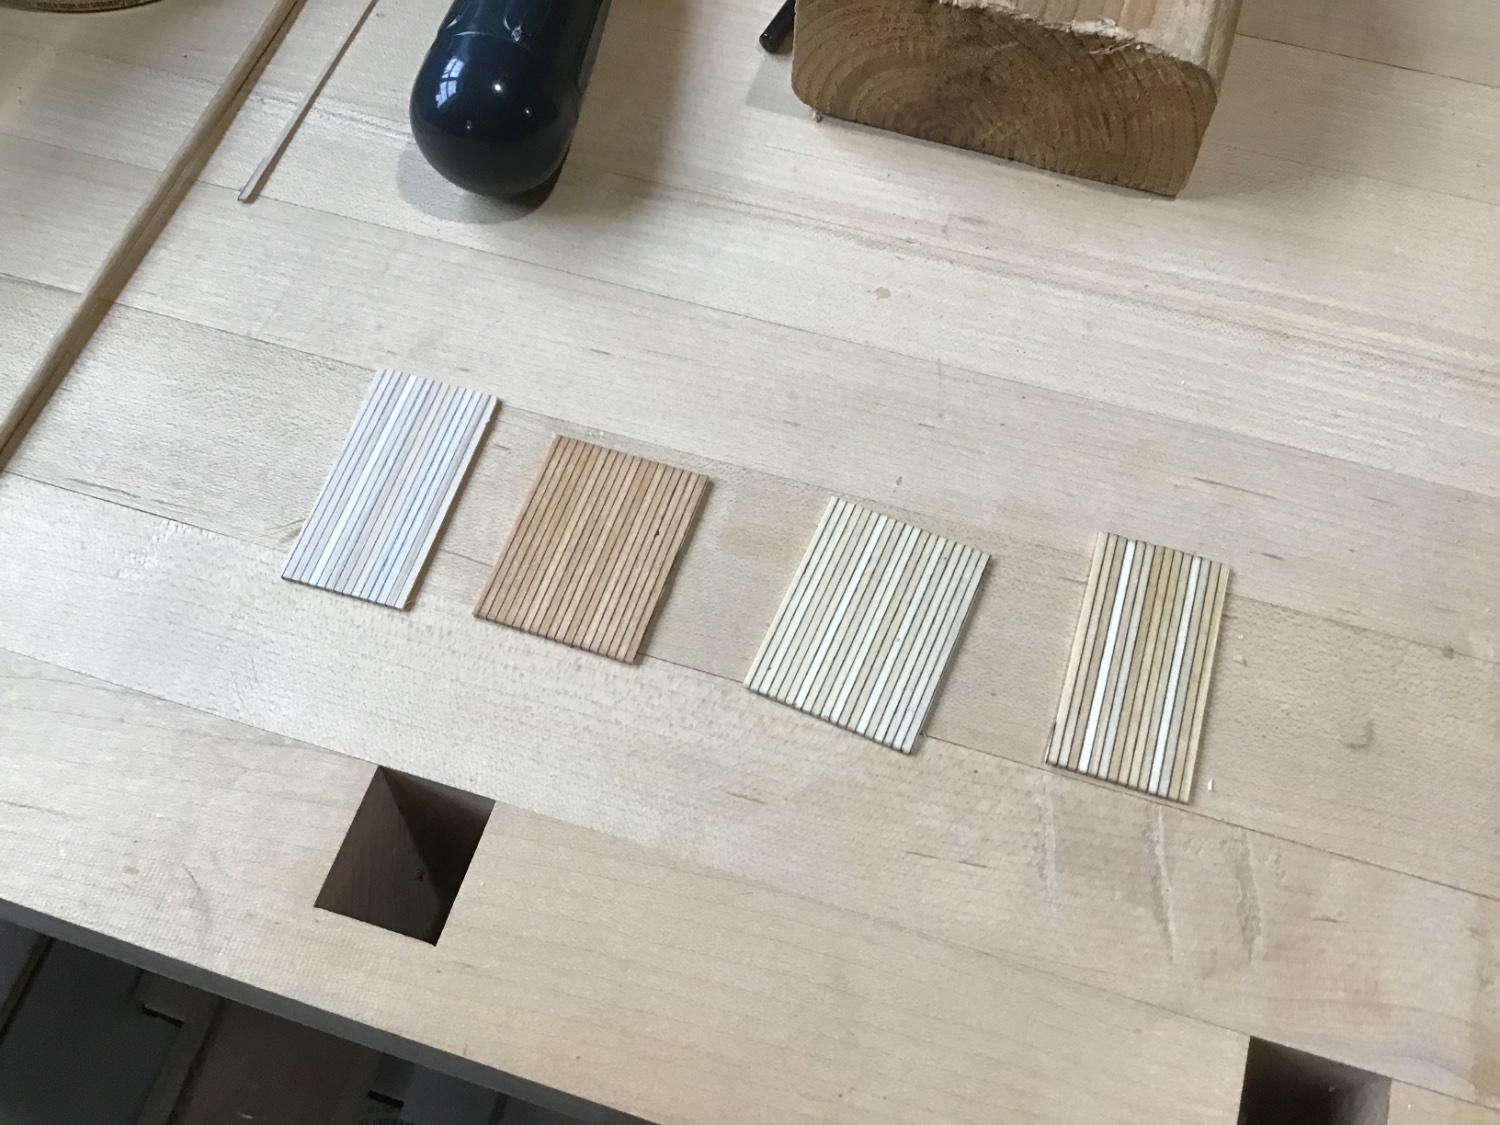
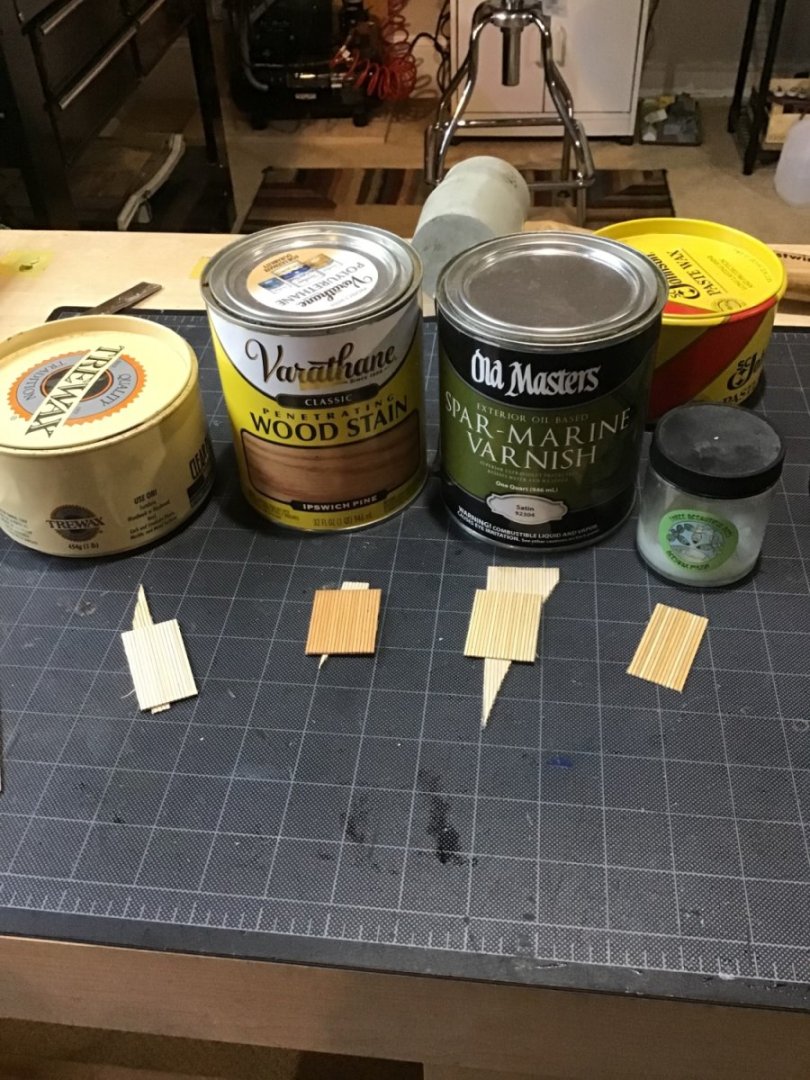
Deck Finish Made up a few finish samples with deck scraps. Tried Trewax, Ipswich Pine Stain, Spar Varnish, and 3 Bees Natural Wax. Wax is easiest, but decided to go with Spar Varnish, like the natural color,. Keep in mind wax would probably inhibit adhesives, so waxing the deck would be left unit the end.

- 166 replies
-
- 4
-
-
- Maine
- BlueJacket Shipcrafters
- (and 1 more)
-
Wow, no CD, can’t remember exactly, bought this kit (#004) from someone years ago. I do have a second kit, I’ll look 👀 there…..
- 166 replies
-
- 2
-
-
- Maine
- BlueJacket Shipcrafters
- (and 1 more)
-
Thank you very much, these pictures are helpful…..
- 166 replies
-
- 3
-
-
- Maine
- BlueJacket Shipcrafters
- (and 1 more)
-
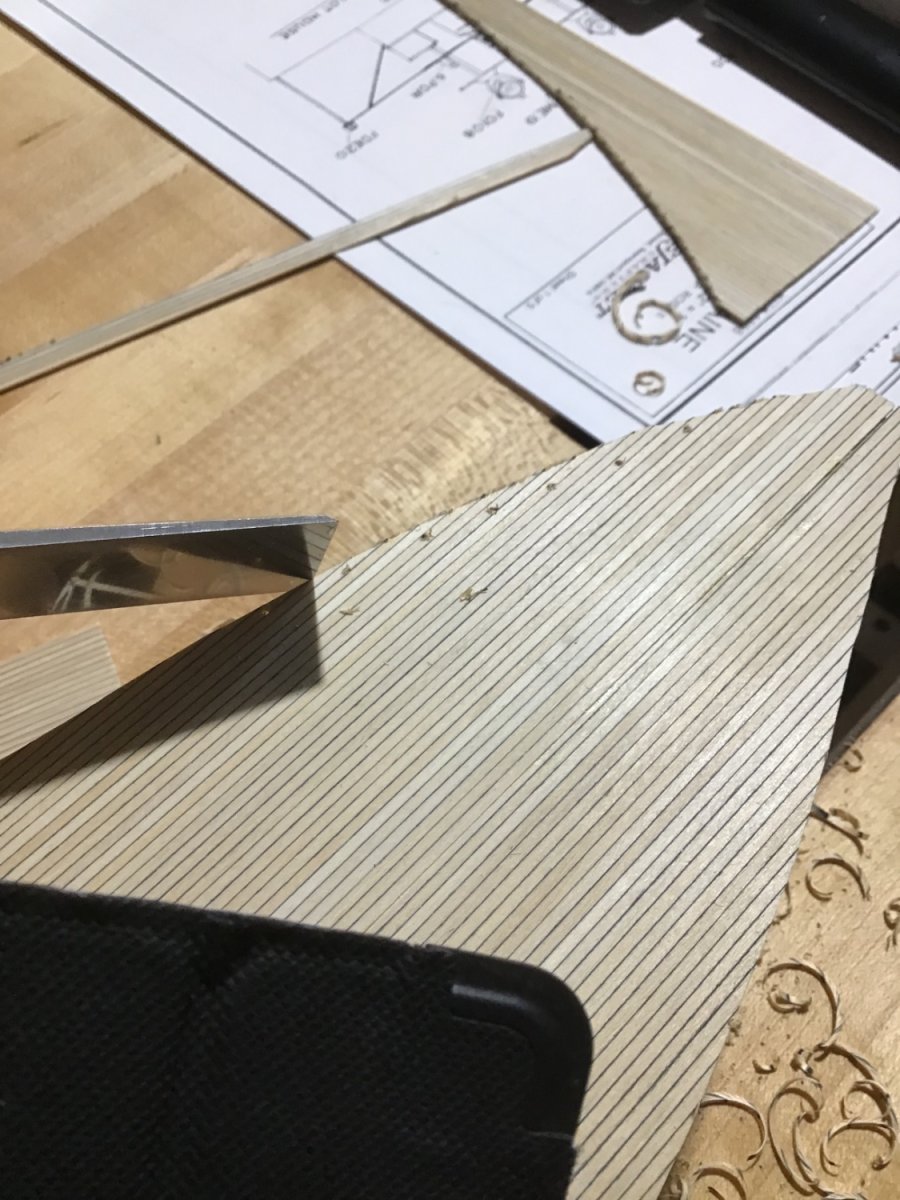
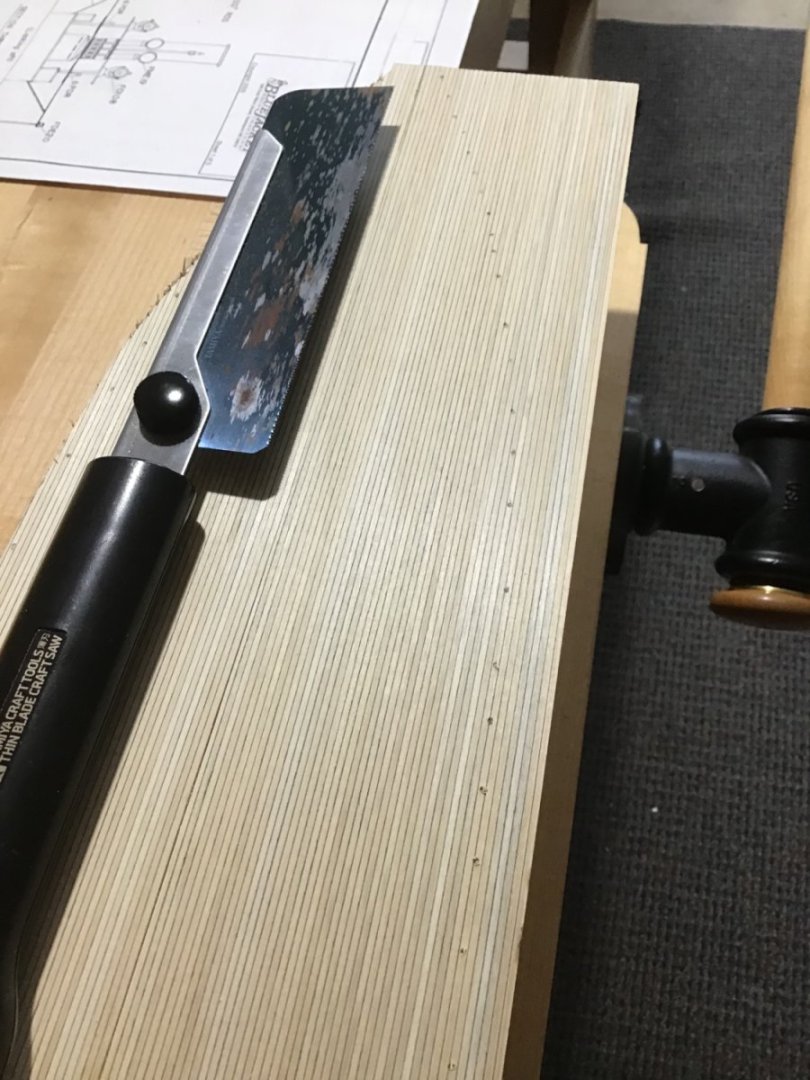
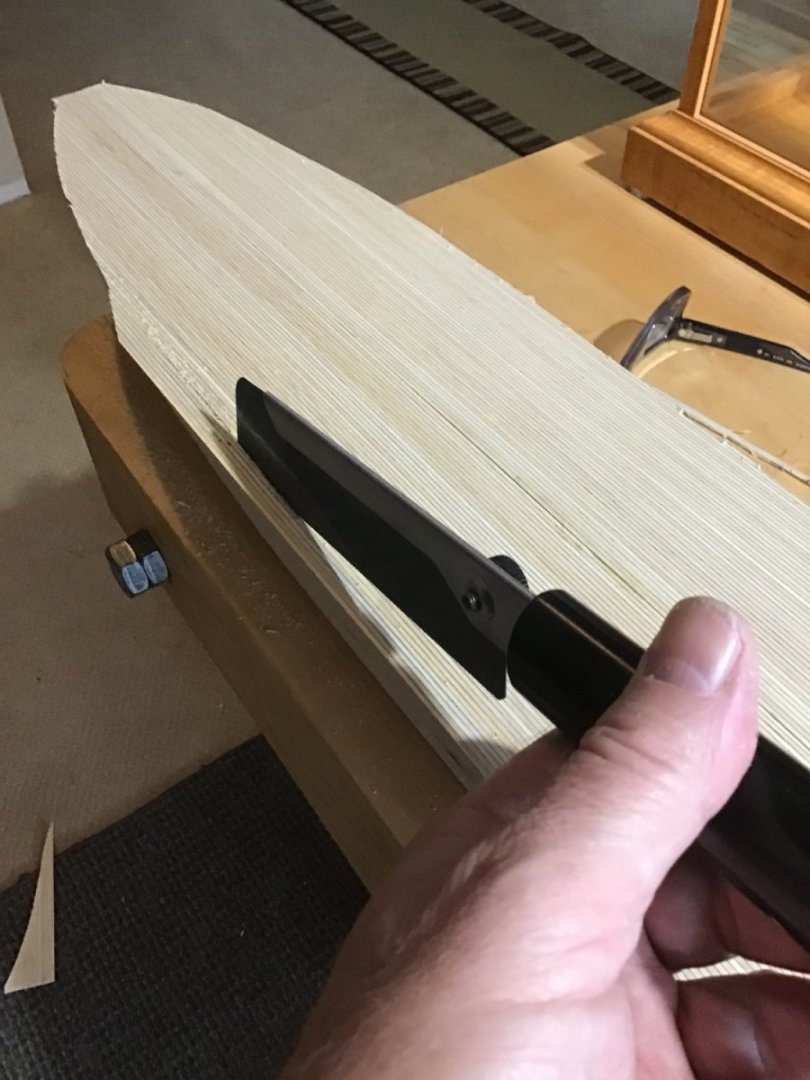
Hull Preliminaries Cut a building board from a piece of plywood and found a chuck block in the scrap pile. Screwed the block in the bottom of the hull and clamped in the shoulder vise. Used a 36” ruler to mark the centerline on the deck. Picture 1 shows two pieces of decking, glued with epoxy, along the centerline. Pretty simple, clamped lightly after the epoxy set. Be careful as the deck can slide. Let dry overnight. Next flipped the hull and drilled a series of holes n the deck along the hull - picture 2. Here picture 3 shows the hull back in the vice with the holes outlining the hull edge. Ready to do the deck rough cut with a Tamiya razor saw. Picture 4, cutting along “connecting the dots”….. Finally cutting along the curves with a well sharpened flat chisel….pictures 5 and 6. Picture 7. Rough cut finished. The deck will be sanded flush with the hull when fairing the hull with the templates.


- 166 replies
-
- 4
-
-
- Maine
- BlueJacket Shipcrafters
- (and 1 more)
-
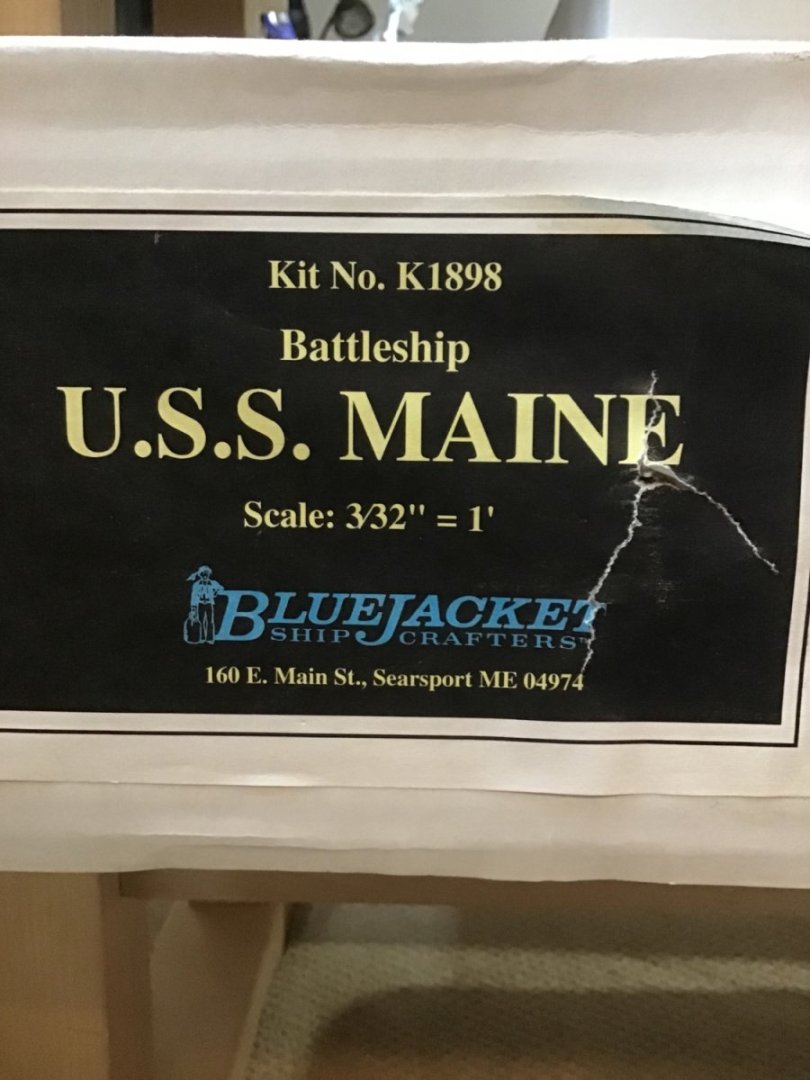
Introduction This is the USS Maine kit by Bluejacket. This beautiful multimedia kit features: an enormous solid hull, resin turrets and sponsons, metal gun barrels, and many sheets of photo etch. After planking many hulls, decided to build this solid hull kit; less time on hull building, means more time spent on topside buildout. And, hopefully, quicker results. Can I knock this out in 6 months? This log may be less detailed than my USS Constitution log, and will show how I do the major tasks. My building philosophy, at this point is to keep working, don’t sweat the small stuff - analysis/paralysis, and trust my ability to overcome the inevitable problems. Please feel free to send a message with any questions you may have.
- 166 replies
-
- 6
-
-
- Maine
- BlueJacket Shipcrafters
- (and 1 more)
-
Project on Hold Thank you for the positive comments. At this time the Constitution project is on hold. Question is whether to just model the hull or to fully build out the masting and rigging. And given the size of a full model, where will I put it. Expect to return to this project in the summer of 2023. Looking for quicker results I’ve kicked off the Bluejacket USS Maine project. Here she is on the shelf:
-
Hello and Welcome! Former cabinet maker here.....always up for answering questions. Enjoy your shipbuilding journey!
-
Hello, It may have been already said…. Checkout the movie Captains Courageous….see the real schooners in action…. Never tire of watching it…. Your work is beautiful by the way…. Cheers!
-
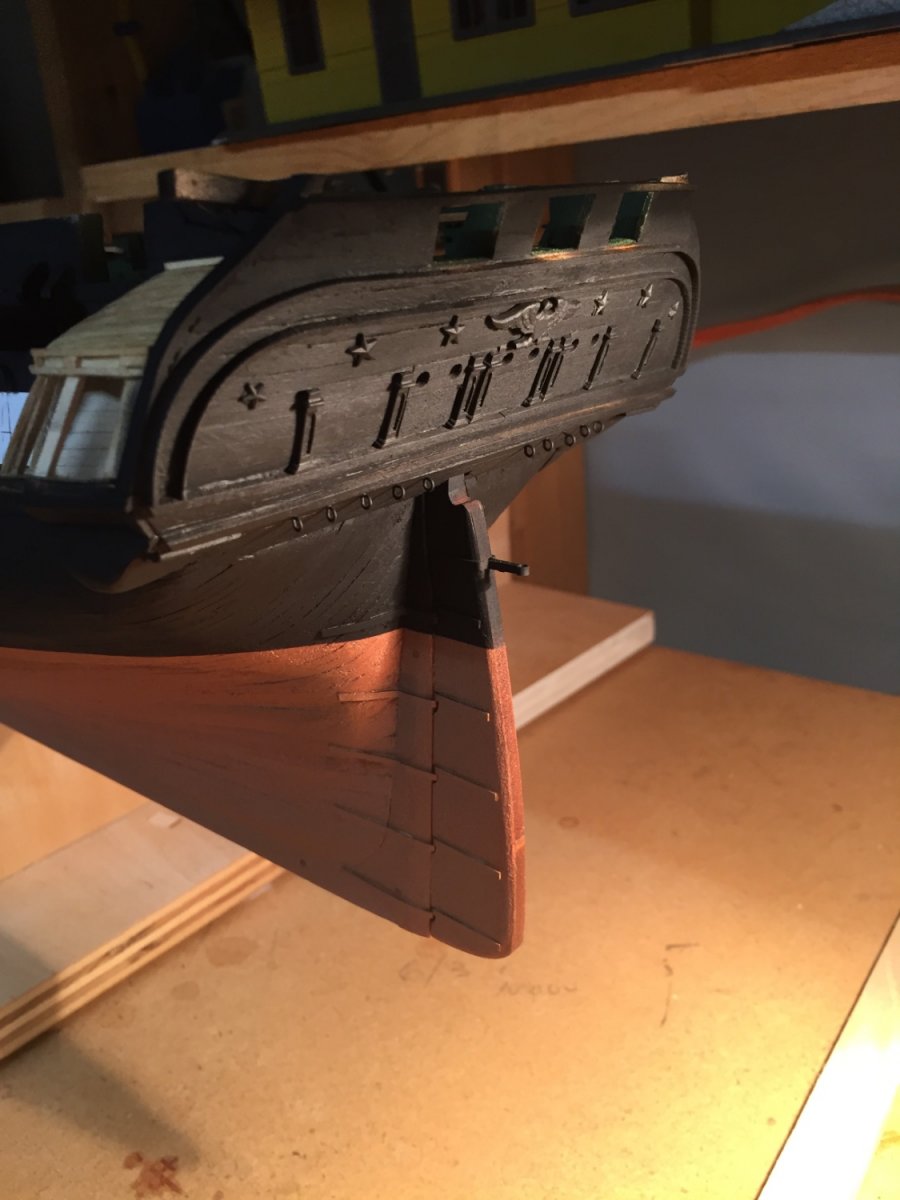
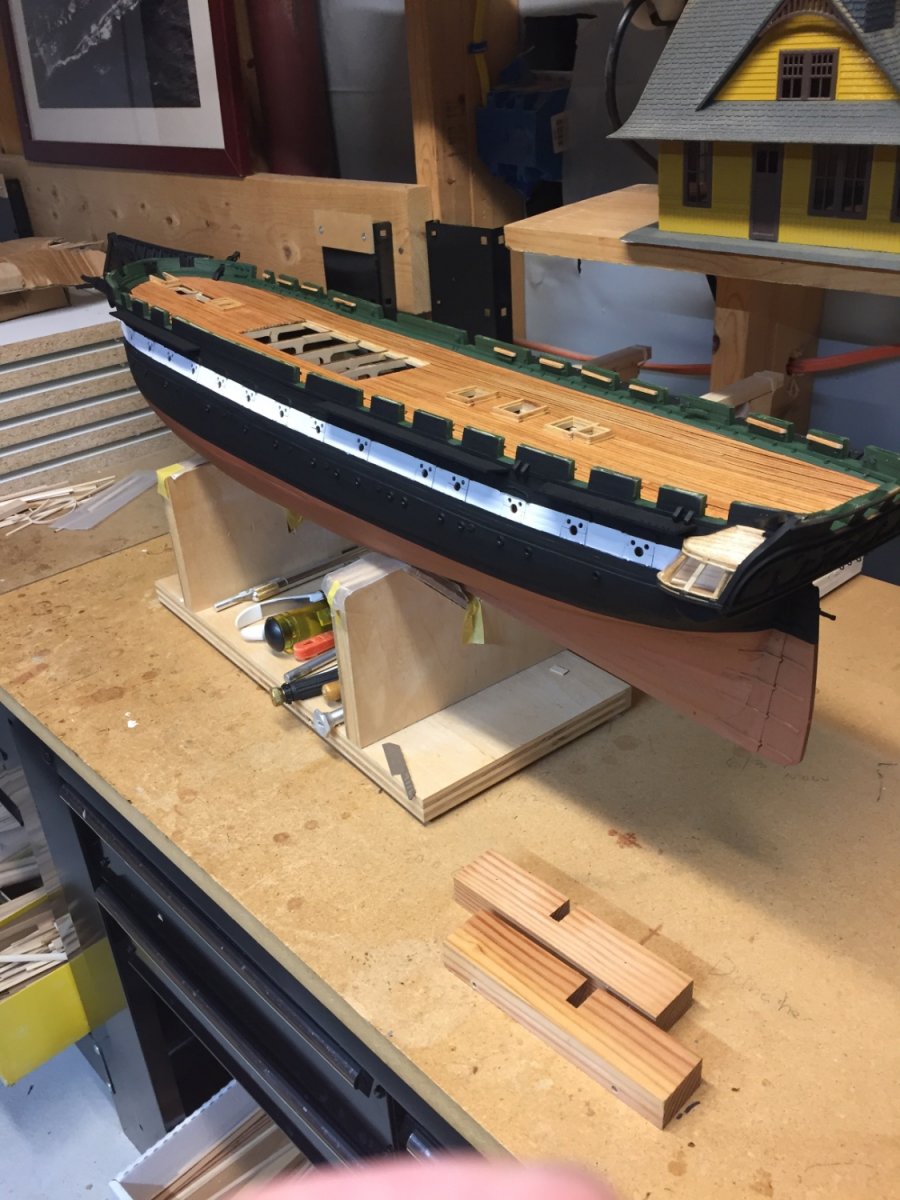
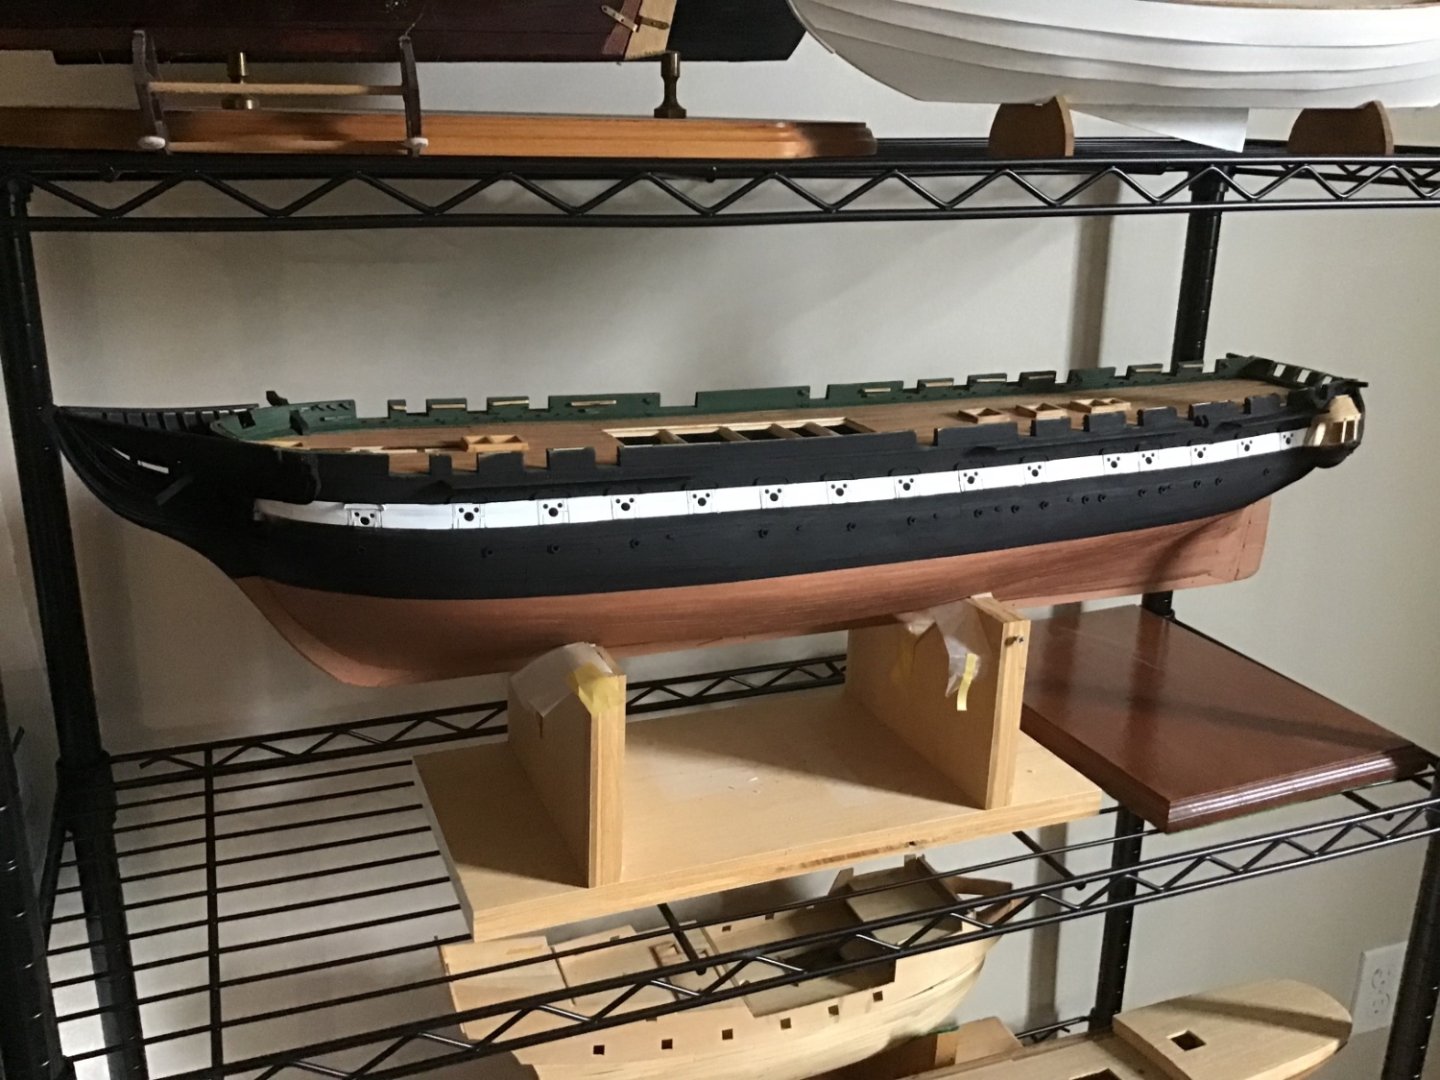
Spray Painting the Hull Completed the spray painting of the hull. Trim painting to follow. Hull was prepped with Varathane Ipswich Pine stain, 1 application, then light rub with steel wool. Wood has a little “tooth”. Lower hull is Tamiya Dark Copper XF-28, thinned with about 10% Tamiya Thinner X-20. Paint applied with an Iwata RG-3L Mini Spray Gun with 1mm tip, @20 psi. This gun produces a robust spray pattern such that the paint lays down wet, silky and smooth. See Paul Budzik’s video on YouTube to find out about this gun. Black bands are Tamiya Flat Black XF-1, also thinned with about 10% X-20 thinner, and with Tamiya Paint Retarder added to the mix. Paint applied with a Paasche Talon, with #3 tip (0.6mm), @18psi. White band is Vallejo Model Air white, with flow improver. Also applied with the Talon. Going to let this paint cure for a few days. Next is the brush work to cleanup the overspray and paint the white trim and details.


-
Hello and welcome to the site. Always up for answering a question. Good luck with your Atlantic…..
-
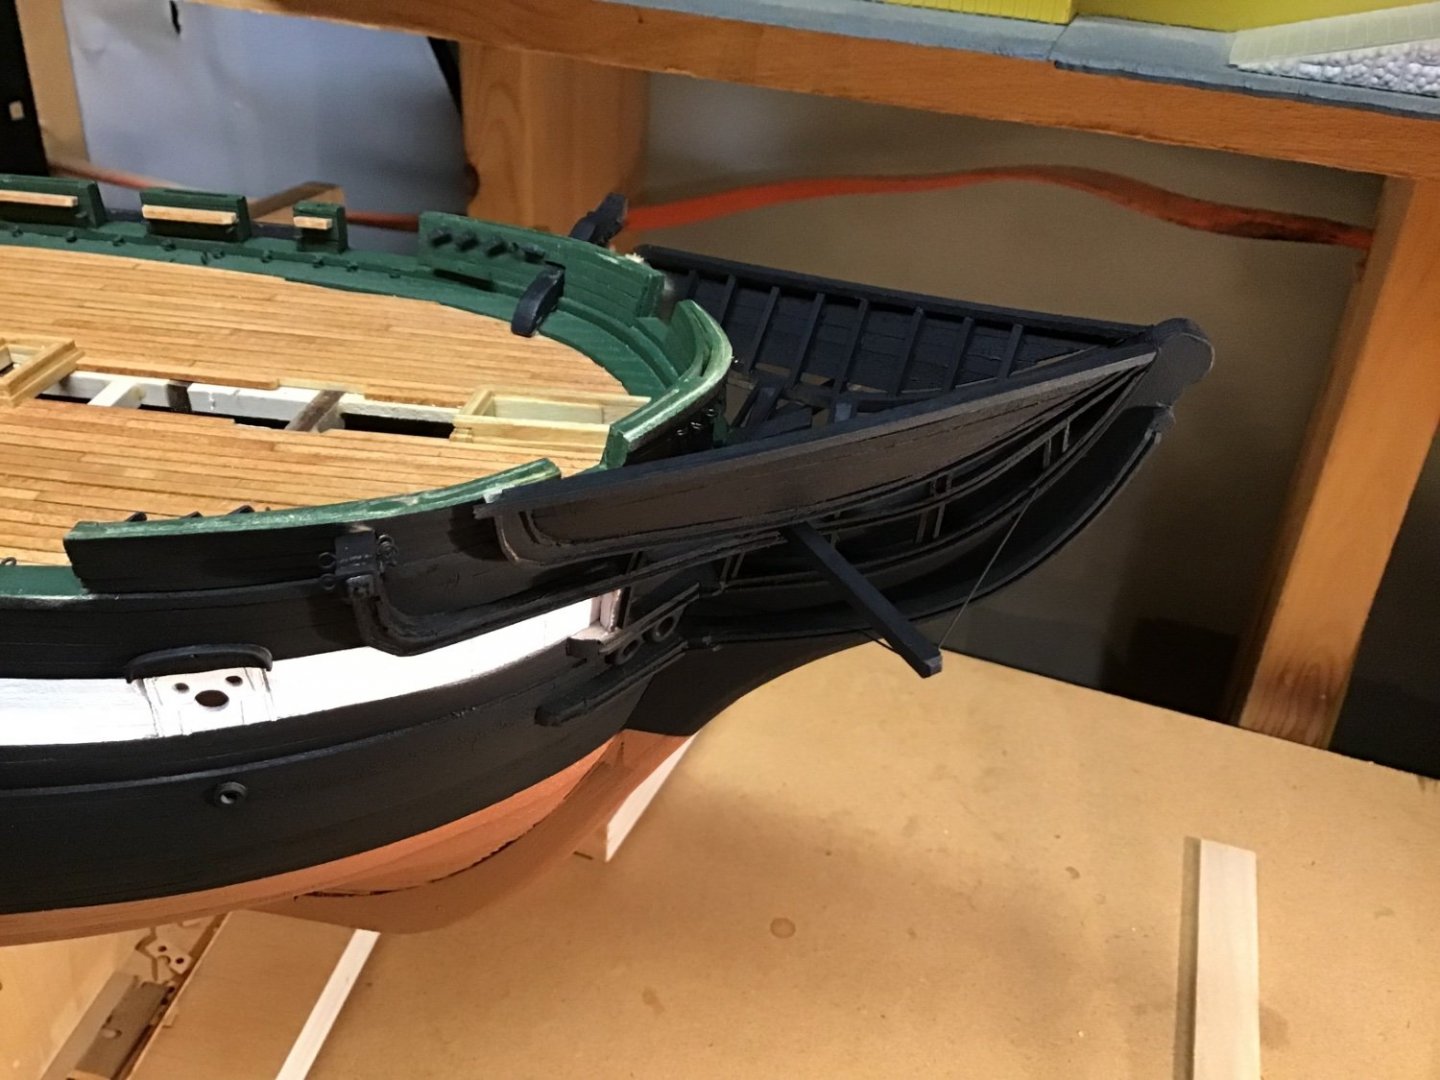
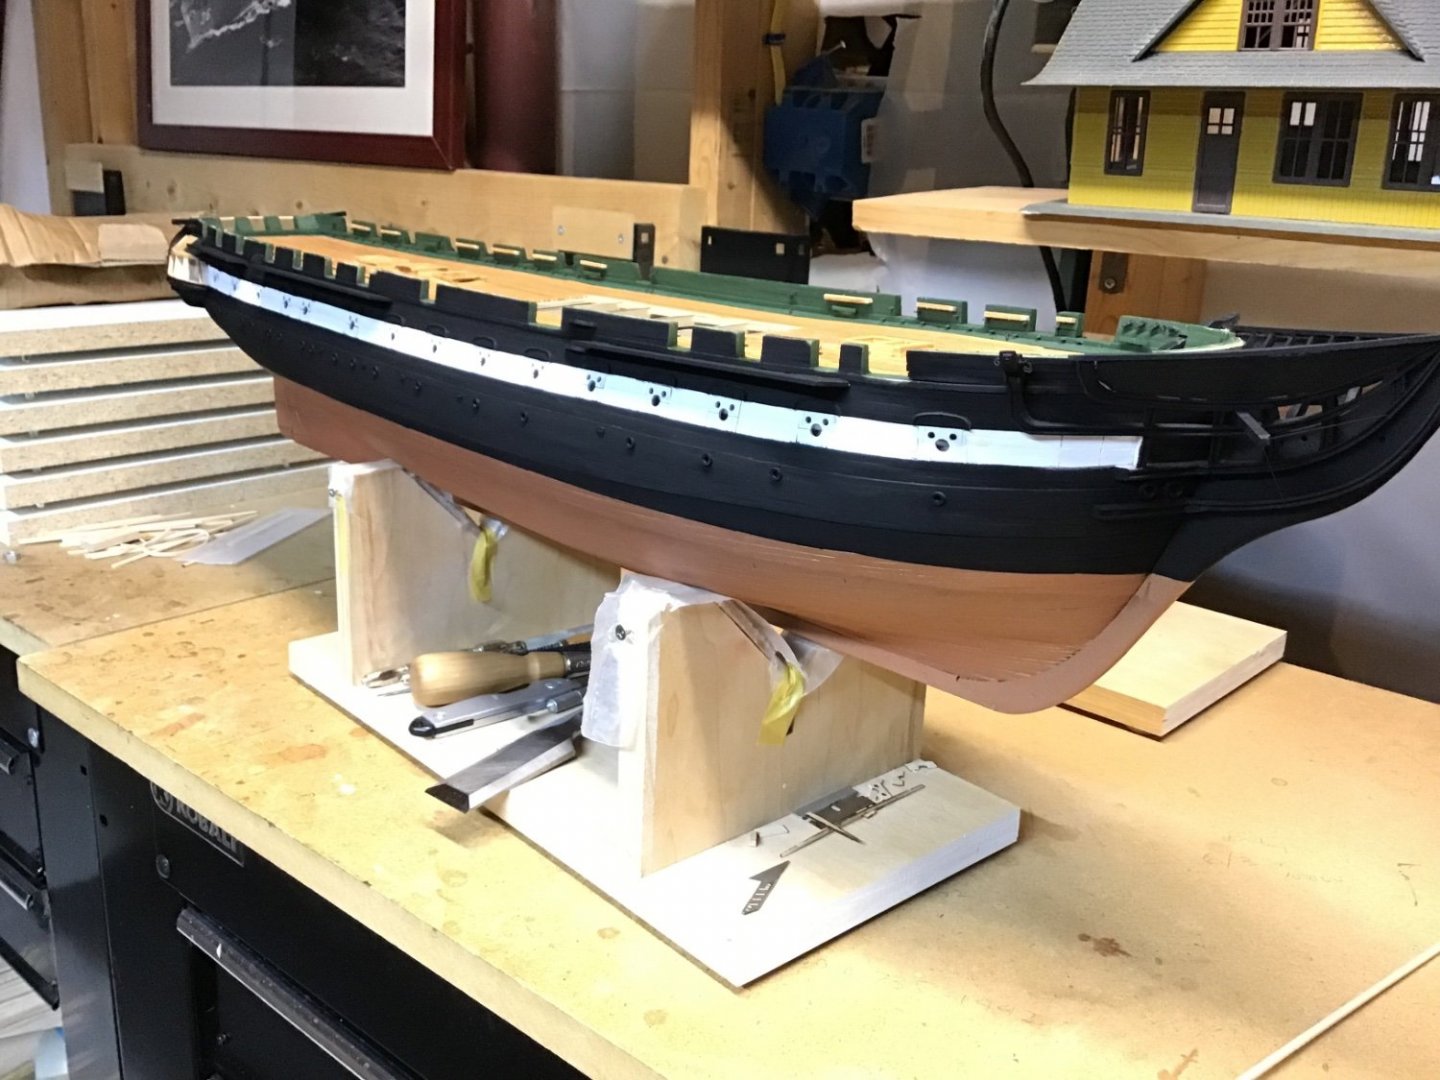
A few close ups….