ERS Rich
-
Posts
772 -
Joined
-
Last visited
Content Type
Profiles
Forums
Gallery
Events
Everything posted by ERS Rich
-
 A lot of work! Lookin’ good!
 -
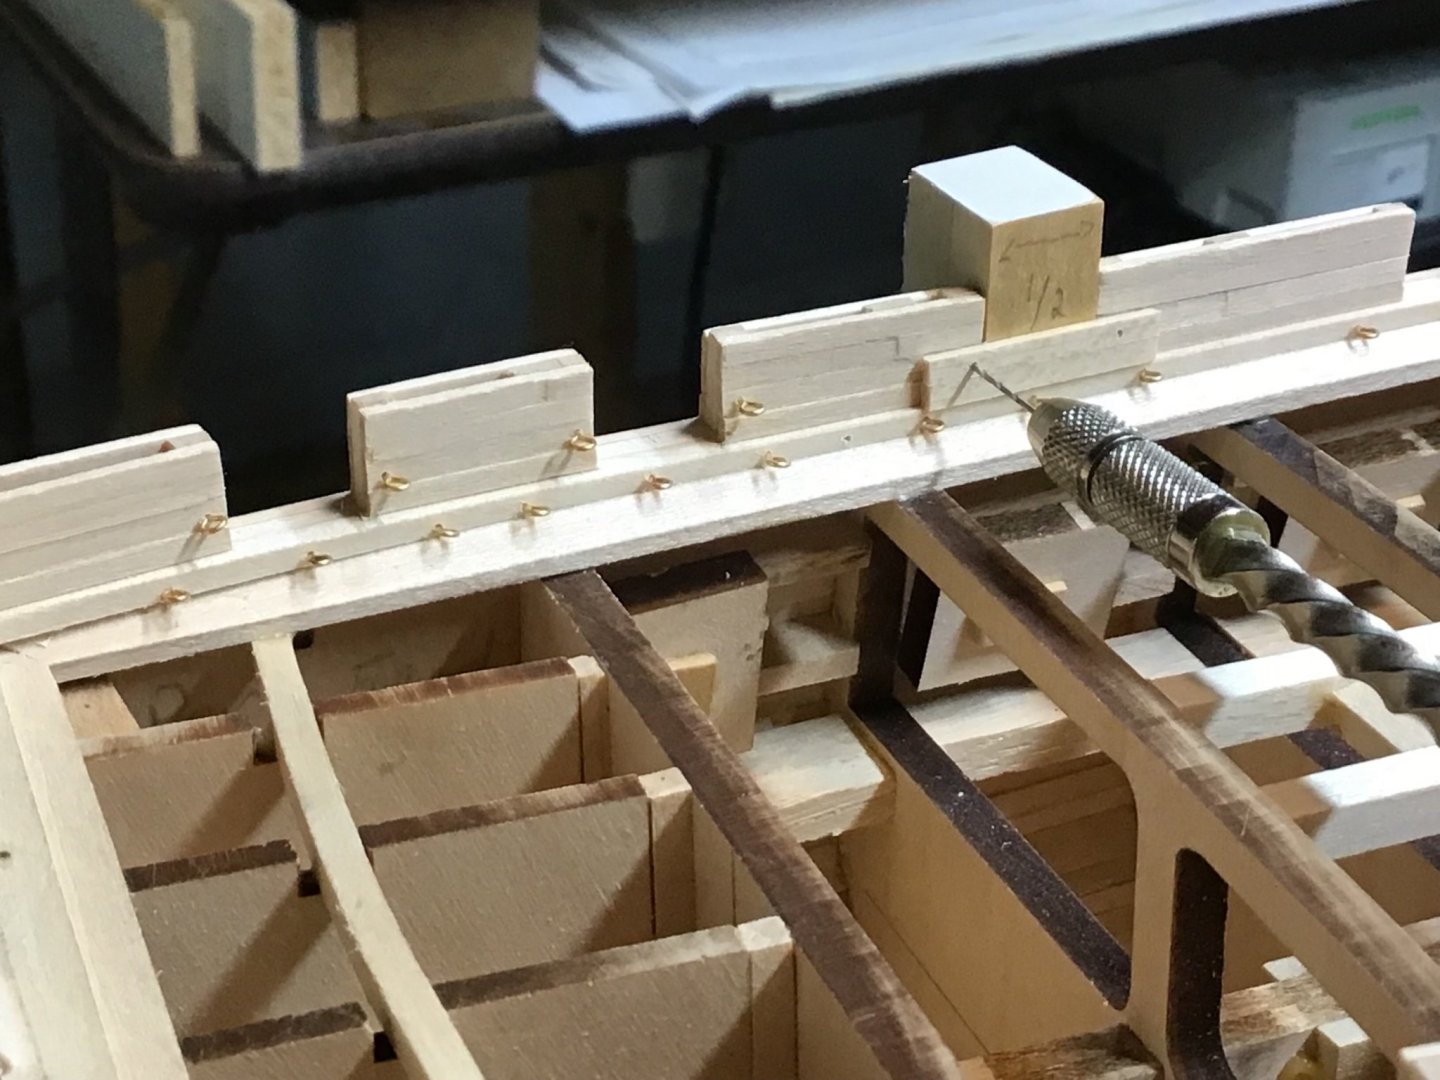
Installing Eyebolts for Carronade Tackle - Bulkhead There are two eyebolts on either side of the gunport, located in the middle of the second plank above the sill. Another drill guide template was made using a 1/2” wide block with two planks glued to the front. The picture shows the drill guide in use and some of the eyebolts already installed.
-
Hi, When removing wood in bulk, the tool sequence is rasp, files, then sandpaper. Sanding is a finishing step and is not meant for bulk wood removal. So if one finds they are spending a lot of time sanding it’s time to think about either a rasp or file. A file can provide a finish that often does not need sanding. Files offer finer control as well. Hope this helps. Looking forward to seeing your results! Here is a rasp in action….

-
Not sure if it’s too late…when removing wood the tool sequence is rasp, file, sandpaper (if needed). Half round rasp and files will get you into the curves. Rasp and files can be both full size and miniature. Here is rasp in action. Files often provide such a smooth finish, that sandpaper is not needed. Really good looking ship, looking forward to seeing more.

-
My first few projects were disasters! Always available to answer a question if you need a hand. Cheers!
-
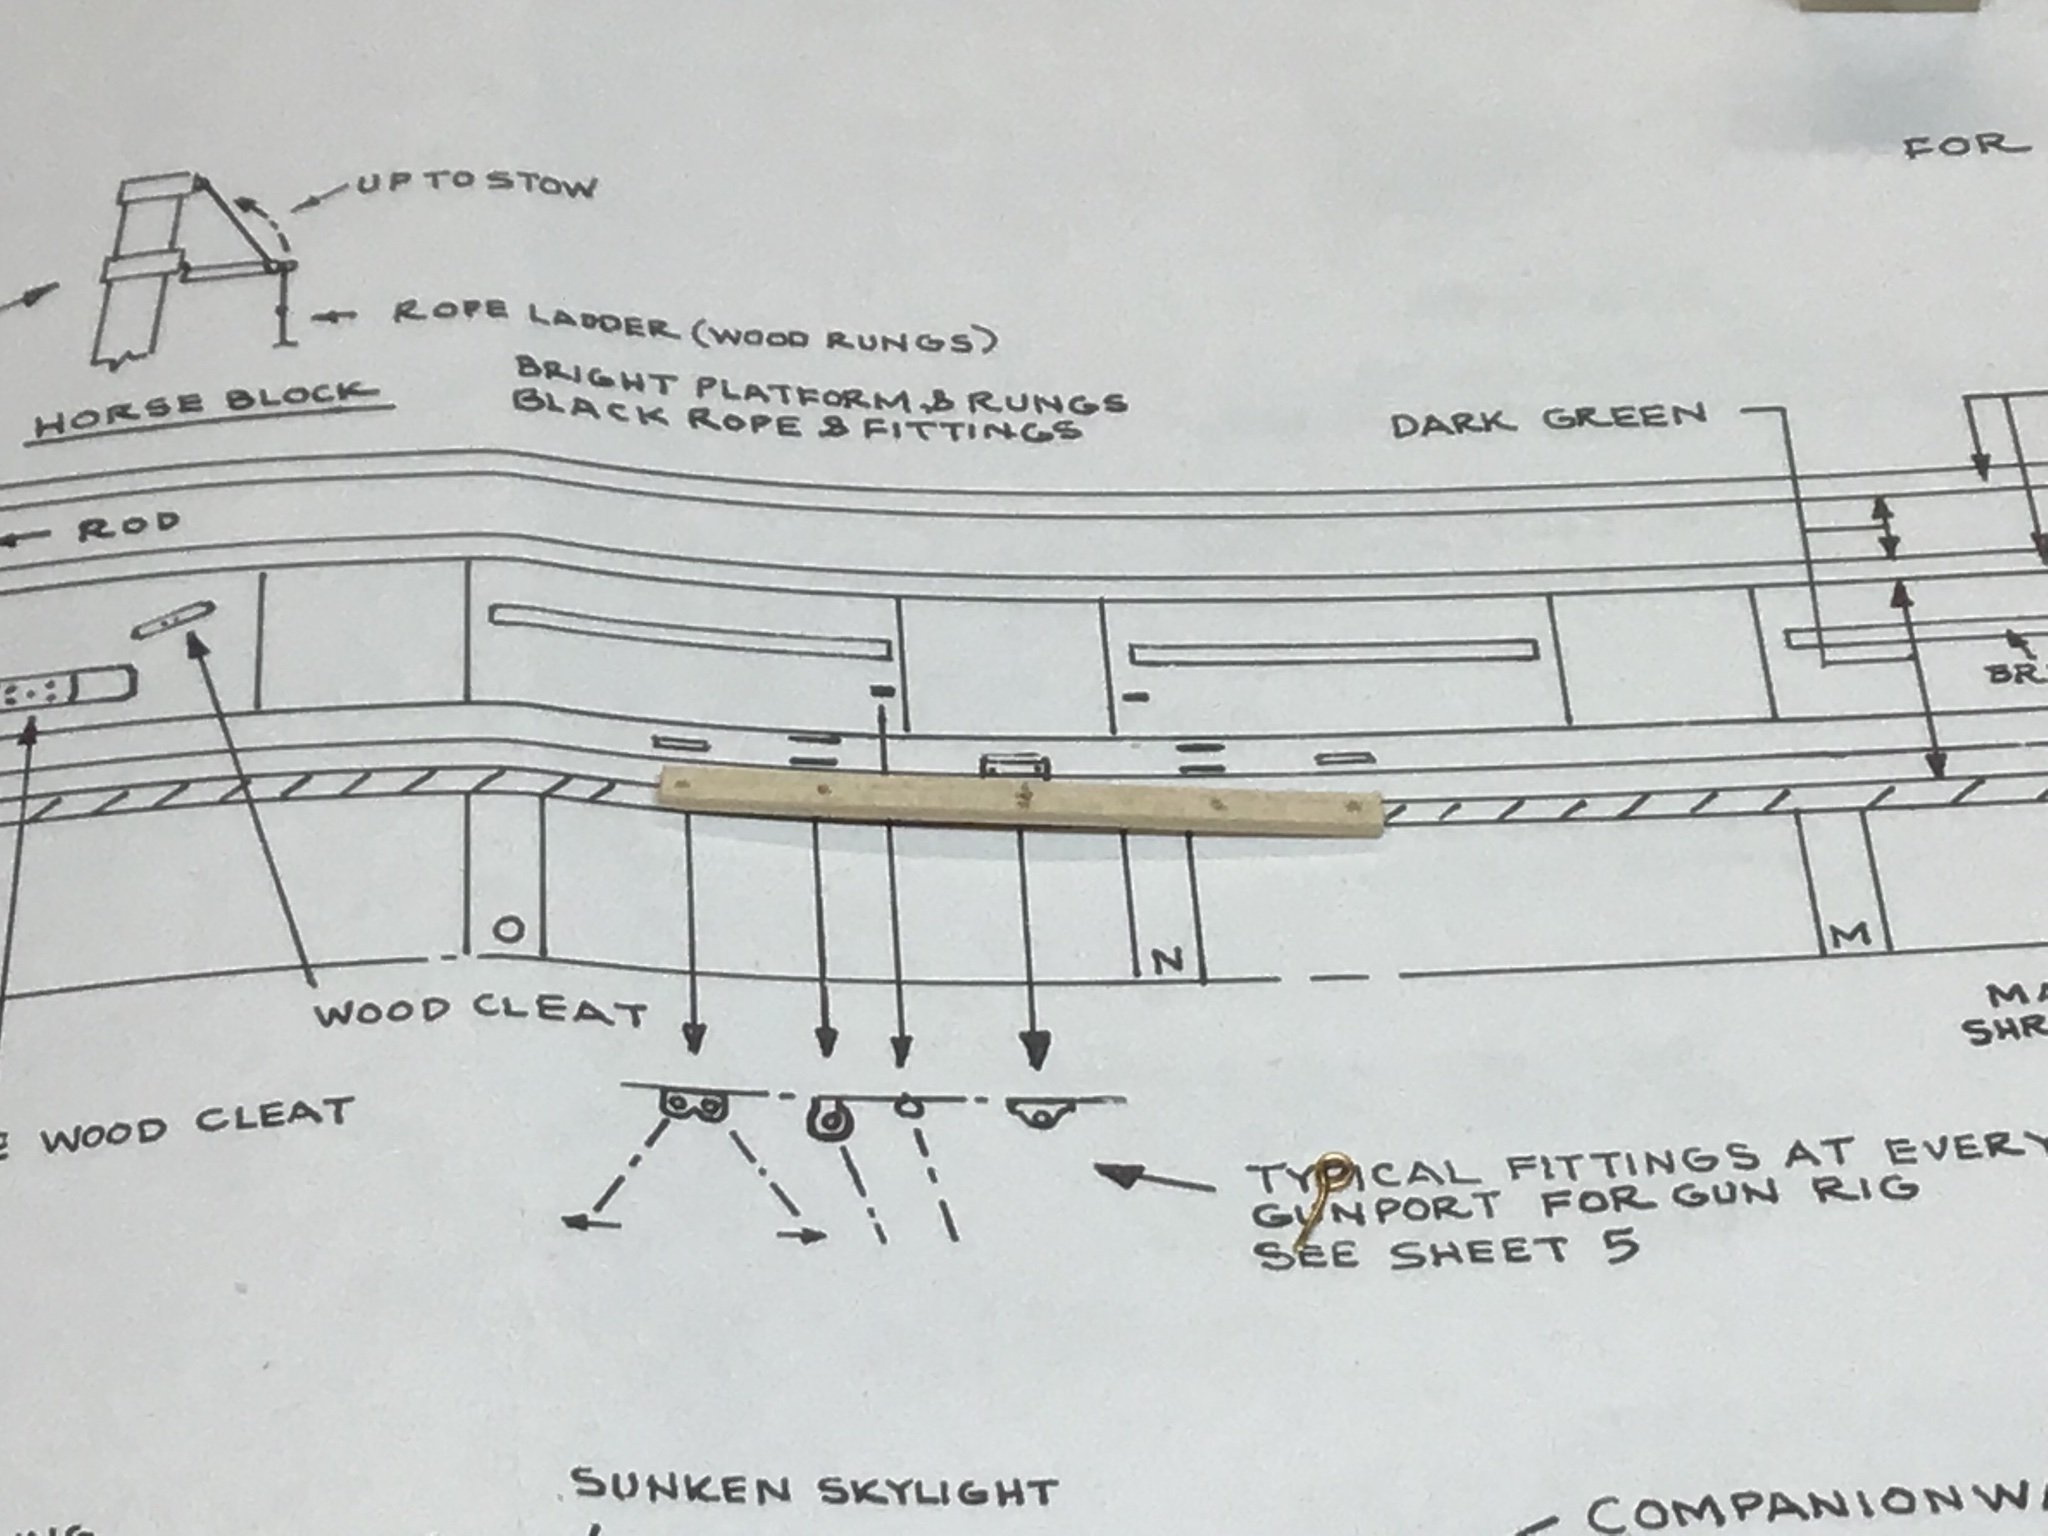
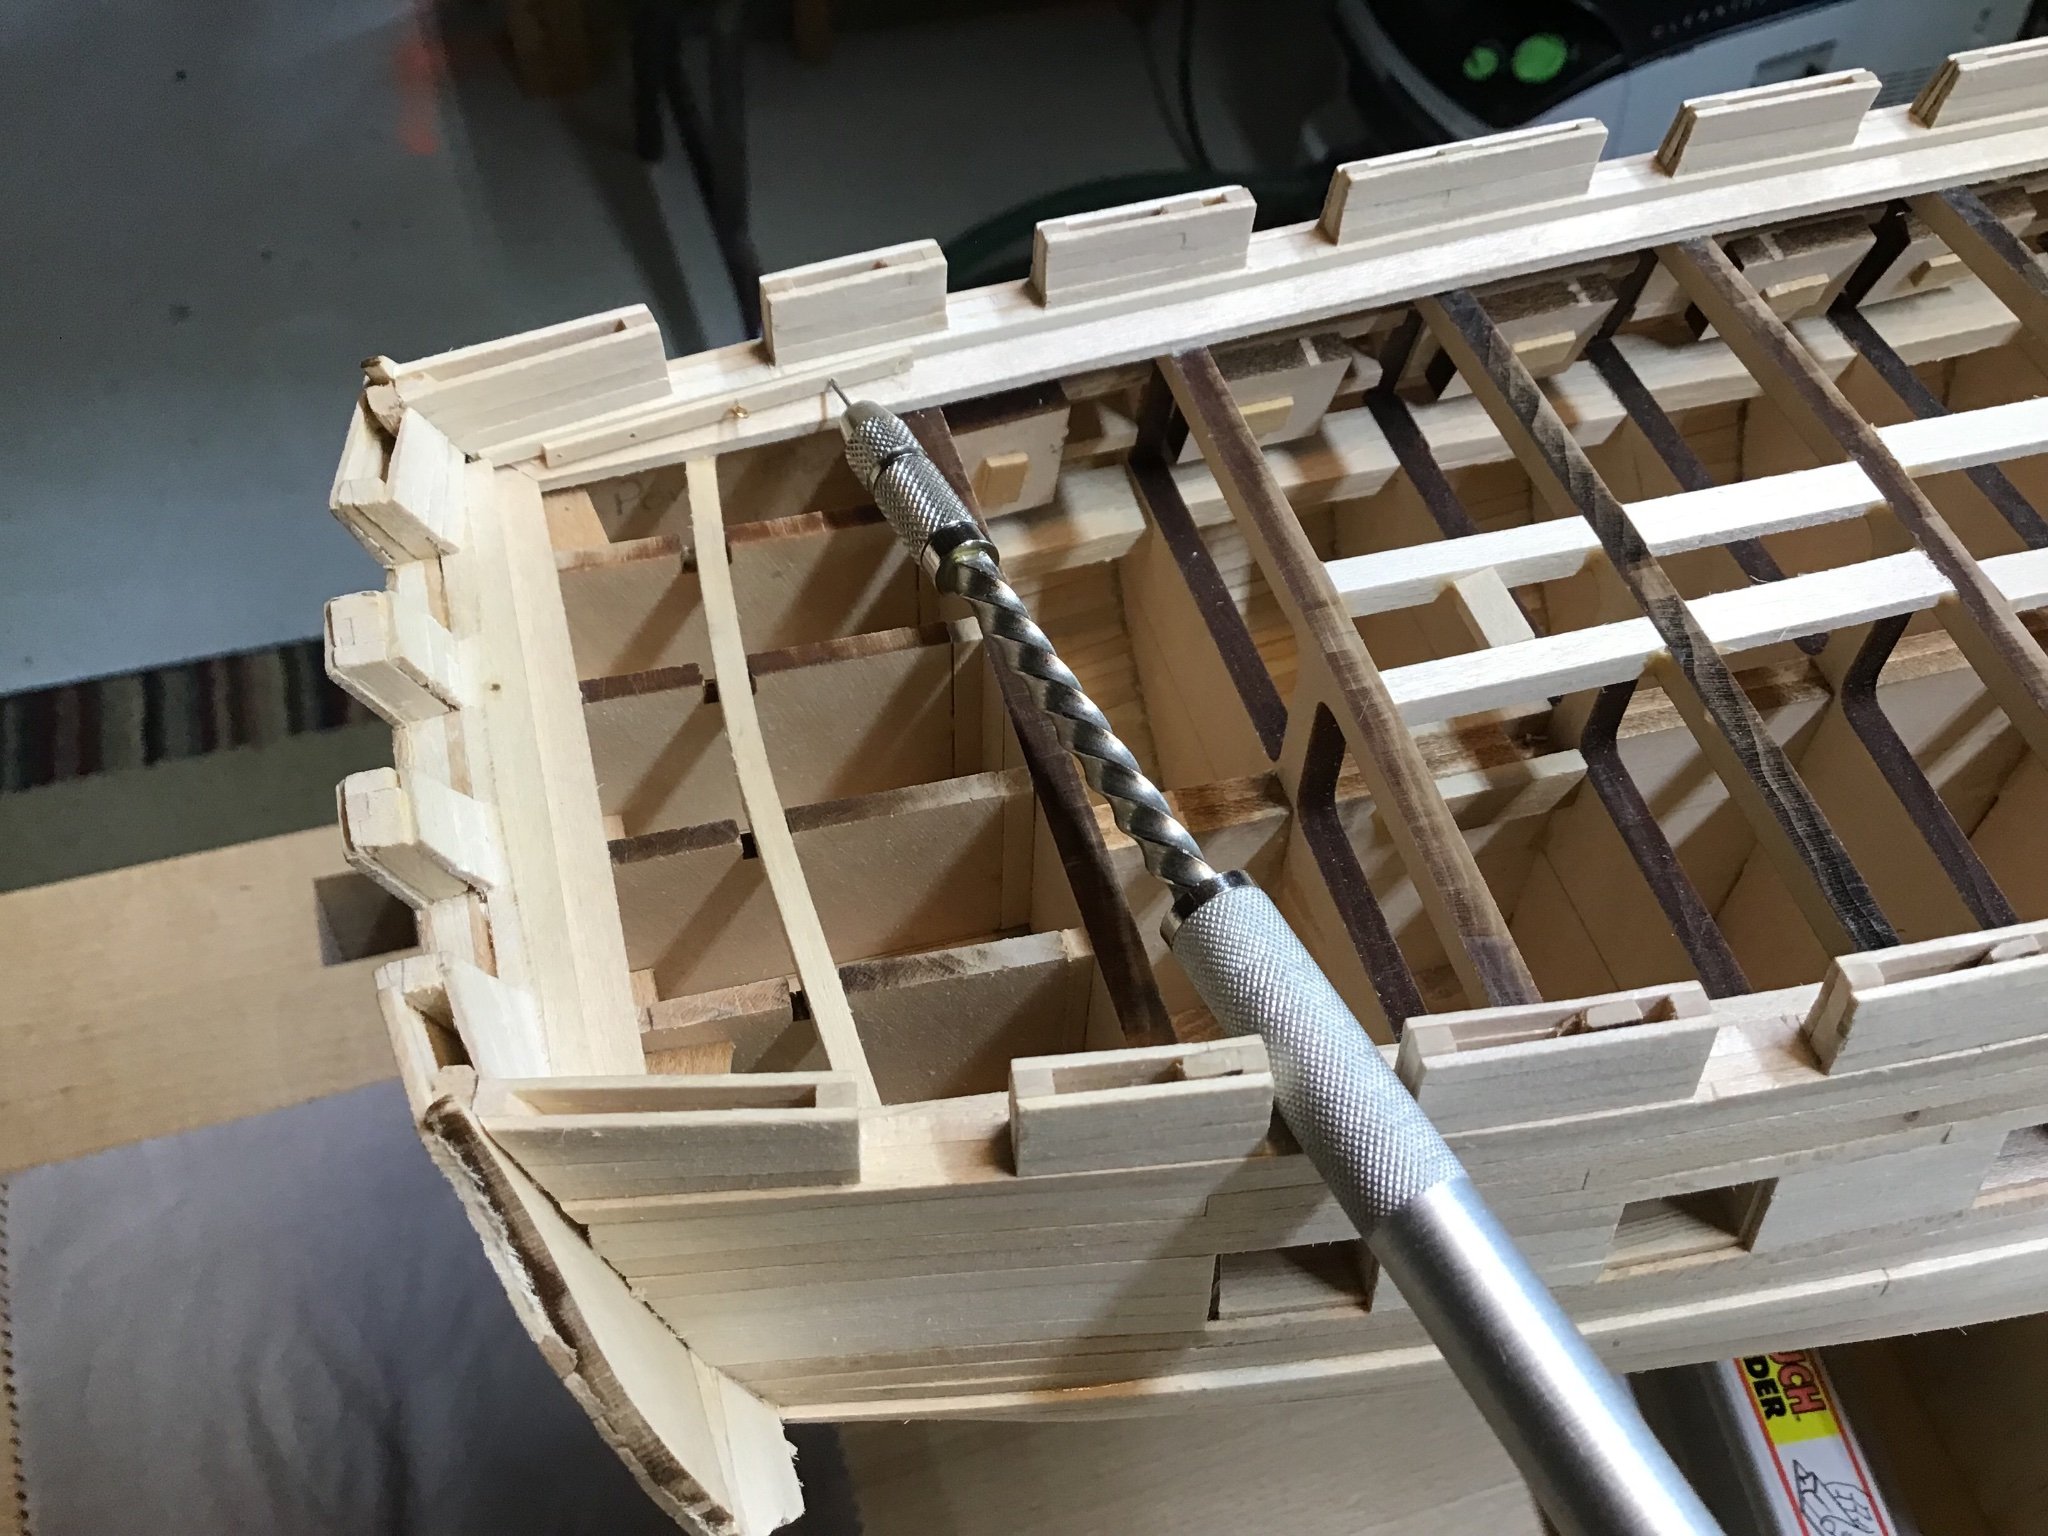
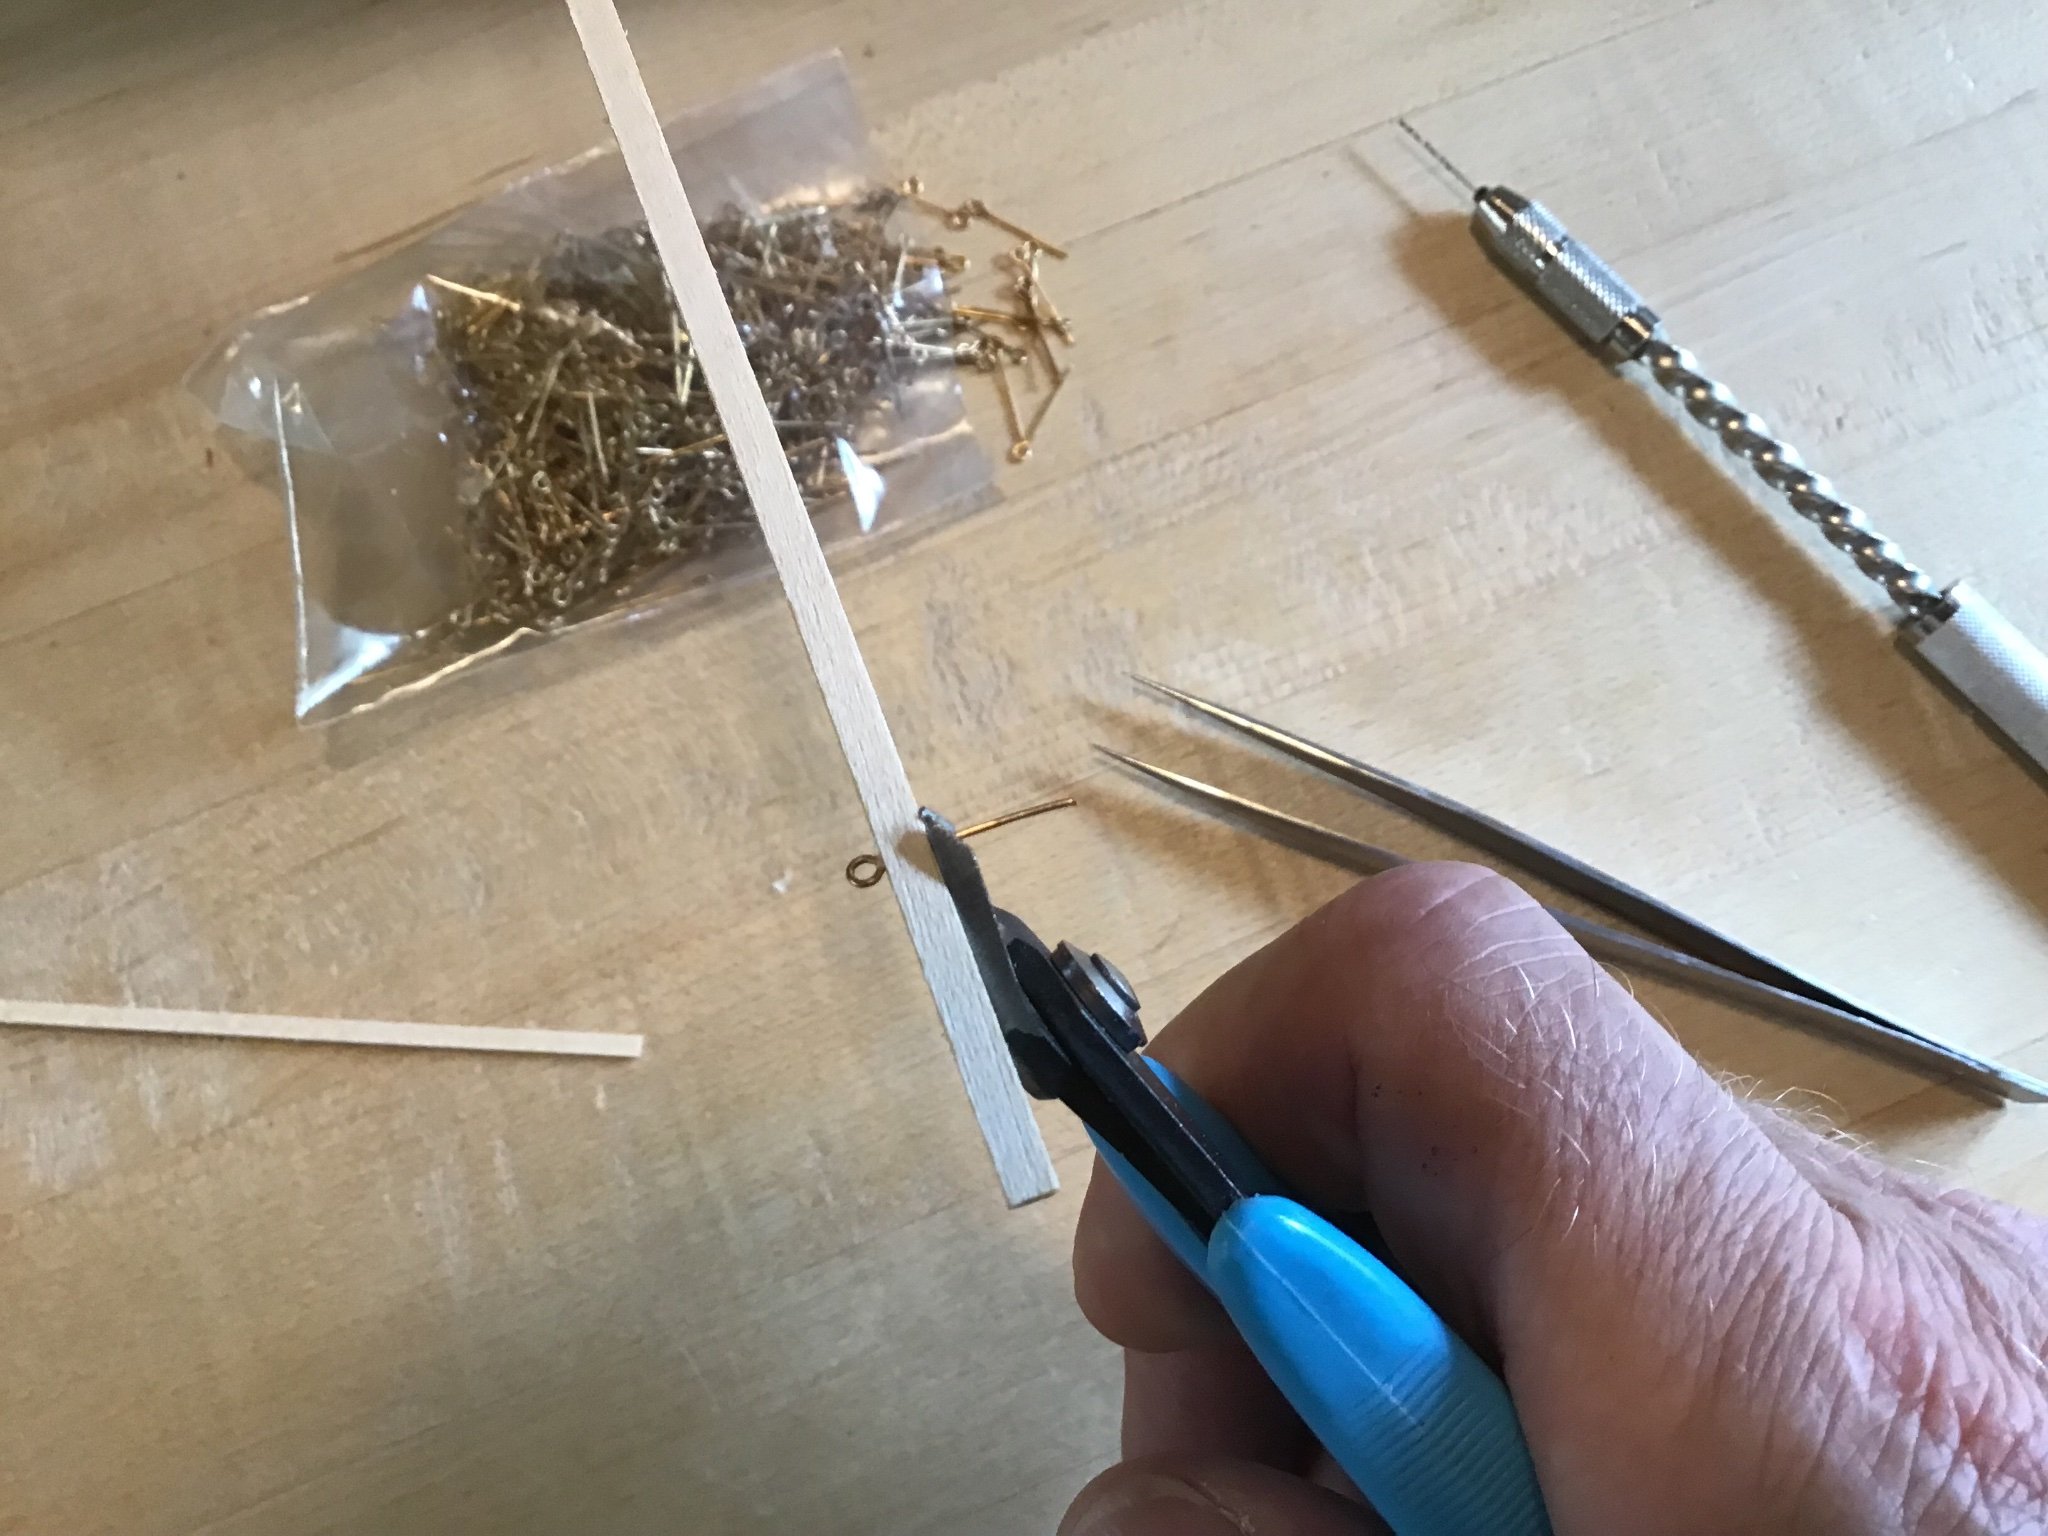
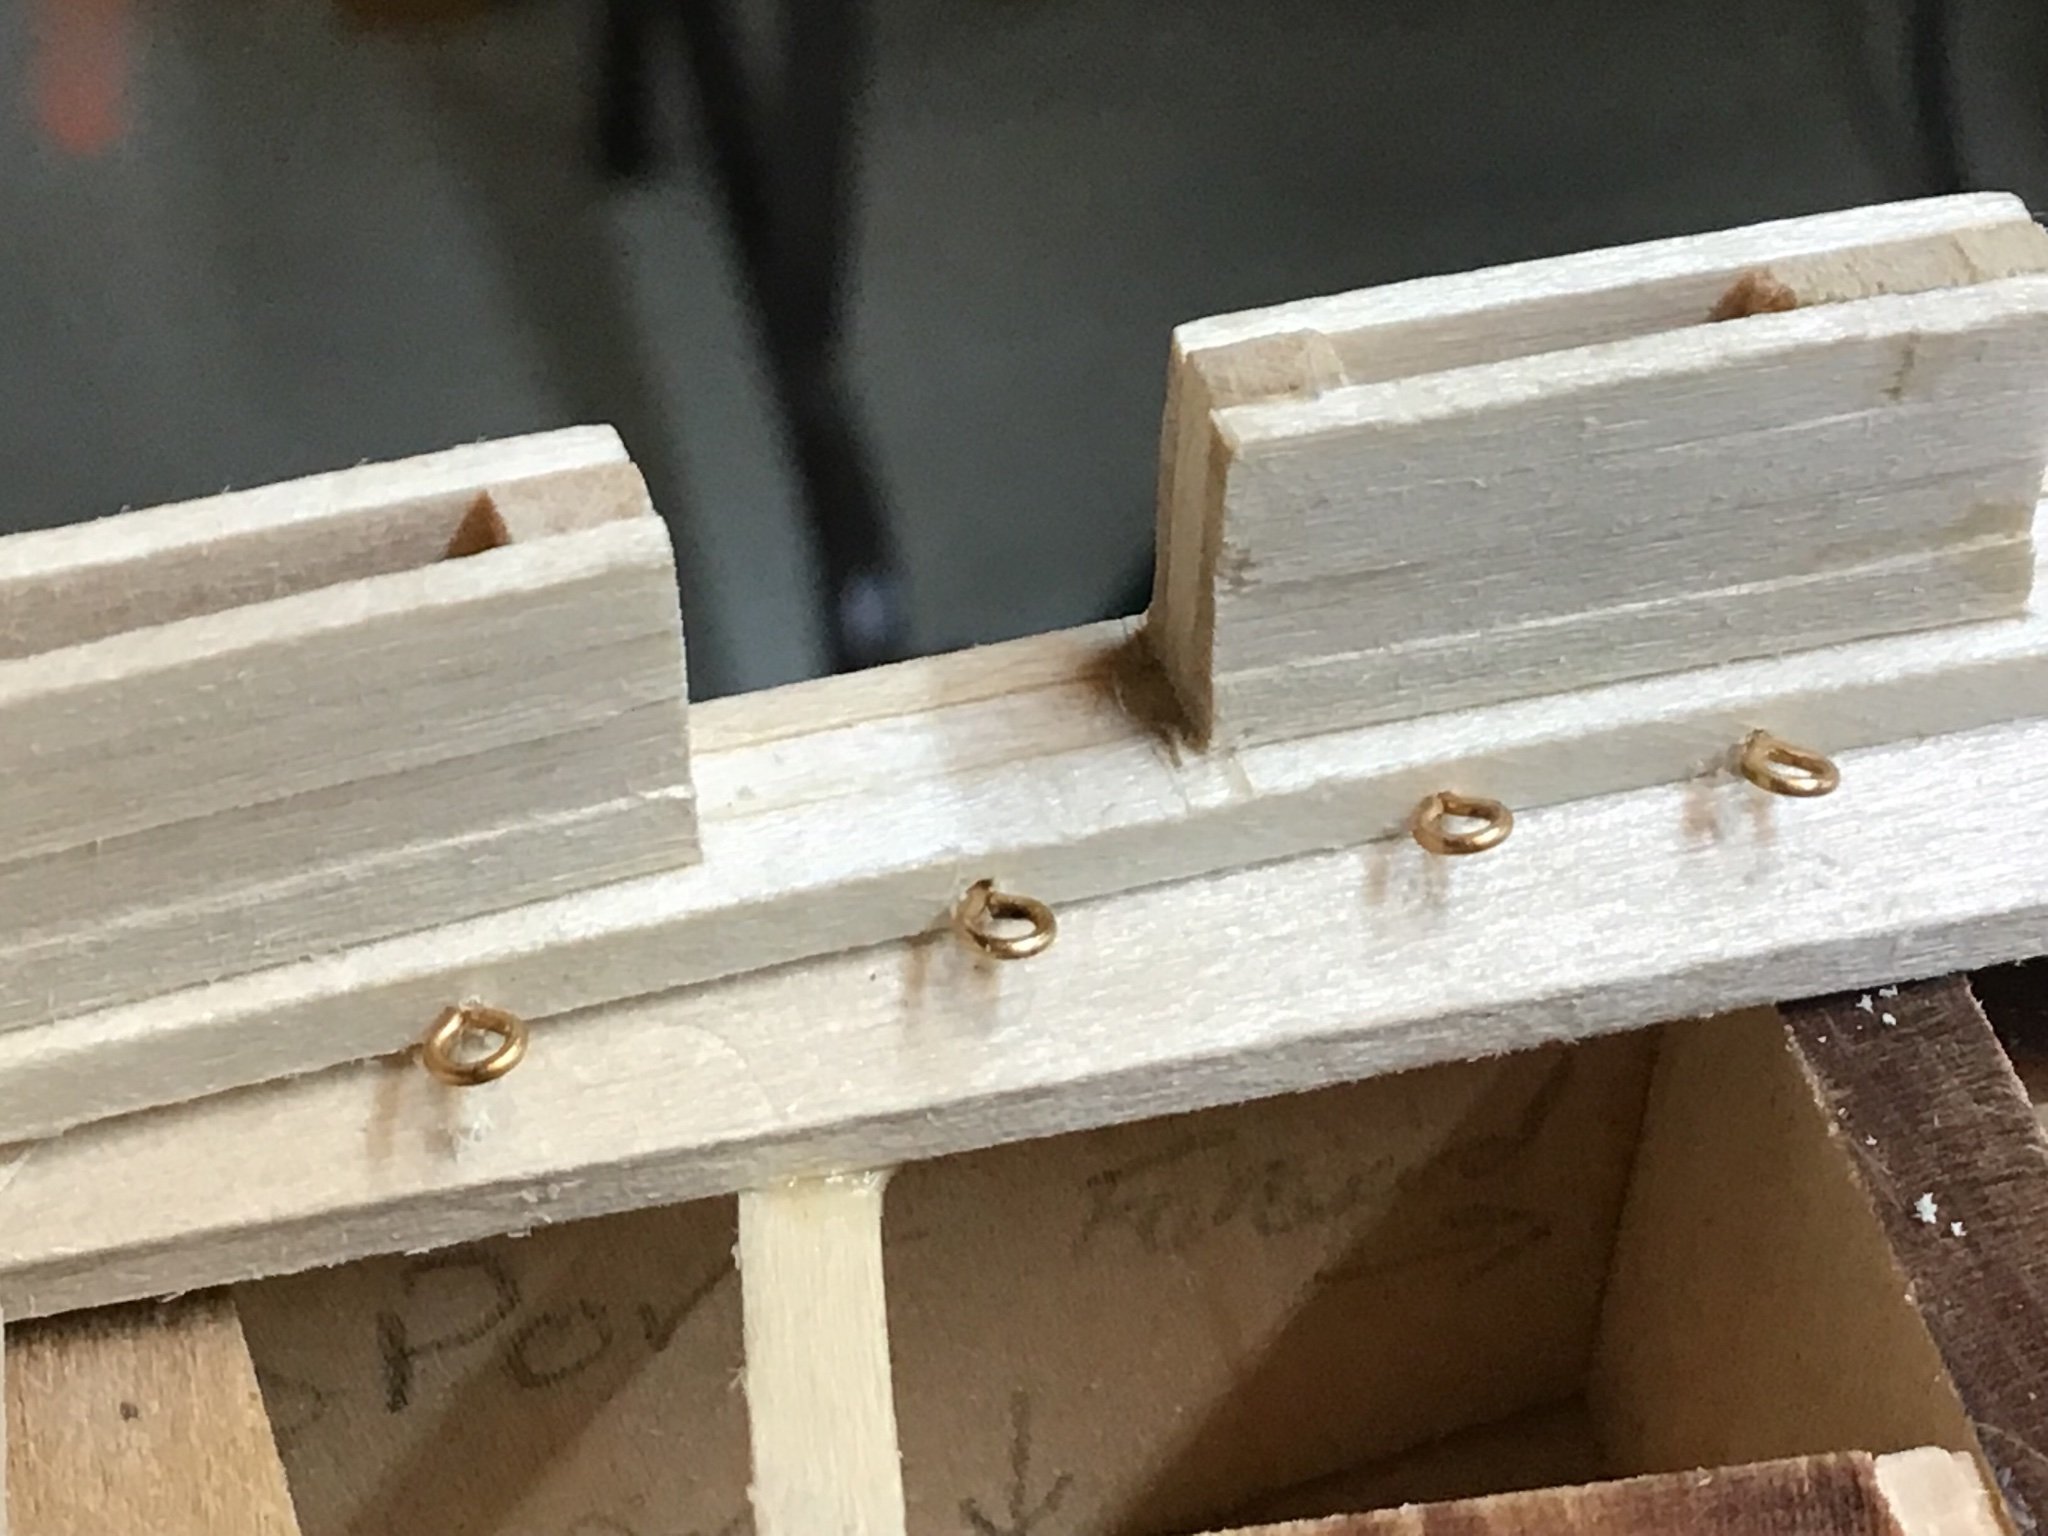
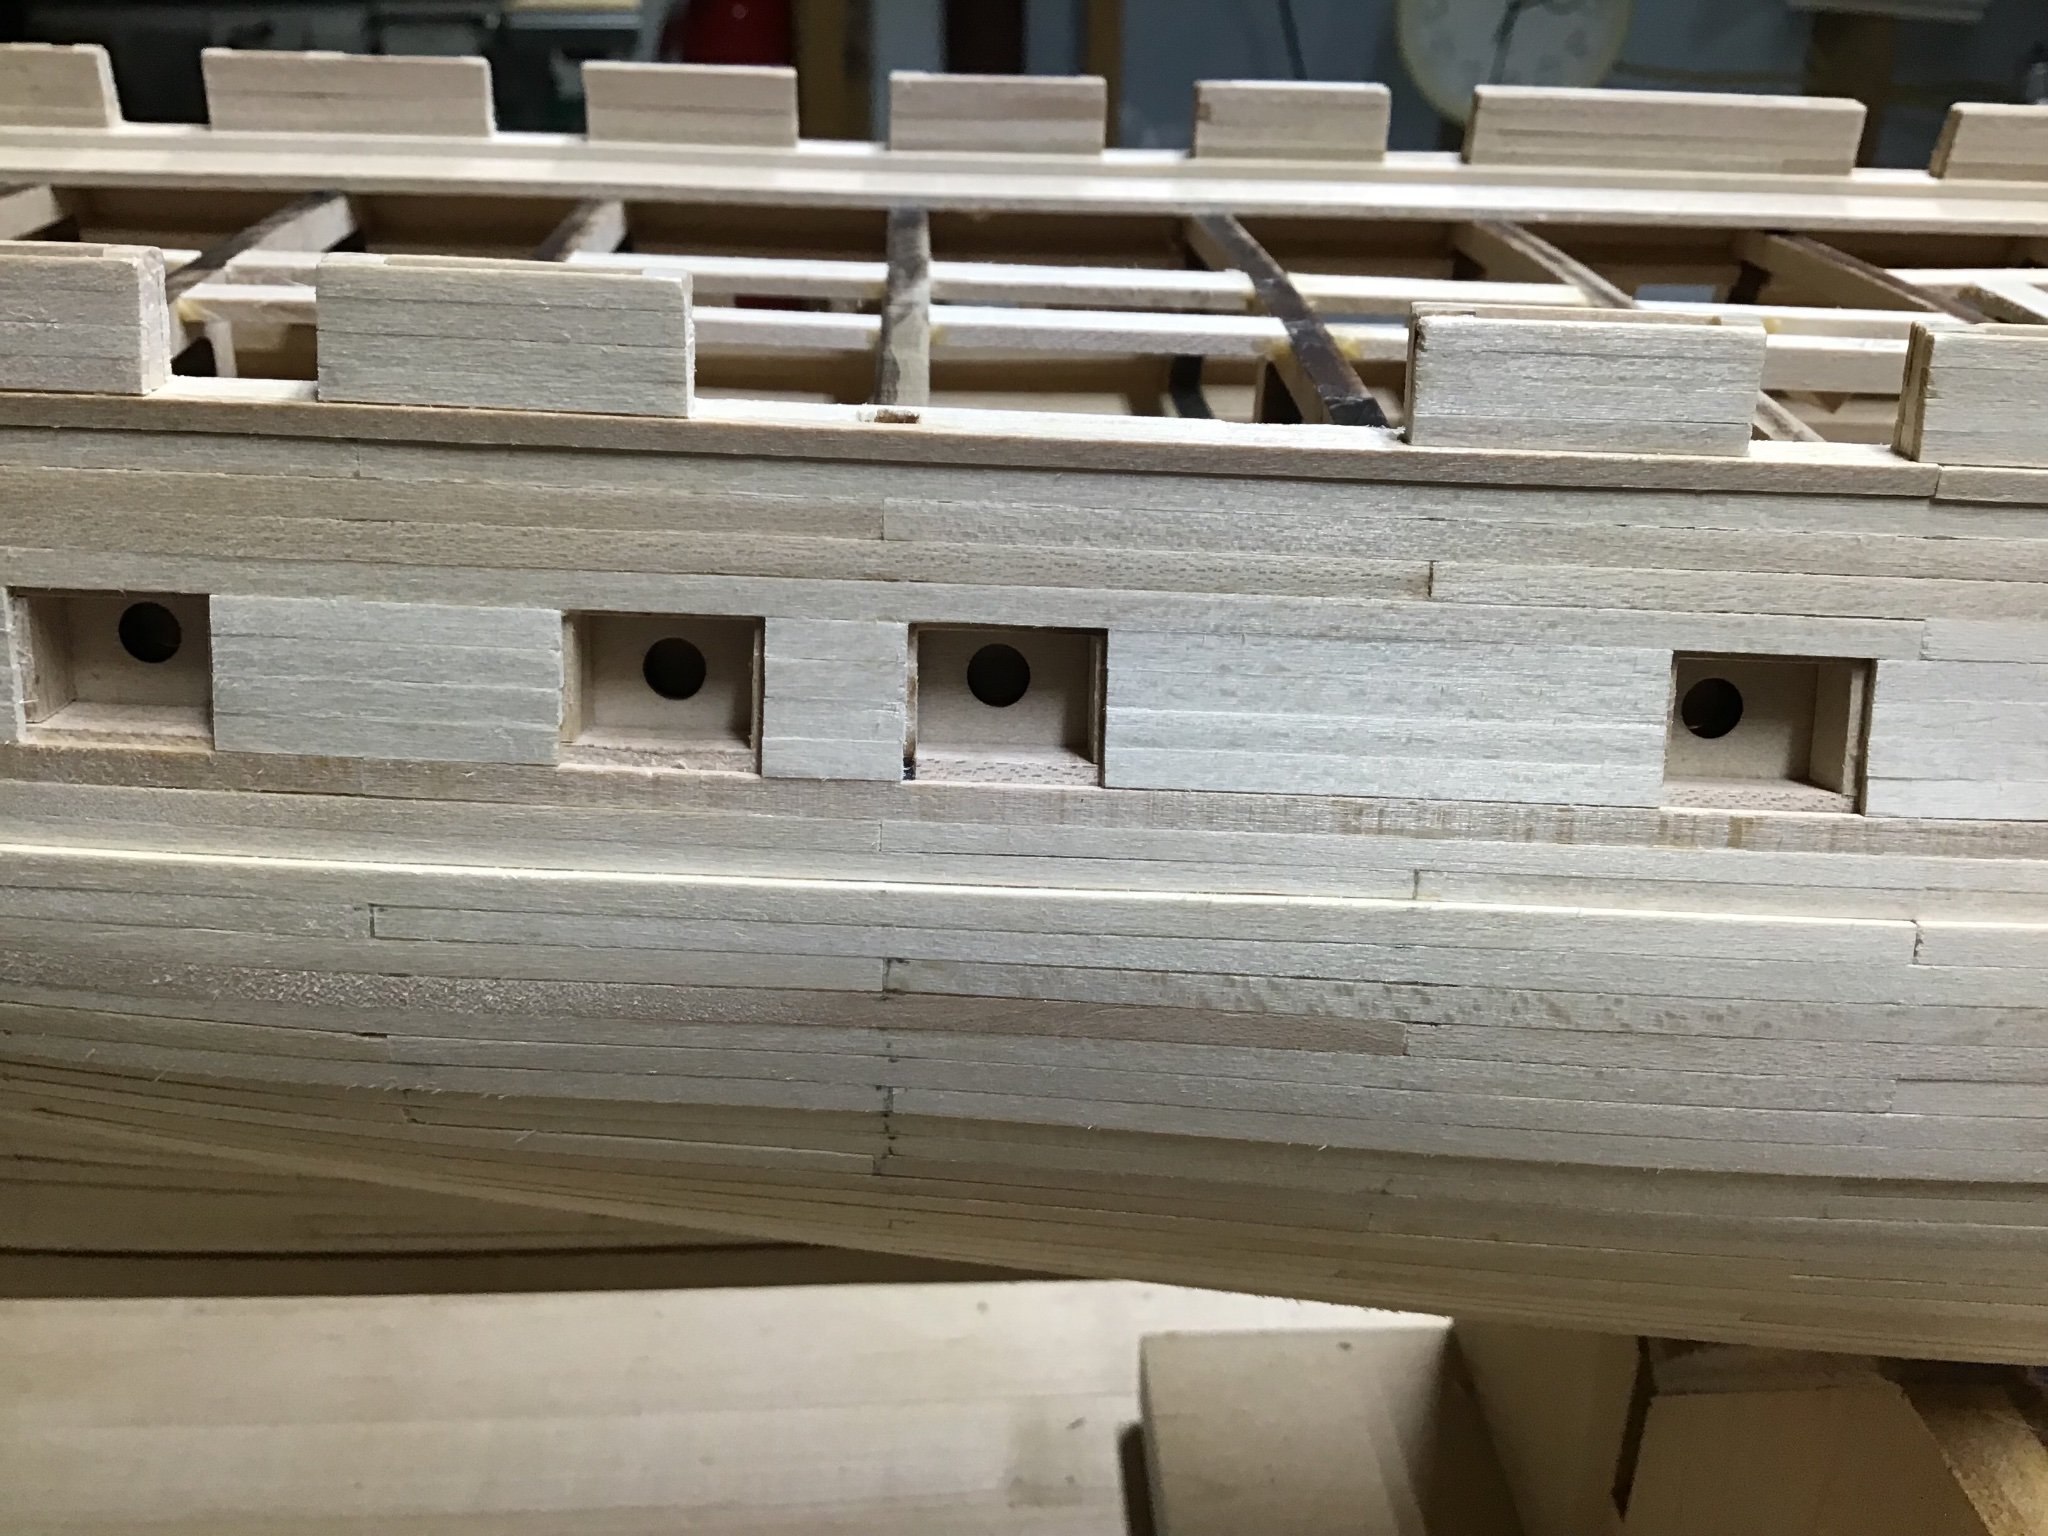
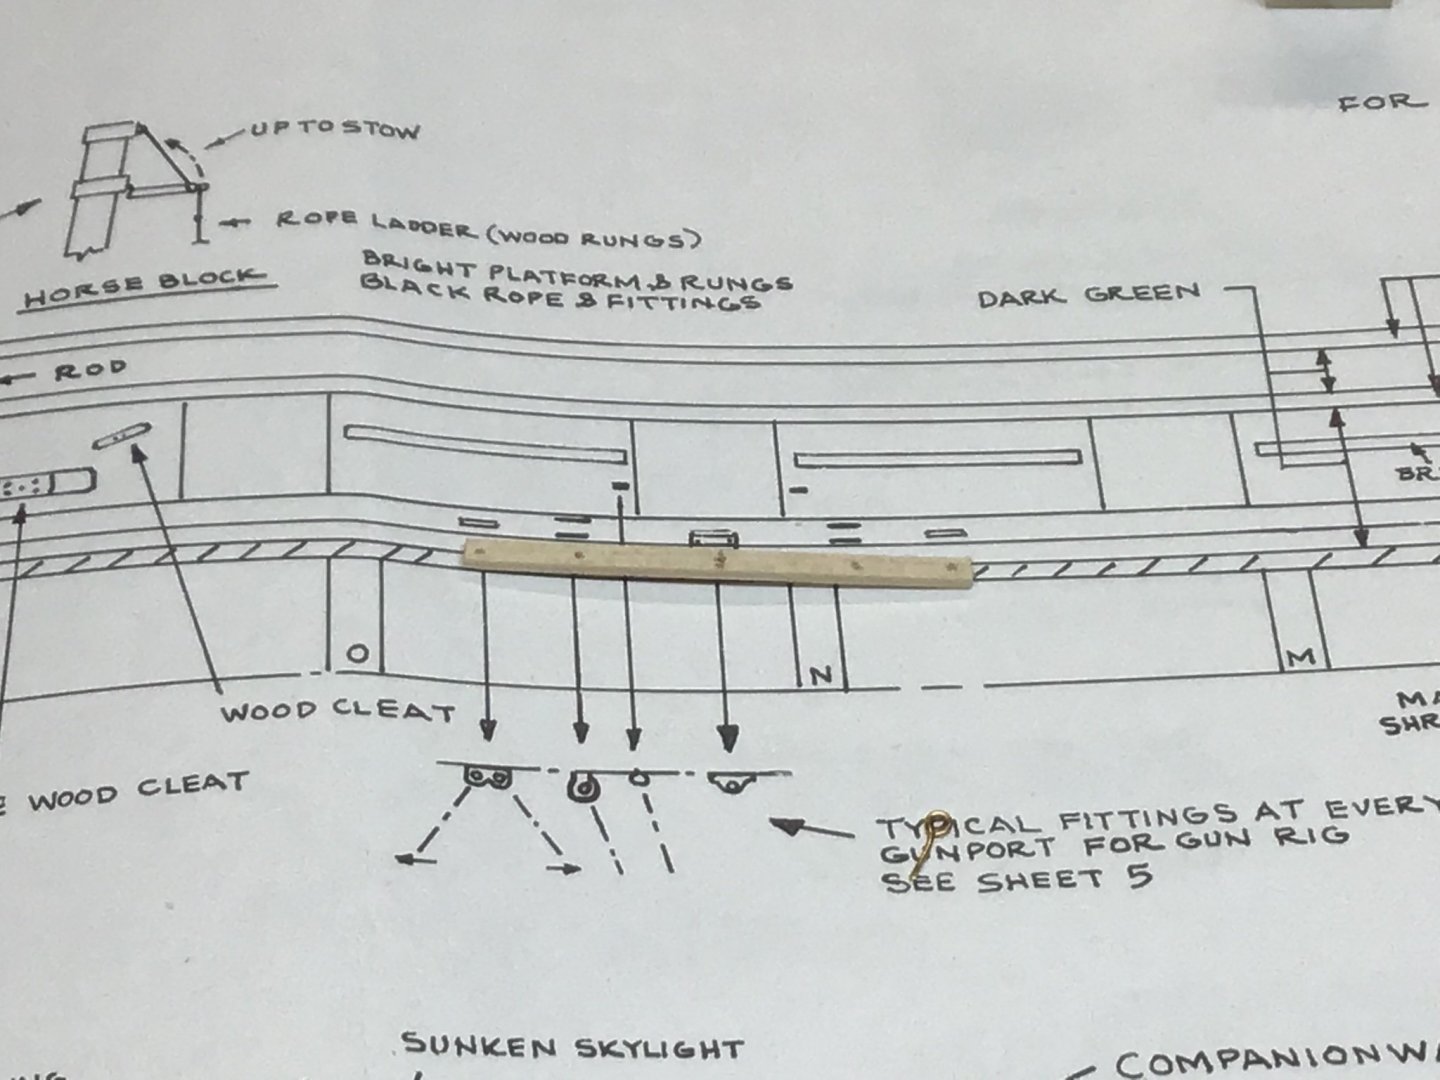
Installing Eyebolts for Carronade Tackle - Sill About 100 eyebolts need to be installed, in the first board above the waterway, for the carronades and associated tackle to attach to. First made a template drill guide with a board and using the plan. Marked the board at bolt locations on the plan and drilled holes in the board. Picture 1. Next drilled a hole in the sill centered on the gunport. Located the template board on the sill with an eyebolt and used the board as a guide to drill the remaining holes on either side of the gunport. Picture 2. Cut the eyebolts to length using a board with a width corresponding to the length of the bolt desired. Picture 3. Last, picture 4 shows the first set of eyebolts installed.


-
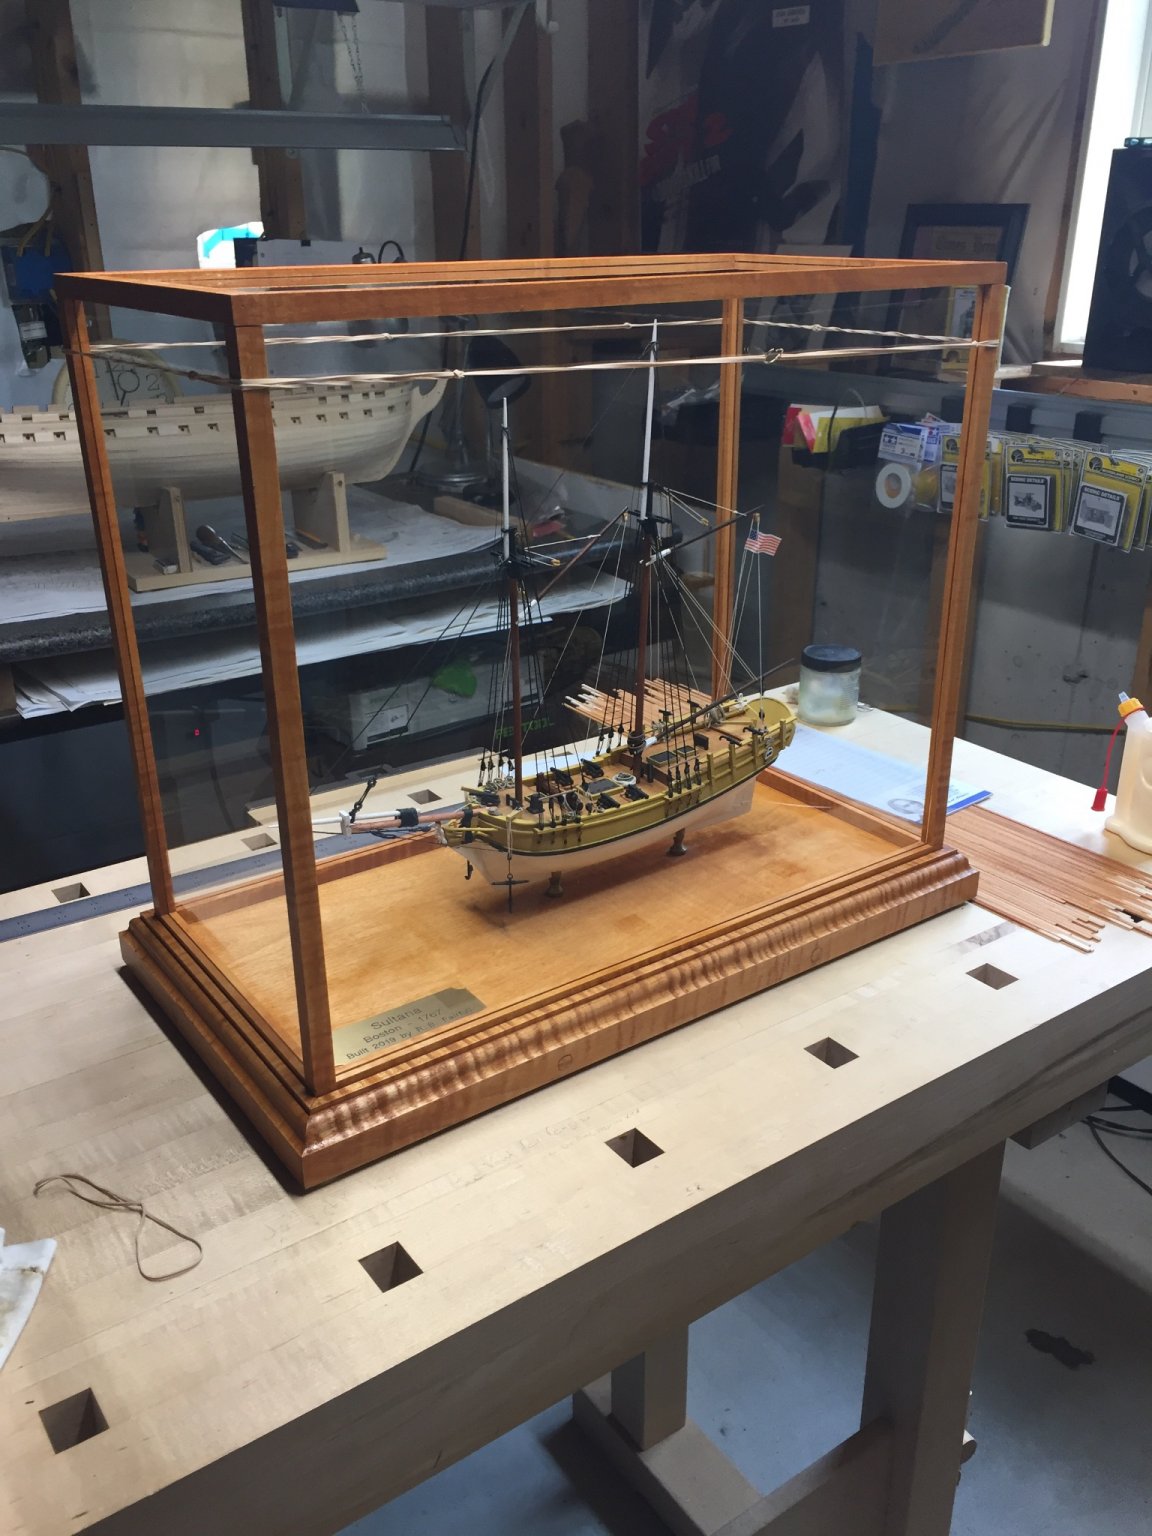
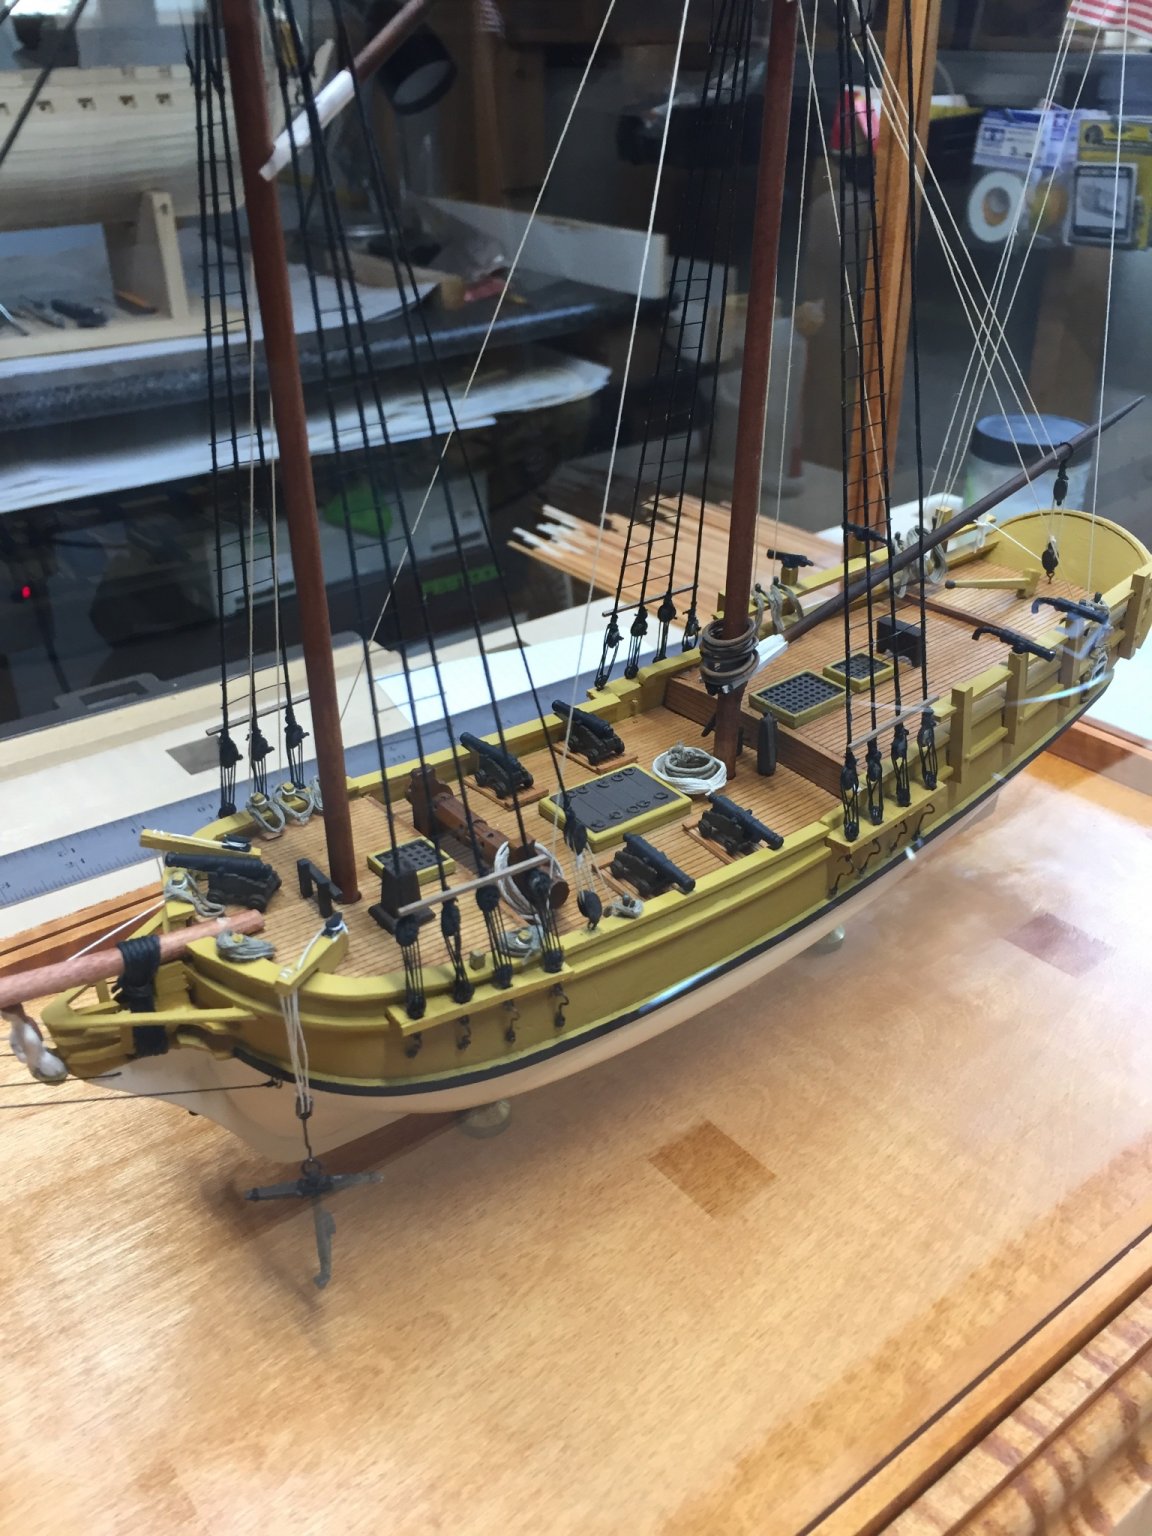
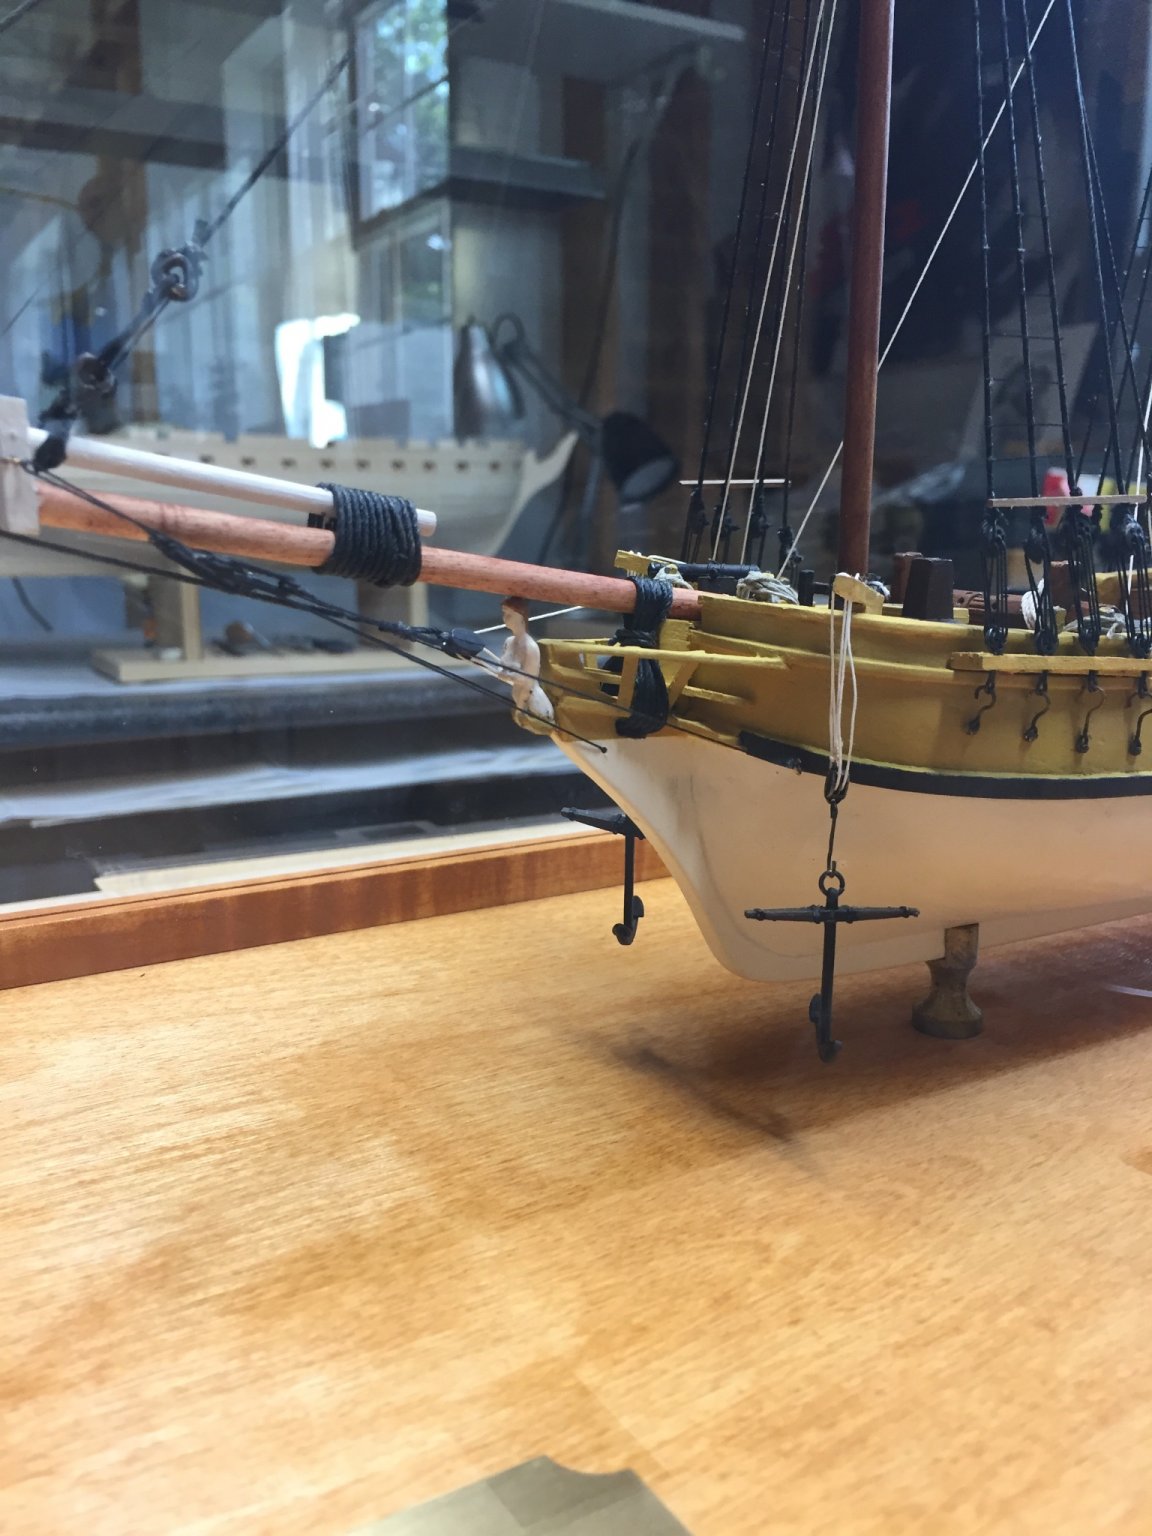
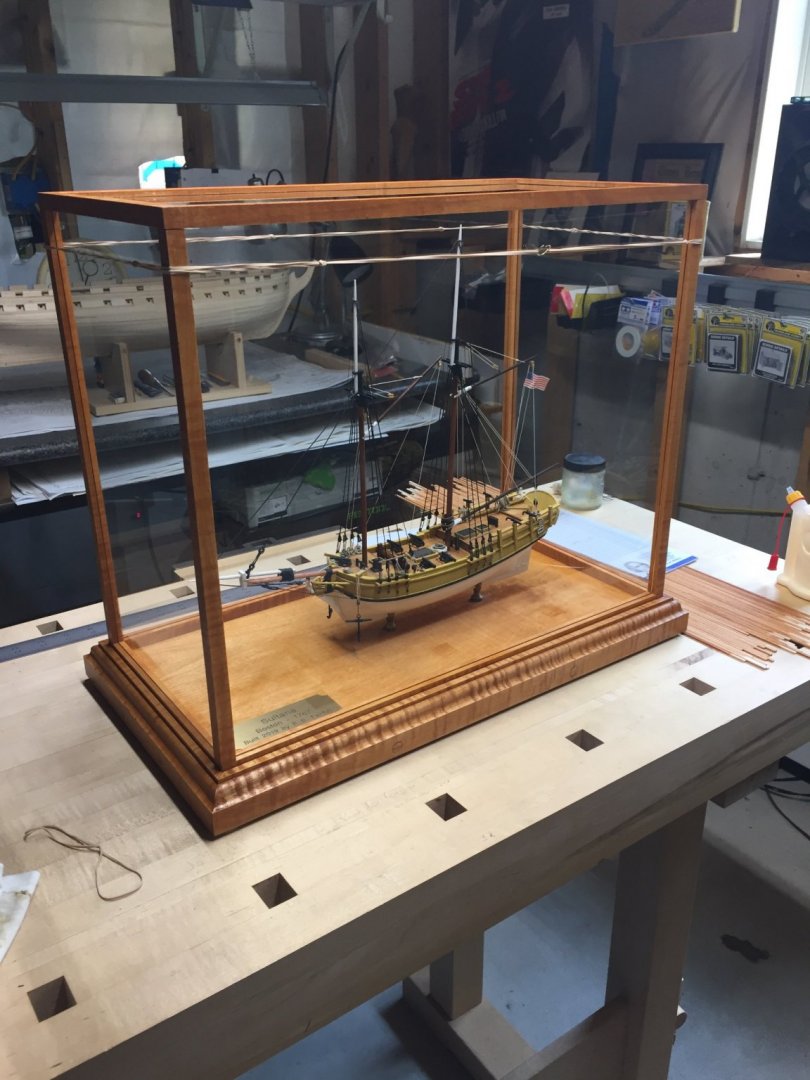
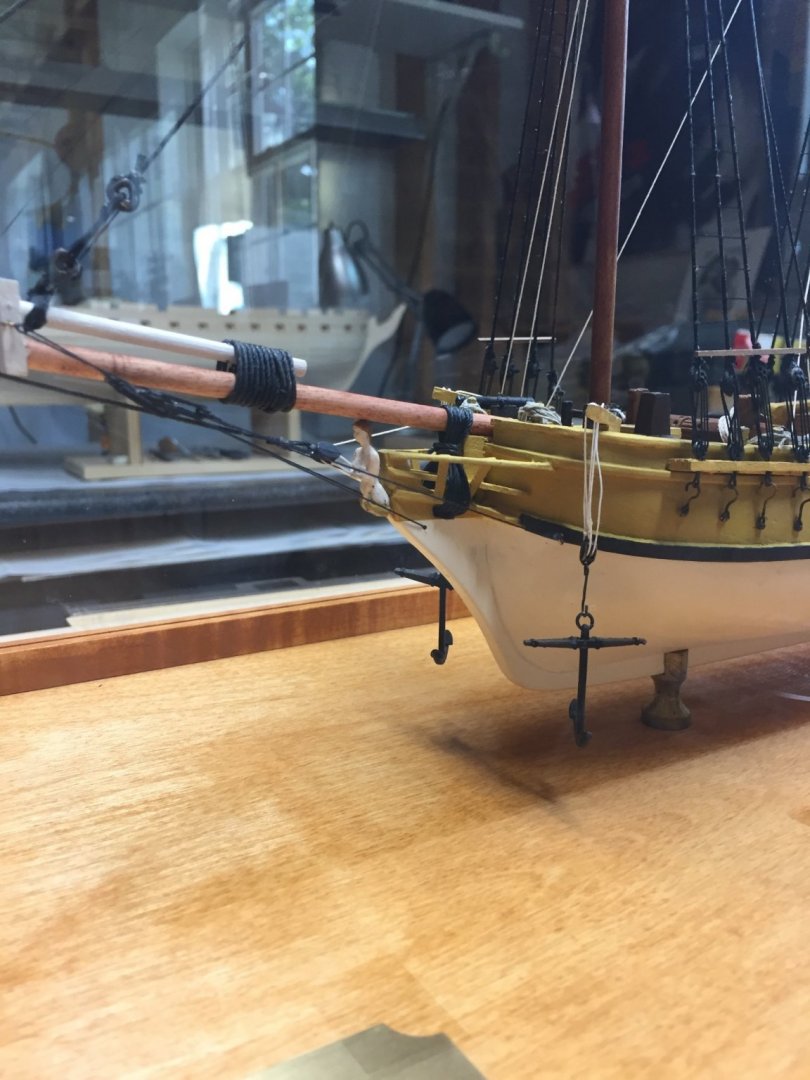
Sidetracked on the Constitution project to repair a commissioned work, Sultana, delivered 2 years ago.
She had to return to the yard for an availability due to Metal Fitting Corrosion. Removed rigging and masts. Cleaned, primed, and repainted fittings. Stained the deck, painted the mast and spars, and redid all the rigging.
She looks better than ever.

-
Hi, I like your Jolly Boat. Seems to me you are on the learning curve and made it to the end with some ups and downs along the way. The important thing is you made it through to the end! Next time will be even better as you incorporate the lessons learned. Keep in mind a stained exterior is more difficult and less forgiving to execute than a painted finish. So you did it the more difficult way, on your first try, and the result looks pretty good! About the stain, try using a nylon brush, I like the cheap brush sets from Walmart. Sounds like the surface was “flooded” with stain. Try applying the stain with a brush, like paint. Keep the surface wet but less than “flooded”, it’s ok to apply just enough stain to keep a wet edge but sparingly so the stain soaks into the wood and dries fairly quickly, without the need to wipe off the excess. Regarding CA, less is more, just a few dots to hold the piece, carpenters glue for the remainder of the seam. This way if the piece needs to be repositioned, it’s possible to pry the piece off, as just a few dots need to give way. Try a gel as well. Has a bit more “open” time before it sets. A master furniture maker once told me, on seeing my frustration in class that, if everyone could do the work perfectly the first time, it would be meaningless.... Looking forward to the next project! Cheers!
- 129 replies
-
- 1
-

-
- Bounty Jolly Boat
- Artesania Latina
- (and 1 more)
-
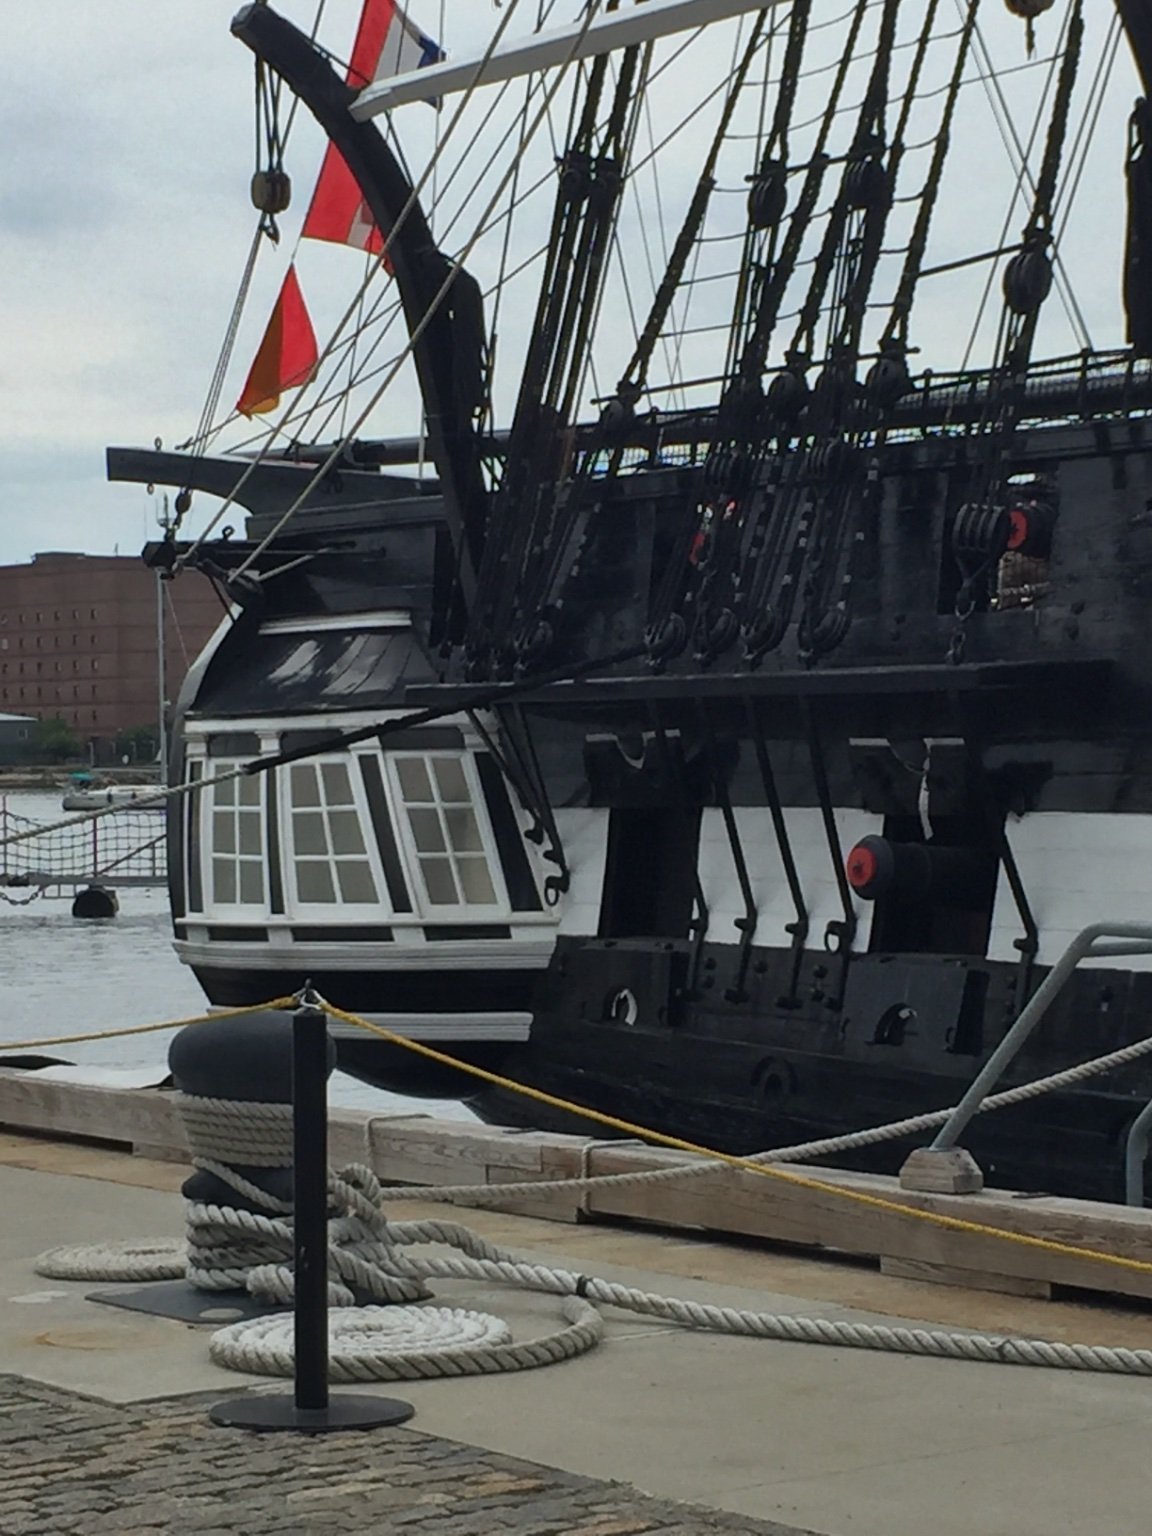
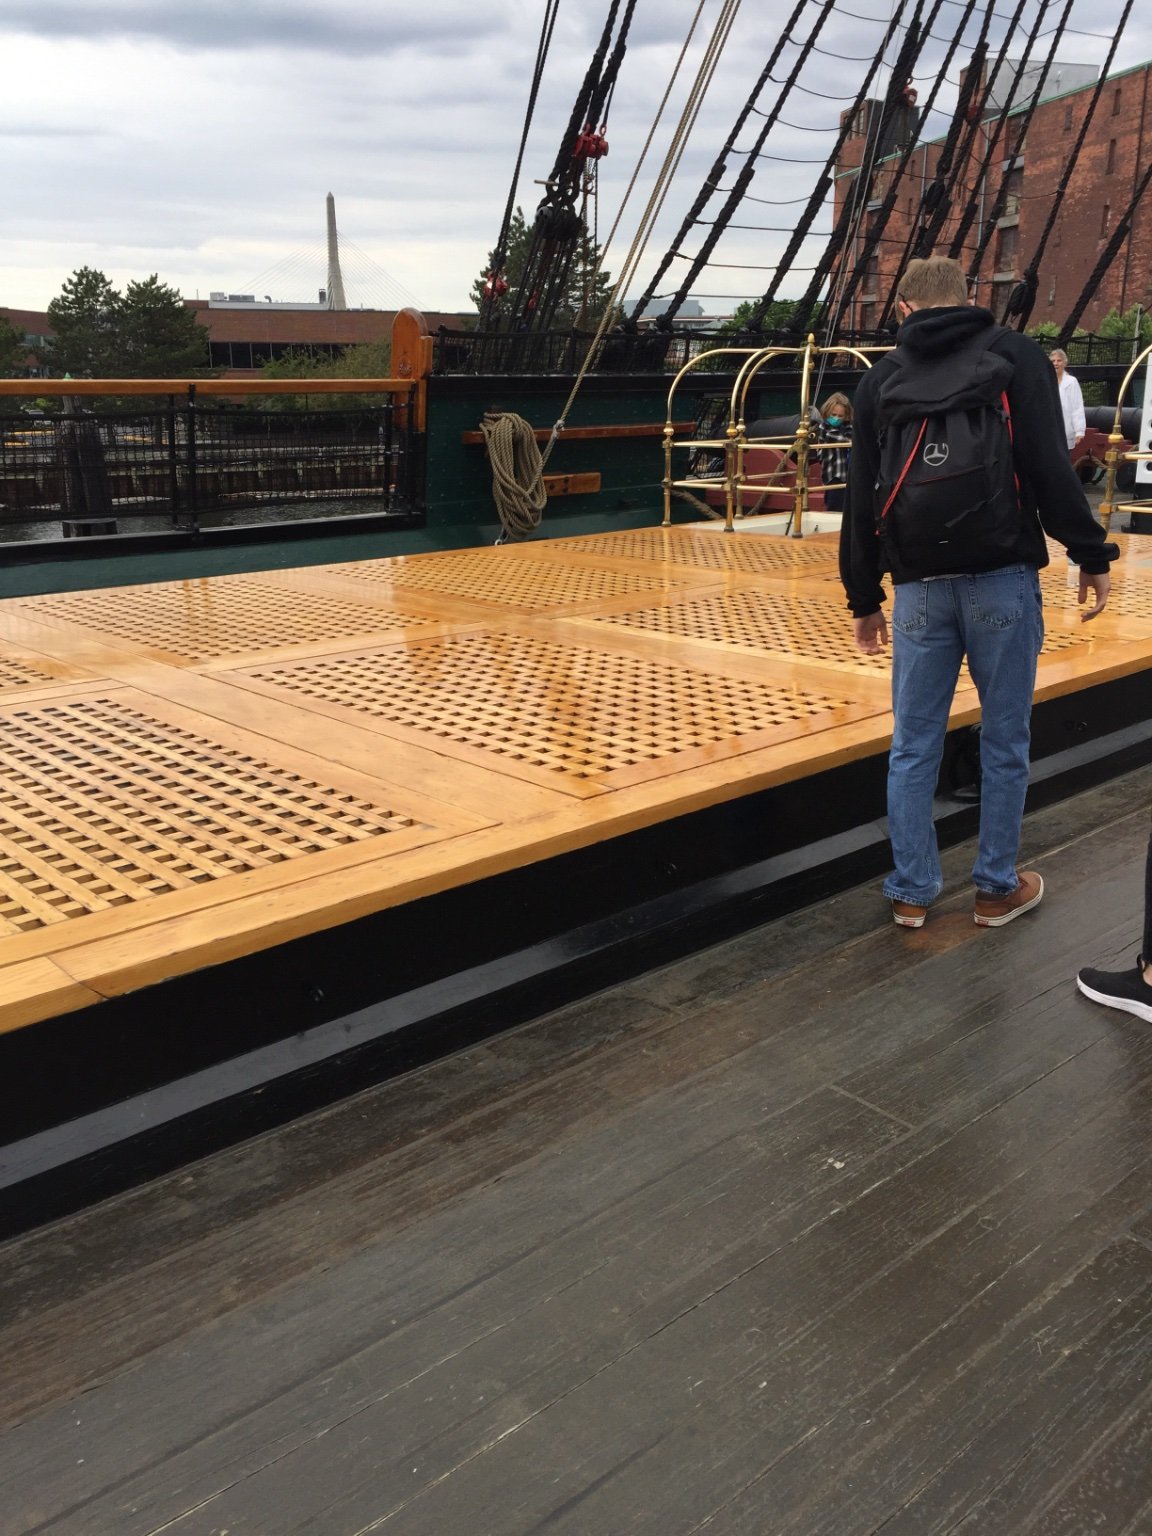
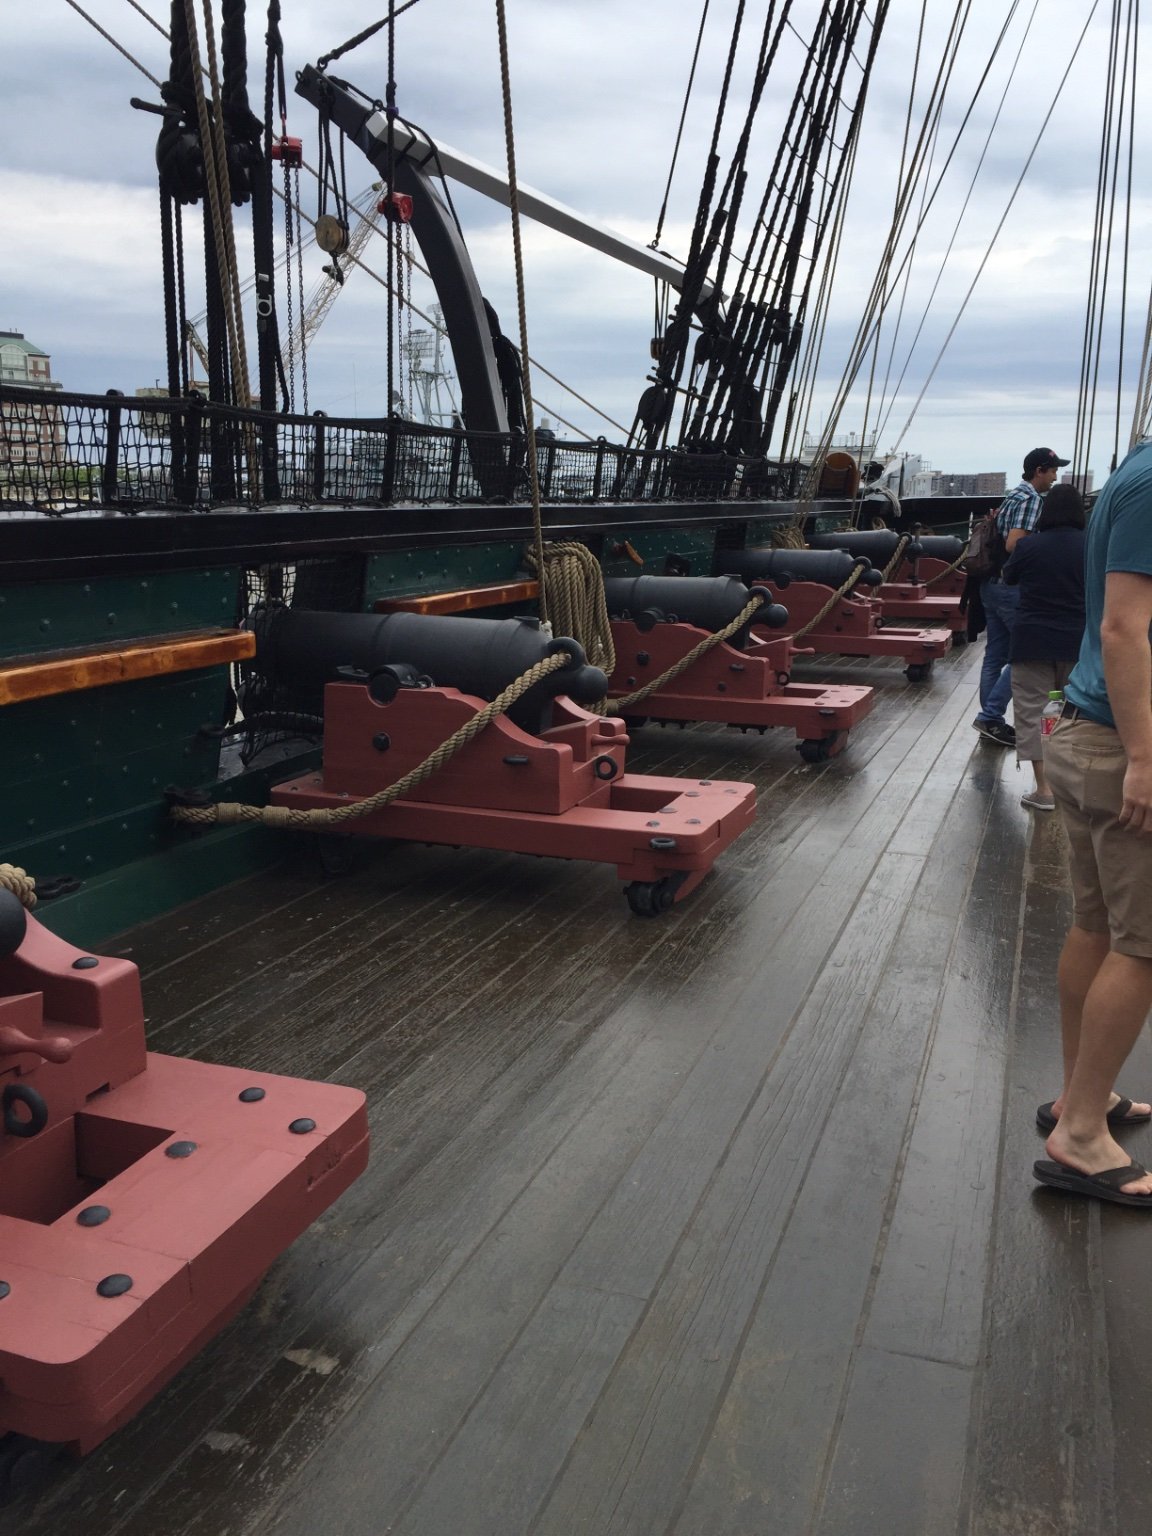
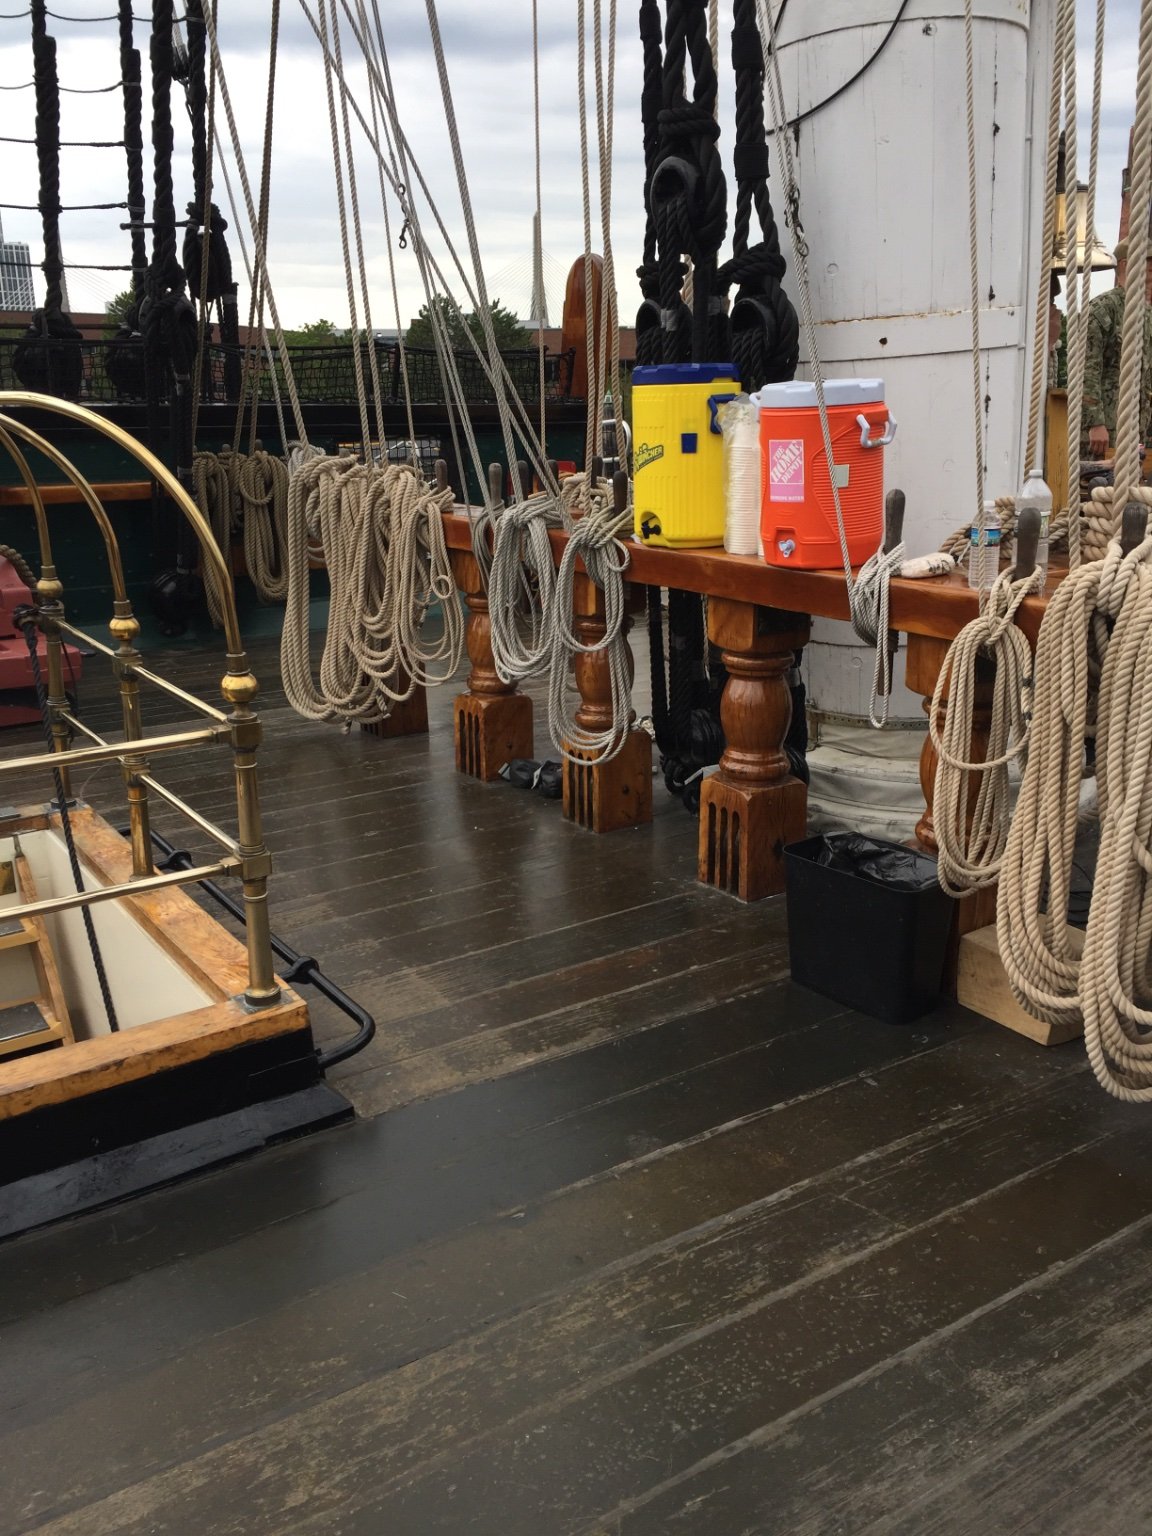
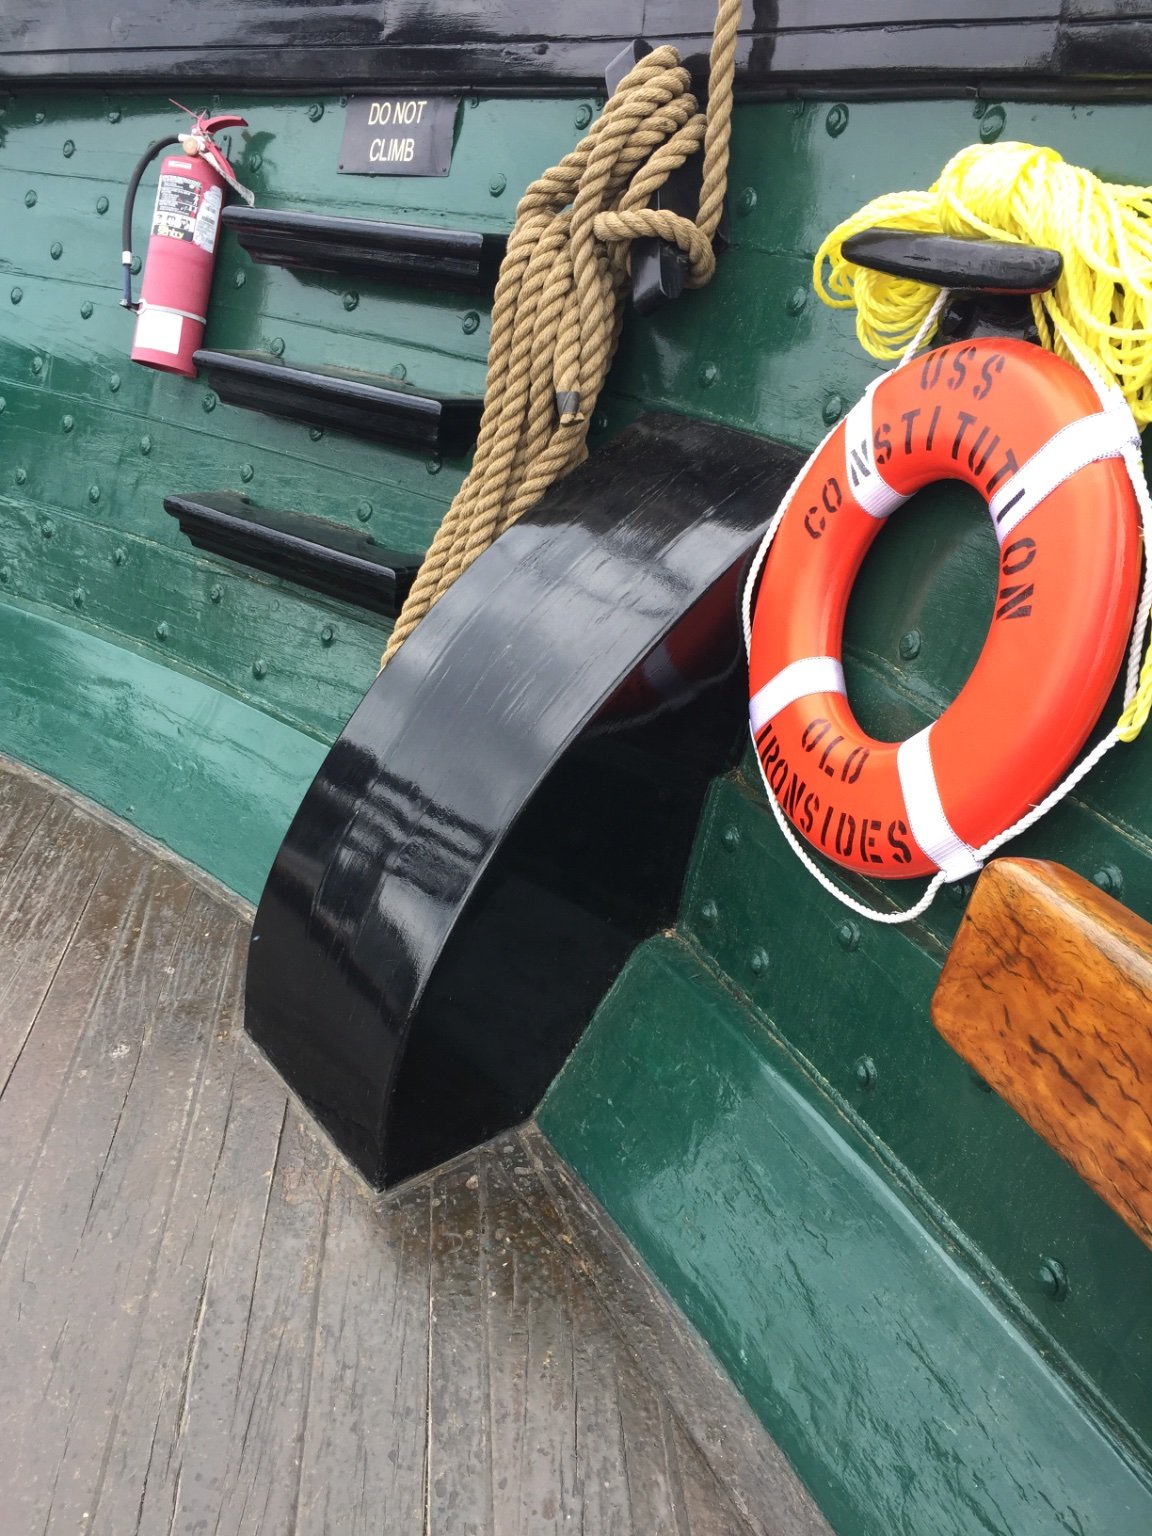
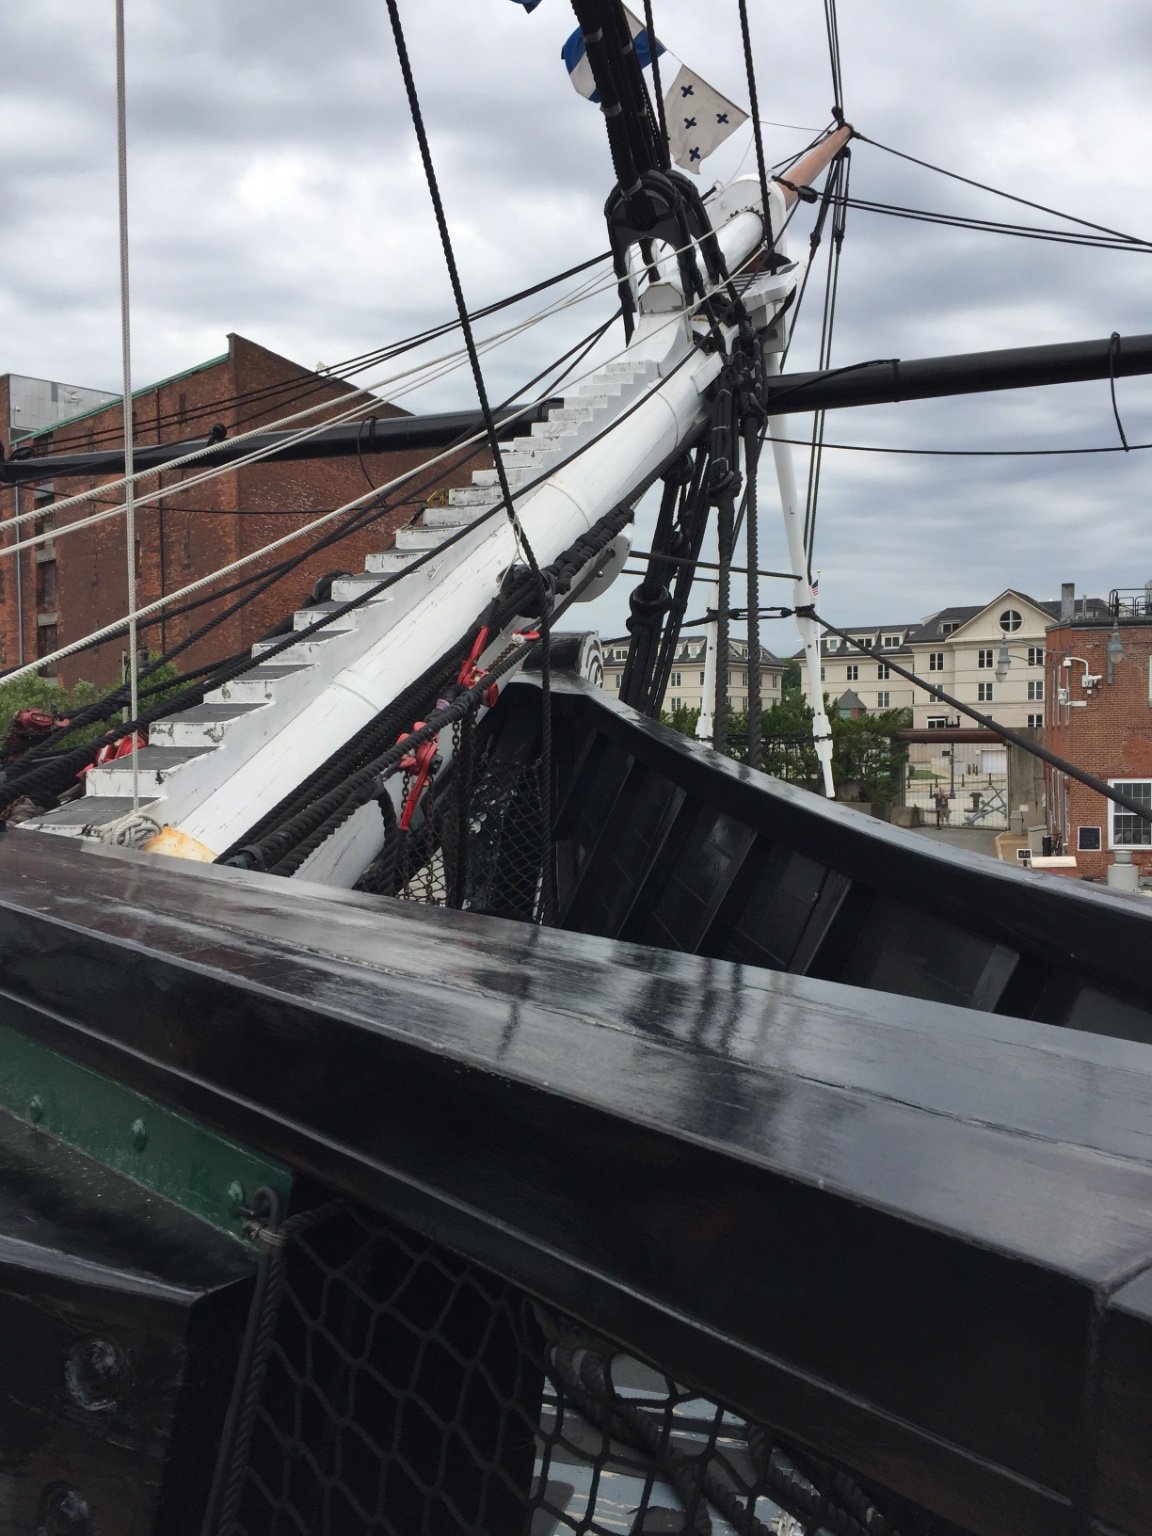
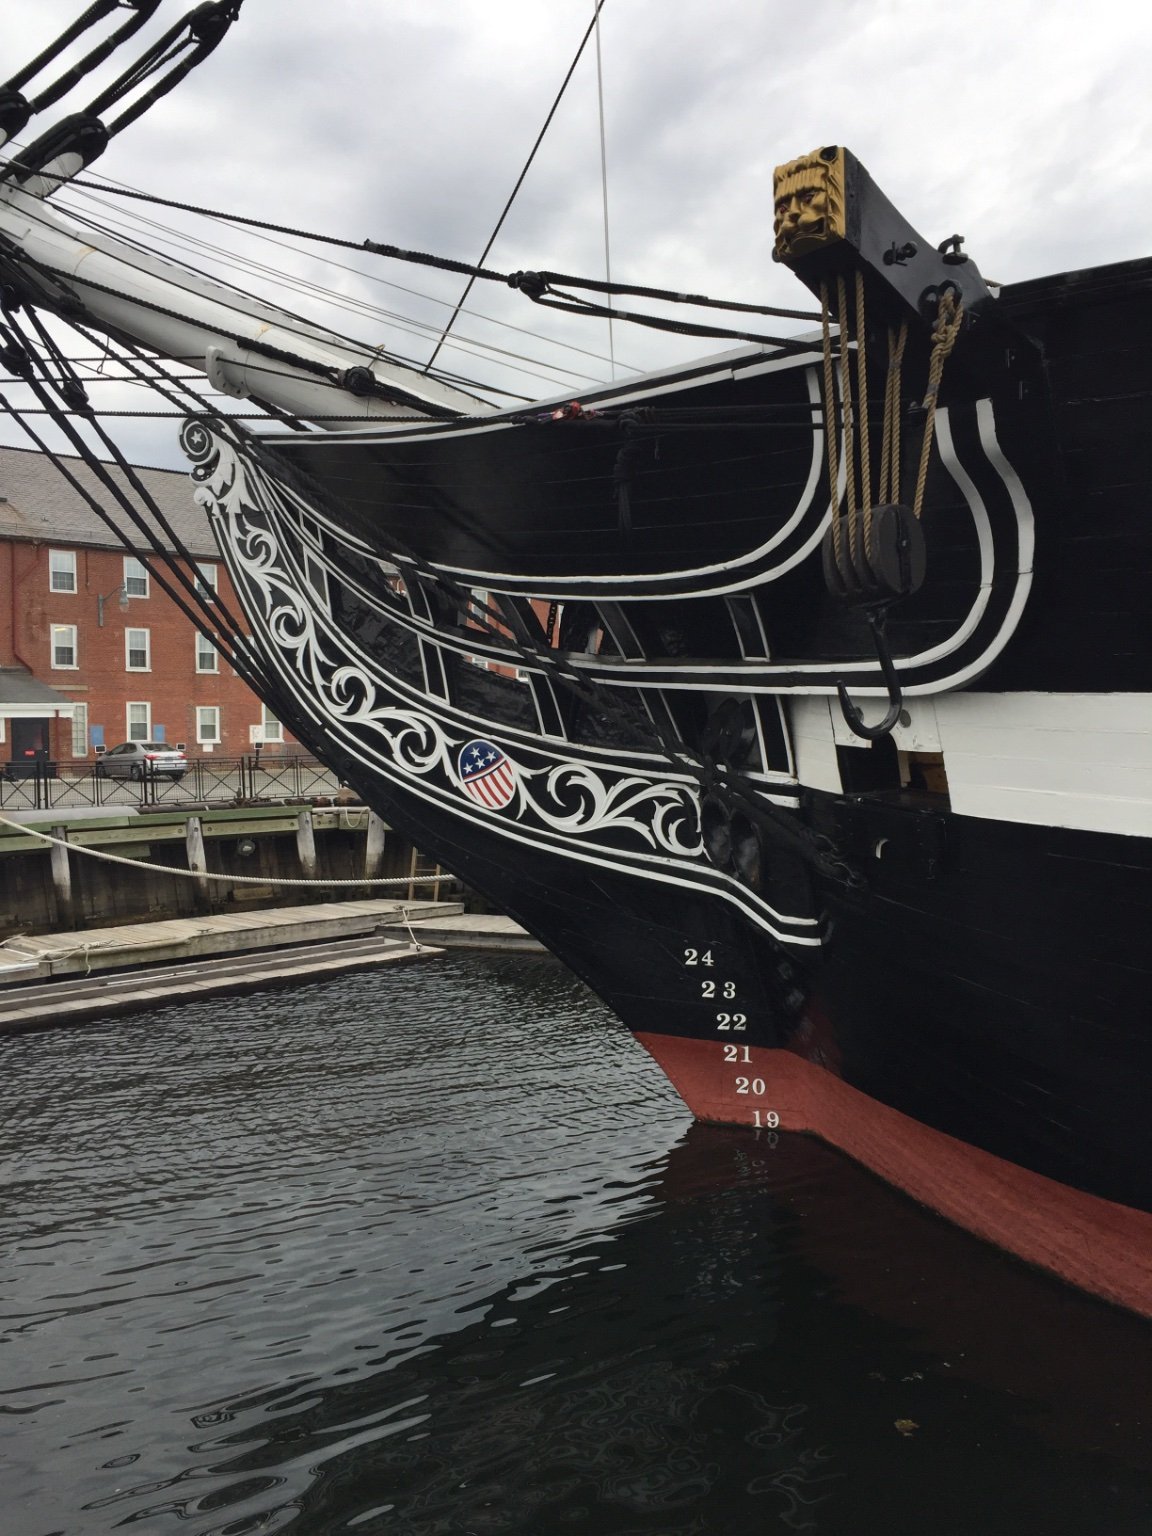
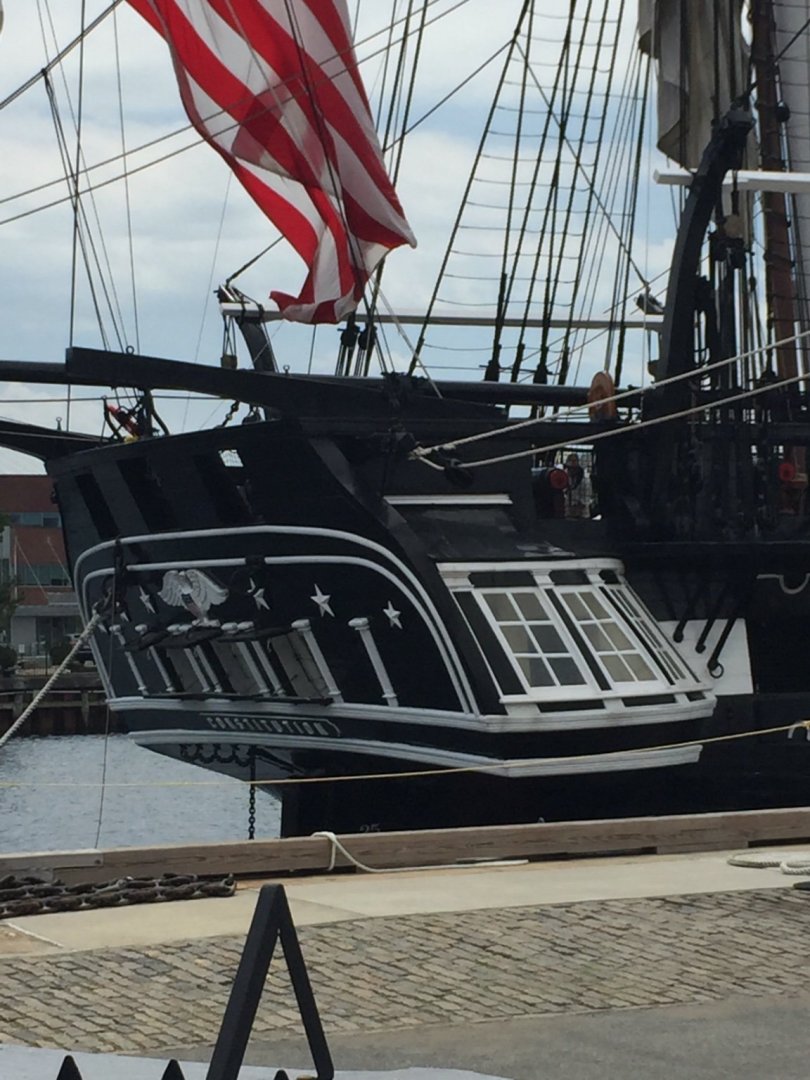
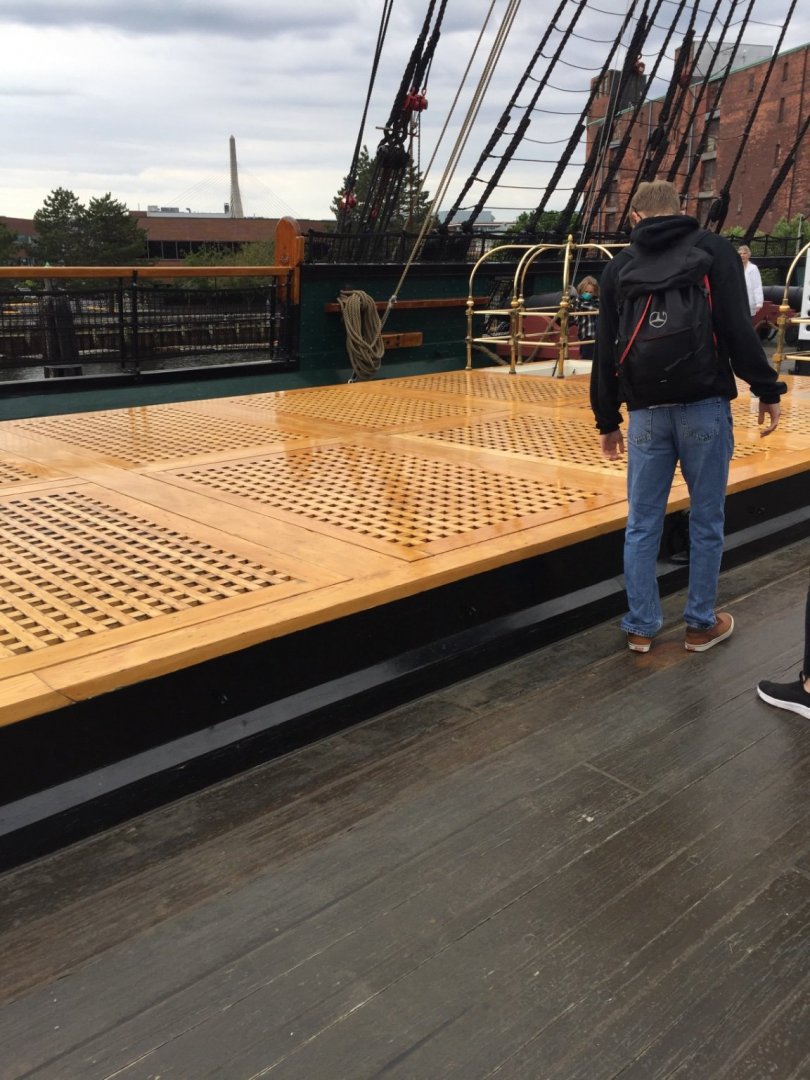
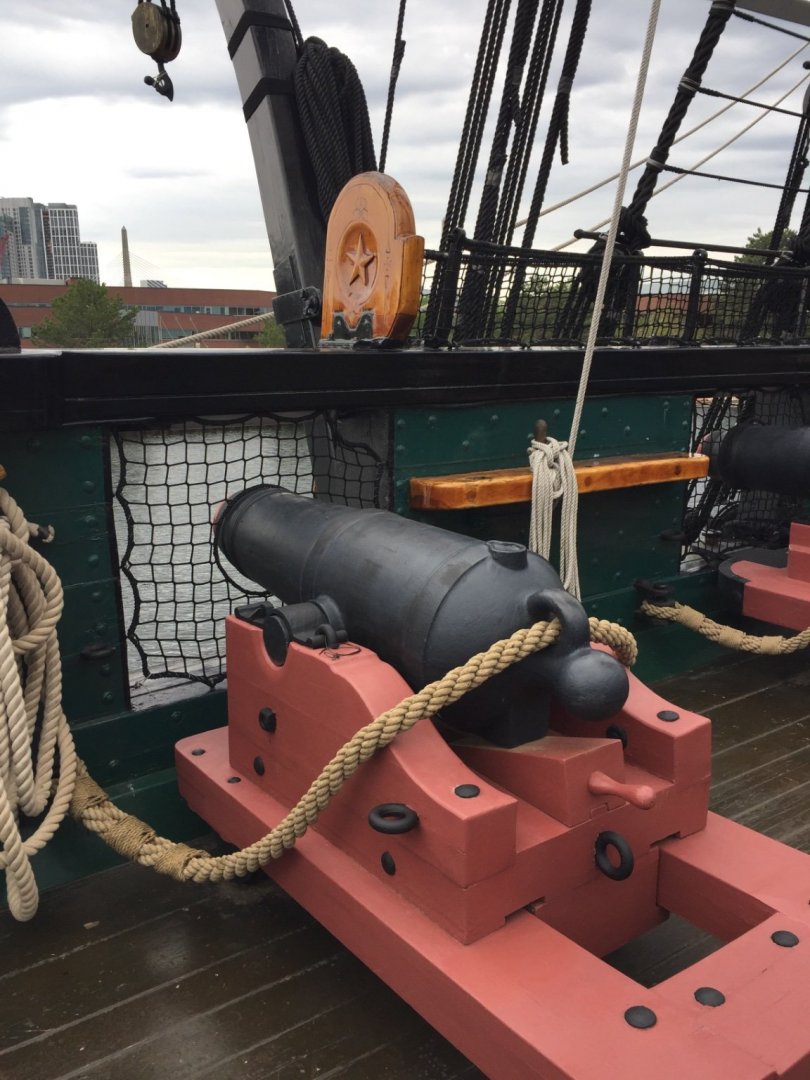
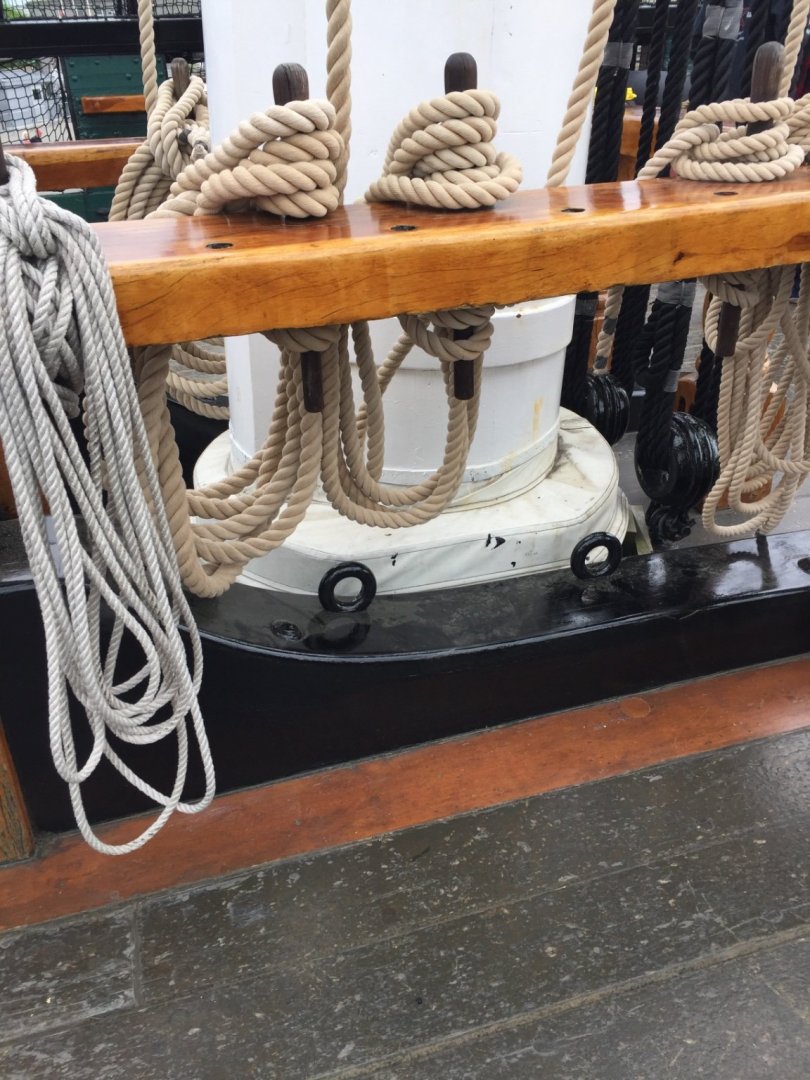
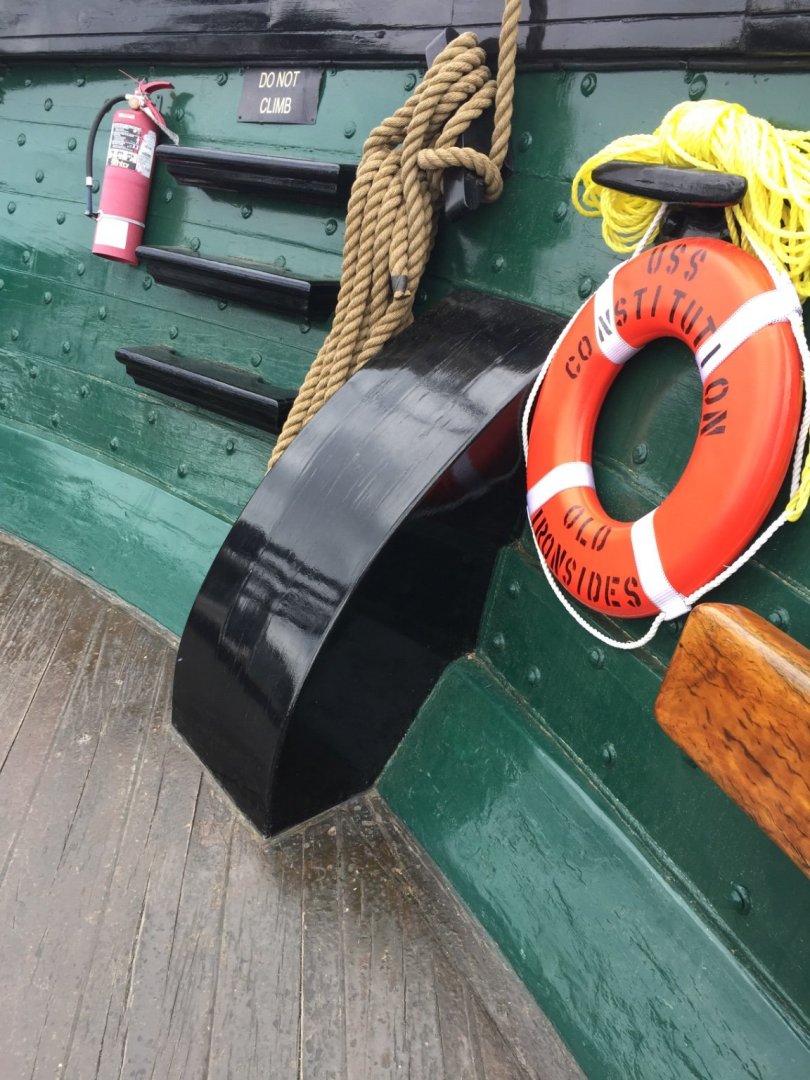
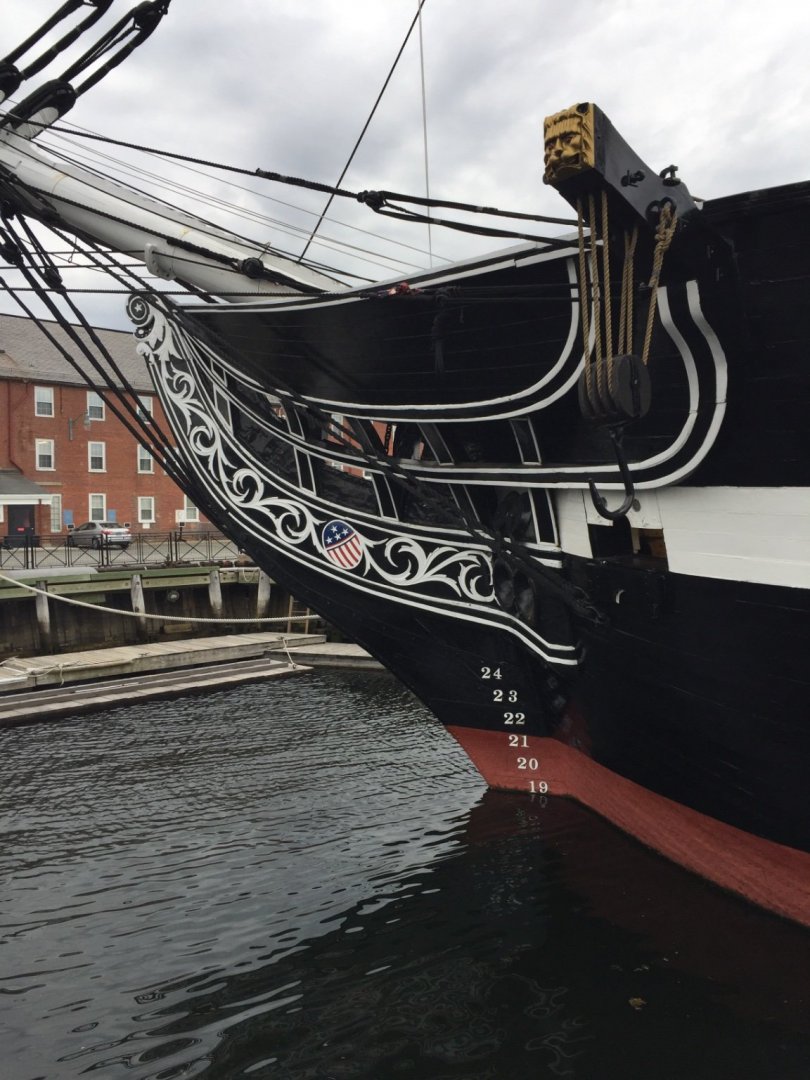
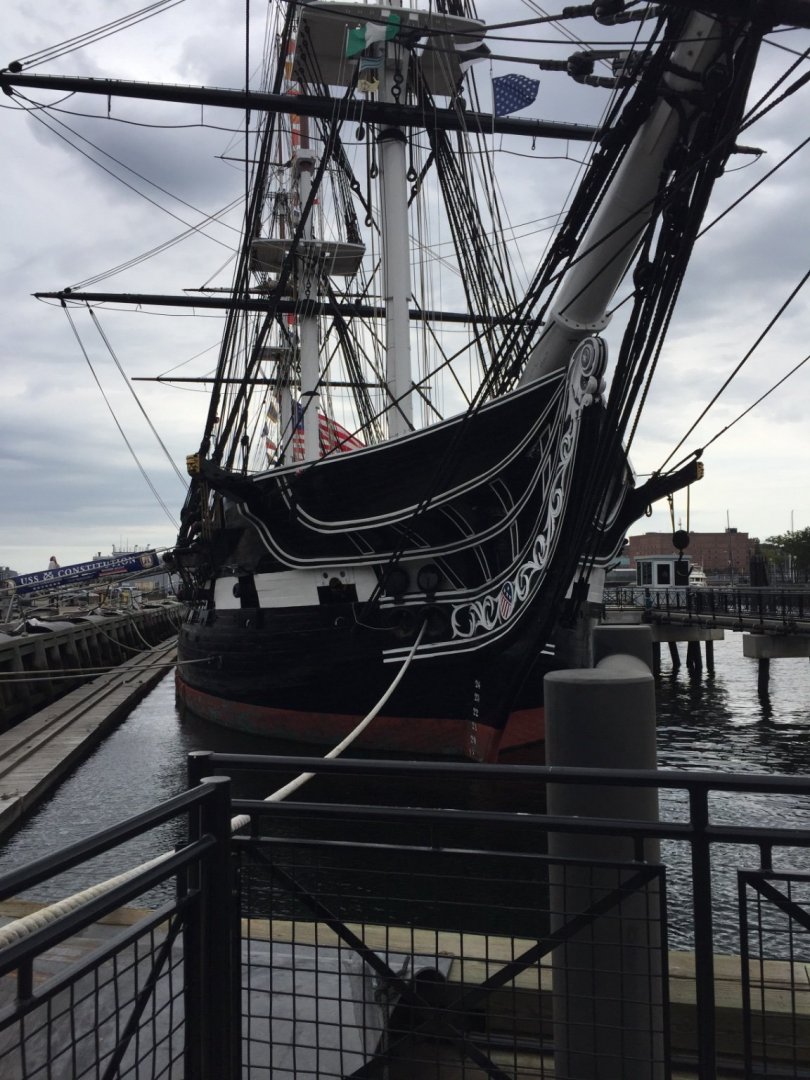
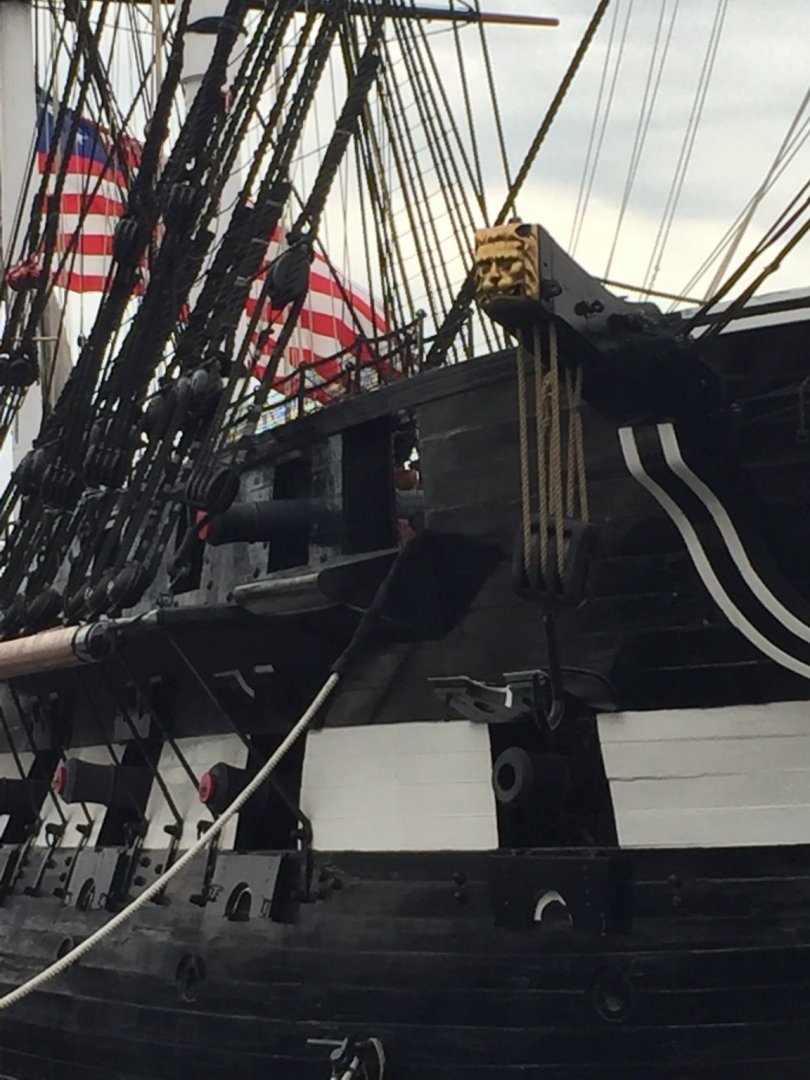
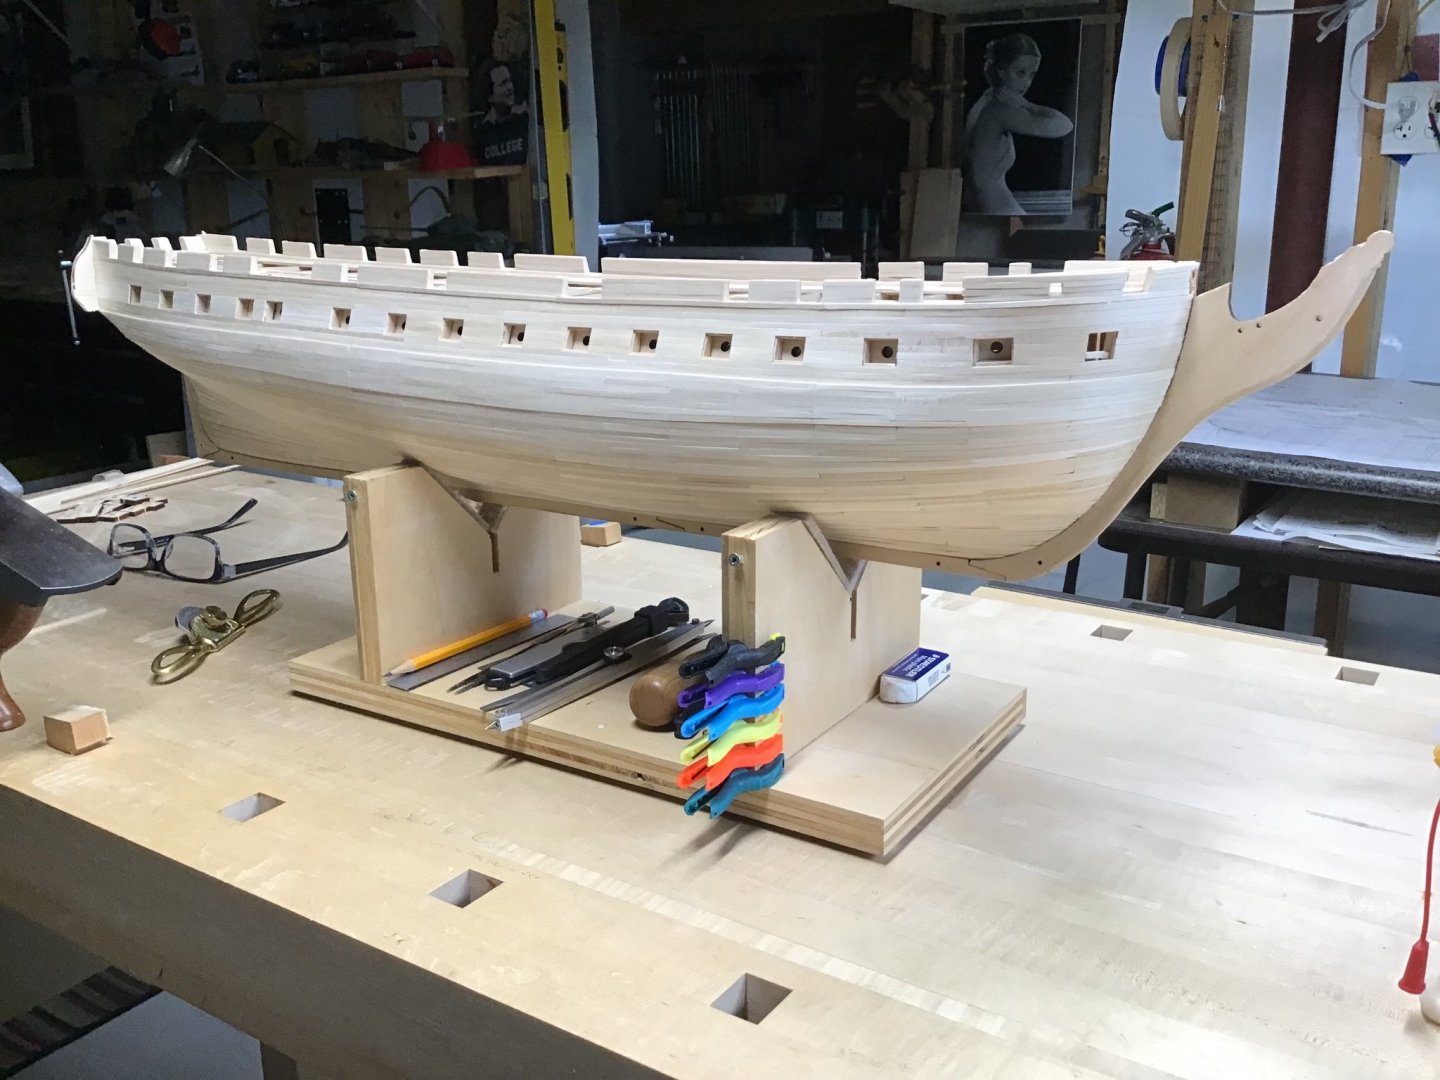
USS Constitution Pictures Pictures taken a couple of weeks ago. She cruised Boston Harbor that day, aboard were First Responders and Healthcare Workers chosen by lottery.


-
Yes, arrived at the same conclusion regarding the Practicum. Decided that before painting the hull, to install all the hull components: channels, stern decorations, steps, cleats, bulwark hardware for the cannon blocks. And last, the galleries. The idea is to avoid glueing parts on painted surfaces. Happy Independence Day!
-
Thanks JS. I’m slightly dyslexic and have had a hard time following the parts of the practicum with dimensions in the text, and comparing to the plans. You may be ahead, skipped some parts of the practicum and jumped ahead in the practicum to finish the hull planking first. Plan to checkout how you did the stern galleries for tips. And I may wait to see how you do the head. 😎 First thought was to finish the entire hull less the deck (to avoid masking the deck), then paint the hull and bulwarks, then install the deck. Today I’m thinking install the deck planks, finish the entire hull, then mask and paint. The missing bulwark is bugging me, of course it will turn up once the new piece is installed…. Cheers
-
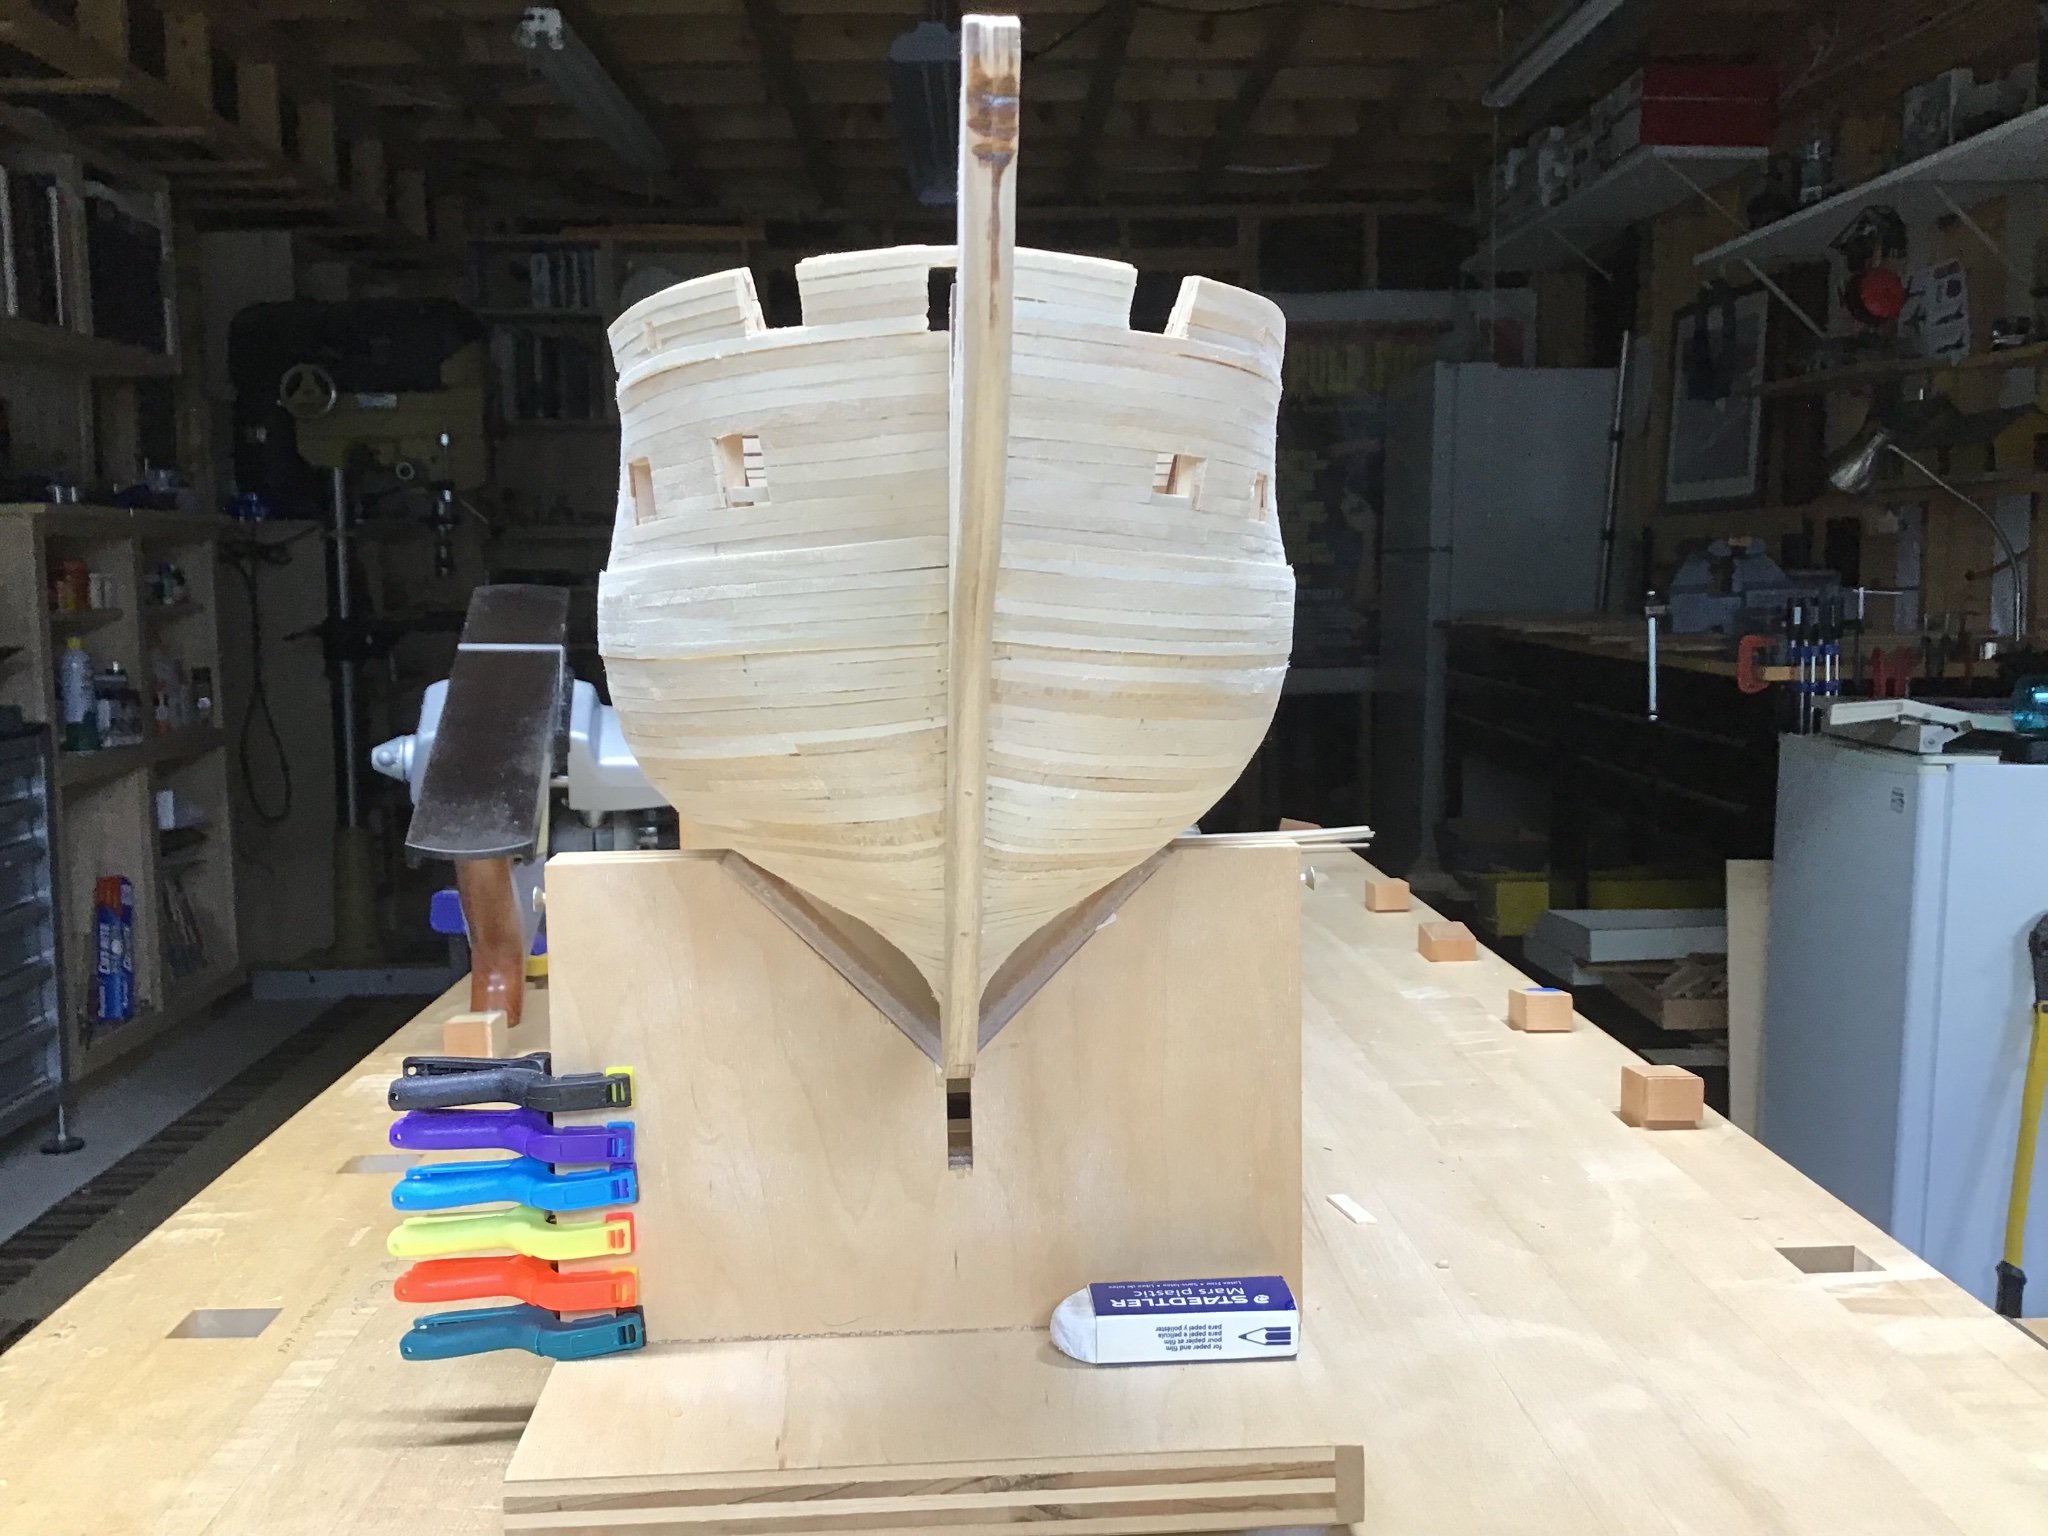
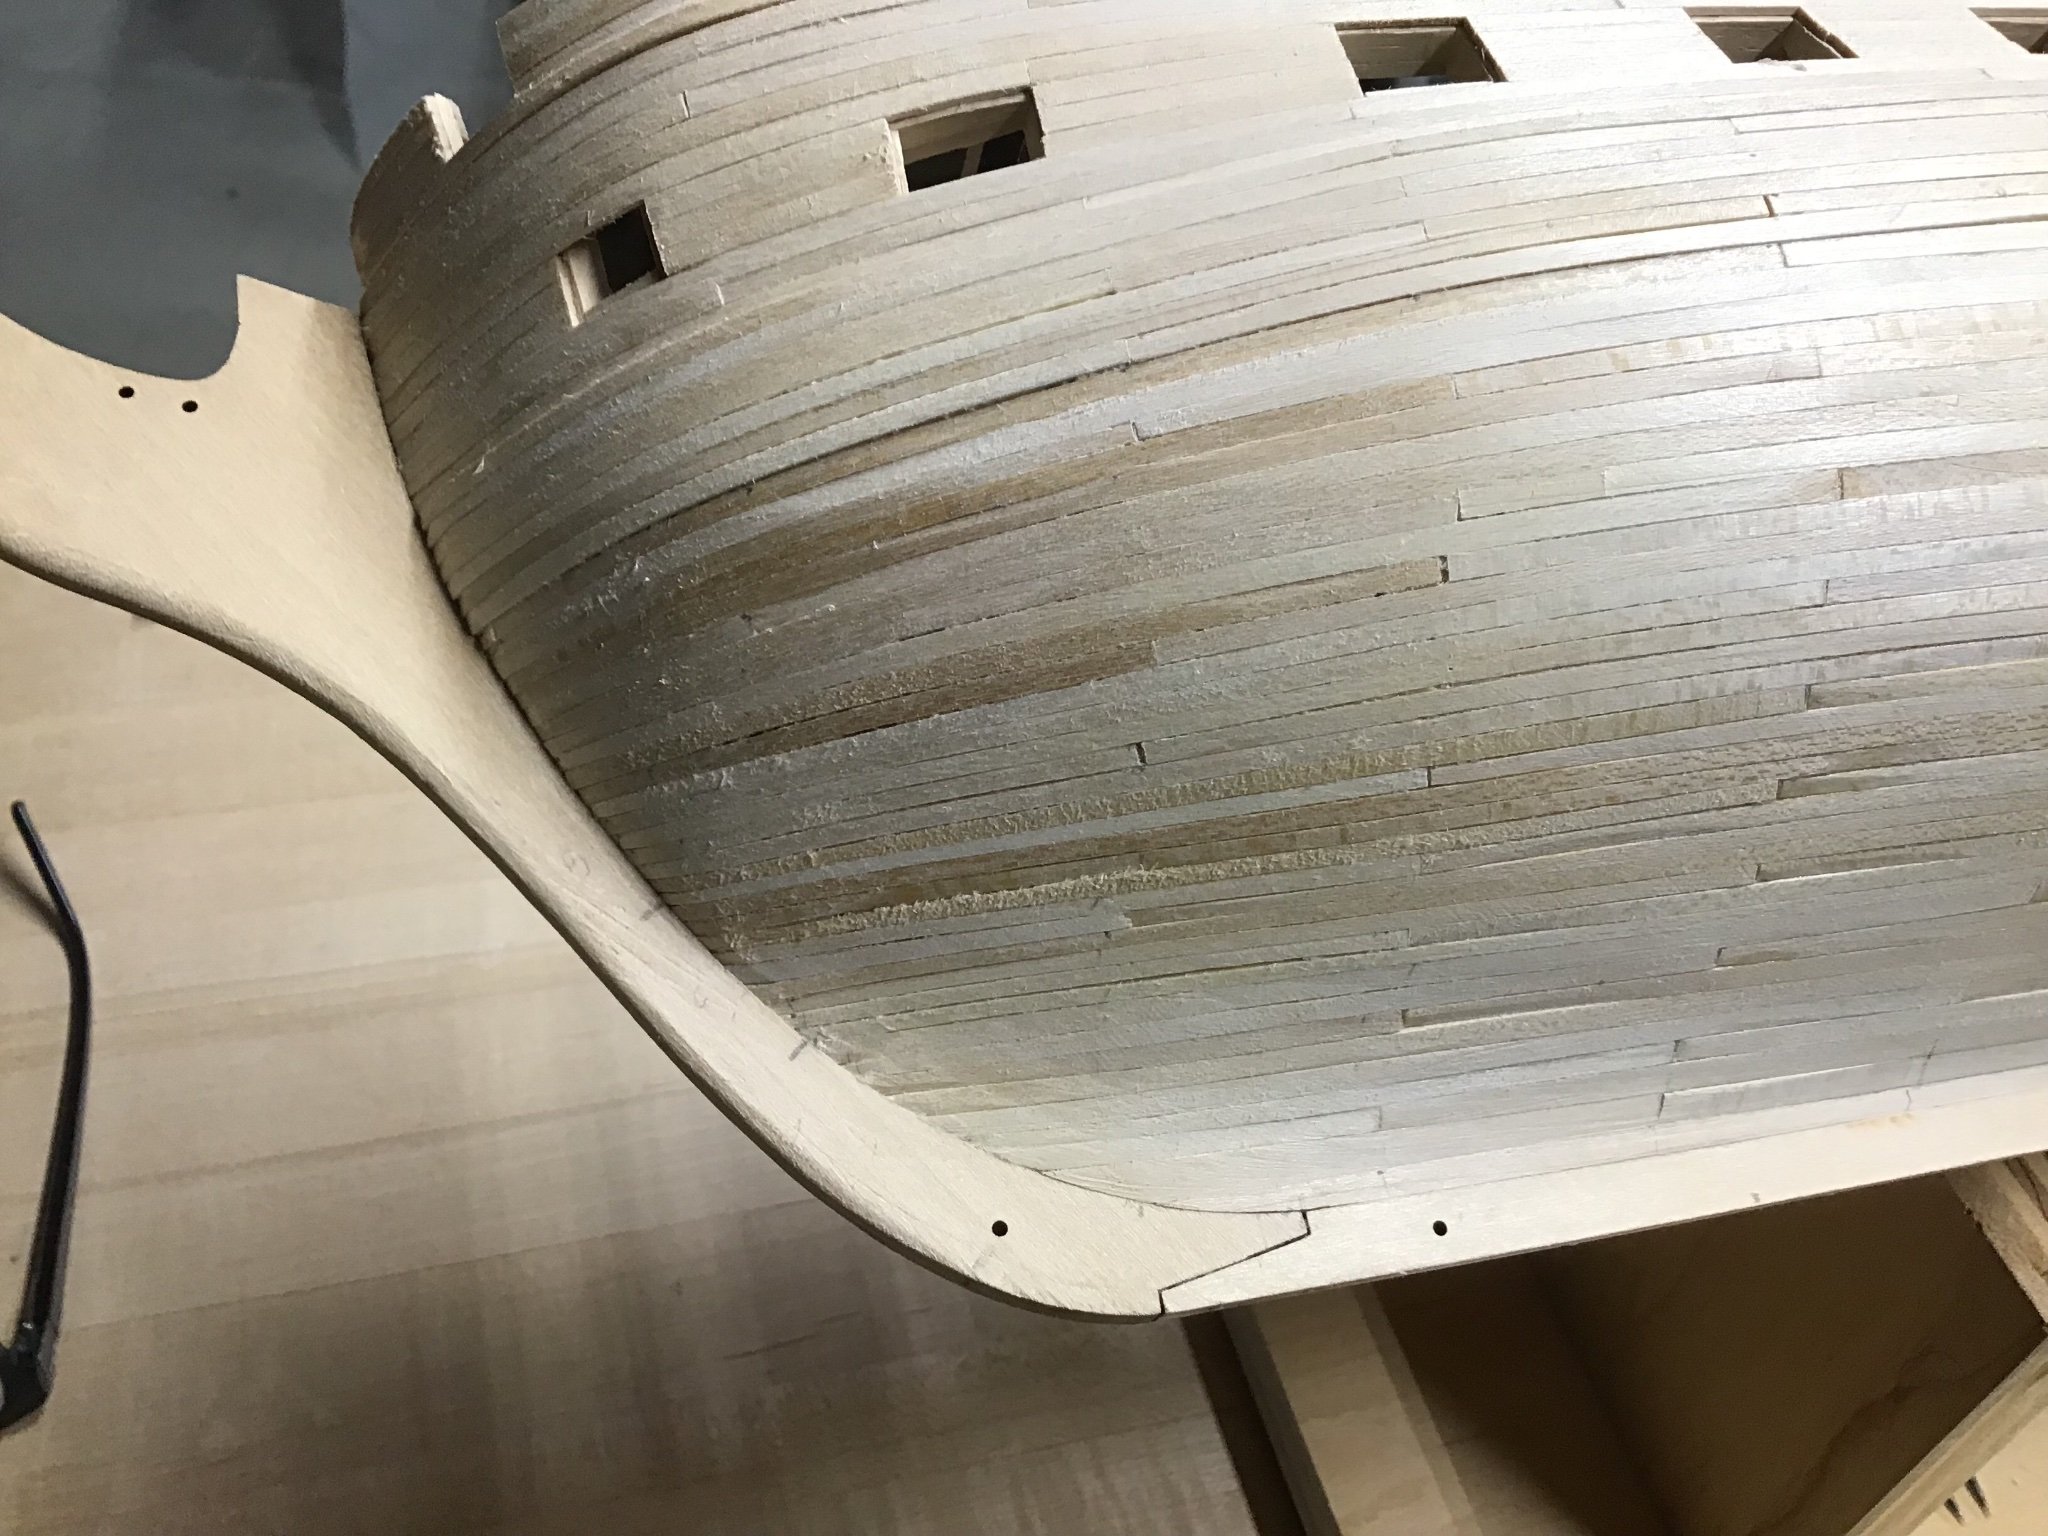
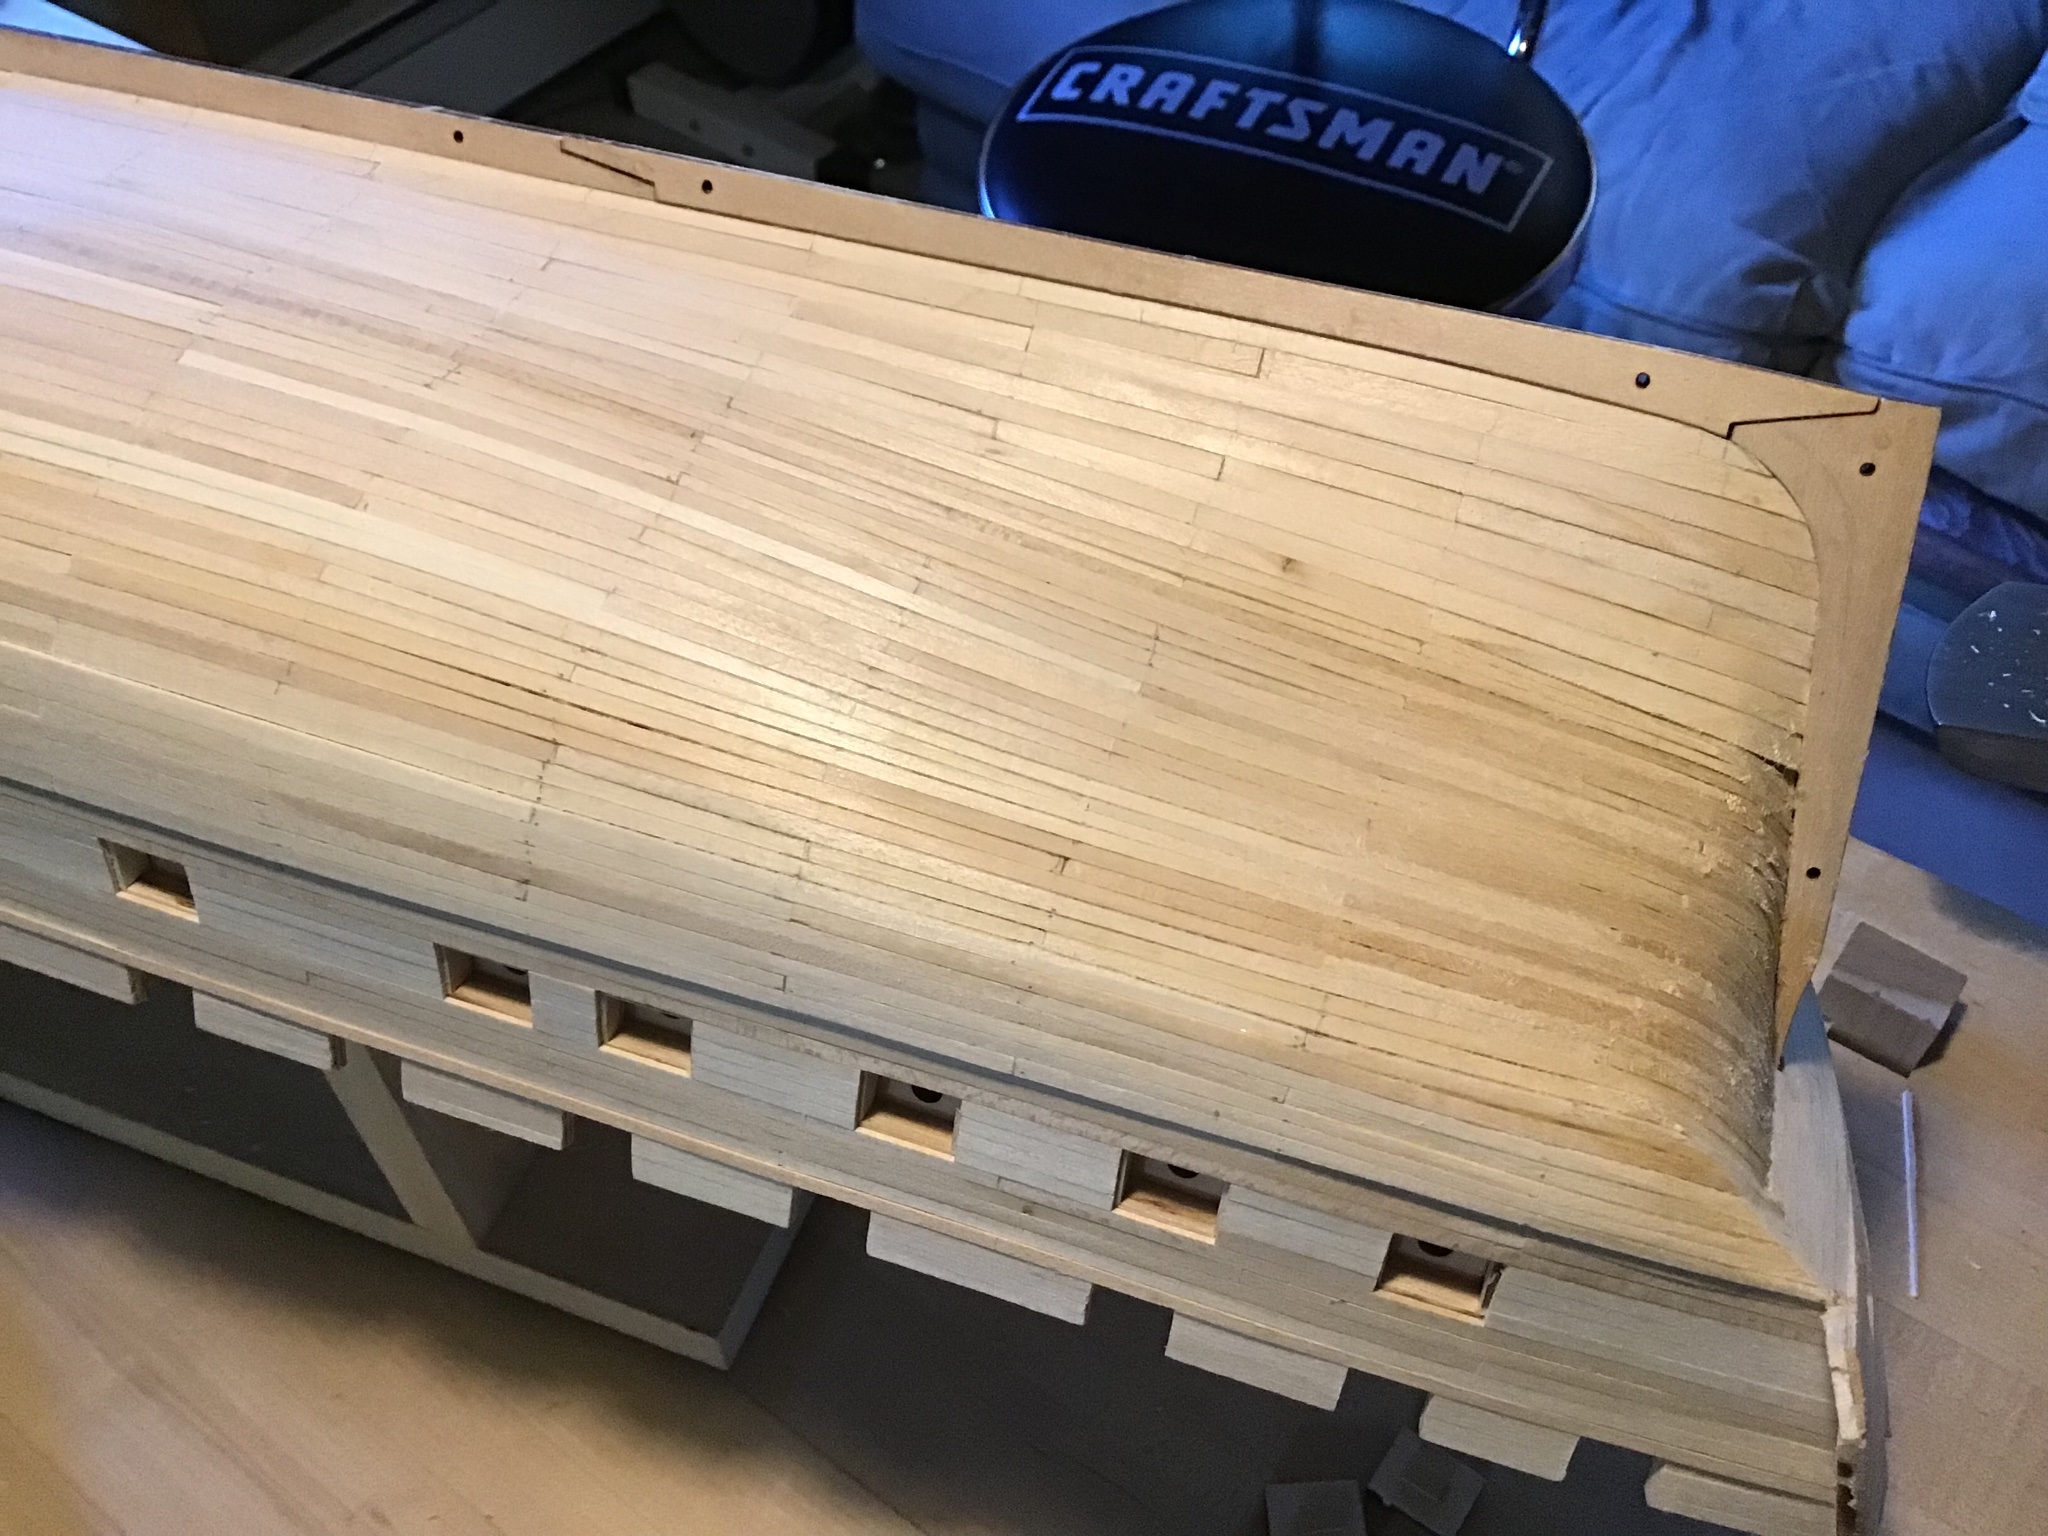
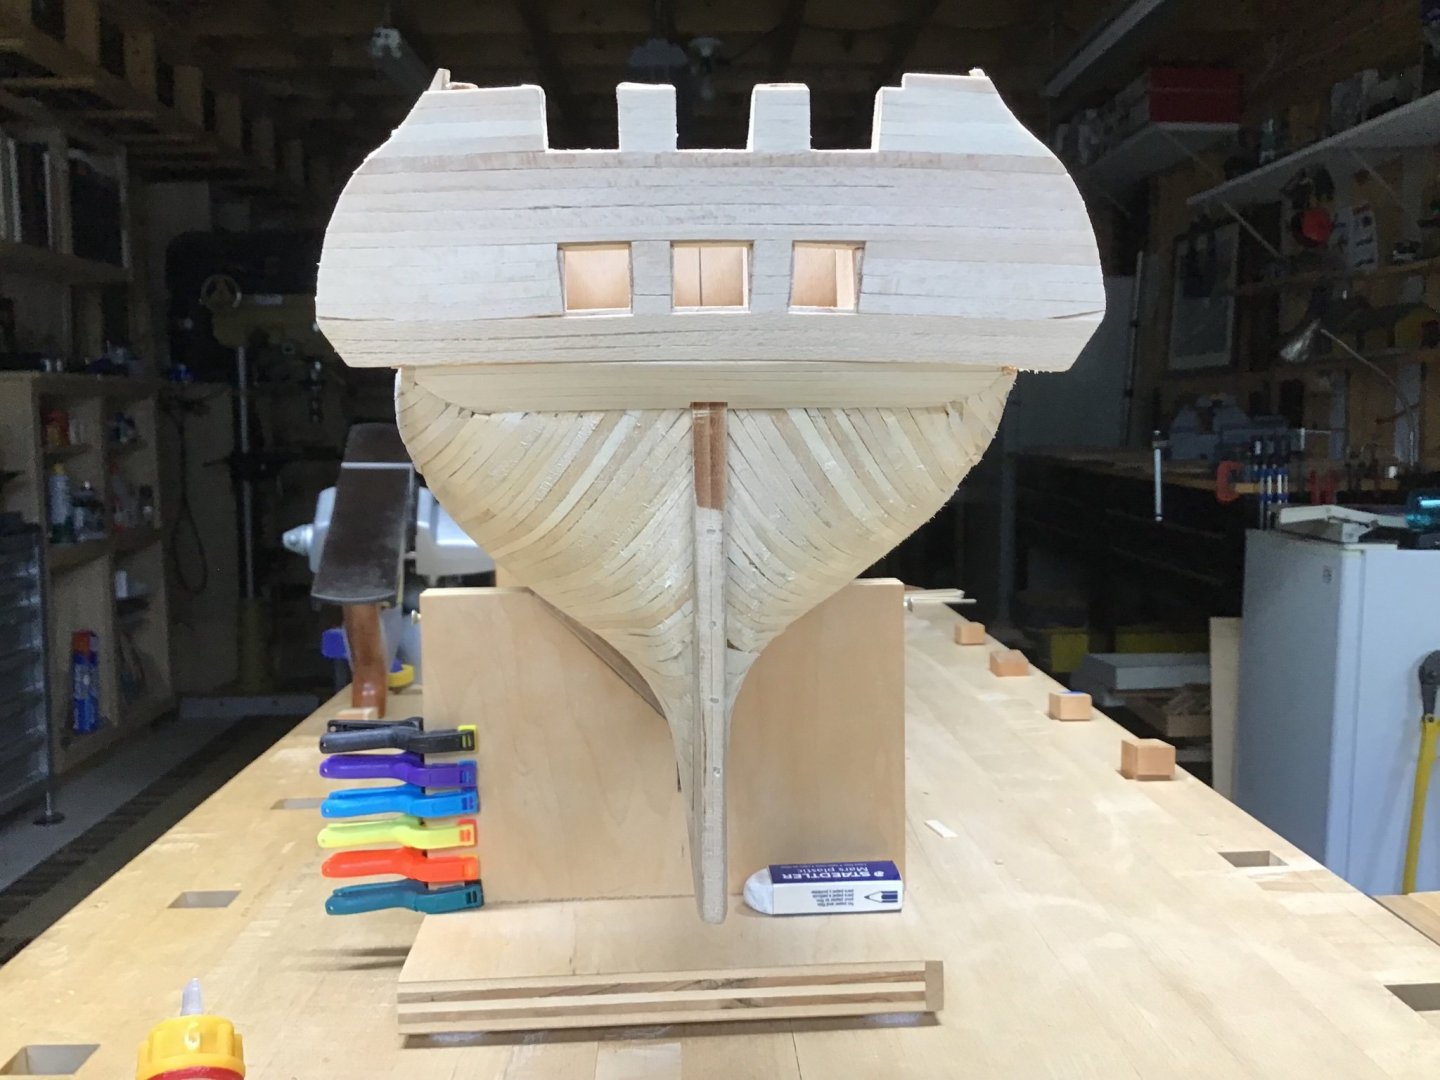
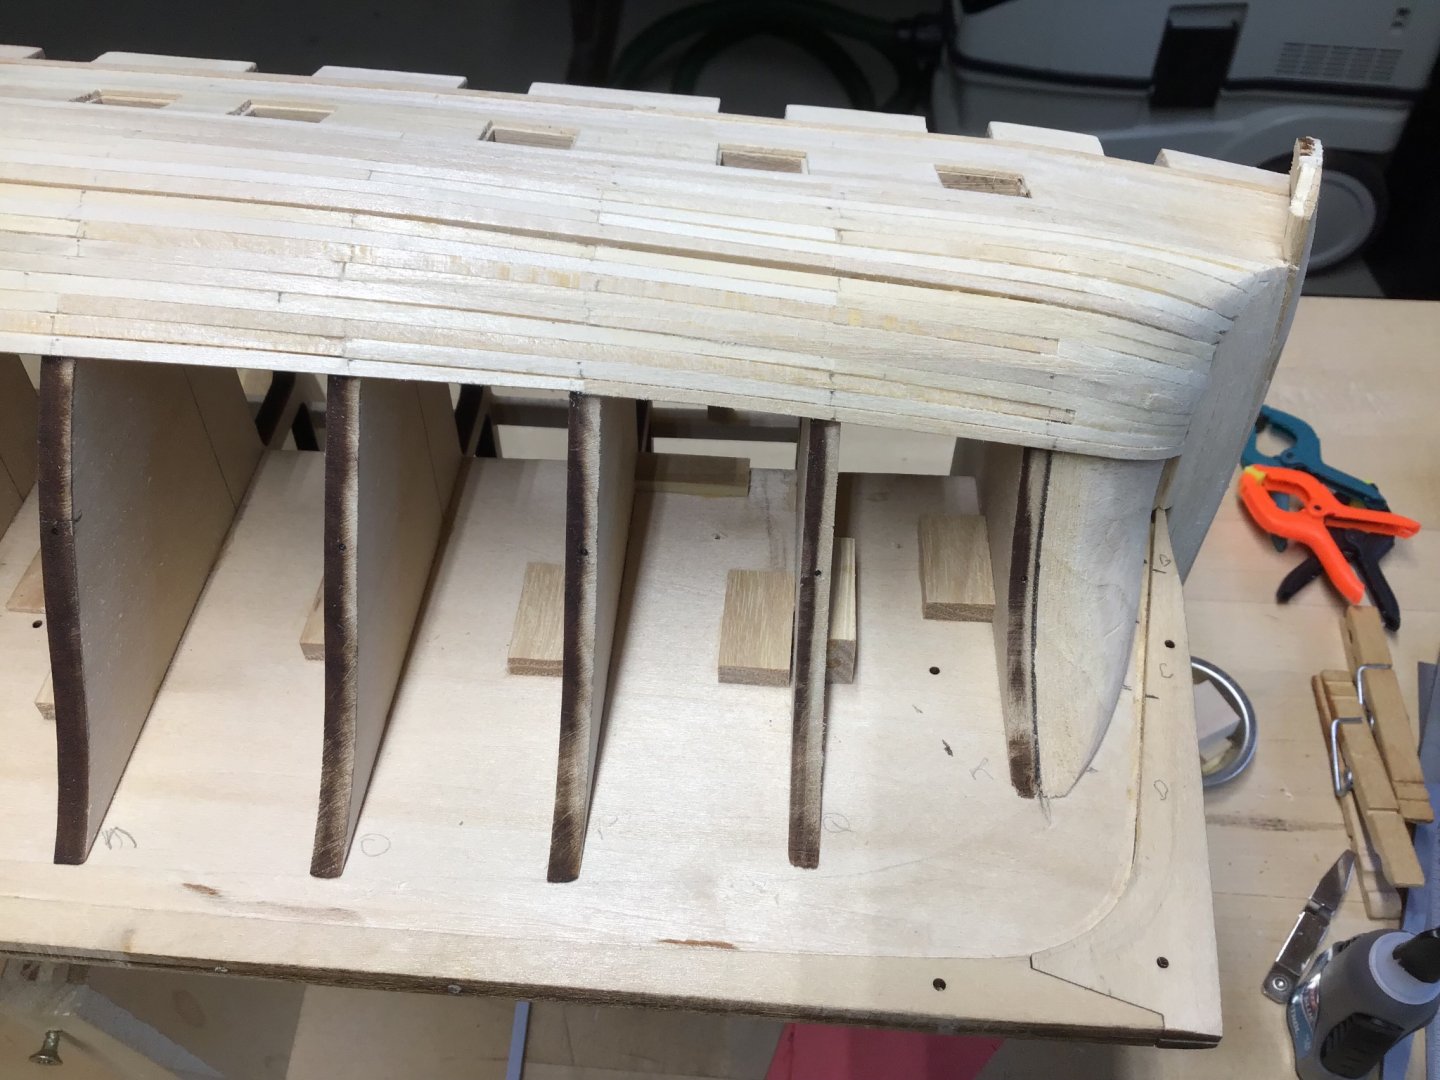
A Couple of Problems Found a few problems while regrouping and thinking of the next steps. Notice in the picture below a section of the bulkhead is missing. It snapped off sometime in the last few weeks during planking. Funny it’s a big piece, searched the shop floor and can’t find it. No big deal just a rebuild. More significant is the fifth gunport from the stern between bulkheads M and N. It’s out of position on both sides. Tight up against bulkhead N. The problem is it will interfere with a chain plate. Major surgery to relocate it into the correct position. I’ll leave it and deal with it later. See if the cannon interferes, and if it does, close the port lids. Such is life….

-
Hi Avi, thank you. Trying to keep it simple. Cheers!
-
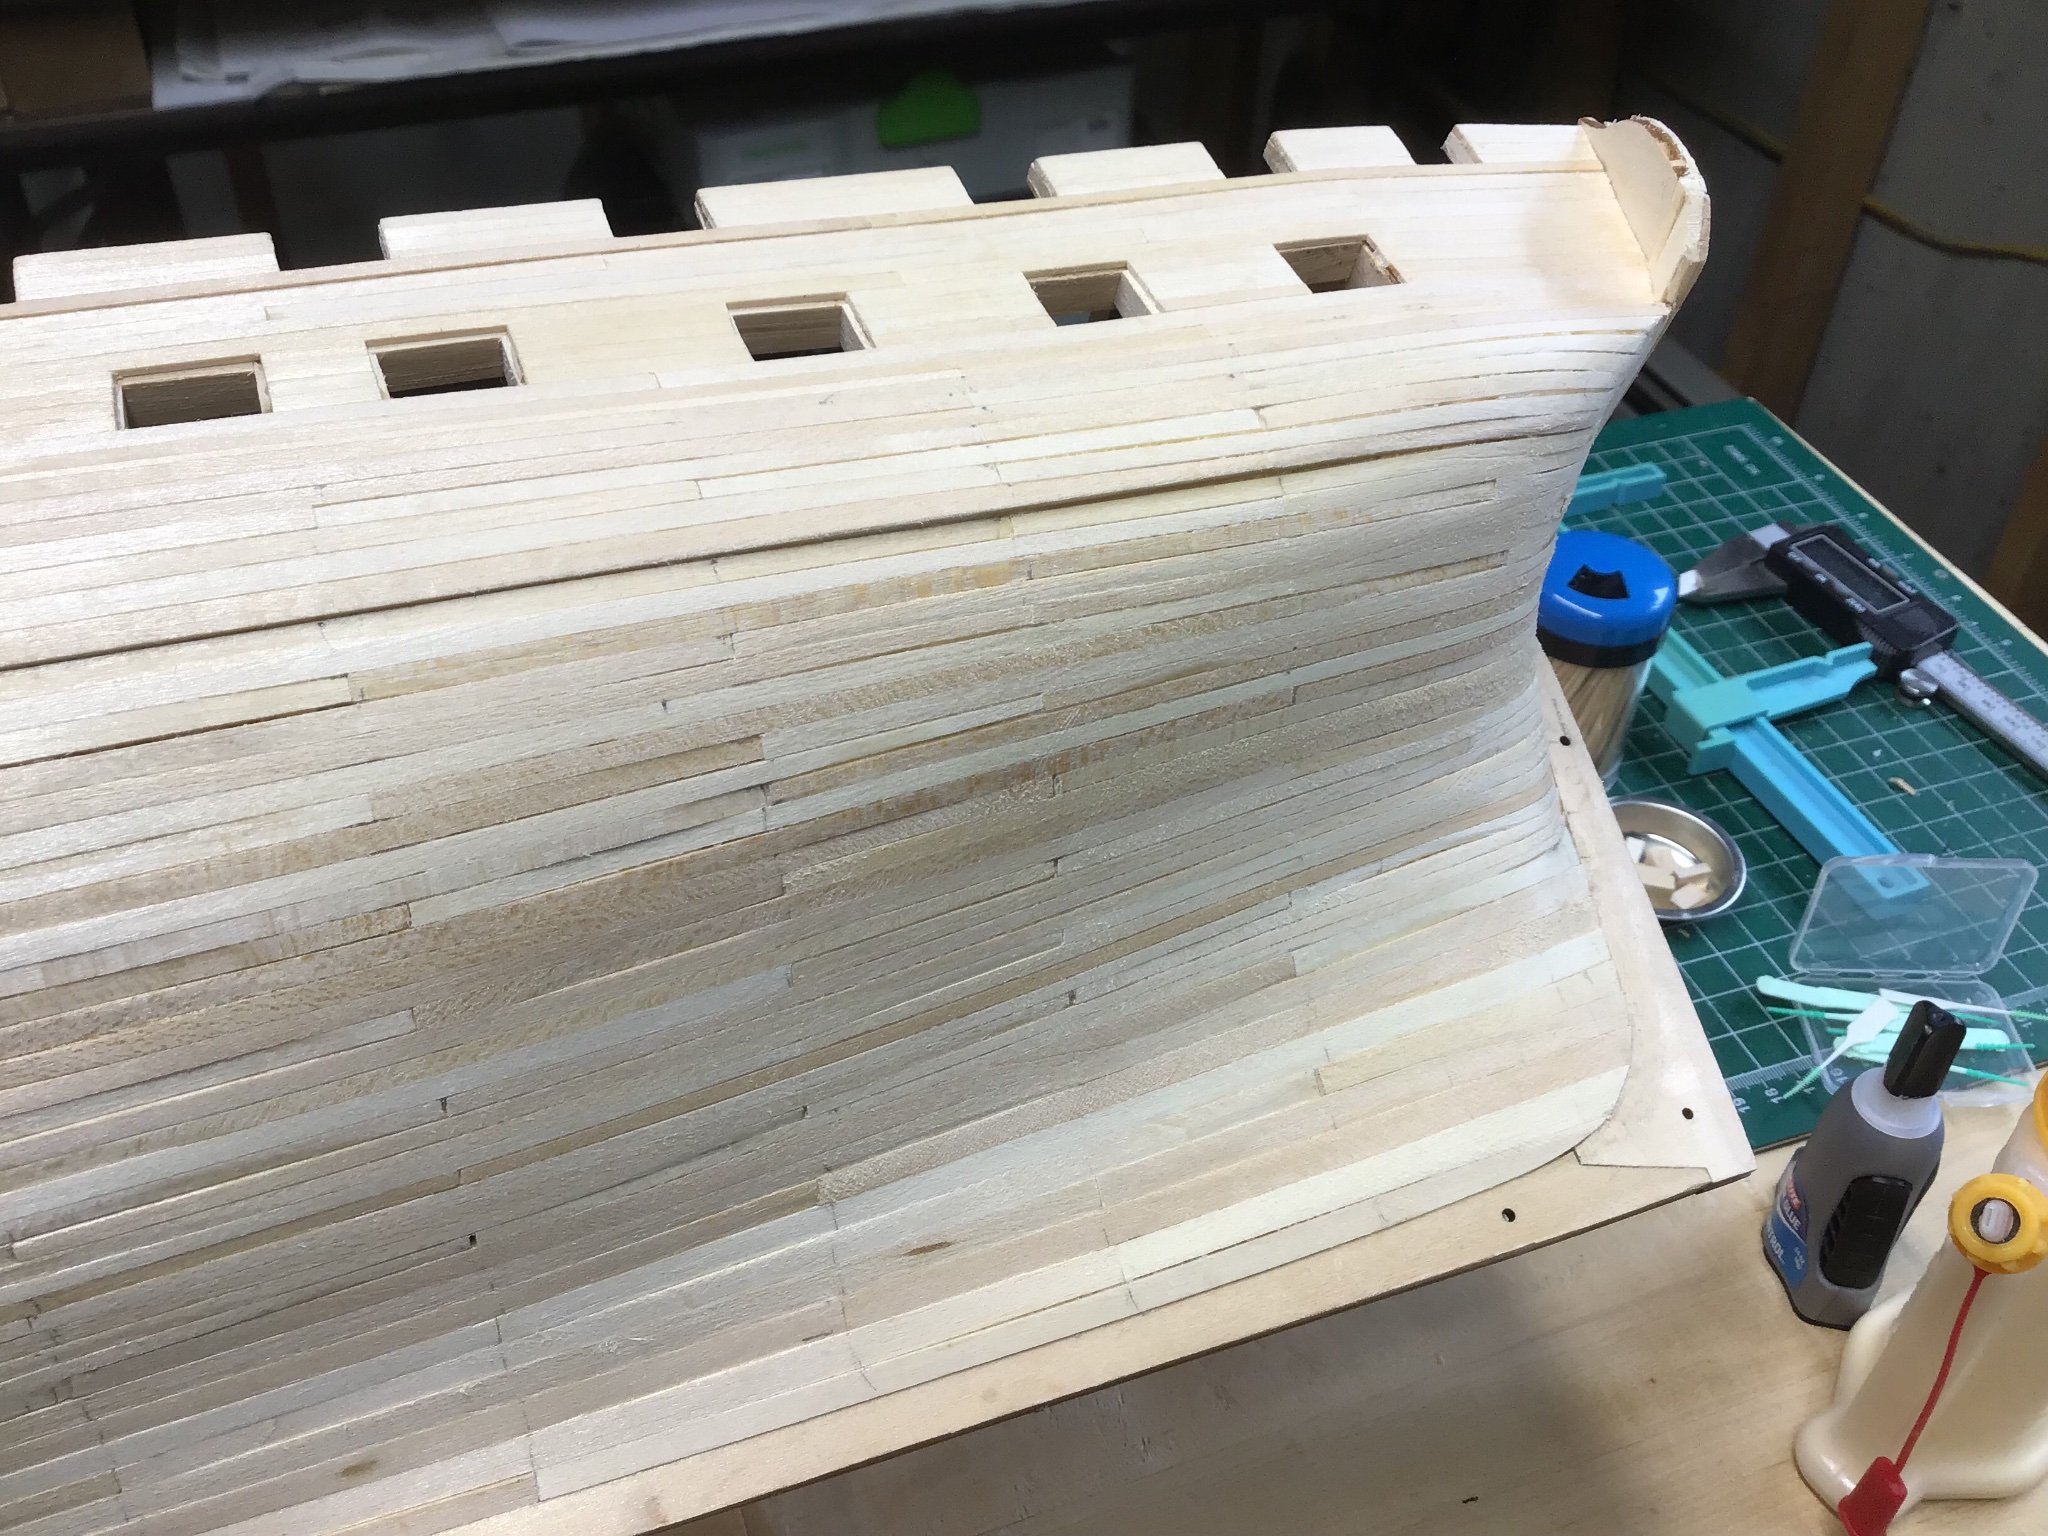
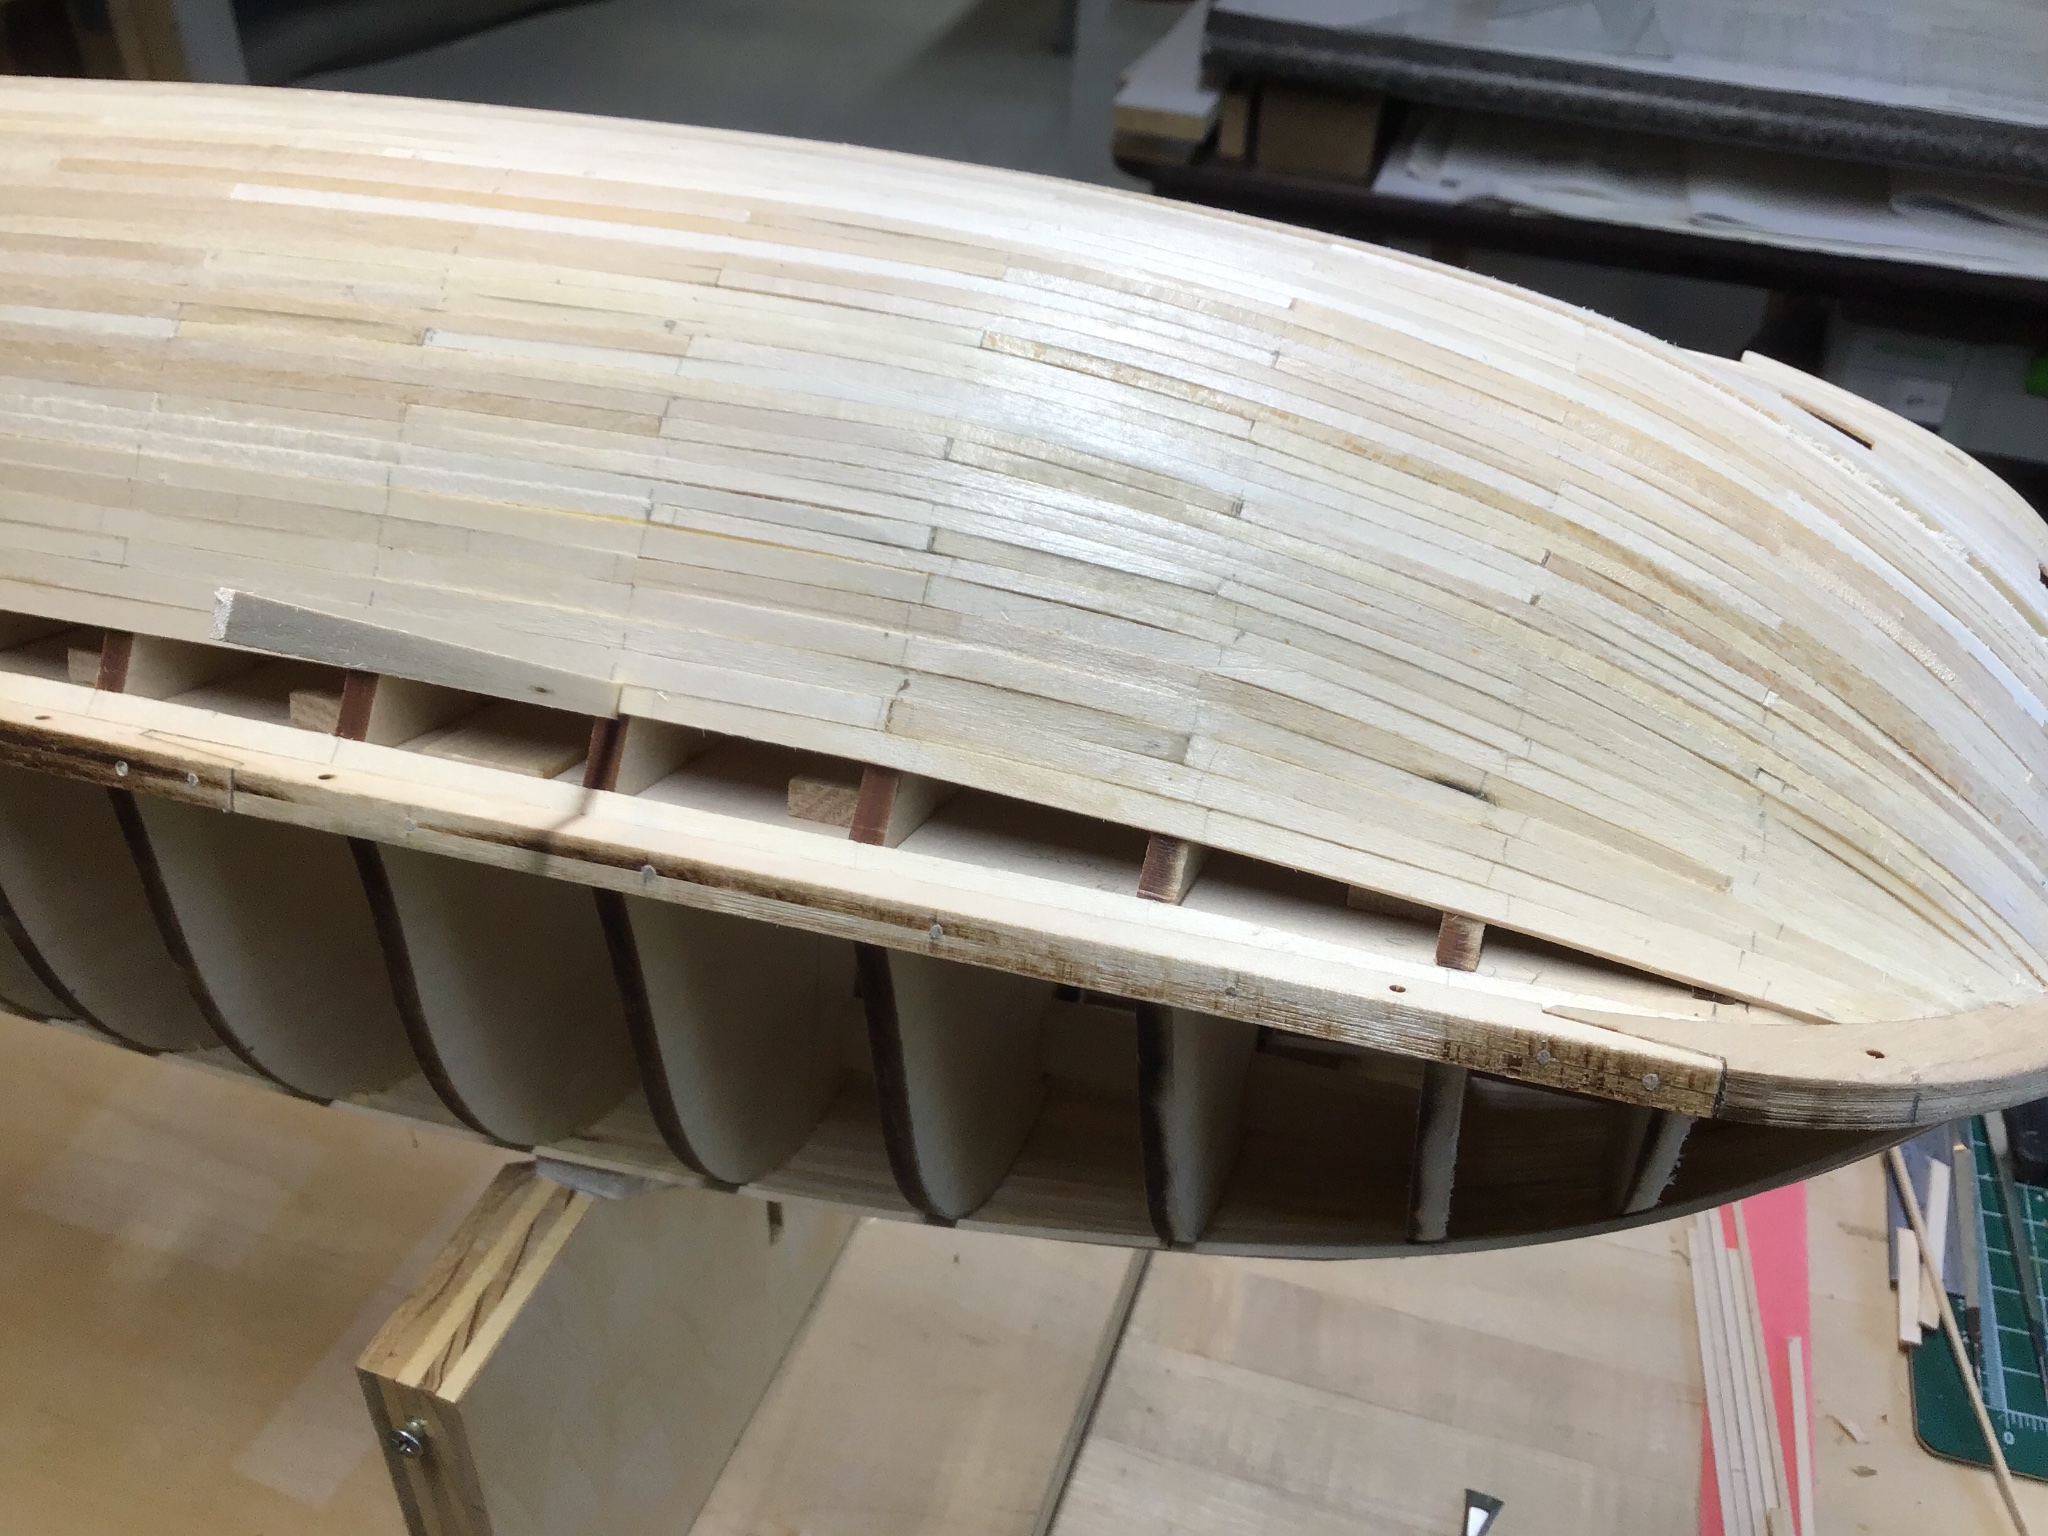
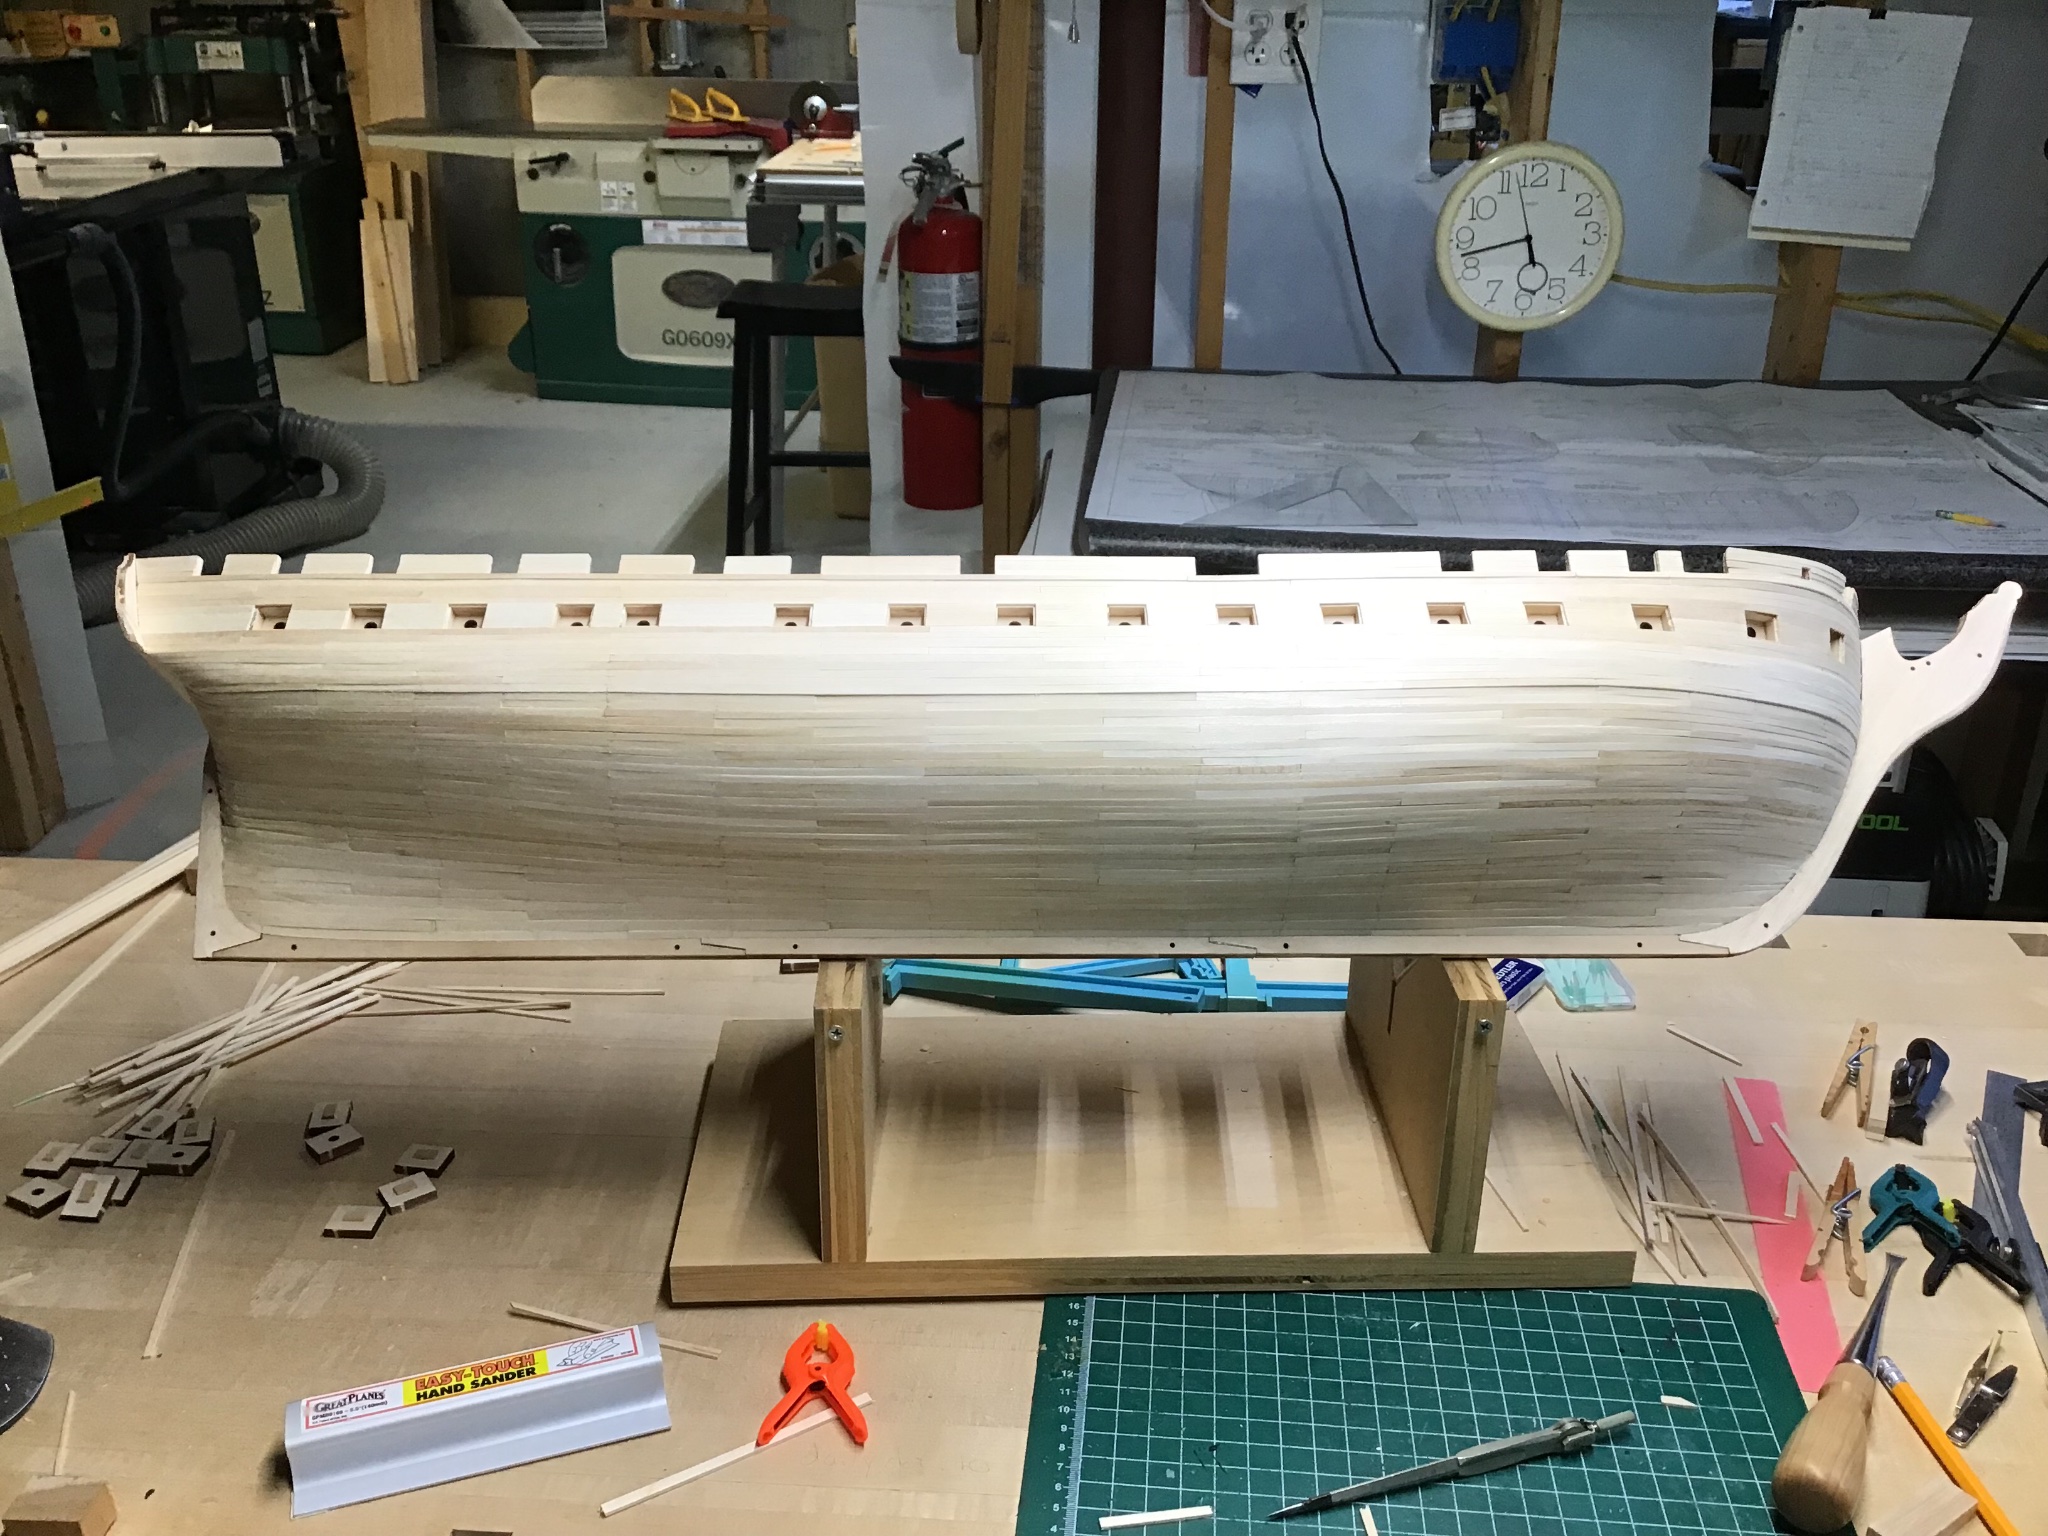
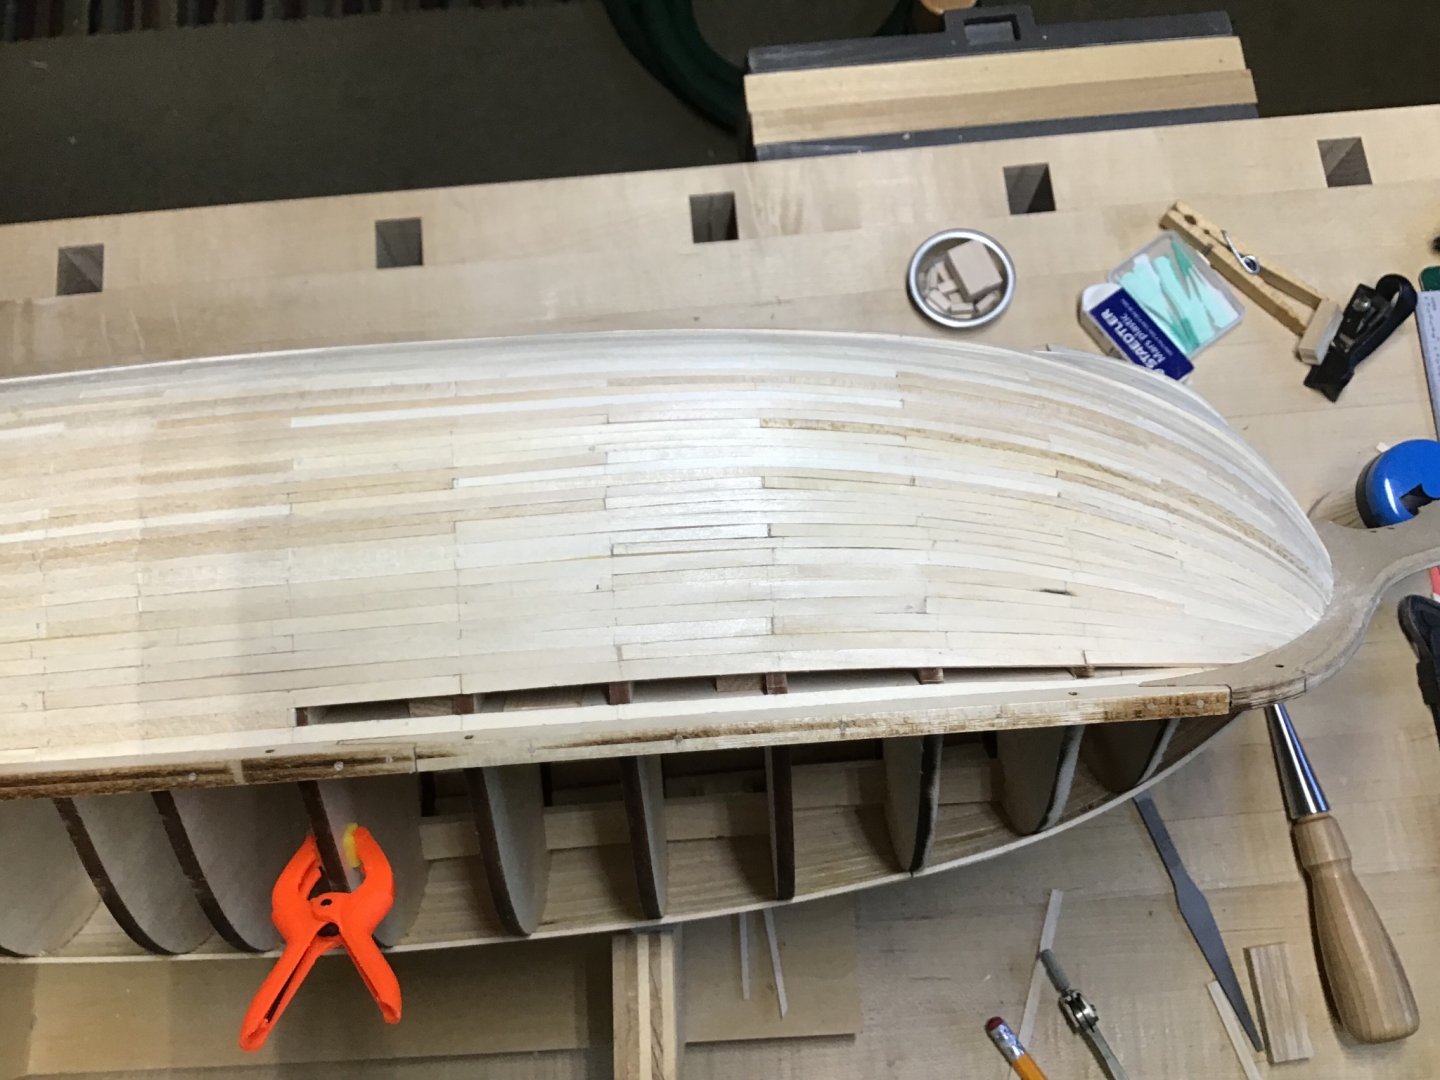
Completion of Port Side Planking Finished up the port side planking. And made a few passes with the tools shown in the first picture to level the planking. When leveling the planks, keep in mind the woodworking concept of Coarse, Medium, and Fine. Chris Schwartz, a master furniture maker, discusses the concept in his woodworking training material, available on his website or YouTube. It’s a consistent time saving approach. Start with coarse tools: the flat and half round files to remove large amounts of material. The half round file gets you into the stem and stern curves. Files will give a fairly smooth finish alone. Medium follows with 150 grit sand paper. Fine is last, 220 grit. Always use a sanding block or dowel. The leveling operation easily takes several hours. So I like to spend an hour or so, take break, and so forth. If you’ve done a good job installing the planks, nice and tight, not much gap filling will be needed. I have a few problem areas that I’ll fill with carpenters glue or plastic wood. Also each plank needs to be glued to it’s neighbor, other wise a plank will flex, making it difficult to file or sand. Overall I’m happy with the result, learned a lot, and found my weakness was paying attention to the tapering at the stern, to get a gentle sweep up into the counter. And I learned how to to understand and follow the planking plan, with 9 planks in each belt. Happy Independence day!


-
My comments were meant to be, and are entirely complimentary. The controversy over “time”, and the semantics of “building” or “assembling” is baffling. The time saving aspects of the design are a benefit not a knock. Saving some time on some tasks is not the same as saying this is a cheap low quality kit - obviously it isn’t. The chief benefit of this kit is one can achieve a fantastic result with a reasonable skill set, in a reasonable amount of time. To paraphrase someone else, it makes the complex accessible. As a mechanical engineer I understand the work required to create this kit is truly monumental. I wish all the best to Mr. Watton and his team. And I plan to treat myself with this kit.
- 355 replies
-
- 11
-

-
- vanguard models
- Sphinx
- (and 1 more)
-
Hello, Have enjoyed looking through this log several times. Thank you! The design and construction reminds me of fine furniture. That is the core is a less expensive wood, popular in furniture, MDF in this case; with a veneer of expensive wood. It’s a smart technique that’s been used for centuries. Another advantage of this kit is less time is spent on the tedious shipbuilding tasks, like say cutting and fitting of small bits of wood associated with hull and bulwark construction. More time can be spent on say the rigging, and adding additional detail - if that’s necessary, because as others have said what the kit offers out of the box is exceptional. Another thought is the design goes easy on the builder - for example the breakaway bulkhead on the stern that protects the bulkhead ears. This means the builder is setup for success. Time is priceless. What normally takes many months for the skilled builder or even years for a newcomer, can be accomplished in weeks. This design solves the biggest problem with model shipbuilding - most people give up before finishing the ship. This fine, unique kit may seem expensive, but in my opinion the time savings, quality, and ultimately the satisfaction, make the kit well worth the price. Tremendous value. Congratulations on your ingenious design Mr. Watton. You certainly have made a significant and remarkable contribution to the craft.
- 355 replies
-
- 8
-
-
- vanguard models
- Sphinx
- (and 1 more)
-
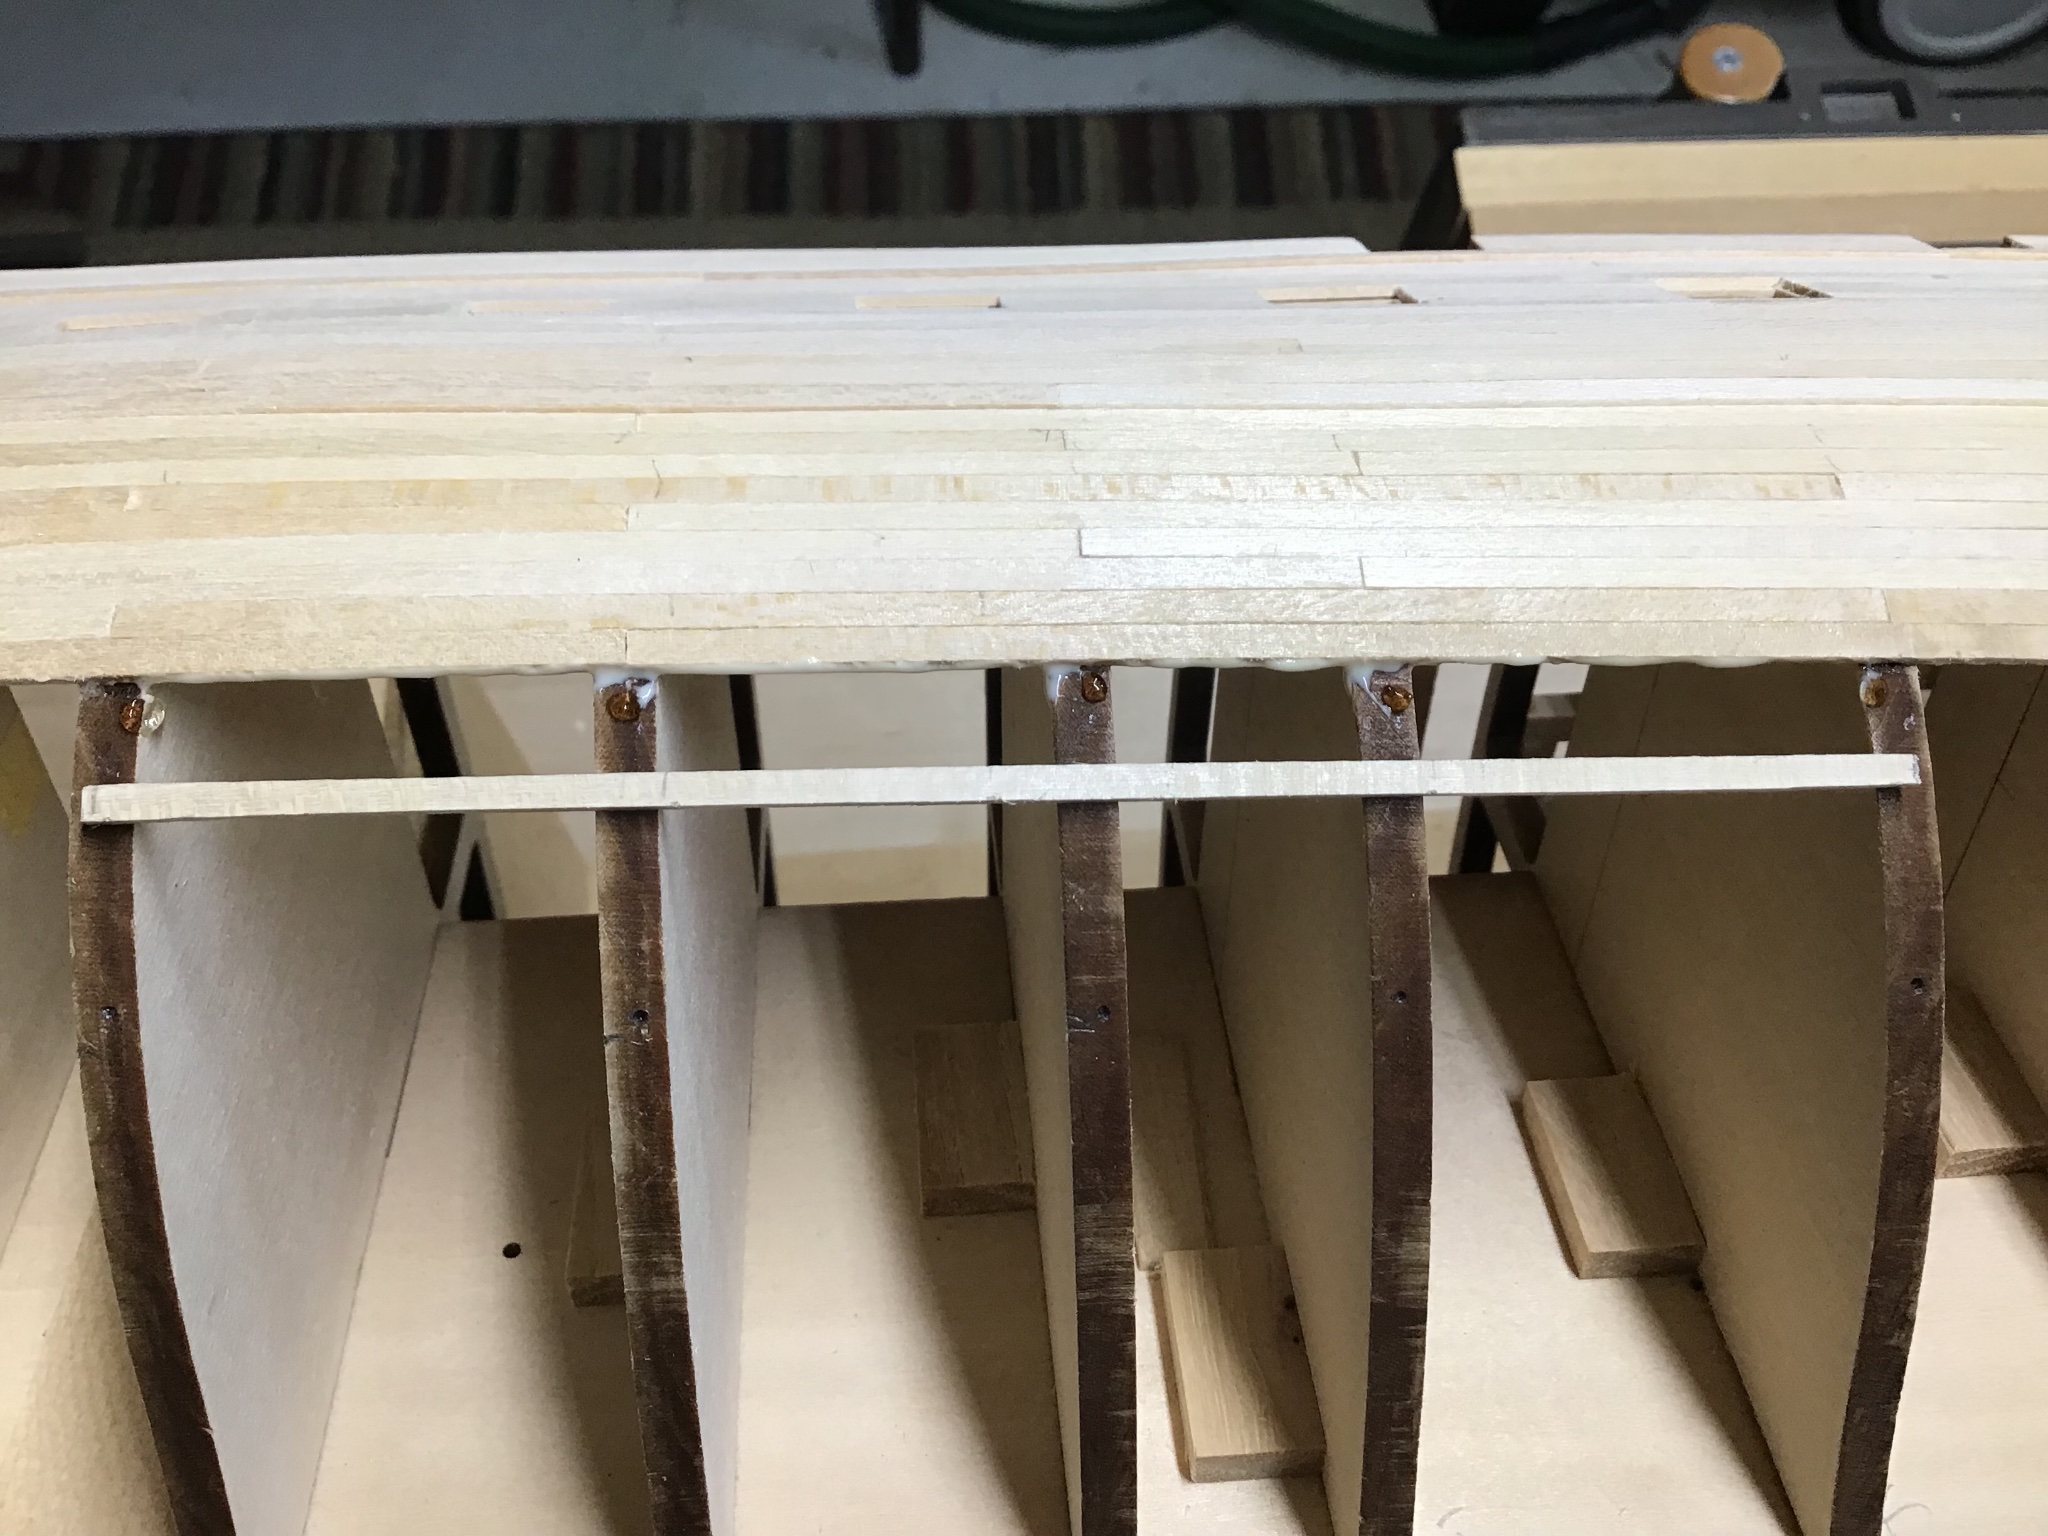
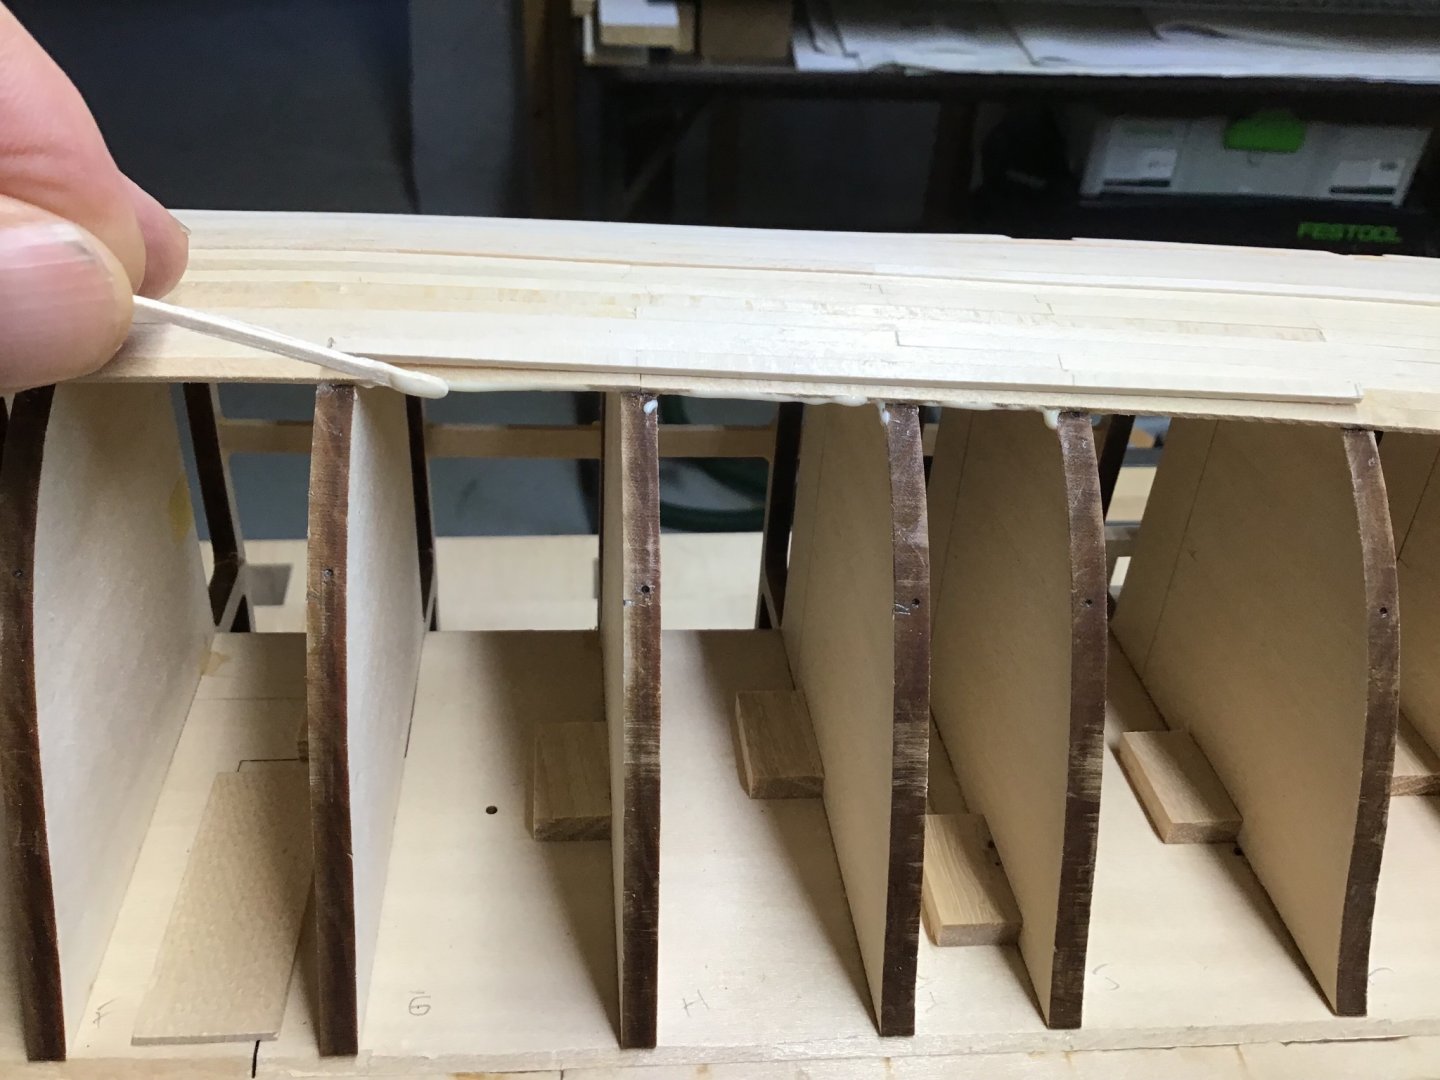
Plank Glue Up After getting tired of applying glue to a plank in my hand, came up with this method - apply glue to the previous plank on the model. Picture 1 shows applying the glue with a toothpick. Picture 2 shows a dot of Locktite Super Glue Gel Control on each bulkhead, and plank in position. Picture 3 shows plank installed - nice and tight. Left out wiping excess with my finger…..

-
Have this one in the “pile”, so decided to follow along…..thanks for posting…
-
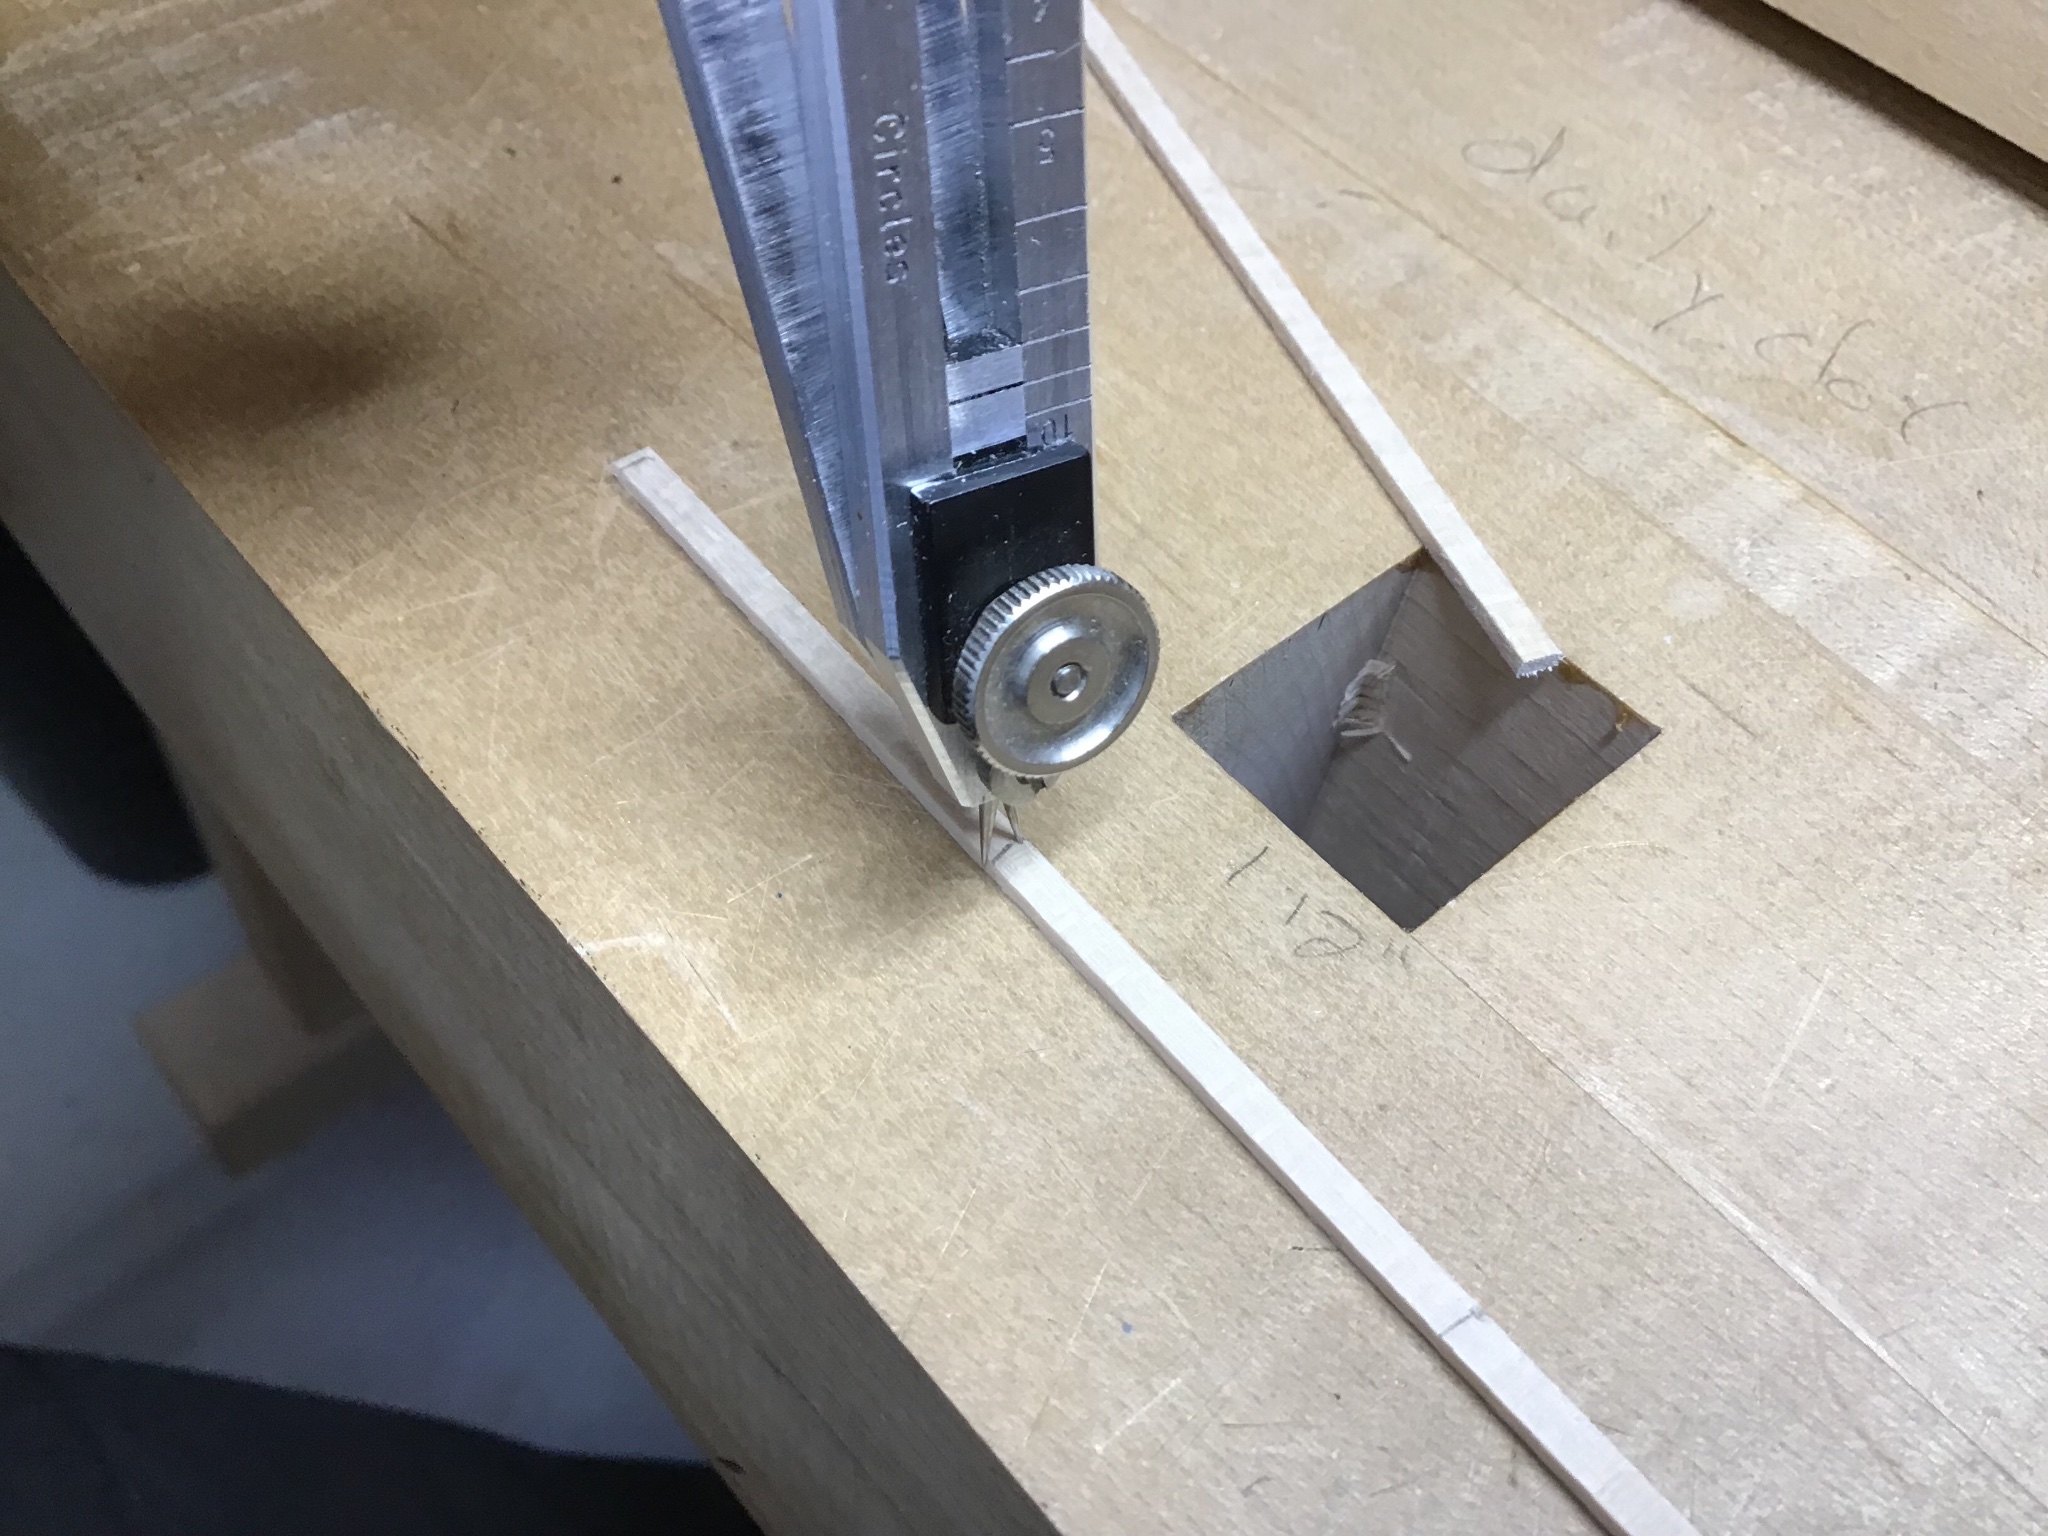
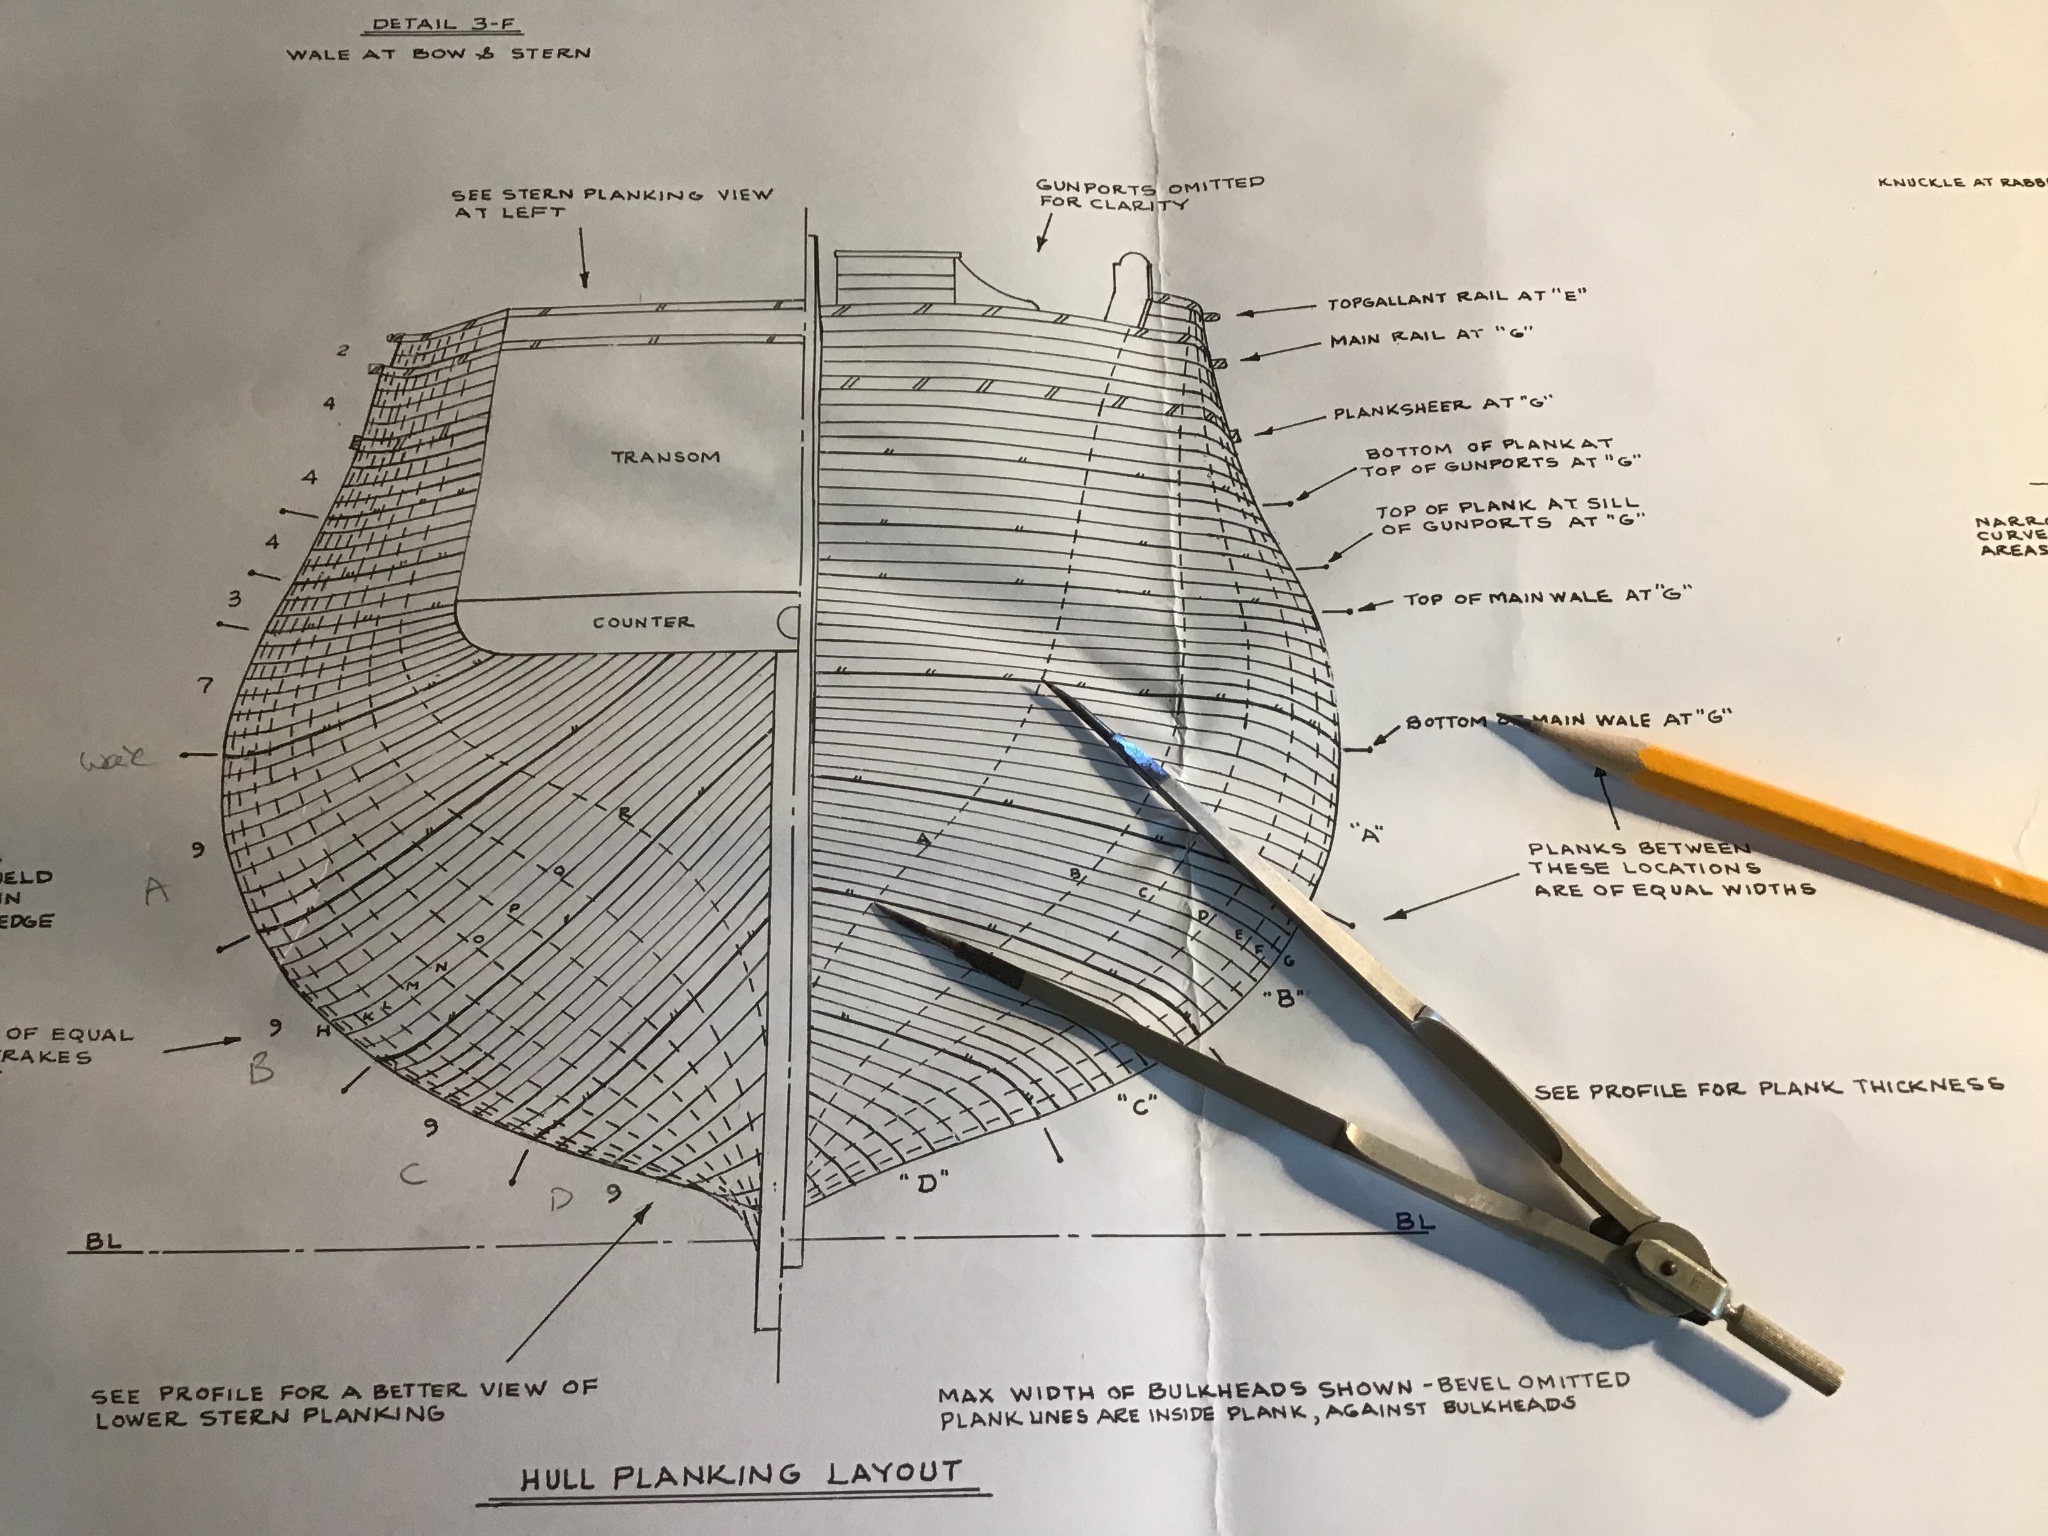
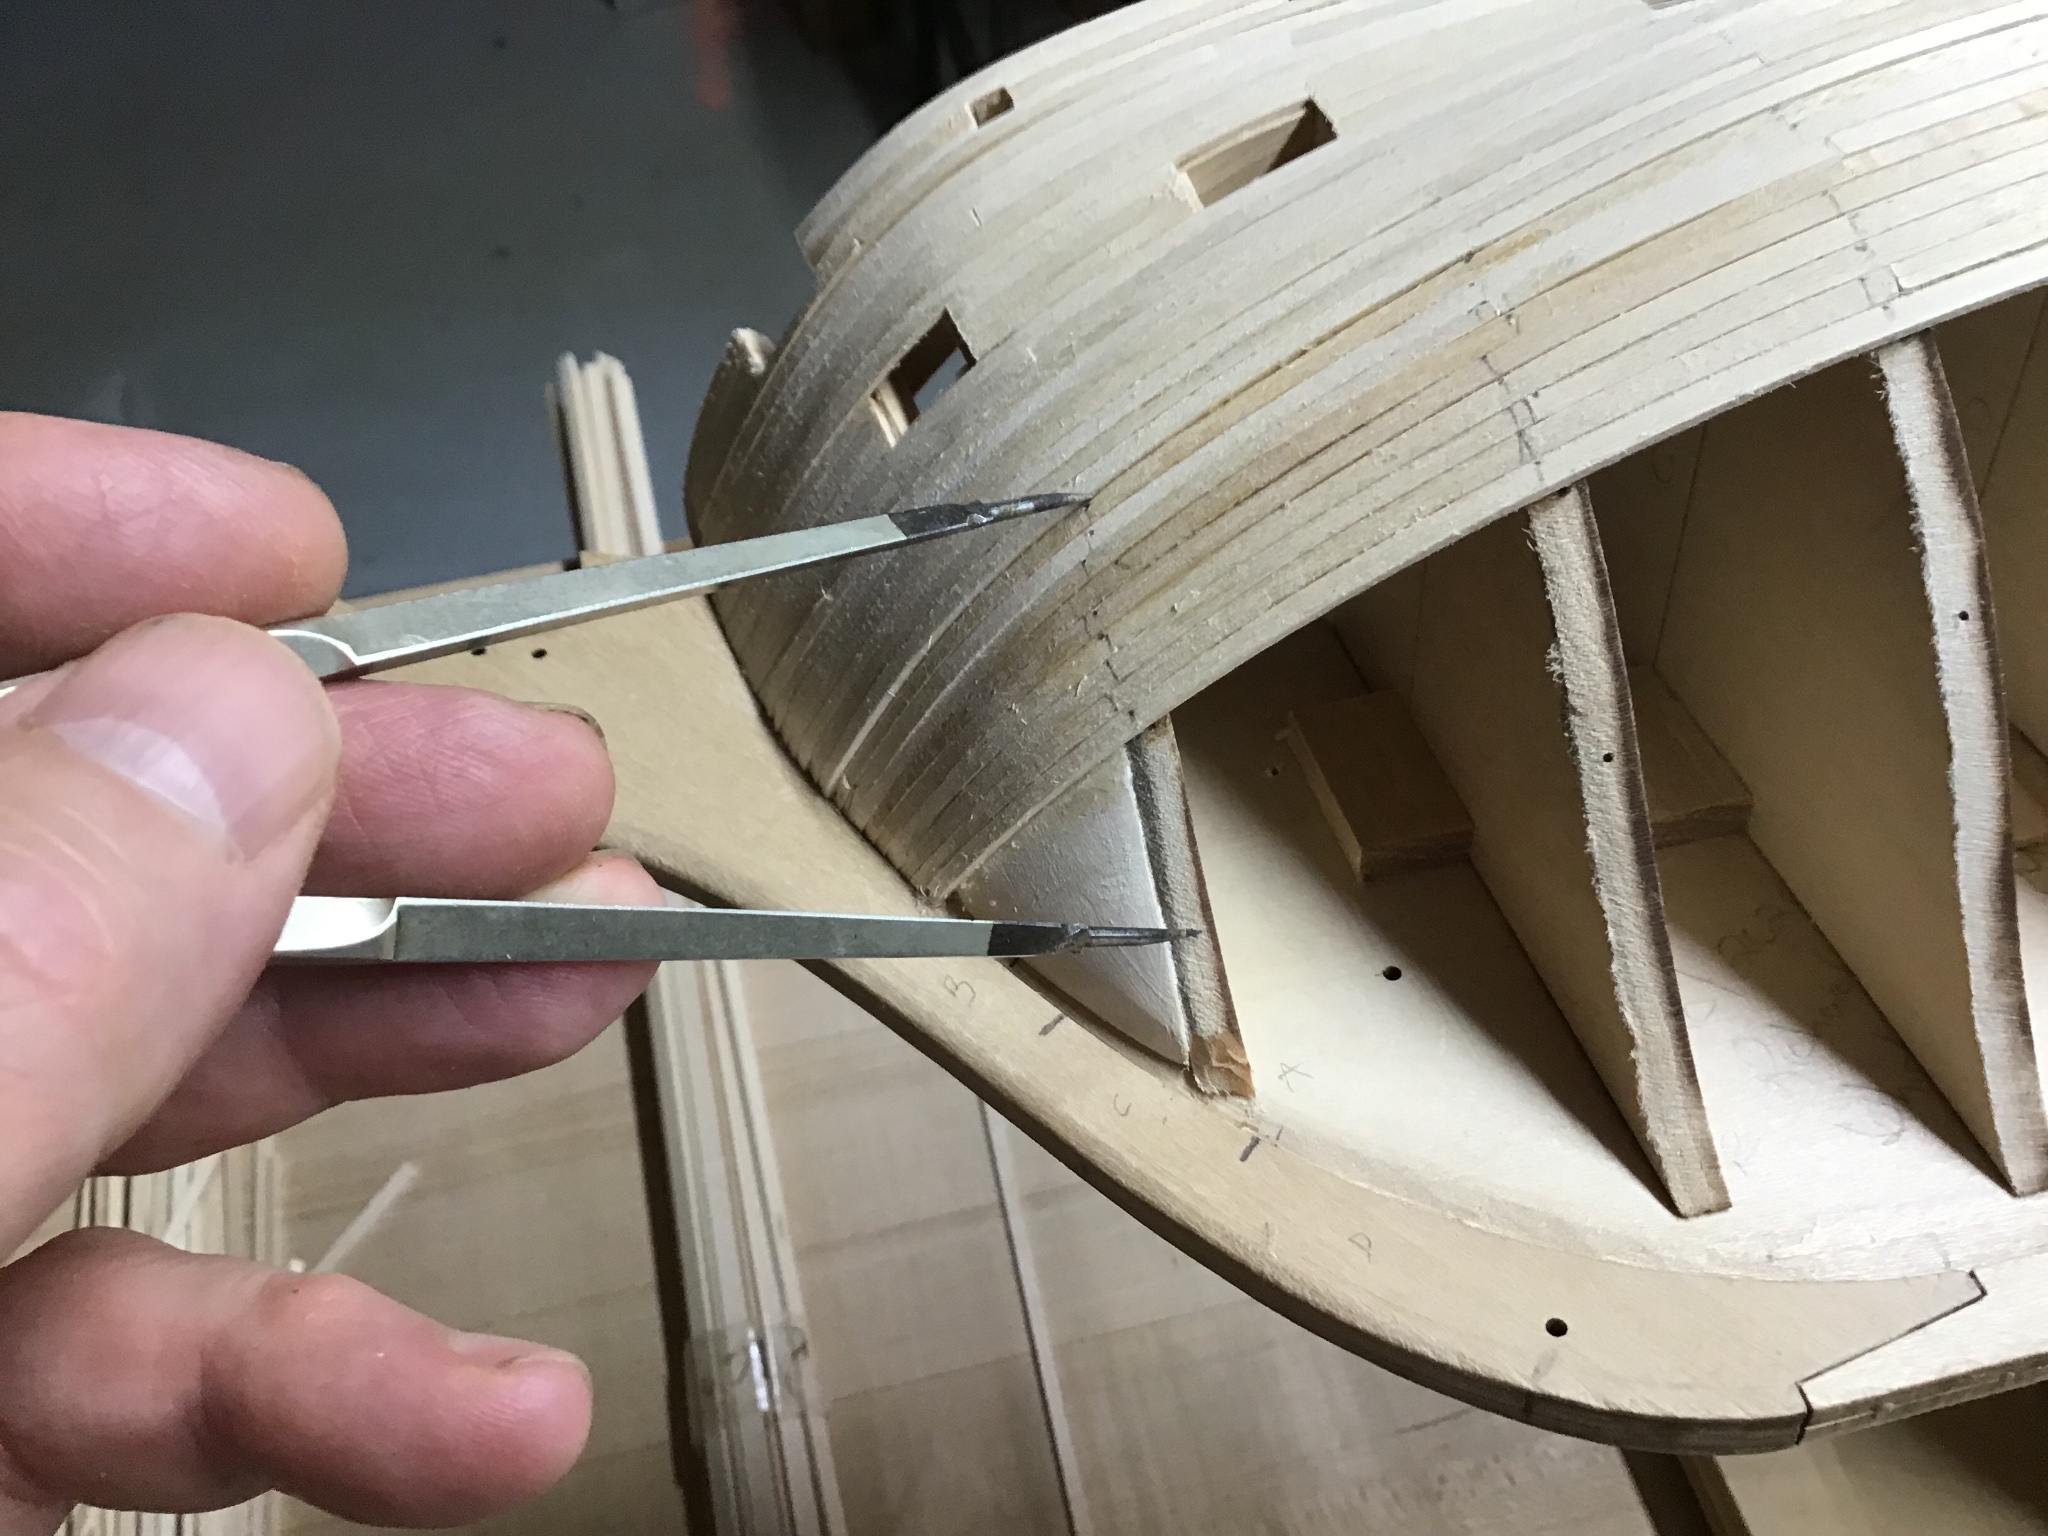
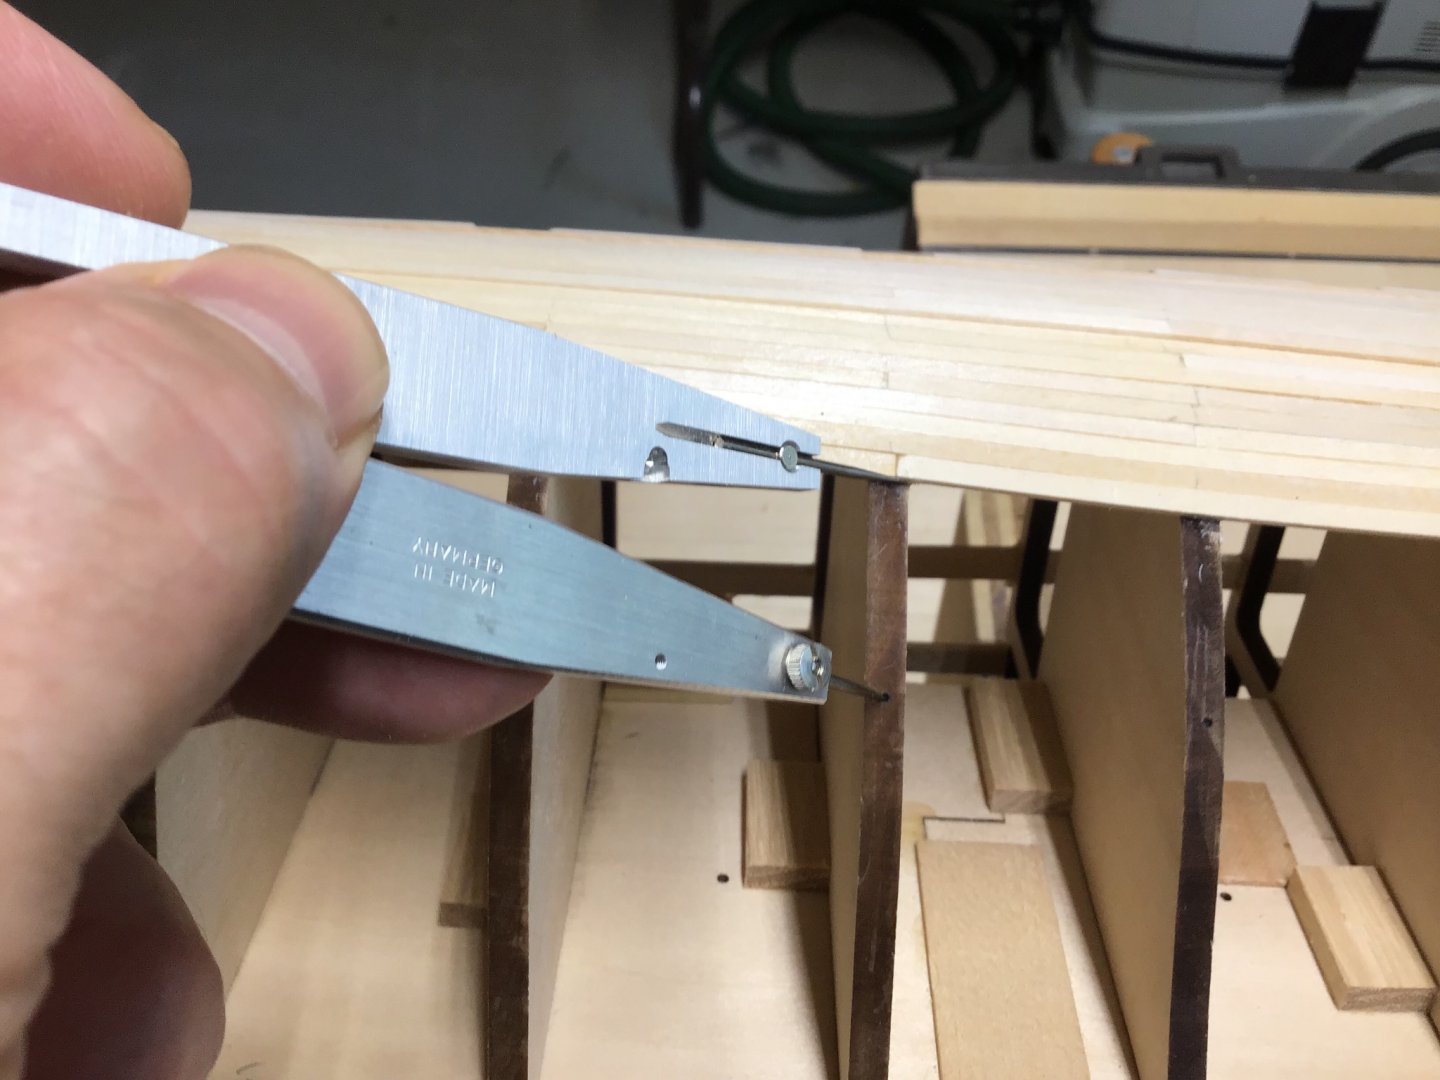
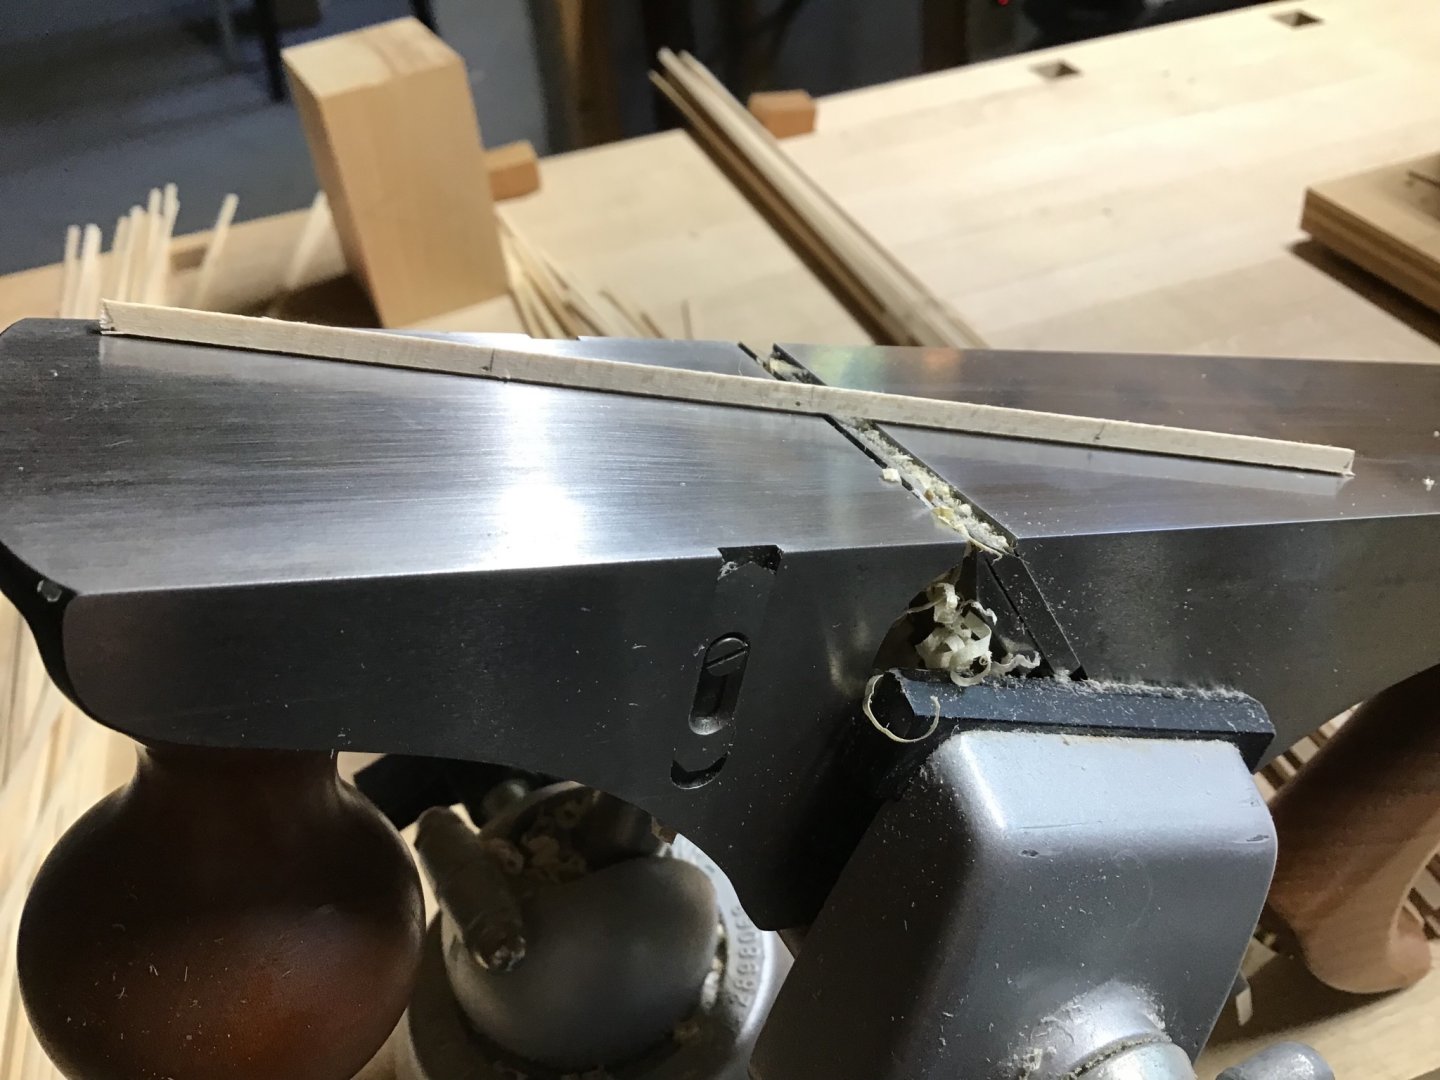
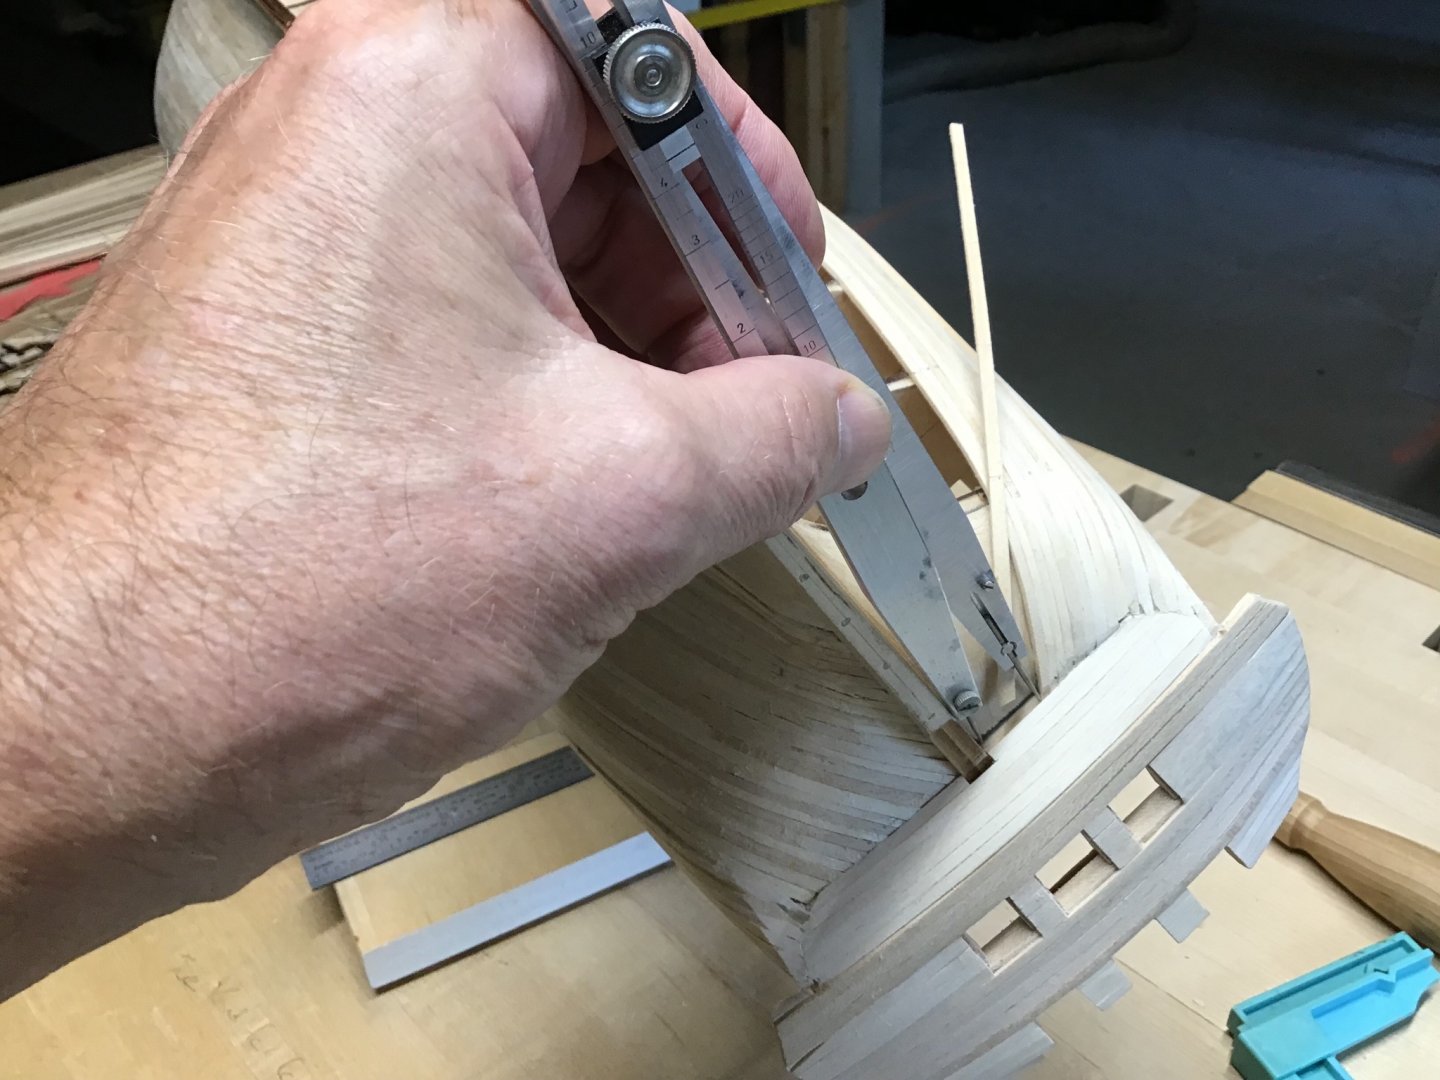
Using Proportional Dividers Proportional dividers are an instrument used to divide a line or a circle into equal segments. Here we are using them at each bulkhead to determine the width of a plank at that bulkhead. Belt B, and all the belts are 9 planks wide. So we set the divider at 9 for the first strake in Belt B, 8 for the second strake in Belt B, and so on. What about the curvature of the bulkhead, since the dividers measure a straight line? The dividers will compensate for that as the set point decreases from 9 to 8 to 7, etc.; and the measured distance along the bulkhead decreases. It’s automatic. The first picture shows measuring the distance from the bottom of Belt A to the mark indicating the bottom of Belt B. Next picture two shows the dividers flipped and being used to mark the width on the plank at the bulkhead - the plank spans 4 bulkheads. Repeat until all the widths are marked on the plank. Color the marks with a pencil. Last the waste material is removed by moving the plank along the bed of hand plane upside down in a vise. Be careful to keep the plank perpendicular to the bed unless a bevel is needed. At the stern we want 4 1/2 planks to span the horizontal counter and same for the vertical stern post. So set the dividers to 4 1/2 when measuring these widths. See last picture.

-
Ha! Knew quit a few when I was in the Nav….can’t think of a one at the moment….this is a “family” forum though…..
-
Dealing with Butt Joint Gaps Occasionally I’ve had a plank come up short after tapering, usually at the bow or stern. To fix, taper the thickness of a plank at the end, and insert vertically into the gap, the plank acts as a plug. Picture 1 shows the plank, on the left with it’s end in the gap. Picture 2 shows the plug, after the plank has been cutoff flush. Will be invisible after priming and painting.

-
Keep going, I’m still catching up…..! Cheers!
-
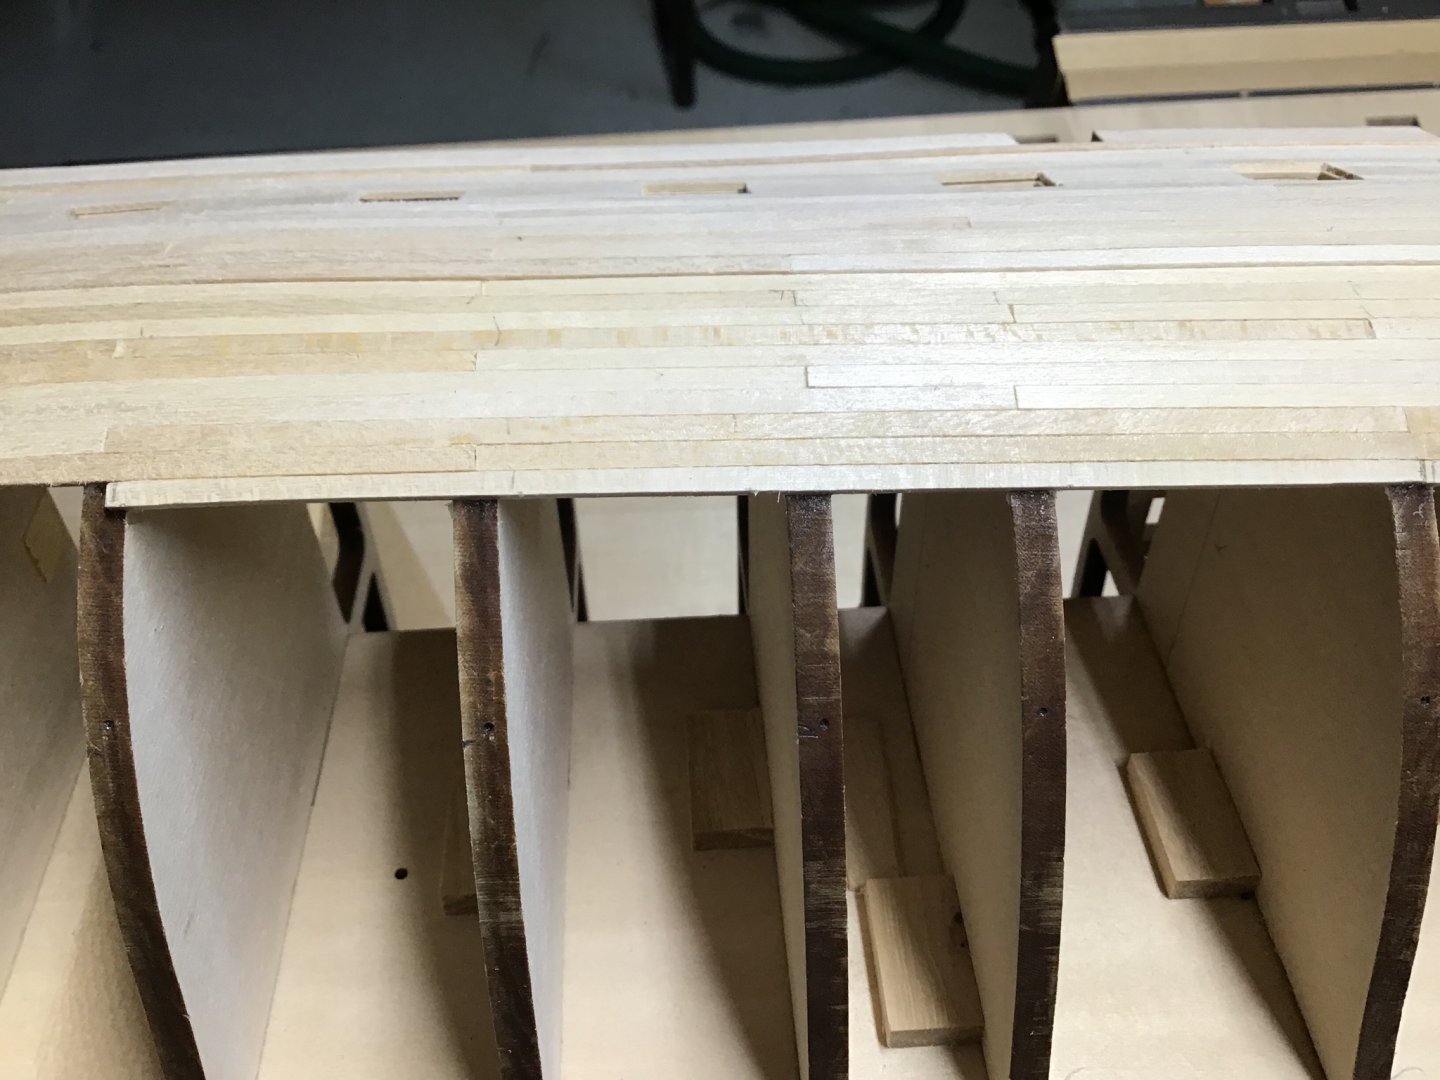
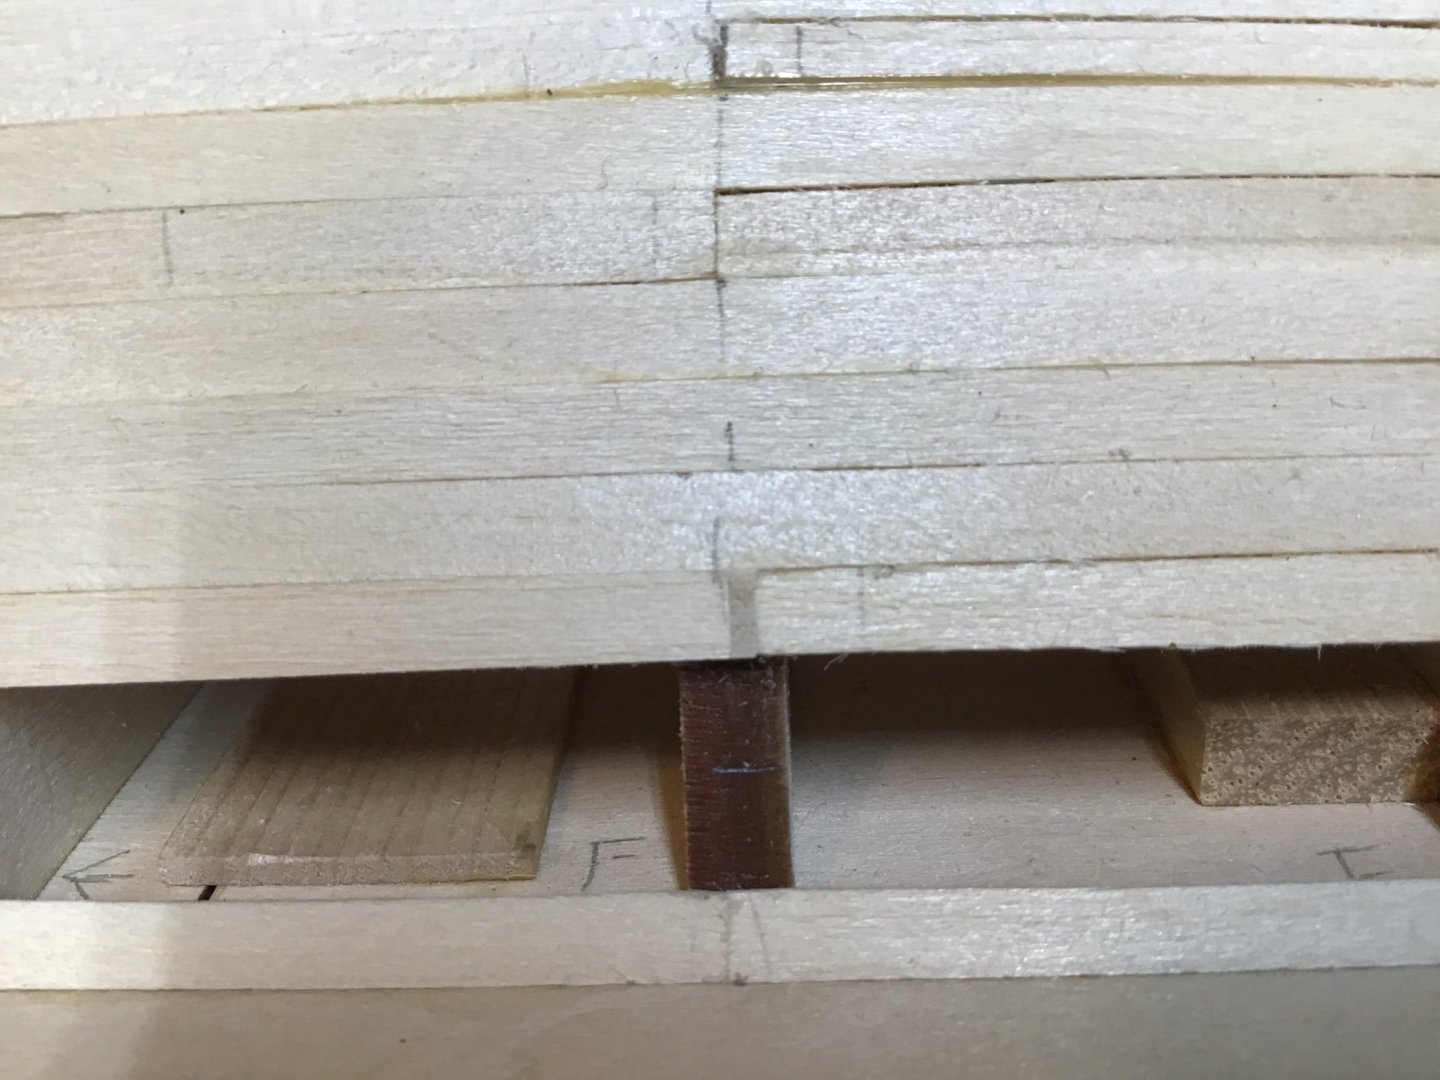
Belt B - Port Side, Marking the Belt Width First step is to mark the width of the belt. The plan provides all the needed information. One just needs to know how to find and use it. The first picture shows the Hull Planking Layout which provides the belt width at each bulkhead. The job is to measure the width at each bulkhead on the plan and transfer the dimension to the model by making a deep impression on the bulkhead with the divider. The impression is marked with a pencil. The measured width is between the bottom of the wale to the bottom of Belt B. The result is a series of dots on the bulkheads which I try to show with Pictures 2 and 3. A problem on the starboard side was unclear marks which led to some errors. So this time making sure they are crisp and clear.


-
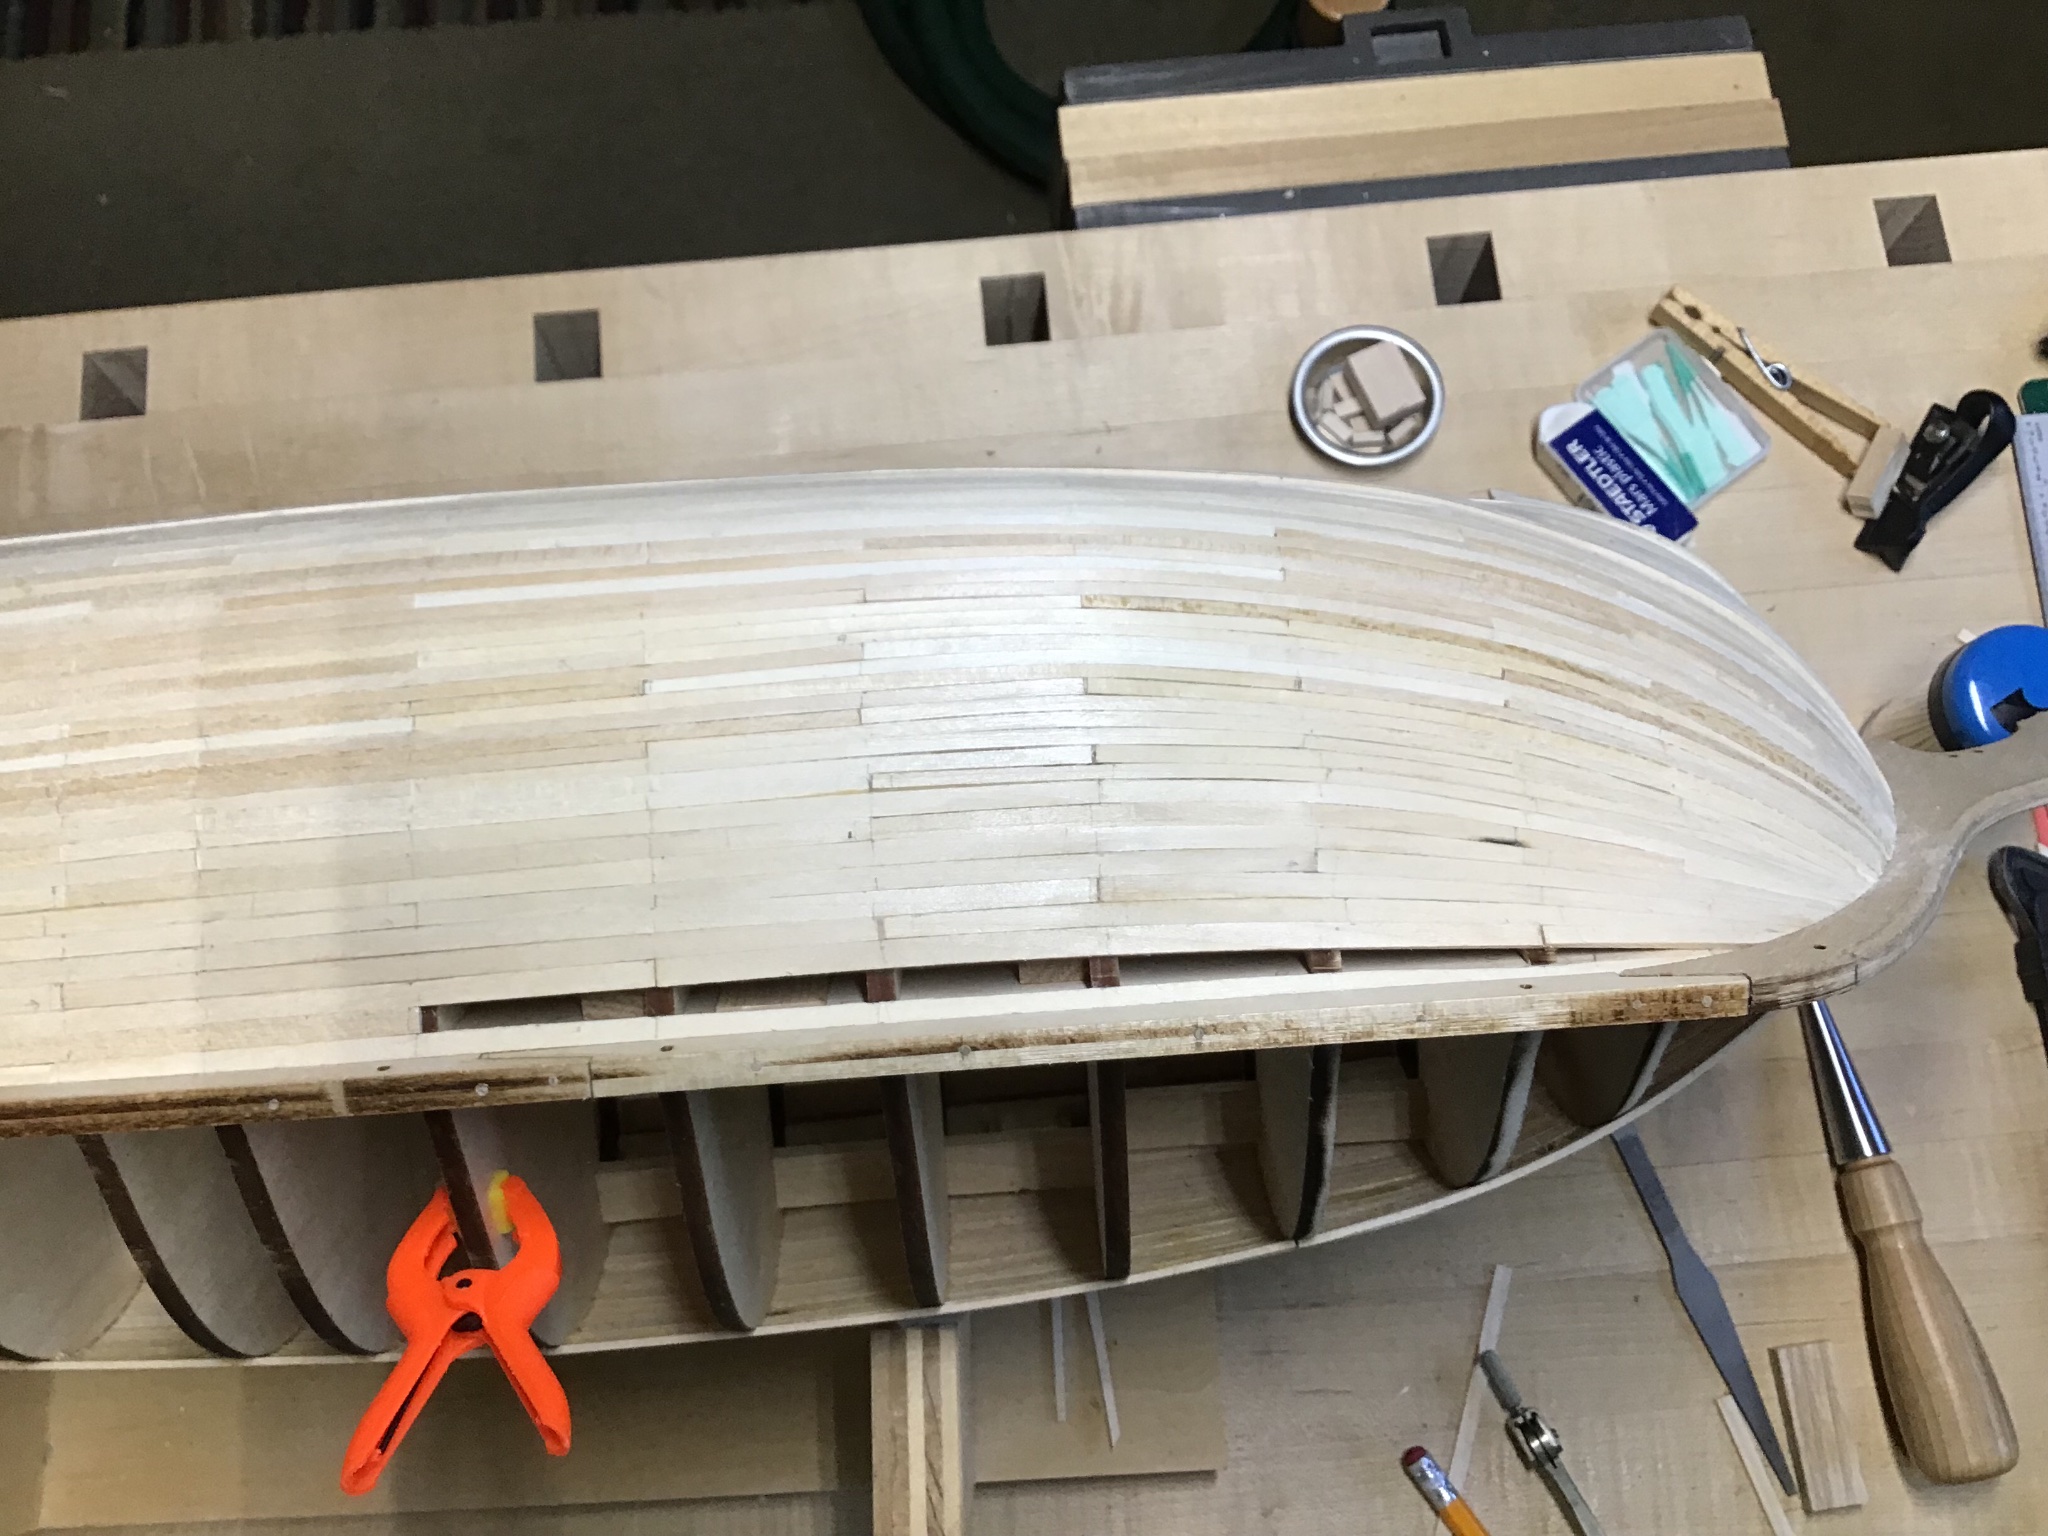
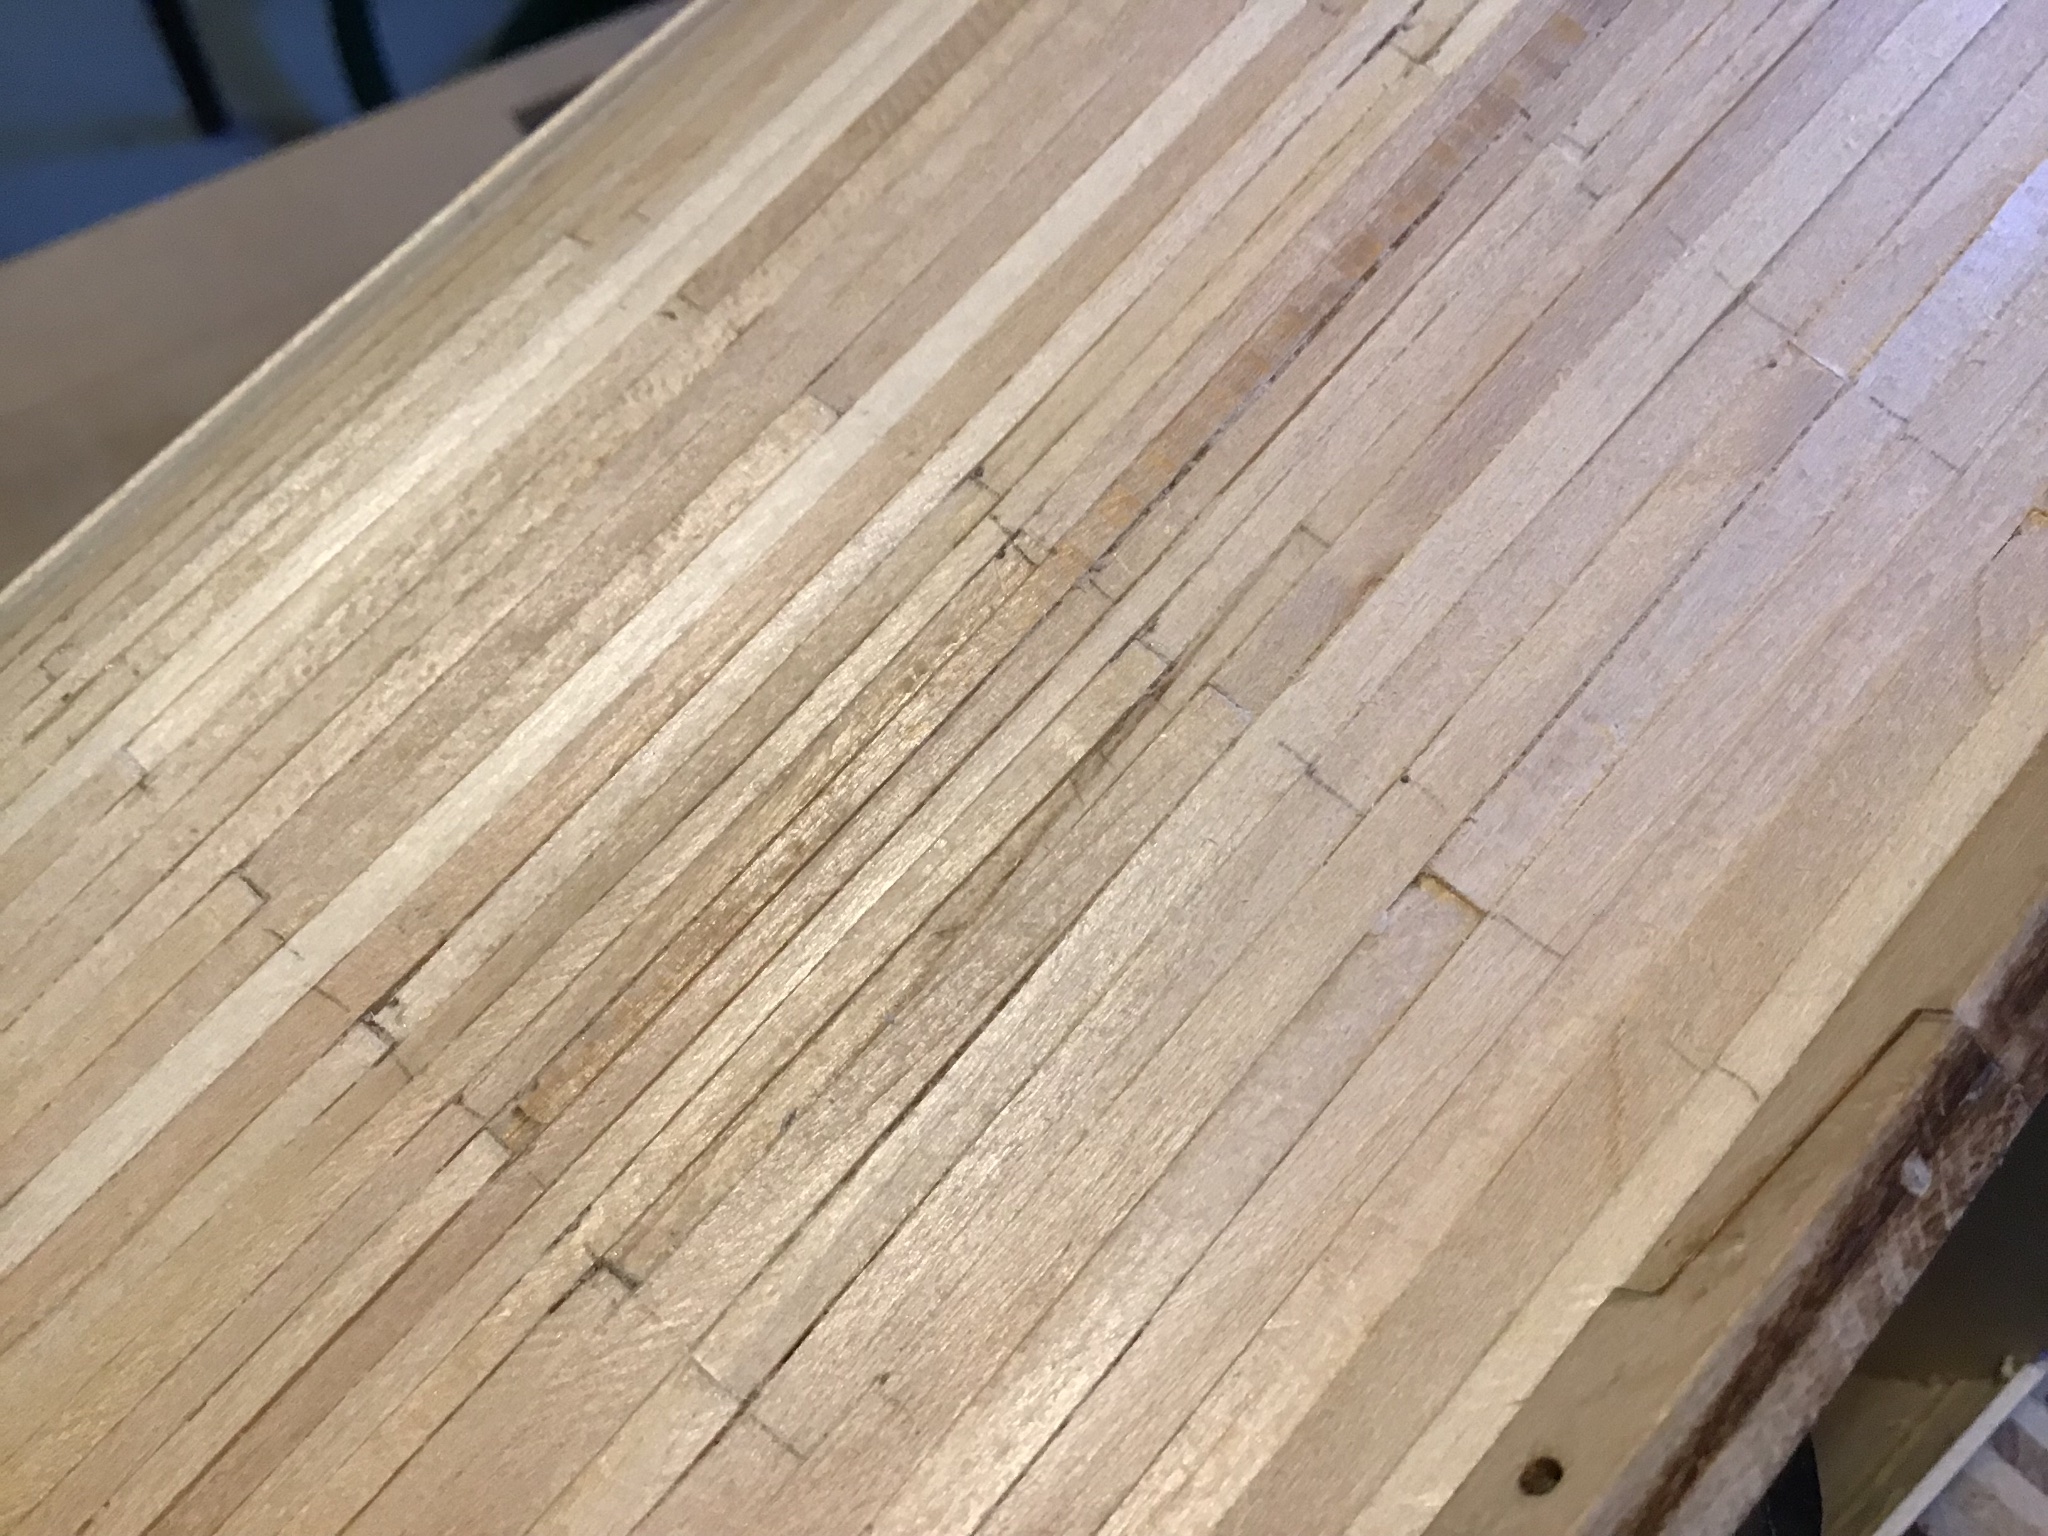
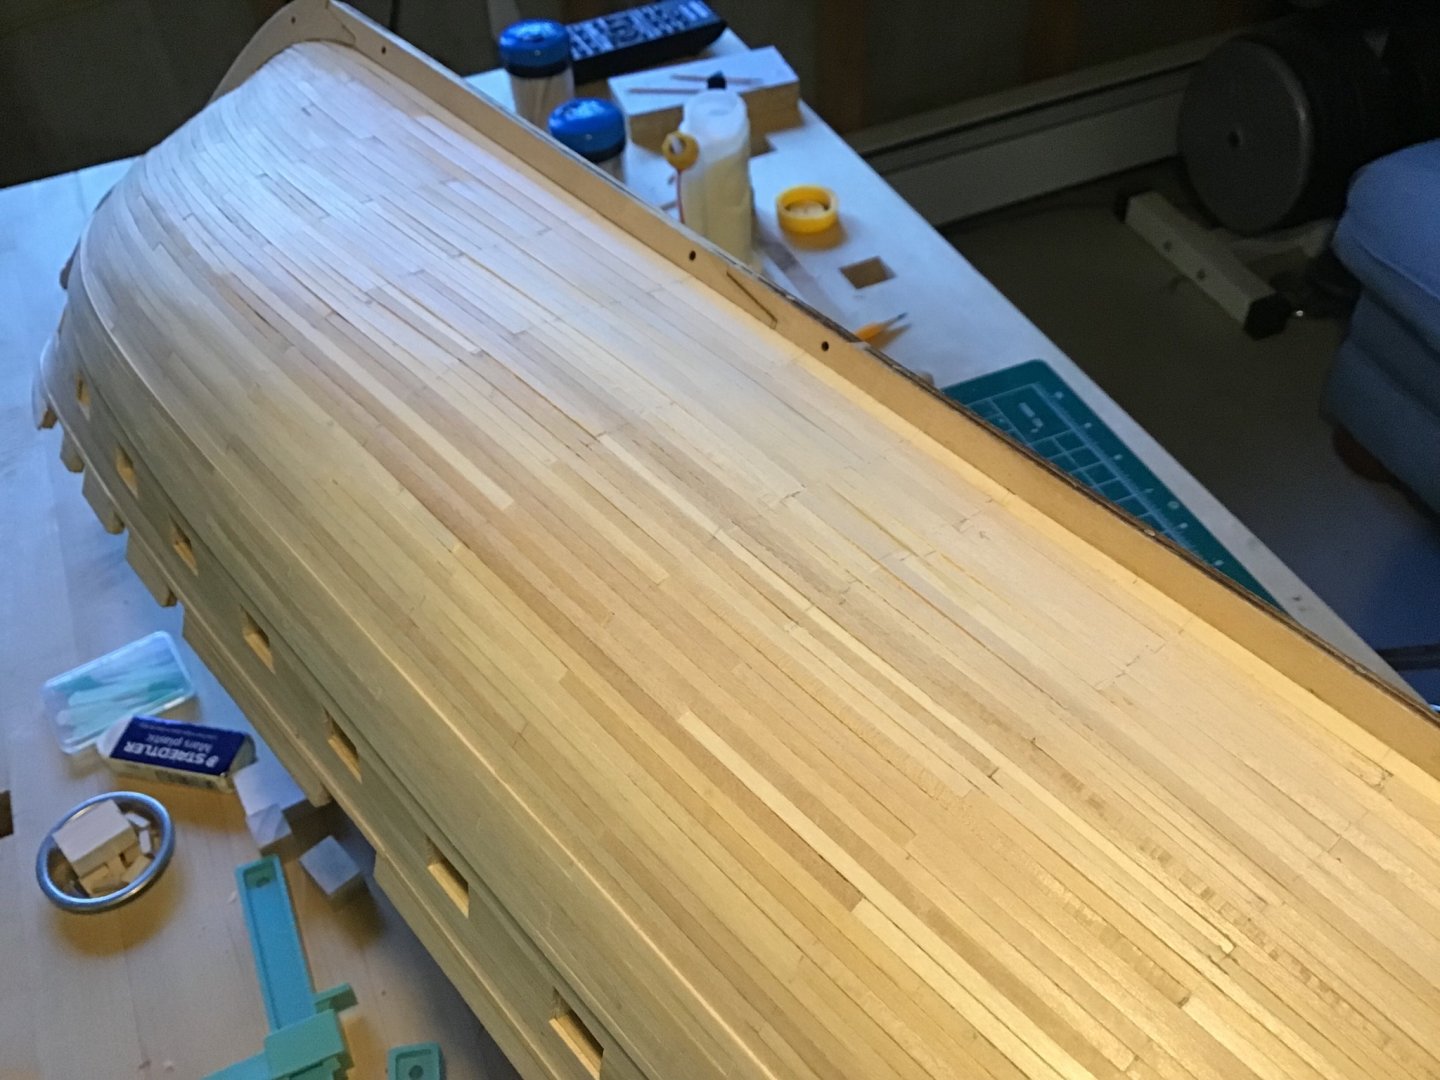
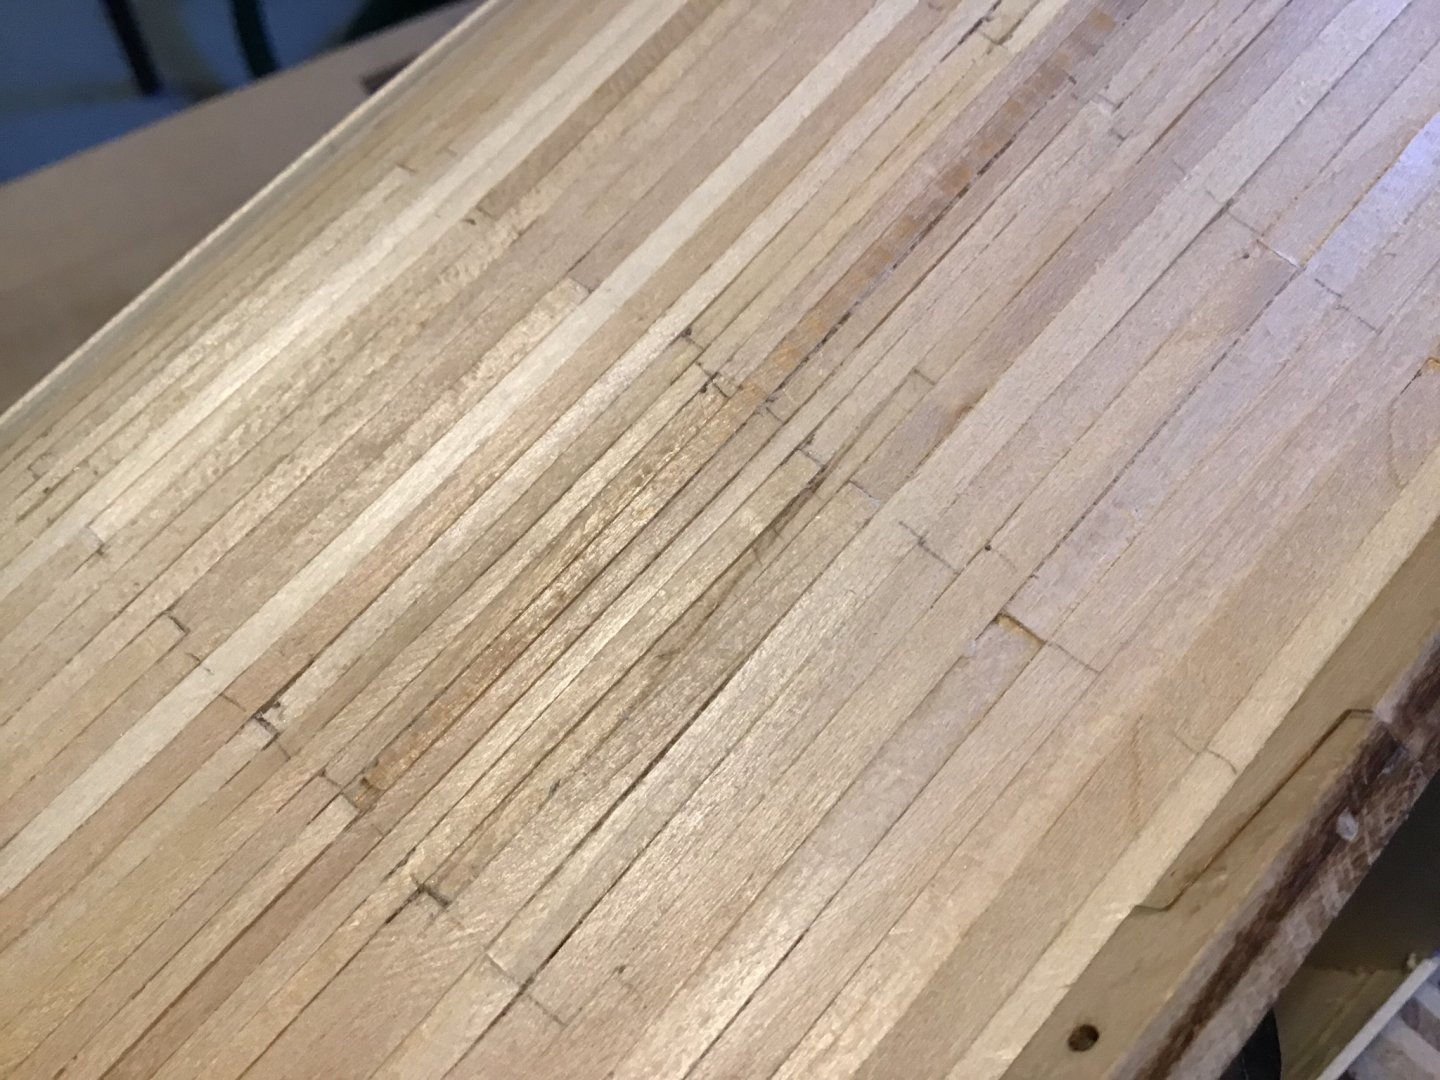
Belt D Installation - Starboard Side Belt D base plank width is wider 3/16” vs 1/8” for Belts A, B, and C. This belt is much easier to install along the stern. First picture shows the open area for the last plank. Notice the plank along side the keel is already installed. Seems easier to fit the last plank between two planks rather than a plank and the keel. Next three pictures show the run of the planking and the last picture tries to show the plank width difference between Belt D and the others. Some smoothing has been done, more to go, it’s a job I like to do in stages. Thanks all for the encouraging words. Much appreciated. So let’s keep this log going…


-
Hi JS, Thanks….it’s all about making mistakes and dealing with them….they happen all of the time. I’ve been blending a little as I go, thought is to deal with the wale after completing all the planking. Will end this log after installing Belt D. And if you don’t mind, will include a link to your log. Going forward I’ll post pictures of my Constitution after major milestones, rather than construction steps, to avoid redundancy. Good to hear from you.