ERS Rich
-
Posts
761 -
Joined
-
Last visited
Content Type
Profiles
Forums
Gallery
Events
Everything posted by ERS Rich
-
 It took me quite a while to get it....I’m the guy who needs to make all the mistakes before getting it right....
- 129 replies
-
- 2
-

-
- Bounty Jolly Boat
- Artesania Latina
- (and 1 more)
-
Hi, About priming with shellac....go with a light coat, too much will form too smooth of a layer....unless that’s the goal. I like to have a little wood texture....to give the viewer a visual clue that they are looking at wood.... Wood stain works as well... Thank you
- 129 replies
-
- 1
-
-
- Bounty Jolly Boat
- Artesania Latina
- (and 1 more)
-
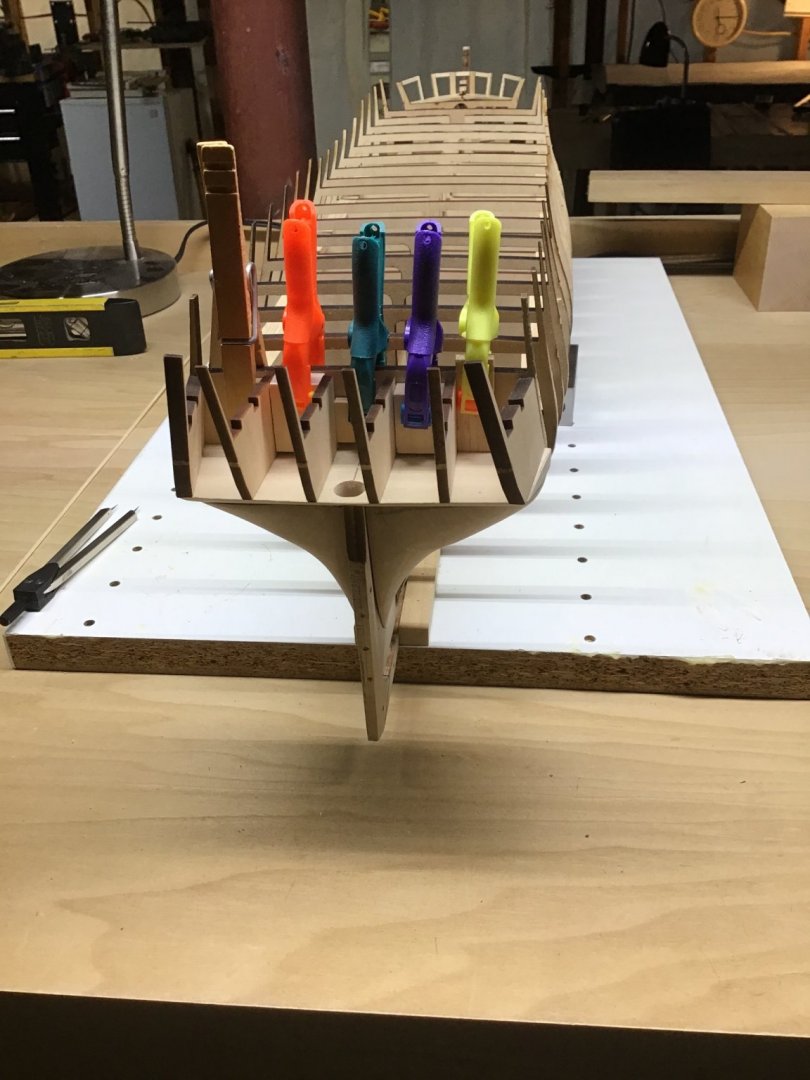
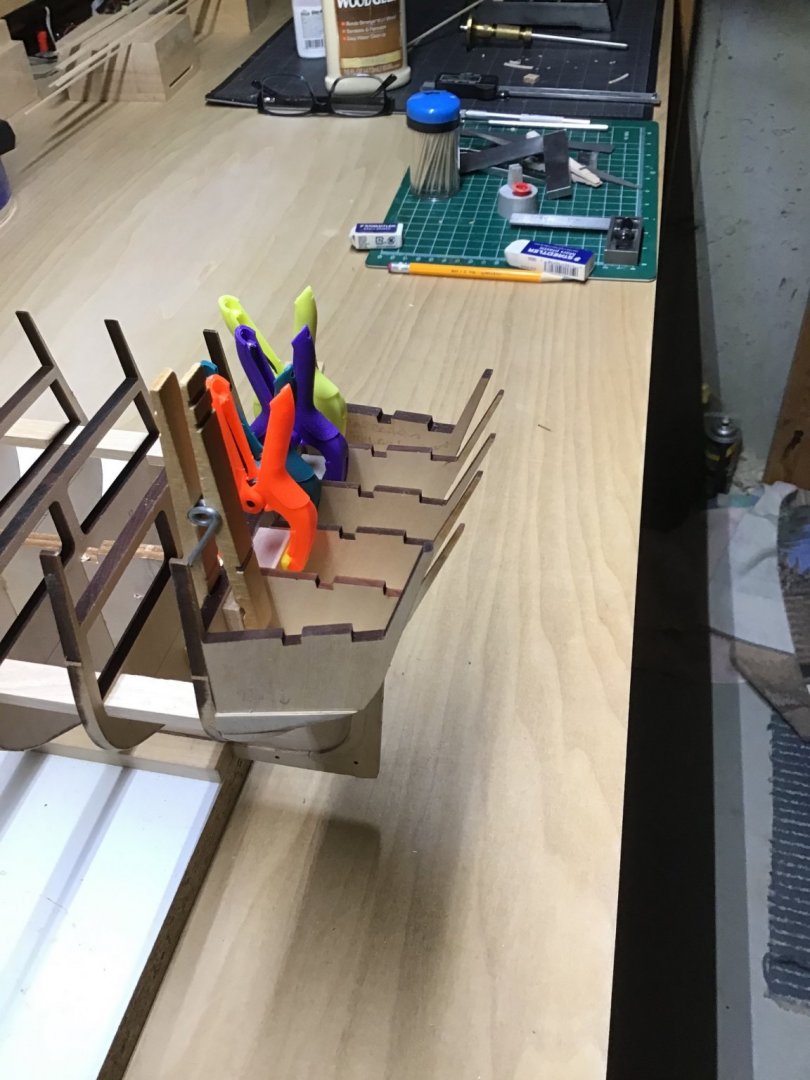
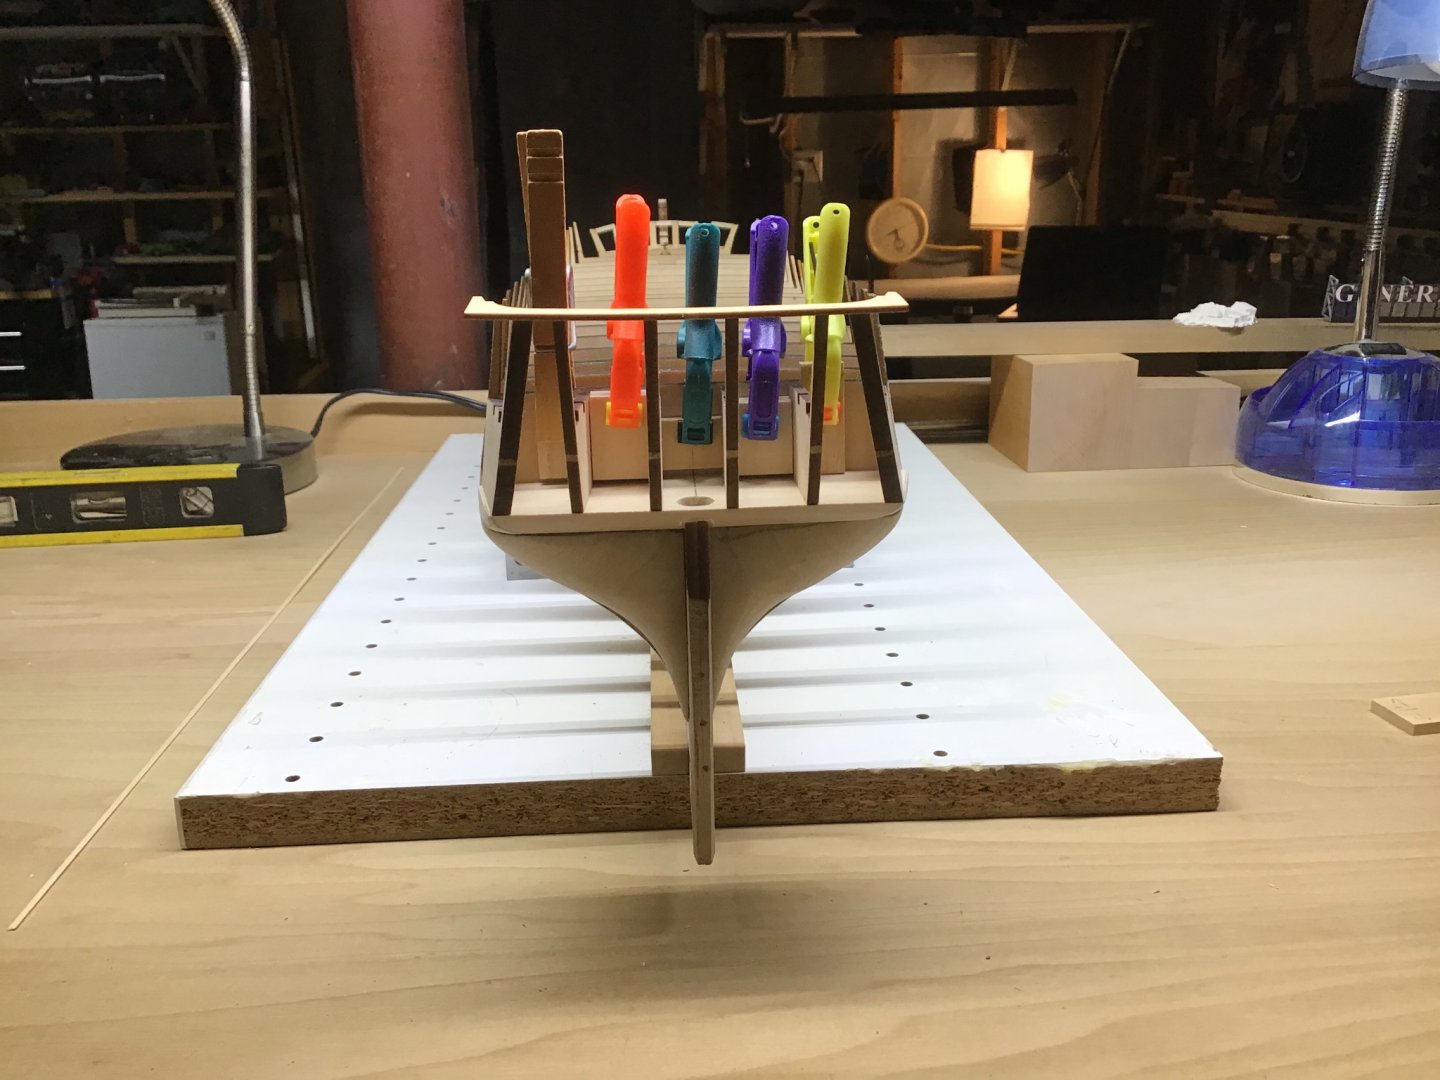
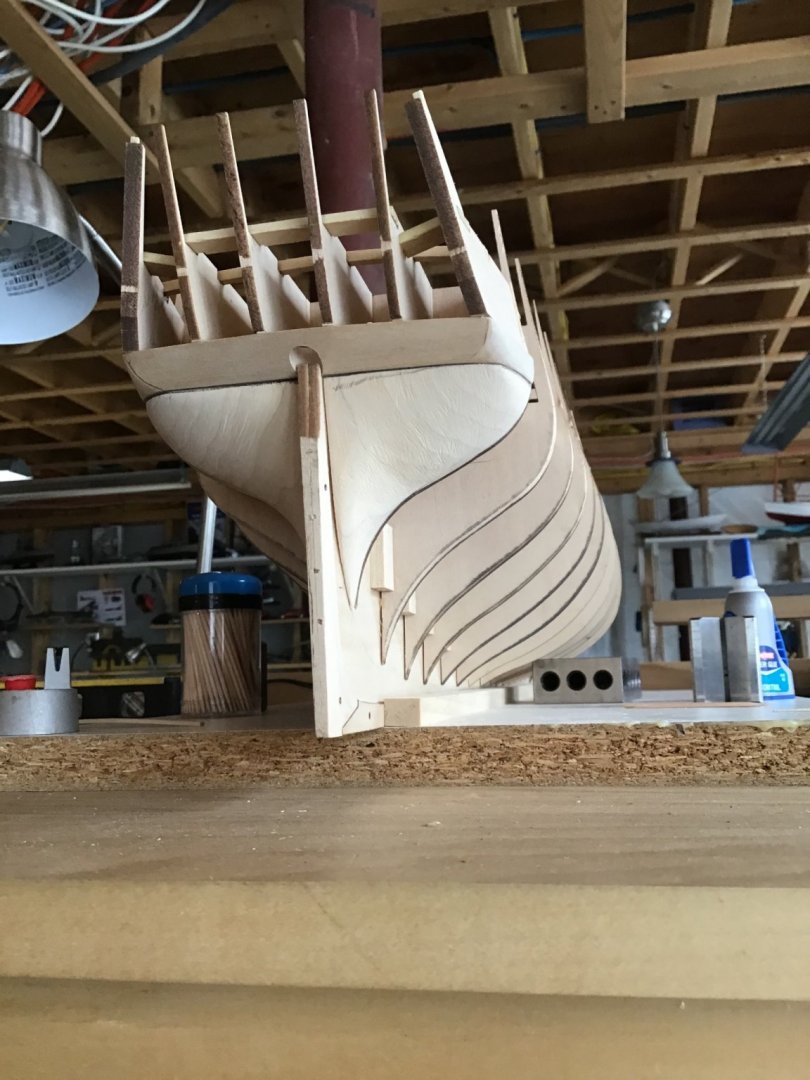
Hi, Just jumping in here.....I’ve lived through this. 🤔 The general issue here is the planks are not tapered at the fore and aft ends.....so say at the aft end the plank needed to be pulled toward the keel to fit against it’s upper neighbor....notice instead of sweeping up aft into the stern, the shape is a frown...notice at the bow, the plank is sweeping up.... The garboard plank is generally thin amidships and fat at the bow.... Here was a big idea that helped me understand what can be done with a plank....a plank laid across the bulkheads can only be naturally pressed down onto the neighboring bulkhead (plank sweeps up), or twisted. Planks cannot be pushed up or down towards the keel or deck because that will warp the plank. So if you find the plank needs to be pulled down, say towards the keel, to fit against it’s neighbor, the plank must be tapered. If a plank is laid and there is a gap, the planked can’t be pushed up or down to close the gap, a filler piece or stealer is needed. So what to do here and now? While the result may not be idea, you can still get a great result with what you have. Have to go with a painted hull. Hull planking does not need to be perfect, because it will be viewed from above and down. And the interior of that boat is where the action is, the viewers eye will be drawn towards the interior. Plank the remainder of the hull with short pieces. At the stern it looks like it will be wedge shaped planks. Try dots of CA on the bulkheads and carpenters glue on the edges. Is there a stem piece? Install if there is. Next sand the hull to smooth the plank edges. Easy with 150 grit, then 220. Vacuum the hull and clean it up with rubbing alcohol. Next fill in the gaps. I like to mask around the gaps and fill with plastic wood - DAP. Go with very small amounts of filler. The last thing you want to do is cover the hull with a layer of filler. A pain in the neck to sand it all off. I would then prime the hull with rattle can shellac. Rub it out with steel wool. You’re going for a relatively smooth surface, no major depressions. Mask and fill again. At this point I like to use something called Gesso. Artists use it to seal canvas prior to painting. It’s an acrylic with fine gypsum. It’s cheap and easy to apply. It gives a uniform surface. Then mask and paint as normal. Looking forward to seeing how it goes. Thanks.
- 129 replies
-
- 3
-
-
- Bounty Jolly Boat
- Artesania Latina
- (and 1 more)
-
A way to deal with the taunt line makes another line go slack problem....rig the line to the belay point, then run the line over the side and weight it with a clip.....this allows for adjustments, after all lines are rigged fix them to the belay point.... Cheers!

- 222 replies
-
- 5
-
-
- reale de france
- heller
- (and 1 more)
-
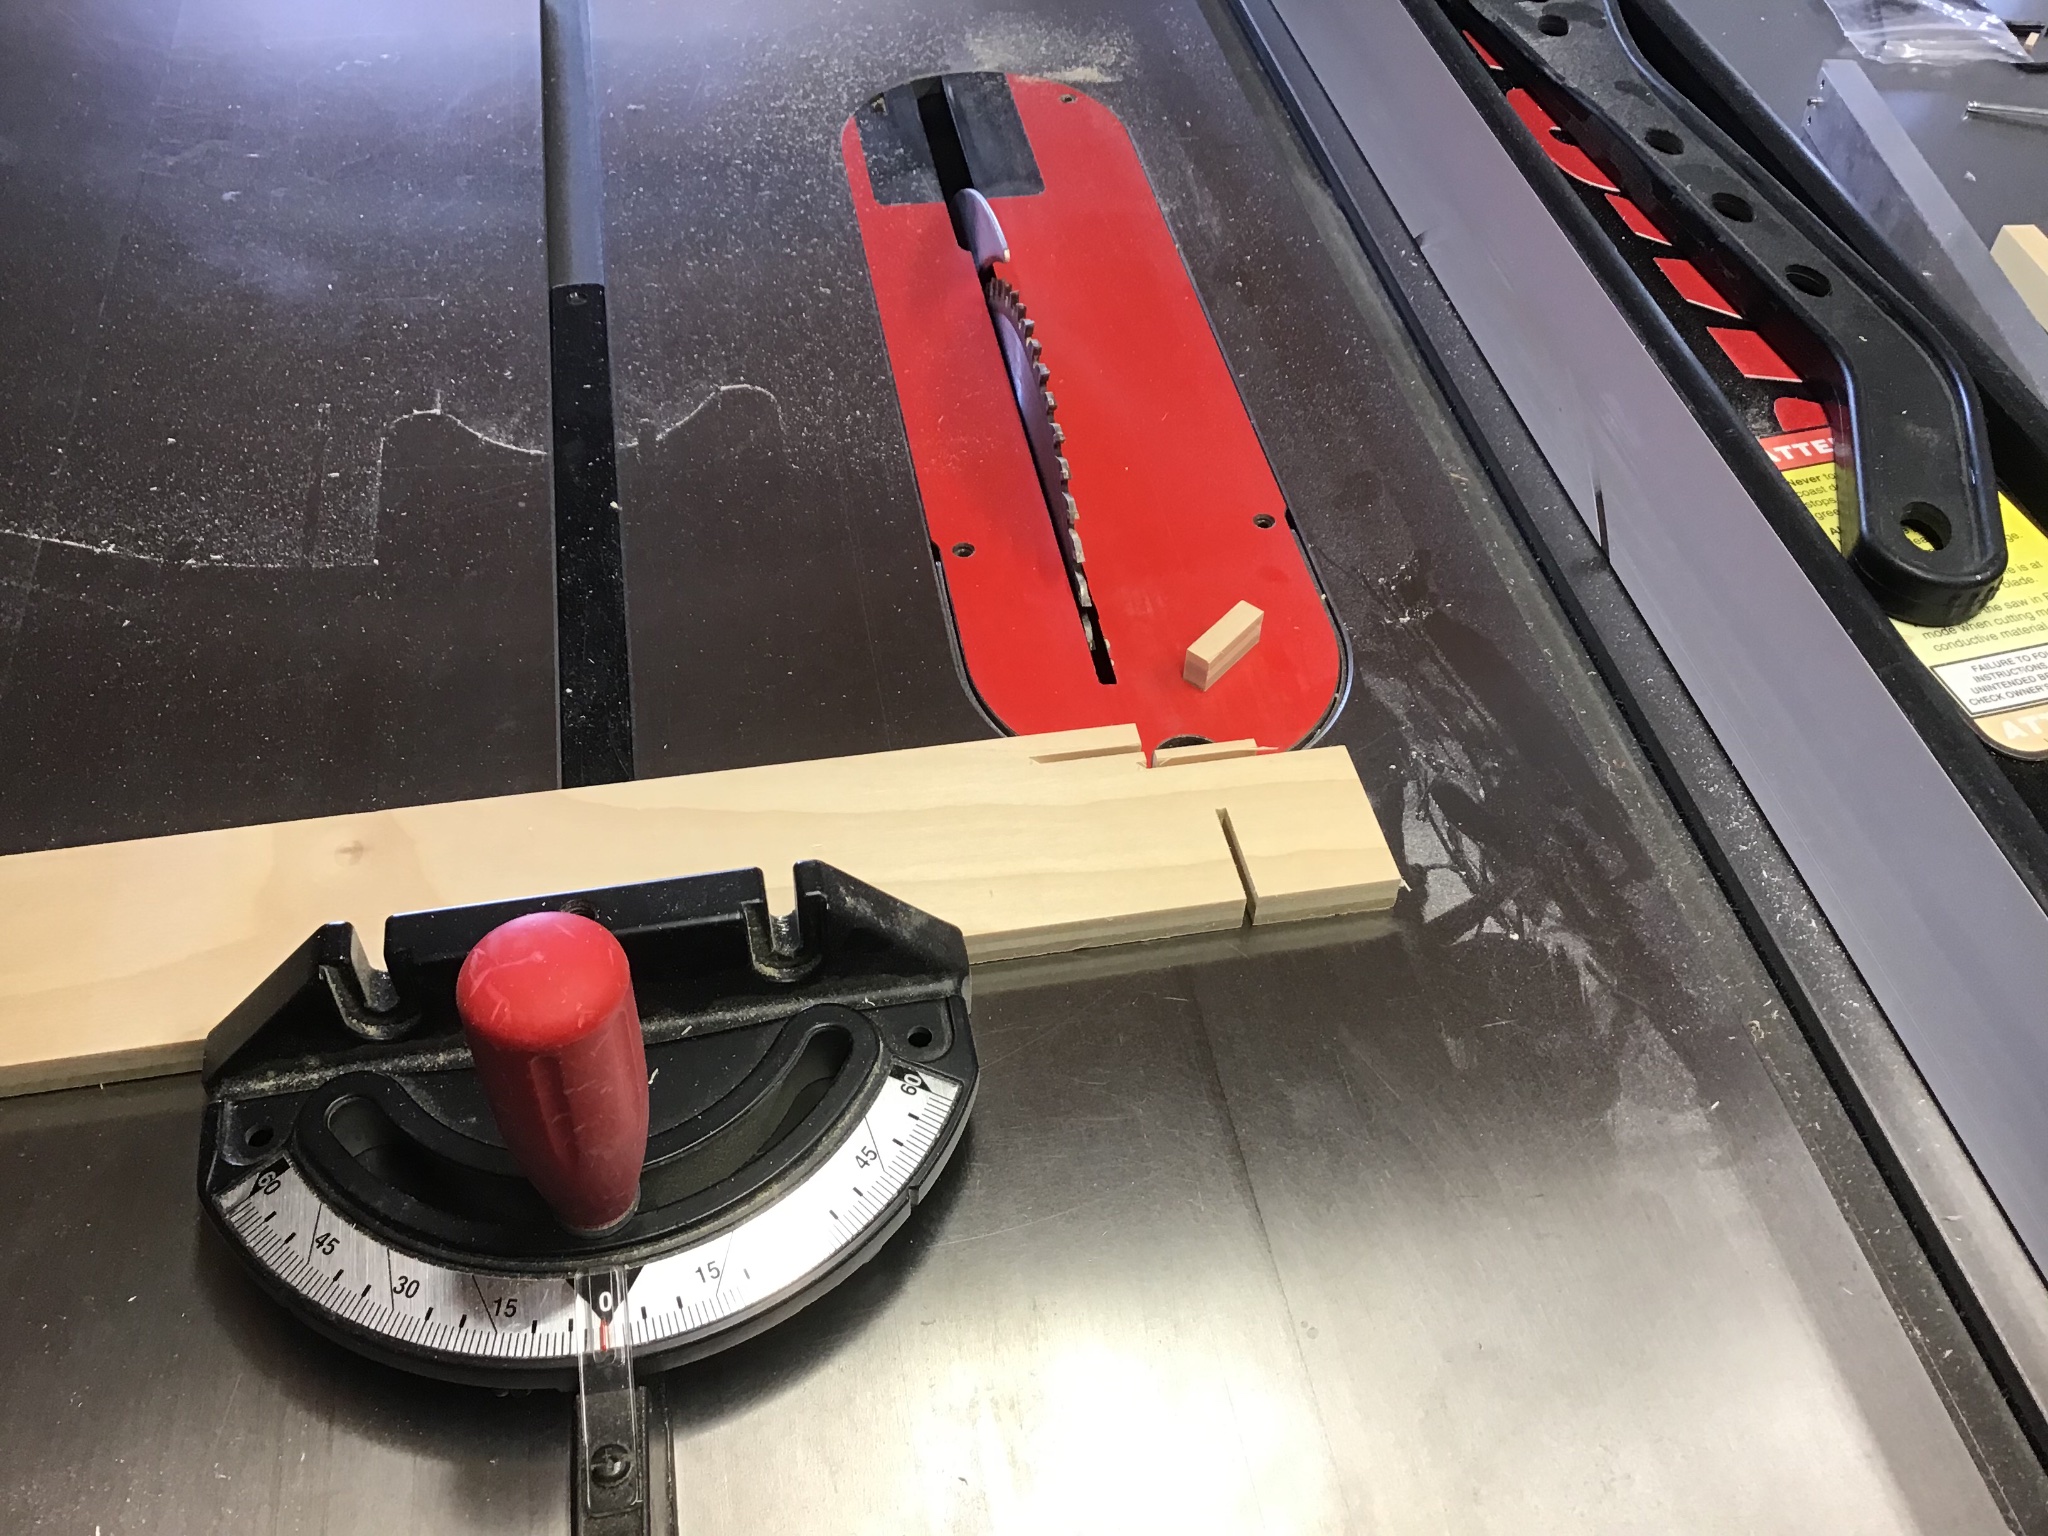
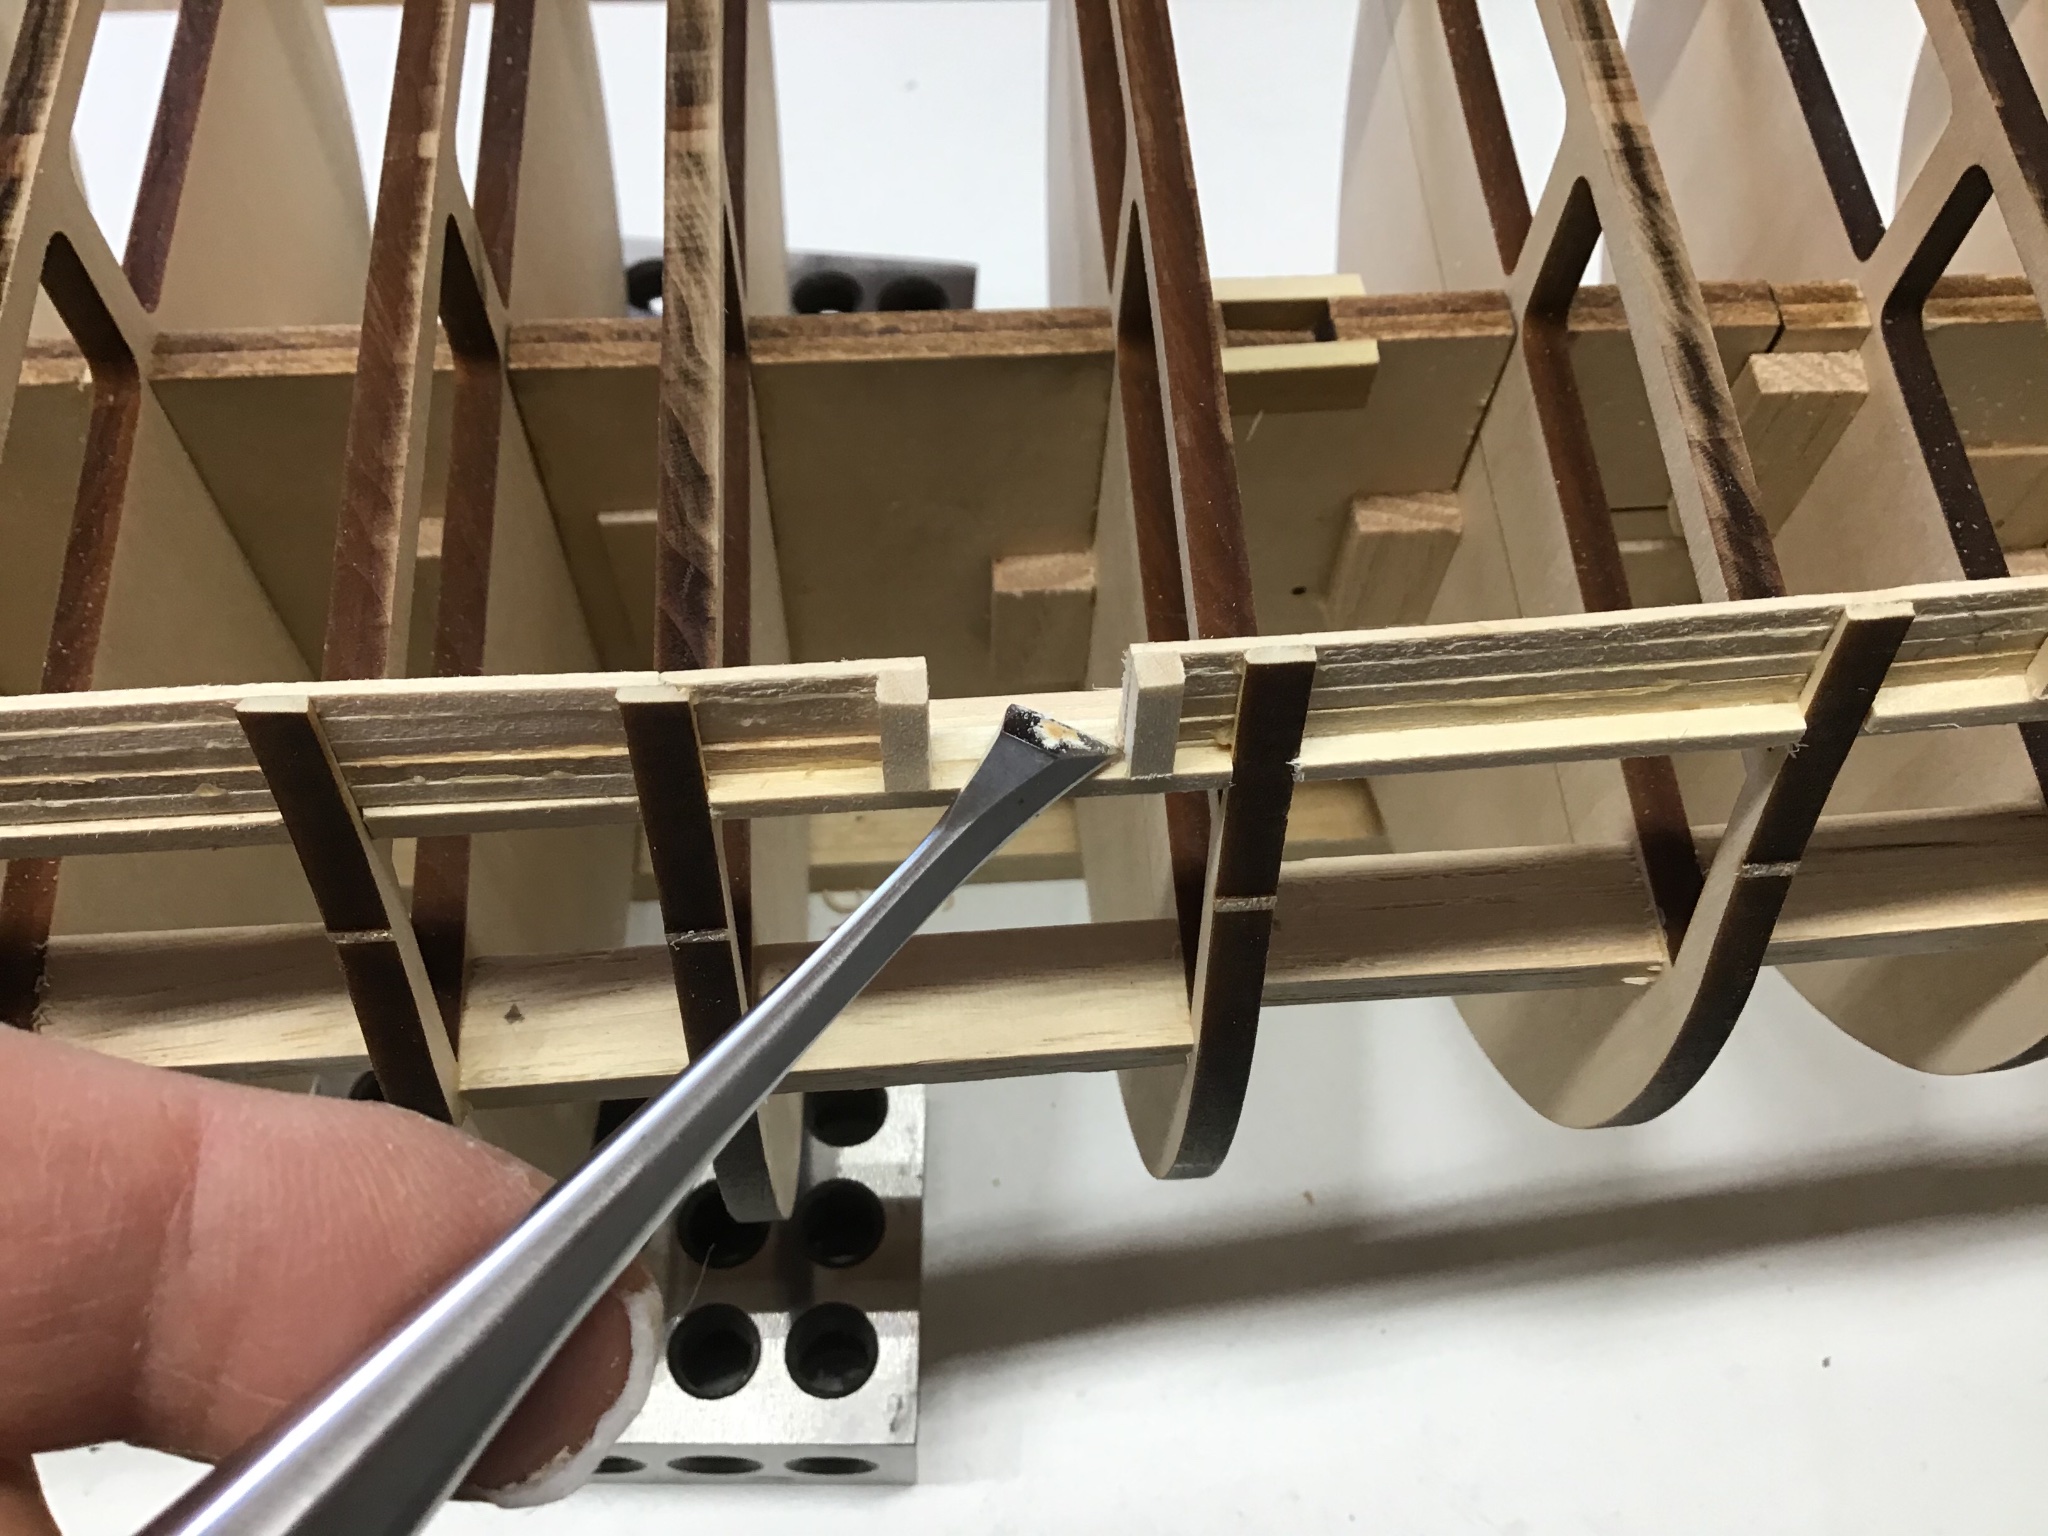
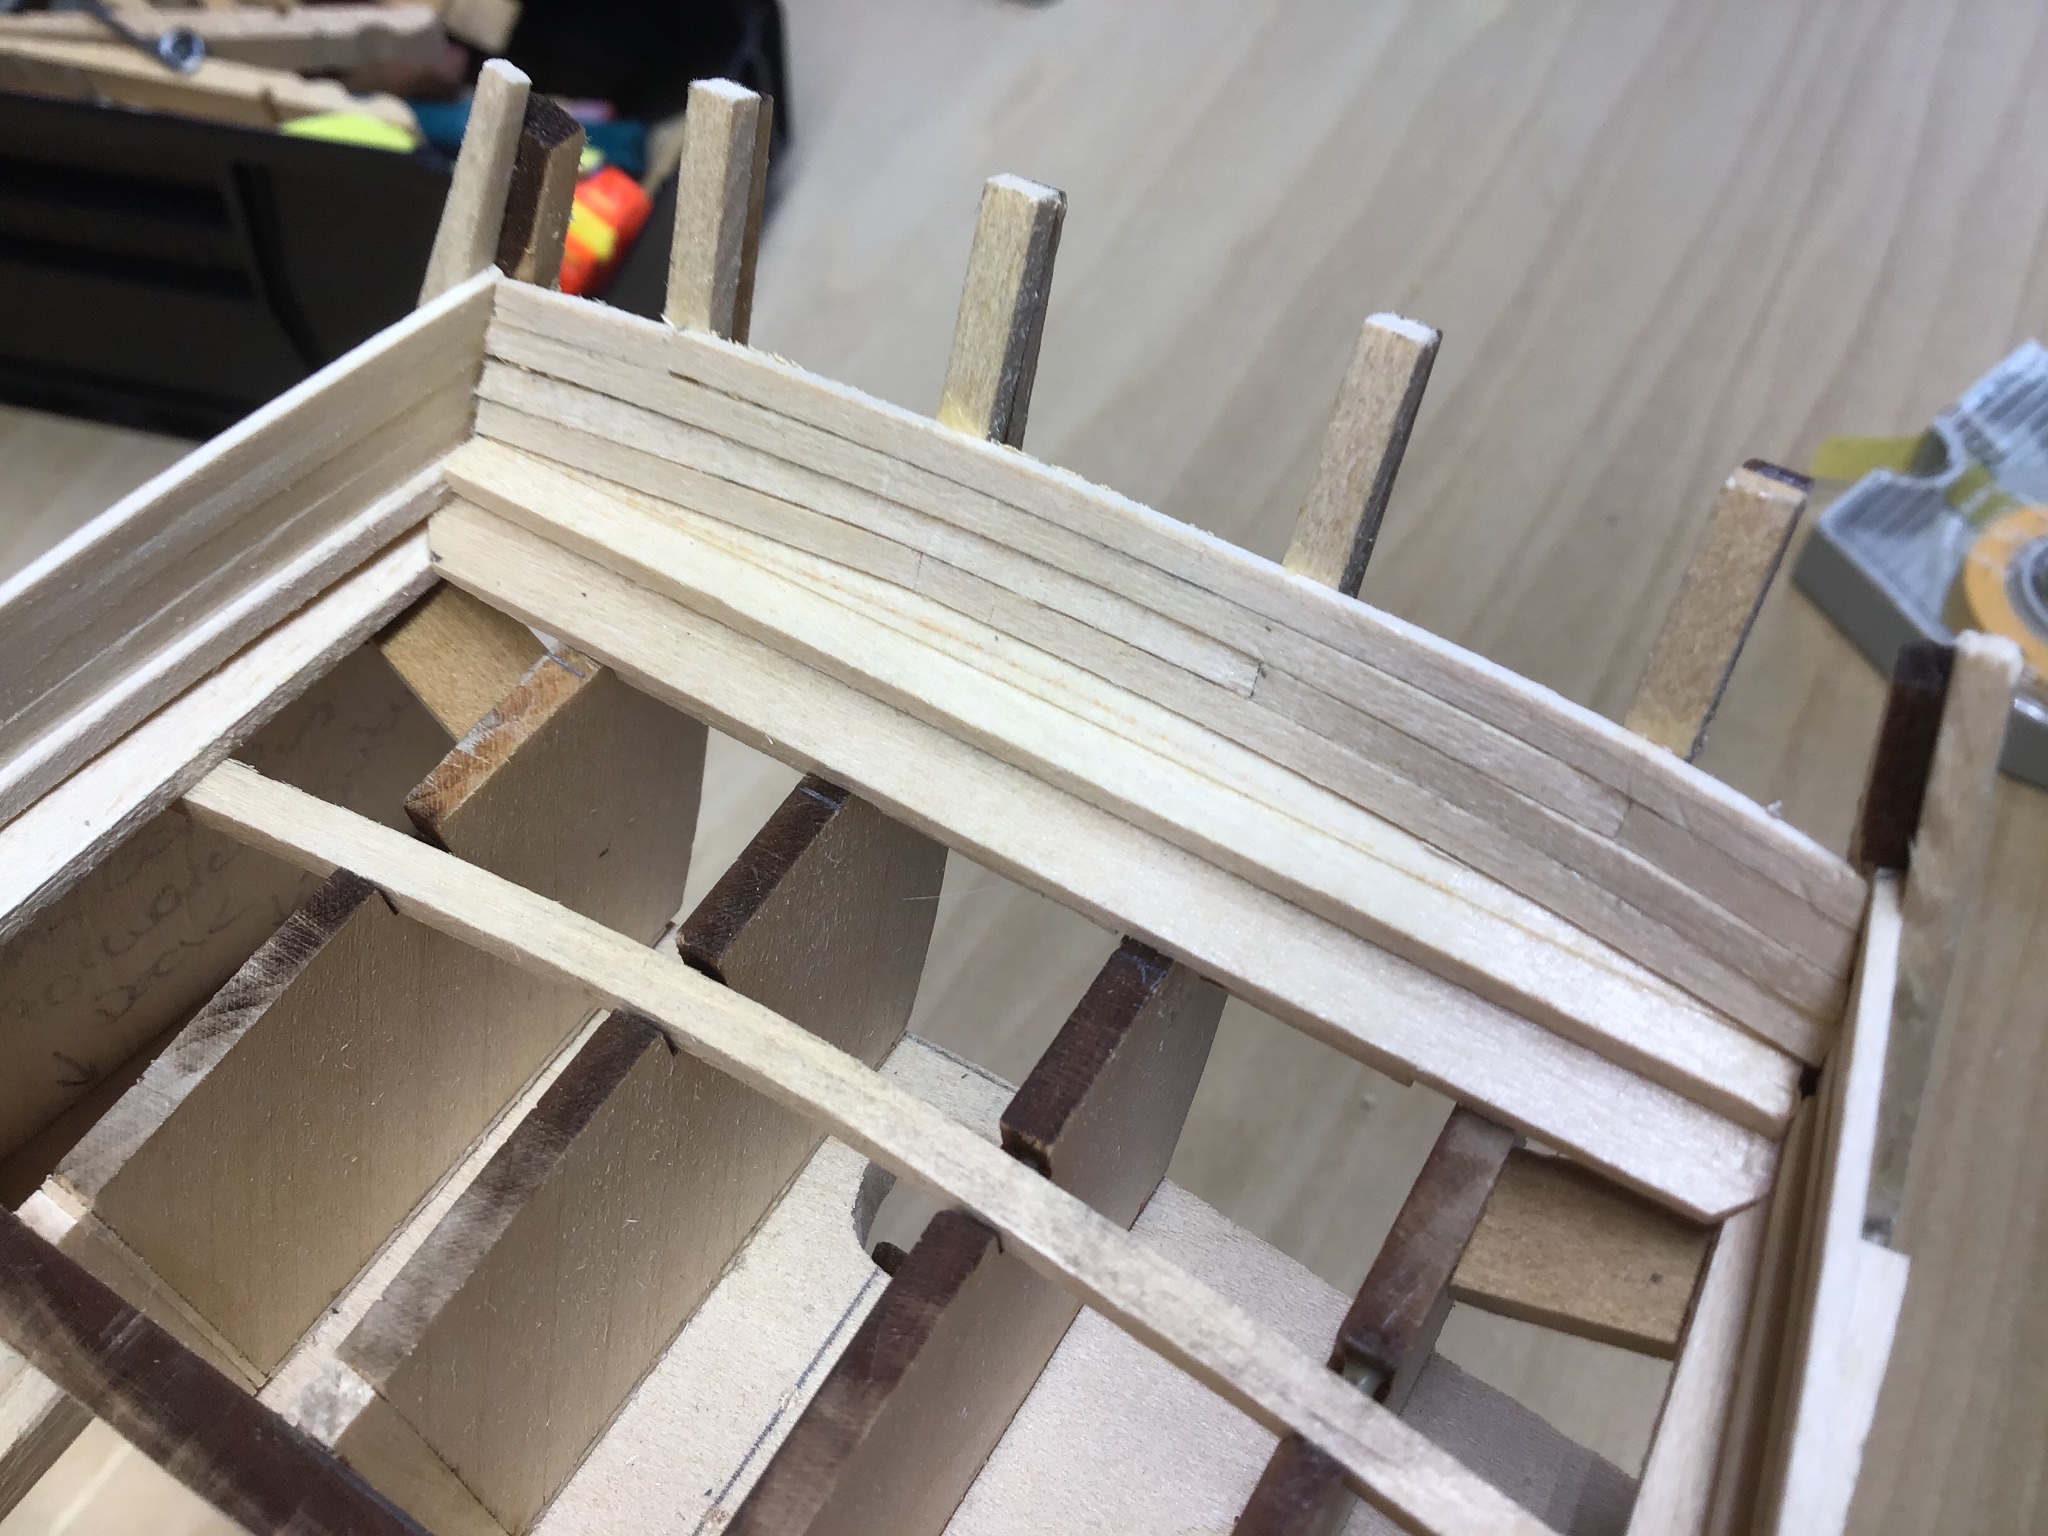
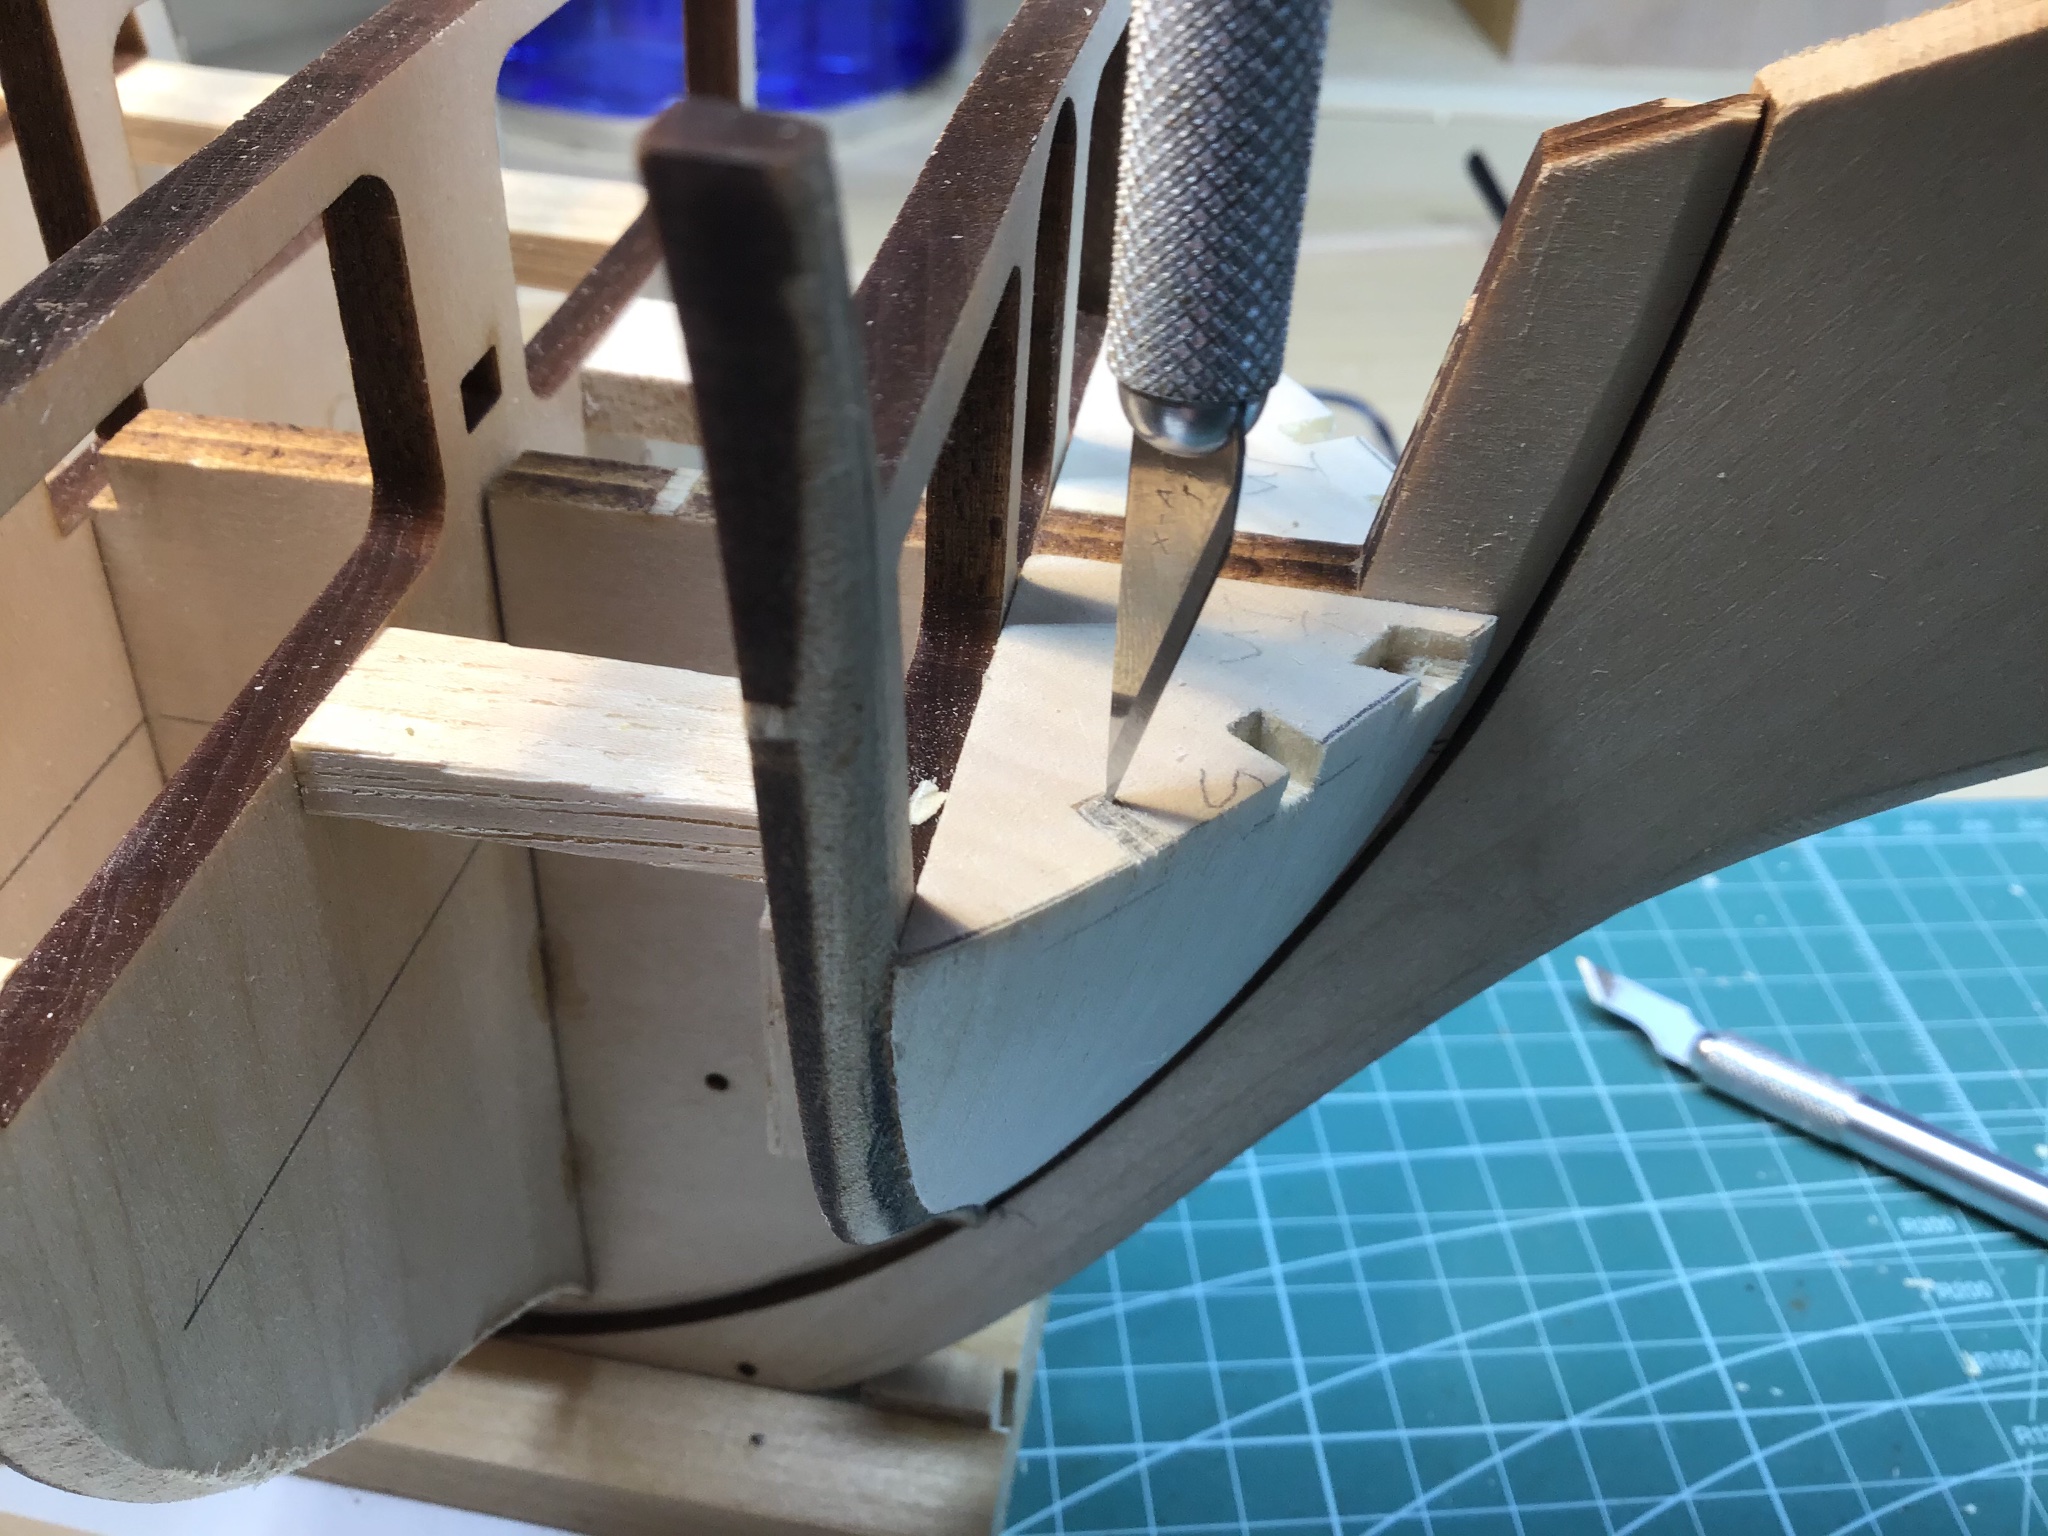
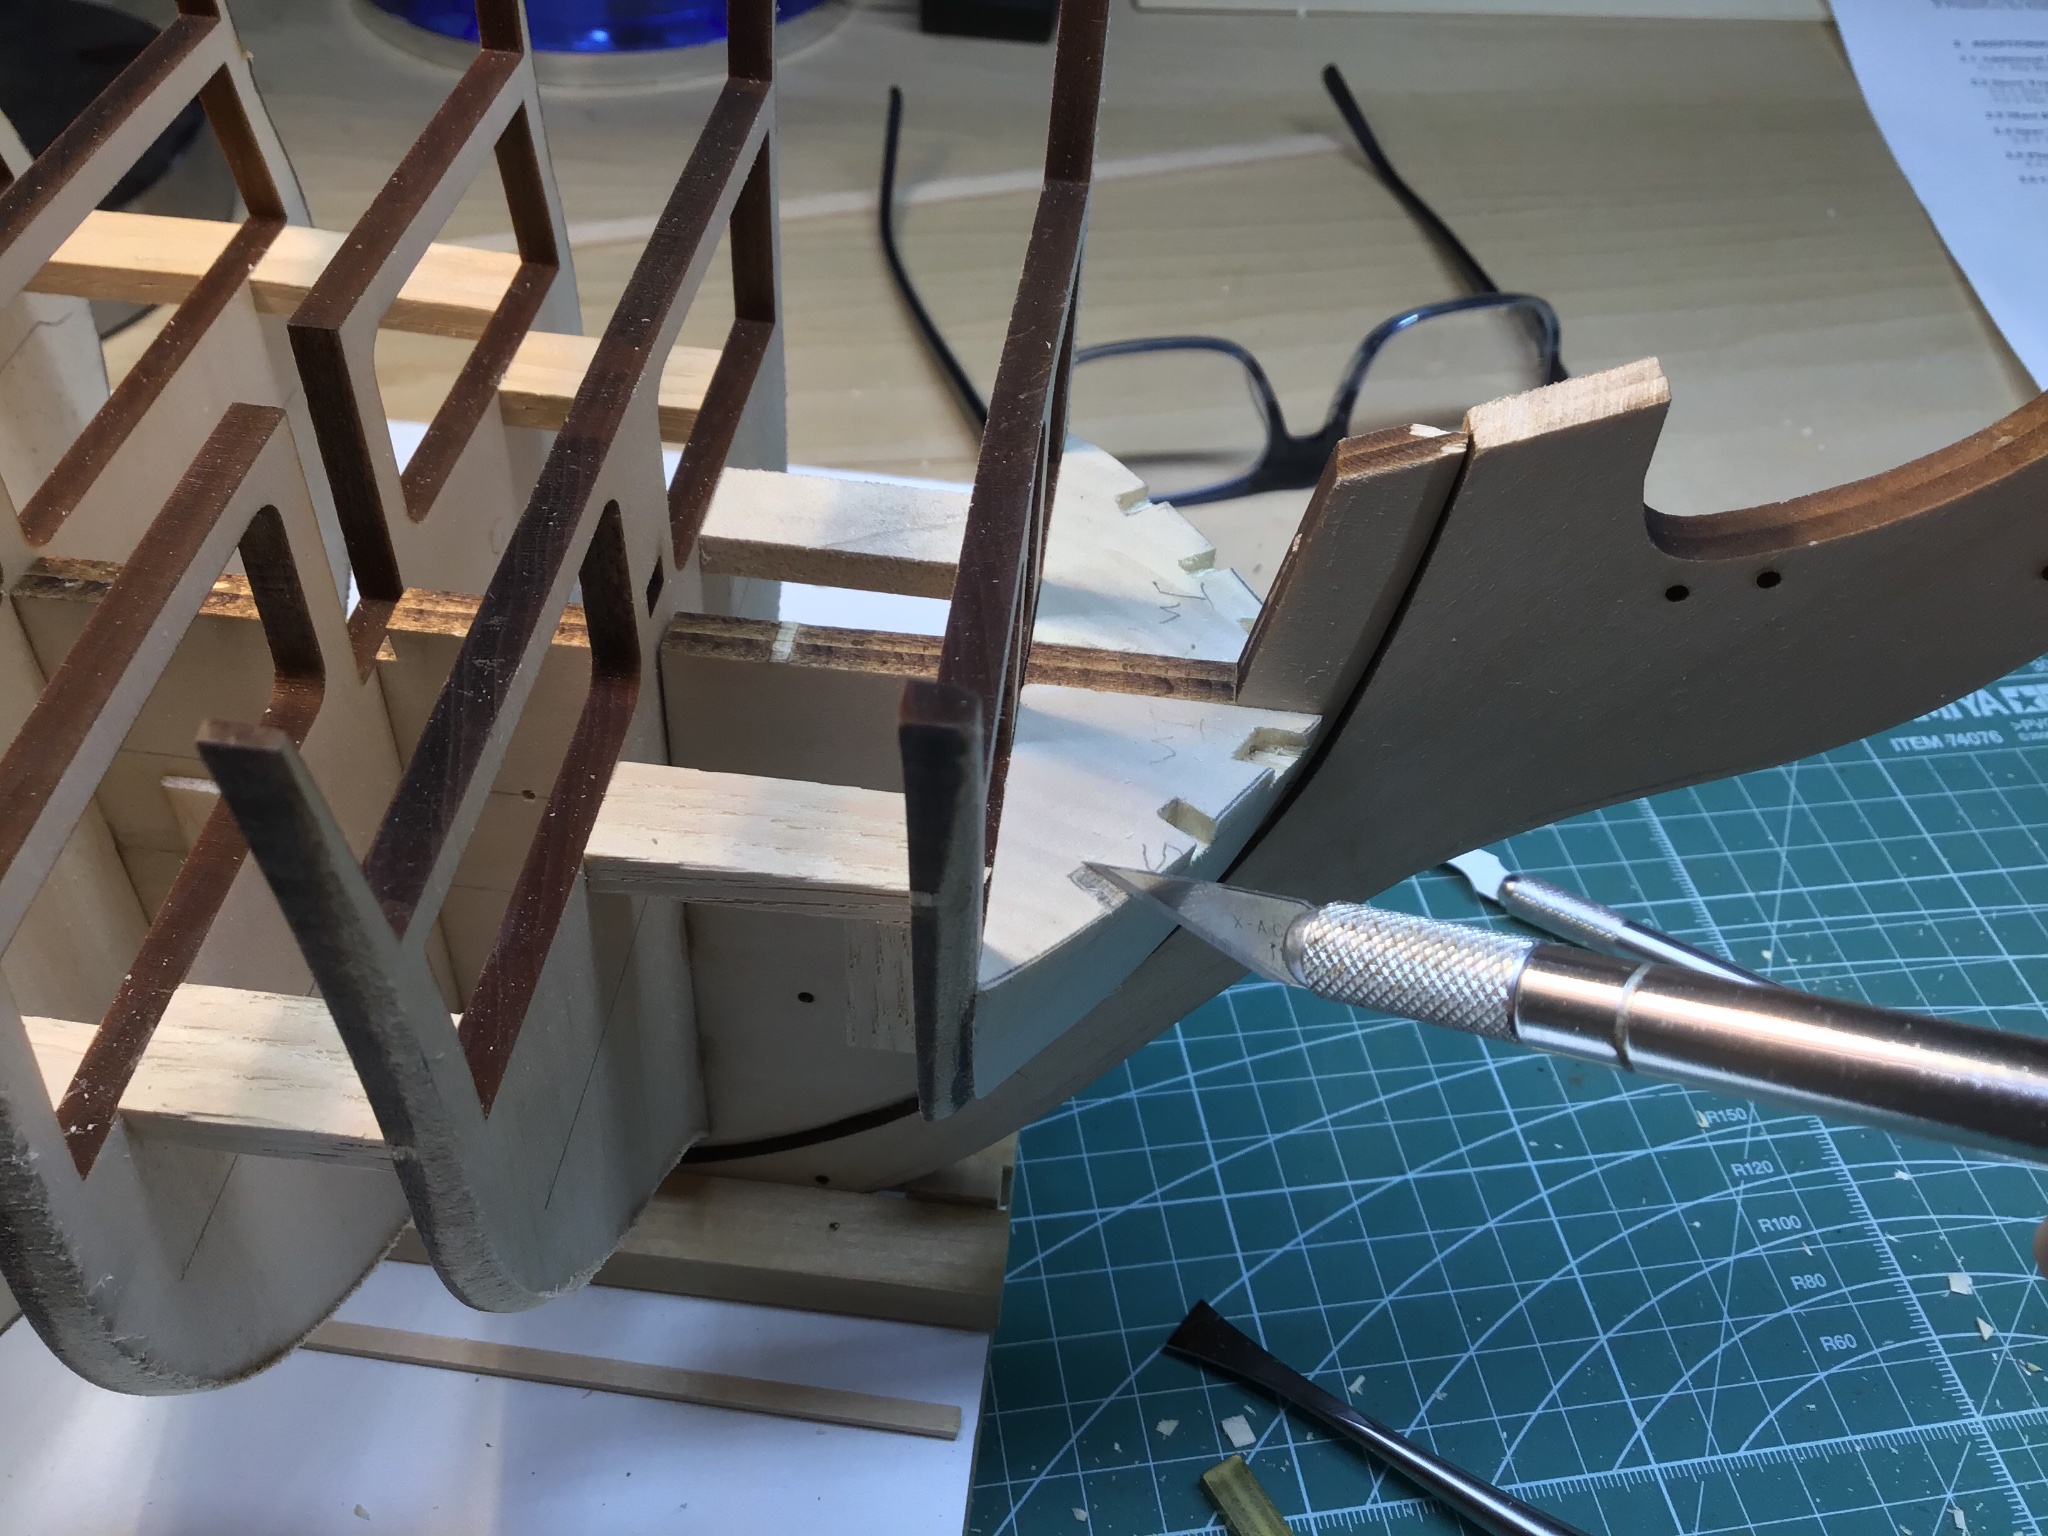
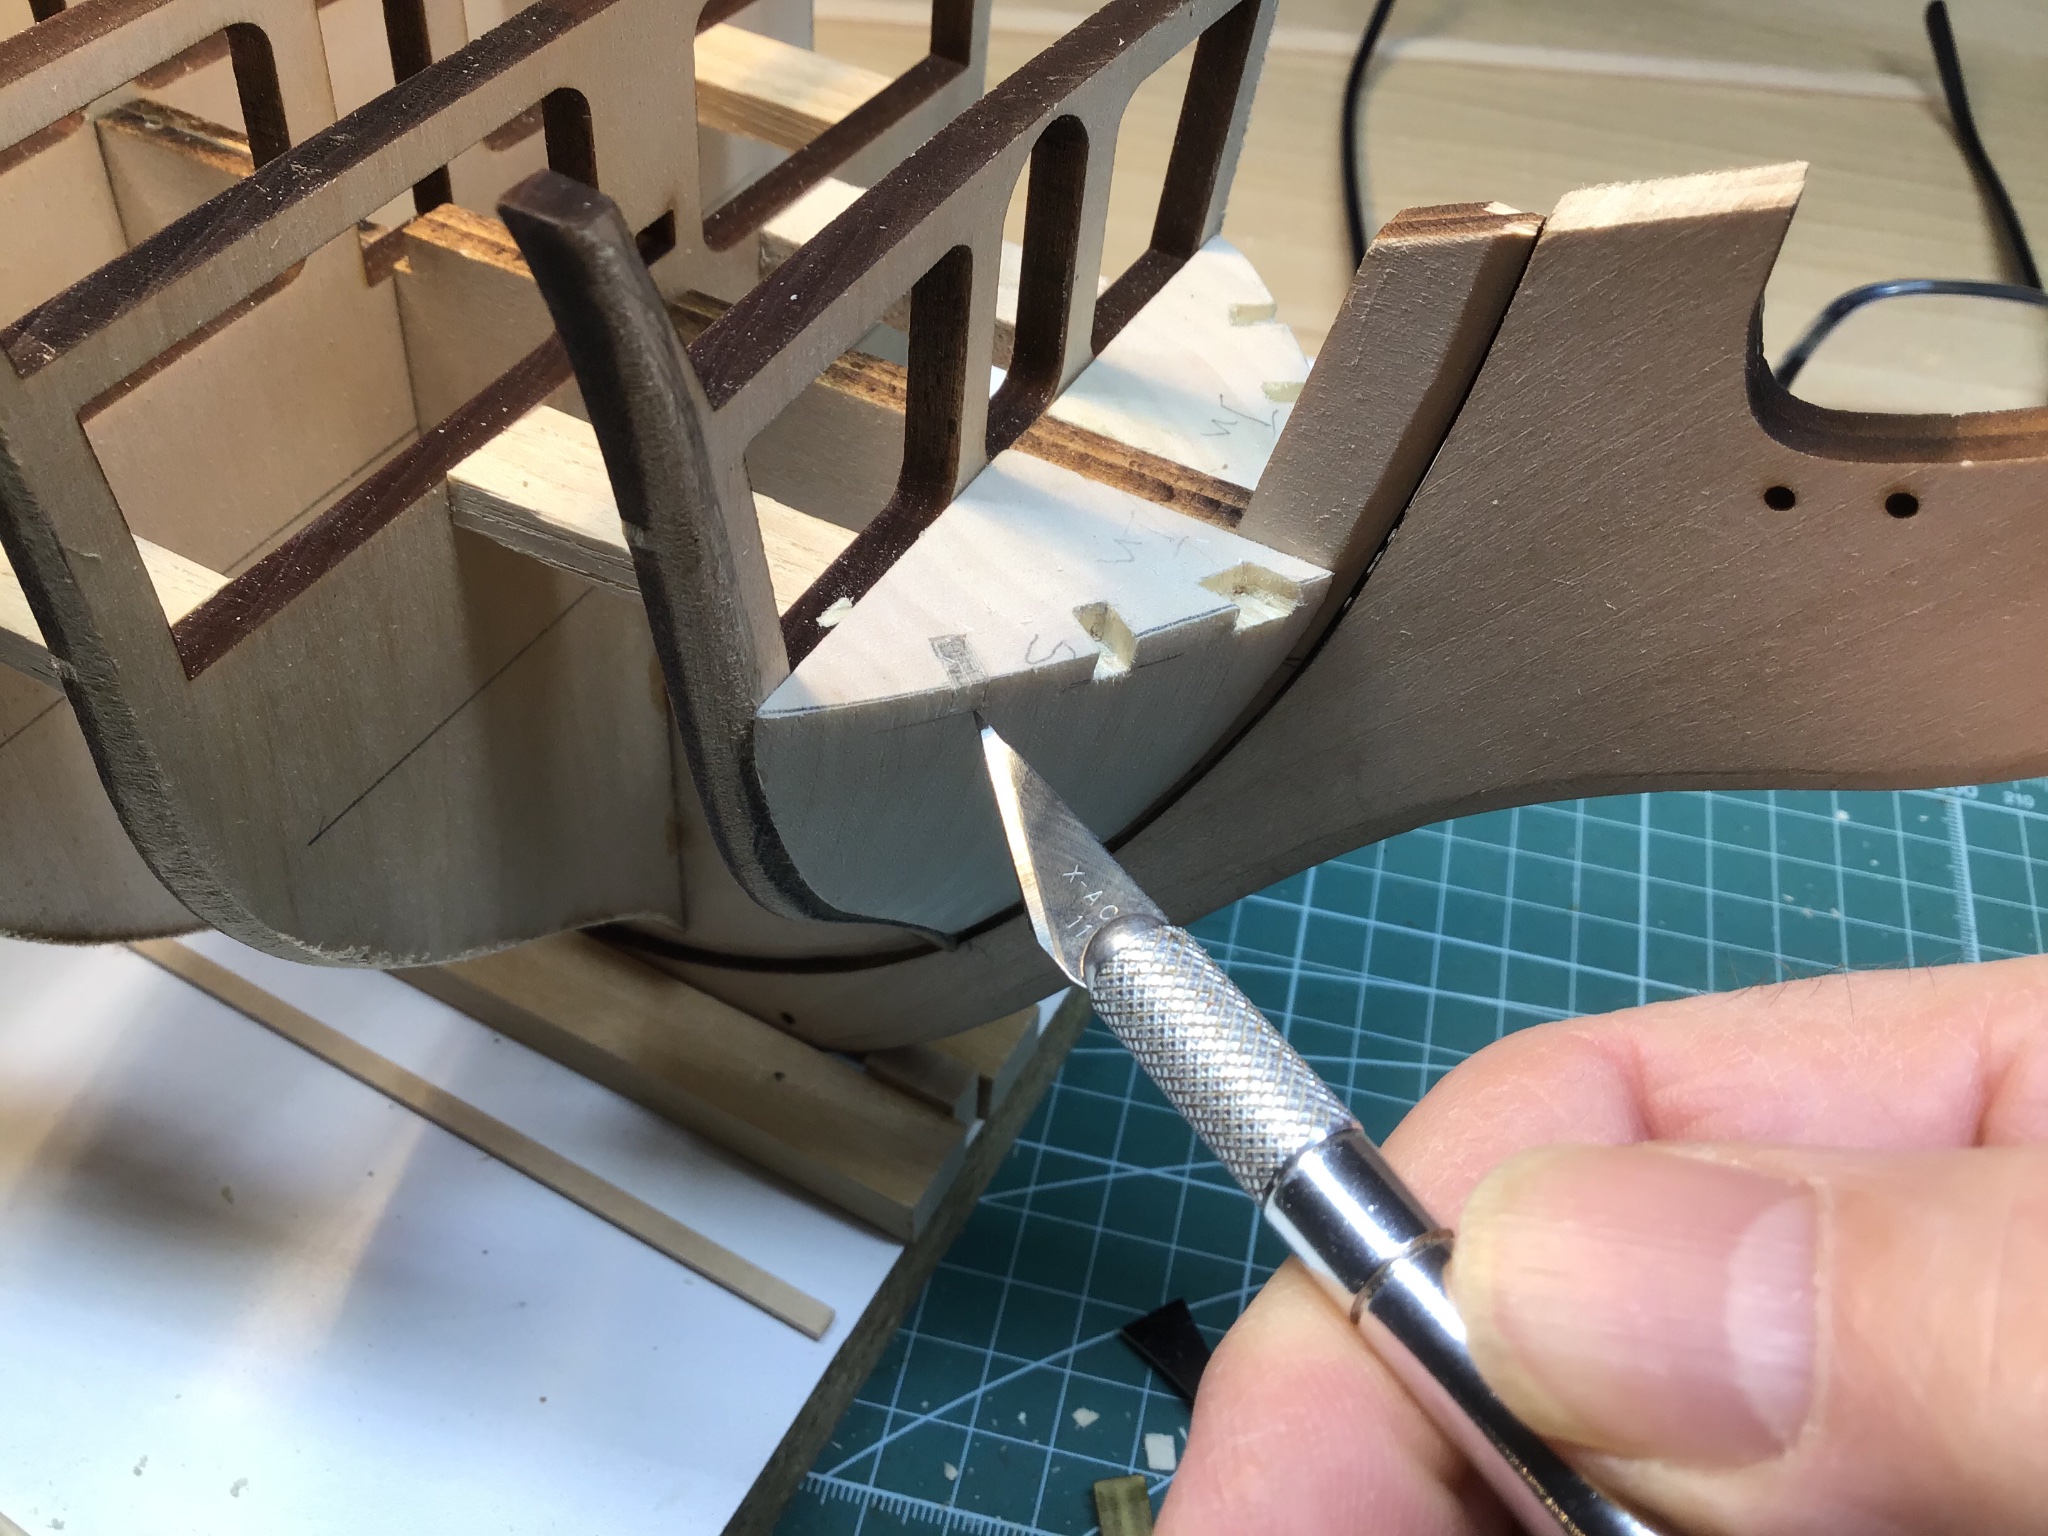
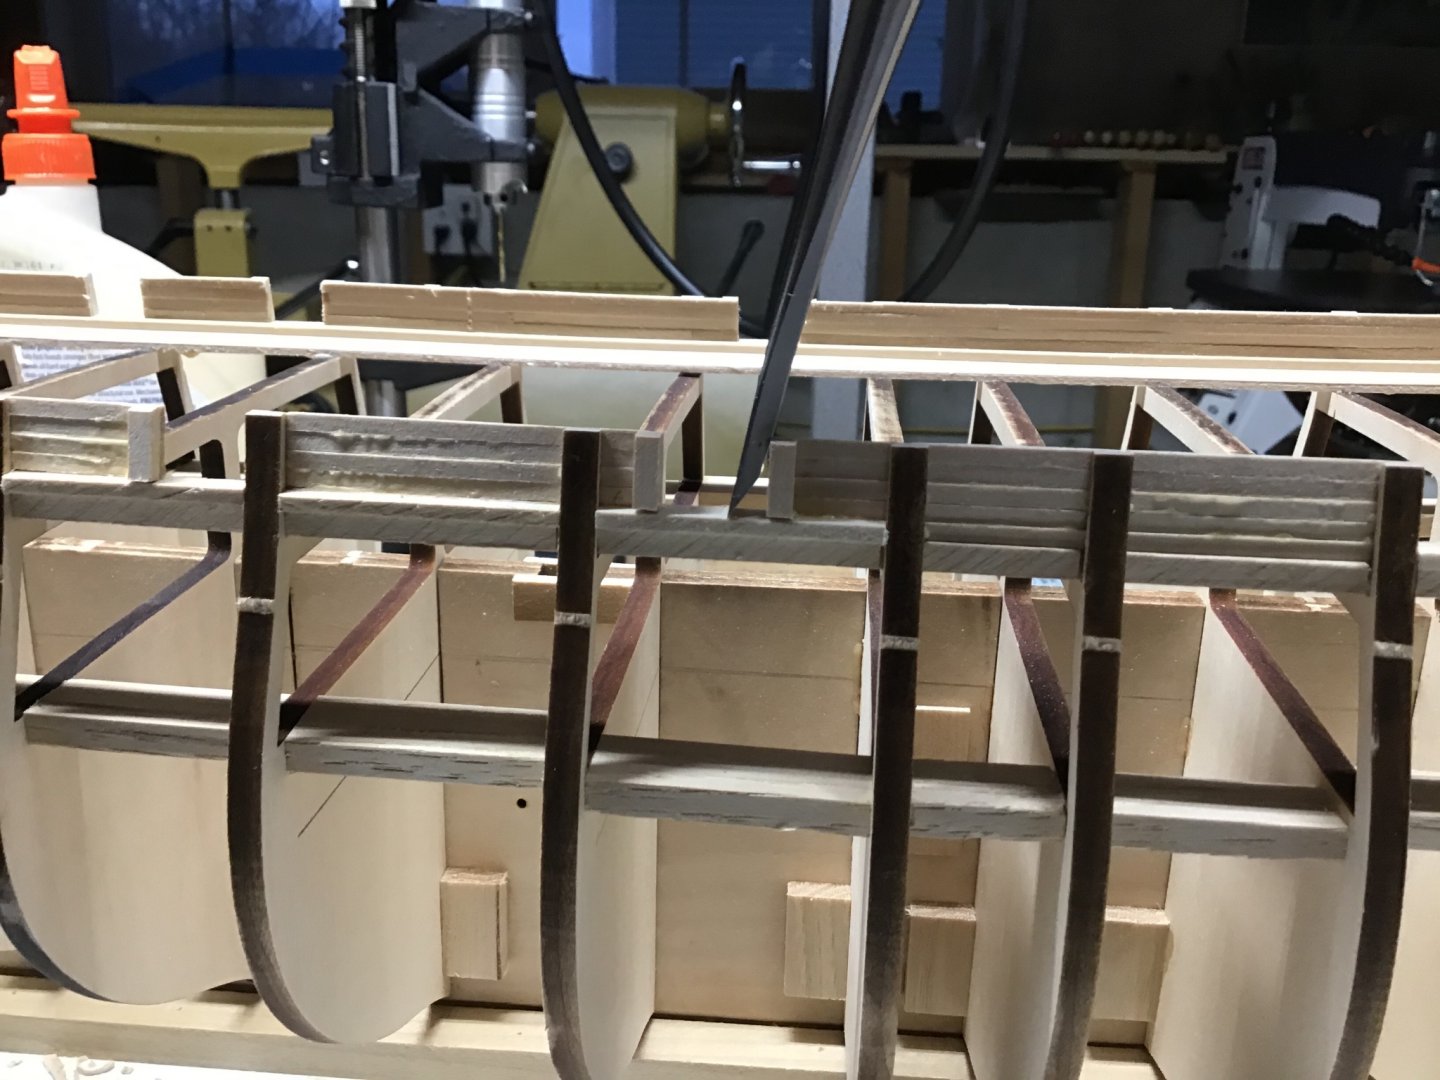
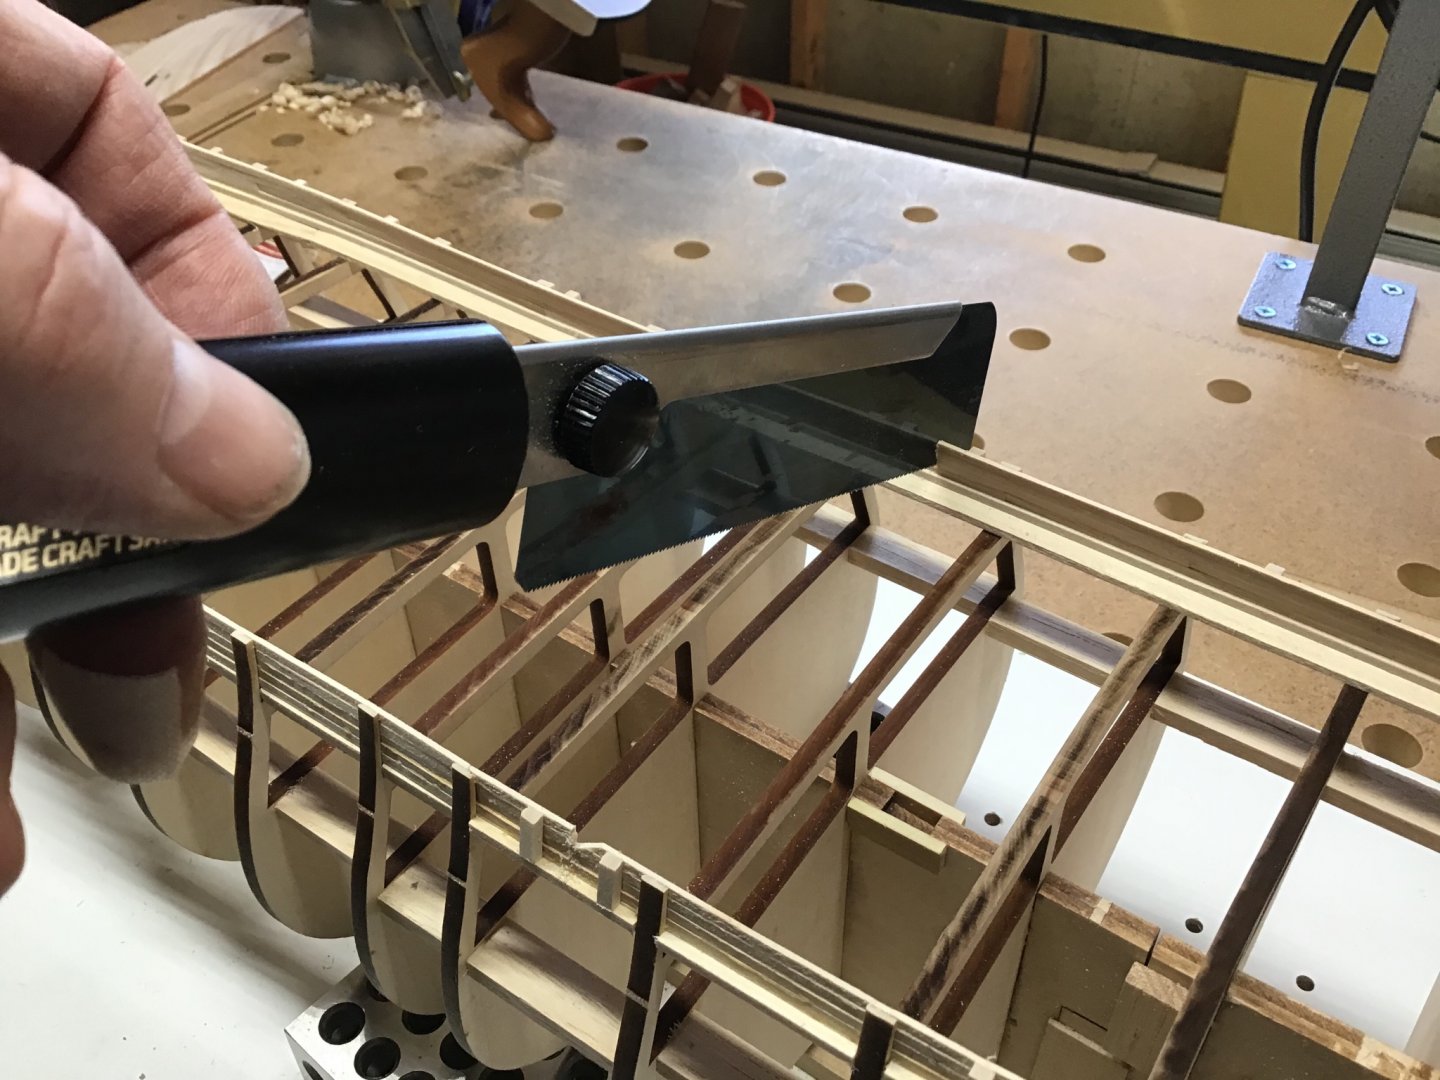
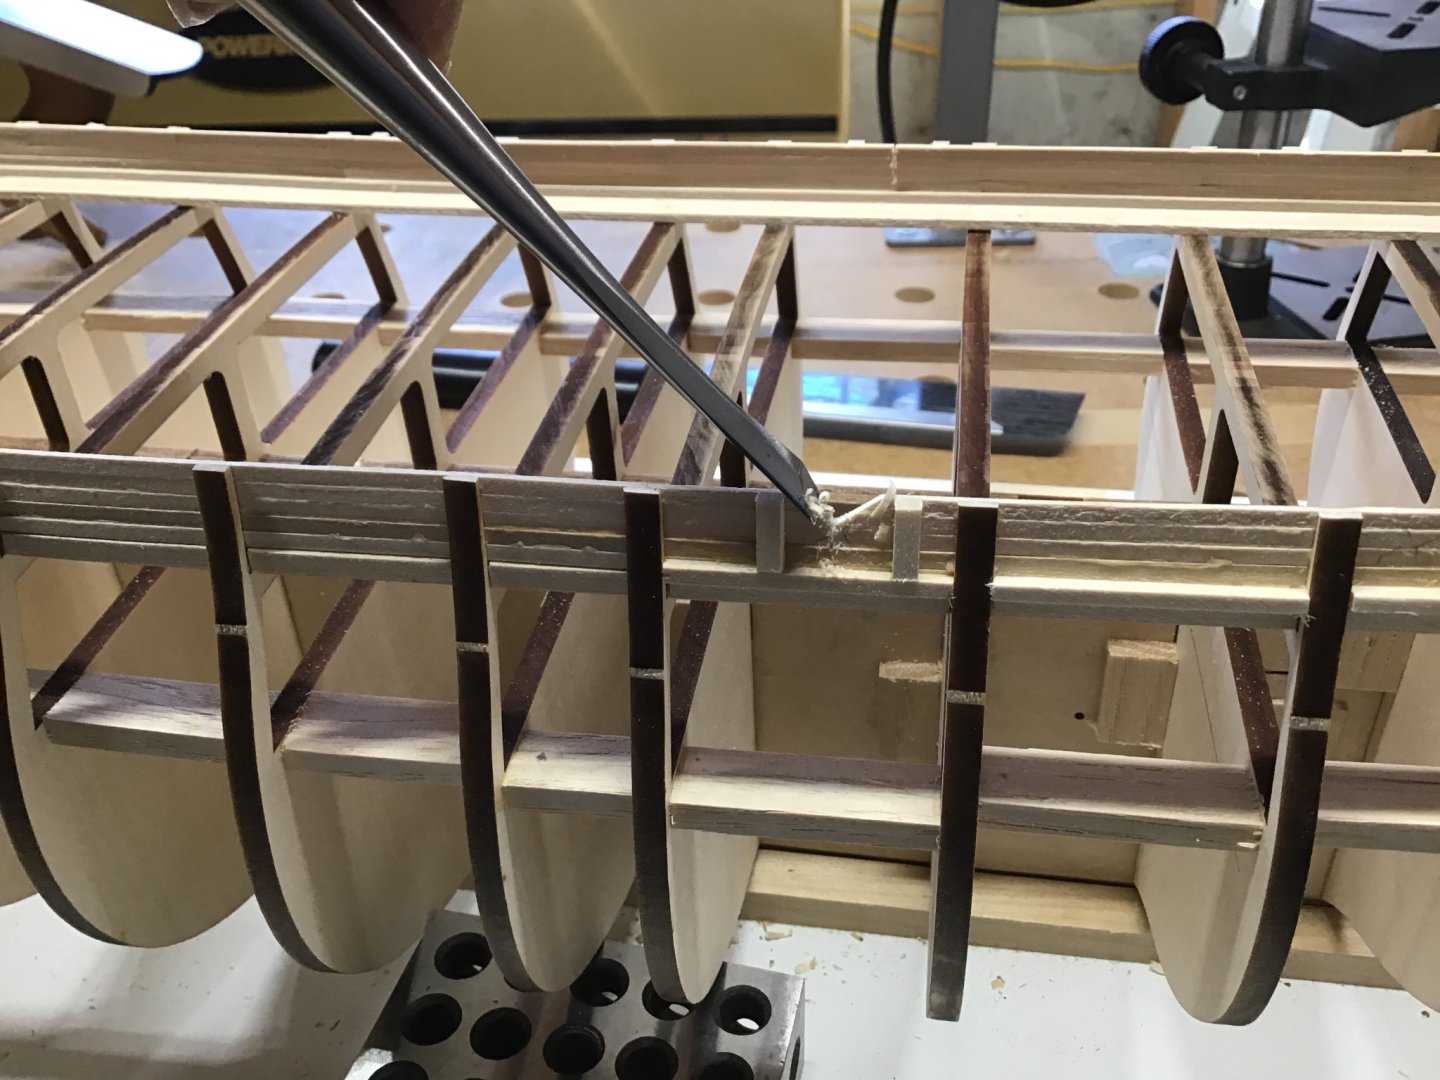
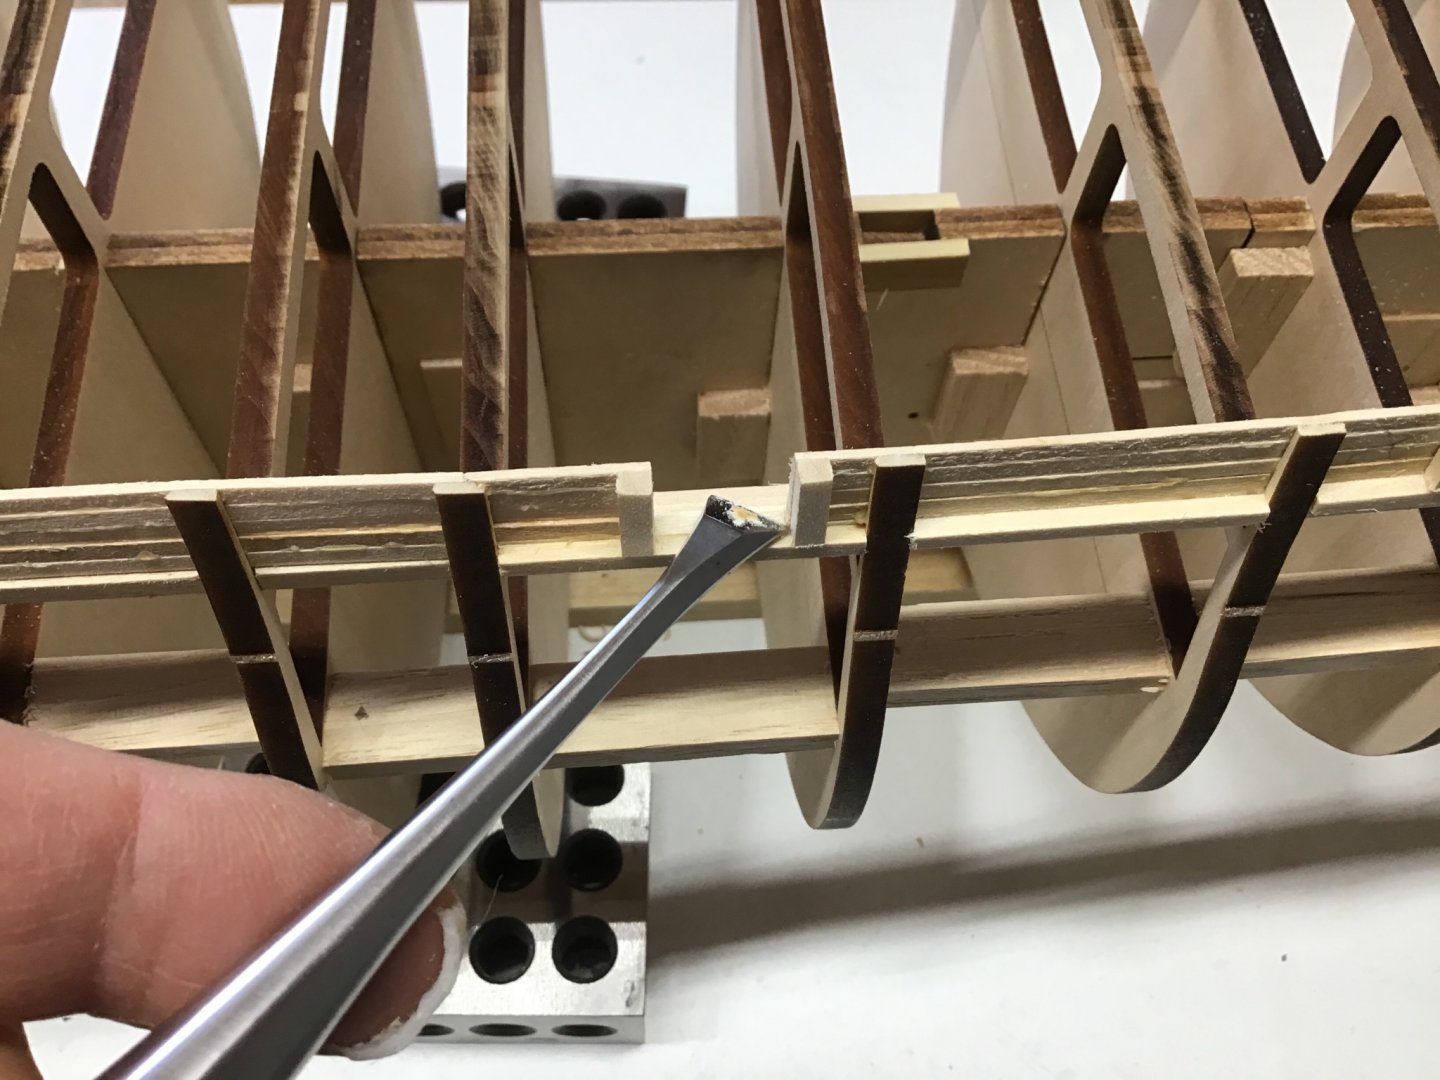
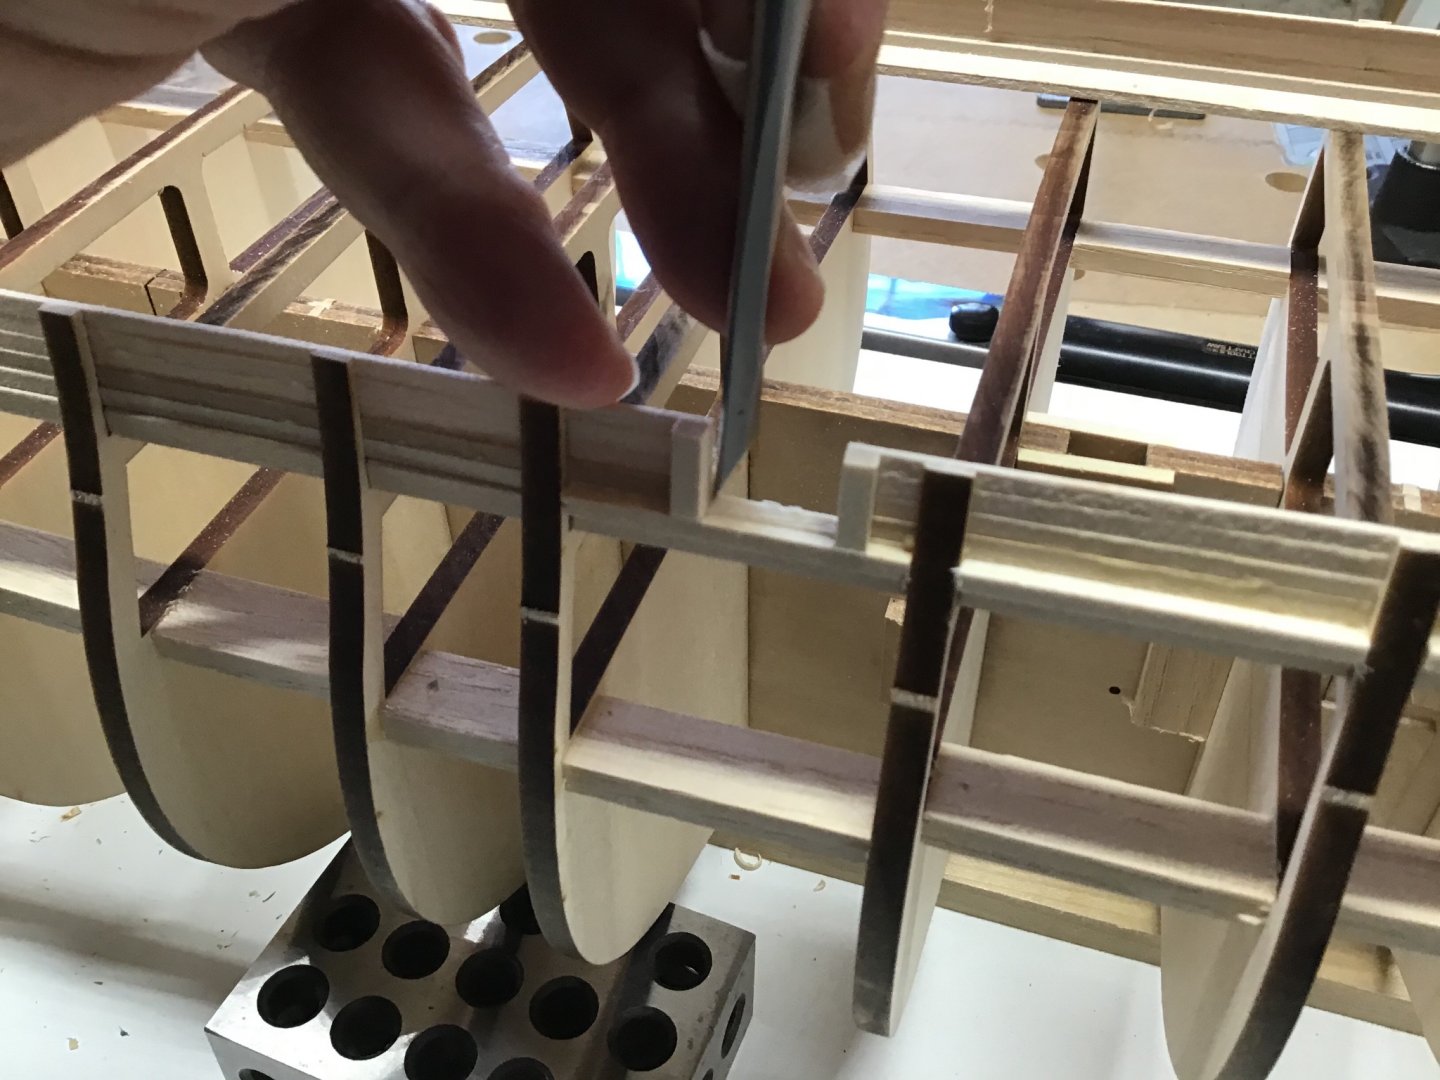
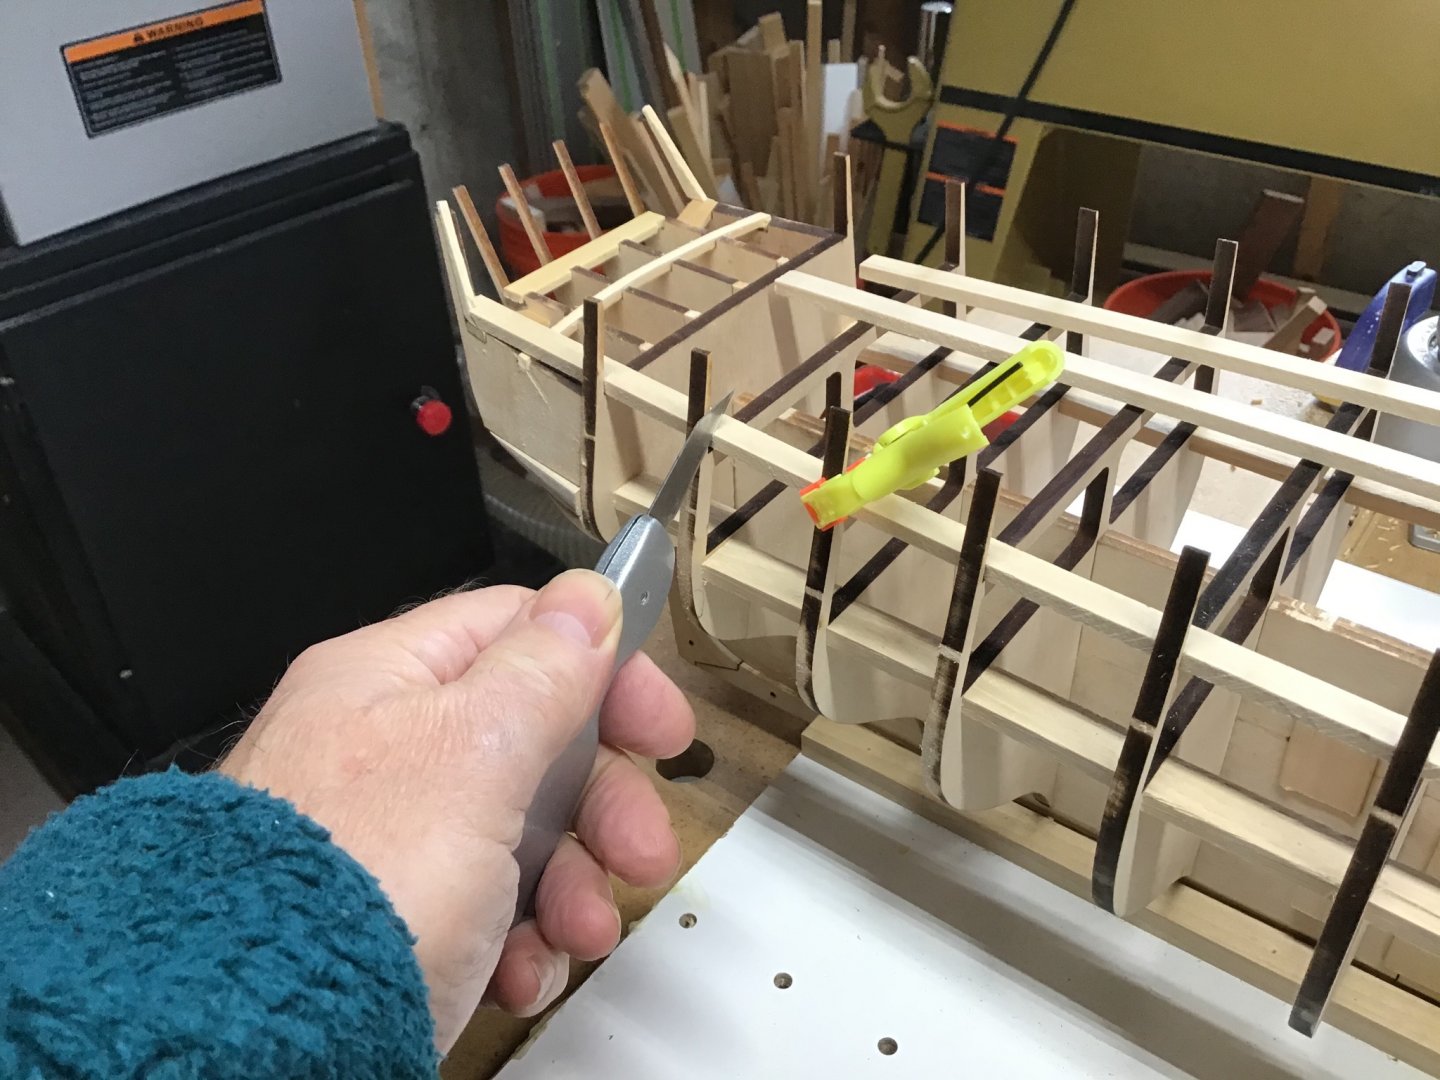
Cutting Out the Gun Ports (continued) After cutting about a dozen, you get into a rhythm, and start to notice what works. Noticed that the chisel is most effective, bevel down when cutting towards the post. First cut down vertically along the post. Then scoop out the wood with the chisel bevel down cutting towards the post. Since the bottom bulwark plank was just fixed with glued at the bevel extensions, and not glued to the planksheer, just scooping out along the post from top to bottom was enough to get the waste cutout to pop out. The previous saw cuts were unnecessary. The chisel, also bevel down, can be levered off the post, from the corner out, to square up the bottom corners and shave the sill flat.

-
Hello Paul, welcome!
-
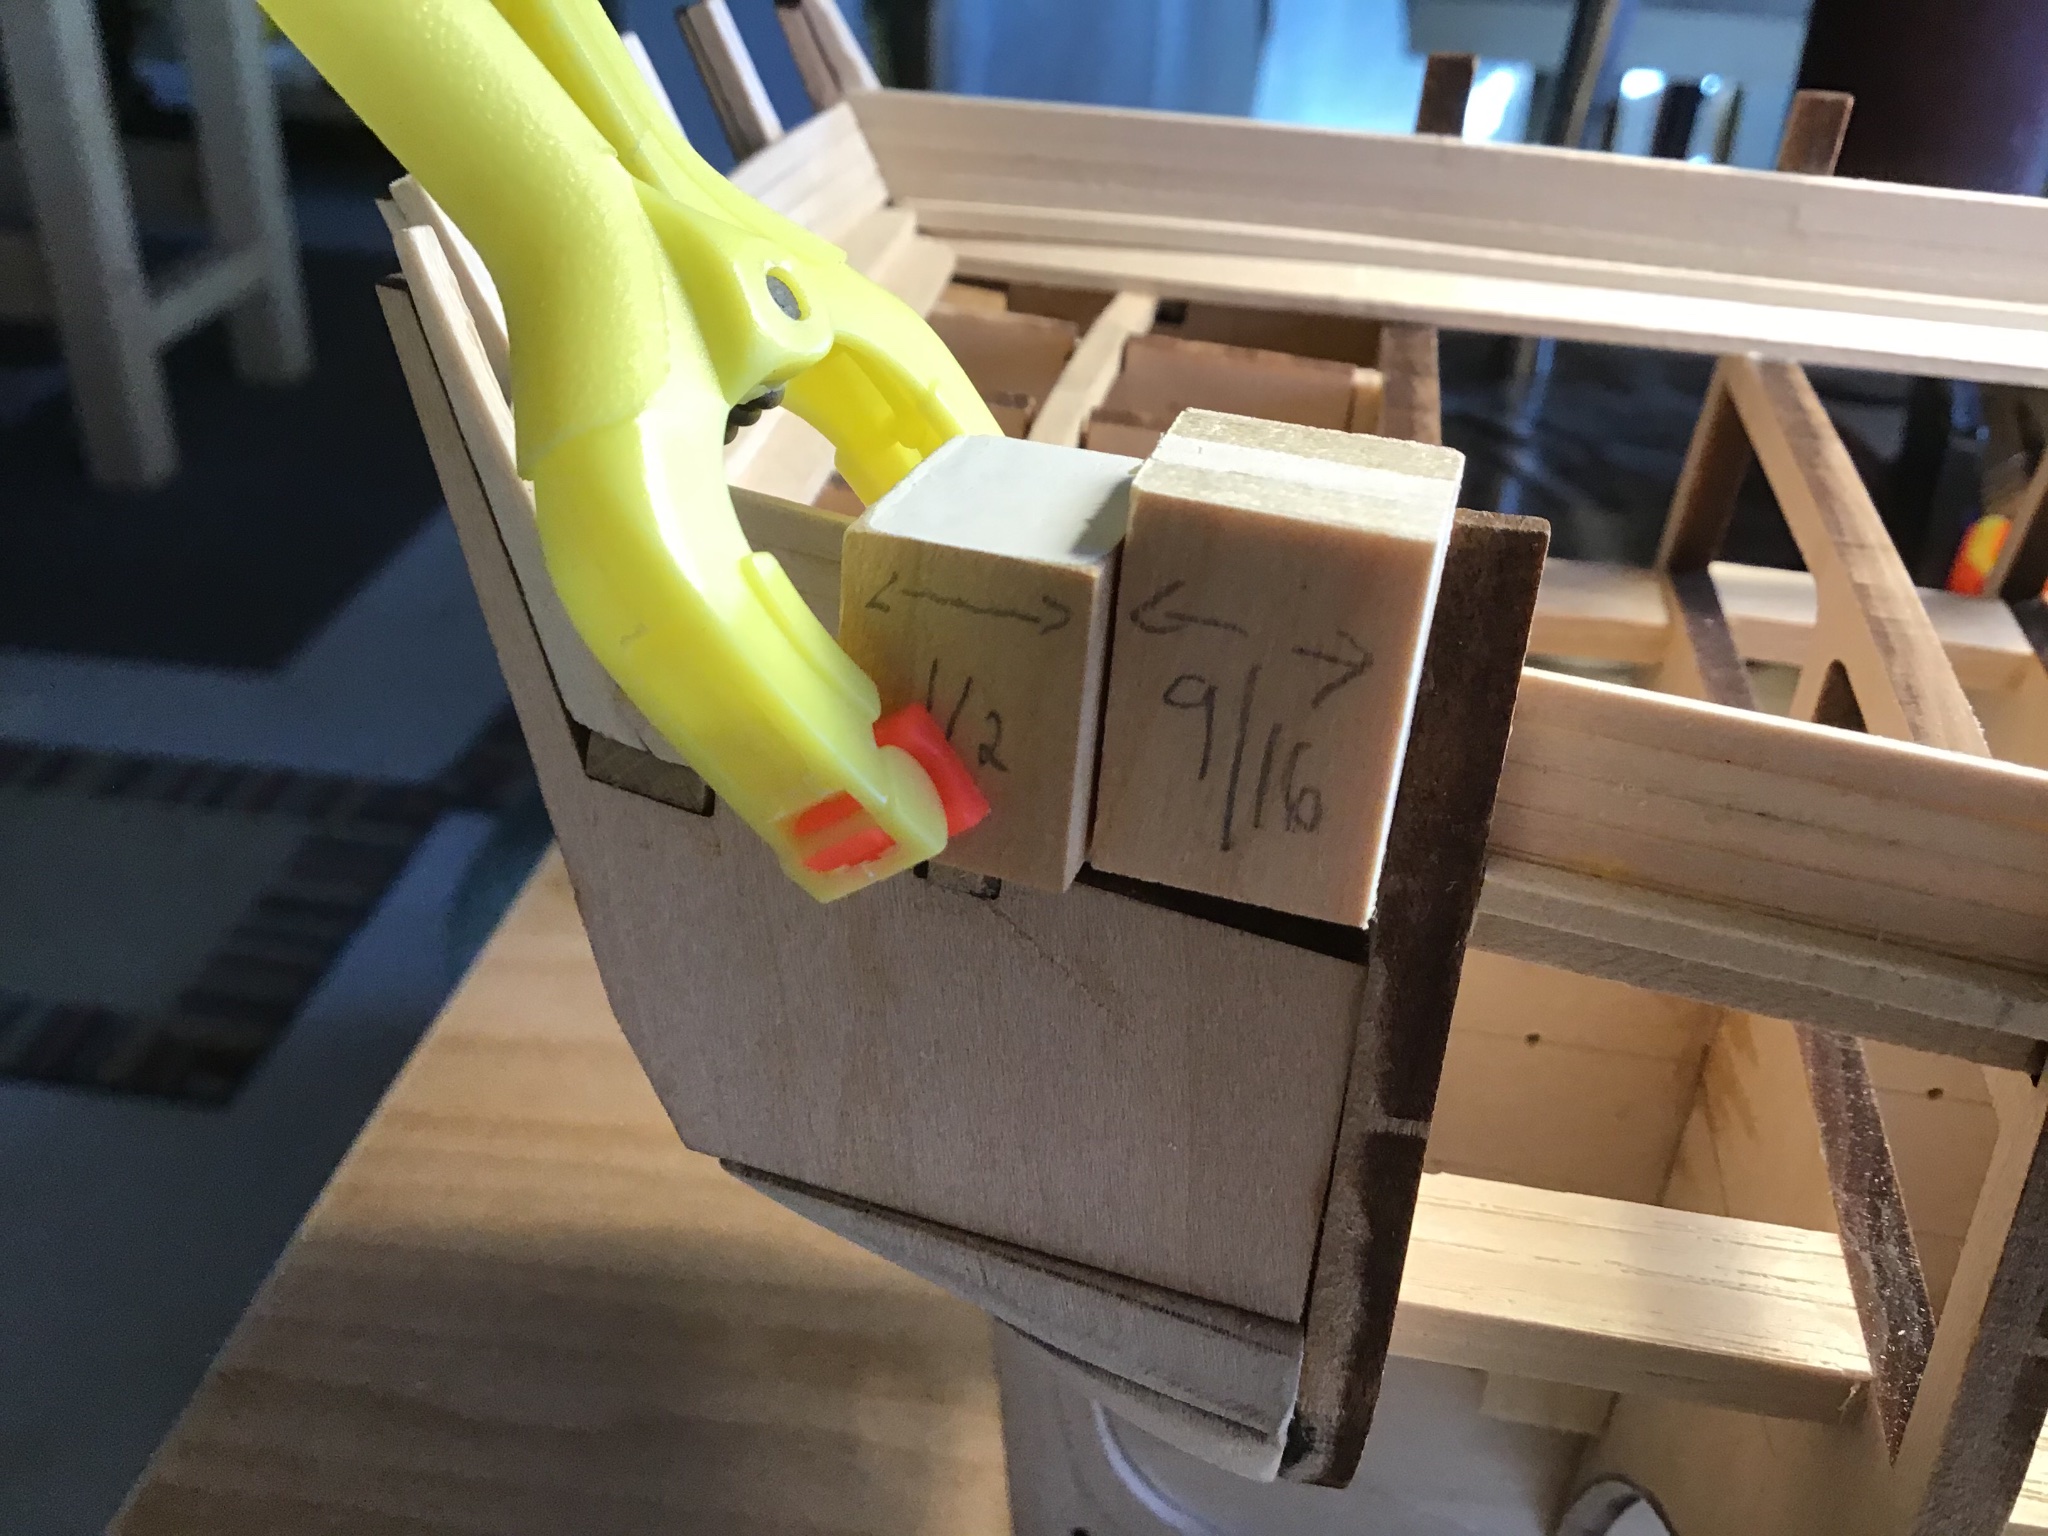
Framing and Cutting Out the Gun Ports Frame the upper gun ports by installing the sill boards and side frames. Sills span the bulkheads and are glued to the planksheer side. Sideboards were made on the Byrnes table saw, with the sliding table. Quick work. Spacer blocks were made on the table saw to help with the gun port side board installation. The blocks ensure the side boards are parallel to the bulkheads. Also used a set of brass ripping gauges from Micromark. A must to get port to starboard gun port spacing consistency. Tip: be sure to apply adhesive to the bottom of the gun port side frame board, as well as the side against the bulwark board, this avoids unsupported bulwark boards after cutting out the gunport. Cutout the ports by first sawing down the center of the opening being careful to not cut into the sill. Chisel out the waste with a fishtail chisel. Fishtail excels here. Final cuts should be very thin!

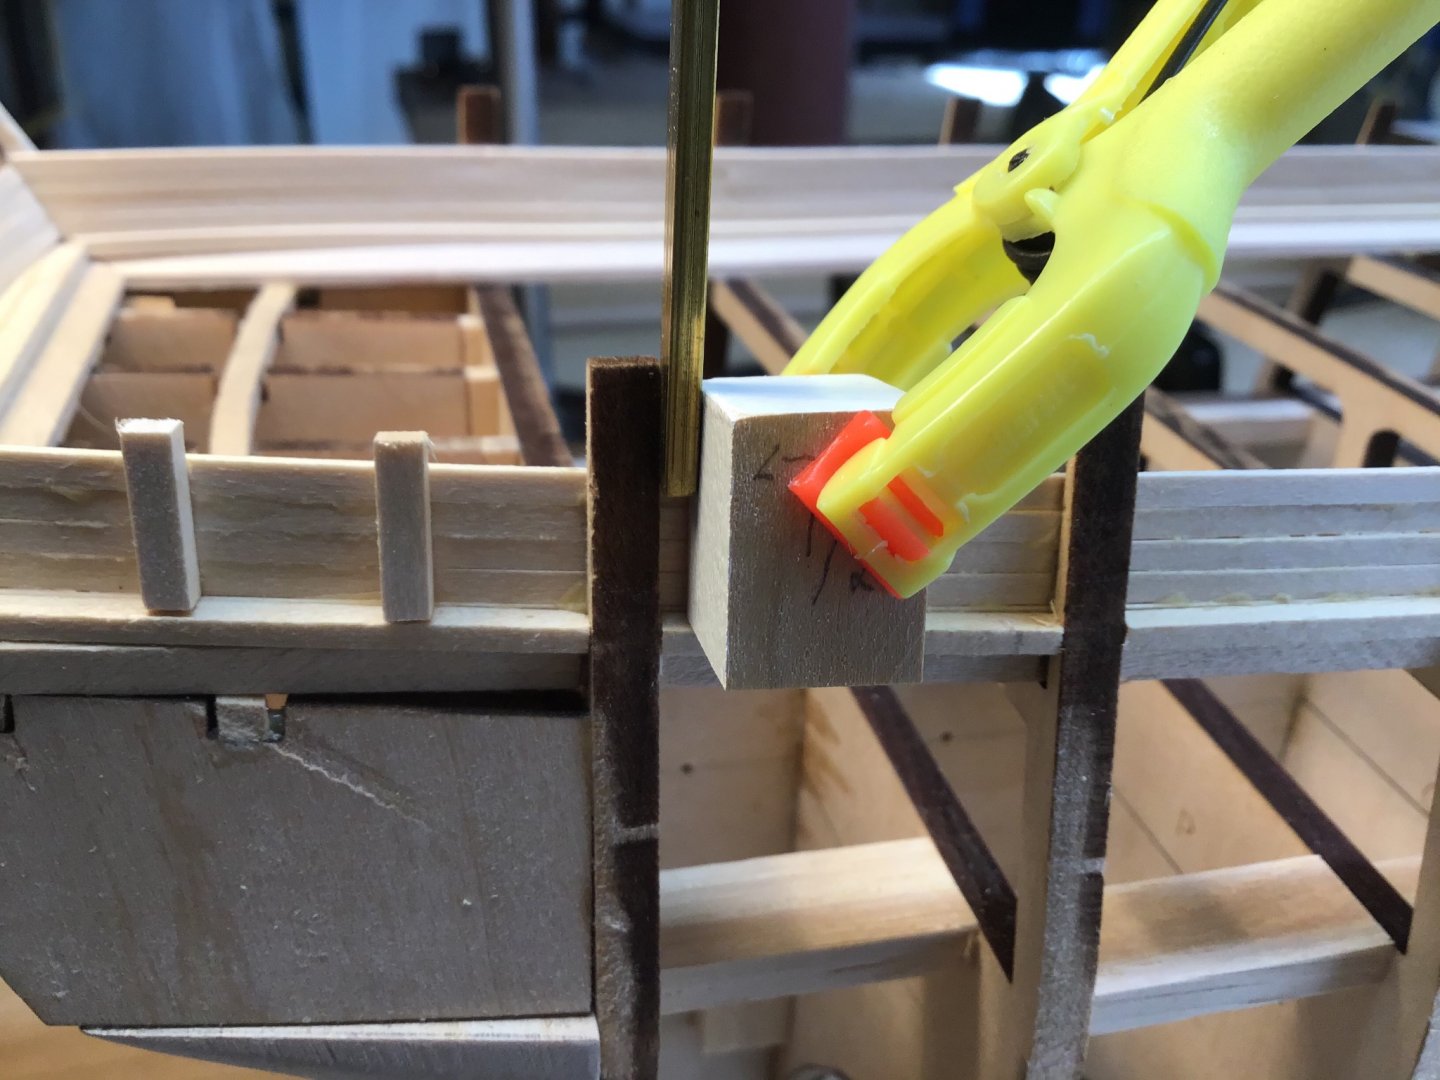


-
Thanks Sea Hoss. Cabinet making was my last full time gig.....so accumulated the full size machines to support that business. And watched Norm Abraham, that guy had everything! -Rich
-
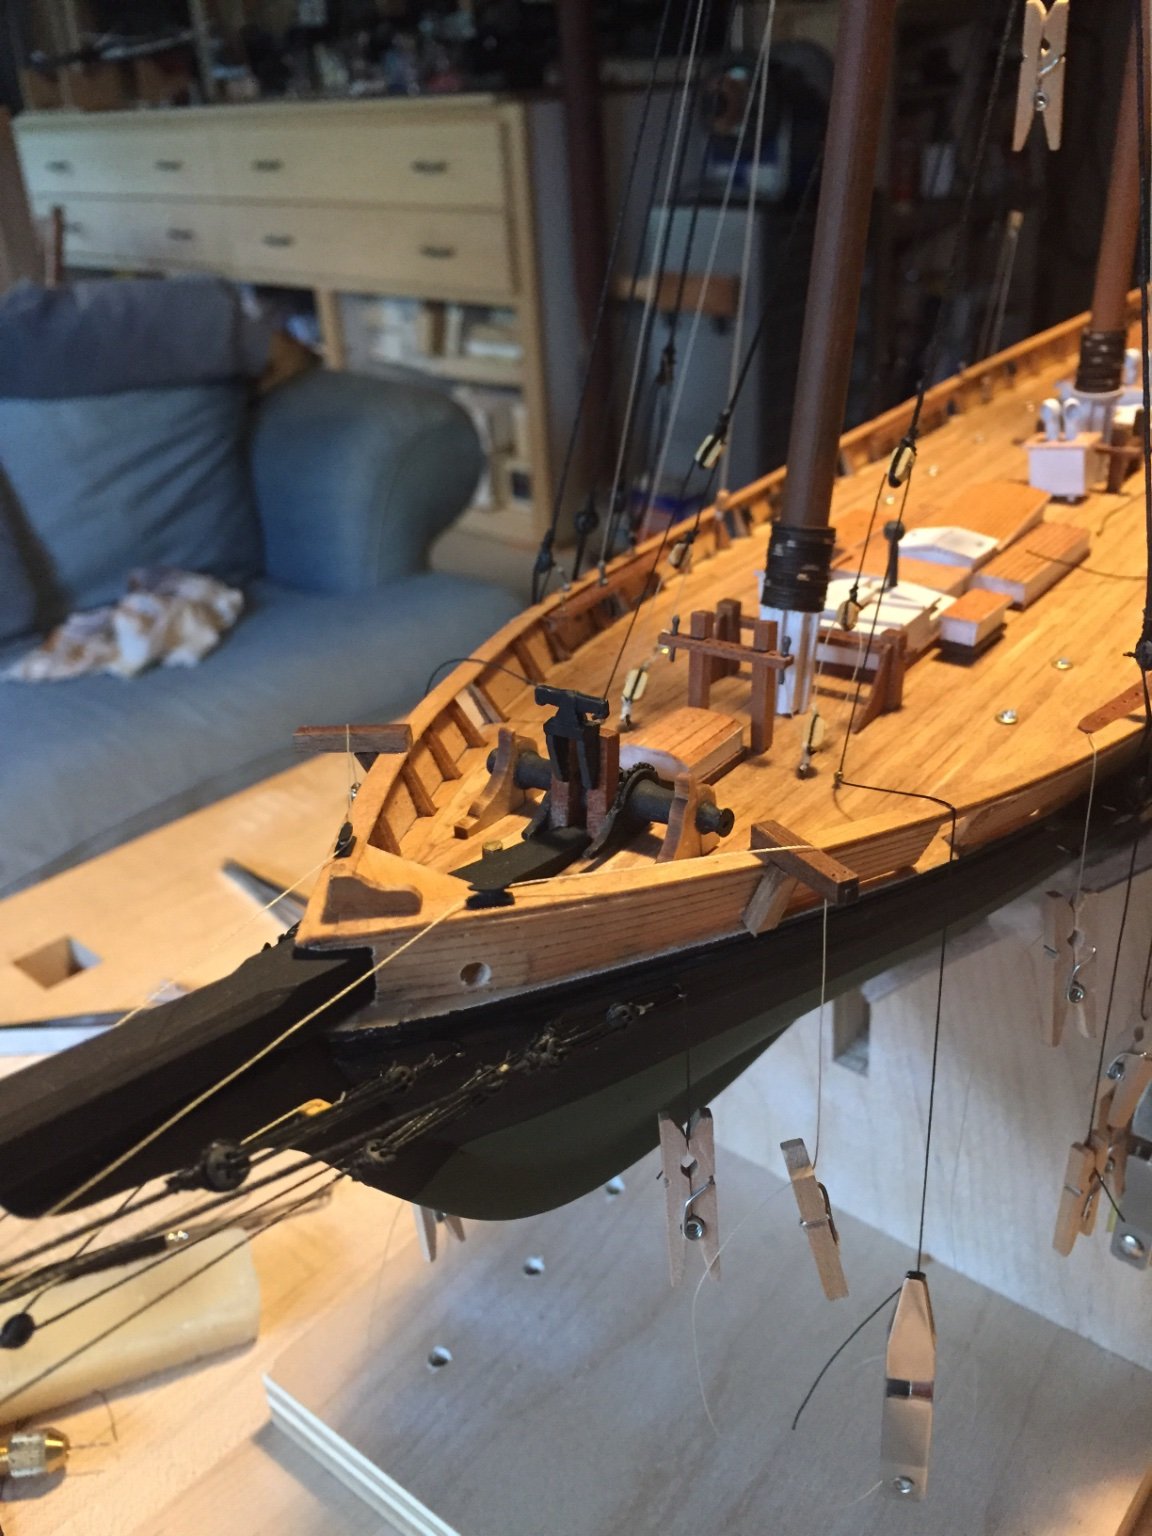
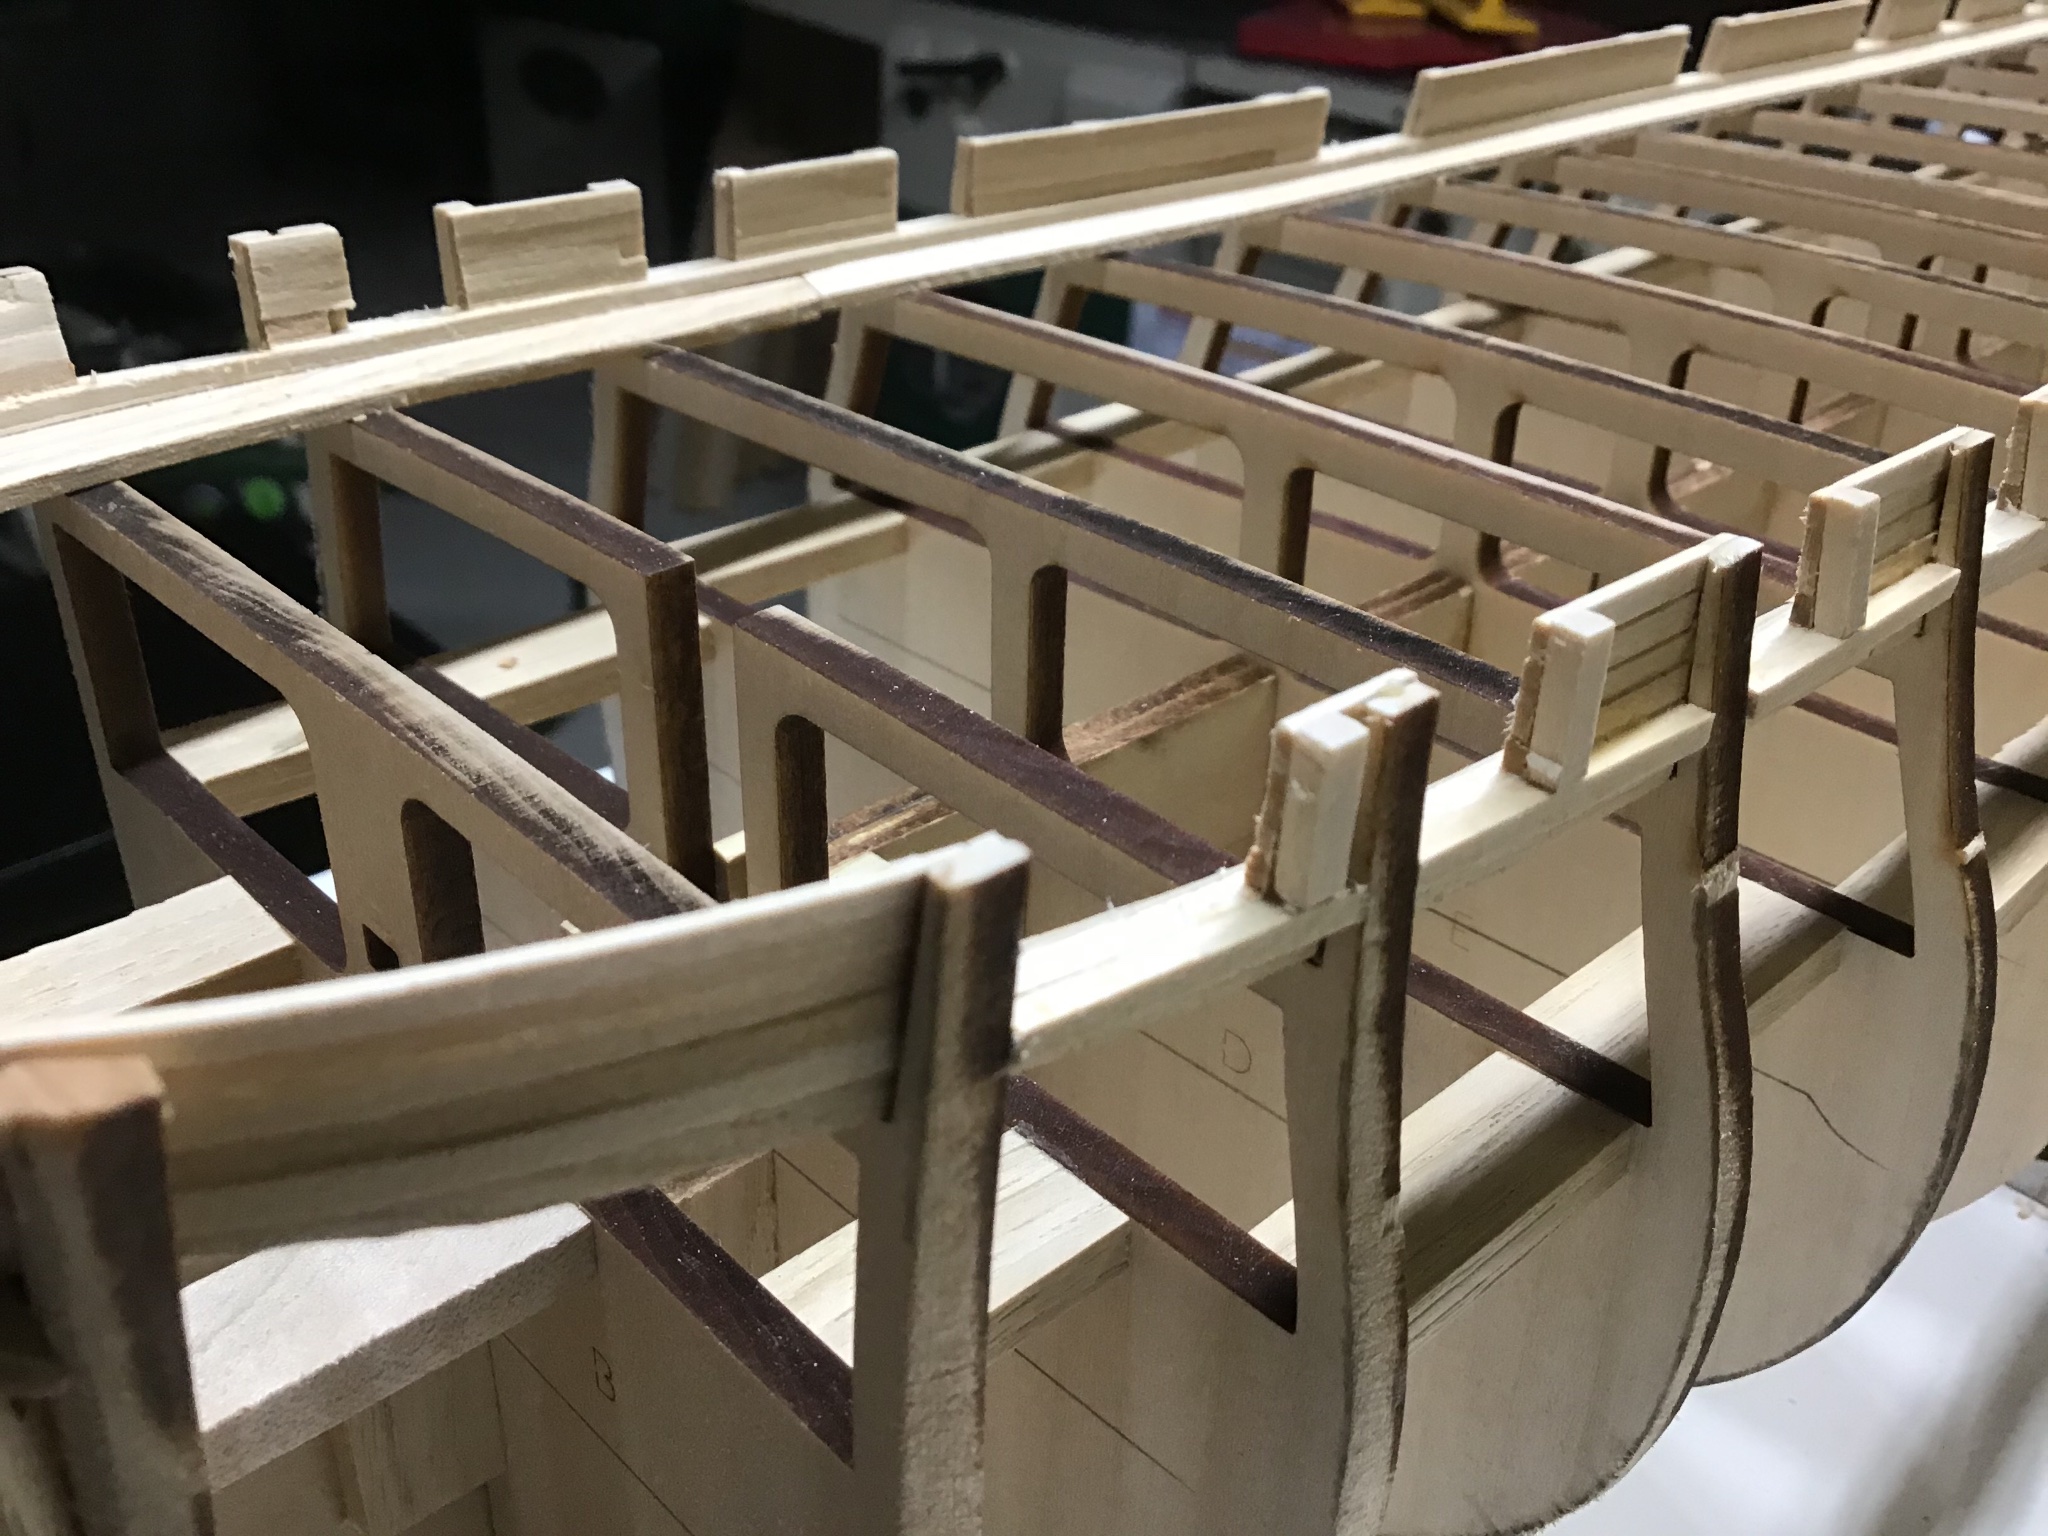
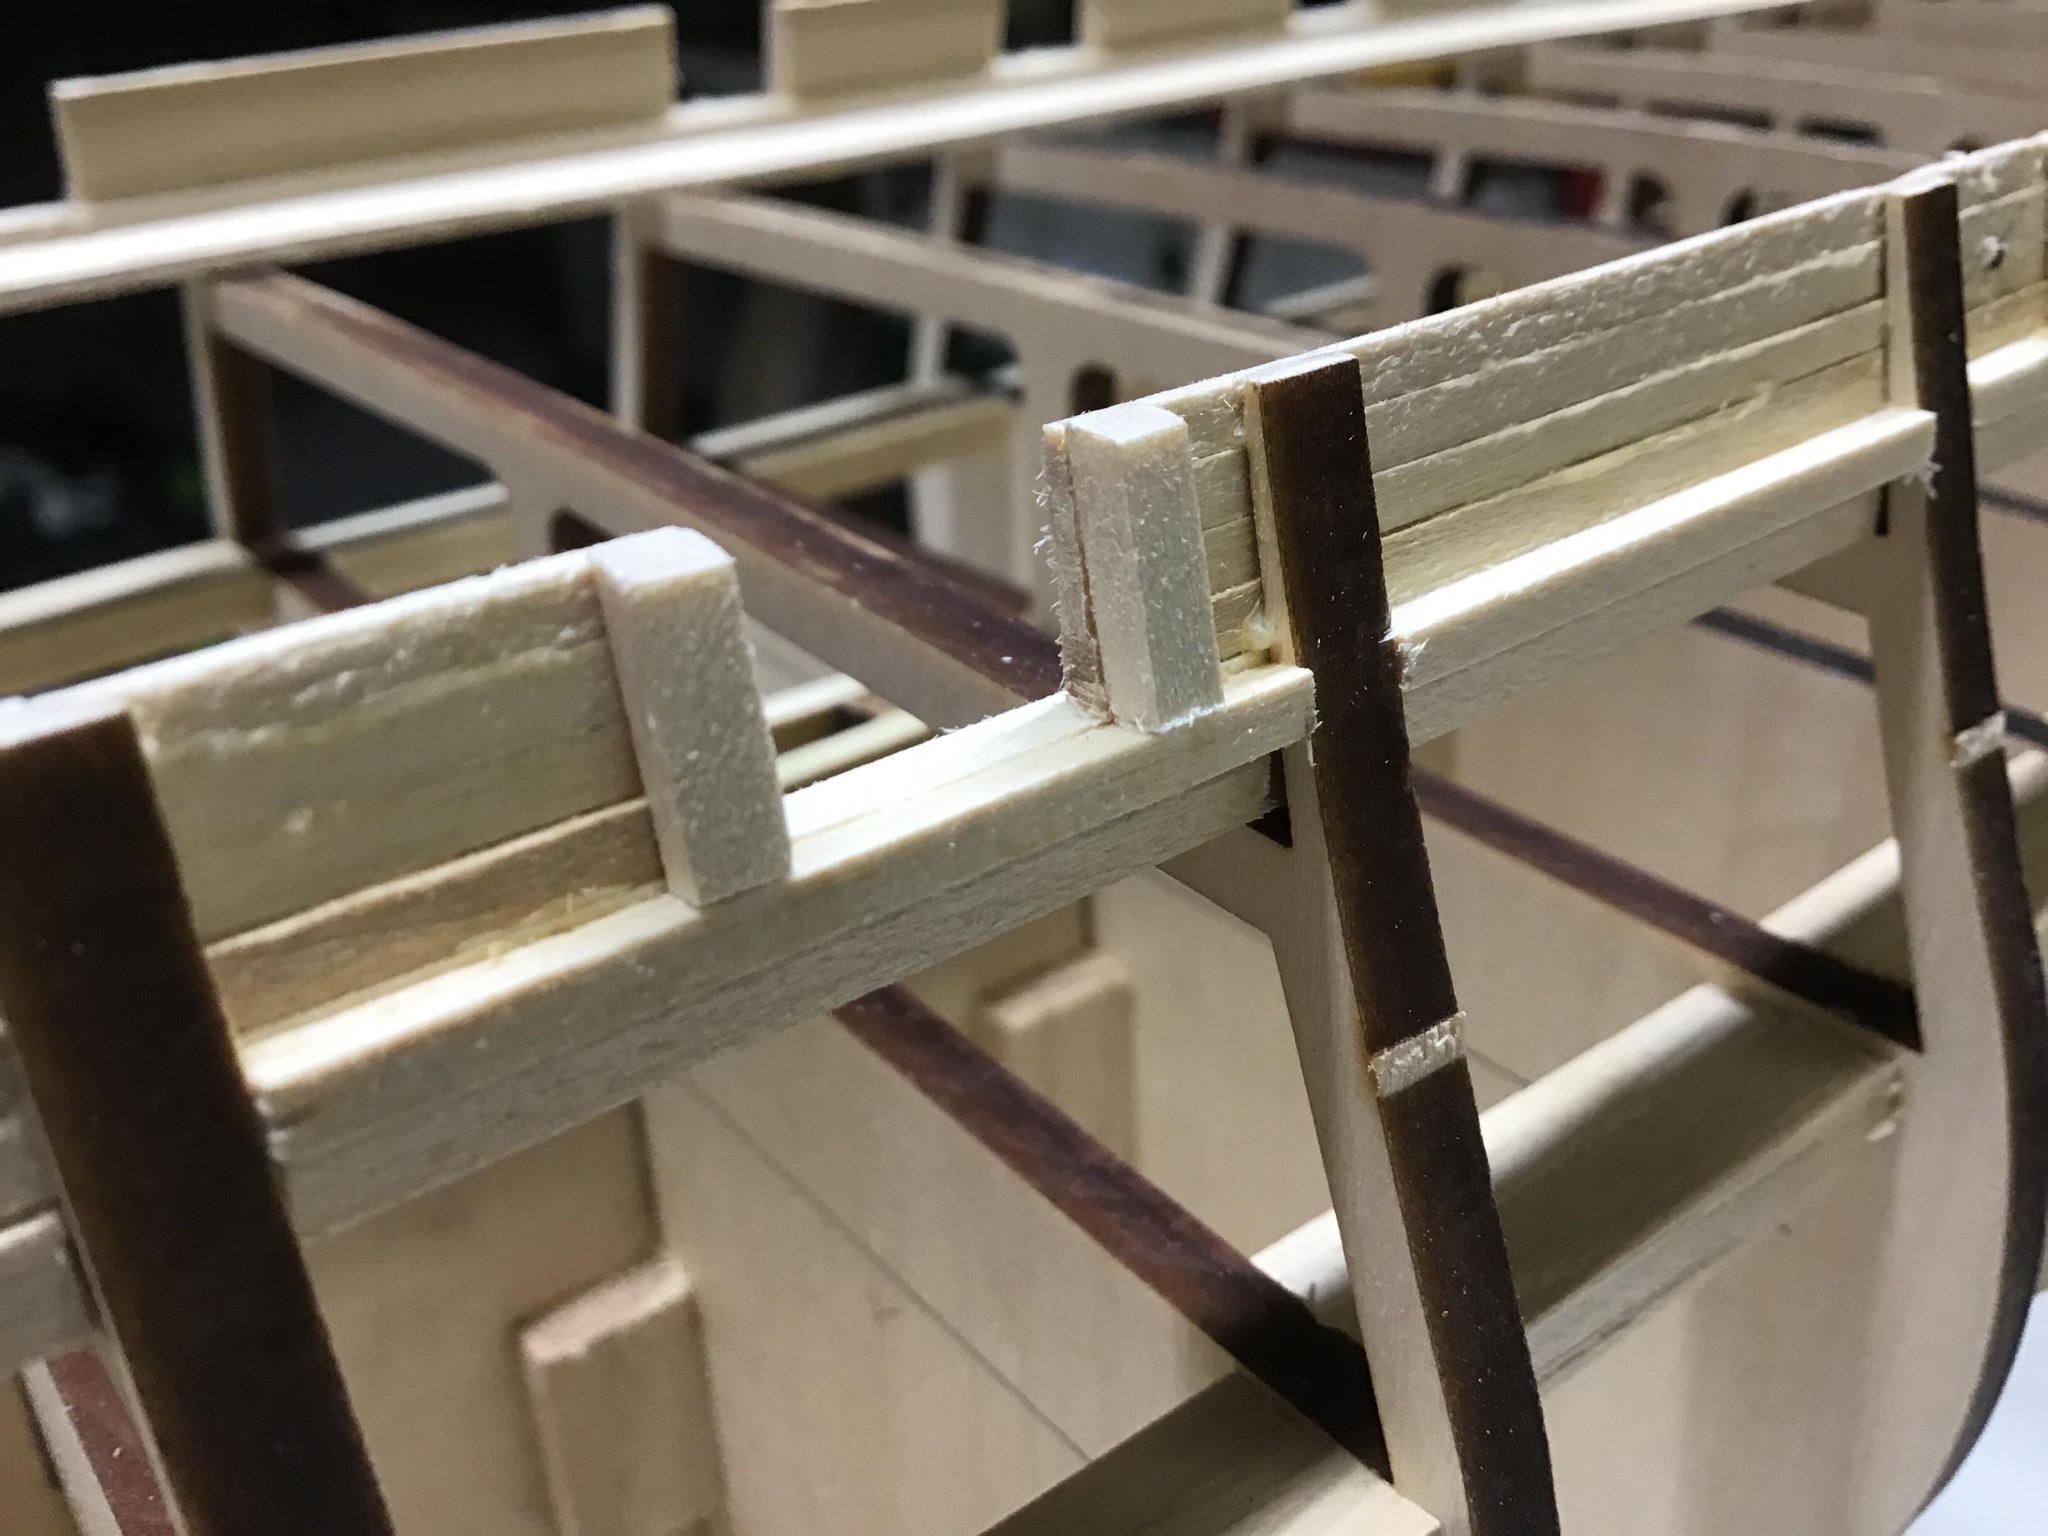
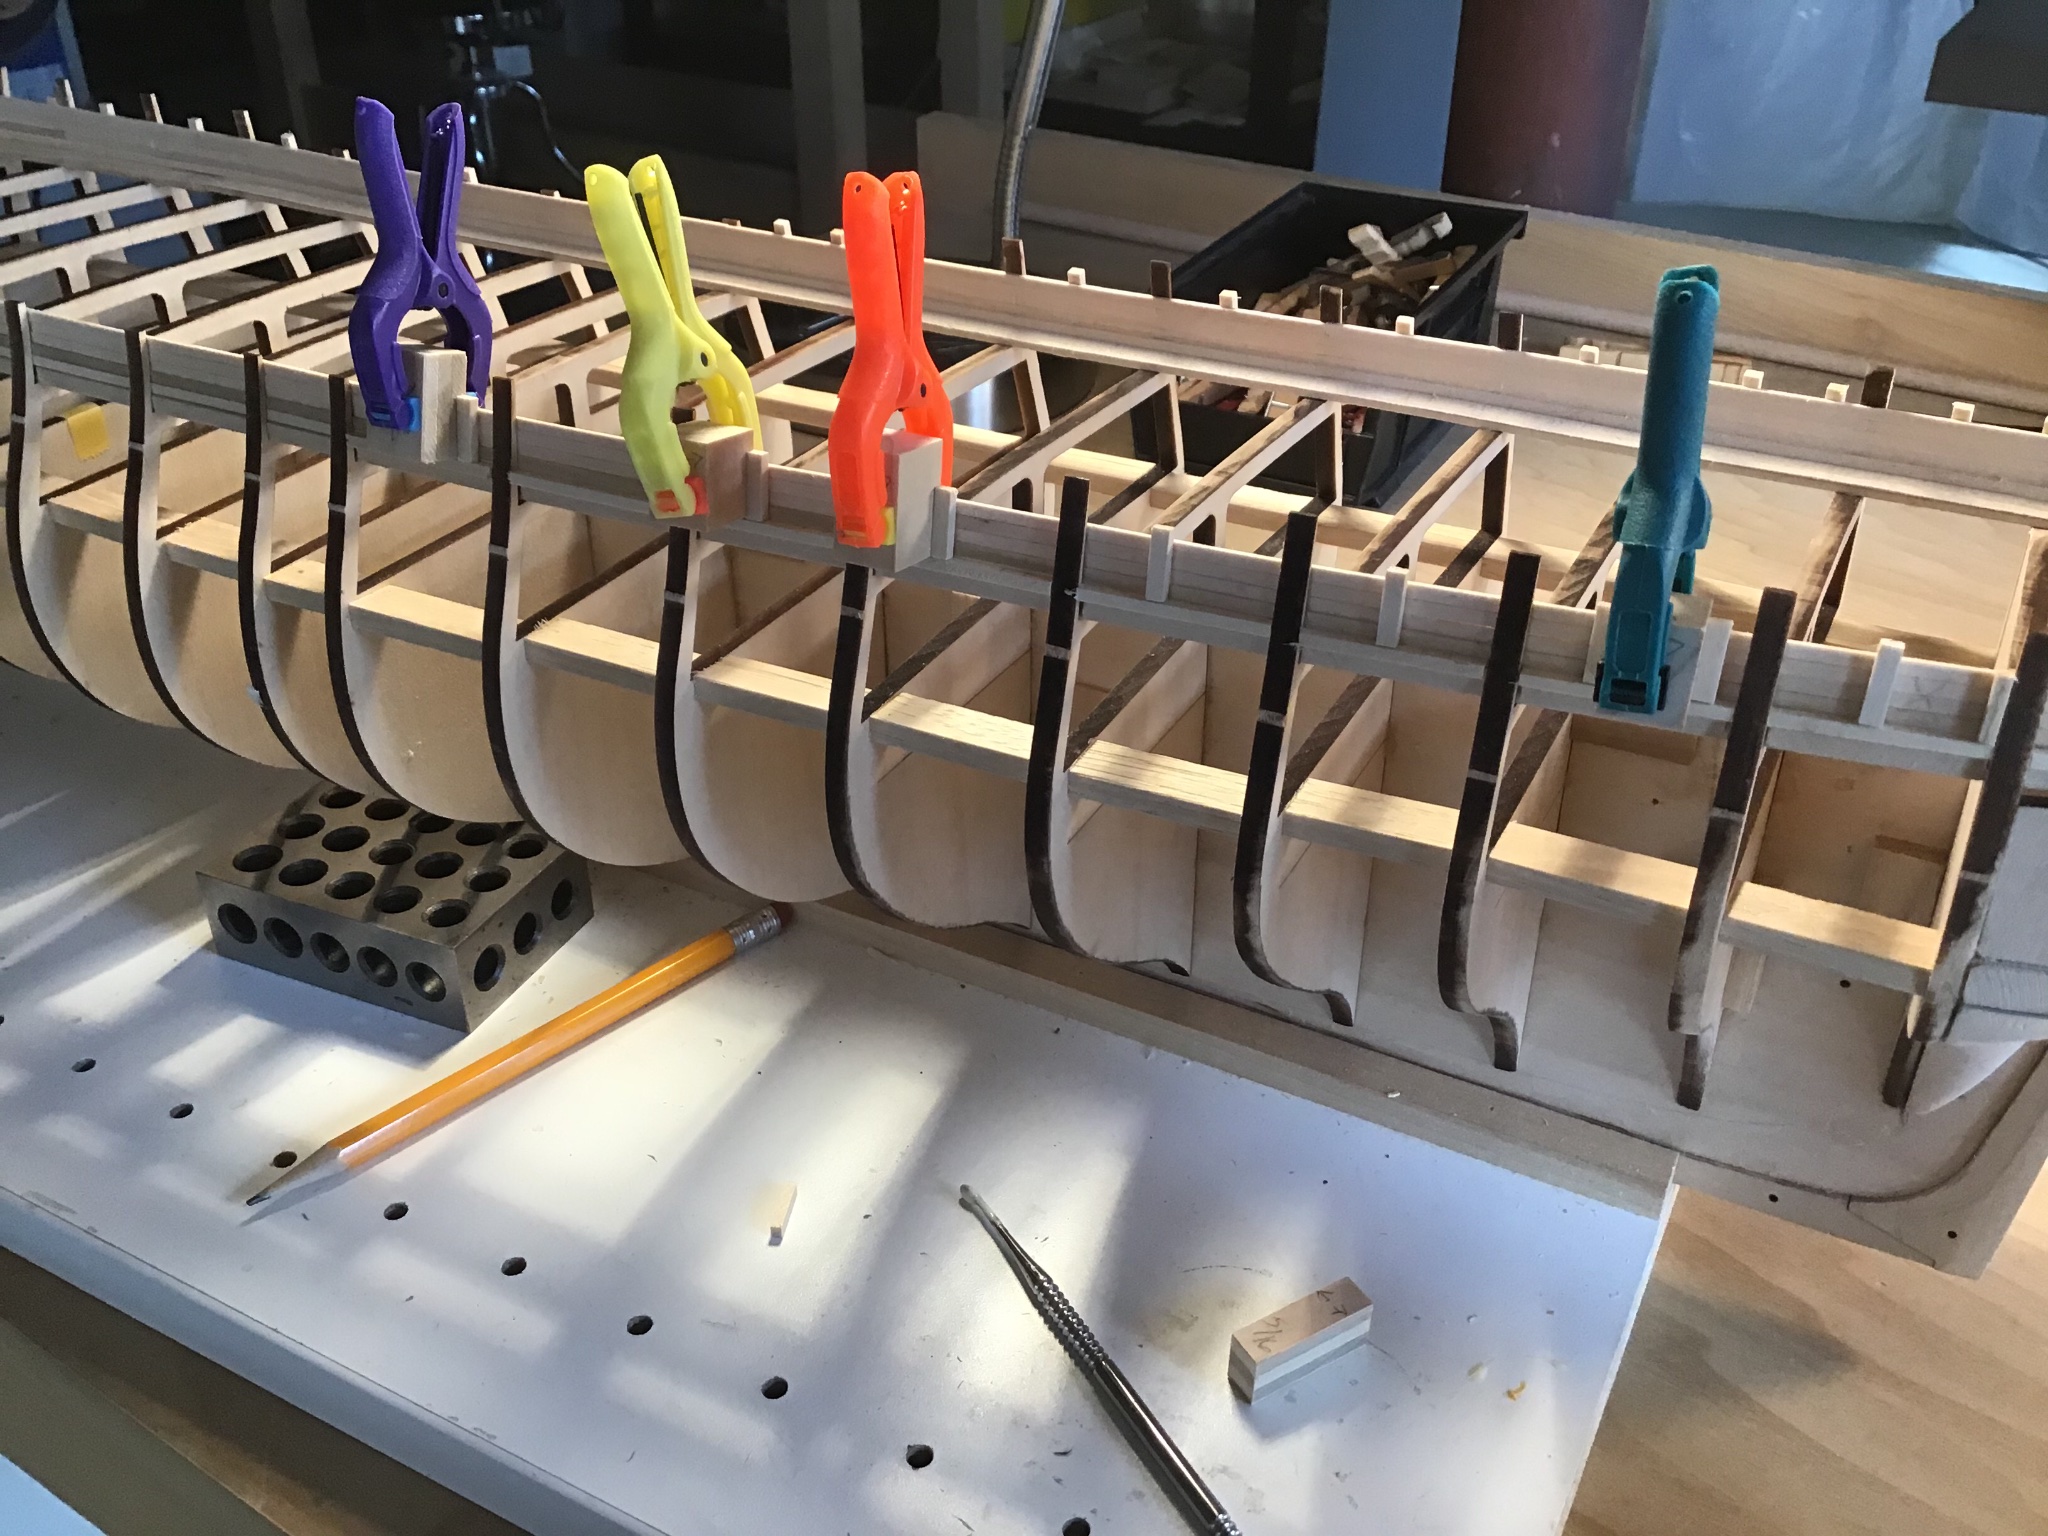
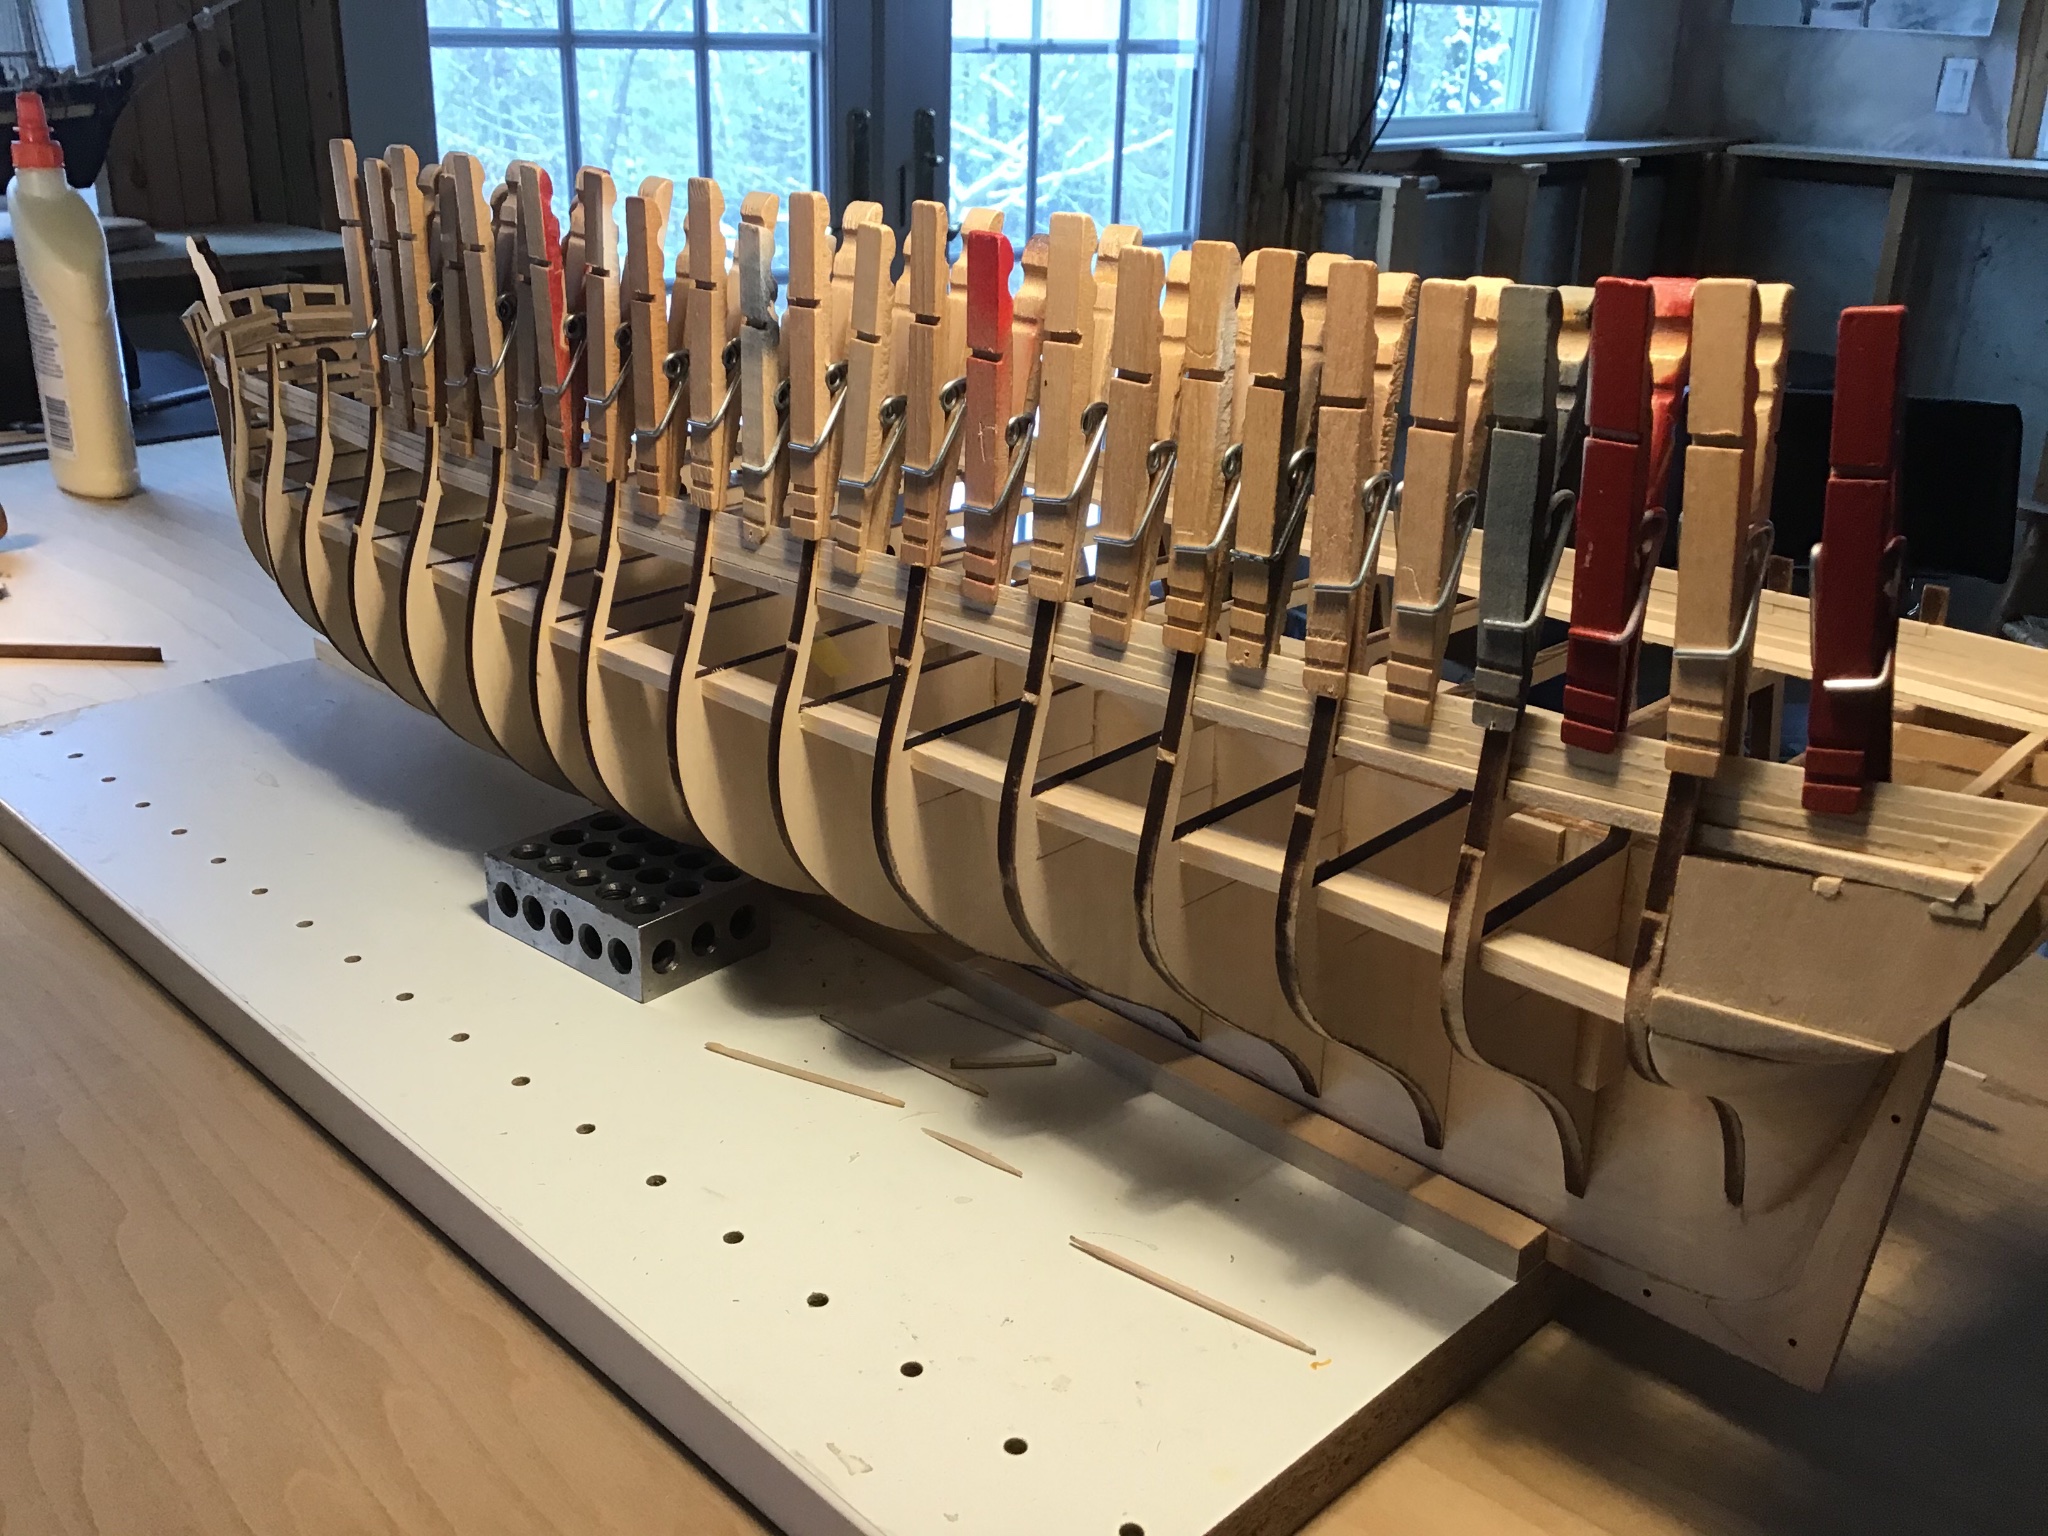
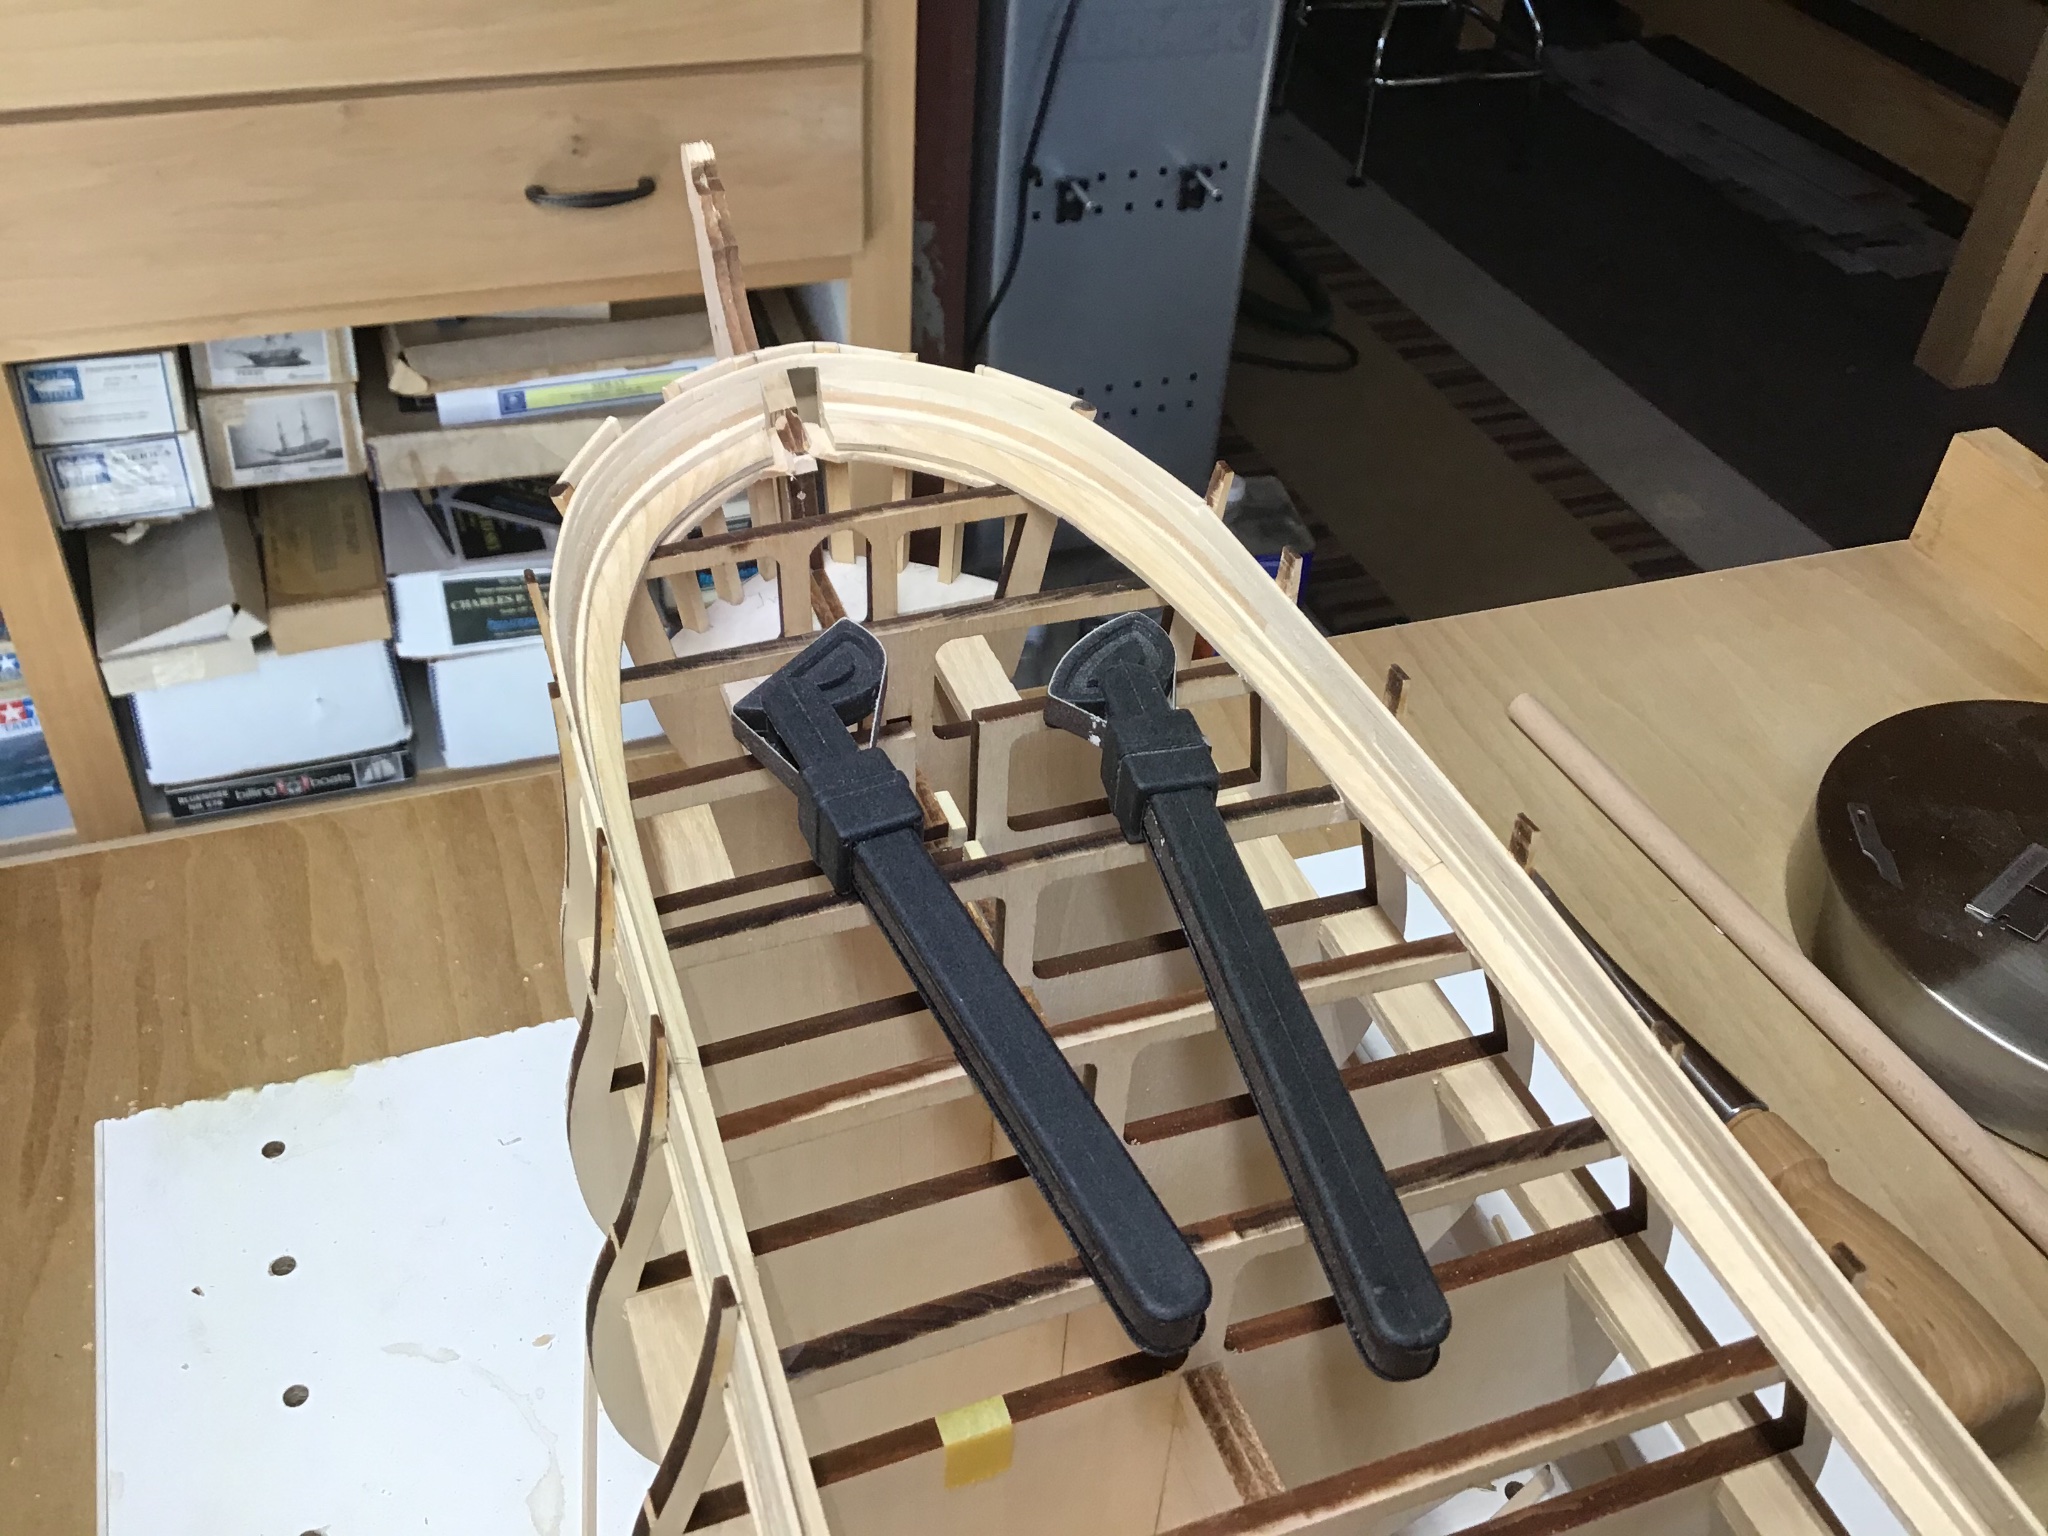
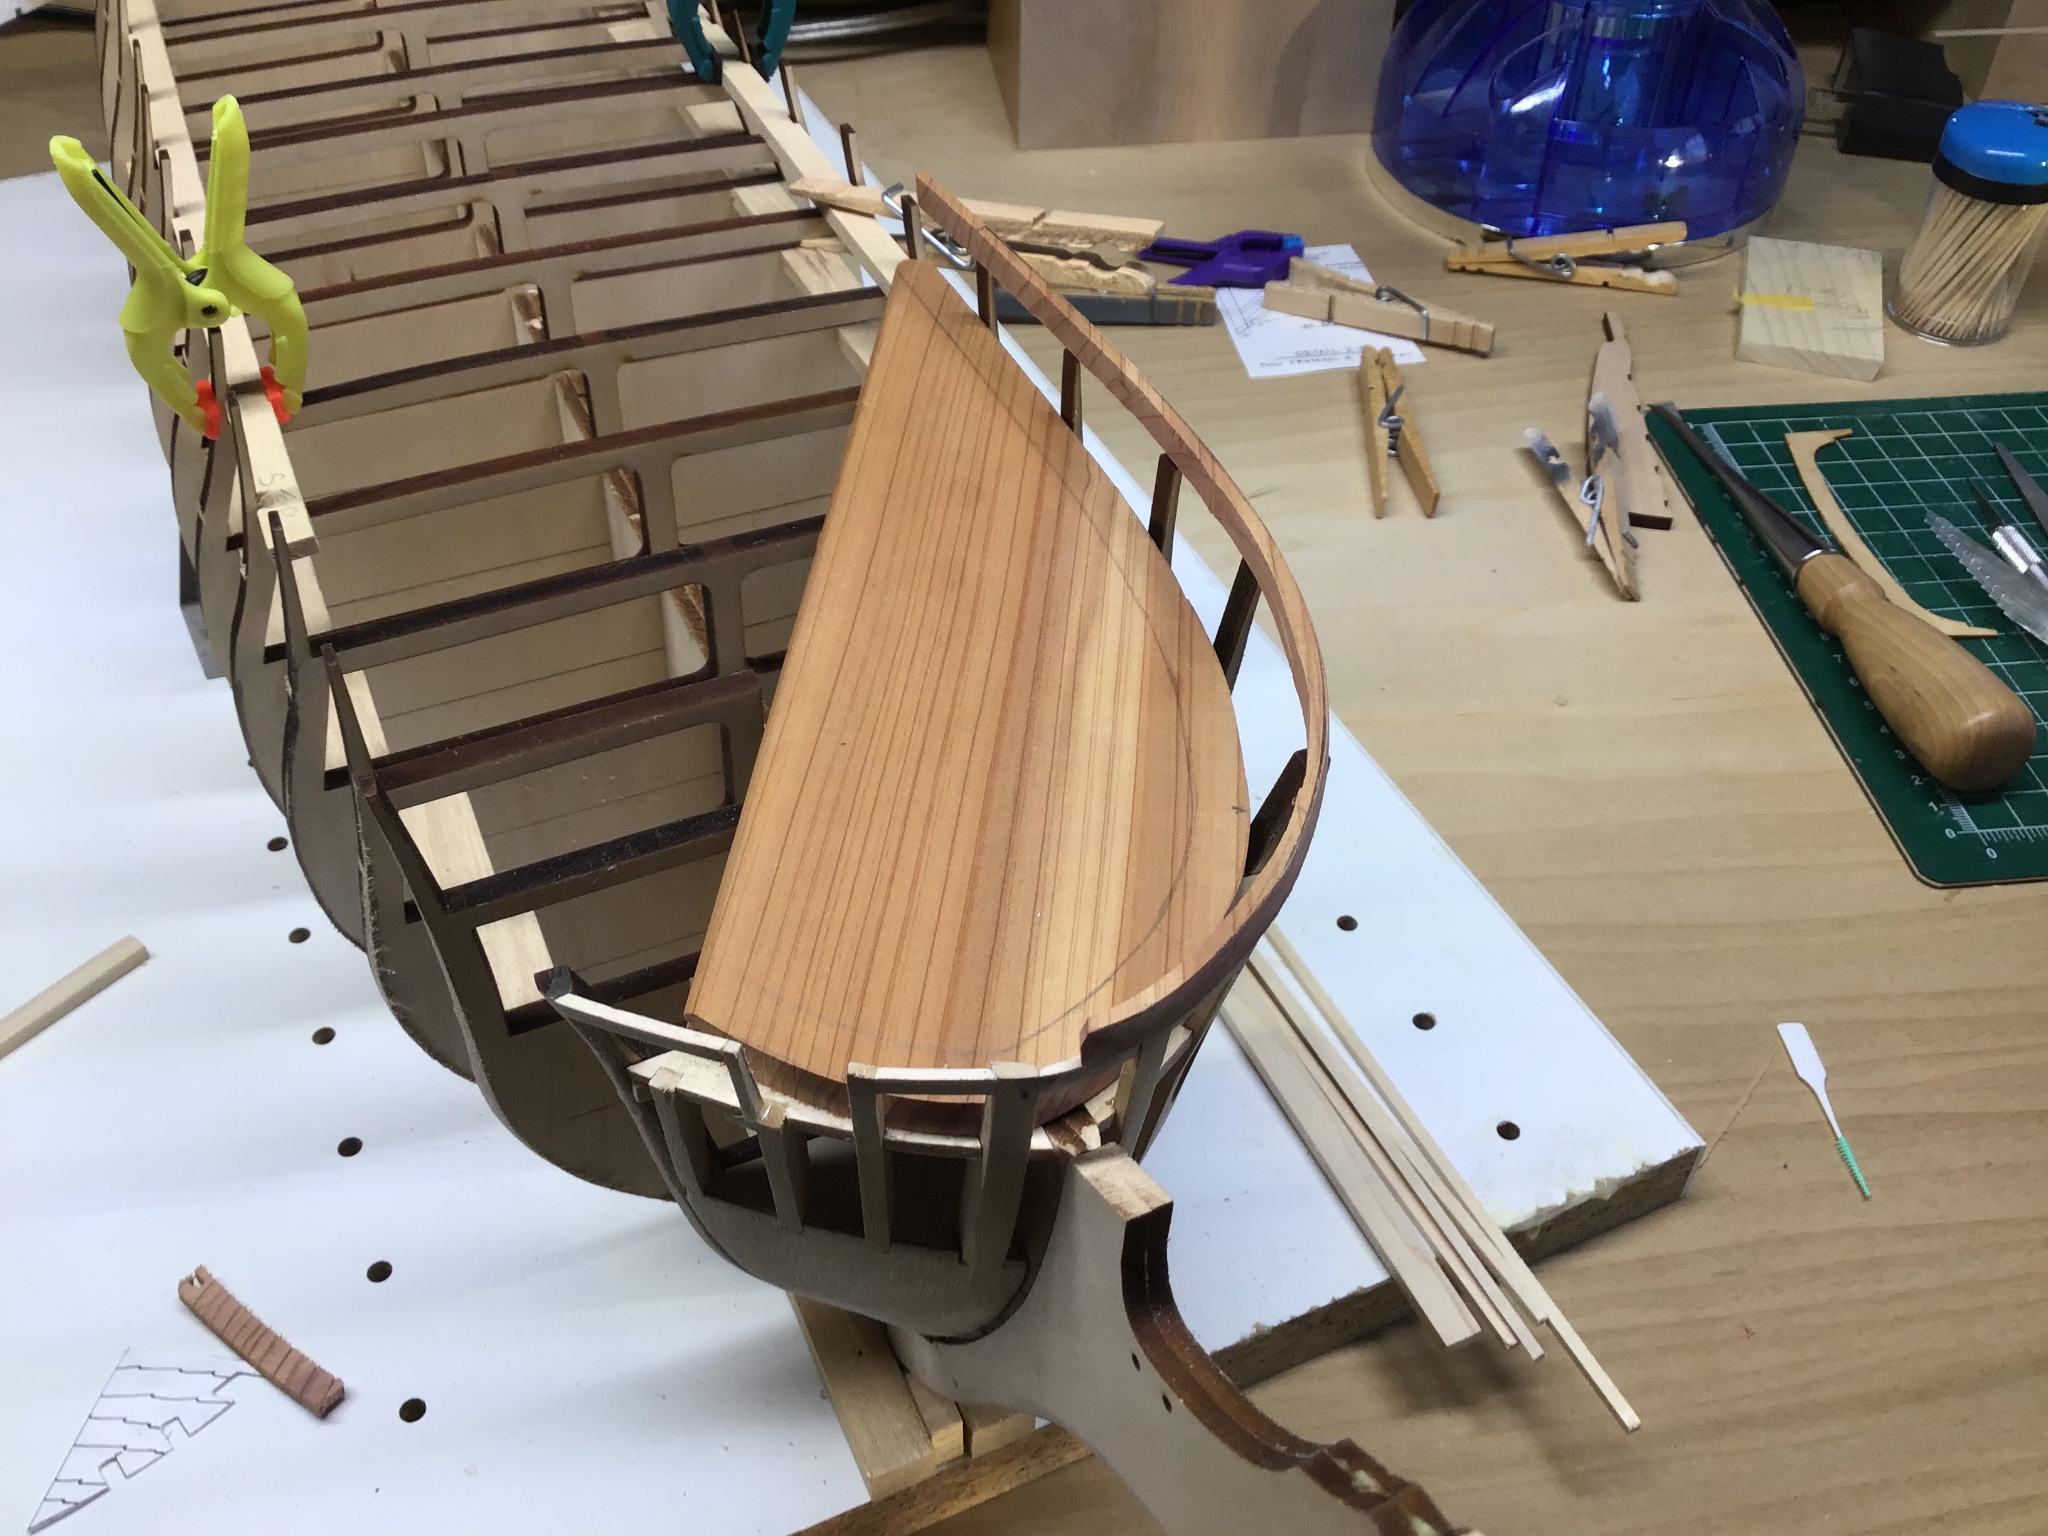
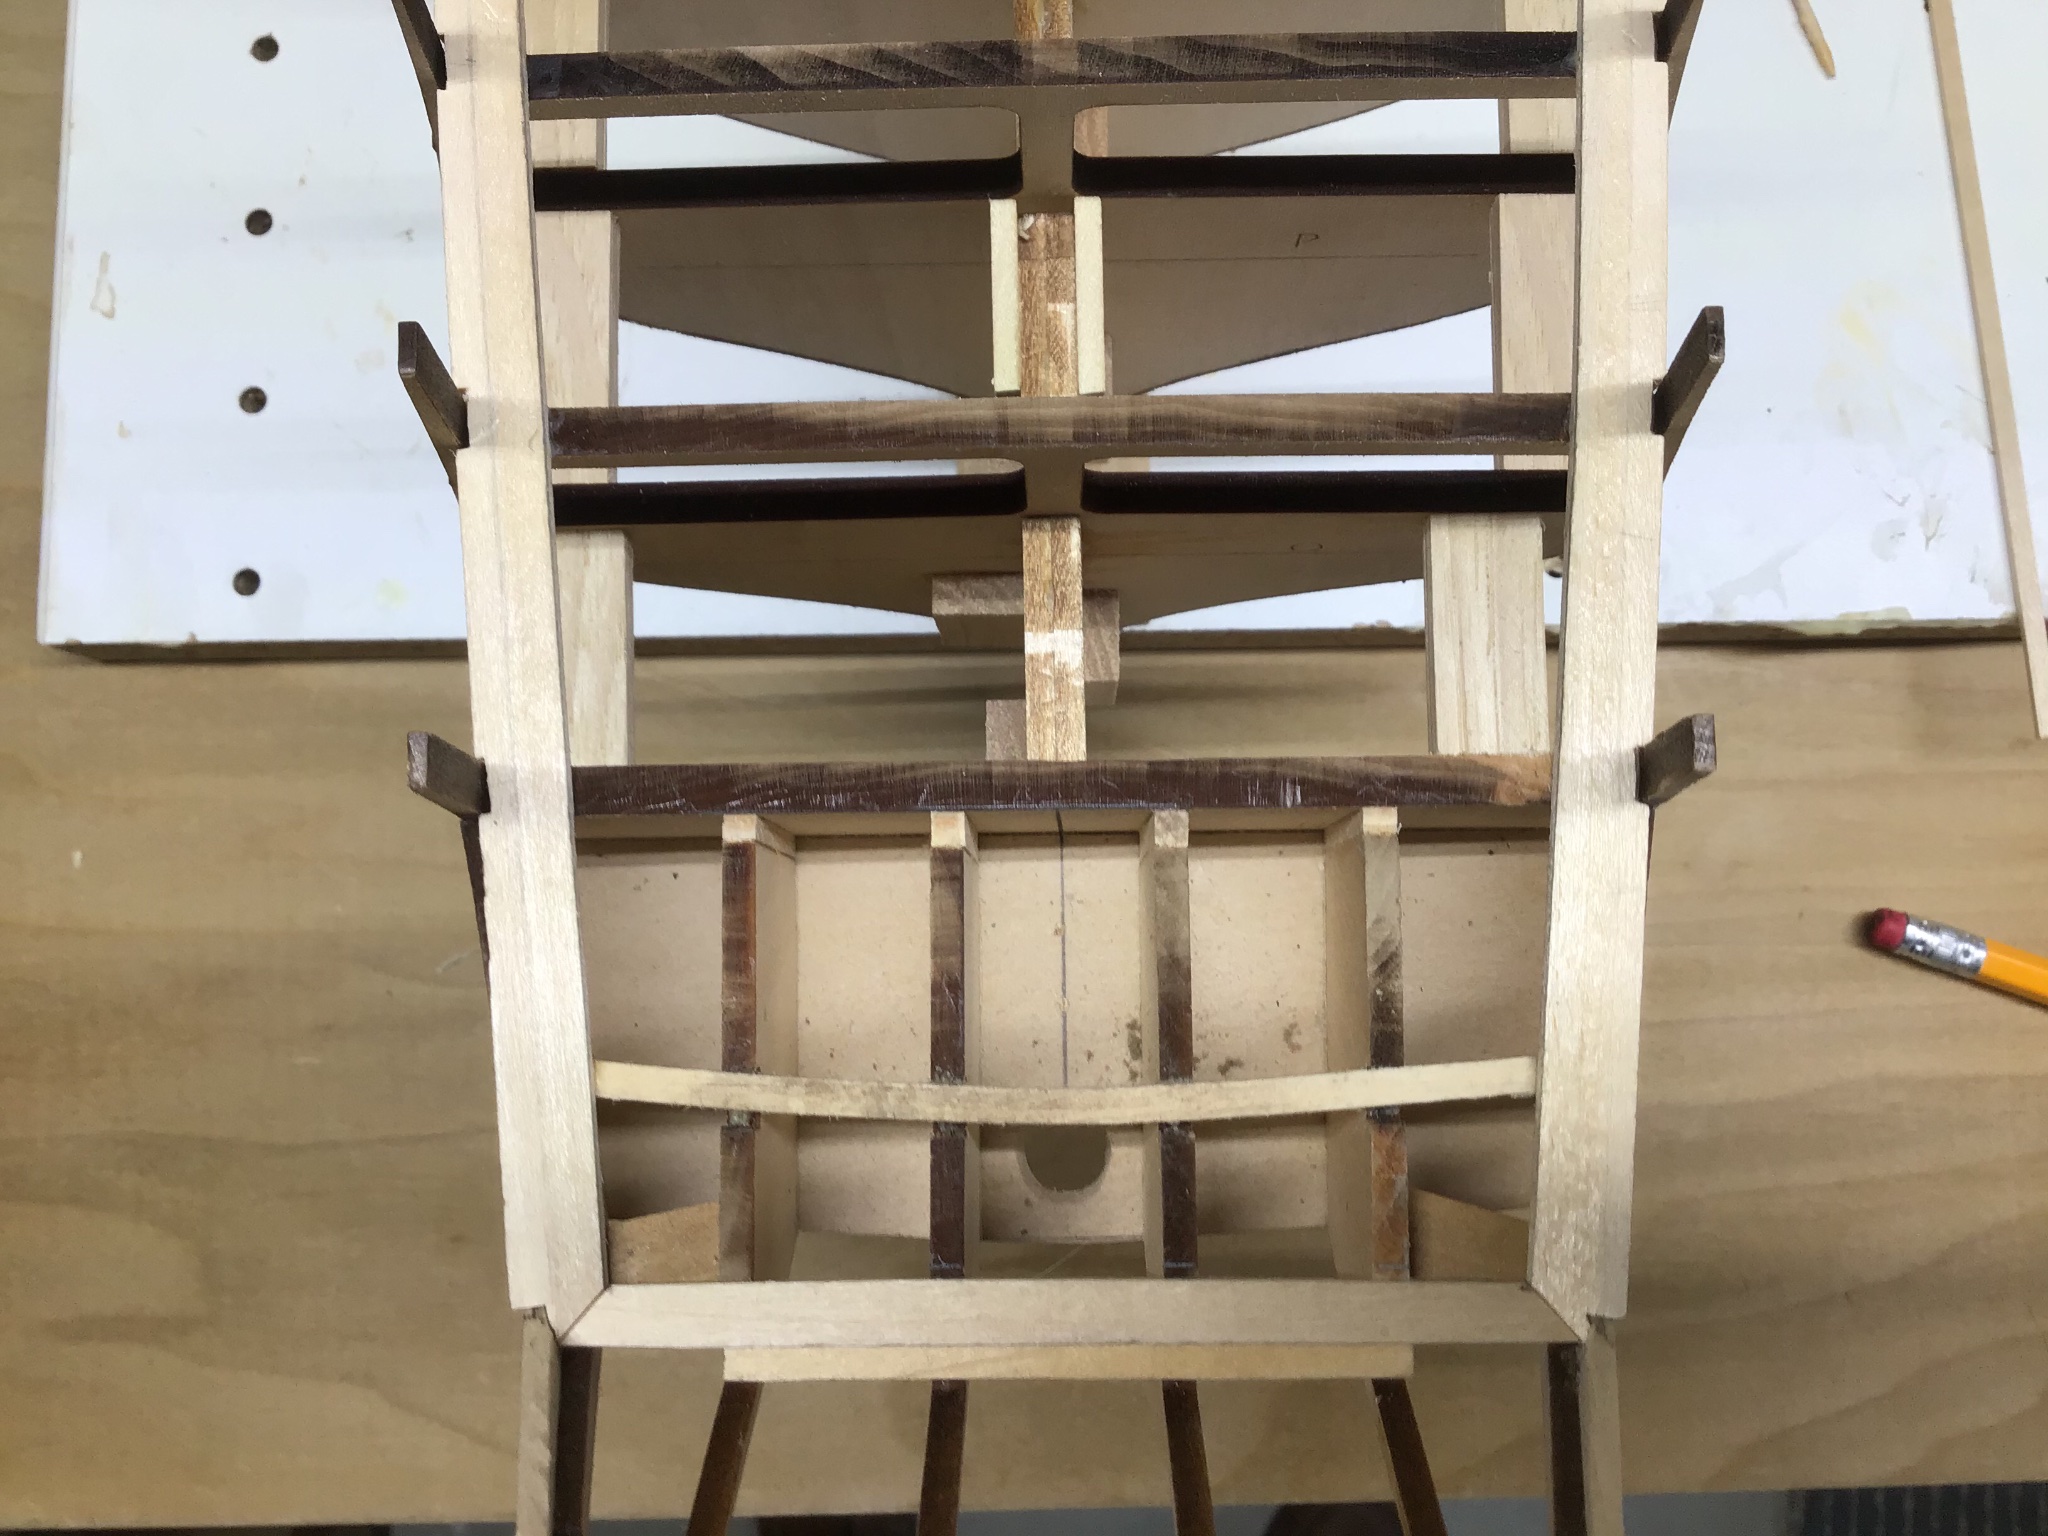
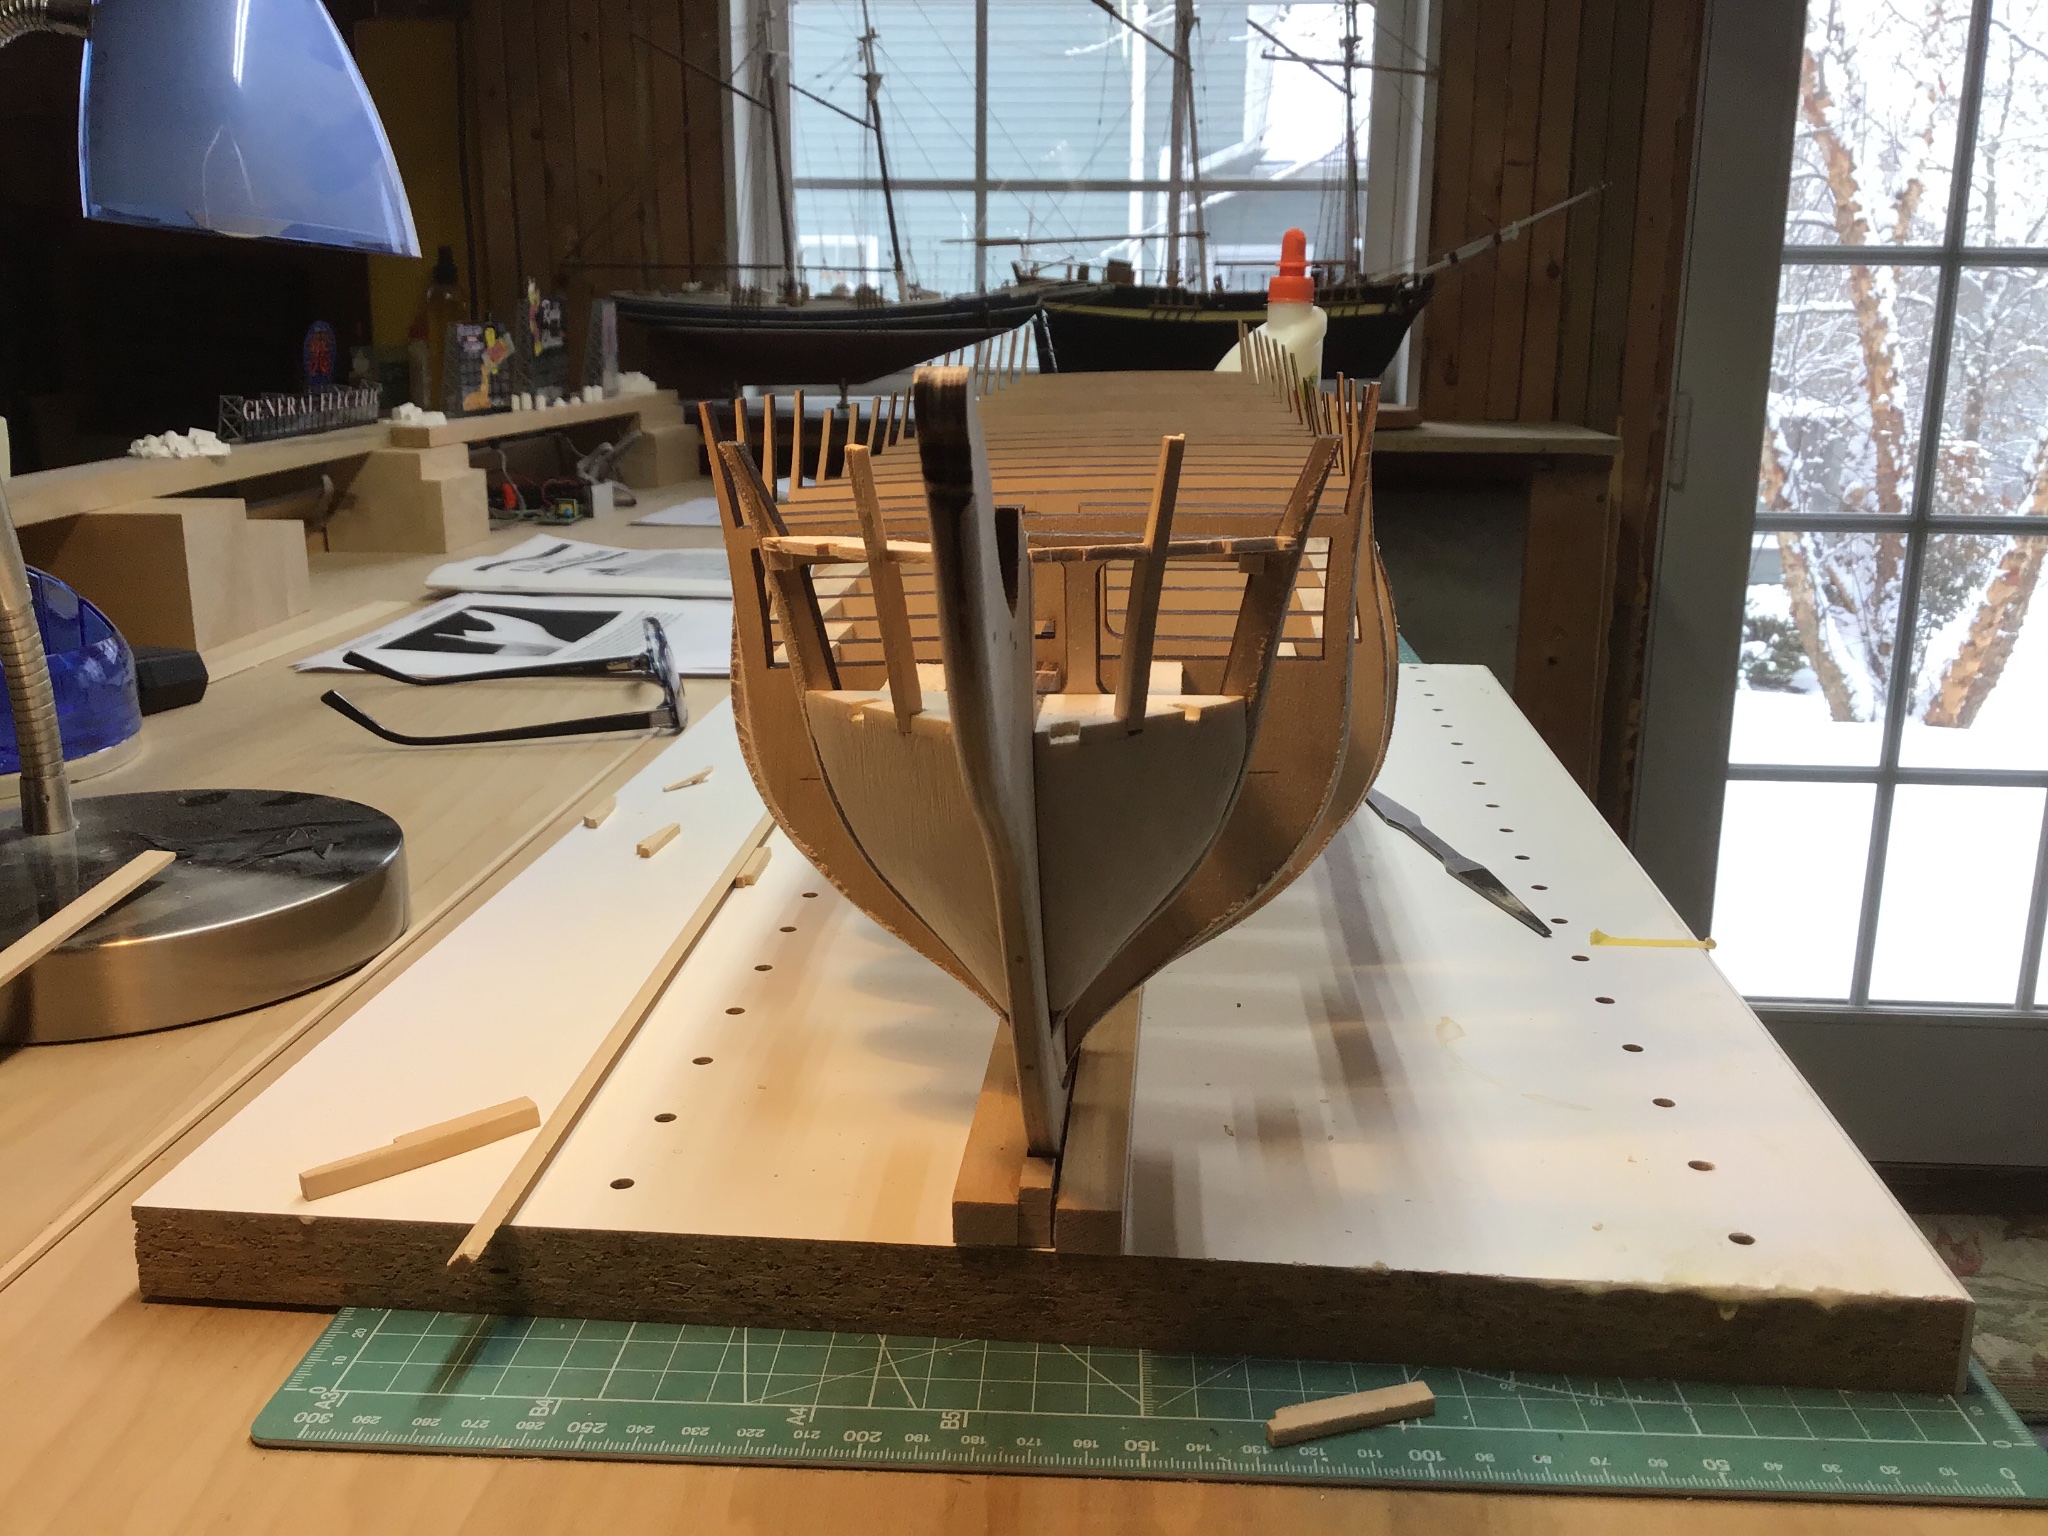
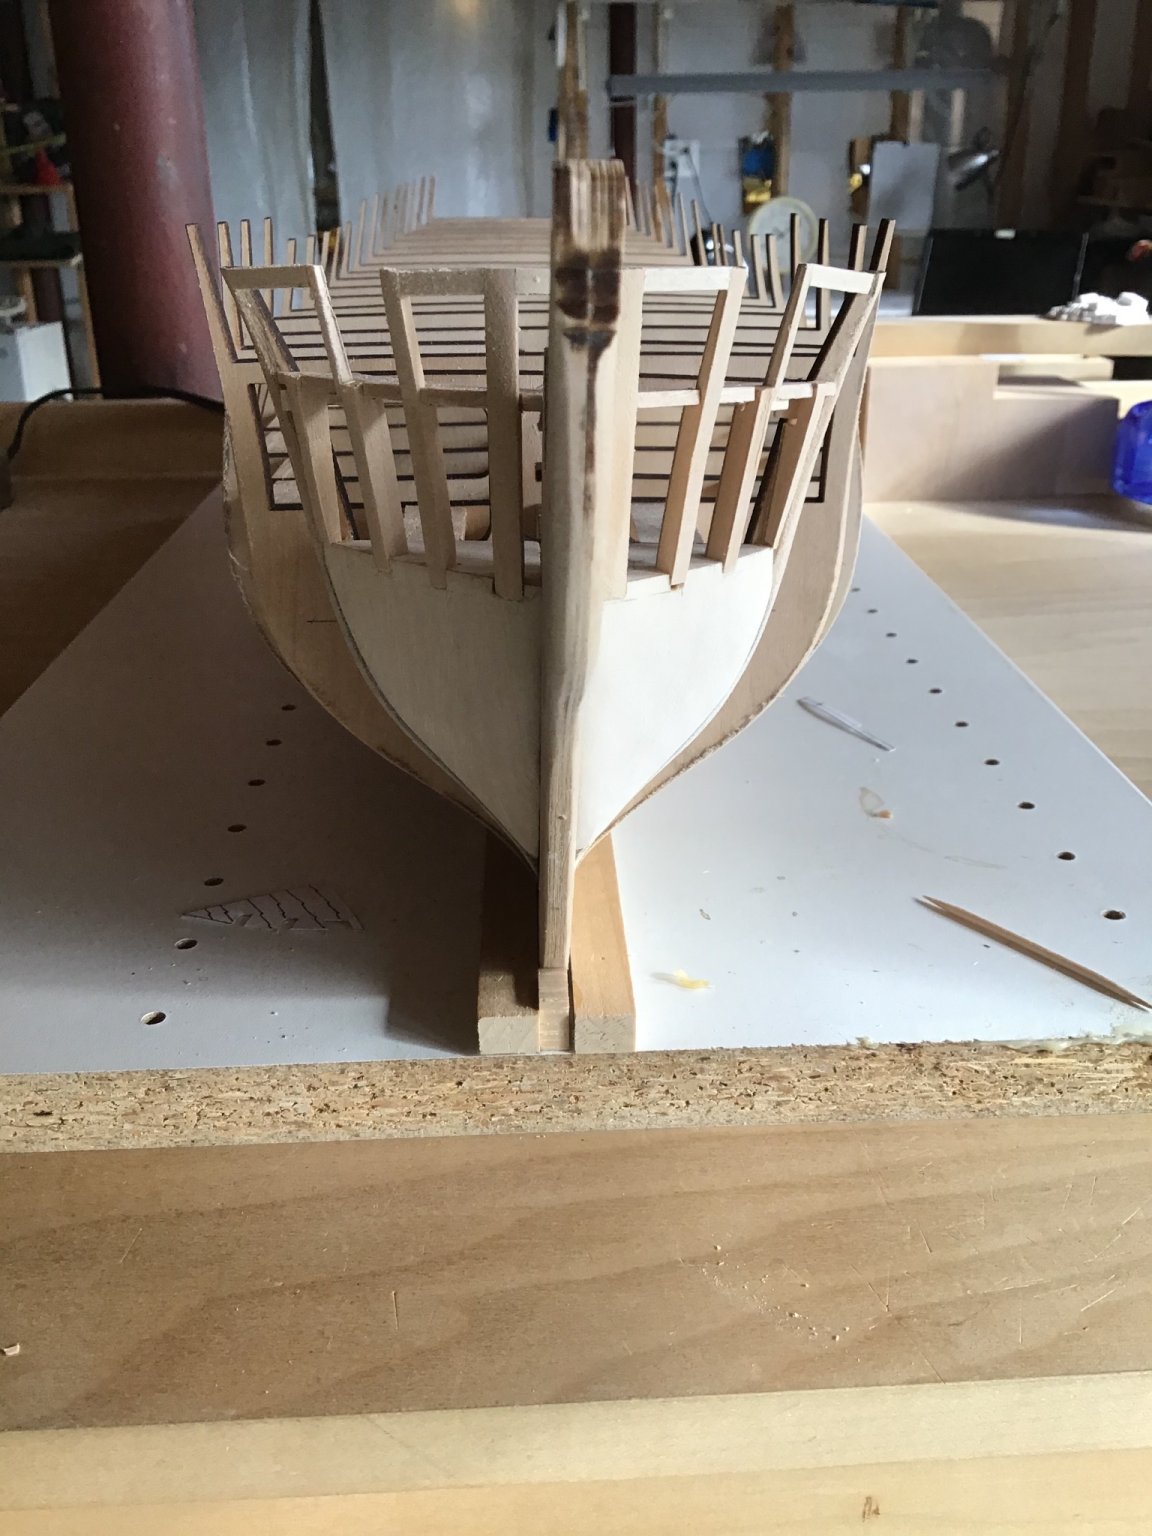
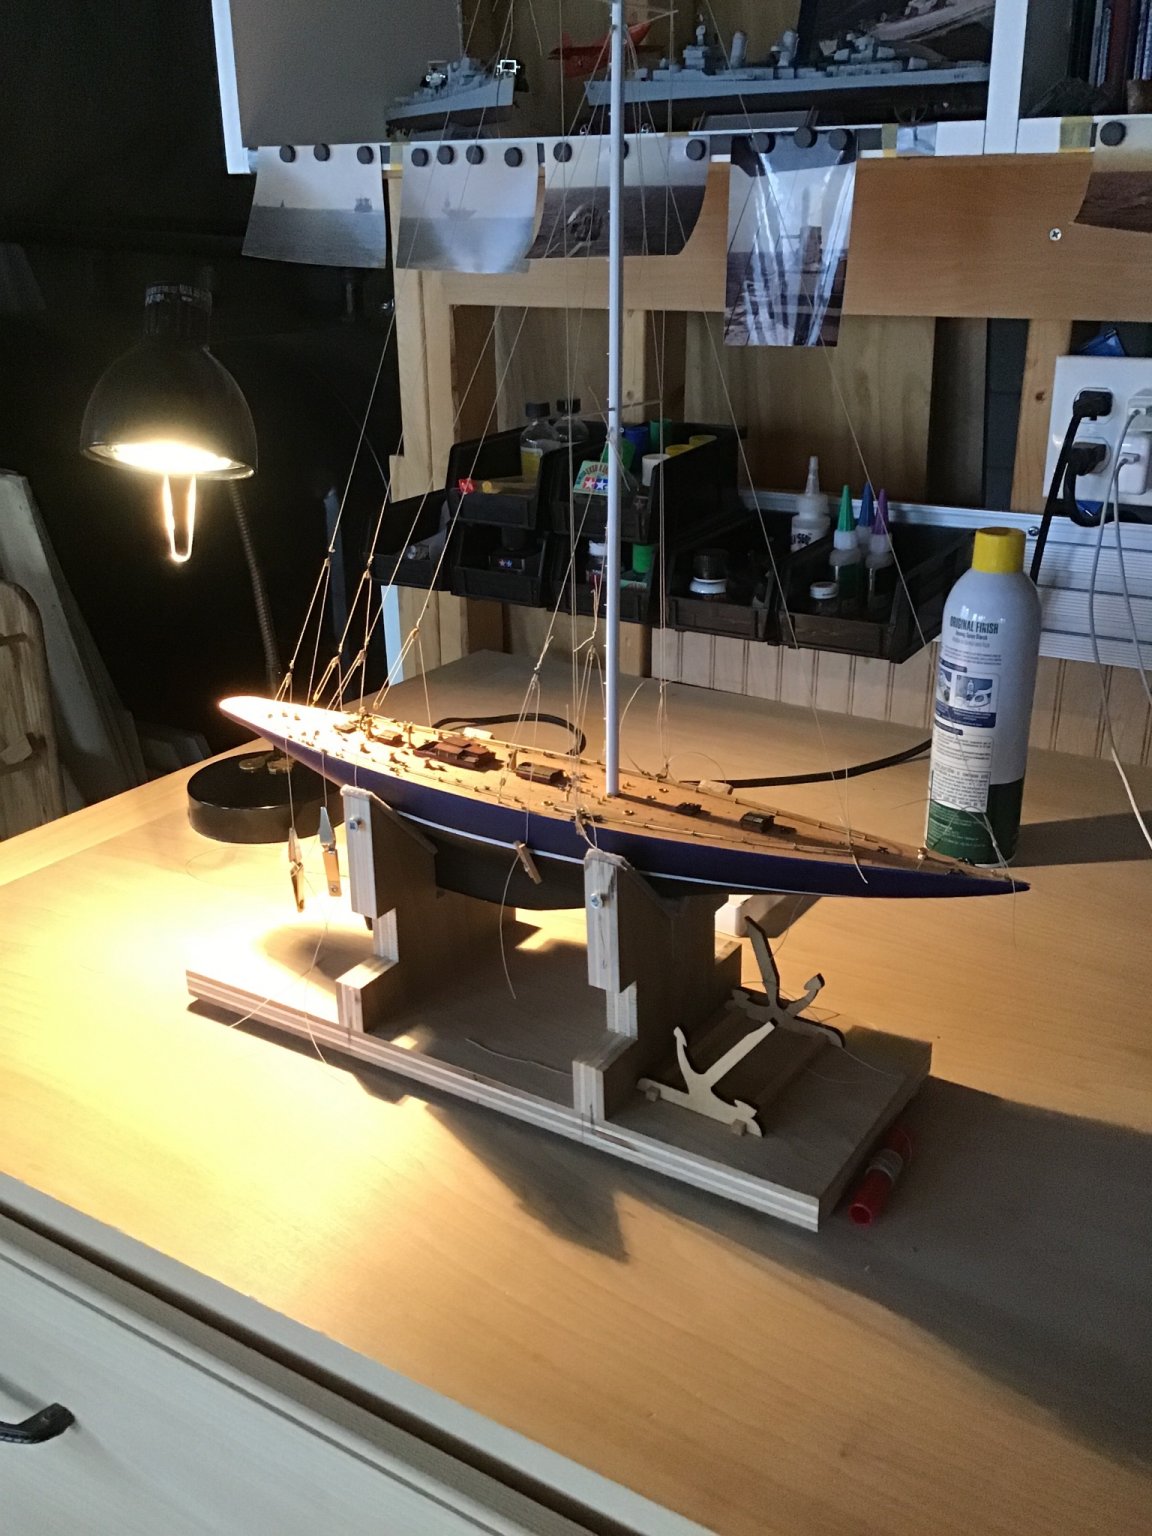
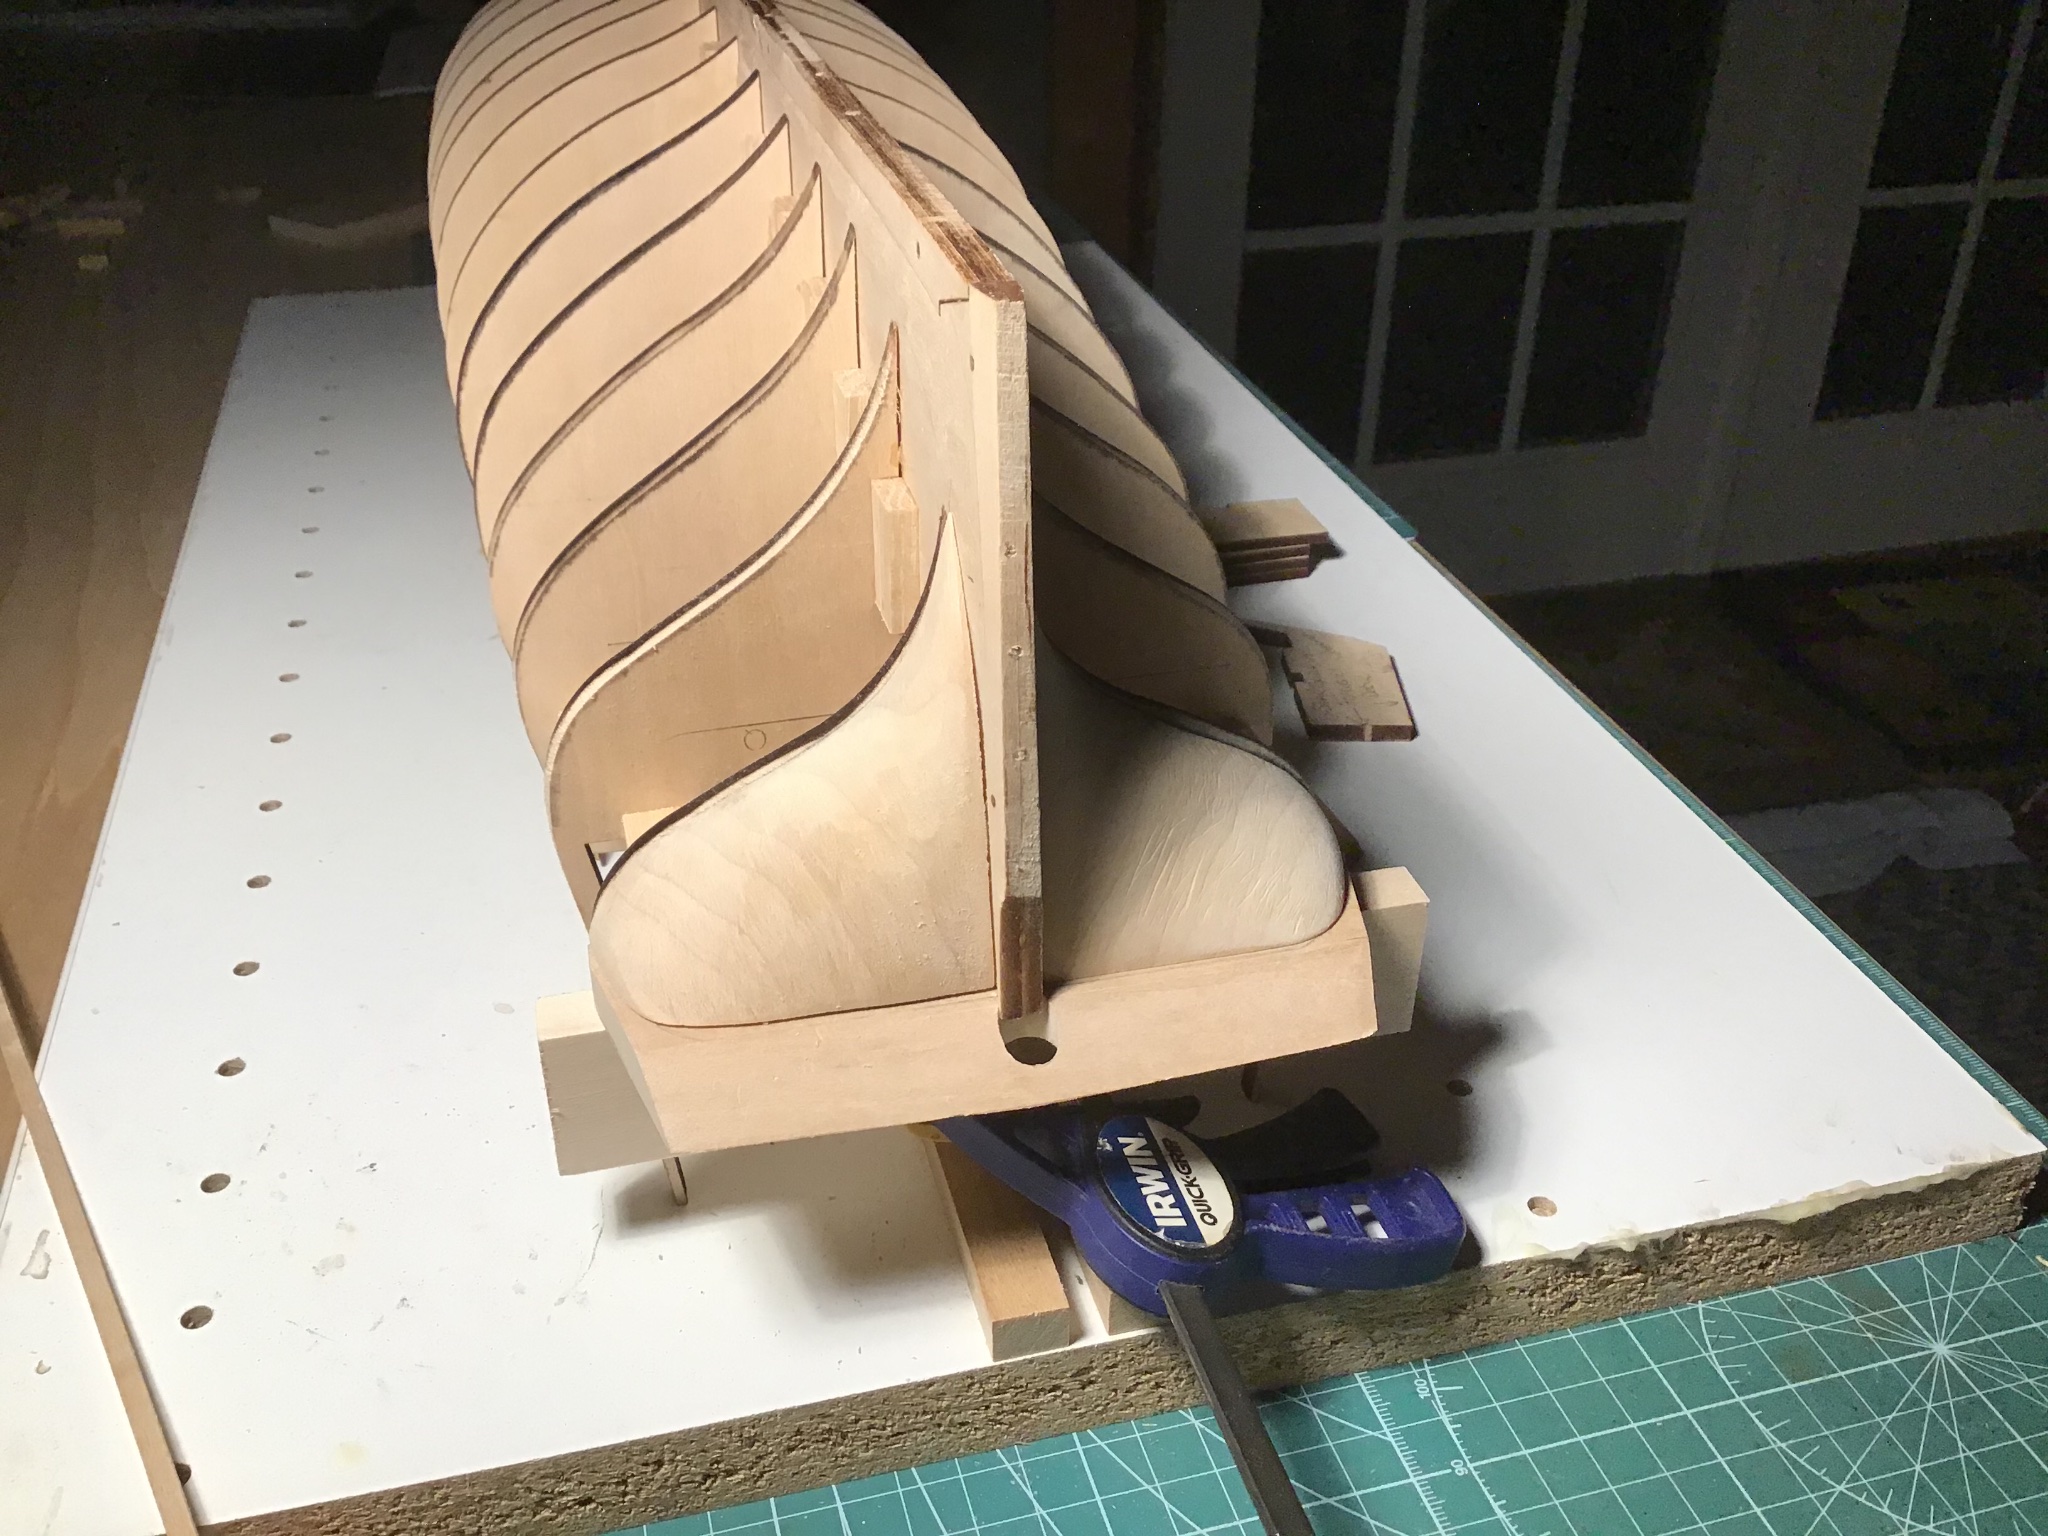
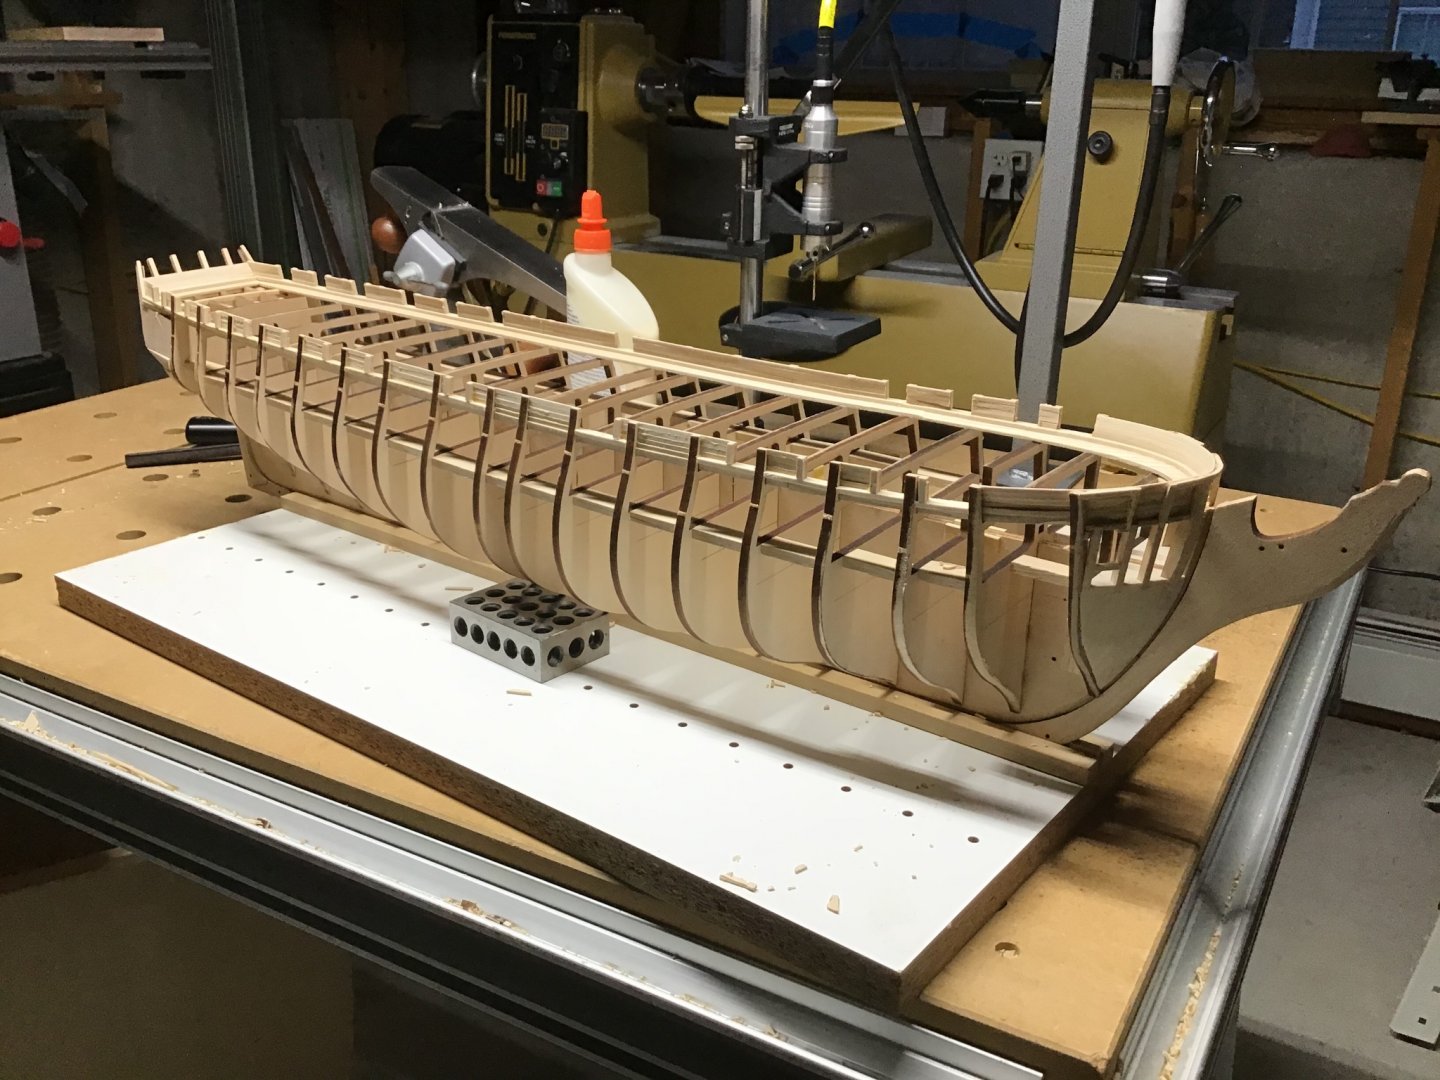
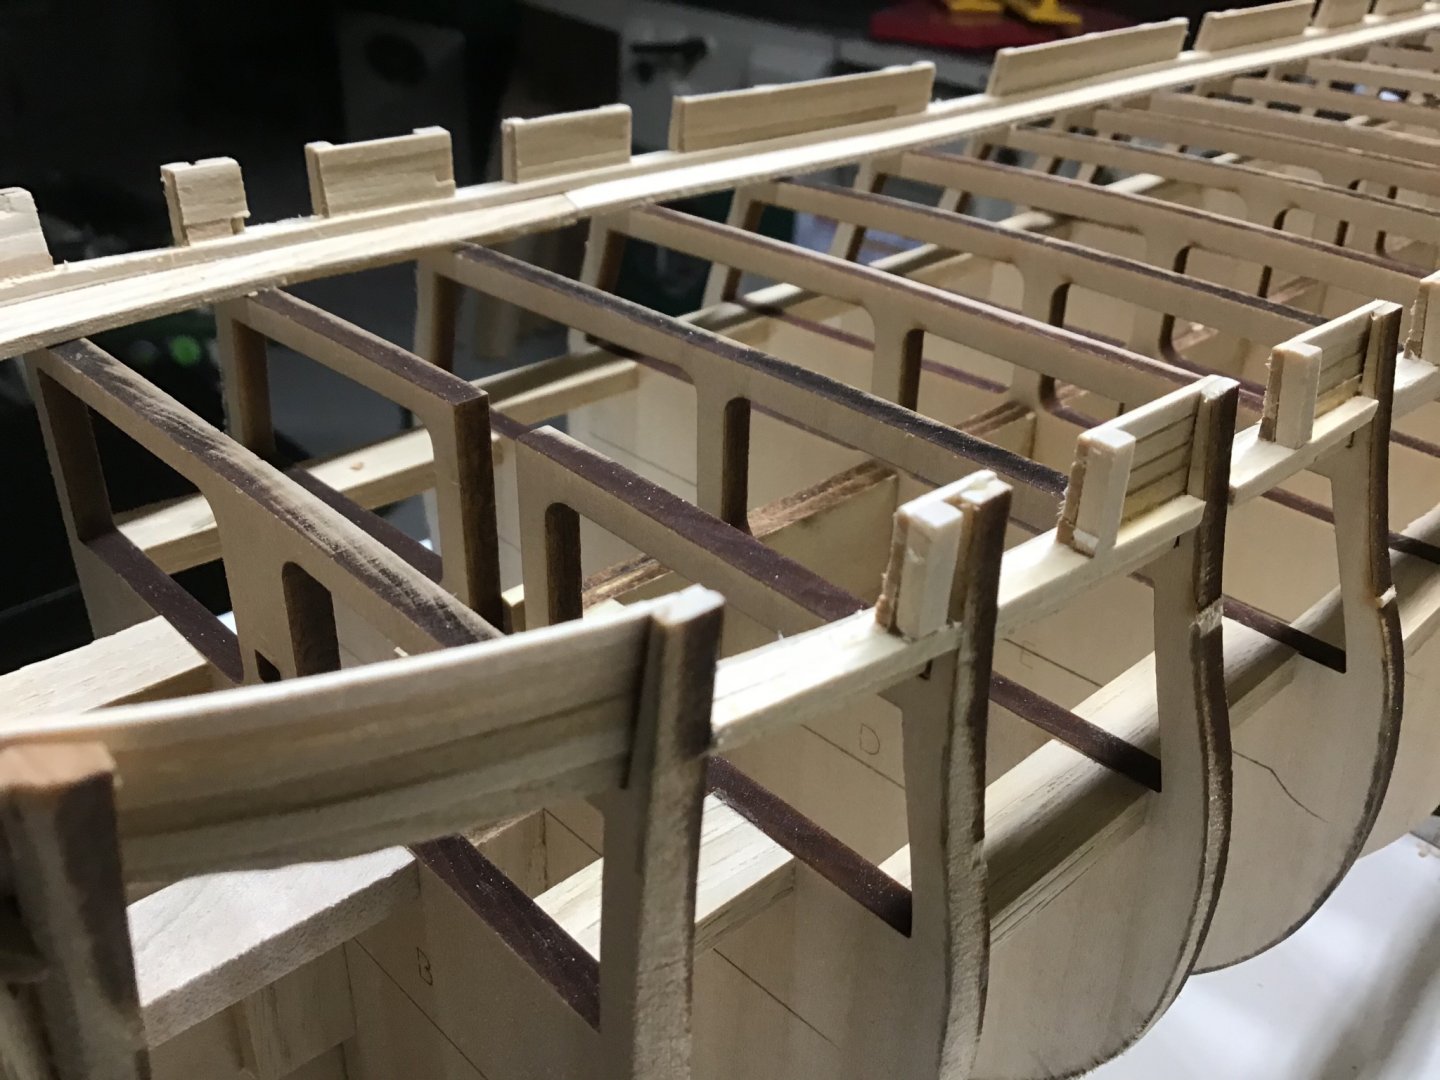
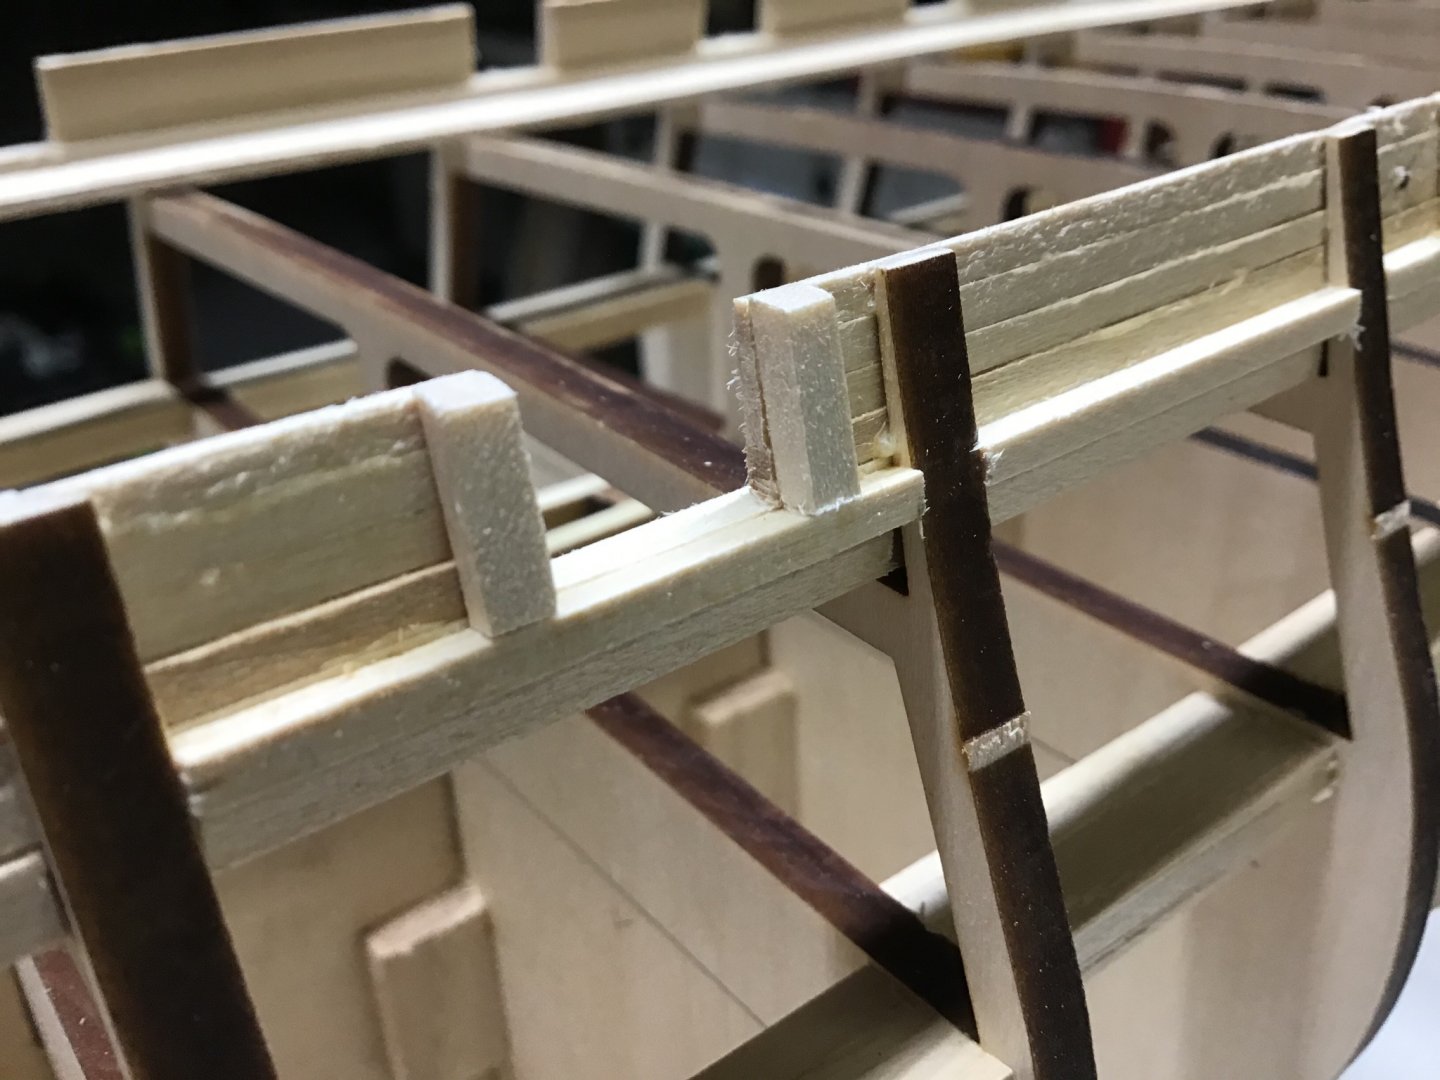
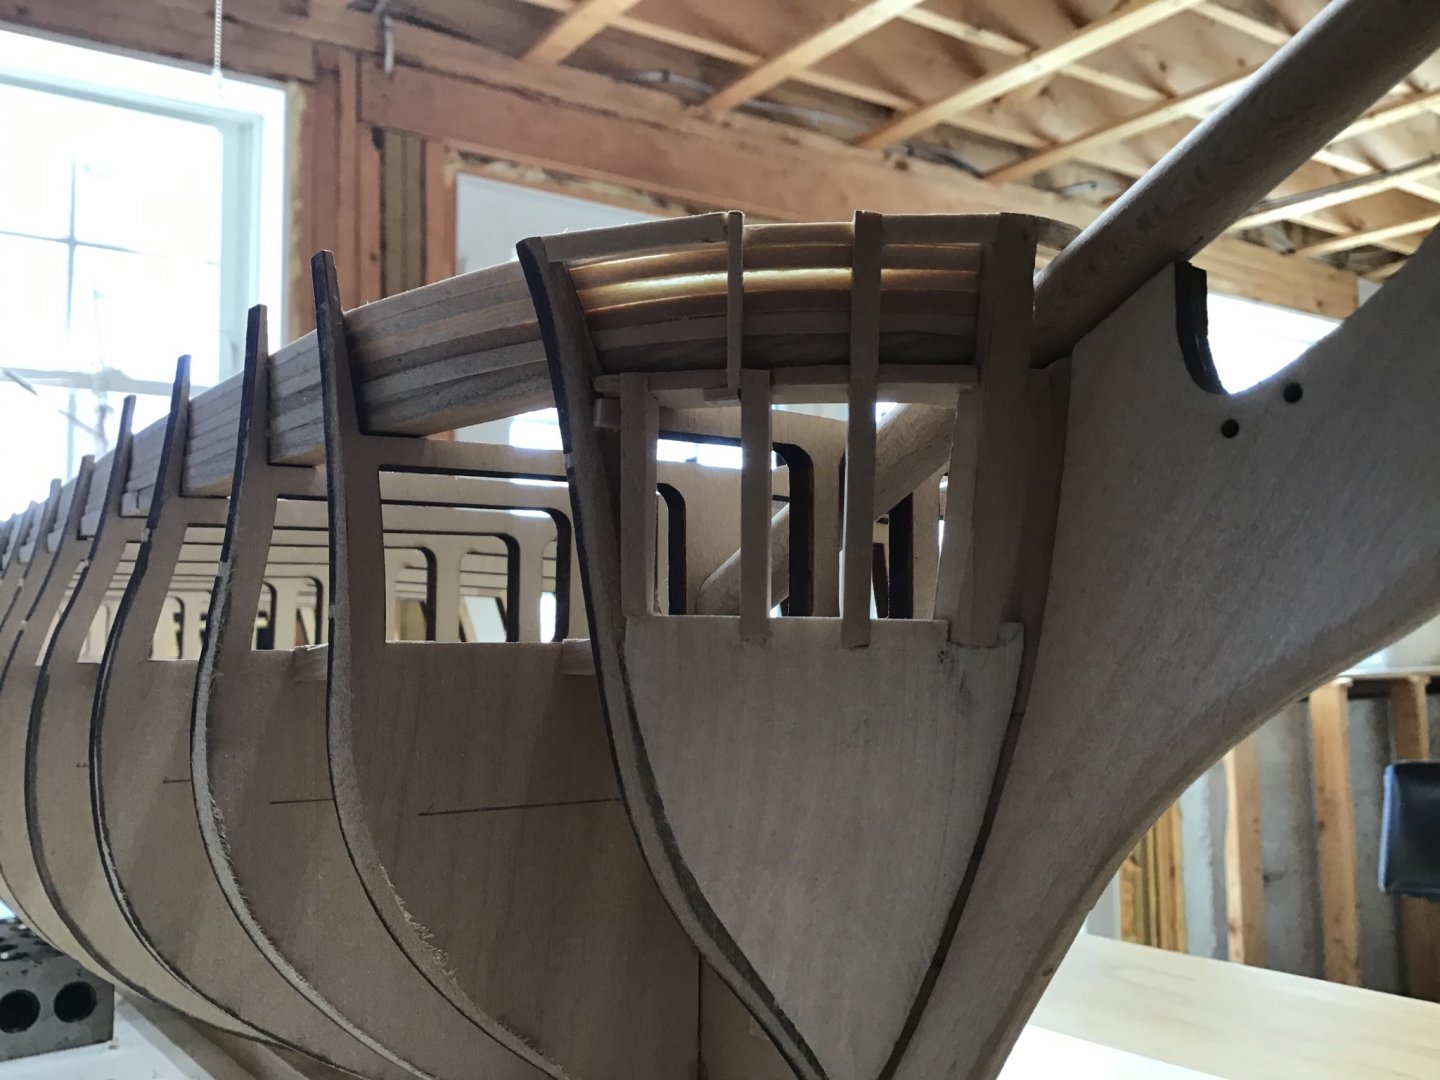
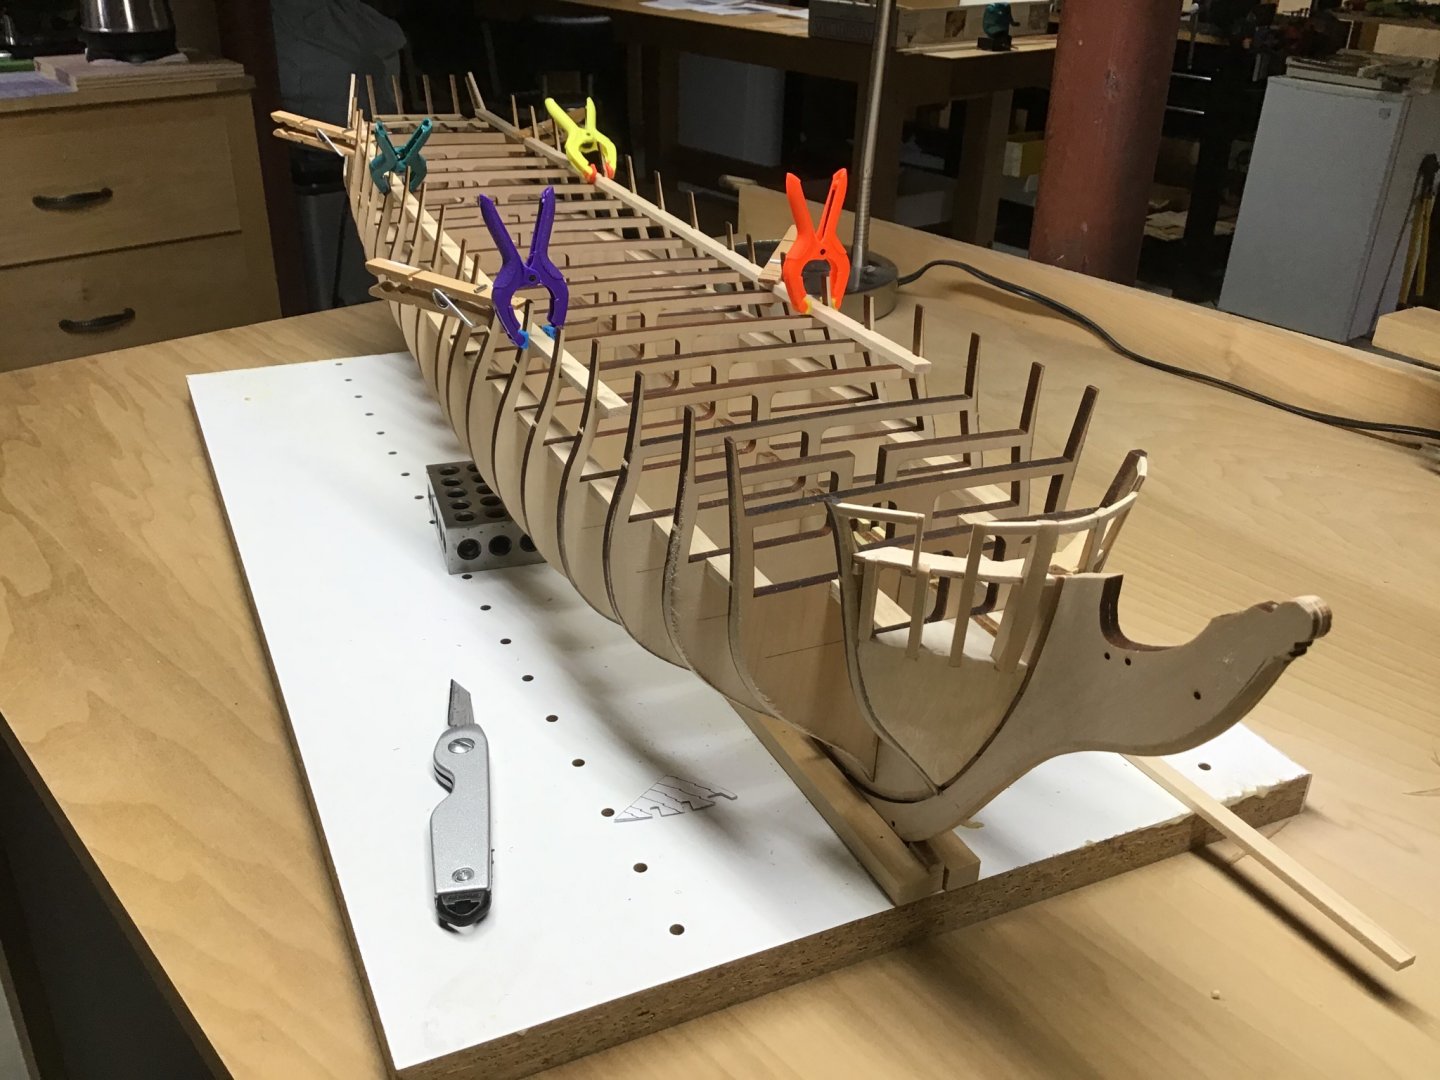
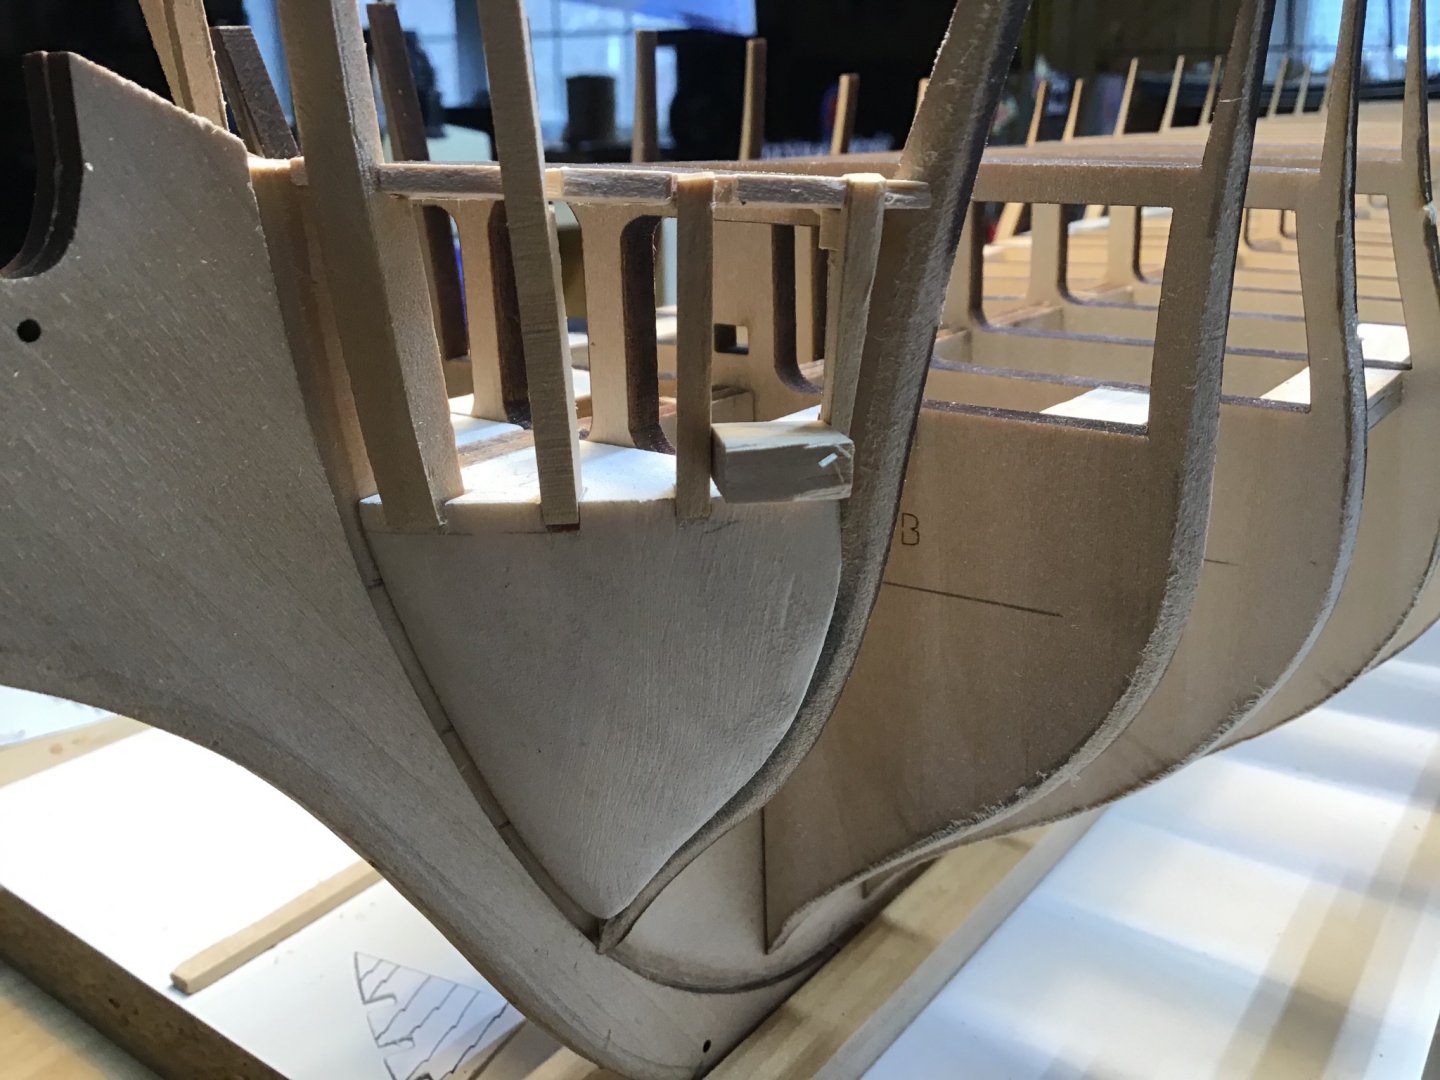
Inner Planksheer/Bulwarks and Bowsprit Prep 5 strakes are above the waterway, the planksheer and four inner bulwark. For the planksheer rounded off the upper inside edge, used butt joint joinery, and did not notch to fit 100% against the bulkhead extensions. Inner strakes consisted of planks spanning up to four bulkhead extensions with staggered butt joints. Tip: make sure inner bulkhead extensions are flat. Reused the cedar template as a moulding for steam bending to shape the bow planks. Planks “stair stepped” around the bow, and were sanded smooth with Amati sanding sticks. Used plastic wood, pressed in from the outside to fill gaps. Added strips, padded, to inboard face of stern transom extension to reduce the inner curvature. Stern bulwarks turned out ok, at this point there is a step at the planksheer level, it should be a bevel between the waterway and the lowest bulwark plank. Will probably leave as is. Bowsprit was cut to fit the notch in bulkhead B. Bulwarks consist of inner and outer planks, with framing pieces in between for the gun port sills and sides. Next is installing the framing and the outer bulwark planking.


-
Nice look and feel....
-
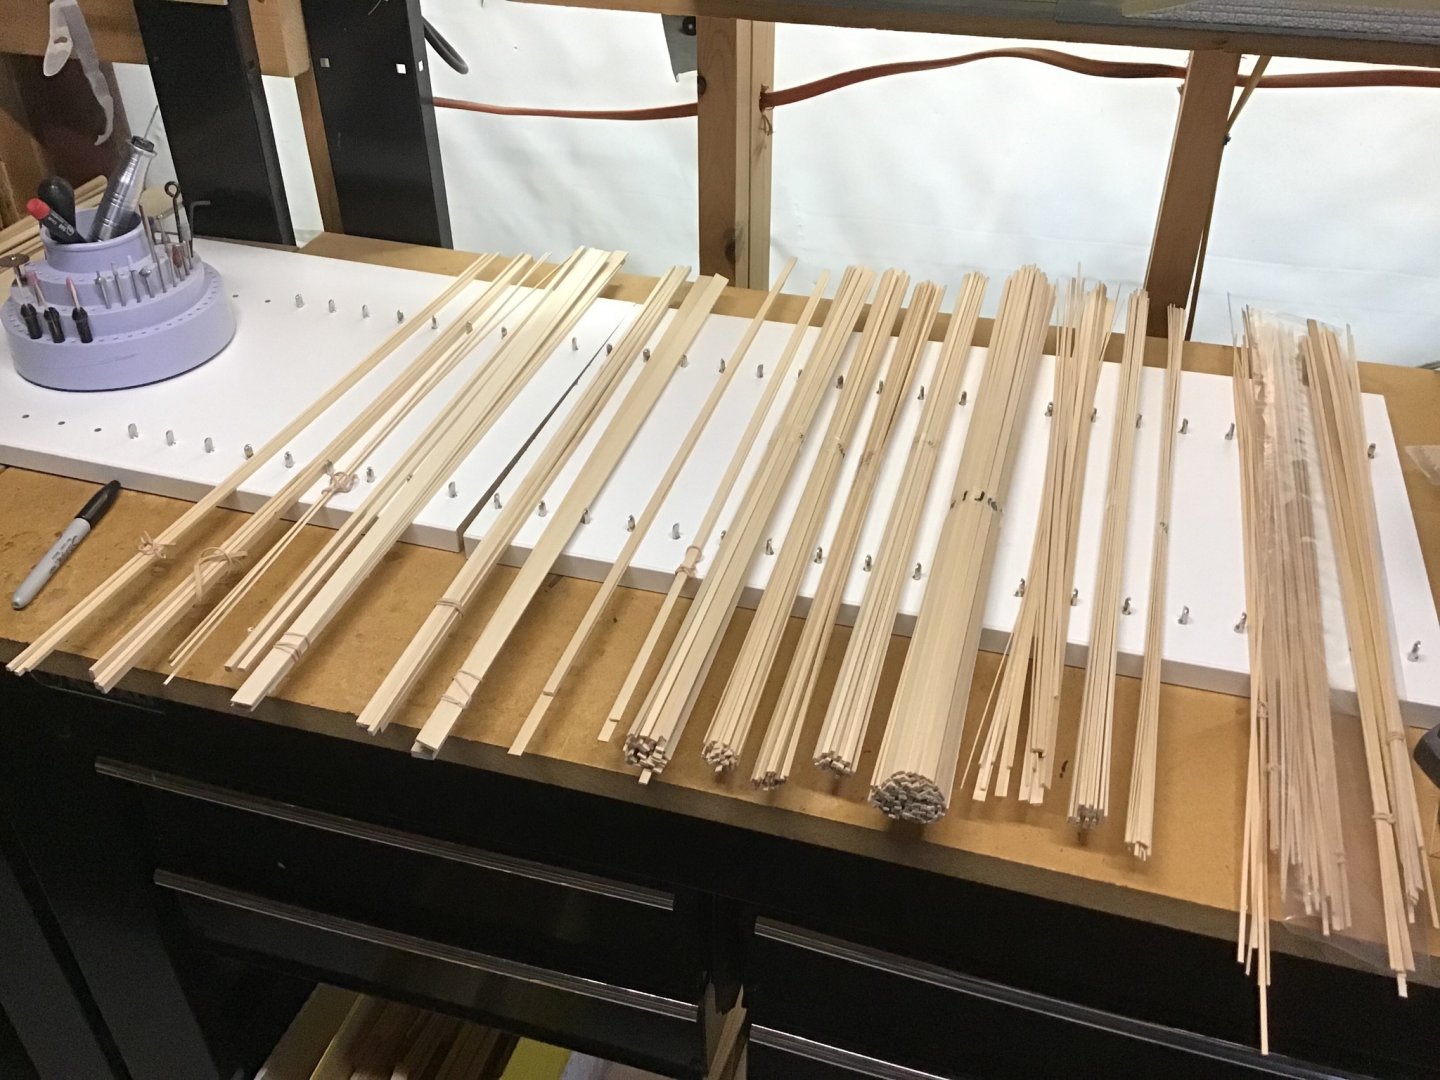
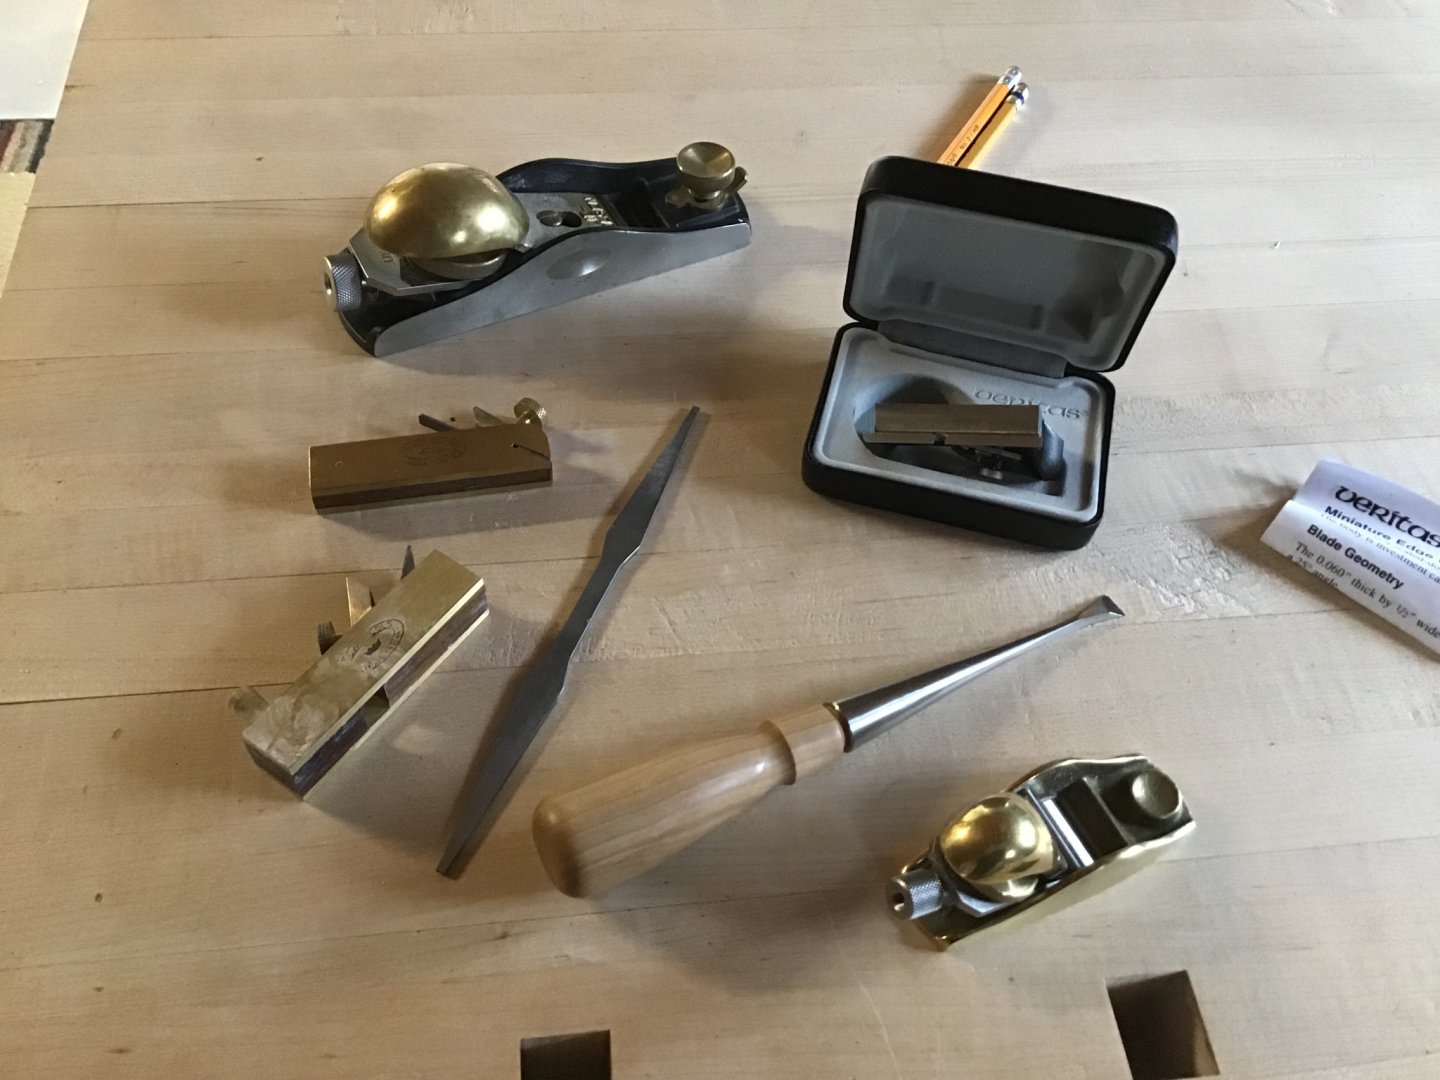
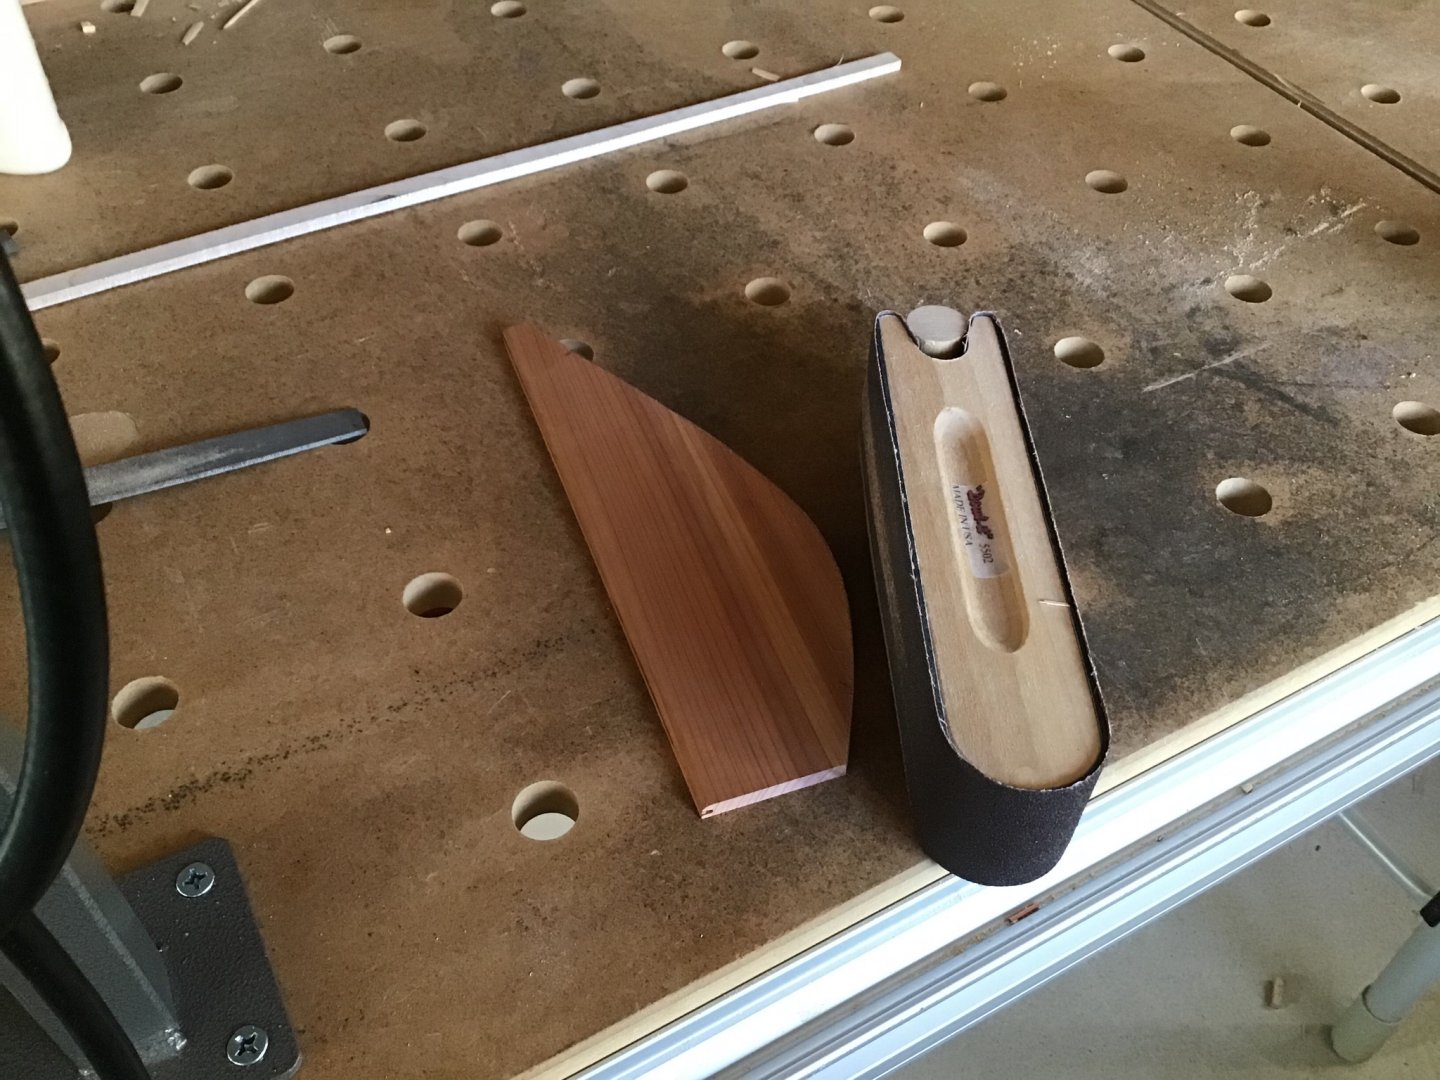
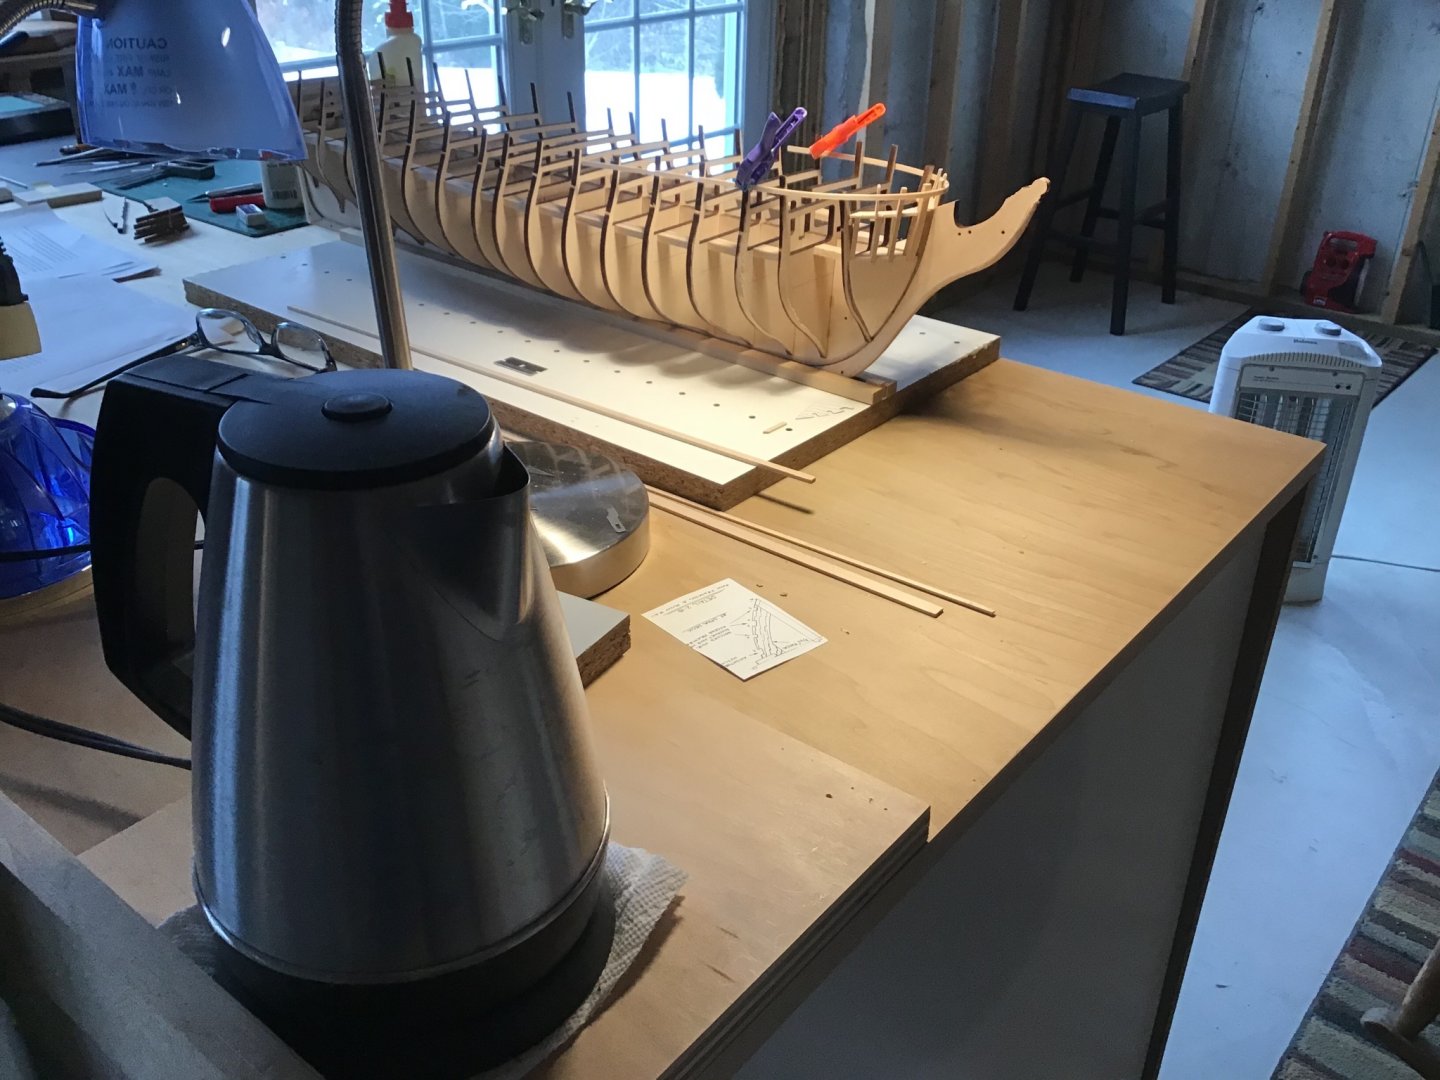
Tools Using a laminate board and shelf pins as a rack to sort the lumber. Some of the hand tools used so far.... Top left, block plane from Lie Nielson. Left middle and bottom bullnose and mini plane by Crown. Edge plane, in the box, by Veritas. Pattern makers file, with safe edges by Lie Nielson. Fishtail chisel and Violin makers plane by Lie Nielson.
-
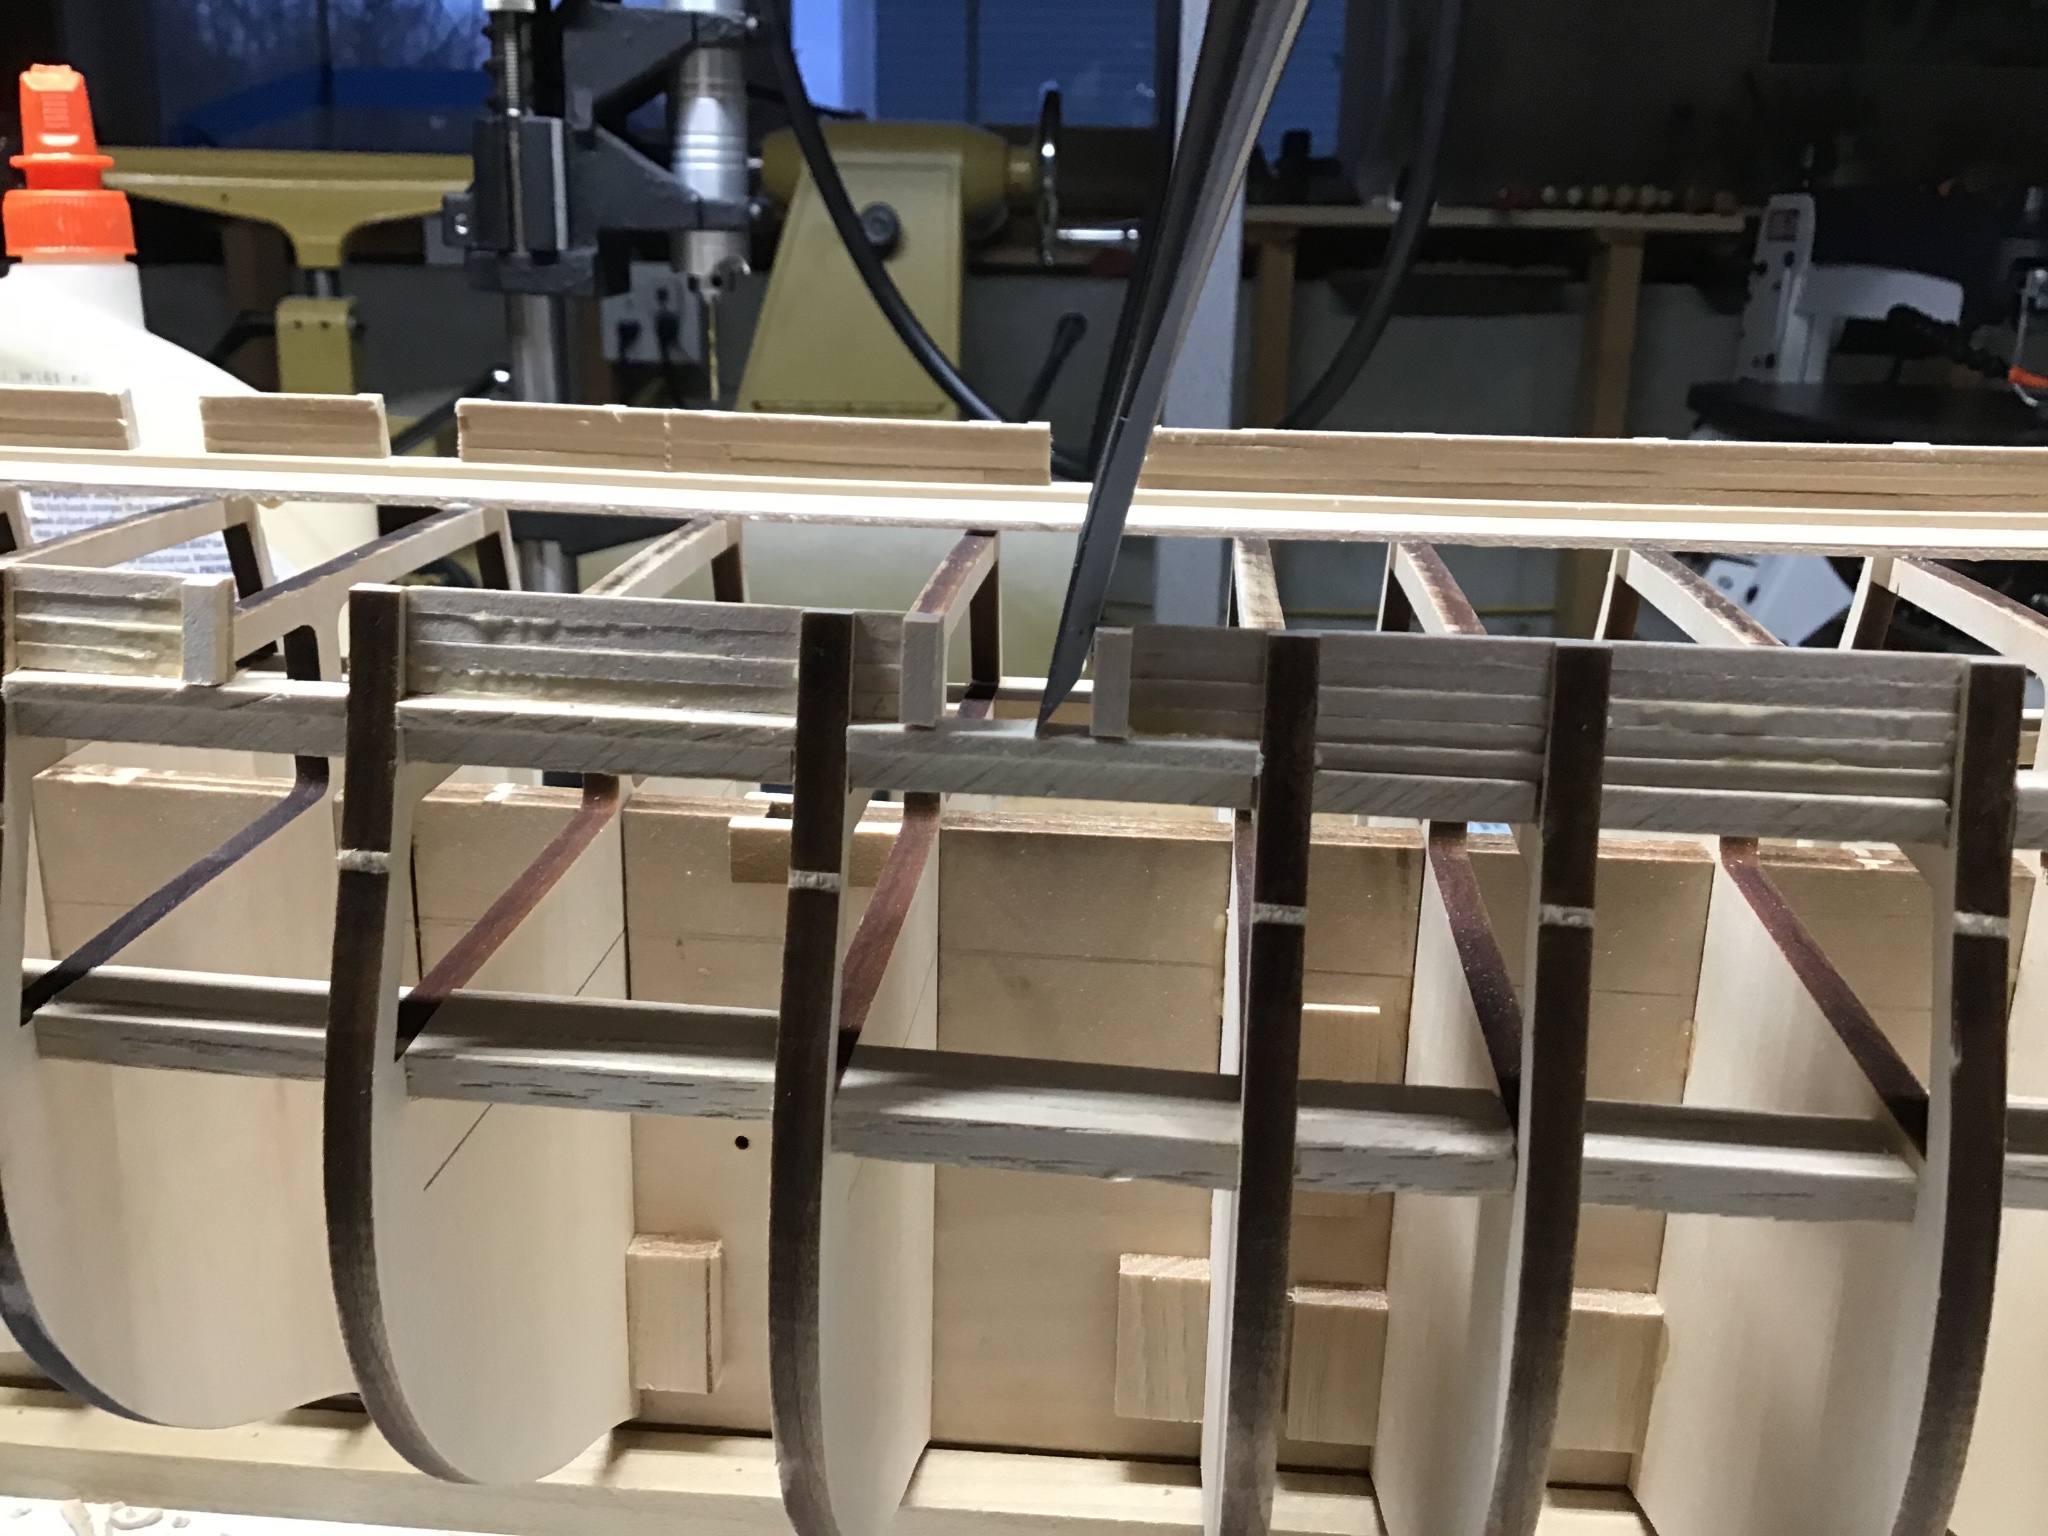
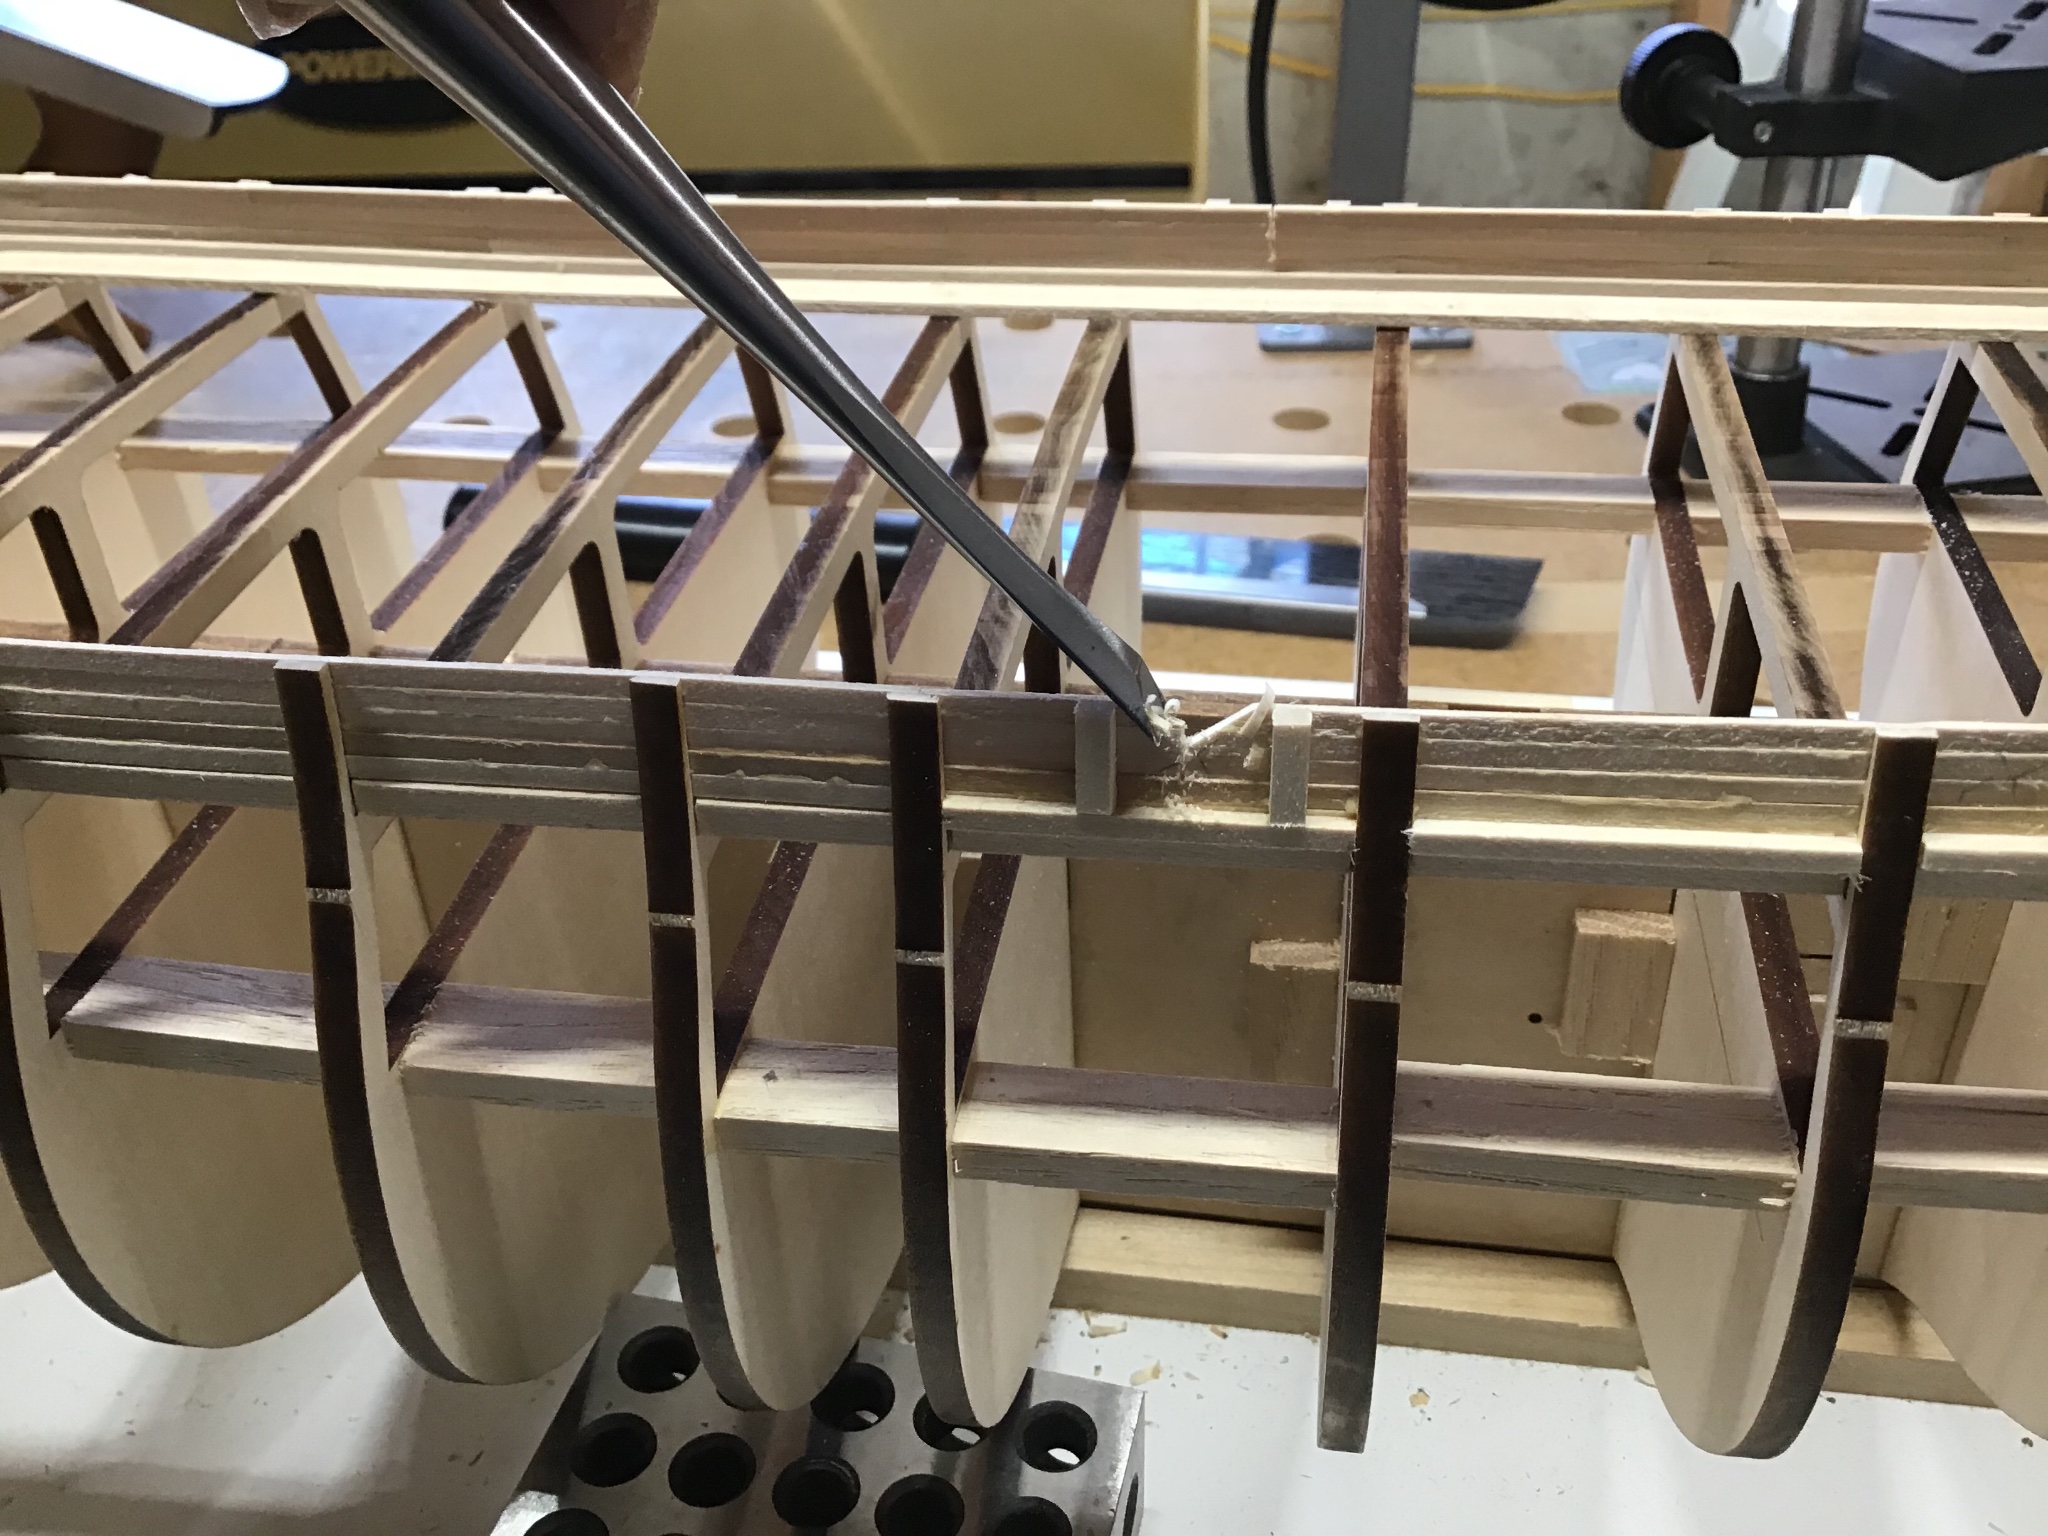
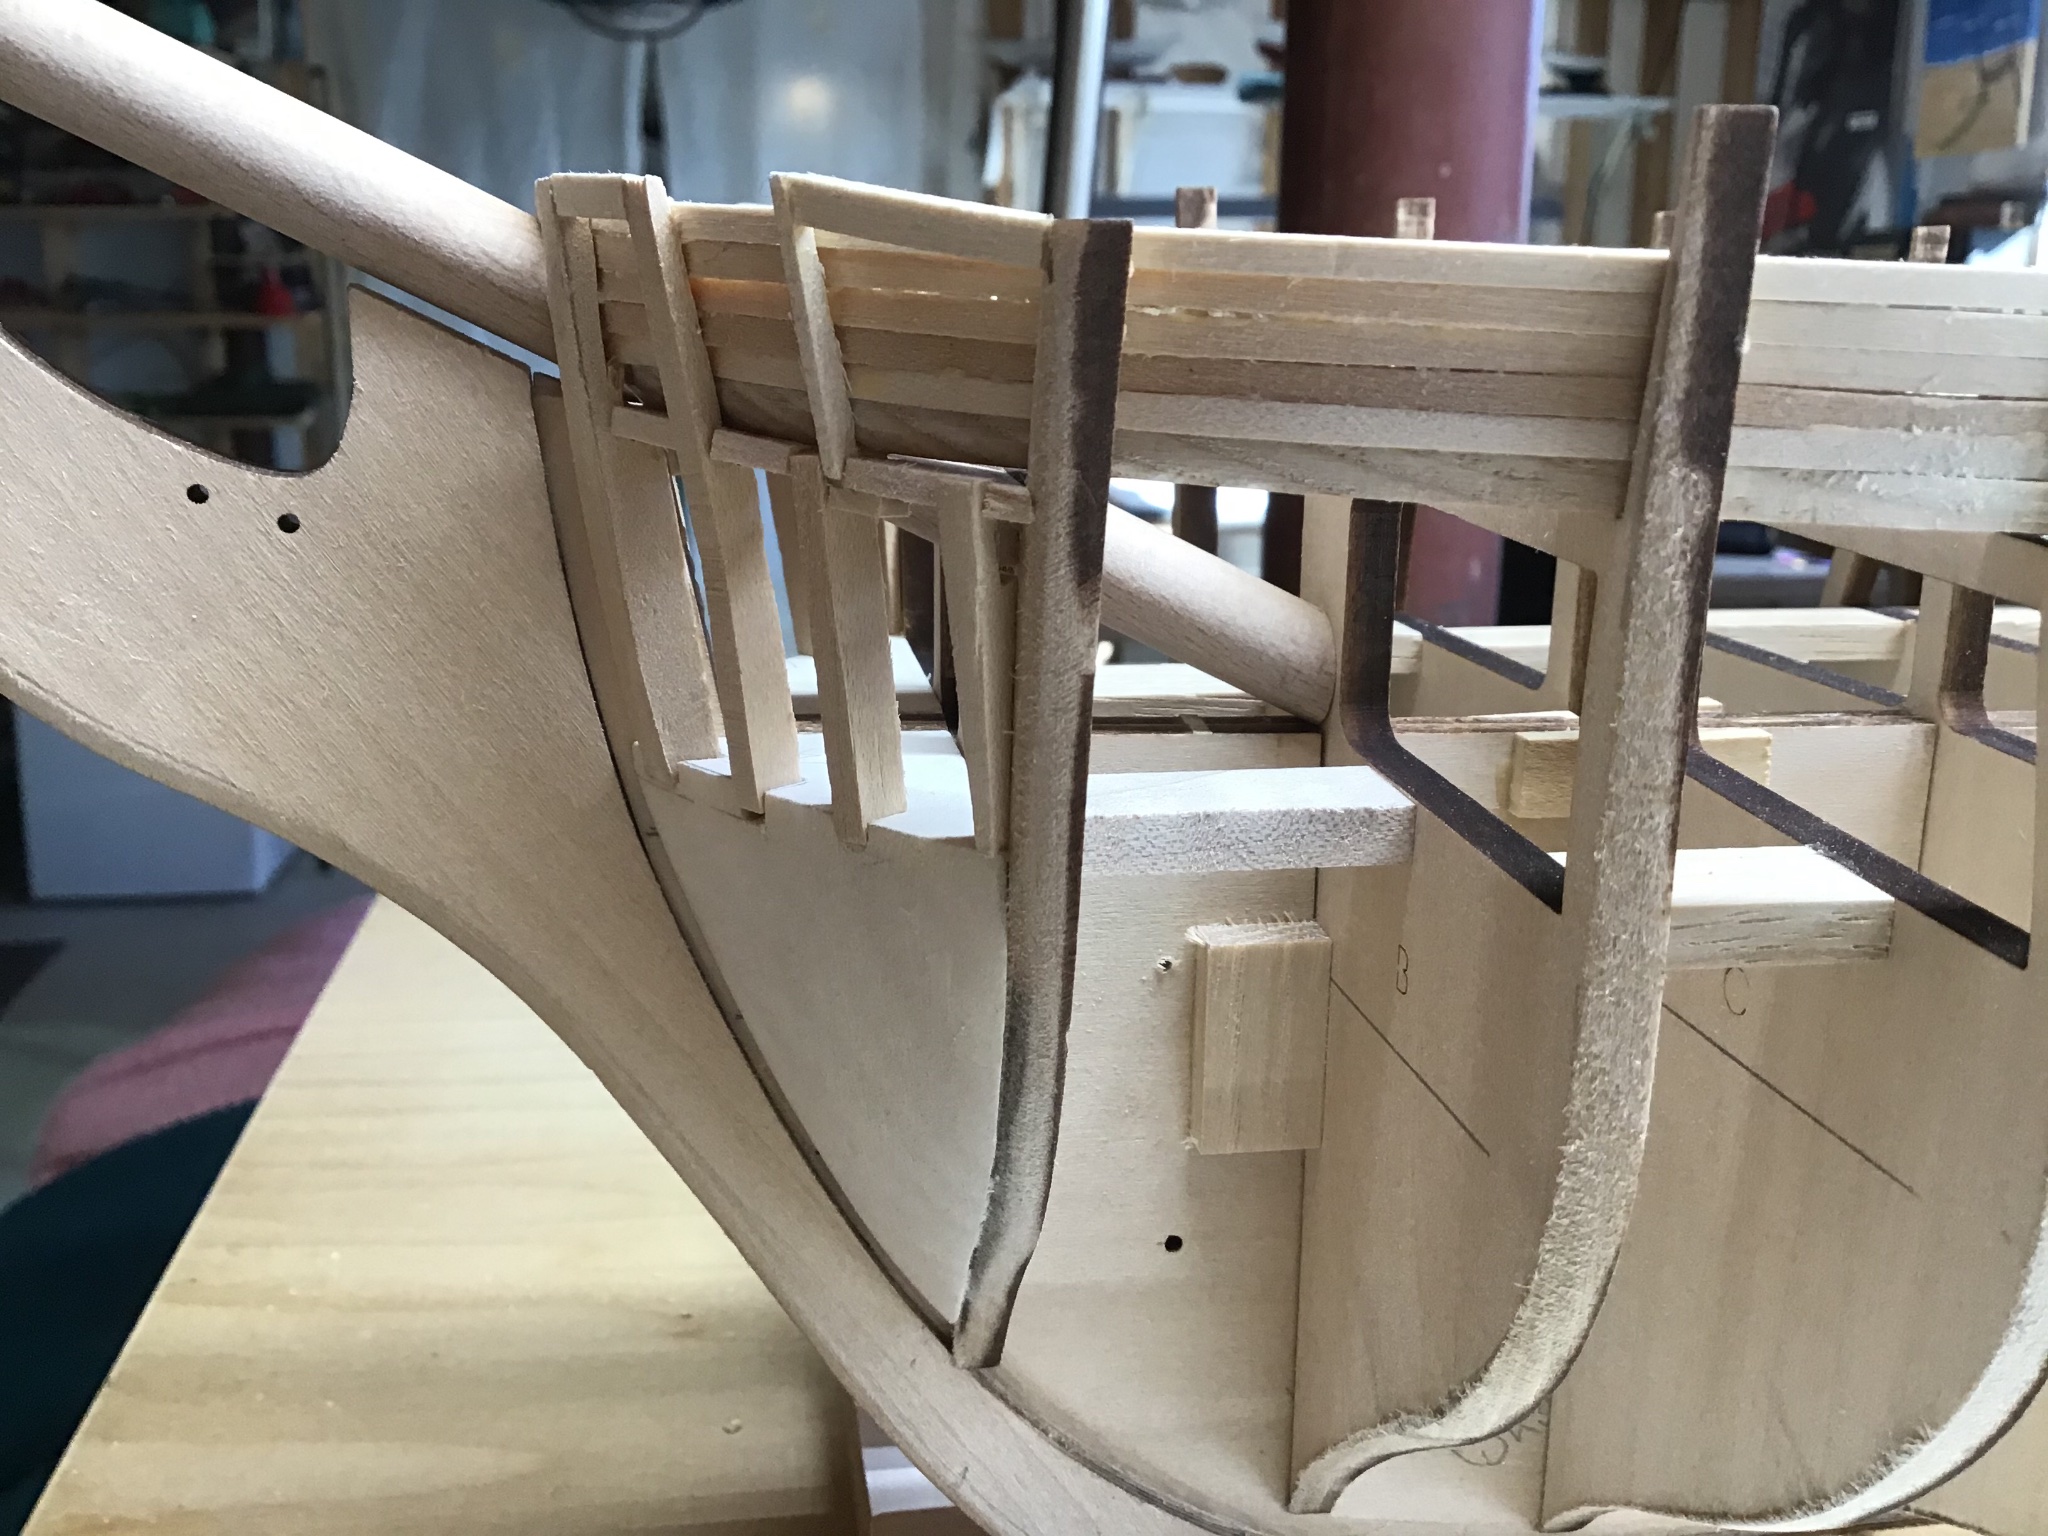
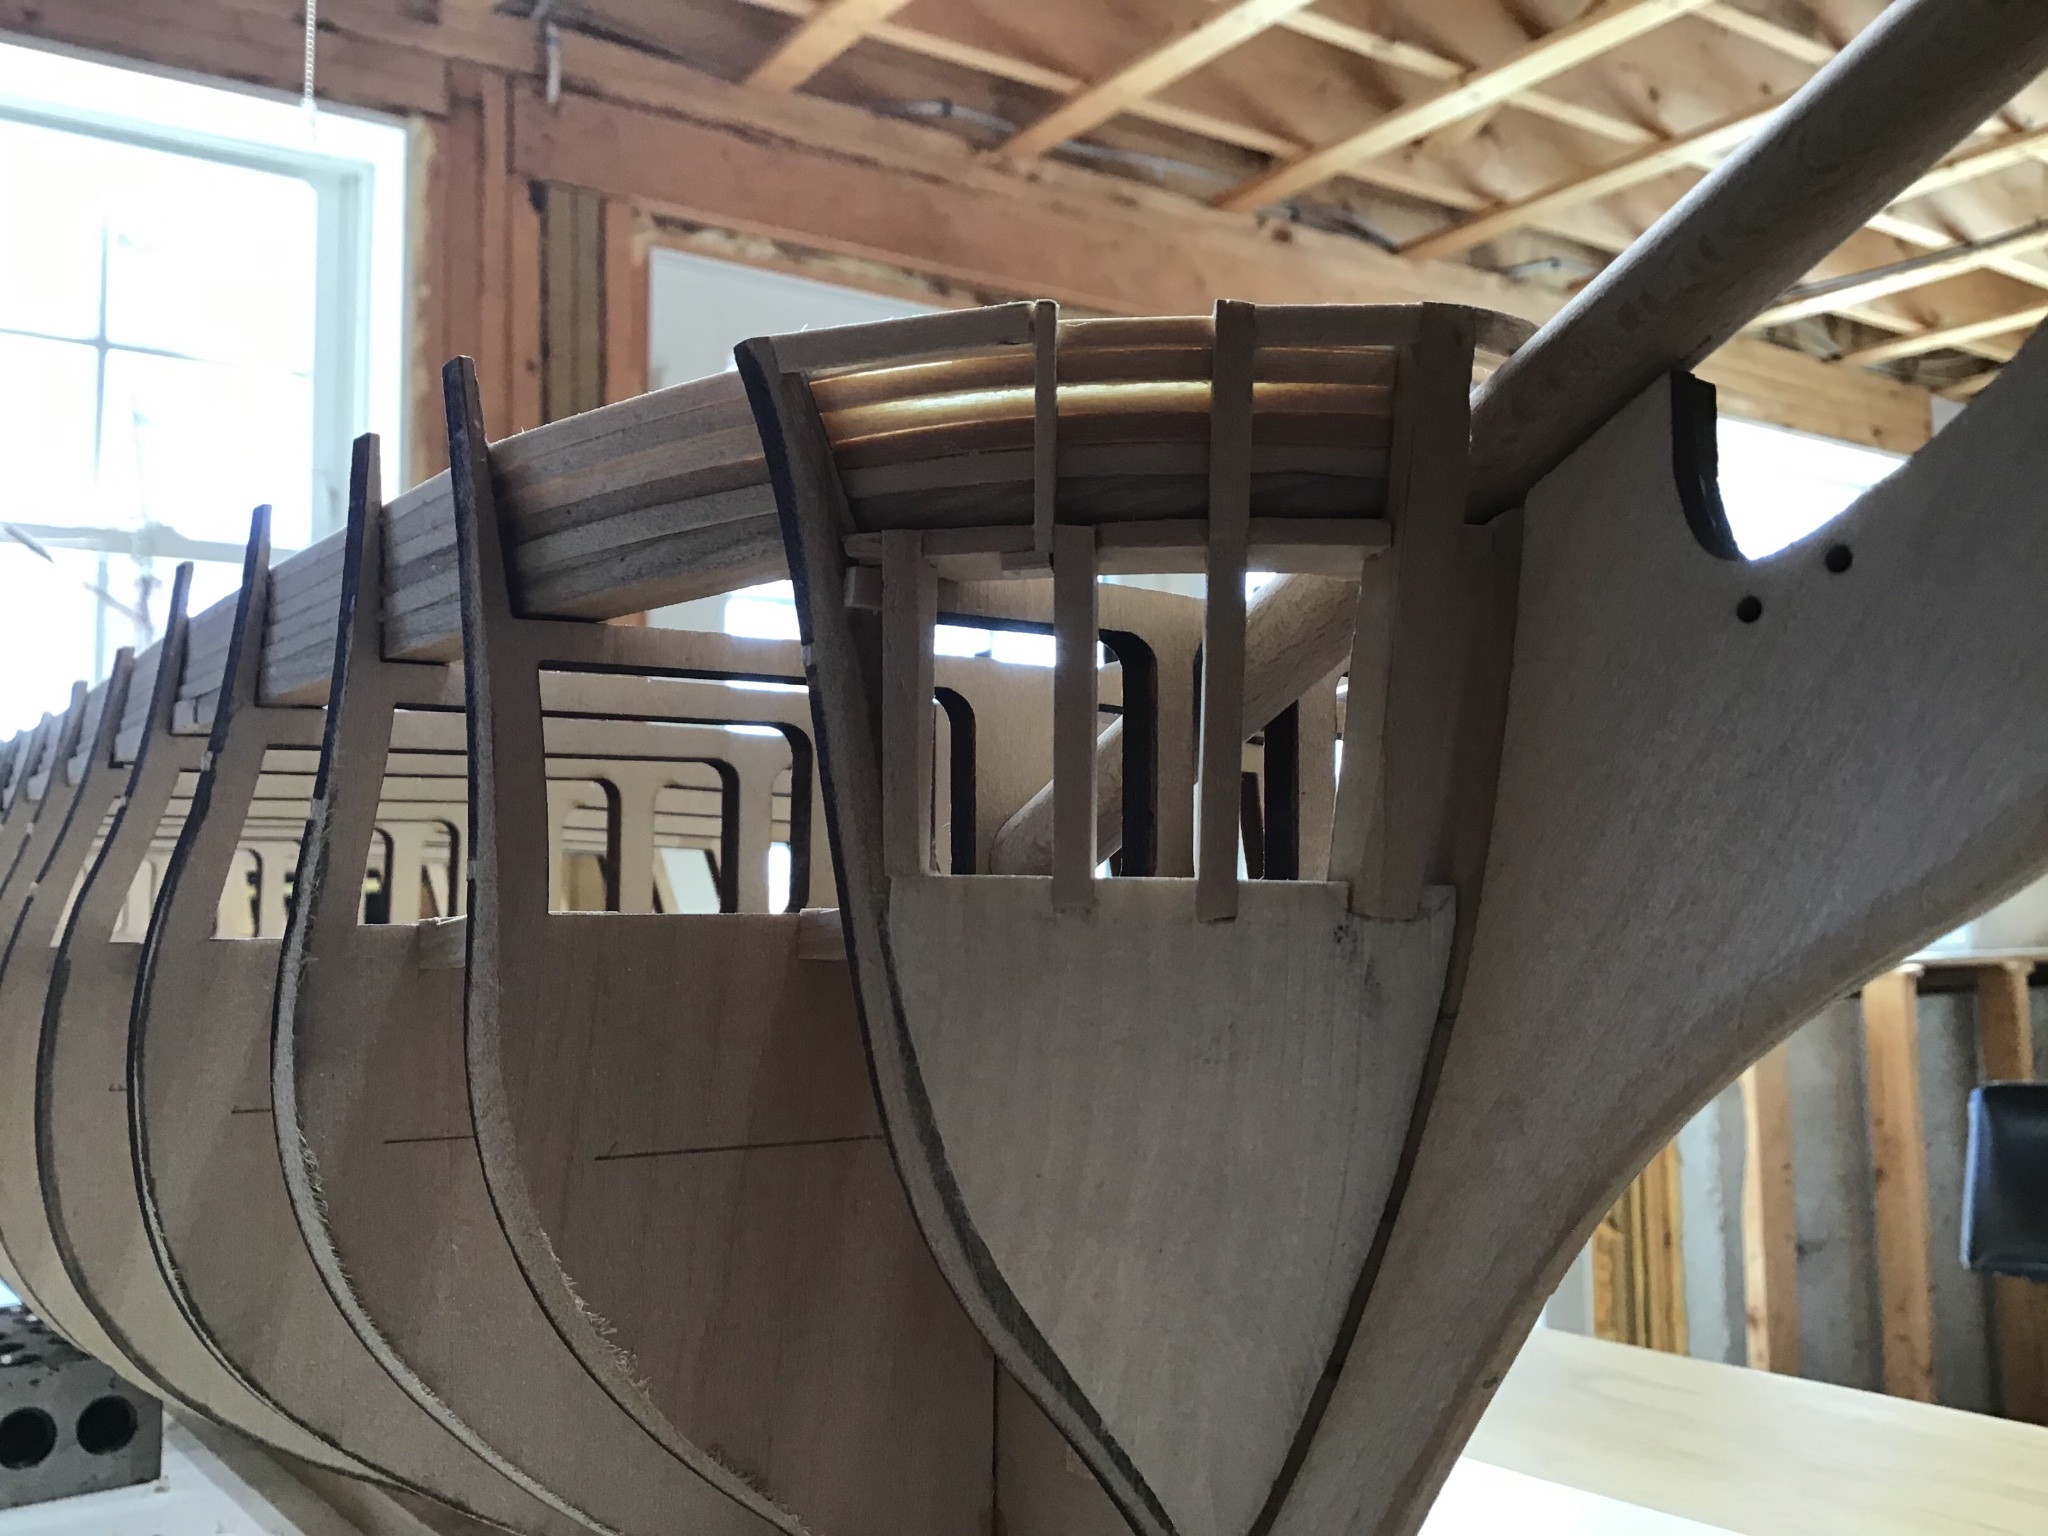
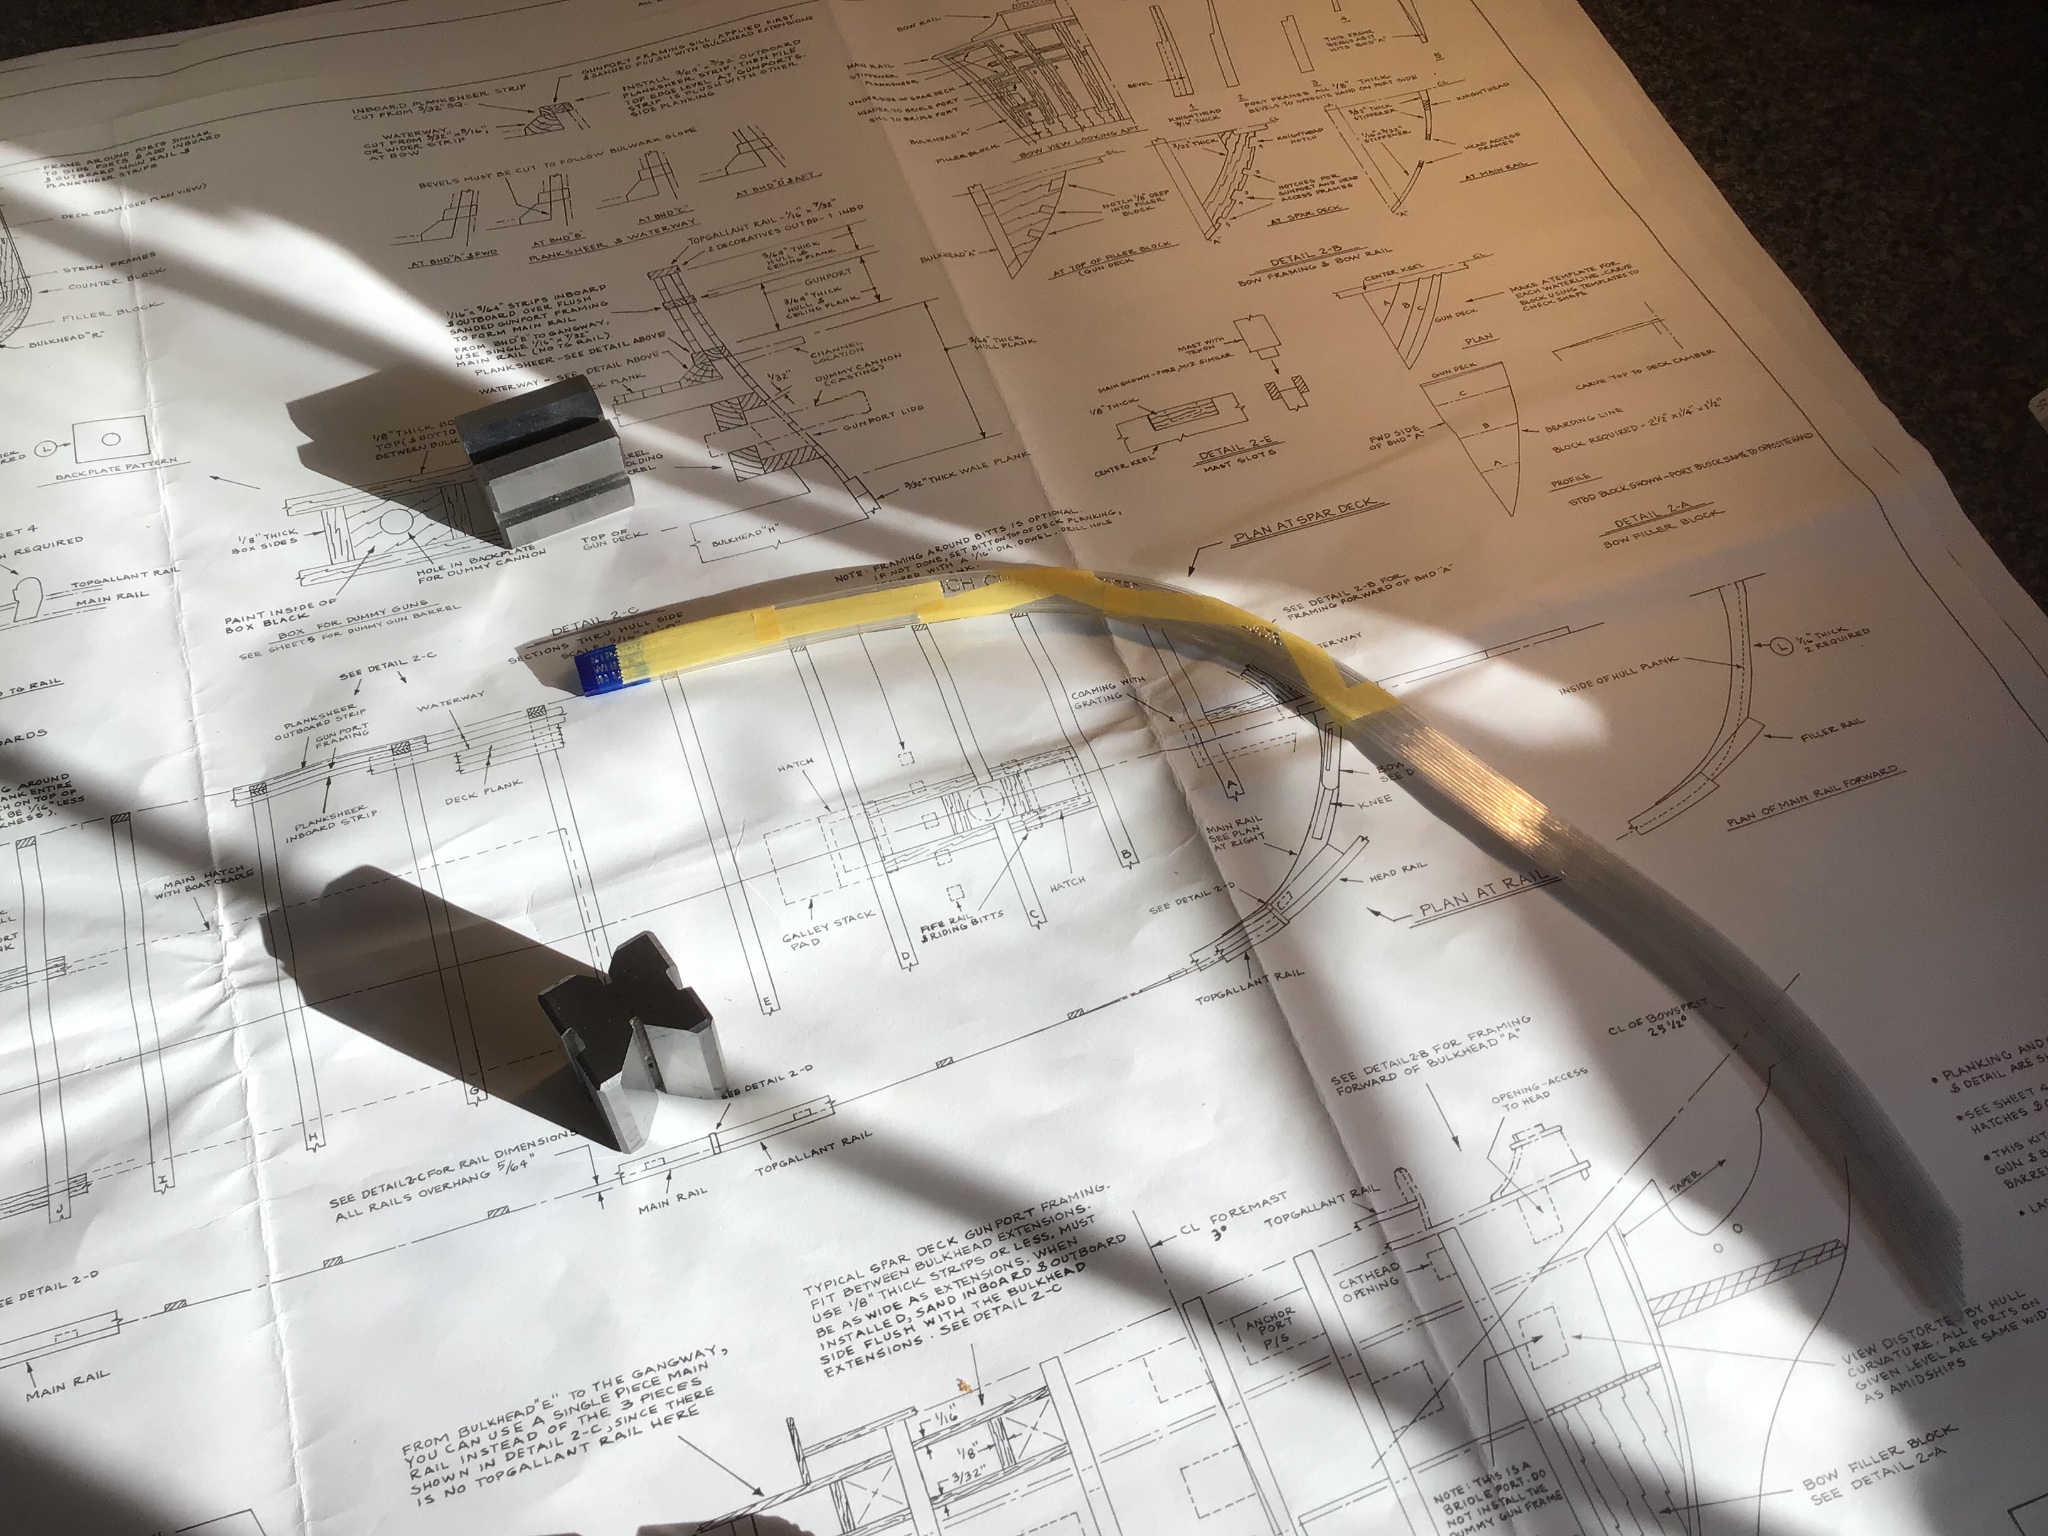
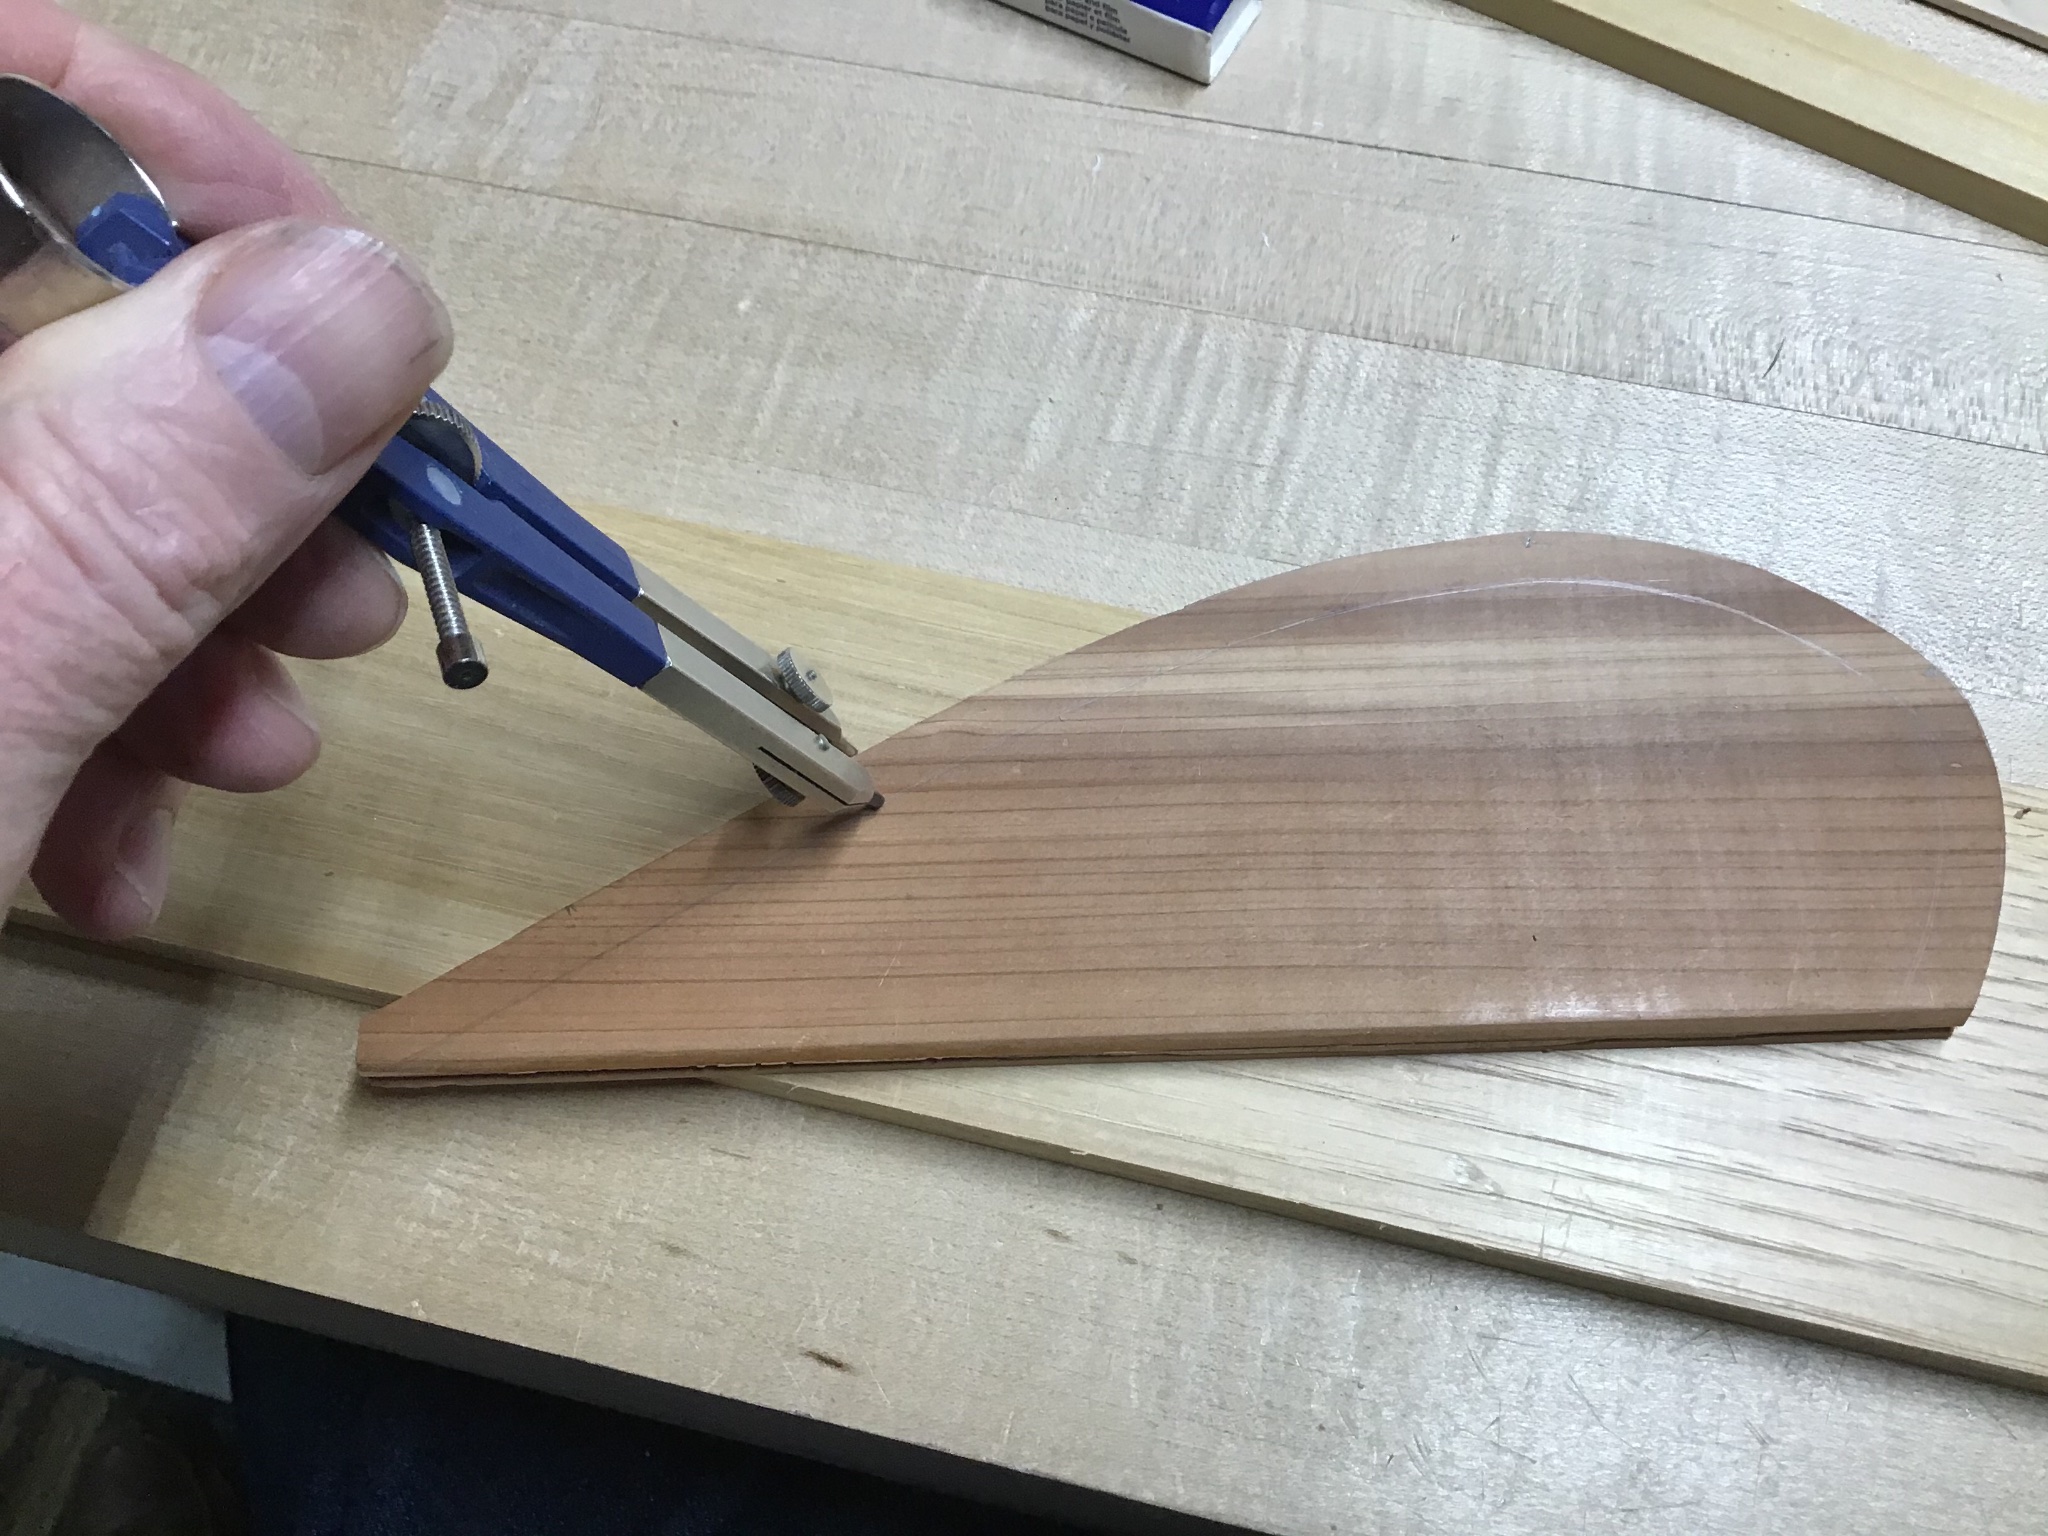
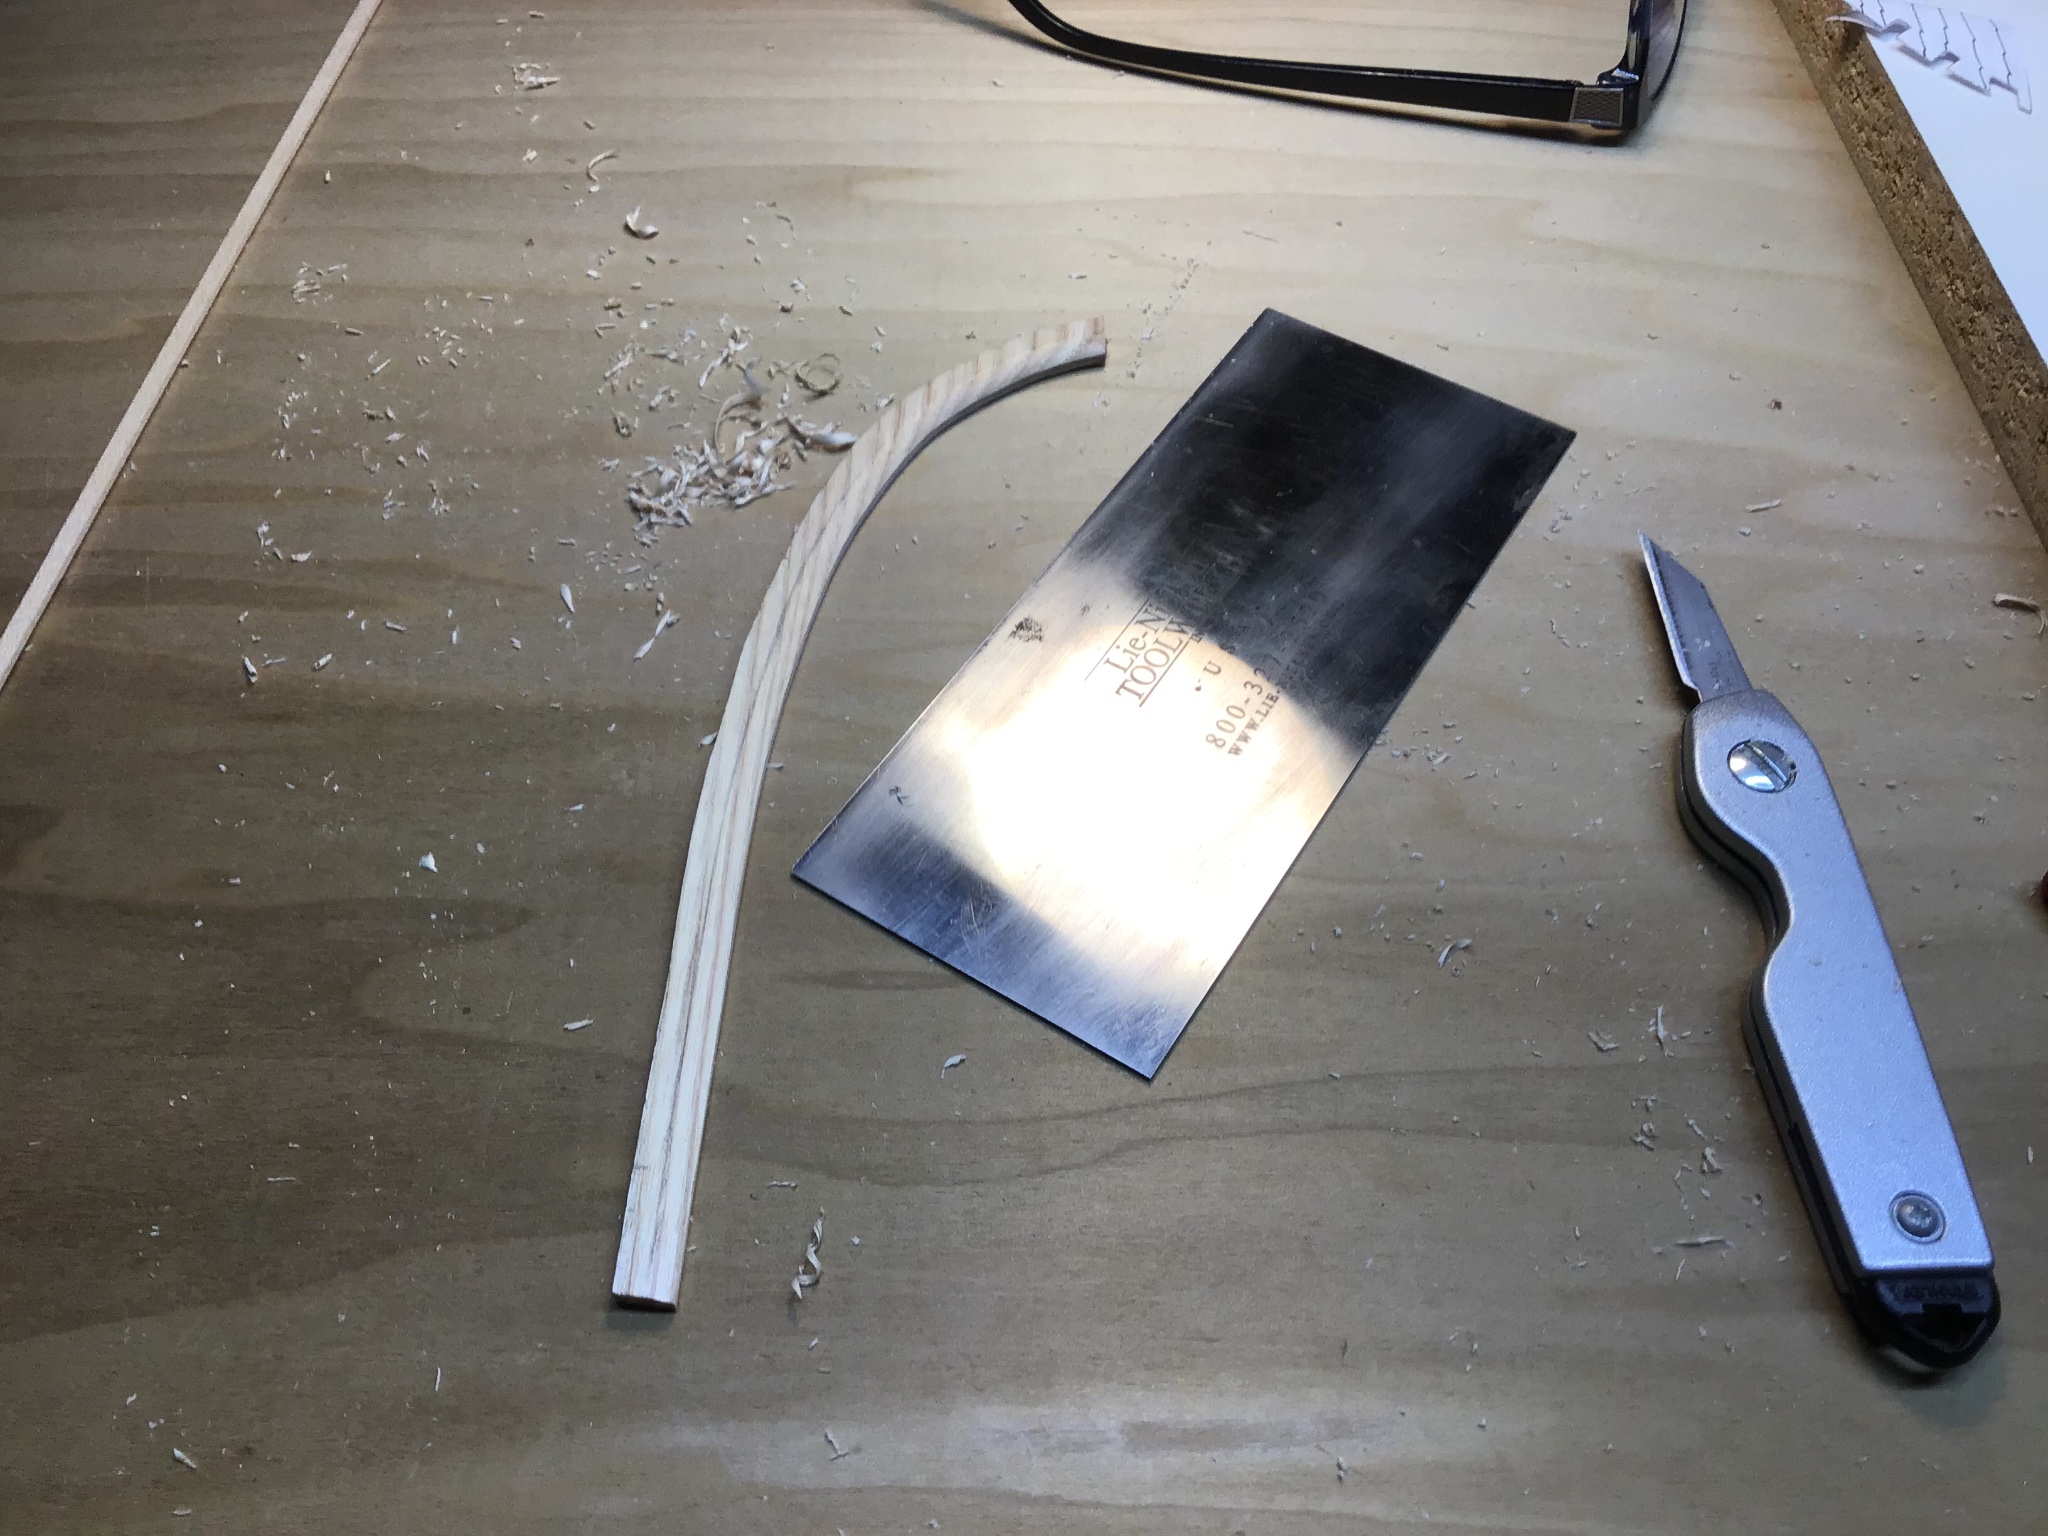
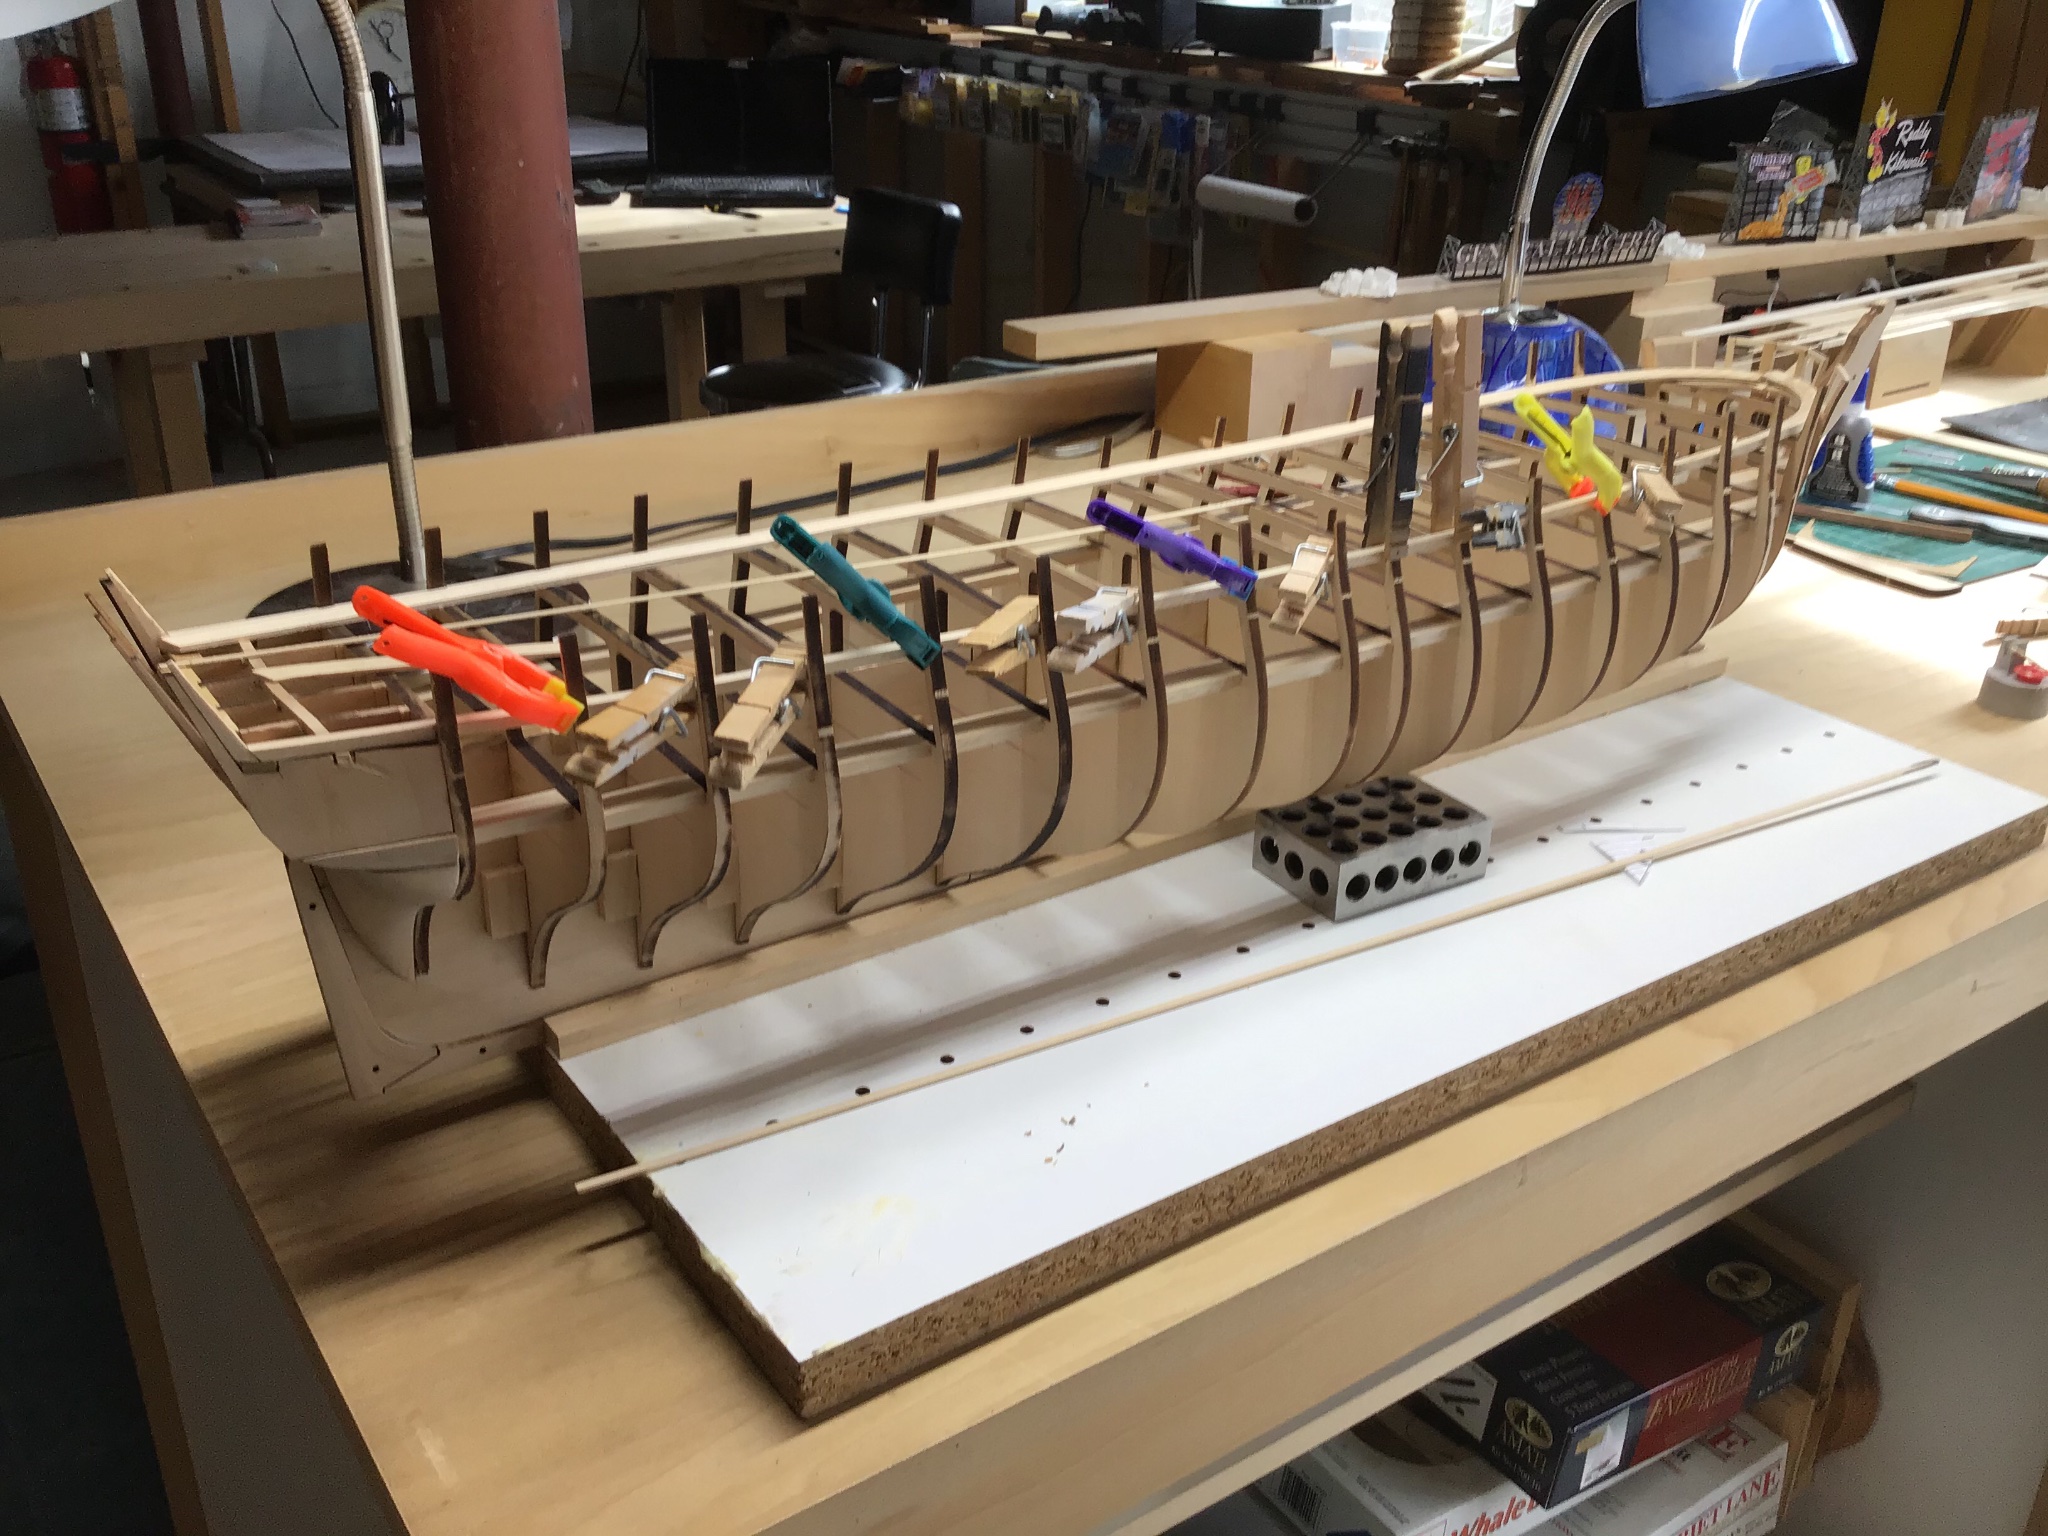
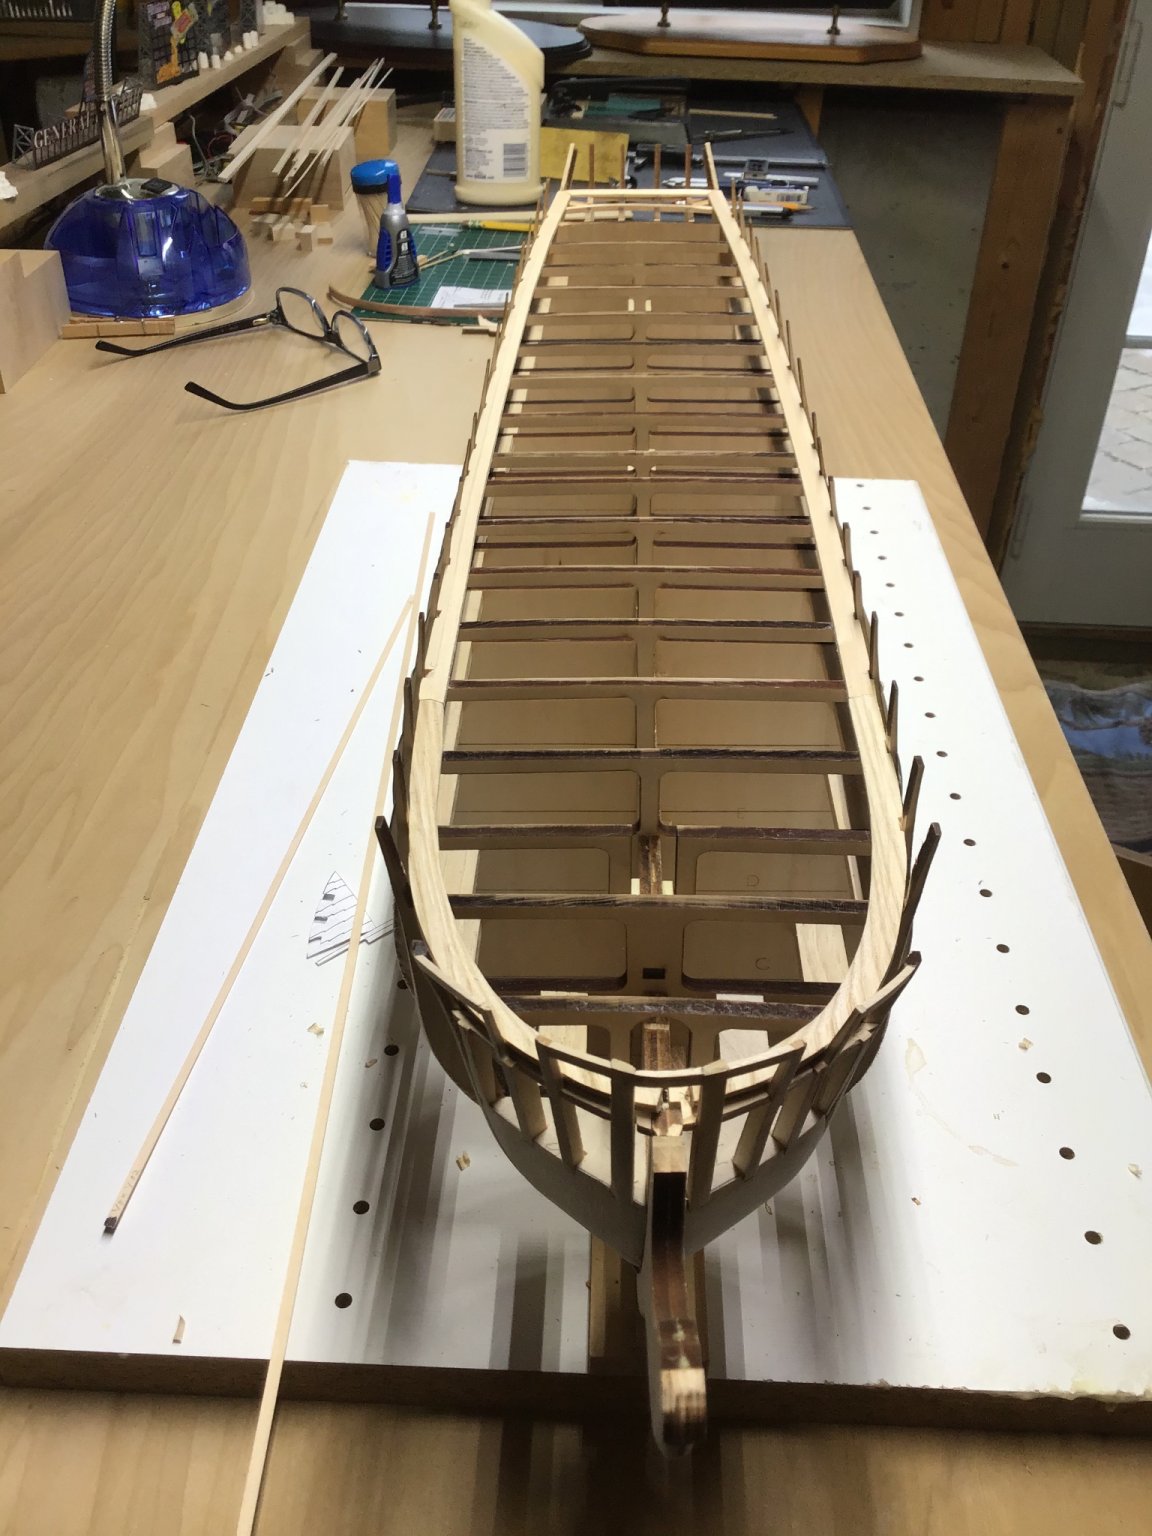
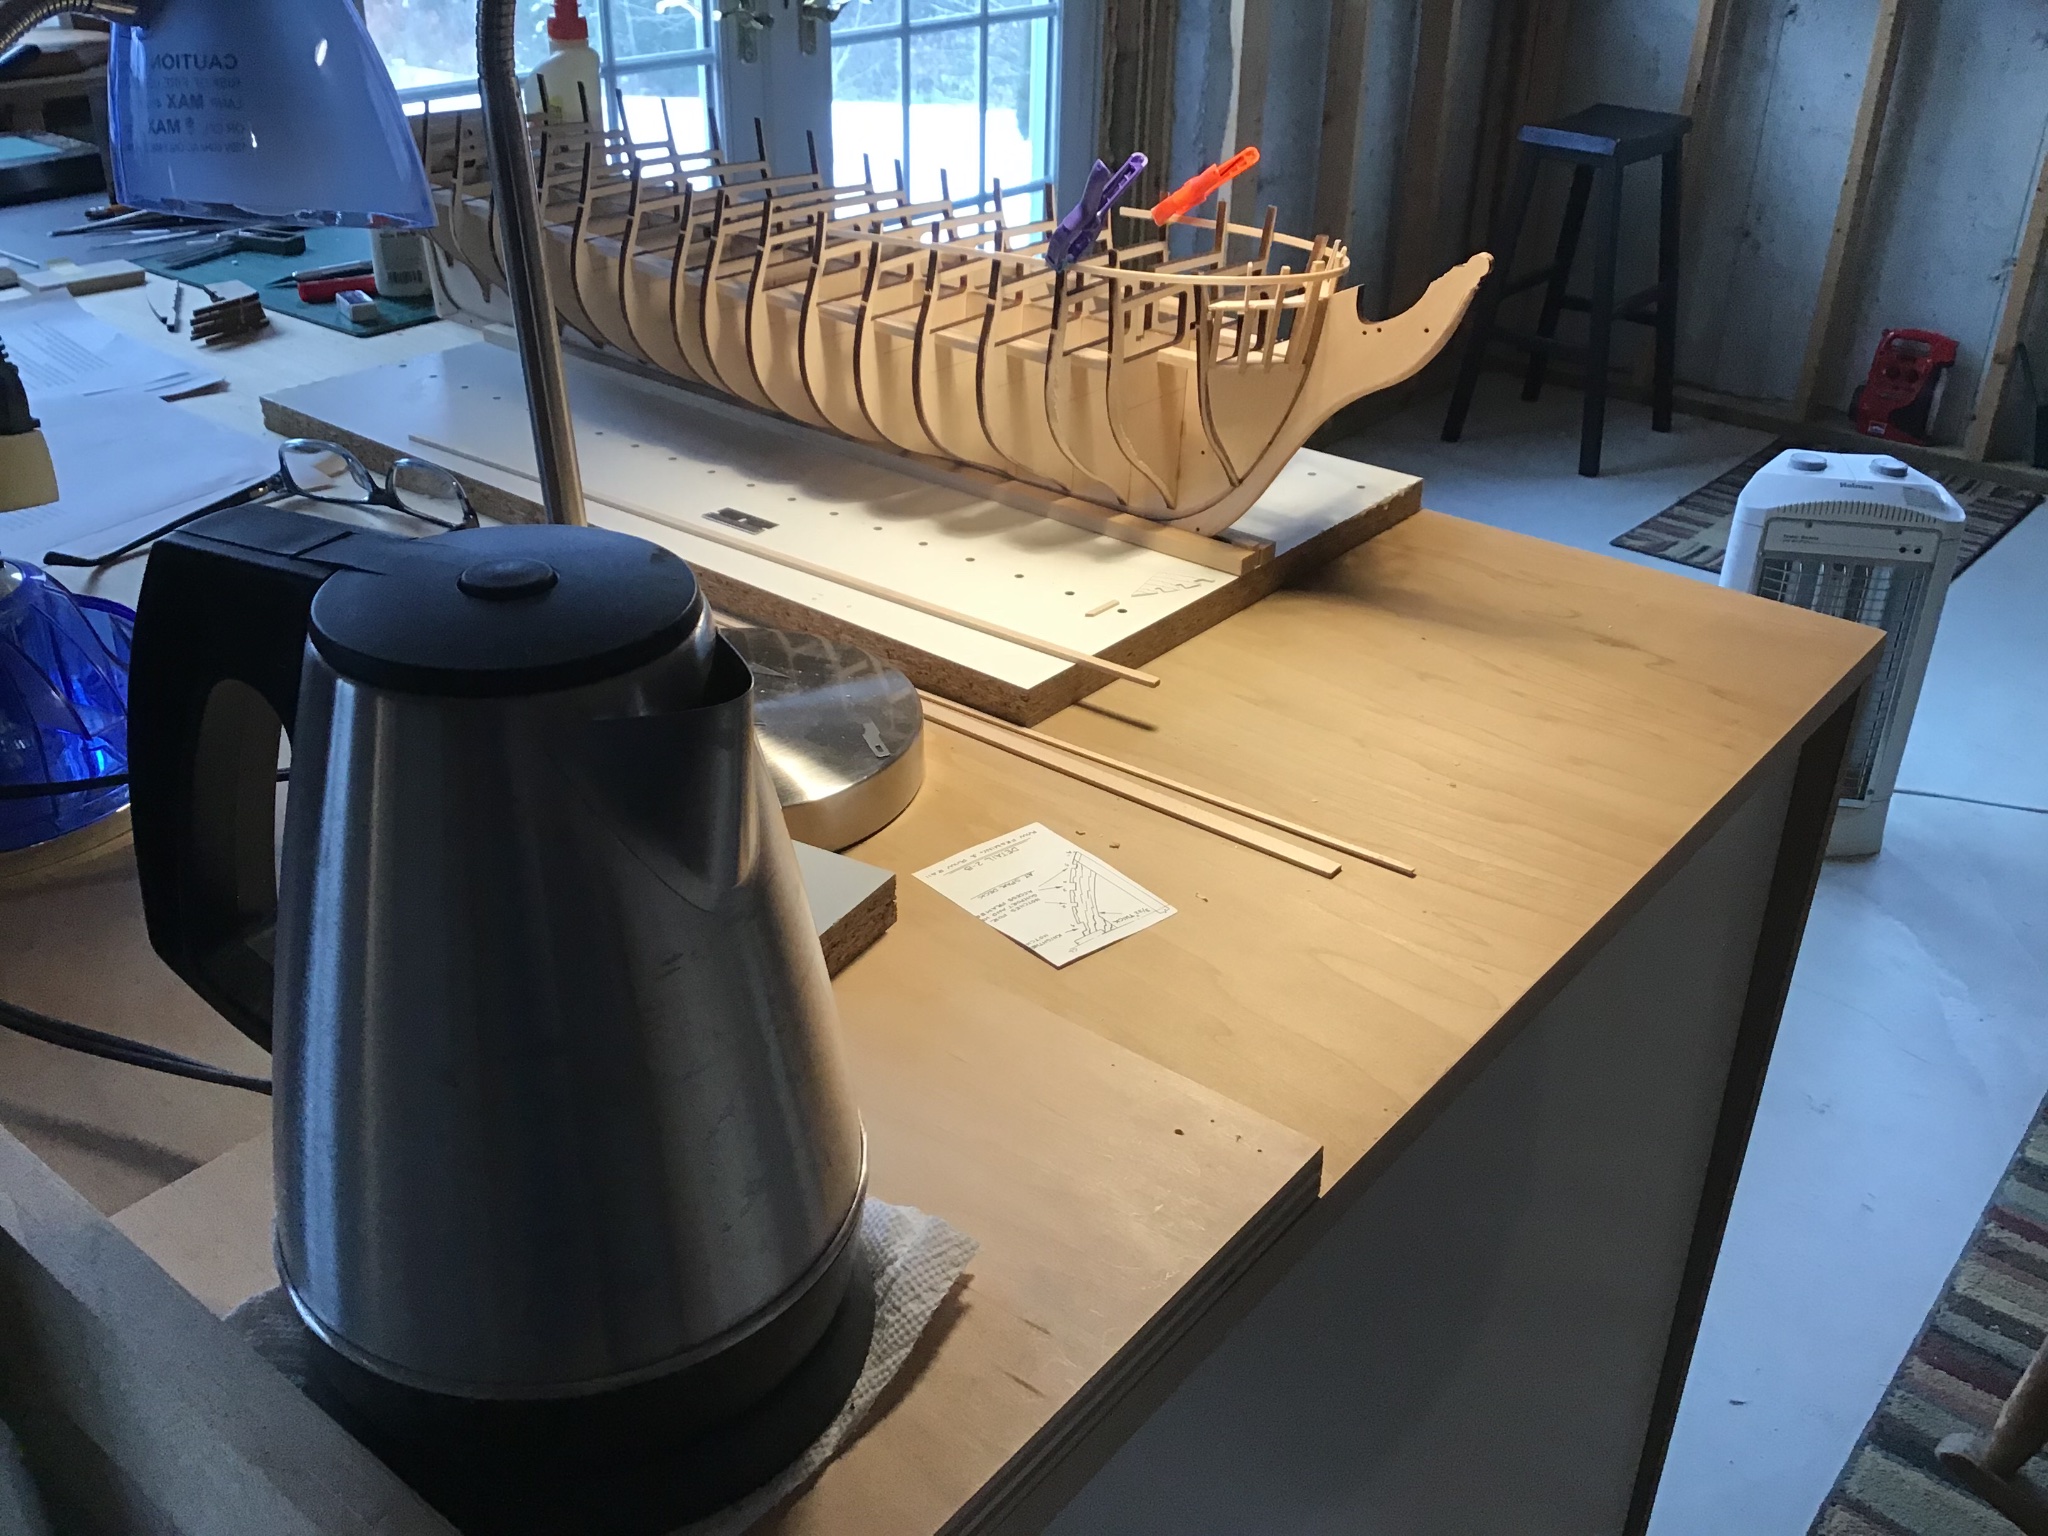
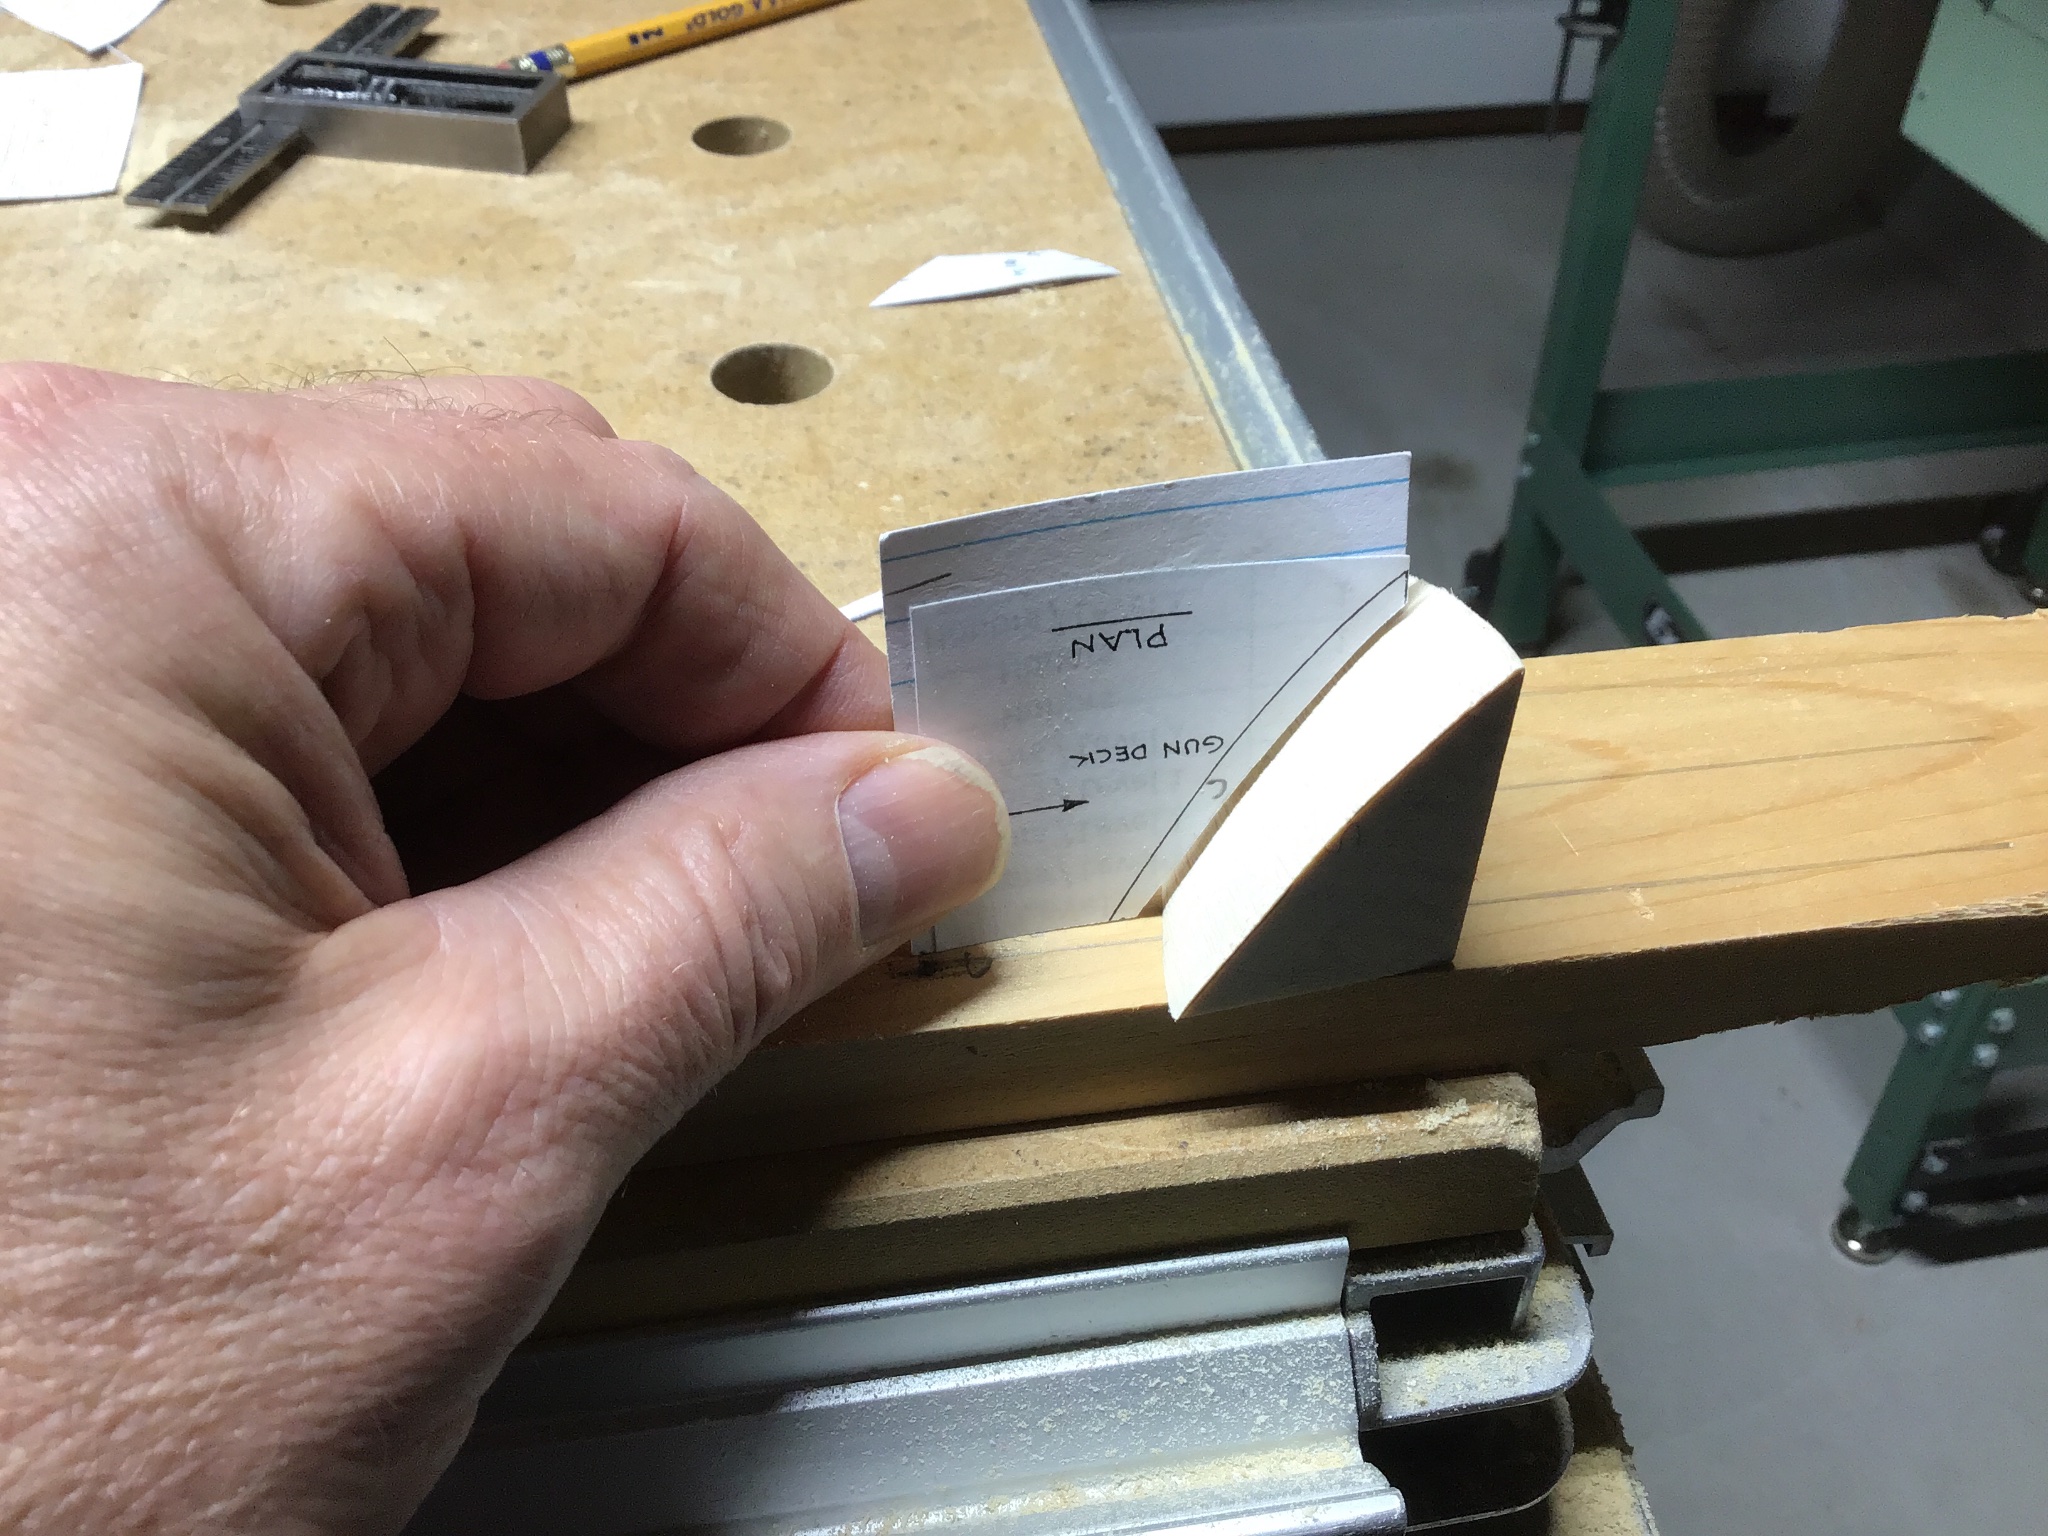
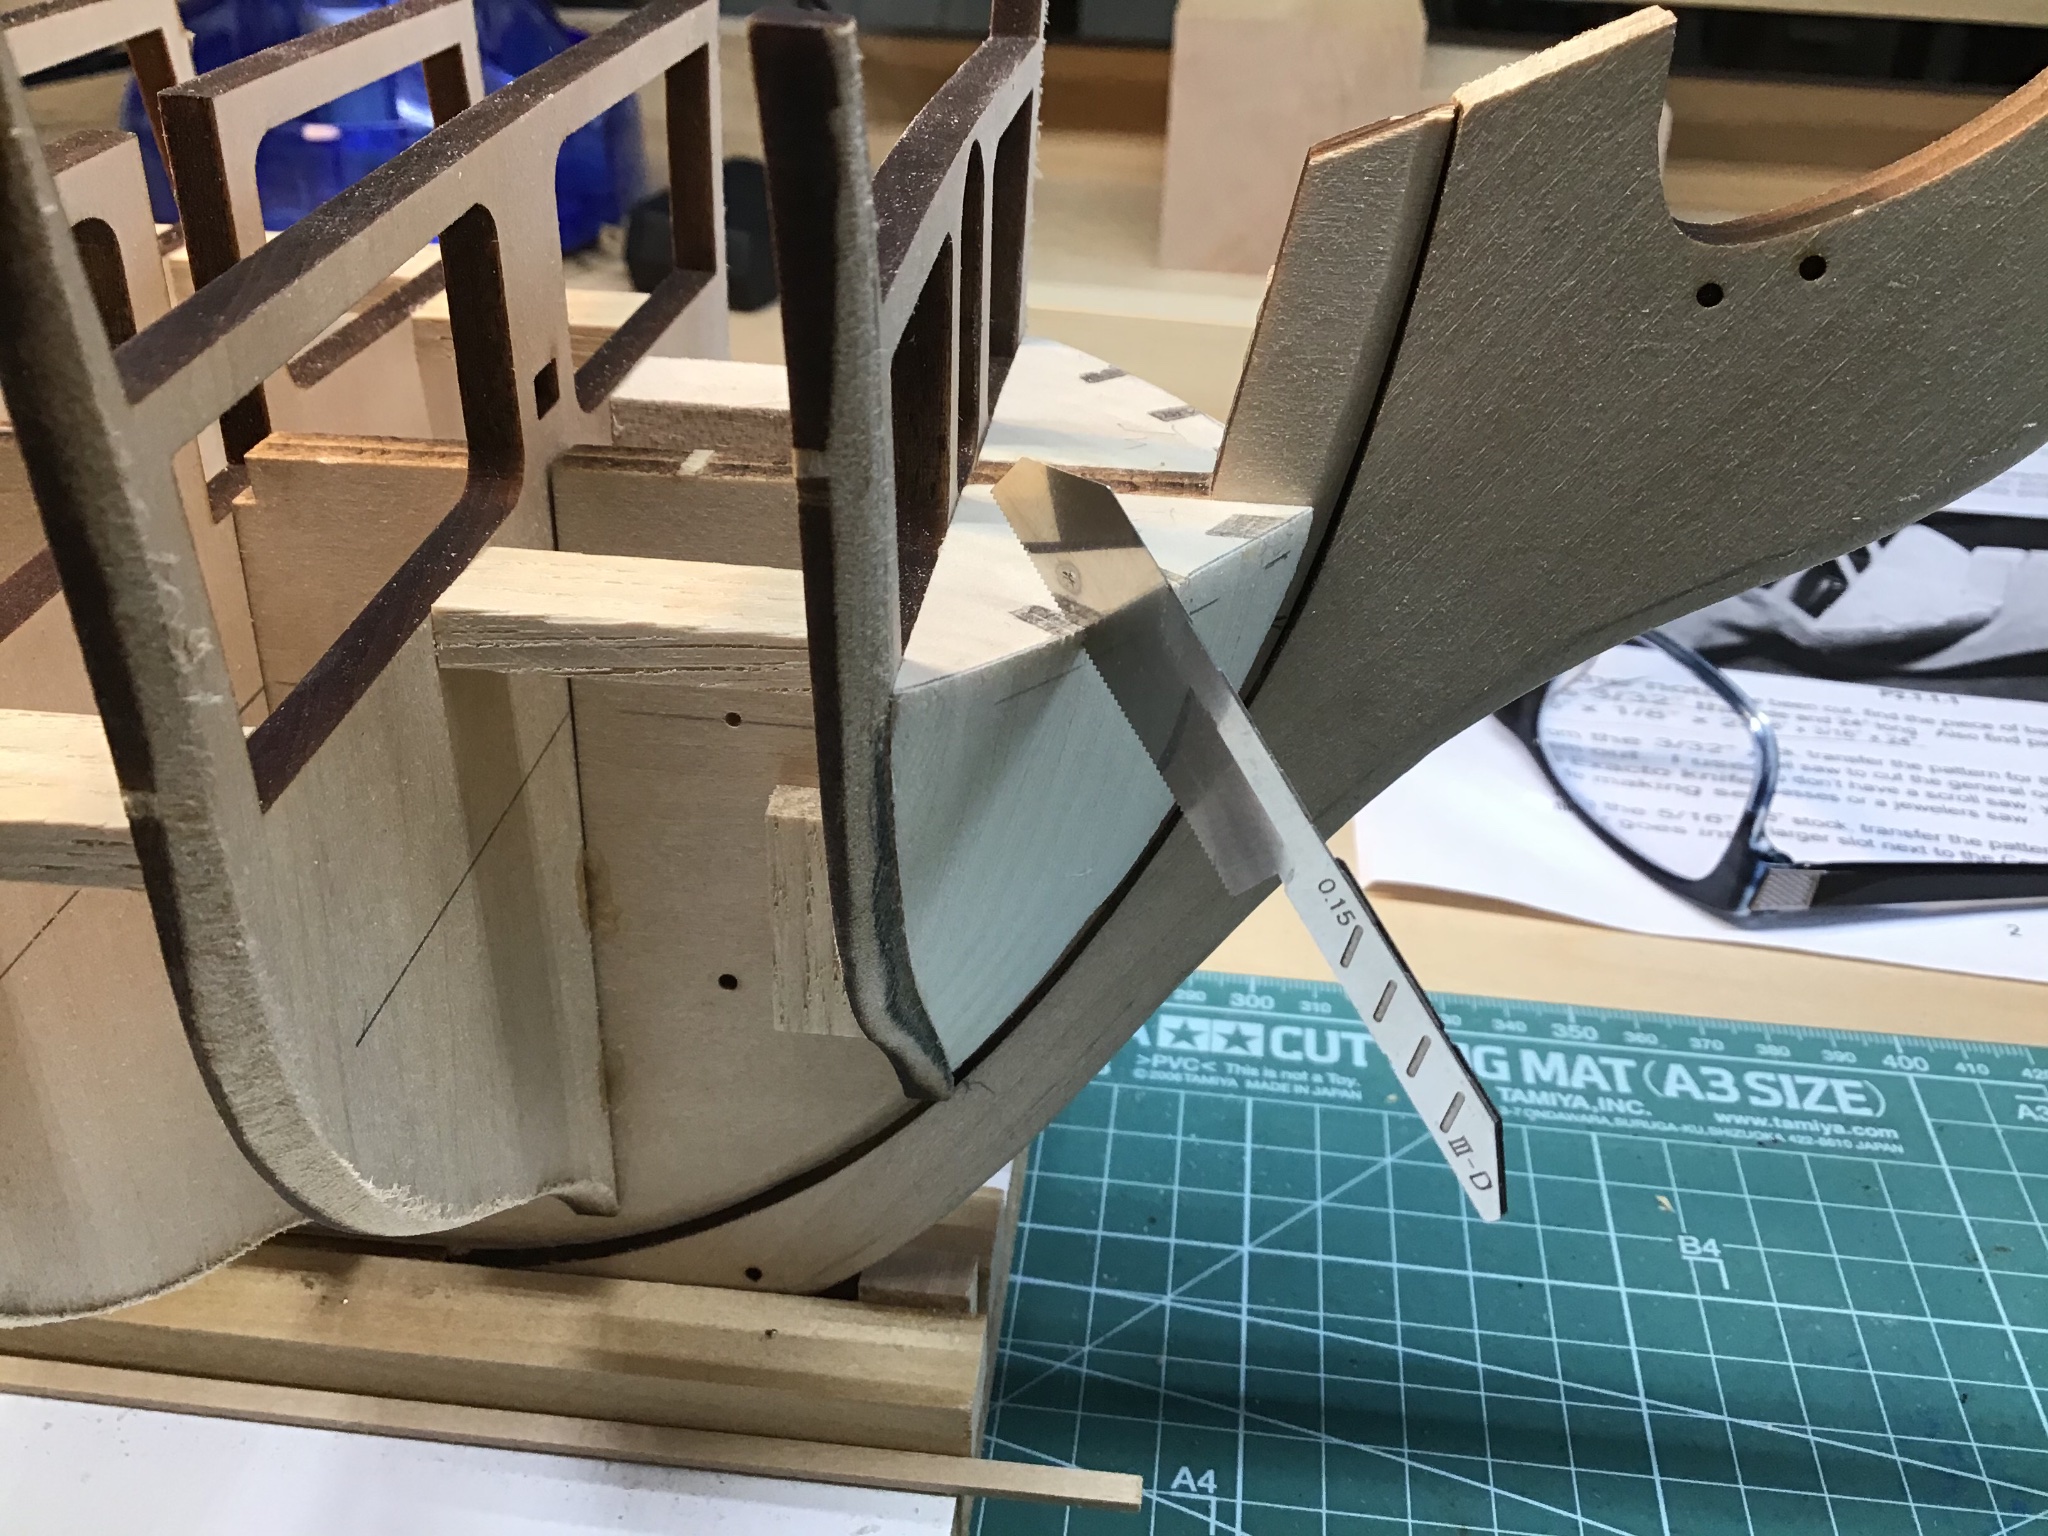
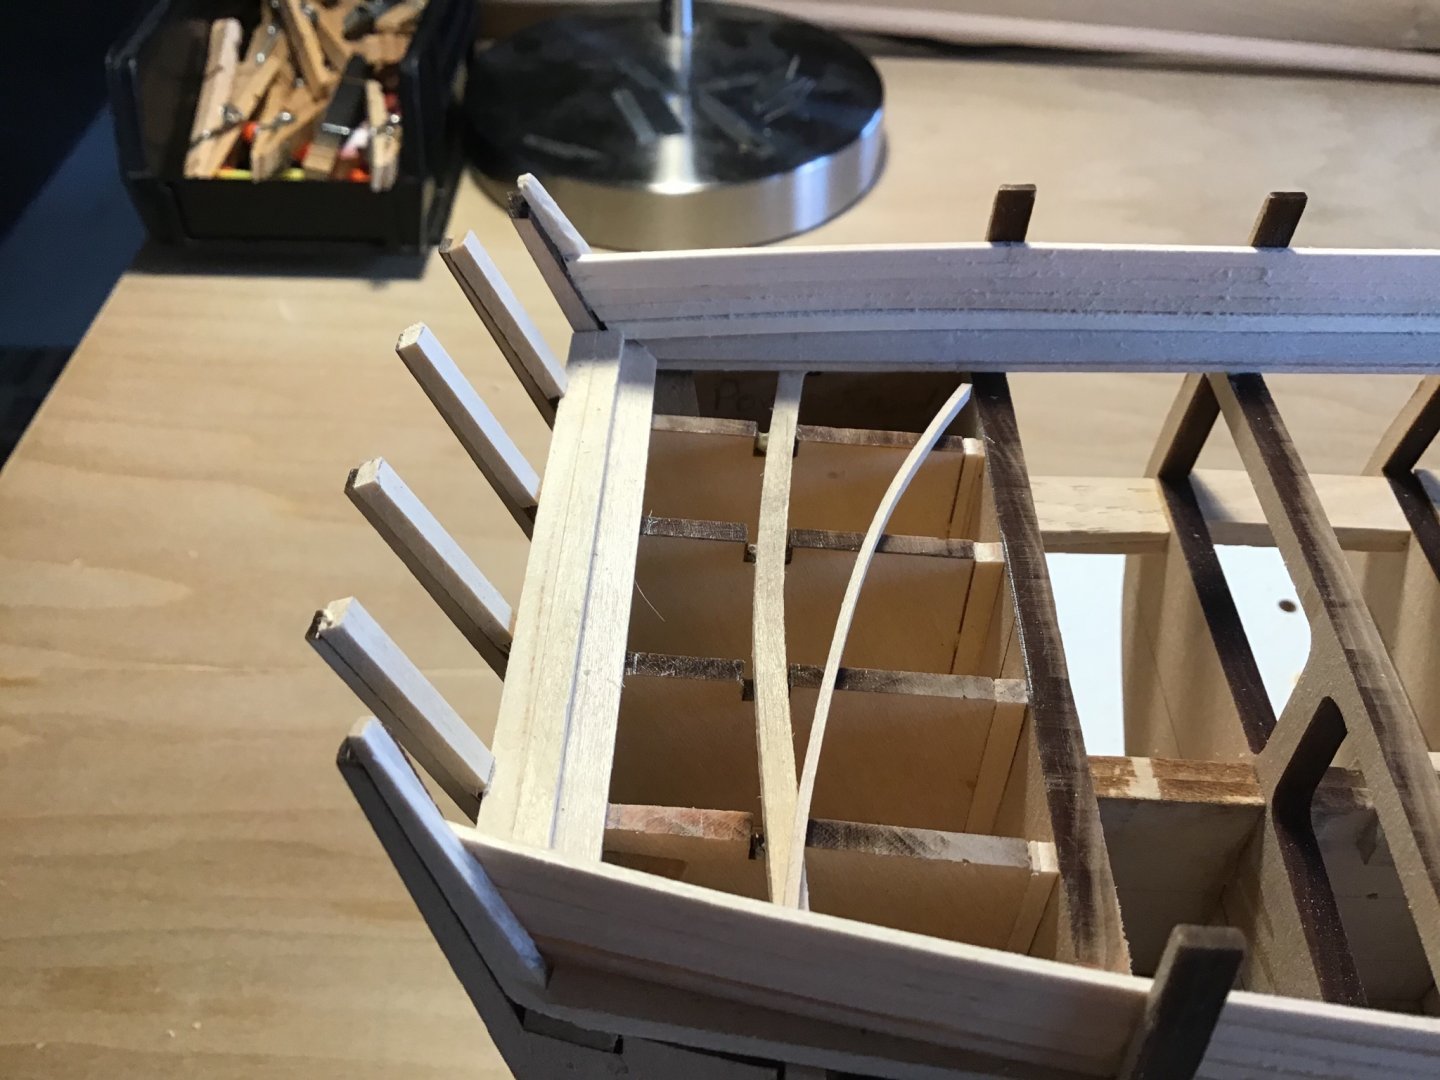
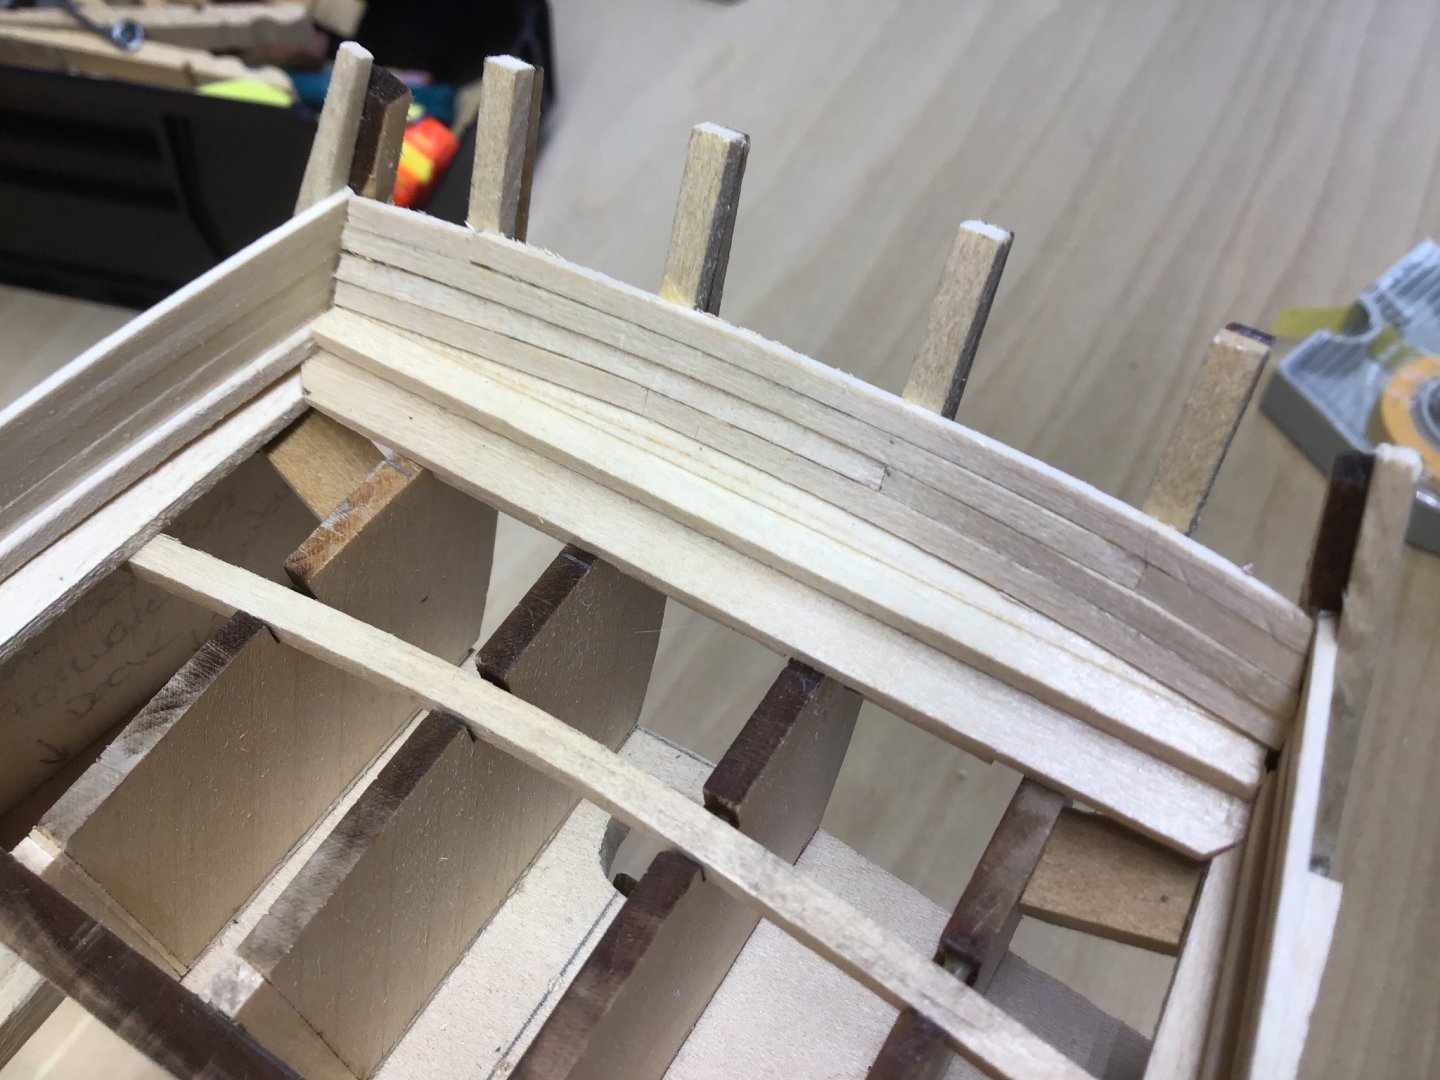
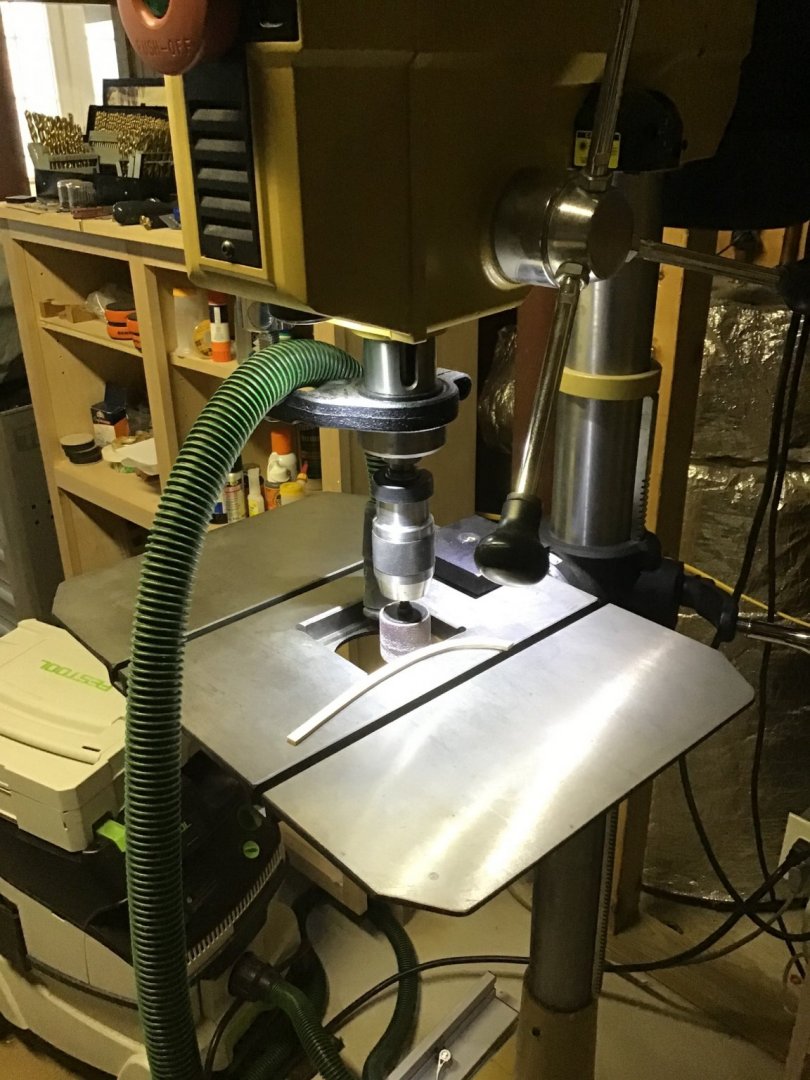
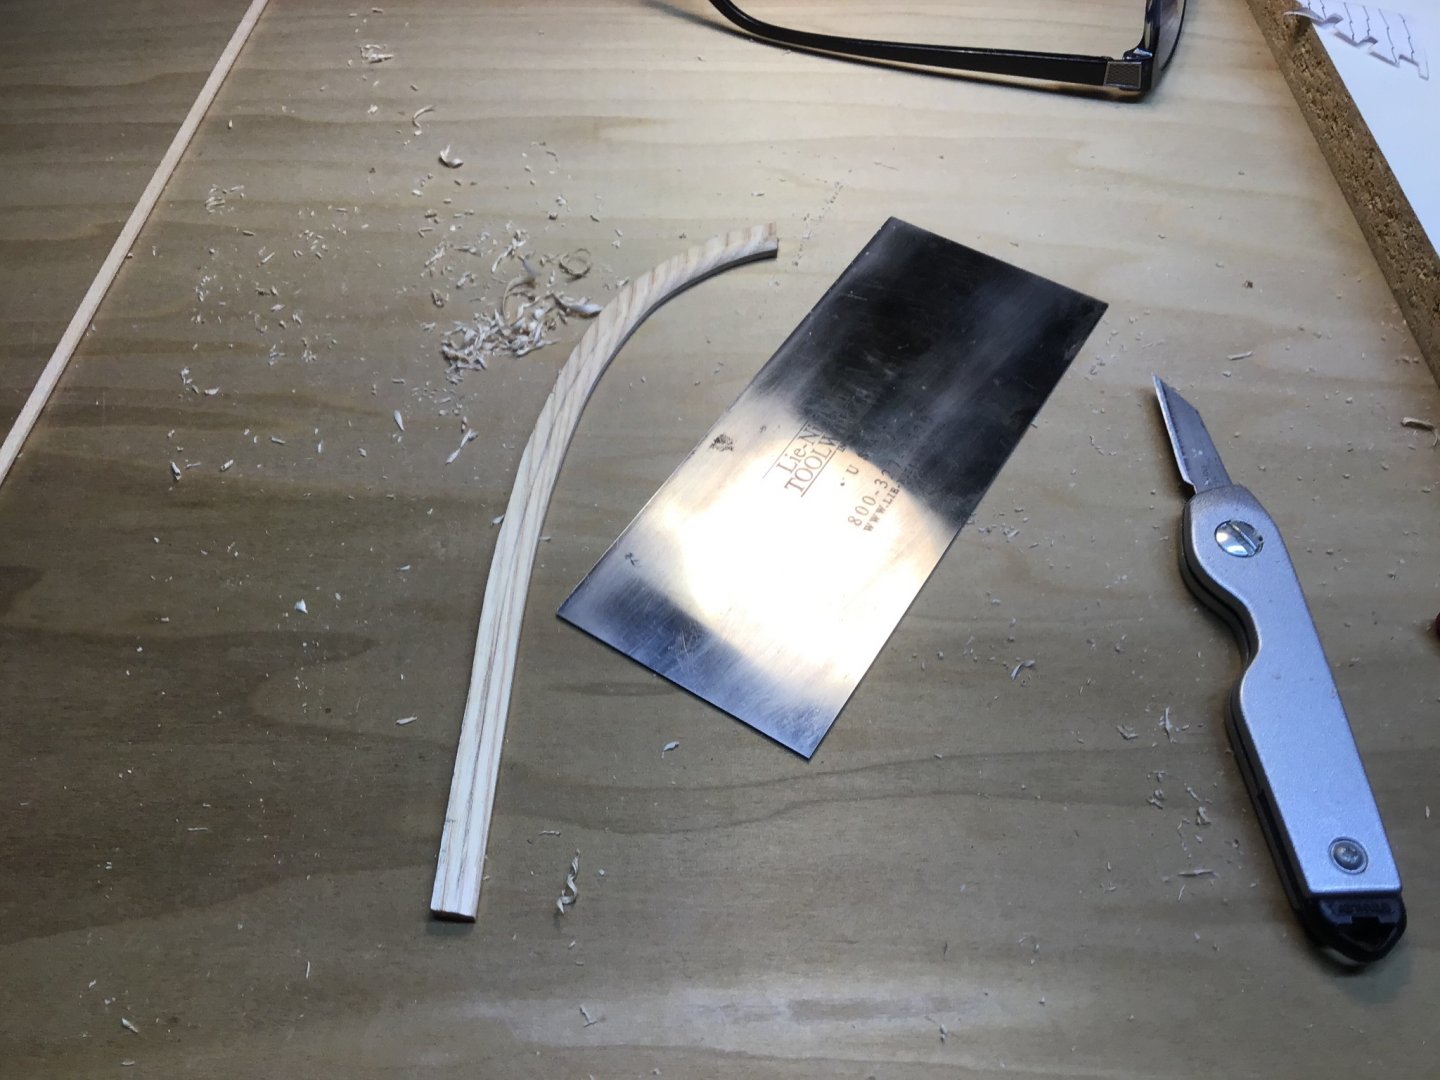
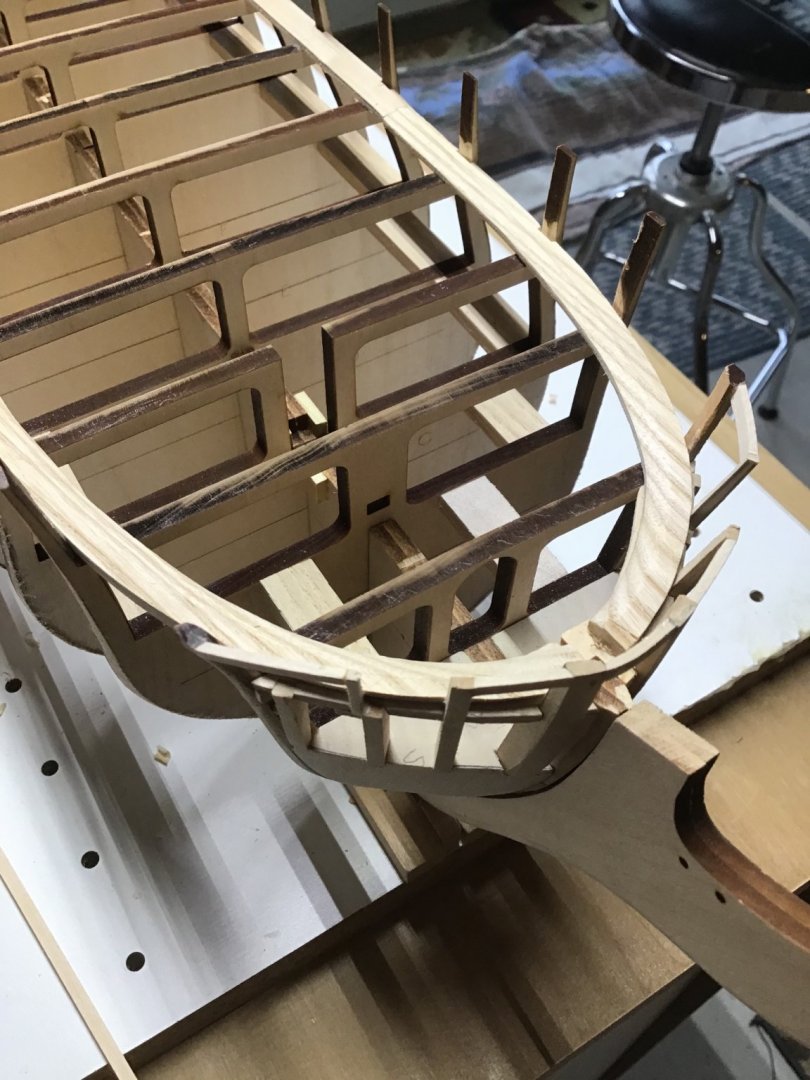
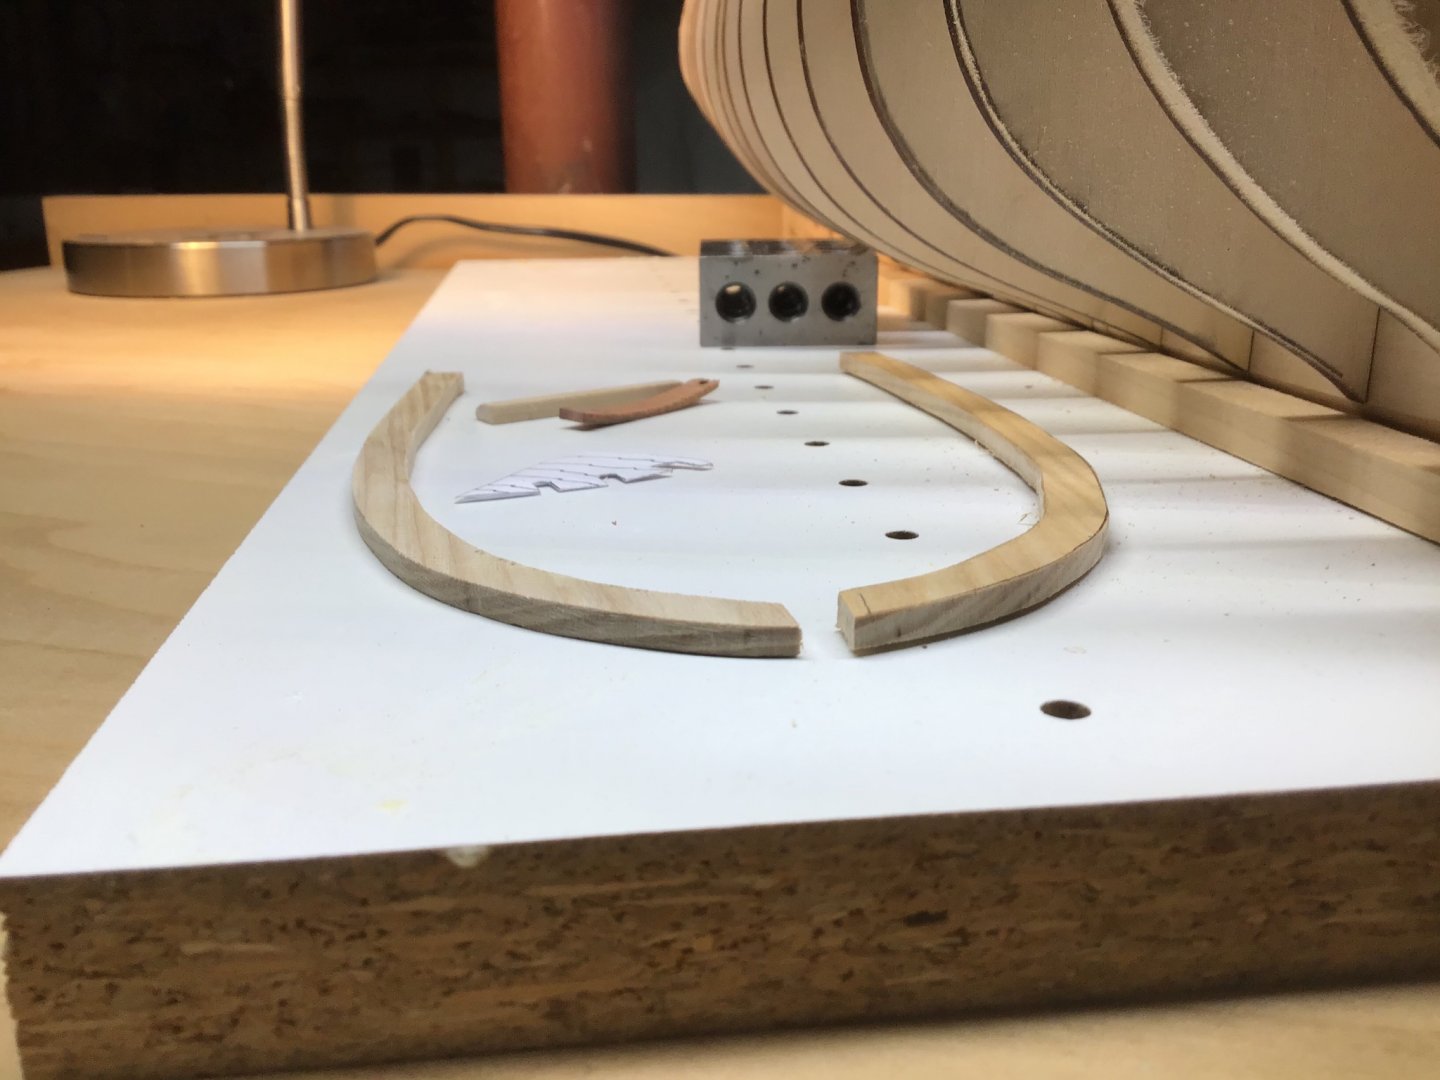
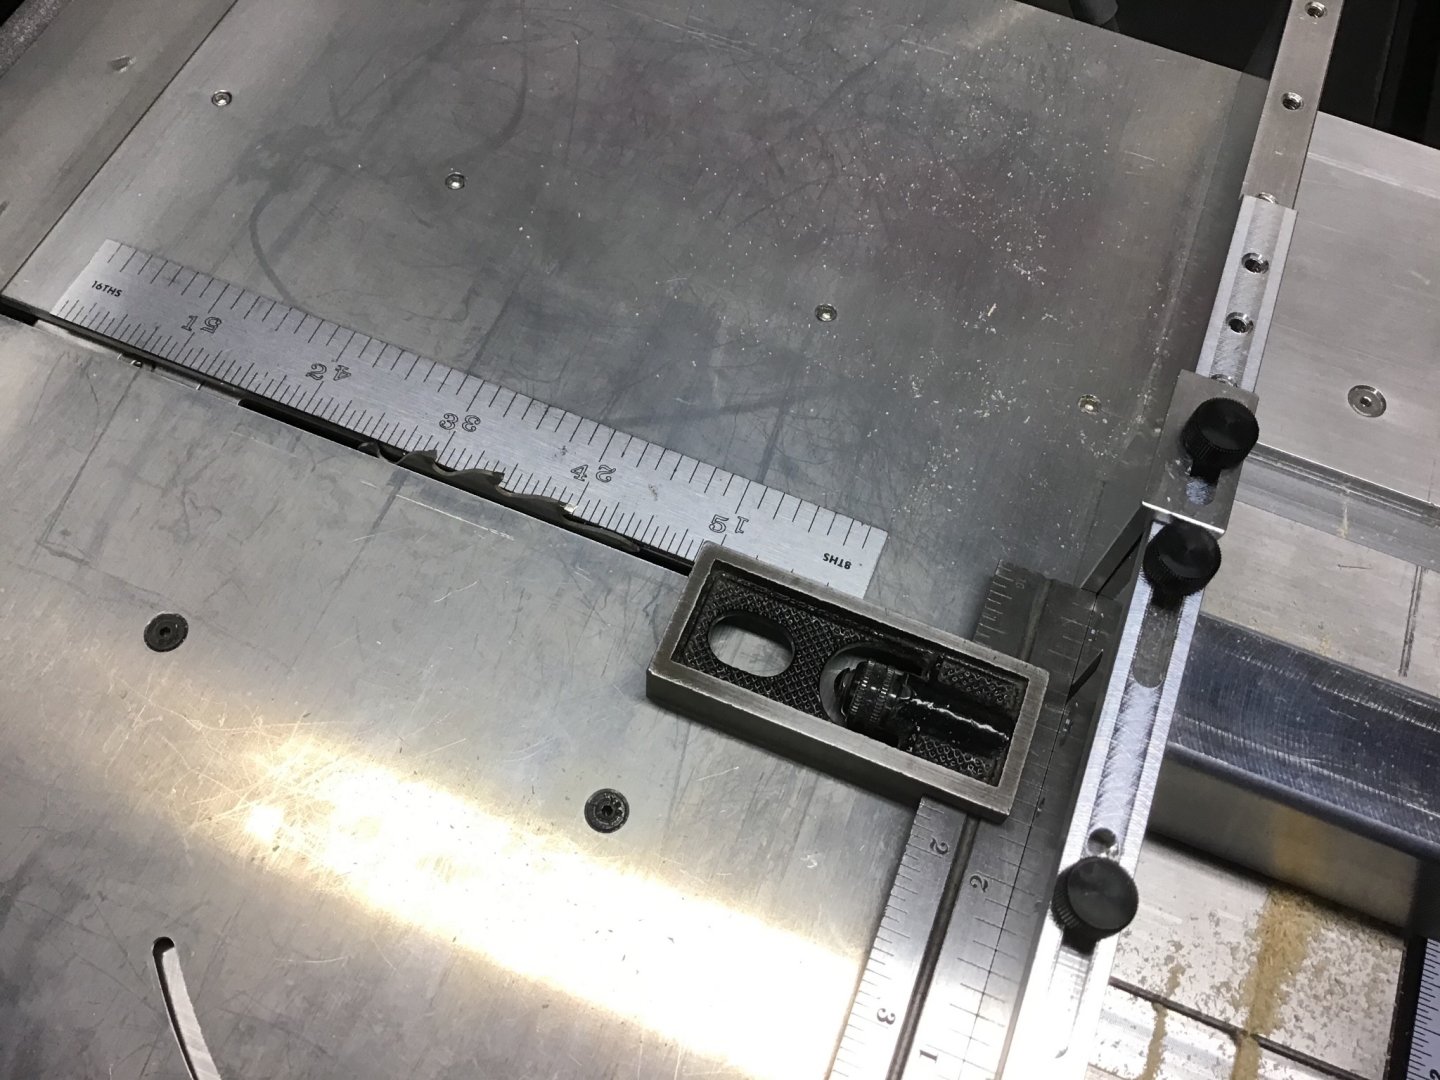
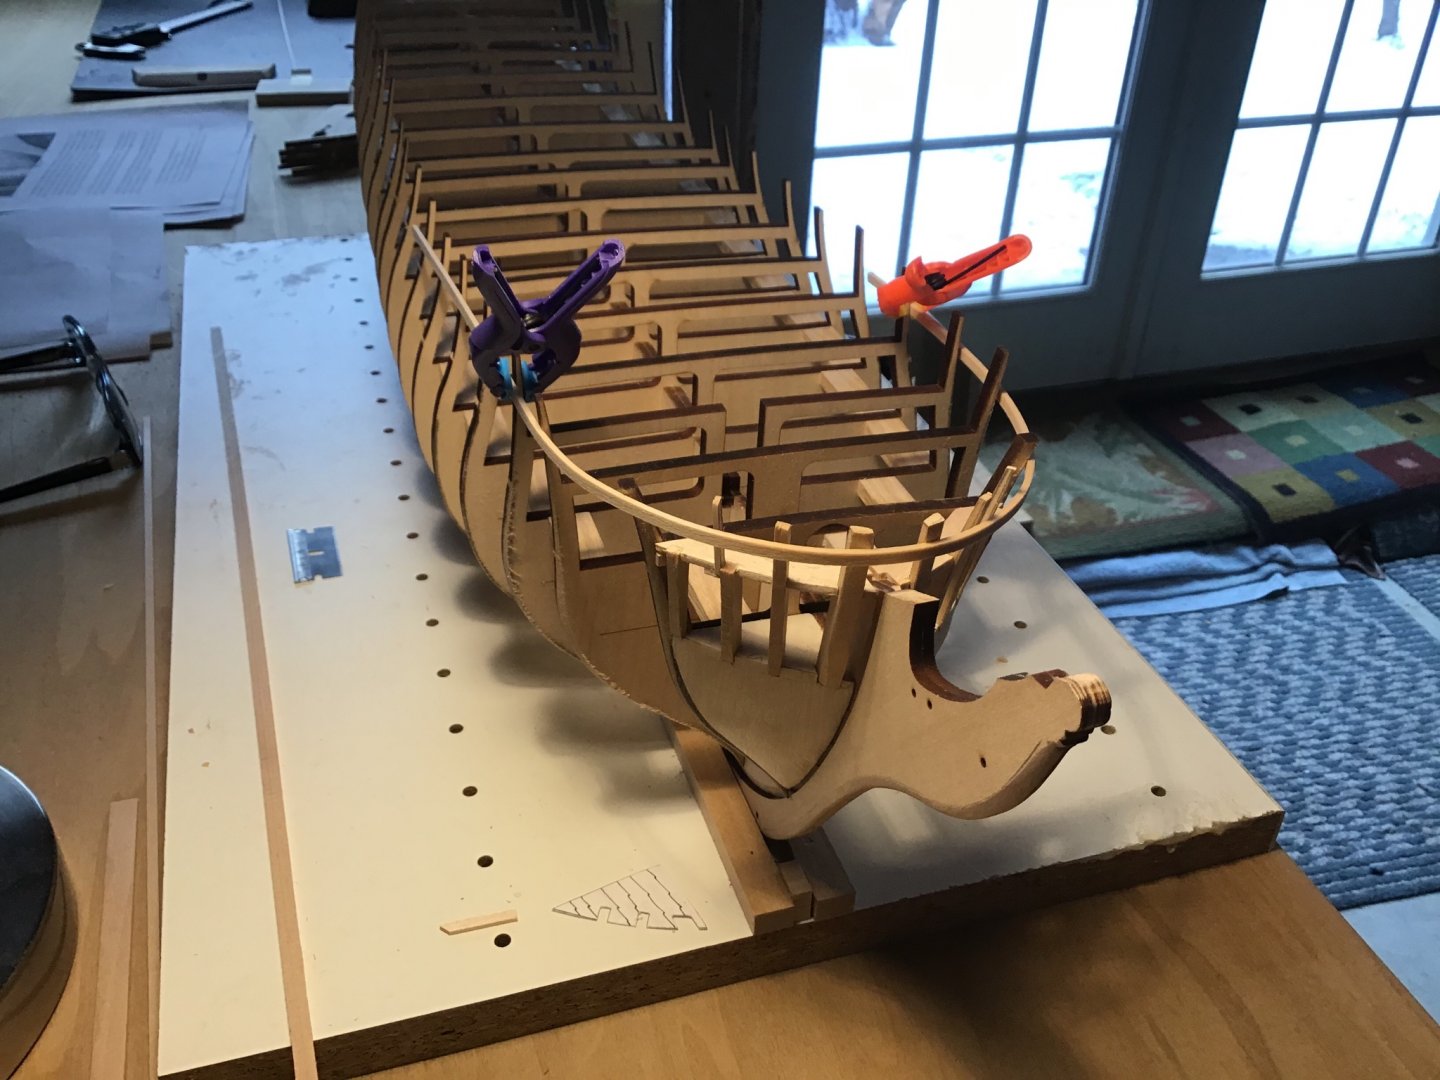
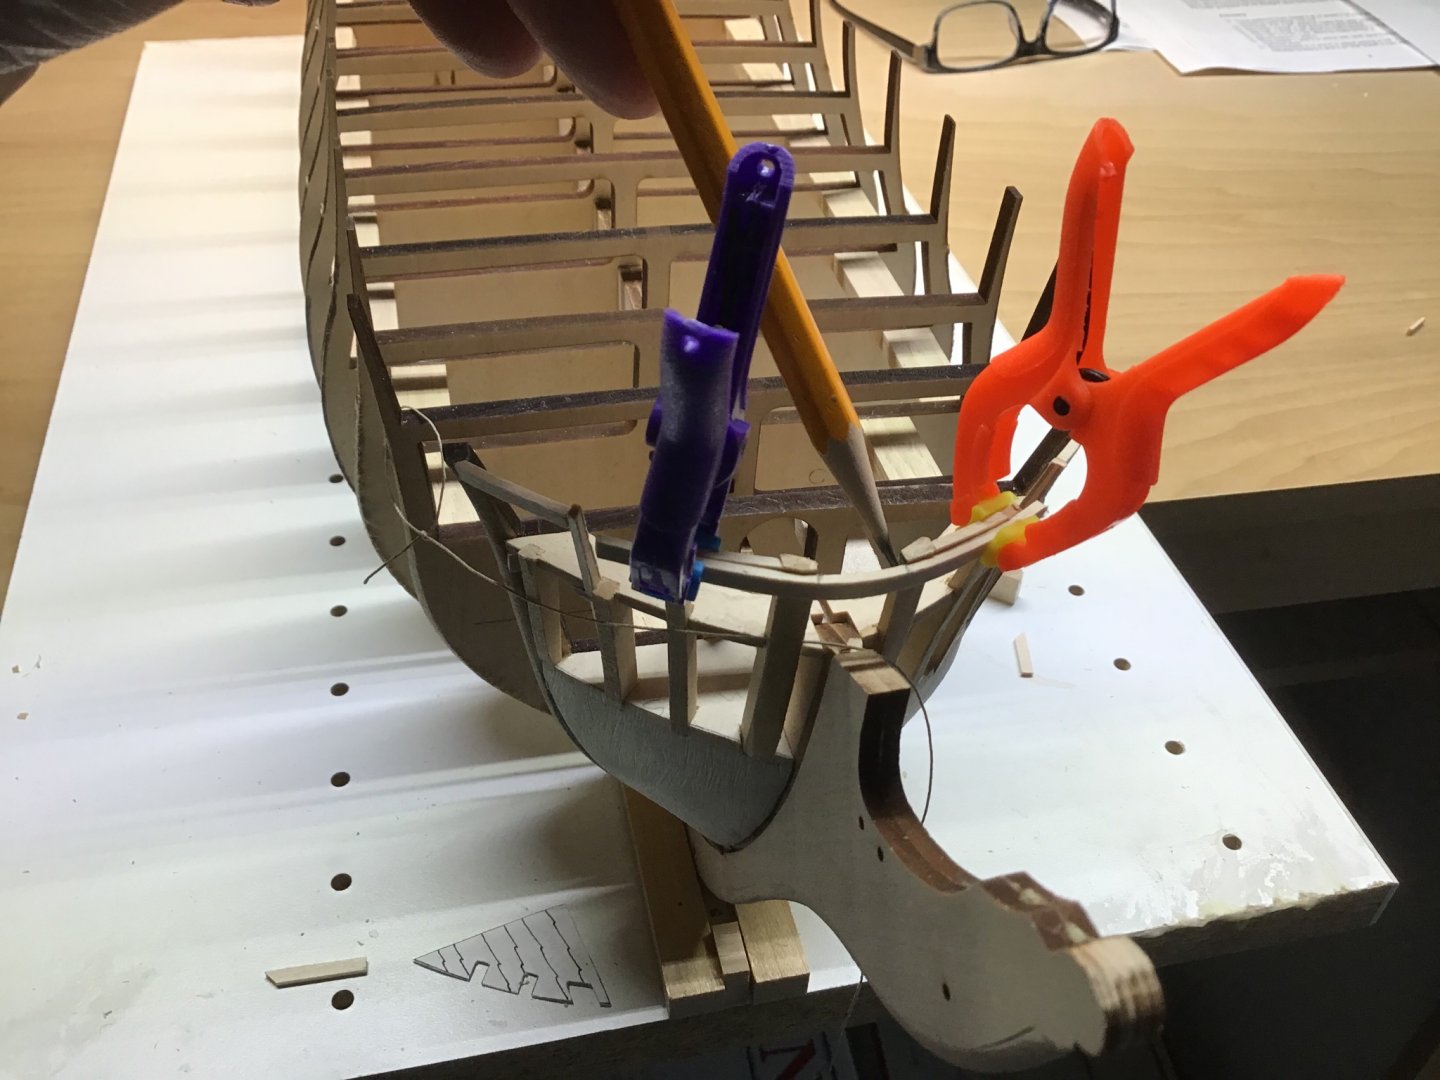
Making and Installing the Waterway This is a significant piece of woodworking. Boards are cut with a curve, beveled along a curve, steam bent, and notched. Hand tools included, block plane, fishtail chisel, and a mini edge plane. The Waterway is a picture frame around the main deck (named spar deck on this ship). Five boards with three shapes make the frame: 2 straight, Port and Starboard sides, from the stern to bulkhead E; 2 curved, Port and Starboard sides, from bulkhead E to the bow; and 1 across the stern. Kit supplied material used for the straight and stern boards, hickory for the bow boards to allow a continuous piece. The cross section is flat top and bottom, with an inside bevel from halfway across the top inboard to a point 1/16” above the inside bottom edge. Made the straight sections first, steam bent the boards, clamped to the frames and marked the location of each bulkhead extension with the marking knife. Then cut notches in the board to accommodate the angle of the bulkhead extensions, so the board edge could set in the bulkhead extension corner. Cut the bevel last, with a small block plane. Learned that next time best to cut the bevel first, then steam bend the plank. 45 degree mitres were cut on the aft ends. For the bow planks, first establish the curve of the bow on a wood template. Used the flexible French curve on the plan along the outside edge of the frames, and marked the line on a piece of red cedar (left over from a closet project). Cut the cedar on the bandsaw. Then used the compass to mark the bulkhead inside curve, and cut that curve on the bandsaw. Used hickory for the bow planks, the angular grain (last picture) makes the board very sturdy along the curve - will not easily break along the curve, like pine. Curved bevel was cut by whittling with the marking knife, then the card scraper used to flatten the bevel. Only way to flatten a curved surface. Used sanding drums on the drill press to square the board edges. Stern piece last. Cut to length, then cut the mitres. Used a test piece to establish the angle (a little less than 45 degrees). Next cut the bevel with a block plane. Reduced the thickness by planing. Last planed the forward edge. with an edge plane to reduce the width - this reduced the bevel and increased the thickness at the forward edge. Straight forward glue up. Long boards first, bow planks next, stern board last. Butt joint between long and bow boards. Smoothed butt joint transitions with the fishtail chisel. Onward to the plank shear and the gun port framing....


-
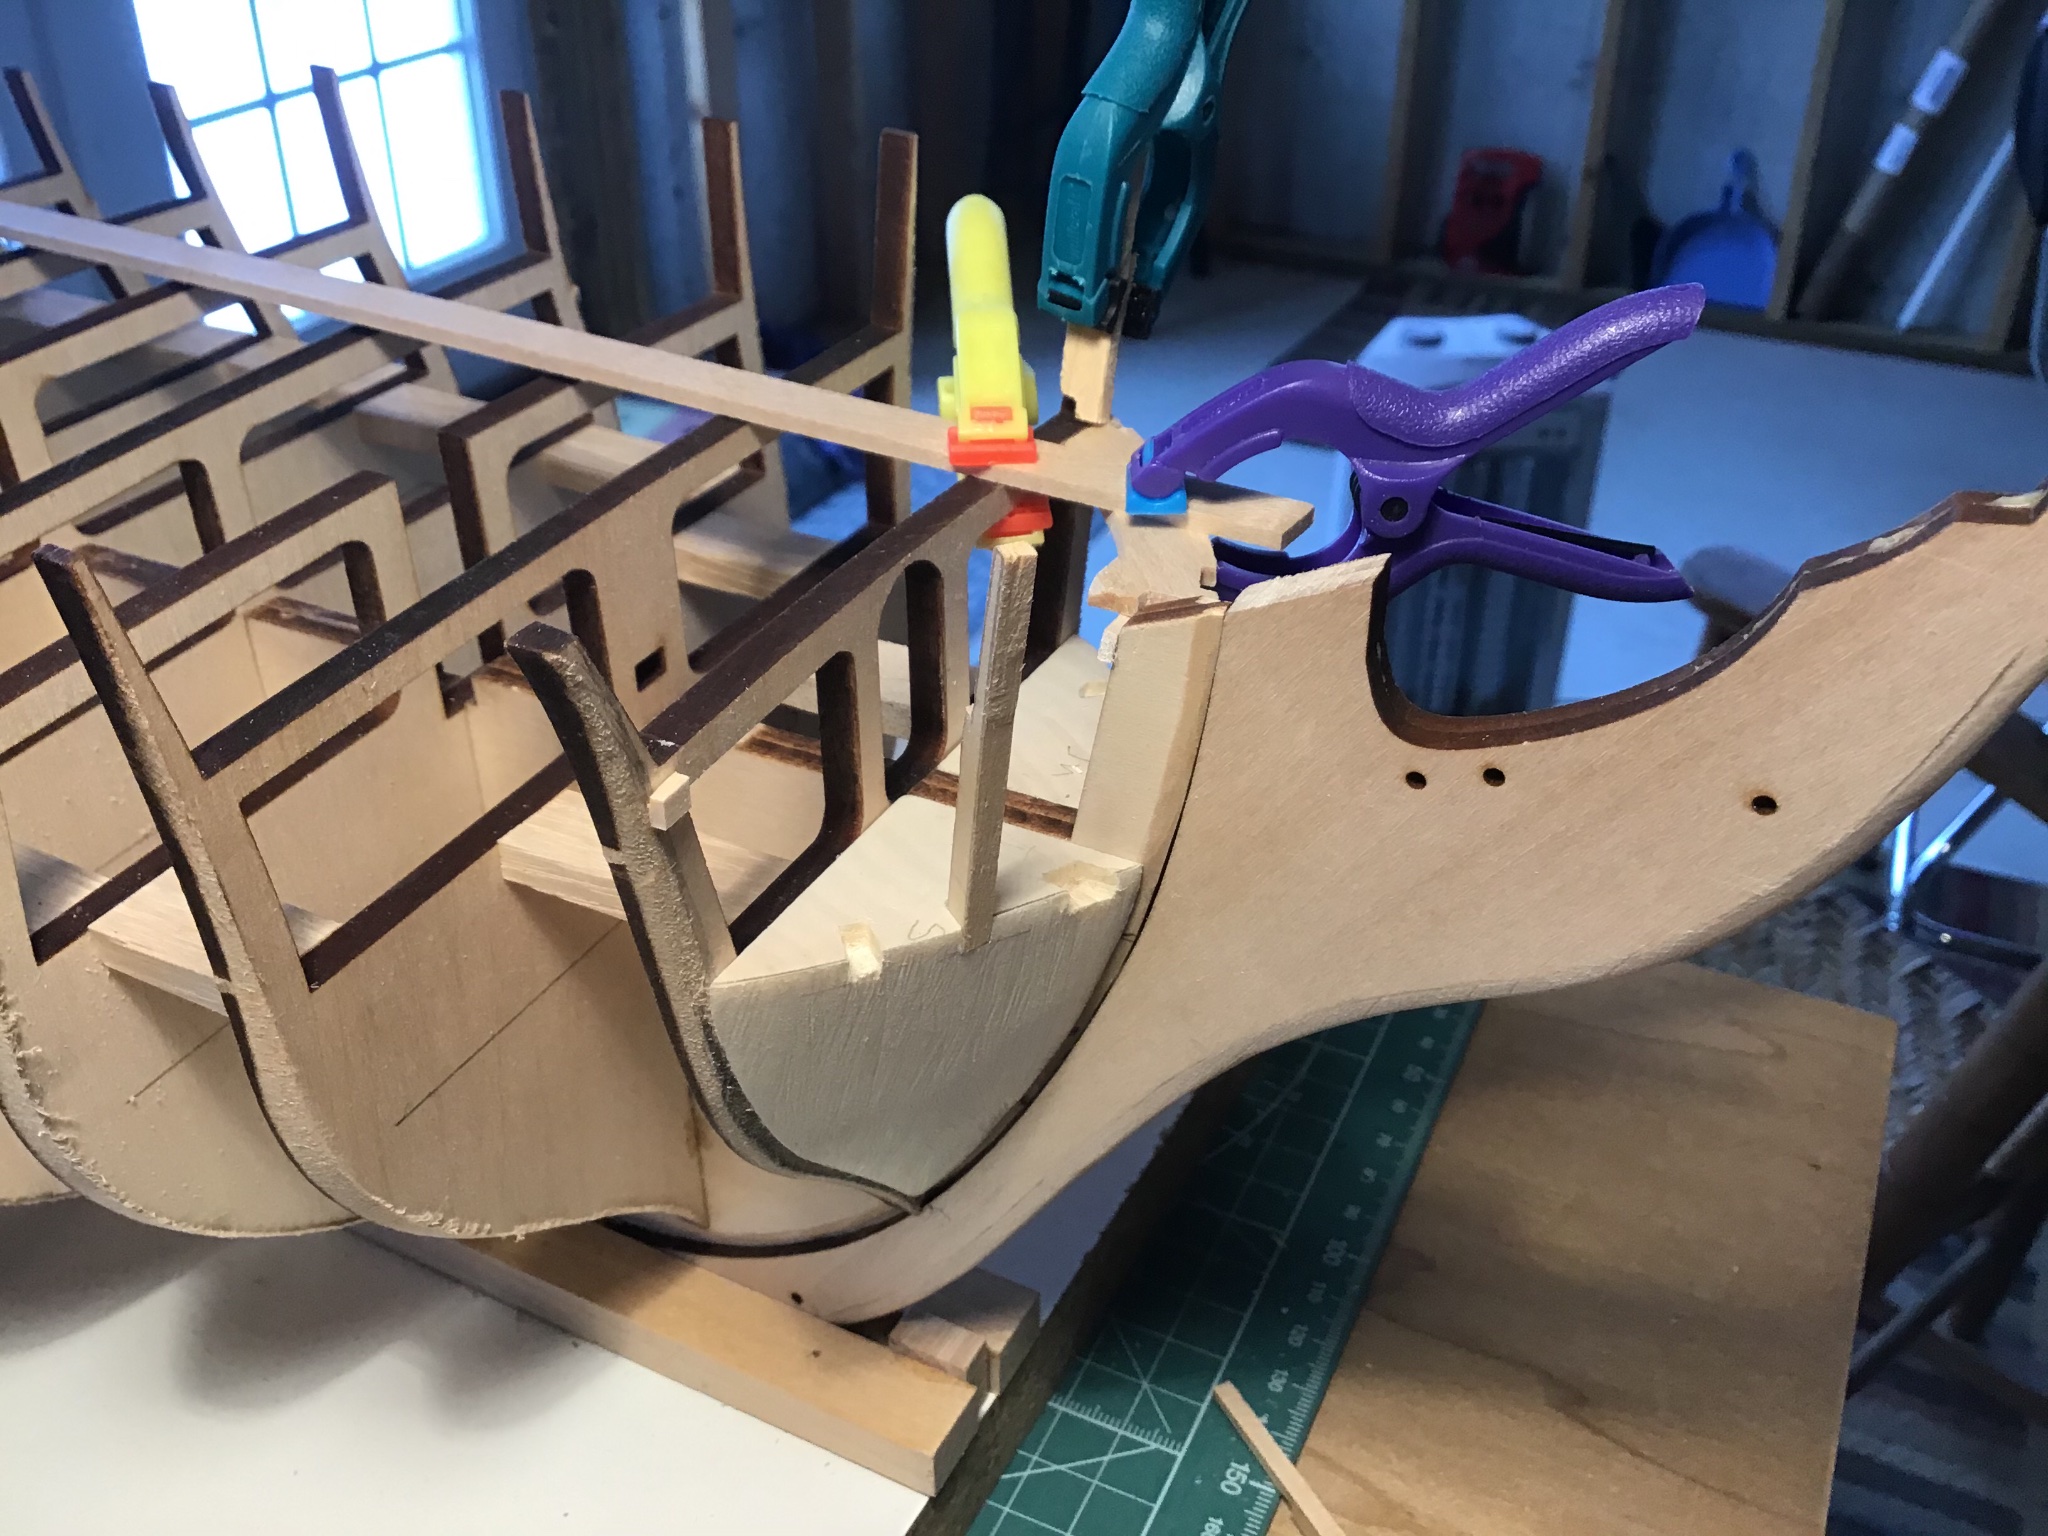
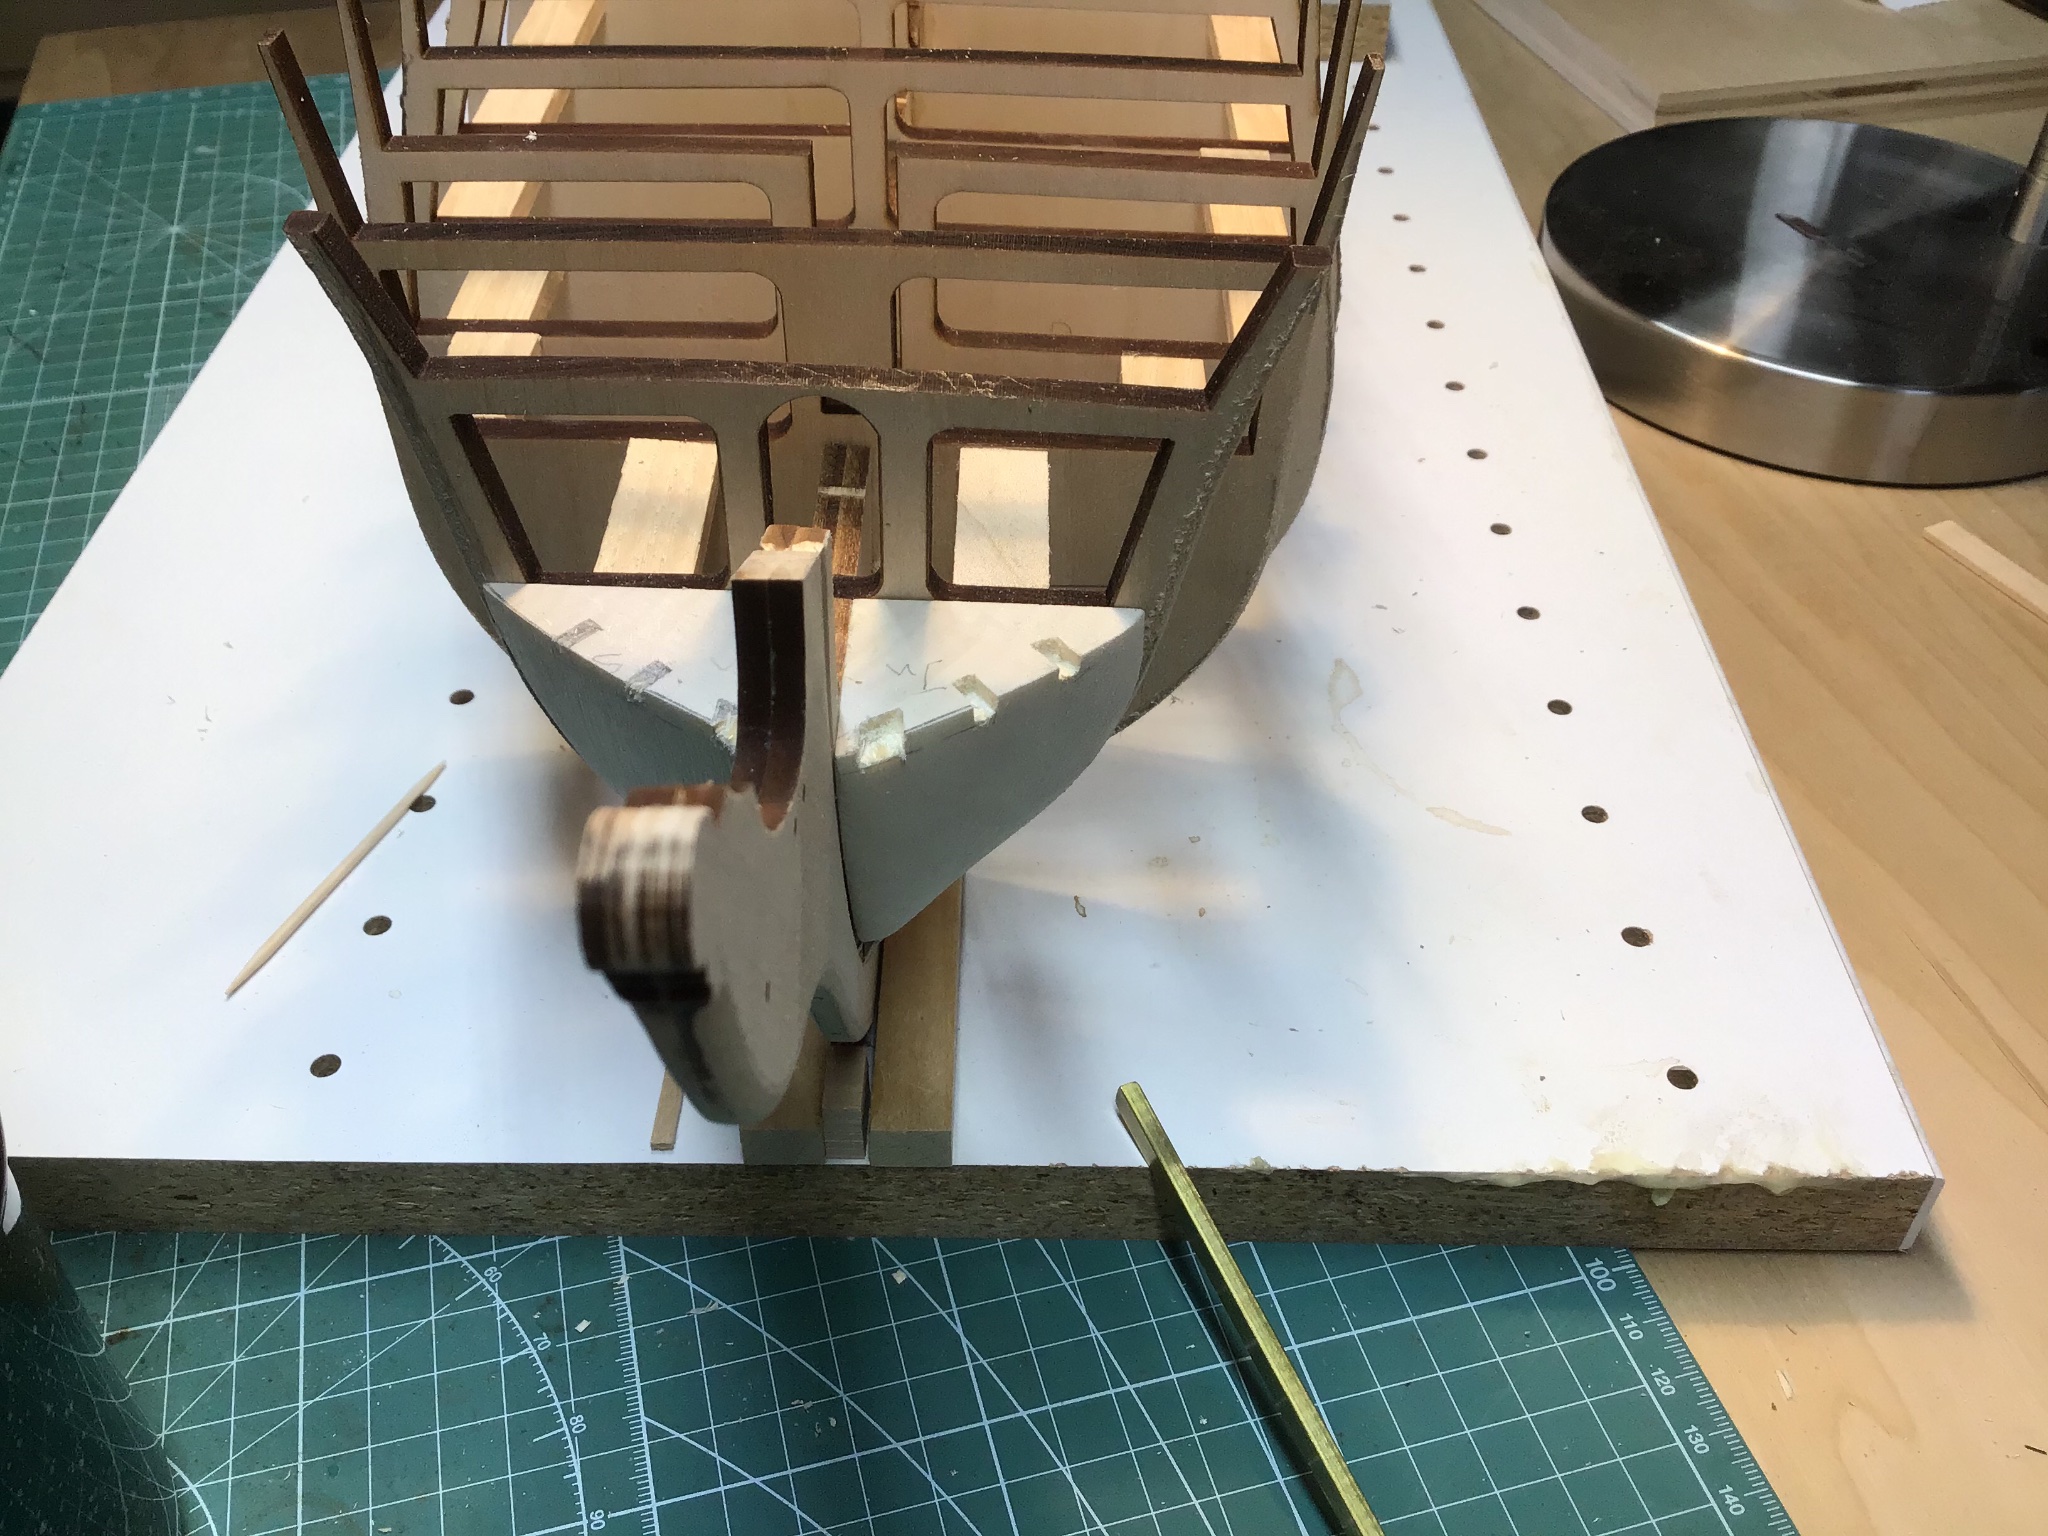
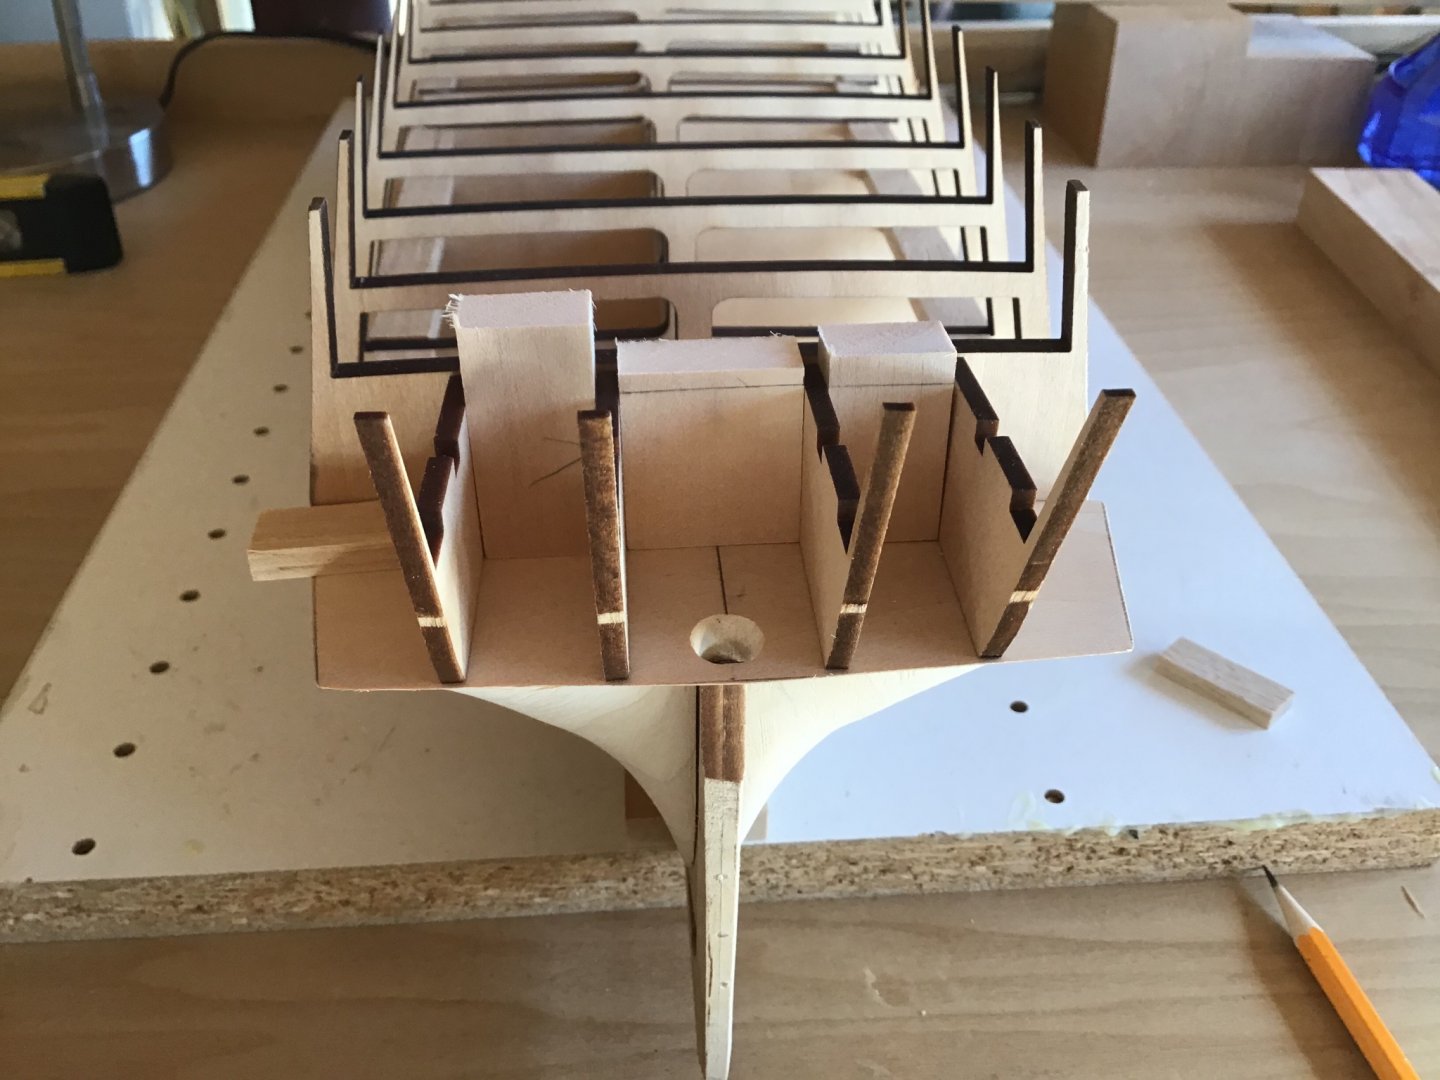
Transom Frame Installation Installed the stern transom framing this week. I like to use spacer blocks for this type of job. Setup the Byrnes saw with the sliding table. Used steel rule and square to set the fence. Make sure all is square, counter with bulkhead R, and frames with counter and bulkhead R. Installed the outer frames first. After installation found that bottom after frame spacing was on, while the top tips were closer than expected. Will need to remove a center section of the laser cut stern top rail, picture shows it overhanging the transom frame tops. Result was the spacing between the inner frames needed to be reduced. Prior to installing, padded the deck and bulkhead R sides of the inner frames with strip wood, so height matched the deck and the aft side was flush with the counter block. Straight forward after that, clamp spacer blocks, and install the frames. Onward to the waterway and beyond..... Have a great week....

-
Enjoyed reading about the problems and challenges, and seeing the very nice final result. Thank you!
- 54 replies
-
- 1
-
-
- norwegian sailing pram
- model shipways
- (and 1 more)
-
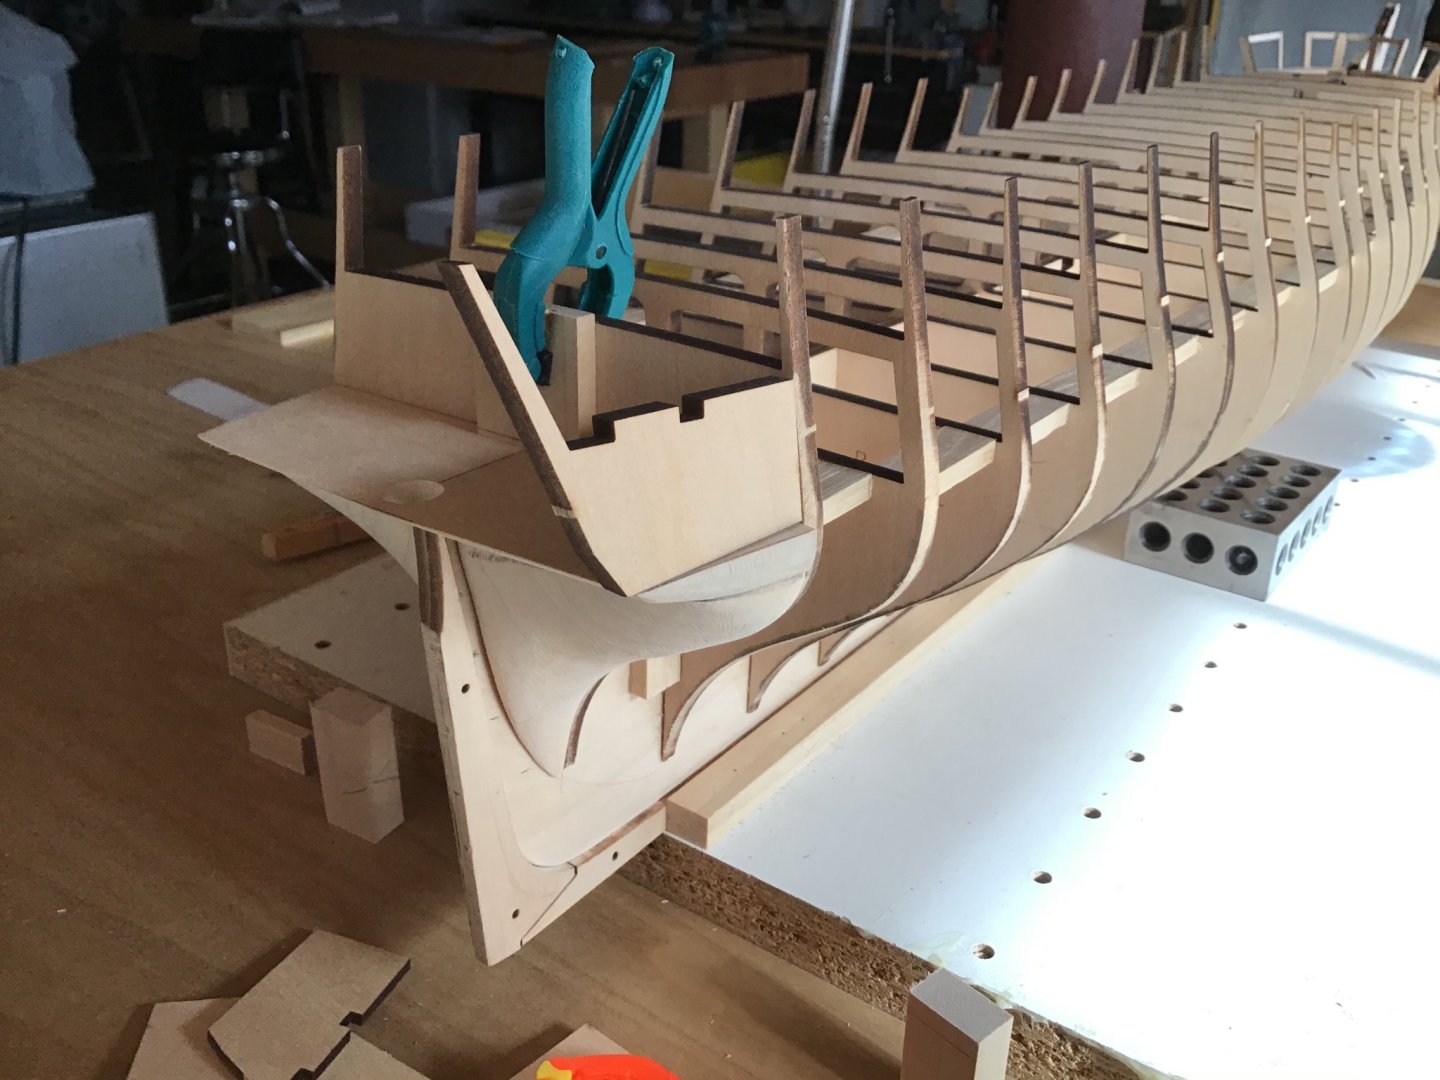
Bow Framing Completion Hello, hope you had a good week. This week band saw up and running, with a new drive belt. And completed the bow framing. Learned that beveling the timbers was very important and the best way to cut them is with a sharp fishtail chisel. No better way to get, small shavings, cut to the lines, and make a flat bevel. Alignment is important to me, so after manufacturing the timbers and the spar deck rail, used planks clamped to the deck framing to locate the spar deck rail ends at bulkhead A and the stem. To support the spar deck rail, small blocks were used to provide ledge points on bulkhead A and the aft end of the stem. The remaining work was straight forward, final shaping and installation of the timbers, and stringers. A string around the bow was used to help with timber alignment. Spacer blocks were used to ensure the correct spacing both between the timbers and, Port and Starboard. A long piece of stringer board was wet under the faucet, steam bent, and clamped around the bow. After drying and marking, this board was cut for the stringer pieces. Finally the assembly was sanded and shaped with the flexi file. Next time around, would make the spar deck rail out of hardwood, like cherry, or plywood. Pine works, but inevitably some of the edges of tabs between timbers flake off because of the grain direction.


-
While processing the wood for the bow framing timbers the Bandsaw died.....drive belt shredded..... Lucky to be able to get a new belt for this Craftsman machine....belt should be here week after next.... Shifting to completing the Amati Endeavor racing yacht...

-
About the scroll work. Good job dealing with the problem at hand! Have this kit and wondered about attaching the bow scroll work. I’ve done, it but glueing a part on a painted surface seems less than ideal. Perhaps use brass pins to help. Drill two holes in scroll work, off the model. Use scroll work as a template to mark the two hole locations on the hull, and drill the two holes. Make hole depth less than pin length. Hang the scroll work loosely with the pins. Apply CA to underside of scrollwork - slide scroll work along nails to contact the hull. Cut the heads off two brass nails. Fielders choice... Looking forward to seeing your completed Atlantic!
-
Hello, about the glue....let’s take advantage of their properties. As you say CA is a fast, but it’s a brittle, bond. So the CA means no need to clamp or hold the plank. If you make a mistake, the plank can be popped of the bulkhead, pry with a knife, and removed before the glue on the edge dried. Start over by sanding off the residue on the bulkhead. Mistakes always happen! Read about the glue procedure somewhere, check out Ship Modeling Simplified by Mastini. There are ways to check that the bulkheads are book matched around the centerline vertical axis. Dealing with problems is part of the experience, and becomes easier with experience, eventually you’ll be able to tackle any problem.
-
Have built quite a few plank on bulkhead and solid hulls. True POB is “harder” or has more problems than a solid hull. However they can be overcome. In my experience bulkheads have had fit problems. The beauty of wood is, if wood is missing, it’s easy to add, and if there is too much, sand it away. As GuntherMT explains above, the bulkhead problem is solvable. In my experience with POB, letting the planks lay easy across the bulkheads is important. Realize the board can be bent to fit the frames and it can be twisted, but it can’t be bent along the edge very much. A minute amount of edge bending to set against a neighboring plank is Ok. Edge bending to close a big gap deforms the board. So there will be stealers to fill gaps and planks will be tapered. Failure to taper means the plank will need to be edge bent to fit. So if you find you are edge bending it’s time to taper. Avoid hollows by edge glueing the board to it’s neighbor during installation. Install a board by applying wood glue to the plank edge, then placing dots of CA on each bulkhead. Start say left to right, left end on bulkhead, then moving right apply light pressure to push the board against it’s neighbor, at next bulkhead press board into CA, apply pressure, etc. Fix the board to each bulkhead one at a time. Left to right. Enjoy your first kit! Note I’ve noticed that once the model is finished and on it’s stand, underside hull or planking imperfections are less noticeable. The viewer is looking in from the side and down.
-
Bow Framing (continued) Regarding cutting the notches..... Plunge cut with two types of Xacto blades. Define the side and rear faces, then slice along the bottom face. Lift after slicing, fibers will pop out. New blades essential.


-
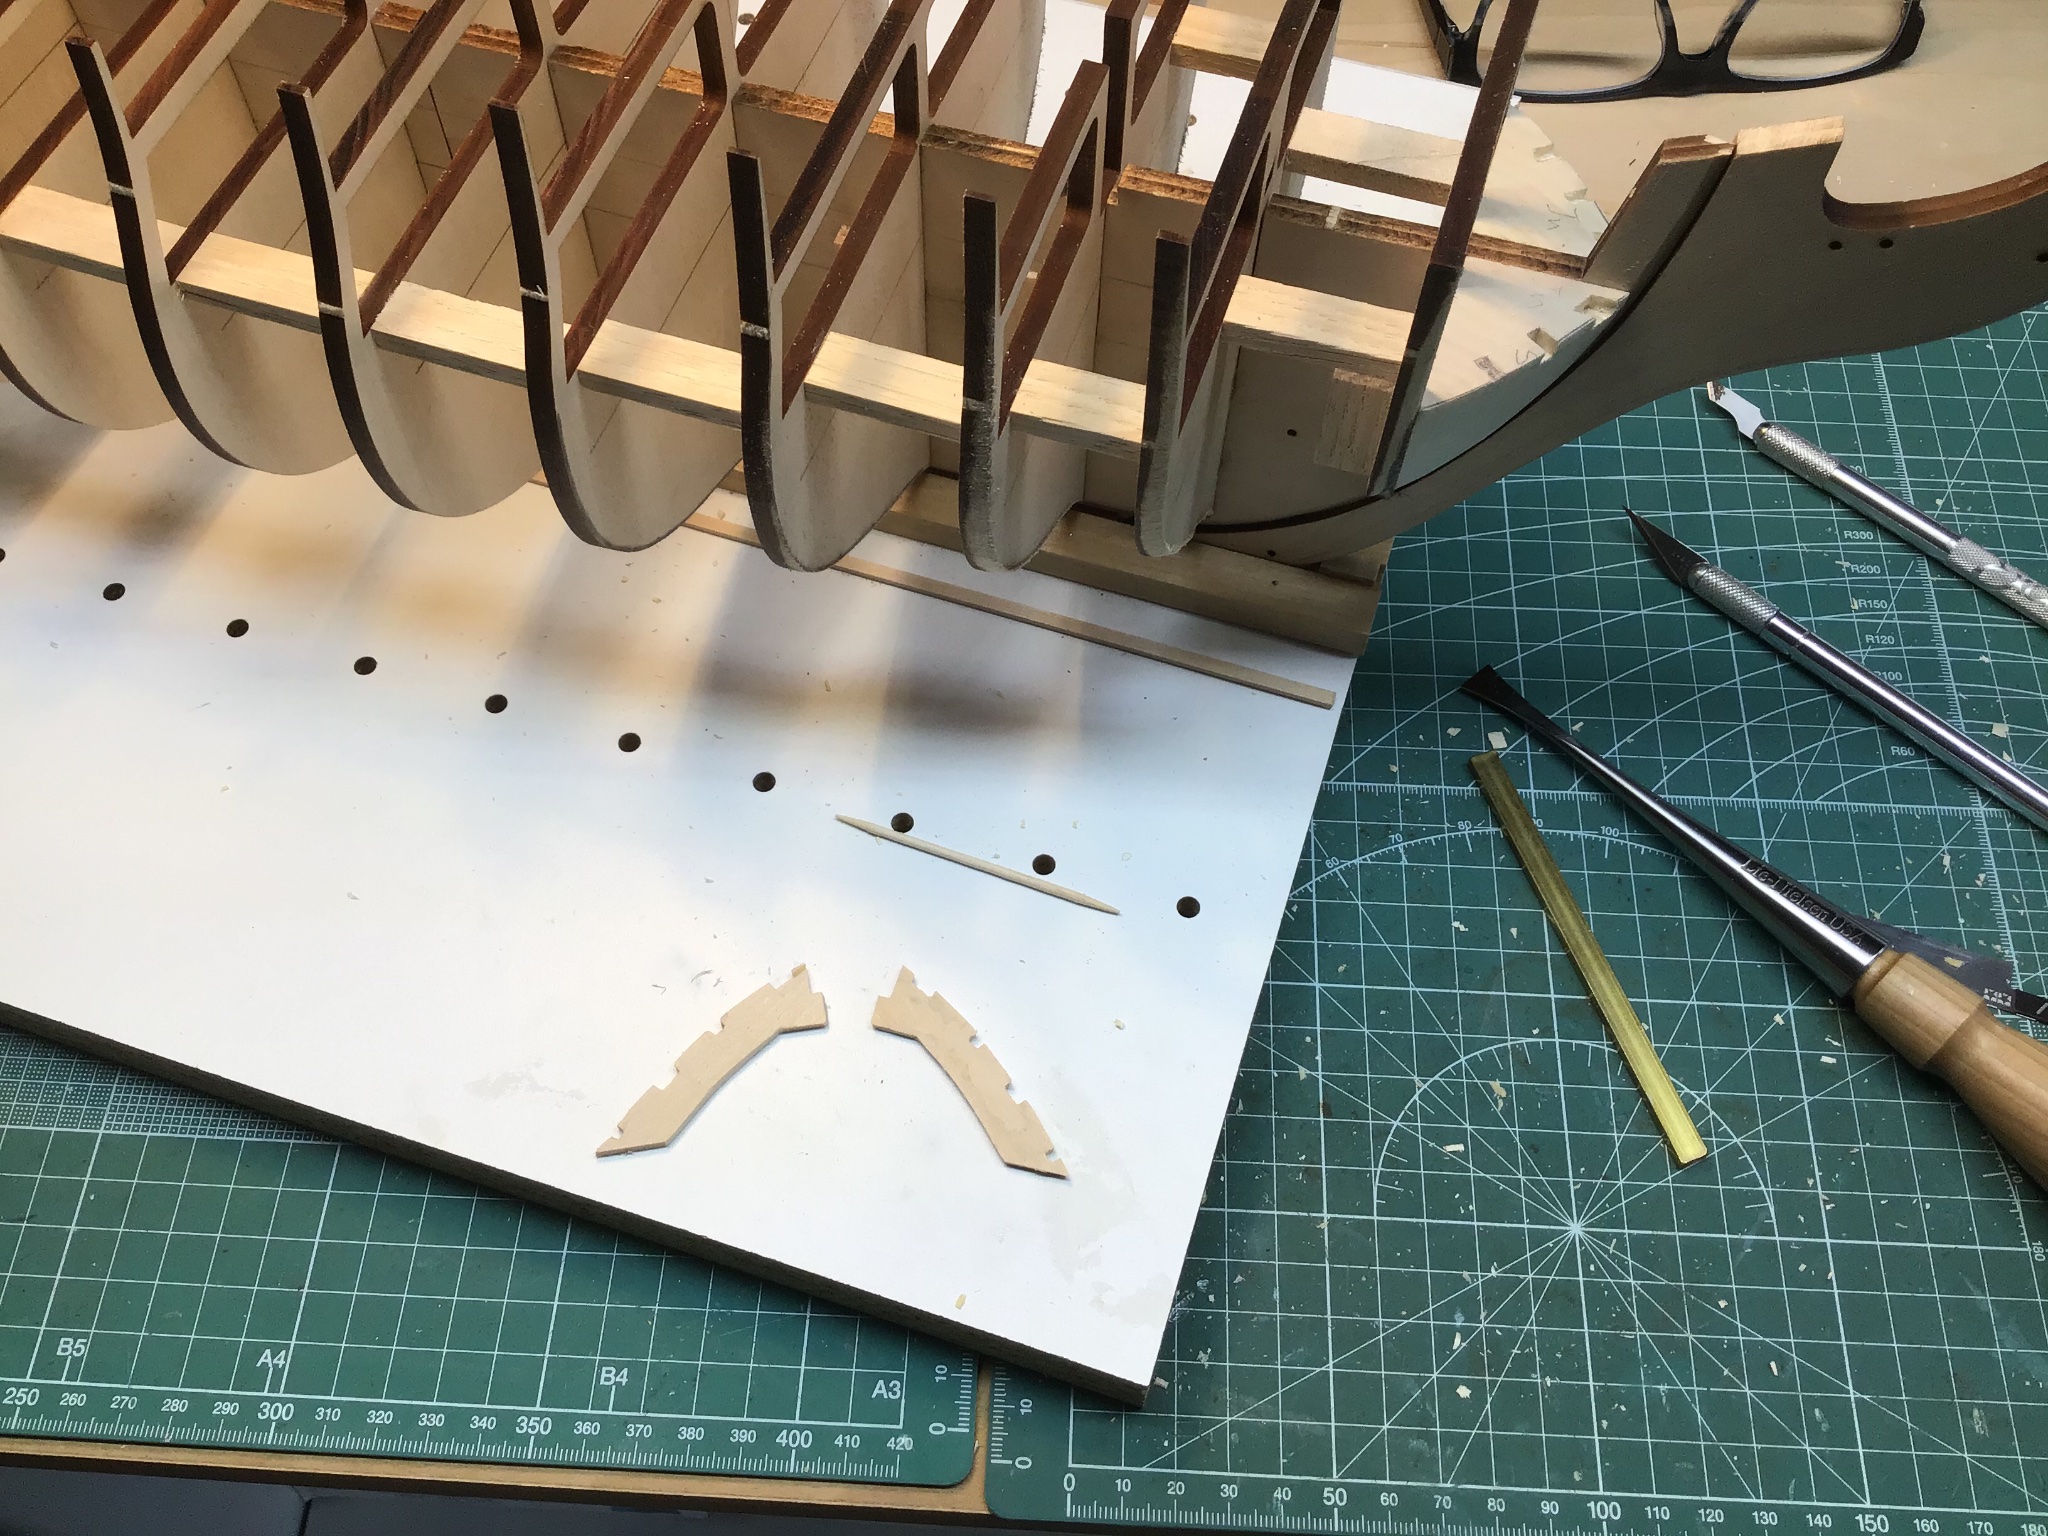
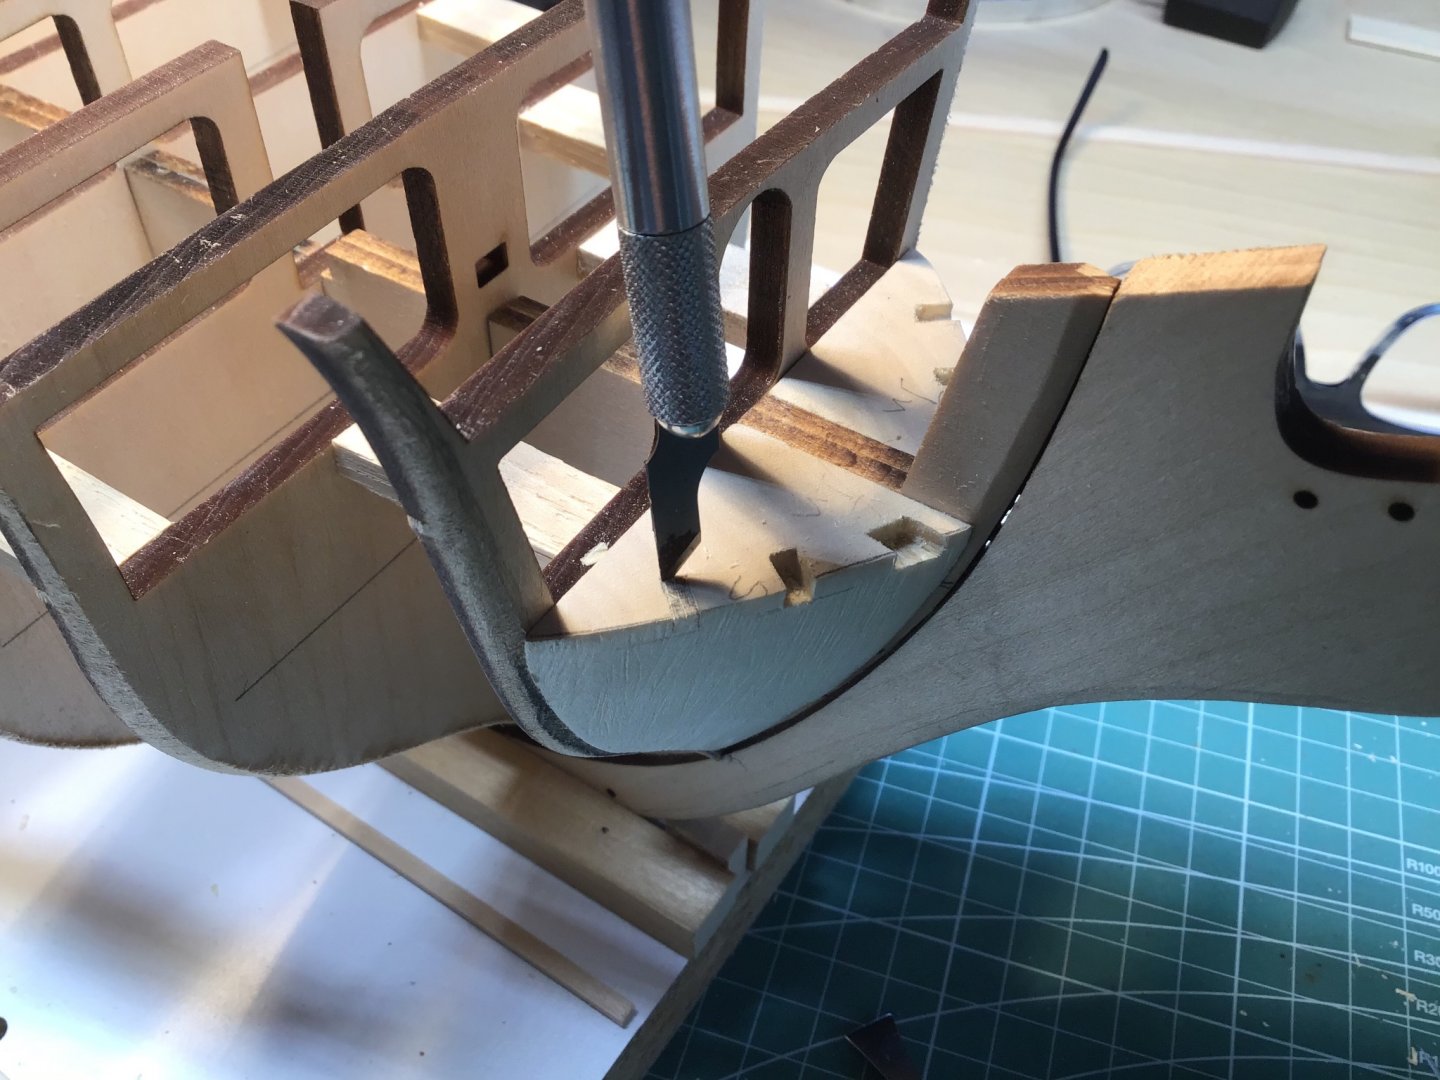
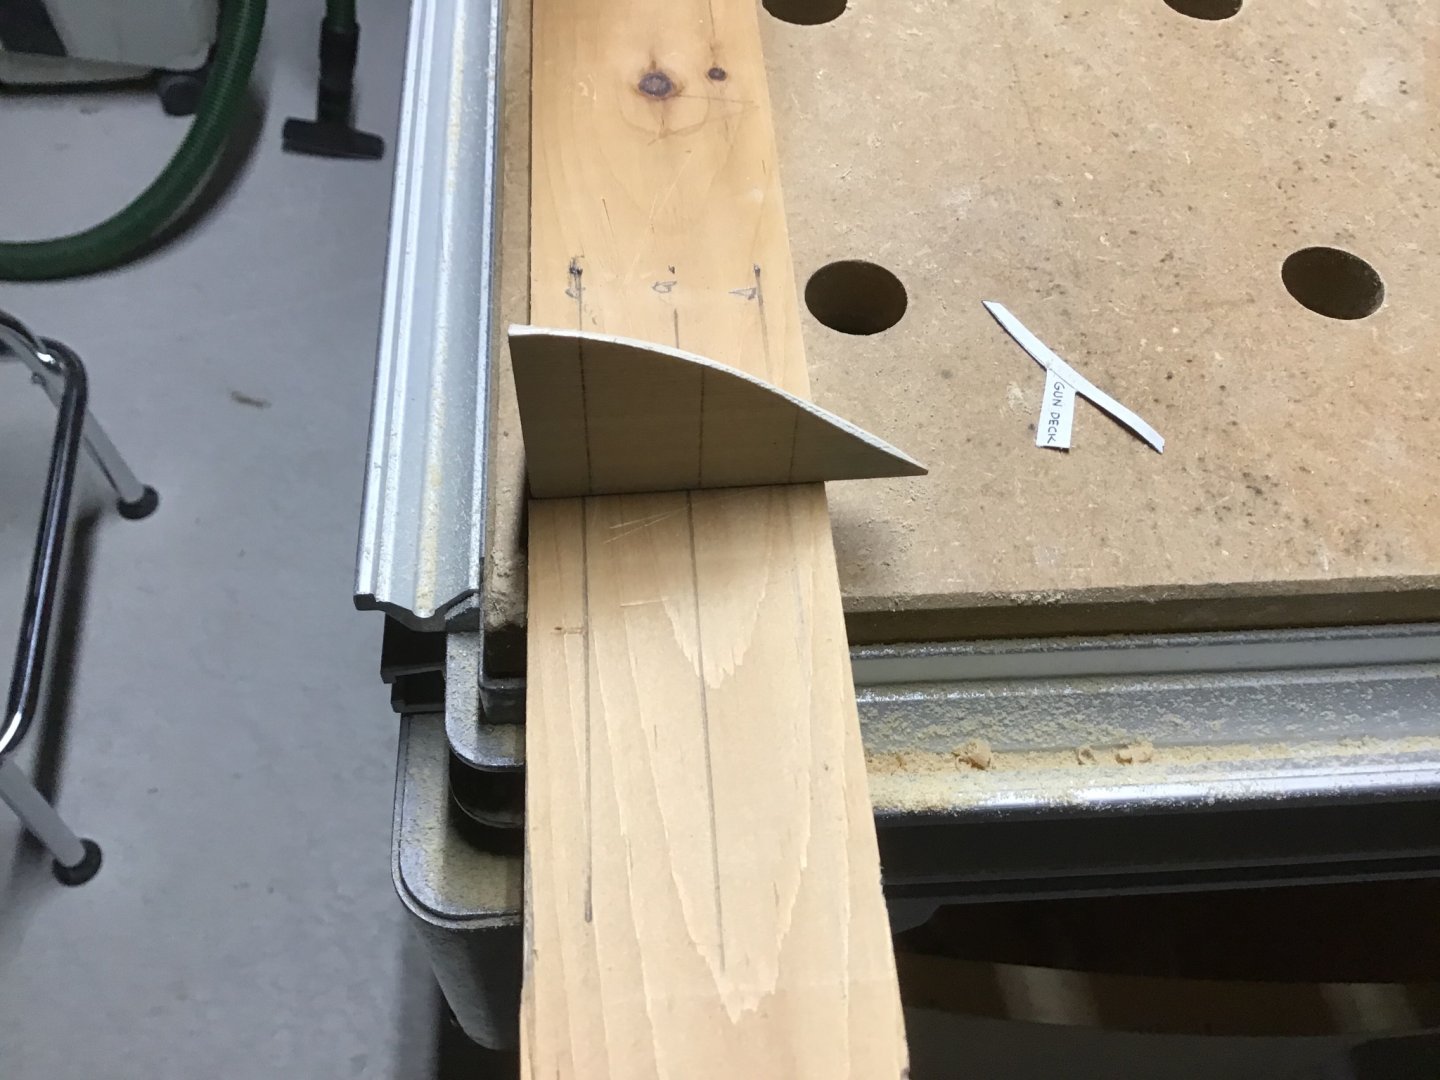
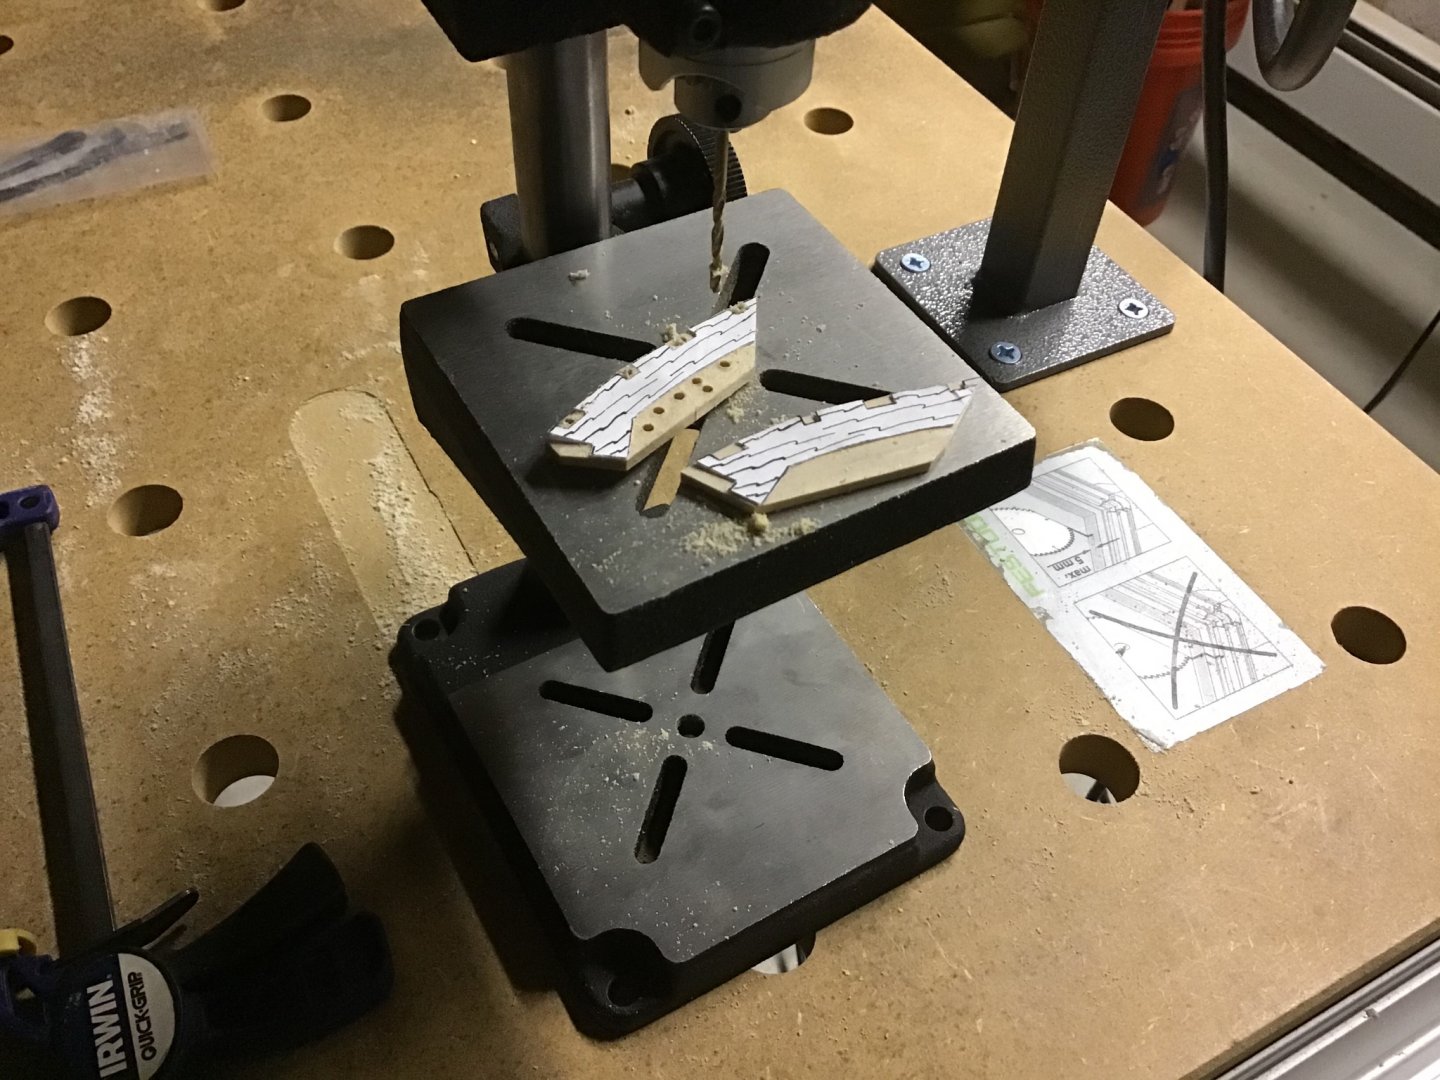
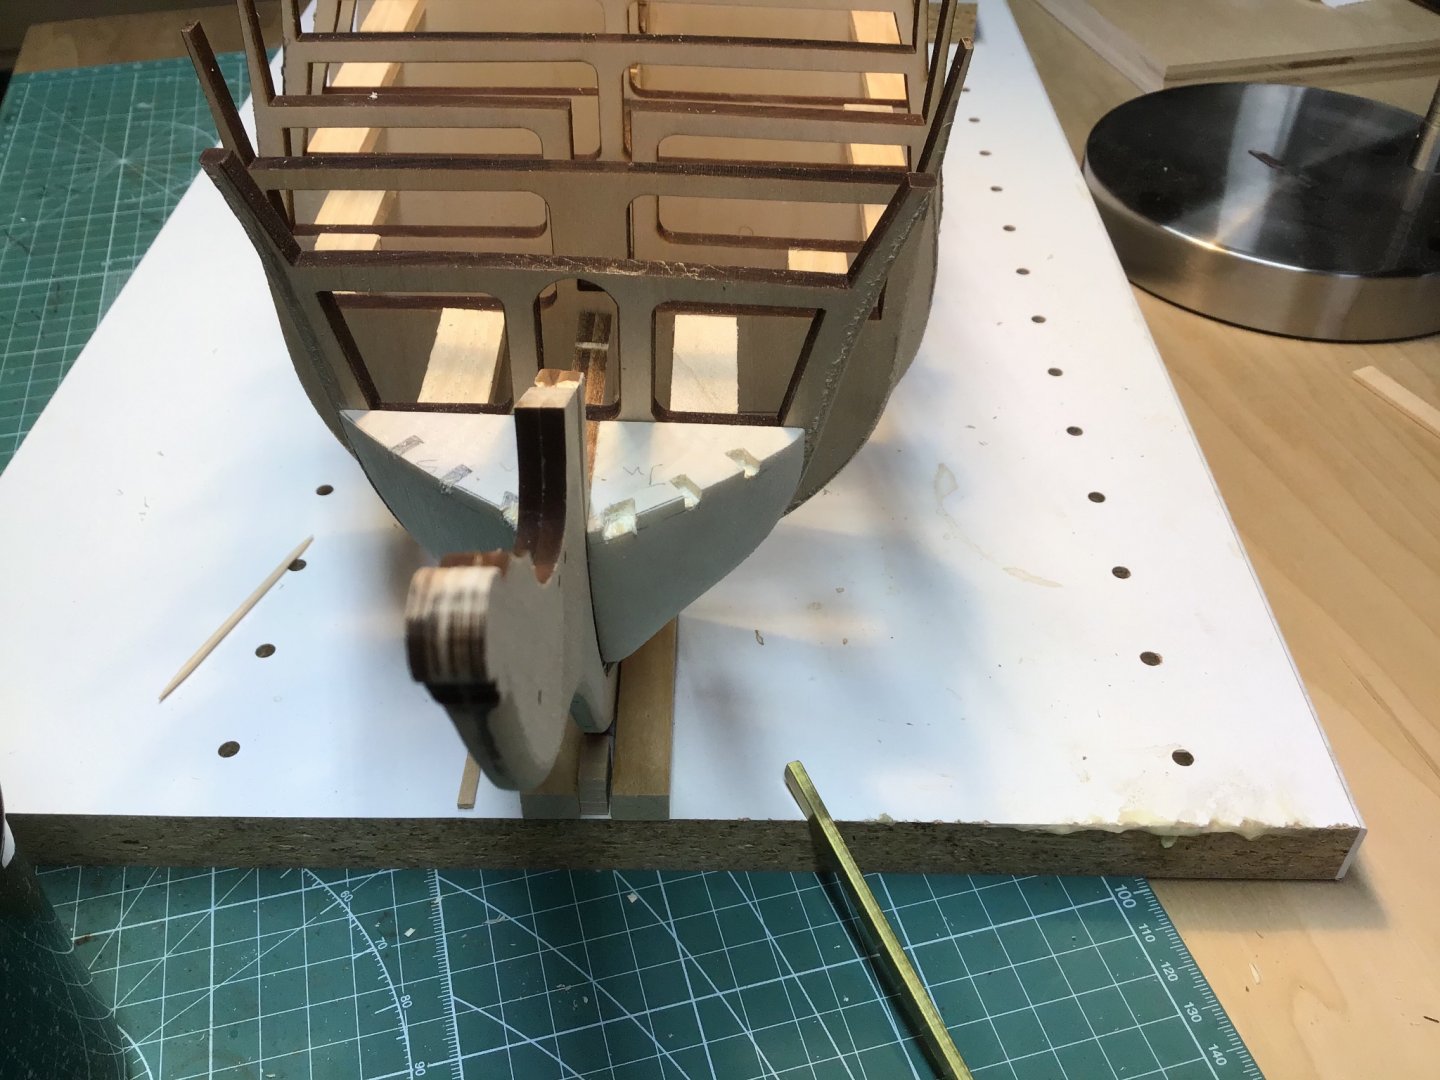
Shaping the Filler Blocks (continued), Starting Bow Framing This week spent time understanding how to make the stern filler blocks using the contour templates. Started on the bow framing. Filler Blocks: Found a board with the contour heights marked, as parallel lines, was a time saver. Index the block along the board edge, and slide the template along the line to contact the block. Shaped the block by working the midline shoulder between the bearding and bulkhead R lines. Kept rounding the shoulder and stayed away from the edges. Worked up to the bulkhead R and bearding line edges last. Bow Framing: Found notching the topside of the bow block, end grain, difficult. Used a Tamiya mini saw for the notch side cuts. Would do this job next time before installing the bow filler block. Used a brass bar to compress the fibers in the notches, port side done in the picture. Made the spar deck rail, attached template with double sided tape, found reside hard to remove, going with graphite paper tracing going forward. Also relearned you need a hardwood board under the chisel to prevent tear out. Used the Foredom drill press to make relief holes in the waste areas on the spar deck rail, to make it easier to remove the remaining waste with a chisel. Gentle chisel cuts needed, with the grain direction, tabs easily break off. Have a good weekend.


-
Thanks for showing the method for using the copper strips. And that spray gun is a game changer. Enjoying your posts, thank you.
-
Welcome aboard and greetings from Massachusetts. Always available to answer any questions. May your projects go smoothly! -Rich