ERS Rich
-
Posts
761 -
Joined
-
Last visited
Content Type
Profiles
Forums
Gallery
Events
Everything posted by ERS Rich
-
 Good move….the difference between theory and reality….clove hitches sound good in theory, the reality is impossible to execute….why not cutoff the lower rat lines?
 -
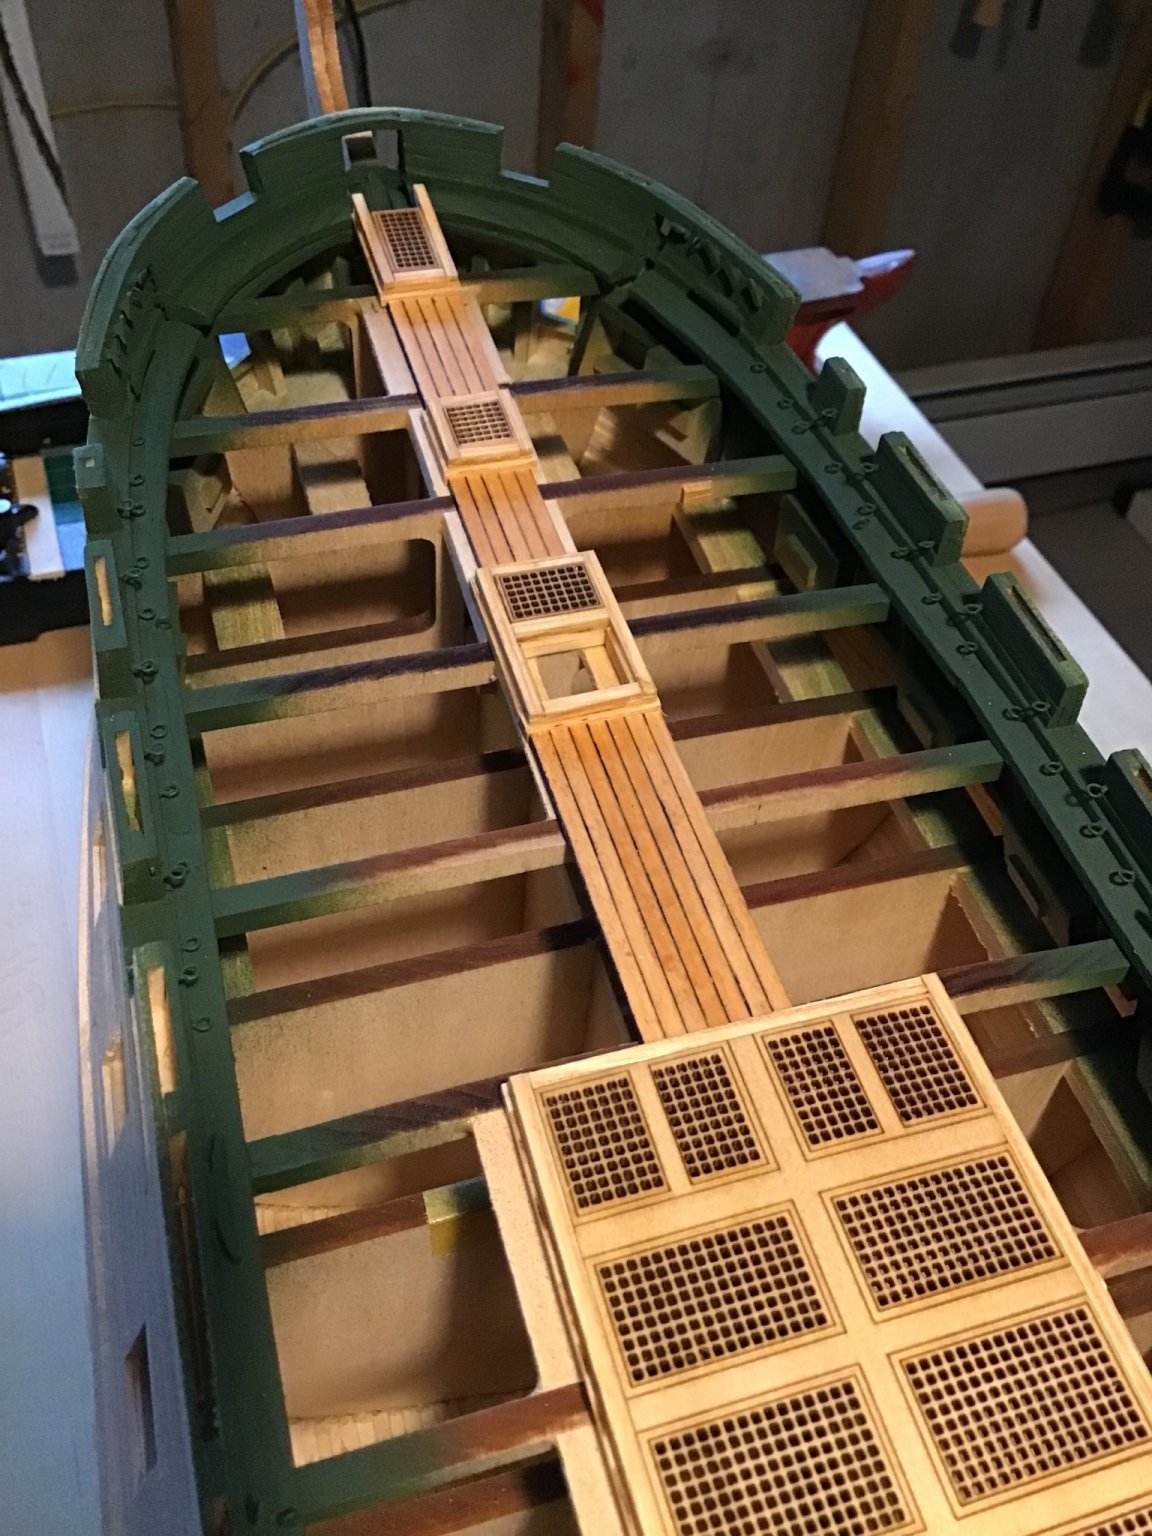
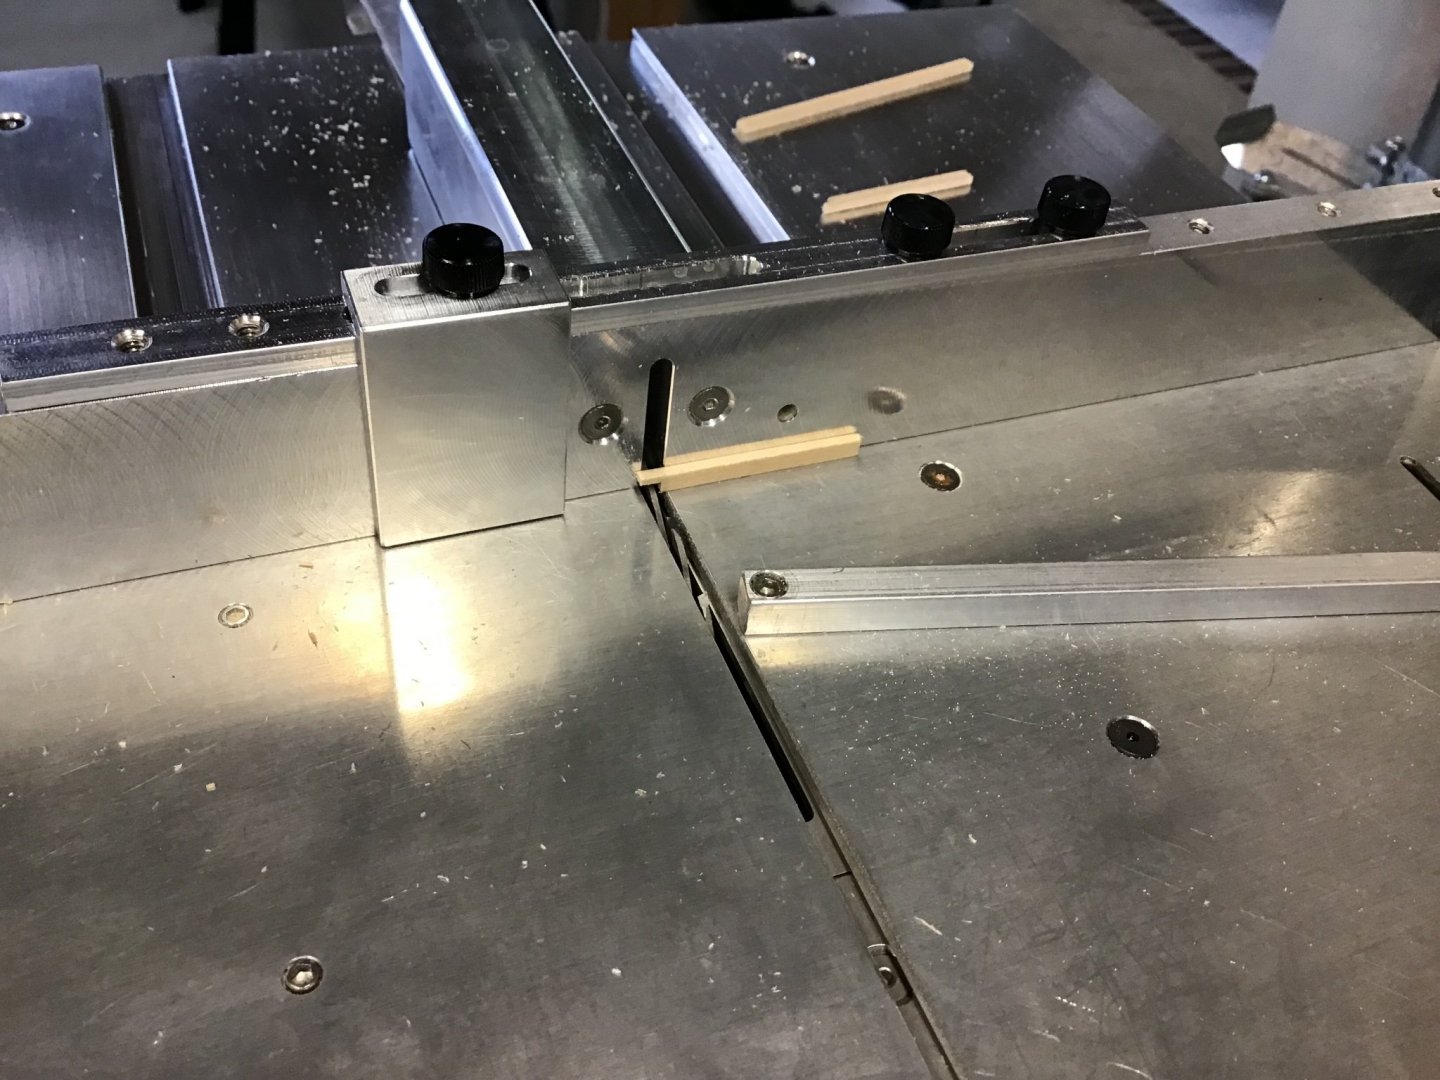
Planking the Deck - Part 2 Next is planking outward to cut notches in the planks to fit around the coamings. We’ll start with fitting two planks around the last hatch aft. The first 2 pictures show establishing the blade height with a couple of pieces of scrap. Adjust the blade height, by raising the blade and making test cuts so the two boards fit equally around the coaming aft corners. Once the blade height is good to go, cut two finish planks a little long and make the notches in the forward ends. Picture 3. Note make the notches a little long and trim the forward ends until the corner in the board fits the coaming corner. Last cut the aft end of the planks to fit.


-
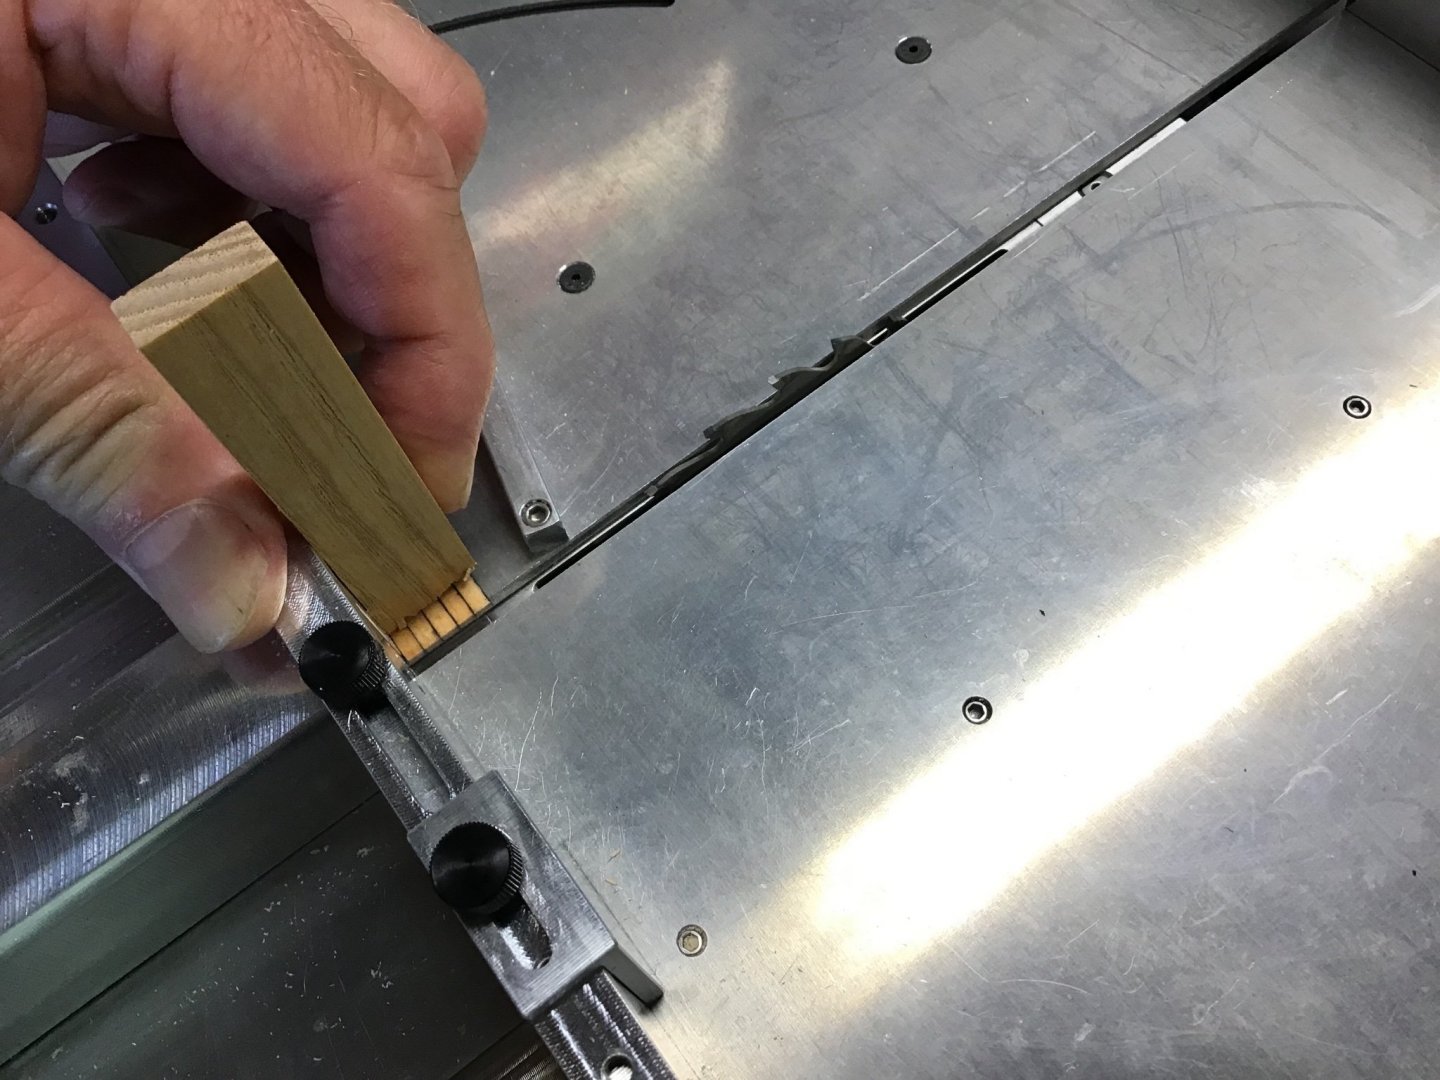
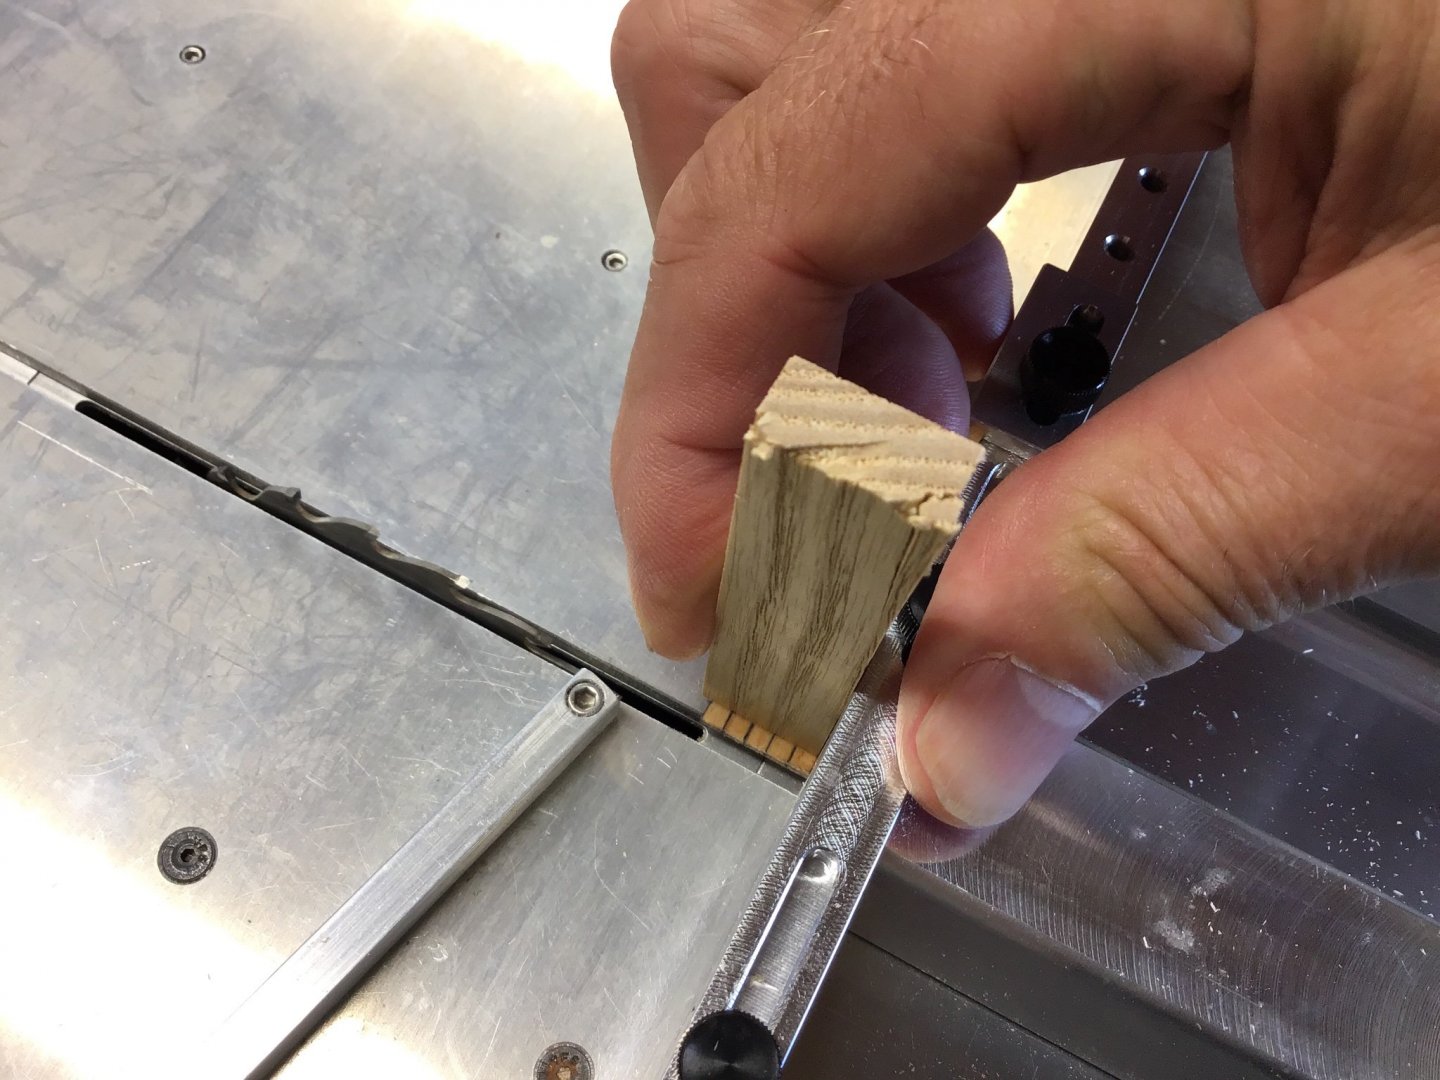
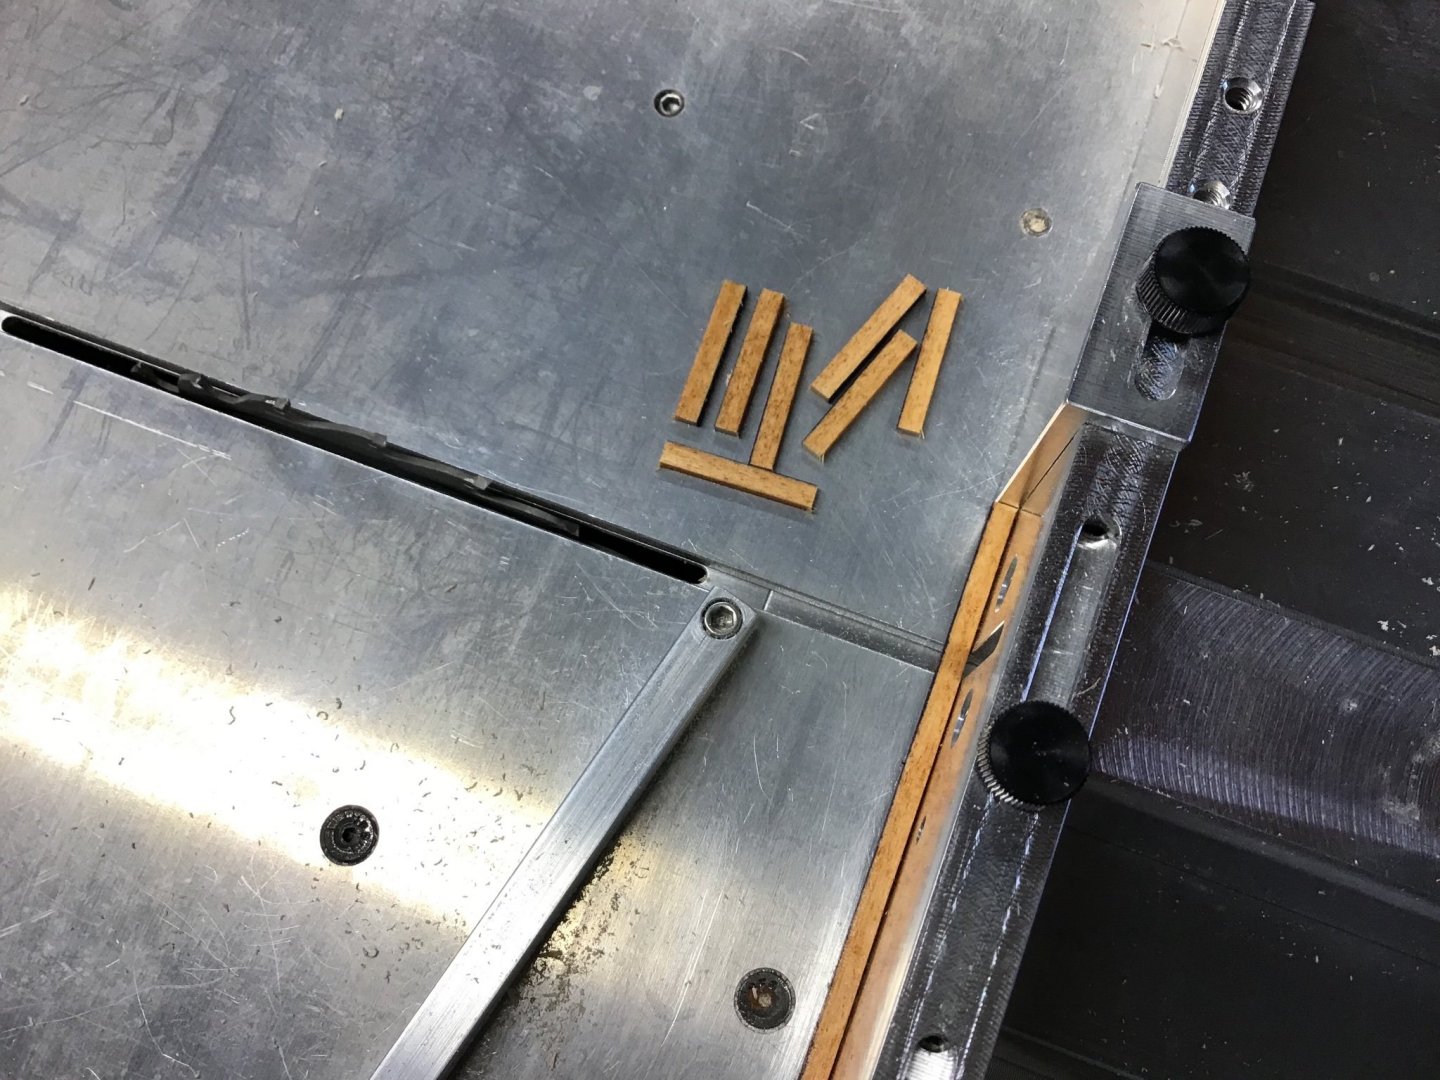
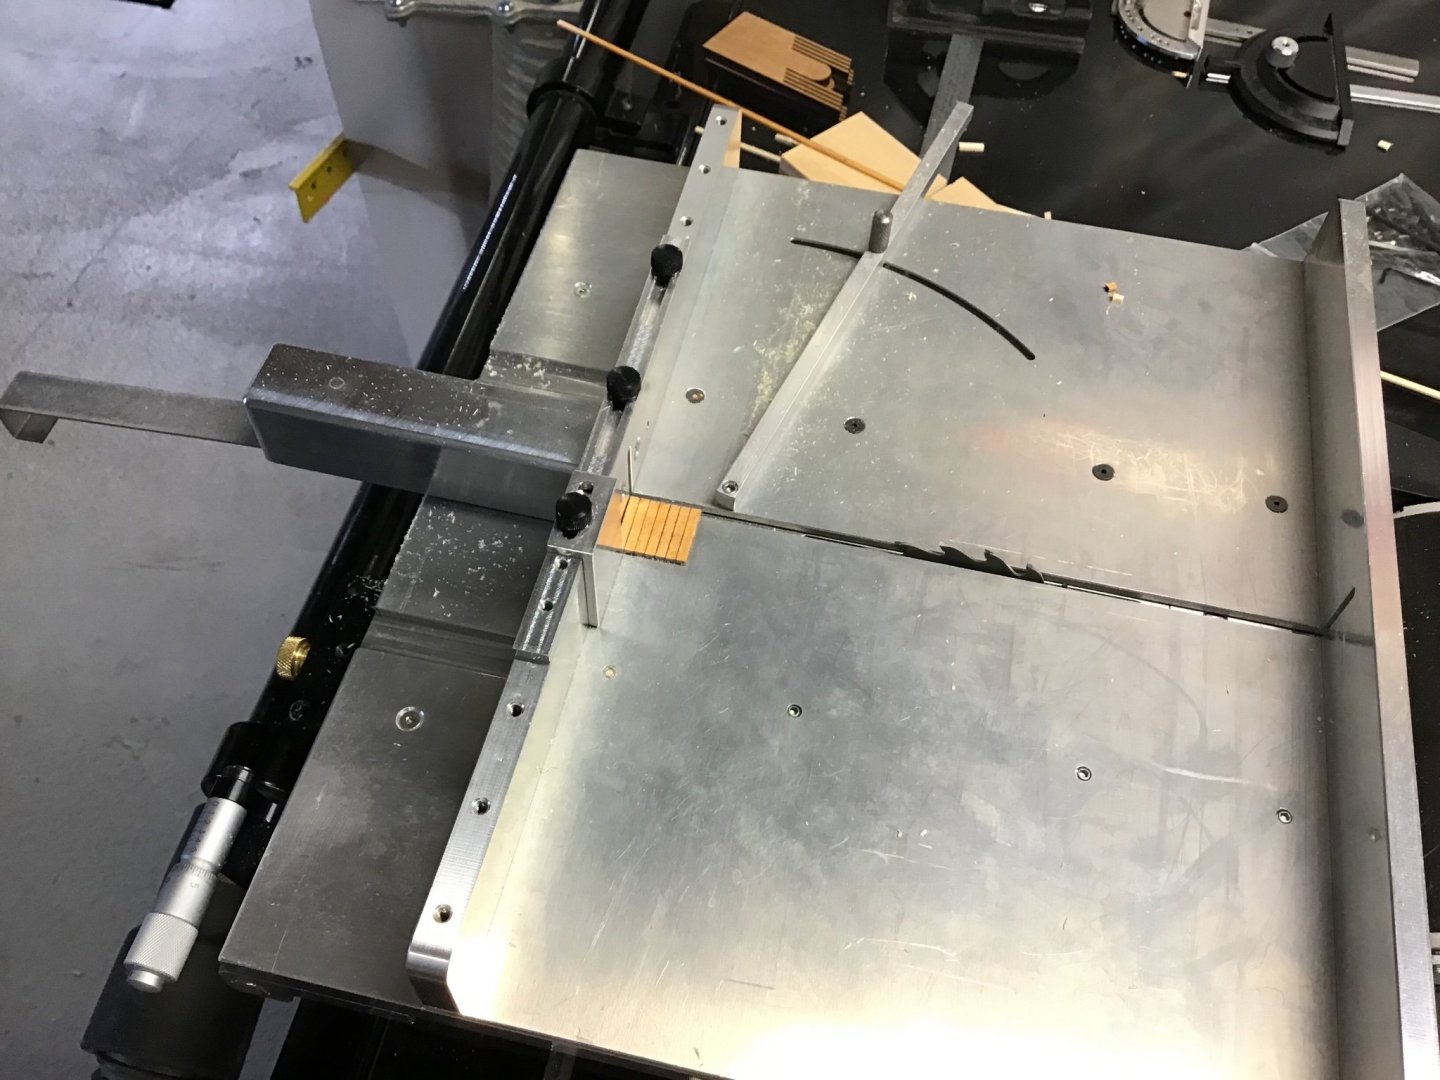
Good Morning JS, Good question, had to look at what I bought, and have a fine tooth blade, but forgot about it and have been going with the first blade I put in the saw. Found best to cut slowly, to avoid tear out at the end of the cut. Especially with pine. A couple of details for the new comer when making the cuts. First cut the right side, then slide piece along the fence and cut the left side. Keep the same edge against the fence. Use a block to hold down the piece, I like my finger tips! The sliding table, for me, is essential for safe square cuts of small pieces.
-
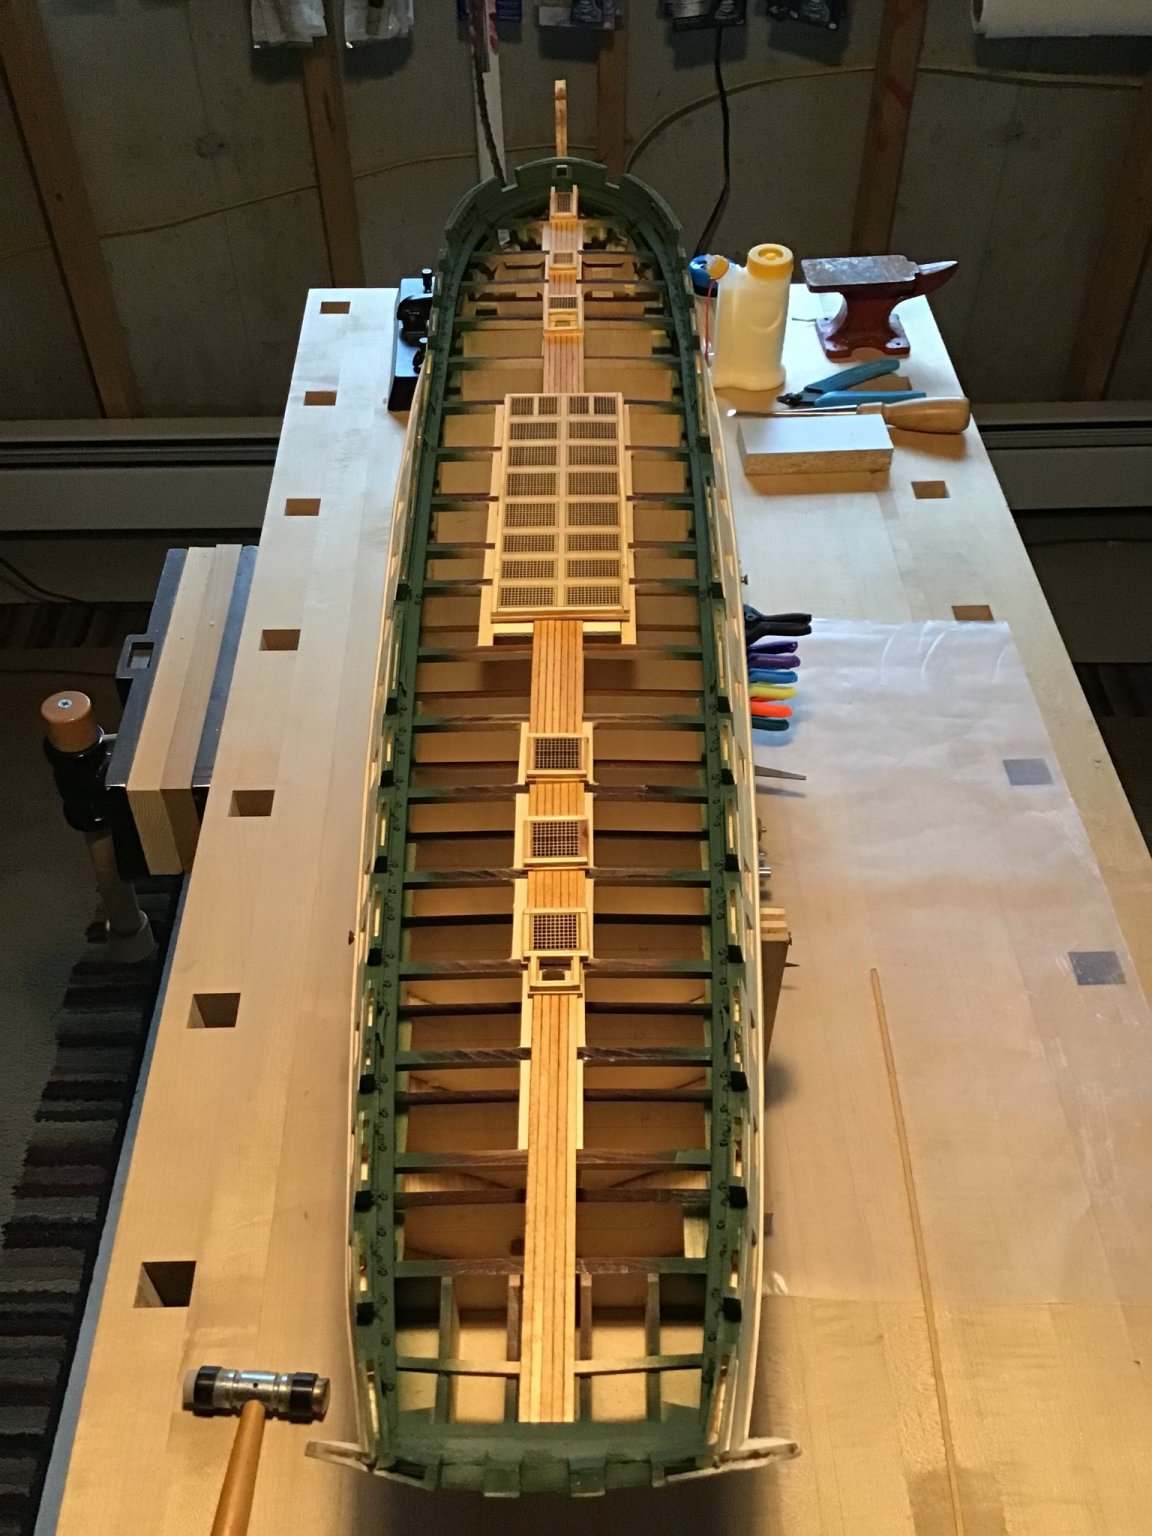
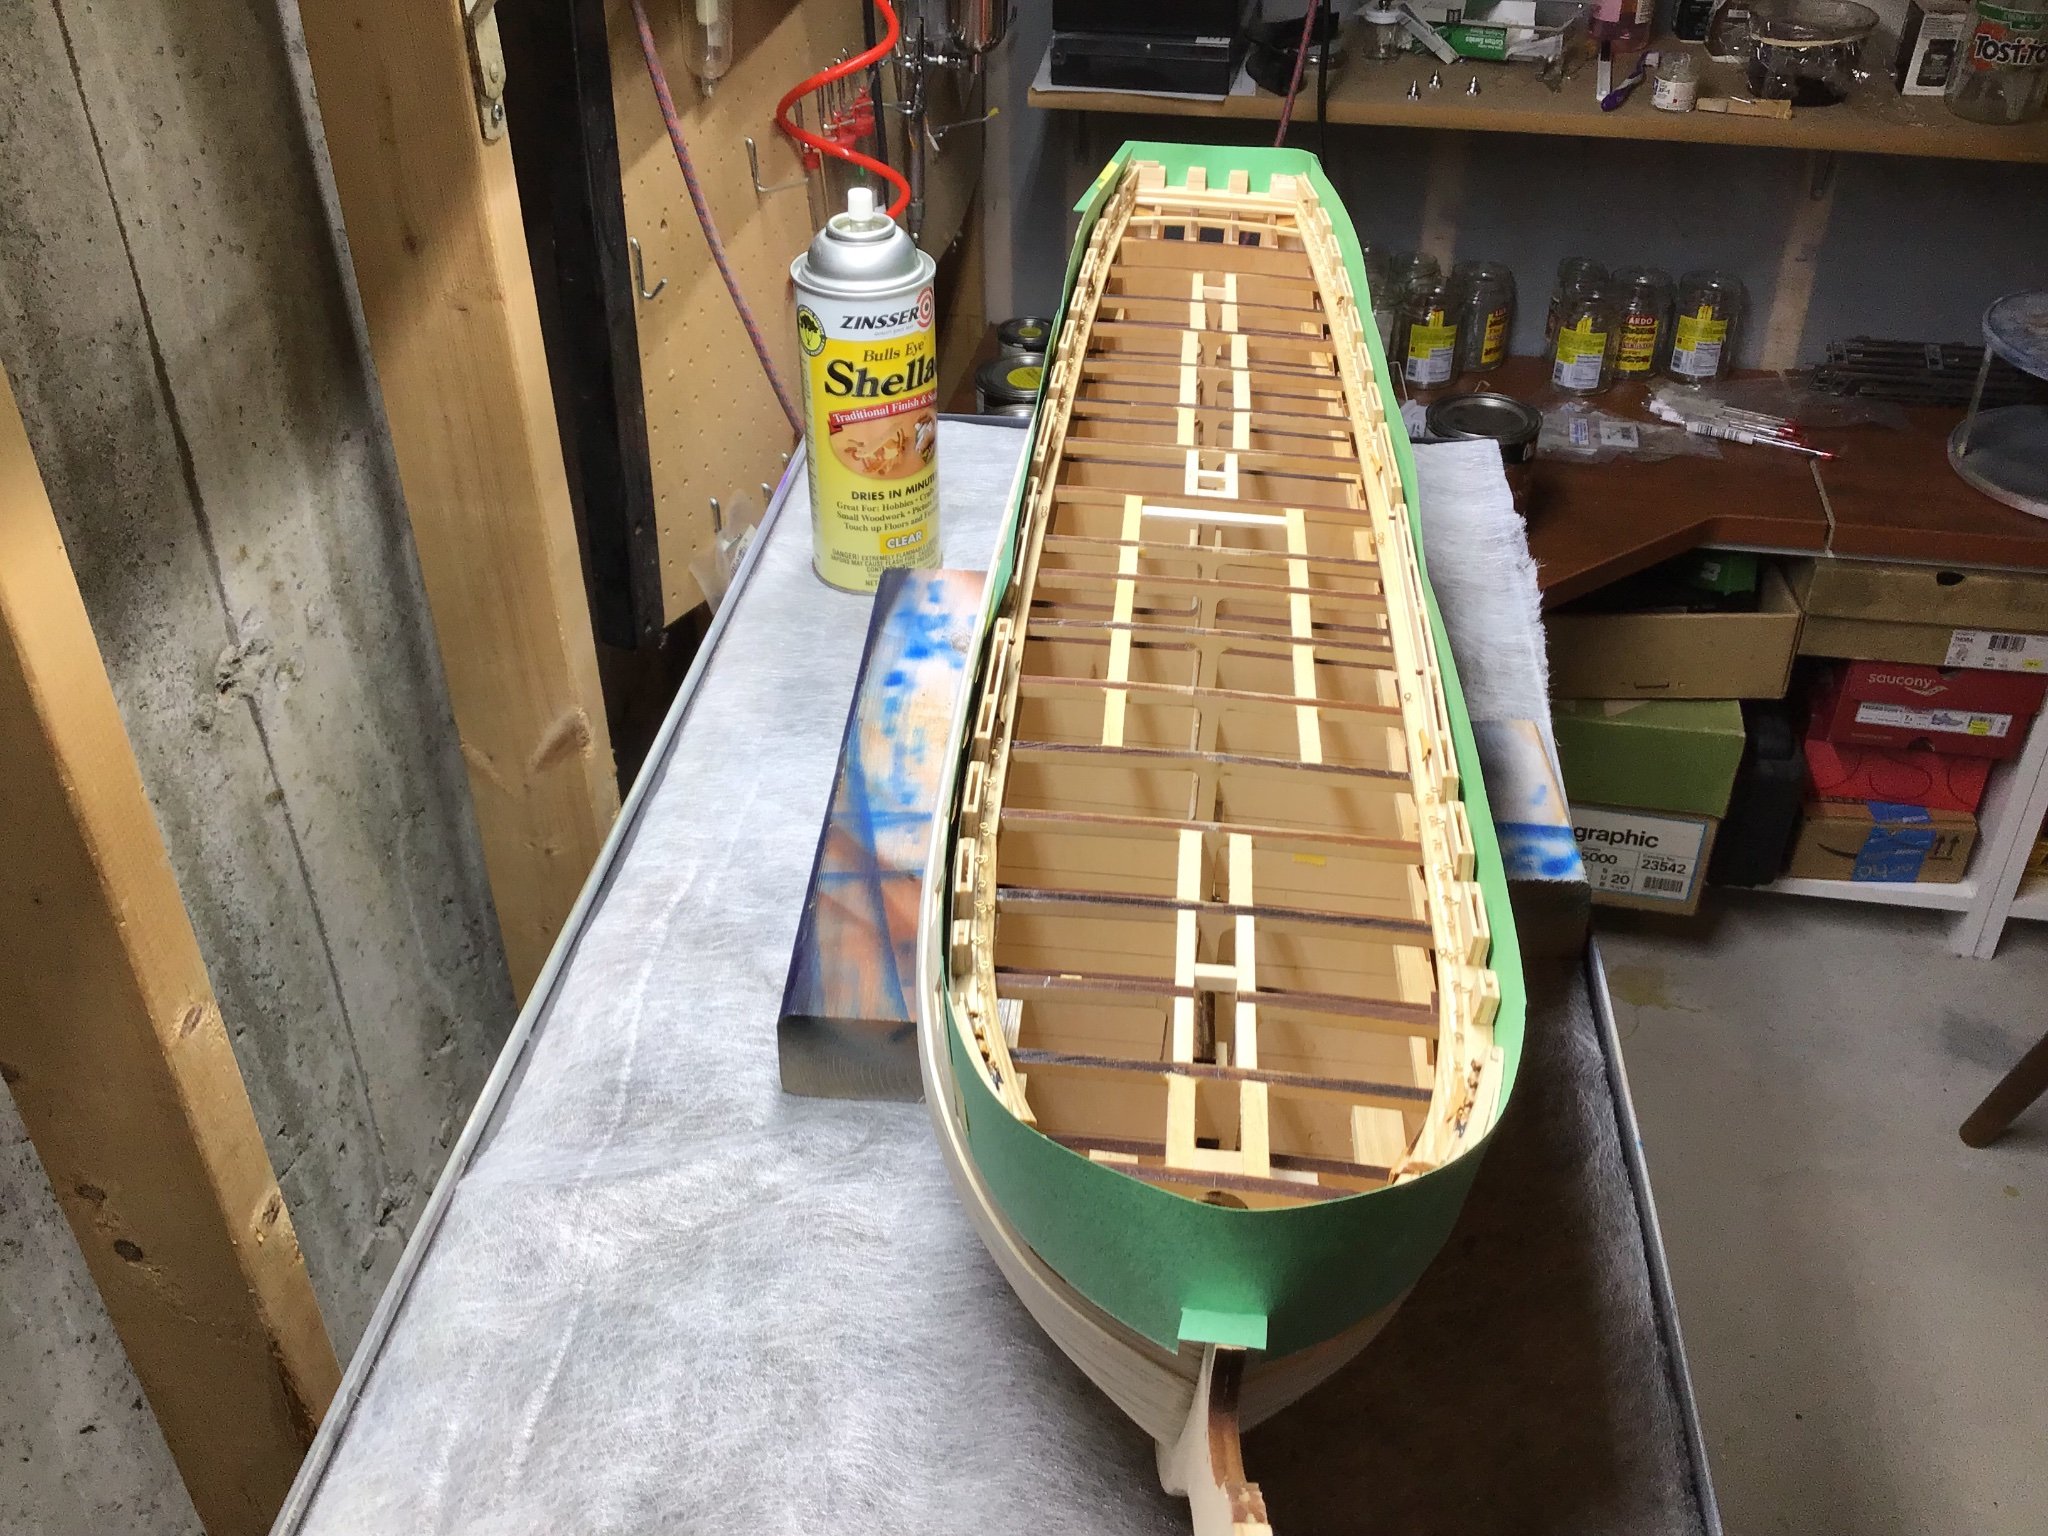
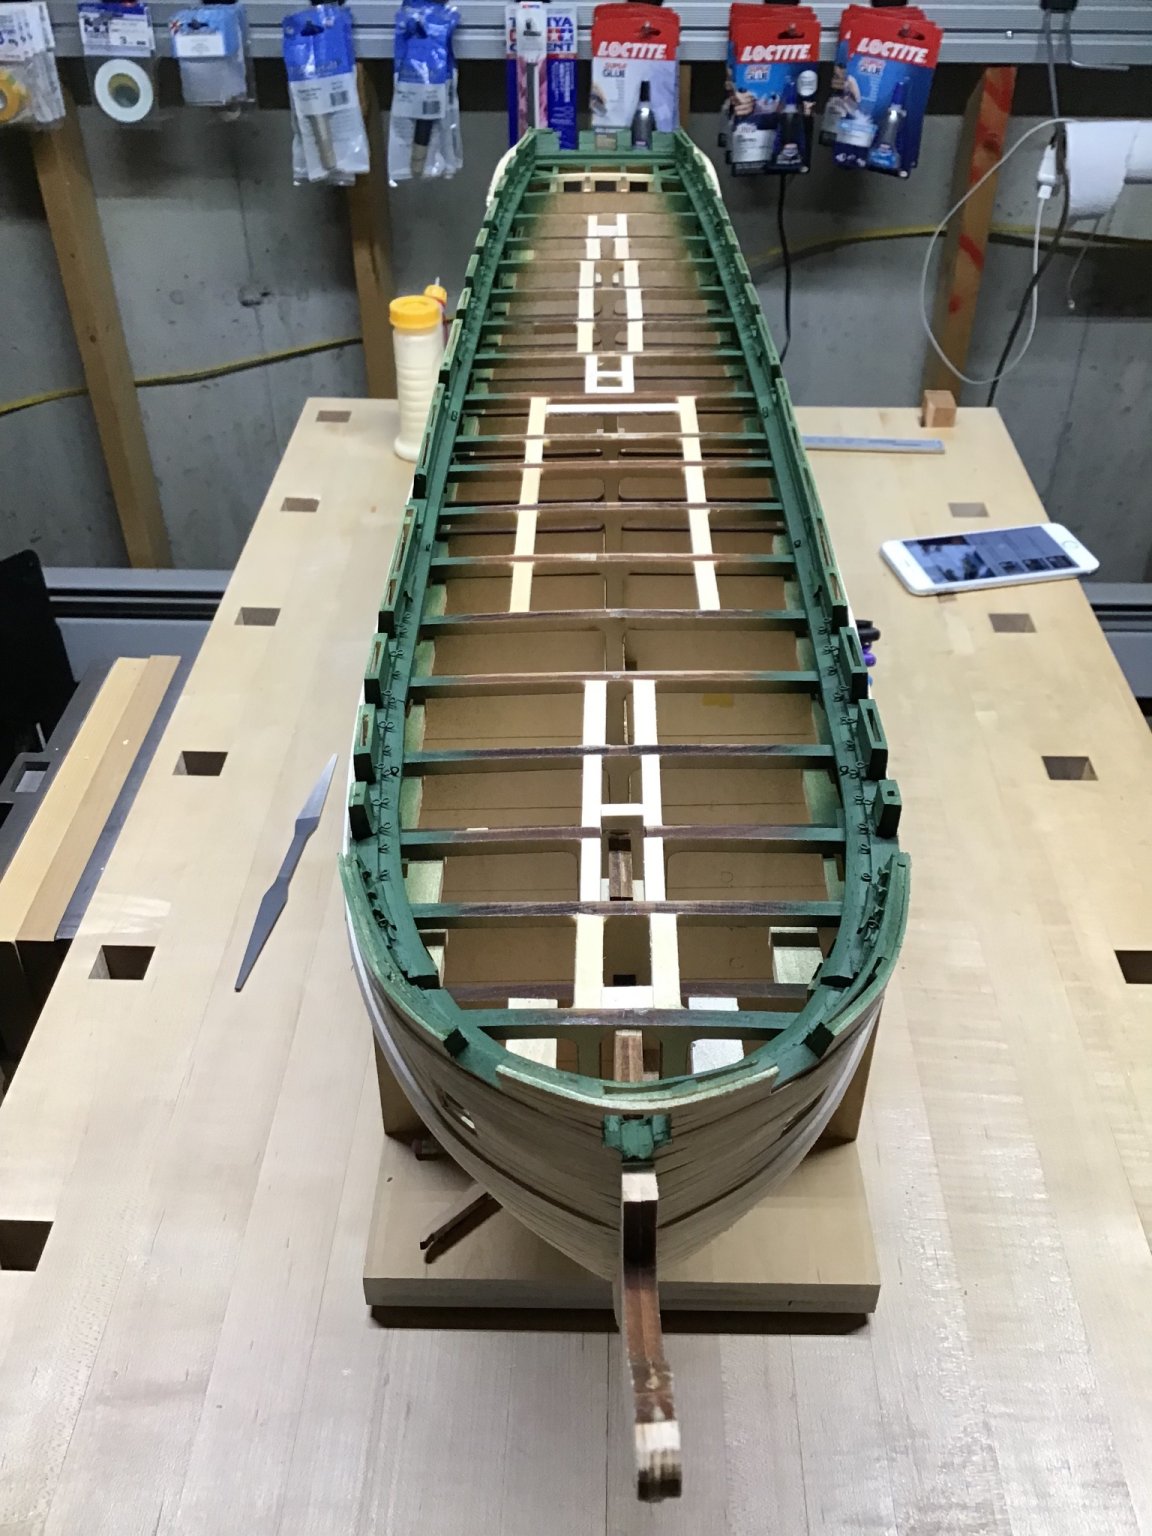
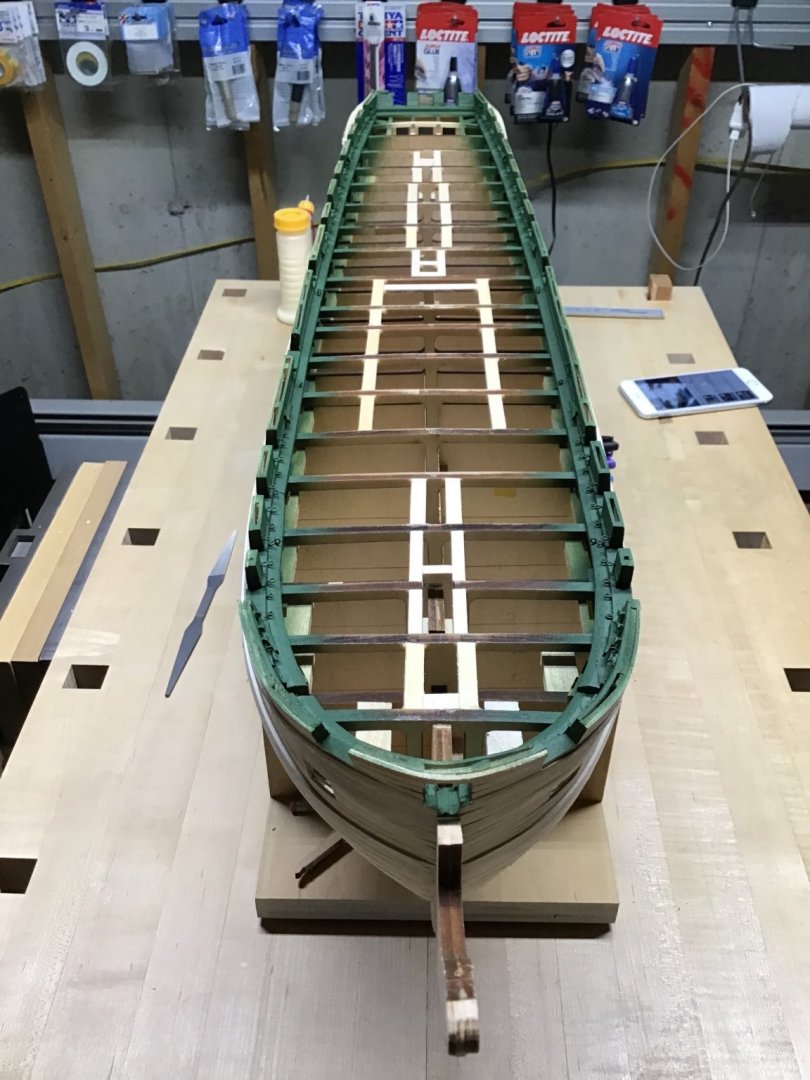
Planking the Deck - Part 1 Planking from the centerline out. There is a plank that runs along the centerline. First part is to install the same number of planks on each side of the center plank, to reach just inside the outer side of each coaming. First measured between two hatches and cut the number of boards required - 5 in this case on the table saw. Next glued up the boards, using a board to help with alignment. Then an easy matter to trim the ends on the table saw. Pictures 1, 2, and 3. Pictures 4, 5, and 6 show coverage between each coaming.


-
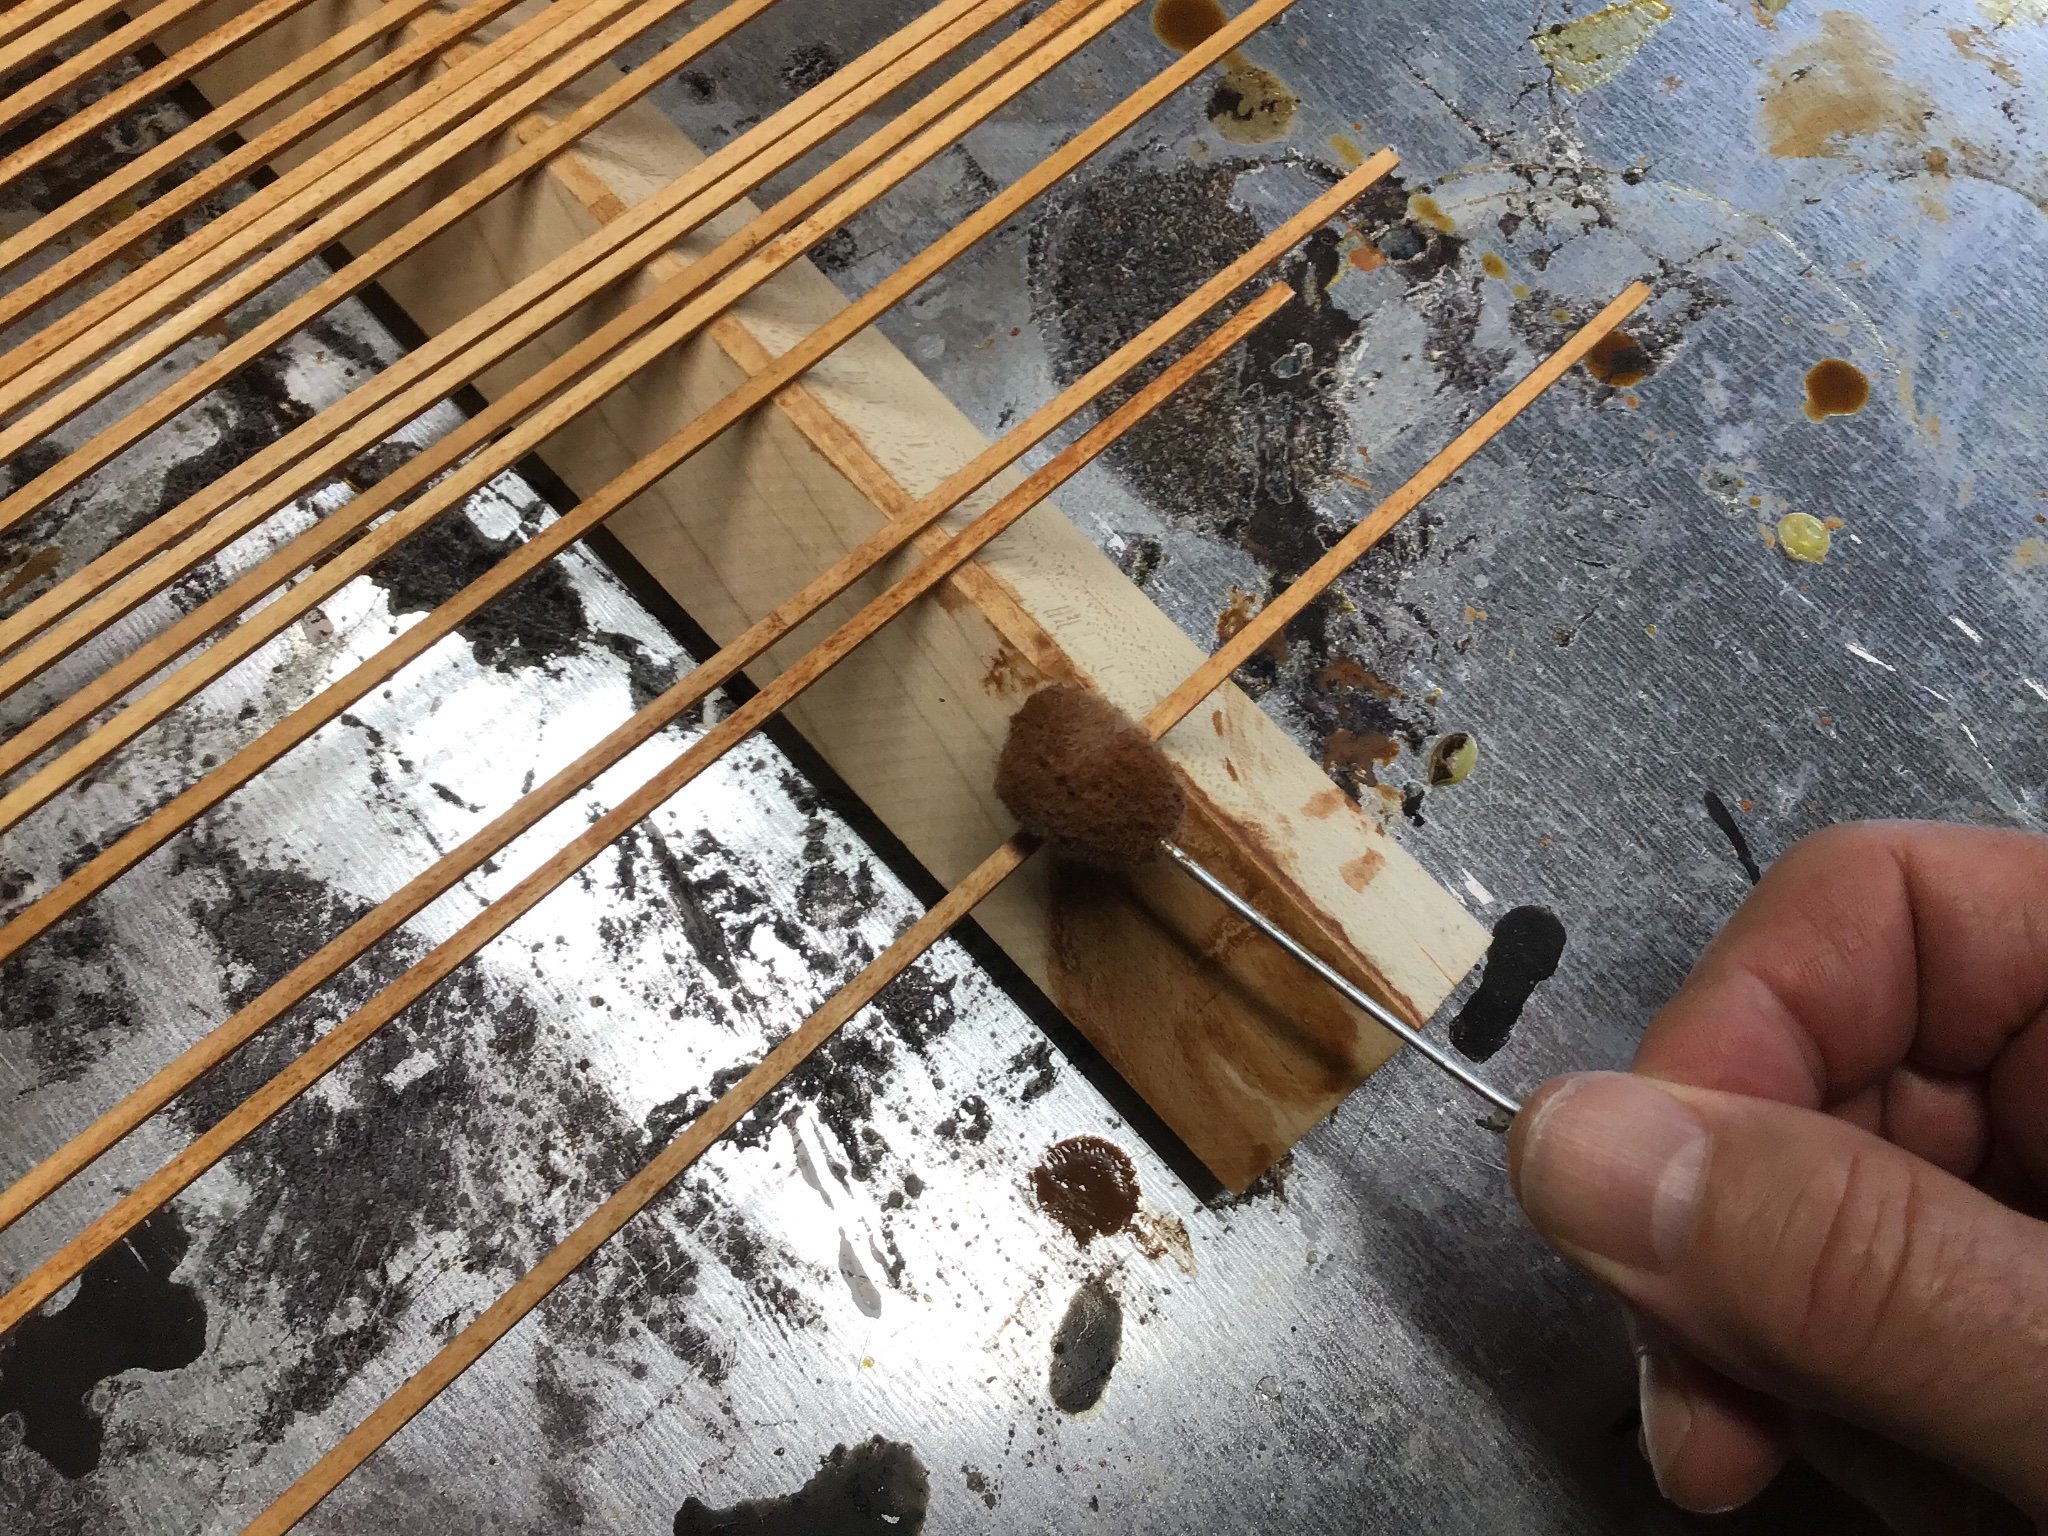
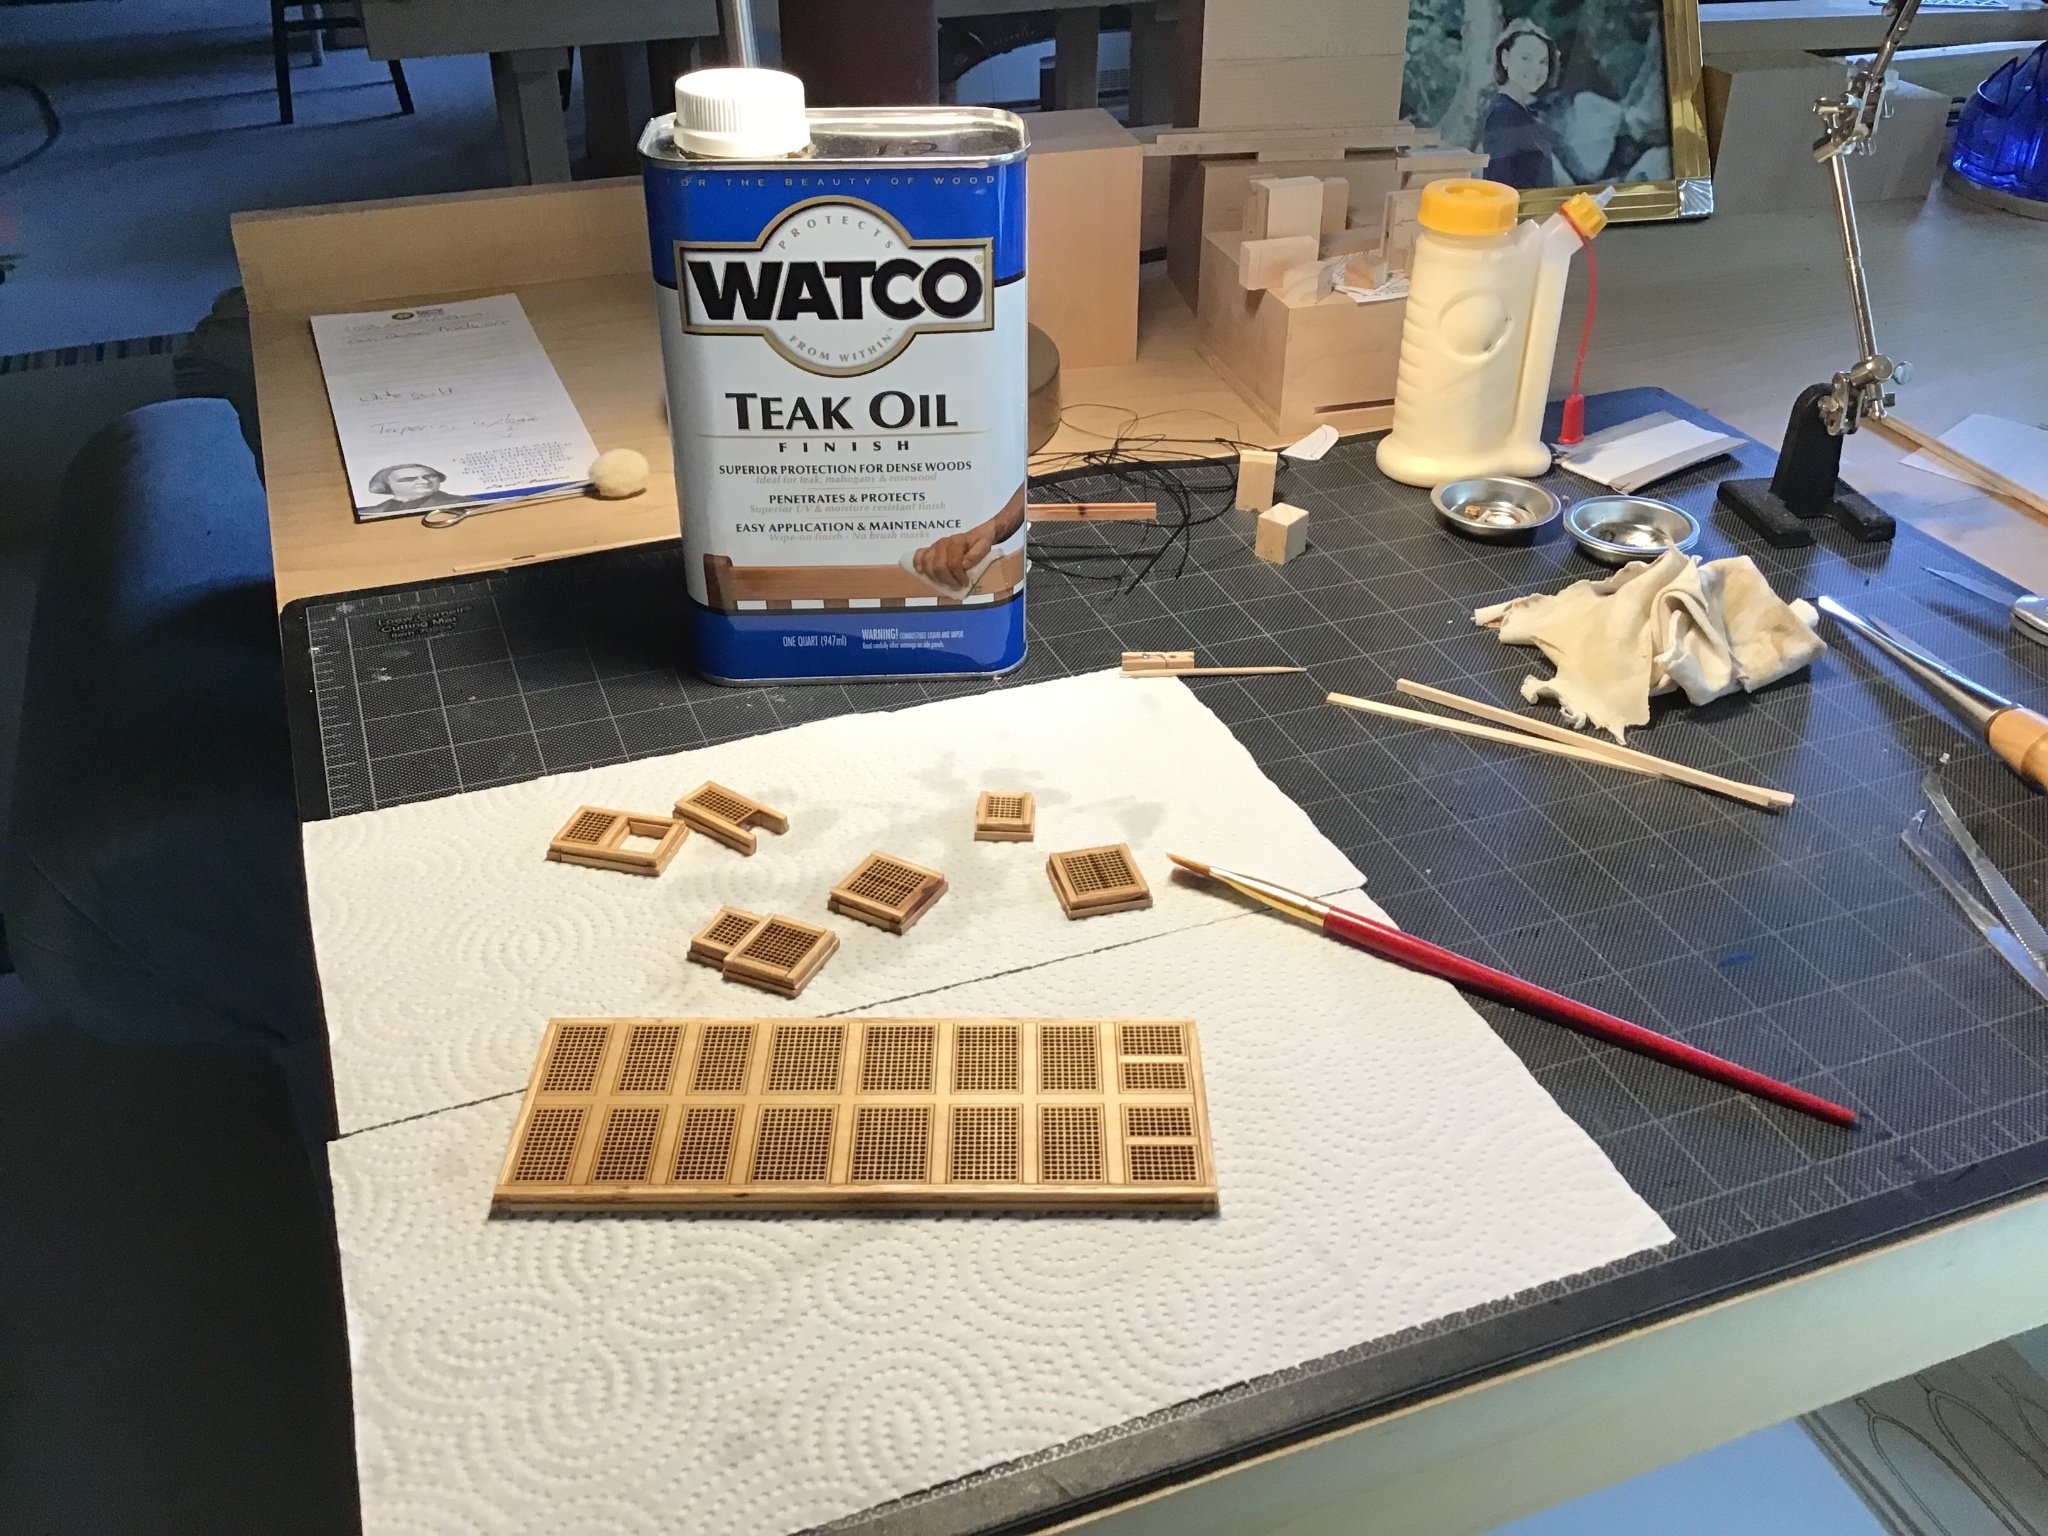
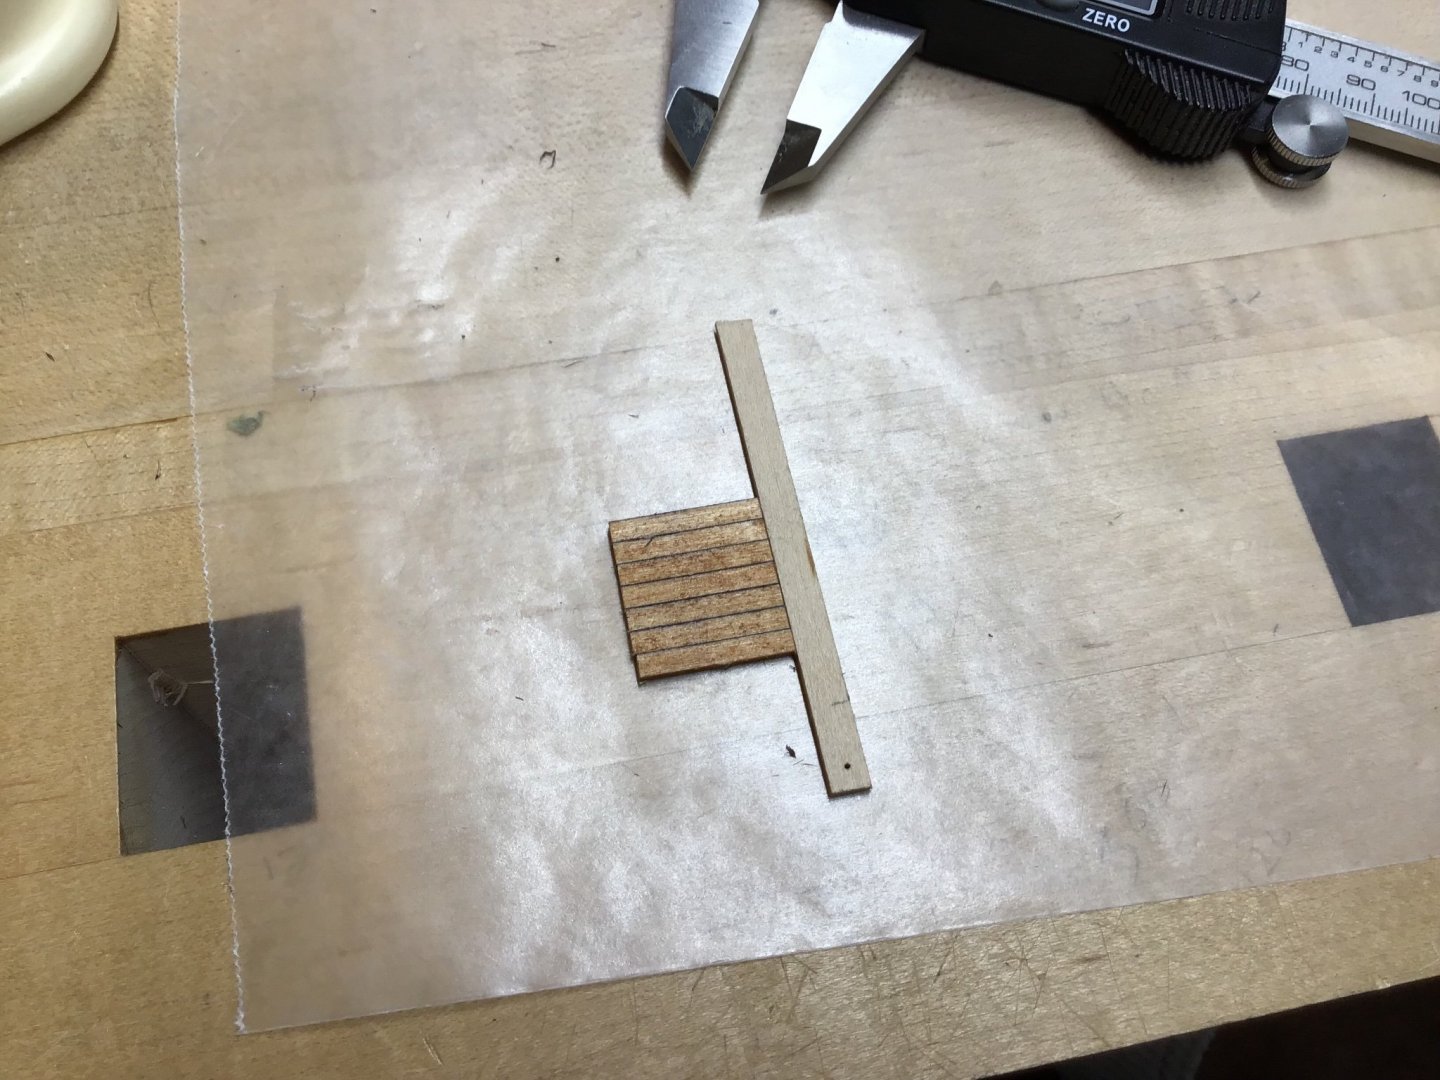
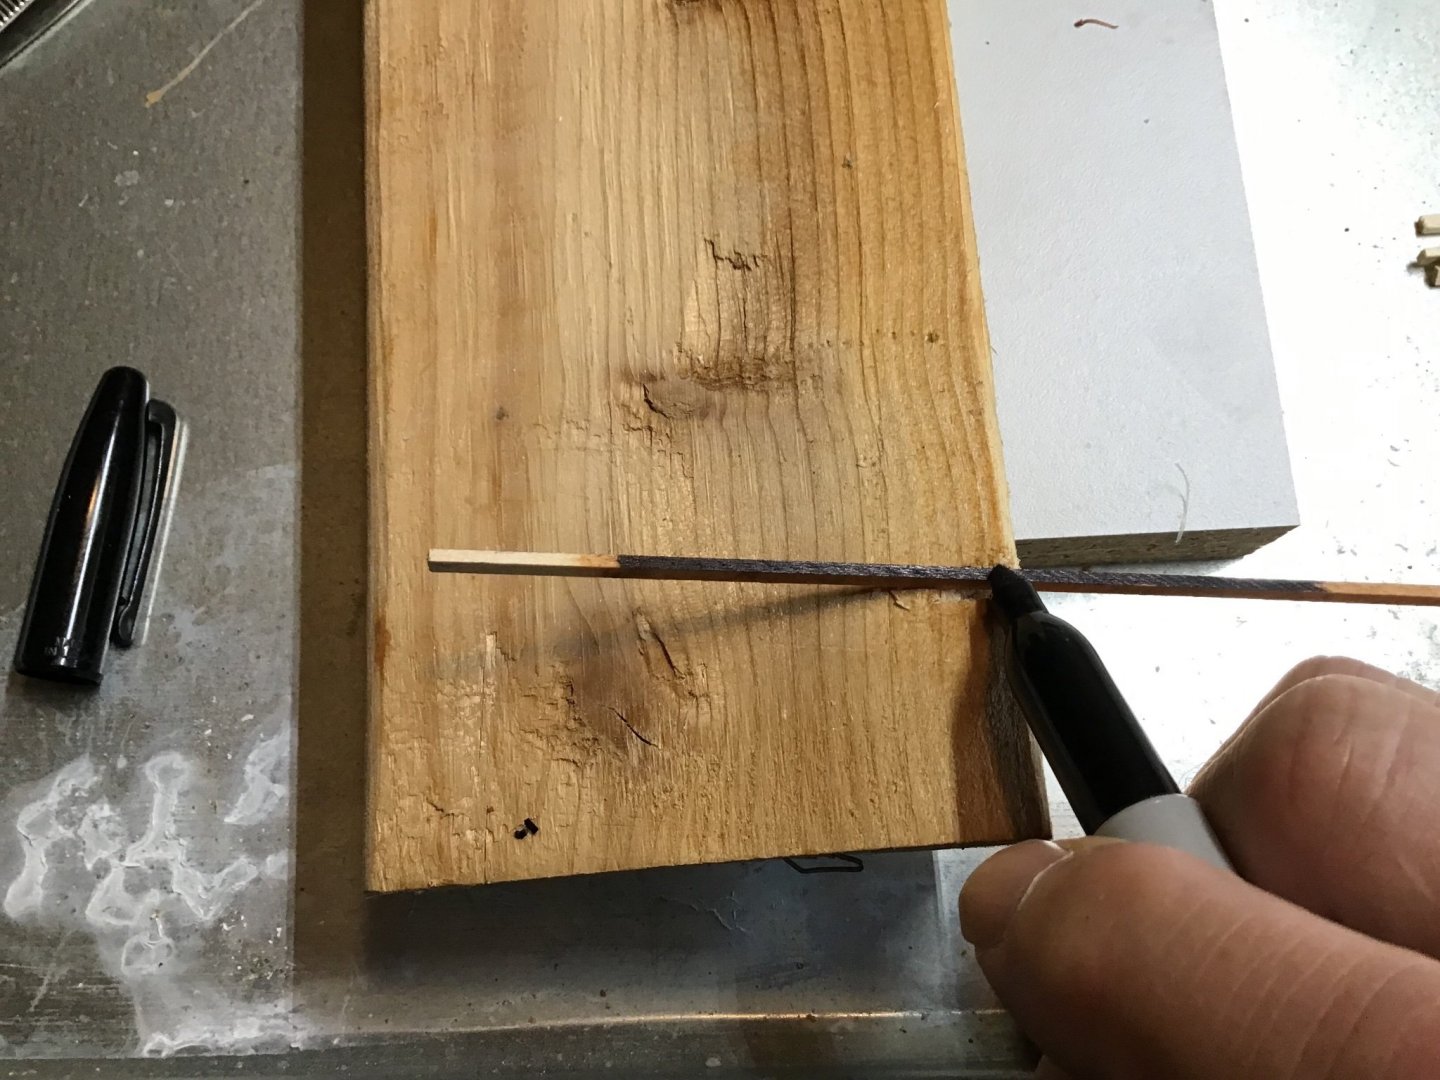
Deck Plank Stock Preparation The deck planks are finished with a three step process. First planks were stained with Varathane Ipswich Pine, applied with a cotton swab. The swab was held stationary while the plank, against a board, was pulled through. Next the planks were sealed with Teak Oil, applied with a plastic bristle brush, again the plank was pulled through the brush with the plank against the board. Finally a notch was sawn through the board edge, and planks were pulled through with a sharpie pressed against the plank edge. Last picture shows the finished product.


-
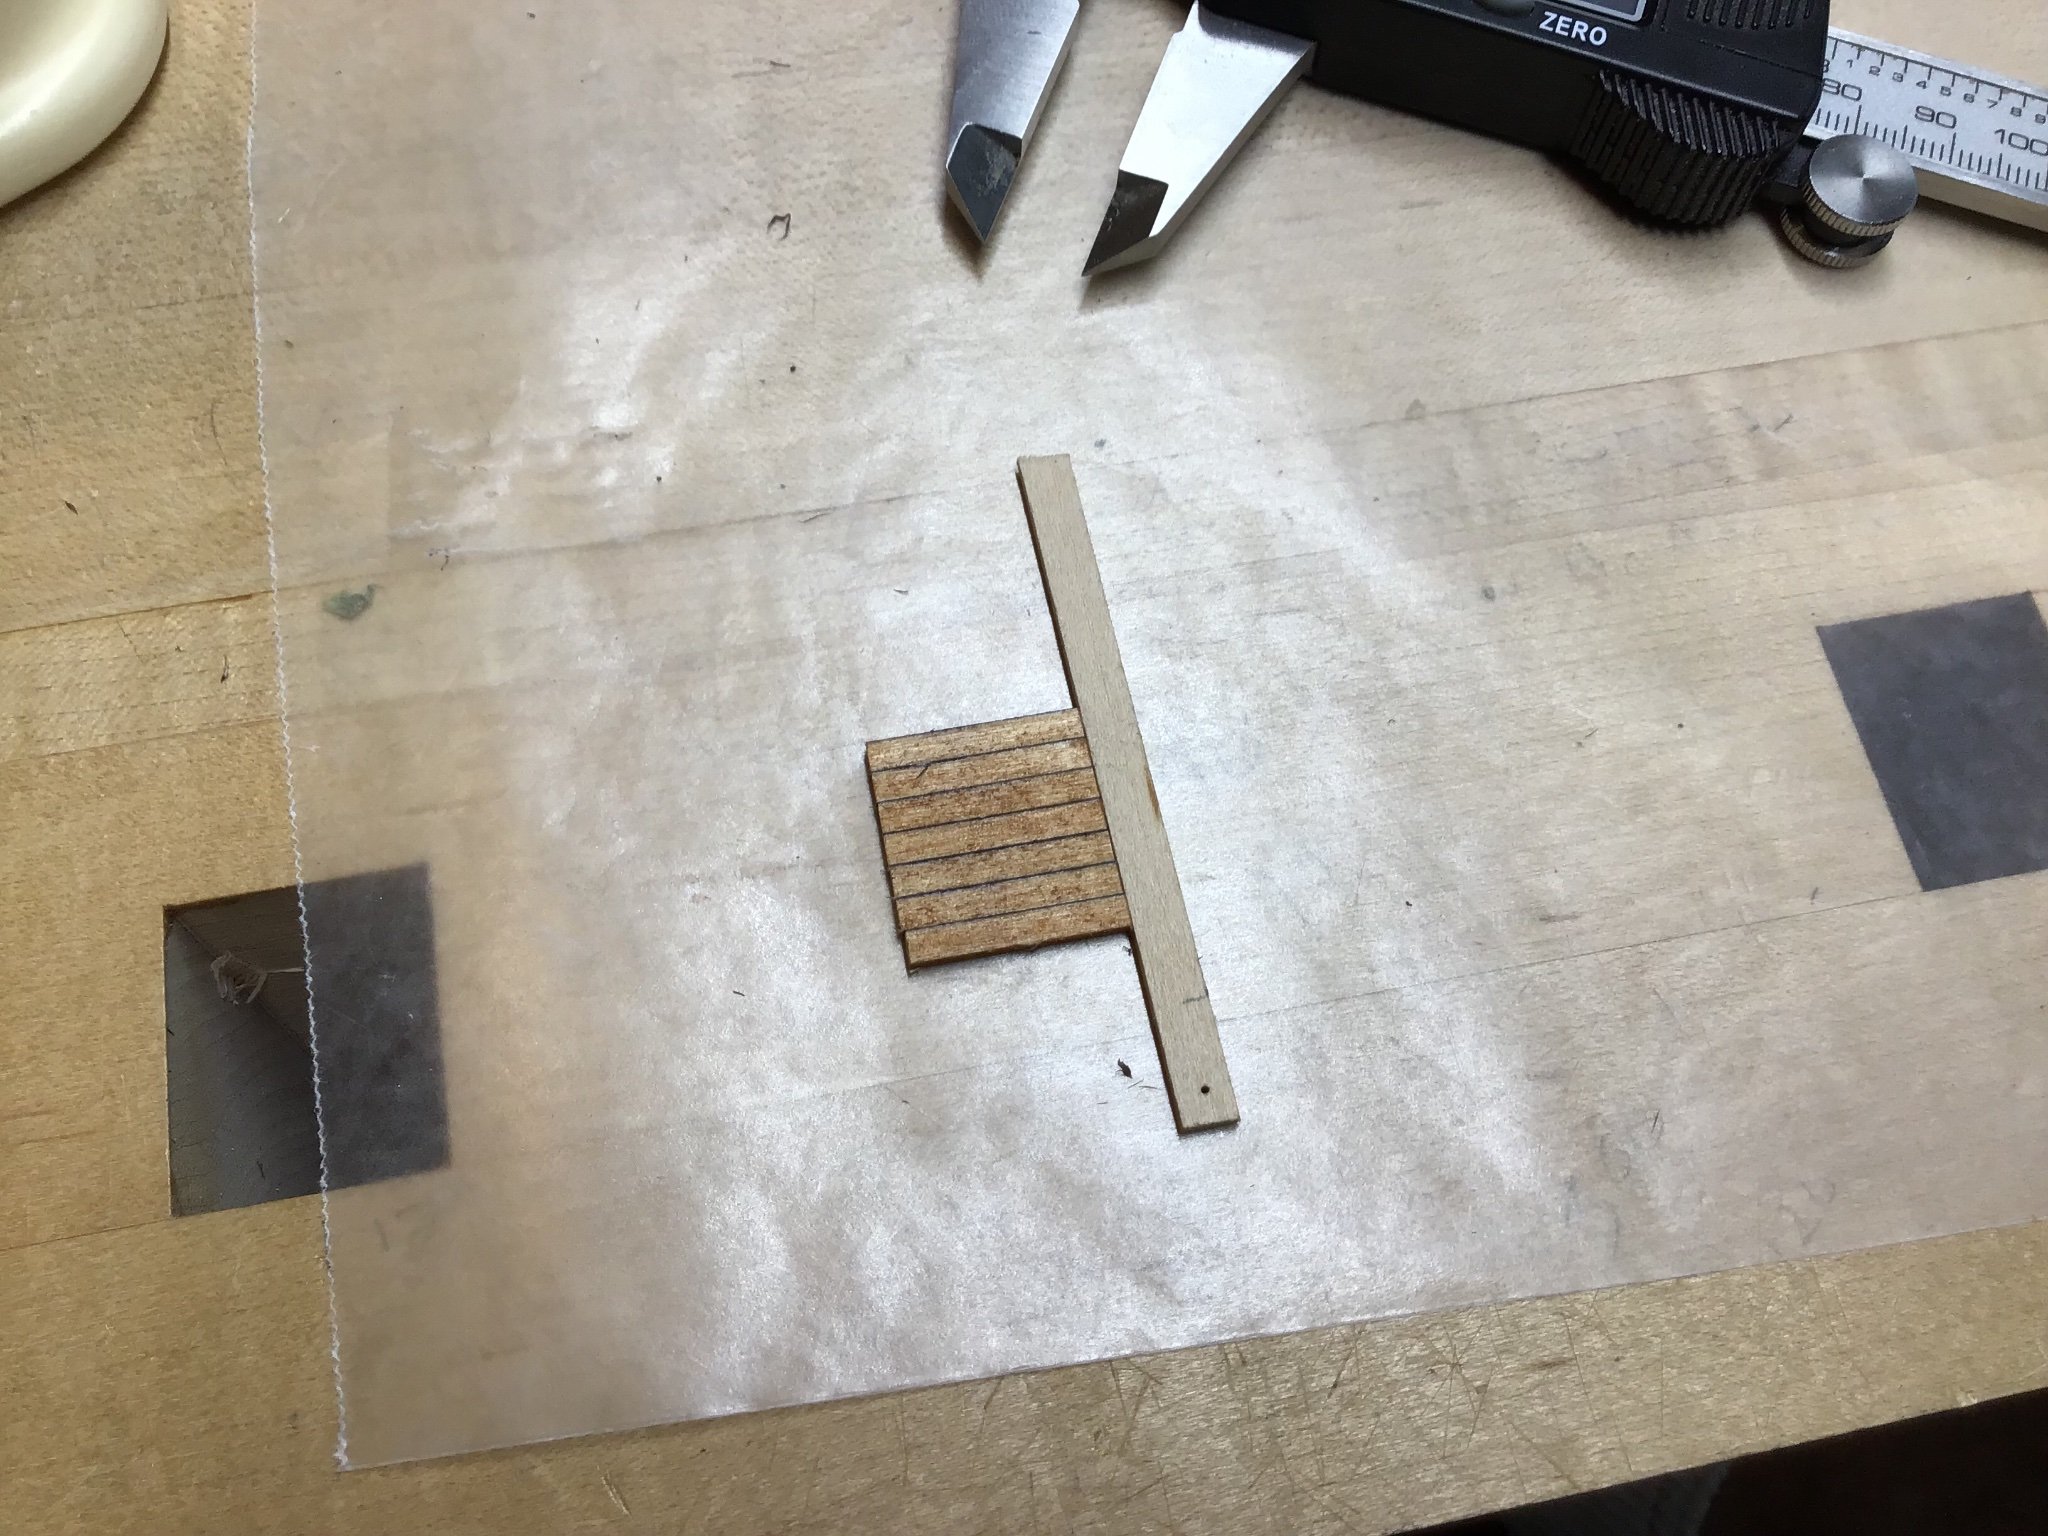
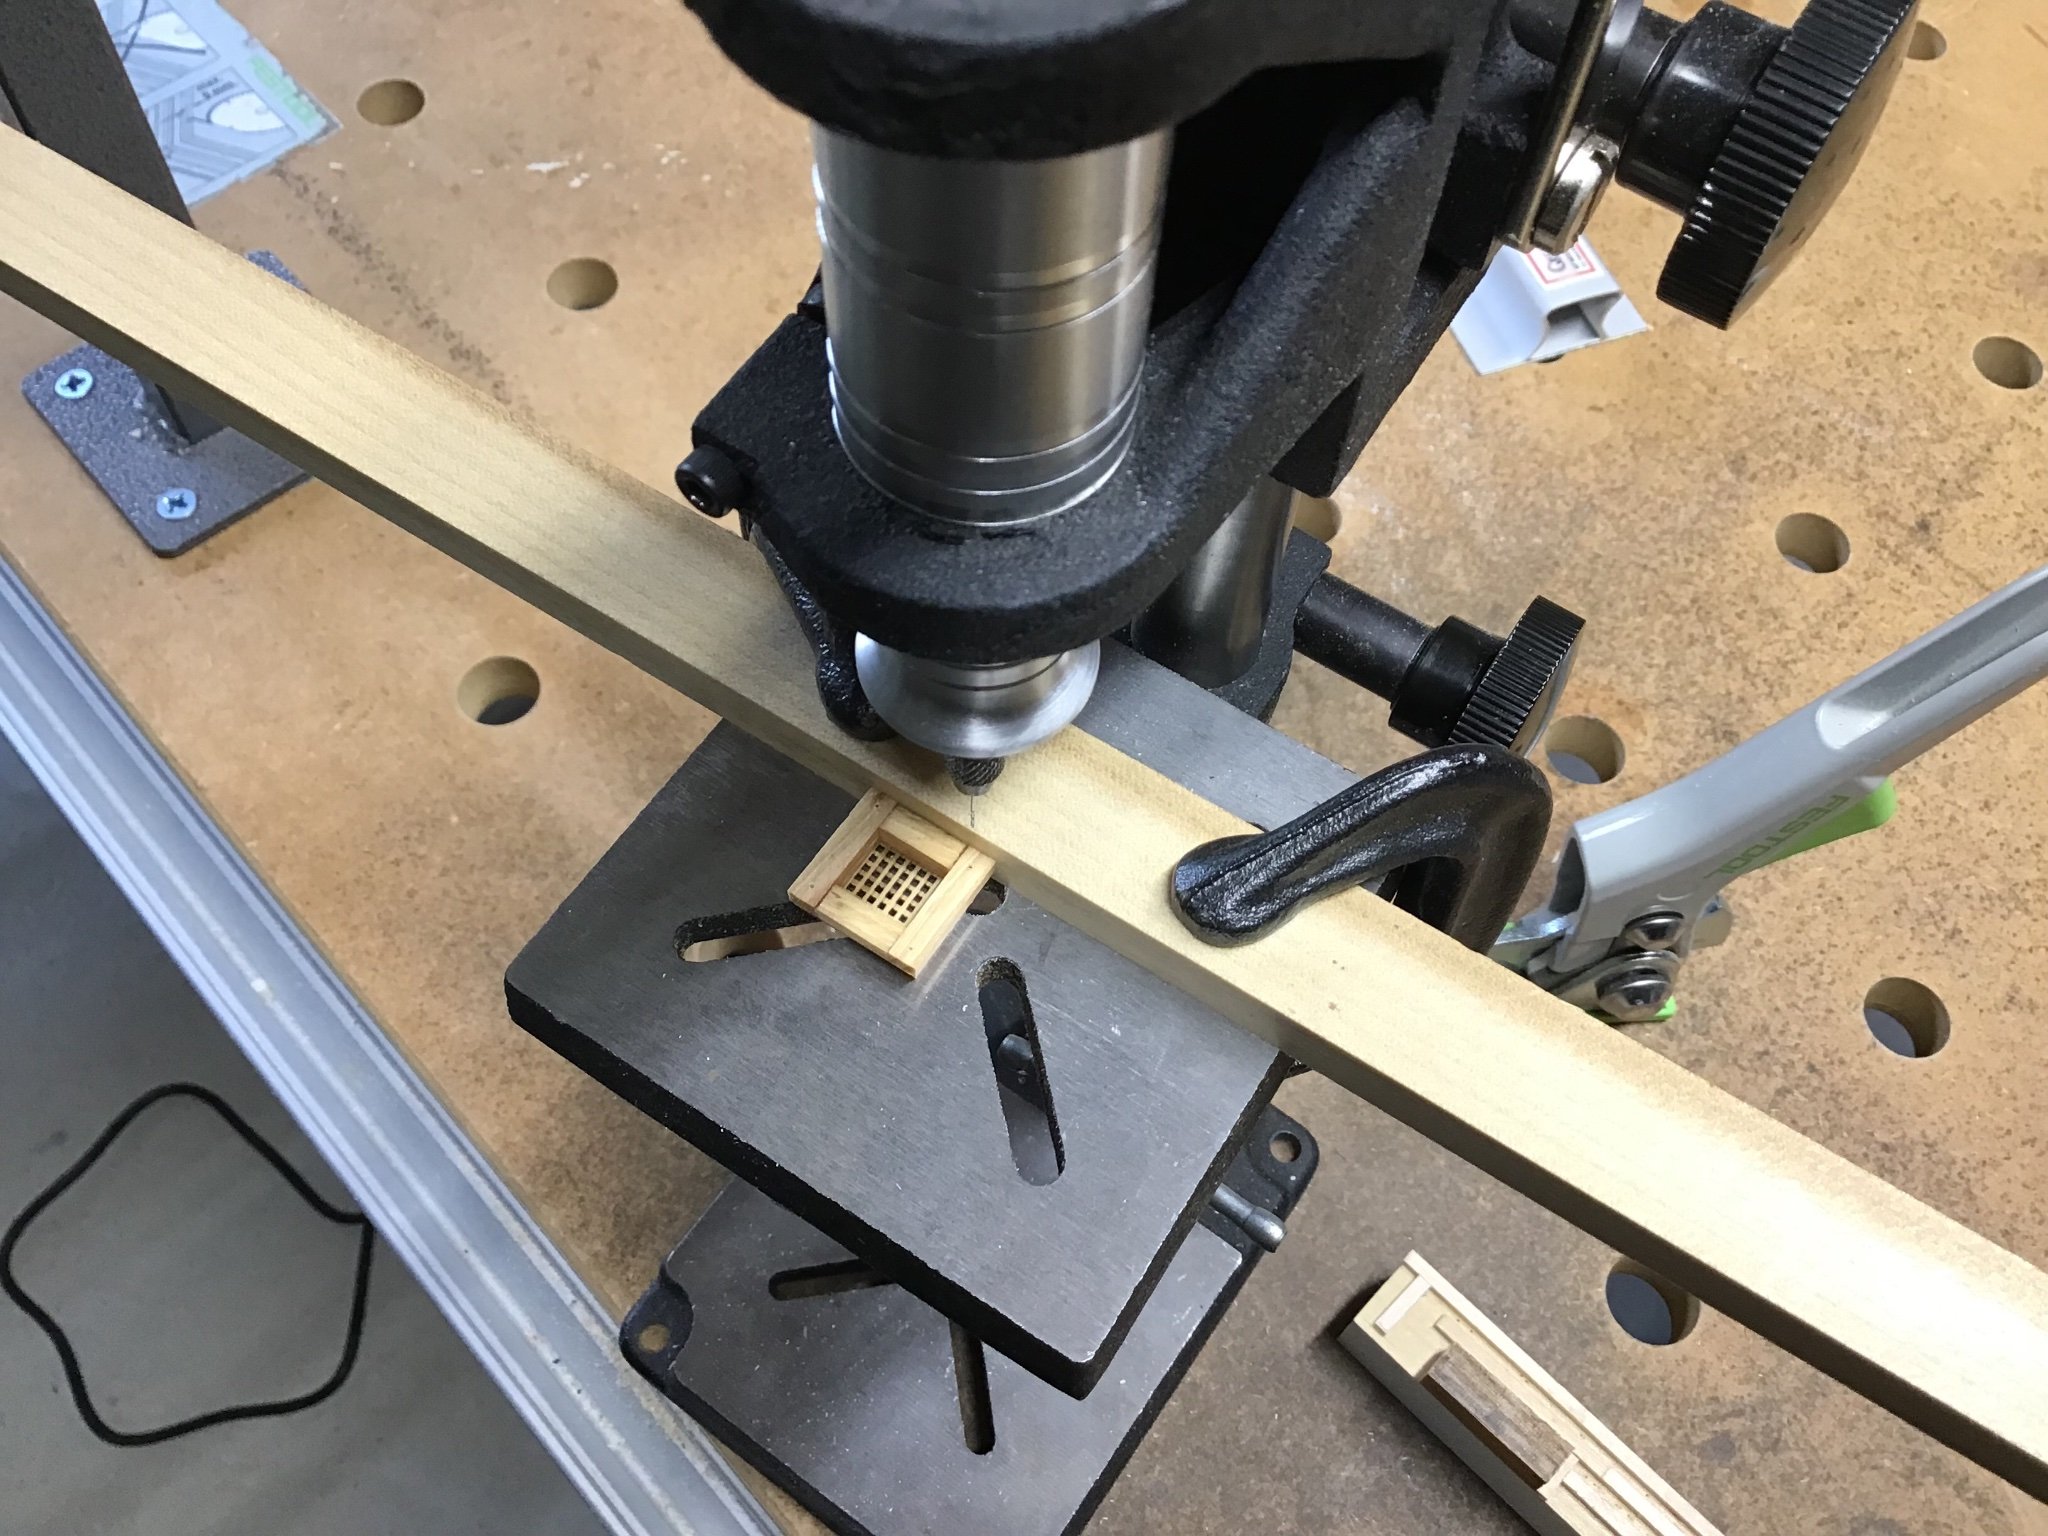
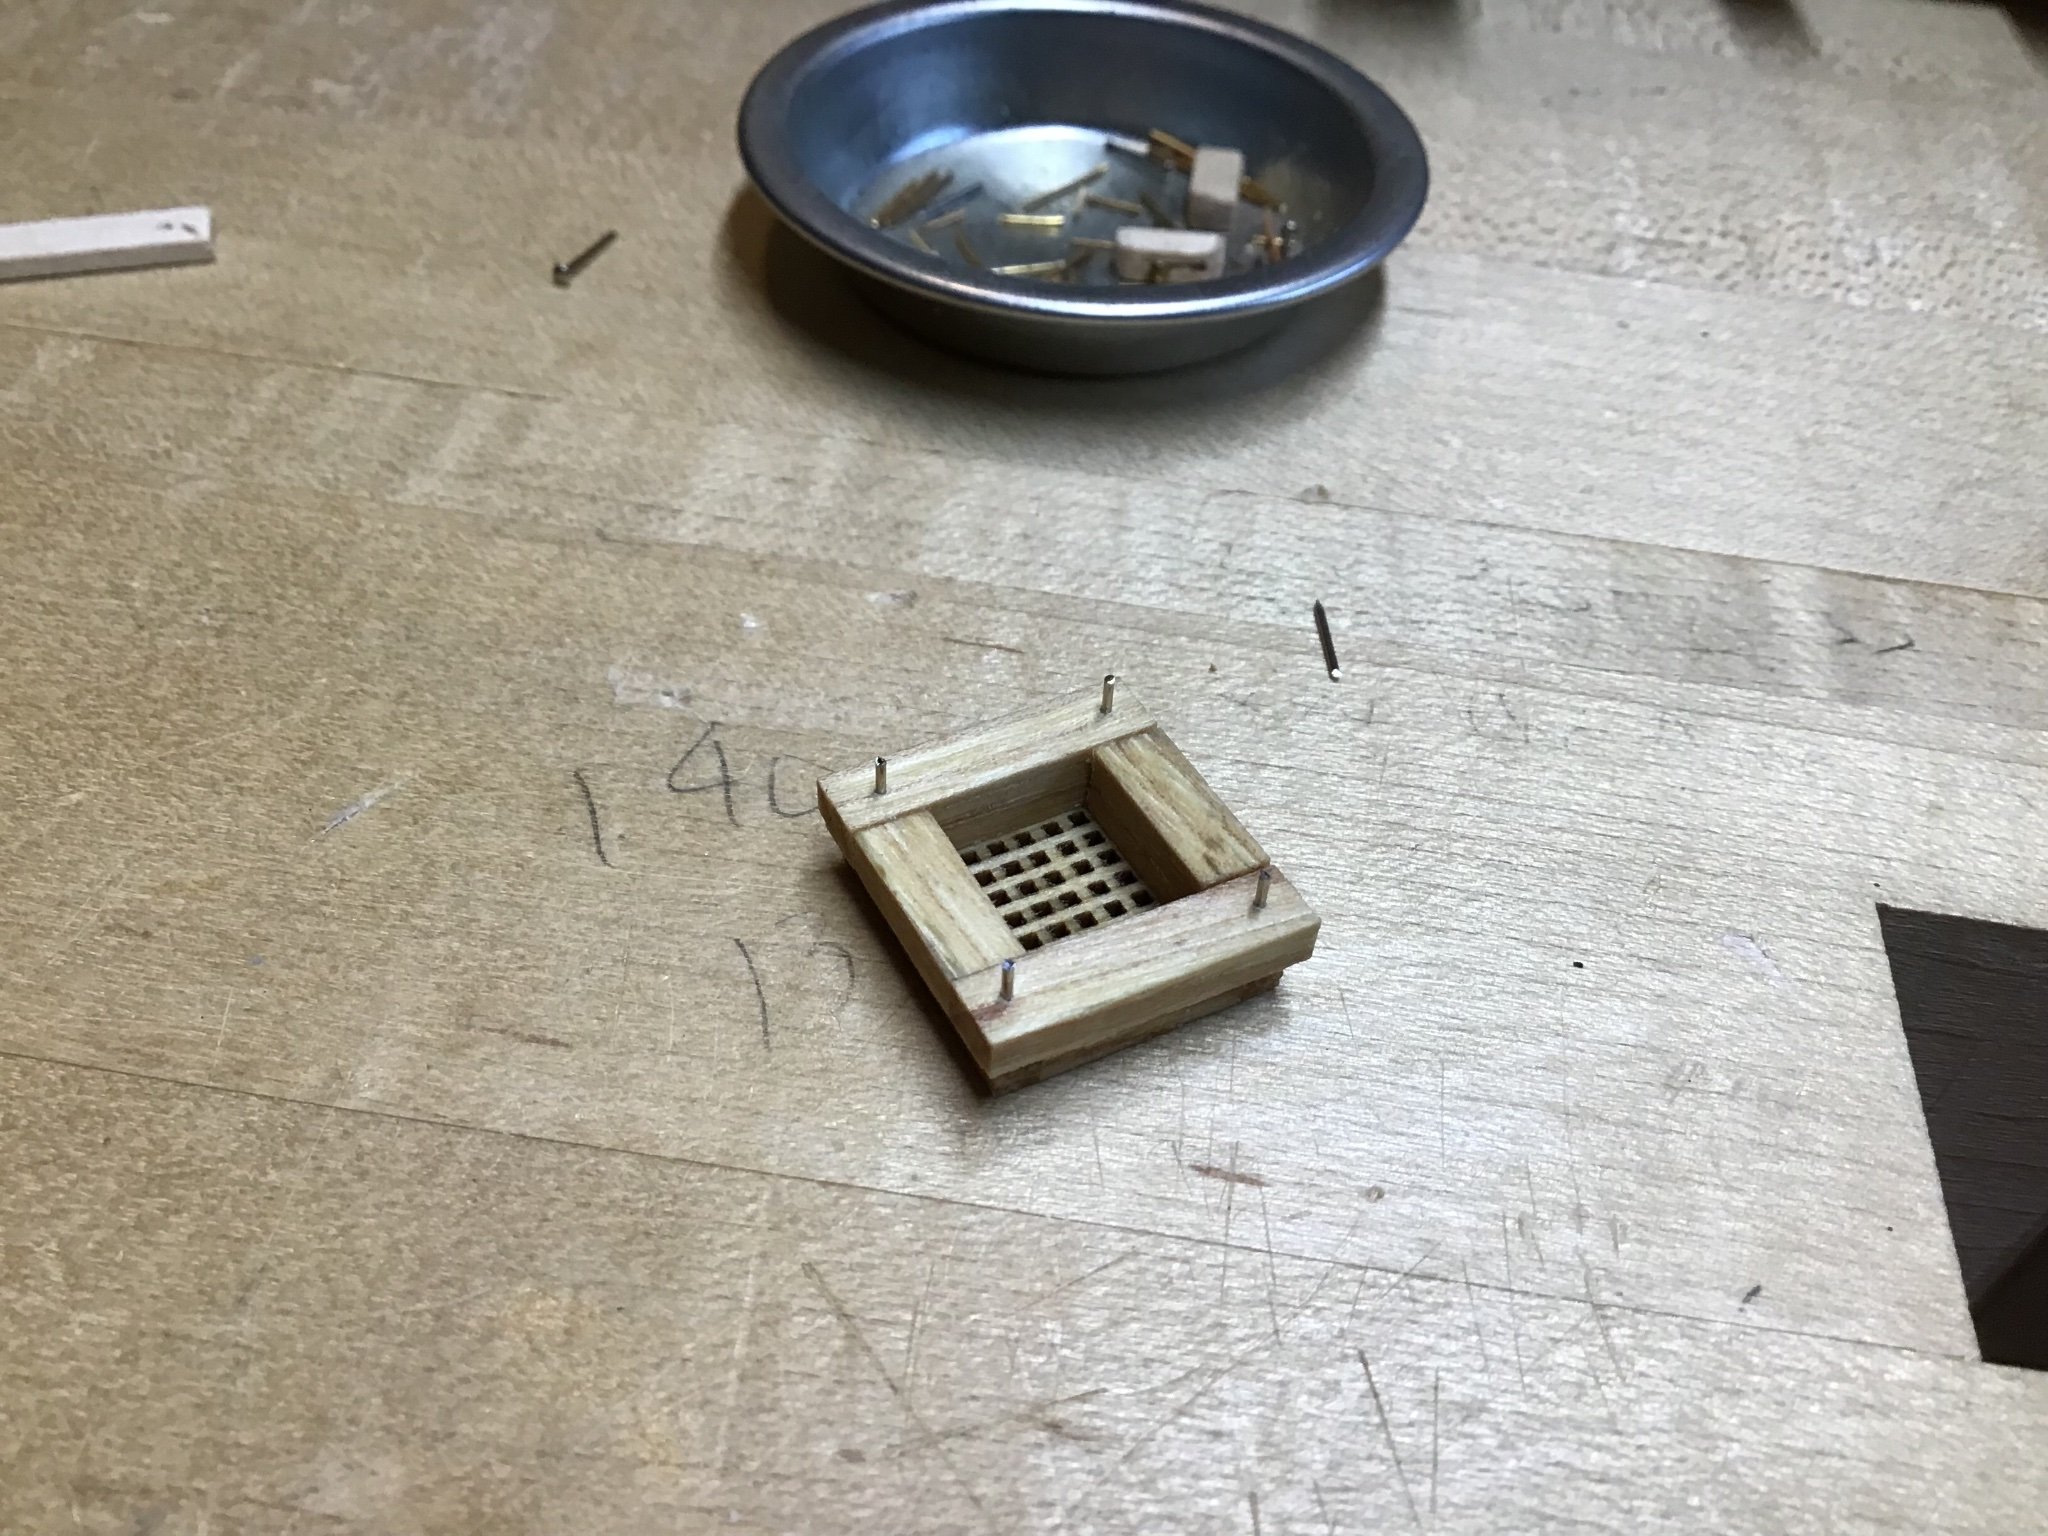
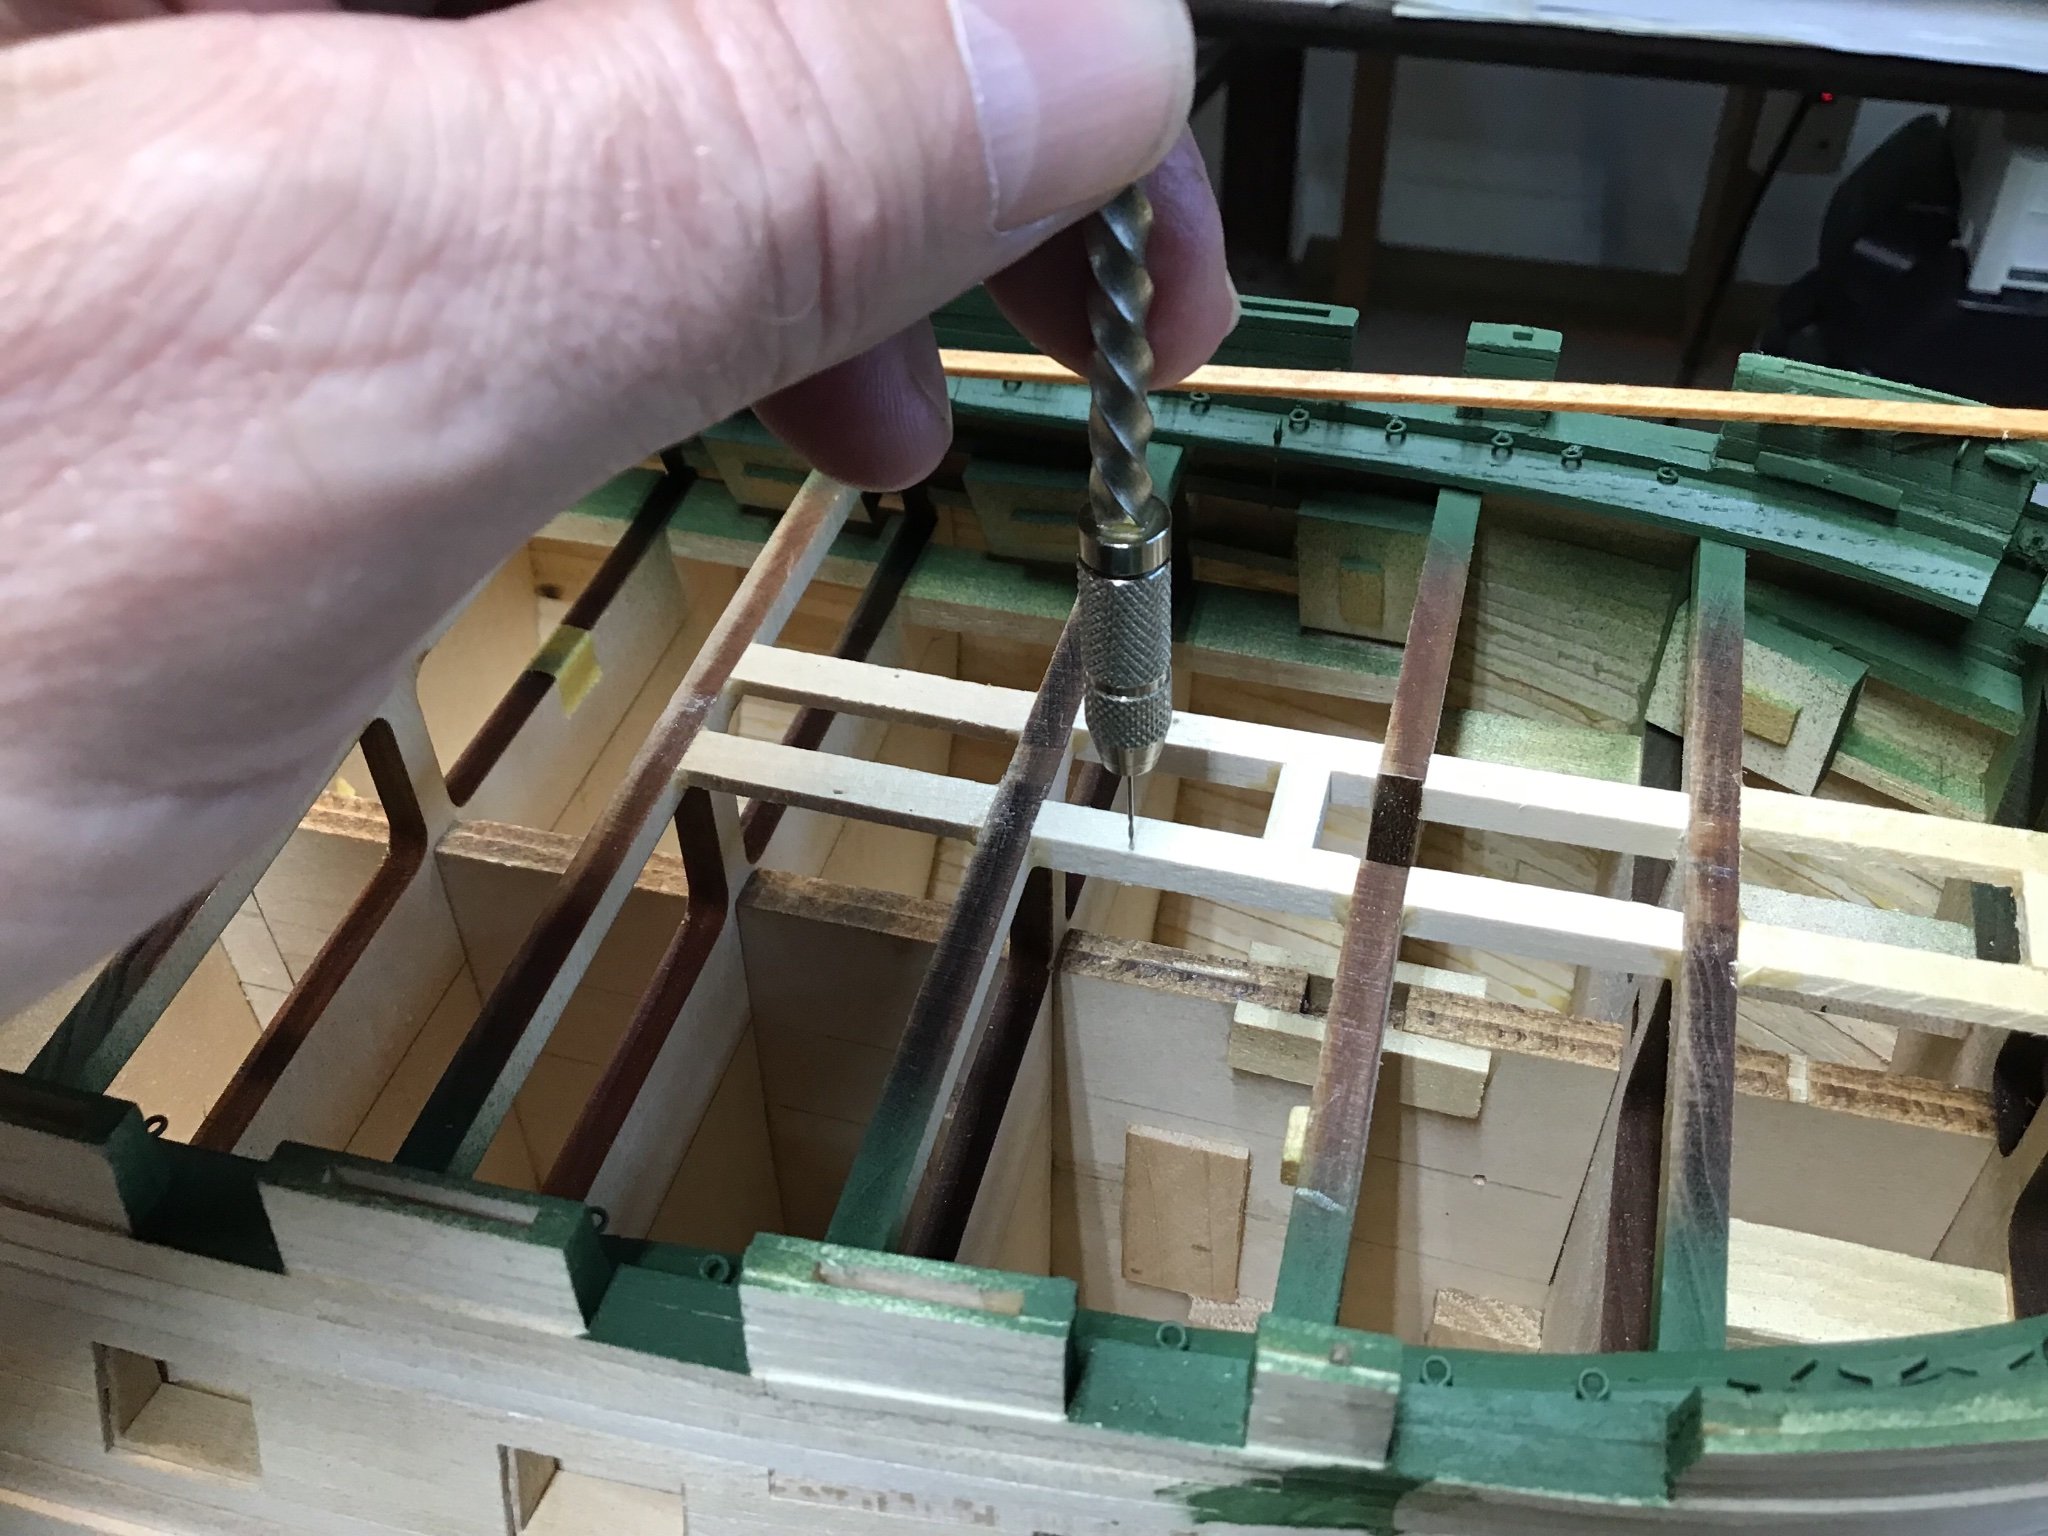
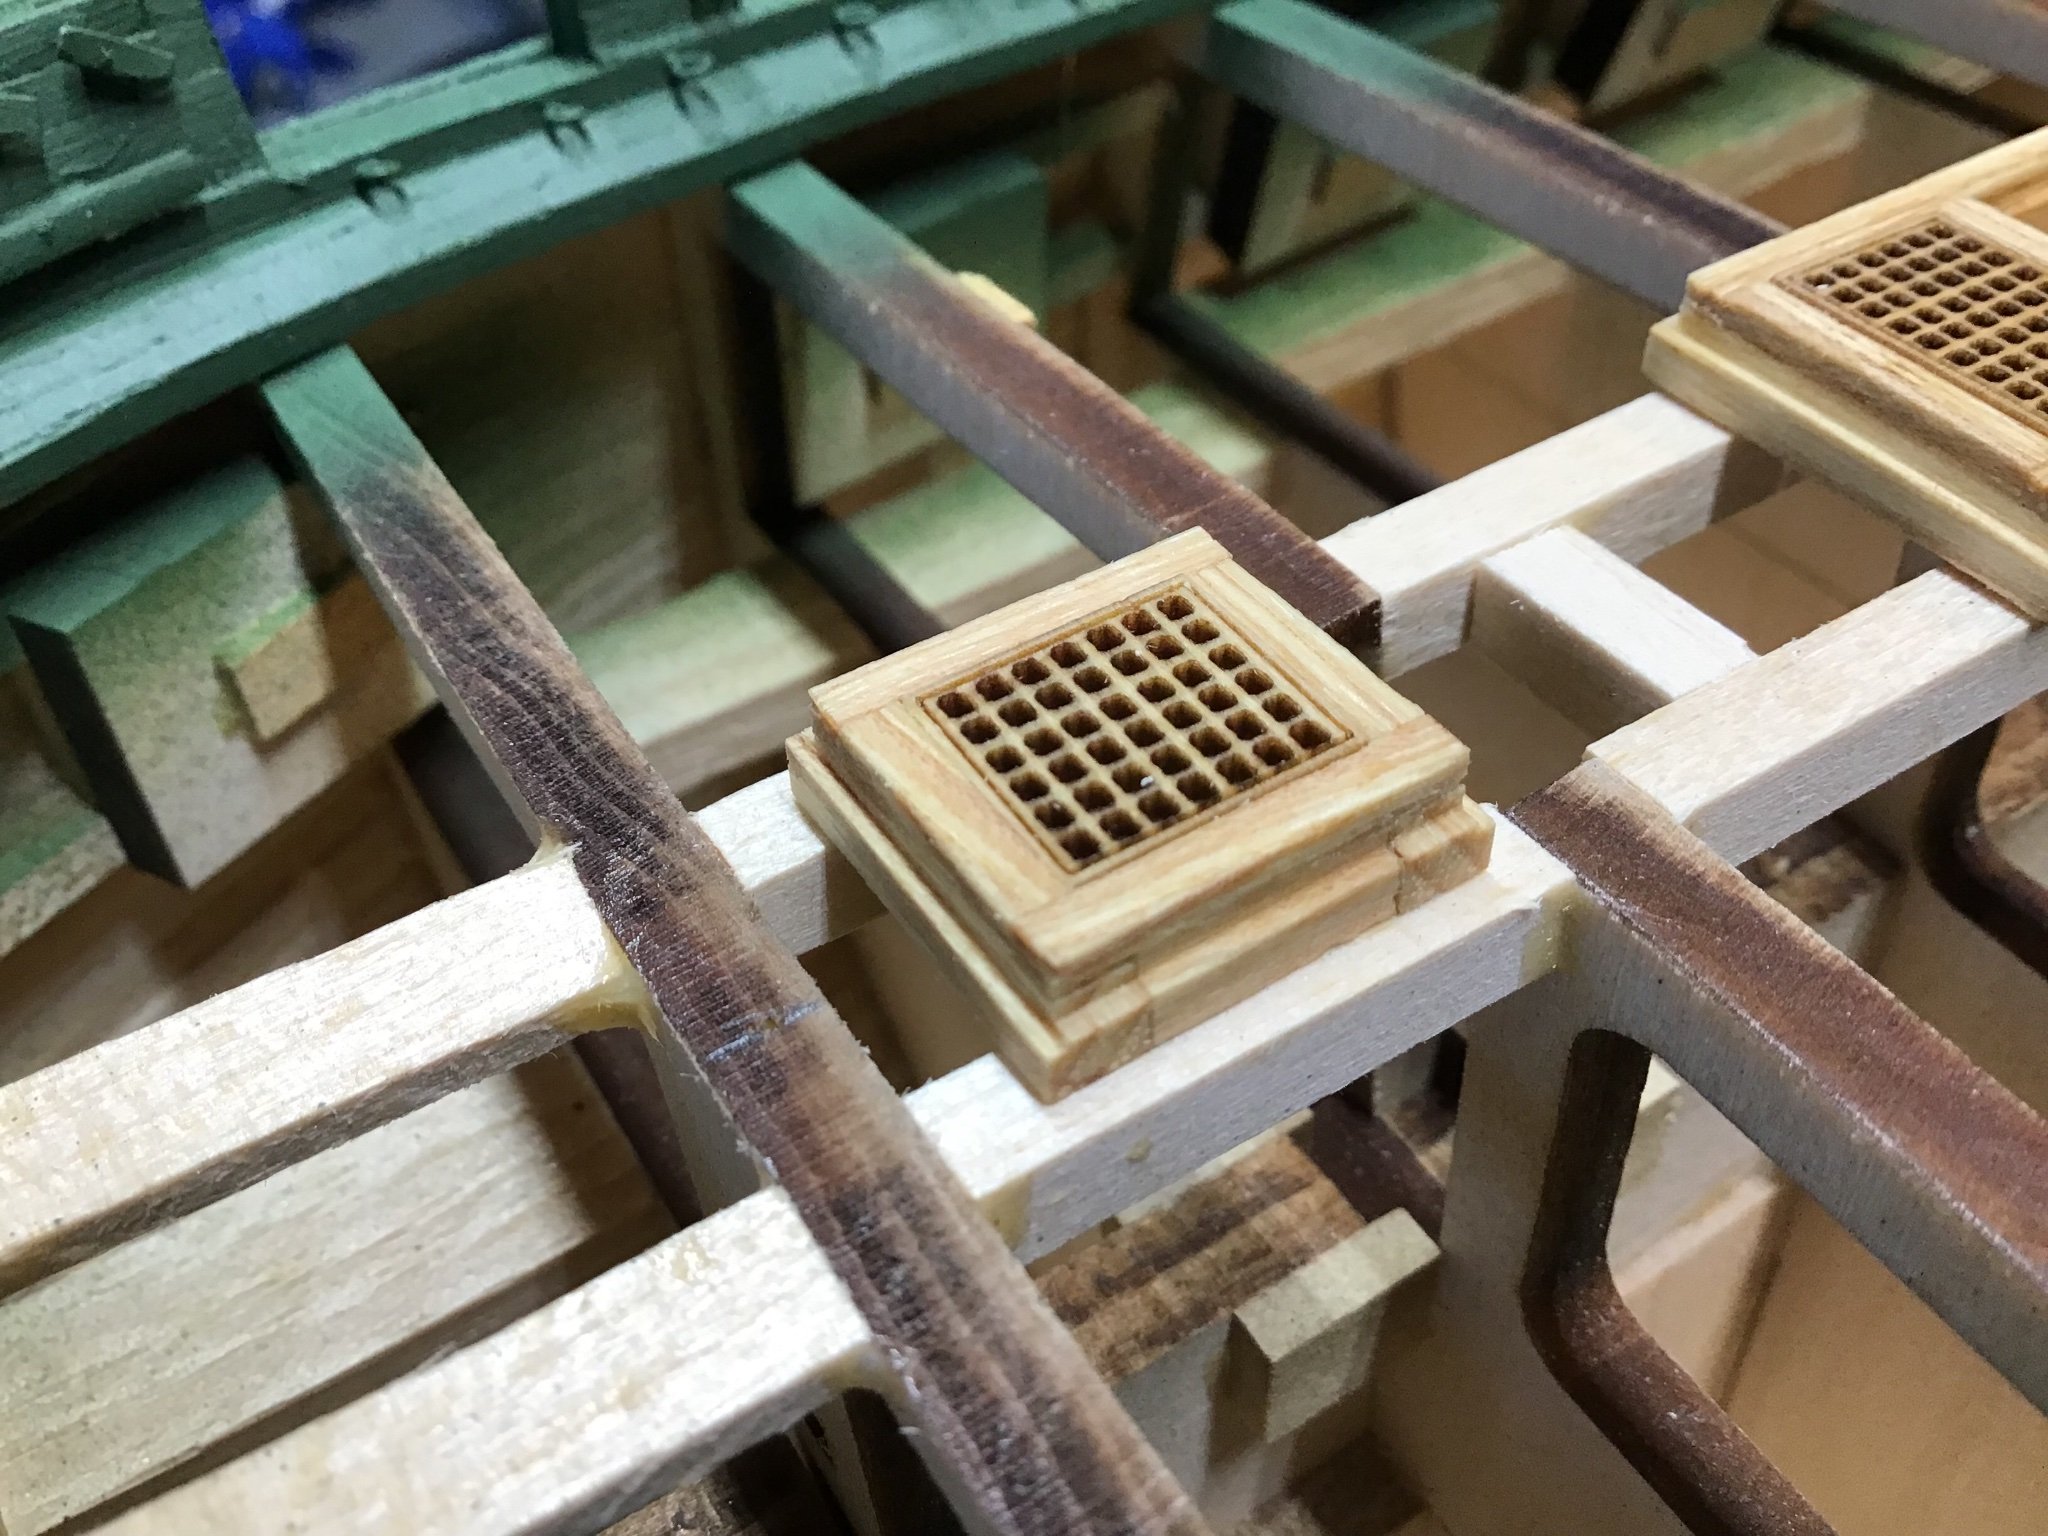
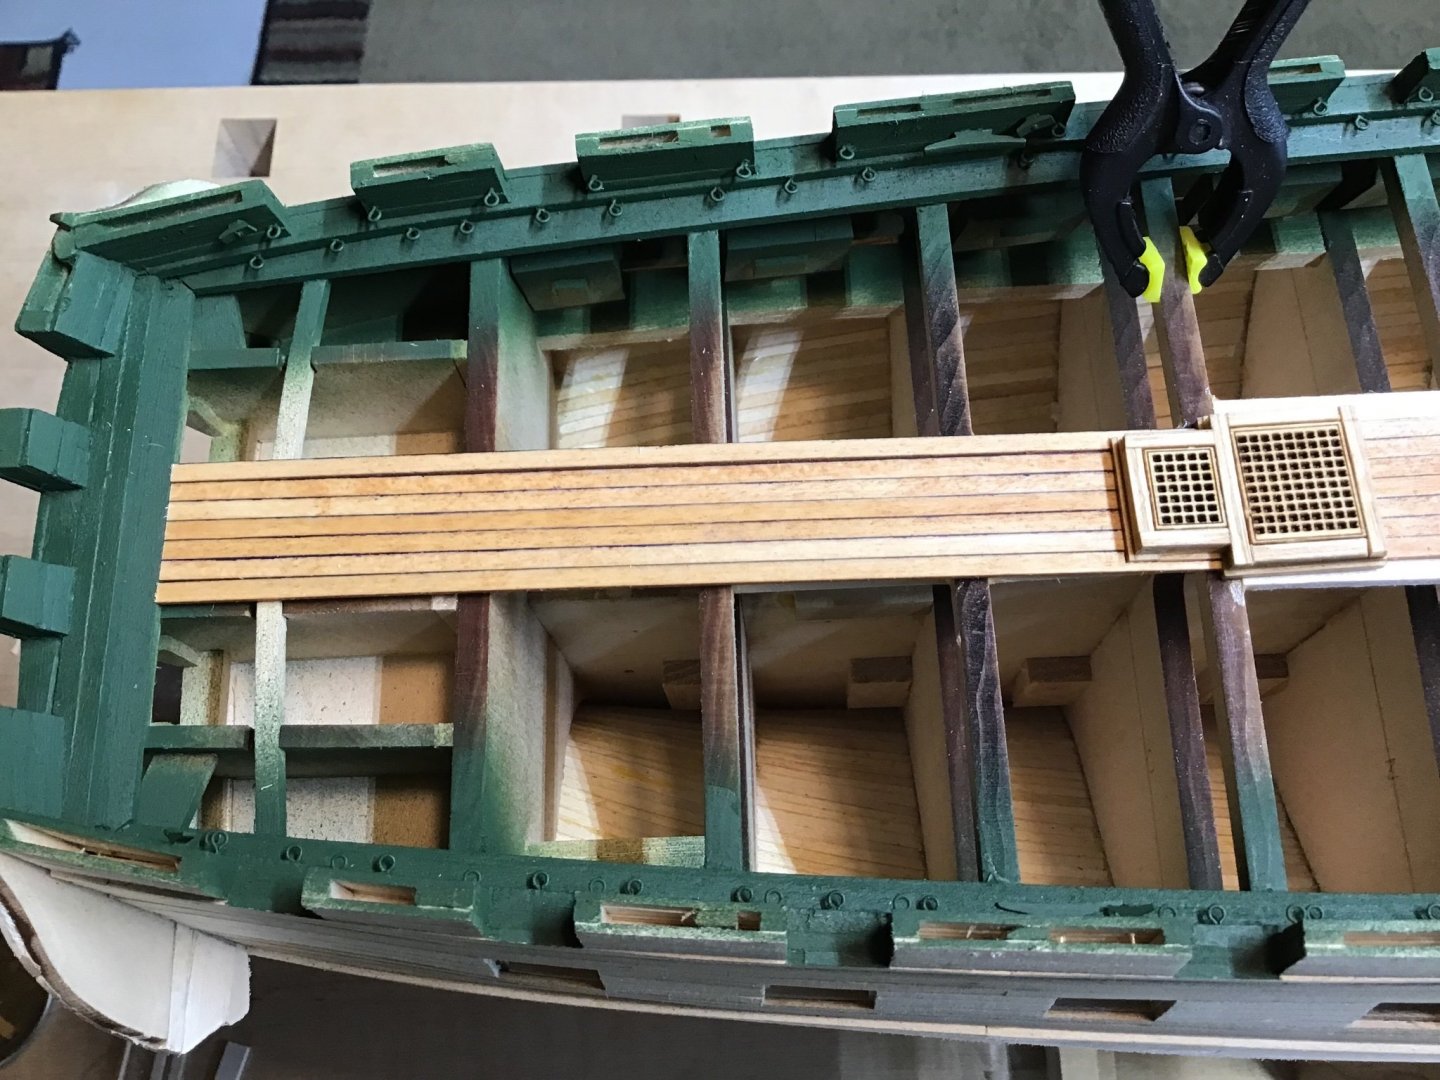
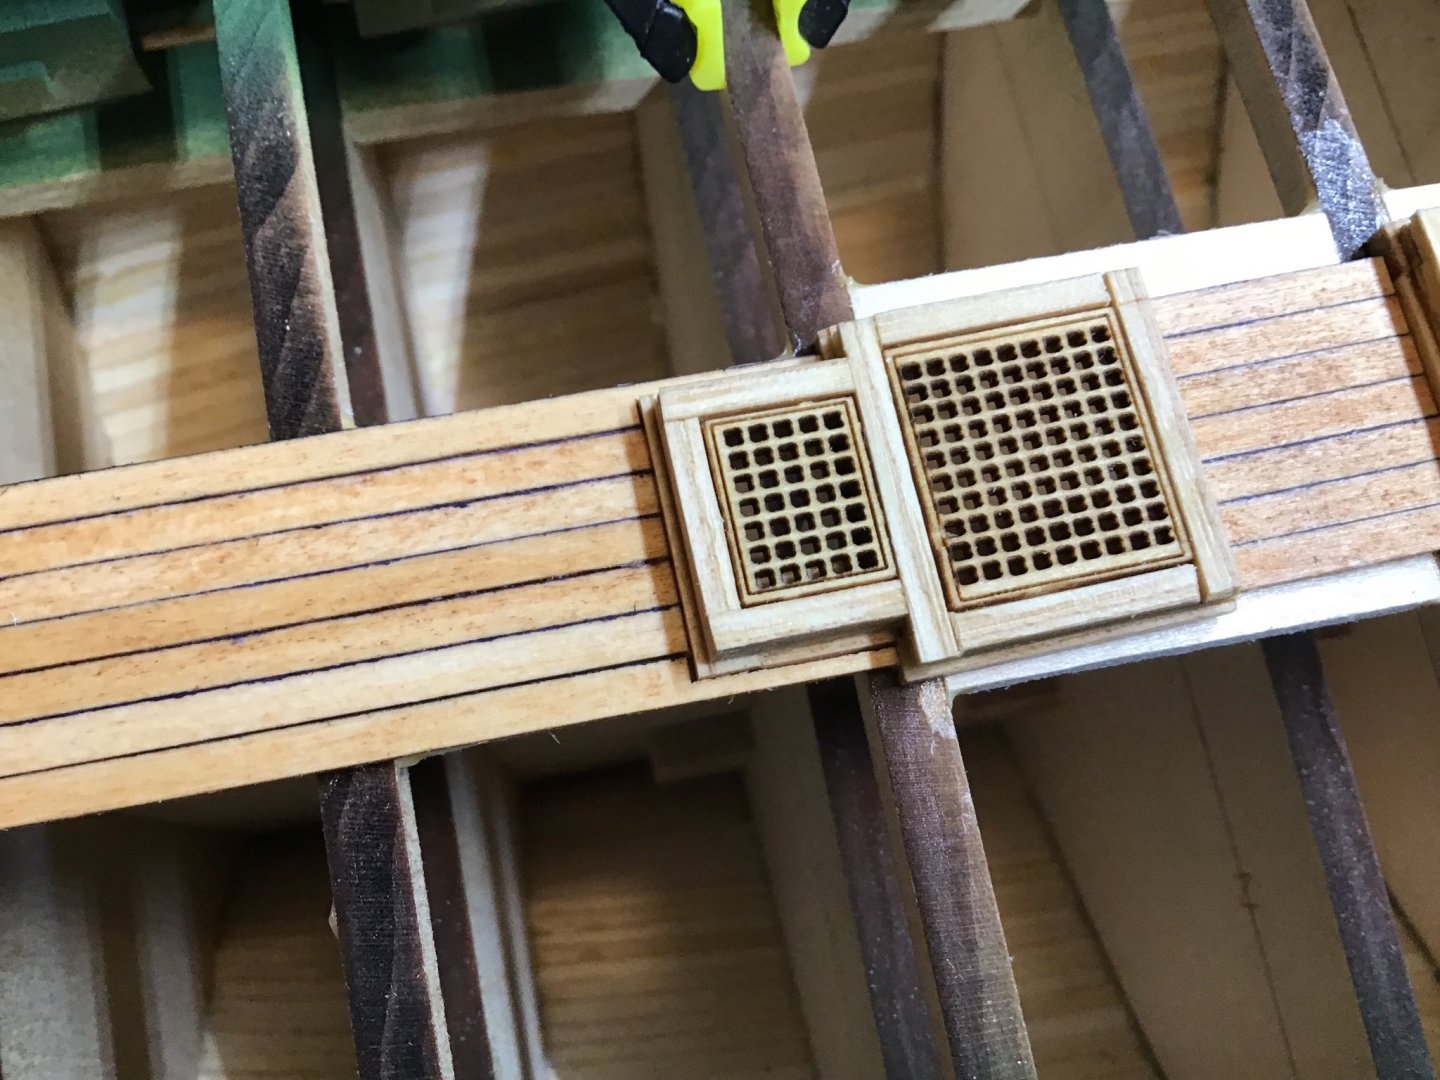
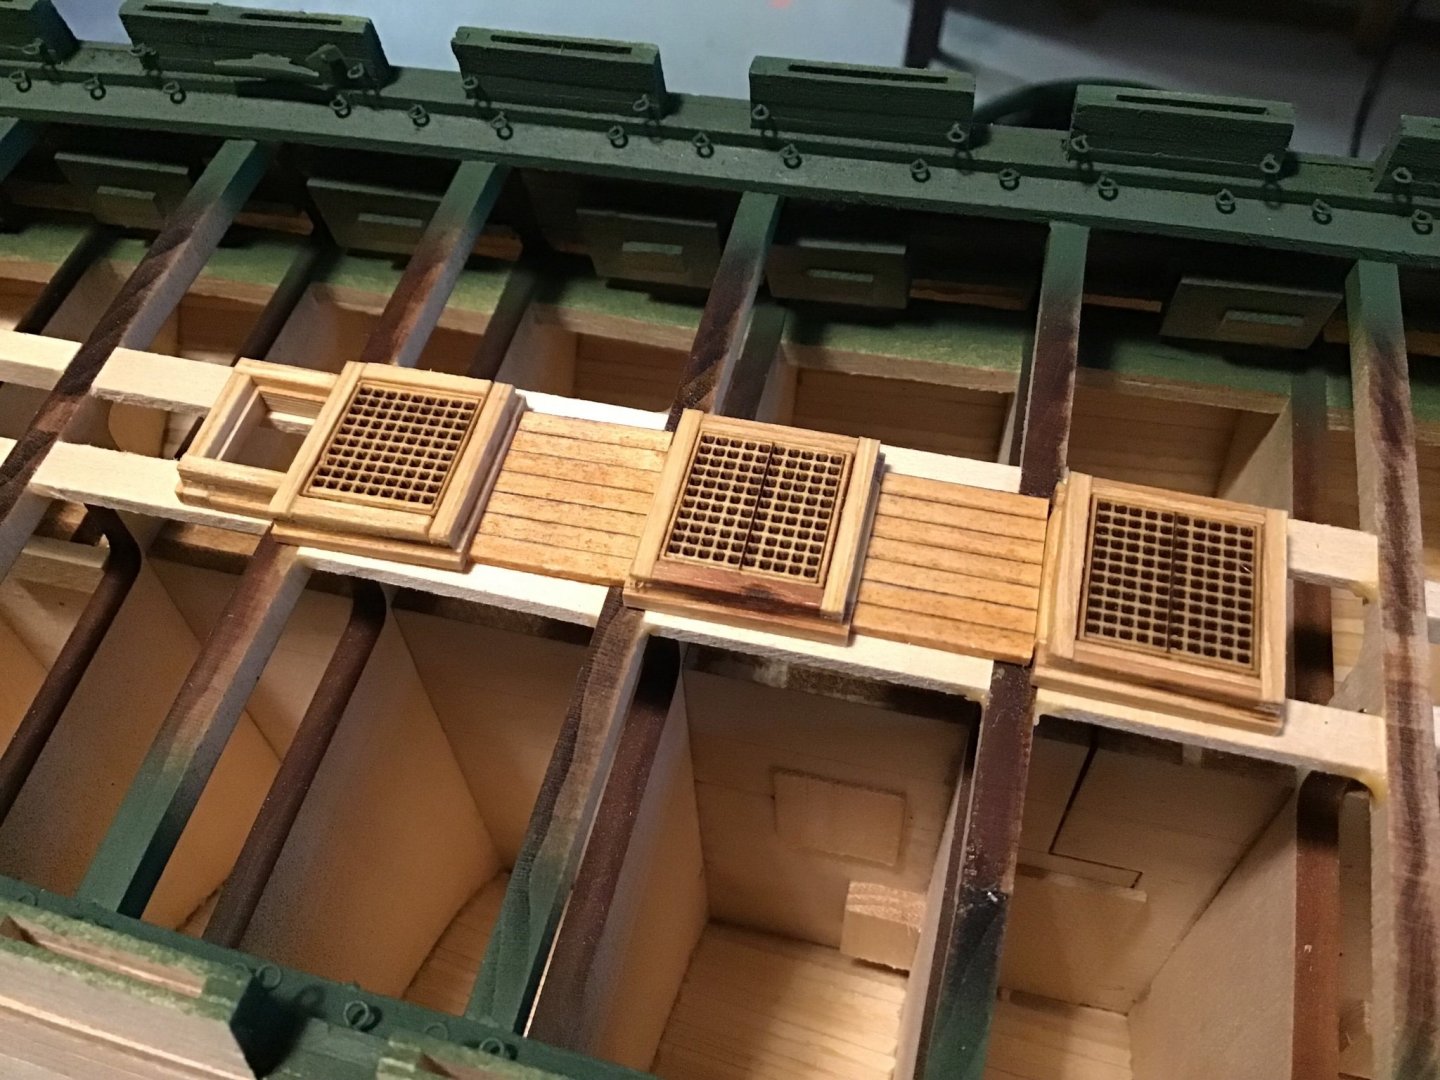
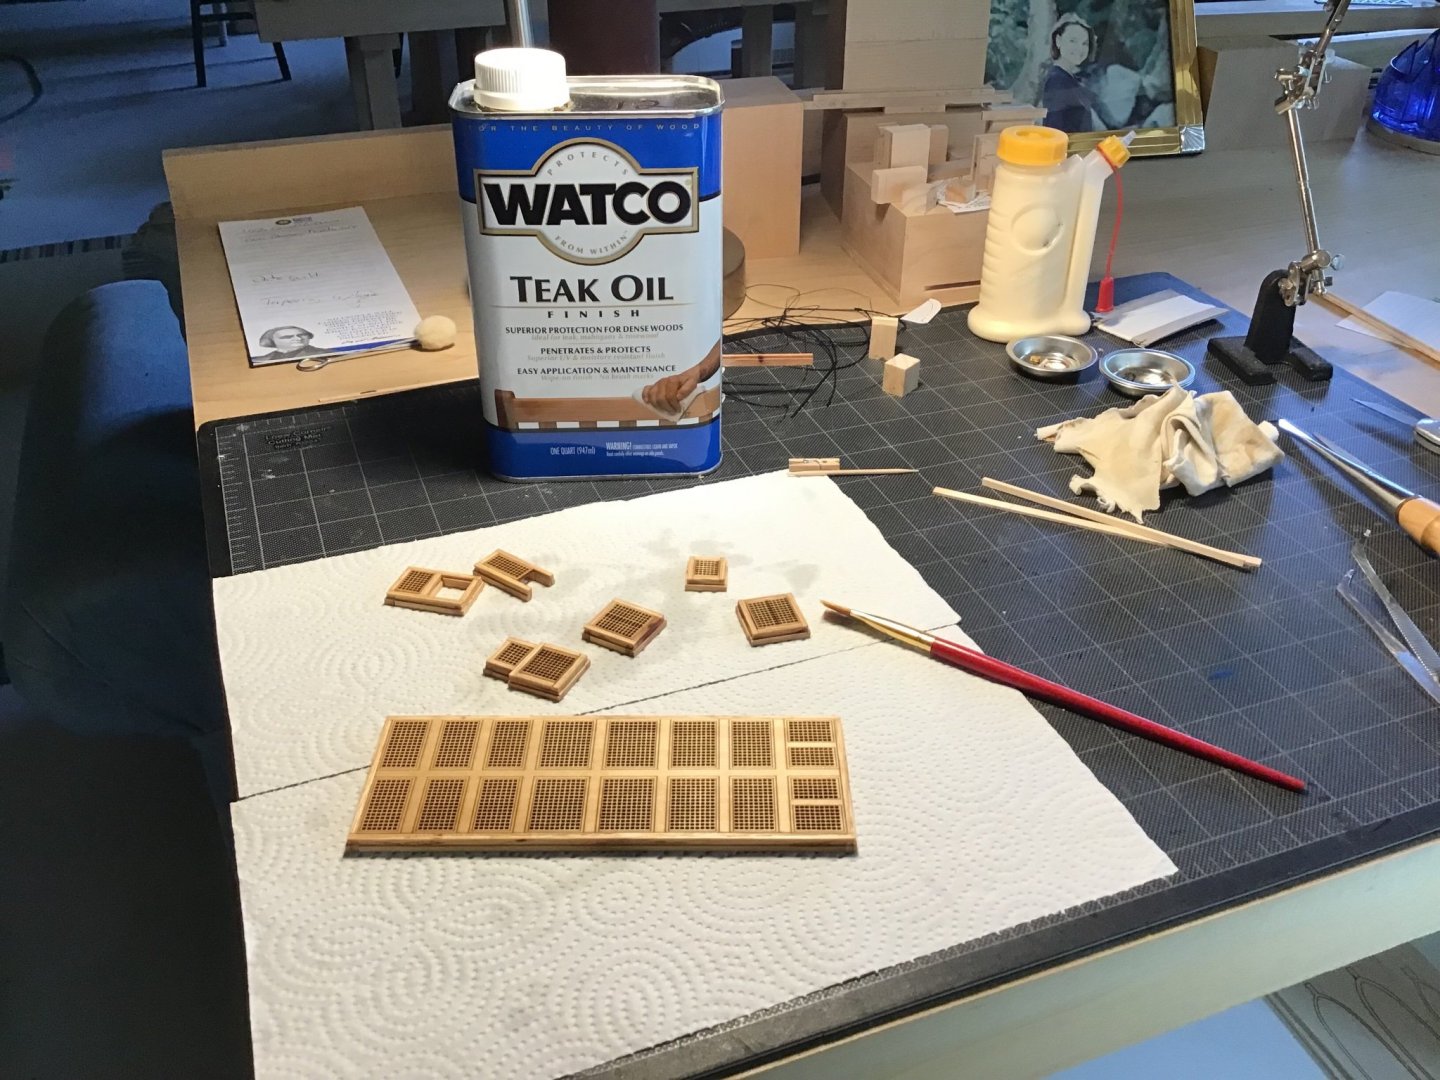
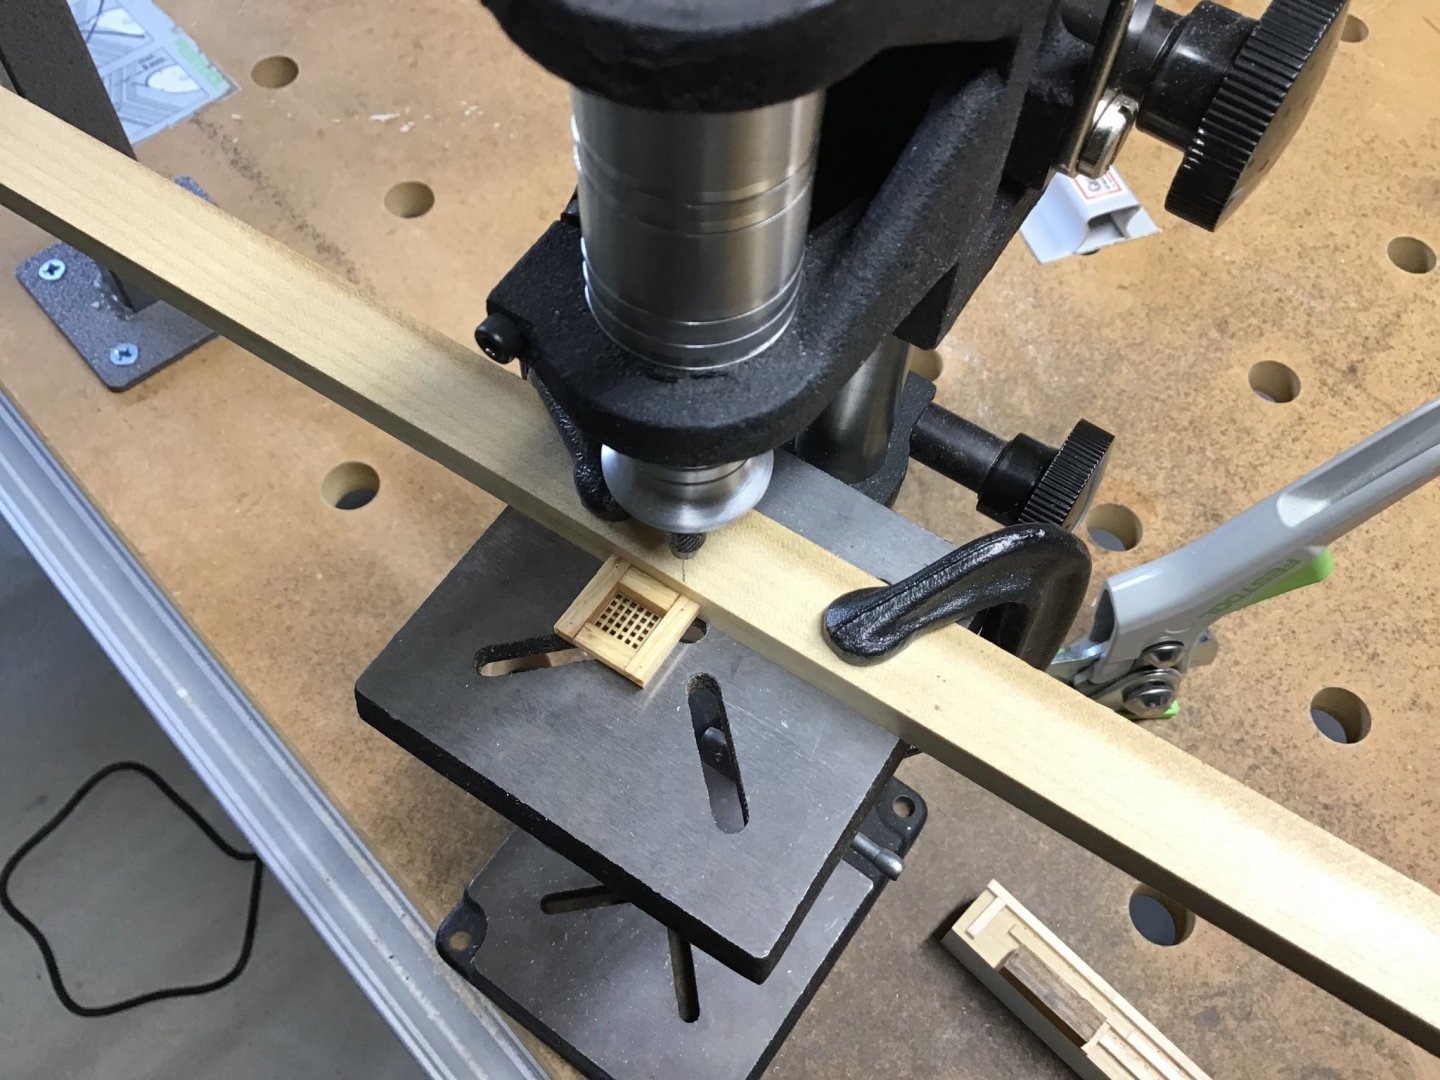
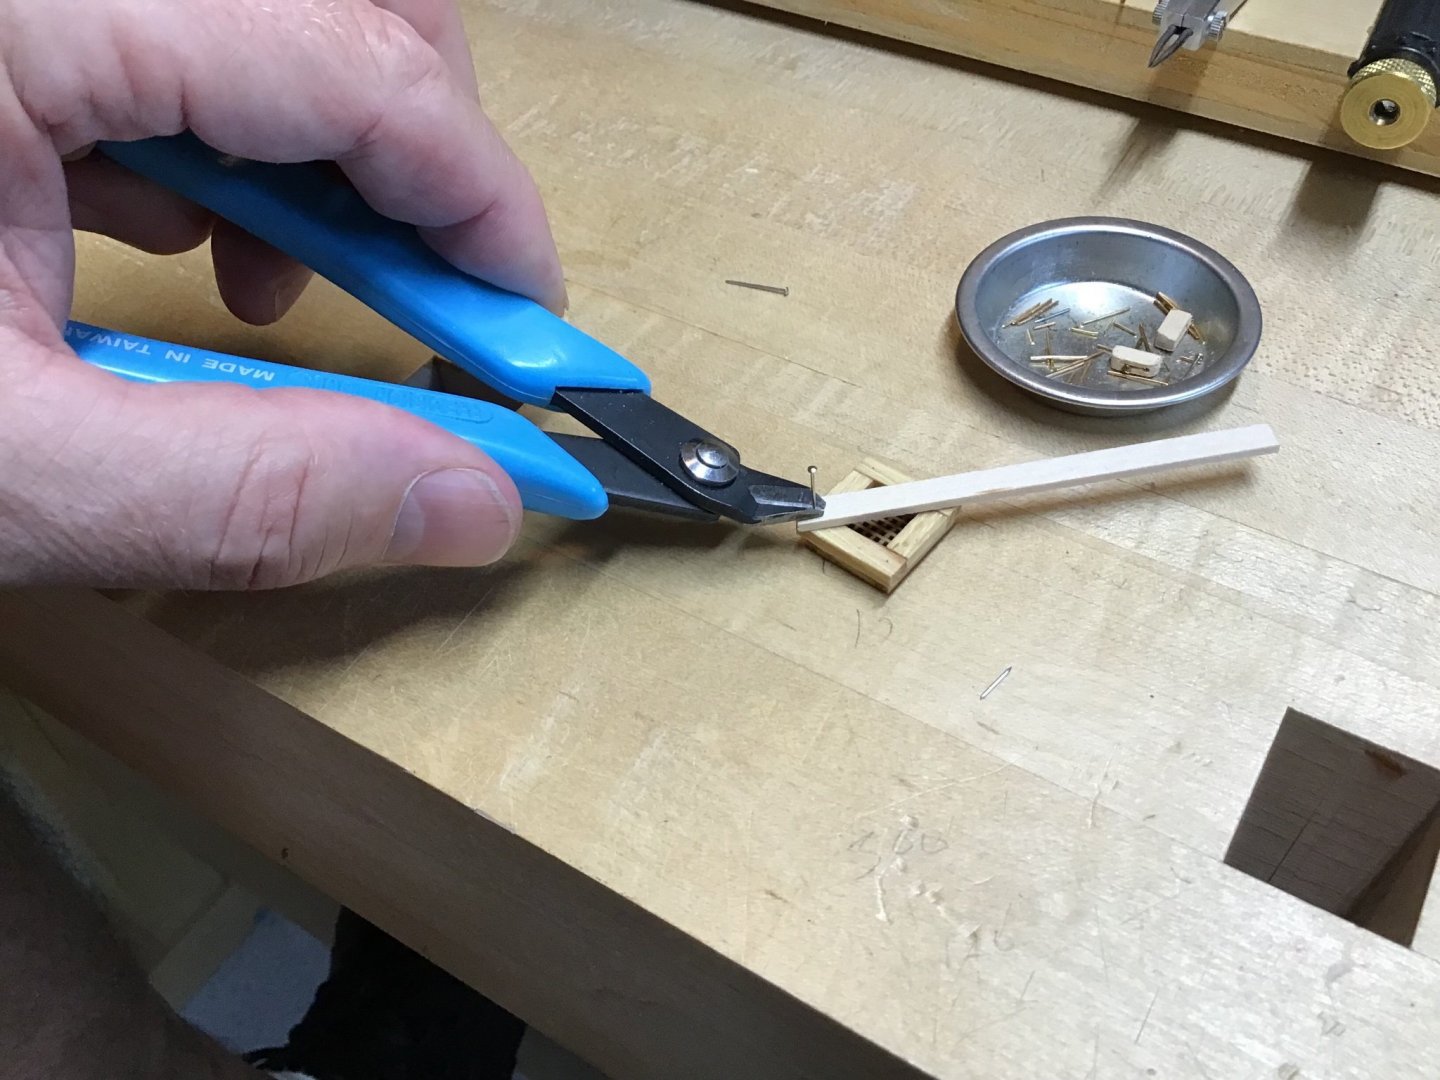
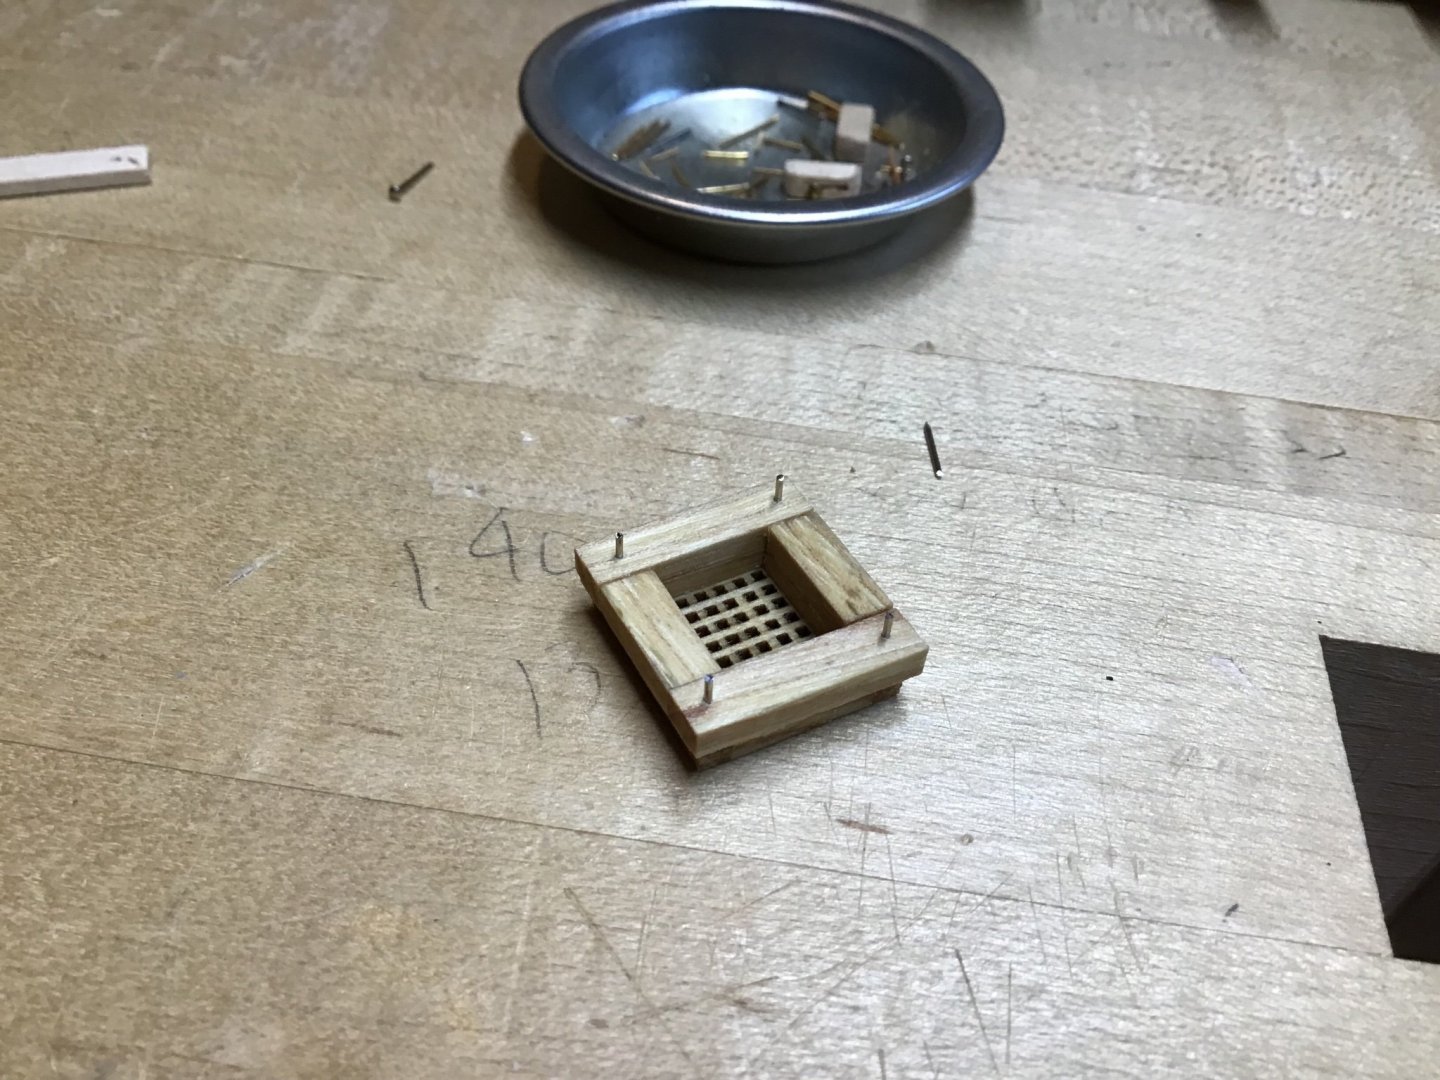
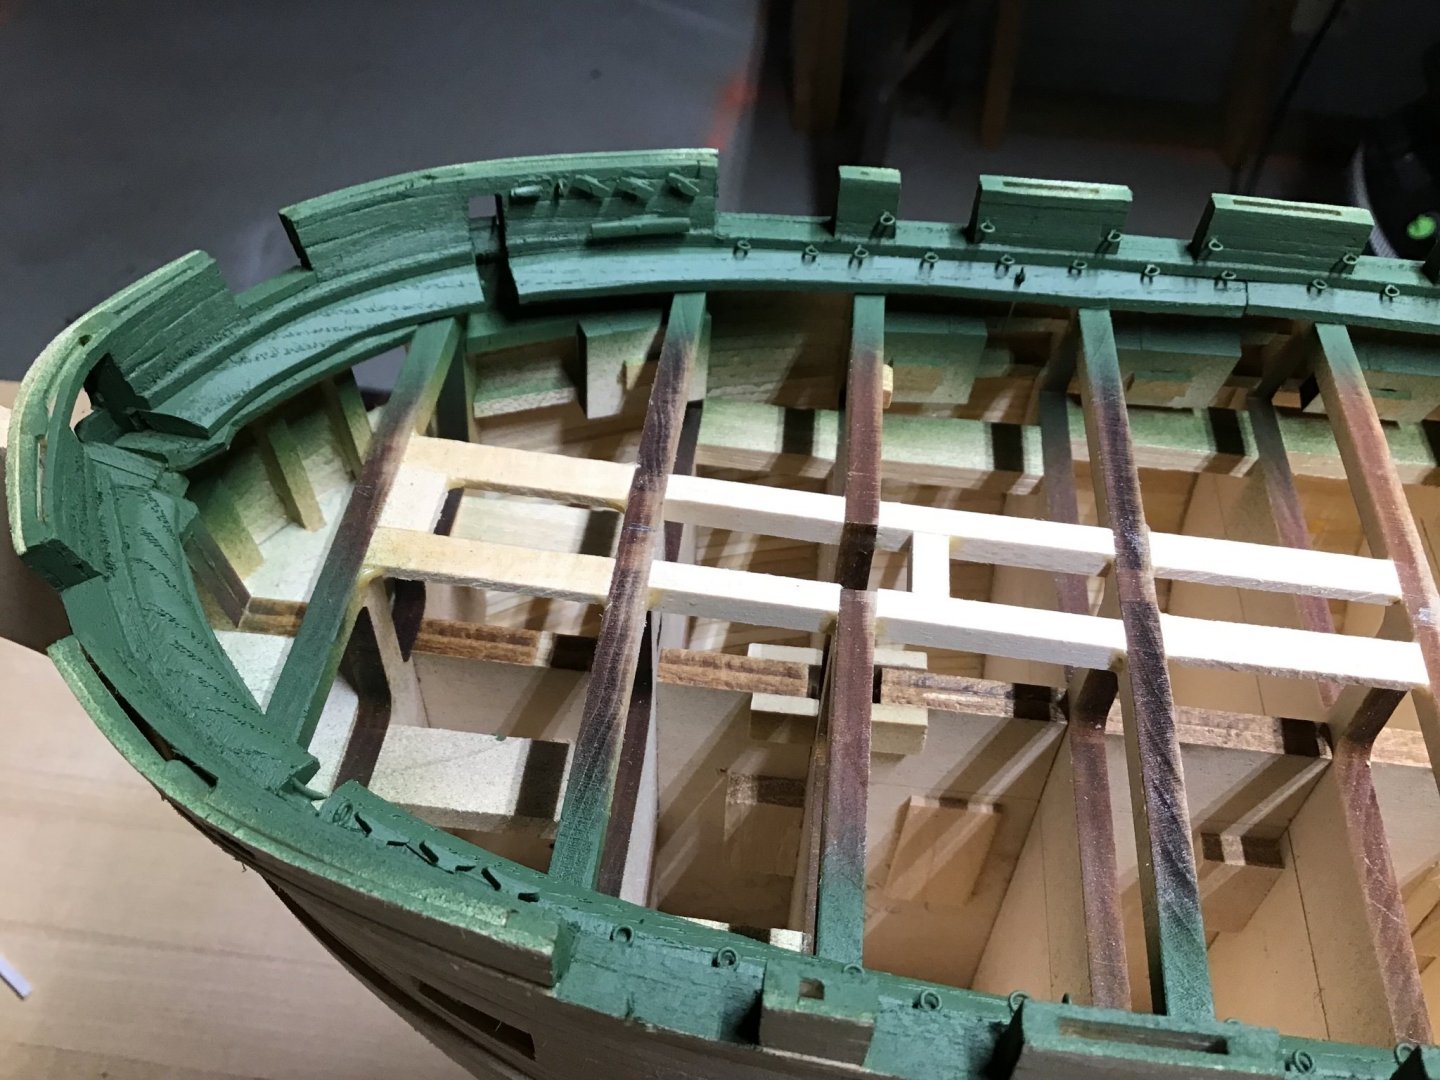
Finishing and Installing Deck Grates The coamings are made of Hickory so decided to finish with Watco Tung Oil. Applied the oil, a wet coat, and wiped after a little while - to avoid dried pools of oil, 5 coats total. Next is installation where Fore/Aft, Port/Starboard alignment has always been a challenge for me. So…… First drilled a hole in each corner with the Foredom drill press. Then tapped a pin nail through a spacing board into the hole, and flush cut the nail. Now the coaming has 4 posts of equal height. Locating the coaming relative to the nearest forward bulkhead, so measured the distance on the plan with dividers and transferred to the model. Placed the coaming in it’s location and press down to make an imprint, and drill the holes Last picture shows coaming installed. Important! Do not glue the coamings. After planking the deck, they will be removed so a template can be used to mark the locations of deck penetrations for the Boom Traveller and Ammo Passing Scuttles, etc.


-
Hi JS, Later will paint black with a brush.... After trying many ways to blacken copper, decided painting is easier.... Thanks
-
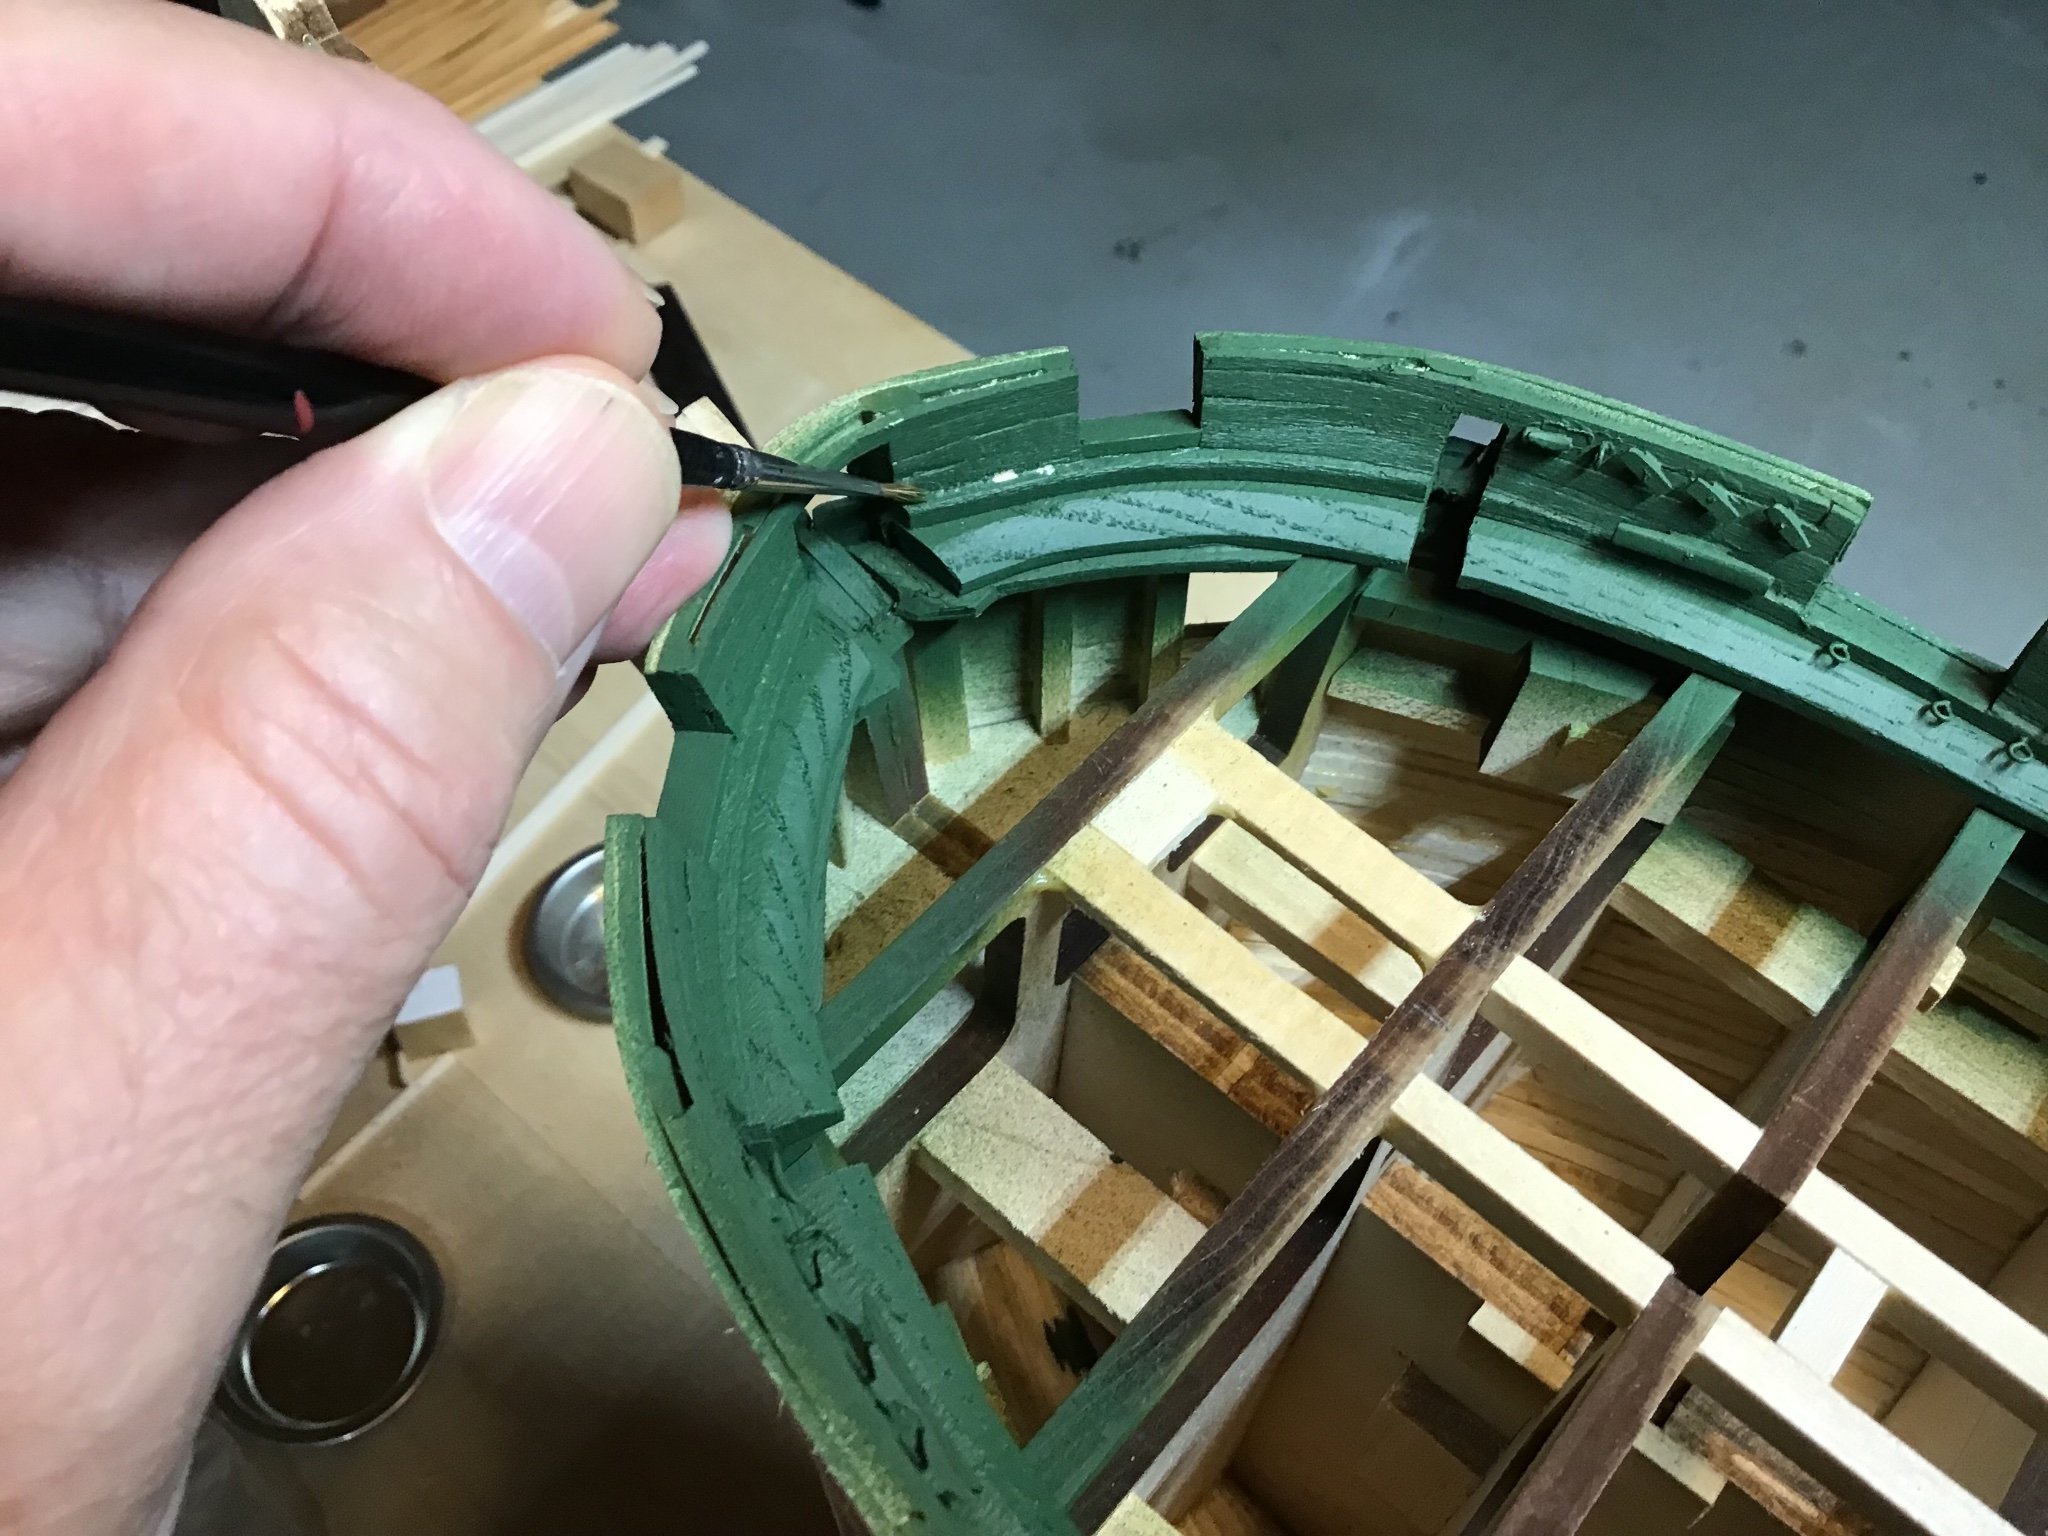
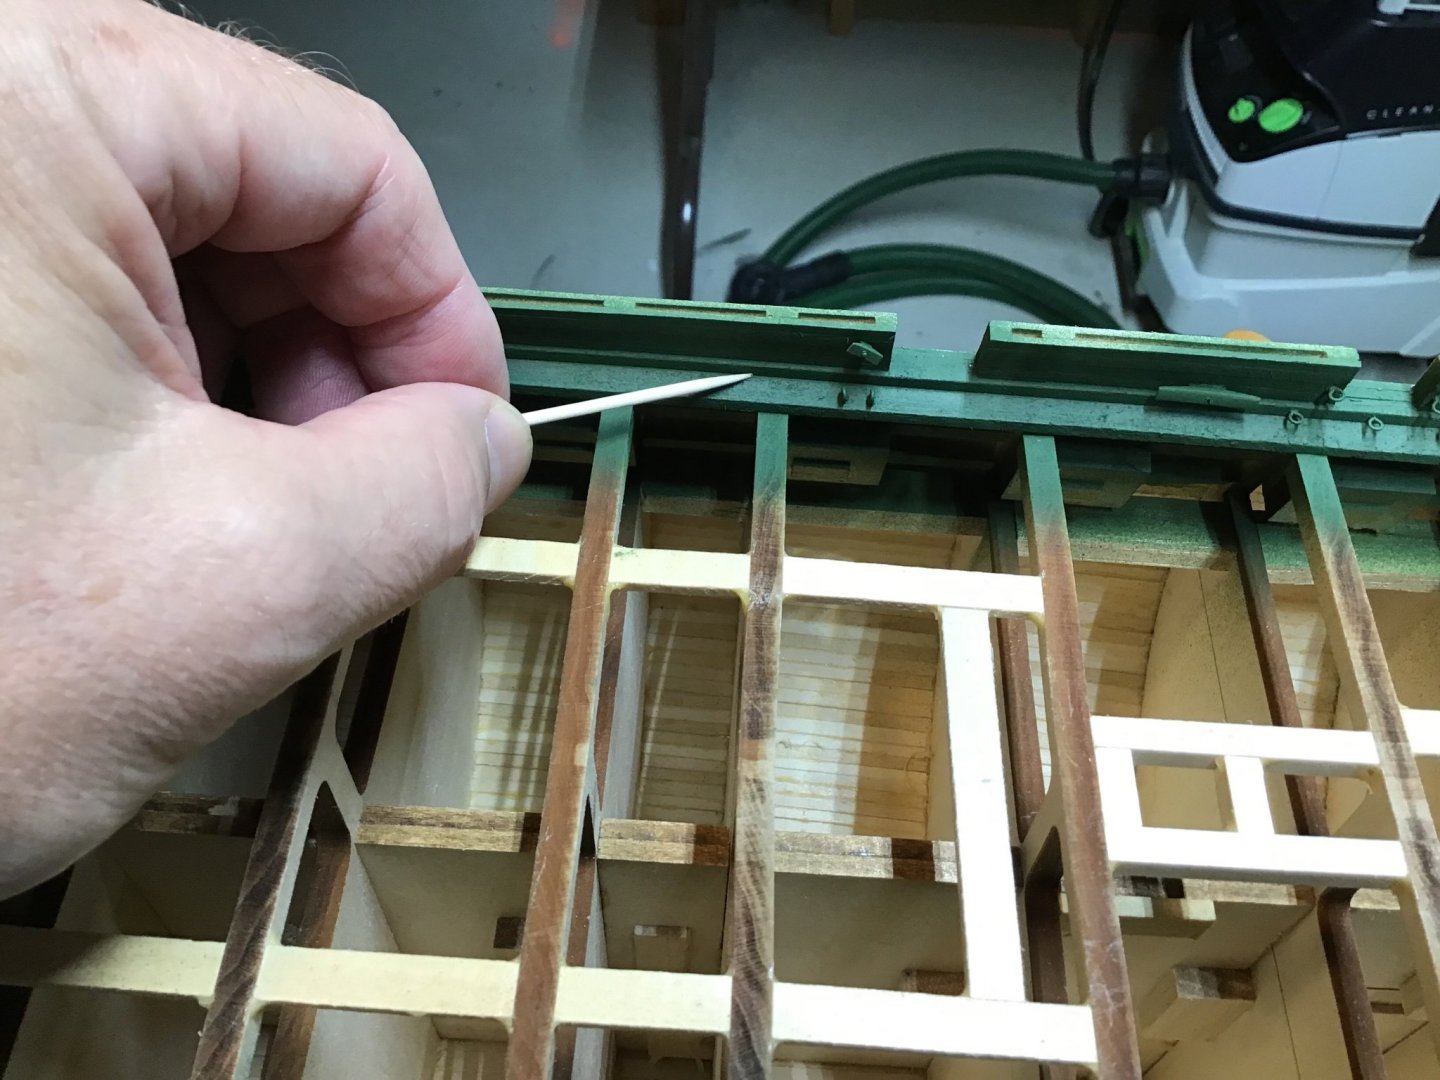
Cleaning up the Dust Inevitably there will be dust. The airbrush kicked up some dust from inside the hull, and from between the inner and outer bulkhead boards. The acrylic surface is forgiving and can be worked with a stiff brush and fine grit sand paper. Hold a stiff brush perpendicular to the surface and work across the surface. A flexi-file with fine grit is used across the gunport sills. A toothpick can be used to get into the corners. Touch up with a brush.

-
Painting the Bulwarks Hit the bulwarks with a light coat of rattle can shellac. Brushed the surface with a stiff bristle brush to remove the fuzzies. Color coat is Tamiya Dark Green XF-26, with Tamiya Paint Retarder, applied with a Paasch Talon airbrush @25 psi.


-
First pic looks like poplar to me…. Studied with a master furniture maker, and when asked, said often he couldn’t identify the species…. Comes down to use….what would you like to do with it…?
-
Hi Bill, Highly recommend the Armed Virginia Sloop practicum and the Model Shipways kit. Liked the larger scale and the practicum is particularly detailed about both standing and running rigging.
-
Checkout: https://www.lauckstreetshipyard.com/home Cheers!
-
New member from the North Atlantic
ERS Rich replied to Thukydides's topic in New member Introductions
Welcome! Greetings from Massachusetts. Glad you are here. Cheers! -
Beautiful job, so crisp and clean. Will bookmark for future reference. Looking forward to more. Thanks
- 225 replies
-
- 5
-

-
- I Love Kit
- Hood
- (and 2 more)
-
Hi Bill, Thanks for the kind words. The references are listed in the Introduction, the first post. Followed the College of Model Shipbuilding Guide until about Chapter 4. Then jumped to Chapter 6 to complete the lower hull planking. And I’ve added some techniques I’ve thought of or learned as a cabinet maker. Your question gives me a chance to explain what’s ahead. Going forward, following a sequence I’ve developed over several projects, the general roadmap is: fit out inner bulwarks paint inner bulwarks plank the deck/install deck furniture fit out outer hull: stern galleries, head paint outer hull main rail/upper bulwarks masts/bowsprit rigging Nothing wrong with the sequence in the practicum, just want to do it in such a way that all parts are installed in an area before painting that area.
-
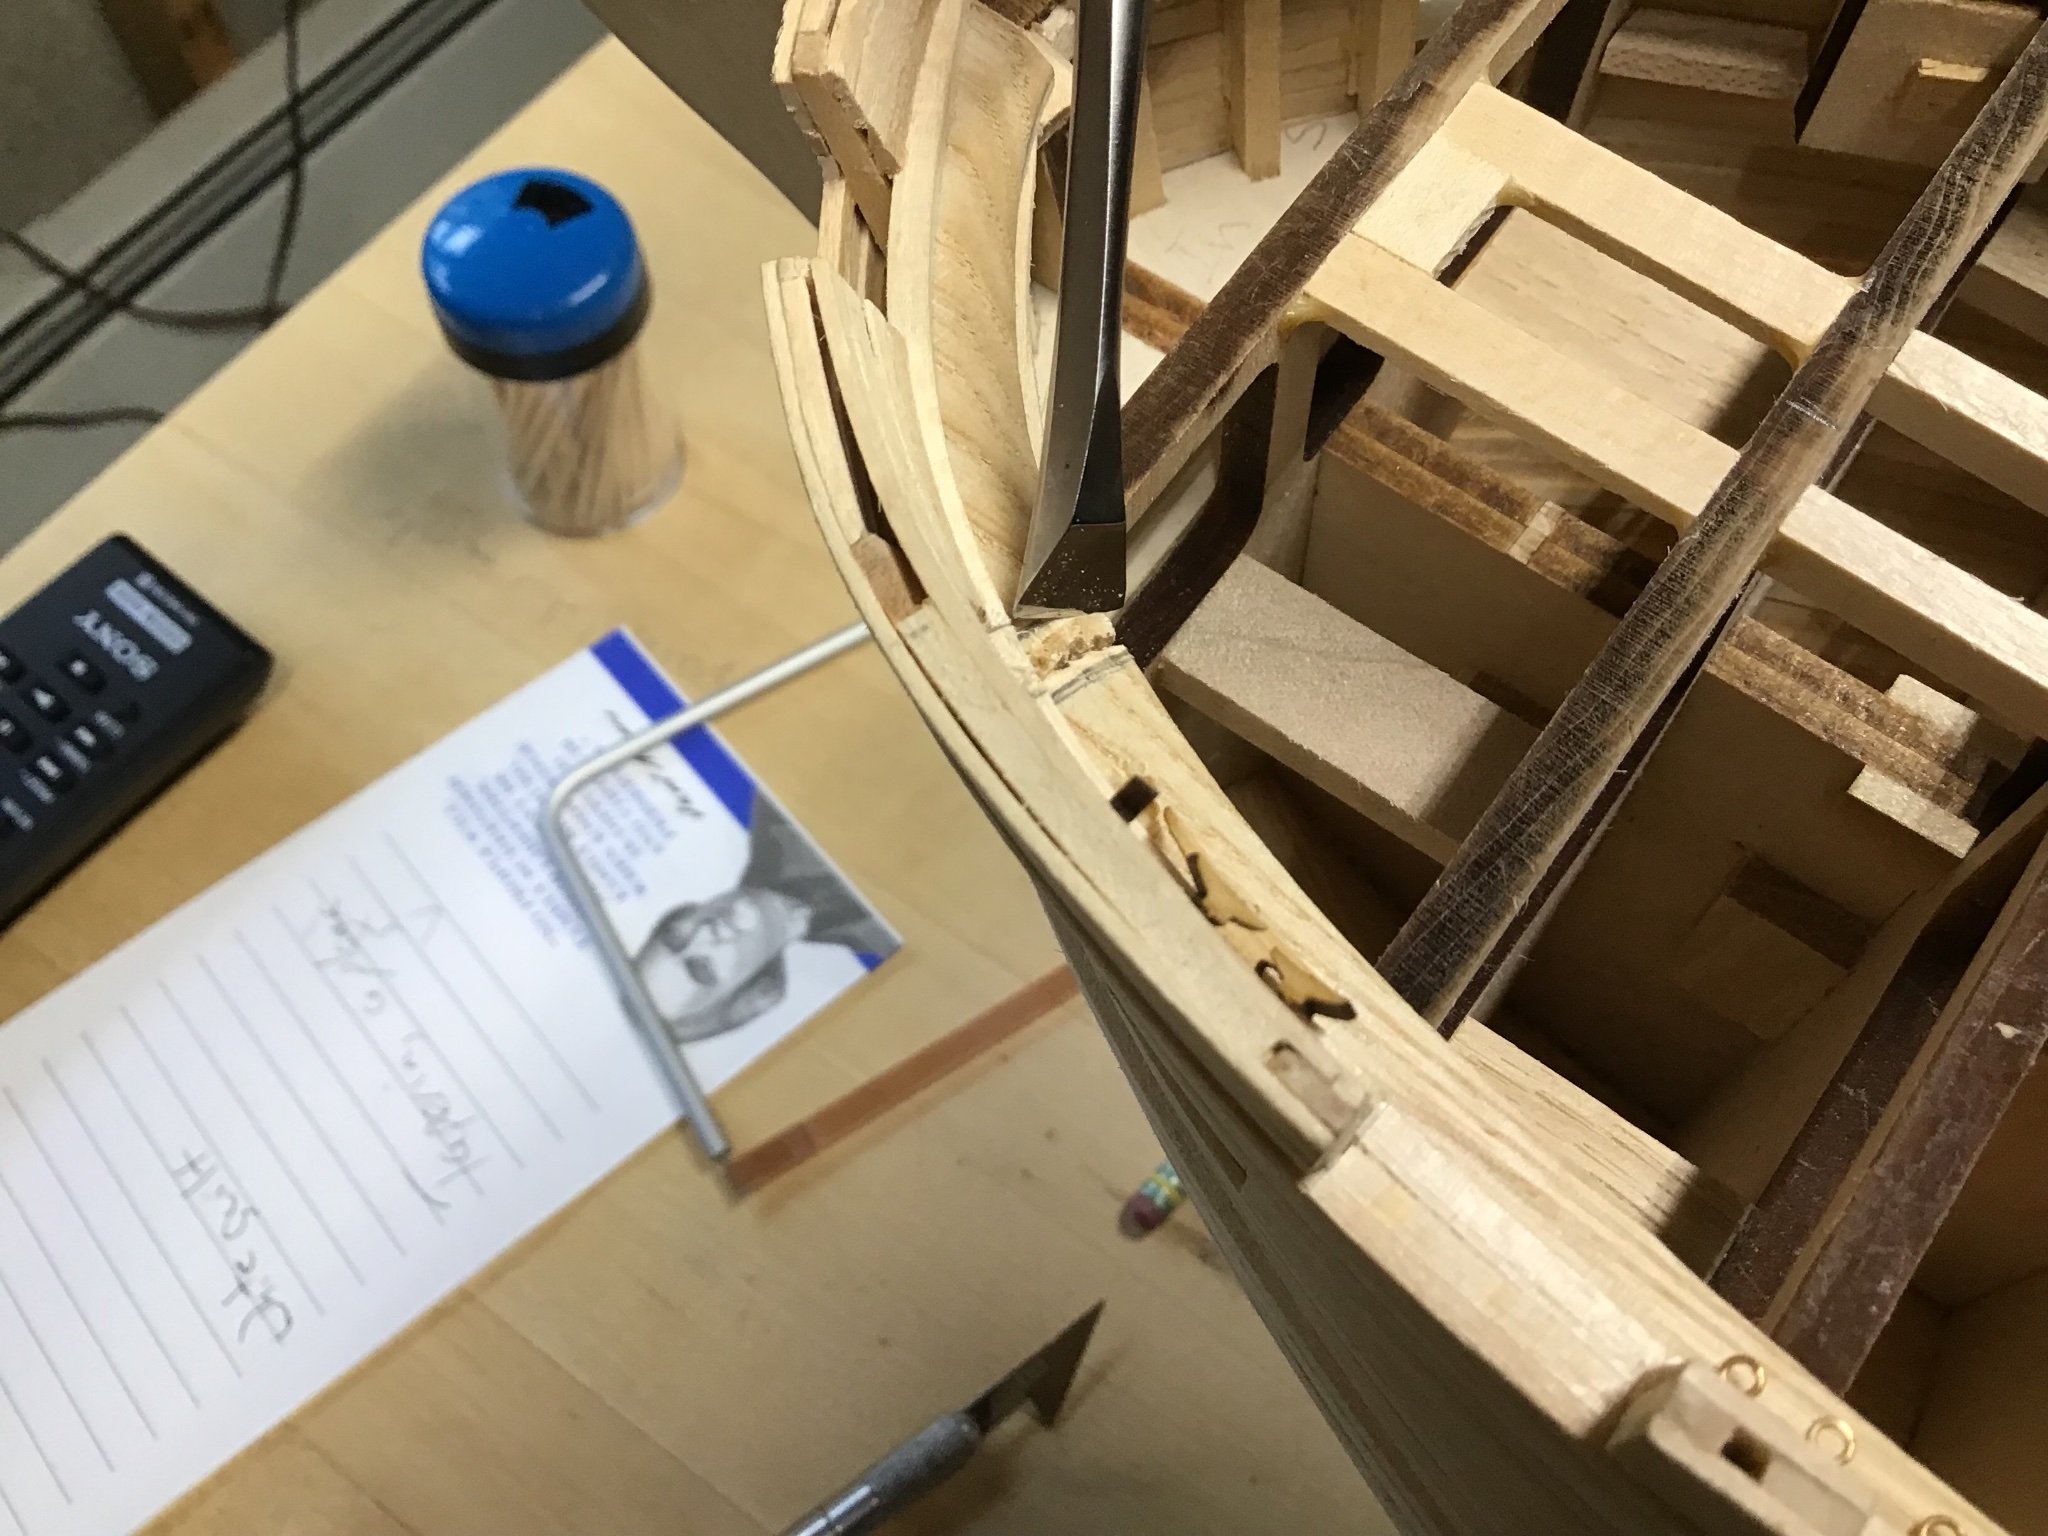
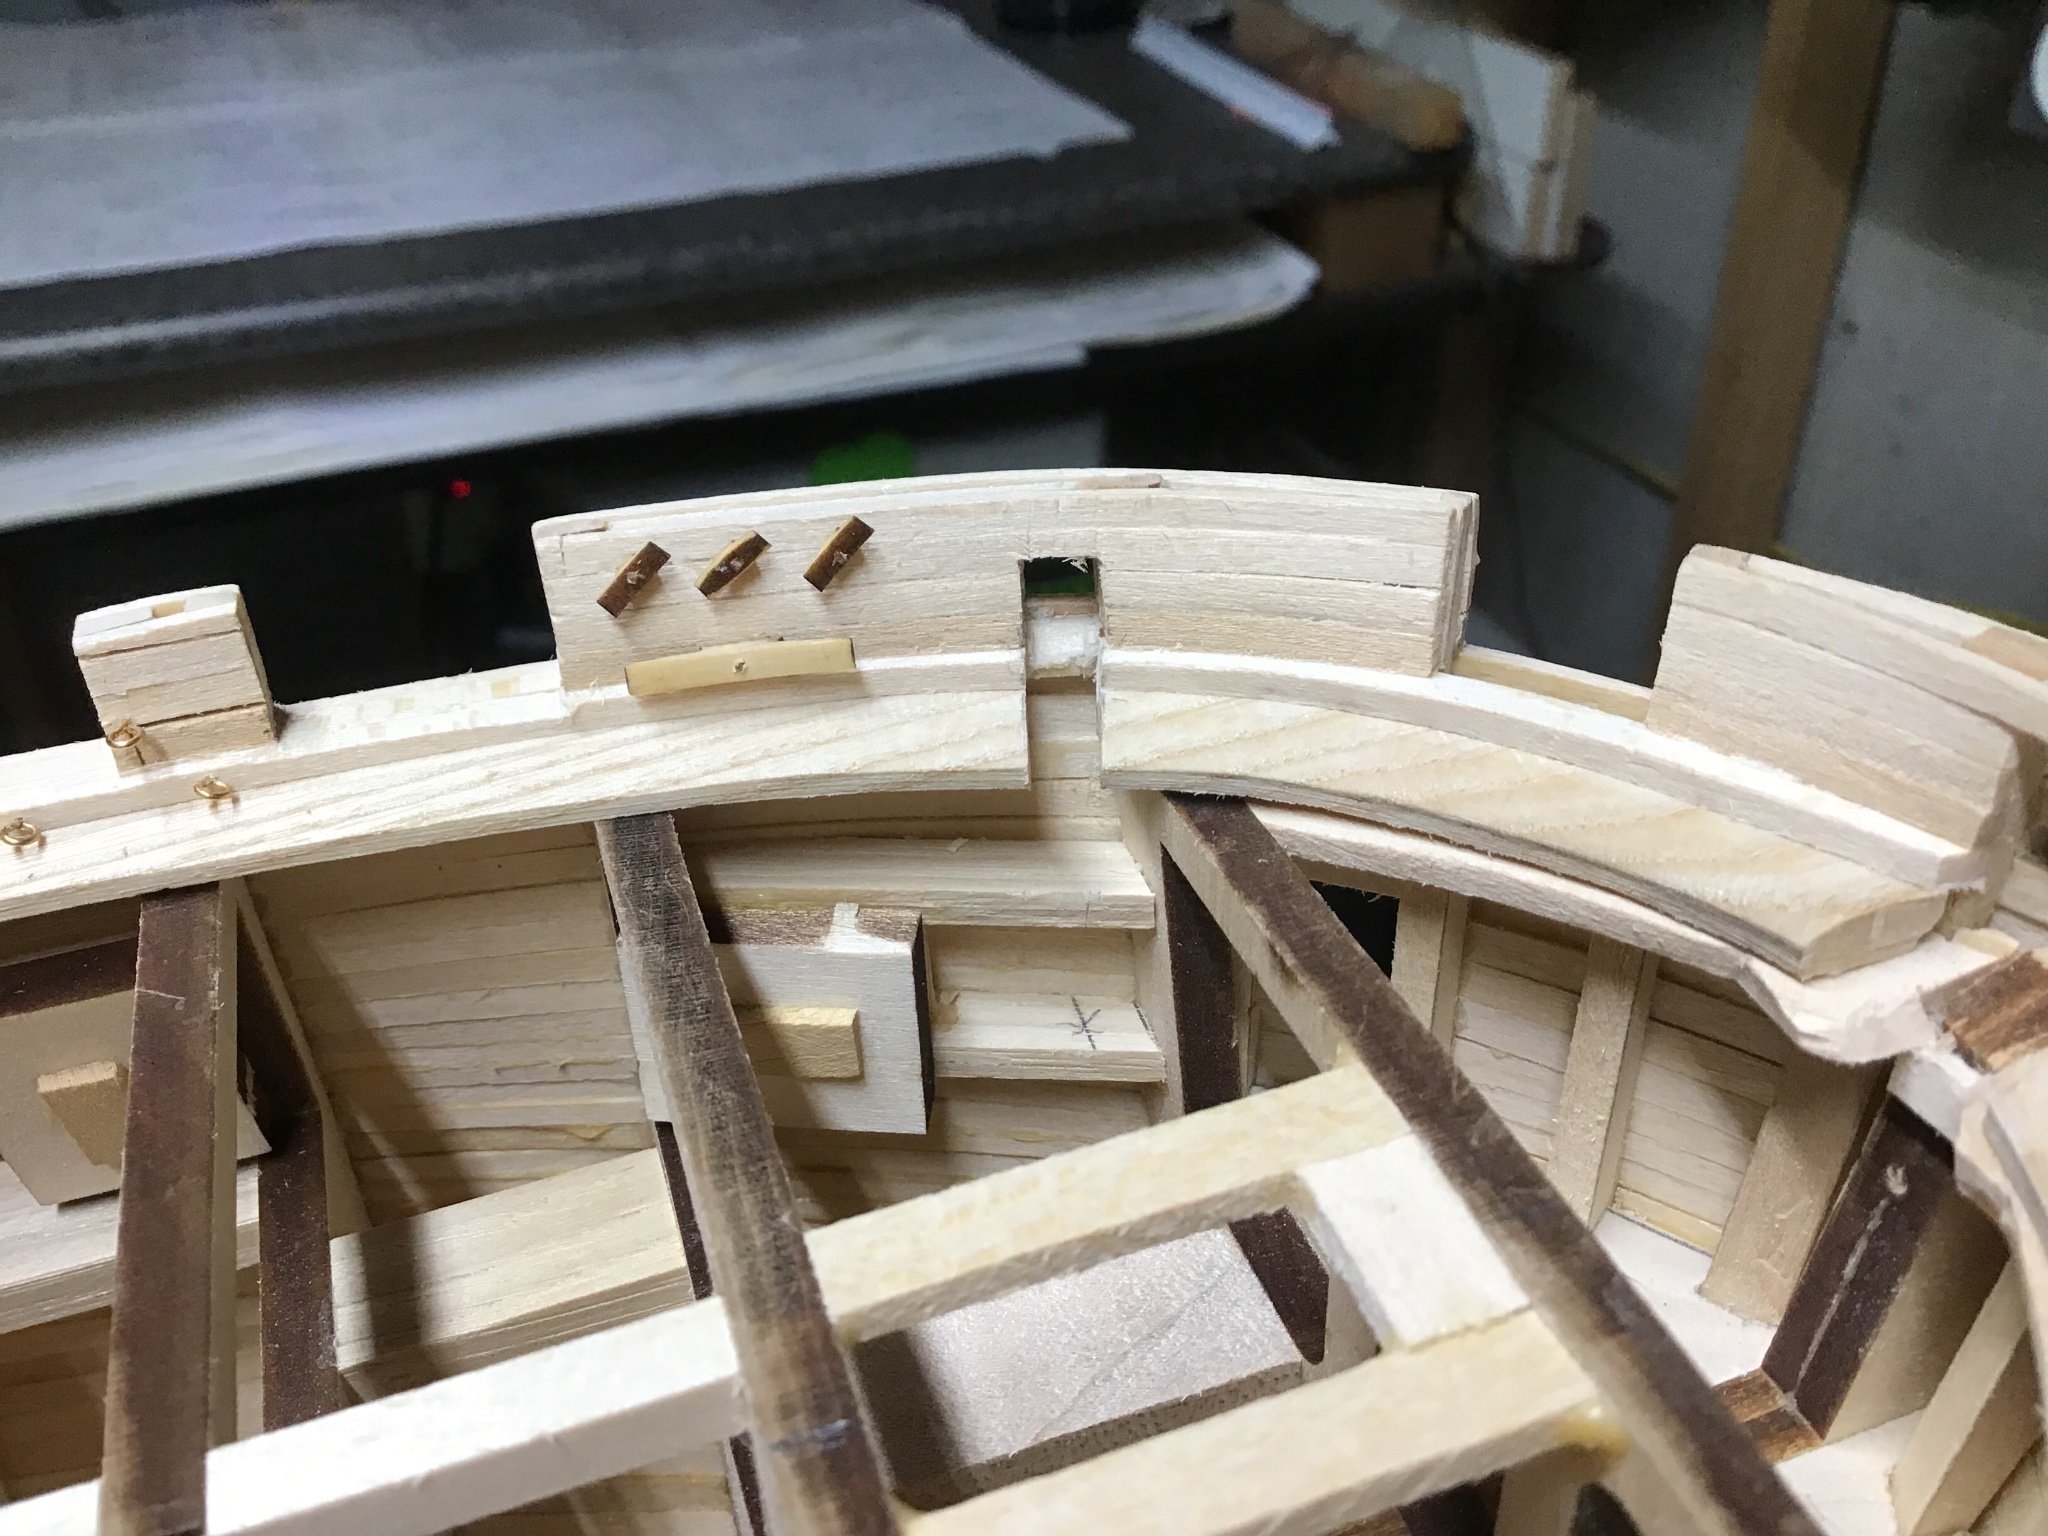
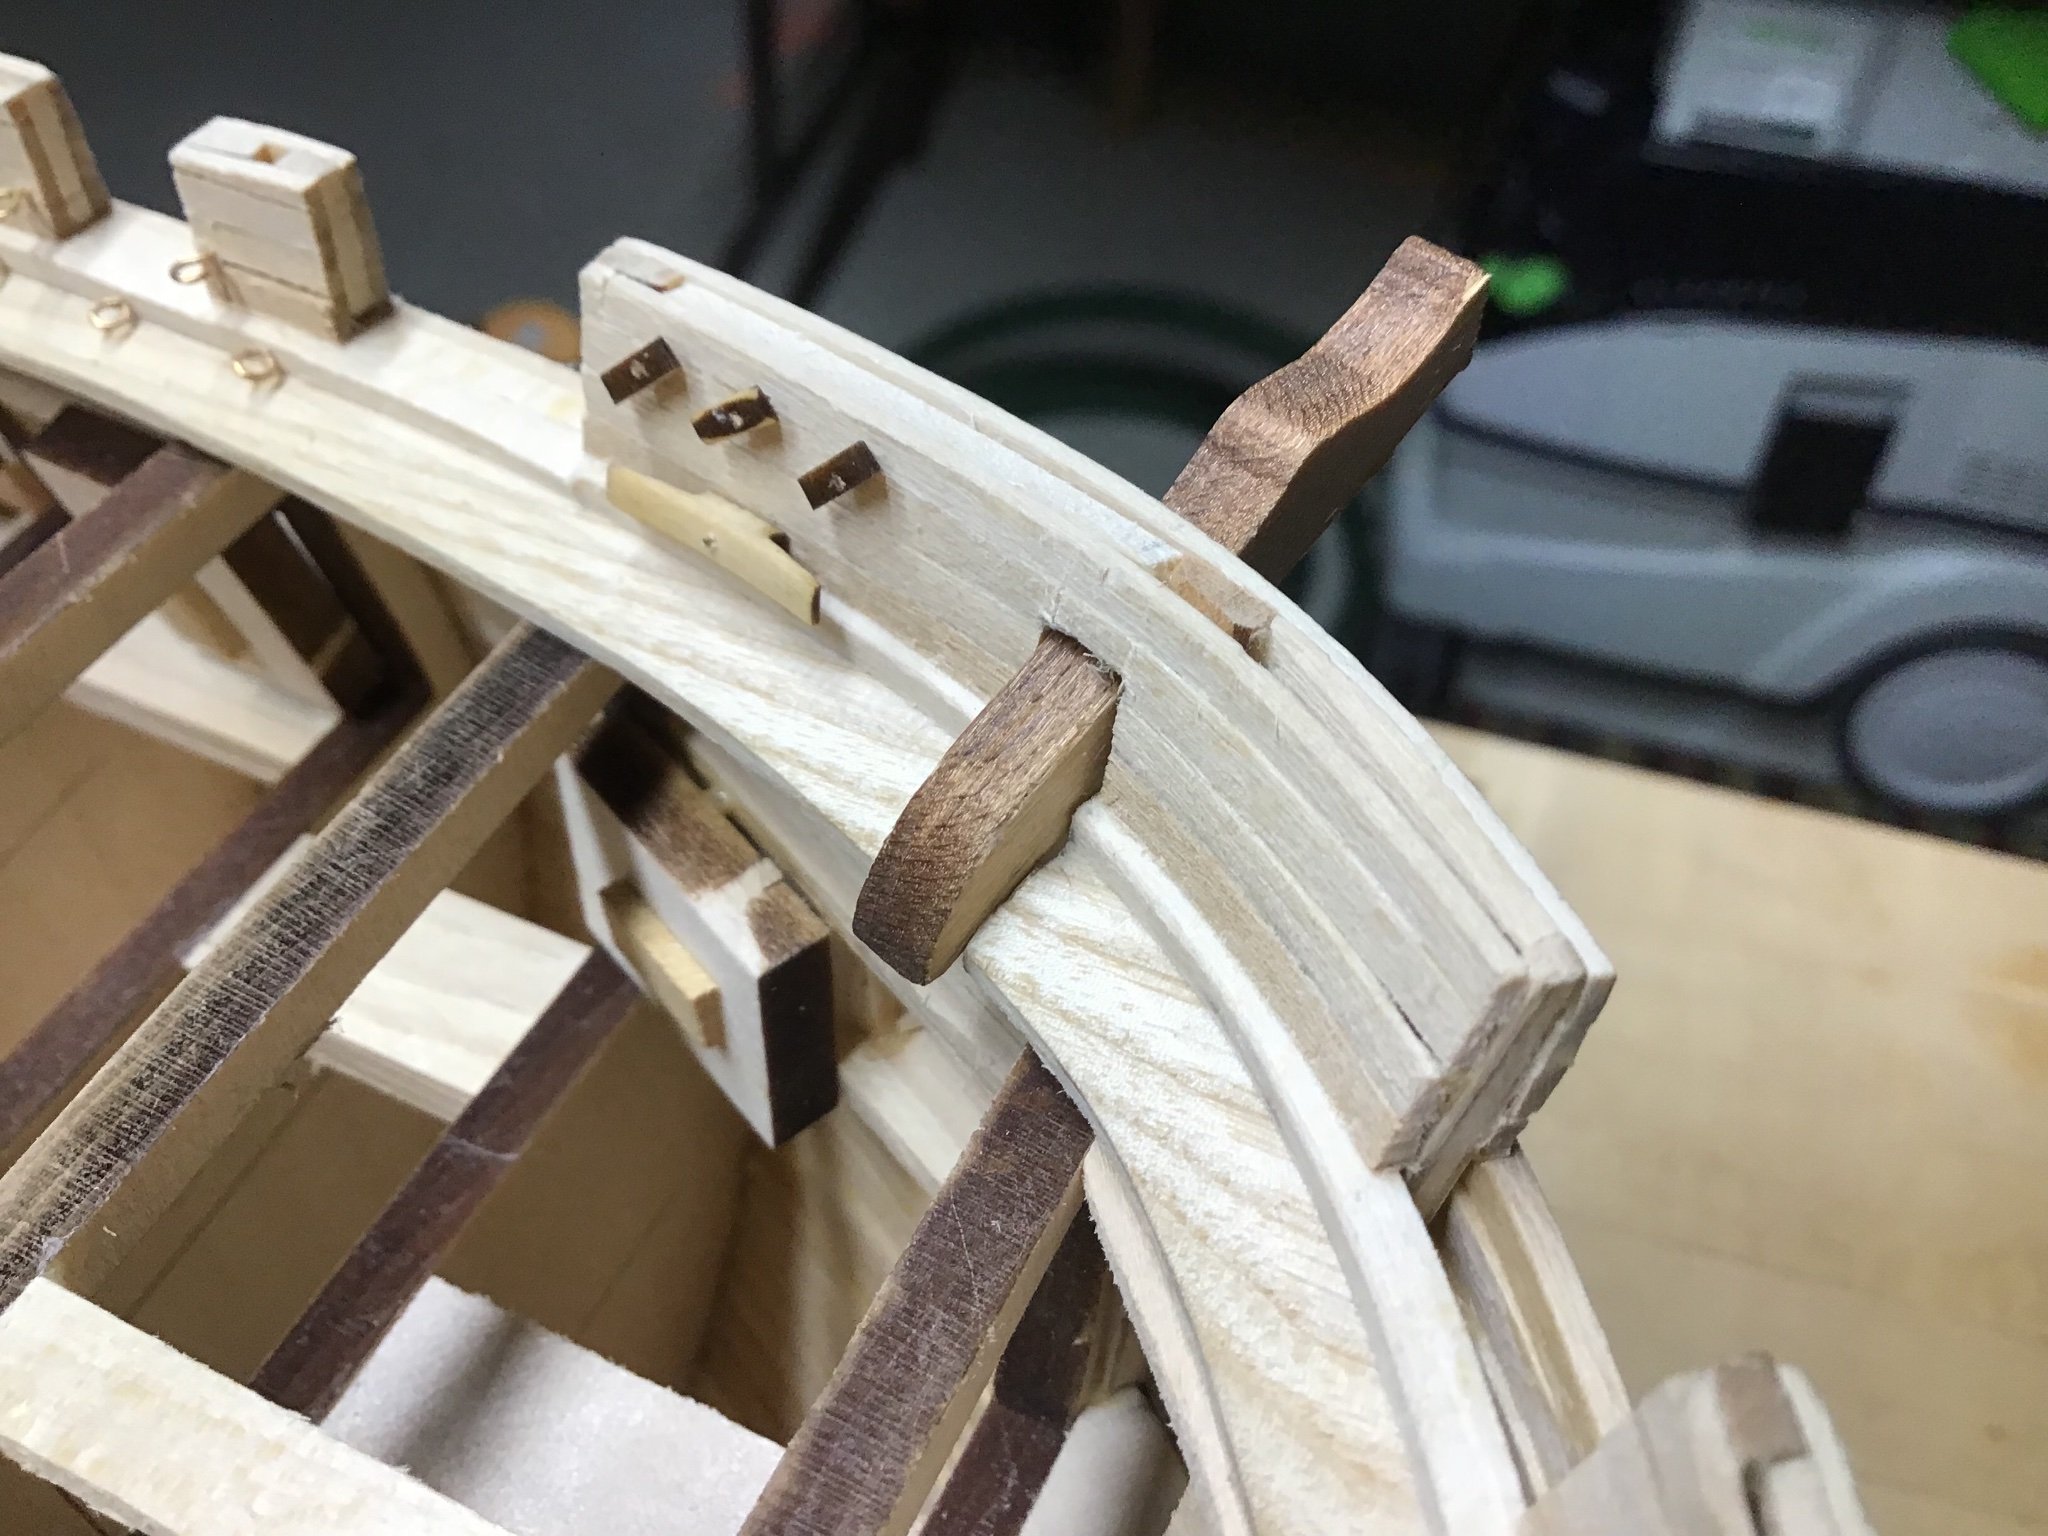
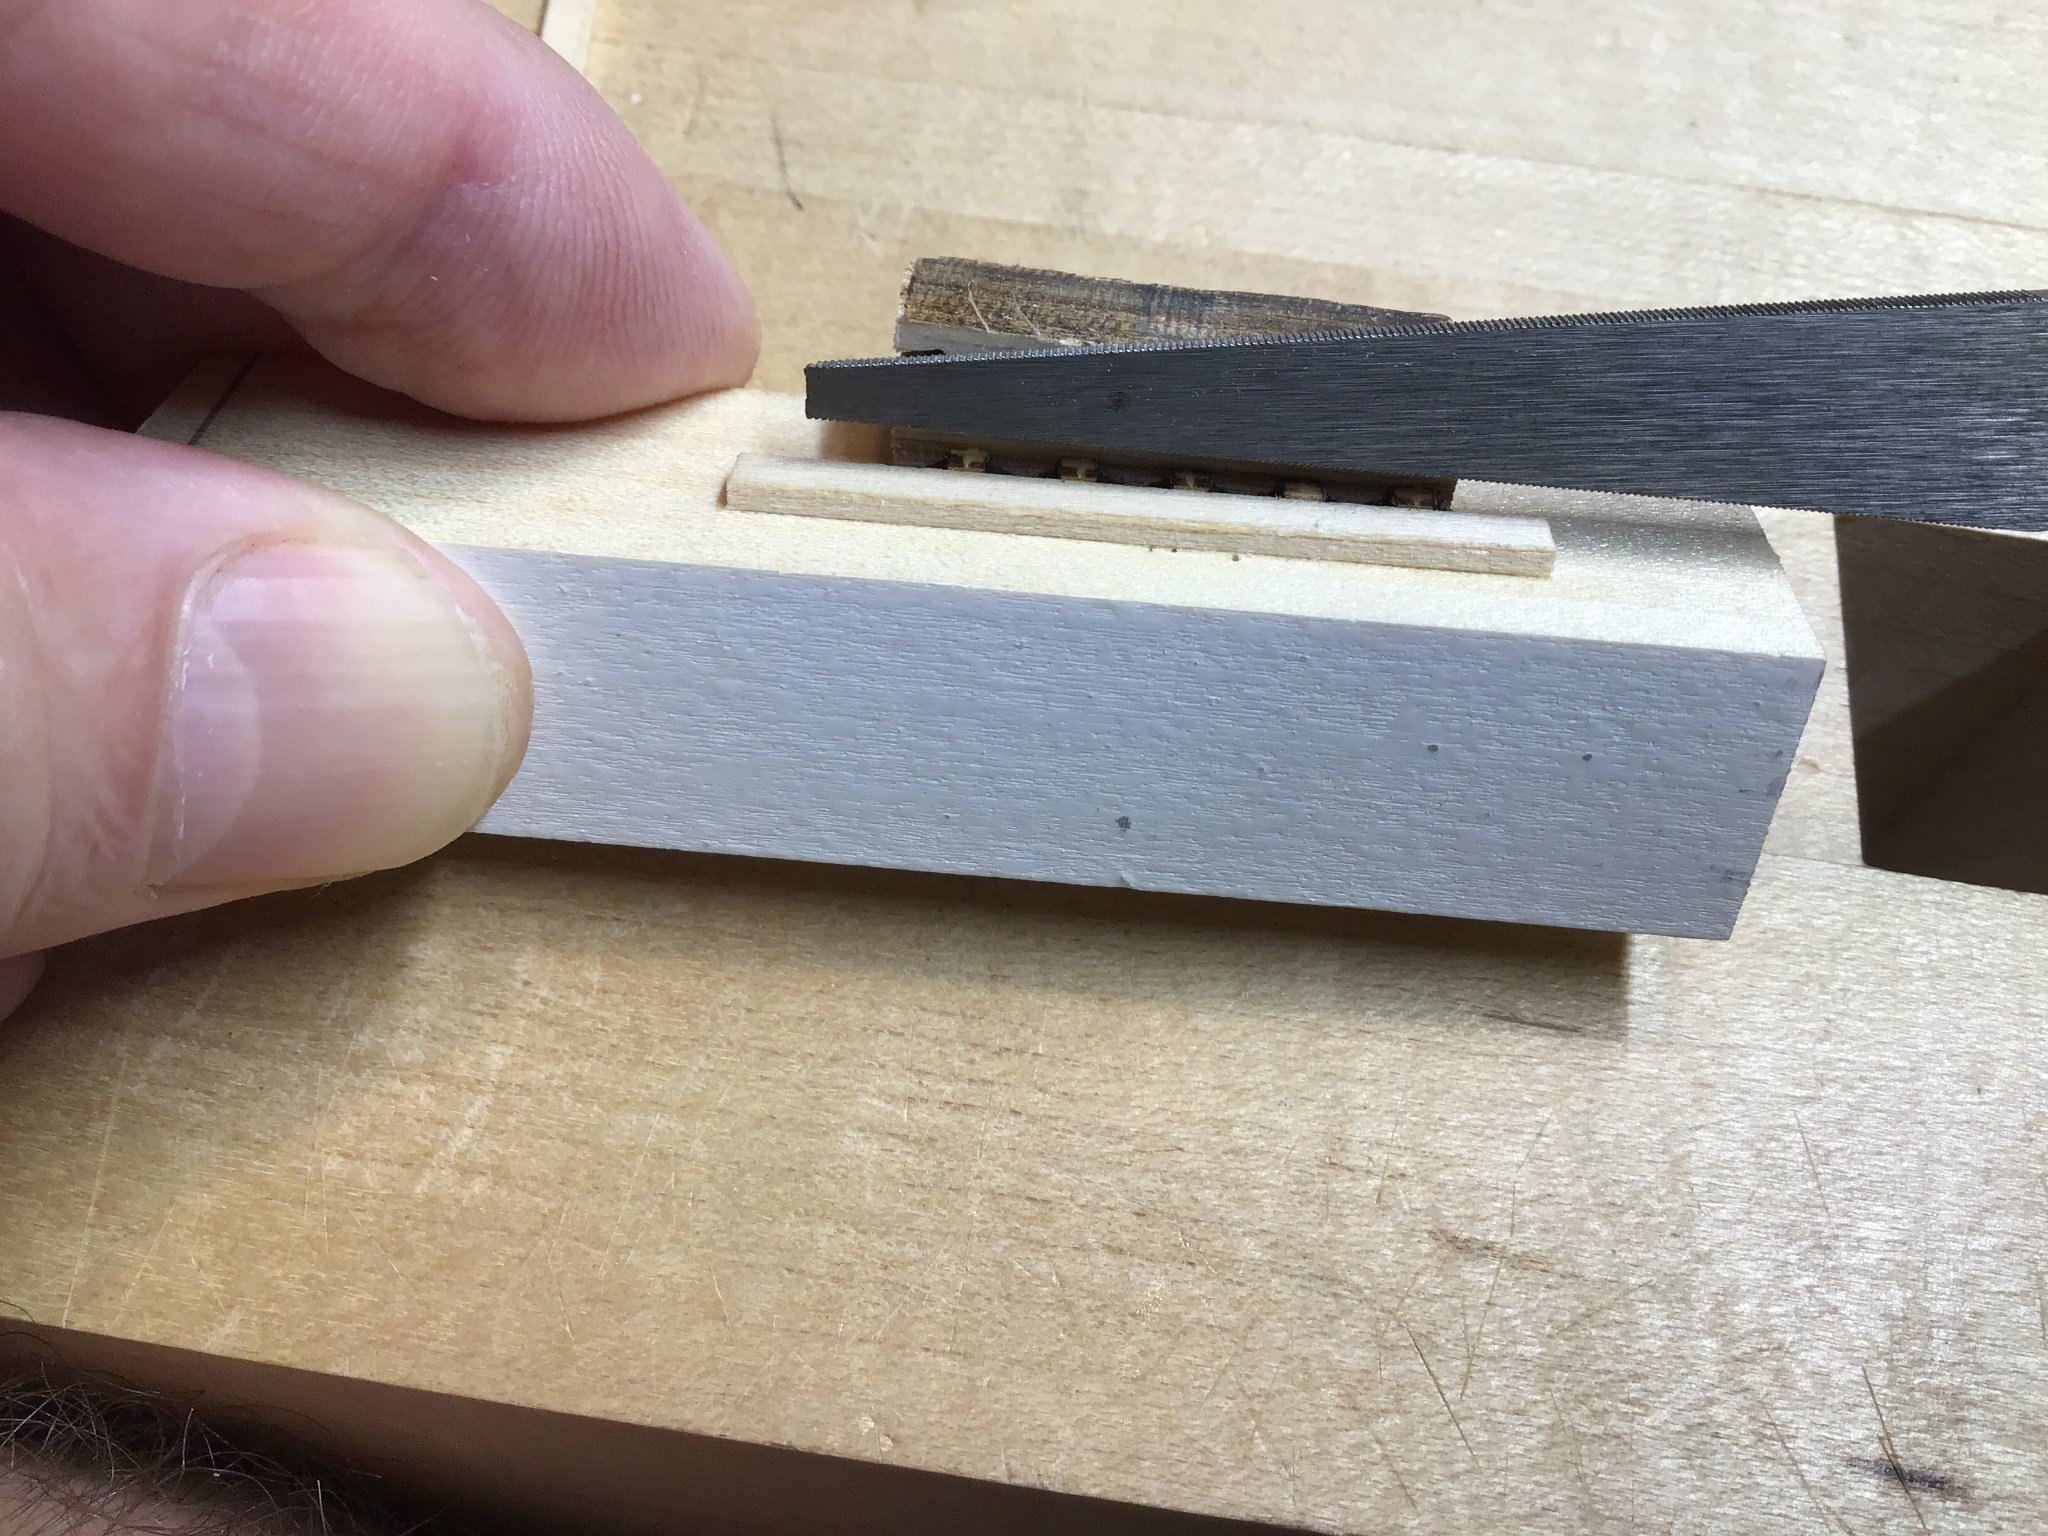
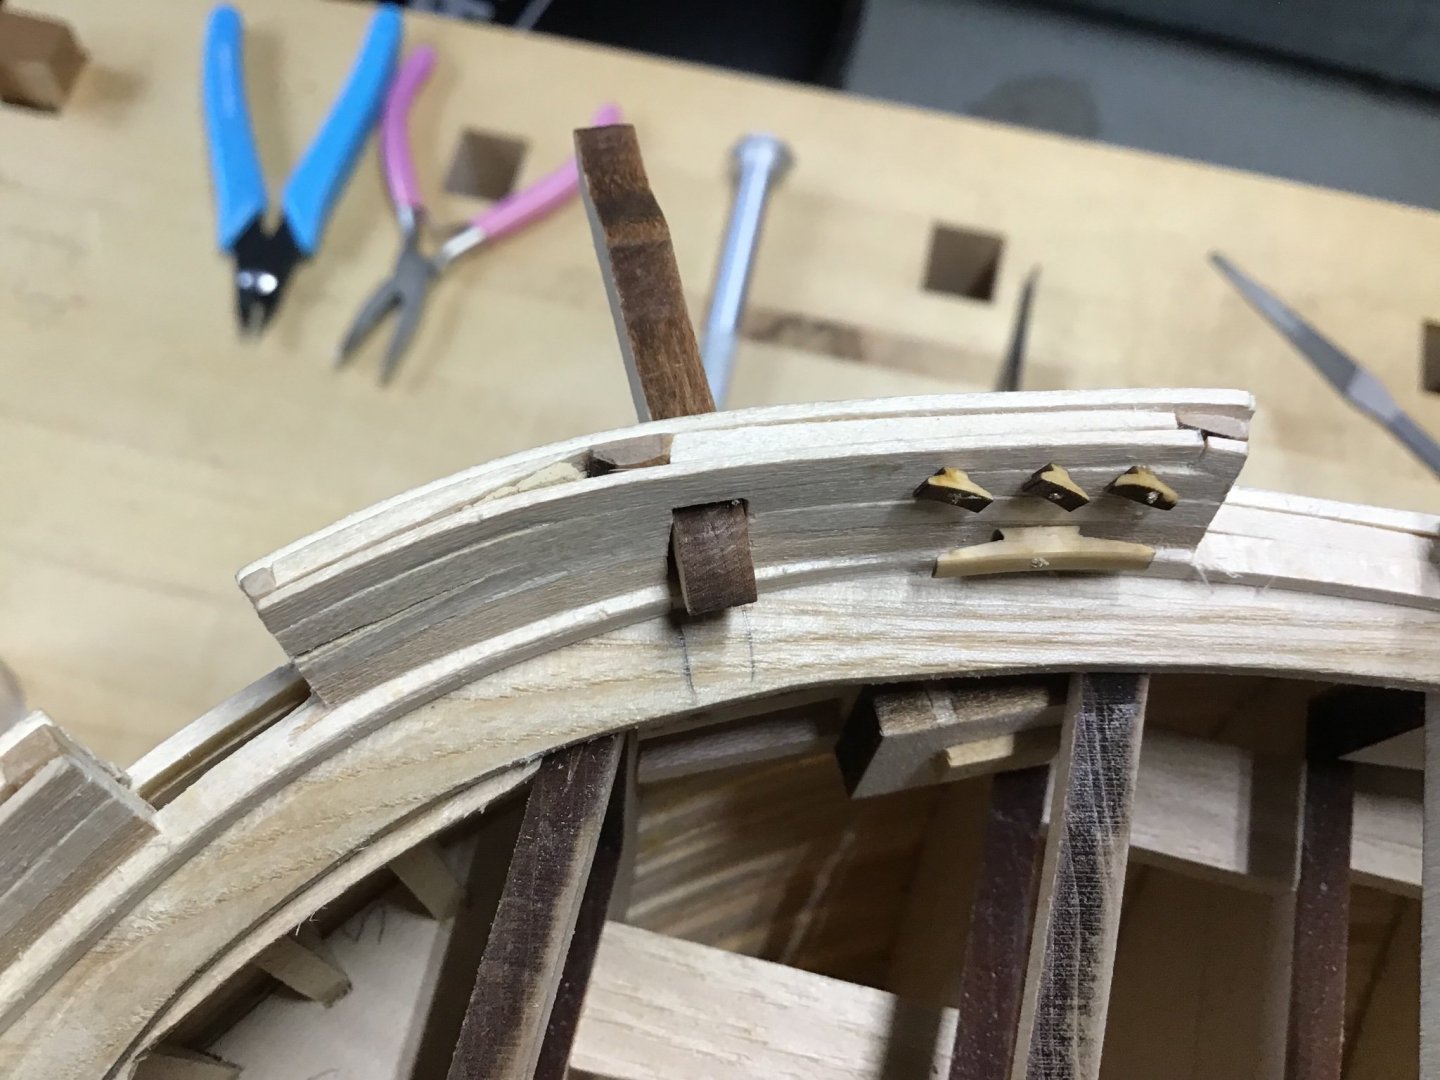
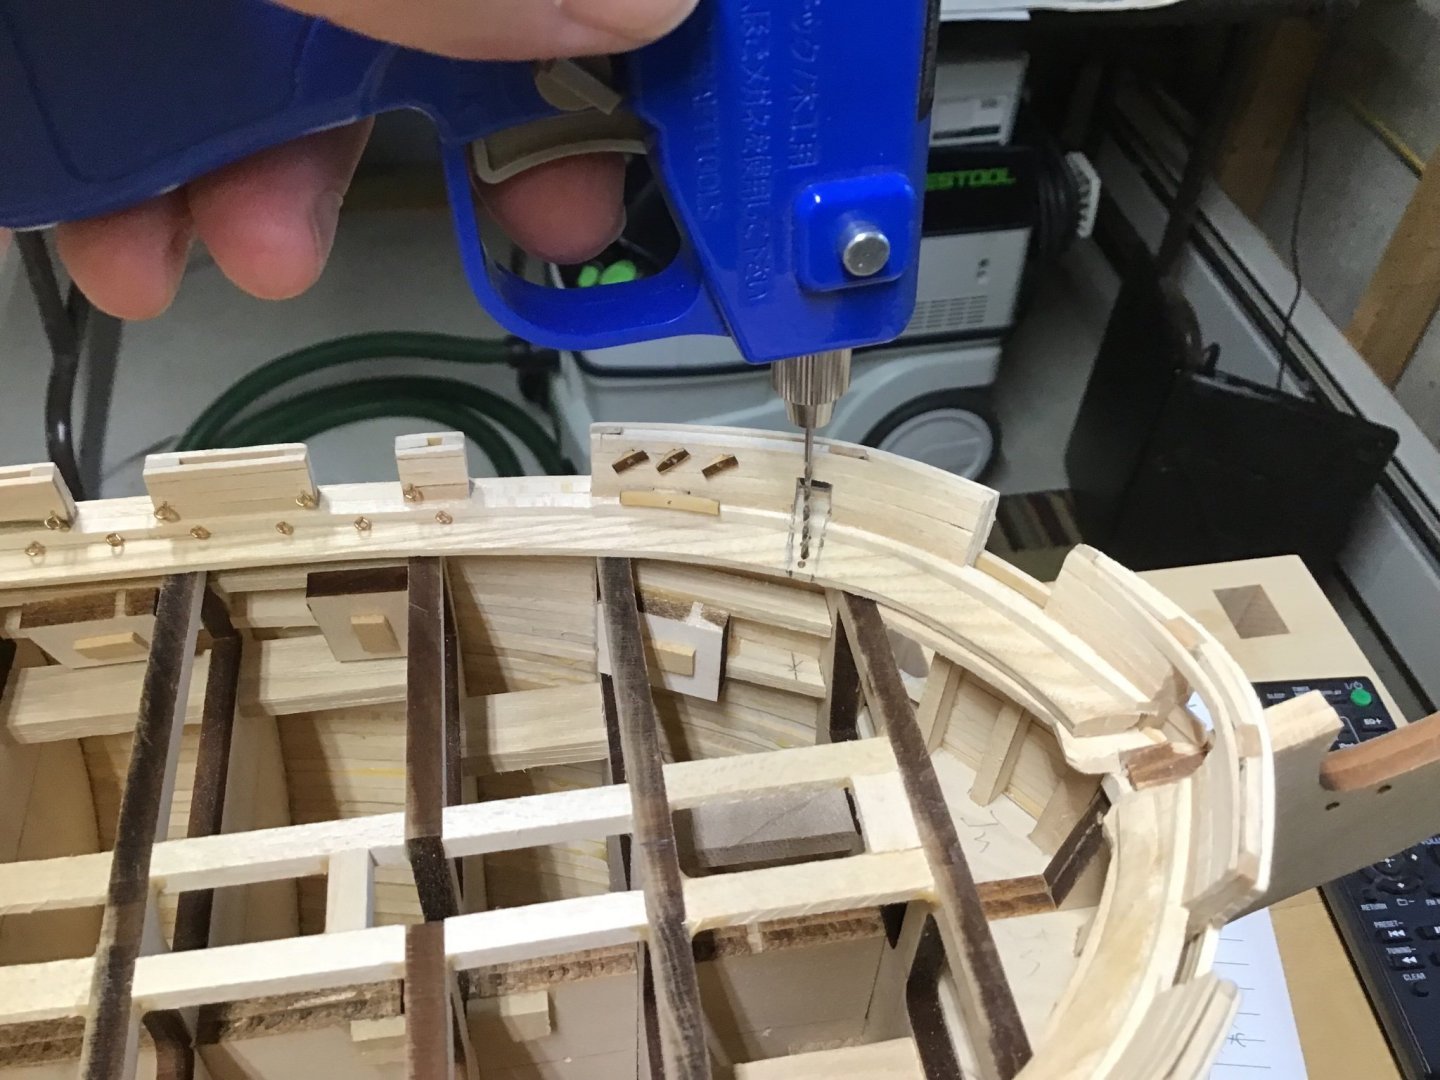
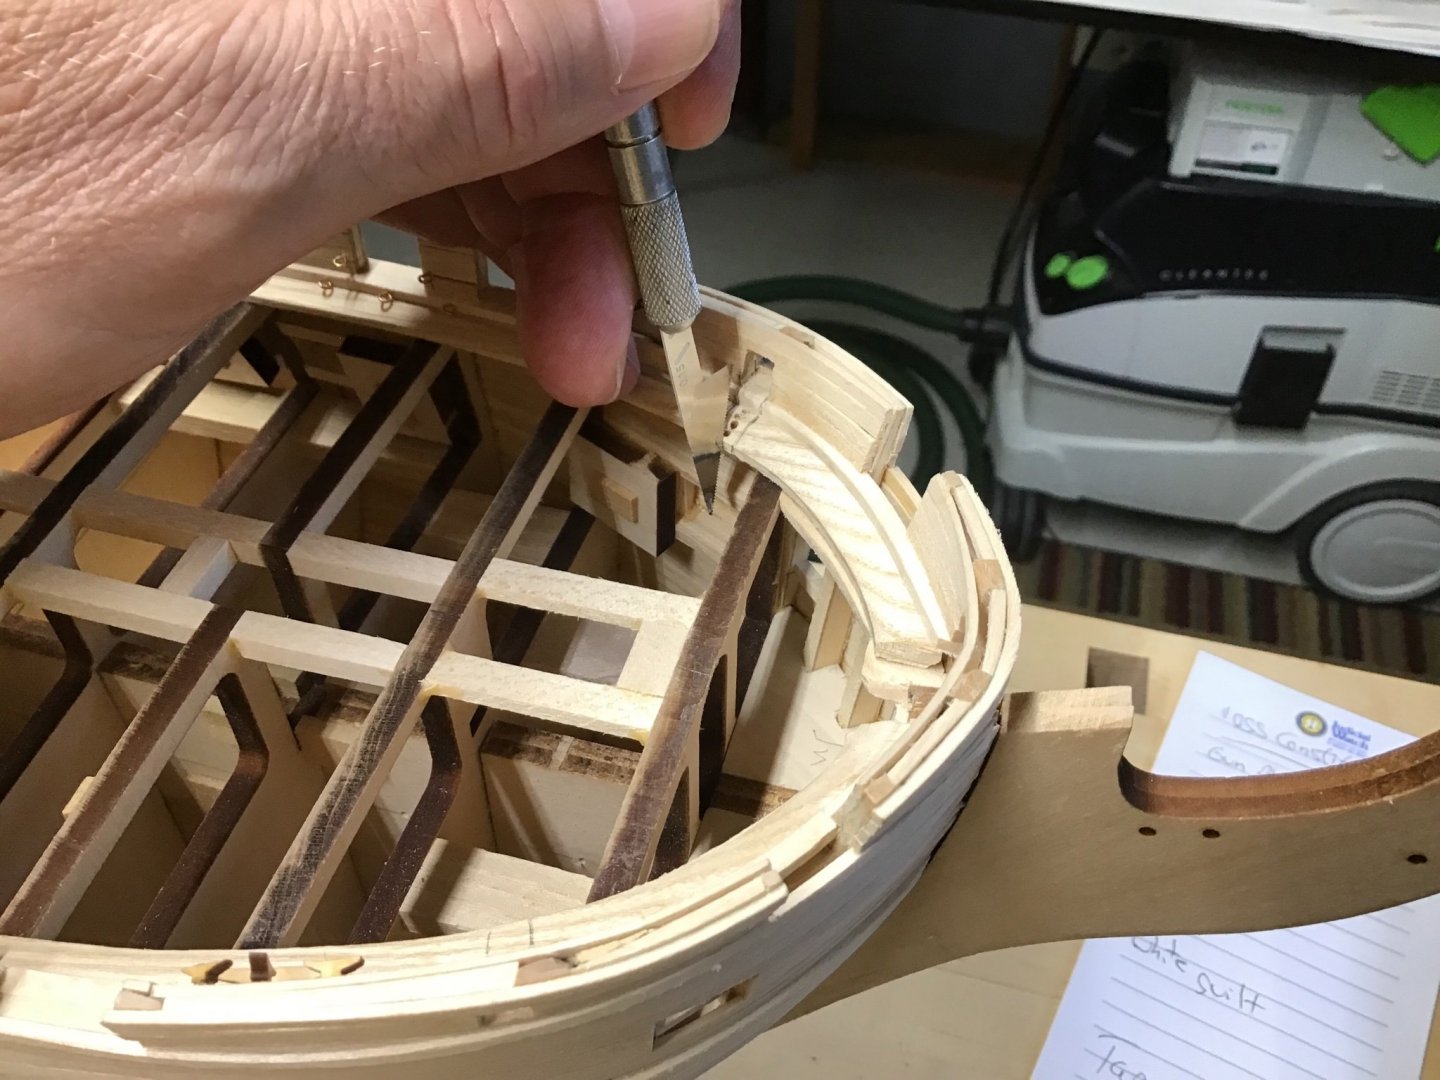
Fitting the Cathead For this task the waterway needs to be cut and the rough bulkhead penetration needs to be finished. First make a pencil mark on the waterway on each side of the cathead. Picture 1. Next drill relief holes in the waste and saw to connect the holes. Pictures 2 and 3. Also use the saw to cut along the top of the pencil line to establish the final edge. Now it’s a matter of carefully removing the waste. The challenge is not to beat up the edges, we want crisp corners. Picture 5 shows the opening. Tools used are Tamiya Fine Craft Saws, Fishtail file, and the pattern file. Once fitted, the lower edge of the top board on the outboard side was careful filed to establish the final angle of the cathead. You know you are there when the outboard face of the cathead is vertical and the inboard end is just past the inboard edge of the waterway. Pictures 6 and 7.


-
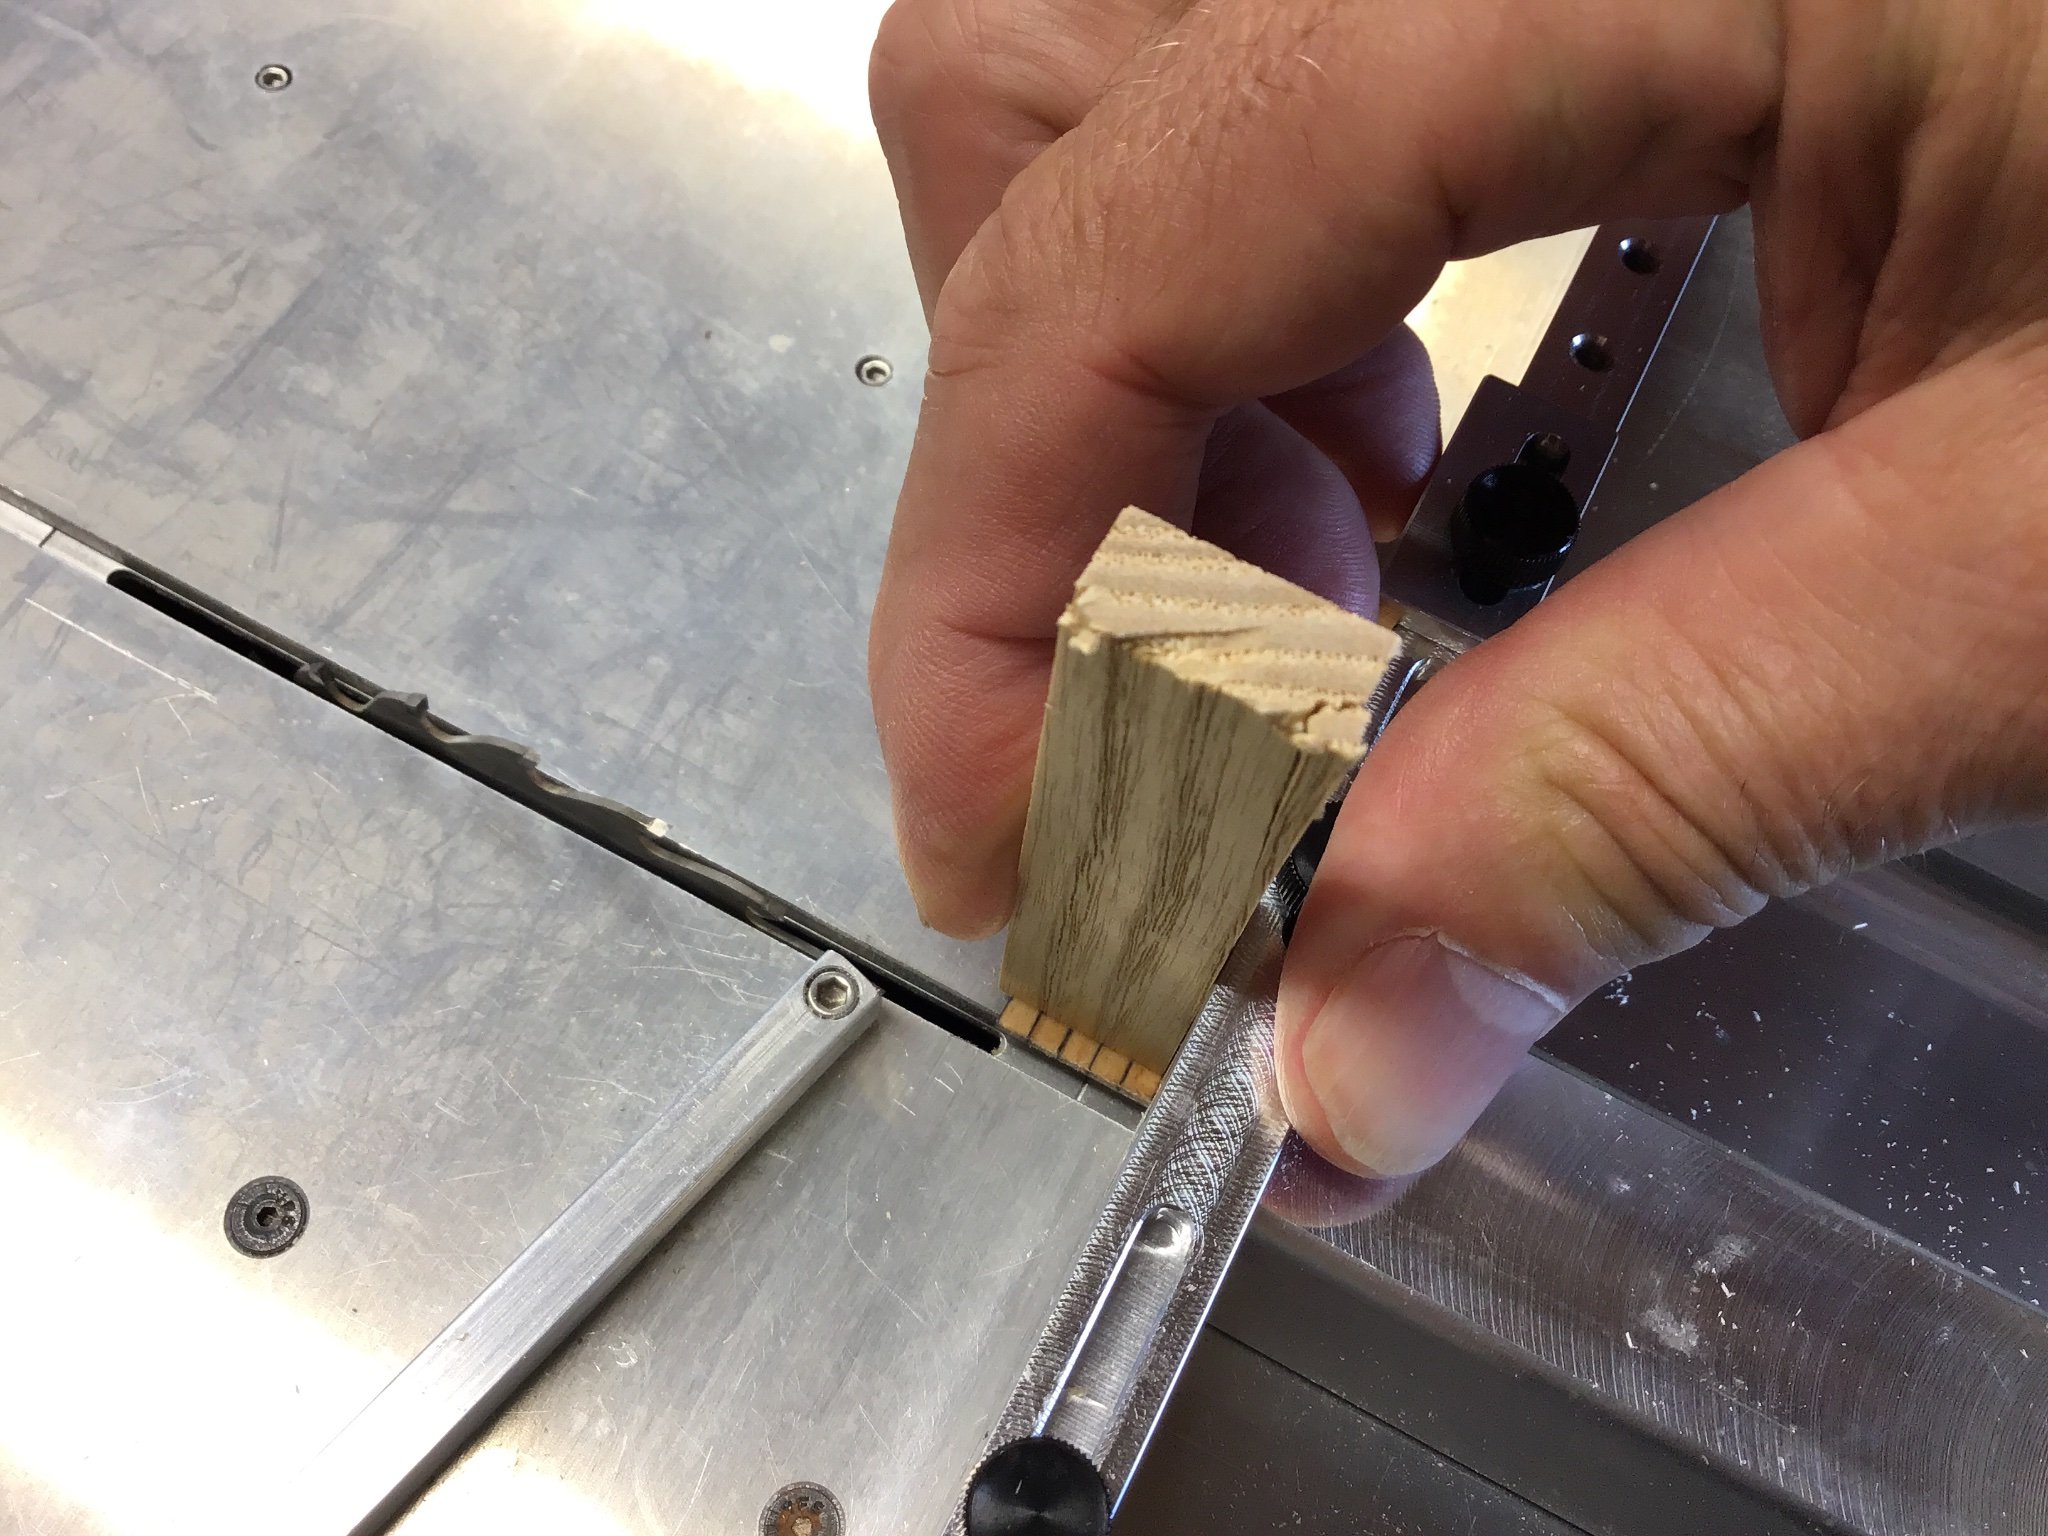
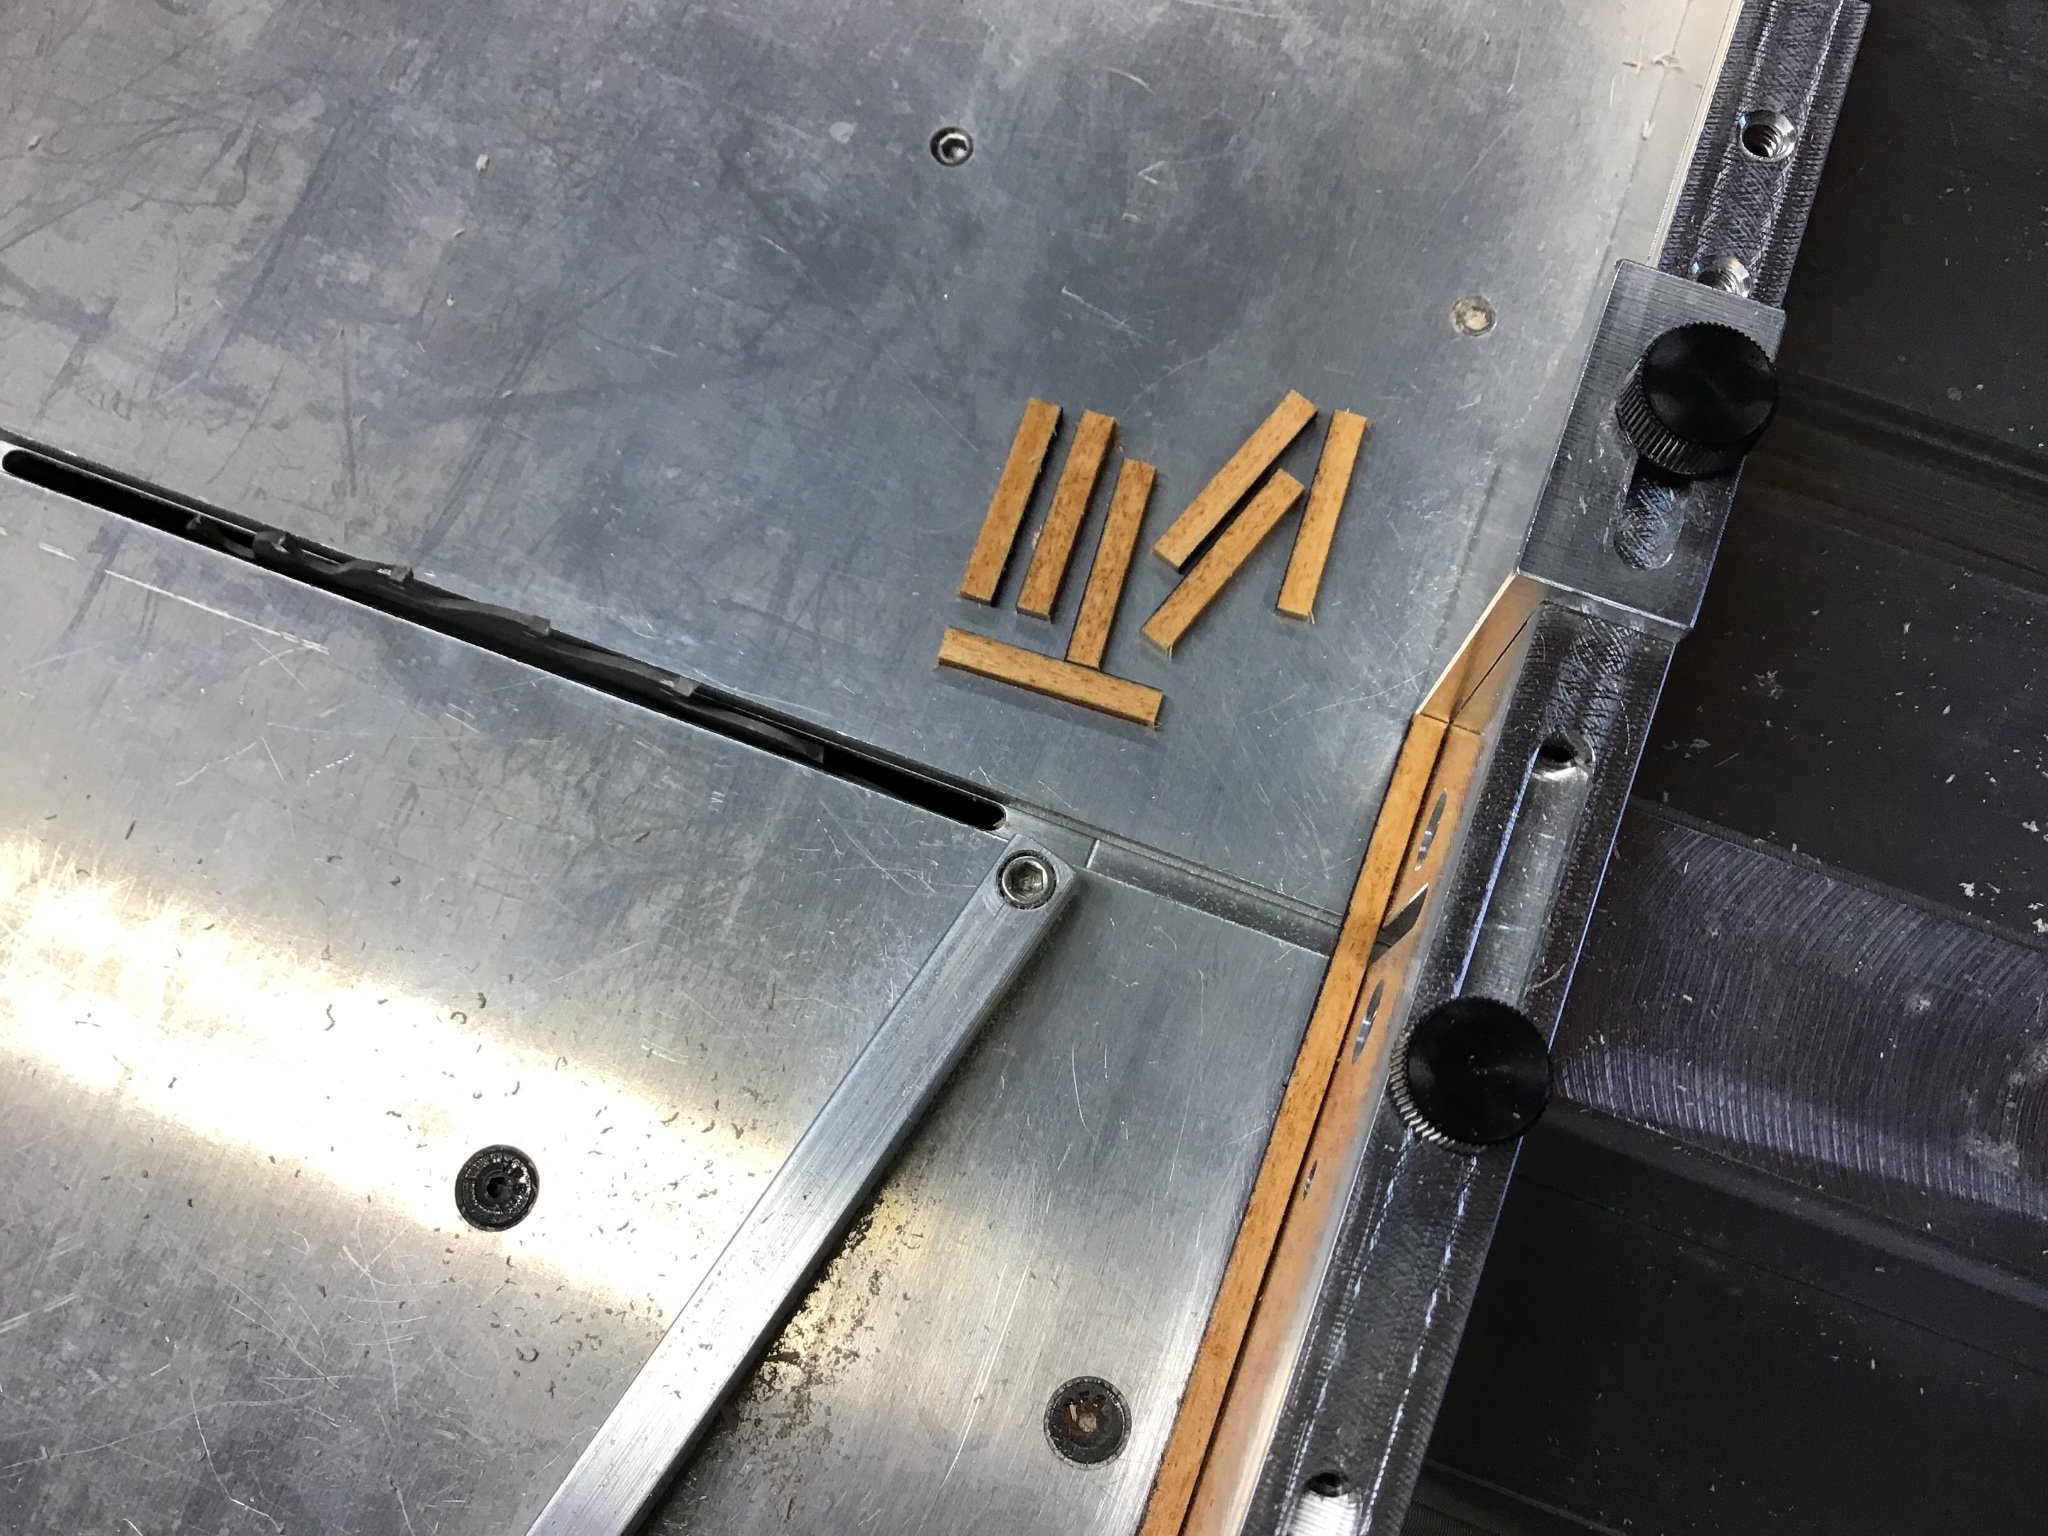
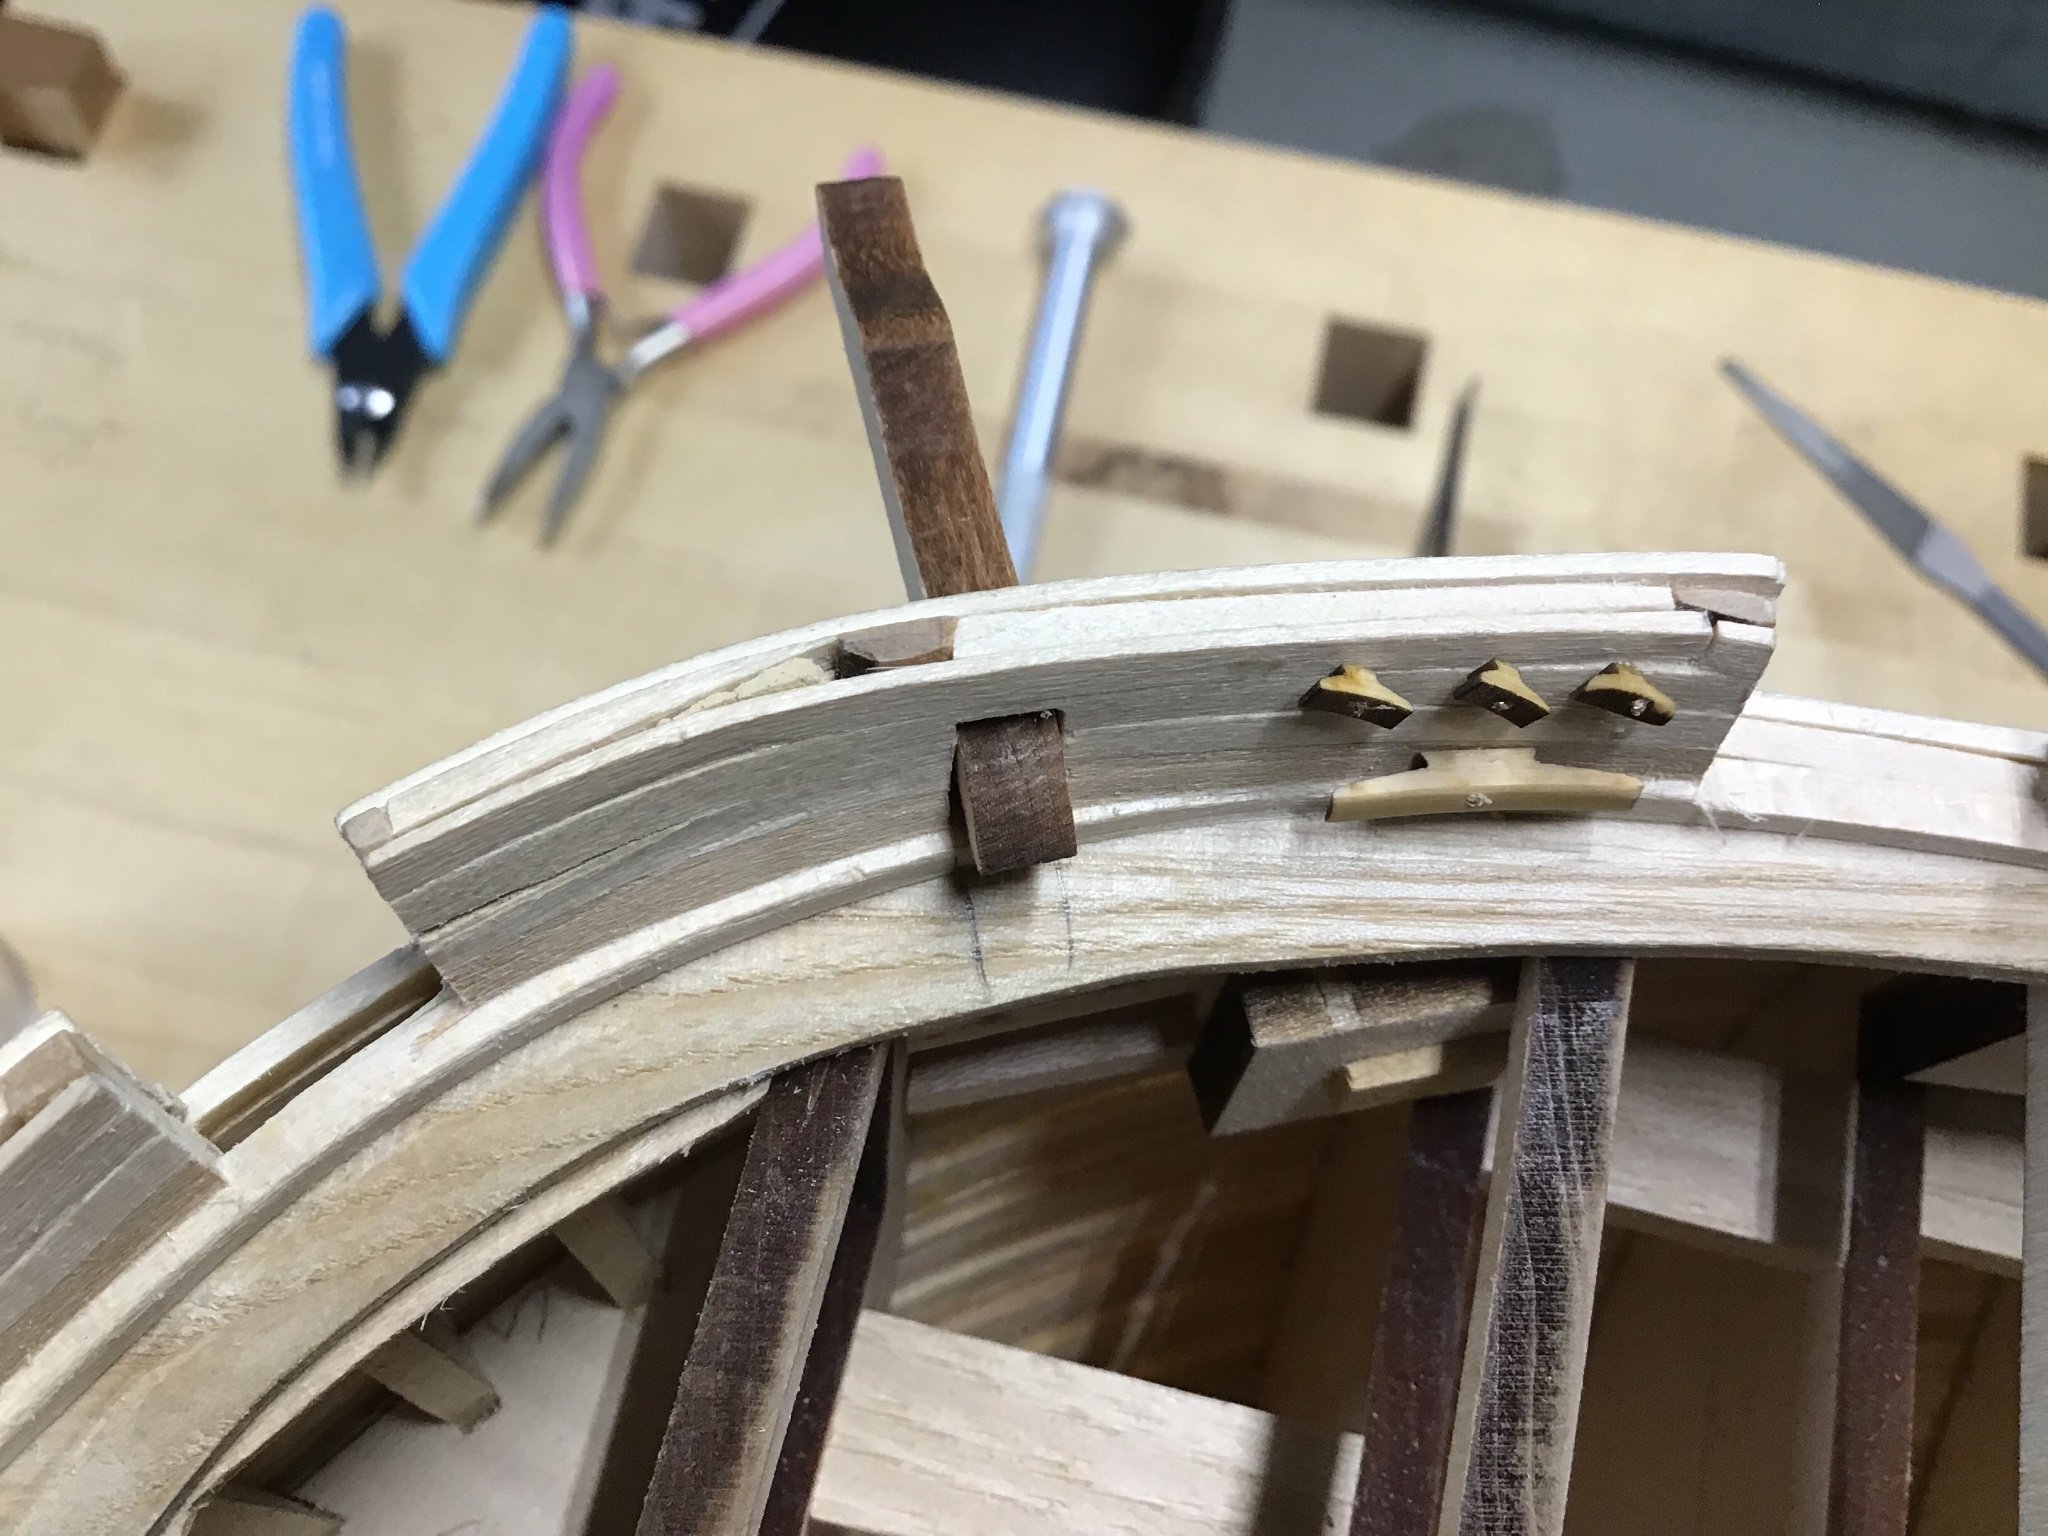
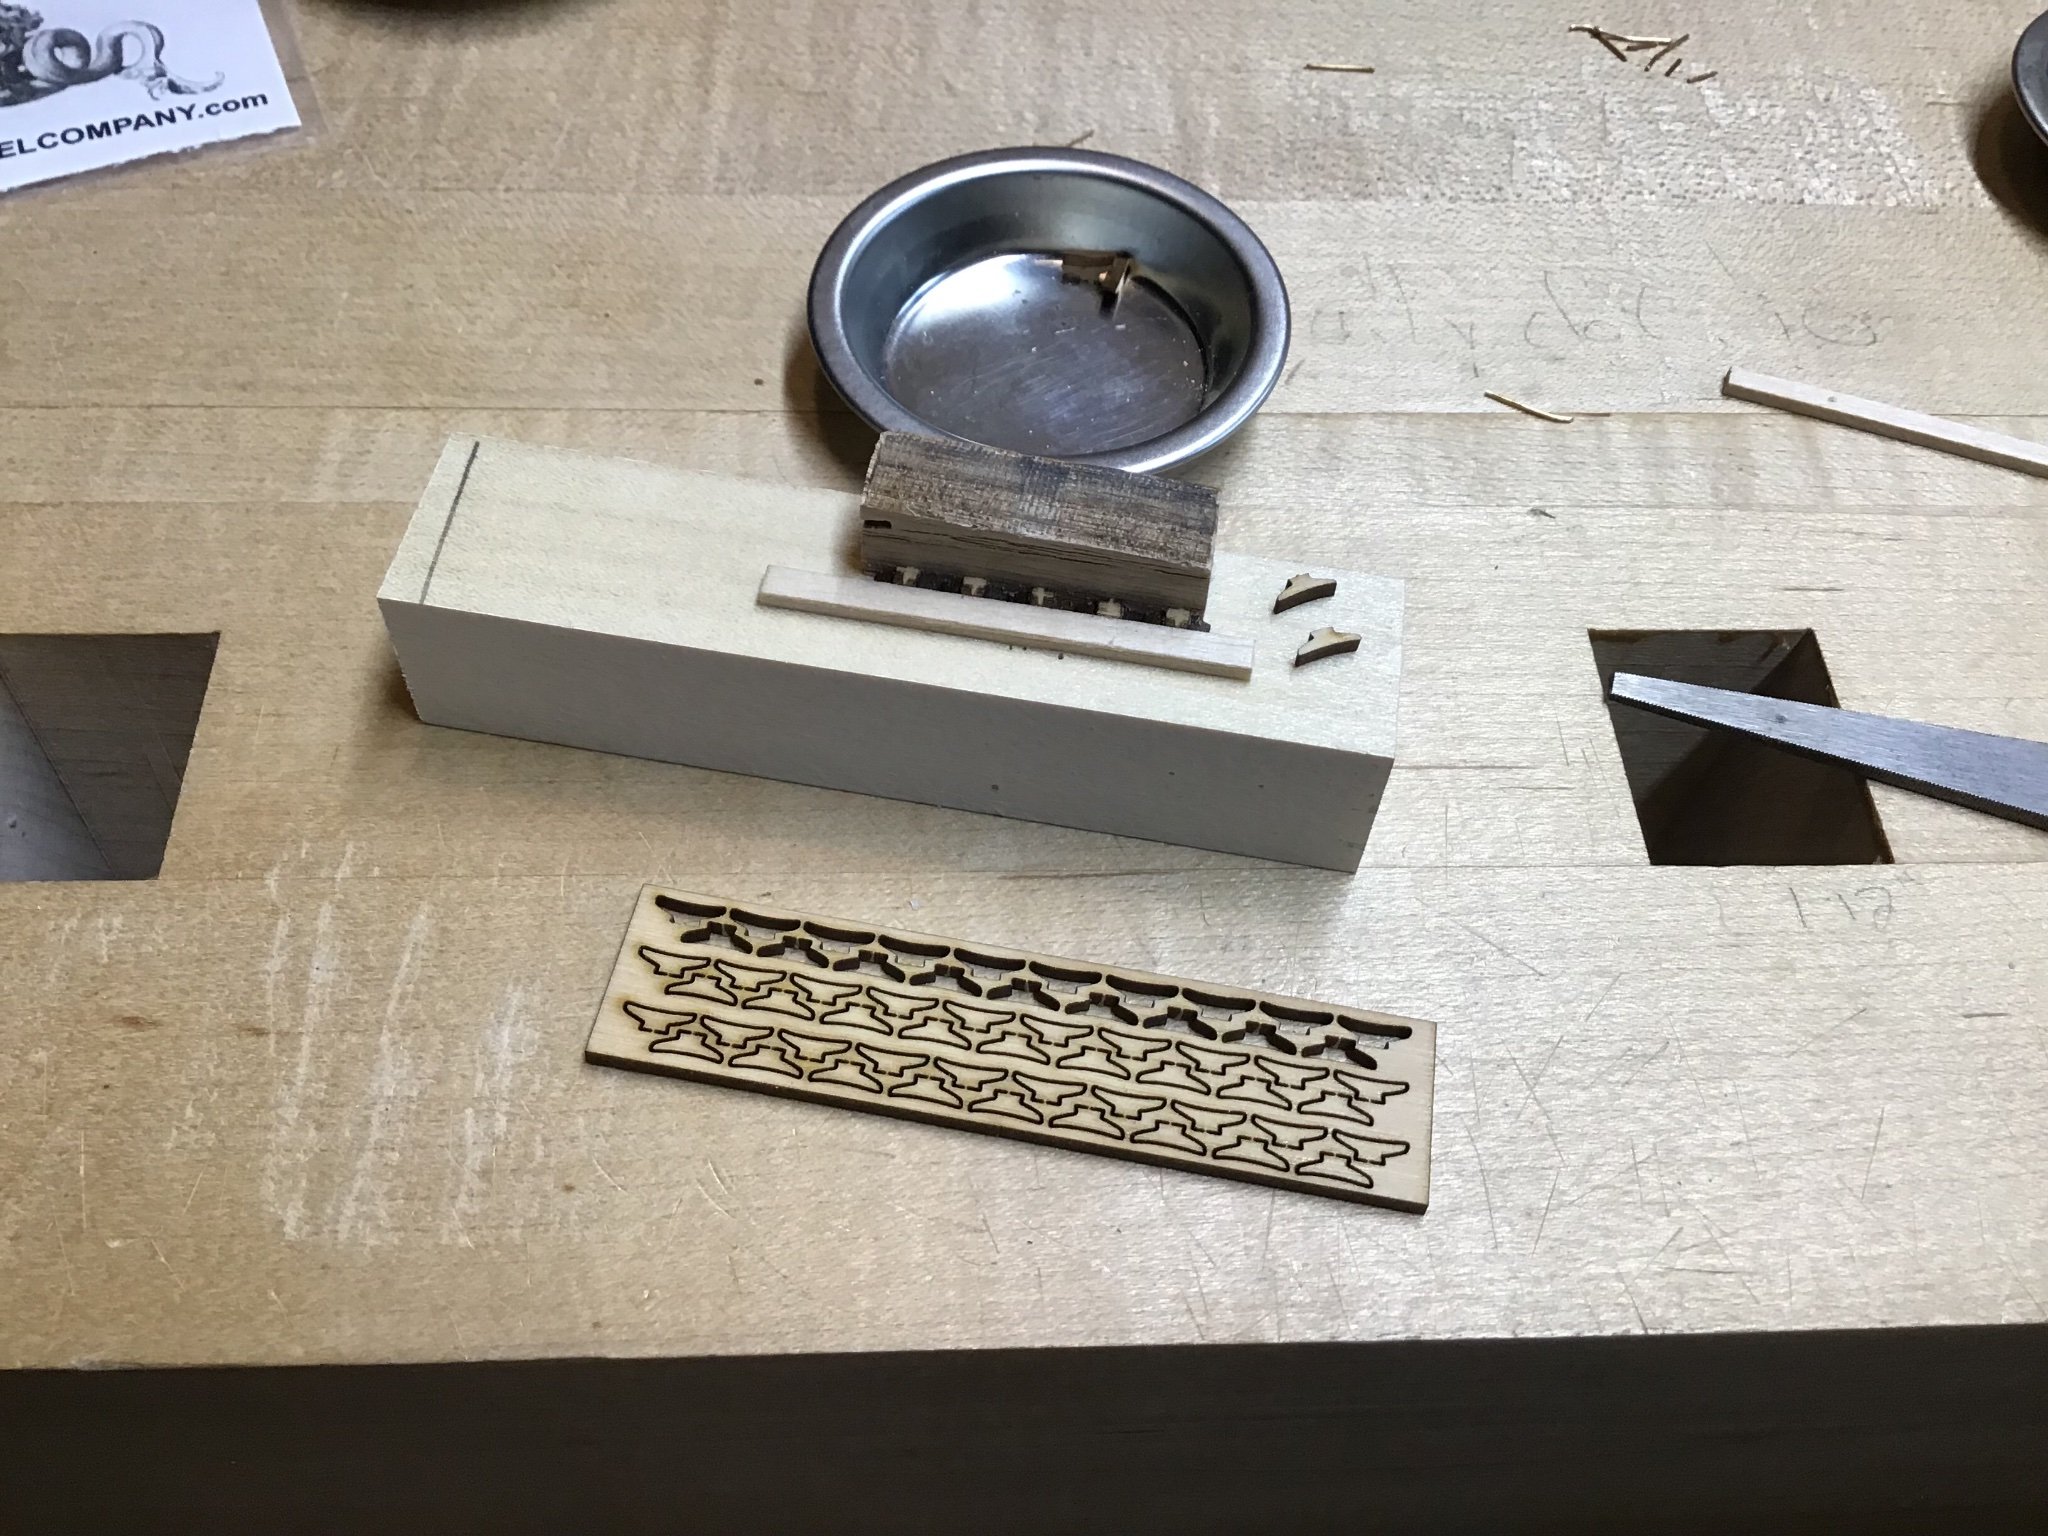
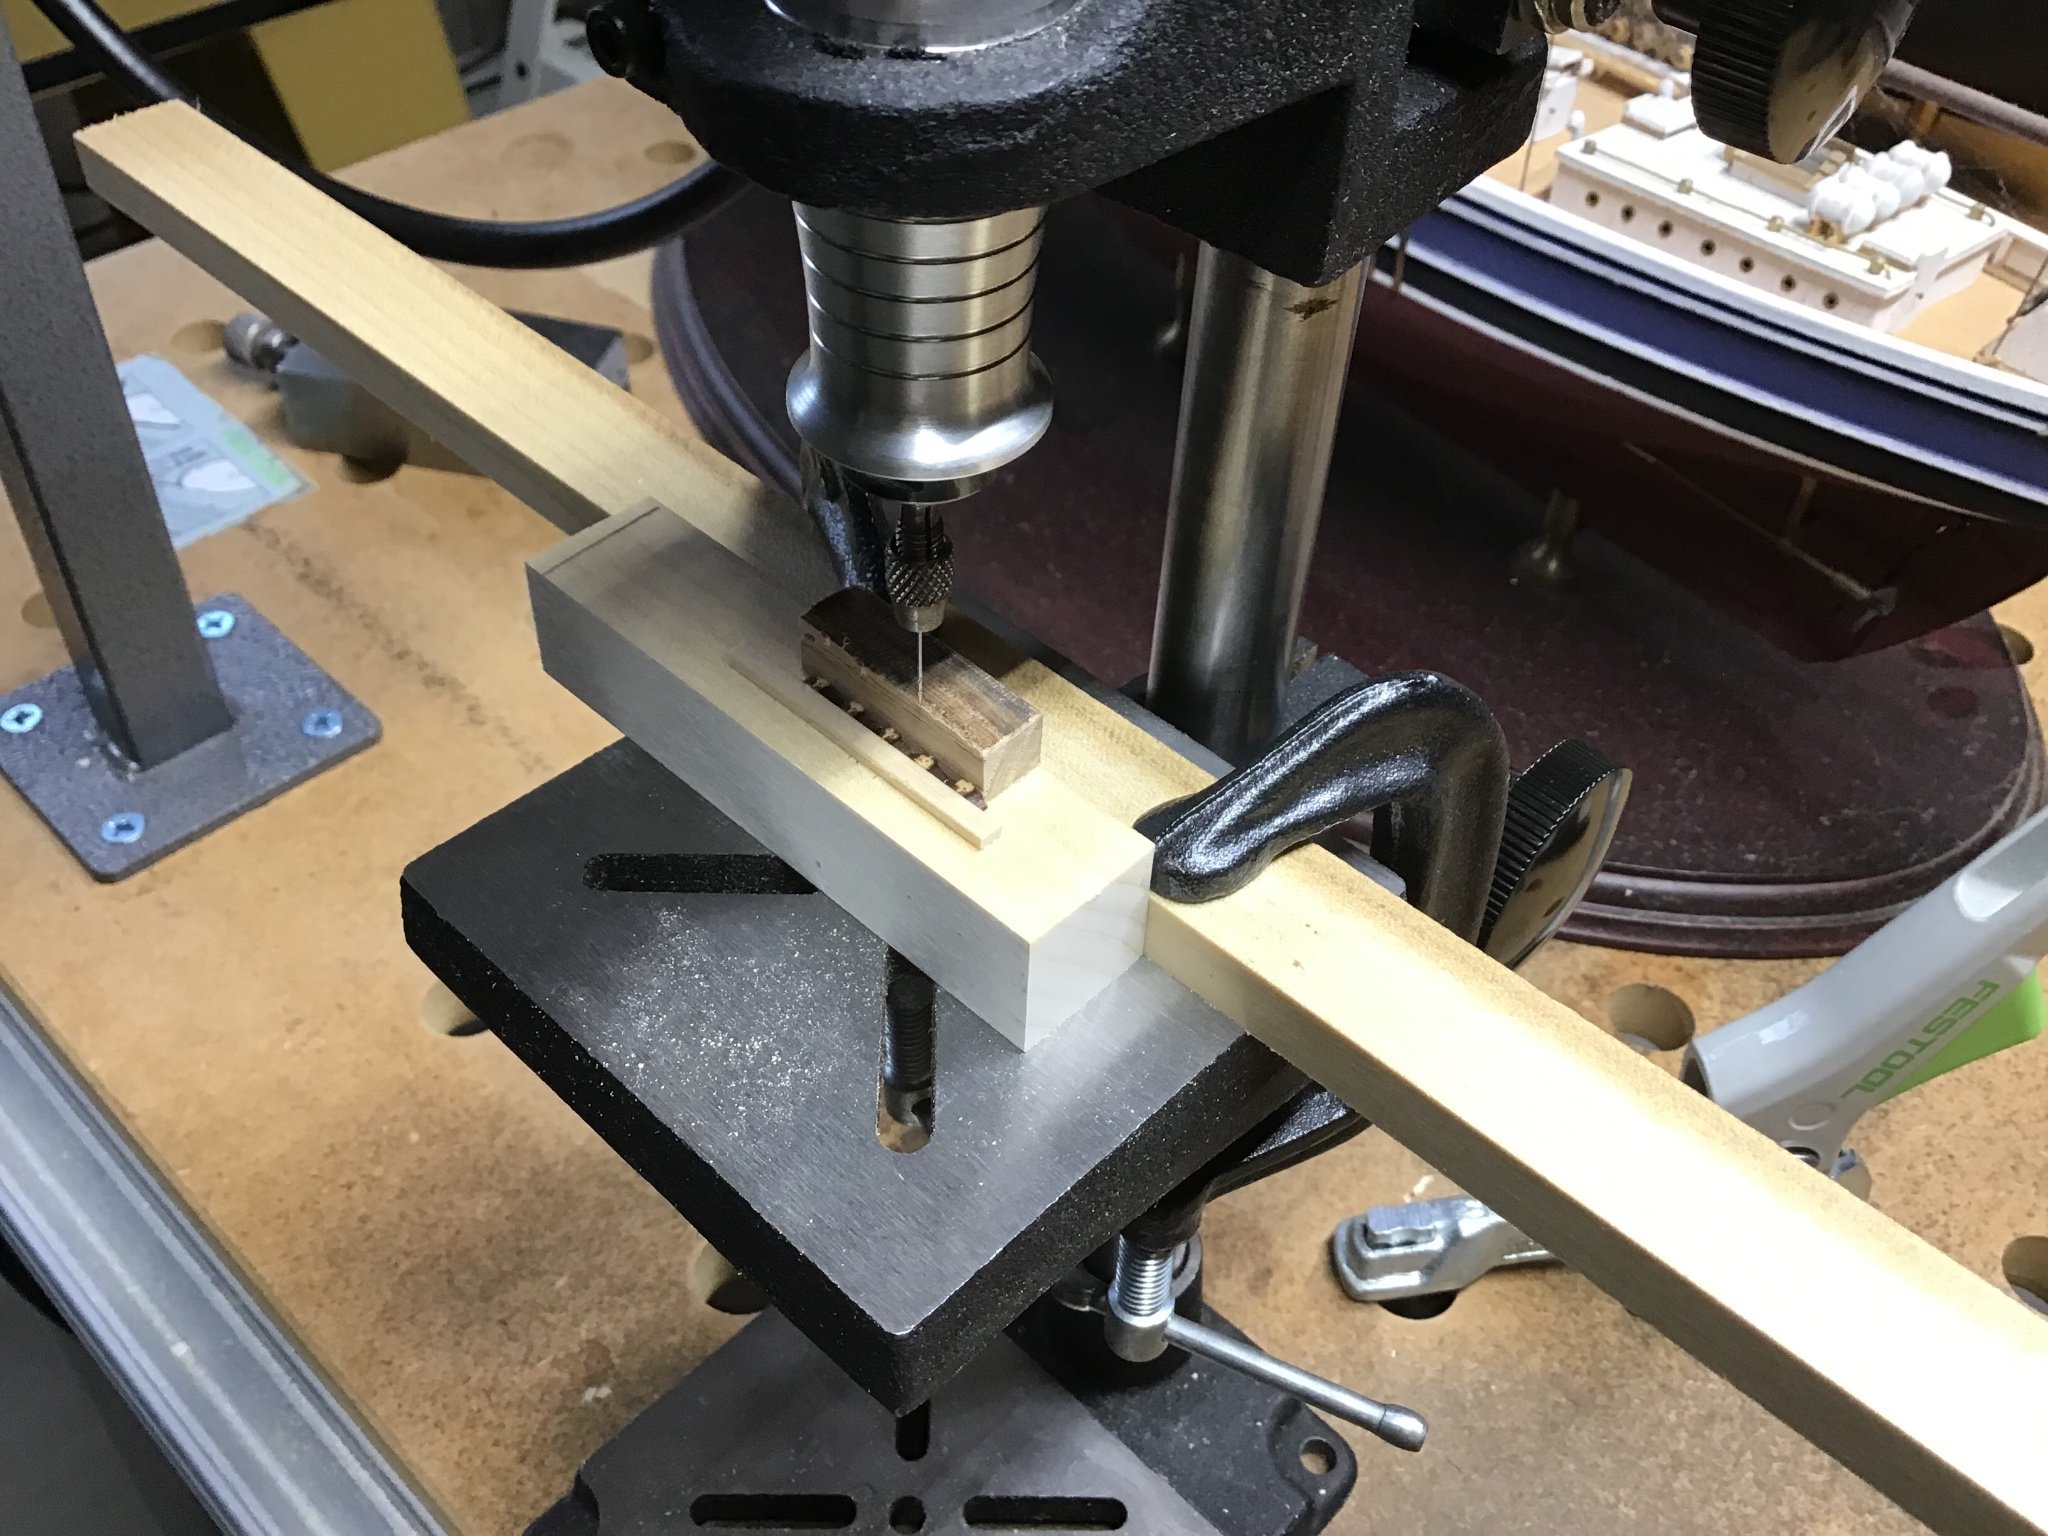
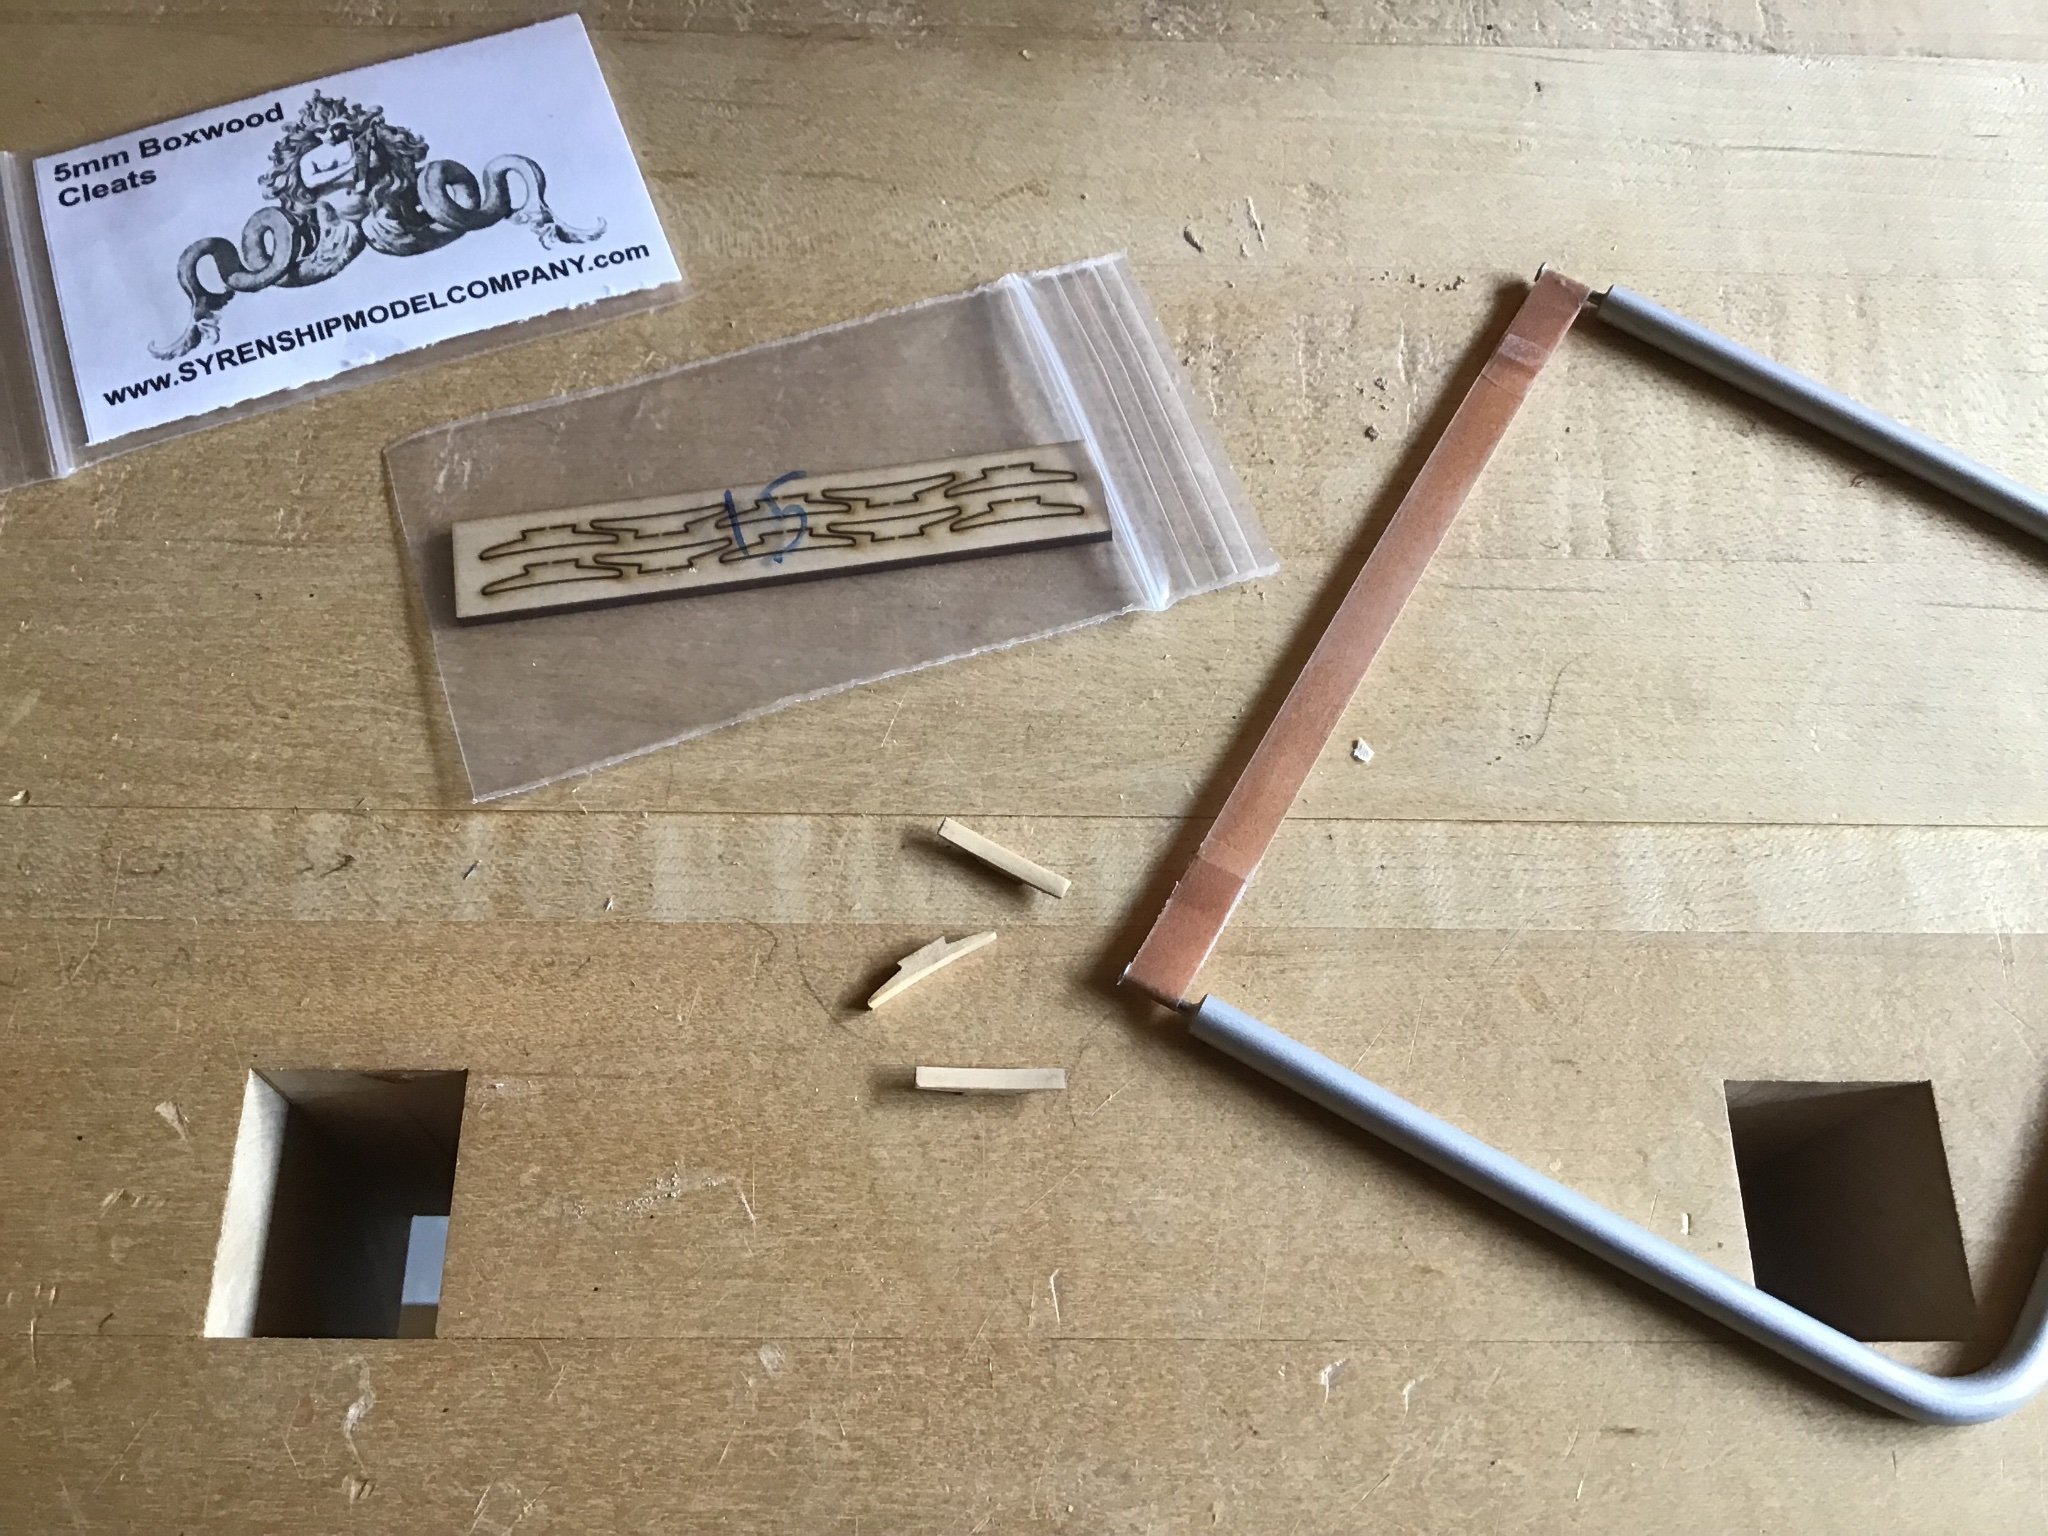
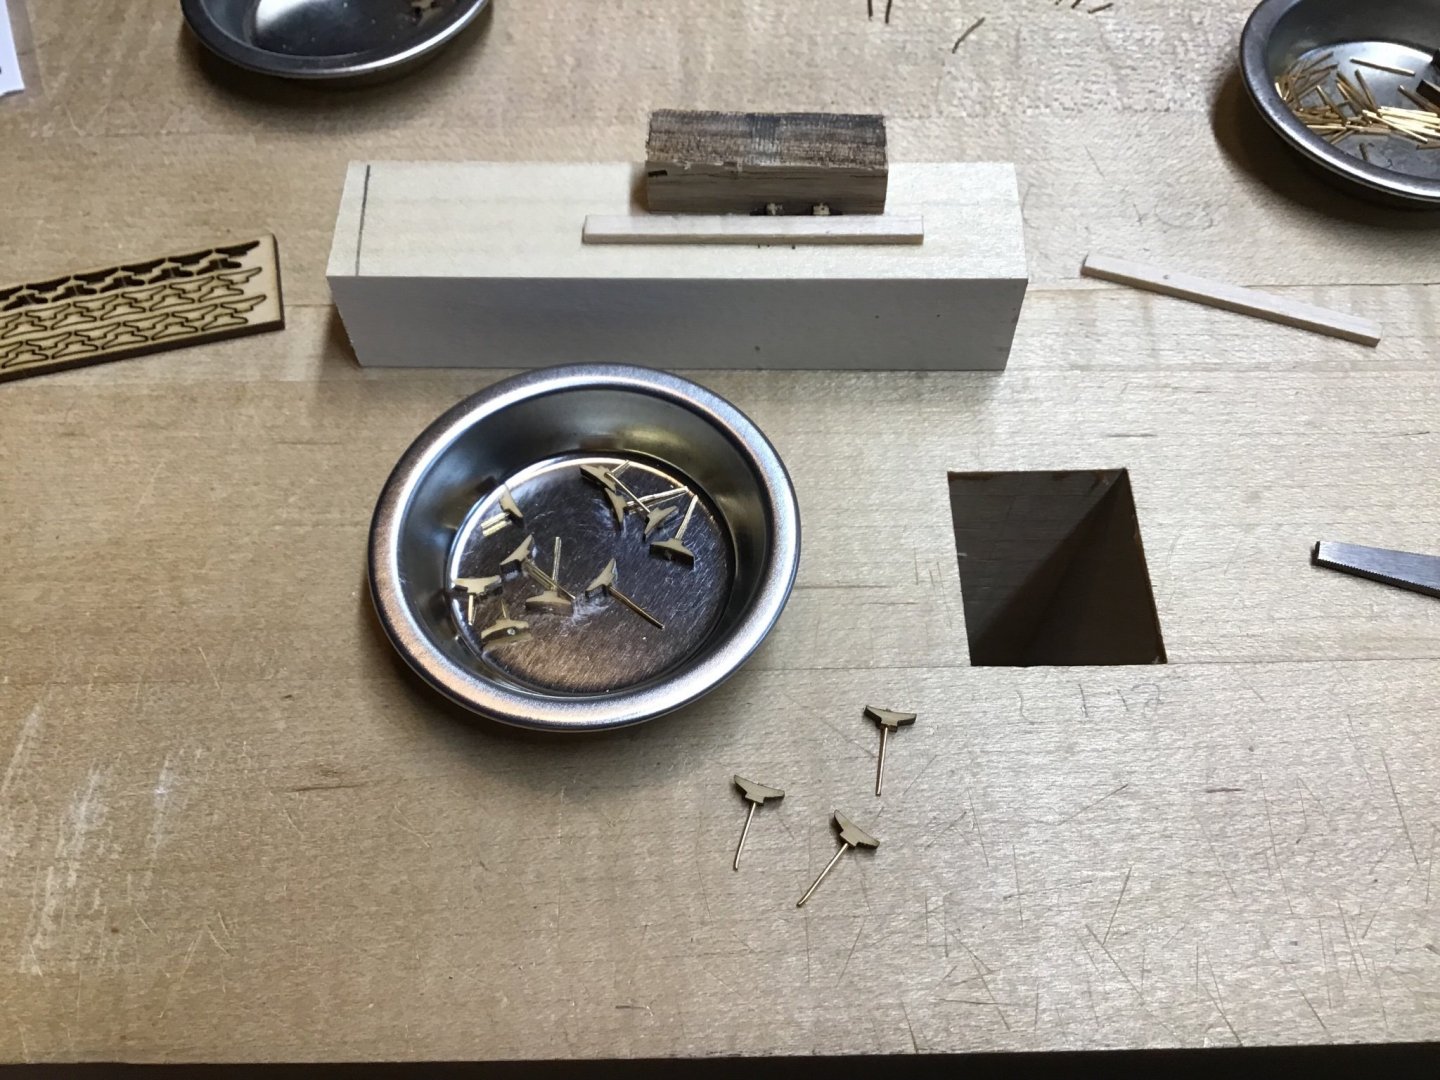
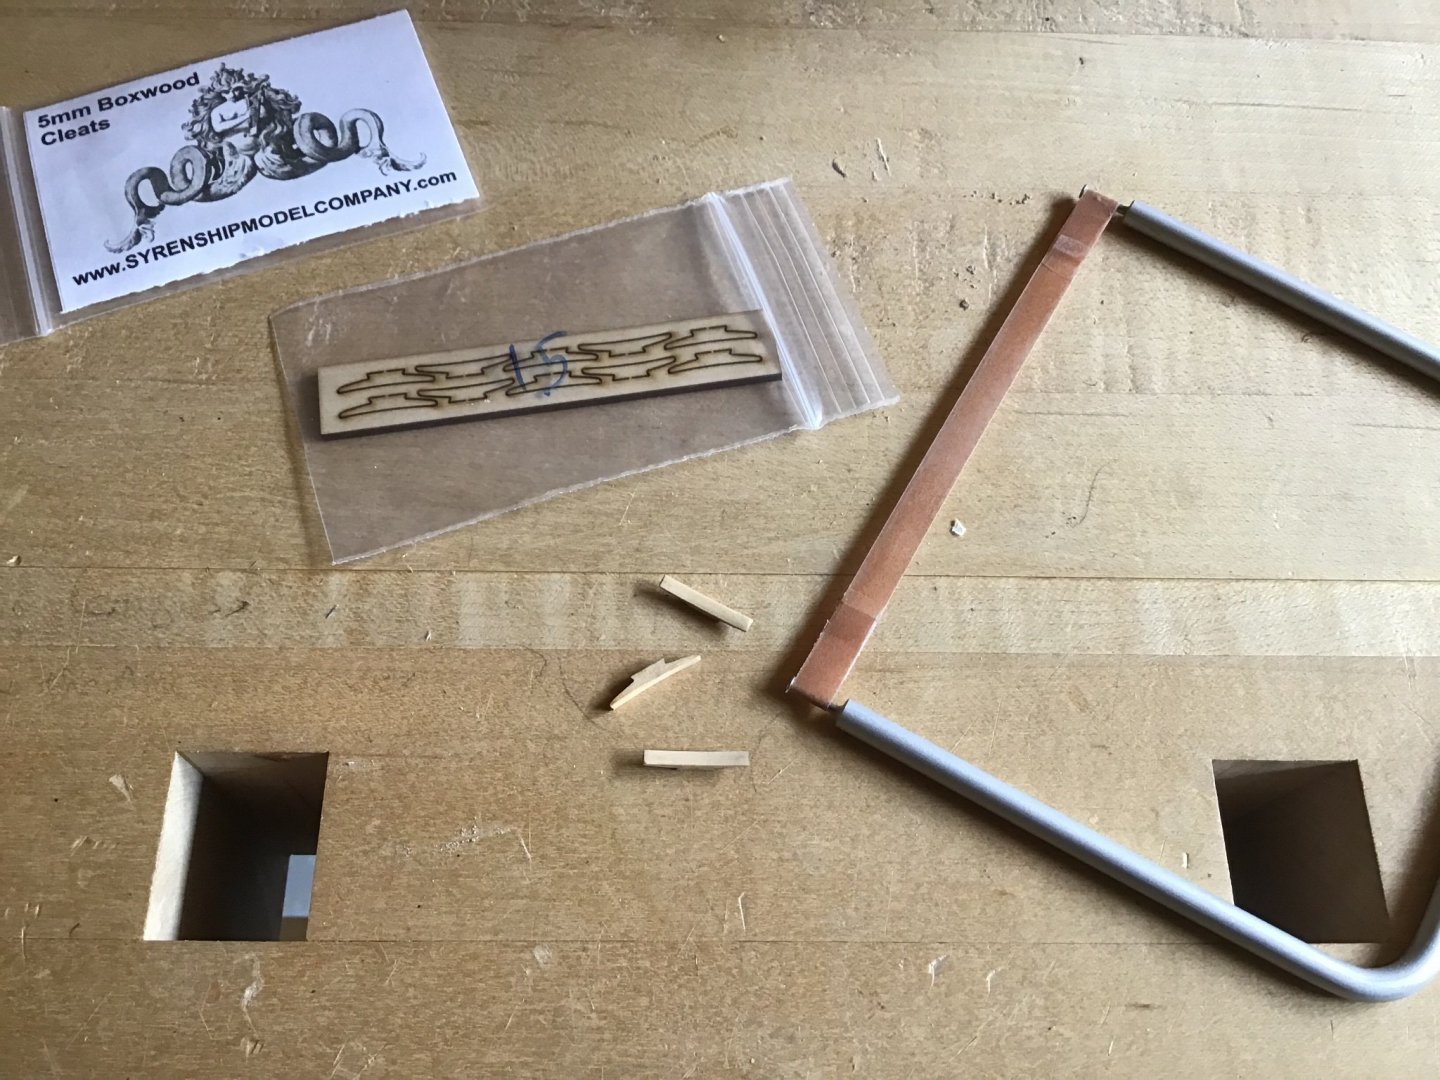
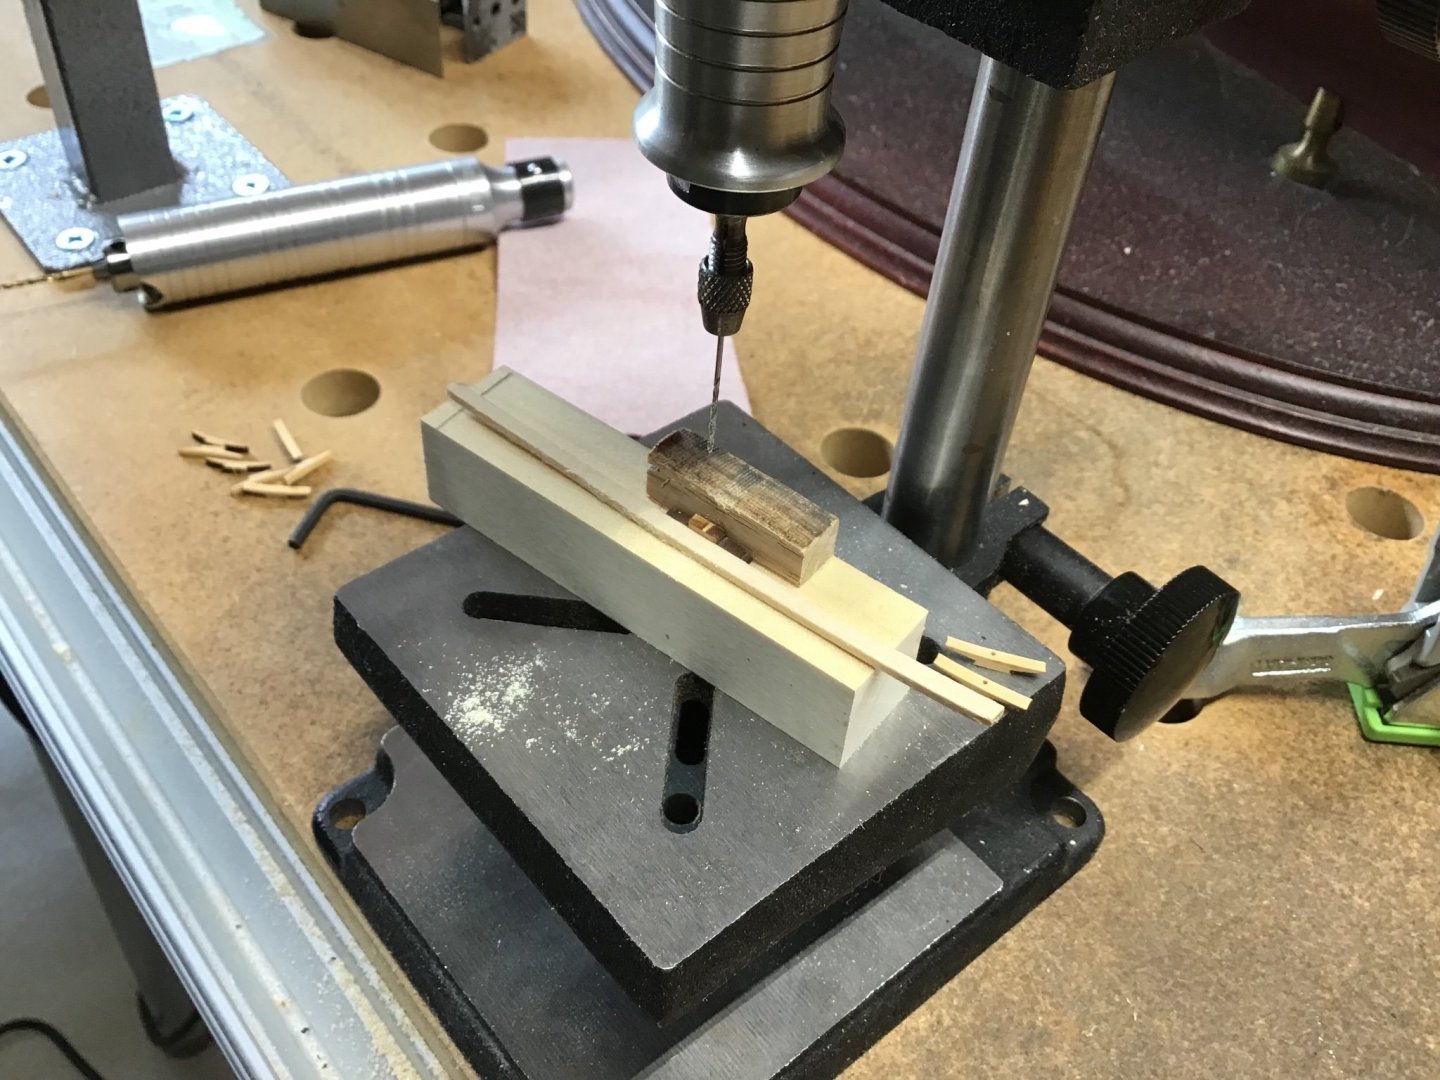
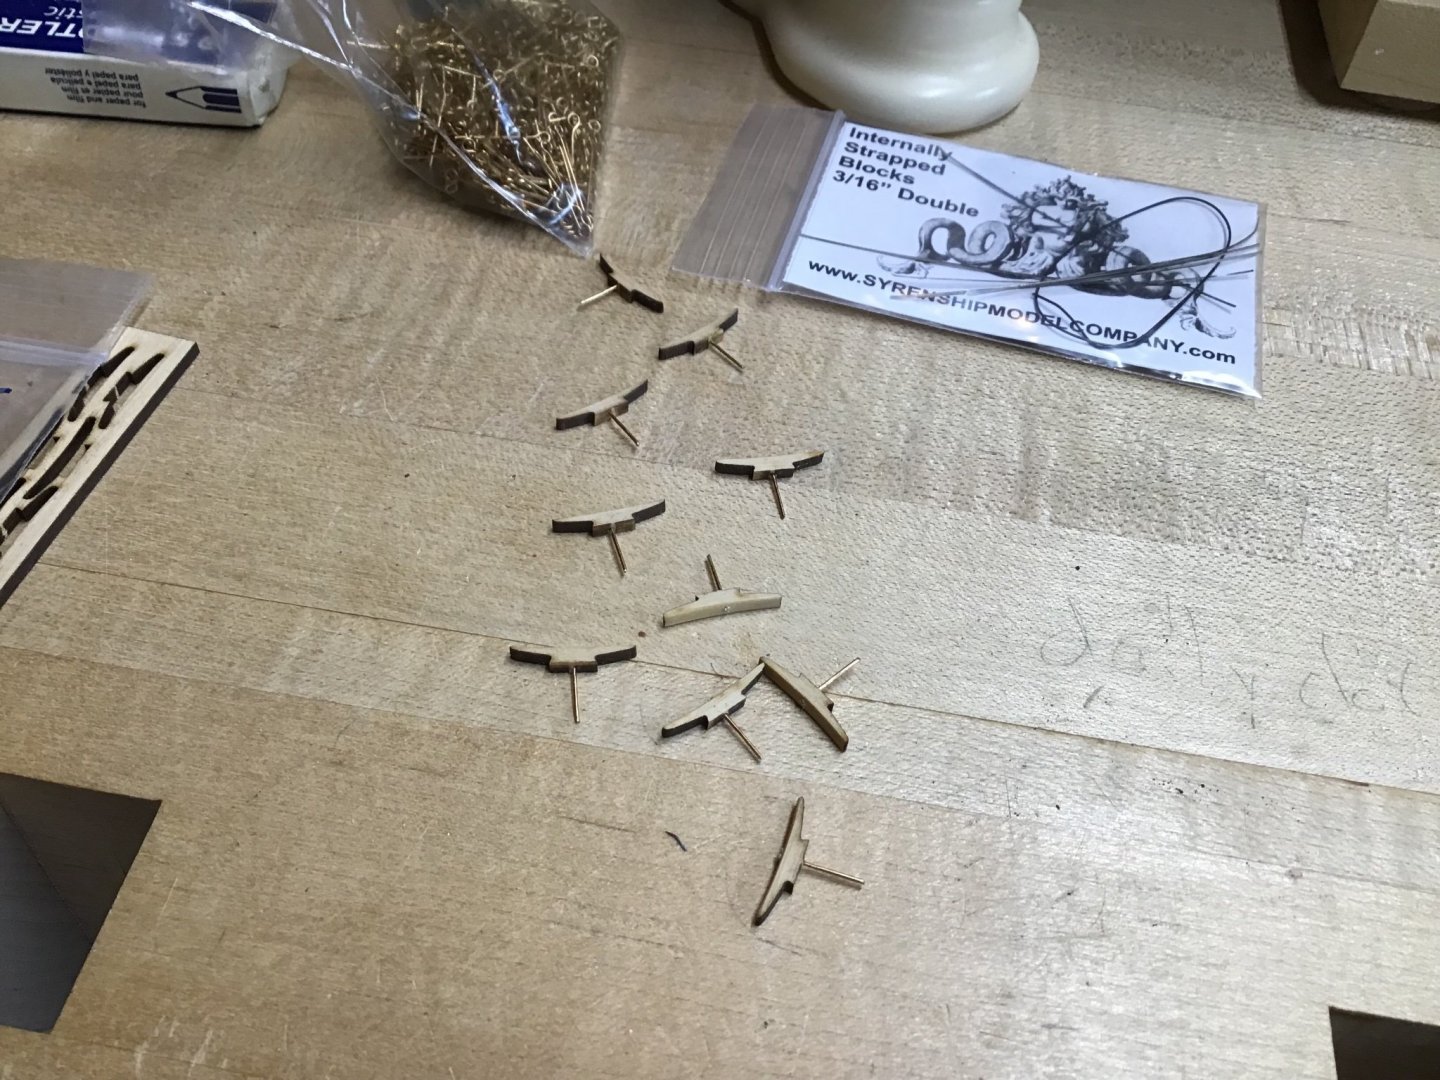
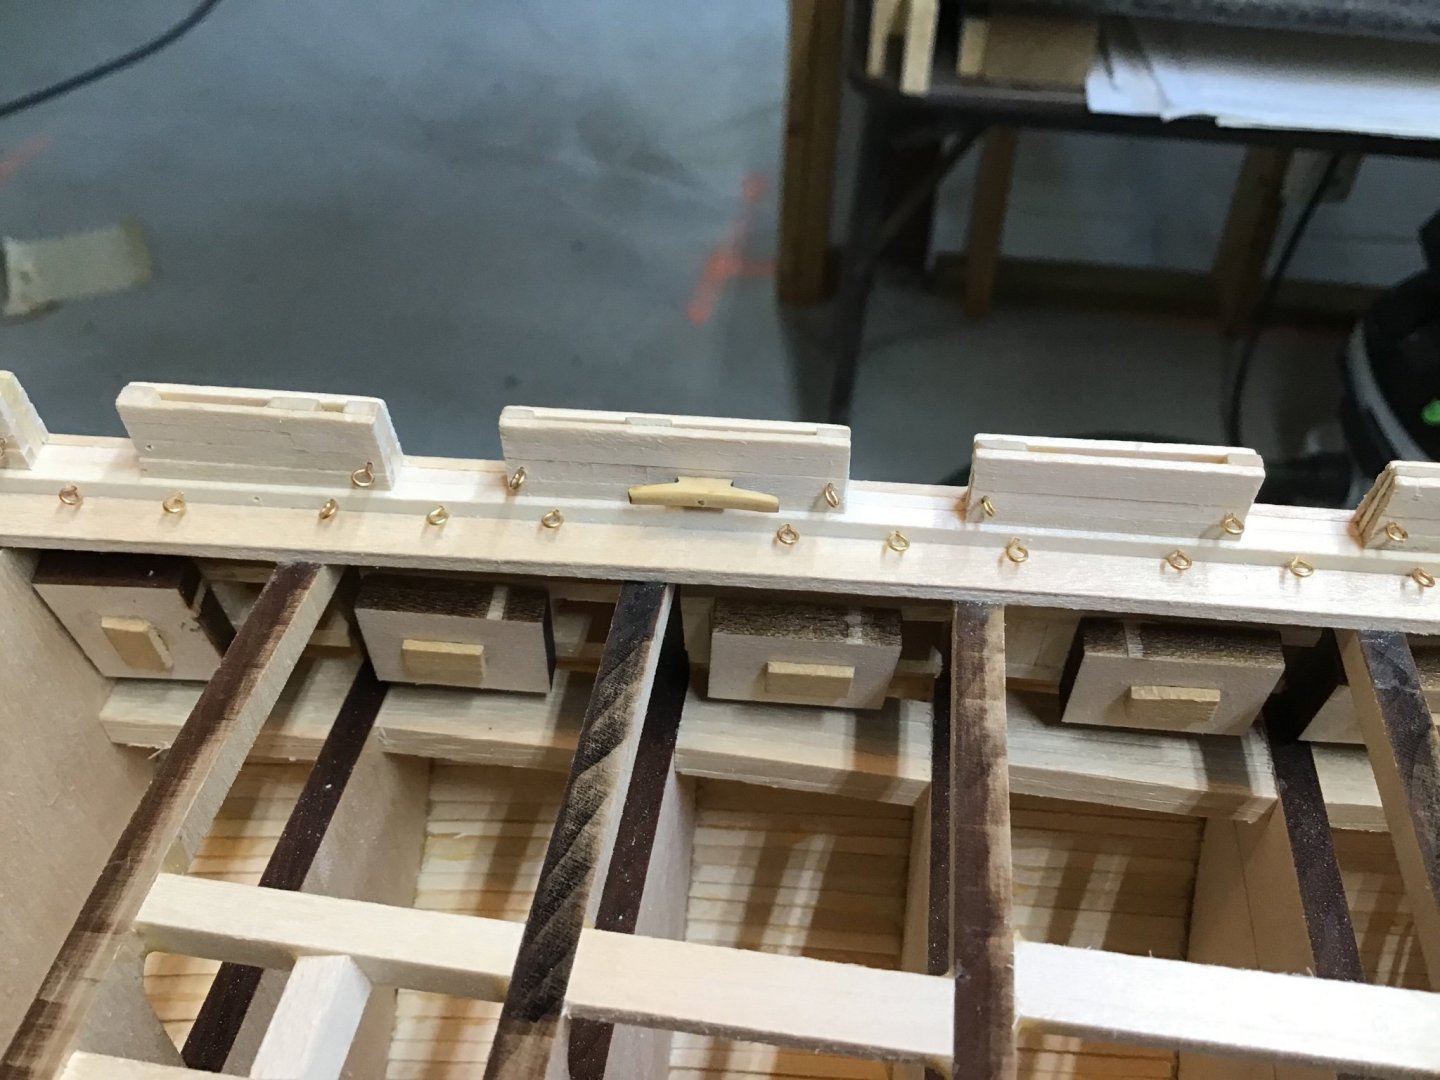
Installing Small Inboard Bulkhead Cleats Rather than making cleats, upgraded with cleats from the Syren Ship Model Company. The process is the same as the large cleats - with the addition of a jig to hold the small cleats. The first picture shows the jig, holding 5 cleats, bottoms up. Next we need to flatten the bottom so the drill bit does not wander across the surface. Picture 2 shows the bottoms being flattened with the Lie-Nielson pattern file. Picture 3 shows holes being drilled with the Foredom drill press with a 1/64” bit. Again eyebolt tails are inserted and glued in the holes. Picture 4. Last picture shows a cleat installed - it’s to the right of the large cleat.


-
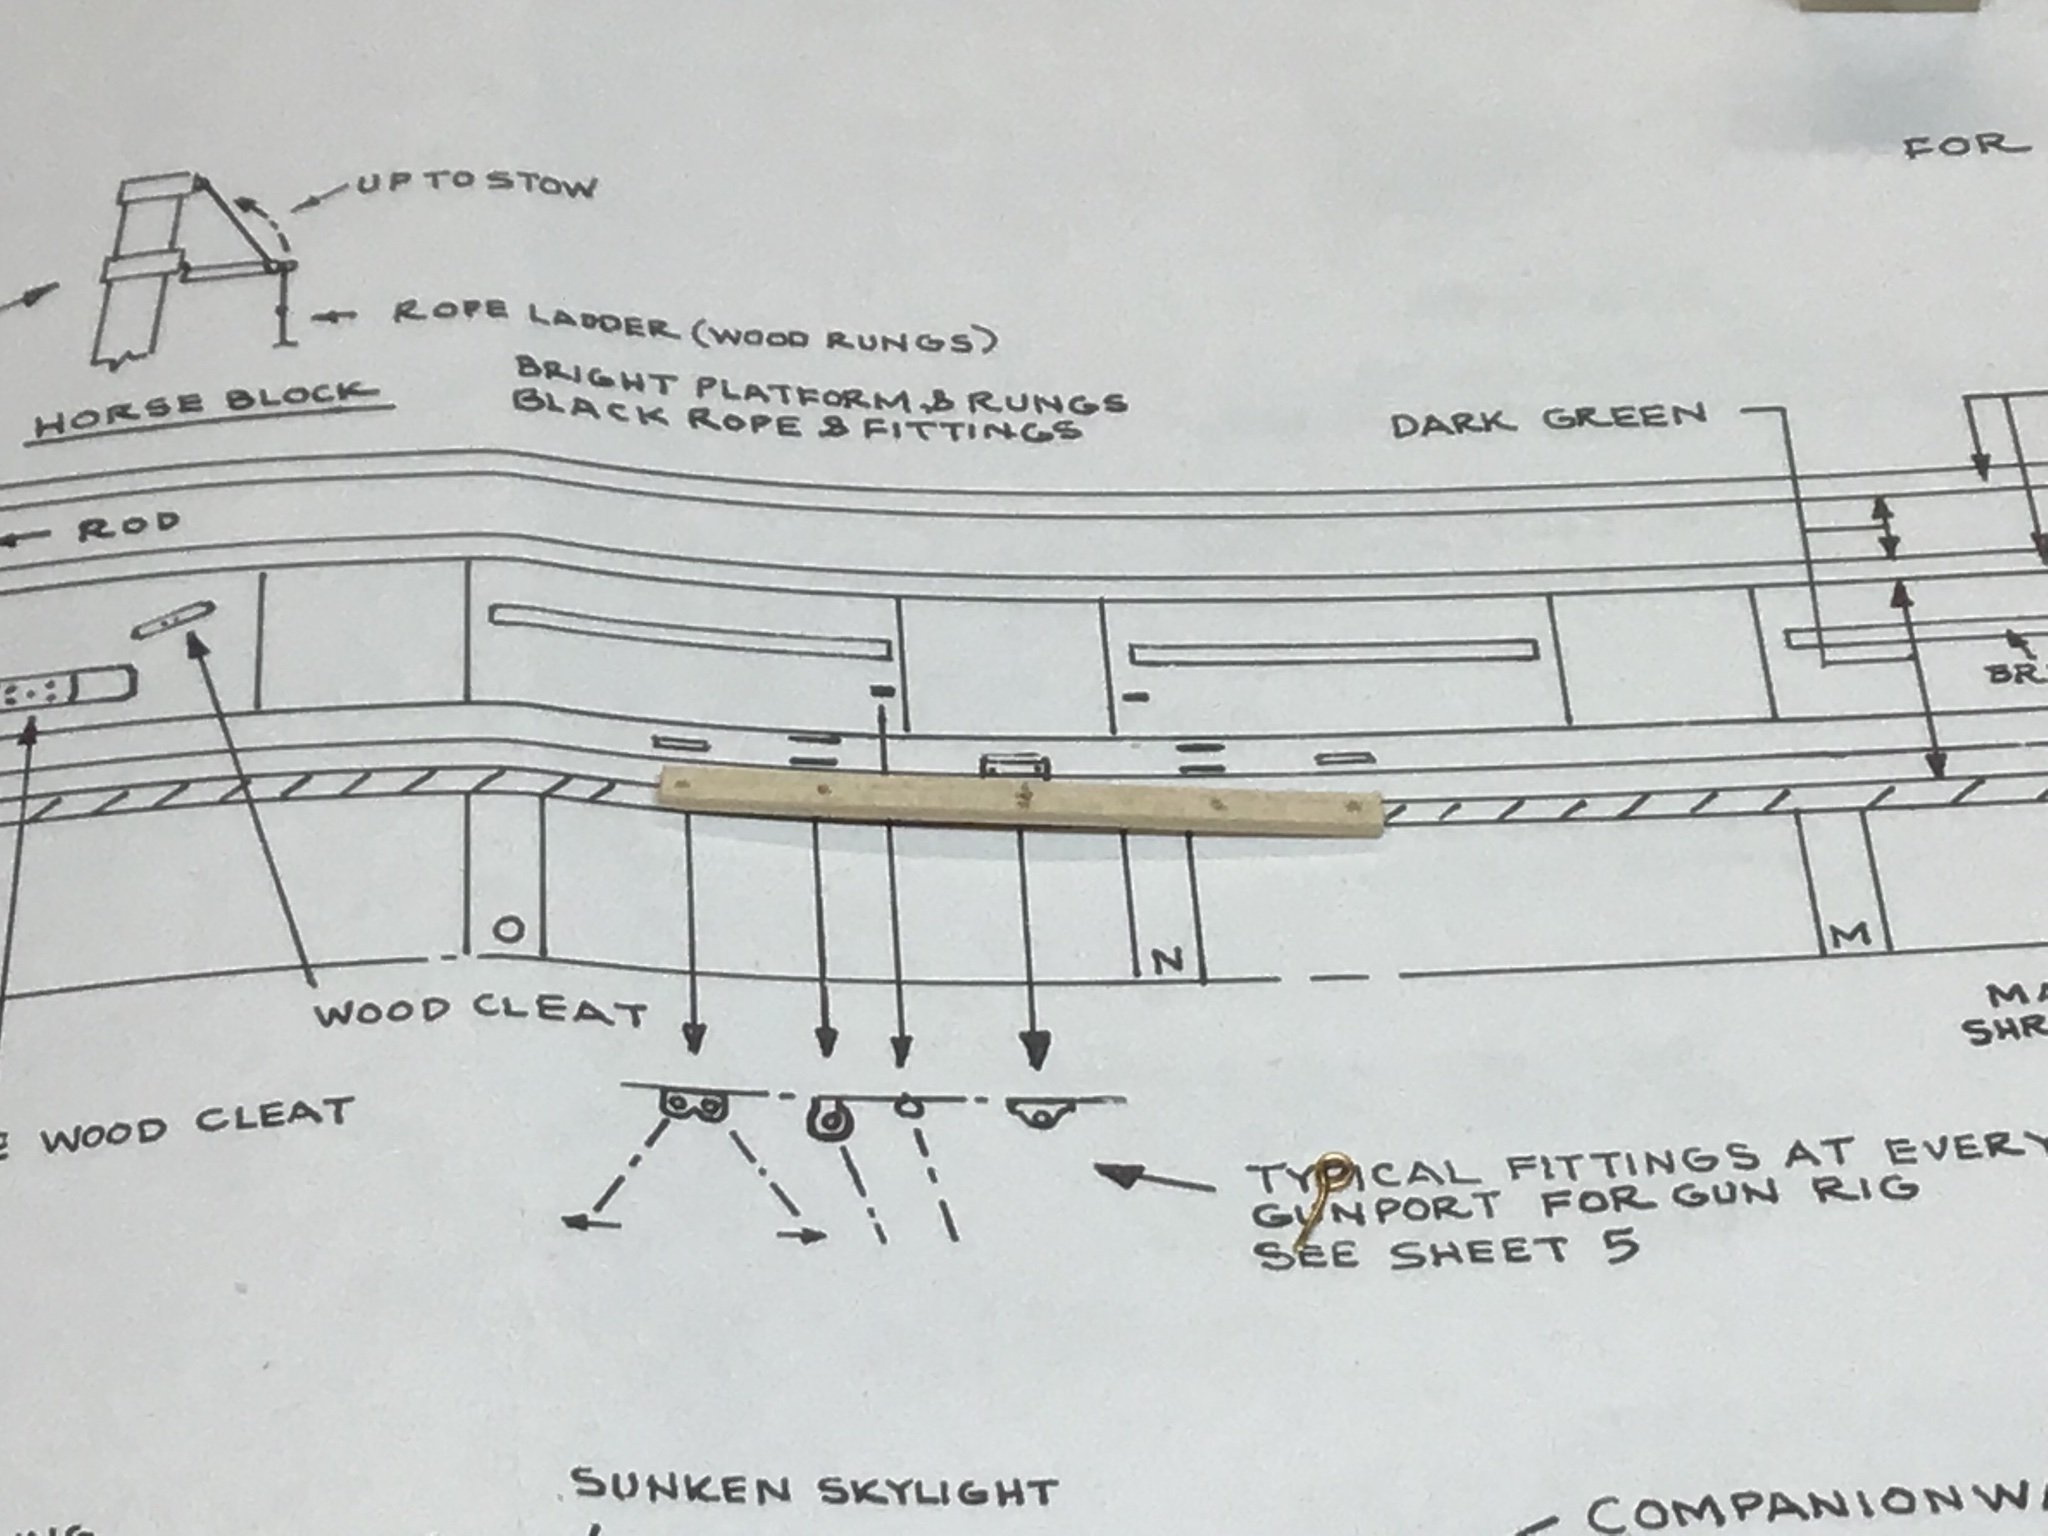
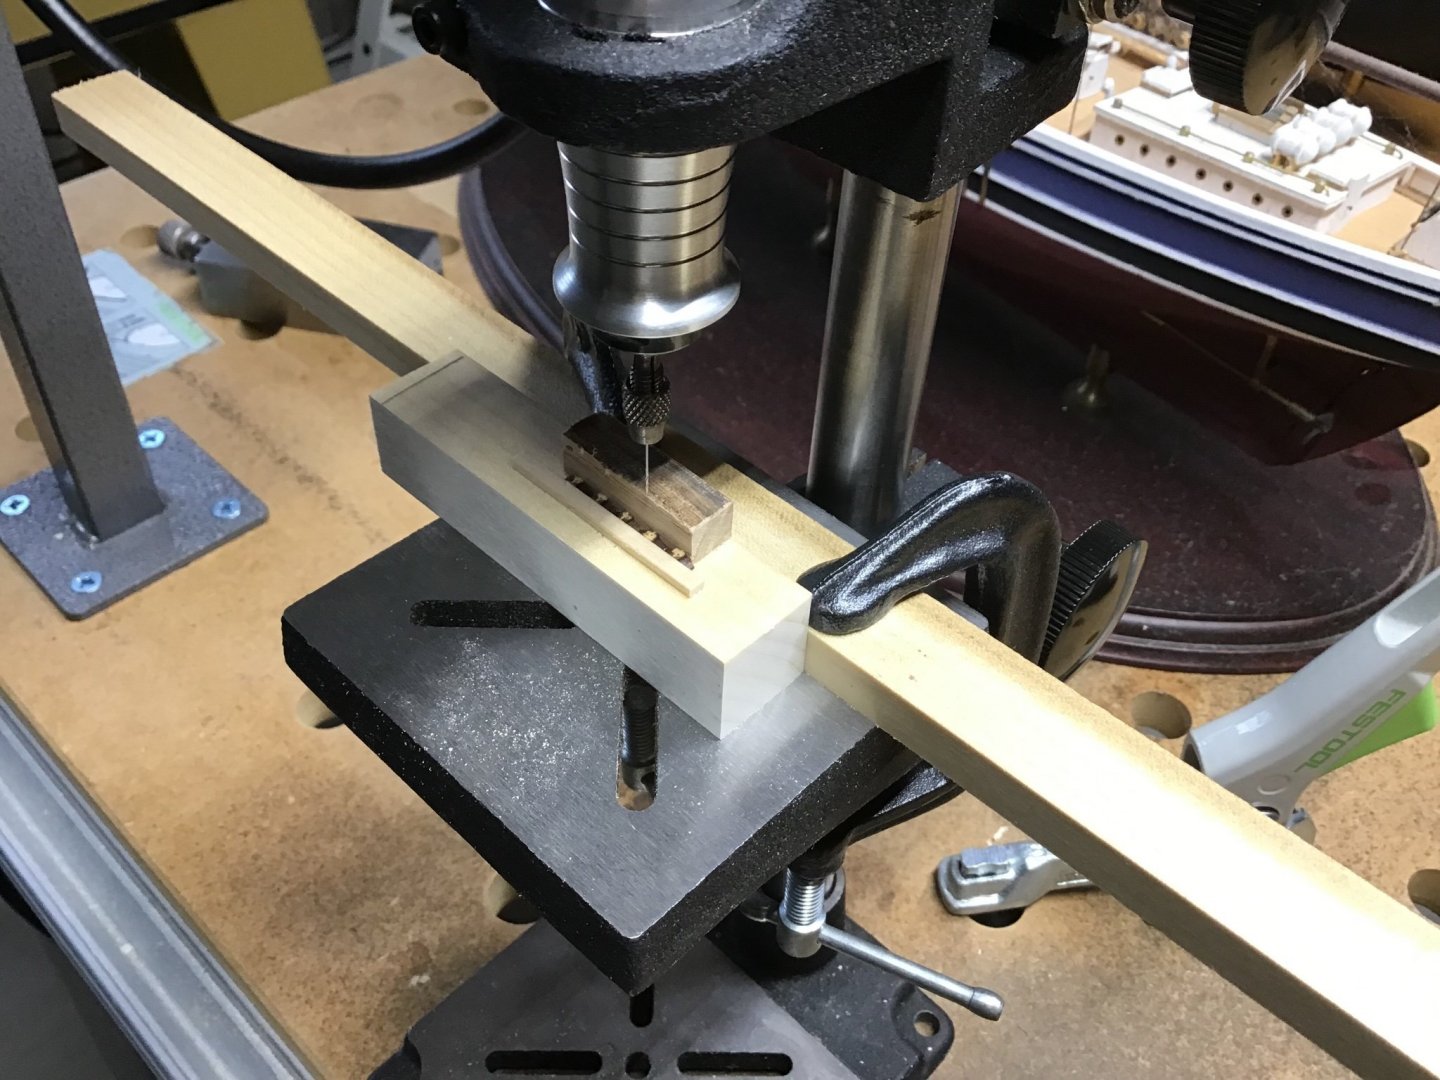
Installing Large Inboard Bulkhead Cleats Upgraded with Syren Ship Model Company cleats, rather than fabricating. Removed cleats from billet and rounded over with a flexi file. Picture 1. Next made a jig and drilled a hole with Foredom drill press. Picture 2. Picture 3 shows cleats with left over eyebolt tails, see last post, glued in holes. Again used the board with a hole drilled in it to size the pin and cutoff with flush cutter. Picture 4. Picture 5 shows a cleat installed in a hole drilled in the second board above the sill.

-
A lot of work! Lookin’ good!
-
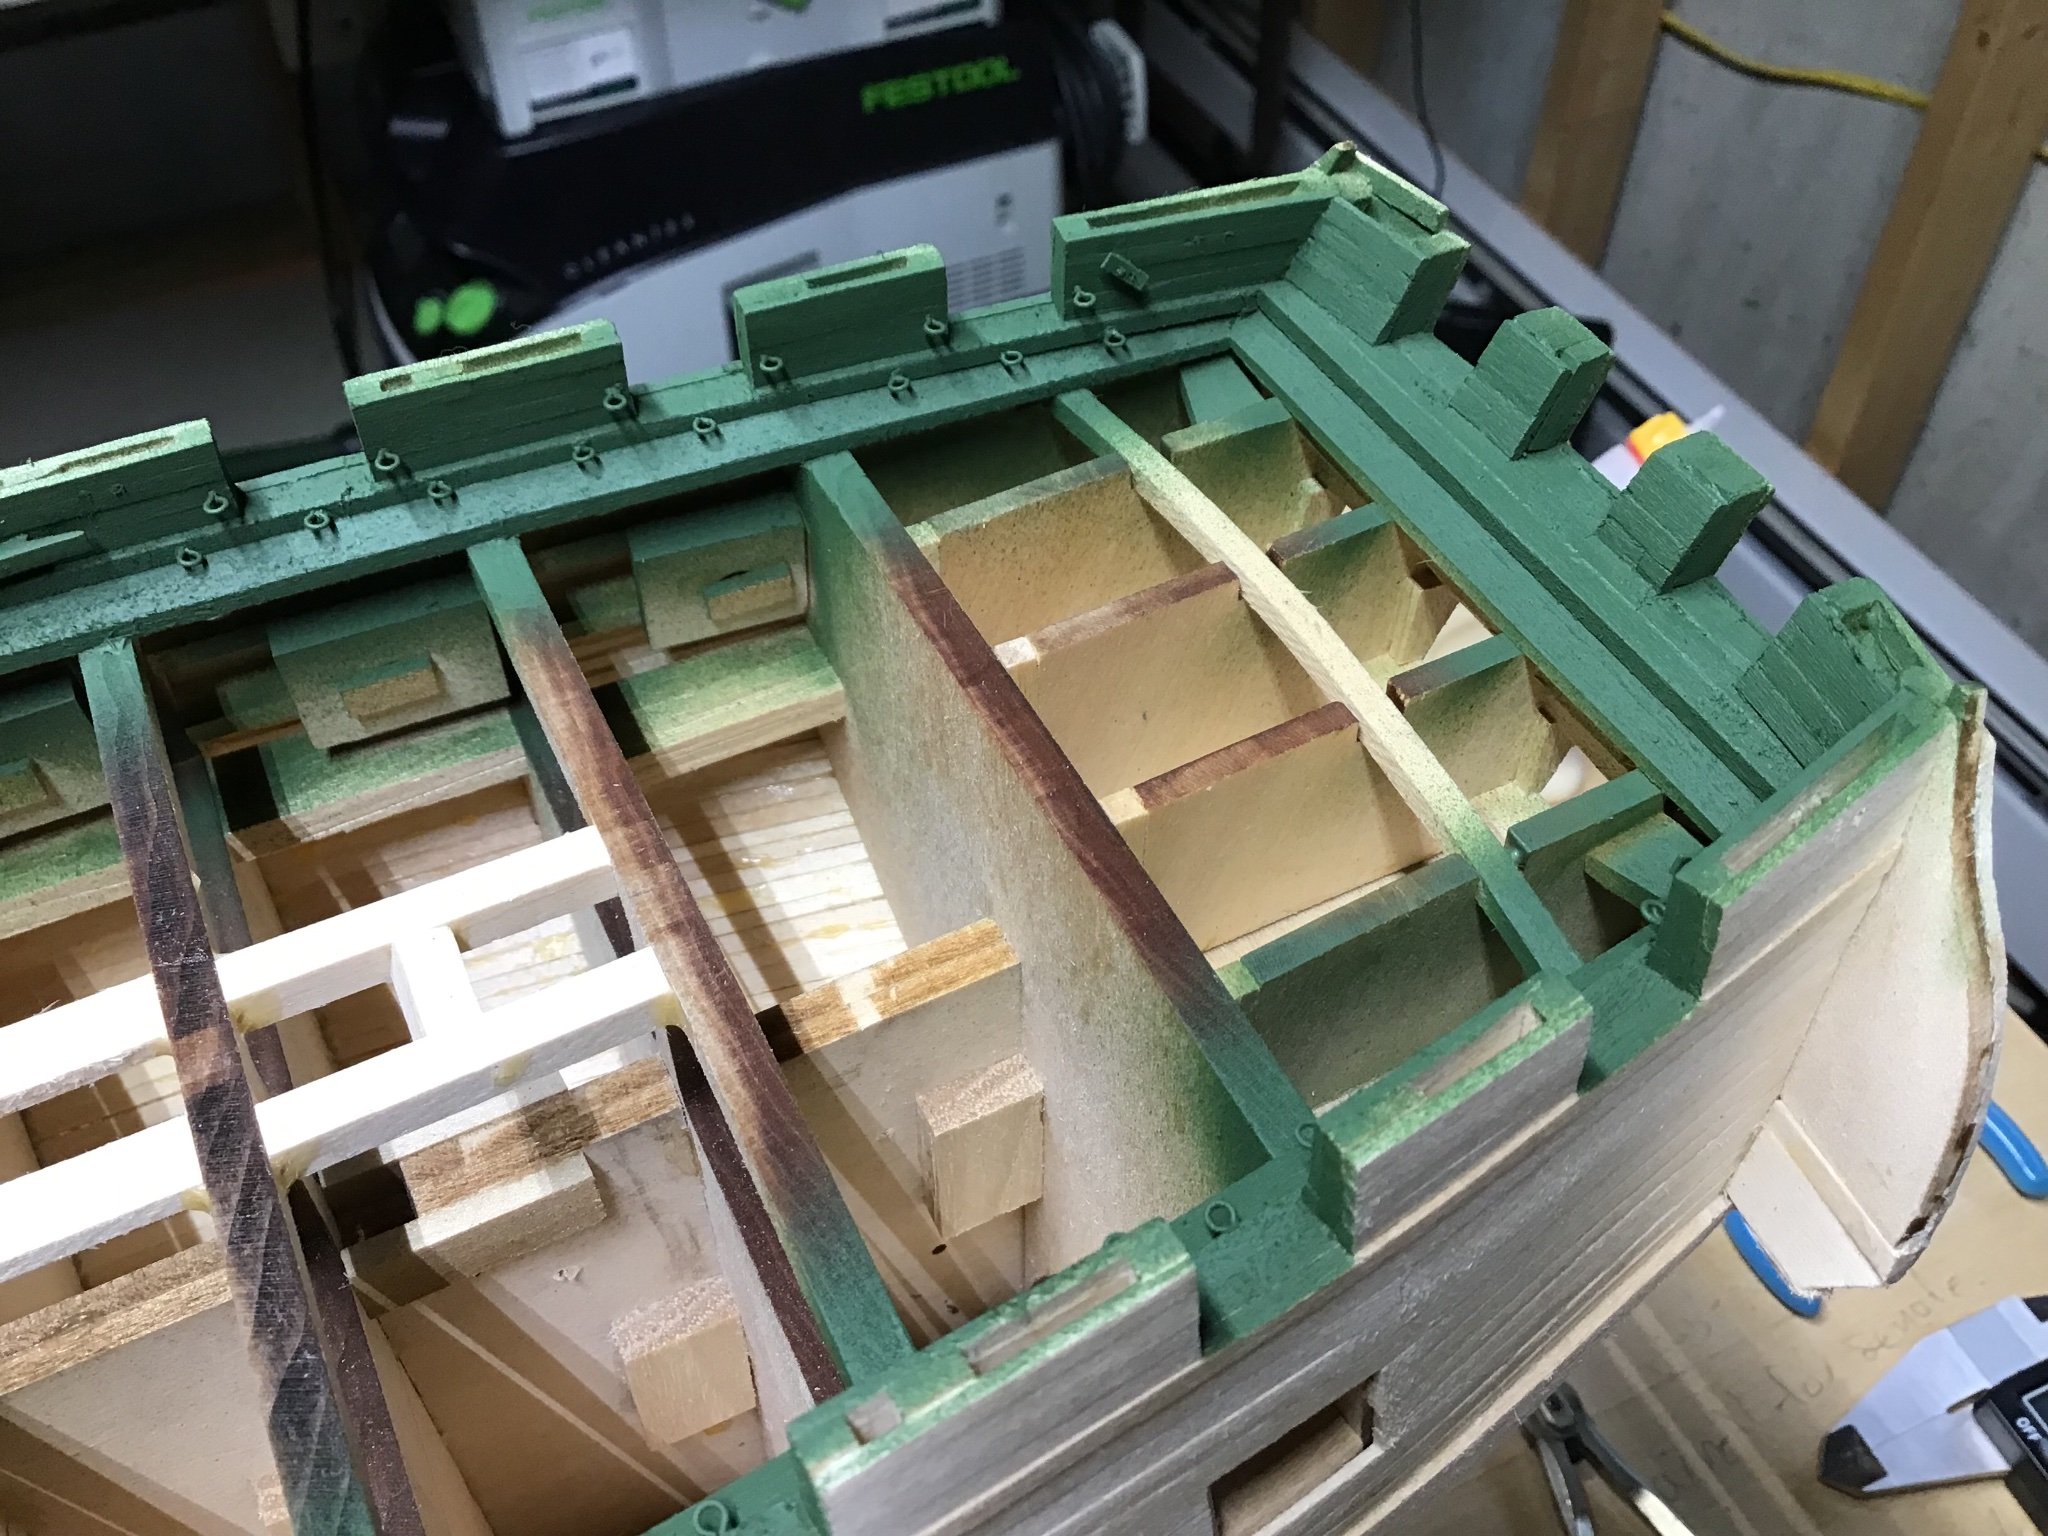
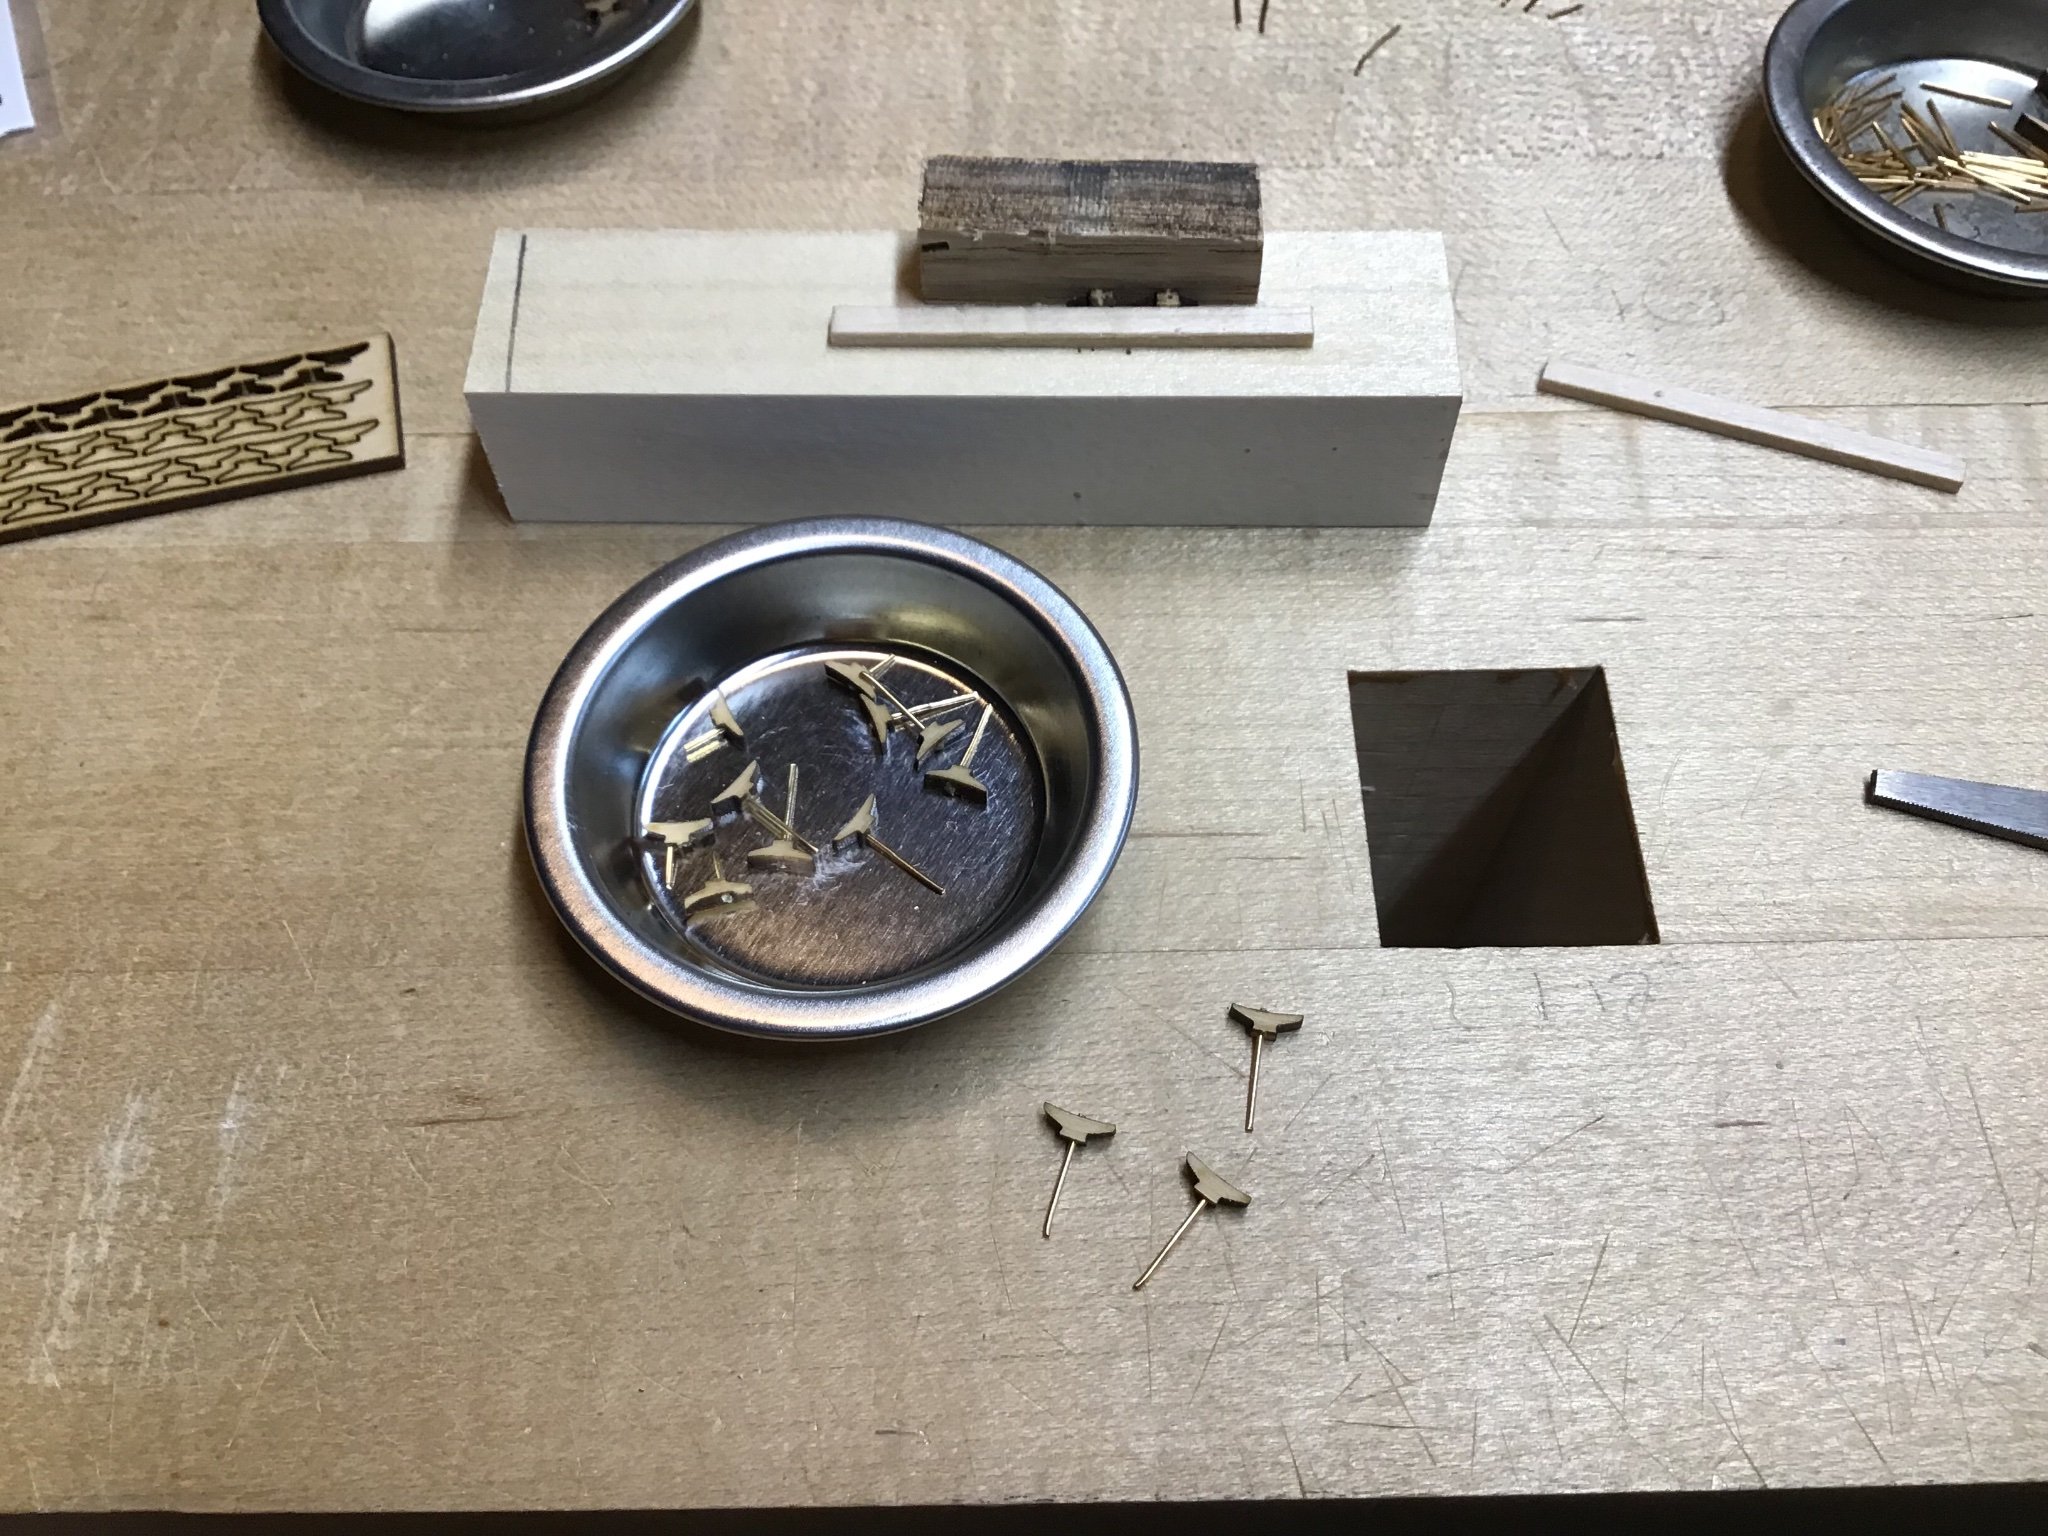
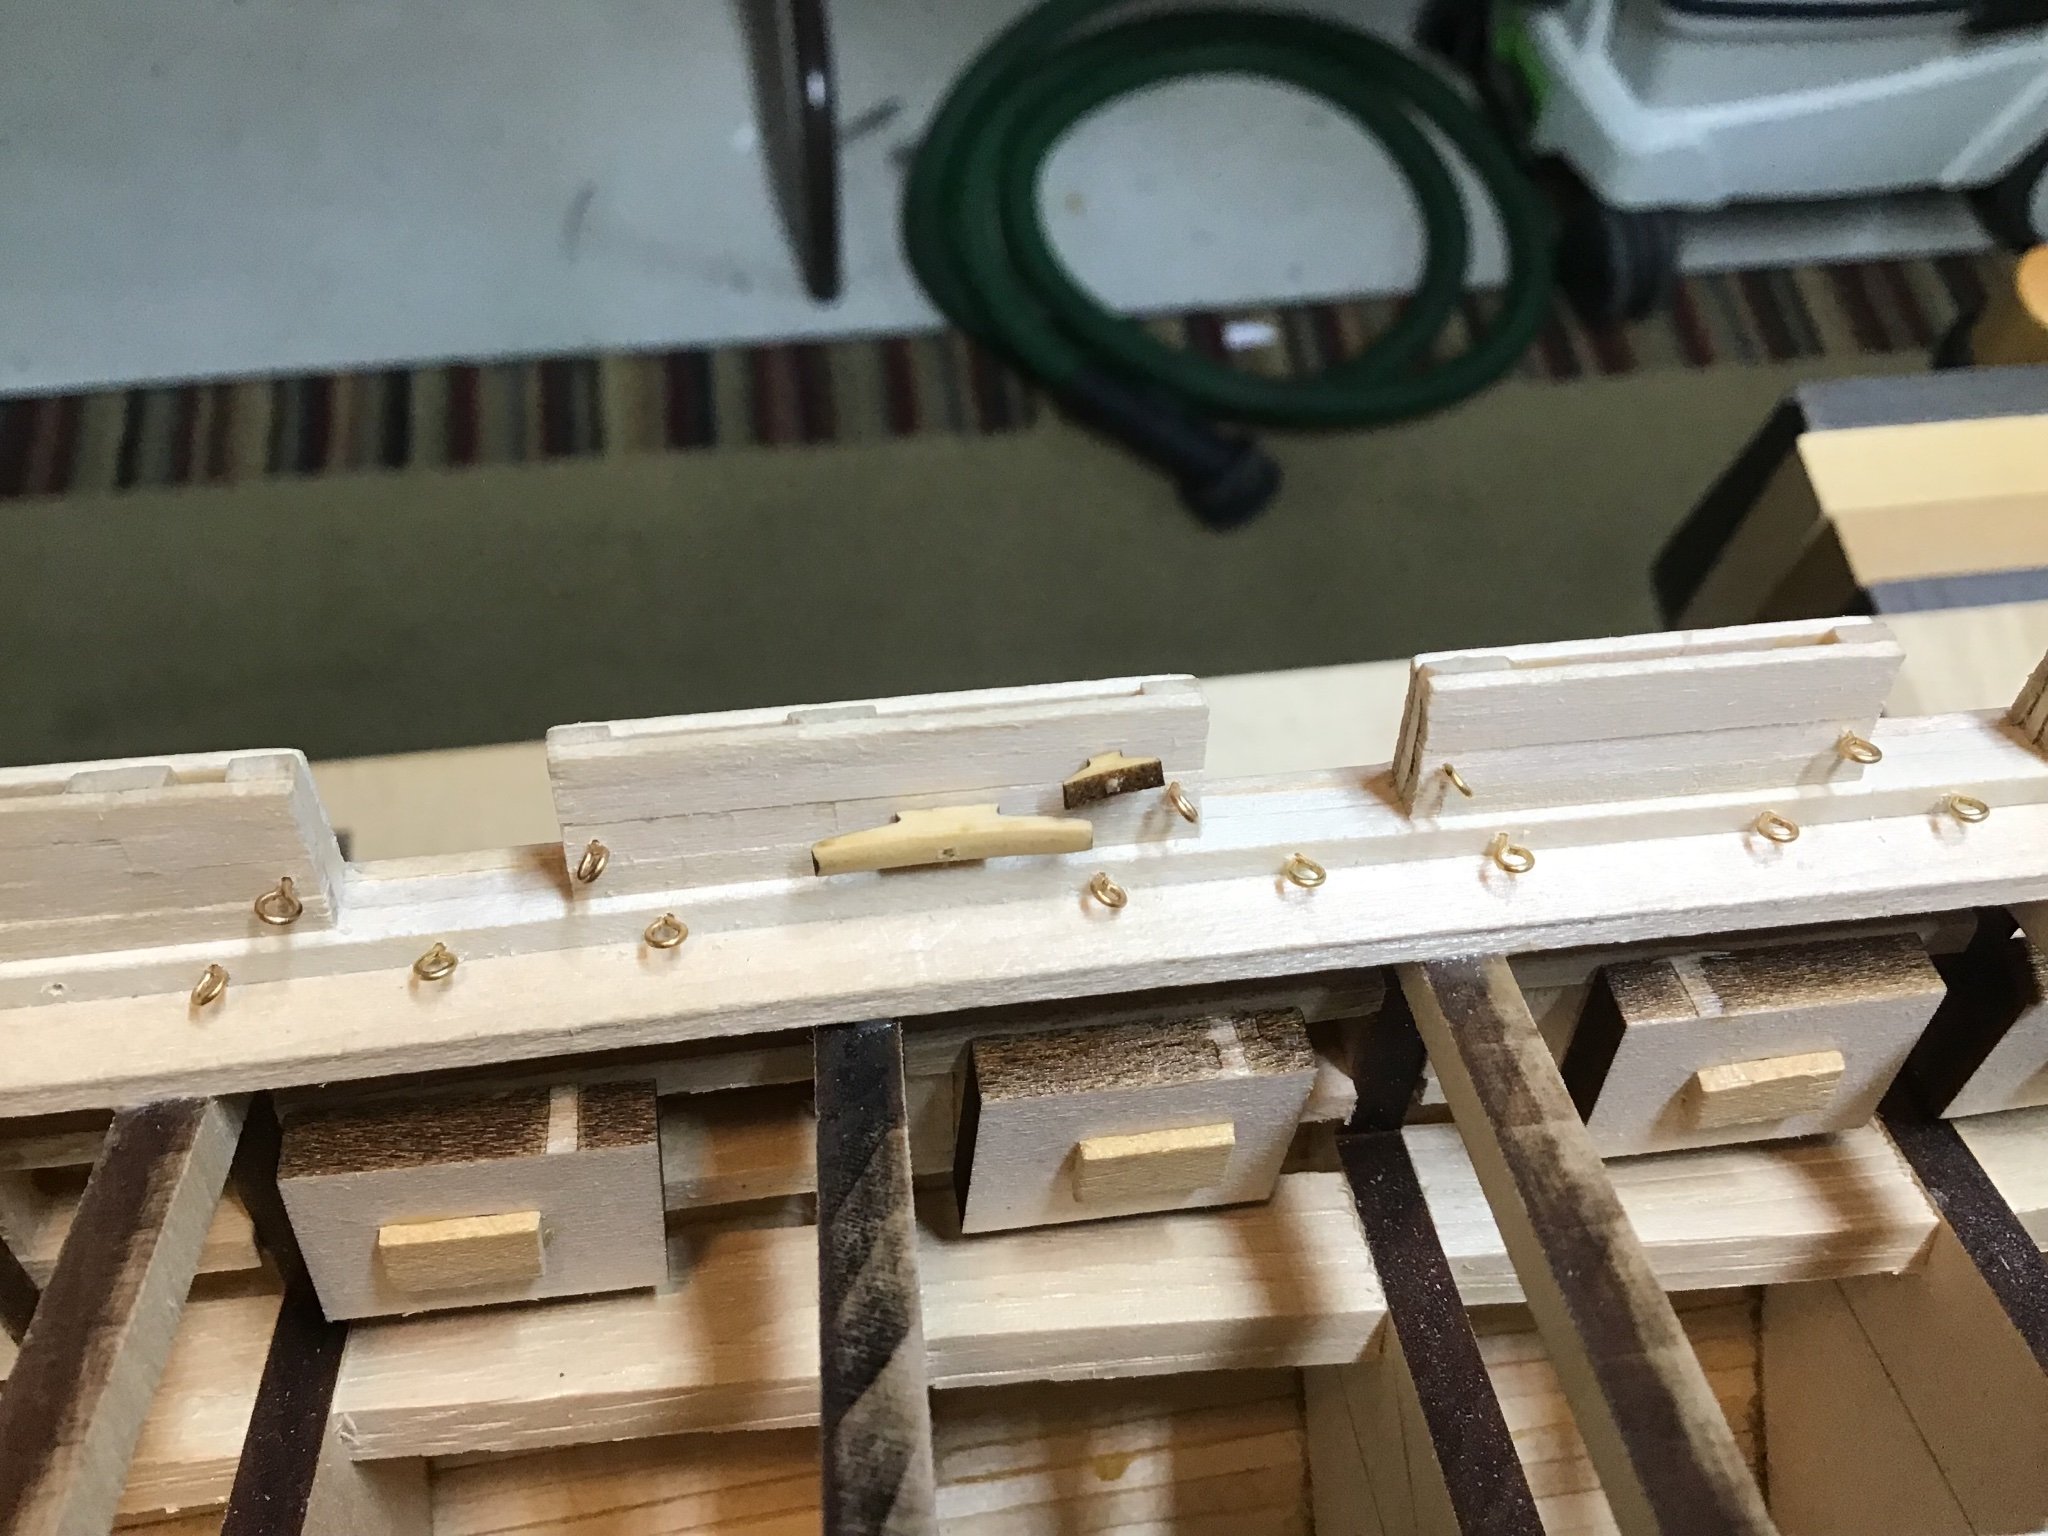
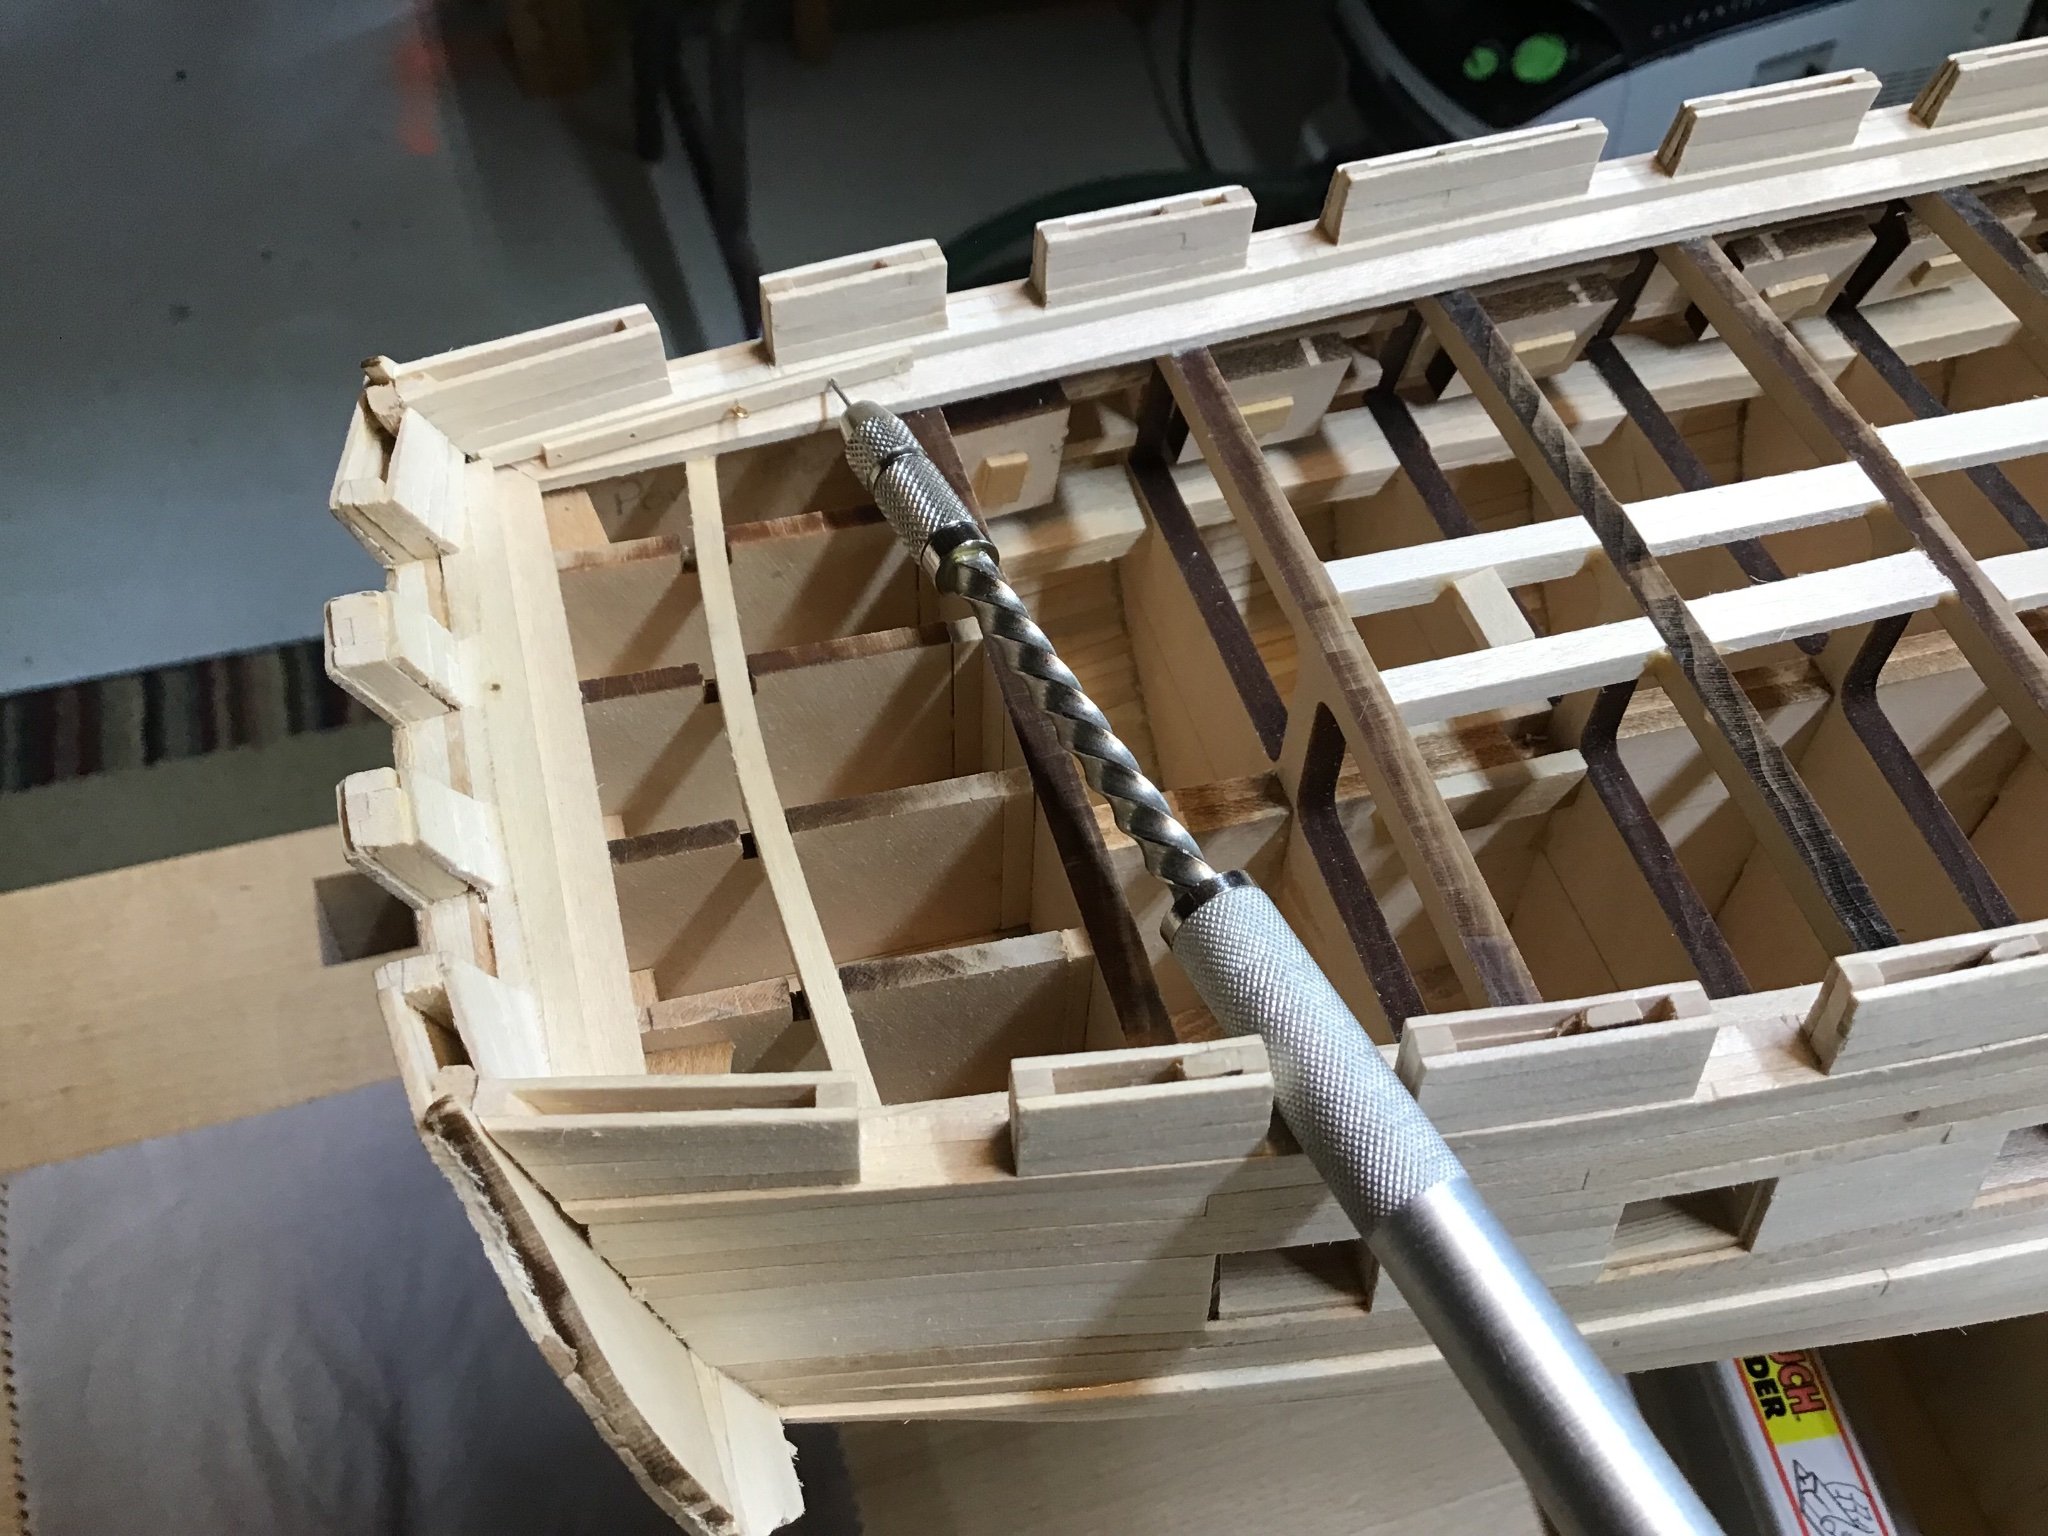
Installing Eyebolts for Carronade Tackle - Bulkhead There are two eyebolts on either side of the gunport, located in the middle of the second plank above the sill. Another drill guide template was made using a 1/2” wide block with two planks glued to the front. The picture shows the drill guide in use and some of the eyebolts already installed.
-
Hi, When removing wood in bulk, the tool sequence is rasp, files, then sandpaper. Sanding is a finishing step and is not meant for bulk wood removal. So if one finds they are spending a lot of time sanding it’s time to think about either a rasp or file. A file can provide a finish that often does not need sanding. Files offer finer control as well. Hope this helps. Looking forward to seeing your results! Here is a rasp in action….

-
Not sure if it’s too late…when removing wood the tool sequence is rasp, file, sandpaper (if needed). Half round rasp and files will get you into the curves. Rasp and files can be both full size and miniature. Here is rasp in action. Files often provide such a smooth finish, that sandpaper is not needed. Really good looking ship, looking forward to seeing more.

-
My first few projects were disasters! Always available to answer a question if you need a hand. Cheers!
-
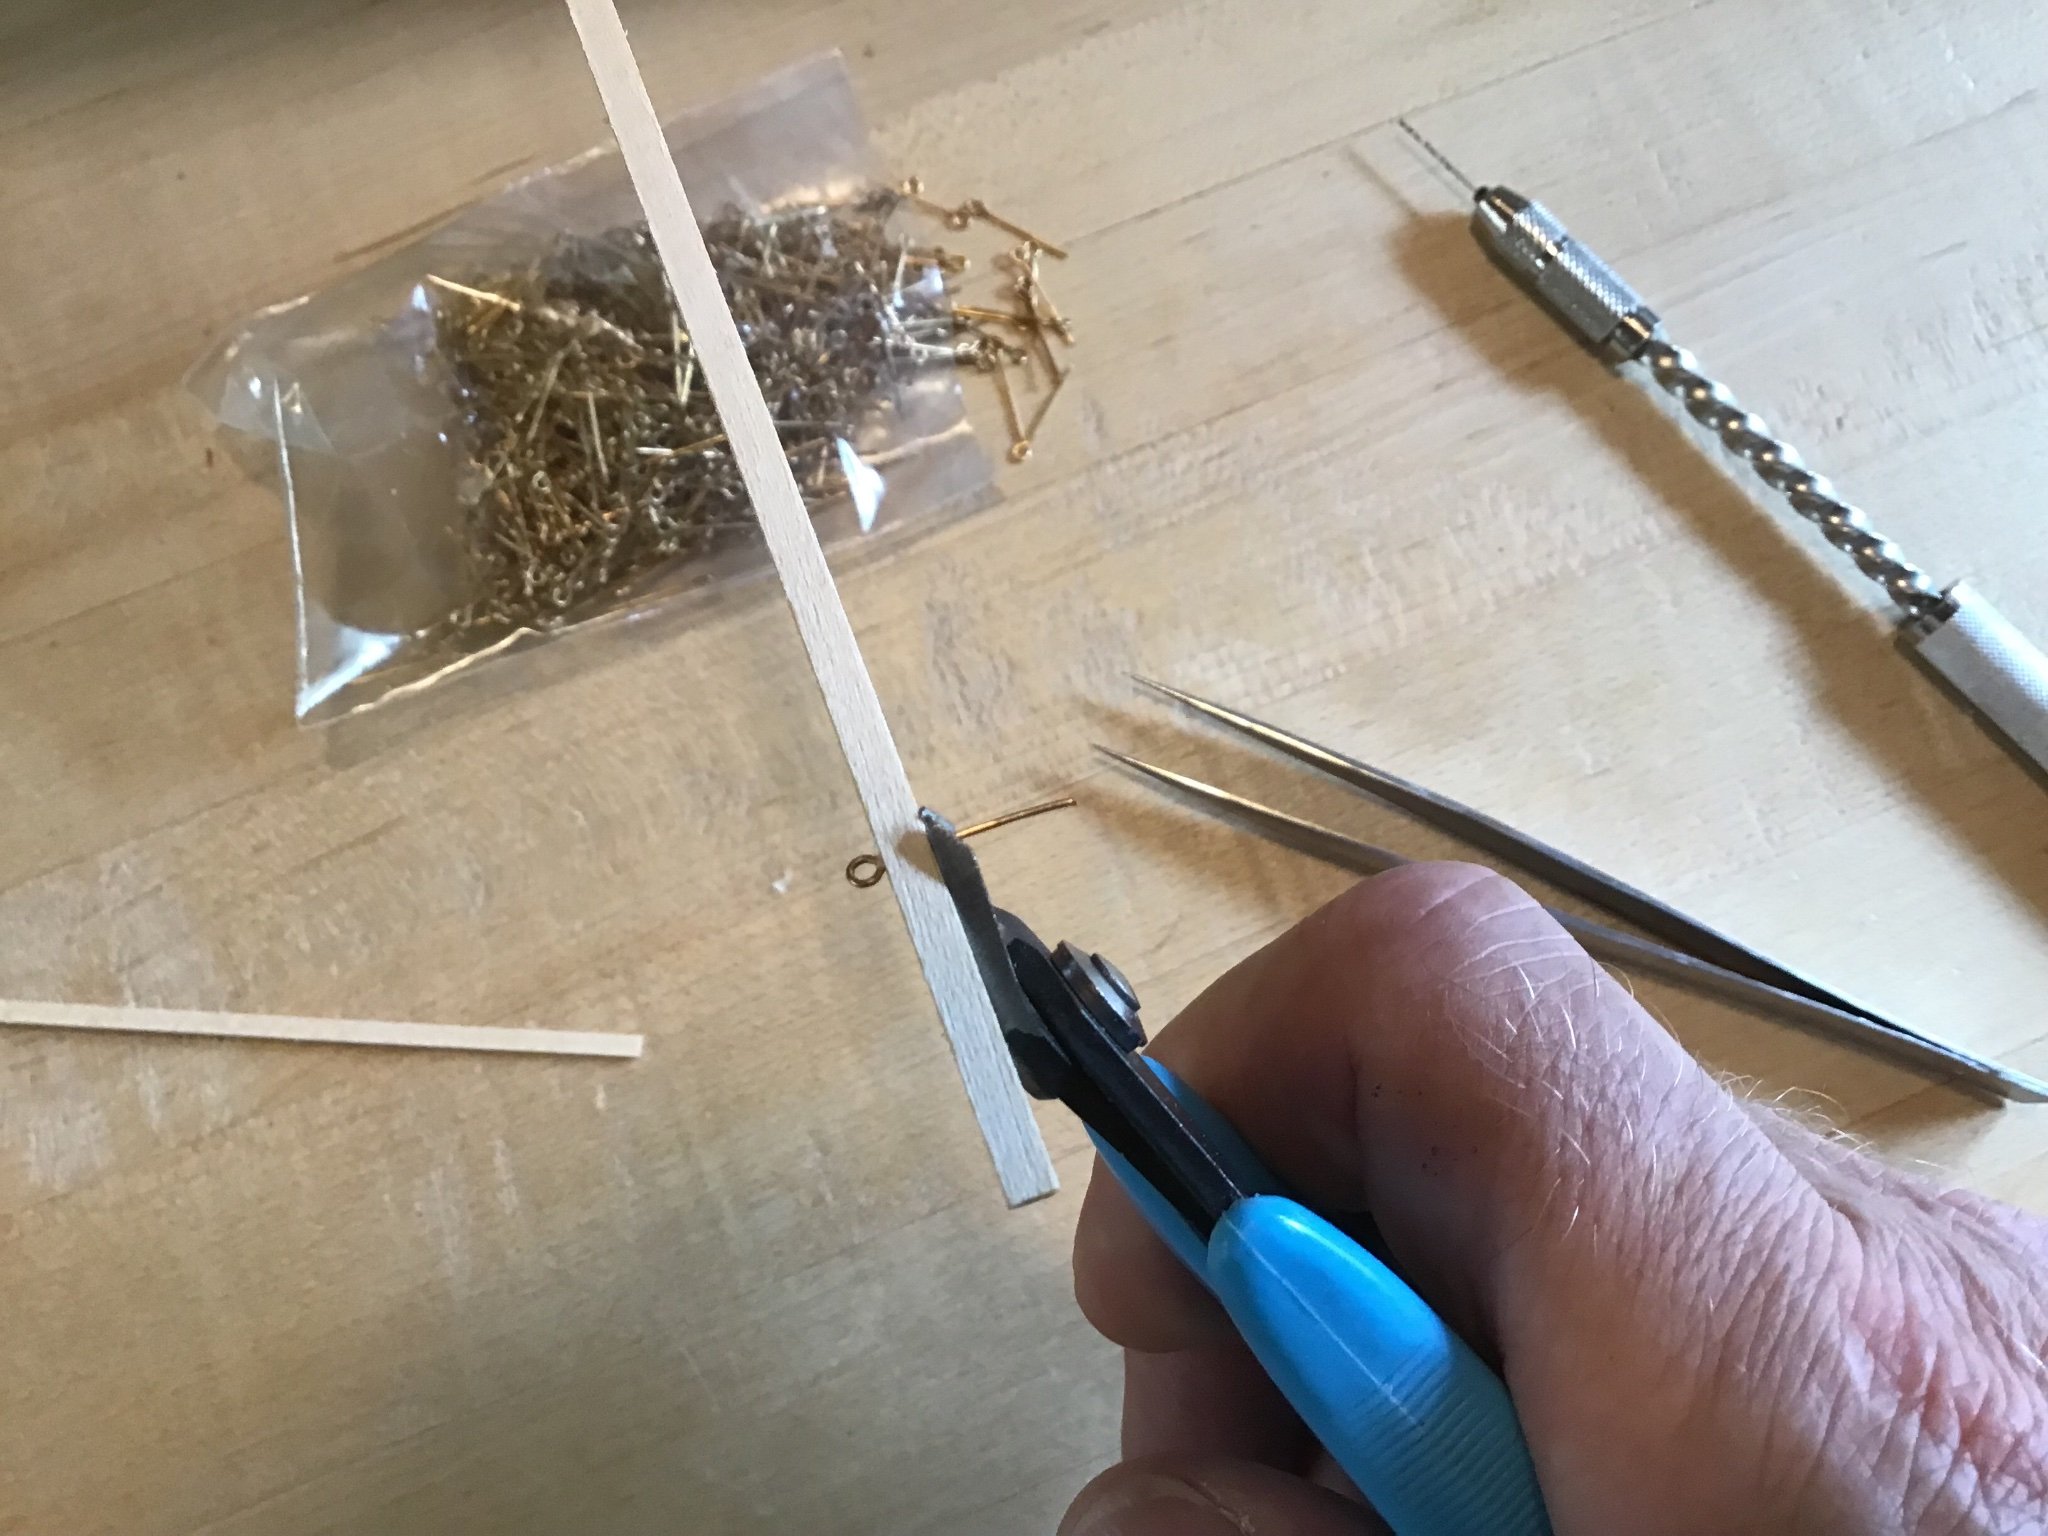
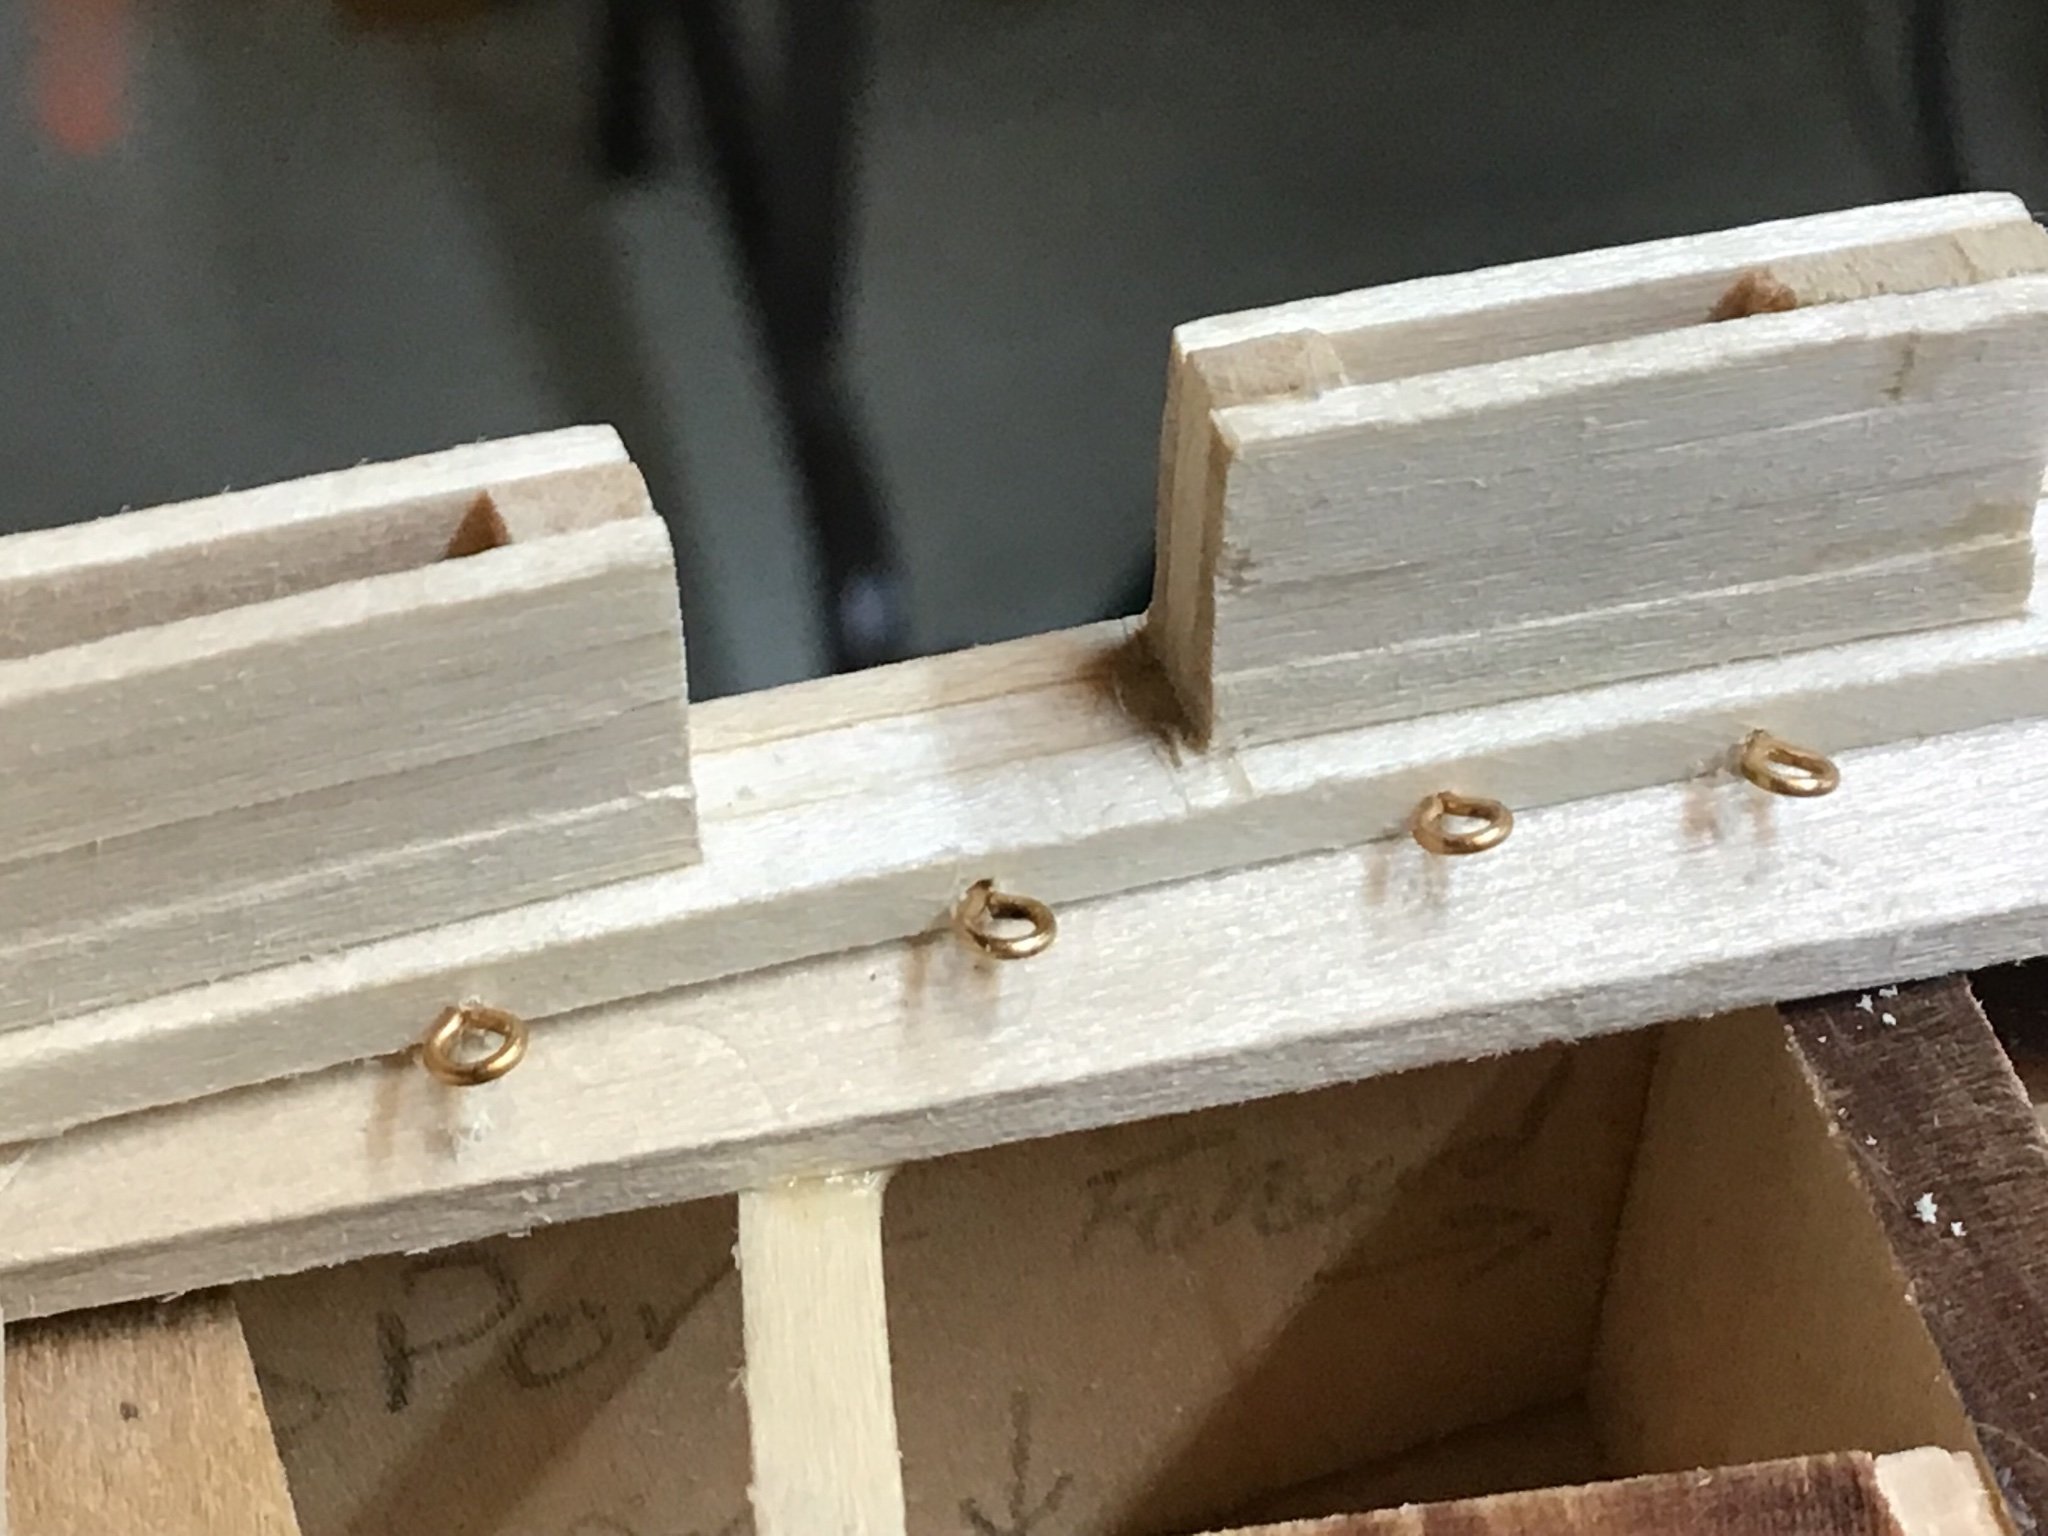
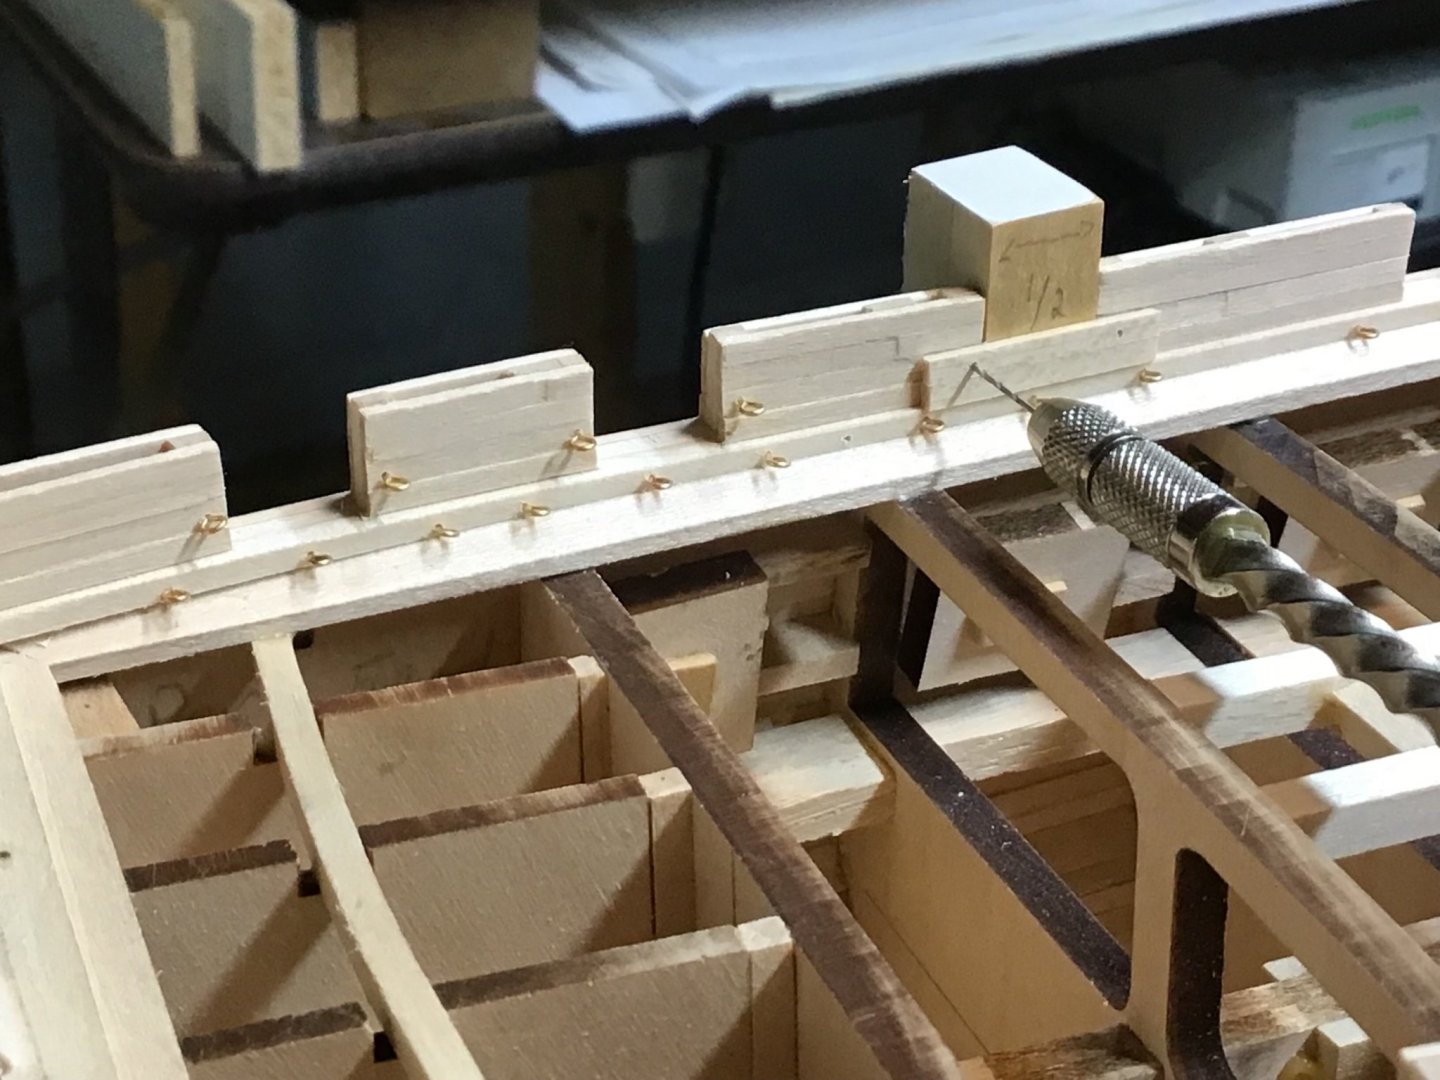
Installing Eyebolts for Carronade Tackle - Sill About 100 eyebolts need to be installed, in the first board above the waterway, for the carronades and associated tackle to attach to. First made a template drill guide with a board and using the plan. Marked the board at bolt locations on the plan and drilled holes in the board. Picture 1. Next drilled a hole in the sill centered on the gunport. Located the template board on the sill with an eyebolt and used the board as a guide to drill the remaining holes on either side of the gunport. Picture 2. Cut the eyebolts to length using a board with a width corresponding to the length of the bolt desired. Picture 3. Last, picture 4 shows the first set of eyebolts installed.


-
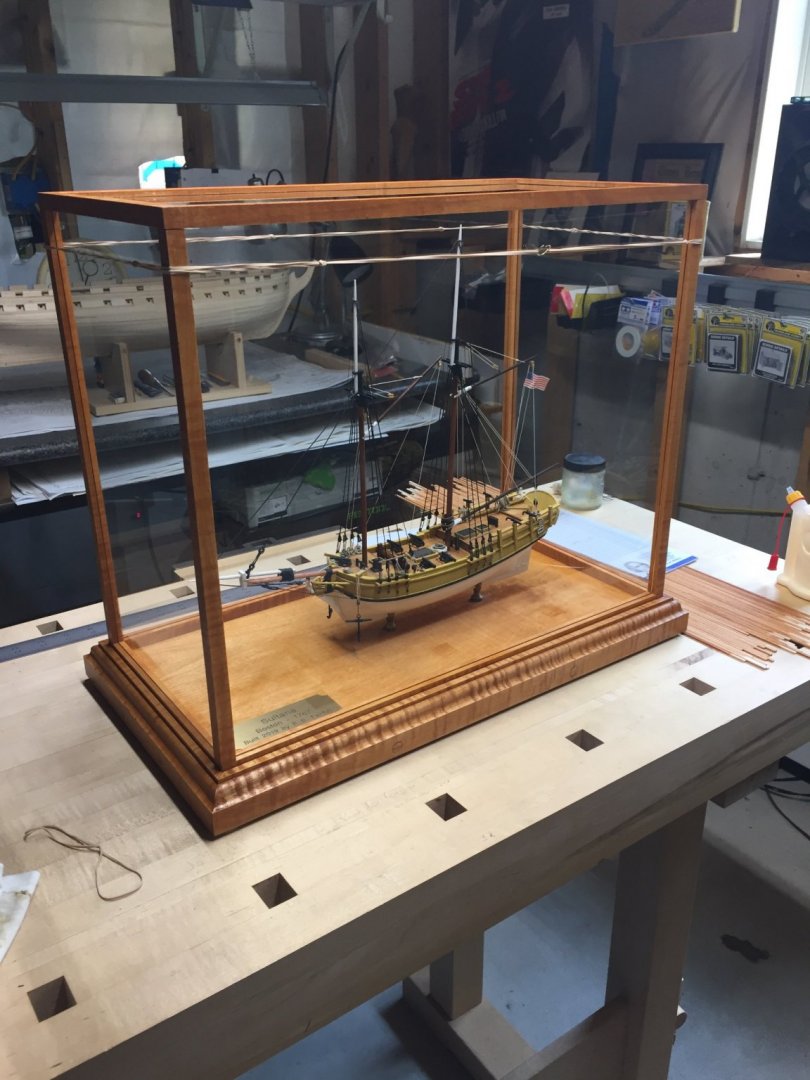
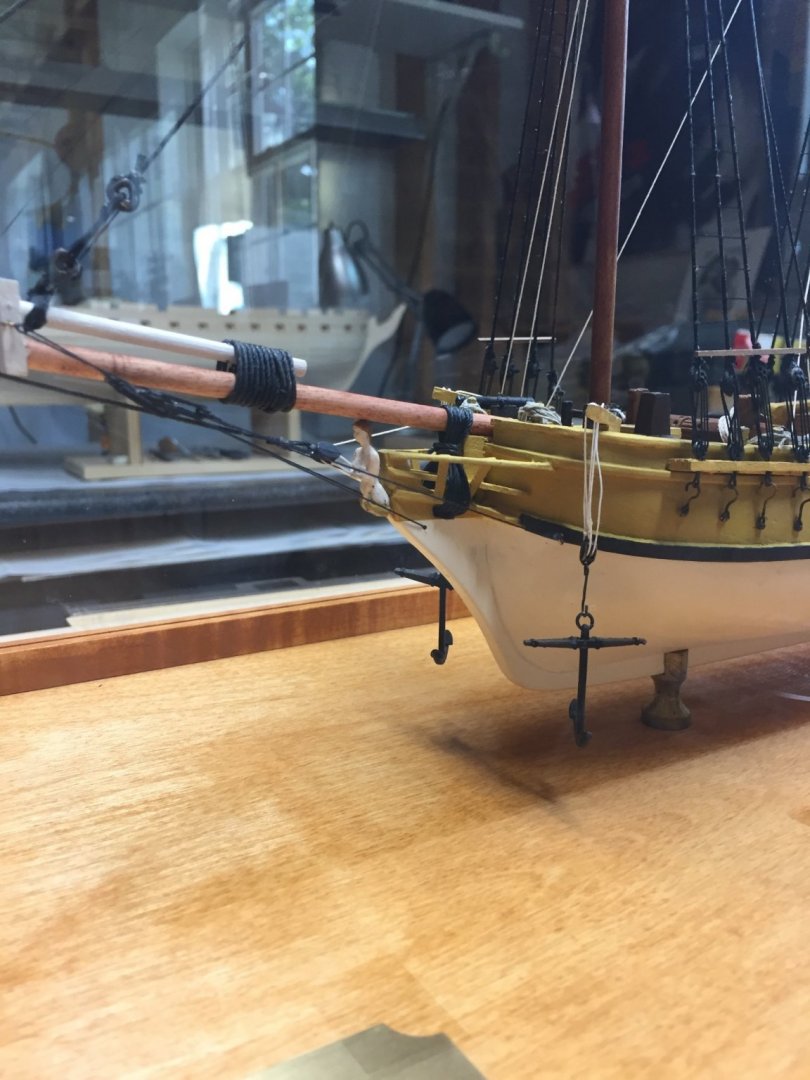
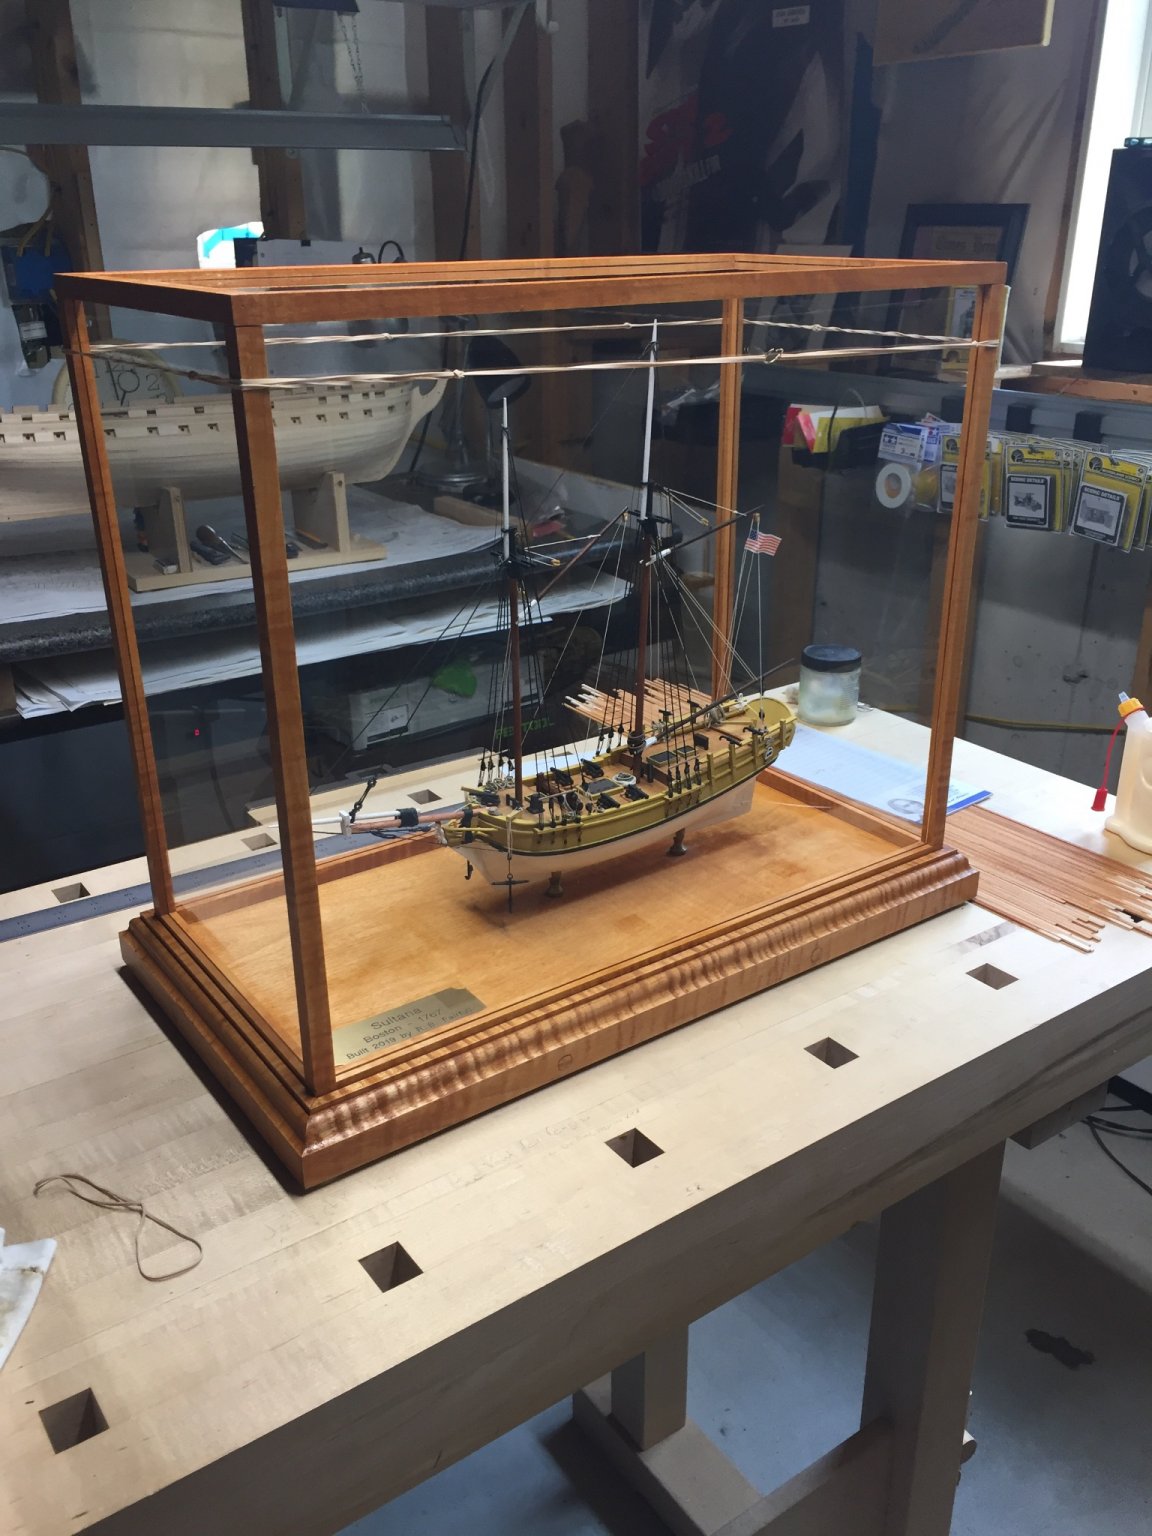
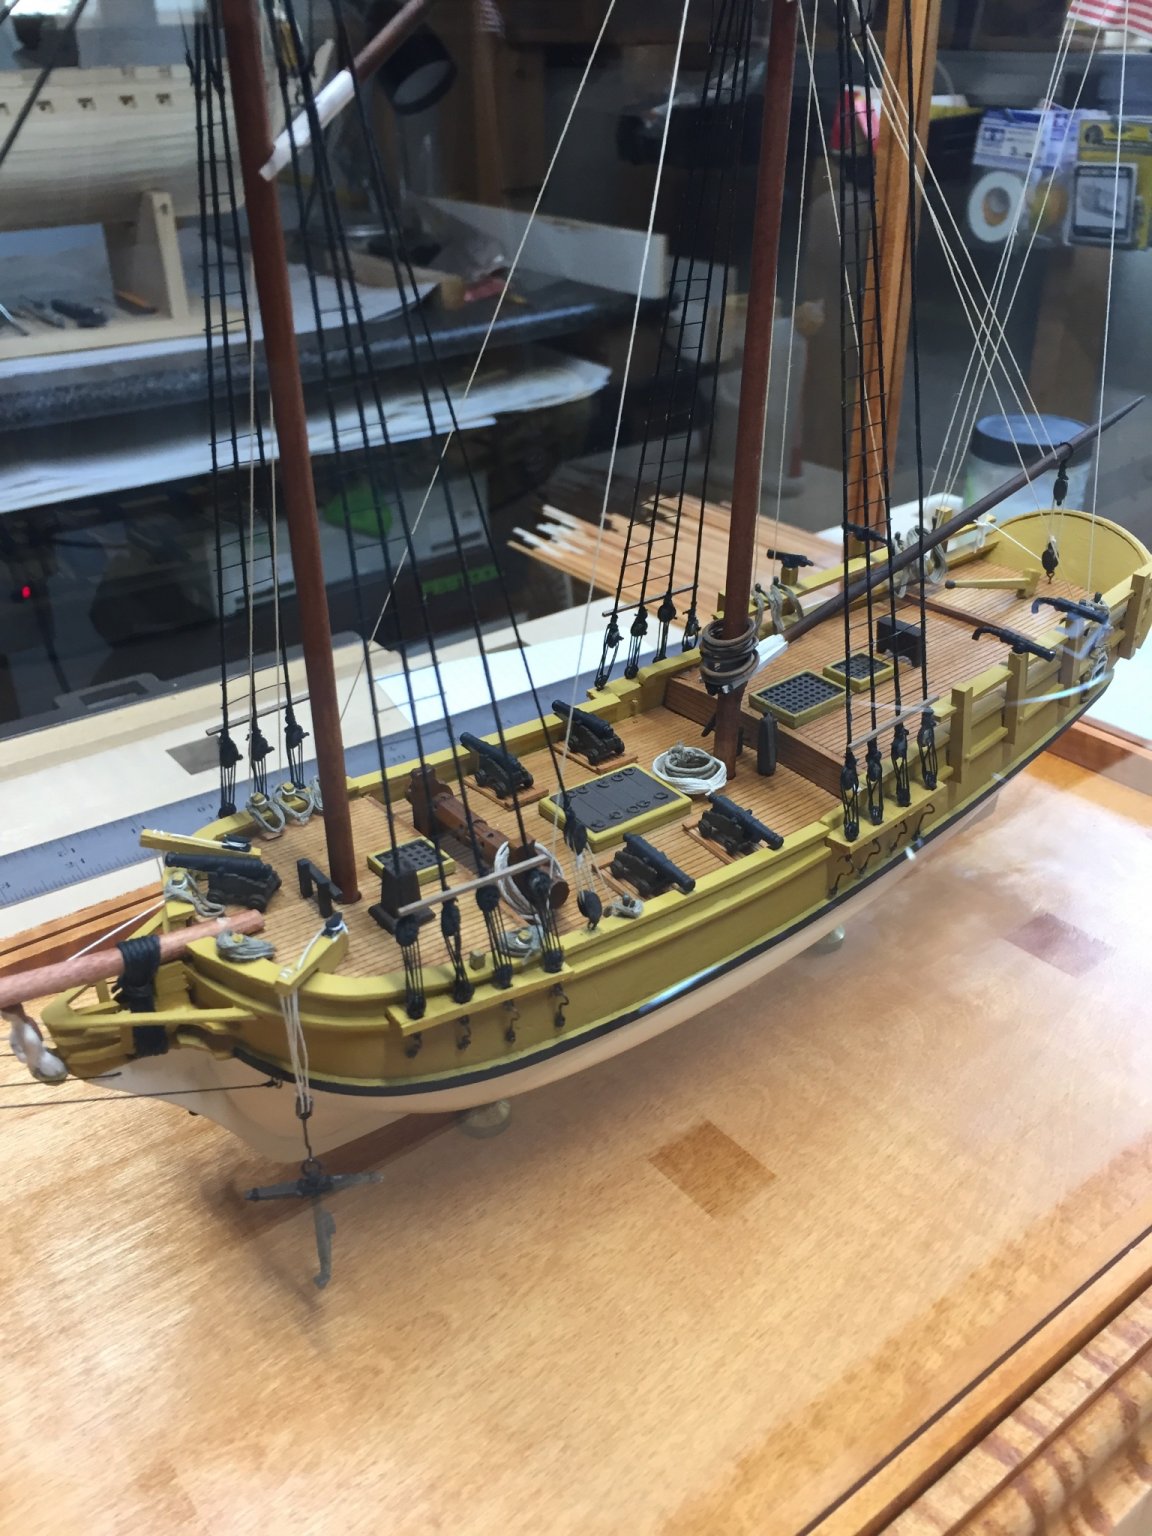
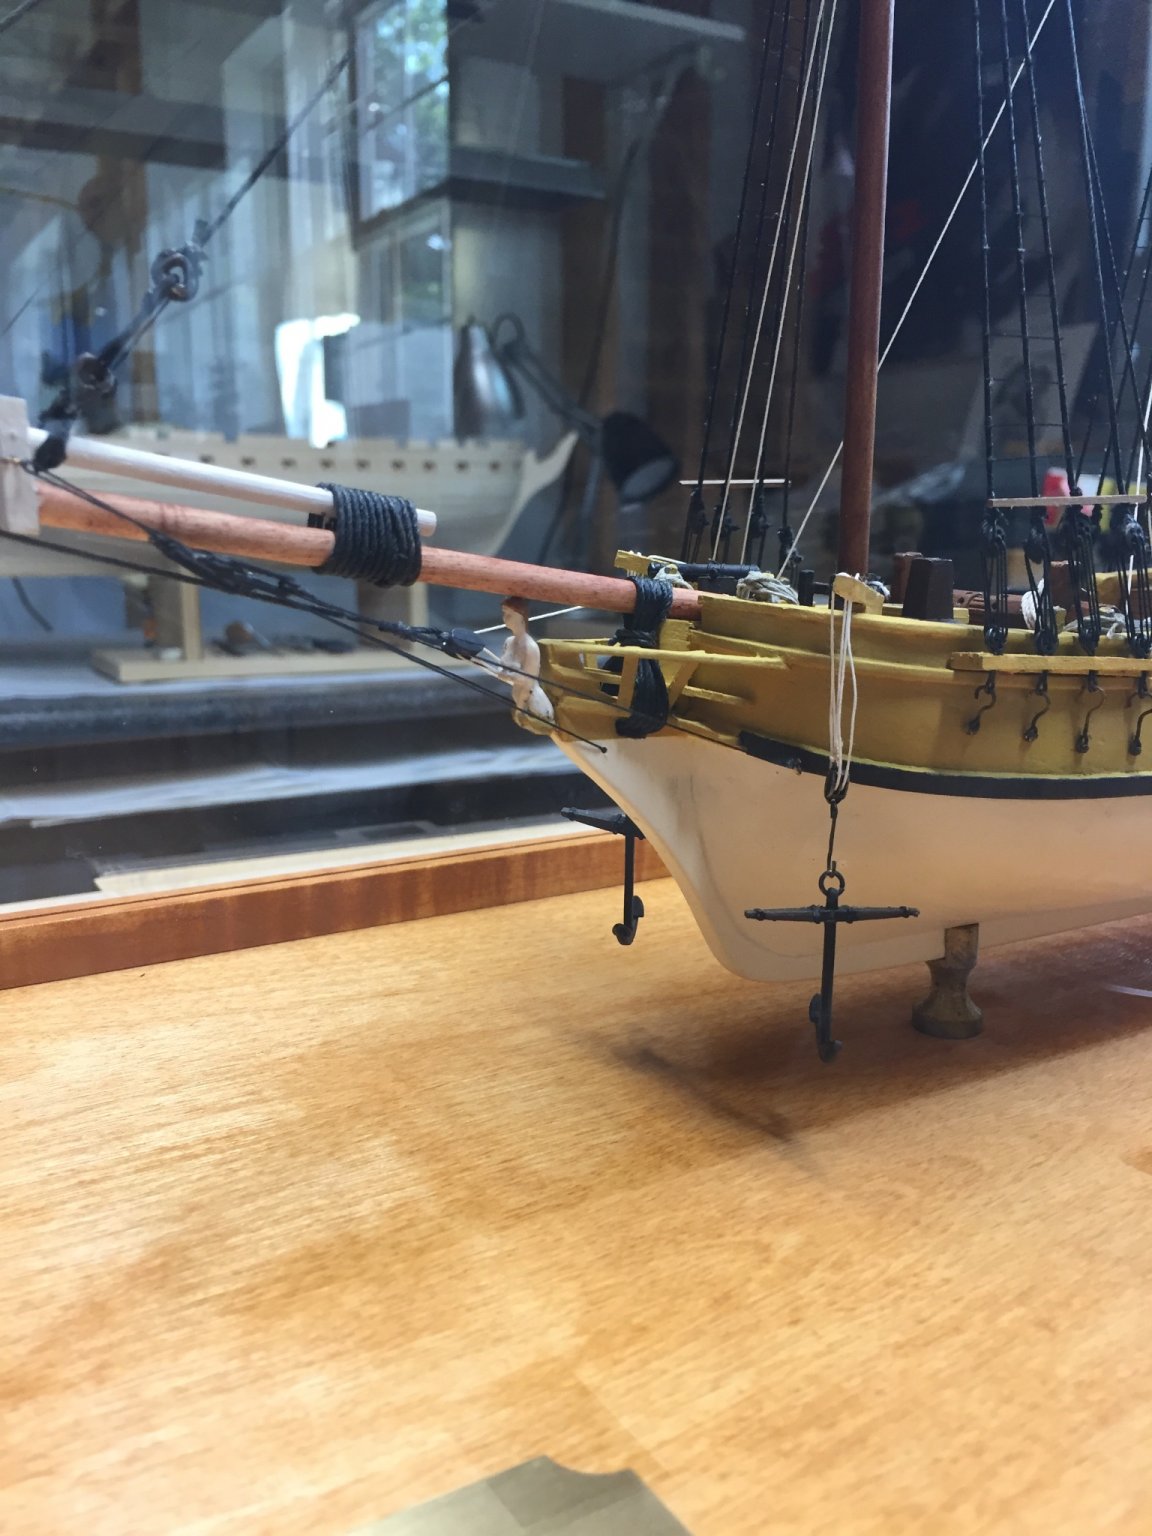
Sidetracked on the Constitution project to repair a commissioned work, Sultana, delivered 2 years ago.
She had to return to the yard for an availability due to Metal Fitting Corrosion. Removed rigging and masts. Cleaned, primed, and repainted fittings. Stained the deck, painted the mast and spars, and redid all the rigging.
She looks better than ever.