HOLIDAY DONATION DRIVE - SUPPORT MSW - DO YOUR PART TO KEEP THIS GREAT FORUM GOING! (Only 36 donations so far out of 49,000 members - C'mon guys!)
×


rfolsom
-
Posts
881 -
Joined
-
Last visited
Content Type
Profiles
Forums
Gallery
Events
Everything posted by rfolsom
-
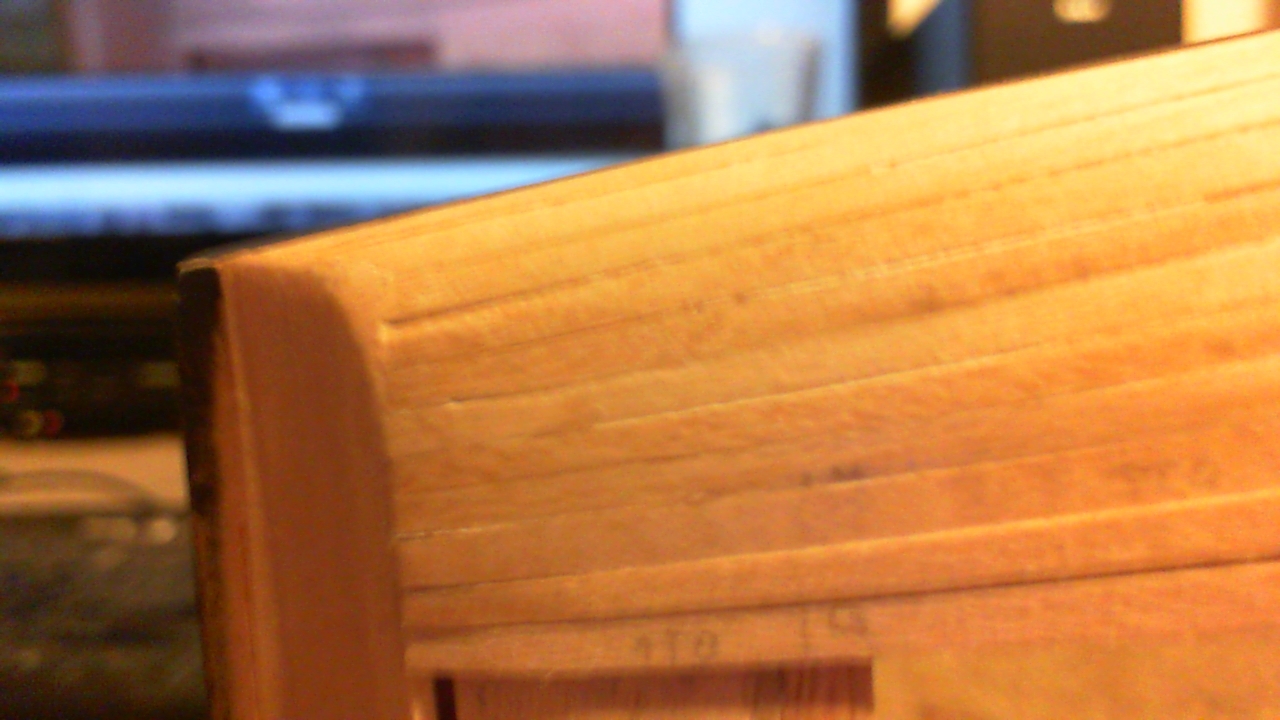
 The planks do taper, and yes, to build an accurate model, you'll have to taper them. Or just throw wood on, sand the living daylights out of it, throw on some automotive bondo, sand again, and paint a nice glossy mirror fiinsh on it! (Ready for the Battle of Lake Erie! ) The planks in the bulwark area are slightly thinner, if I recall.. Photos show the tapering (hopefully)
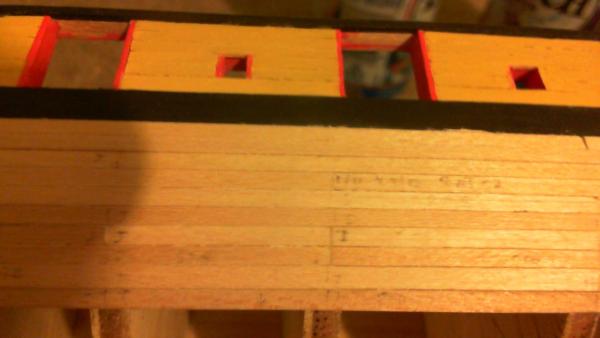


-
Oh yes;.. just been caught up with my Cutty Sark build lately...
-
Nenad; Thank you for the kind words, my friend. You see the good picture; I'll be posting the frustrating pictures later....
-
Nenad, if I sand this down as it is, the inner panels would lose their proper dimensions (i.e. the ovals would appear way to close to the top of the rail) Imagine my post #486 with two millimeters shaved off the top...
-
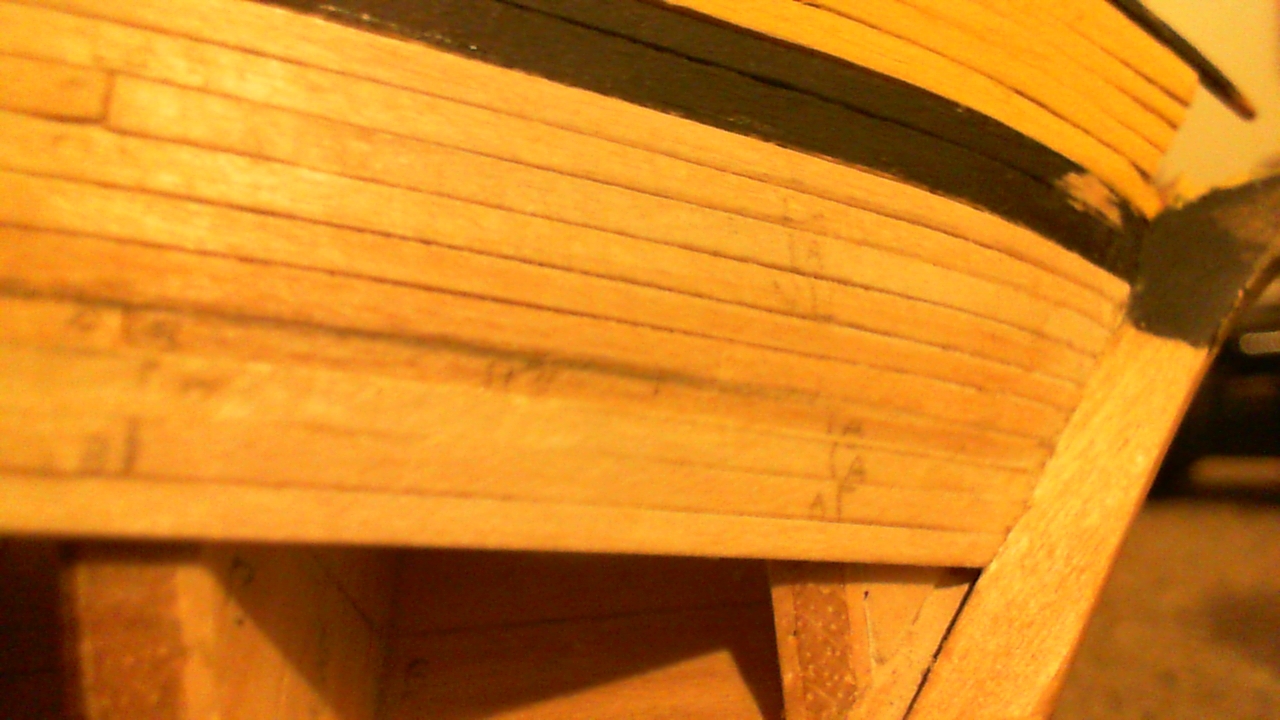
During test fitting, I noticed my bulwarks were going to be a little short when the strips were installed; I'll be adding a 1/32" shim all along the edges to compensate, then sand everything even in preparation for the topgallent rail. (View is from the outside, showing the strip overhang) "...reckless is he, now matters are worse"
-
"No, That's not true.. That's impossible!!" "Come with me, it's the only way..." -Luke finds out about Dad... Now that 8 months of the dark side is shed, the starboard side is finished... (No close ups yet, gotta take a deep breath)
-
8 months of dealing with these things? 5 mm x 130 cm? I think that speaks patience! (Darth Vader may lose his head in the process...)
-
It's good that Nenad gets us to think! Well, now it is finally panel mounting day for Bob. After 8 months of fiddling and ignoring these things, off and on, they are going on the ship, regardless of what they look like. I must say, with the many dissatisfactions of the build that I can live with, this one is the worst so far. Without mechanical help, however, I could never make these accurately, even if I practiced for 100 years. Some are better than others, and I plan on targeting the worst 5 or so and cutting them out for remaking, but then I will be done with it. Pictures will follow, and yes, some will be macro, just to show you why this is driving me crazy... But like I said previously, at least the build (hopefully) will be enjoyed, mistakes, blemishes, imperfections, and all; and not sit in a box to rot in an attic, forever incomplete... "Don't give up the Ship!!"
-
Quick note: those notches on the rear (poop) deck are not necessary; the bulkheads need to be trimmed there as well. (If you haven't already done so).. Decking looks great! ~Bob
-
No, Nenad; not the hencoops; I've done the pigpen and paint locker. According to Campell's plans, the dimensions of the top of the coops would be 7' 4" x 29", which at 1:90 scale would be 24.75 mm x 8.18 mm. Top of the coop is 34.75" off of deck, or 9.80 mm at 1:90.
- 74 replies
-
- 1
-

-
- del prado
- cutty sark
- (and 1 more)
-
Four pieces, Kevin; with cross-grained structure, it never would hold up otherwise.. Thanks for looking in; ~Bob
-
Also, there is a grey area between "kit-bashed" and scratch-built" My Cutty Sark started as "kit-bashed". It is now 95% scratch-built.. But my Niagara is (so far) straight out of the box...
- 287 replies
-
- 1
-
-
- niagara
- Model Shipways
- (and 1 more)
-
Hello, Brian; Battens are temporary planks that sit on the bulkheads to provide natural curvature reference lines when planking the hull. They are usually removed during actual planking. A strake is one continuous run of planks, from stem to stern. (A "row" of planks). The waterline of a ship is where the water comes up to on the hull, in ideal engineering conditions, on a perfectly calm sea, with an even keel, and a normal and perfectly balanced ballast, cargo load, and crew accompaniment. (with some allowance of cargo variance, ship's designers will set this) Hope this helps... ~Bob
-
Thanks, Keith. I know that when Nenad clicks the "Post" button, many times he has an evil grin and chuckle... Right, Nenad? (Pictures of fluffy persian kitties can't hide you now...)
-
Nenad; looks like you have a good technique with the hemostat; I am just roughing out all my pieces and parts right now., soon, (I hope), all this railing stuff will come together, and I can start giving the final finishing touches to everything; (and hoping for the best).. ~Bob
-
As for the riveting details on the outside, I will be working on this area, including all the freeing port doors, after the bulwark railings are complete.
-
Consulting Campell's plans; the bulwarks in this area are still made of iron, with plain varnished teak panels on the inside. Giving thought to where this extra thickness would "reconcile" , I could not see a point on the exterior; but consulting Lou's photos, the interface between the inside teak panels and the sternmost vertical uprights on the oval panels would account for the thickness.
-
Wow. Actually Nenad, as you were posting this, I was looking at the same area (only on the INSIDE of the bulwarks) and it shows the same three plank scheme. I decided to do the inside planks to thicken the bulwarks.. Not sure if I can do both inside and outside; Maybe more walnut veneer... Hmmm.
-
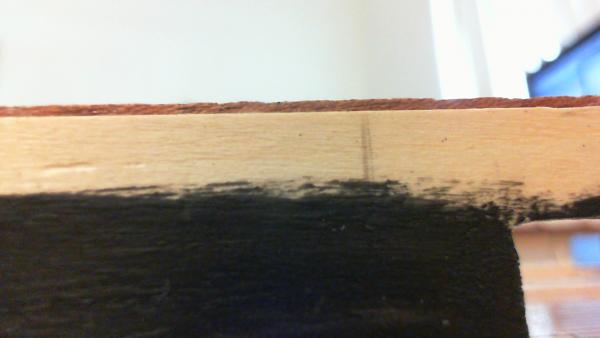
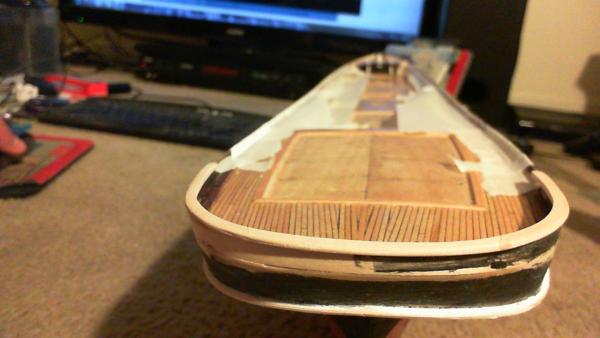
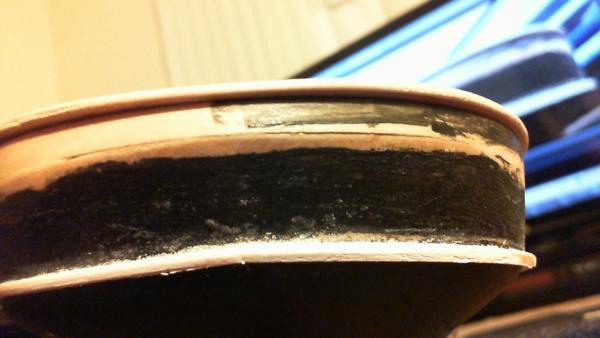
Test fit of rail pretty much ok. Still needs sanding to make the even 1/8" all around. Masking tape is protecting main rail and deck from the white background paint for the ovals, waiting for strip installation....
-
Rail survived the cutting process... and snapped during the sanding process... hopefully the cyano glue joint will hold during the rest of the sanding; just need to get the rail a uniform 1/8" all around, and sand round the inside edges.. The party continues...
-
Cutty Sark by NenadM
rfolsom replied to NenadM's topic in - Build logs for subjects built 1851 - 1900
Hmm, Yes, I didn't expect to see a post from you yet, as your time is 8 hours ahead of mine, and figured you were still sleeping.... Makes sense now... Good Morning, BTW.. (Nenad says: "Good Morning, my %$*&, Bob!")- 4,152 replies
-
- 1
-
-
- cutty sark
- tehnodidakta
- (and 1 more)
-
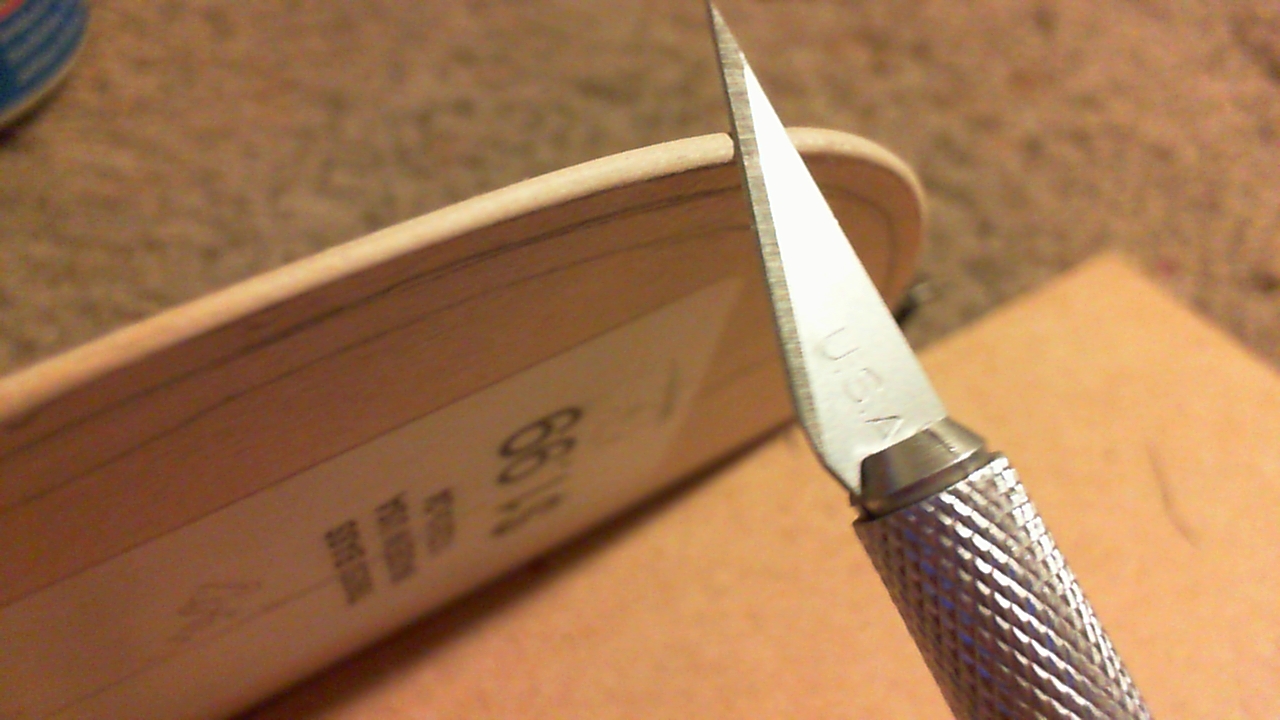
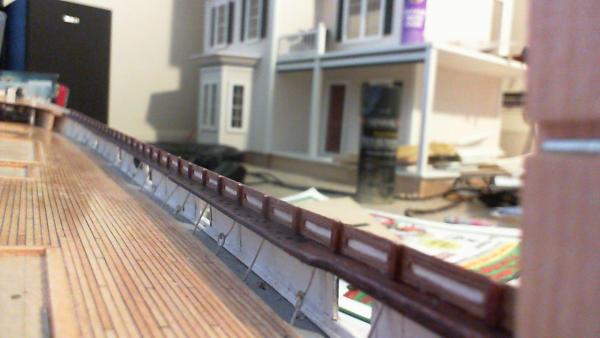
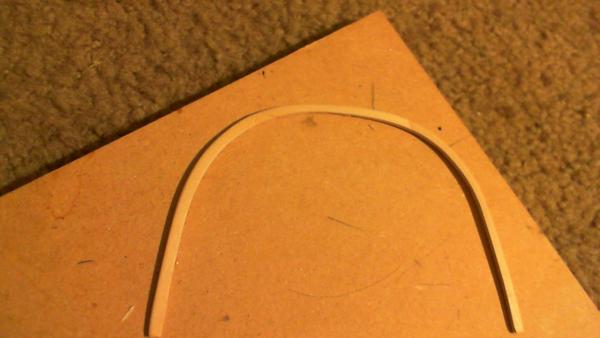
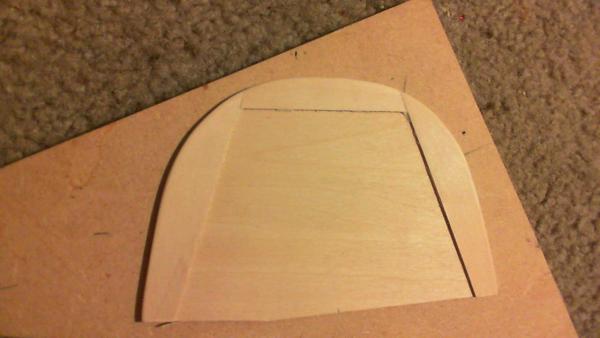
Outside curve of the stern topgallent rail has been cut and sanded to shape. I am very satisfied how it follows the curve of the hull. Now I just have to get the courage up to cut out the inside curve, and hope my structure is strong enough to survive the cutting process... Out comes a new #11 blade...

-
Nenad has excellent advice; I did my first tests on this in November; I'm now planning on installing my strips sometime this week... I have made some progress on other areas in the meantime, but the fact that I cannot get these ovals all equal has haunted me for the last eight months. Time for me to just live with the inaccuracies; (most of which will be hidden by other details anyhow) Great job so far! ~Bob
- 151 replies
-
- 1
-
-
- cutty sark
- billing boats
- (and 1 more)
-
These tangents, by the way, (catheads, rails) will all have to be (in my build at least) simultaneously assembled with the oval augmentation strips, all capped off with the continuous topgallent rail, assemblies painted or stained, then masked off and coated with protective finish... I can then proceed in any direction I like, (deckhouses, freeing port covers, scrollwork (how the h#@# am I going to do that??). Nenad; I see you are also pondering scrollwork; maybe I'll sit back and see what you come up with... ~Bob
-
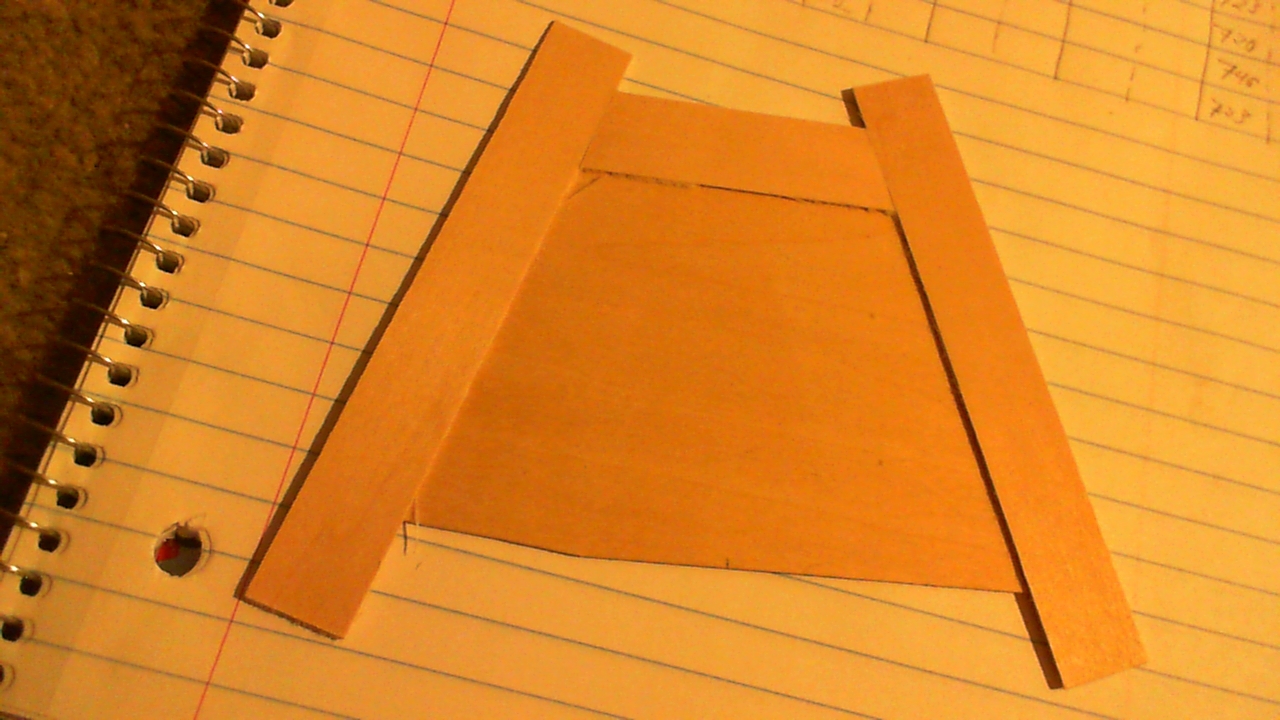
...and laminated to the three pieces that will be the top of the rail; grain flows lengthwise; time to cut it out and see if it will fit...