HOLIDAY DONATION DRIVE - SUPPORT MSW - DO YOUR PART TO KEEP THIS GREAT FORUM GOING! (Only 36 donations so far out of 49,000 members - C'mon guys!)
×


rfolsom
-
Posts
881 -
Joined
-
Last visited
Content Type
Profiles
Forums
Gallery
Events
Everything posted by rfolsom
-
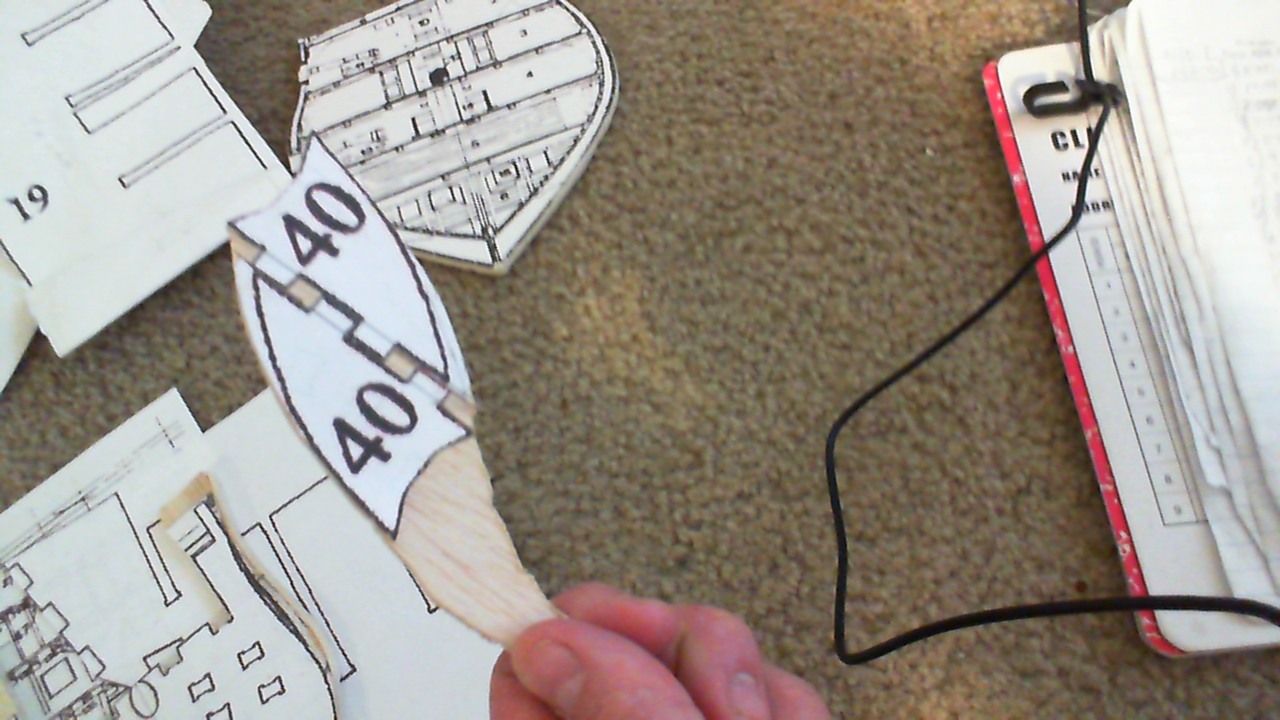
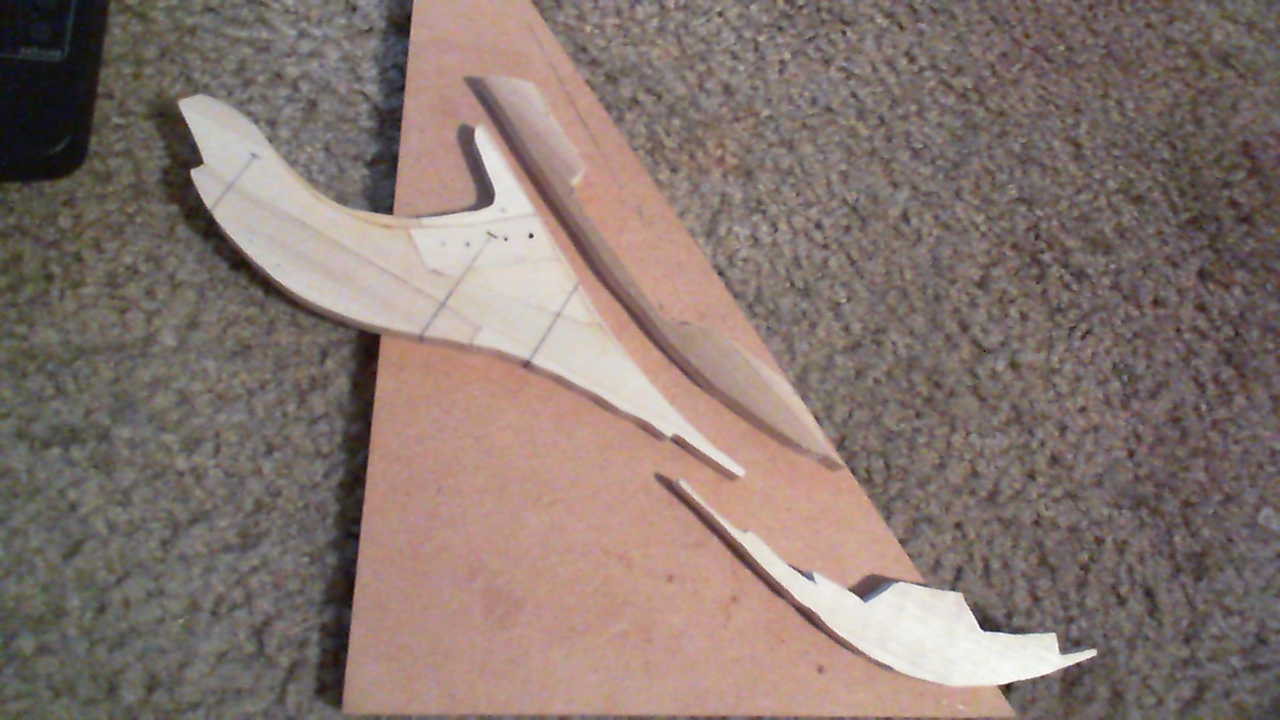
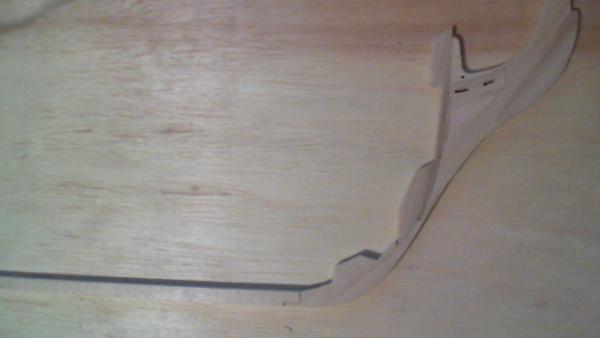
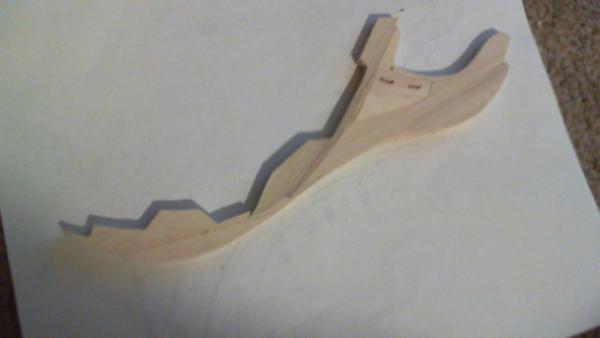
 My piece #40 "paddle" made of a scrap piece of plywood; Their curvature has to change to match the AOS.
-
Forgot the photo...
-
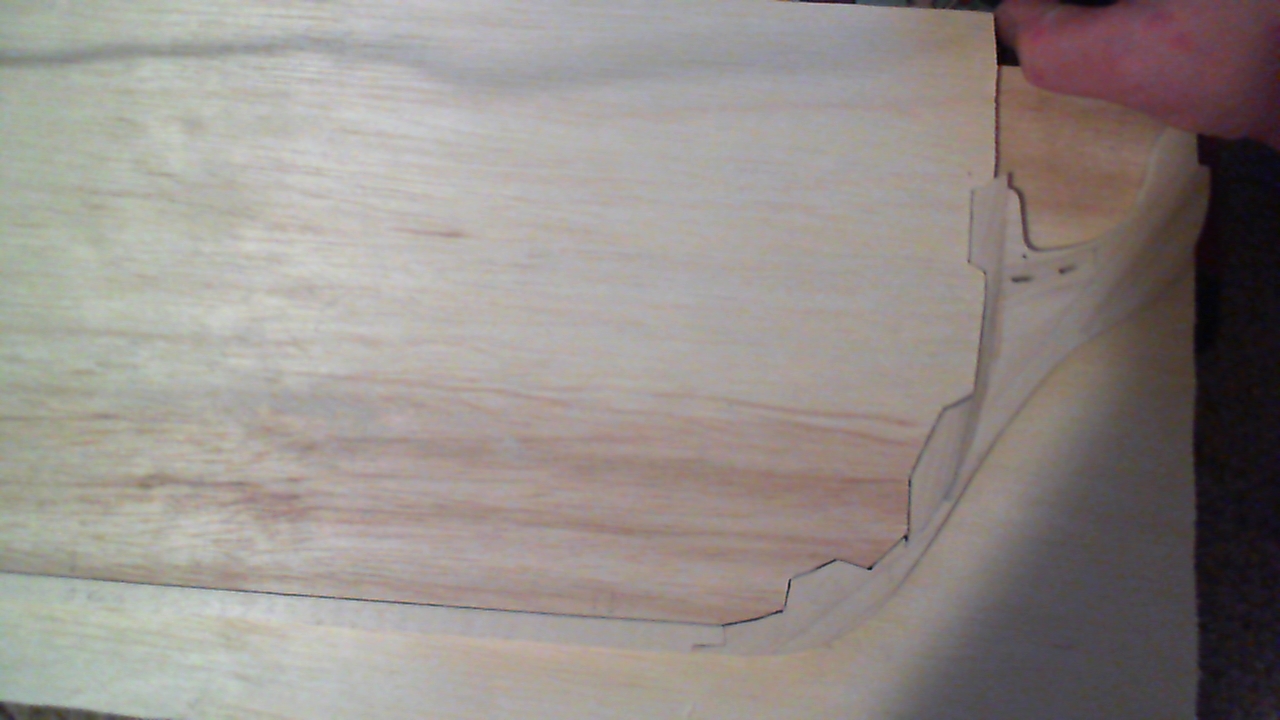
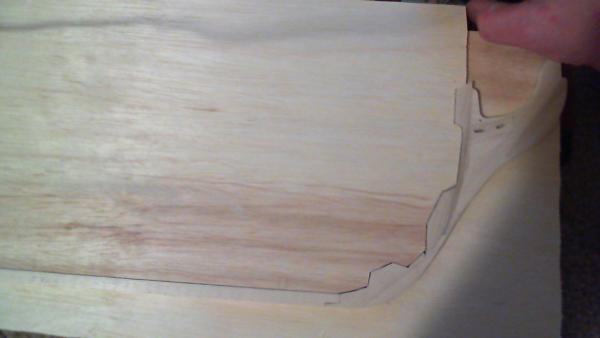
This process is very time consuming and tedious; The Caldercraft plans line up very good in most cases, but not the bulkhead outlines. (AOS). I won't be making bow filler blocks per se; but will "borrow" the Caldercraft method... Again, the Caldercraft bulkhead is too narrow, so these bow filler pieces will have to be re-designed. This photo is a hodge-podge of parts and plans- Caldercraft guys will recognize the part outlines, and see that parts 40 will need to be extended to match AOS.
-
Cutty Sark by NenadM
rfolsom replied to NenadM's topic in - Build logs for subjects built 1851 - 1900
Wow, Nenad; Zx spectrum. It is very similar to the Timex Sinclair. When I was 13 I was visiting my older sister in Denver (I now live in a suburb) and was looking for that computer. Every place was sold out, but did find a Commodore VIC-20 on sale for $85. That summer I spent approx. 13 hours a day programming in Basic....- 4,152 replies
-
- 1
-

-
- cutty sark
- tehnodidakta
- (and 1 more)
-
The fore plywood false keel is being marked for mast, bowsprit, deck, and bulkhead locations following AOTS, with the finished poplar keel piece and stem in place for reference.
-
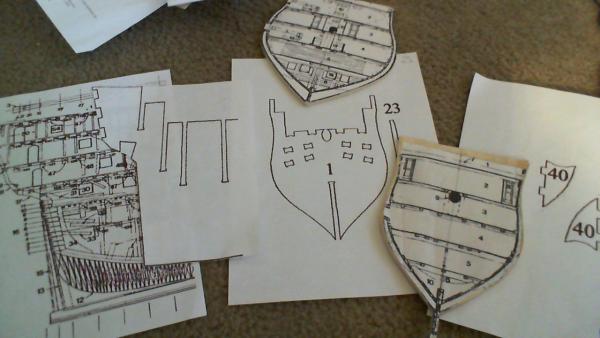
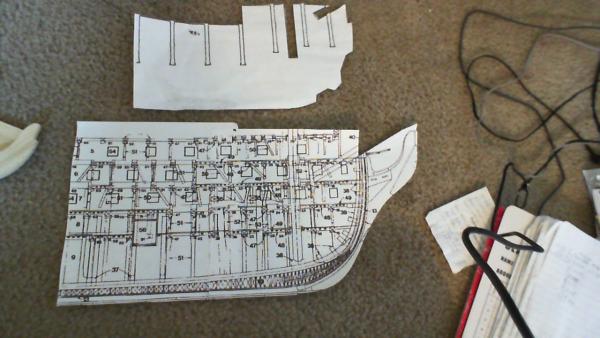
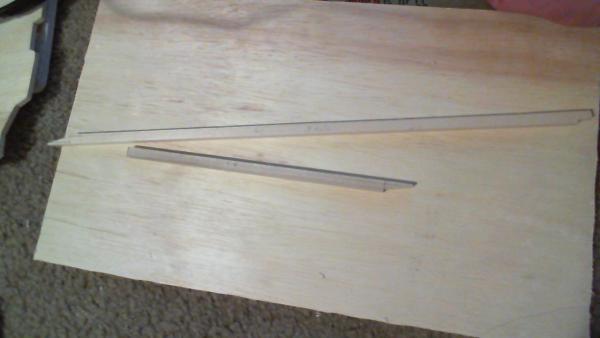
Many more Victory logs than the Cutty Sark... but I'll get them read! This is a photo of the templates I am using to fabricate the false keel. Caldercraft scaled down to 1:78, and AOTS scaled up to 1:78.
-
And yes, I do work on my carpet; In college when studying I would sit on my floor surrounded by a 2 meter circumference of books and notes; 25 years later I do the same thing when the workbench is full... Not sure if the Admiral likes this, but that's what I do... ~Bob
-
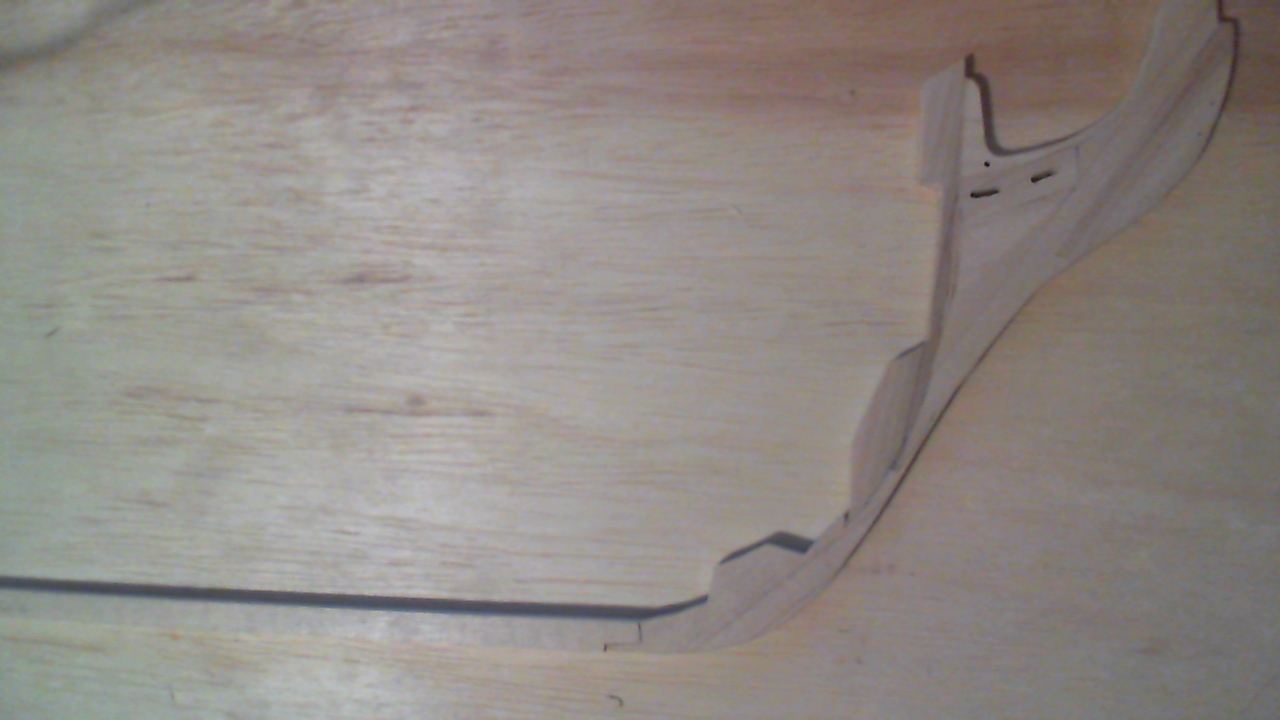
First two bulkheads on "blanks" normally I would conserve as much wood as possible; but I am more concerned with cutting these out (nonexistent scroll-saw talent.)

-
Bulkhead "&" is on it's plywood, and bulkhead "x" has been cleared for symmetry. This may seem like a goofy process, but this is how this build of mine will progress for the moment...
-
Cutty Sark by NenadM
rfolsom replied to NenadM's topic in - Build logs for subjects built 1851 - 1900
She's waiting patiently, as am I and the rest of the CS Fleet... Priorities first!! This is just a hobby; (or is it .... ..)- 4,152 replies
-
- 2
-
-
- cutty sark
- tehnodidakta
- (and 1 more)
-
Yes Nenad, I admit I am powerless when it comes to ships... first thing Admiral said: "Where are you going to put it??" When the new arrival came. However.. I had bought a scroll saw (cheap model, around $100) just to cut out two 2 x3 cm blocks for the Niagara. It sat idle after that. So now I am using it every day to cut pieces for the Victory, and getting a little better each time. (I still am quite bad; I need some more sandpaper.. ) Learning new skills will give all of our projects that much better attention to the detail. Still need to buy and learn how to use an airbrush. I'm still not sure how I can make the scrollwork; (I'm waiting for your solution) but initially I thought photo-etched brass. This would have the fine detail, but only two dimensional. I think that's what I'll opt for, finally. But then I'll have to learn how to do the etching. I worked for a circuit board manufacturing company 10 years ago, and I would have been able to do all the photolithograpy and other prep at work, I would have just needed slightly different chemistry to etch brass instead of copper....
-
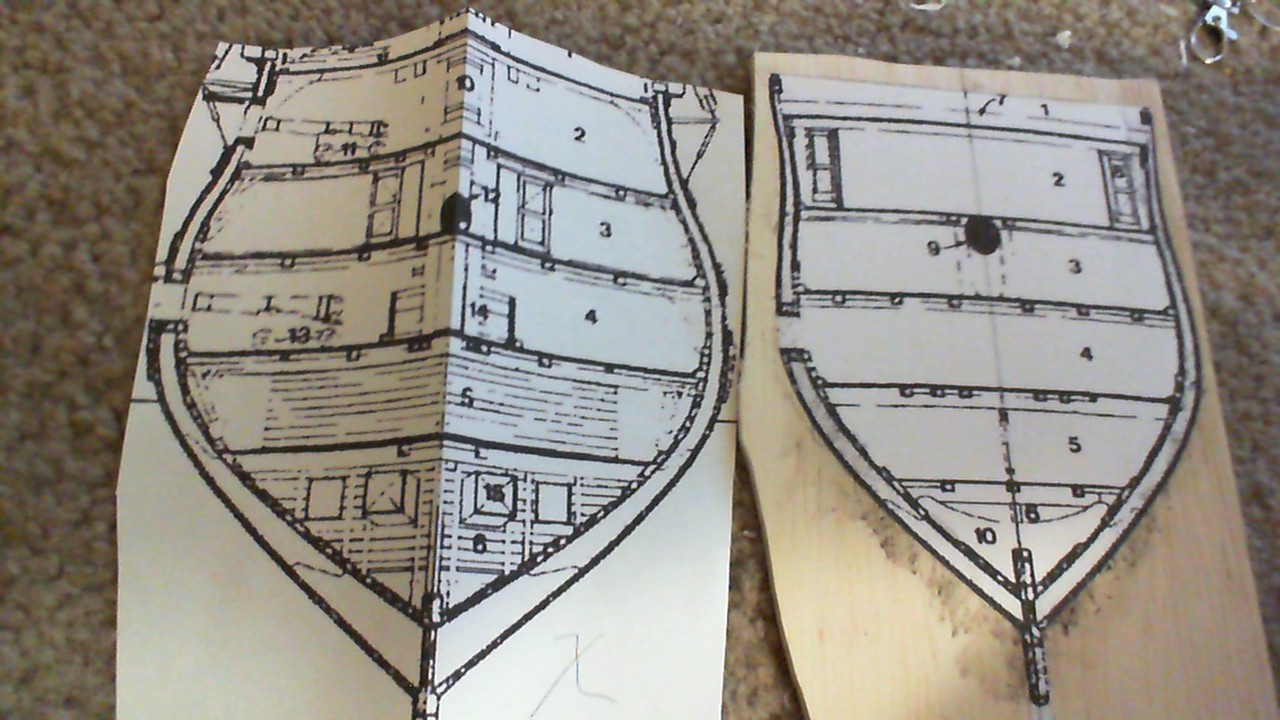
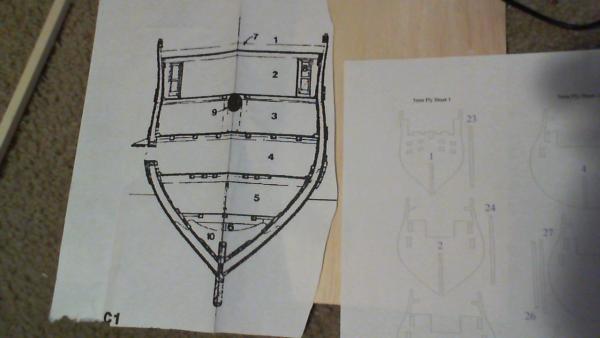
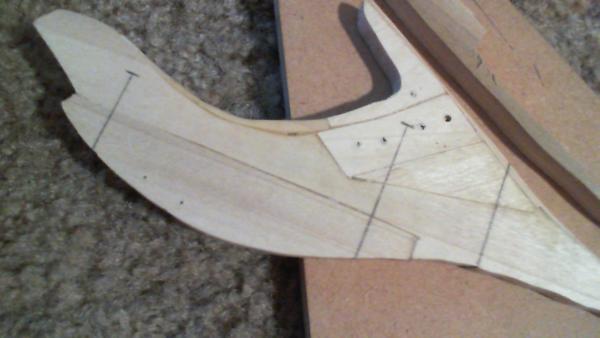
I am also preparing to cut out my first bulkhead. (bulkhead 1 from Caldercraft's parts list, or section "&" from McKay. I will use McKay's dimensions, of course, scaled up from 1:192 to 1:78, but will use the Ccraft general arrangement. Notice the fold on the left hand (McKay) plan; It was used to check symmetrical accuracy... and was spot on. The unenlarged plan to the right (upper left, labeled 1) is Caldercraft's representation of this bulkhead. I'll use it as a general reference as to where to put beams, decks, etc. Final accuracy of placement will be determined by McKay, of course. This will be done for each bulkhead, simultaneously with the keel.
-
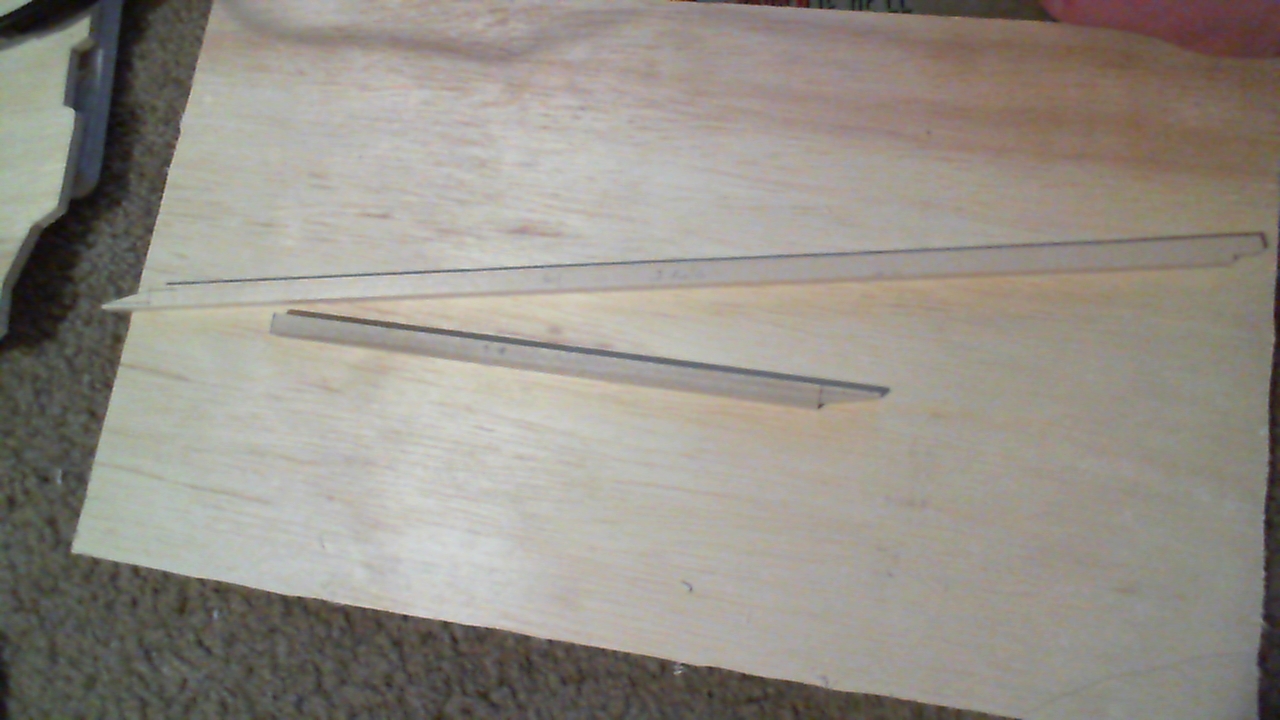
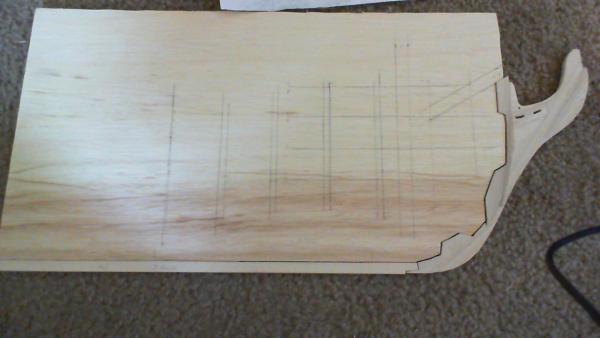
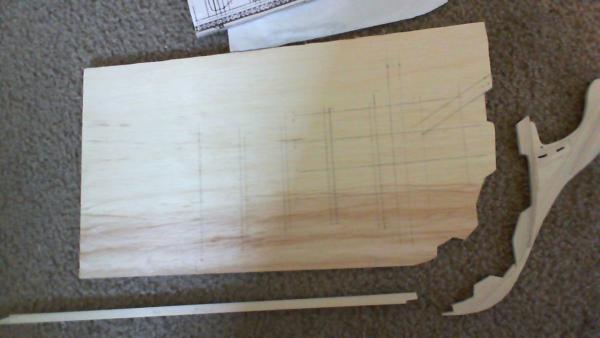
I cut the two pieces that make up the keel proper from poplar; (same stock the stem pieces were cut from) They will be united with a scarph joint: since the keel will be copper plated, I randomly chose the placement of the joint due to my scroll saw's 16" bed. I also cut the mating outline of the stem from 1/4" plywood that will make up the fore false keel piece. I initially cut this out using Caldercraft as a template, but it was so far out of line, the piece was sent to the scrap wood bin. I've found that these parts need to be made simultaneously, and progressively, to ensure accuracy of fit. When these perimeter parts all line up accurately with the plywood false keel parts, I will use McKay's plans to line everything up and cut out the mast and bulkhead slots. Background is a piece of the plywood that the false keel and bulkheads will be cut from (poor choice of background on my part..)
-
Thanks, Keith; I've had the Victory stewing about in the planning stages for several months now, always planning on doing a complete scratch build for this one, as most high end kits are beyond my price range; I am enjoying following your excellent Vic build, btw... Nenad; as I will be completely planking, painting, and coppering this ship, I will not be doing a complete POF. (nor will I allow you to persuade me... ). I have plywood purchased for cutting out the false keel and bulkheads, and will use The Anatomy of the Ship as my plans for cutting bulkheads, and refining Caldercraft outlines to better match the parts. I will also be using dummy cannon barrels for the lower gun decks as well. After these three builds are completed, (plus the USS Constitution which is on my list) I might tackle a true plank on frame scratch build, at a large scale; 1:24 perhaps.... I'll be 65 in twenty years; which is about how long it will probably take me to finish all current and planned builds.... But I won't neglect the Cutty!
-
Definitely, the laser cut planksheer needs alot of tweaking to meet the bulkheads, and the bulwarks behind. Measure, measure, measure, and then measure. If you think the plans look funky, measure. Don't trust the plans, but distrust yourself first. And measure. Compare from all possible angles, and with inspiration, use the inspired angles. And measure. I always measure in metric and english, (twice) and do the conversions on a calculator. Then I compare the measurements with one another, doing the unit conversions both ways. What do you think I do at the end?.. measure... The tolerances I can perceive with my naked eye are about 1/4 of a mm. That is my tolerance for inaccuracies no matter what scale I'm working in.
-
Ok. I'm still working on the Cutty; but had a good deal from Dale, one of our MSW friends, who offered an uncompleted build of the HMS Victory by Mantua/Sergal from the 1970's, for the price of shipping. This is one of the "Big three" that I plan on completing in my lifetime (Cutty, Connie, and the Victory) The Niagara is on my list because she's such a proud and intriguing ship, with wonderful lines, and a great (short) history. So, four concurrent builds now...
-
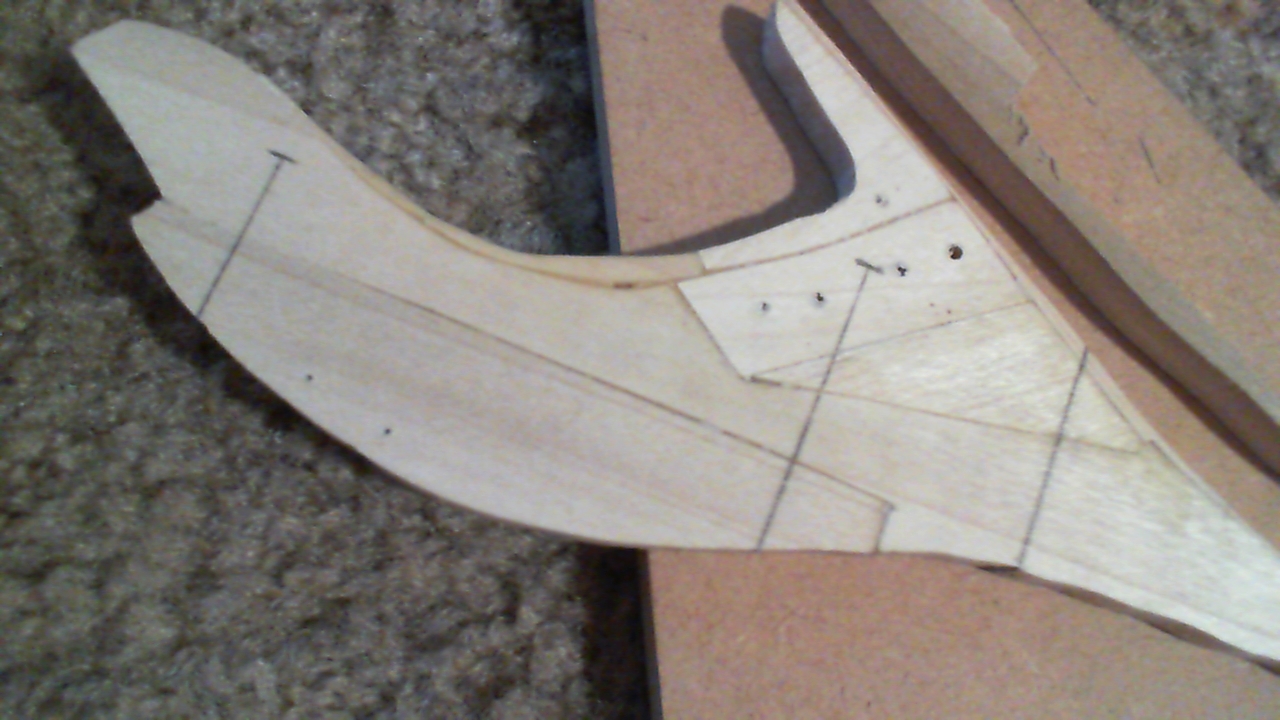
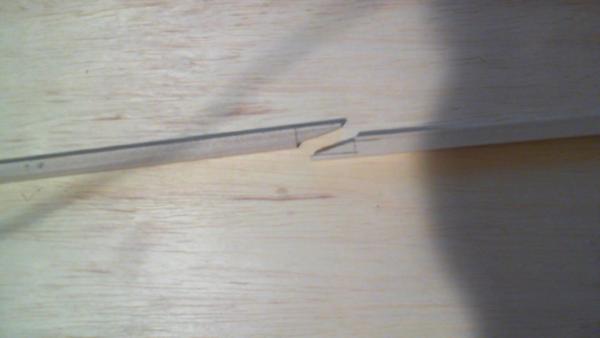
The little "puzzle pieces" on the inside of the stem are to match with the Caldercraft keel's "puzzle pieces" . I am using the parts layout from Caldercraft, posted on their website, combined with the AOTS plans, to develop my own scratch-built bulkheads, keel, and framing. As these are highly modified from Caldercraft's freely posted plans, I wouldn't think there would be an issue of copyright infringement. Anybody smarter than me in legal issues, please let me know if I'm doing a no-no!
-
Cutty Sark by NenadM
rfolsom replied to NenadM's topic in - Build logs for subjects built 1851 - 1900
Hello, Spencer; Good to see you again. Our good friend Nenad is probably just getting out of bed at this time to go to work. Is that right, Mr. Nenad? -
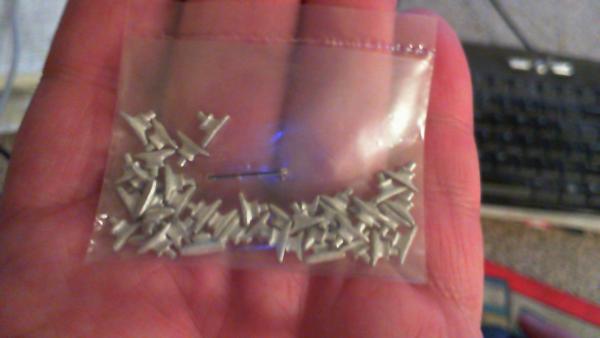
Hmm.. had to dig into my Niagara box to make sure I had the cleats. (Box was under some Victory parts and plans.... where did they come from? ) But I do have a bag of cleats... As I posted earlier in your log, (post 78) my belaying pins were the wrong size, but the part #'s matched the list, and Model Expo fixed the problem; no questions asked.. My kit is only about two years old btw, and packaged in the blue boxes that Model Expo uses in their recent kits. Mast tops look great! ~Bob
-
Cutty Sark by NenadM
rfolsom replied to NenadM's topic in - Build logs for subjects built 1851 - 1900
Sounds like a good deal, Nenad! -
Stem is finished.

-
Cutty Sark by NenadM
rfolsom replied to NenadM's topic in - Build logs for subjects built 1851 - 1900
Hope my comment didn't offend anyone, I meant it to be taken with a grain of salt.. Of course smart phones are very useful; my "dumb" phone just serves my needs; talk, text, music, pictures (not great quality, but still better than my first digital camera). Road navigation definitely would be nice; I'm just wary about all the contracts providers can rope you into, not to mention the price of replacing a lost, stolen, or broken phone... -
Cutty Sark by NenadM
rfolsom replied to NenadM's topic in - Build logs for subjects built 1851 - 1900
I spend $5 for a phone; (yes, five dollars) and $25 for 1000 minutes; people who pay more need their heads' checked... -
My scroll saw talents are horrible (only used the the thing a few times yet), but I managed to cut out all pieces for the stem, and get most glued together, with a little sanding, filling, shimming.... The stem deadwoods will be doweled together for extra strenght, using 1/16" bamboo doweling (asian toothpicks).

-
Looks great Dale; I can't wait until I'm at this point... Might be awhile due to my other "distractions".... ~Bob