HOLIDAY DONATION DRIVE - SUPPORT MSW - DO YOUR PART TO KEEP THIS GREAT FORUM GOING! (Only 36 donations so far out of 49,000 members - C'mon guys!)
×


rfolsom
-
Posts
881 -
Joined
-
Last visited
Content Type
Profiles
Forums
Gallery
Events
Everything posted by rfolsom
-
 I found that with all the clutter on my workbench, I lost these 3.5 mm deadeyes easier (bouncing into wood piles and tool piles, bouncing off the table and onto the floor or under the hull of the build) then just sitting cross legged on the floor and working in my lap. Worst case, I had to stand up and look down.... I haven't spent more than 30 seconds finding one when working on the floor, sitting in front of the T.V. with some video or documentary playing! Bob
 -
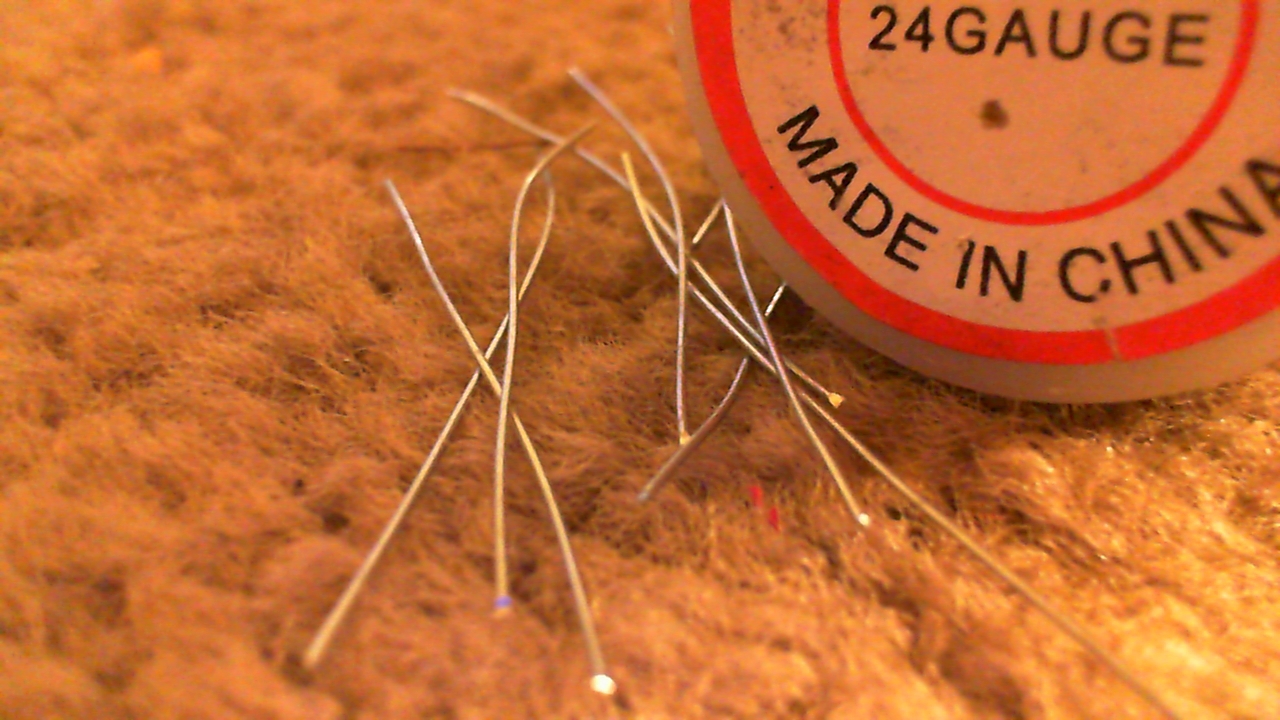
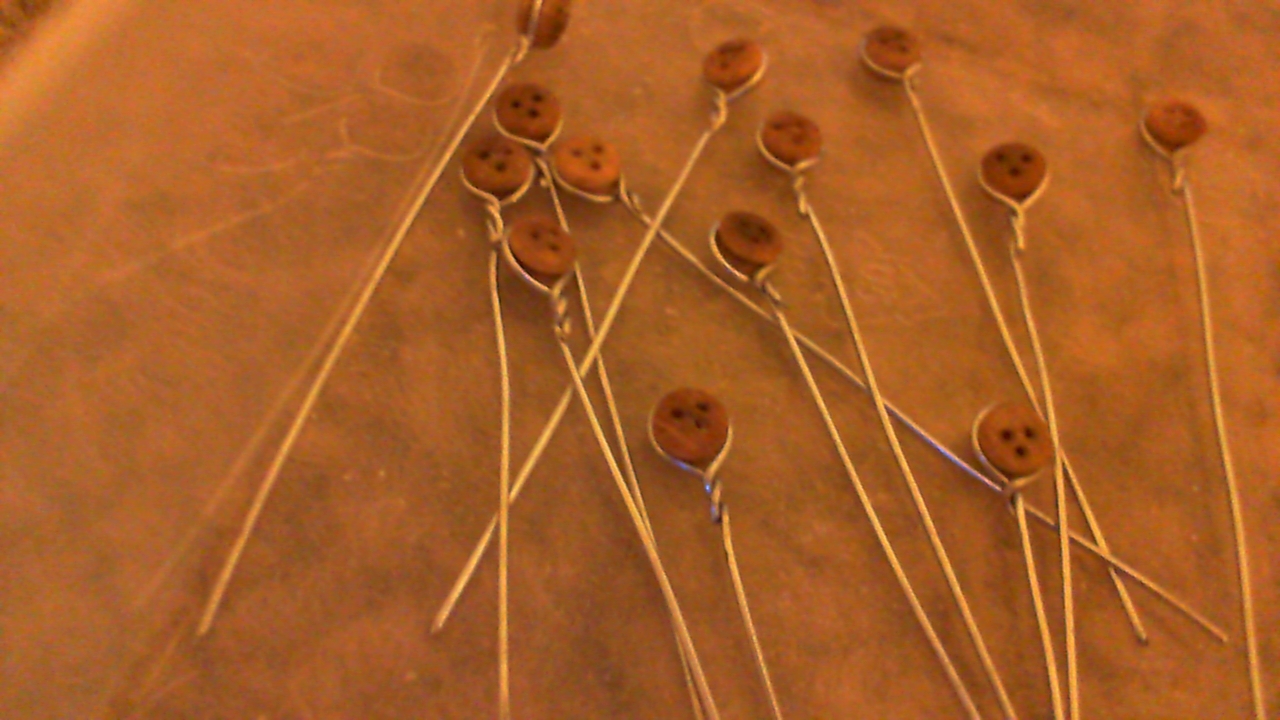
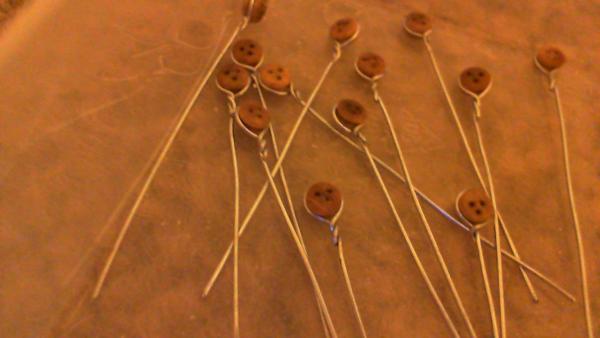
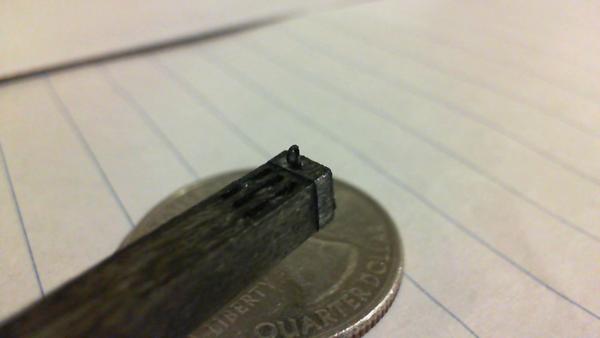
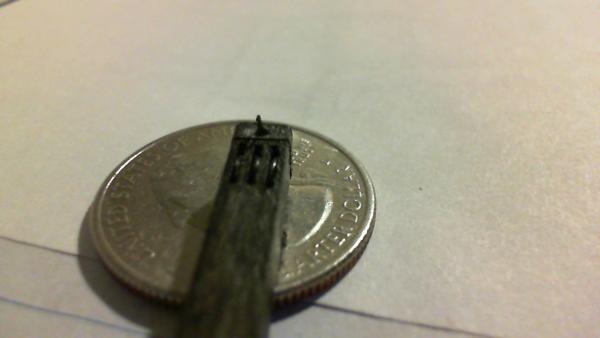
Getting tired; but still want to make progress... Decided to start on the deadeyes. Semi-mass produced, I just cut off a 4 to 5 cm length of 24 gauge wire and started in on the larger ones... Need at least 50 for this size, 25 for the smaller size... This is for the bottom of the stays.. All will need the white metal bands (and painted, at a later time...) And yes, I am doing this part on my carpet!!


-
I'm happy to see someone else paint the pig pens black; to me, it just made sense... I beleive the piece on the left is the skylight panel, however; my billings kit didn't address the pigpen or paint locker details; (unless the pieces weren't present when I bought the 40 year old kit)..
-
Cutty Sark by NenadM
rfolsom replied to NenadM's topic in - Build logs for subjects built 1851 - 1900
Very interesting testing, done, my friend; I would never had thought to approach this step with this technique; I'll be watching, I won't be attemping this until all my freeing port hatches are finished... Hopefully you'll have it all figured out by then, and I can follow...- 4,152 replies
-
- 1
-

-
- cutty sark
- tehnodidakta
- (and 1 more)
-
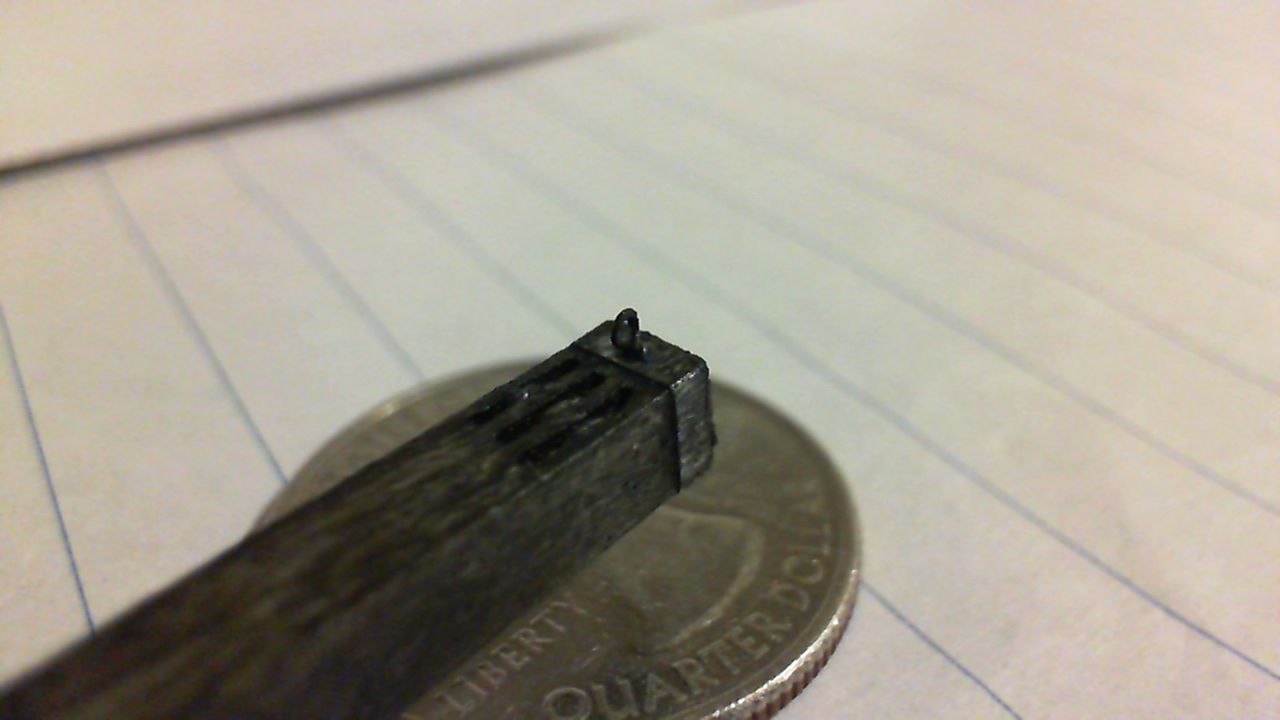
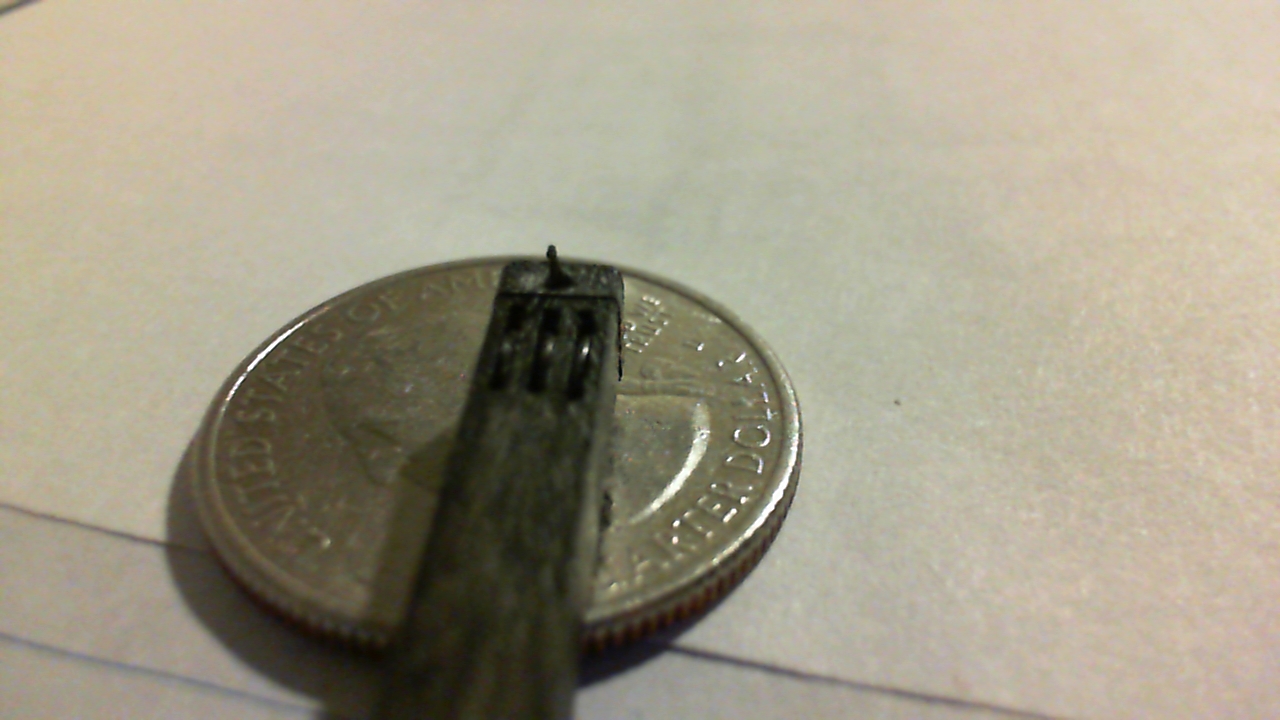
Bouncing around again; I'm back to the cathead testing. I found out sheaves could be done pretty easily by forming a ring of #24 steel wire, and inserting into the slots. I also put the first coat of black paint on. I'm not sure if the exact dimensions of everything is correct, so I haven't put anymore details on at the moment. This is a test assembly, and although I'd like to use it on the actual ship, I'm not above remaking it when everything is finalized. Oh, and what looks better, white inner ends (of the catheads) (per current restoration) or all black?? Was one scheme original? Cheers! ~Bob
-
Looks like a great sturdy way to affix those deadeyes; I'll probably just use CA.
-
Cutty Sark by NenadM
rfolsom replied to NenadM's topic in - Build logs for subjects built 1851 - 1900
Beautiful work, my Friend! No shout needed; We'll shout for you in Colorado! Absolutely wonderful....- 4,152 replies
-
- 1
-
-
- cutty sark
- tehnodidakta
- (and 1 more)
-
Thank you, Lou; I think we all are waiting on the progress of your fine model...
-
When I first assembled the keel, and test fitted the bulkheads, they were spot on with Campbells plans. Billings is not a shipshod company; but they don't seem to carry through to the end. I'll be curious to see your fitting kit (I don't have one). I know the blocks and deadeyes are plastic. (No bueno para me) but the brass winches, pumps, and capstan are invaluable, and I'll either have to fabricate these (yeah, right) or purchase them.
-
Cutty Sark by NenadM
rfolsom replied to NenadM's topic in - Build logs for subjects built 1851 - 1900
Or have you already been admitted to the institution? I'll bring a cup of jello.... -
Cutty Sark by NenadM
rfolsom replied to NenadM's topic in - Build logs for subjects built 1851 - 1900
I'm eagerly awaiting your artistry skills with the brushes; When can we hear the Tarzan yell of your finished plating? -
Yes, David; the pain and fun go hand in hand through all the parts of these ships. I have "test" belaying pins that are too small for the pinrails, but would work great for wheel handles...(a start, but where from there?) That's why I'm on this forum..
-
Very nice work. Remember, there's only two of us doing the Billings Cutty!!
-
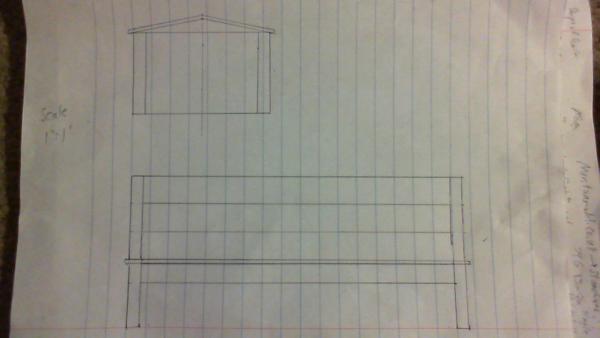
I've already decided on the wood to be used, and their dimensions. Just need to finalize the size of the structure. (Campbell says 6' by 2.5'; drawings that Nenad supplied, from Lou (?) say 36" by 81.25") Which is the more accurate? (and I think to correct the Admiral's grammar )
-
Where is Lou, by the way? Seems he pops in every once in a while, but teases us with work that the mortals can only dream of... Are you out there, Lou? Time to post!! ~Bob
-
Resizing is never an issue with me. I just have a problem when two frames of reference don't agree. (Especially if the two reference frames can be trusted; i.e. Campbell and Lou.) But as I've shown with the catheads, and Campbell's plans, his (Mr. C.) drawings don't agree on the same sheet! So, I have the schematics you gave me (75%) the schematics I derived from Lou's actual photos (20%) and the tiny bit shown by Campbell (5%). The wheelhouse does not disturb me nearly as much as the ship's wheel itself... most all I've seen are grossly out of proportion...and has anyone attempted to scratch build a ships wheel?? Cheers to all the insane modelers! ~Bob
-
Bingo! Nenad, that's what I was looking for! Unfortunately, these measurements don't fit well with Campbell... But if this is from Lou's stock, I'll probably use it. Thanks!
-
Thanks, Keith and Nenad; very useful indeed. Does the wheelhouse itself taper from fore to aft? Or is it just the perspective? I know the angle that it sits is not level with the deck... Anyone?
-
Cutty Sark by NenadM
rfolsom replied to NenadM's topic in - Build logs for subjects built 1851 - 1900
I passed this panel through with a yellow color; when it came out, I couldn't see anything. Holding it very close to the light, there was the lightest hint of the lettering. I believe the wood absorbed all the colored ink. I have a test panel coated with gloss polyurethane that I'll try with tomorrow.- 4,152 replies
-
- 1
-
-
- cutty sark
- tehnodidakta
- (and 1 more)
-
Hello, I peeked into your log as I am looking into a Victory model. Extraordinary work! Your furniture work is very inspirational, as another hobby of mine is dollhouse miniatures. And I see my good friend Nenad is following as well . Keep up the great work, this is incredible detail... Cheers, ~Bob
-
what is the ideal modelling table?
rfolsom replied to AON's topic in Modeling tools and Workshop Equipment
I like the idea of several "workstations". Besides my main bench, I commandeered the top of a small bookcase to do some trim work. Also, everyone gives me grief about "working on the carpet"; I take my photos on the carpet because that's where my corded, $5 webcam reaches to. My (much more expensive) digital camera doesn't take pictures near as well.... -
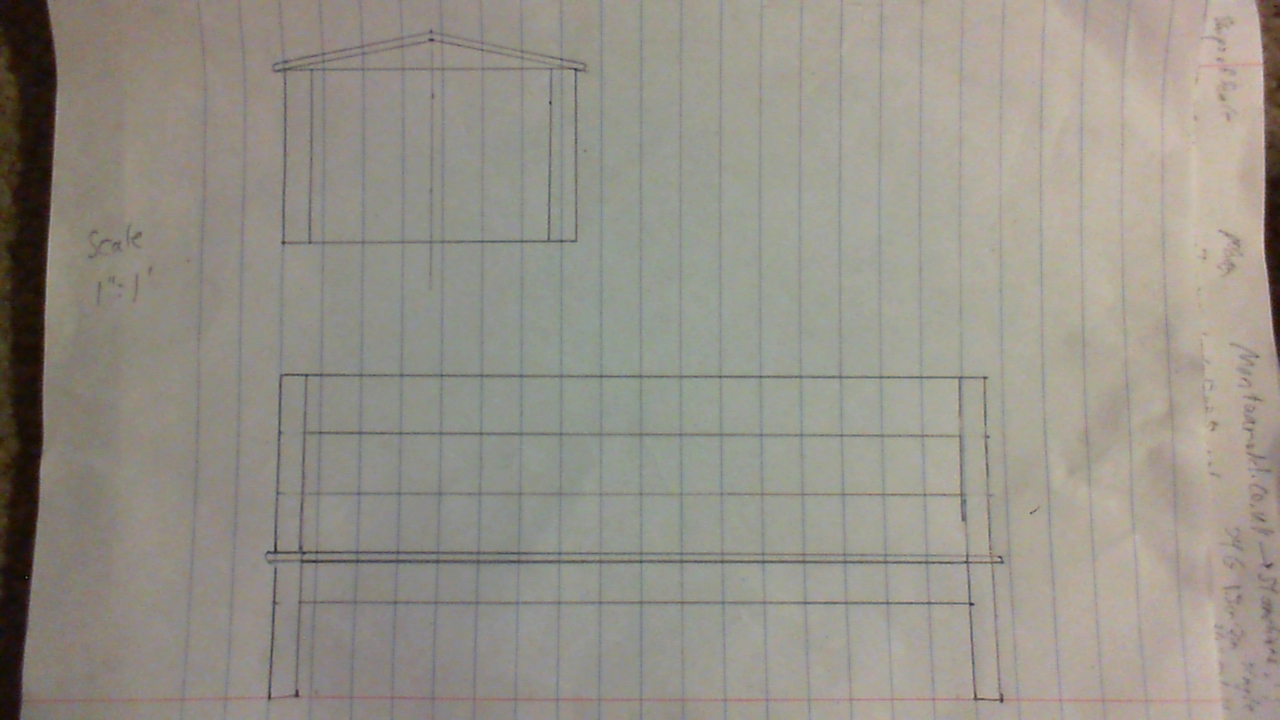
After looking at photos of the stern area to help me with bulwark shaping, I inevitably ran into many pictures of the ship's wheel box. (Is that even a right term?) So, on another tangent, I decided to do some measuring and fiddling. Campbell's plans are very sparse in this area, so I brought up one of Lou's photos (#26 on his OneDrive) and did some measuring directly from the photo. It's easy to assume that board widths would be standardized in inches at the time, and I'll be willing to bet each board on the side of the box is 6 inches wide. From there I interpolated most of the dimensions, (not the wheel, yet) And drew up these preliminary plans: (the aft "feet" will need to be shortened to give the proper angle of the box). Side dimension does not show the top. For those that have visited the actual ship, please let me know about any gross inaccuracies...
-
Cutty Sark by NenadM
rfolsom replied to NenadM's topic in - Build logs for subjects built 1851 - 1900
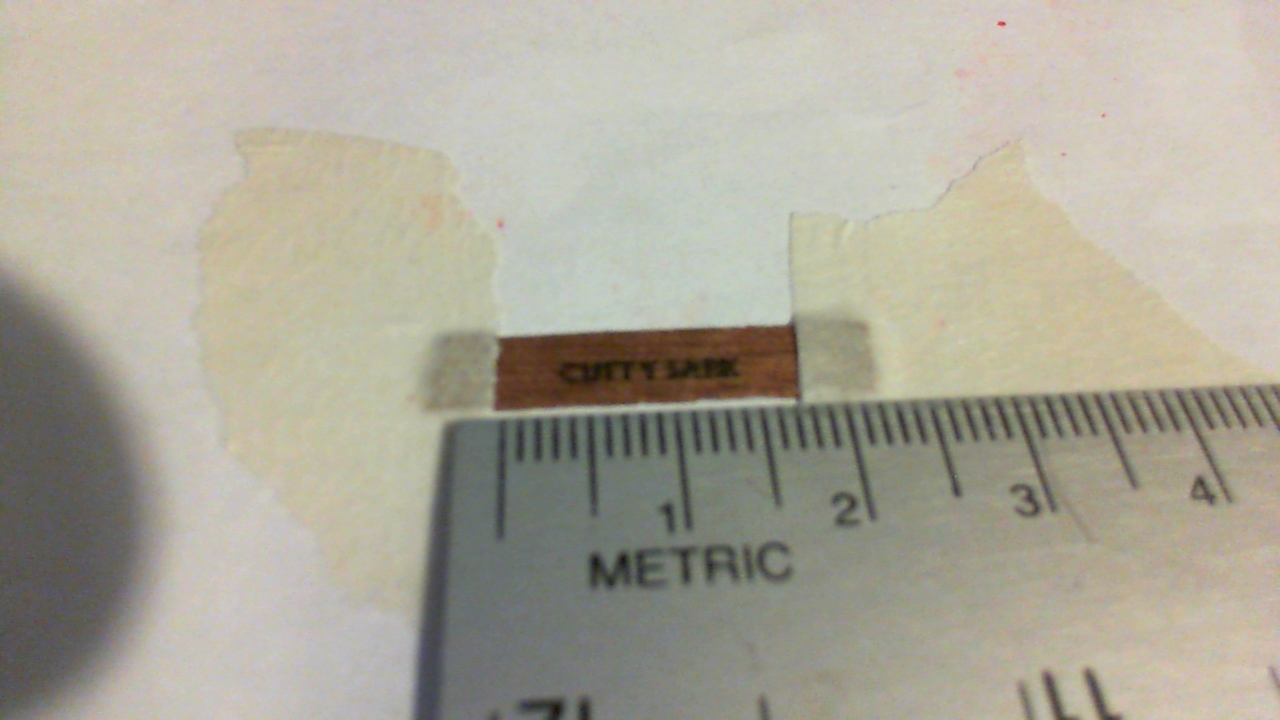
Nenad; you've gotten me doing the hmmmm... thing again. Is my 0.5mm thick walnut veneer thin enough to pass through my printer, taped to a piece of paper? Yes, It was... first of (many, I'm sure) tests...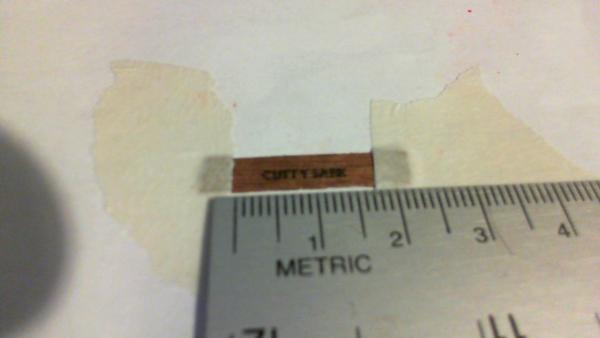
- 4,152 replies
-
- 6
-
-
- cutty sark
- tehnodidakta
- (and 1 more)
-
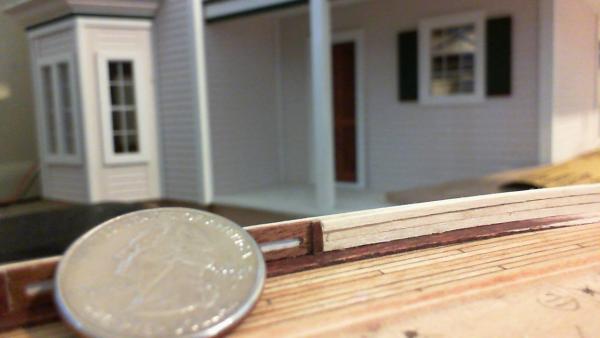
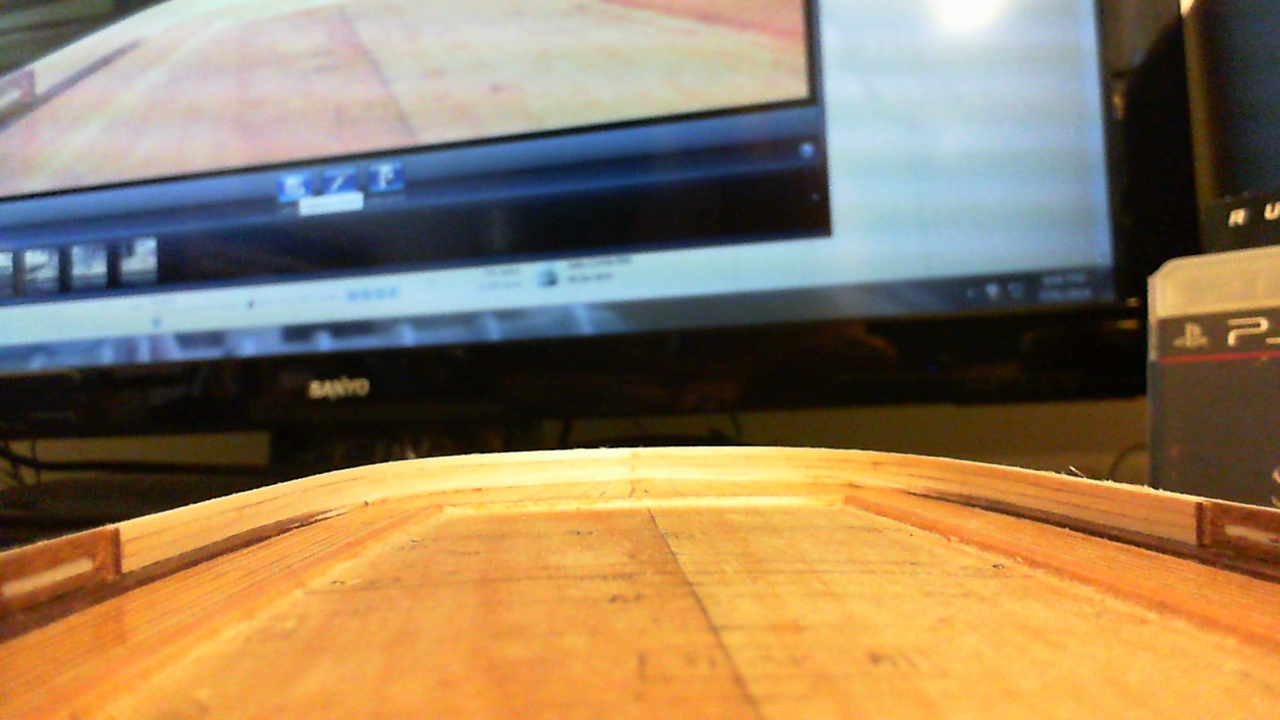
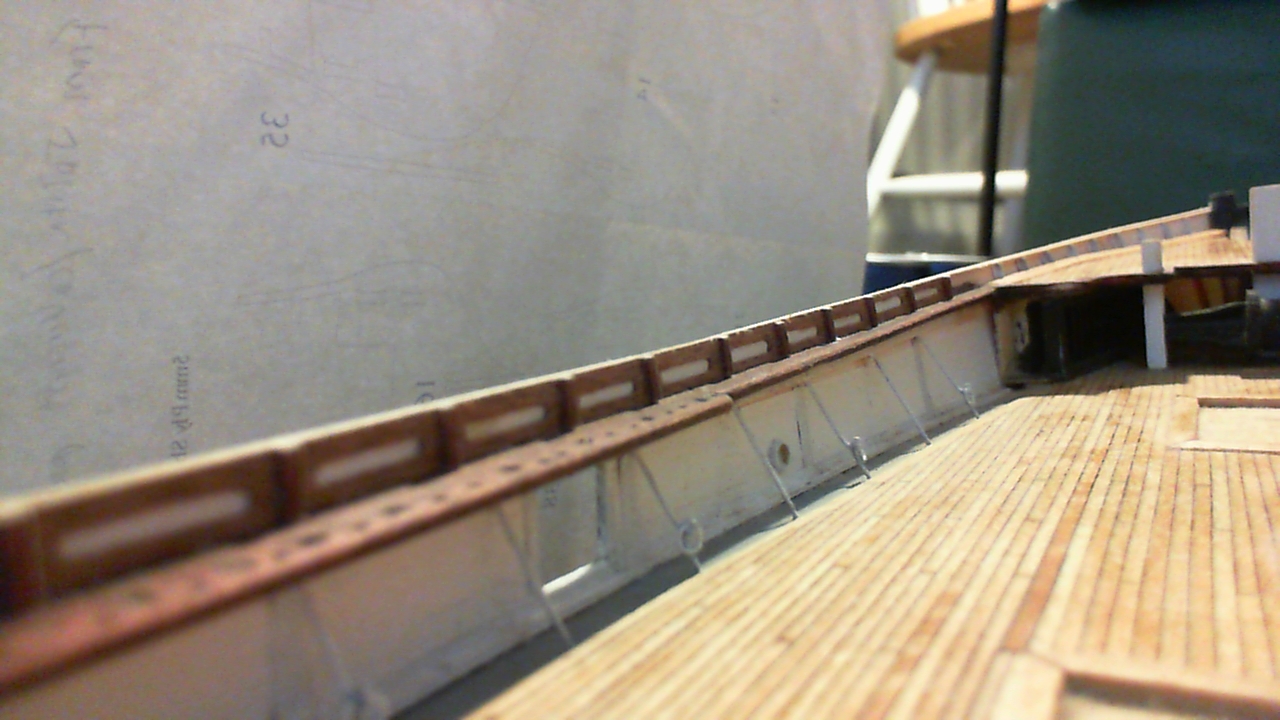
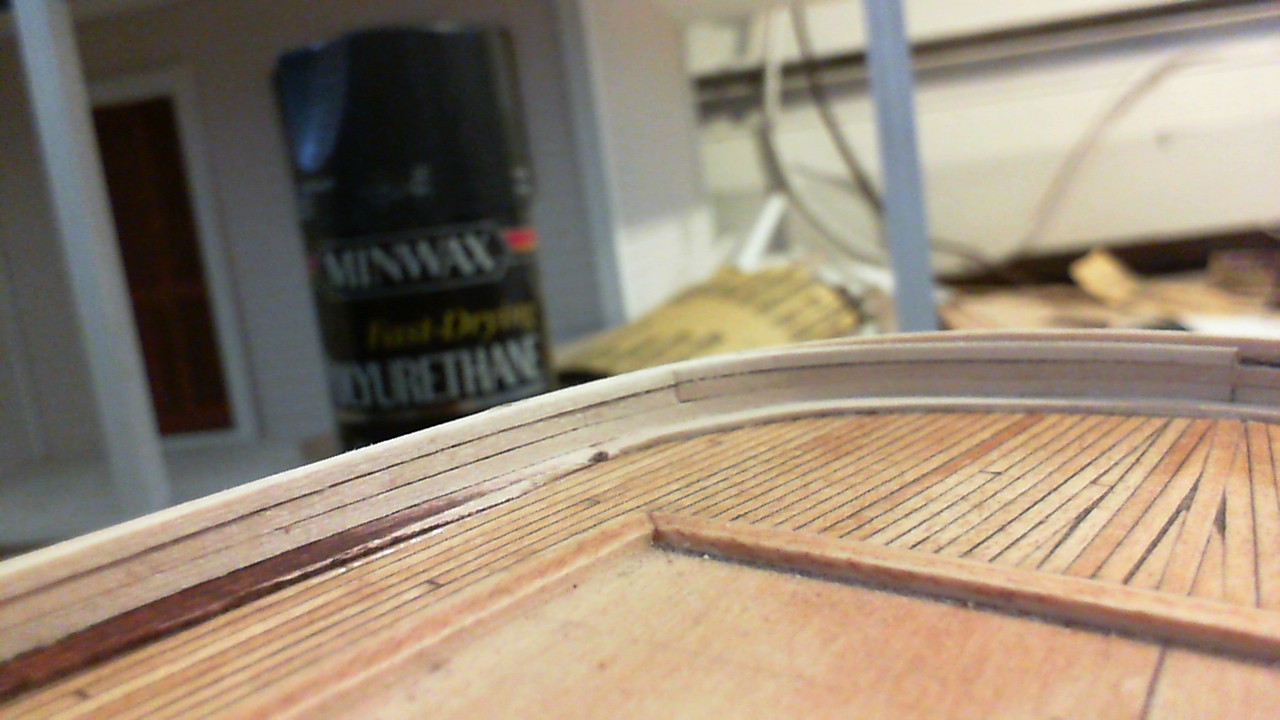
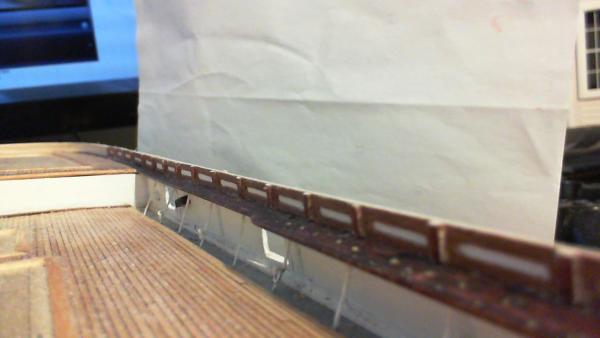
Now I'm done with the stern inner bulwark planking. Just need to stain. This pretty much completes the inner bulwarks; I had previously said that I would cut out the worst five ovals and replace them. Not anymore; I am going to have to live with it, or I'll drive myself crazy . You can see all the imperfections in these photos... Good advice from Nenad: Don't take macro photos! It does look ok from a normal viewing angle, and there's a heck of a lot more stuff to go on to hide it... Cheers, ~Bob


-
Stern inner bulwark planking almost done; I soaked each plank for about 30 min, and formed it to the bulwarks clamping with clothespins and allowing to dry. I then removed the plank, cut to size, and glued it on. After forming the top plank while wet, I found that it had "glued itself" on when dry; the residual wood glue from the previous plank must have watered out and glued it, leaving a small gap between planks. Hopefully after sanding and staining, it won't be noticeable. (along with the clothespin dent) One more port side plank to go, and then the trim strip behind can be sanded flush, along the entire perimeter of the ship. The next major hurdle after sanding, touching up, etc. will be completing and installing the catheads before finally laying down the topgallant rail.