HOLIDAY DONATION DRIVE - SUPPORT MSW - DO YOUR PART TO KEEP THIS GREAT FORUM GOING! (Only 36 donations so far out of 49,000 members - C'mon guys!)
×


rfolsom
-
Posts
881 -
Joined
-
Last visited
Content Type
Profiles
Forums
Gallery
Events
Everything posted by rfolsom
-
 I was going to completely dismantle the hull; but I am planning on rebuilding, using the AOTS.
 -
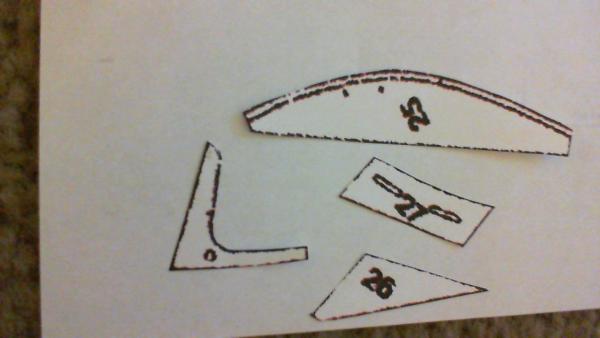
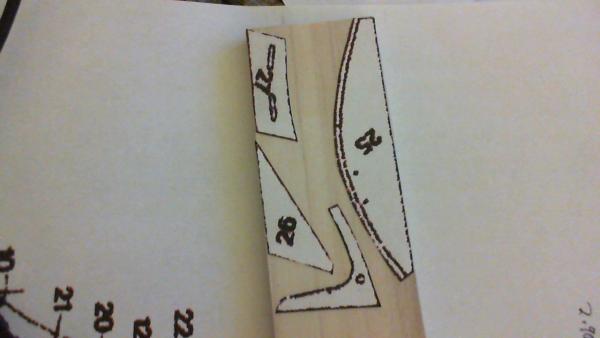
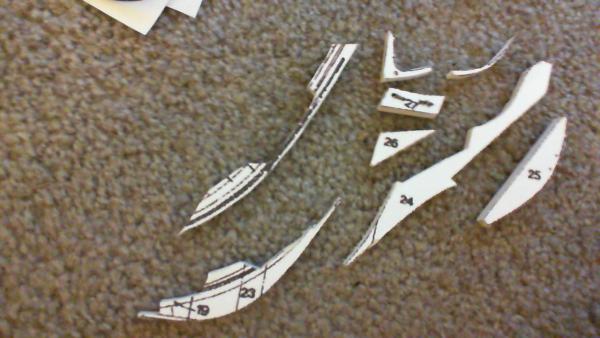
In the meantime, the one thing I have to do is remake the stem. I found a cheap piece of poplar at home depot; very satisfied with it! I'll "experiment" by cutting each deadwood separately ...

-
Jotika/Caldercraft posts their manuals and ship parts manifest online; their keel is spot on to the AOTS plans. Their bulkheads are not. This 70's Sergal's bulkheads are. So I'll have to figure this all out.
-
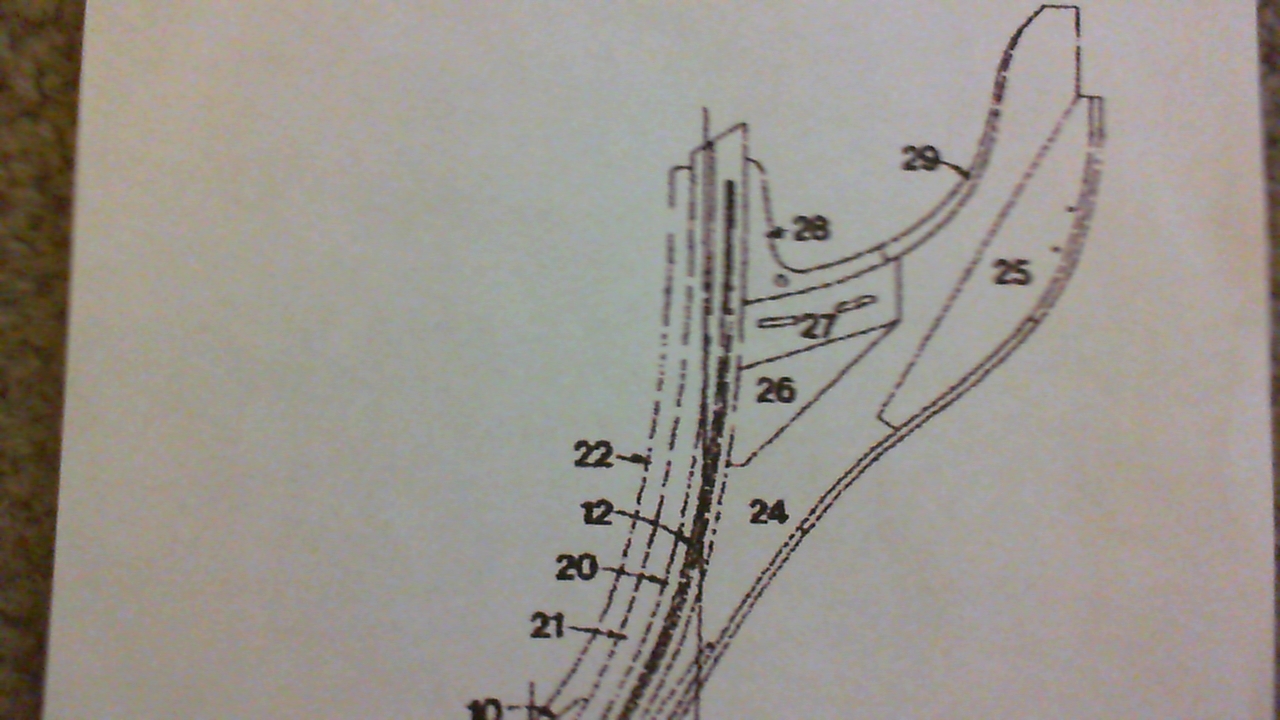
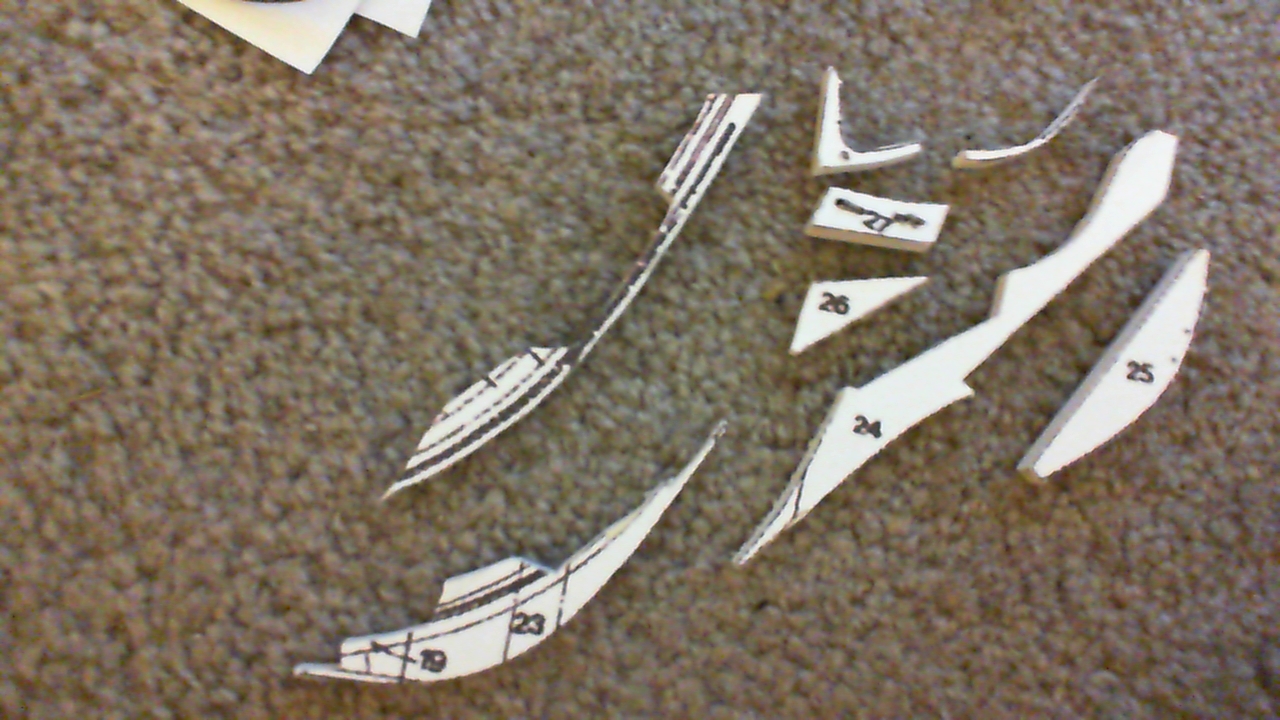
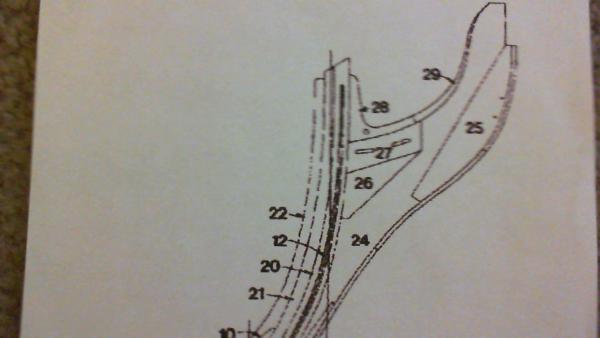
Well, the Vic was planned for about 10-15 years down the road; (Cutty Sark and Niagara are my current builds) but our friend Dale; (laxet, check out his Niagara build log) was kind enough to ship his partially built Victory to whomever wanted to complete it. I jumped in.... After receiving the ship, I immediately compared the plans to the Anatomy of the Ship; HMS Victory. After about 4 to 6 hours, I came to the conclusion that the bulkheads are accurate (in outline) but the keel is off on bulkhead (frame) location and the mast locatiions are completely inaccurate. Please note that these are an inaccuracies in the kit; Not the experienced model builder I got this from...
-
Cutty Sark by NenadM
rfolsom replied to NenadM's topic in - Build logs for subjects built 1851 - 1900
I like the tests, so far, Nenad. I really hope there is an easier method... I can't sculpt! -
Yes, I rebuilt my '64 Olds 394 (The last year for that size) when I was 15. Pulled an old Rochester 4 bbl carb and manifold off a junked vehicle to rebuild. Not alot of custom parts available for that engine in 1983. (No Eldelbrock manifolds), even the Rochester was an old 4gc(?) completely different profile from the quadrajet, so no Holly plate adapters. Had to have a hi-perf cam custom ground by Chet Herbert. Sent valve covers into Lincoln Plating to have them chromed, plus the stock thermostat housing (aluminum) for polishing. Nothing was available for this engine. Anyhow, I don't follow that hobby anymore, (My Jeep is sitting waiting for a fuel pump, and I just do not want to work on it). But, as hard as it was to find parts for the 394, I think a ship build is 10+ times harder than rebuilding an engine!
-
Cutty Sark by NenadM
rfolsom replied to NenadM's topic in - Build logs for subjects built 1851 - 1900
Hmmm... Reading this makes me realize I haven't made my rudder yet, and the copper on my ship already has quite a few months of natural patina.... Maybe I should at least copper my rudder before things get too mismatched...! -
Yes, Nenad; After hijacking a ship's boat, he's almost there...


-
When I received my Niagara a couple of years ago, I noticed the belaying pins were too large per the plans. The part numbers matched up from the inventory sheet, however. I had ordered belaying pins for my (mostly) scratch built Cutty Sark from them previously, that matched the size I needed and consulted the MSW community if they'd had the belaying pin size problem, which they hadn't (older releases). A couple of emails to Model Expo (I did take actual pictures of the two pins on the 1:1 plans; they initially said that the pins were correct; subsequent email showed that part numbers were wrong on the new inventory sheet) and a batch of new pins were sent. I say: "Bravo; to Model Expo for being a kind company that preserves services and traditions; and Hurray for the MSW site and community; for the wonderful people who post and help each other out."
-
I beveled the top and bottom of the planks around the tighter curvature. By not beveling, gaps are not a problem if you use filler, but each strake is still driven further away from the last, and your build will start to deviate from your plans. I would take a raw plank, of the width labeled in the upper right corner, plan sheet 2, left side; test fit it, making tic marks at each bulkhead, labeling the marks, then directly place onto the hull planking layout, at each bulkhead, and transfer the widths. Then I connected the bulkhead marks via a straightedge, cut the plank to length, hand sanded the taper, and kept test-fitting as I sanded the bevel. On my plans all of belt "a" are 3/32" at bulkhead H. They will taper from there, towards the fore and aft. All of belt "b" are 1/8" at bulkhead H; also tapering towards the fore and aft; I used 3/32" planks for the outermost planks due to tapering. You can do the measurements for each belt and divide by number of planks, or you can use the method I use above, or (what's better) use both methods to double check your accuracy. Either way, you have to do the measurements at each bulkhead along the plank for an accurate taper. I would fabricate each plank in pairs, port and starboard, and make sure they land exactly equal on the bulkheads when mounted.
- 287 replies
-
- 2
-

-
- niagara
- Model Shipways
- (and 1 more)
-
I'll look upon your planking; but you know tools help make the build; too bad Snap-On doesn't make model shipbuilder's tools..
- 287 replies
-
- 1
-
-
- niagara
- Model Shipways
- (and 1 more)
-
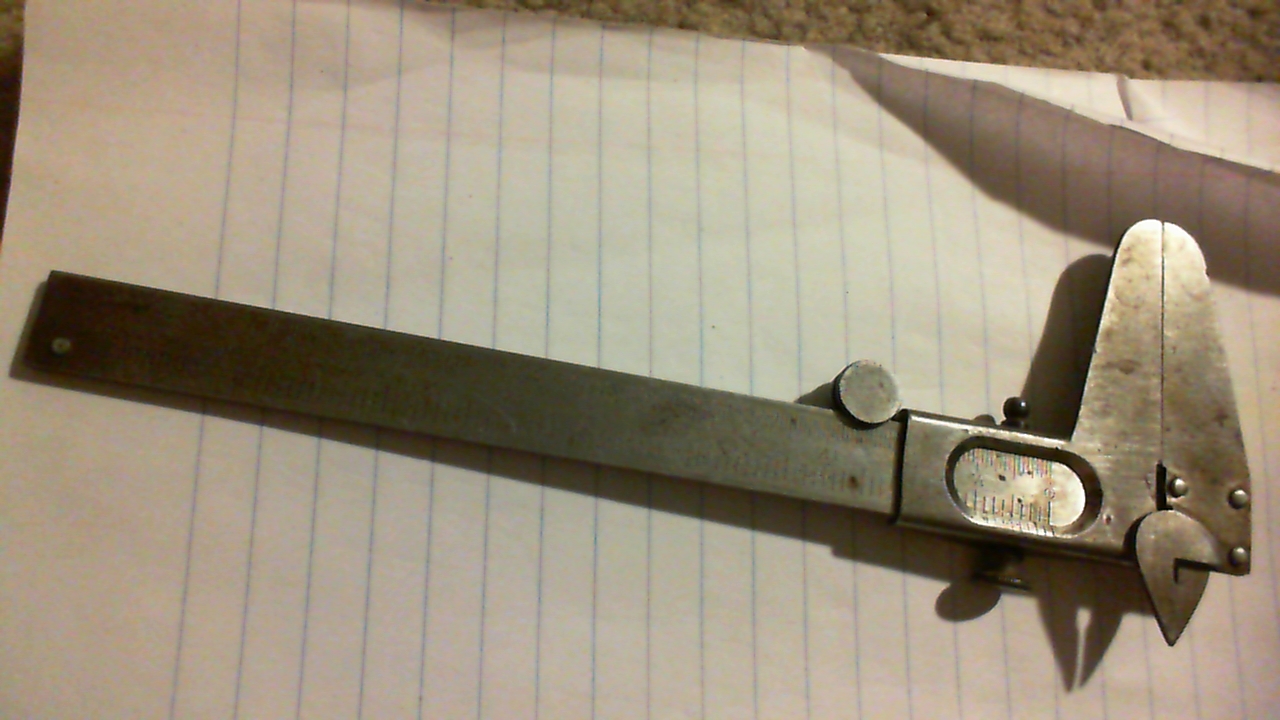
Looks to me like you have a major tool problem. You can't buy reliable digital calipers for under $80. The electronic apparatus may be spot on, but the mechanical set-up is usually s#$%. These non-digital calipers of mine are between 40-60 years old, and they work just fine....(Had to clean them recently with a toothbrush)

-
Uh oh, somebody forgot to properly shut the pen door...

-
Cutty Sark by NenadM
rfolsom replied to NenadM's topic in - Build logs for subjects built 1851 - 1900
That's my kind of thinking process... Yummm!- 4,152 replies
-
- 4
-
-
- cutty sark
- tehnodidakta
- (and 1 more)
-
Anchors look great, deck looks incredible; I found that most of my plank bending can be accomplished with soaking in normal (130 degree or so F.) tap water, but for steam bending I use an old pressure cooker, without the jiggler, The focused steam can turn a plank into pretty much any shape you want...
-
Cutty Sark by NenadM
rfolsom replied to NenadM's topic in - Build logs for subjects built 1851 - 1900
Let's not forget our friend Marc (Keelhauled) did some fine hand-carved scrollwork with sharpened jeweler's screwdrivers; I really think that would be beyond my skills, but I also just said "nothing is impossible"... Maybe it's possible for Mr. Nenad.... -
HMS Victory by willz
rfolsom replied to willz's topic in - Build logs for subjects built 1751 - 1800
I'm not one to say "There's no way I could do this", but looking at your carving skills, I have to say "There's no way I could do this" Utterly fantastic work... ~Bob -
Very good work.
-
Have a good night, my friend; May you dream of scrollwork solutions!
-
The new toy is just being inspected right now, not played with: and it's 3 o'clock in the afternoon in Colorado; who's missing sleep in Belgrade? :D
-
Cutty Sark by NenadM
rfolsom replied to NenadM's topic in - Build logs for subjects built 1851 - 1900
Nothing is impossible... I've thought about photo etching these things.. It wouldn't have the carved 3-dimensional detail that we want, but It would look very presentable.- 4,152 replies
-
- 2
-
-
- cutty sark
- tehnodidakta
- (and 1 more)
-
The motor on this unit fires right up, with the sound I remember from childhood, and the (bed screws?) turn very smoothly, so all it would really need would be new belts, rewired power cord, (there's a short in the old cord), plus the missing accessories, which I believe my sister located. She lives 200 miles away, so on her next visit she'll bring them. I'd still like to do a complete restoration, after approx. 40+ years of use (I know he bought this sometime in the 50's, and he passed in 2000, and was out in his shop every single day that I recall). Thanks, Popeye for the link; I'll be referencing it often, I believe. As this is not "Model Lathe World" I'll wait to talk about the lathe when the Cutty's little 6 pound signal cannon is turned from brass....
-
I believe it is of German or Austrian manufacture...
-
Keith: I'm a lonnnnng way from doing anything with this lathe; i remember dad turning little screws with this; but the belts have disintegrated, and I'm not sure everything is there..
-
Lot of love/hate with this thing. Dad was a music teacher; who did model railroading and RC airplanes. As an engineer, I think I could make more use of the lathe... When I look at it I see my Father; who never let me touch his lathe.. But a lot of Love :D