rfolsom
-
Posts
881 -
Joined
-
Last visited
Content Type
Profiles
Forums
Gallery
Events
Everything posted by rfolsom
-
 Wonderful work! Looking forward to your progress! ~Bob
 -
Good words of wisdom, Marc. Progress vs. perfection: I believe we all should stop fretting about every last detail, and enjoy the journey as you say. We're not engineers sending men to the moon, we have no time constraints, and each step is an enjoyment unto itself. That being said, I wish I were to the "yard stage". I haven't been there in any ship build since I built the Revell Cutty in (1978?-1984?) (not sure). Anyhow; Very inspirational work, my friend; and I'm looking forward to your great progress. ~Bob
- 525 replies
-
- 1
-

-
- cutty sark
- mantua
- (and 2 more)
-
Cutty Sark by NenadM
rfolsom replied to NenadM's topic in - Build logs for subjects built 1851 - 1900
Beautiful work, my friend! I'm not sure if I can make something halfway as good, but you can bet I'll try..! Happy New Year!!- 4,152 replies
-
- 2
-
-
- cutty sark
- tehnodidakta
- (and 1 more)
-
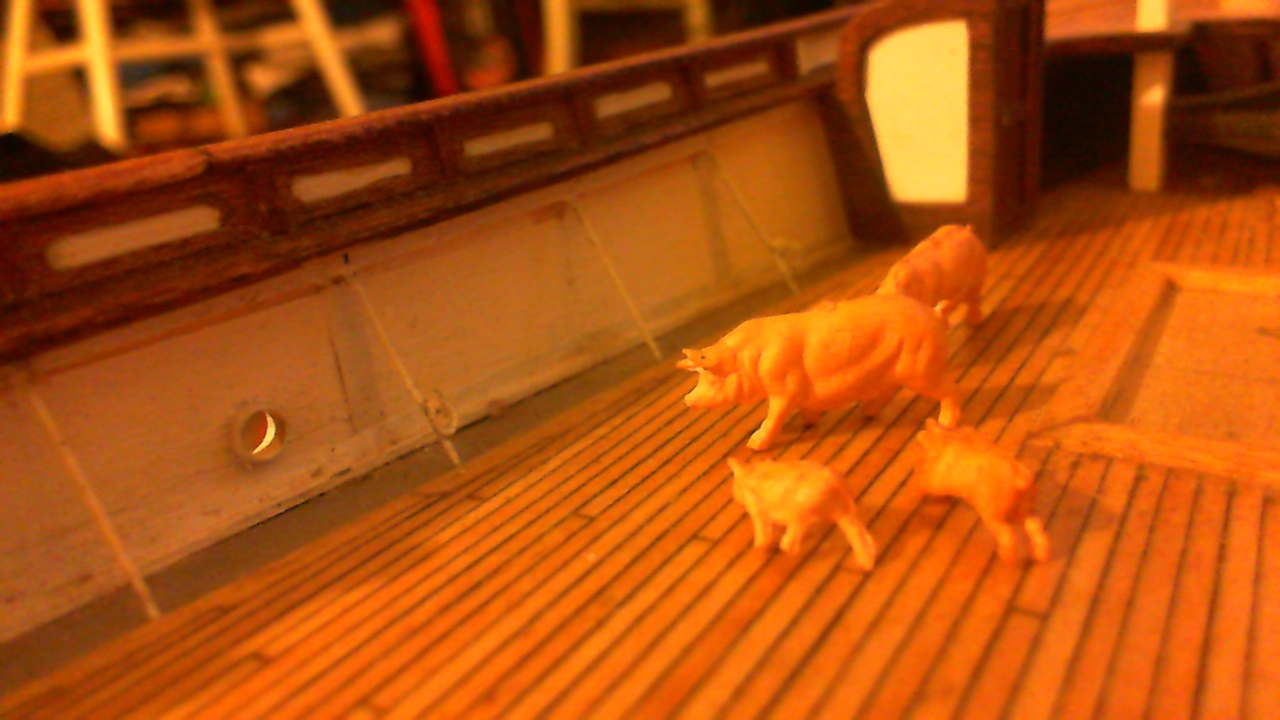
I do believe Piggy has settled down a bit; But who know's where he will be next... (young piglets grow fast)! Happy New Year!!

-
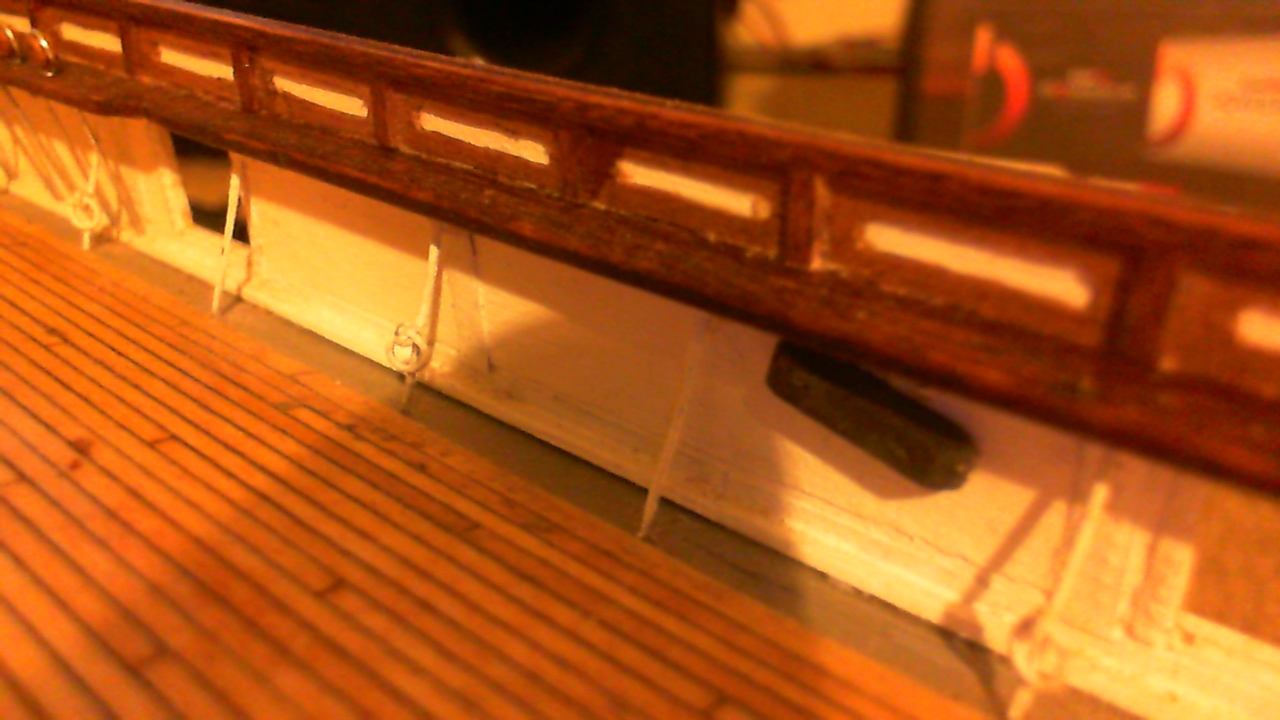
Hmmm.. thought I had pics posted of the sheaves.. Like a small child who gets a 'grape popsicle' and is happy with it, then sees sister with a 'cherry popsicle' he all of a sudden wants it.... This is how I feel about my chosen sheave color of black after seeing Marc and Nenad's white... Ah, well.. Anyhow, broken drill bit shows where the boat davit crosses the aft sheave block, and all holes are pre-drilled, with a notch cut in the sheave block to provide clearance for the davit.

-
Very nice! I chose my sheave blocks to be black; Can't remember the photo I used...
- 525 replies
-
- 2
-
-
- cutty sark
- mantua
- (and 2 more)
-
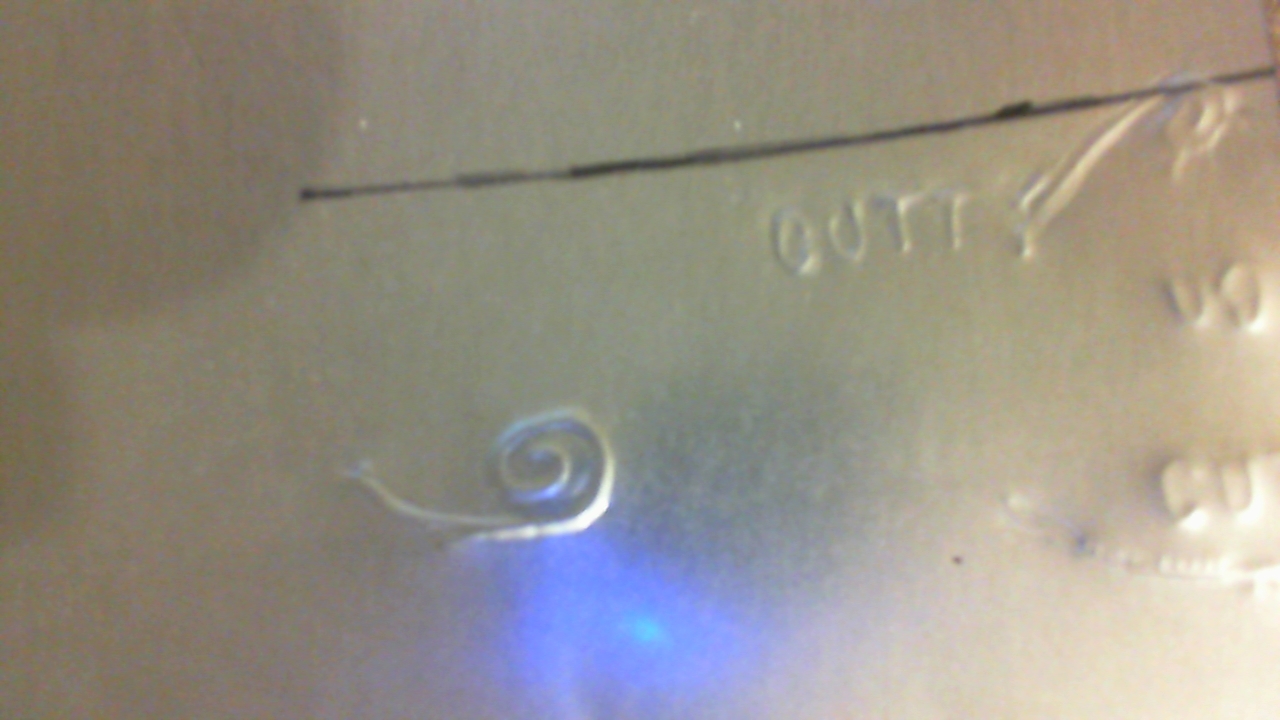
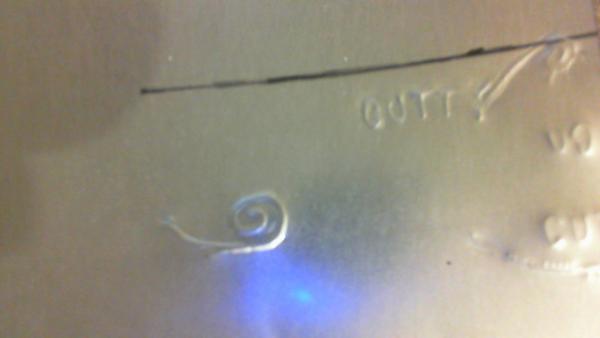
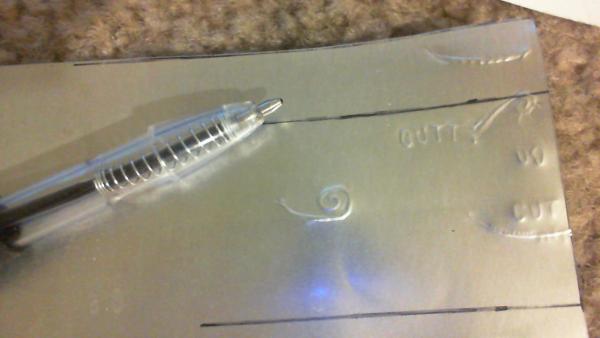
More testing will come in the near future; I've looked into many methods of fabricating the scroll detail, but this one seems the easiest, cheapest, and possibly the best resulting one for someone with very little artistic talent such as me. (I've tried some of Nenad and Marc's techniques, but I wasn't able to succeed.)
-
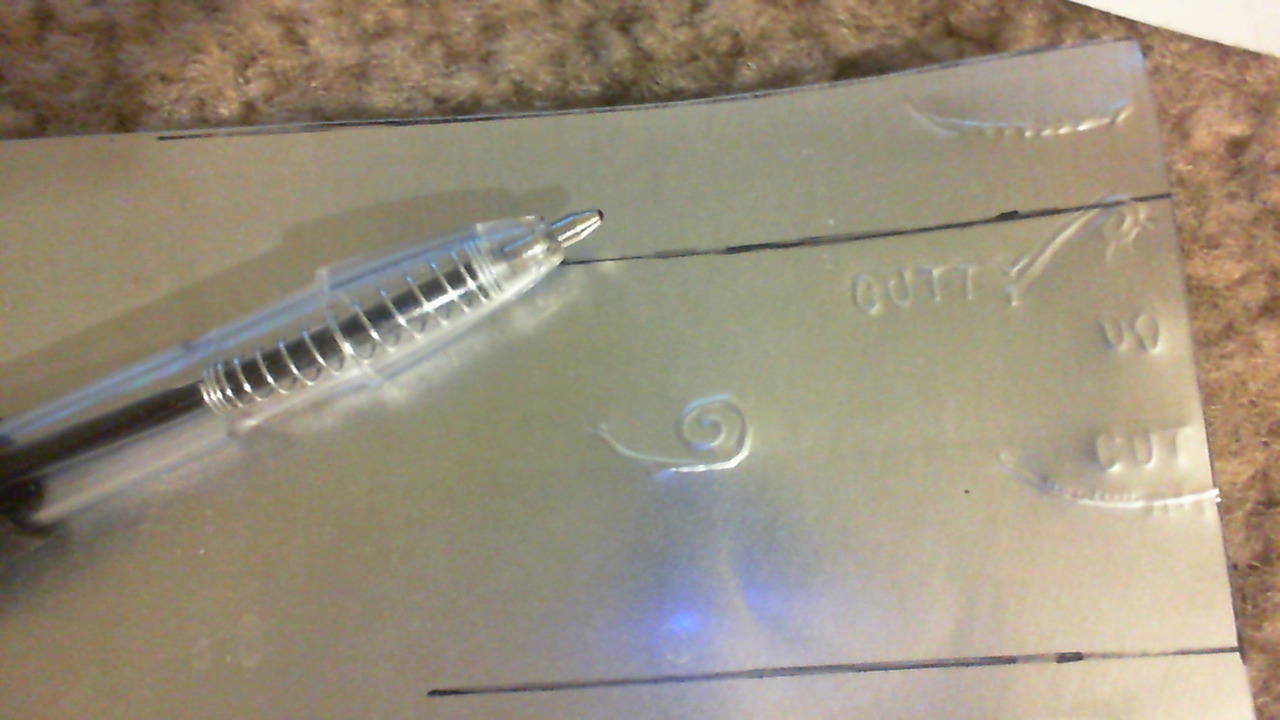
Happy New Year, Friends!! I wish all of you the best for you and your families in 2015. I stumbled upon a you tube video on embossing metal cans... Not sure if the link can work.. But it might seem to solve my problem with the scrollwork... I took the time to test the metal embossing techniques used by this person, and were very satisfied with the results, of about 10 minutes of testing... These are only tests, and were made with a ballpoint pen and aluminum from a beer can....
-
Cutty Sark by NenadM
rfolsom replied to NenadM's topic in - Build logs for subjects built 1851 - 1900
Good to see your work on Her again; I'll have to get started back with the rails; also, I need to affix the freeing port lids.. Your work is excellent. ~Bob -
Cutty Sark by NenadM
rfolsom replied to NenadM's topic in - Build logs for subjects built 1851 - 1900
Family first, my Friend; and a break from the build; and your break from the build coupled with your career pressures will be just what the doctor ordered. My Best Wishes to You, and All of Yours, Always.. Your Friend; ~Bob -
Dragzz, I'll be following your fine work; I have a scratch built Vic along with my Cutty Sark... We may have to compare notes... Bob
-
Thanks dragzz; just looked into your Victory build; doing a fine job! Patrick; Thanks for the kind words; Your Niagara is outstanding! Haven't looked at your progress on the Connie for awhile... mainly due to my shipoholic state....If I see too much, I order too much, and try to build too much..... and my Christmas present to my self would be ....? (Family needs presents too!) I'll look in when I think my problem is under control... Happy Holidays! Bob
-
Cutty Sark by NenadM
rfolsom replied to NenadM's topic in - Build logs for subjects built 1851 - 1900
Well understood, My Friend; I just walked by my CS tonight, she's sitting proudly, and started wiping the dust off of her deck. It's too late at night to start working on her right now, but hopefully tomorrow and can get going and back into the game. By the way, You know I have other builds, but I haven't been working on them either. The Cutty is still my Main Build. As always, congrats to Princess and Hothead, and I hope everything will turn out to your advantage with the strike, and best wishes to you and your family.. Bob -
Thanks for the kind words, everyone.. Marc; I hope everything is going well for you and your loved ones; I know we would like to see more of your wonderful progress.
-
Cutty Sark by NenadM
rfolsom replied to NenadM's topic in - Build logs for subjects built 1851 - 1900
Hello, Nenad! Sorry it's been awhile since I checked in; your paintings are incredible; AND this explains how you have managed to do such a marvelous job on the stern decoration. As a non-artist, I certainly appreciate your tutorials; and I will follow these (with your permission, of course) when I get to that stage. And again: Well Done My Friend!! ~Bob PS: Cute kitty, btw.. any concerns with him playing in the rigging of the ship when the time comes?- 4,152 replies
-
- 1
-
-
- cutty sark
- tehnodidakta
- (and 1 more)
-
Cutty Sark by NenadM
rfolsom replied to NenadM's topic in - Build logs for subjects built 1851 - 1900
I pulled the Admiral aside to show these pics. She says they are "Absolutely Beautiful" Which they are, of course... Well Done, my Friendl Well Done!!! ~Bob -
Cutty Sark by NenadM
rfolsom replied to NenadM's topic in - Build logs for subjects built 1851 - 1900
Outstanding work, my Friend; simply outstanding! As an engineer, I'm not overly concerned with my abilities to reproduce technical detail; but when it comes to artistry, I hit a wall. You have managed to tackle all of that, and I'll be following your lead on this one... Please don't get mad if I copy some of your techniques, Your solutions are brilliant. ~Bob -
Cutty Sark by NenadM
rfolsom replied to NenadM's topic in - Build logs for subjects built 1851 - 1900
Sorry to hear of your loss; hope your family is doing well...- 4,152 replies
-
- 1
-
-
- cutty sark
- tehnodidakta
- (and 1 more)
-
That's a good observation,Chef. Seems like your plans were designed by an artist, not an engineer, as the shrouds's lines of force should be transmitted along the axes of the load bearing members (tension in the shrouds, as well as all standing rigging, transmitted through the chainplates into the hull). Campells' plans are accurate in this sense; as they show the chainplates in direct alignment with the shrouds. Non-parallel forces would tear the chainplates free from the ship, promoting total catastrophic failure for the entire system.
-
Cutty Sark by NenadM
rfolsom replied to NenadM's topic in - Build logs for subjects built 1851 - 1900
I really have to find that runaway pig; send him to Belgrade; (with a camcorder); and watch you over your shoulder as you produce these works of art.....- 4,152 replies
-
- 2
-
-
- cutty sark
- tehnodidakta
- (and 1 more)
-
Looking forward to more pictures; and Happy Thanksgiving to you and your family! All the best, ~Bob
-
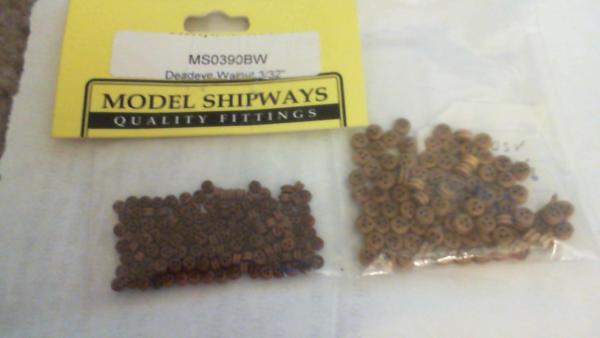
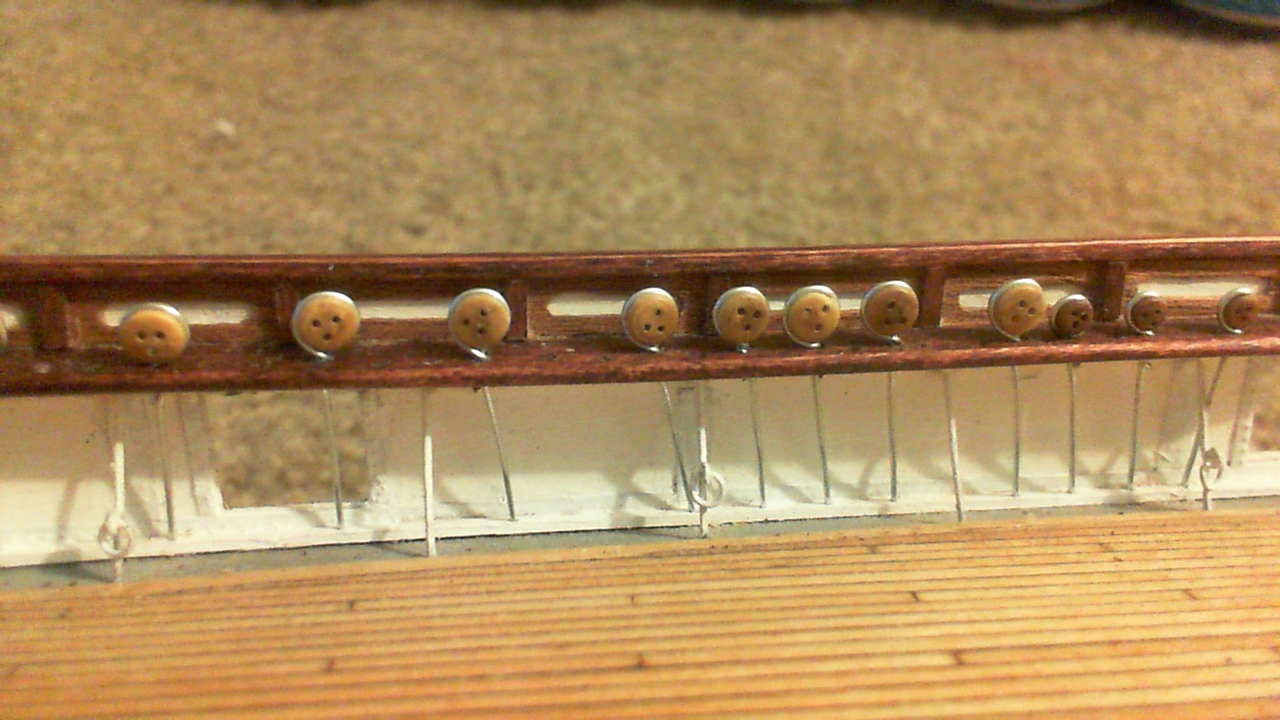
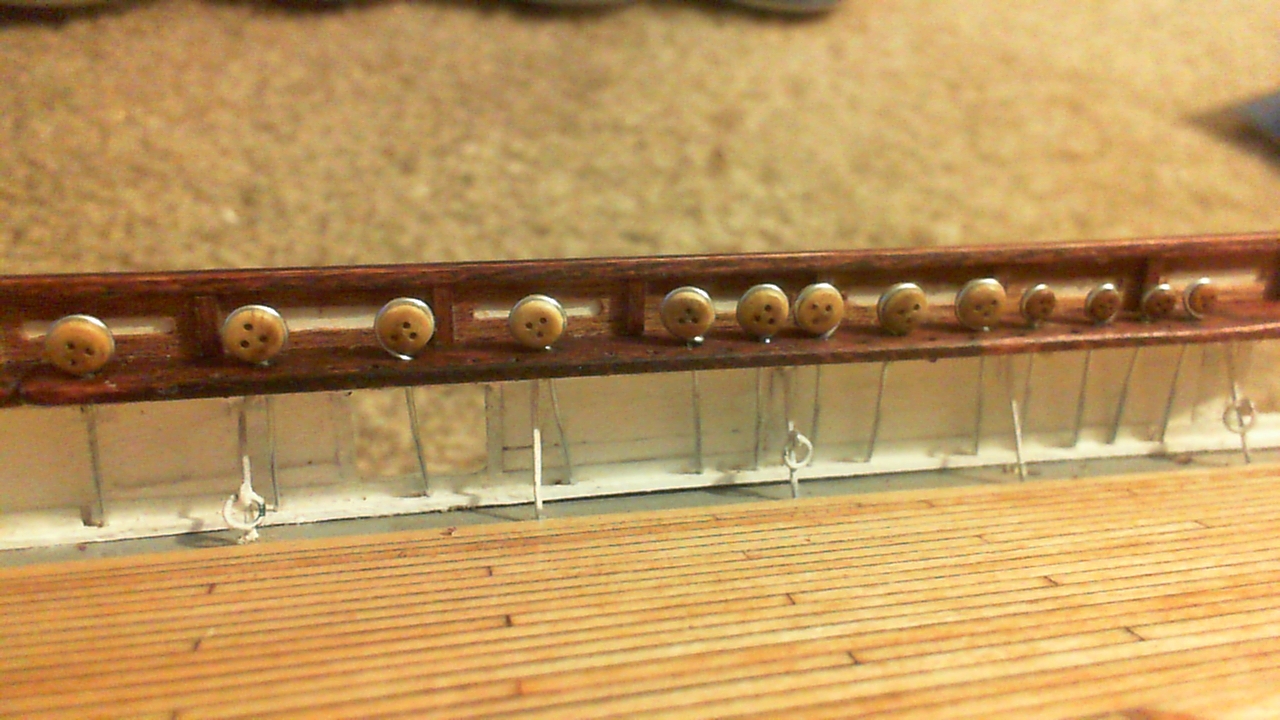
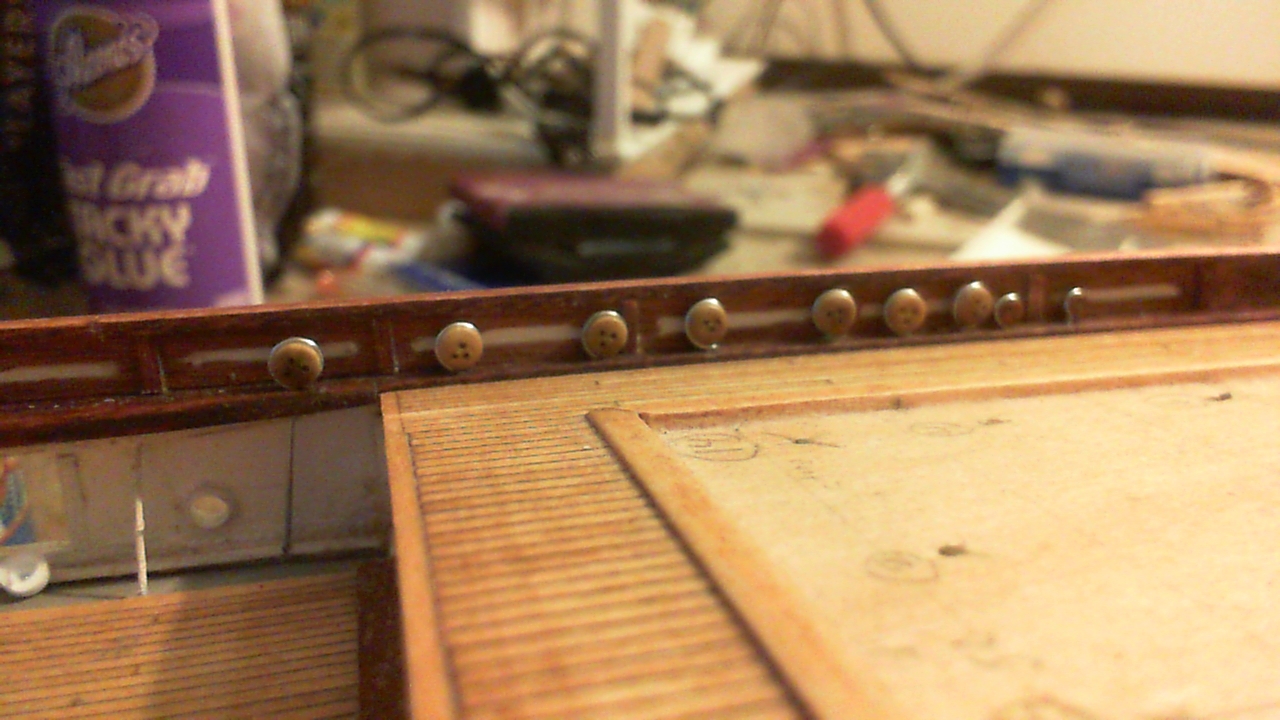
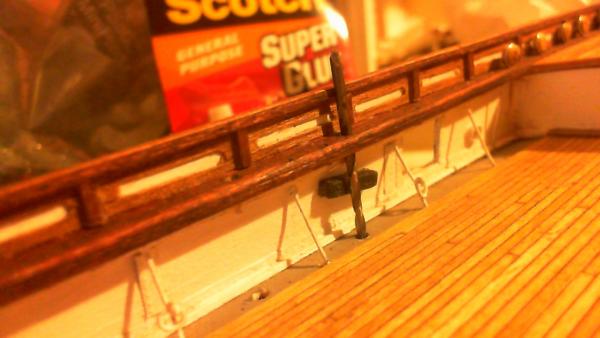
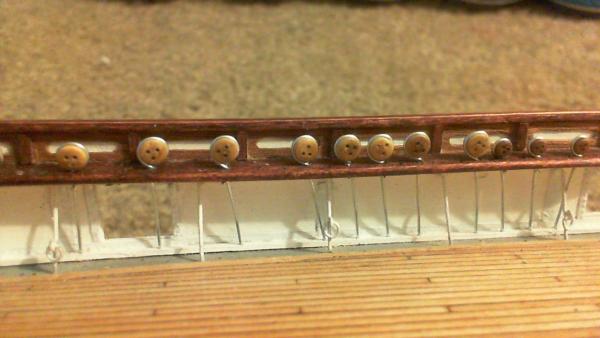
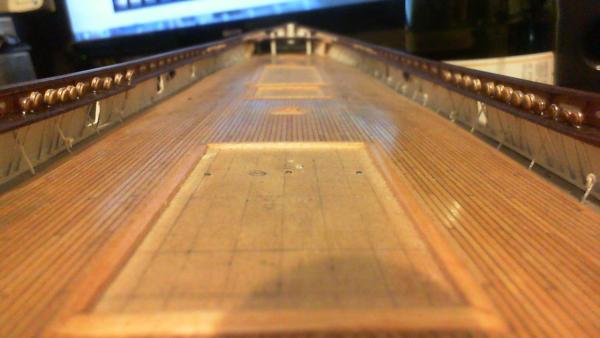
With the exceptions of 6 of the smaller deadeyes on the port side, all deadeyes are married to their chainplates and temporarily put into position. Each one has been fitted into it's respective position, and will be removed for detailing. (AL strops, painting, and alignment), after which the bulwarks will be cleaned up, touched up, and sealed with a polyurethane coat, before final fitting of assembled deadeye units. Pics are starboard fore, main, and mizzen rails with repective deadeyes and chainplates. Note the unfinished deadeye units. Also the varying angles due to the shroud angles. Last pic shows a look forward from the poop.


-
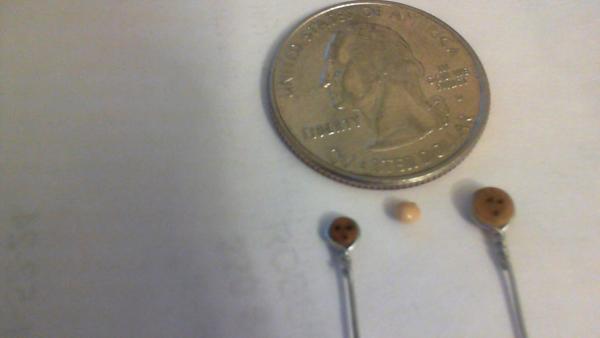
You wouldn't think 1 mm or so would make much of a difference, but the smaller deadeyes were MUCH harder to wrap than their larger friends.... (The thing in between is an orange from the crews' store.. ... actually, it's a bird seed from my messy parakeets....)
-
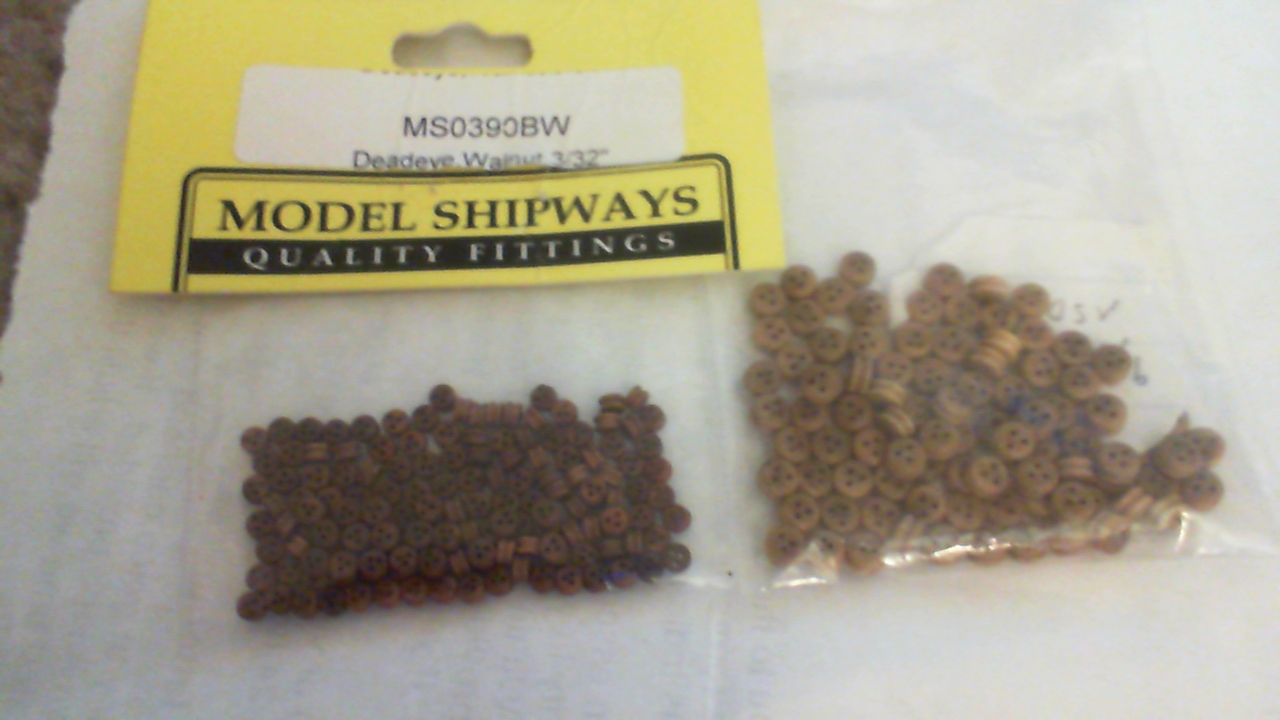
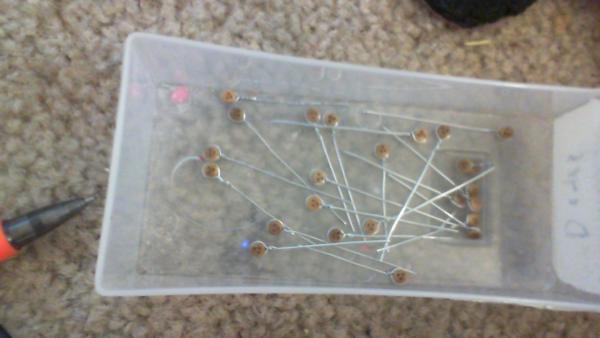
It took about two or three relaxing evenings to wrap the 24 gauge wire around the 50+ 3.5 mm deadeyes, with resultant very sore fingers. (This was done a while back) The smaller deadeyes, however, even though only being 18 in number, are much harder on my fingers... I tried two pairs of pliers, but no matter how careful I twisted, I always managed to break the wire. There's no substitute for the tactile feel of one's fingers..
-
Hi, Nenad; by "raw" I just meant a deadeye with the chainplate on; untrimmed, unpainted, and without it's little aluminum band strop. All my deadeyes are purchased from Model Expo... There's no way in #@@ I could ever scratch build these, nor would I want to.... Just wrapping the wire around them and getting them fitted is tedious enough... and remember; You, my Friend, are the one responsible for me making the little aluminum strops...