rfolsom
-
Posts
881 -
Joined
-
Last visited
Content Type
Profiles
Forums
Gallery
Events
Everything posted by rfolsom
-

Cutty Sark by Keith B
rfolsom replied to Keith B's topic in - Build logs for subjects built 1851 - 1900
Very nice work! I'm looking forward to your coppering methods... -
Cutty Sark by NenadM
rfolsom replied to NenadM's topic in - Build logs for subjects built 1851 - 1900
Nenad; you've seem to really master the porthole/mooring hole scratch build... I took the easy way out with my "non-elliptical" mooring pipes. Now I am doing the "hmmm" thing again... Very well done, my Friend!! ~Bob -
Coppering is looking excellent. Good to see your new posts... Well done! ~Bob
- 121 replies
-
- 1
-

-
- cutty sark
- artesania latina
- (and 1 more)
-
Cutty Sark by NenadM
rfolsom replied to NenadM's topic in - Build logs for subjects built 1851 - 1900
Very nice, Nenad. I may follow your lead on this... -
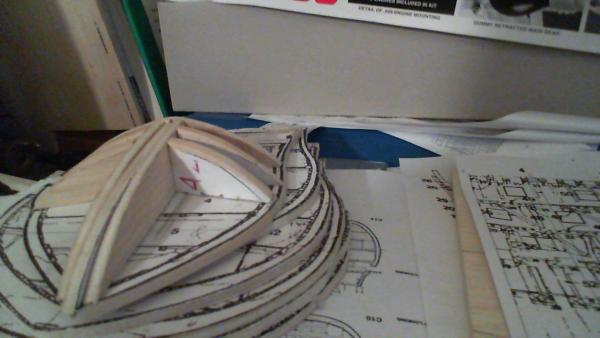
Your boats look great; Not cluttered at all... The kit's "bread and butter" method is very tedious, and inaccurate, if you are a stickler for scale. A POF approach, while very, very, time consuming is more rewarding, but I think you've captured the effect quite nicely. Don't sweat the small stuff... If you stick with the scale, these boats' hulls can be about as thin as an eggshell...
-
Ok. I started initial installment of hinges (semi-painted) to the rudder, using CA at the hinge points, but letting the ends free. Once dried, I will drill into the rudder through the pre-drilled gudgeon holes and affix the loose ends with small nails (hopfully NO CA). The sternpost gudgeons remain unfinished, as I decided to make the whole rudder/hinge assembly first, then fine tune how it meets with the ship. These will be evened up and trimmed to approx. 7mm, and drilled with 3 or 4 holes, for accepting the nails.


-
Thanks, Nenad; I'm doing paint testing... Marc, thanks for checking in, and it's great to hear from you again! Hope the new job is going well, and I hope to see some new posts in the near future... BTW, the Pig is well trained, and will be paying a visit to you in Virginia to inspect your progress... All the best, ~Bob
-
Cutty Sark by Keith B
rfolsom replied to Keith B's topic in - Build logs for subjects built 1851 - 1900
Looking good, Keith; you'll be coppering in no time! -
Cutty Sark by NenadM
rfolsom replied to NenadM's topic in - Build logs for subjects built 1851 - 1900
Nenad; this is why I have not installed the whisker booms on the catheads yet. The cats as they stand, are pretty strong. I also will not install the boomkins until rigging is well under way... Bulwarks were bad enough to deal with when I was planking: ( 1. Plank a bit. 2. fix cracked bulwarks. 3. repeat...) -
..and back to the Cutty soon....


-
A little bit of work was done on the Vic. Rough cut a couple more bulkheads, and stared at the plans for awhile. Although I base this build loosely on Caldercraft, I've noticed many errors cropping up. The bulkheads are not lining up properly, so I'll be going completely to the AOTS. I've rough-cut many of the bulkheads, with AOTS templates affixed, but I'll have to re-draw the alignments on the keel; Caldercraft/Jotika is inaccurate.
-
Hello, Dale; thanks for looking in. I've been busy with the Cutty Sark, and there's so many Victory builds it's hard to keep track of... On the unfortunate side, I decided to completely scratch build the Victory's hull. I thought about tearing into your build, and taking the bulkheads, etc.(Decided not...). Anyhow, she's safely in my shipyard, as a model reference..
-
Cutty Sark by NenadM
rfolsom replied to NenadM's topic in - Build logs for subjects built 1851 - 1900
Great way to organize your research, my friend. I initially cut some detail in "A, yellow" but filled it in. This is the area I'll be focusing on after the rudder. -
Cutty Sark by Keith B
rfolsom replied to Keith B's topic in - Build logs for subjects built 1851 - 1900
Very nice work. And fiddly = detail! Looking forward to more light-speed progress.. Cheers, Bob -
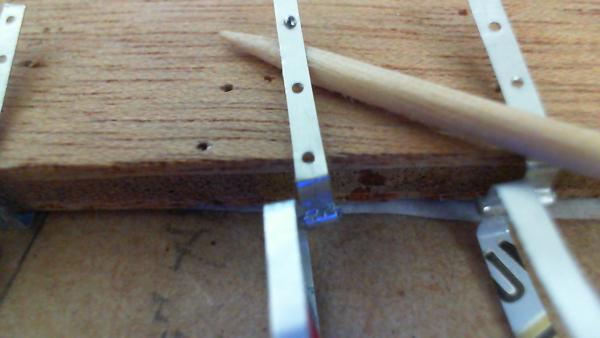
Another pic with a ruler (in mm). Unfortuneately, my poor painting skills will probably obliterate this...

-
Wow. Thanks, Nenad! I couldn't tell if it worked or not until I took these macro photos... (One nail is in hole above toothpick, top center)

-
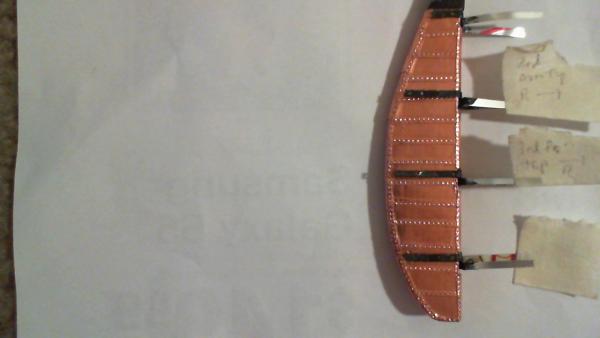
A little bit more work.. I have trimmed, drilled, and filed the rudder side of the hinges.. The ship-side gudgeons have yet to be finished. They are shown taped to the scrap piece of wood that I used for a drilling back. It also keeps them together and somewhat protected. I will simulate bolts with small lengths of 24 gauge wire. (0.51 mm). The holes are drilled with a 0.55 mm bit, which broke, so I'll be stalled until I pick up some more bits.

-
Keith; I was originally planning on epoxy for these, but since I didn't have any on hand, and these hinges do not actually support the rudder in my build, I tried CA and found it to be adequate. Lawrence, thanks for the kind words. I plan on using brass to fabricate all the yard and mast hardware, but that's a ways down the road, and my brass inventory is very limited. Also, my soldering equipment is not up to structural soldering; new toys must be purchased in the future...
-
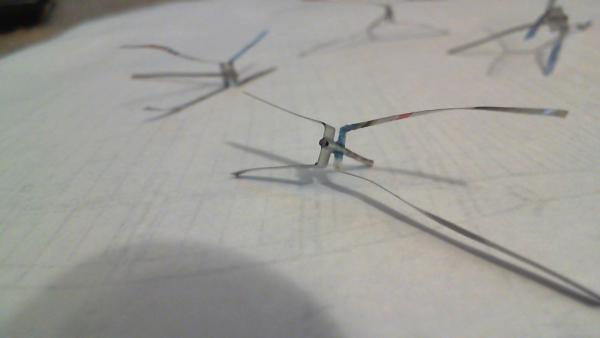
Four "fans"... I know it looks weird, but the hinging areas are consistent; everything else was left long and wide, to be trimmed to size individually later. I'm going to let the CA cure overnight before trimming and drilling....
-
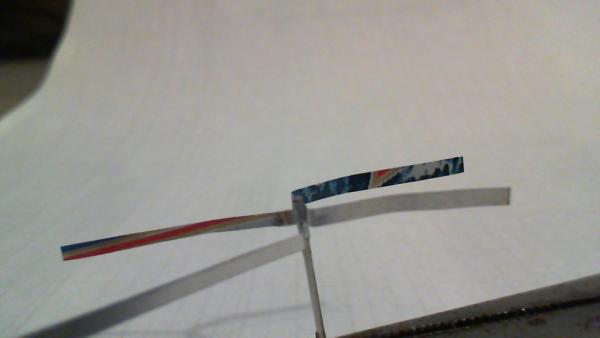
Thanks, Nenad. I'm still thinking about the nails. In the meantime I'm testing CA to hold the pintles to the gudgeons. I think it will work out ok. Picture shows my prototype hinge assembly, before drilling and trimming. (Admiral asks: "What are you making, a fan?" )
-
Cutty Sark by Keith B
rfolsom replied to Keith B's topic in - Build logs for subjects built 1851 - 1900
Looking good, Keith. I see hatch remakes for me in the future... -
Cutty Sark by NenadM
rfolsom replied to NenadM's topic in - Build logs for subjects built 1851 - 1900
Very nice work, my friend! I really enjoyed the work on the detail for the rudder ring. Your ad hoc macro lens is very cool, too; It reminds me of the views from stereoscopic microscopes in college... -
Cutty Sark by NenadM
rfolsom replied to NenadM's topic in - Build logs for subjects built 1851 - 1900
Nenad is silent....... Perhaps just sitting back with a snifter of brandy or Scotch, looking at Her lines, and going ; Hmmmmmmmm...... -
Keith; I'm not sure if they're the same, but I have a bunch of pins that came with my Billings kit. I'll have to do some testing soon, I believe...
-
Thanks for the kind words, gentlemen. Nenad; I am in the process of determining the rivet/bolts for the gudgeons, but they will be present. I would like them to serve a structural purpose, (i.e. actually holding the gudgeons on) so I don't have to use any CA. Keith; The topgallant rail is here to stay, for better or worse, and I'm ok with how it looks.