HOLIDAY DONATION DRIVE - SUPPORT MSW - DO YOUR PART TO KEEP THIS GREAT FORUM GOING! (Only 36 donations so far out of 49,000 members - C'mon guys!)
×


rfolsom
-
Posts
881 -
Joined
-
Last visited
Content Type
Profiles
Forums
Gallery
Events
Everything posted by rfolsom
-
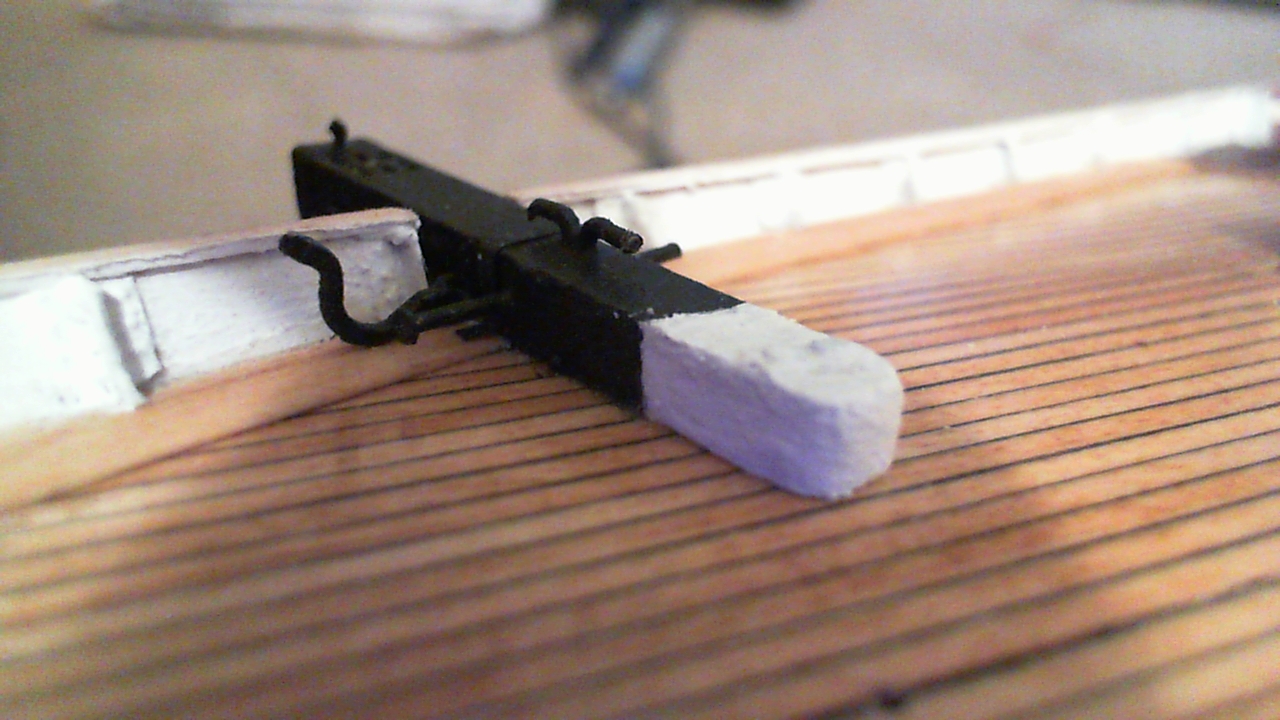
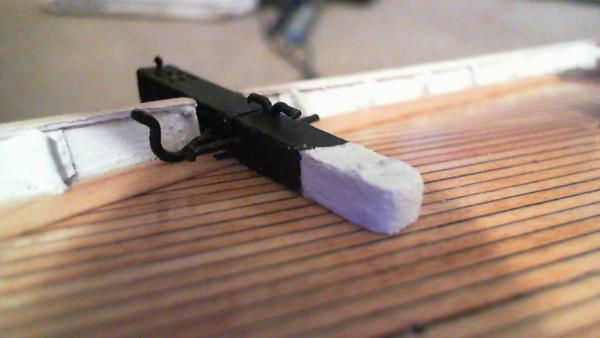
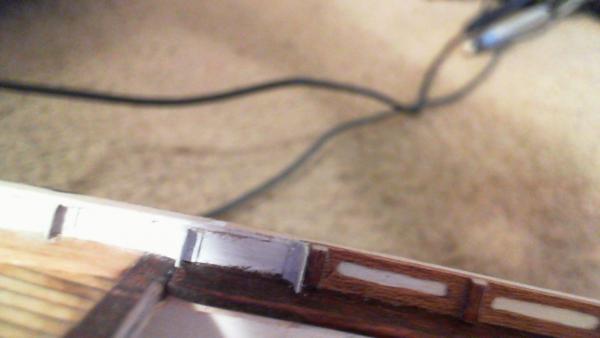
 Catheads are mounted, with brackets attached just inboard of the bulwarks. Also added the pins that affix the very inboard ends to the deck. Not too happy with the way the white paint turned out; I may have to clean it up a bit. Also added two more frame extensions where the toilets will sit. Now I'm finally ready to add the last of the topgallant rails.
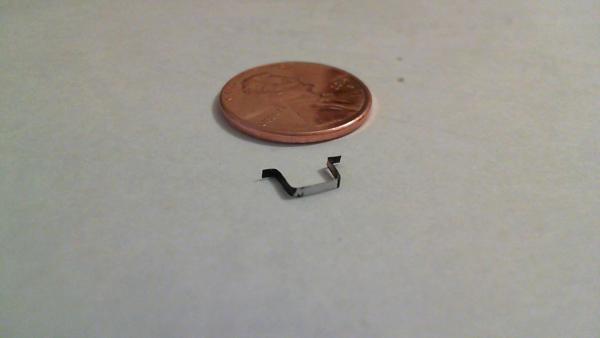
-
Hi Frank; Thanks for dropping by and thank you for the kind words. Moving along (slowly) I soaked 1/8" x 1/16" basswood strips in hot water for about an hour, and used the actual model to form the foremost sections of the topgallant rail, leaving to dry overnight. Once the catheads are fixed in place, these will be mounted and blended in to the rest of the railing, finally completing this step. It would have been much harder to install detailed catheads after installing the rail, so I'm happy with the progress. I'm also adding two more frame extensions near the toilets that needed to be added to the inside of the bulwarks before the rail is in place. I hope to have some meaningful pictures in the next couple of days, but I'm taking my time to hopefully prevent any major screw-ups. Cheers, ~Bob
-
Cutty Sark by Keith B
rfolsom replied to Keith B's topic in - Build logs for subjects built 1851 - 1900
I would still trust Campell over any kit plans; I am basing my parts fabrication for the Victory off of Caldercraft, but fine-tuning to The Anatomy of the Ship. Either way, it's splitting hairs, and you will still produce a fine model; and all the more proud that it started as a blank sheet of plywood... Fine job! -
Cutty Sark by NenadM
rfolsom replied to NenadM's topic in - Build logs for subjects built 1851 - 1900
Very, very nice work, my friend! -
Hello Dale; fantastic looking build so far; While framing, I carved out a couple of ship's boats hulls for my Niagara awhile back, and contemplated the ribbing. I know a lot of guys use styrene, but on accident I found that a bamboo wok brush, purchased at my local asian market, had hundreds of bamboo "slats" that split very evenly into the sizes required, and bent to the hull shape easily. I haven't done any more experimenting with this for a while, but in my book it will be a sure bet that I will use a couple of pieces from the brush to do the framing of the boats. Just a thought....
- 468 replies
-
- 1
-

-
- niagara
- model shipways
- (and 1 more)
-
Keith; I popped in on your Victory log tonight; great work, and a temptation to jump over to my Victory. I will try to resist temptation.... (Did Admiral Nelson jump ship to take over the Cutty Sark and run tea from China? ...not to mention the minimum of 64 years in the future...) BTW, the last time I built a Tamiya tank model was when I was around 11 or 12 years old... Did you say the tank treads are metal? I remember the vinyl(?) ones at the bottom of the box that you had to melt the tabs with a hot knife in order to join their ends together...
-
Great looking build, Keith. My Vic is in it's infancy; when I try to focus for awhile on one build, I try not to look at other build posts. However, as a confirmed shipaholic, I couldn't help myself; so I dropped in on your fine build log once again. Will I be tempted to work on the Victory and abandon the CS for awhile? We'll see what tomorrow brings.... Cheers! ~Bob
-
Cutty Sark by Keith B
rfolsom replied to Keith B's topic in - Build logs for subjects built 1851 - 1900
You're progressing much quicker than I am with my scratch built Victory, but I have also shifted back to the CS. You're tempting me to shift again to the Vic.. Great work so far! ~Bob -
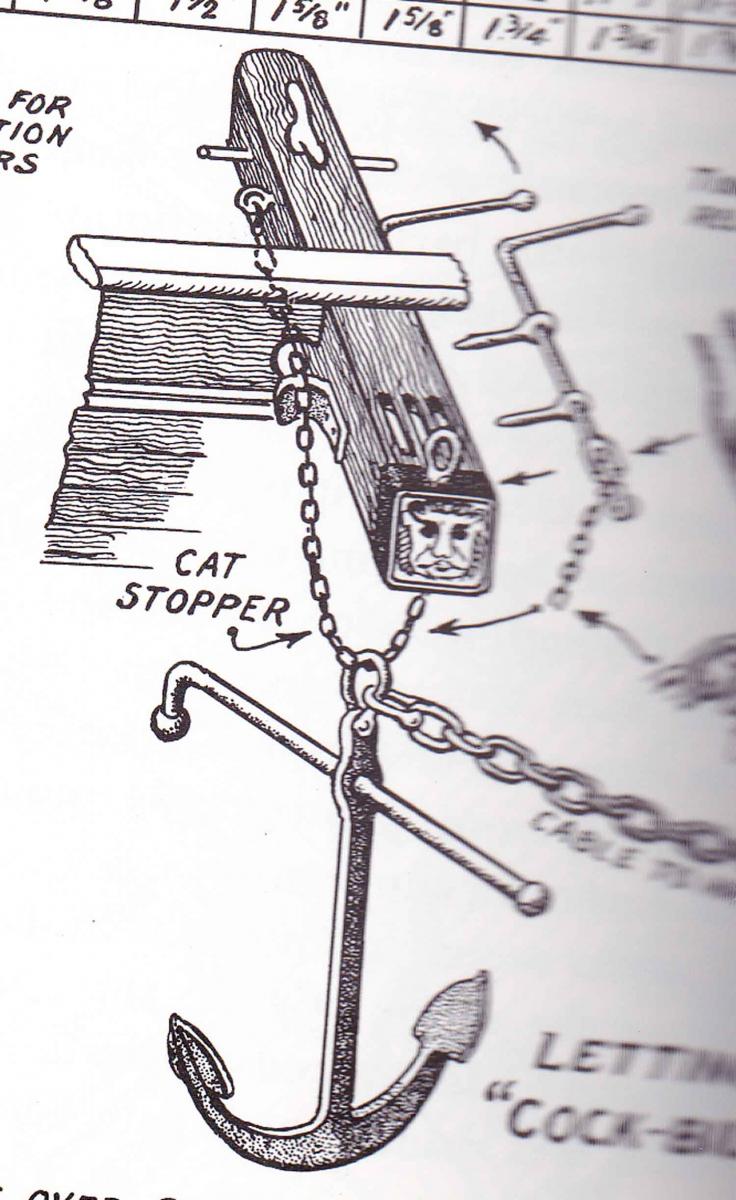
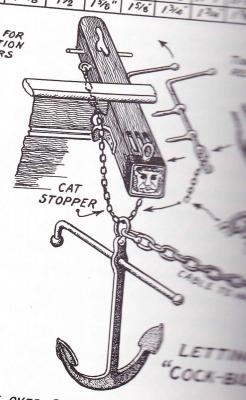
I found my mistake in Campell's China Tea Clippers. I wrongly assumed the "up" position was the anchor stowage, pulling down to release; it is the other way around; luckily a gentle nudge broke the ca loose, and I was able to rotate it freely into position; The right way (stowed) is shown in post #635. And believe me, Keith, if it hadn't have been that easy of a fix, I was not about to remake the assembly; as you said, nobody, (except me) would have known the difference.. Lesson learned: Do your research thoroughly , especially if you have the resource material right at your fingertips..
-
Cutty Sark by NenadM
rfolsom replied to NenadM's topic in - Build logs for subjects built 1851 - 1900
Seems like real life always gets in the way of the ships... Hope everything is ok with you and yours. I'm curious to the cause of the strike;.. political? money? pecking order? And yes, to me, 3 years for deck houses and fittings, and another 3 for masting and rigging sounds about right.... -
White ends need to be painted... (again)
-
Catheads are almost finished; and so are the bulwark modifications needed to accompany them.

-
New observation I missed: If you check out my posts 629 and 630, and assuming the ship is at sea; what do you find most wrong with my tumbler release handles?
-
Cutty Sark by NenadM
rfolsom replied to NenadM's topic in - Build logs for subjects built 1851 - 1900
Great looking rudder, Nenad; What's next on the list? -
Cutty Sark by Keith B
rfolsom replied to Keith B's topic in - Build logs for subjects built 1851 - 1900
Nice job Keith; If you make the twenty bulkheads shown on the section plan, they all line up on the center keel as shown immediately left of the section lines. The Cutty's main deck is continuous from stem to stern, with a gentle curve, so you can use the top diagram to find the shape of the center keel both at deck level and keel (proper) levels. For my Victory, I made separate stem, stern and keel pieces from poplar to attach to the plywood center keel; you can also opt to keep them all in one piece. As for the slots on both center keel and bulkheads, I believe your best bet structurally is to divide the point of contact between each piece by two, and cut each slot in keel and bulkhead equally. Bulkheads will be square to the bottom of the keel (not necessarily true for frames, but I'm assuming you're building this POB.) Make sure when you cut the mast slots, you include the rake, as they are not perpendicular to the keel bottom. Hope this rambling helps... ~Bob -
Campbell's plans are a good starting point. If I remember right, you have a copy. Use the "body sections" area of the General Arrangement plan sheet to fabricate bulkhead templates, and create a false keel using the other drawings from the same plan sheet. A $10 2' x 4' sheet of 1/4" cabinet grade plywood, and you're off and running.. Good luck and best wishes for whichever route you choose; We'll be eagerly watching! ~Bpb
- 151 replies
-
- 1
-
-
- cutty sark
- billing boats
- (and 1 more)
-
Cutty Sark by NenadM
rfolsom replied to NenadM's topic in - Build logs for subjects built 1851 - 1900
I deleted my last post. MSW is here to provide a community of like-minded people a place to talk about their ships, not their problems..- 4,152 replies
-
- 1
-
-
- cutty sark
- tehnodidakta
- (and 1 more)
-
Thanks for the input Keith; I thought that would be the best course of action; although most CS builders I've seen add the whiskers to the cats before installing... It's been about three decades since I've rigged a ship, so I'm looking forward to everyone's advice when the time comes.
-
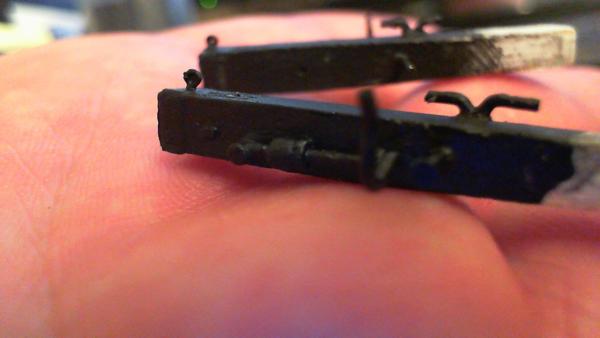
Grrr... relocating (again) cross pin on the port cathead.. And the cleats are a bit too big... However, I was able to get both of these test-fitted into the bulwarks after filing and fiddling, so they should fit into place nicely, if they ever get finished..
-
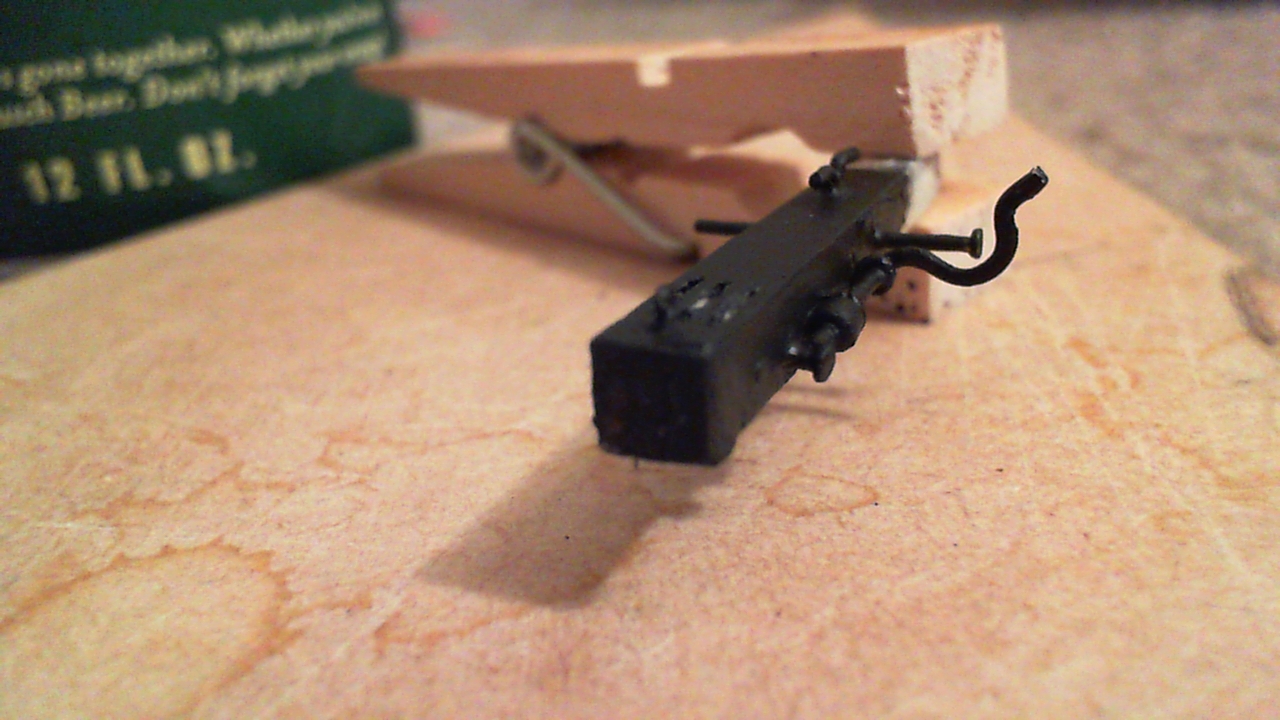
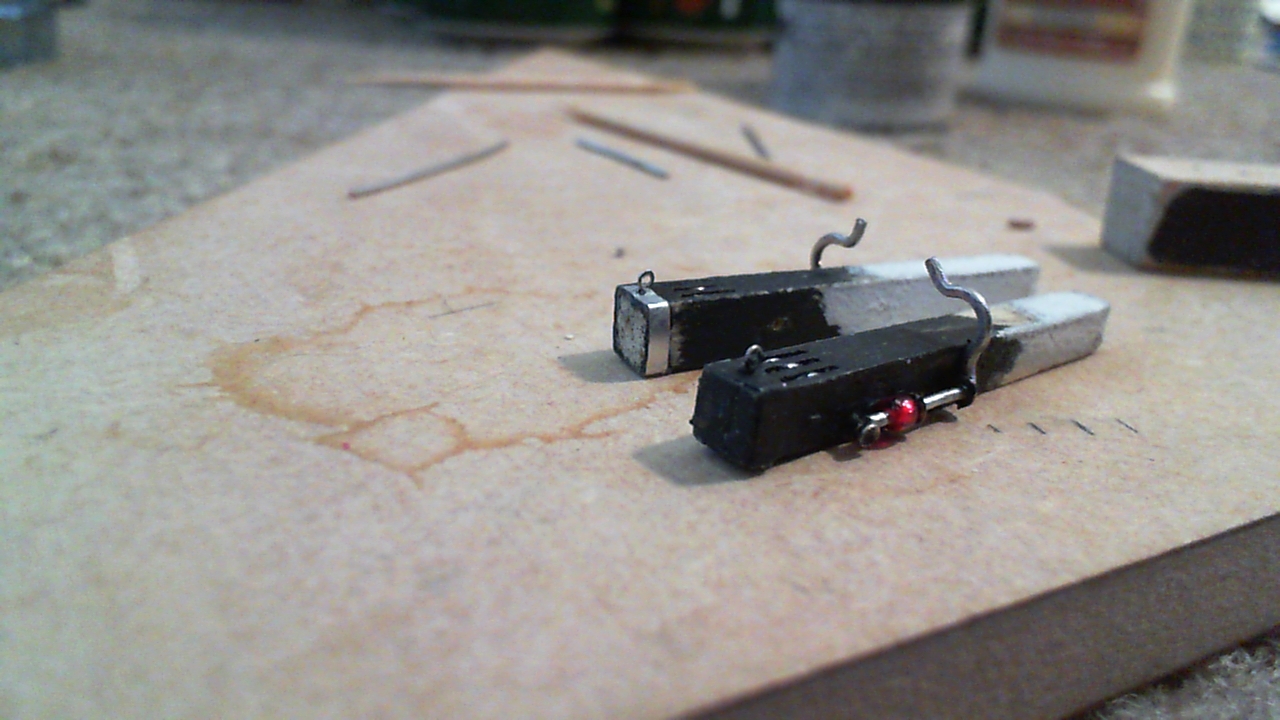
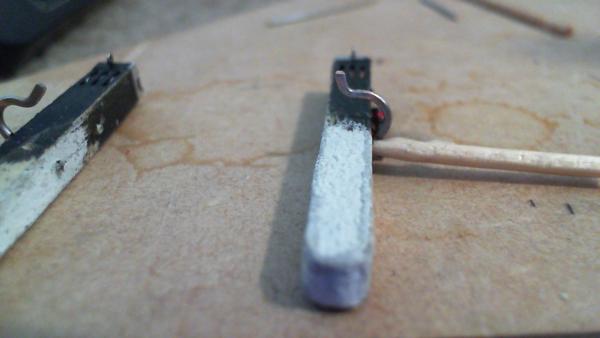
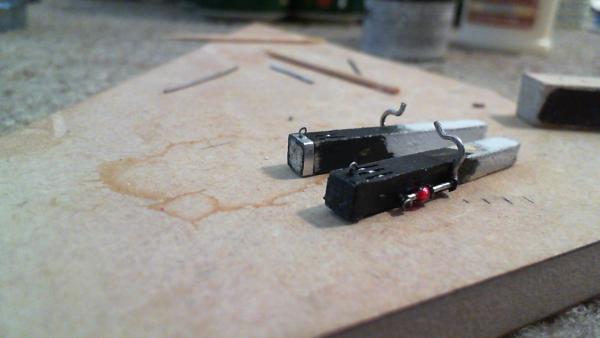
Alright. I know everyone's tired of my cathead fiddling... I guess I just have to post the little bits I get done (Nenad.. maybe this is my "group therapy" for my "shipaholic" state) Tumbler assemblies are finally done, after much fiddling, testing, sanding, patching etc.... Final painting soon, (The red bead will not be red in the end) As I mentioned before, the whiskers will not be installed (or indeed fabricated) until a later date. There's much to be done on the outside of the ship's hull that would probably destroy that assembly in the process.
-
Nenad; it becomes tricky when nothing adds up; then you have to rely on limited knowledge to fill in the gaps... This was the way with scratching the catheads.. Campell's plans, on three different diagrams, did not not match, even after rescaling. I used the photos that Lou, and yourself provided, to fill in the gaps; actually measuring on the cmputer screen, to provide approximate dimentions. I hope to be over the "Cathead Hurdle" in the next couple of days. ~Bob
-
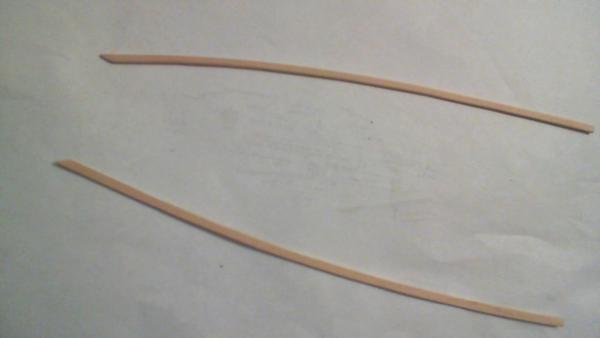
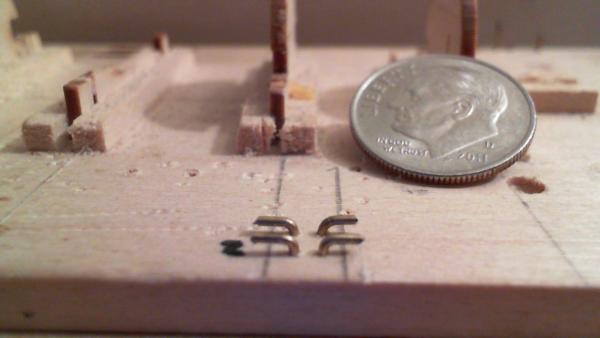
Cleats, (in the foreground) for the fore tack, that will be mounted on the top of the catheads, are sized up on a scrap board....
-
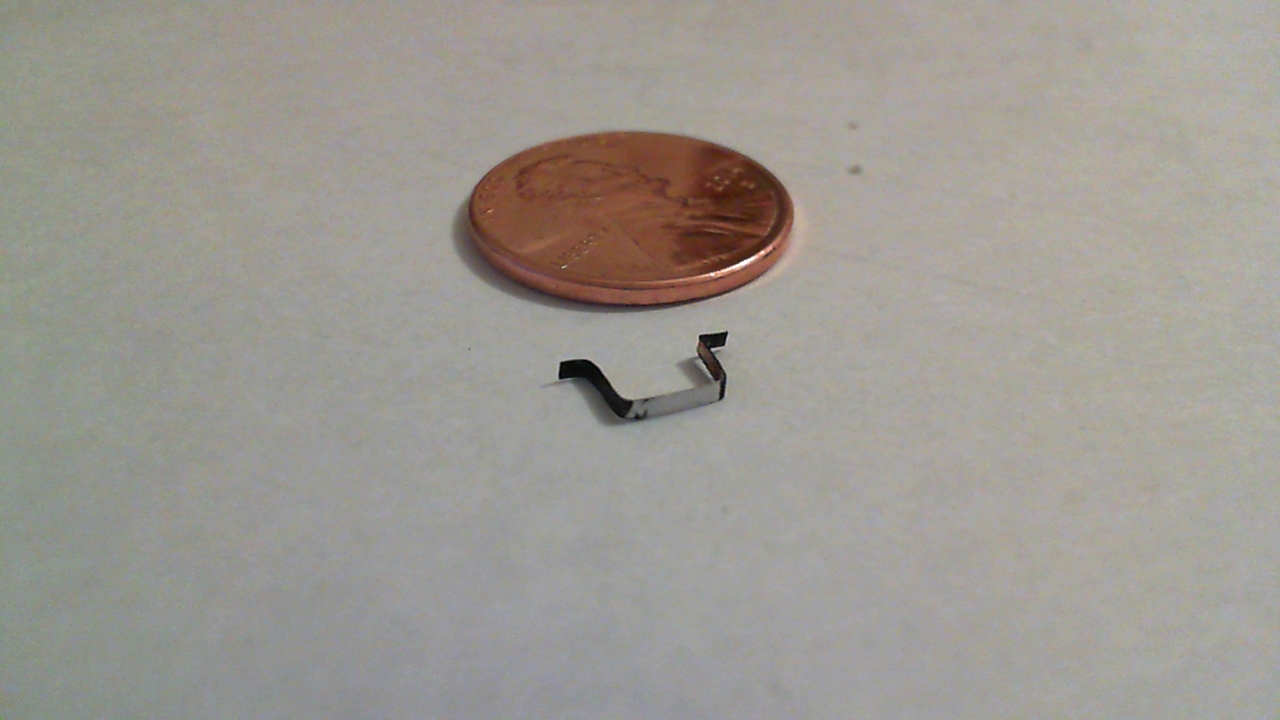
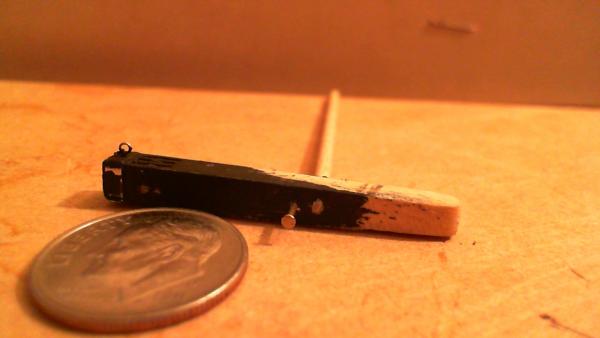
This is the frustrating part of this assembly; (catheads) after reviewing (and re-reviewing) pictures of the actual ship, the cross-pin had to be relocated outboards by about 2.3-2.5 mm. The old holes are plugged with toothpick tips (cut plug in foreground, uncut toothpick in background. Also, you'll see on top the rough pencil lines where the white ends will meet the black.
-
I'm working on finishing the catheads except for the whisker booms, the cleats that hold the whiskers into place, and the actual cat's head sculptures on the ends. The catheads will then be painted and mounted so that the topgallant rail can be finished over them. I've had to fiddle, redraw, and redrill some things on these, as Campell's plans don't agree with different drawings on the same plans, let alone the pictures of the actual ship. As far as structures go, poop deckhouse is pretty much complete, as well as the main hatches, companionways, and heads; fore deckhouse has been preliminarily framed. All this was done about a year and a half ago...
-
Thanks for the kind words, everybody. Popeye; I plan on mounting the cats before installing the whisker booms, and I'm still deciding on how to fabricate them; they'll probably be installed after all the outside detail and deck detail is added, (probably right before stepping the masts) so that's a good ways down the road....