Jump to content
Check out our new MSW Sponsor Innocraftsman ×

Glen McGuire

NRG Member
  • Posts

    1,937
  • Joined

  • Last visited

Everything posted by Glen McGuire

  1. That made me laugh! Very appropriate saying for this one, Pat! And thank you to everyone for your kind comments regarding how the project turned out. I greatly appreciate all of y'all. As for the next one, the Essex is certainly an intriguing idea. There's probably a lot that could be done with that ship and story. And I'm having a hard time getting Gary's suggestion (having a whale boat glued upside down to the inside of the bottle) out of my mind. But the next project may be a more standard SIB in nature. A local restaurant (very high-end chop house) has asked me to do an SIB that will be the centerpiece decoration for their "Mayor's Room". We are still working out the details on what they would like the project to be. I'm getting the impression that they may want something a little more traditional than my usual stuff, but we will see. Regardless, I'm really looking forward to creating something that they are happy with and will be a complement their fine establishment.
  2. Where do you come up with cool things like this and why have you not told me about it before!! That looks perfect for my SIBs - a heckuva lot better than the pencil lines I've been drawing for a deck plank look. Oh, and by the way, what a cool project you are working on, Mike! Can't wait to see how you present it in a diorama (with a hanging locomotive I hope)! The Seishu Maru looks like the type of industrial vessel that @Javelin might model, albeit a vintage one.
  3. Yessiree! Thanks for the tag, Bob. I'm on board and ready to watch the action. Looks like you are off to a nice start, Kenny. Now you know why I do all my SIB hulls in laminated layers. Learned it from this kit.
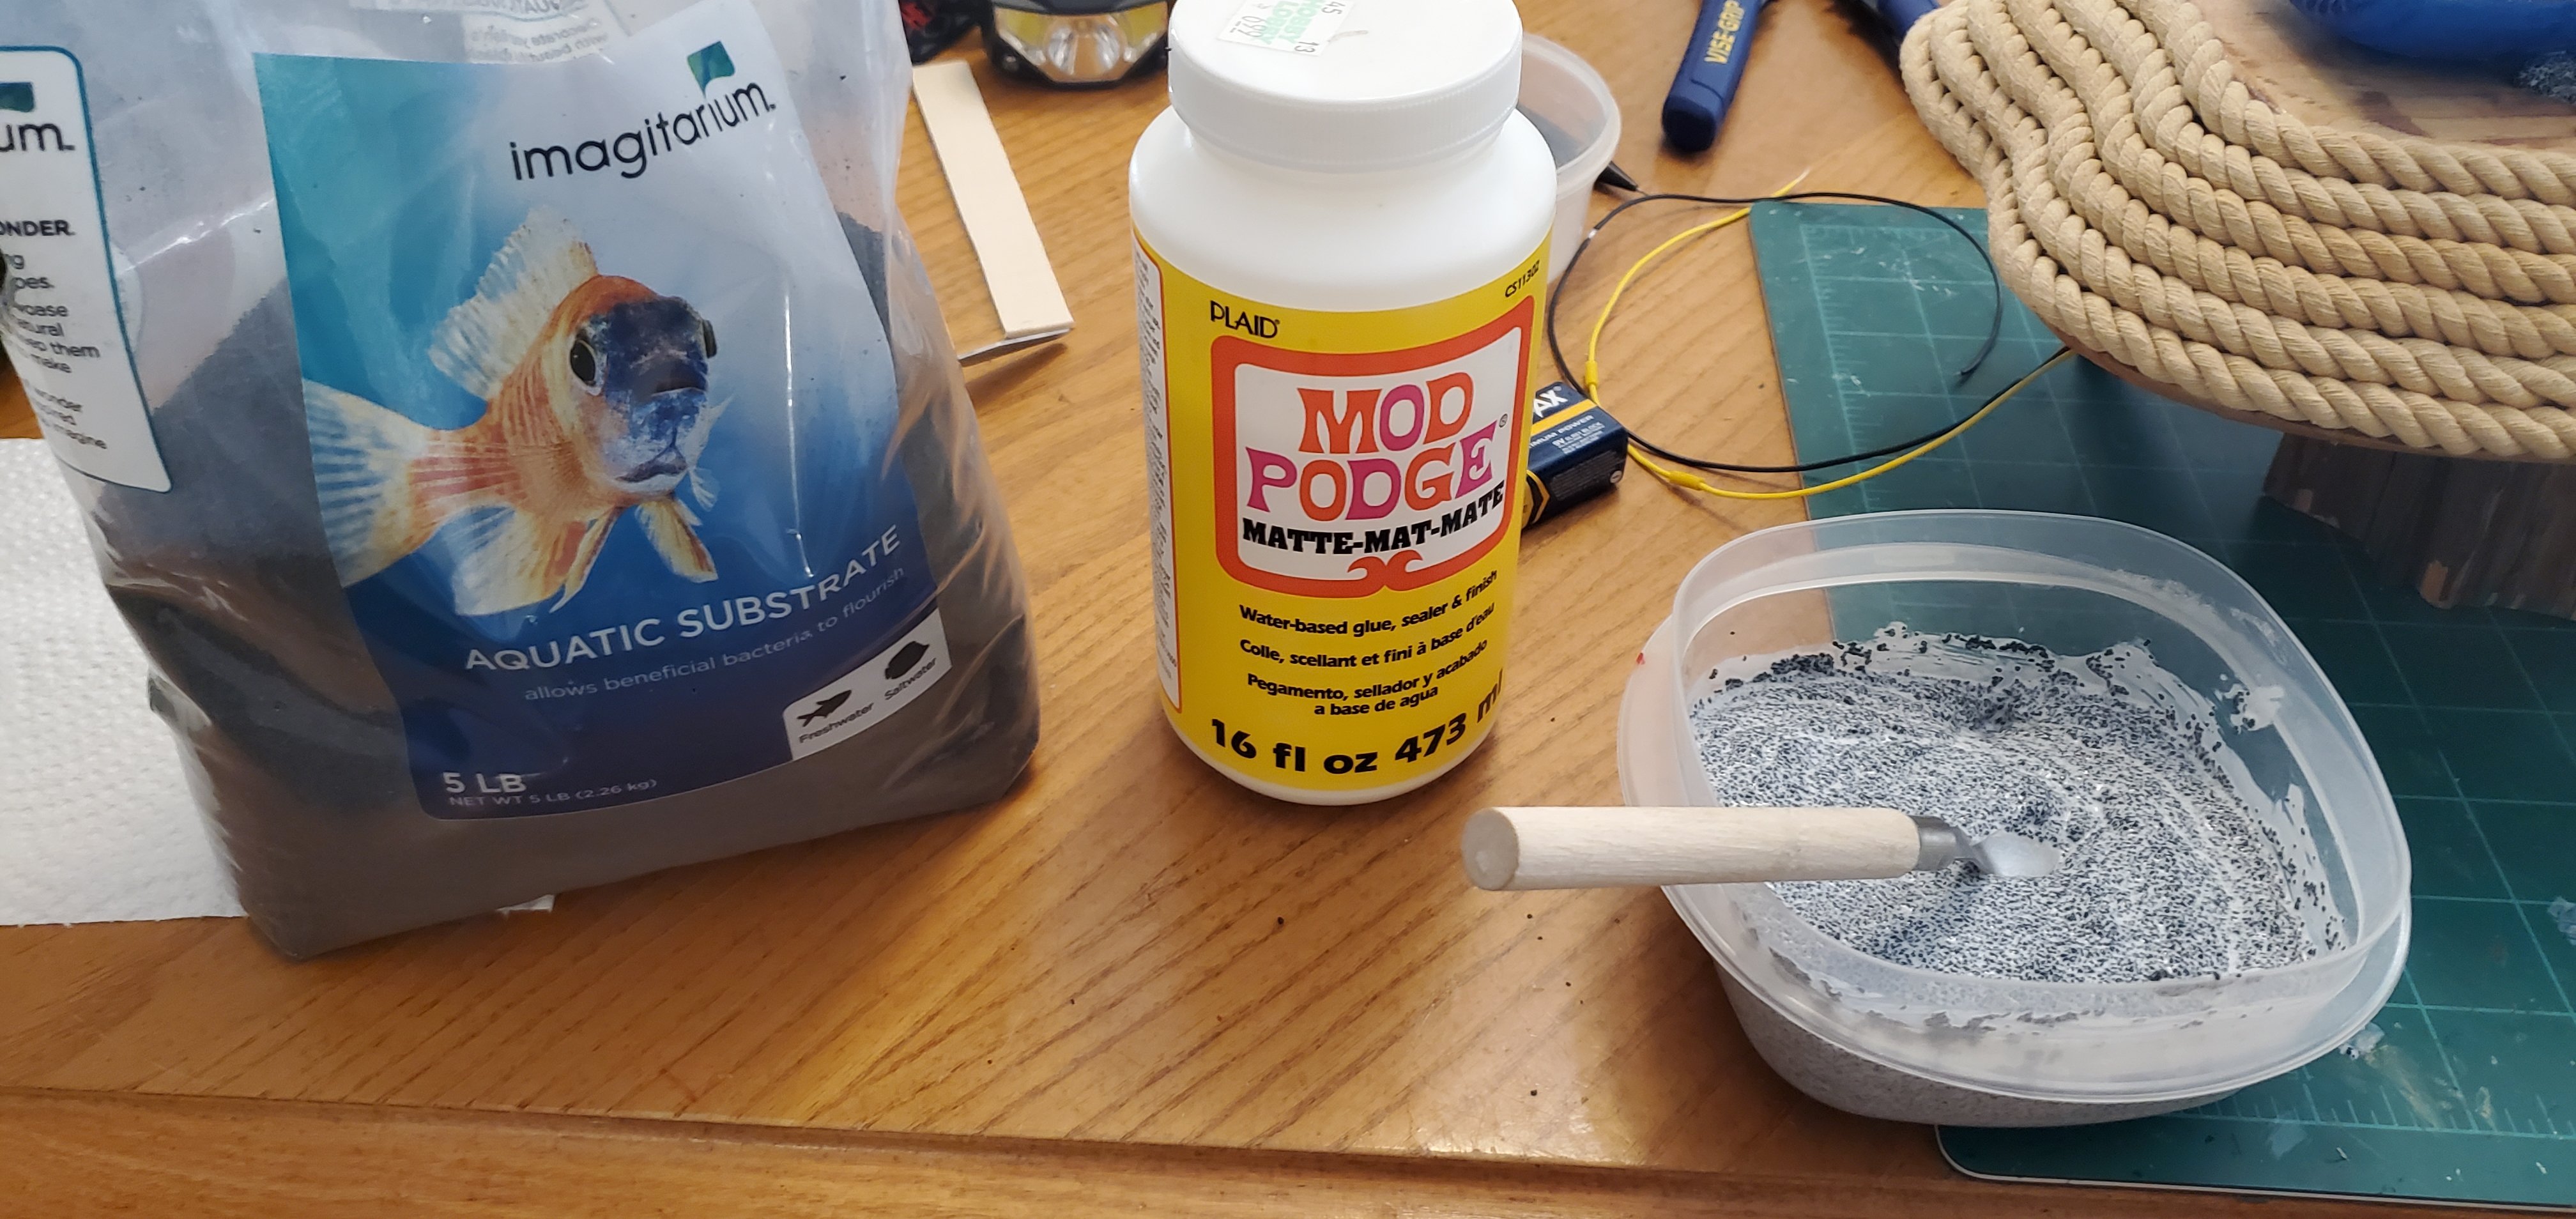
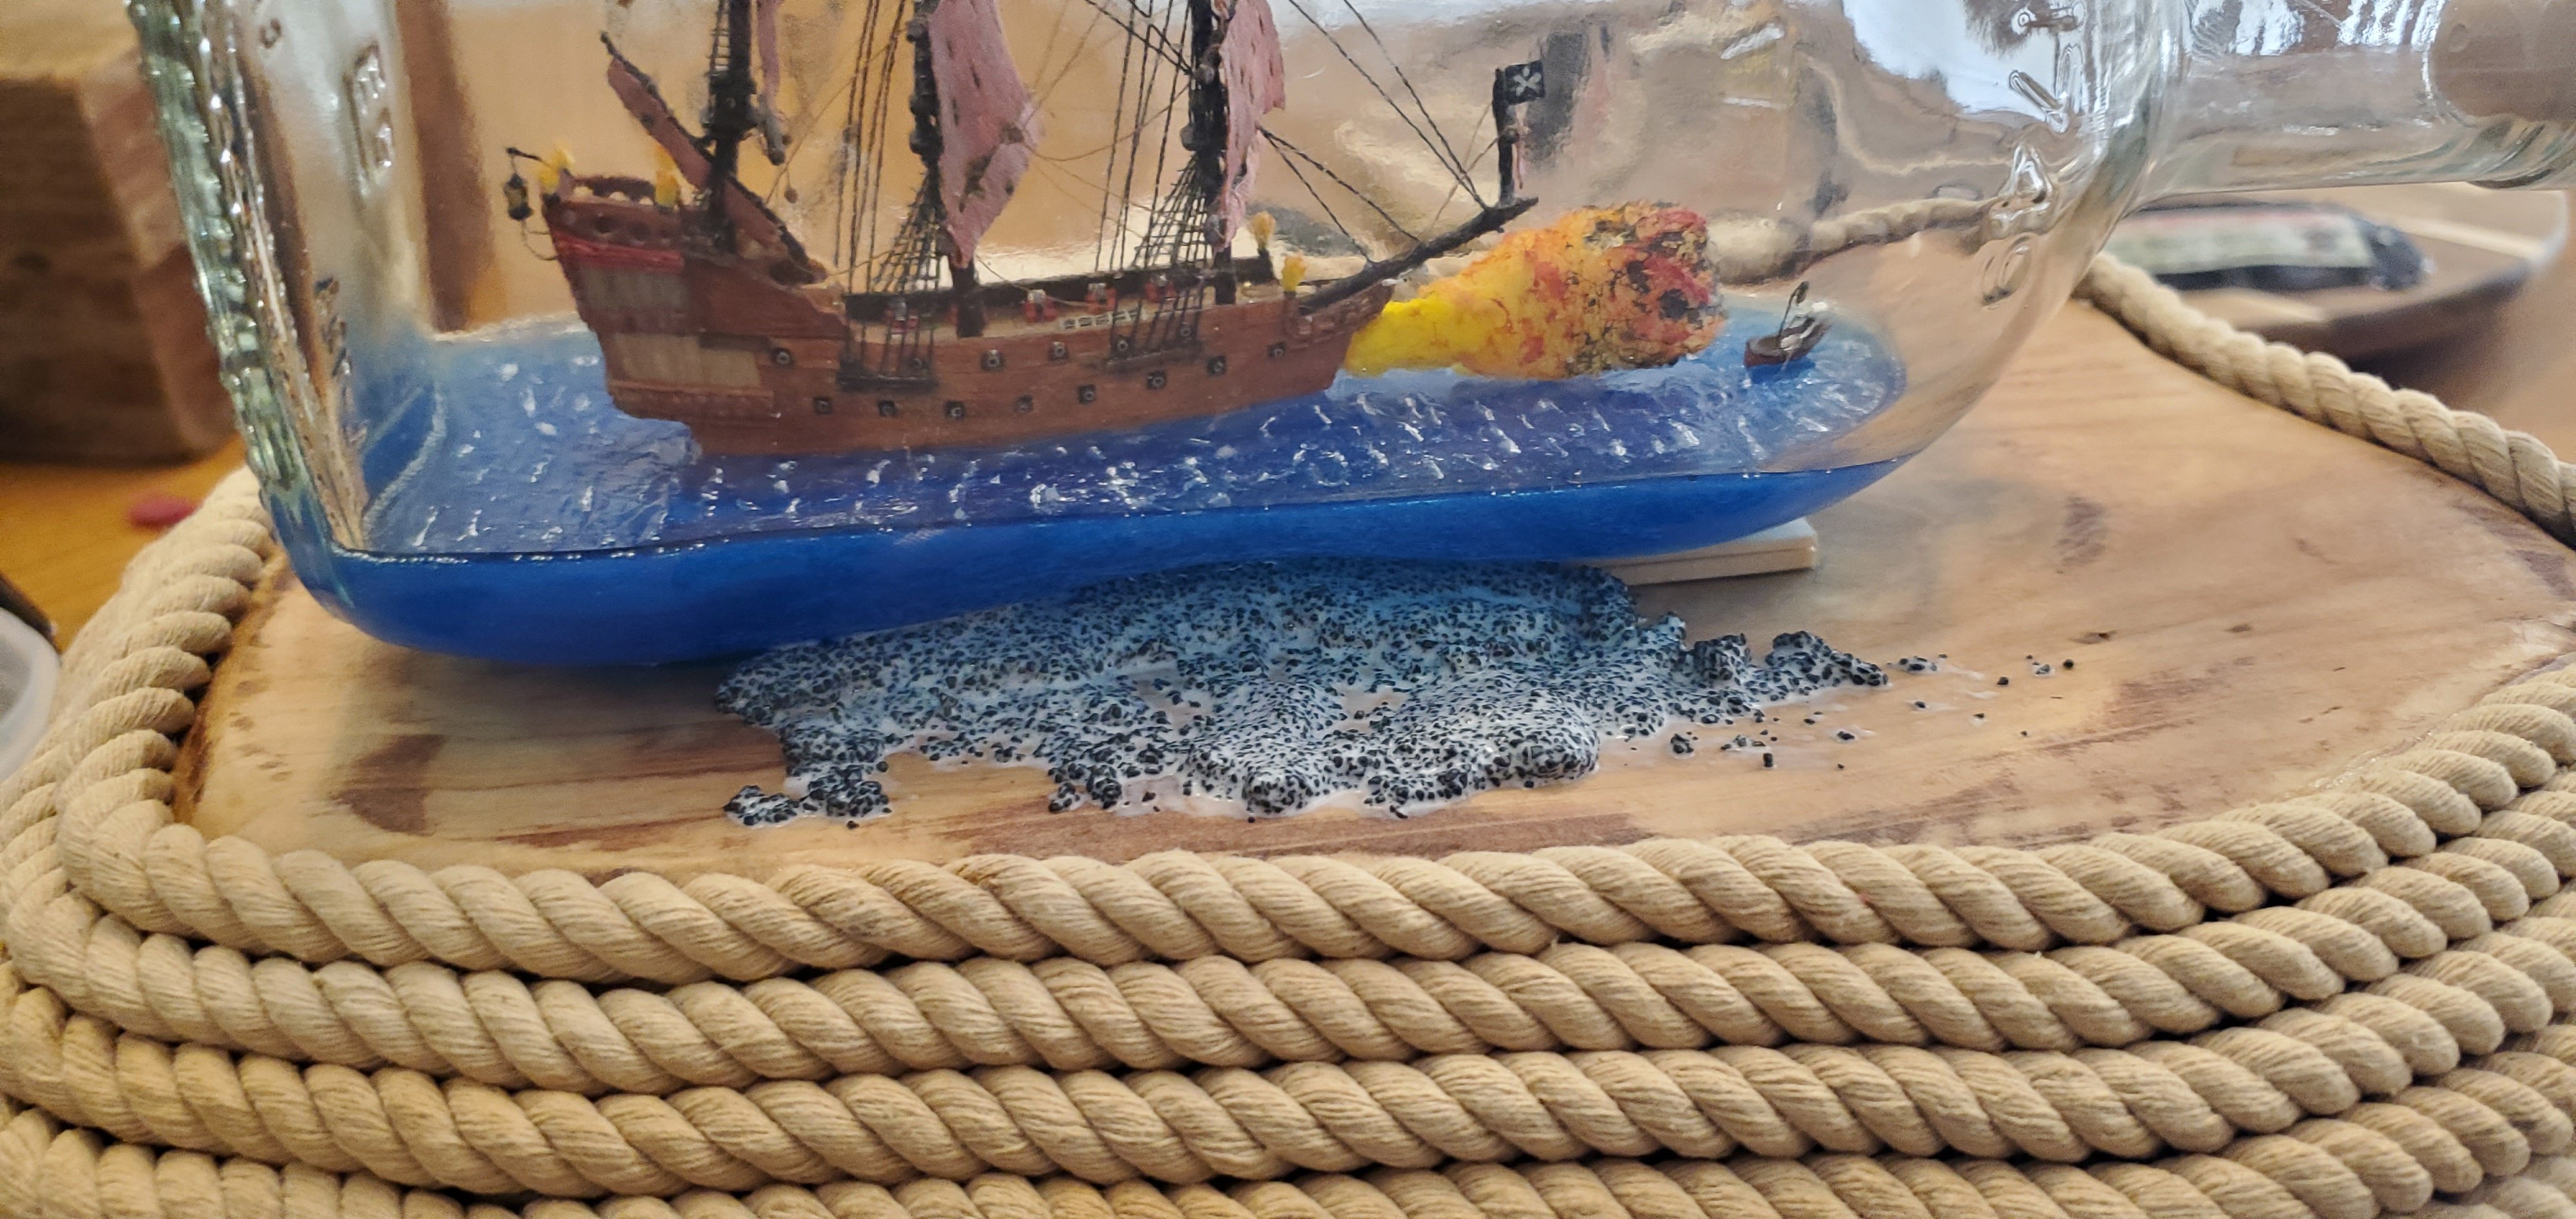
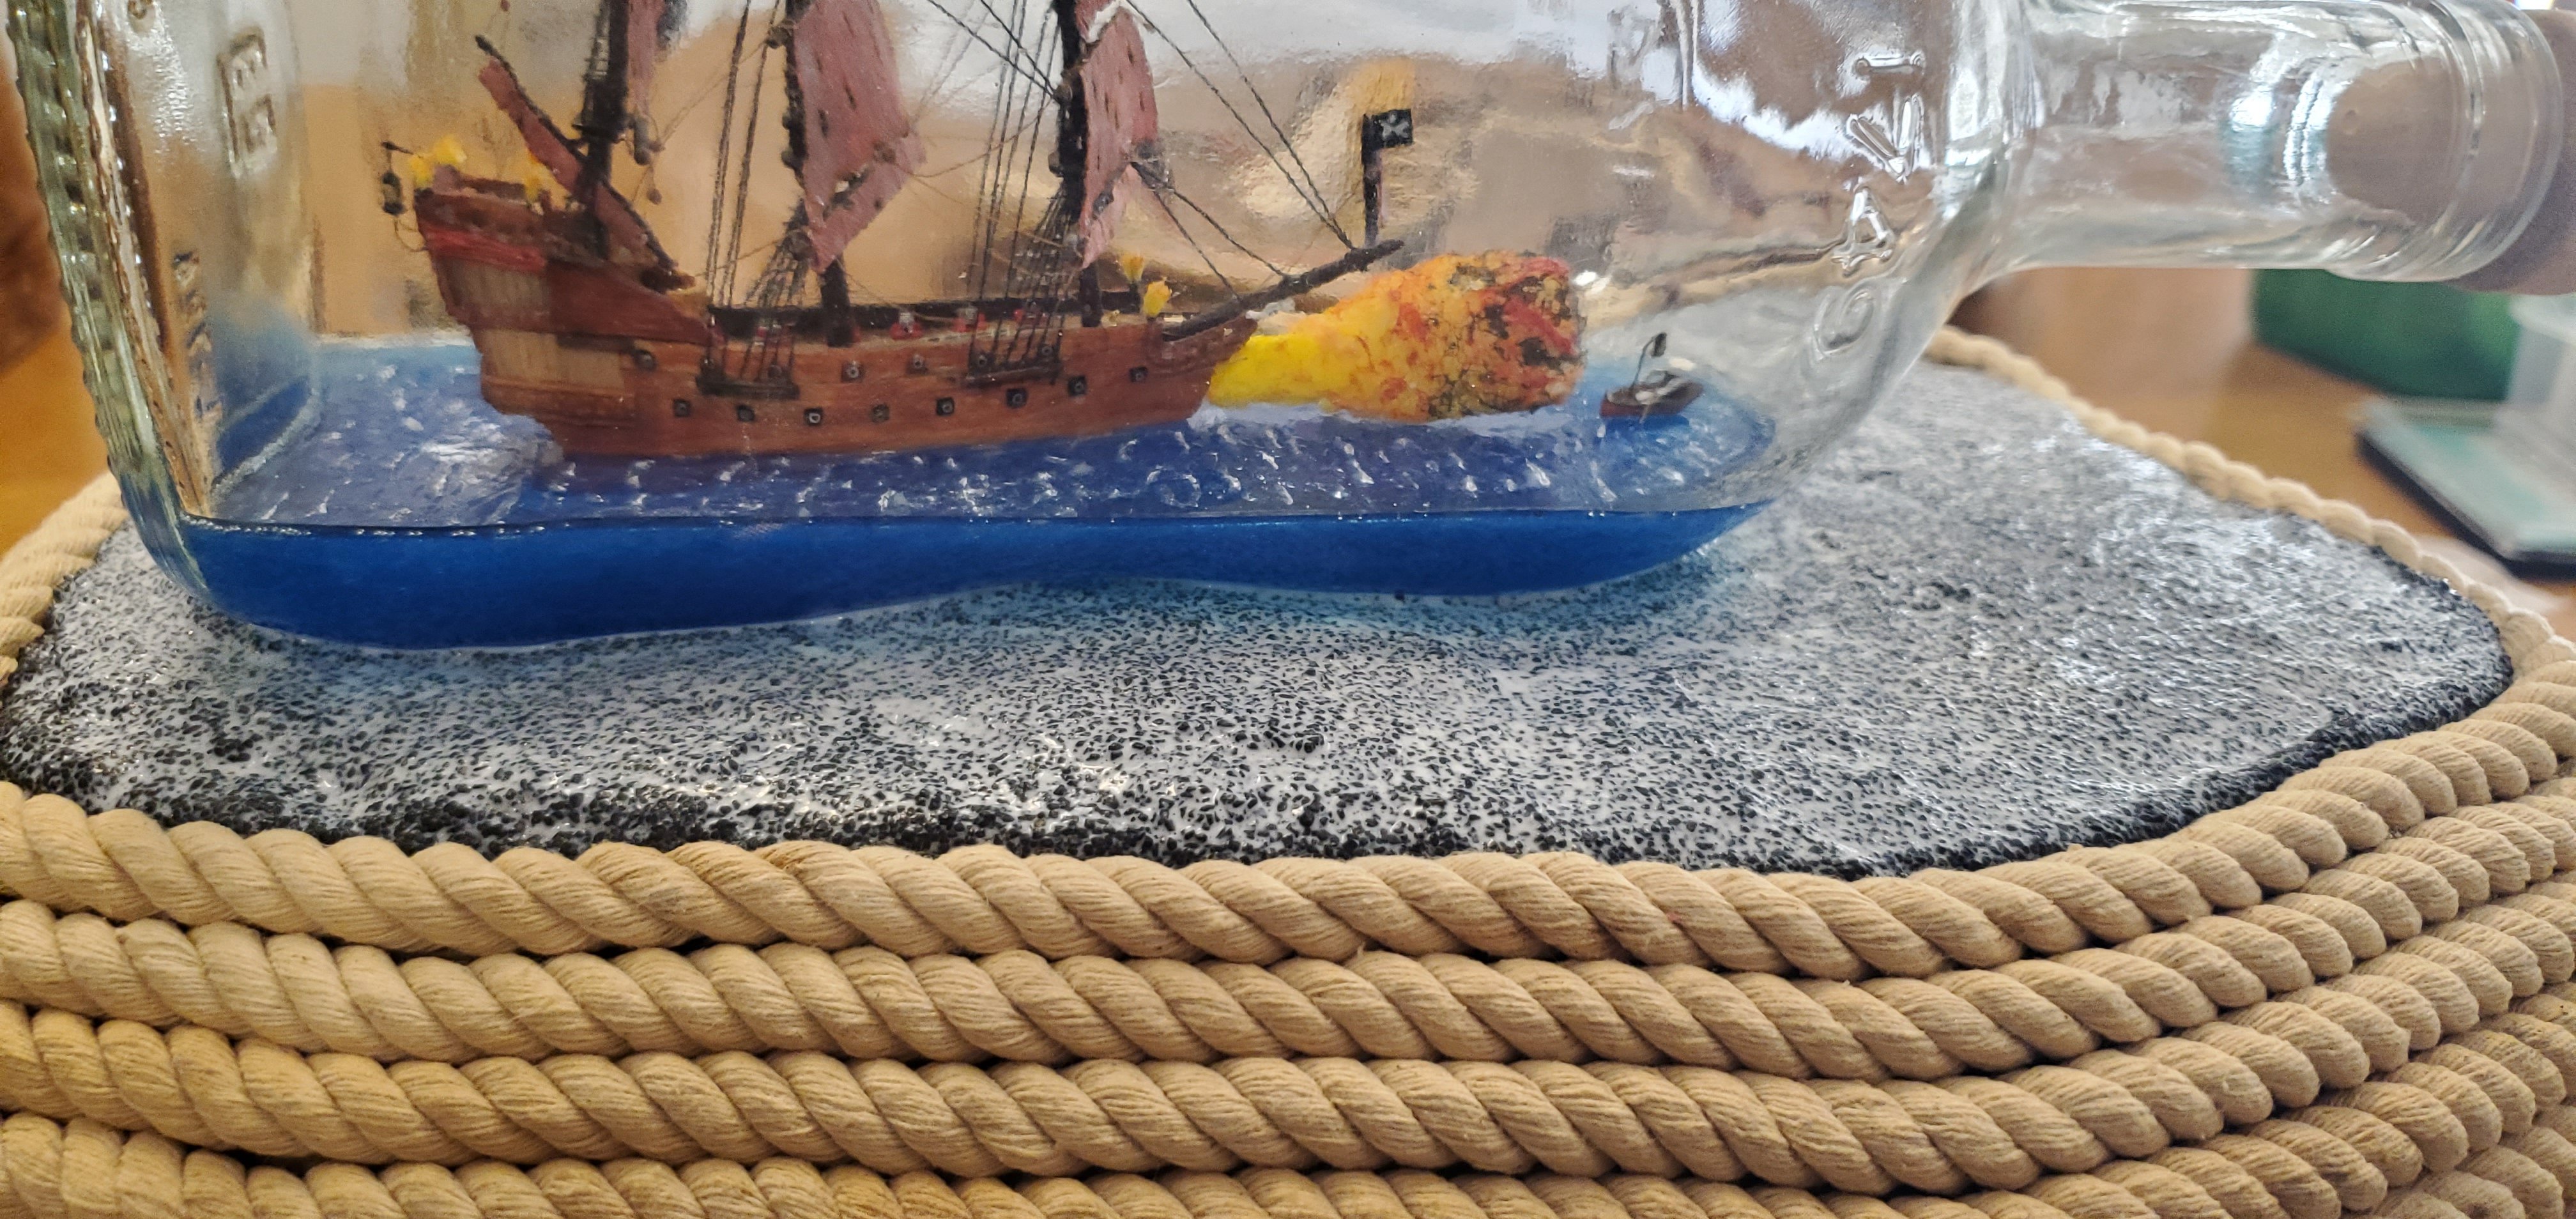
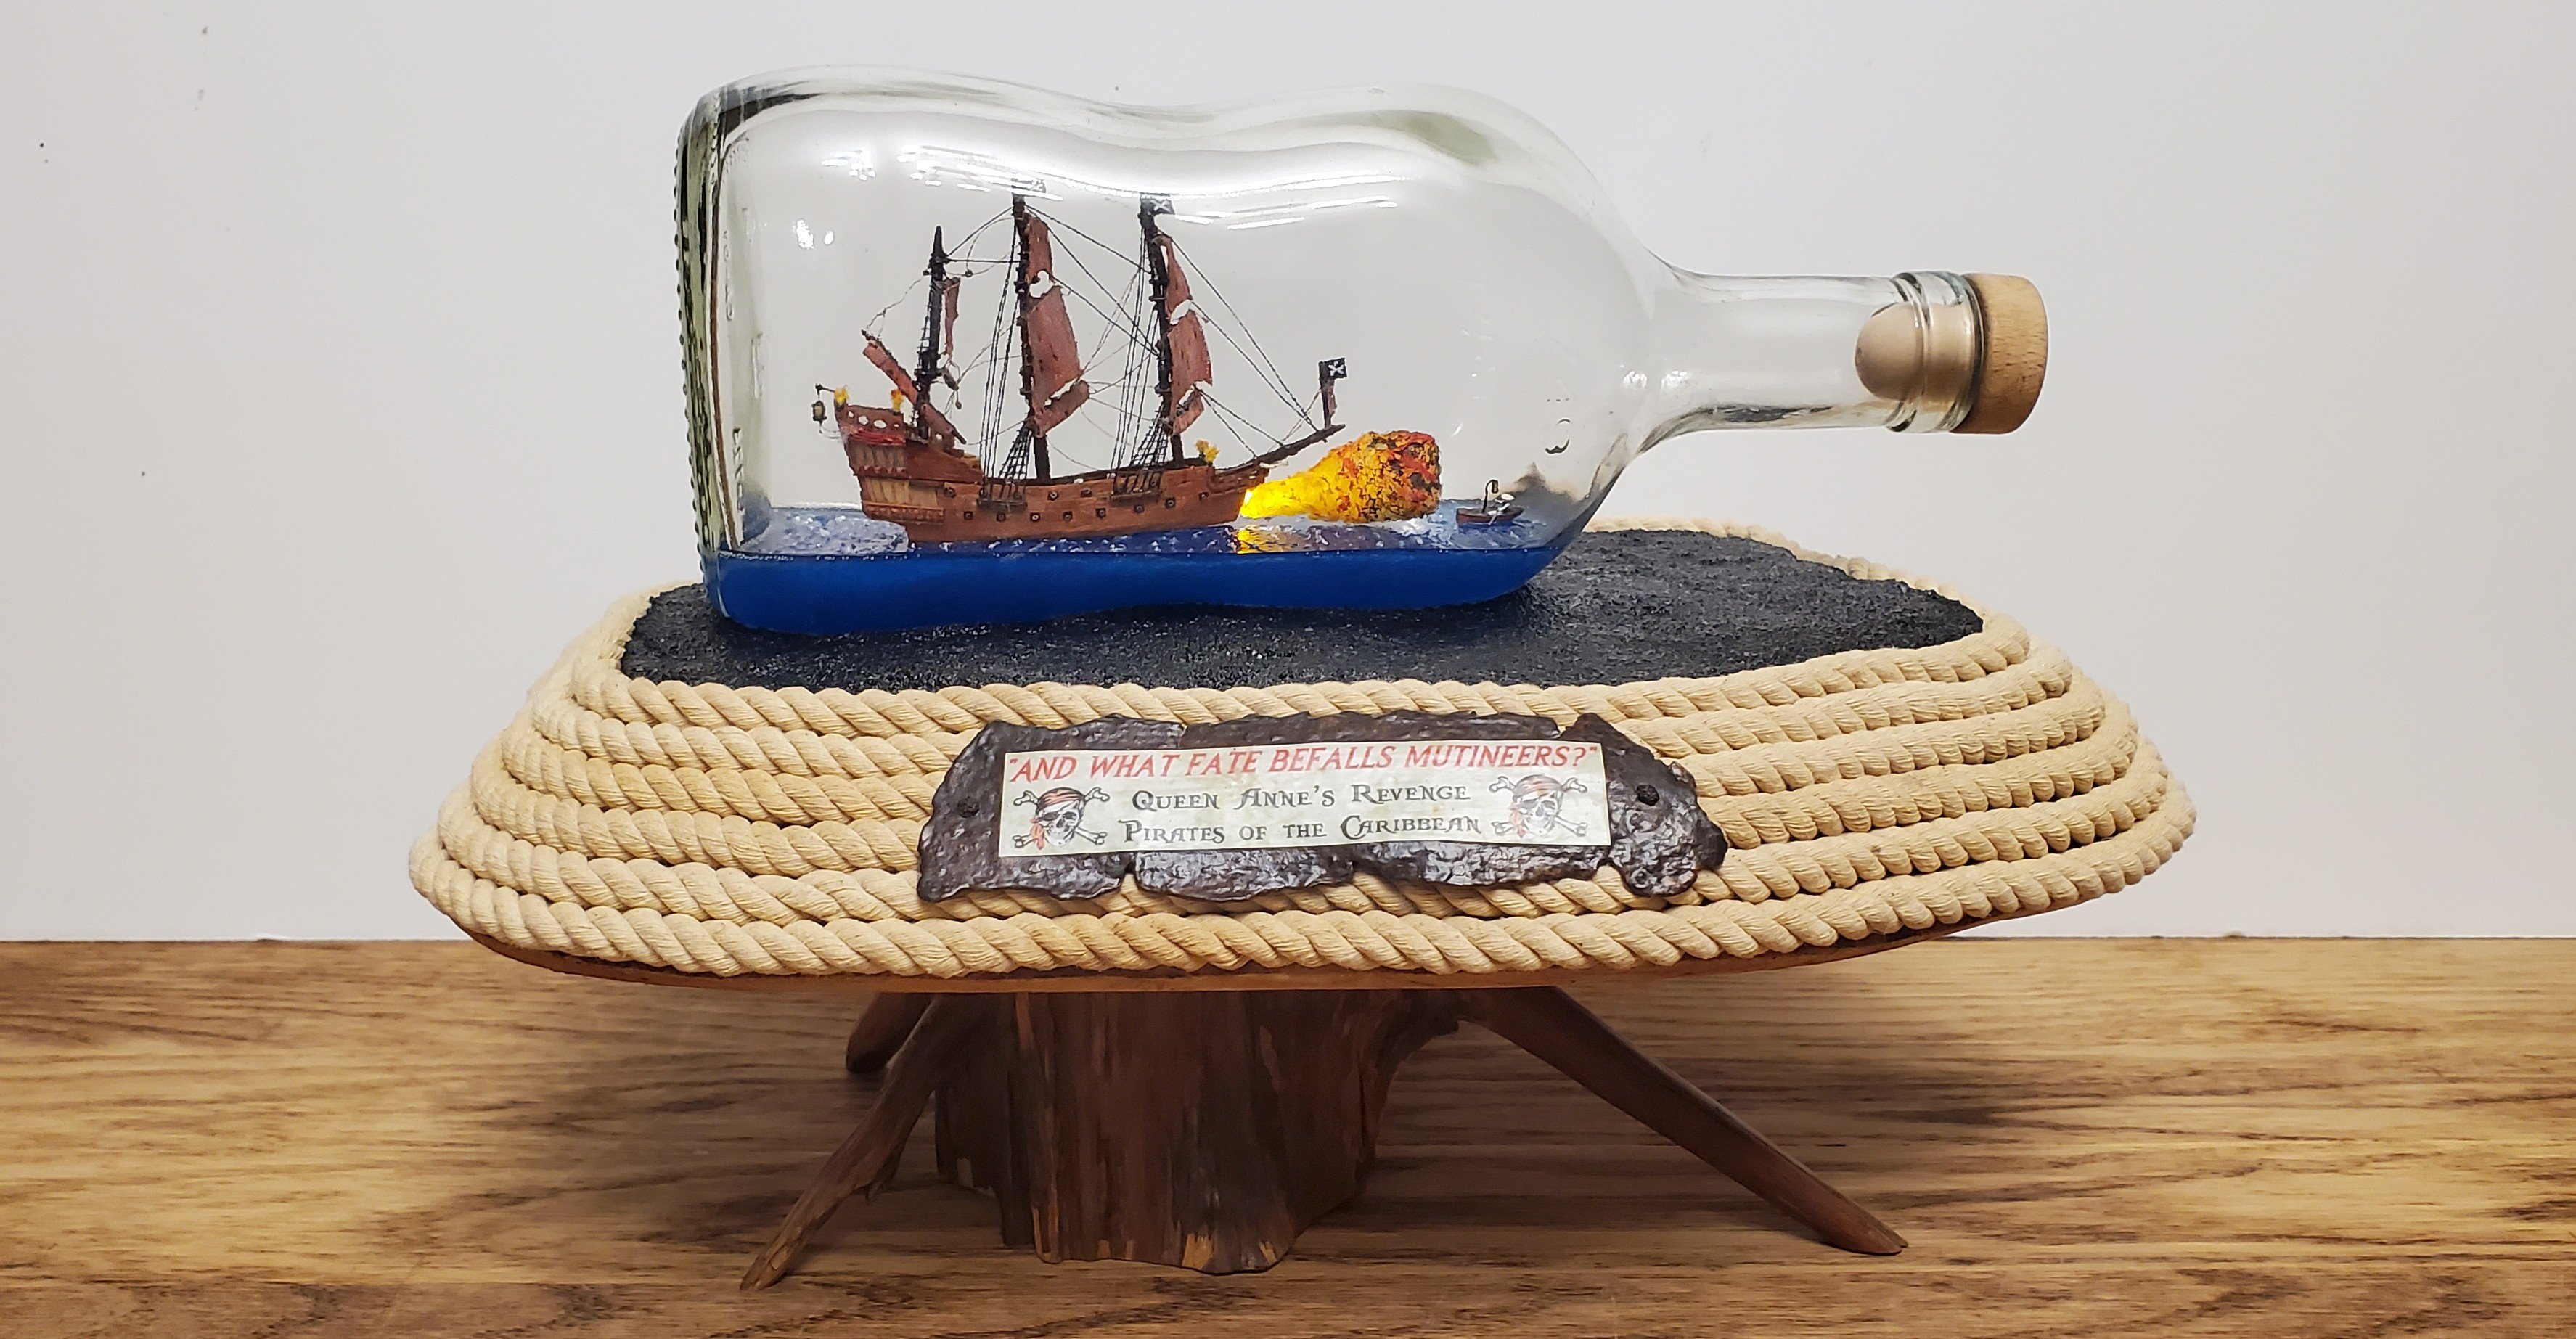
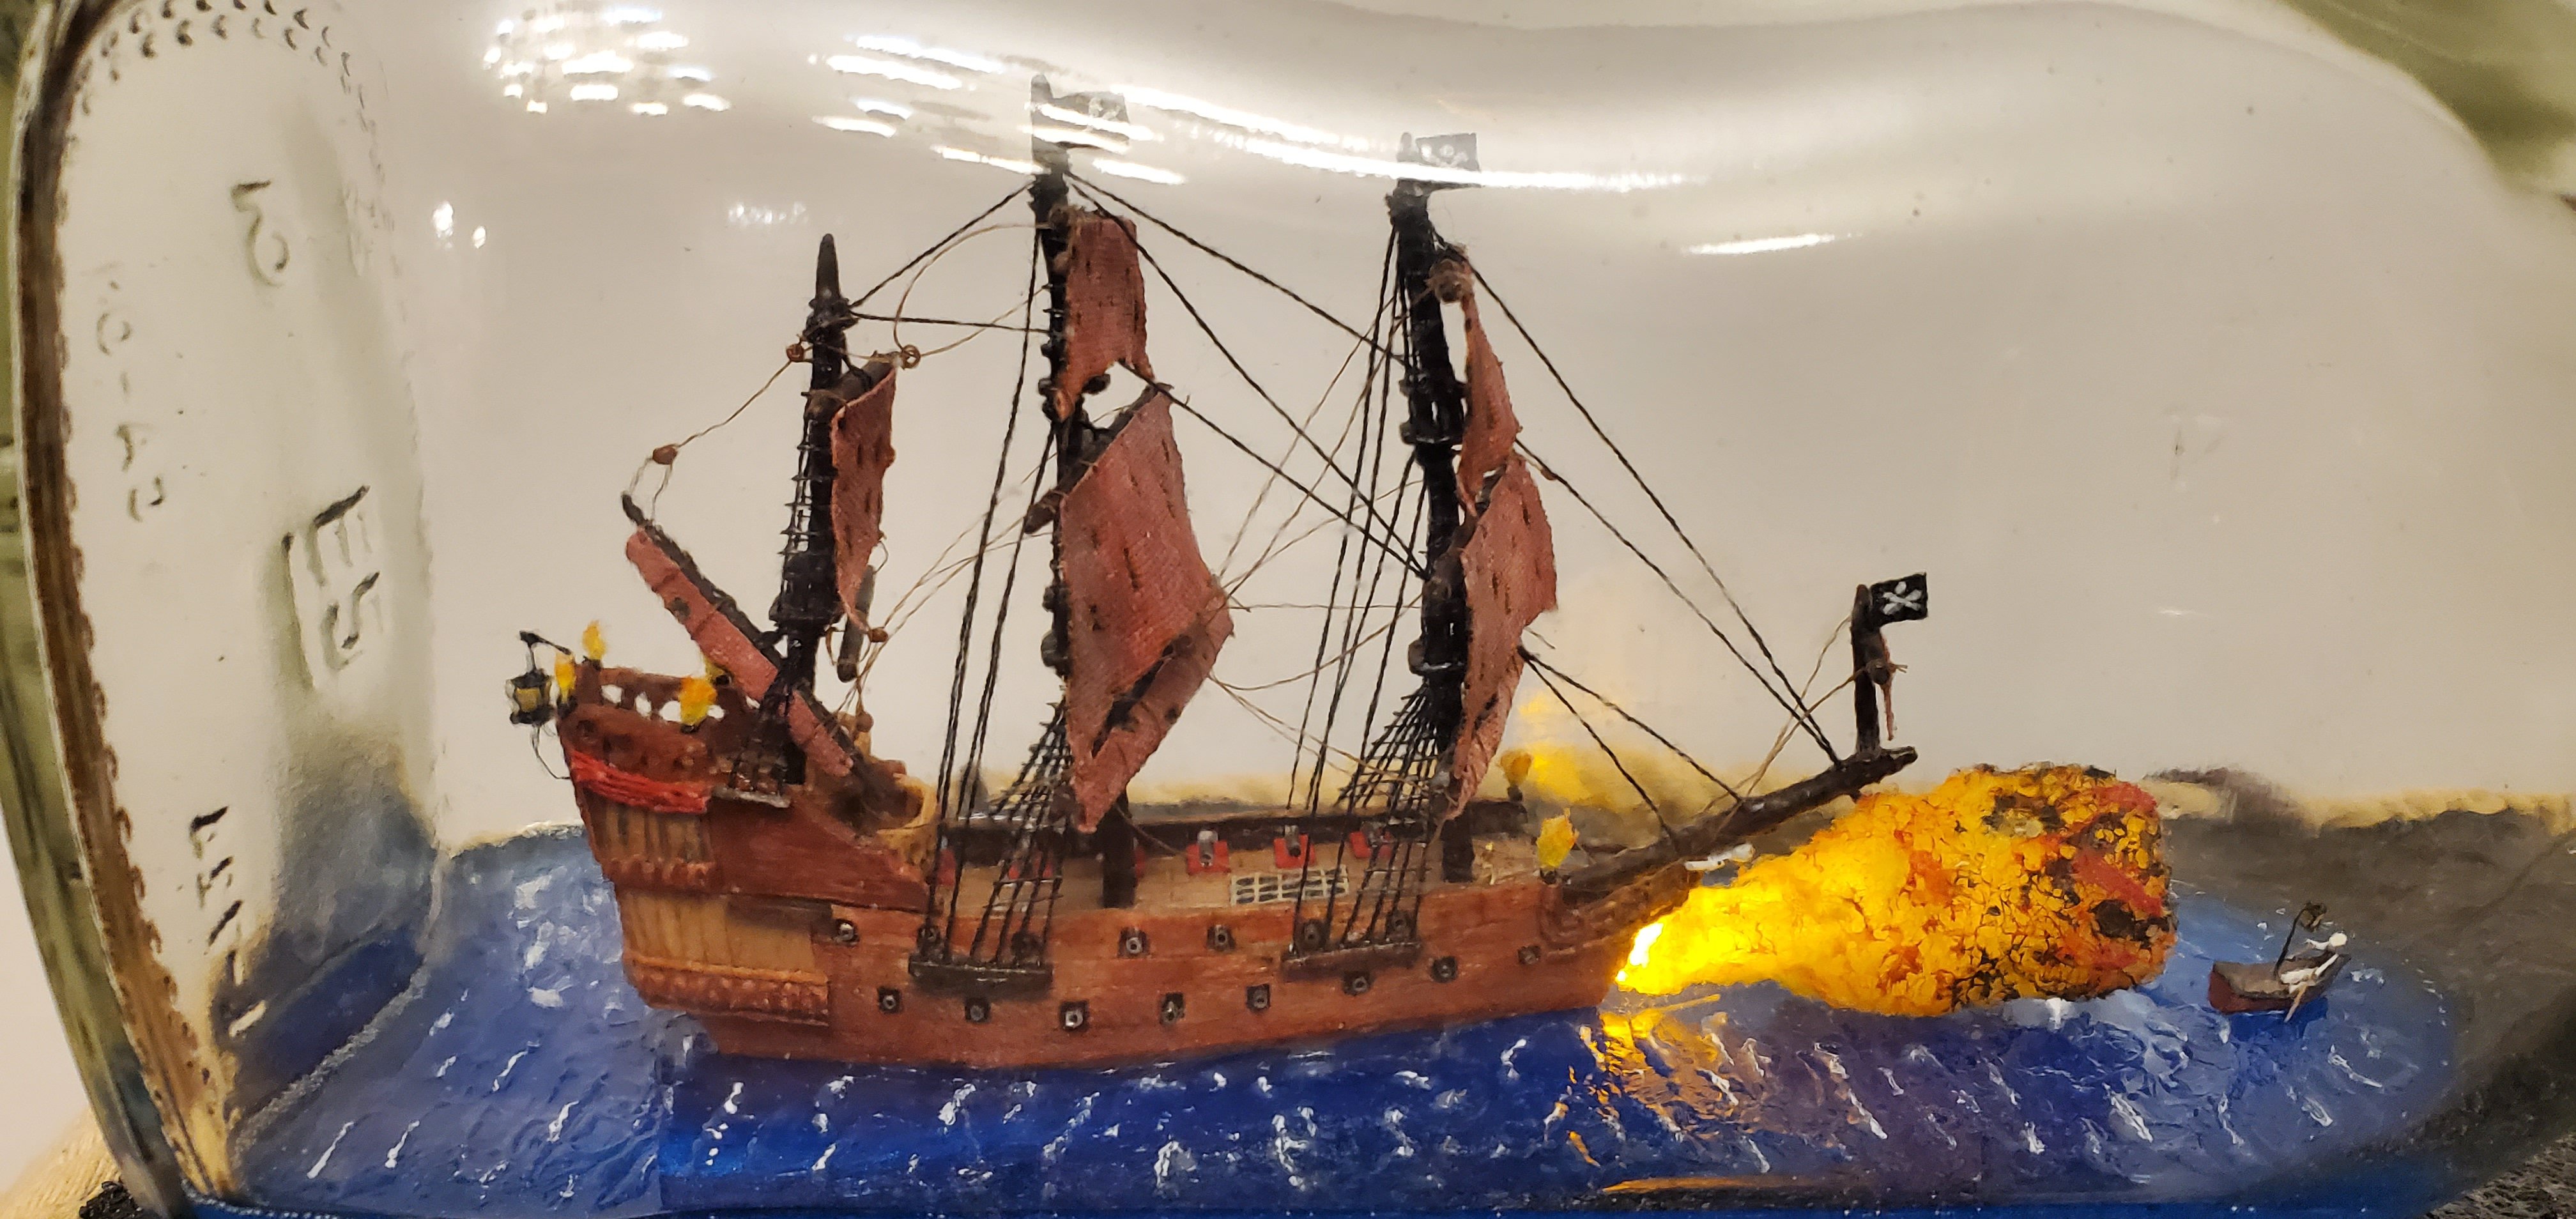
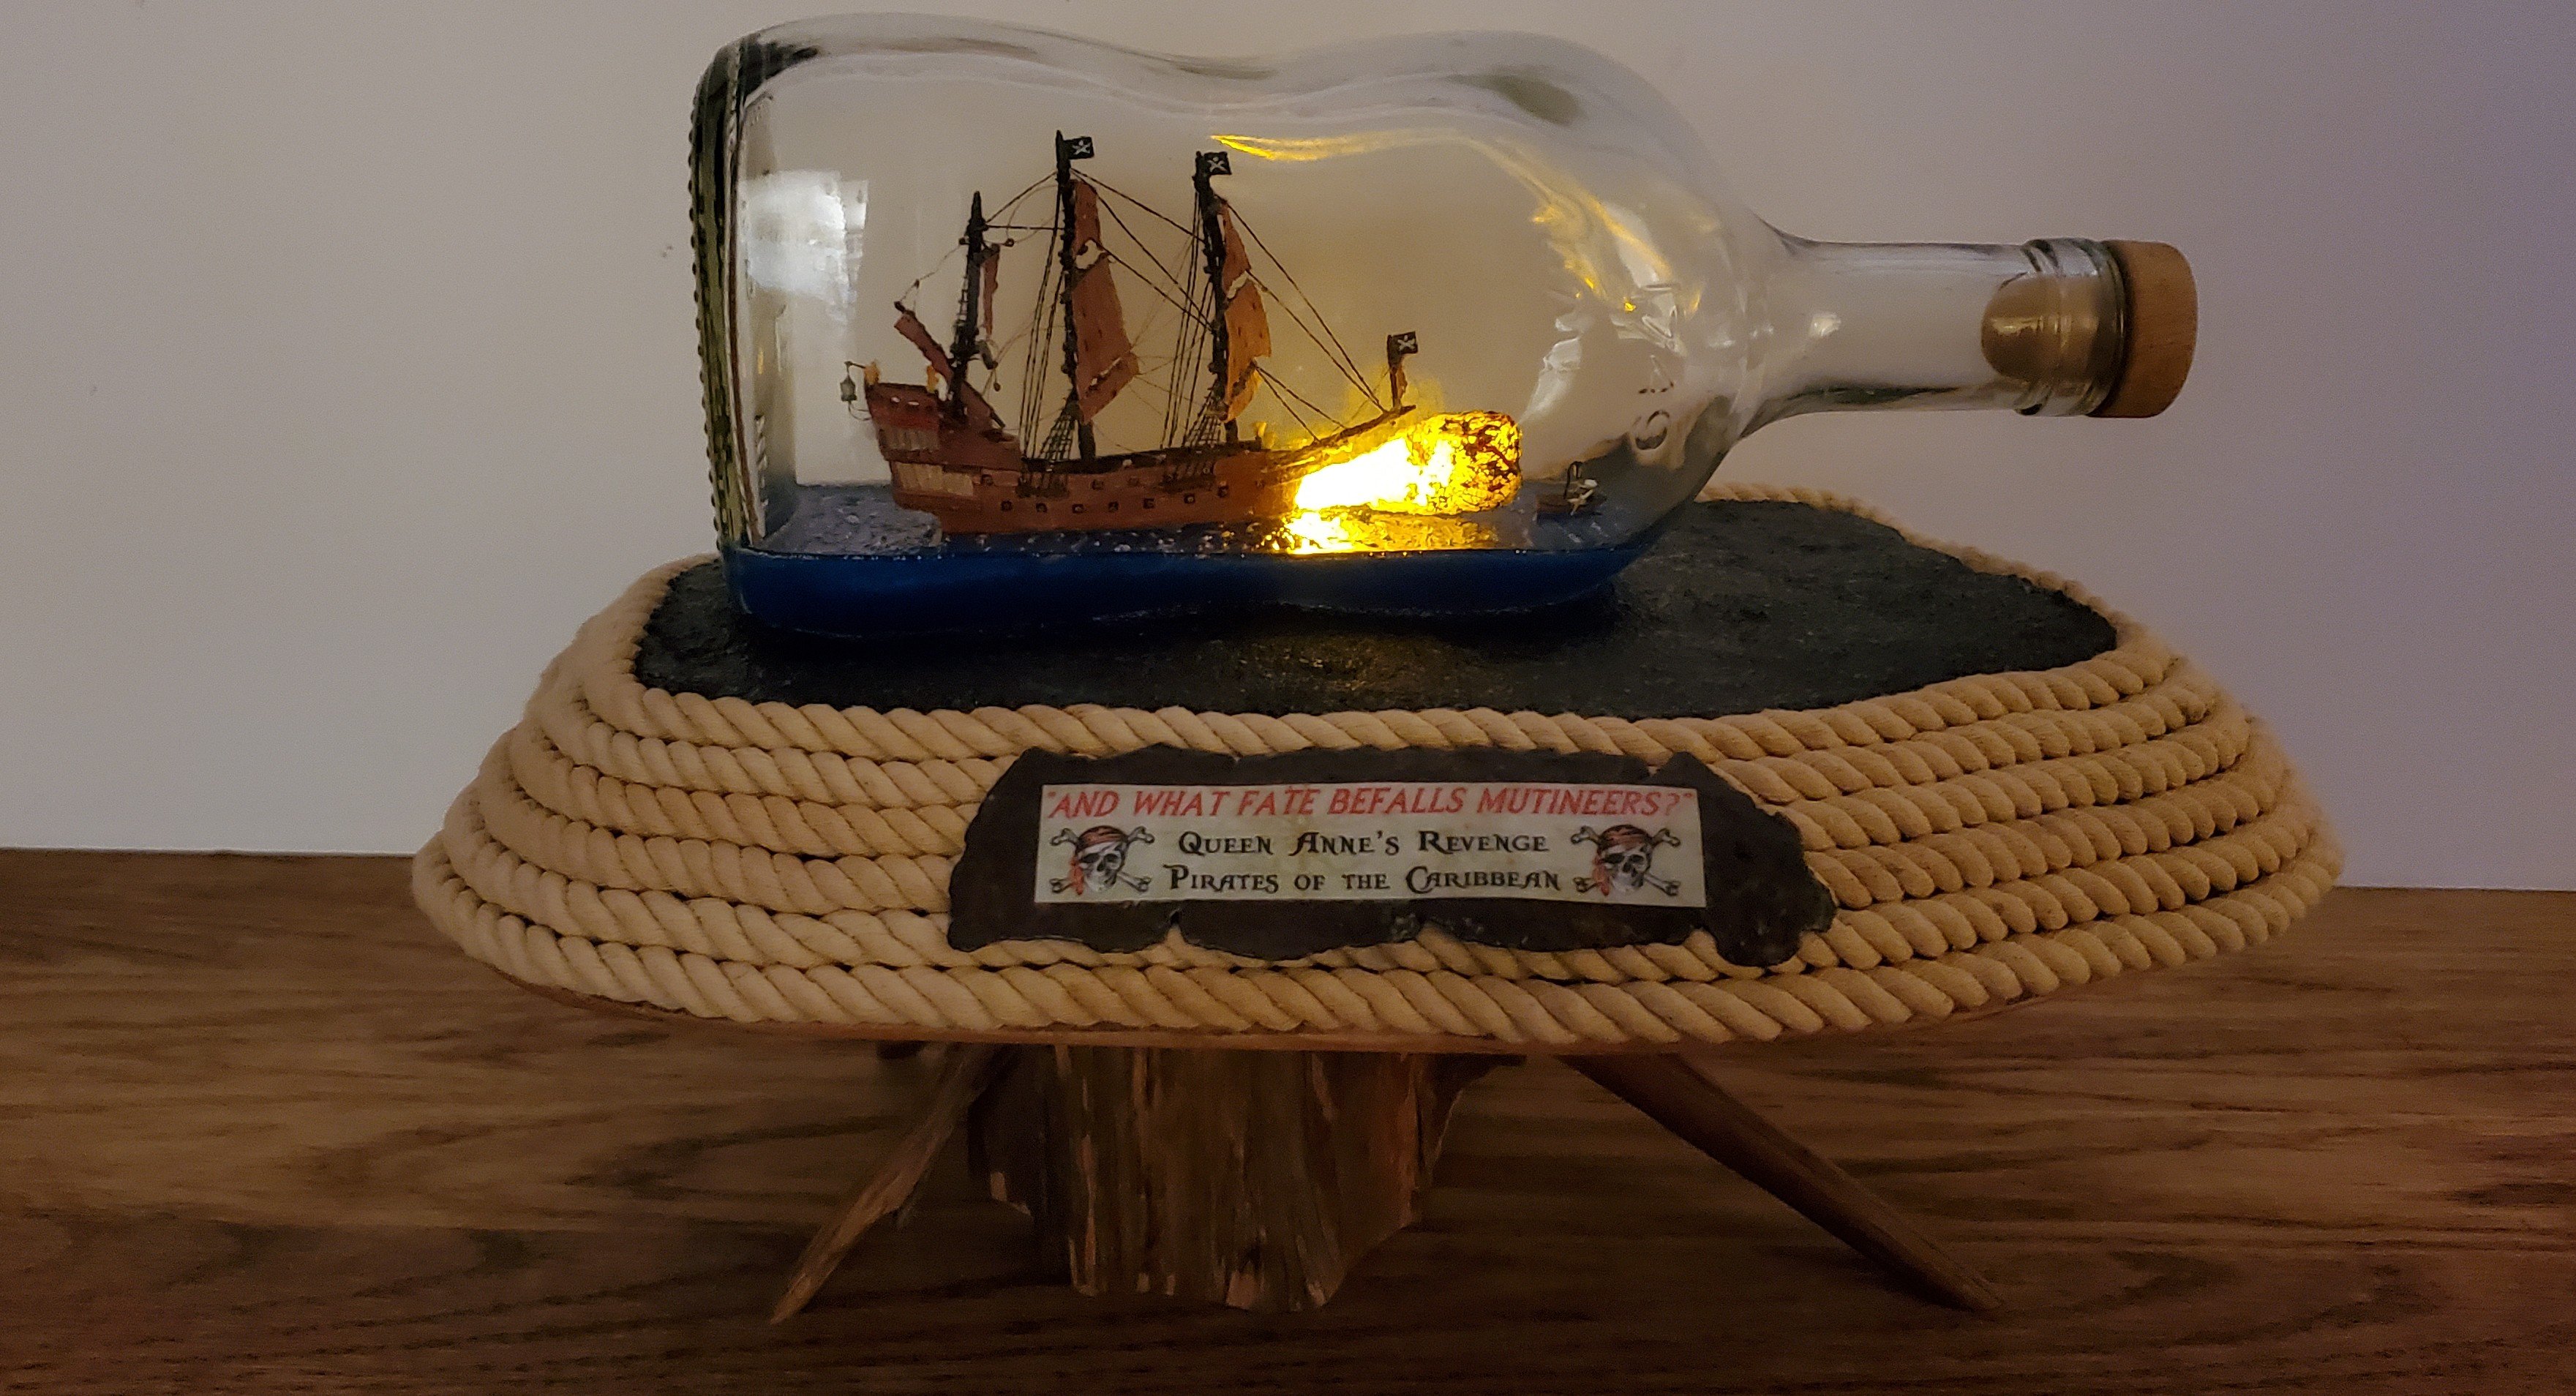
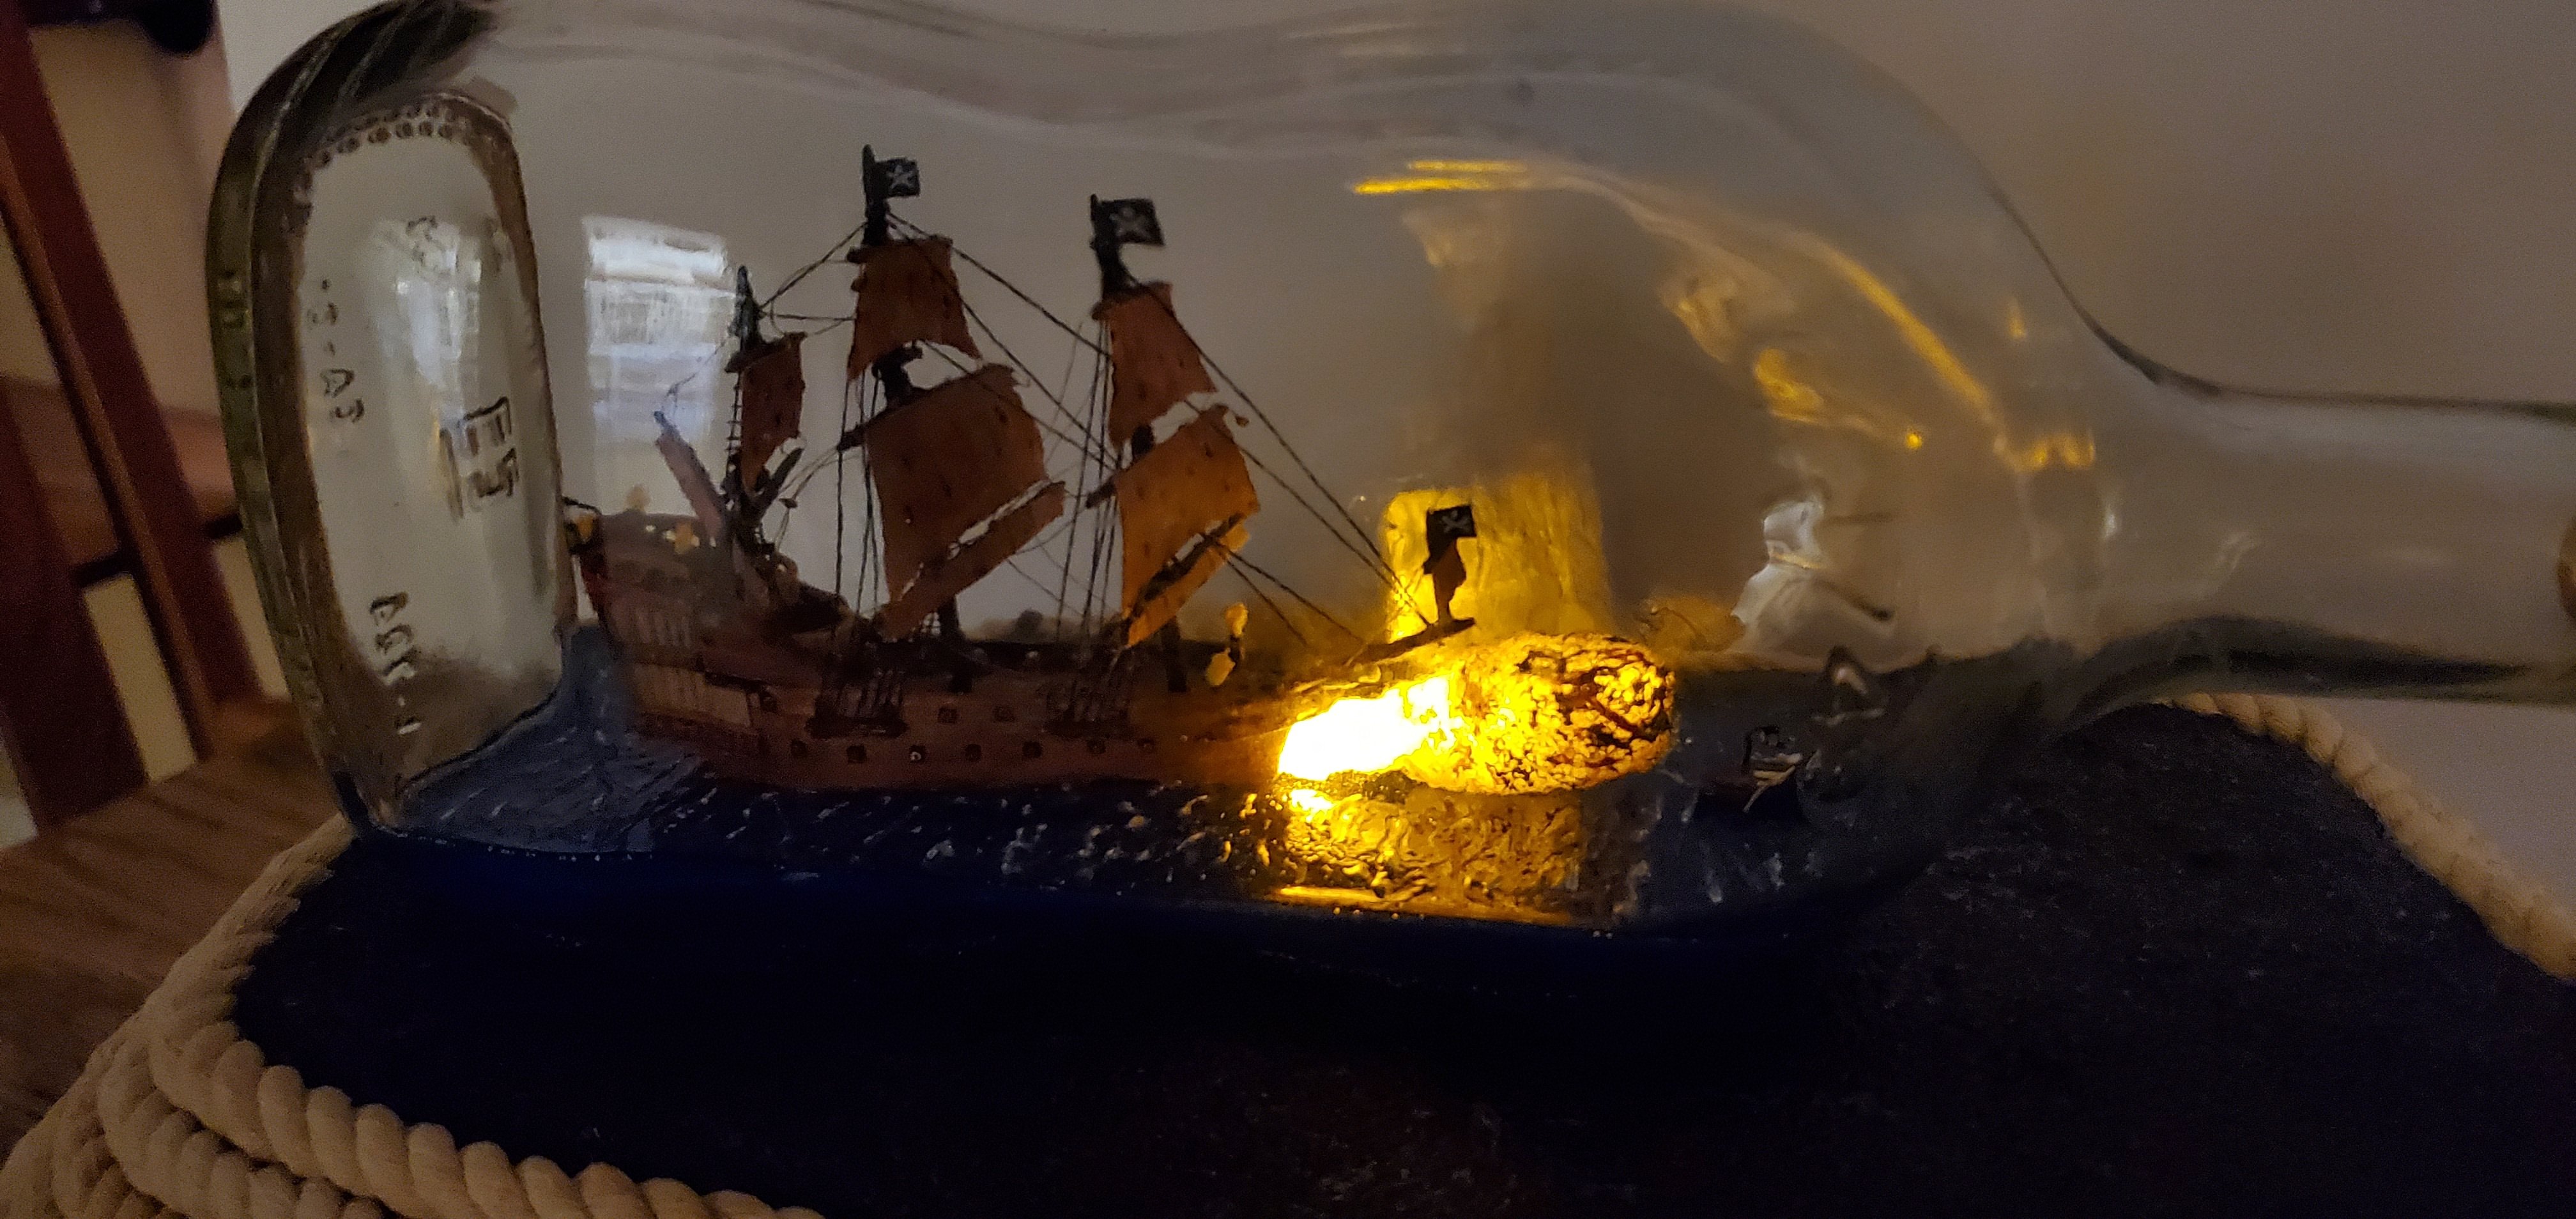
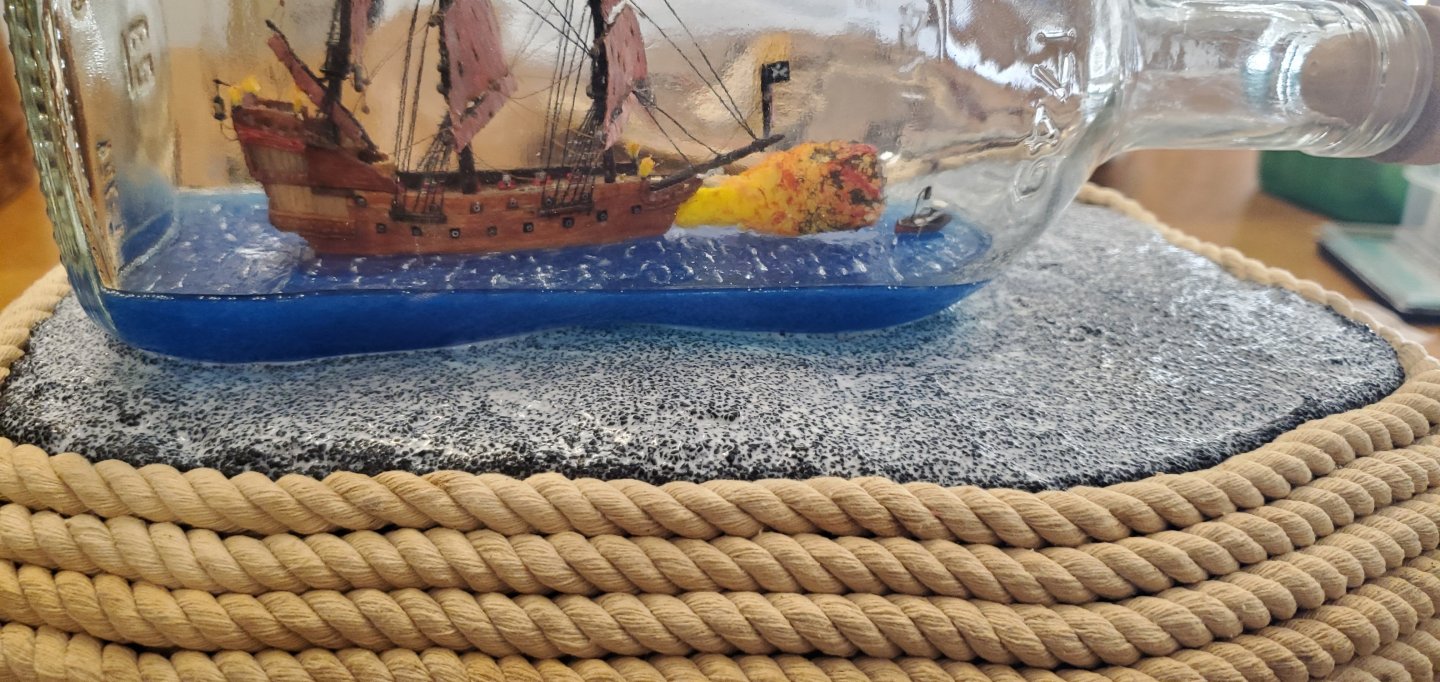
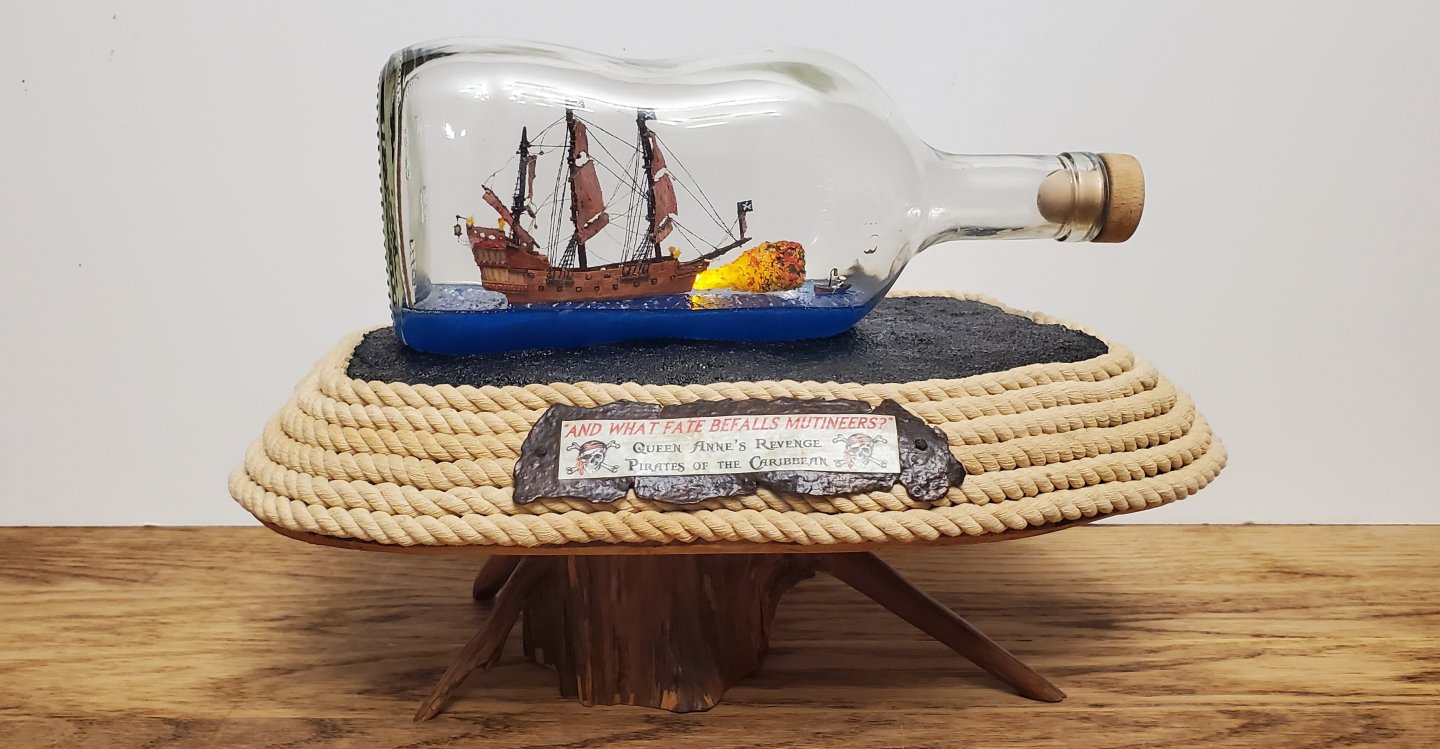
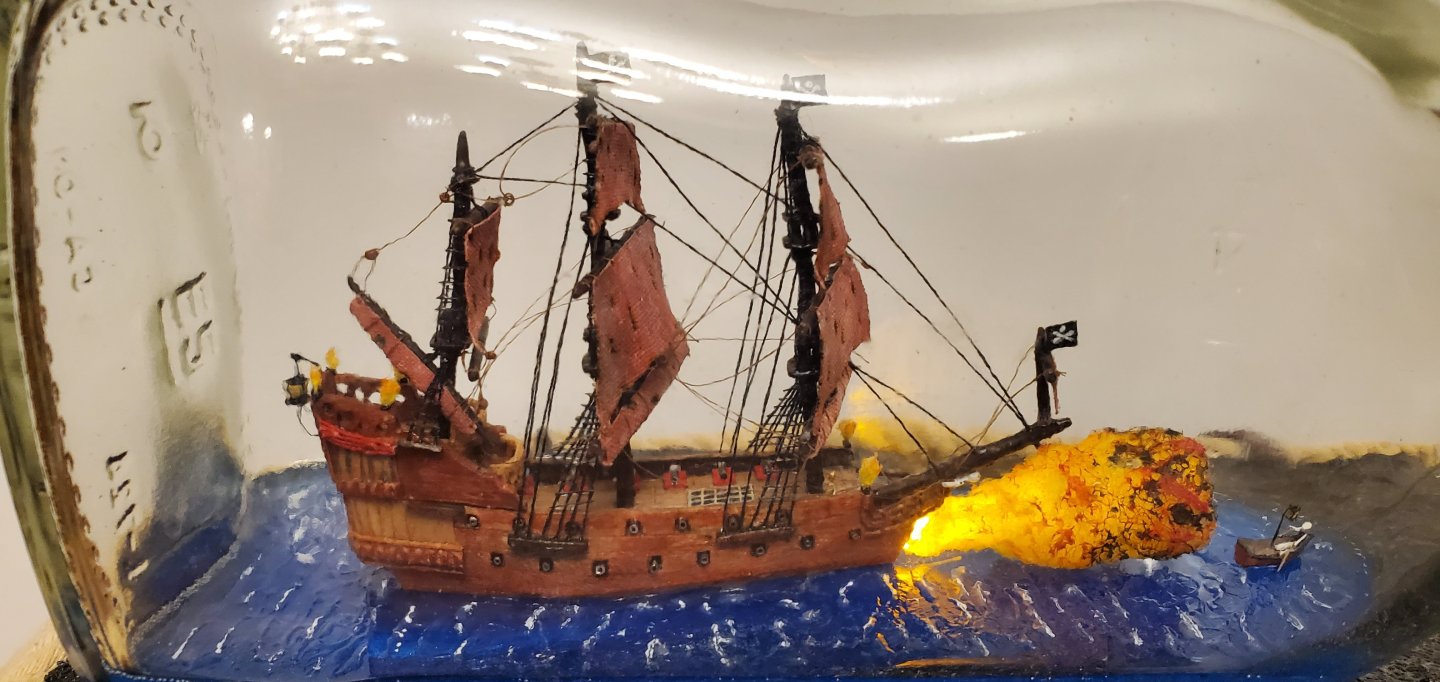
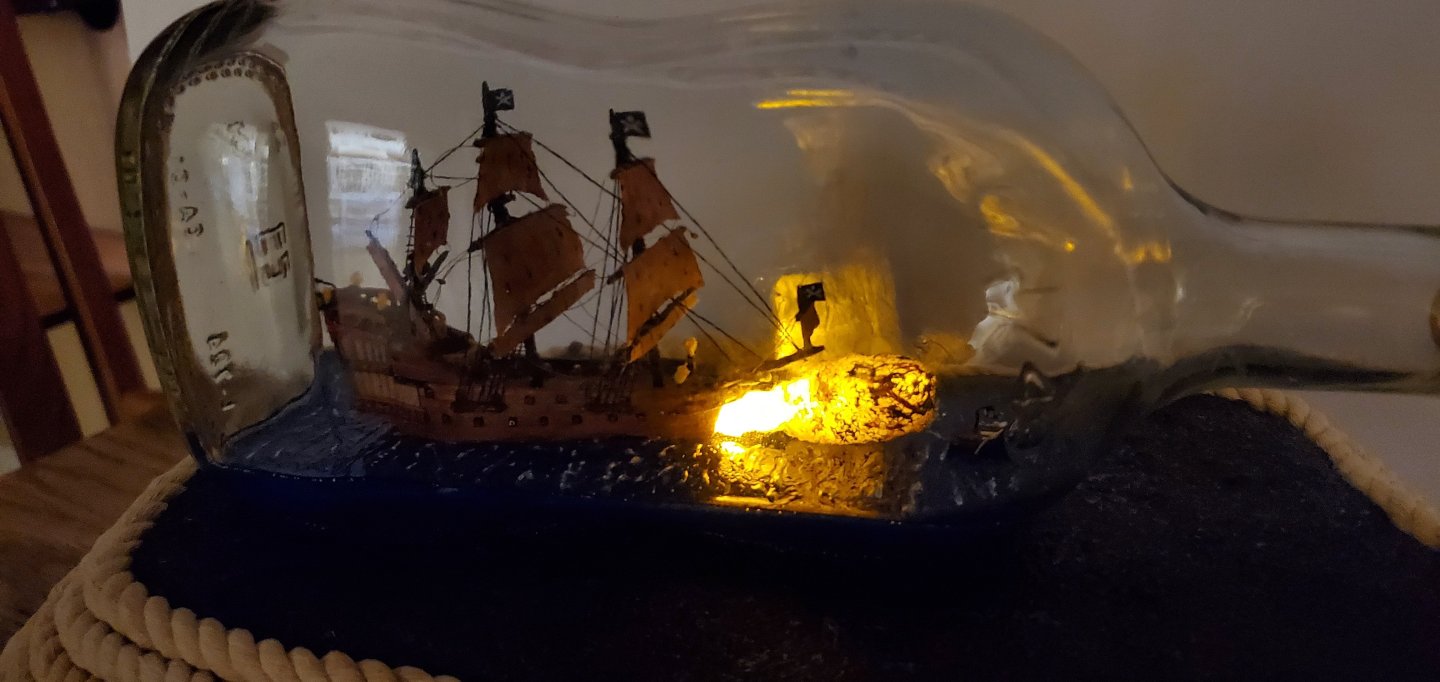
  4. I got all the wires soldered together and the connectors connected to the switch. The last step was mounting the bottle on the base. The bottle is flask-shaped, but the sides are curved so it does not lie on it's side with any stability. Also, it's got kind of a female body shape with a gentle waistline in the middle. After more hand-wringing, I decided to mount the bottle on a "black sand beach". The thought was that I could push the bottle slightly into the sand and it would conform and adhere to the side of the bottle providing stability to the mount. For my black sand beach, I used a mixture of aquarium sand and Mod Podge. After a day, the Mod Podge dried clear and provided a solid adhesion to the bottle and the base, I also made a nameplate and attached to the front which you can see in the final pics below. But before I post those final pics, I want to give a sincere thank you to everyone that participated in the fun expedition. Whether you read every post of just popped in on occasion, I greatly appreciate you being part of the journey from idea to completed project. So a huge THANK YOU to @Keith Black, @Ian_Grant, @Coyote_6, @Snug Harbor Johnny, @Knocklouder, @Javelin, @KennyH78, @Canute, @Bryan Woods, @Baker, @gjdale, @gsdpic, @Paul Le Wol, @BANYAN, @JacquesCousteau, @SaltyScot, @GrandpaPhil, @John Fox III, @popeye2sea, @hollowneck, @tmj, @CiscoH, @FriedClams, @Desertanimal, @ccoyle, @BLACK VIKING, @Siggi52, @robdurant, @Landlubber Mike, @Kauz, @Kenchington. Here are the final pictures: And here's the same in low light: What you can't see in the still shots is that I used a flickering LED inside the fireball. So if you want to see what that looks like, here's a 15 second video: https://www.youtube.com/watch?v=PQxOmC4wIFM. And with that, this fun ride comes to a close. Thank you again for all your comments, help, humor, and inspiration! It's an amazing community we have here in MSW.
  5. Nice job with the crow's feet, Bob. Much better looking than the ones on my face!
  6. Of course the best part of "In the Heart of the Sea" was the fact that Nickerson was a ship in bottle guy, right? Although his years of emotional scars seemed to drive him to that devotion. For me, I think it's working in the opposite direction! 😵‍💫 After a couple of lessons in electronics from @Ian_Grant (thank you, Ian!), I figured out my wiring and power supply (8 x AA batteries). The challenge then became how to incorporate it into an interesting base that would hide everything from view (at least from one side). After much gnashing of teeth, I decided to try a small wooden serving tray and flip it upside down. The depth of the tray was just big enough to hide the battery pack. Here's a shot of the tray after carving a slot for the battery pack. The tray is right side up in the pic, but upside down for my usage. Next, a small slot for the on/off switch. I also added the pedestal that the serving tray is attached to. It's a section of a small cedar tree trunk that I cut down at the ranch (smells really nice!). I built a crude compartment for the battery pack to slide into and added a rope wrapping around the edge of the tray. You can also see the yellow wire disappearing into a hole in the pedestal that leads thru a hole in the tray. And here's what it looks like from the backside. A bit messy, but hopefully will look better from the opposite viewing side.
  7. Somehow I forgot to hit the Follow button when you kicked things off. I'm caught up and fully on board now. You've made a lot of progress in just a couple of weeks. I like the way you layered the pieces of the hull with different thicknesses to create the side openings. Well done. She is really starting to take shape and looking like the real thing. The fly screen looks perfect for the supporting structure of the carousel. Again, well done. However, I'm having a hard time getting a grip on how large (or small) she is. For your next post, can you put something next to her that helps visualize the scale?
  8. I'm late but ready for another interesting build, Keith. You never disappoint!
  9. There are 2 types of people in the world - those that recommend good movies to watch and those that recommend lousy movies. @Snug Harbor Johnny and @KennyH78 are definitely the first type. We watched the "In the Heart of the Sea" last night and thoroughly enjoyed it. When I saw that Ron Howard was the director, I knew the odds were high that it would be a good movie, and it was. Thanks for the recommendation!
  10. That is awesome, Kenny! I hope that you will do a build log for it so I can follow along.
  11. Well Johnny, you were right! I watched the trailer and now I will most certainly watch the film. Looks epic. Thanks for the referral. I am starting to clinch (as @Keith Black would say) already! I think that's more suited for you, Ian! You could add servo motors and other kinds of engineer magic to add motion to the fight! I have always been fascinated by the Heroic Age of Antarctic exploration - Shackleton, Falcon, Amundsen, etc, and my personal favorite subject, Sir Douglas Mawson. The scene you describe, Kenny, has been done masterfully by a professional SIB Modeler named Gabrielle Rogers. So I would not want to go there. My second SIB effort ever, 4 years ago, was the steam yacht that Mawson used on his expeditions, the Aurora. I hate to put a picture of my work next to hers, but you can see the Aurora in the 2nd pic below. I love discussing ideas for future projects, but as I mentioned earlier, there's still a lot of work left on the Revenge. @Javelin mentioned above that everything was a perfect fit in the bottle. What Roel did not realize was that I still had one more thing to float on the water - the hapless cook in the longboat rowing frantically trying to escape the fireball. Here's a screenshot from the movie. I've made mini-longhorns for a previous build (Zheng He Treasure Fleet), but this was my first try at making a very tiny person. First though, the long boat carved from a bamboo stir stick borrowed from Panera's. Here's the little dude in the boat with a hanging lantern. His body was made from Play-Doh and arms from brass wire. His head is a tiny bead. And now in the bottle, a moment before he pays the price for all the mutineers. And with that, I believe I'm done with everything inside the bottle, except for some spot cleaning. Now I can turn my attention to the presentation. Still working on ideas for that.
  12. Wow. That is quite a creative and ambitious idea you got there, Johnny! I will take in into consideration. I've often thought about the Pequod and Moby Dick for an SIB subject, as you mention (I actually listened to a 21 hour audio book of Moby Dick while driving from Austin to Boston for the Constitution Museum ship model show early this year). I am not familiar with the story of the Essex so I will read up on it. As for Gary, a.k.a. @gsdpic, and his upside down, glue it to the bottle, whaleboat suggestion, I have no words! At least none that I can type on this forum! But ask me again after a few bottles of rum!!
  13. Thank you @Paul Le Wol for the good luck wishes, @Knocklouder for hanging on the edge of your seat, @Keith Black for clinching, @BANYAN for puckering, @SaltyScot for the moral support, and @Canute for the St Elmo reference! It was a long and frustrating day on Saturday, trying to get that dang ship in the bottle (while watching college football games out of the corner of my eye). Here's the Revenge on the playing field with her back to the opponent, right before kickoff, Things began ok. I had to wad things up VERY tight just to get the end of the ship barely in the bottle. Of course the wires sticking out the base of the ship did not help, but fortunately, they kind of fit in the bottom curvature of the bottle's neck. I started pushing the ship in, but hit a snag snag right off the bat. So I pulled her out, mashed her a little tighter, and tried again. I'd push her in some, pull her out, mash some more, then push her in a little further, pull her out, mash again... Rinse and repeat. I kept thinking something had to break, but I didn't hear any cracks or snaps, so I kept working her in. Finally, after about 45 minutes, the Revenge dropped in. It's always hard to tell at first, if anything got damaged or if lines are tangled beyond hope. But at least the fireball looked like it survived. The next major obstacle was securing the ship to the water. Normally, that's a piece of cake. But the LED wires presented a problem trying to get the bottom of the ship to lie flat against the surface of the water. The good news was that the wires allowed me to push the ship upwards and hold it so I could easily get some epoxy in place. To get the ship to lie flat against the water, I took the whole thing to my table saw and used the gap for the side extensions to run the wires straight down. Then I attached a large clamp that was just weighty enough to pull the ship flat, but not pull the wires out. Once the epoxy set and the ship was secure against the water, it was time to untangle the lines and raise the masts. That was an hours-long and nerve/patience testing process After that, I added the stern structure behind and the double-balcony piece in front of the mizzen mast. That took a couple of hours. Despite the custom tools I made for the process, I still kept dropping the pieces and having to retrieve them from the bottle and start over. It was quite a relief to finally get them in place and glued down. Next was gluing the mizzen channels to the stern structure. After that, I added the sprit mast and its tiny rigging. That was pretty easy. The final part of the ordeal was tightening all the lines and cutting them off. Here's how she looks resting comfortably inside the bottle. And the fireball lighting still works! Whew! I like how the fireball light reflects off the water. It will look different after I add waves, but hopefully I will still get a cool reflection. There's still a ton of work left, but at least the scary part is over!
  14. Hey Thukydides! I just stumbled onto your build log here. Your miniatures are amazing and definitely a huge upgrade from what looks like come with the starter set. Well done, sir!!
  15. Glad to see you back at it, Bob. Maybe if you can hide out in the shipyard for a few more days, it might snow enough for you to put off the First Mate's outside chores till next spring!
  16. OK, Keith, clinch time is here. The ship is done. The fireball is done. The water is set. The only thing left to do is wad things up and see if we can get her inside the bottle. Not sure if it's my eyesight going bad or what, but that bottle opening seems to get smaller every time I look at it. Here are some final pics of the Revenge before she finds her final resting place. In case she suffers some catastrophic damage over the weekend, at least you'll know what she looked like before. Also, if you look close, you can see a few stray blocks hanging around per @BANYAN's suggestion above. Unlit fireball... Lit fireball... How she looks in darker light... Assuming I get that far, it will be interesting to see how the LED light looks reflecting on the epoxy resin water.
  17. Even on medication, your eyes must be better than mine! I looked at the pictures above and could not find the hole that I know I drilled thru the caulk and the epoxy resin. So here's a better picture to show where the LED wires will go thru the water, out of the bottle, and to a switch and battery location TBD.
  18. I like that idea, Pat. I will see if/how I can work that in. In the meantime, I got the epoxy resin water inside the bottle. The first thing I did was plug the hole I'd drilled in the bottom of the bottle (for the fireball LED wires to pass thru) with some clear caulk. Once the caulk dried, I set up my usual high-tech resin pouring fixture. Then it was just a matter of slowly pouring the resin in until I got it to the desired level. After the resin cured, I textured the part of the water that will be behind the ship. I used acrylic gel gloss medium for the small waves. I did that part of the water texturing now because it's very hard to reach that area after the ship is in the bottle. While the epoxy resin was drying, I made a couple of tools that will hopefully help to get the stern structure and the double balcony in place after the main part of the ship is in the bottle. Music wire, dowl rods, and a bit of soldering to make the tools. The wire(s) fit loosely thru holes in the railings of each piece. In theory, this will allow me to guide each piece thru the bottle's neck, place it on the ship's deck, then slide the tool out sideways leaving the piece in place. I anticipate the double balcony piece being the more difficult one to install because I will have to squeeze it in between shrouds, backstays, and other rigging, plus get it oriented correctly in a very small space. I also began work on the fireball starting with the "lightsaber". I found some small clear acrylic rods on Amazon which I am using in lieu of the clear plastic fork tine from the original practice fireball. They are easier to attach to the LED and give a smoother distribution of the light. I CA-glued the acrylic rod to the LED at an upwards angle to run it more or less parallel with the bowsprit as that's the way the fireball tracks as it emerges from the bow.
×
×
  • Create New...