Glen McGuire
-
Posts
1,978 -
Joined
-
Last visited
Content Type
Profiles
Forums
Gallery
Events
Everything posted by Glen McGuire
-
 She looks AMAZING, Phil. Well done!! Hard to believe all of that is made from card.
- 288 replies
-
- 5
-

-

-
- Card
- Pre-Dreadnought
- (and 3 more)
-
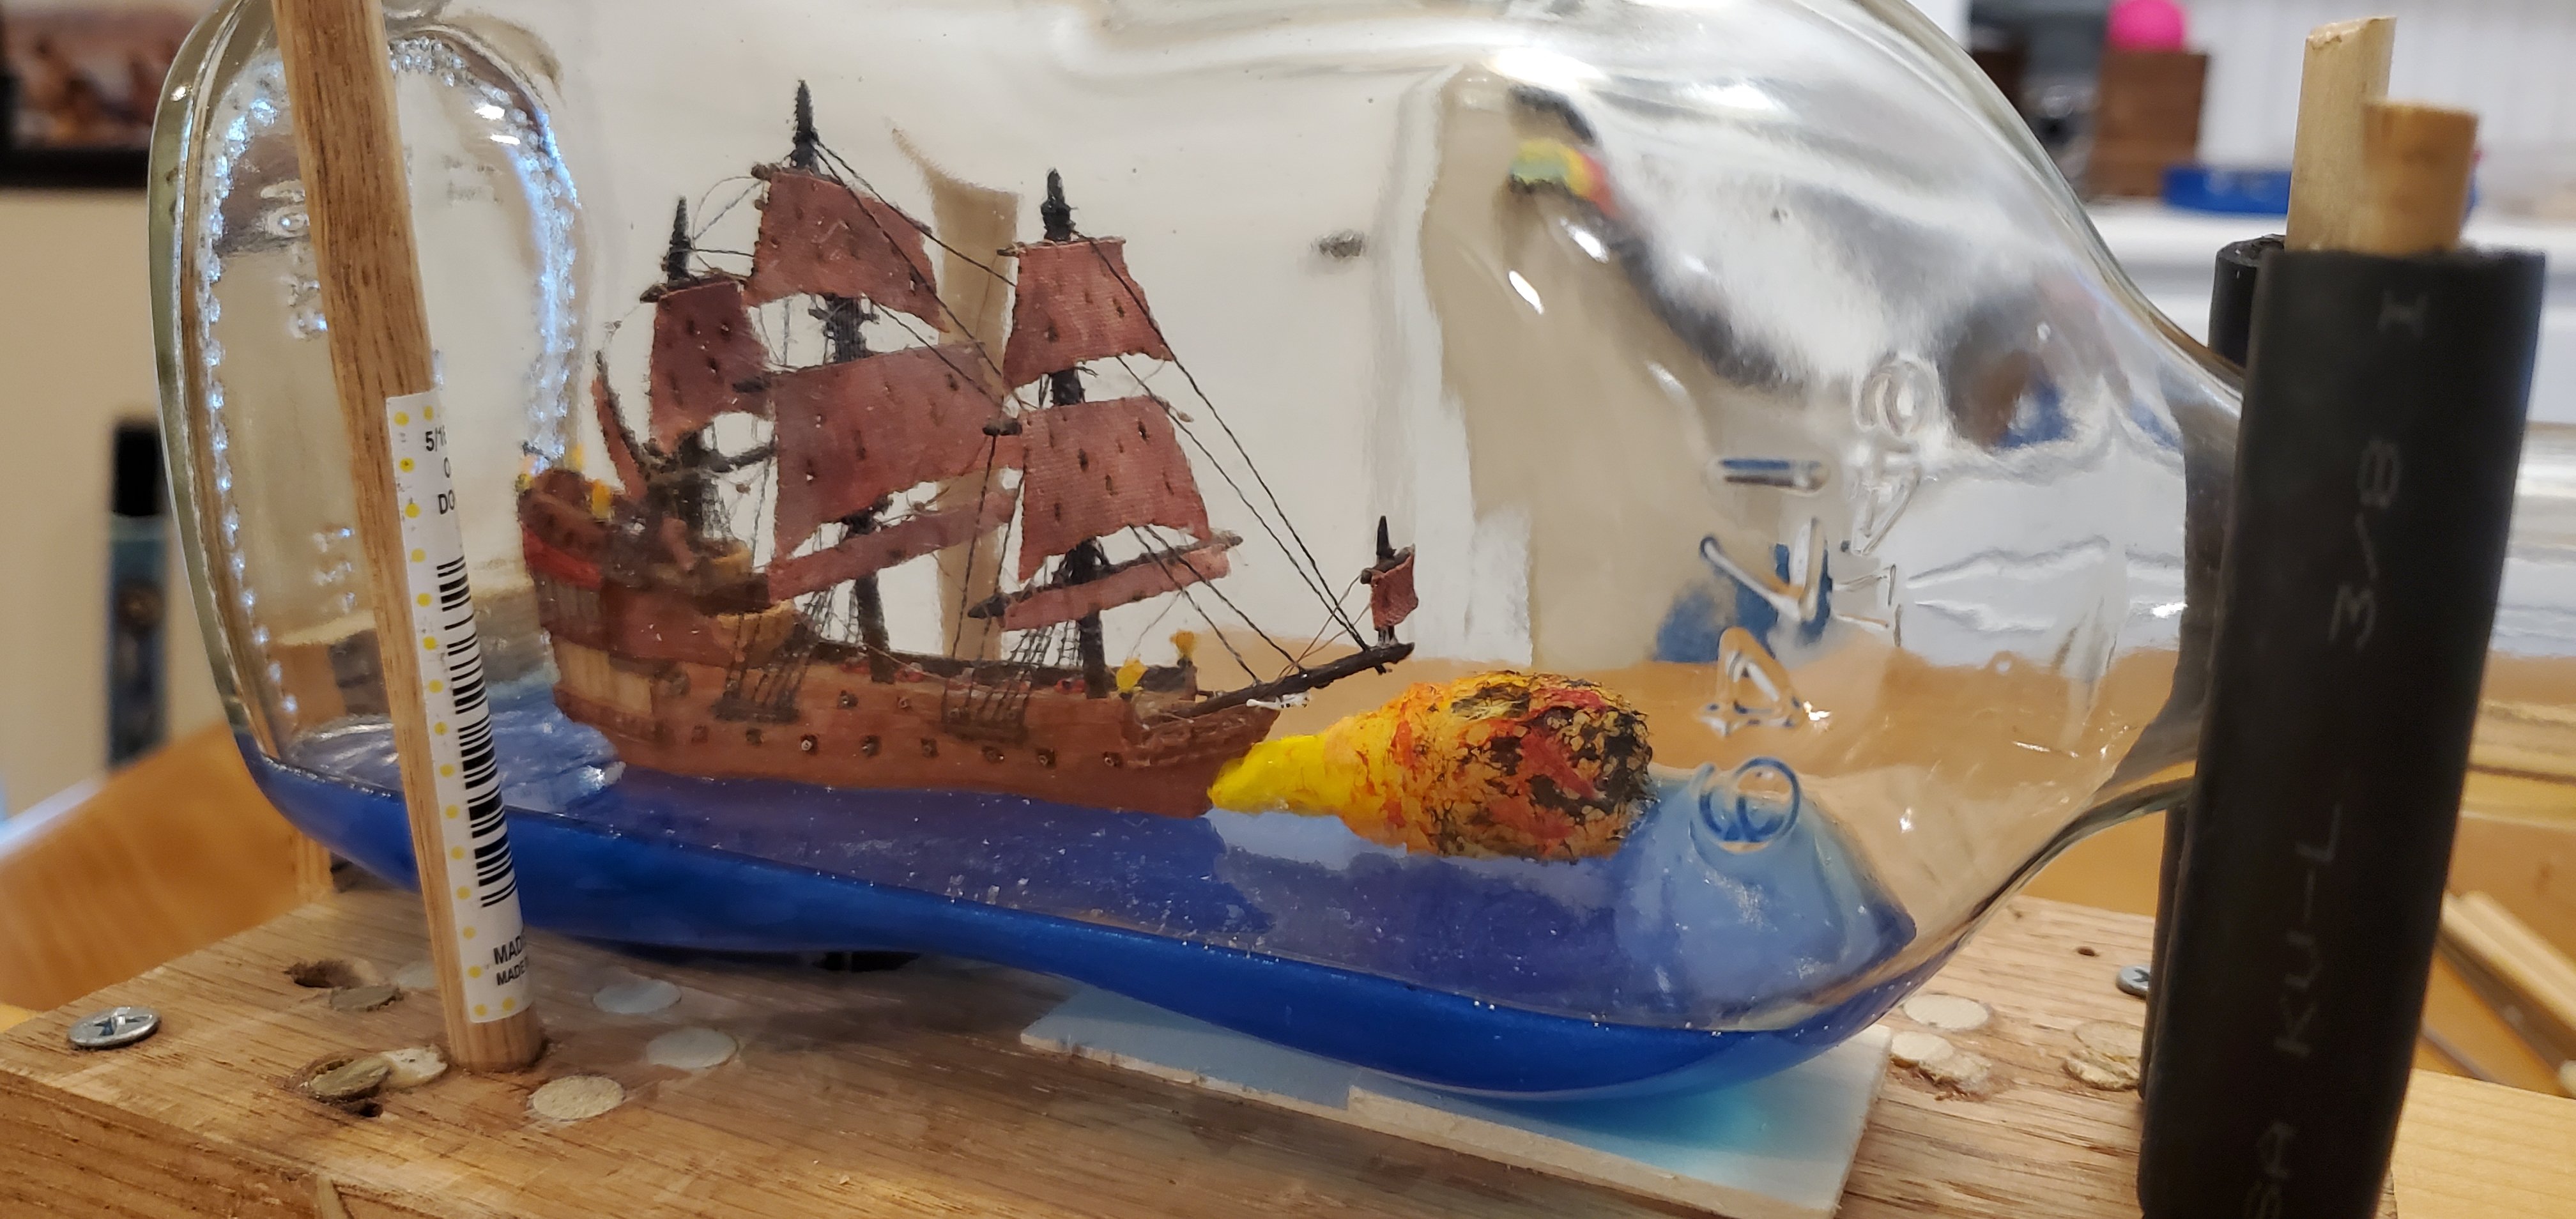
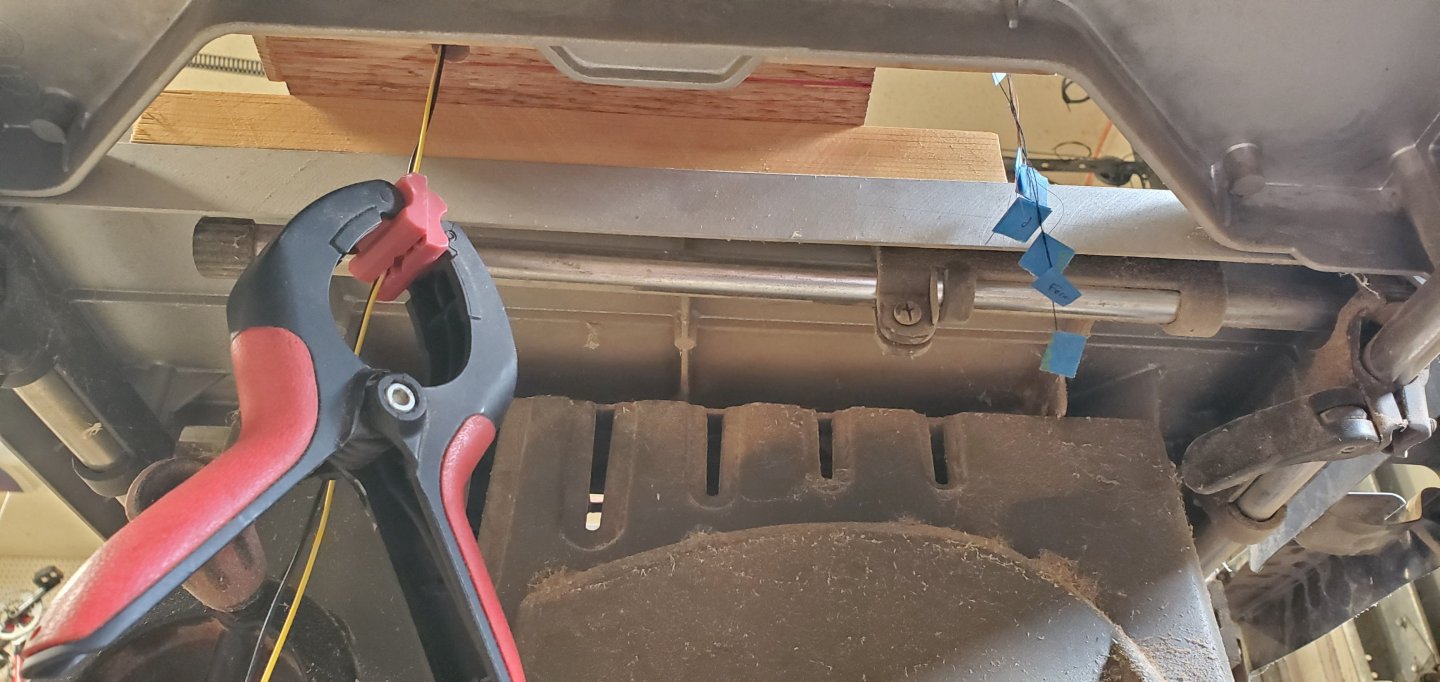
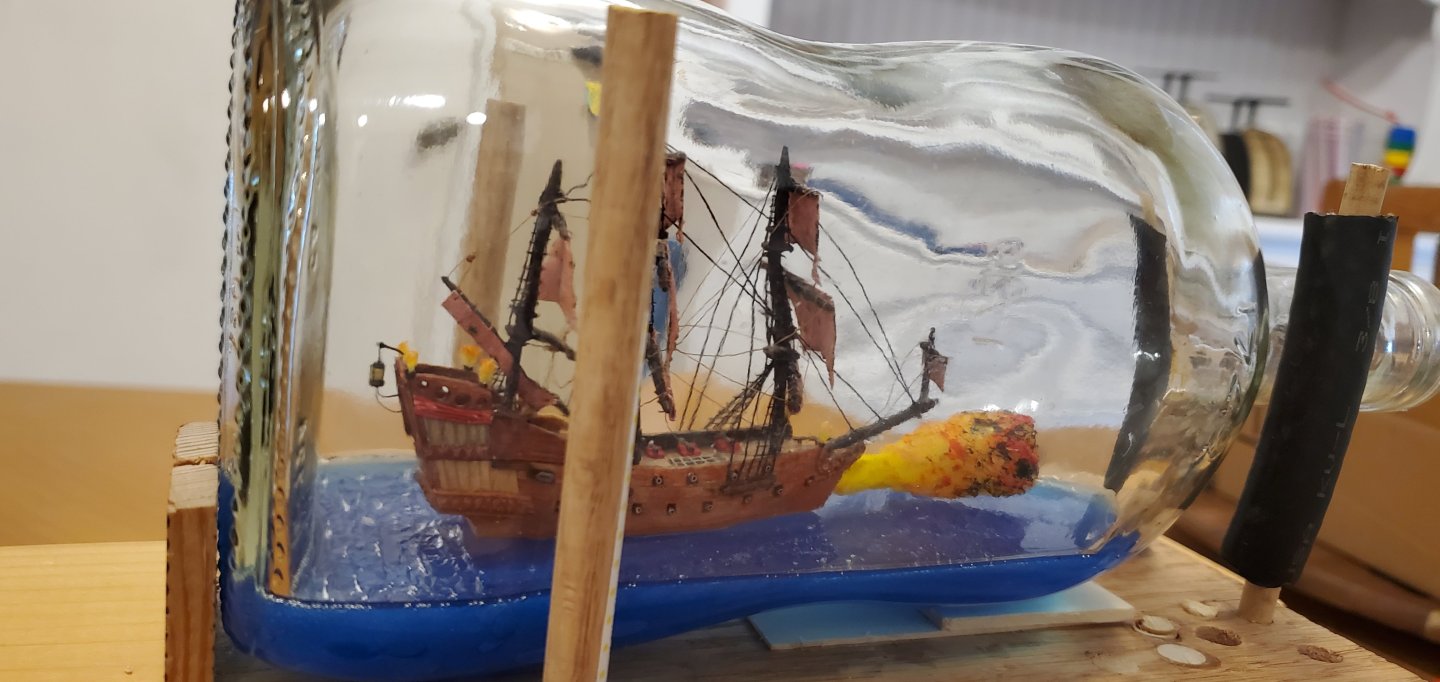
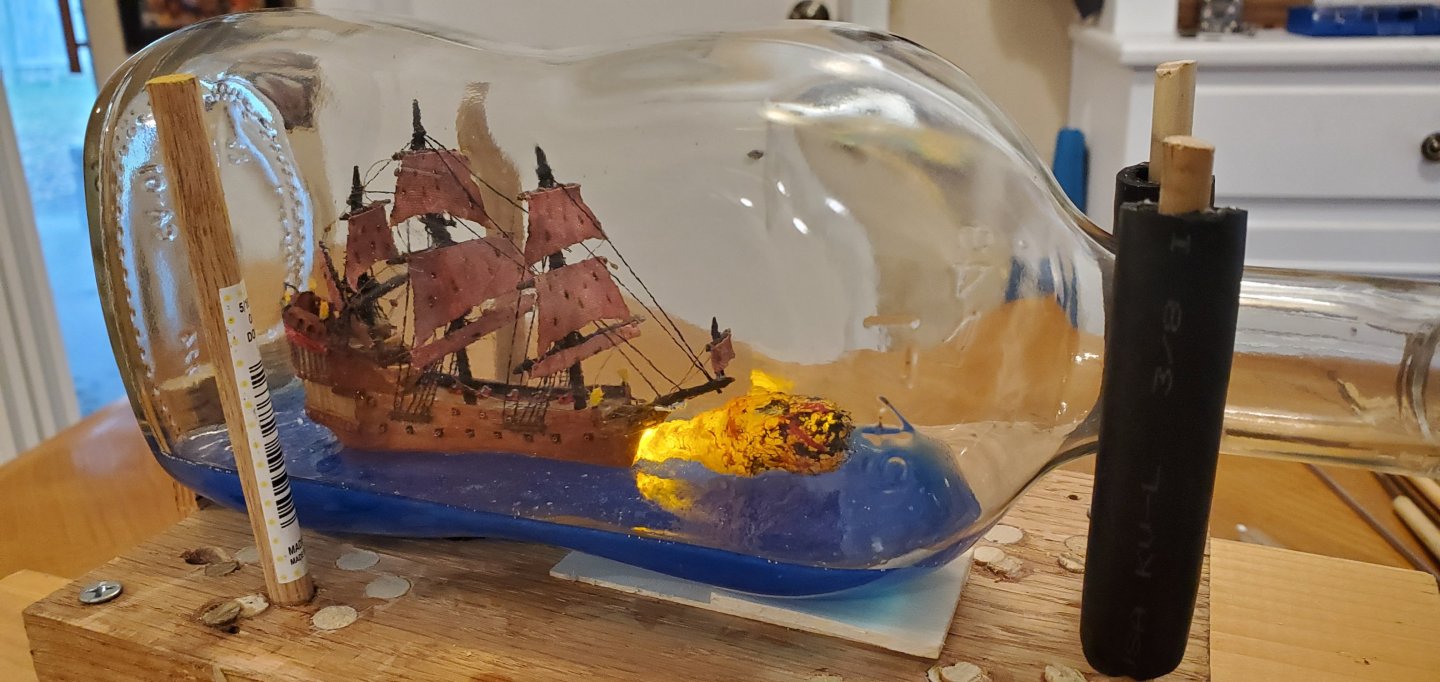
Thank you @Paul Le Wol for the good luck wishes, @Knocklouder for hanging on the edge of your seat, @Keith Black for clinching, @BANYAN for puckering, @SaltyScot for the moral support, and @Canute for the St Elmo reference! It was a long and frustrating day on Saturday, trying to get that dang ship in the bottle (while watching college football games out of the corner of my eye). Here's the Revenge on the playing field with her back to the opponent, right before kickoff, Things began ok. I had to wad things up VERY tight just to get the end of the ship barely in the bottle. Of course the wires sticking out the base of the ship did not help, but fortunately, they kind of fit in the bottom curvature of the bottle's neck. I started pushing the ship in, but hit a snag snag right off the bat. So I pulled her out, mashed her a little tighter, and tried again. I'd push her in some, pull her out, mash some more, then push her in a little further, pull her out, mash again... Rinse and repeat. I kept thinking something had to break, but I didn't hear any cracks or snaps, so I kept working her in. Finally, after about 45 minutes, the Revenge dropped in. It's always hard to tell at first, if anything got damaged or if lines are tangled beyond hope. But at least the fireball looked like it survived. The next major obstacle was securing the ship to the water. Normally, that's a piece of cake. But the LED wires presented a problem trying to get the bottom of the ship to lie flat against the surface of the water. The good news was that the wires allowed me to push the ship upwards and hold it so I could easily get some epoxy in place. To get the ship to lie flat against the water, I took the whole thing to my table saw and used the gap for the side extensions to run the wires straight down. Then I attached a large clamp that was just weighty enough to pull the ship flat, but not pull the wires out. Once the epoxy set and the ship was secure against the water, it was time to untangle the lines and raise the masts. That was an hours-long and nerve/patience testing process After that, I added the stern structure behind and the double-balcony piece in front of the mizzen mast. That took a couple of hours. Despite the custom tools I made for the process, I still kept dropping the pieces and having to retrieve them from the bottle and start over. It was quite a relief to finally get them in place and glued down. Next was gluing the mizzen channels to the stern structure. After that, I added the sprit mast and its tiny rigging. That was pretty easy. The final part of the ordeal was tightening all the lines and cutting them off. Here's how she looks resting comfortably inside the bottle. And the fireball lighting still works! Whew! I like how the fireball light reflects off the water. It will look different after I add waves, but hopefully I will still get a cool reflection. There's still a ton of work left, but at least the scary part is over!


- 156 replies
-
- 17
-

-
-
- Queen Annes Revenge
- bottle
- (and 1 more)
-
Agree with everyone on the base. Very unique. Well done!
-
Welcome aboard!
-
Hey Thukydides! I just stumbled onto your build log here. Your miniatures are amazing and definitely a huge upgrade from what looks like come with the starter set. Well done, sir!!
- 39 replies
-
- 2
-
-
-
- Black Seas
- wargaming
- (and 1 more)
-
Glad to see you back at it, Bob. Maybe if you can hide out in the shipyard for a few more days, it might snow enough for you to put off the First Mate's outside chores till next spring!
- 261 replies
-
- 5
-

-
- Victory Models
- Pegasus
- (and 3 more)
-
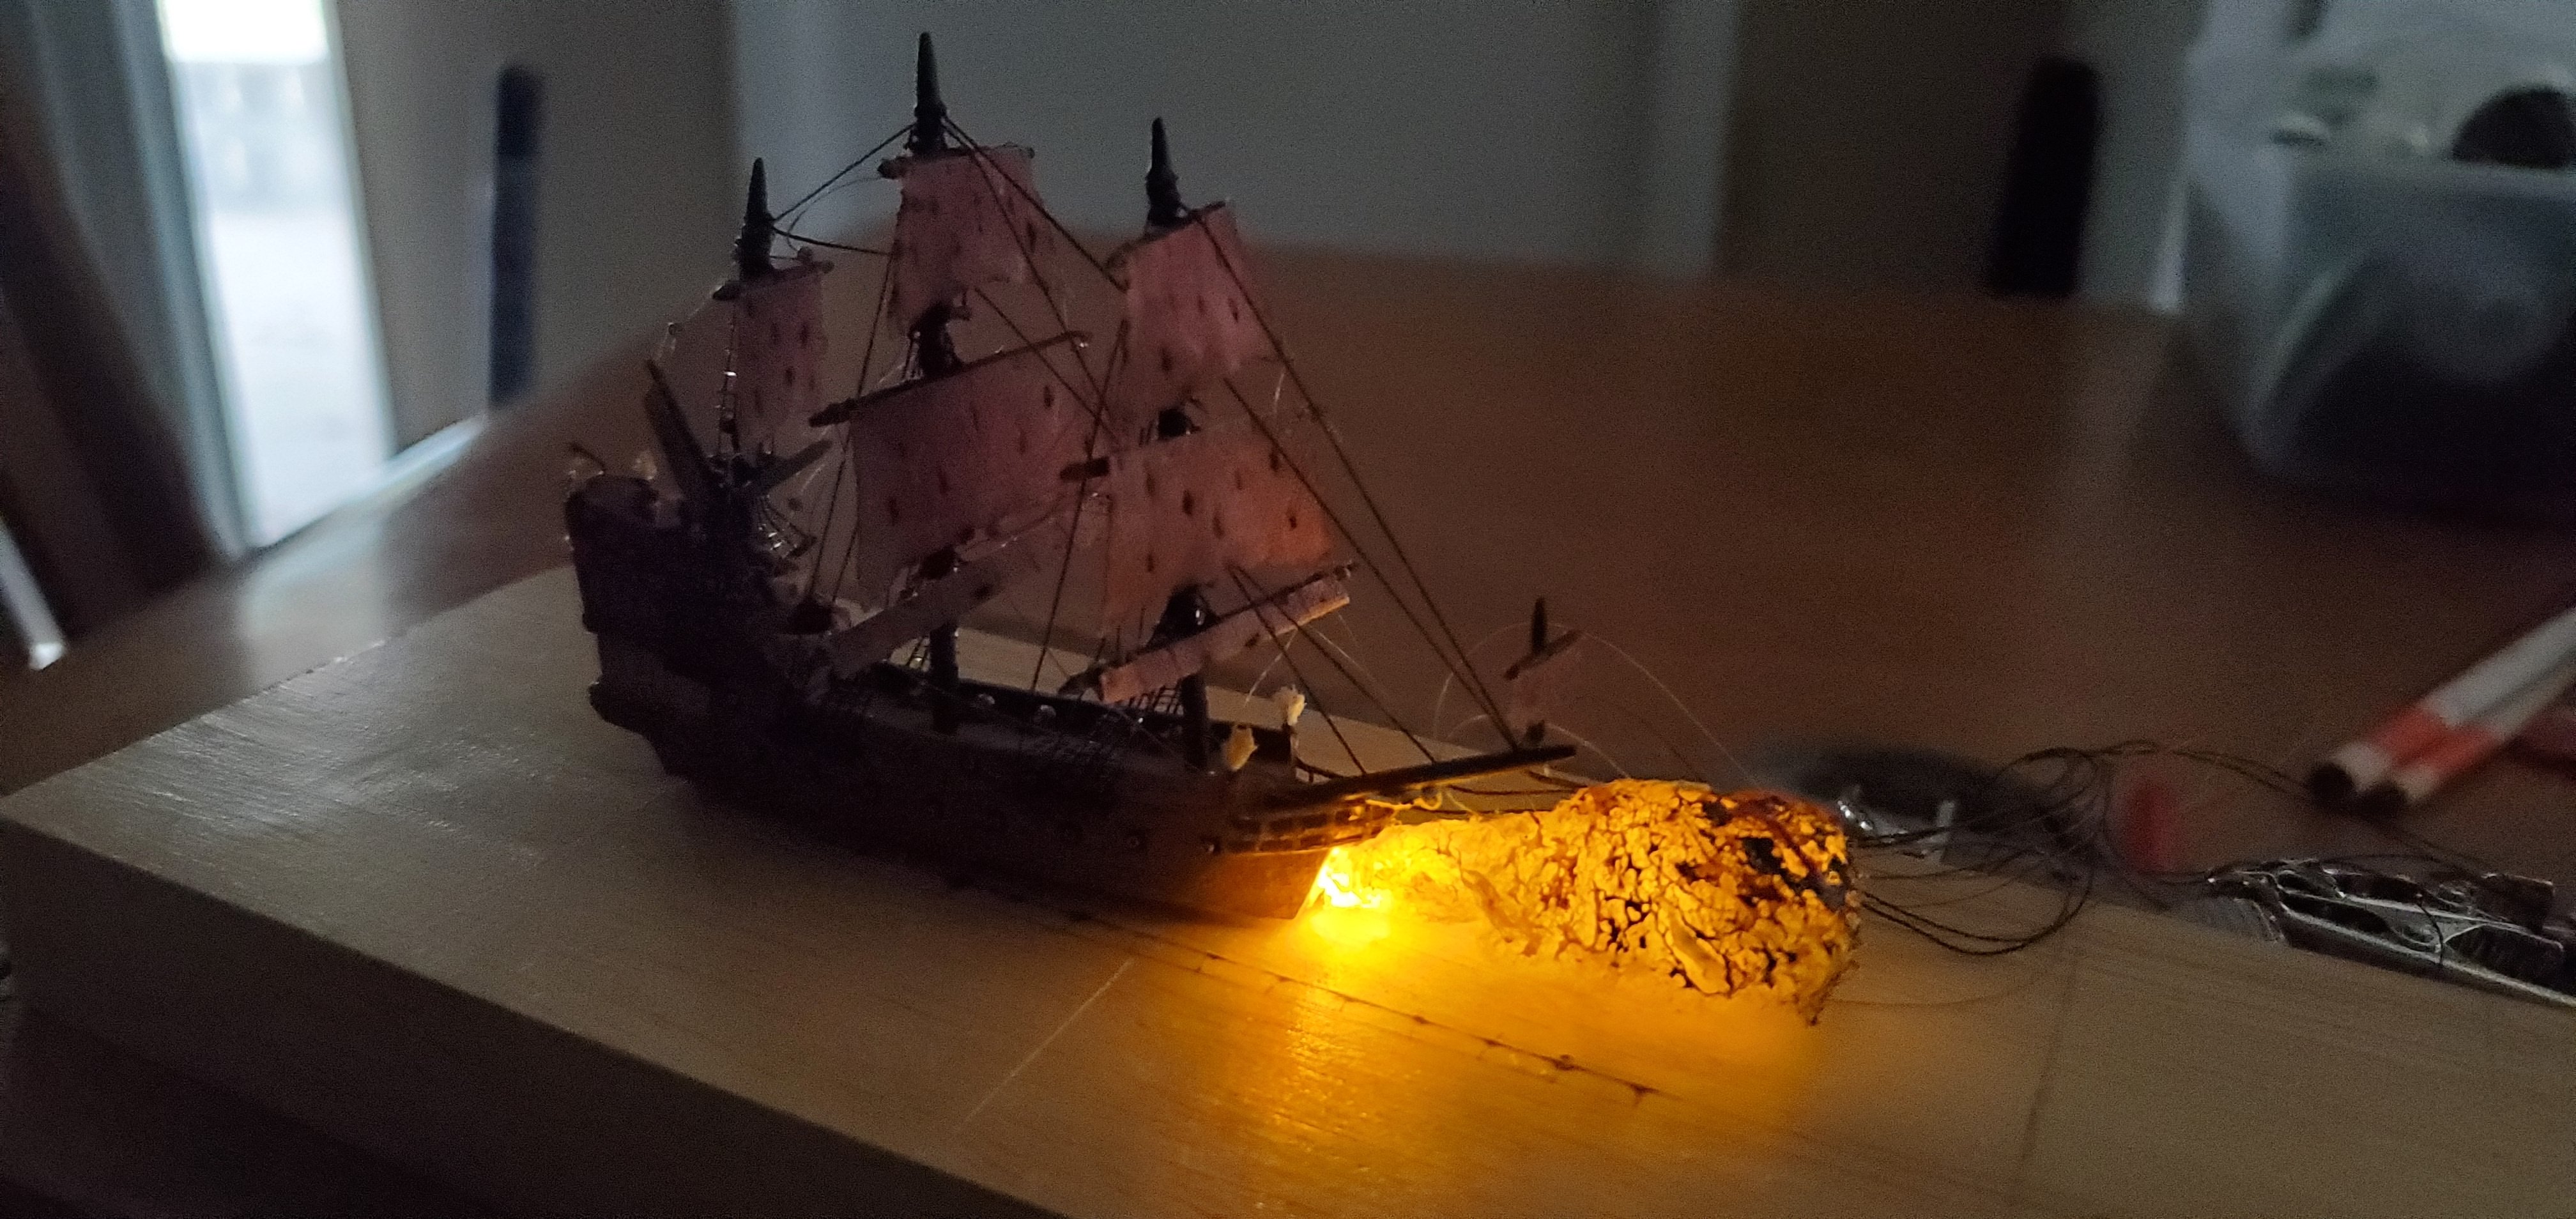
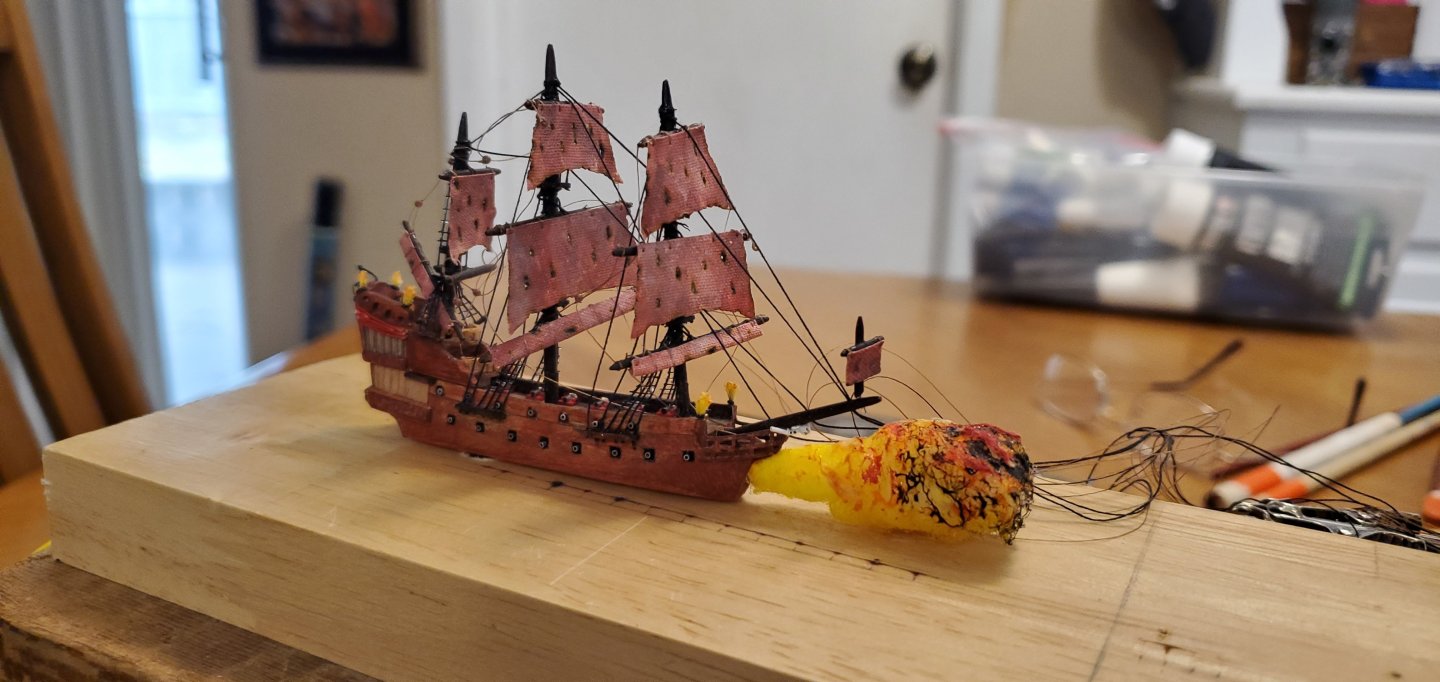
OK, Keith, clinch time is here. The ship is done. The fireball is done. The water is set. The only thing left to do is wad things up and see if we can get her inside the bottle. Not sure if it's my eyesight going bad or what, but that bottle opening seems to get smaller every time I look at it. Here are some final pics of the Revenge before she finds her final resting place. In case she suffers some catastrophic damage over the weekend, at least you'll know what she looked like before. Also, if you look close, you can see a few stray blocks hanging around per @BANYAN's suggestion above. Unlit fireball... Lit fireball... How she looks in darker light... Assuming I get that far, it will be interesting to see how the LED light looks reflecting on the epoxy resin water.


- 156 replies
-
- 15
-
-
-
- Queen Annes Revenge
- bottle
- (and 1 more)
-
Looks cruddy and very realistic. Nice work, Keith!
- 457 replies
-
- 3
-
-
-
- sternwheeler
- Hard Coal Navy
- (and 1 more)
-
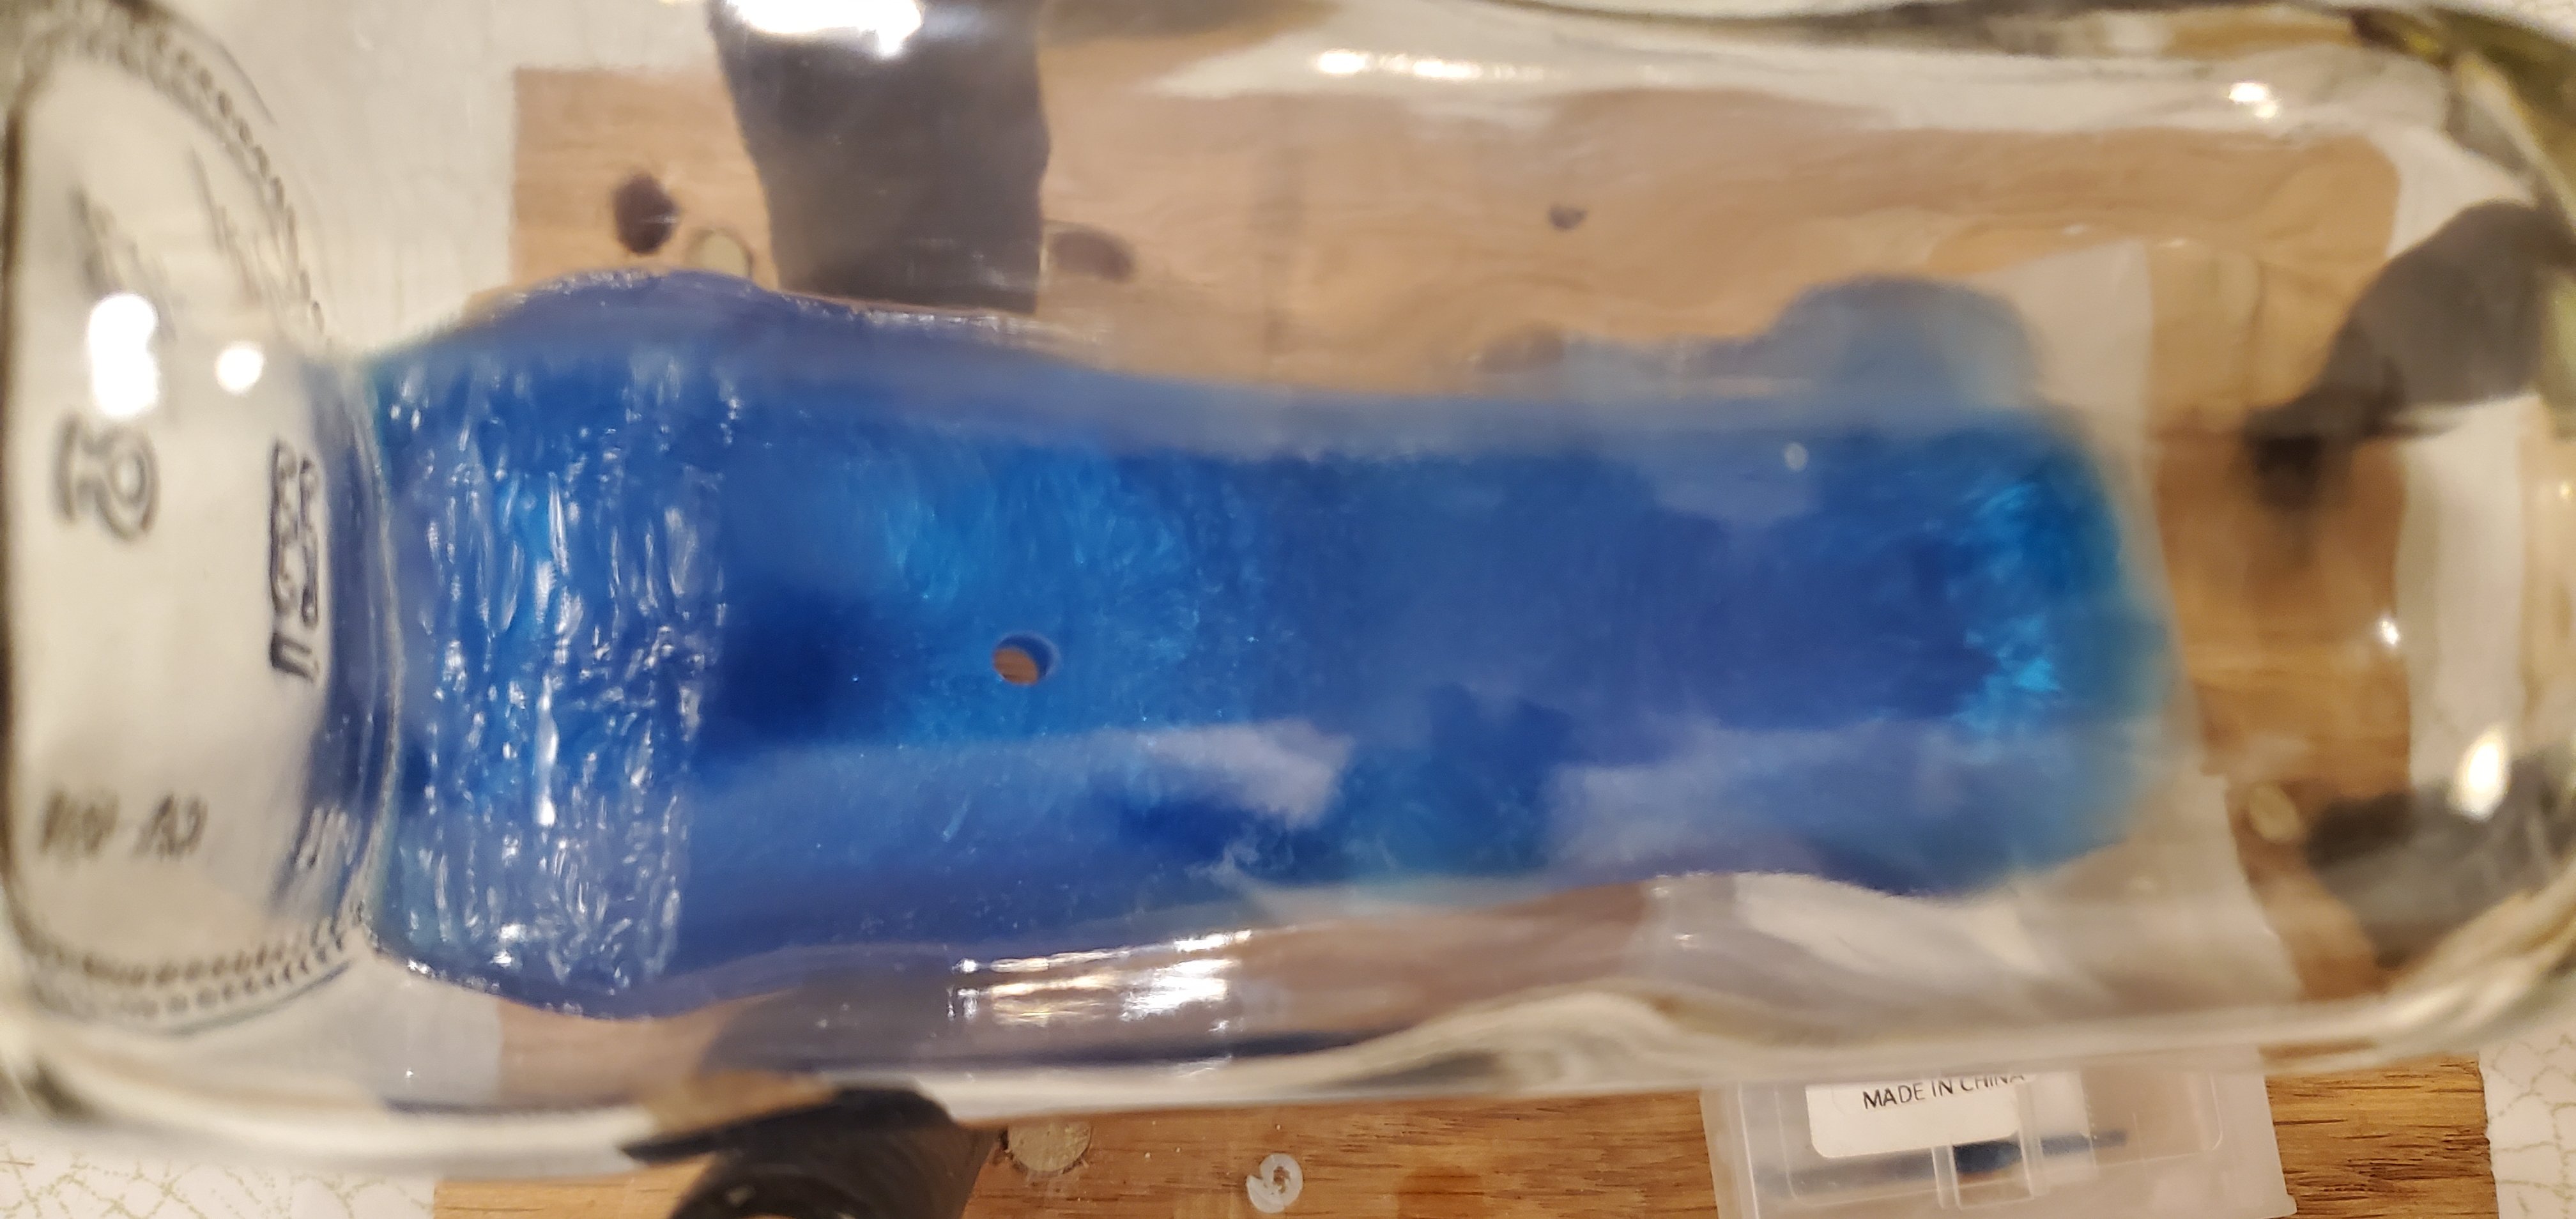
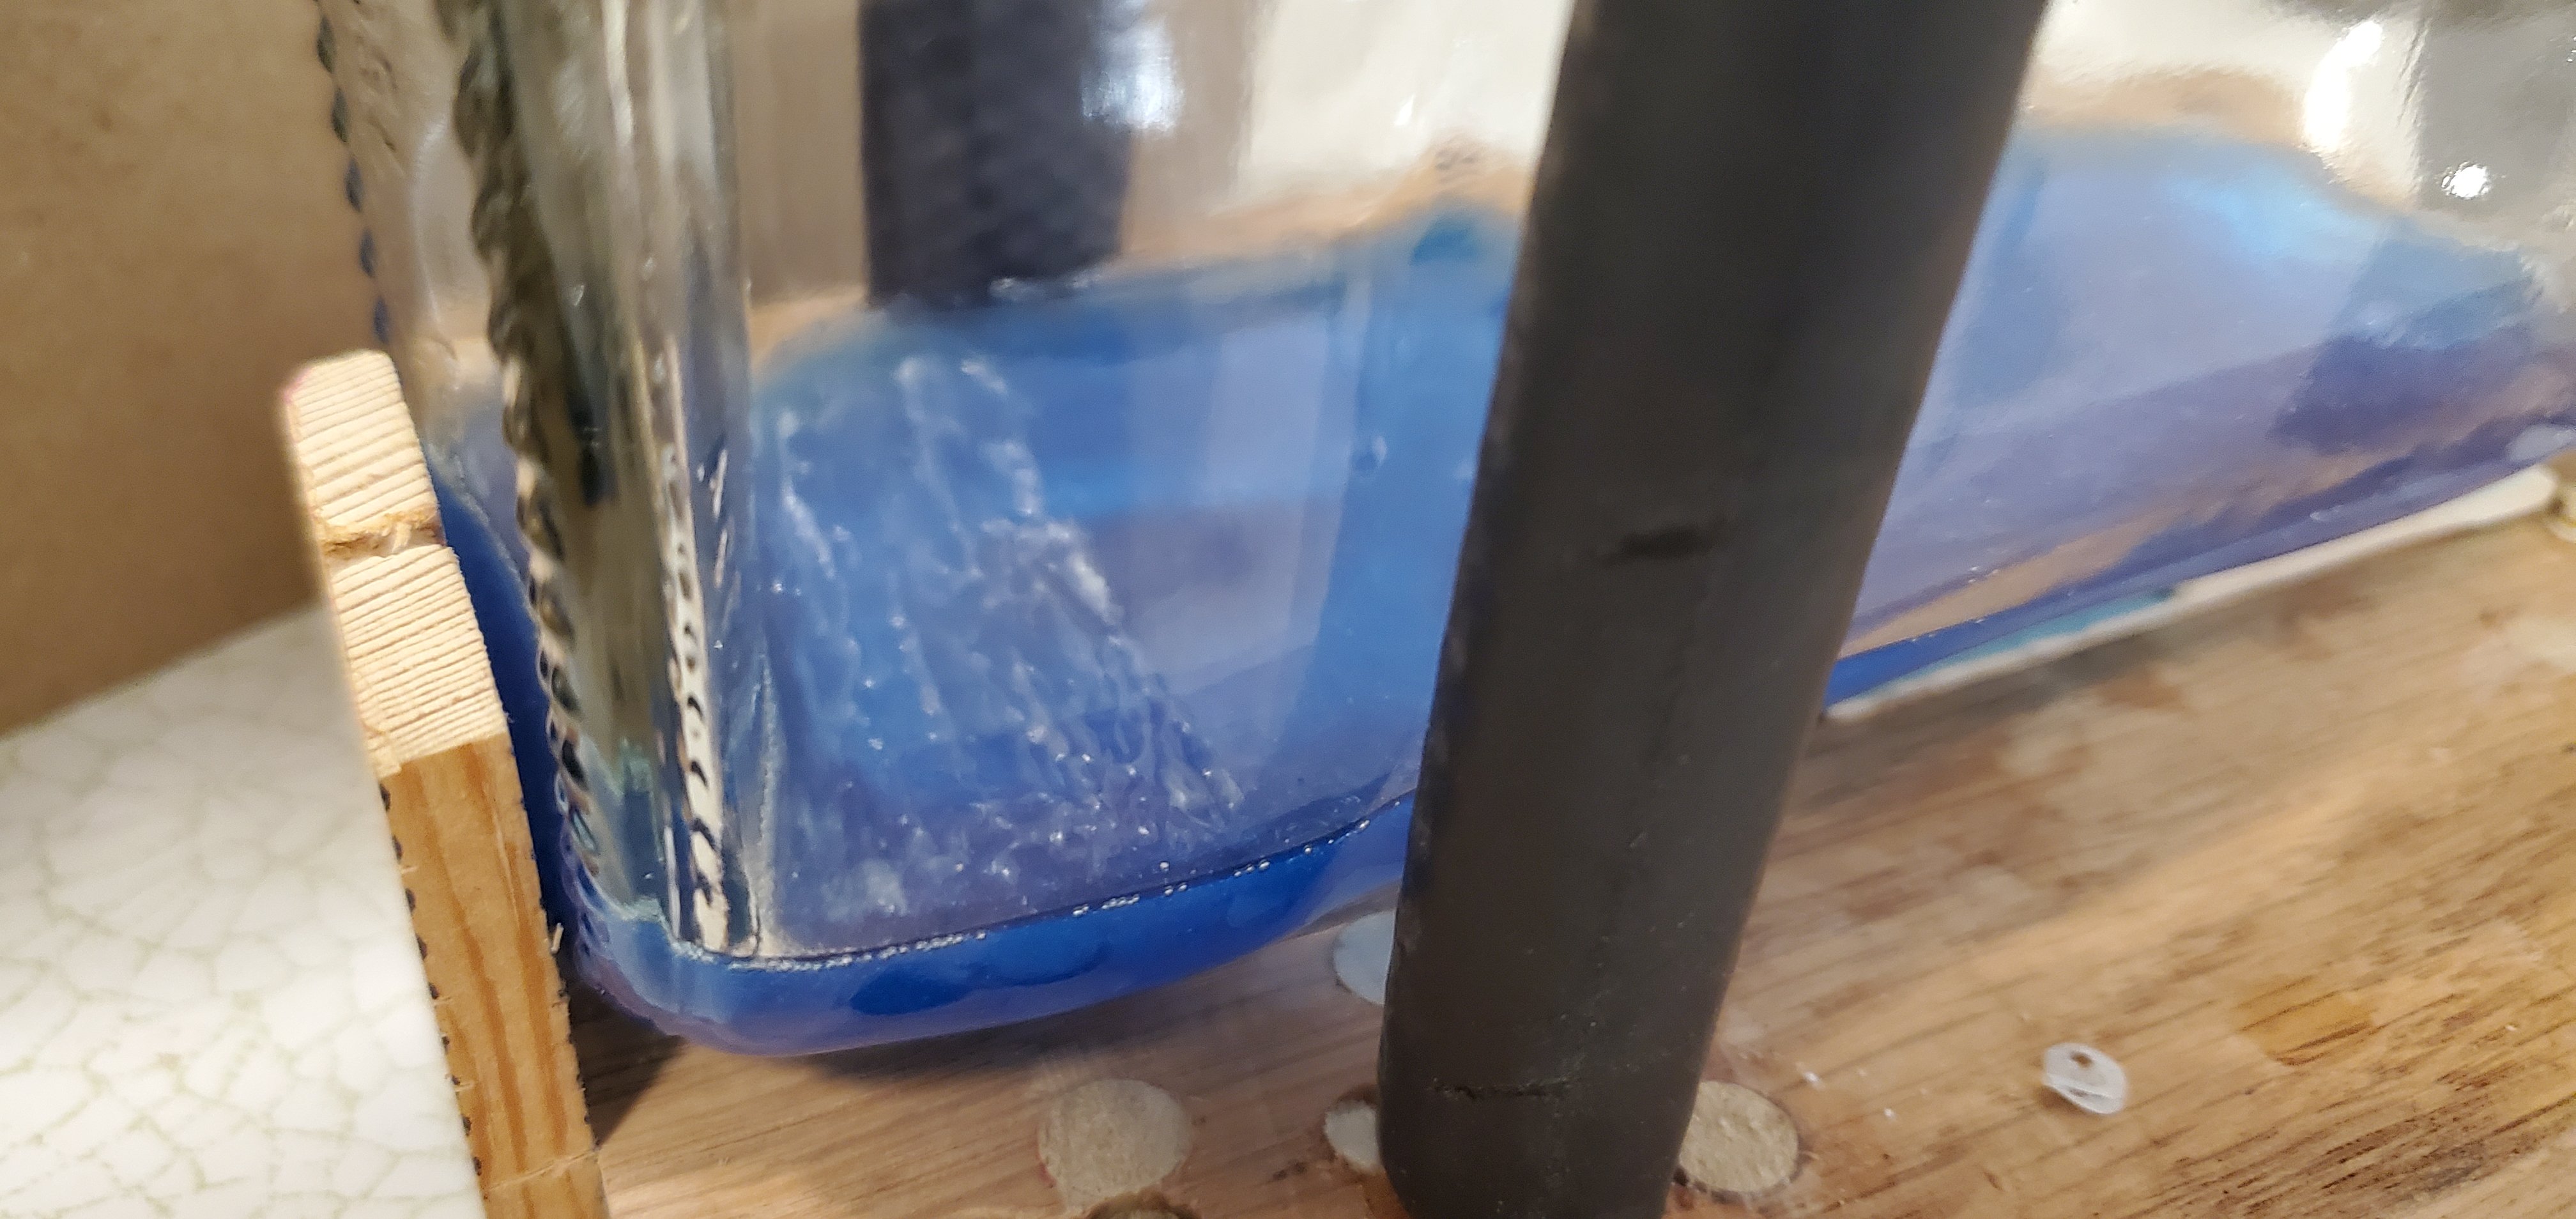
Even on medication, your eyes must be better than mine! I looked at the pictures above and could not find the hole that I know I drilled thru the caulk and the epoxy resin. So here's a better picture to show where the LED wires will go thru the water, out of the bottle, and to a switch and battery location TBD.

- 156 replies
-
- 8
-
-
- Queen Annes Revenge
- bottle
- (and 1 more)
-
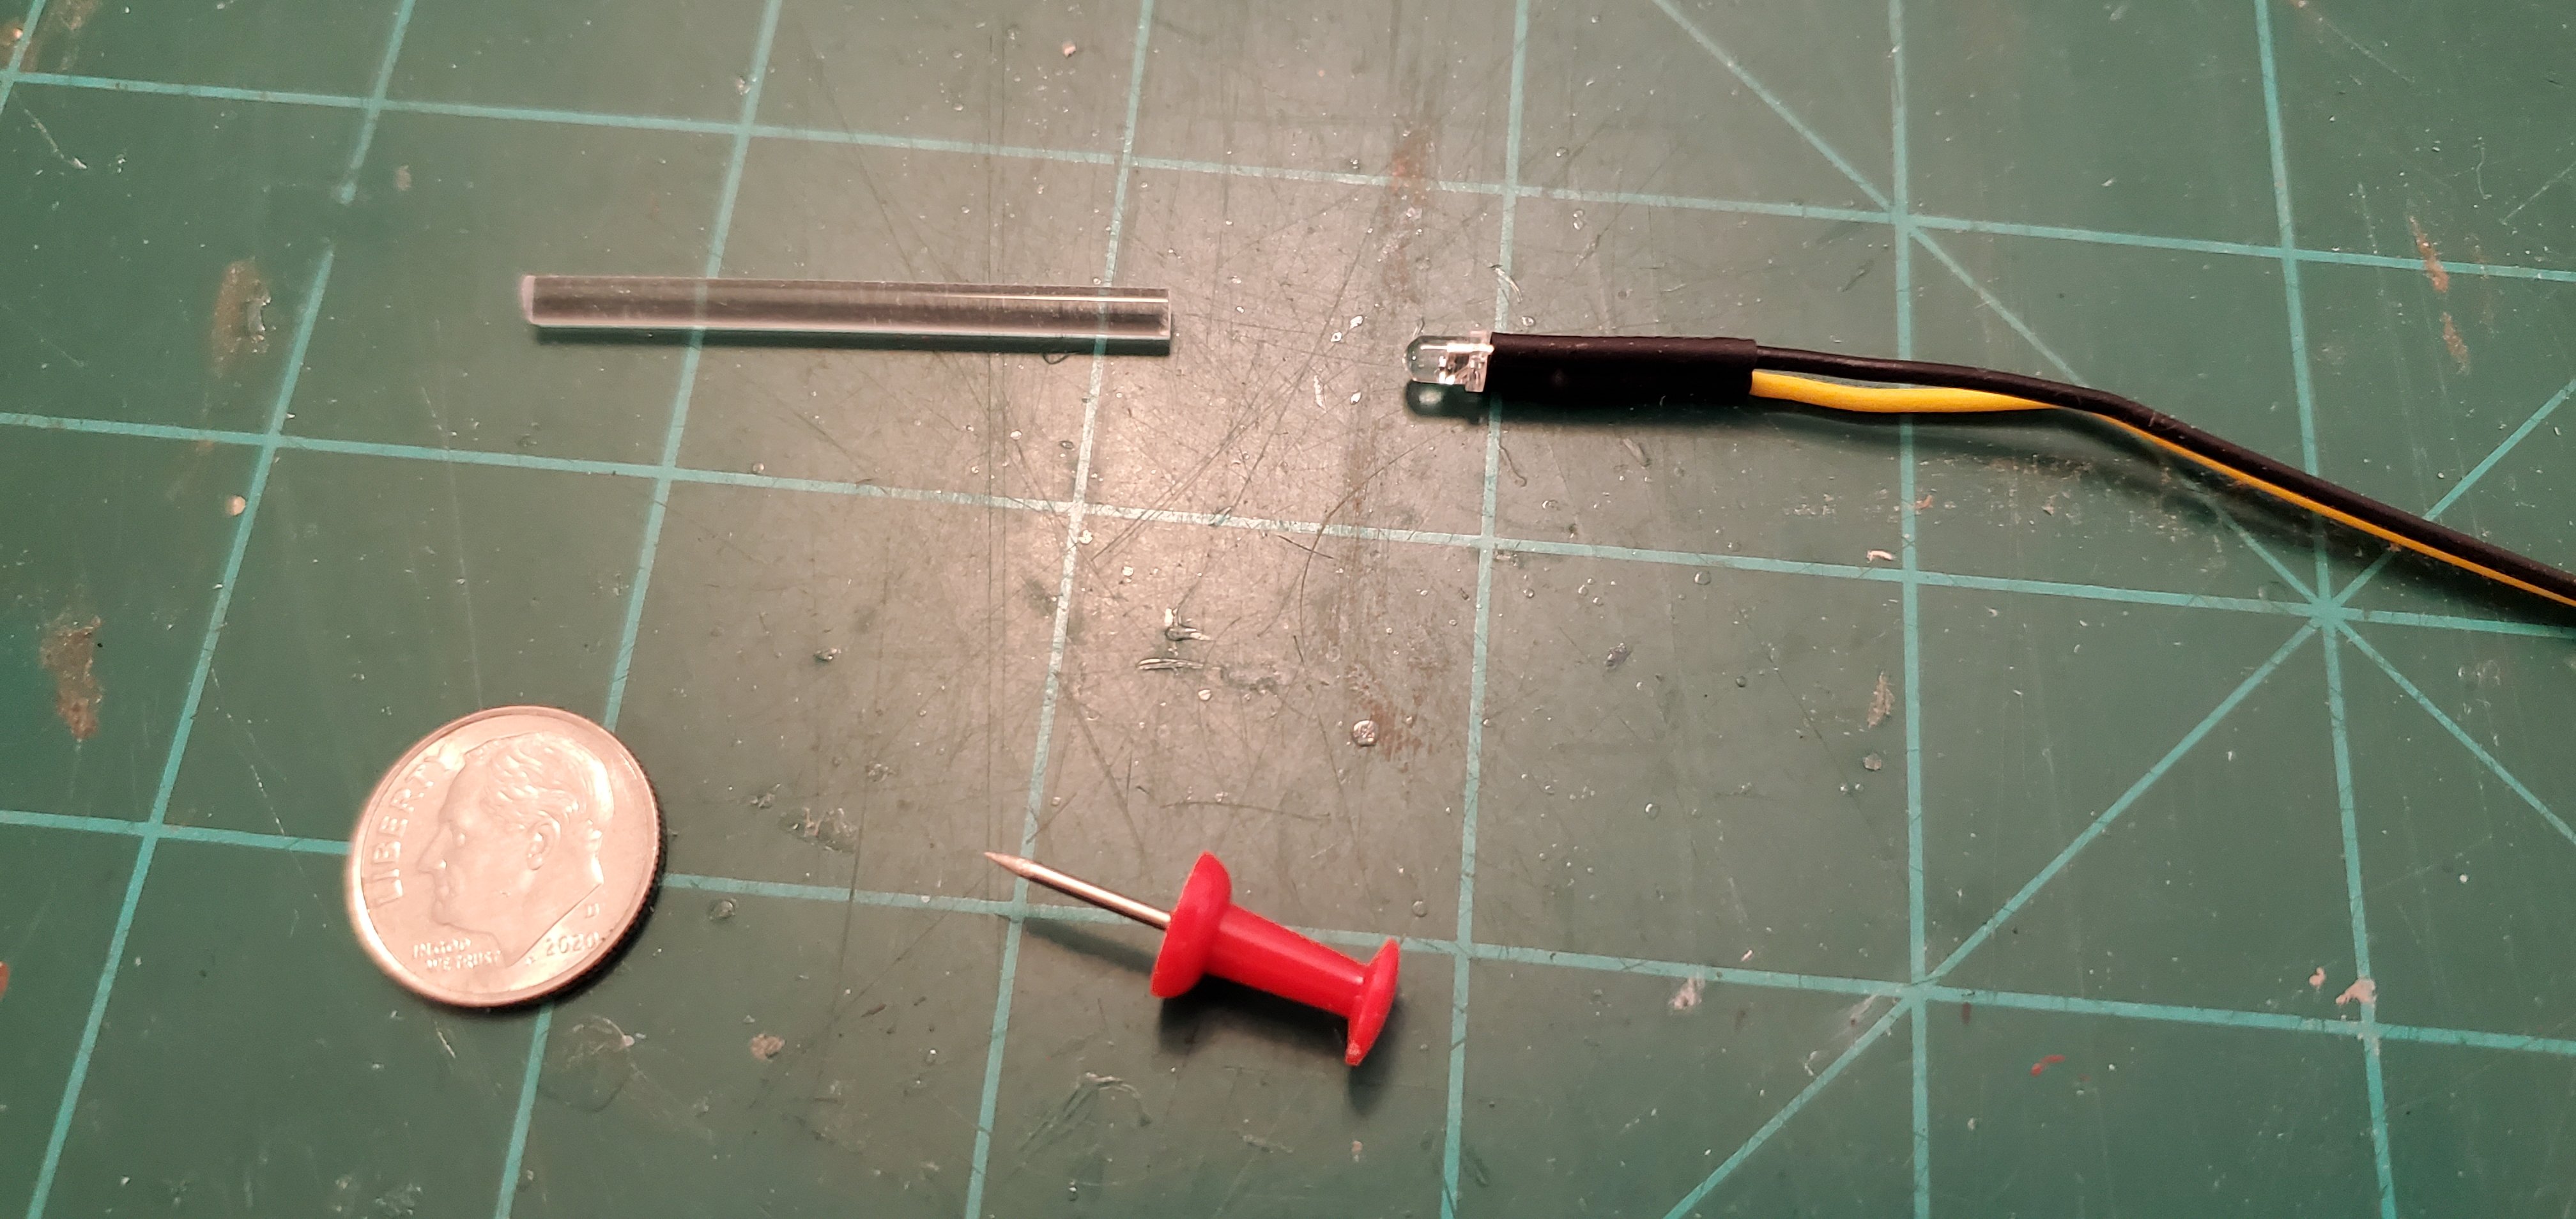
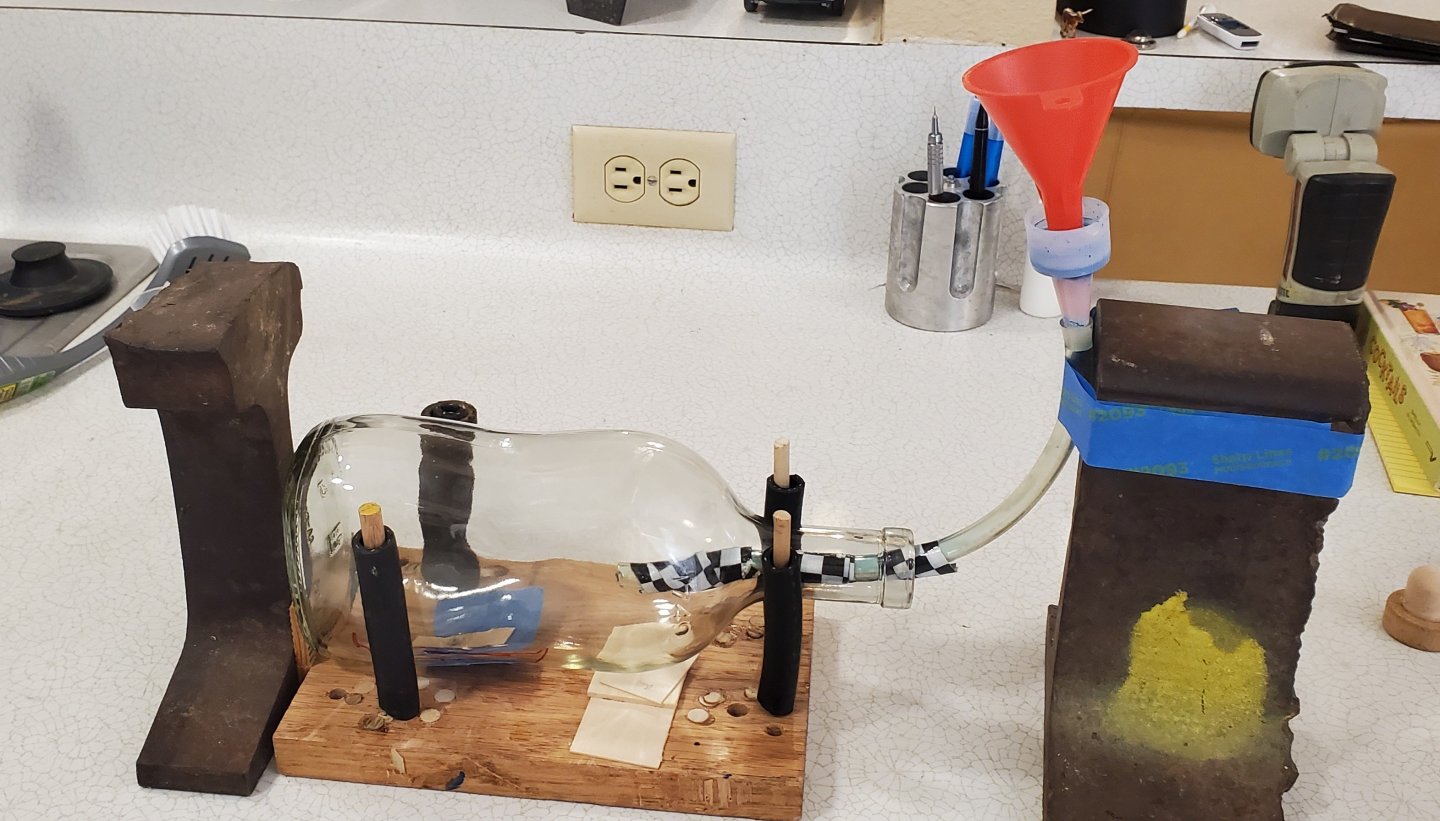
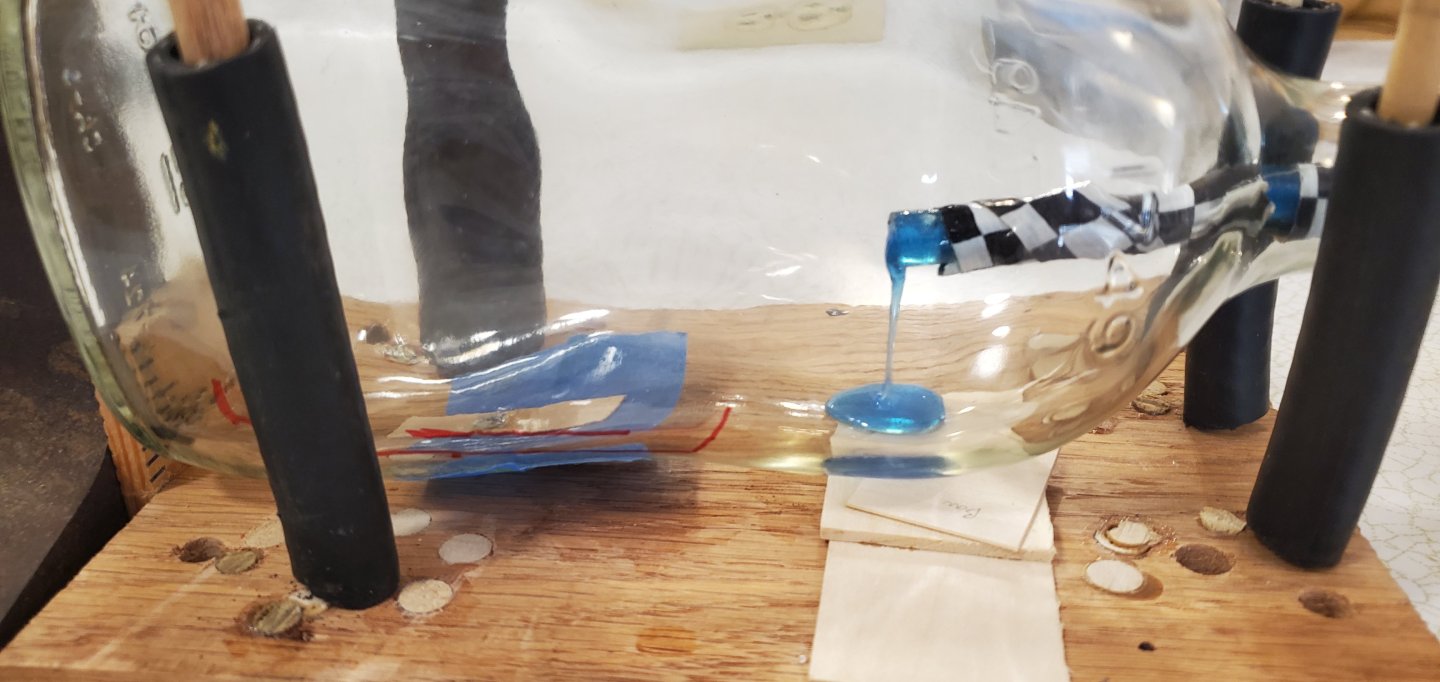
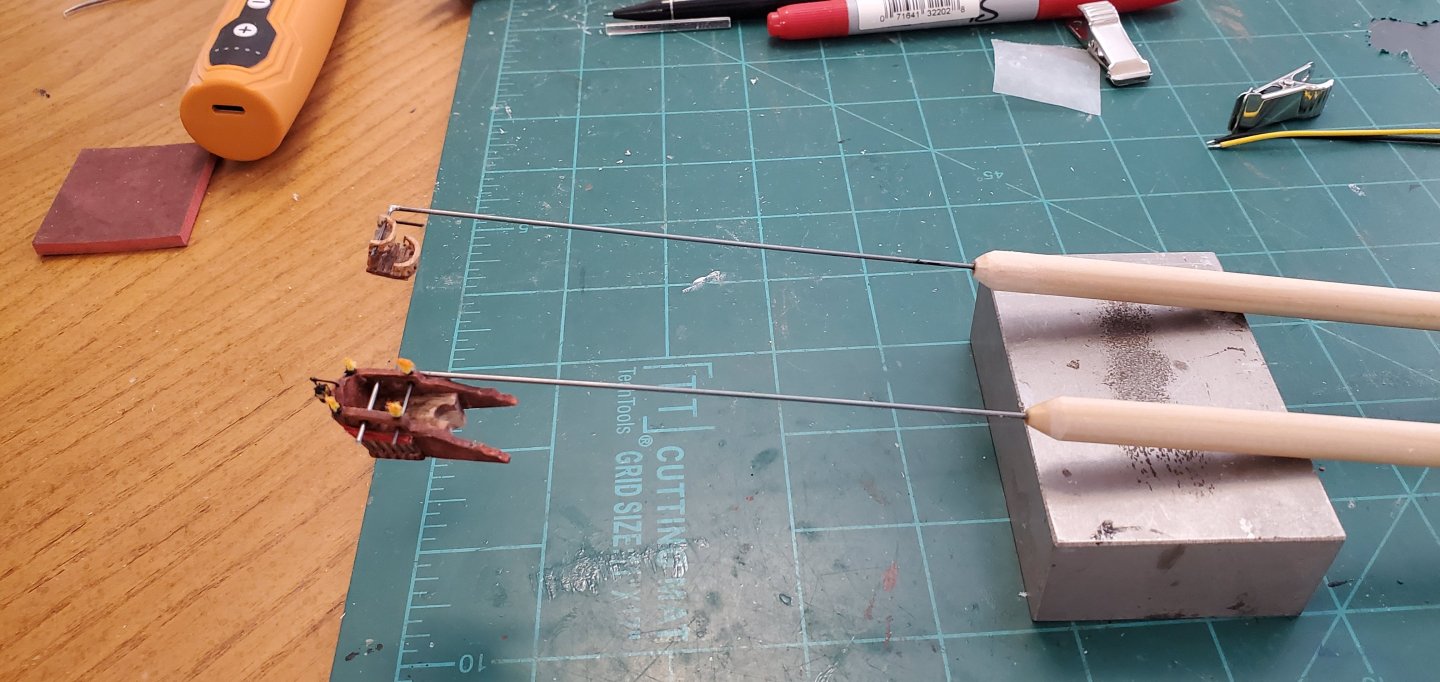
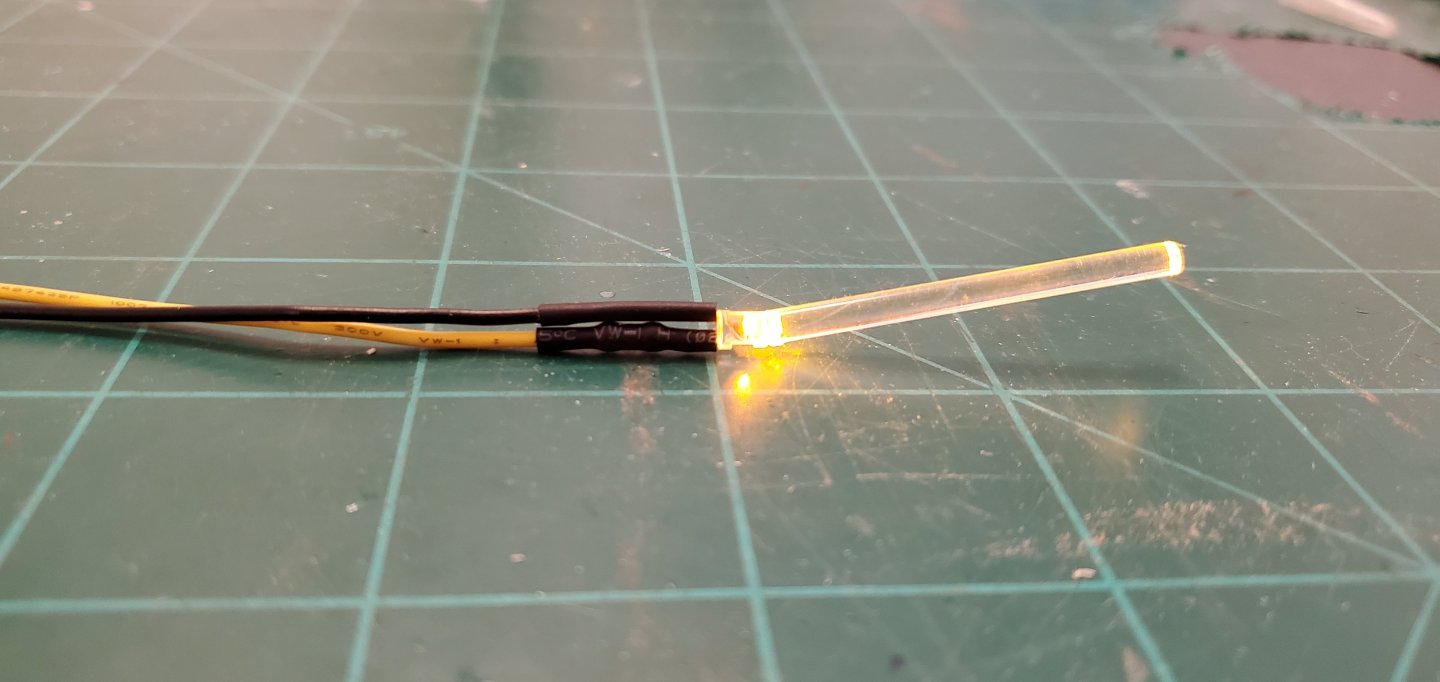
I like that idea, Pat. I will see if/how I can work that in. In the meantime, I got the epoxy resin water inside the bottle. The first thing I did was plug the hole I'd drilled in the bottom of the bottle (for the fireball LED wires to pass thru) with some clear caulk. Once the caulk dried, I set up my usual high-tech resin pouring fixture. Then it was just a matter of slowly pouring the resin in until I got it to the desired level. After the resin cured, I textured the part of the water that will be behind the ship. I used acrylic gel gloss medium for the small waves. I did that part of the water texturing now because it's very hard to reach that area after the ship is in the bottle. While the epoxy resin was drying, I made a couple of tools that will hopefully help to get the stern structure and the double balcony in place after the main part of the ship is in the bottle. Music wire, dowl rods, and a bit of soldering to make the tools. The wire(s) fit loosely thru holes in the railings of each piece. In theory, this will allow me to guide each piece thru the bottle's neck, place it on the ship's deck, then slide the tool out sideways leaving the piece in place. I anticipate the double balcony piece being the more difficult one to install because I will have to squeeze it in between shrouds, backstays, and other rigging, plus get it oriented correctly in a very small space. I also began work on the fireball starting with the "lightsaber". I found some small clear acrylic rods on Amazon which I am using in lieu of the clear plastic fork tine from the original practice fireball. They are easier to attach to the LED and give a smoother distribution of the light. I CA-glued the acrylic rod to the LED at an upwards angle to run it more or less parallel with the bowsprit as that's the way the fireball tracks as it emerges from the bow.


- 156 replies
-
- 13
-
-
-
- Queen Annes Revenge
- bottle
- (and 1 more)
-
I with you on that, Roel. That first picture really grabs your attention. But you gotta do what the customer says! I love the subjects you pic for your builds, Roel. They are always fascinating and a offer great learning experience for people like me that have no idea what these vessels do or even that they exist! Really looking forward to this one!
-
I can't think of a better way to spend a day! Except maybe painting longhorns?
- 261 replies
-
- 4
-
-
- Victory Models
- Pegasus
- (and 3 more)
-
I appreciate your optimism, Kenny! Next up is putting the finishing touches on the main part of the Revenge, starting with the sails. The first, and most challenging task with these sails is getting the color right. Here's a screenshot from a video clip that shows the sail coloring from the movie ship. My goal was to get a coloring fairly close, but with maybe a bit more reddish hue to keep things from looking too bland. I started with a piece of white shirt cloth and a small color palate of acrylics - red, brown, gray, white, and a liberal amount of acrylic thinner. Then I did a bunch of random mixing and splotching it on the white cloth. After getting a streak of acceptable color on the cloth, I cut the sails to shape. The sails from the screenshot show some ragged holes which I assume are burn holes from cannon shots. To make those, I heated up my soldering iron to 900 degrees F and lightly touched it to each sail in some random spots. The burn had an unexpected (but cool) effect - it turned the border right around each burn mark a slight yellowish-orange color. It doesn't show up very well in the pic below, but In real life, the yellowish-orange adds a subtle bit of extra color that enhances burn effect. Next, I hung the sails and strung the running rigging (braces). I also added some more eye candy - four more torches, an anchor, a skeleton (of sorts) on the bow under the bowsprit. I finished things off by reworking the red drapery on the stern. Here's how she looks now. Now things are about to get interesting. Time make the fireball and try to get this mess inside the bottle.


- 156 replies
-
- 15
-
-
-
- Queen Annes Revenge
- bottle
- (and 1 more)
-
Beautiful work, Steve.
-
I'm afraid you are right, Keith. This hole I've been digging for myself keeps getting deeper! 😛
- 156 replies
-
- 5
-
-
-
- Queen Annes Revenge
- bottle
- (and 1 more)
-
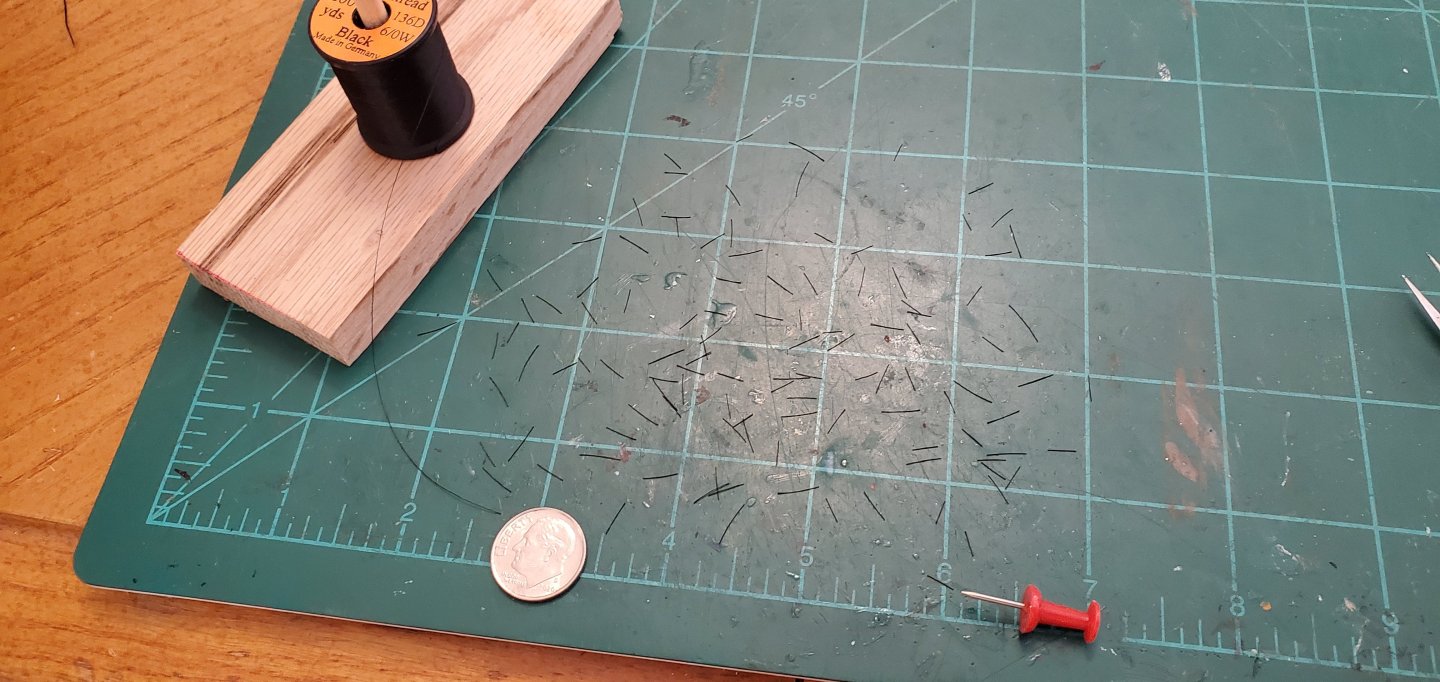
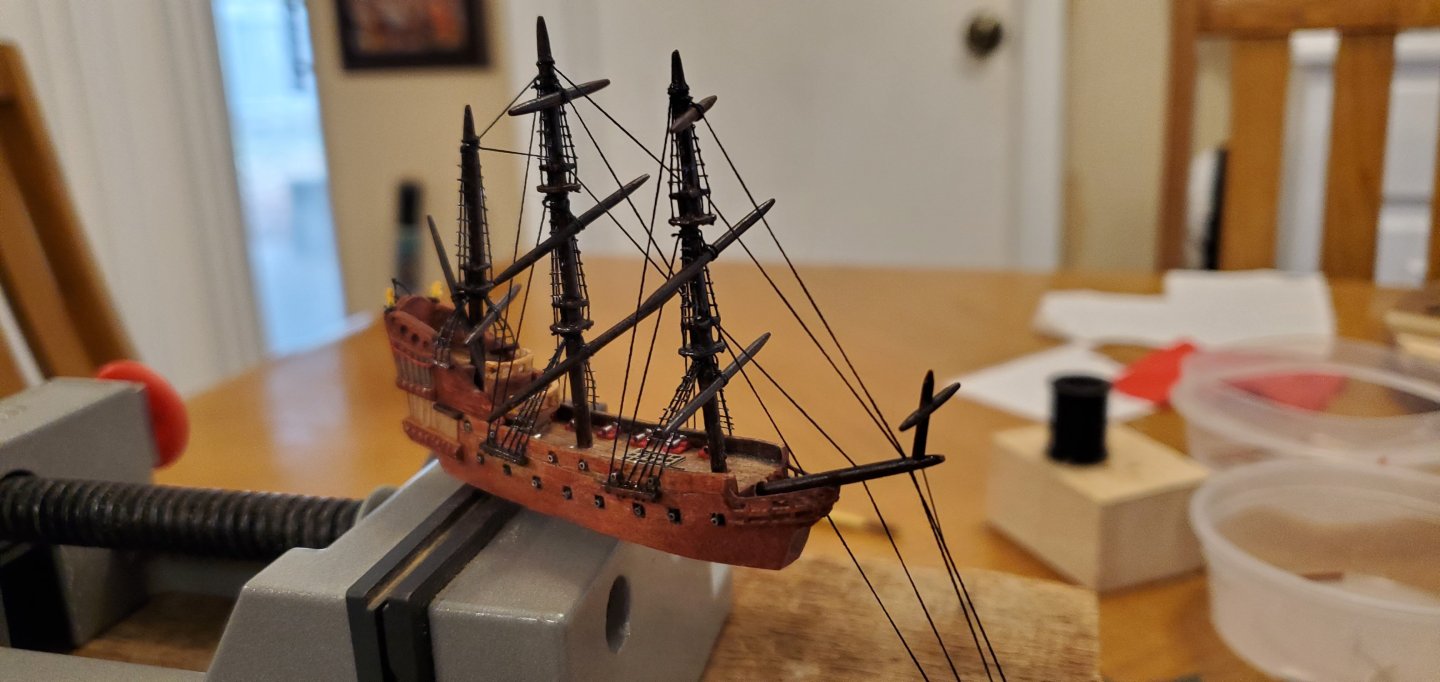
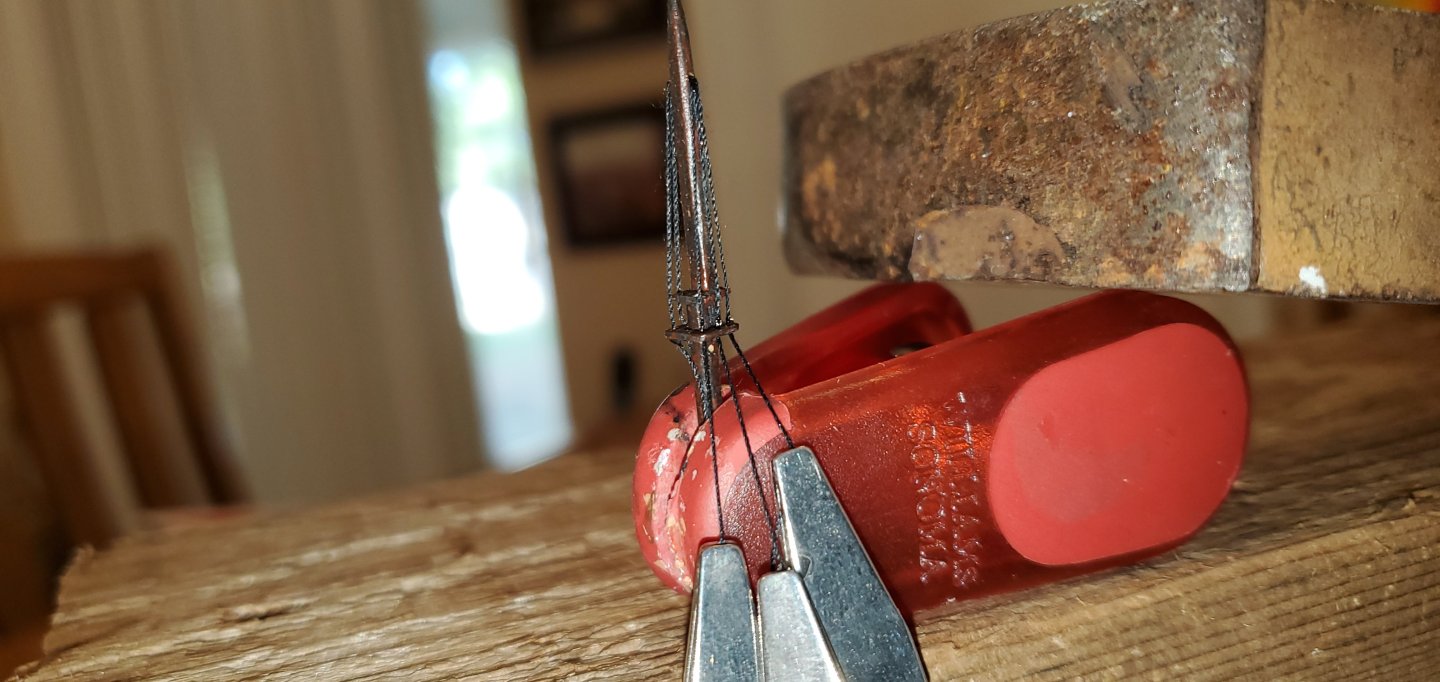
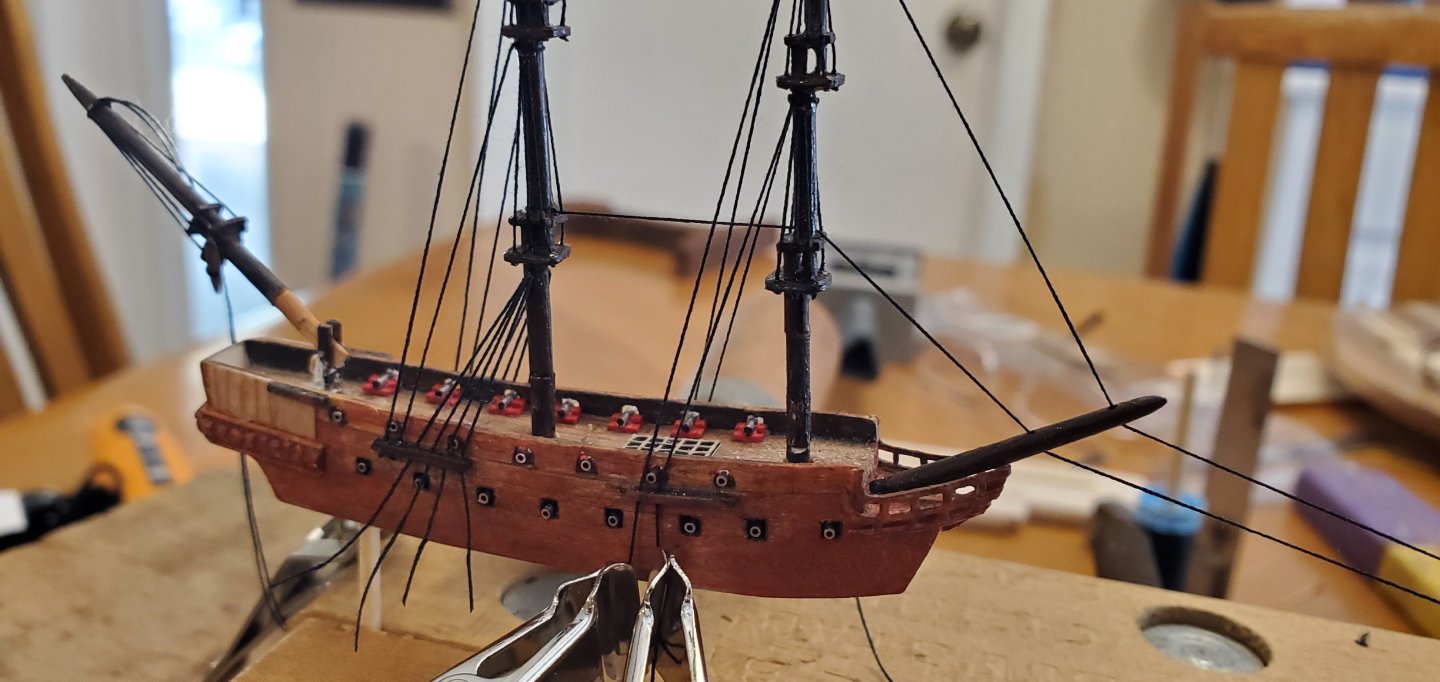
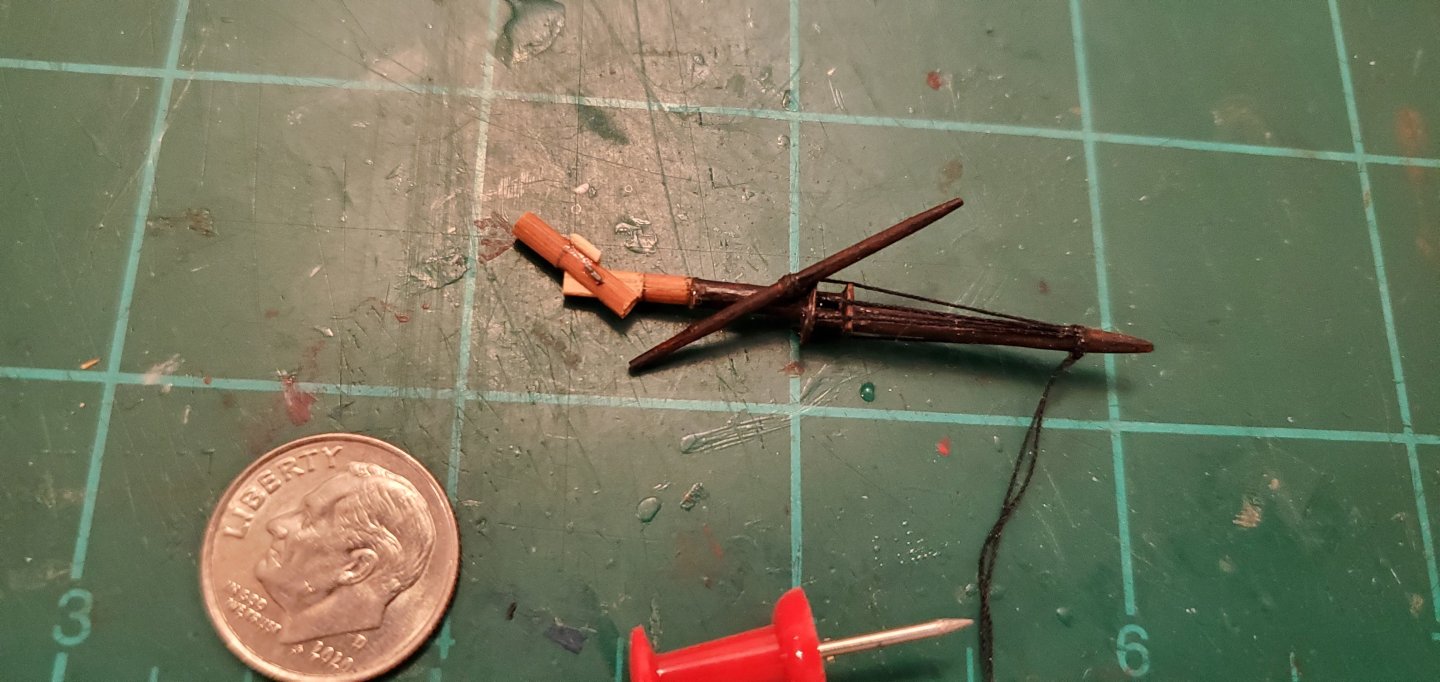
My build logs are never complete without penguins and boobies! With the shrouds hung, next up are the ratlines. Soooooo much easier and quicker than real ratlines on a full-size ship model. I have not discovered a better technique than fly tying thread and fabric glue so I continue to stick with it. First I cut the fly tying thread into random pieces ranging in length from 1/4" to 3/8". Then I grab each one with my finest point tweezers, drag it thru fabric glue, and place it across the shrouds. Rinse and repeat all the way up each set of shrouds. After the glue dries, I snip off the overhanging ends with cuticle trimmers. What takes a couple of weeks for regular ship models takes only a few hours here. I do have one small variation in the process for this particular ship - another challenge caused by the high-rising stern structure. The channels for the mizzen lower shrouds attach near the top of the stern structure. Because the stern structure will be added after the ship is in the bottle, I cannot secure the channels yet. So they will dangle loosely and I will have to attach them to the stern structure inside the bottle. I'm not exactly sure how (or if) I can pull that off, but I'll worry about it later. To add the ratlines to the dangling shrouds, I looped a thread around the middle shroud and weighted it with a small clamp. That provided enough tension to get the ratlines in place. Here's how she looks before getting her whiskers trimmed. While waiting for the glue to dry, I went ahead and made the yards. I use a cow hitch knot around the center of each yard to secure it to the mast. The cow hitch allows the yard to be twisted around in different directions. This is necessary when I lay the masts down and wad everything up to get it in the bottle. The Revenge also has a sprit topmast which I've never had to deal with before. Of course with the angle of the bowsprit and the height of the little mast, it won't fit thru the bottle opening. Sigh. One more thing to add after the ship is in the bottle. To help facilitate the installation, I figured I'd drill a small hole in the end of the bowsprit and have a small wire protruding from the bottom of the sprit topmast. The only problem was that my thinnest music wire and thinnest brass wire was too thick. Hmmmm...walk around garage and house looking for ideas...hmmmm...AHA! The high G string on my 5-string banjo looked very thin! I clipped off a small piece from the end that wound around the tuning key and measured it. A tenth of a millimeter. Perfect!! So I drilled a tiny hole into the end of the mast, inserted the wire and bent to the correct angle. The sprit top mast and yard fit nicely. Now I just have to be able to do it inside the bottle!


- 156 replies
-
- 13
-
-
-
- Queen Annes Revenge
- bottle
- (and 1 more)
-
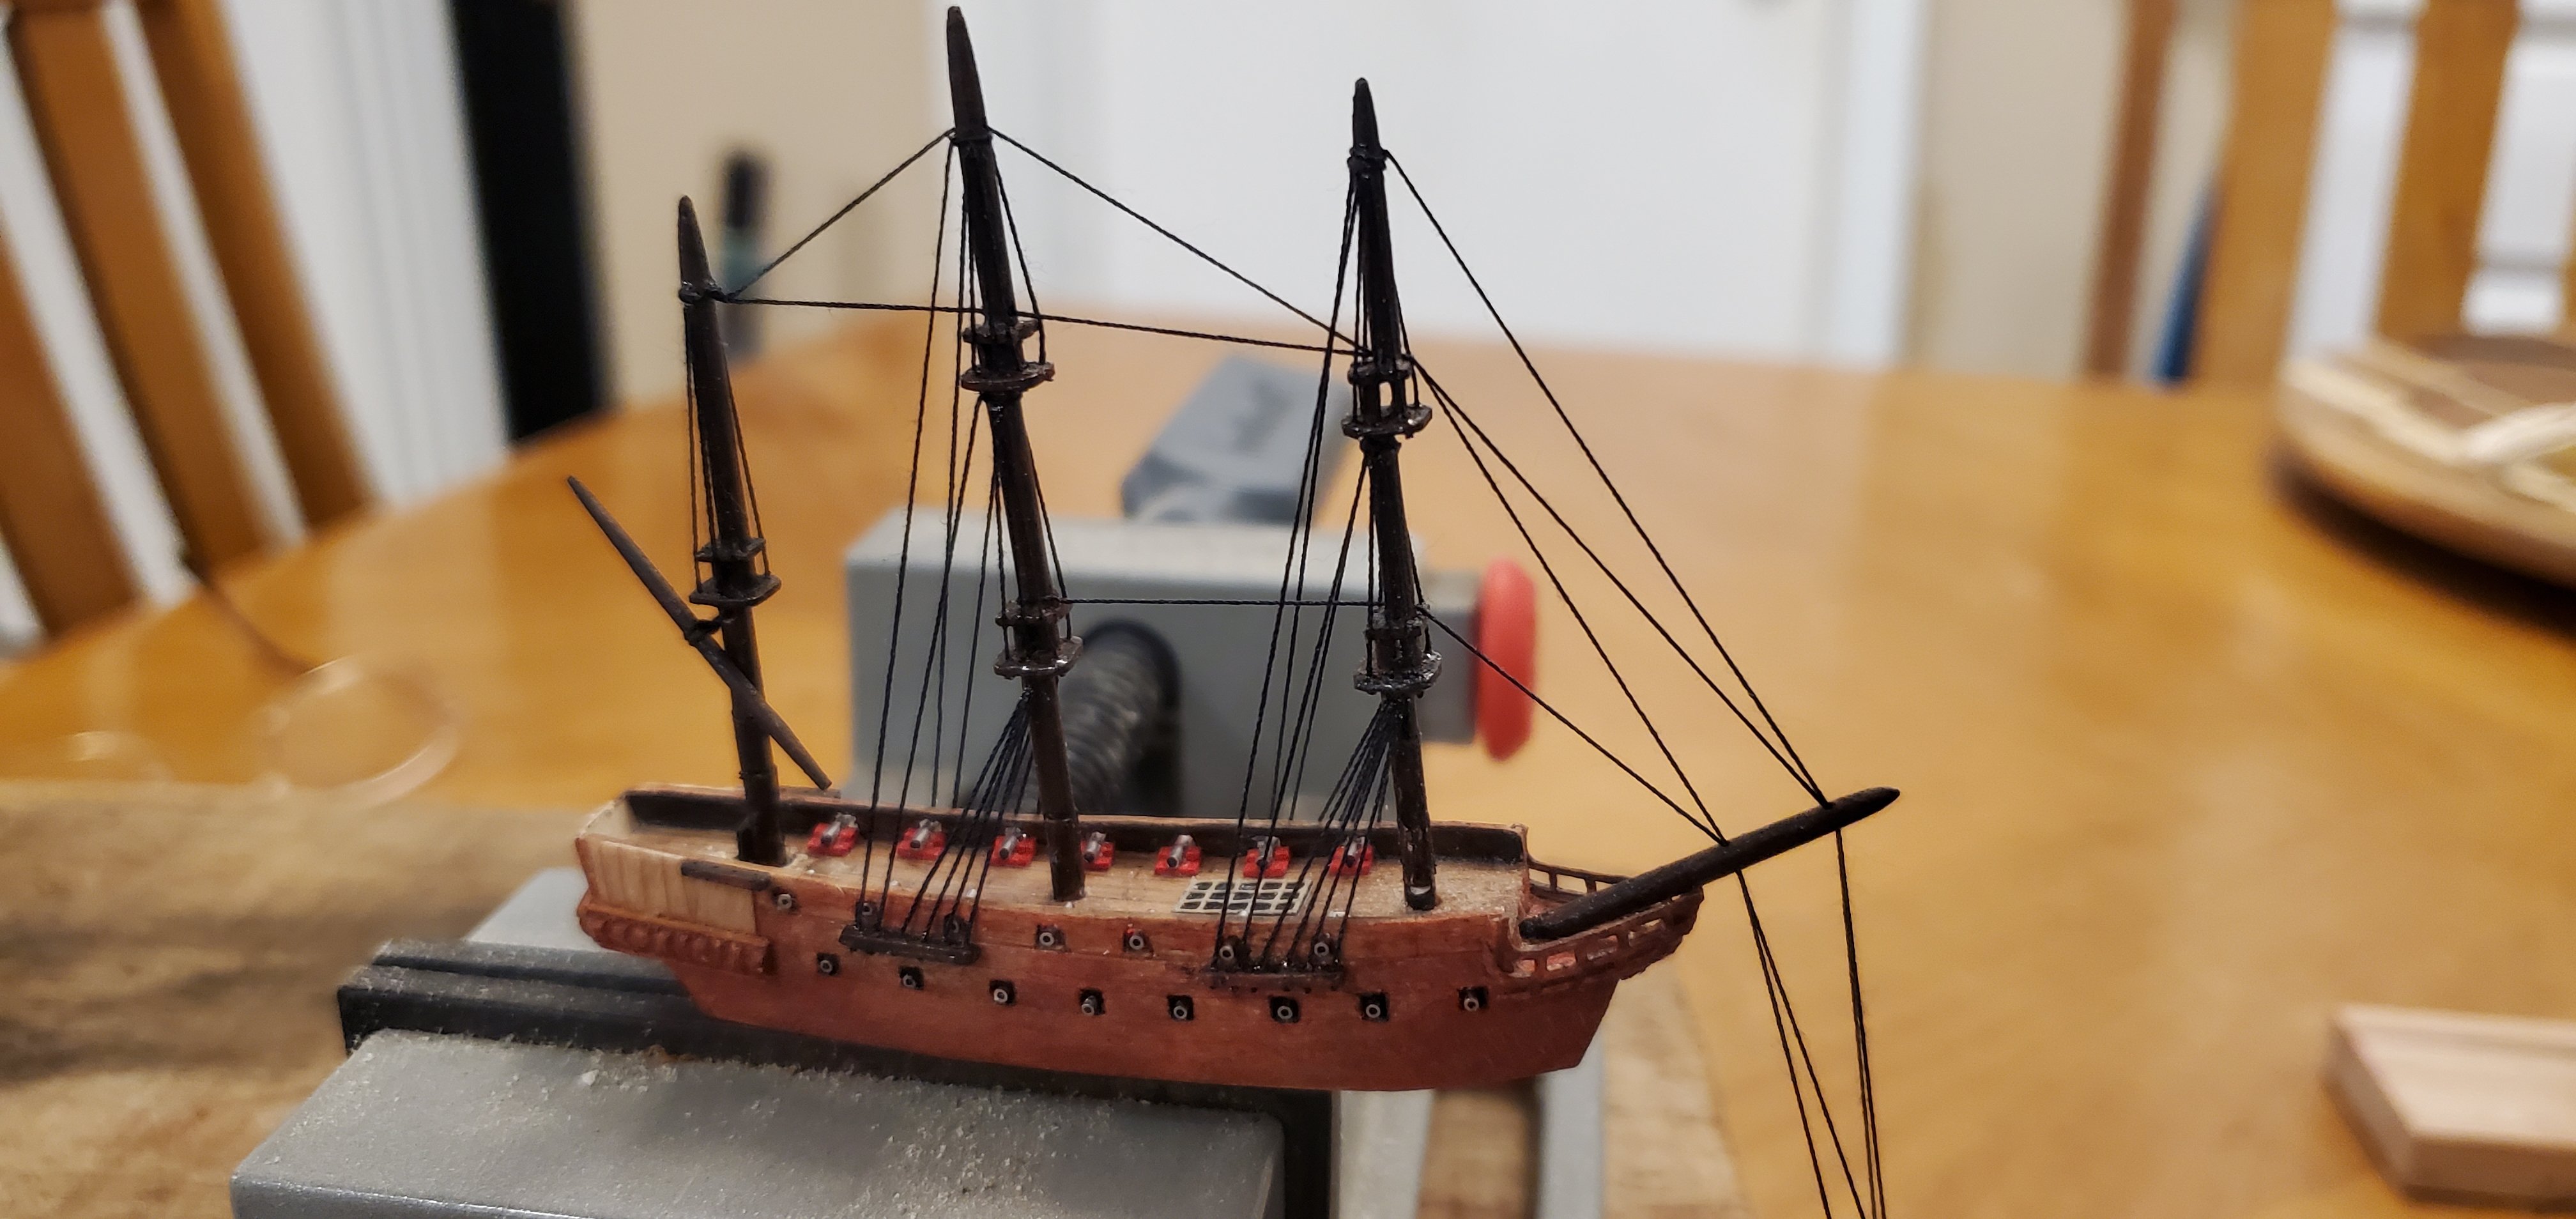
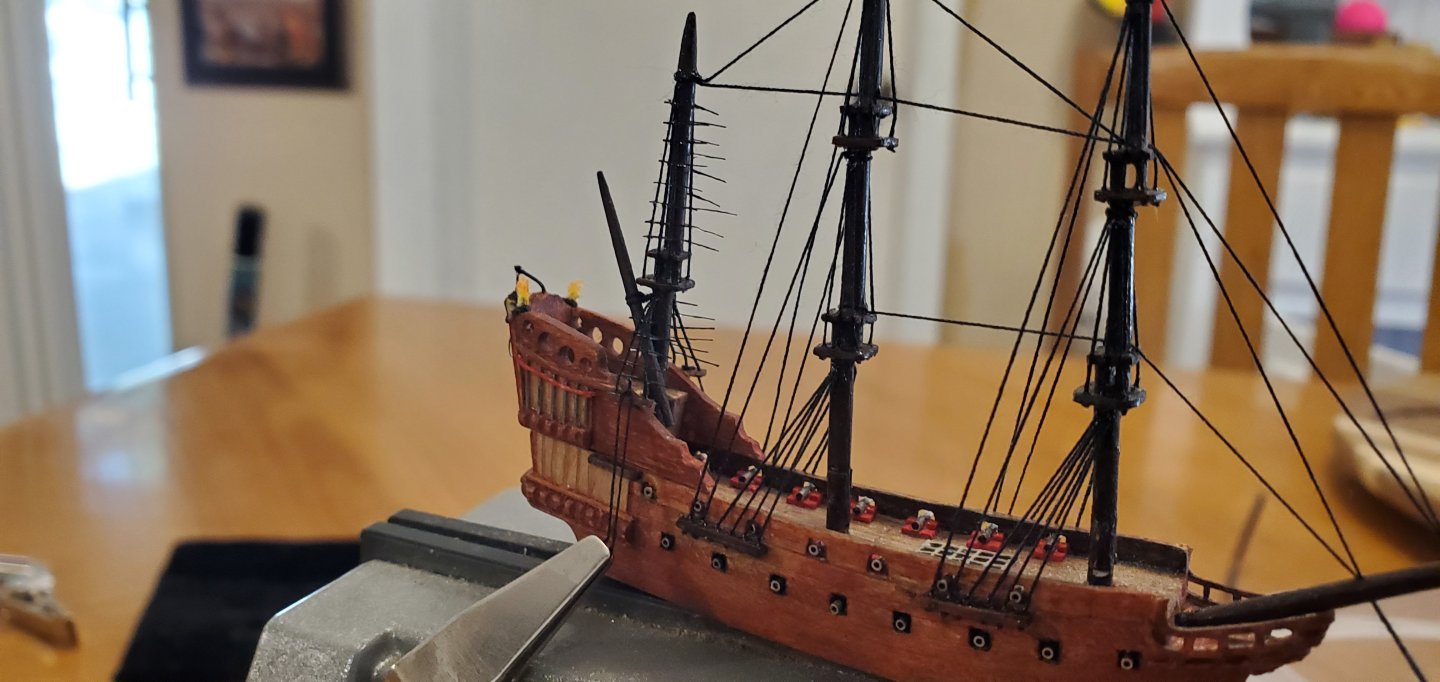
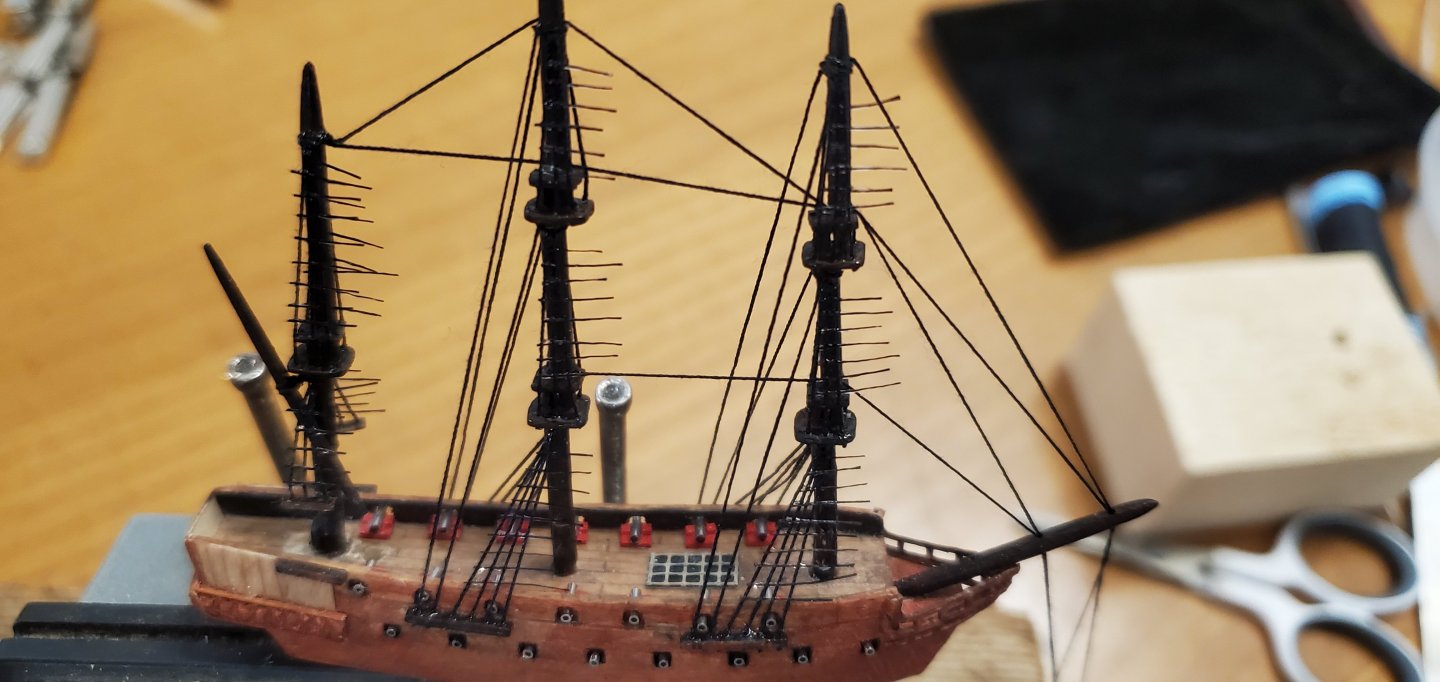
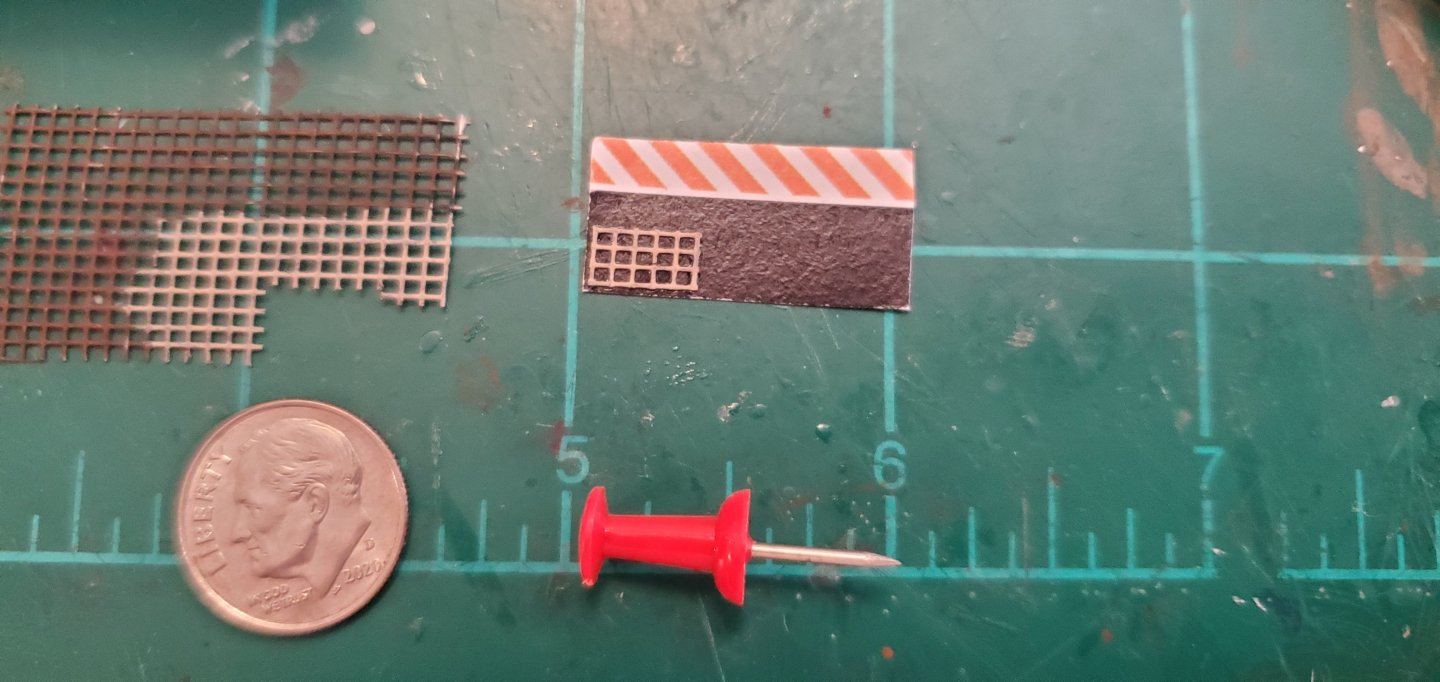
Crazy weekend in the shipyard. It started out nice and calm with making a grate for the ship's deck. For the grate I cut a small piece of a window screen, painted it, then glued it to a piece of black paper for depth. It is certainly out of scale, but I think it gives the right impression. After that, it was time to start on the rigging. First, the upper shrouds. Then the backstays. And that's where things got crazy. As you can see in the pic below, there's a mess going on with the mizzen mast (I think @Keith Black would call it a dog's lunch). I channeled my inner @Knocklouder and somehow broke off the mizzen mast while handling the ship. I know Bob specializes in doing that to bowsprits, so I thought I'd one-up him. After fixing the break, I somehow managed to do it again!! 🤬🤬🤬 So this time, I decided to replace the hinge completely and splice the mast above the hinge. I did NOT want to have to rebuild and paint the entire mast. I also reinforced the splice with a stiff piece of music wire as a dowel. Here's how the mizzen mast looks after a few hours of friendly-fire rework. And with the stern structure dry-fit in place.


- 156 replies
-
- 18
-
-
-
- Queen Annes Revenge
- bottle
- (and 1 more)
-
That is the coolest way to make mast rings I've ever seen. Ingenious, Gary!
- 90 replies
-
- 3
-
-
-
- Friendship Sloop
- bluejacket shipcrafters
- (and 1 more)
-
Thanks, Kenny! If you want to try an SIB, you might consider Amati's Hannah SIB kit. It's how I got started making SIBs 4 years ago. @Landlubber Mike has a great build log for the kit, which helped me tremendously.
- 156 replies
-
- 6
-
-
- Queen Annes Revenge
- bottle
- (and 1 more)
-
Glad to hear you are on the mend, Bob. That's a beautiful display case. A fitting place for all your wonderful work.
- 261 replies
-
- 6
-
-
-
- Victory Models
- Pegasus
- (and 3 more)
-
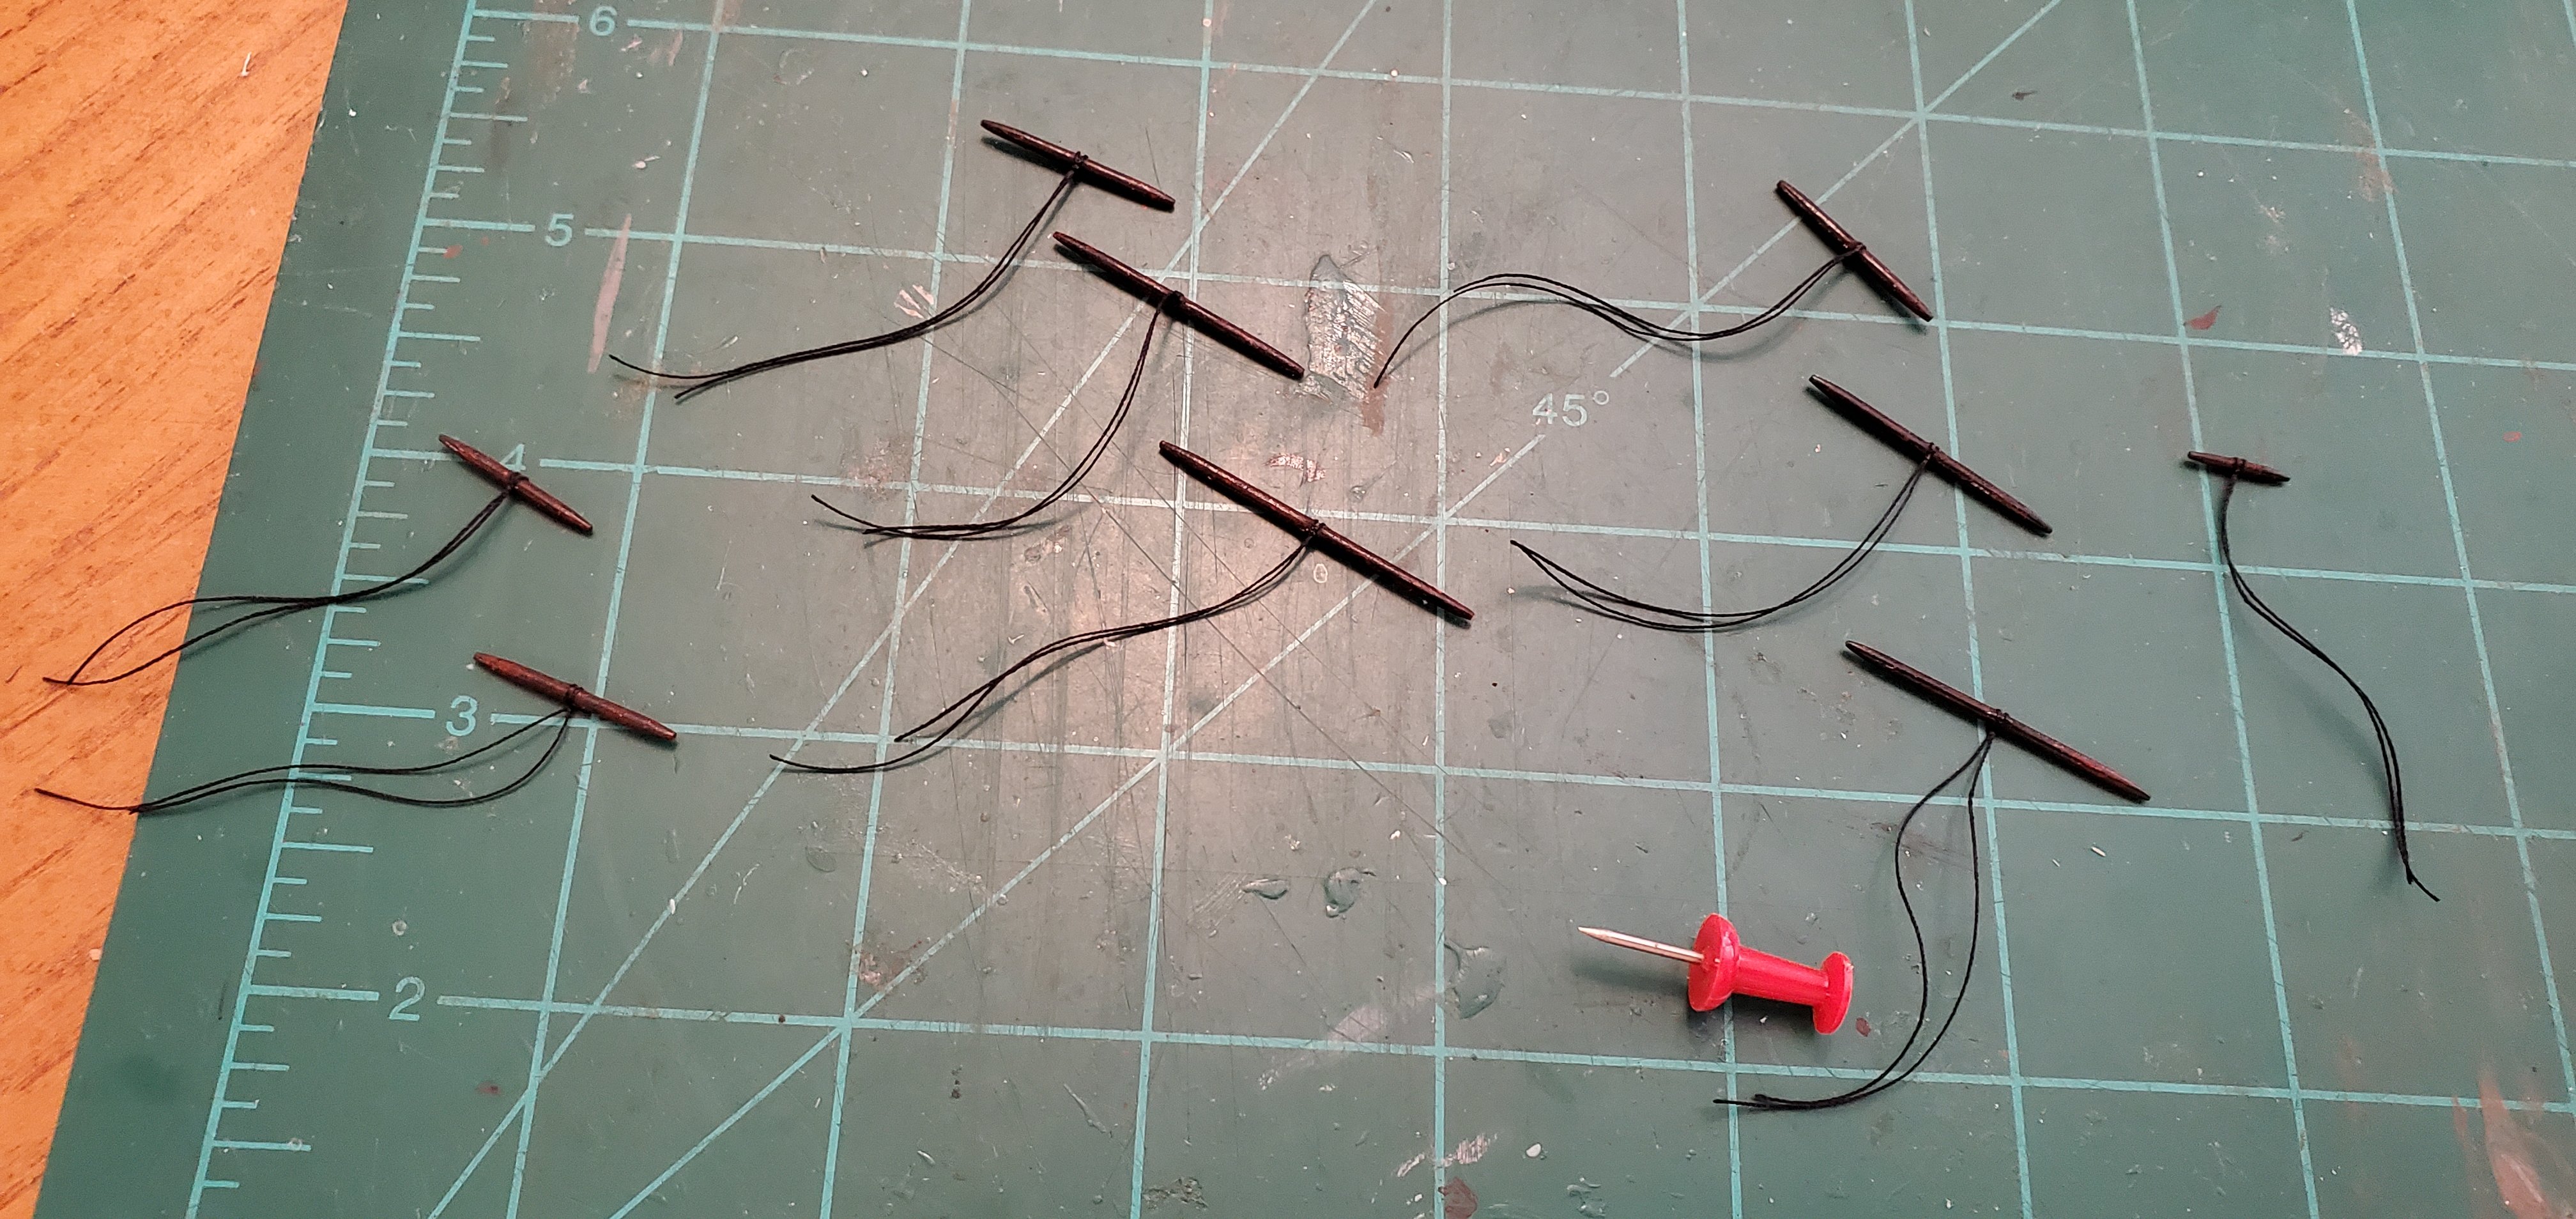
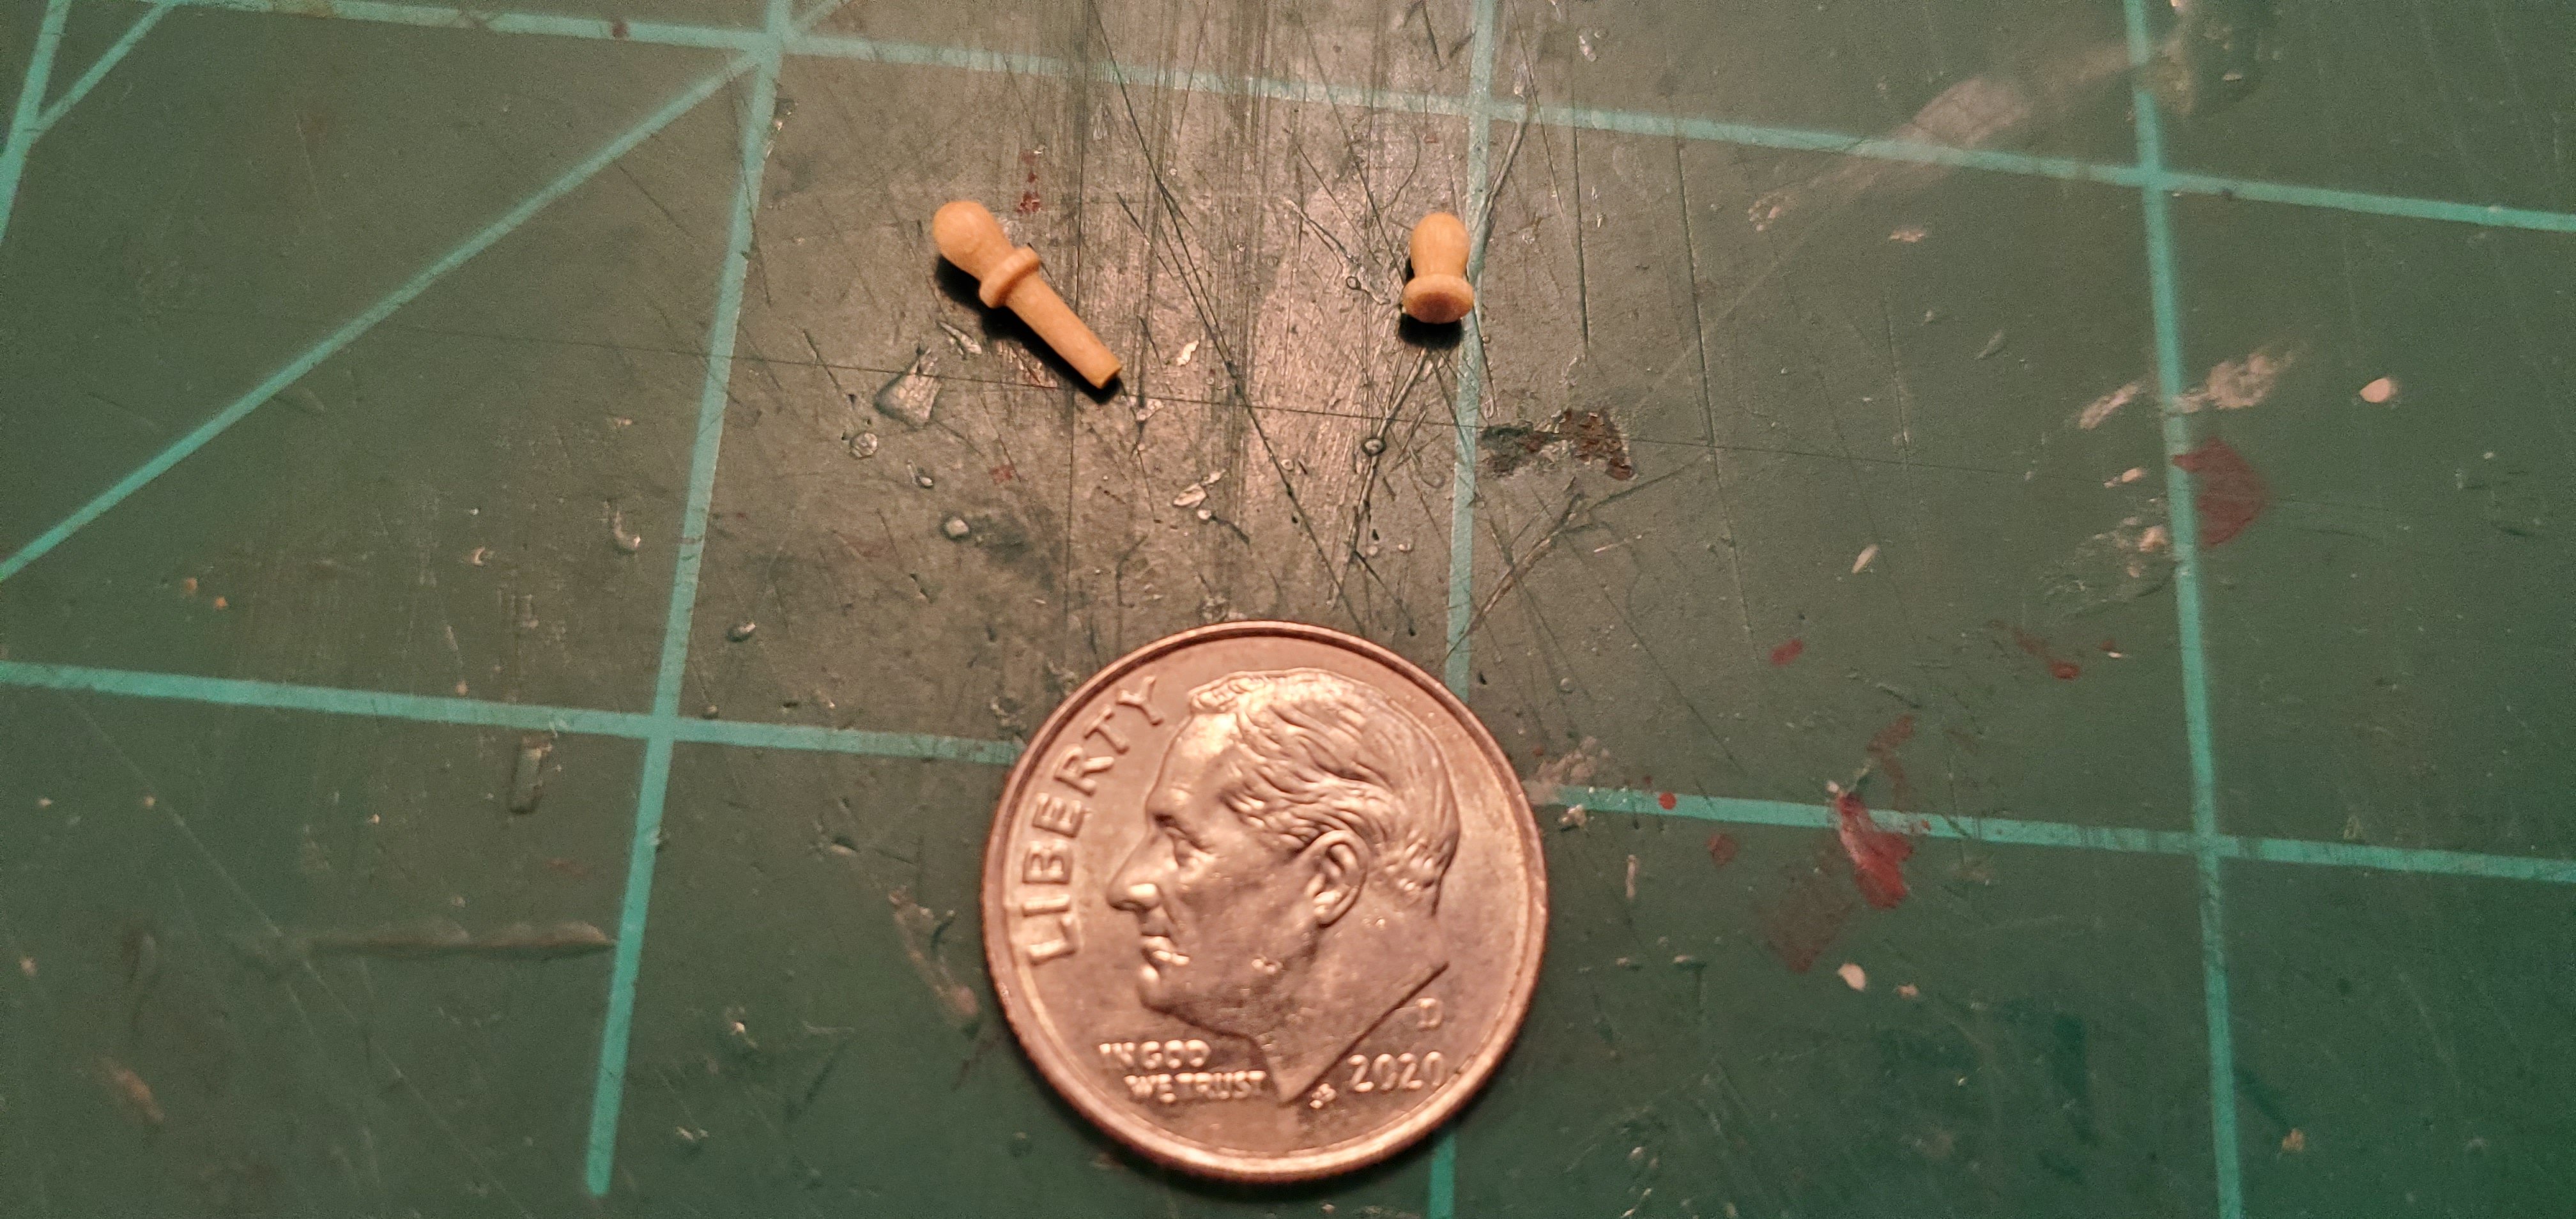
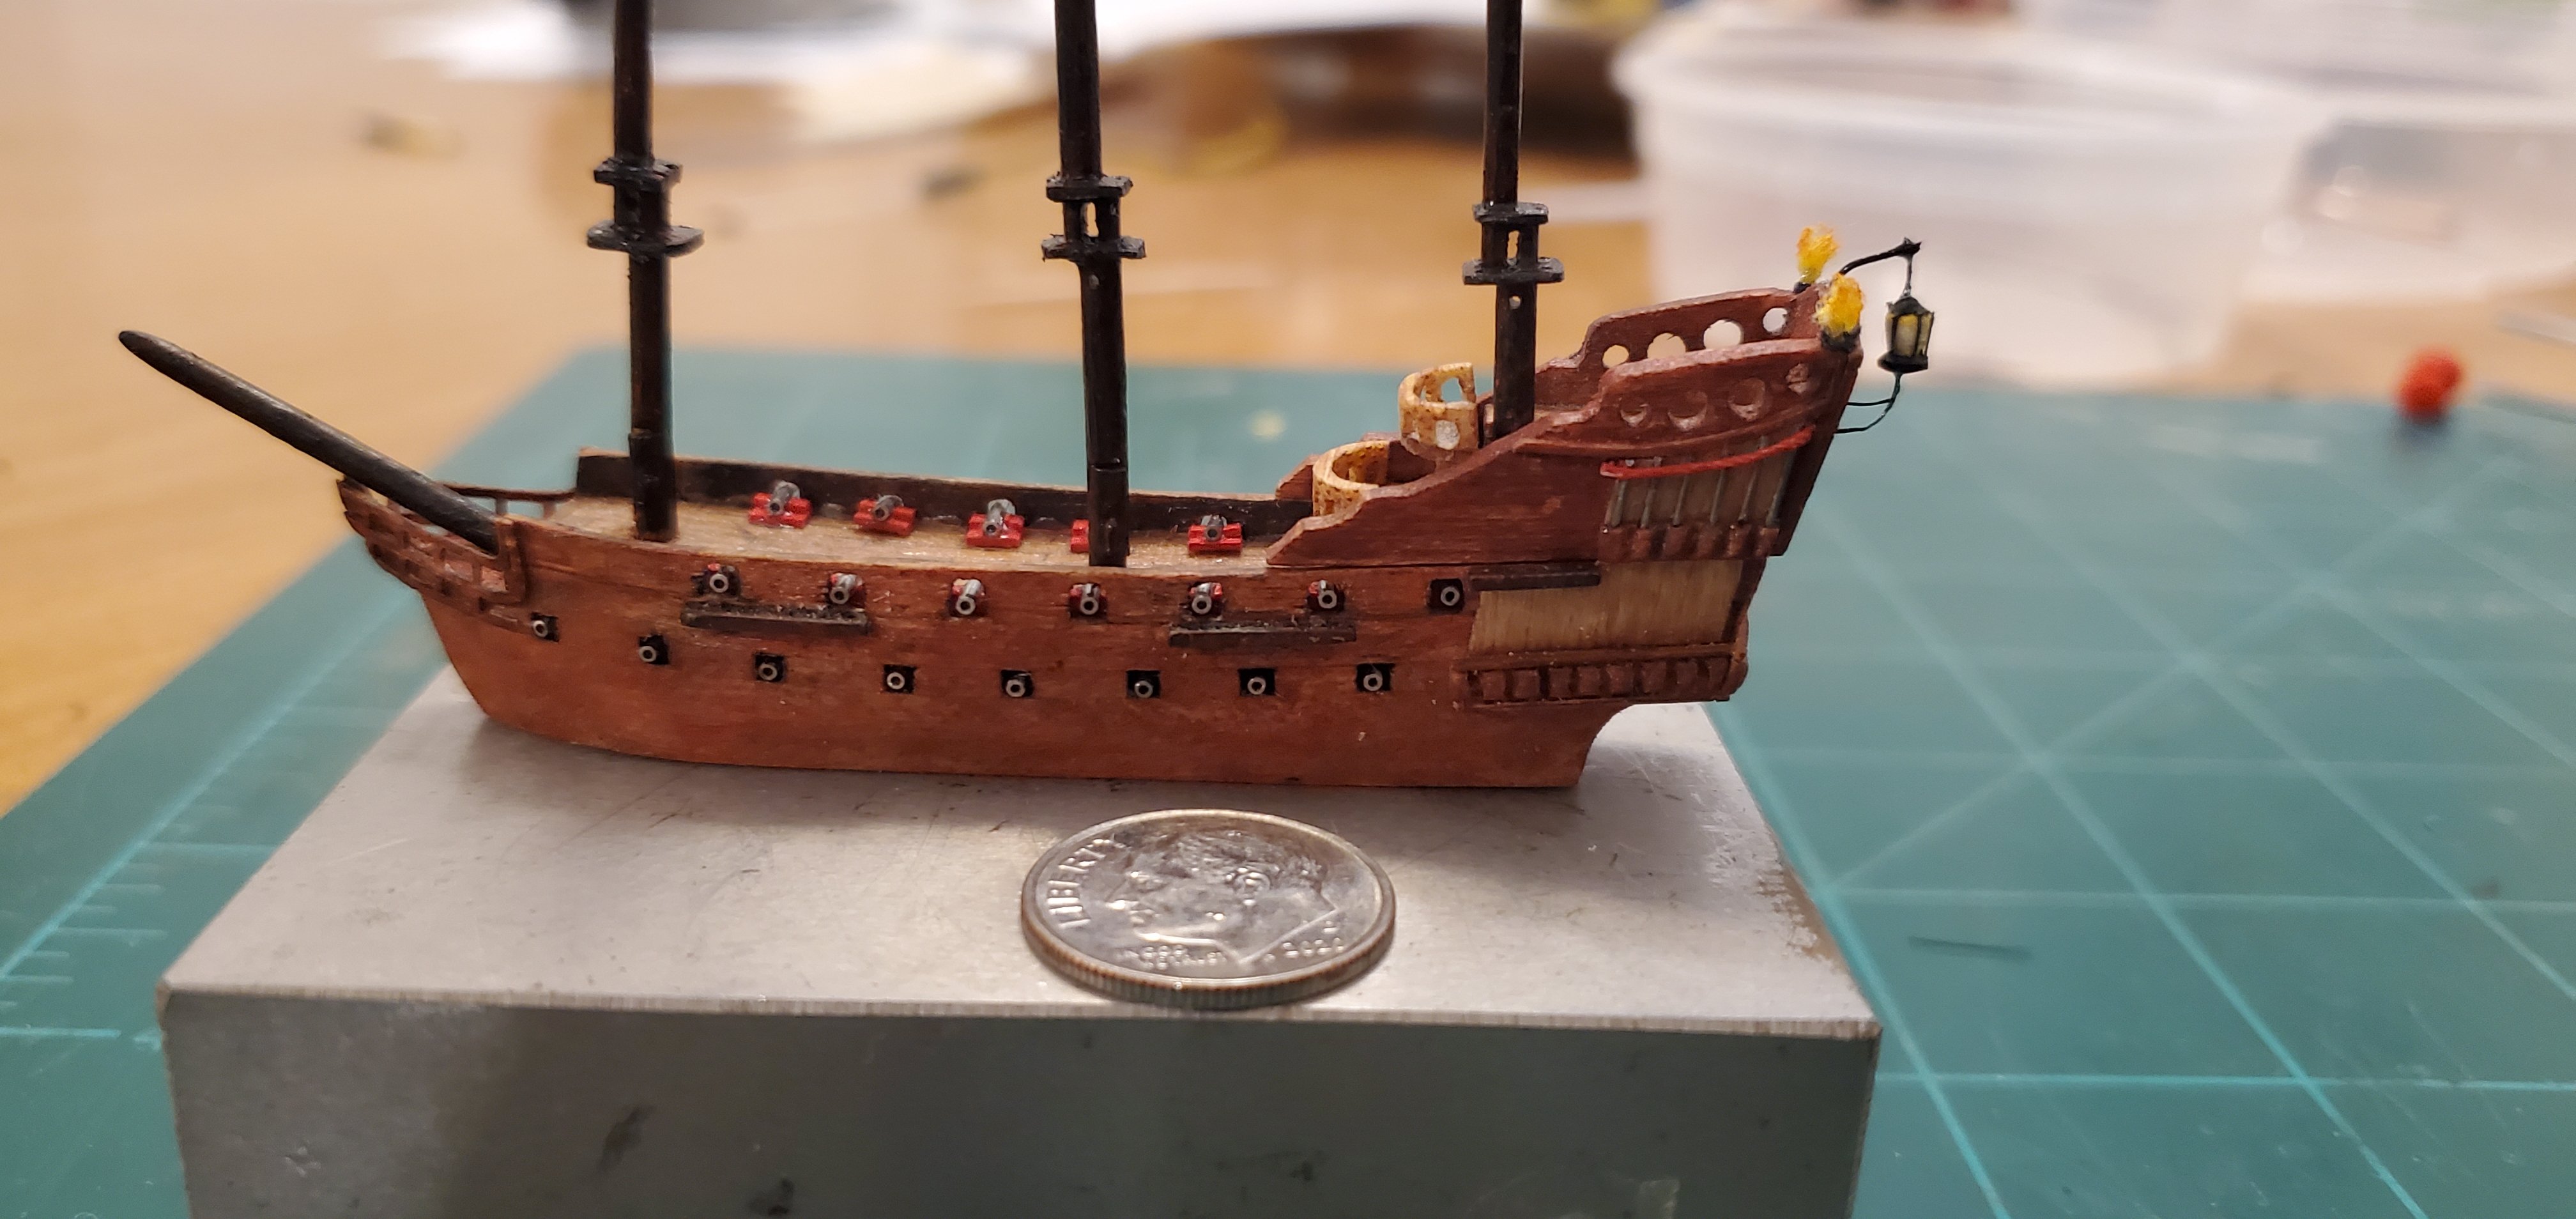
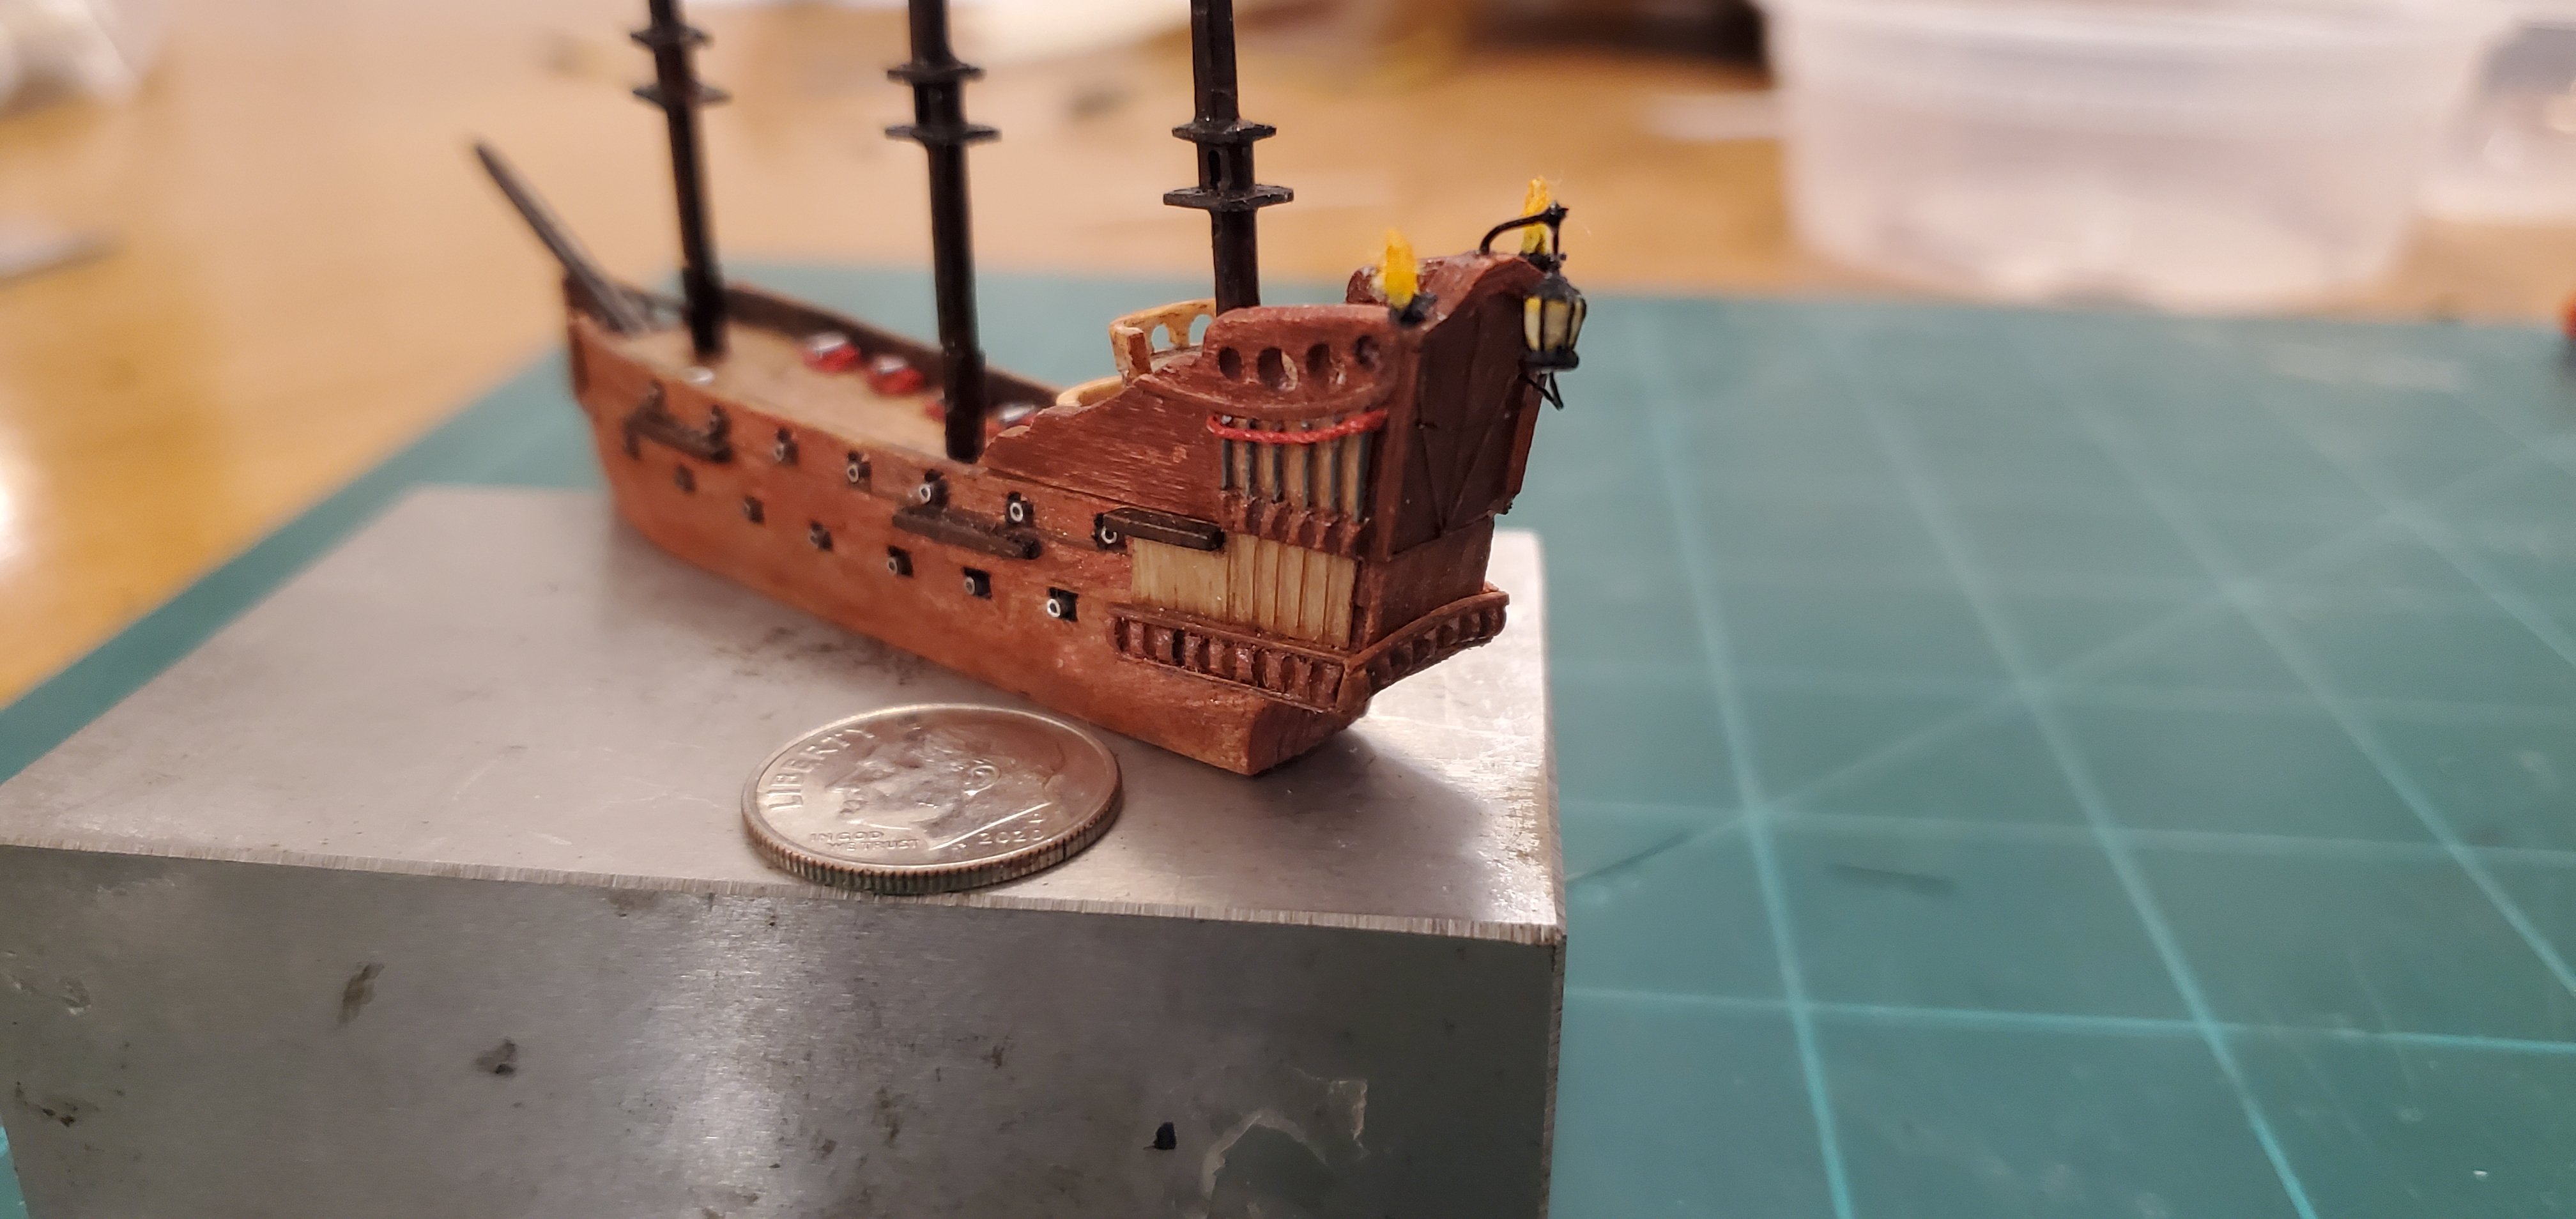
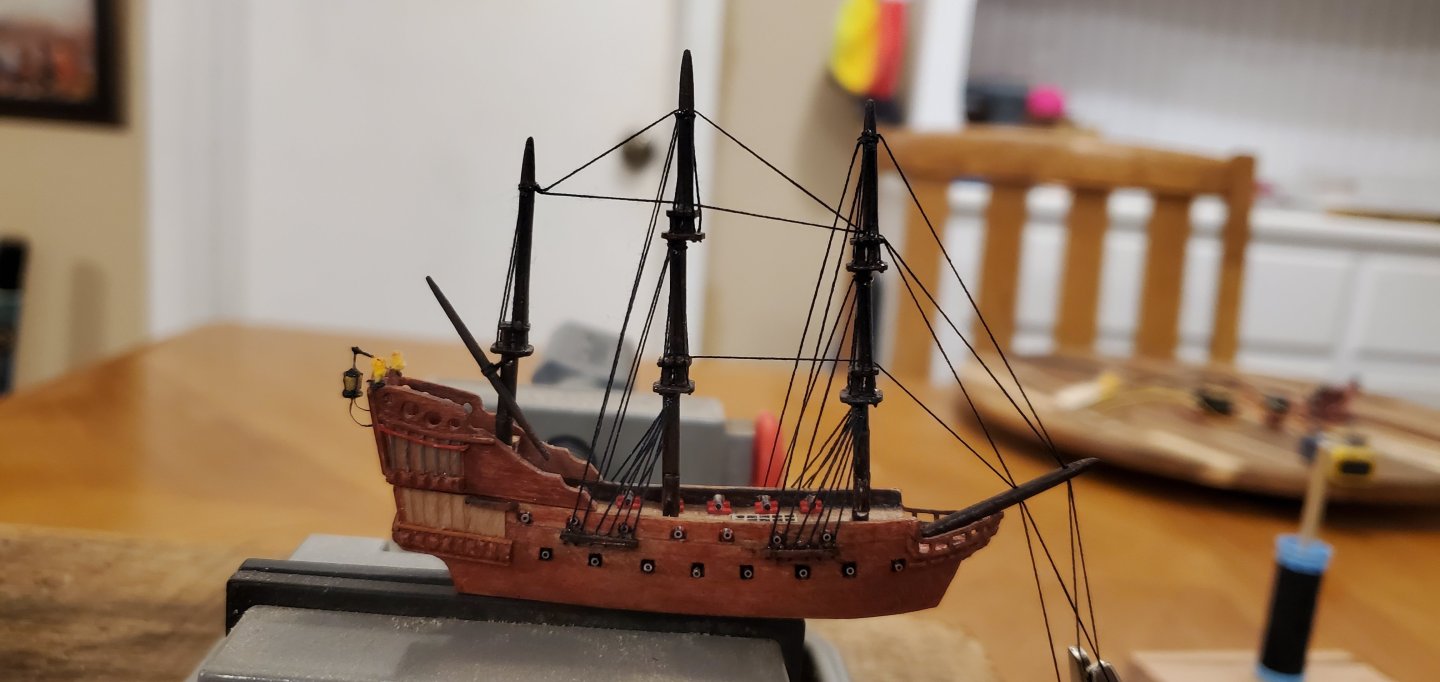
Thanks, Keith! But it wasn't quite finished. Still a few things to add. Before I finished up that stern piece, however, I decided to make the balconies that protrude forward of the mizzen mast. I finished assembling and painting the balconies, but didn't take a pic, so moving on to finishing up the stern. Obviously, I can't recreate all the detail of such an elaborate piece of work at this scale. I just try to add as many elements as I can to try and make it look recognizable. The hanging stern lantern and the 2 other corner lanterns grabbed my eye so I did my best to add them. Except with the corner lanterns, I decided to make torches. While the picture of the model in the previous post shows lanterns in both corners of the stern, the movie ship looks like it has torches. For the hanging lantern, I used the head of a small belaying pin. For the torches, I took some of the yellow-painted cotton I had made earlier for my test fireball, glued it to part of a small brass nail, put a piece of thread around it for a base, and inserted it into a hole in each corner of the stern rail. I also added a small bit of red thread to mimic the drapery shown in the pic. Here's how the hunka hunka burning love looks with all those pieces in place. I hope the hanging lantern and torches survive the fitting process inside the bottle!


- 156 replies
-
- 16
-
-
-
- Queen Annes Revenge
- bottle
- (and 1 more)
-
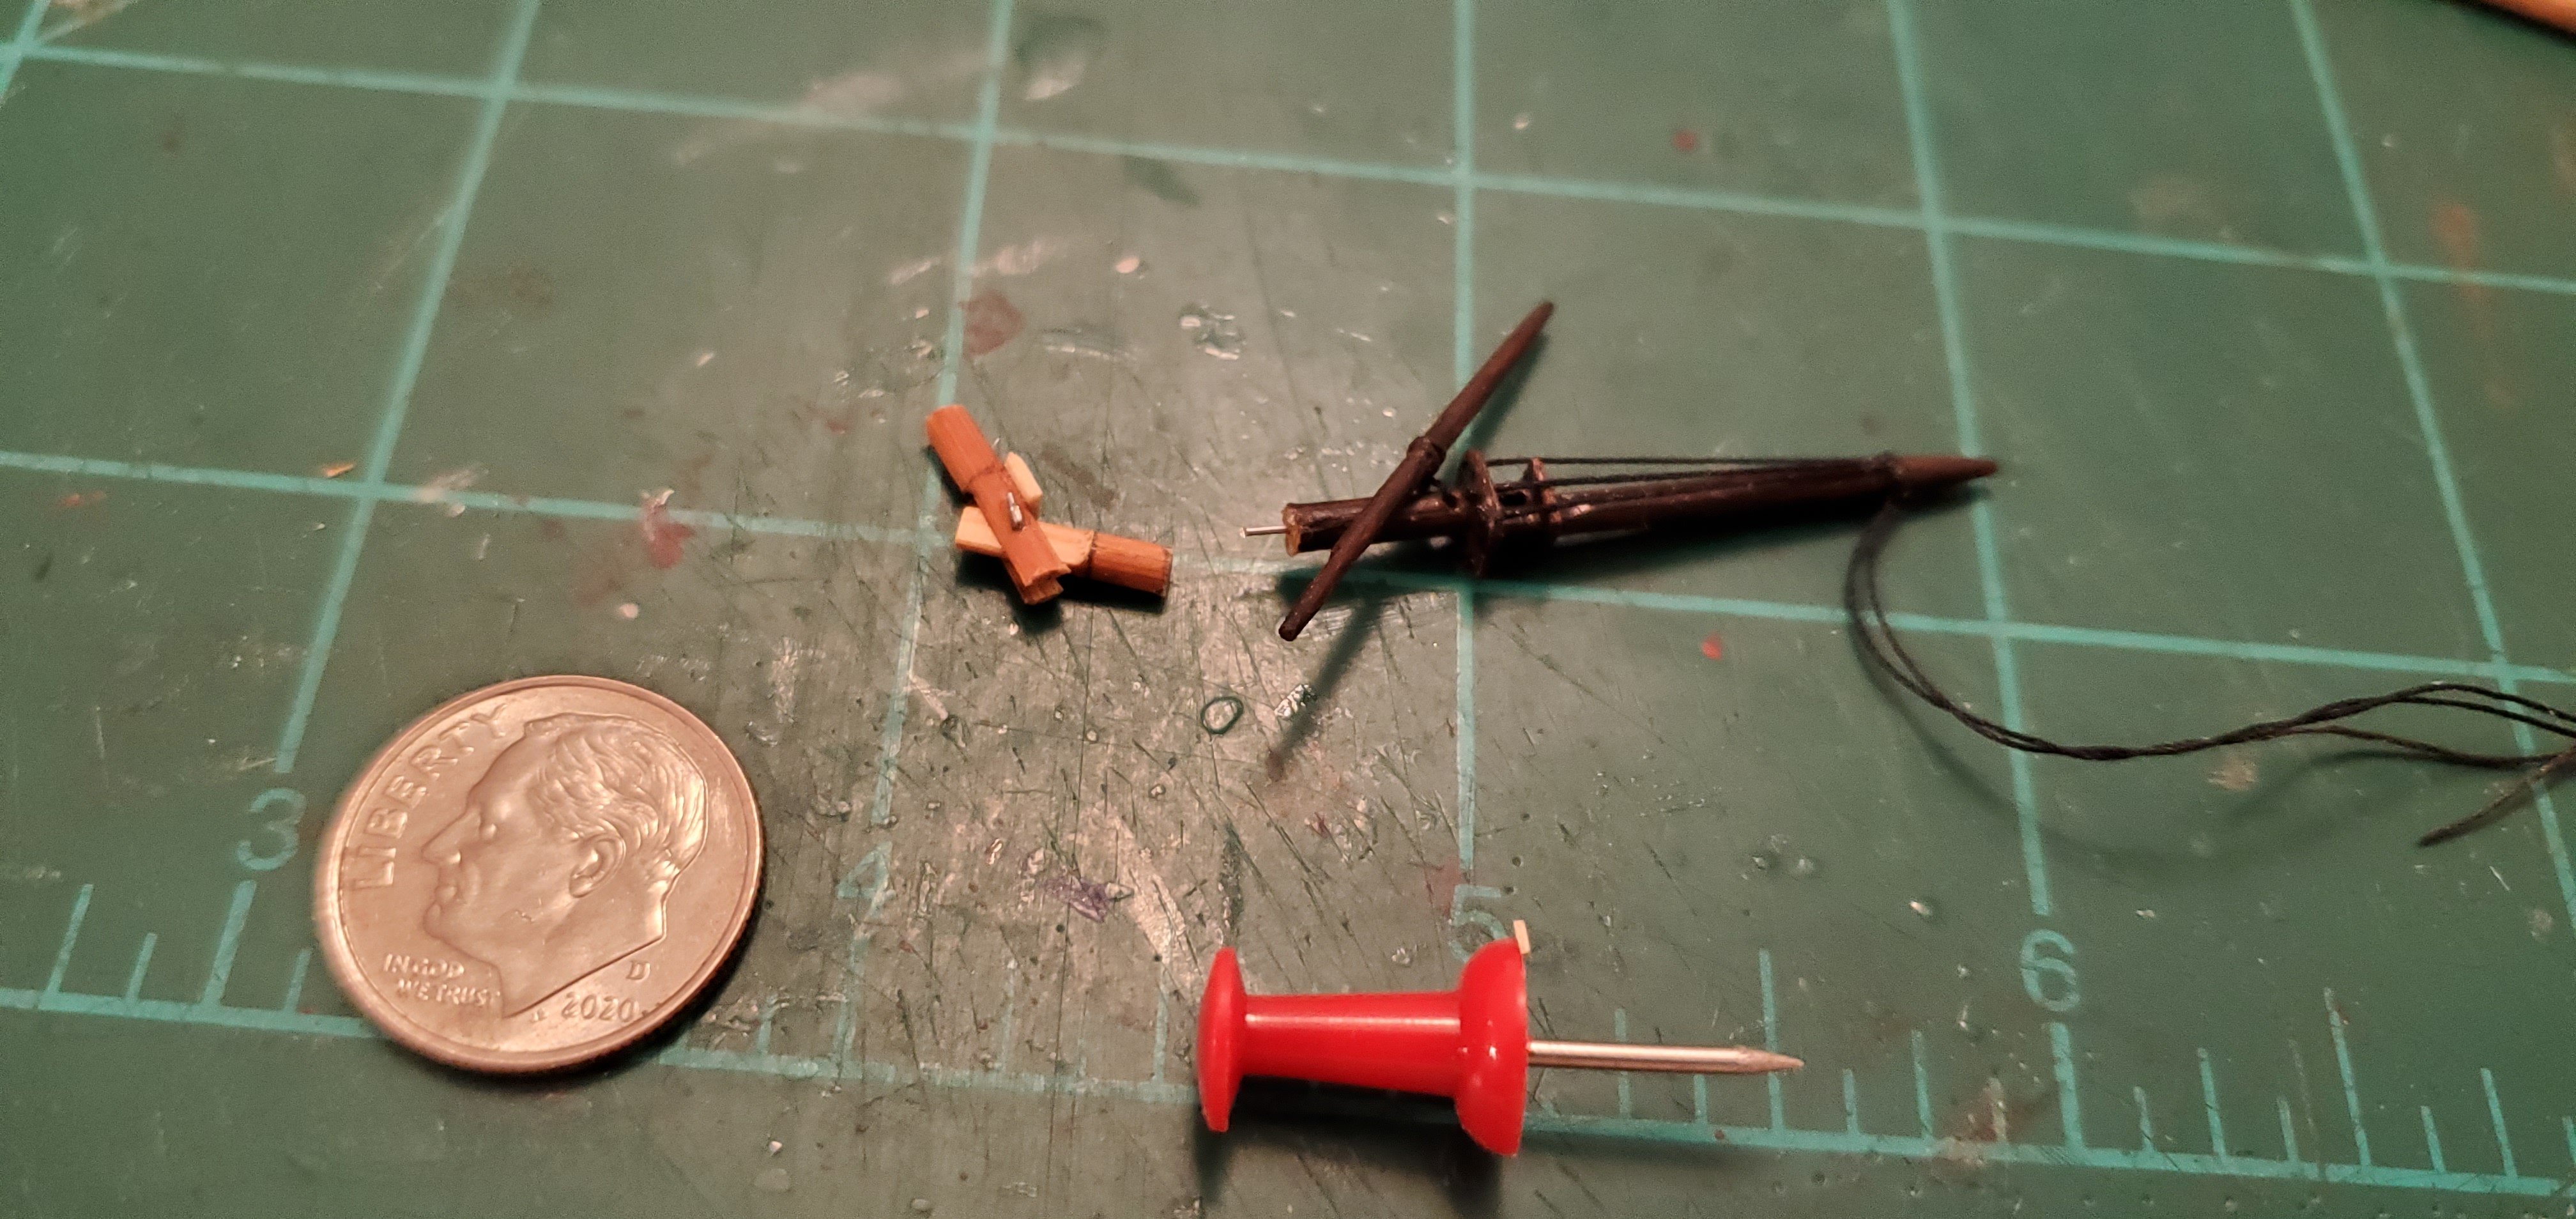
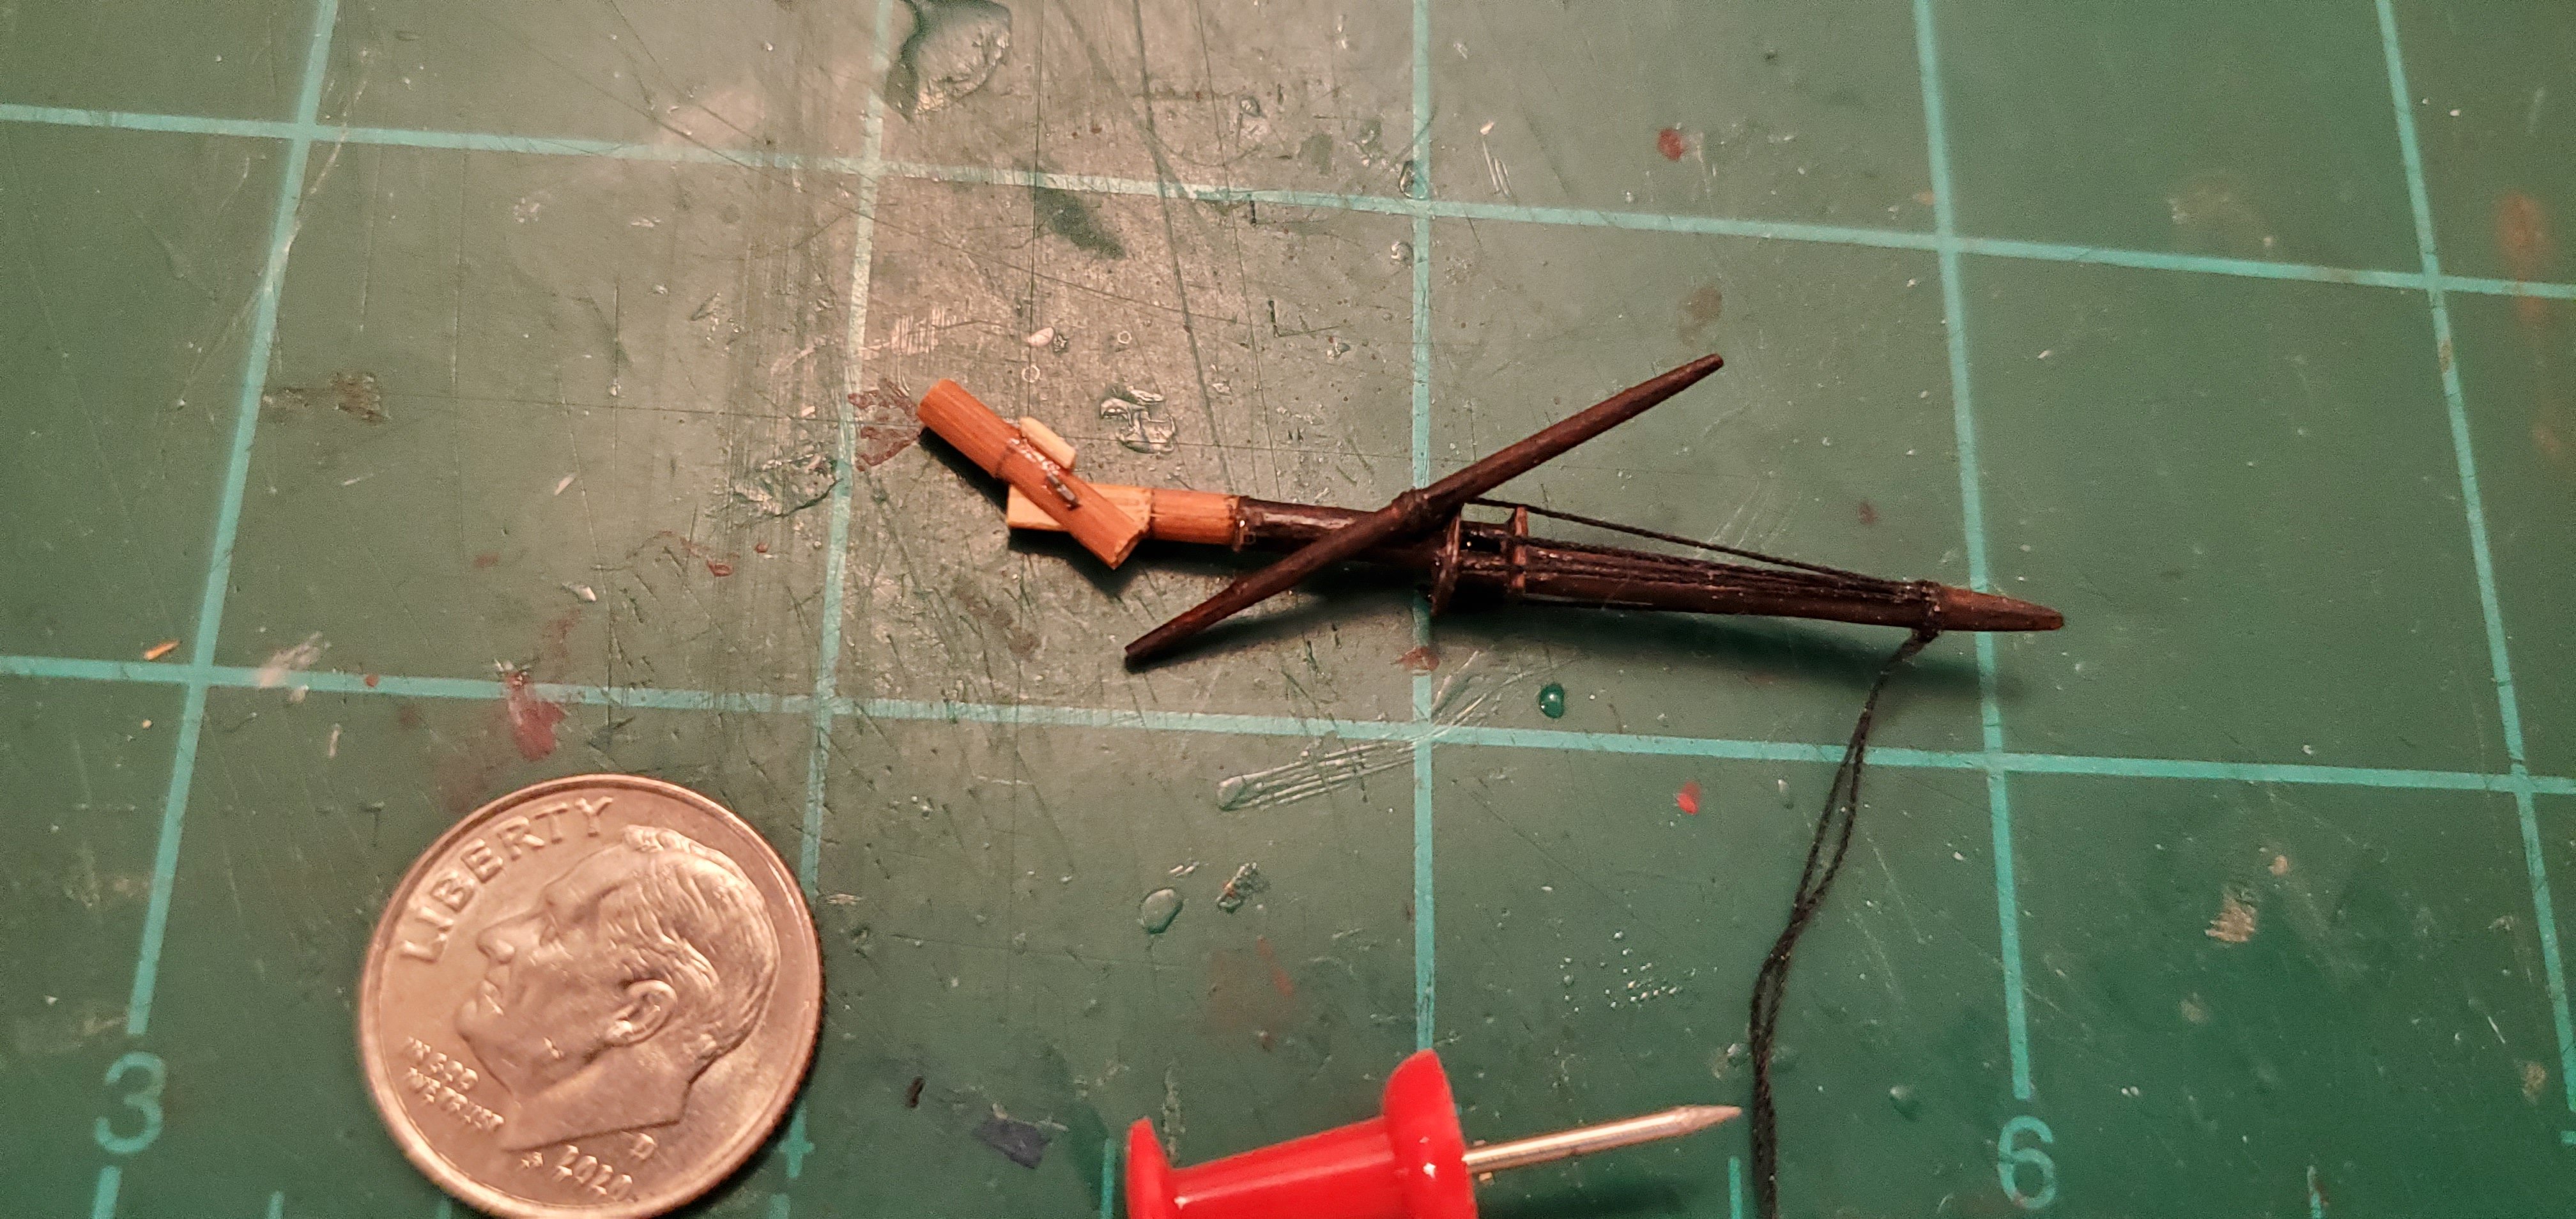
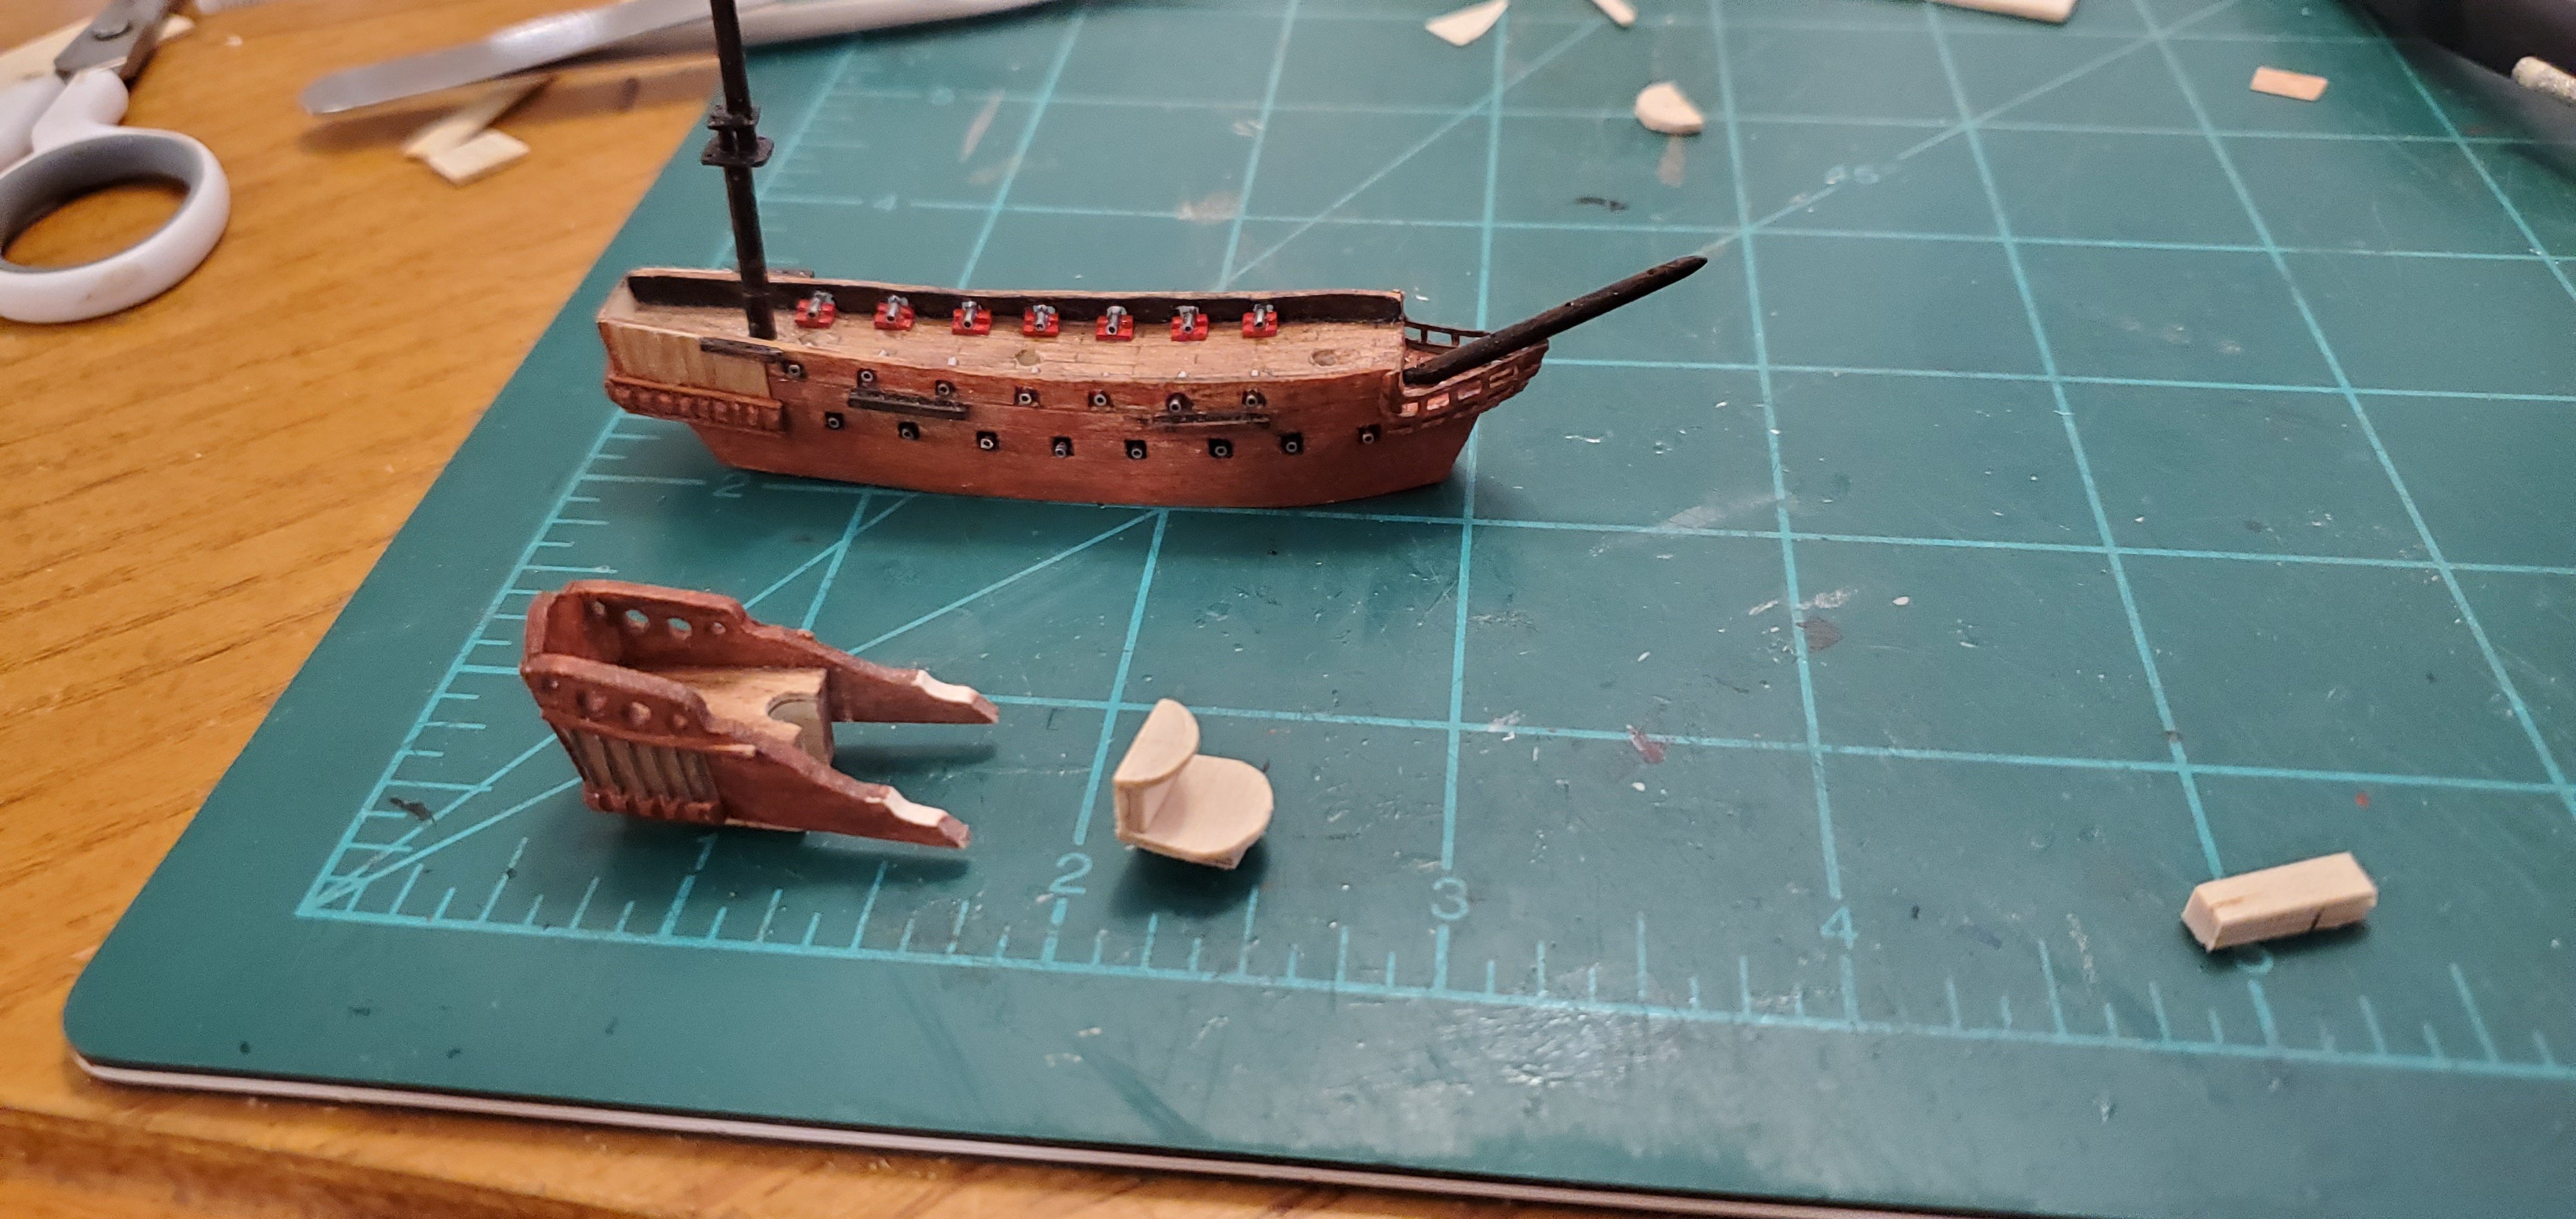
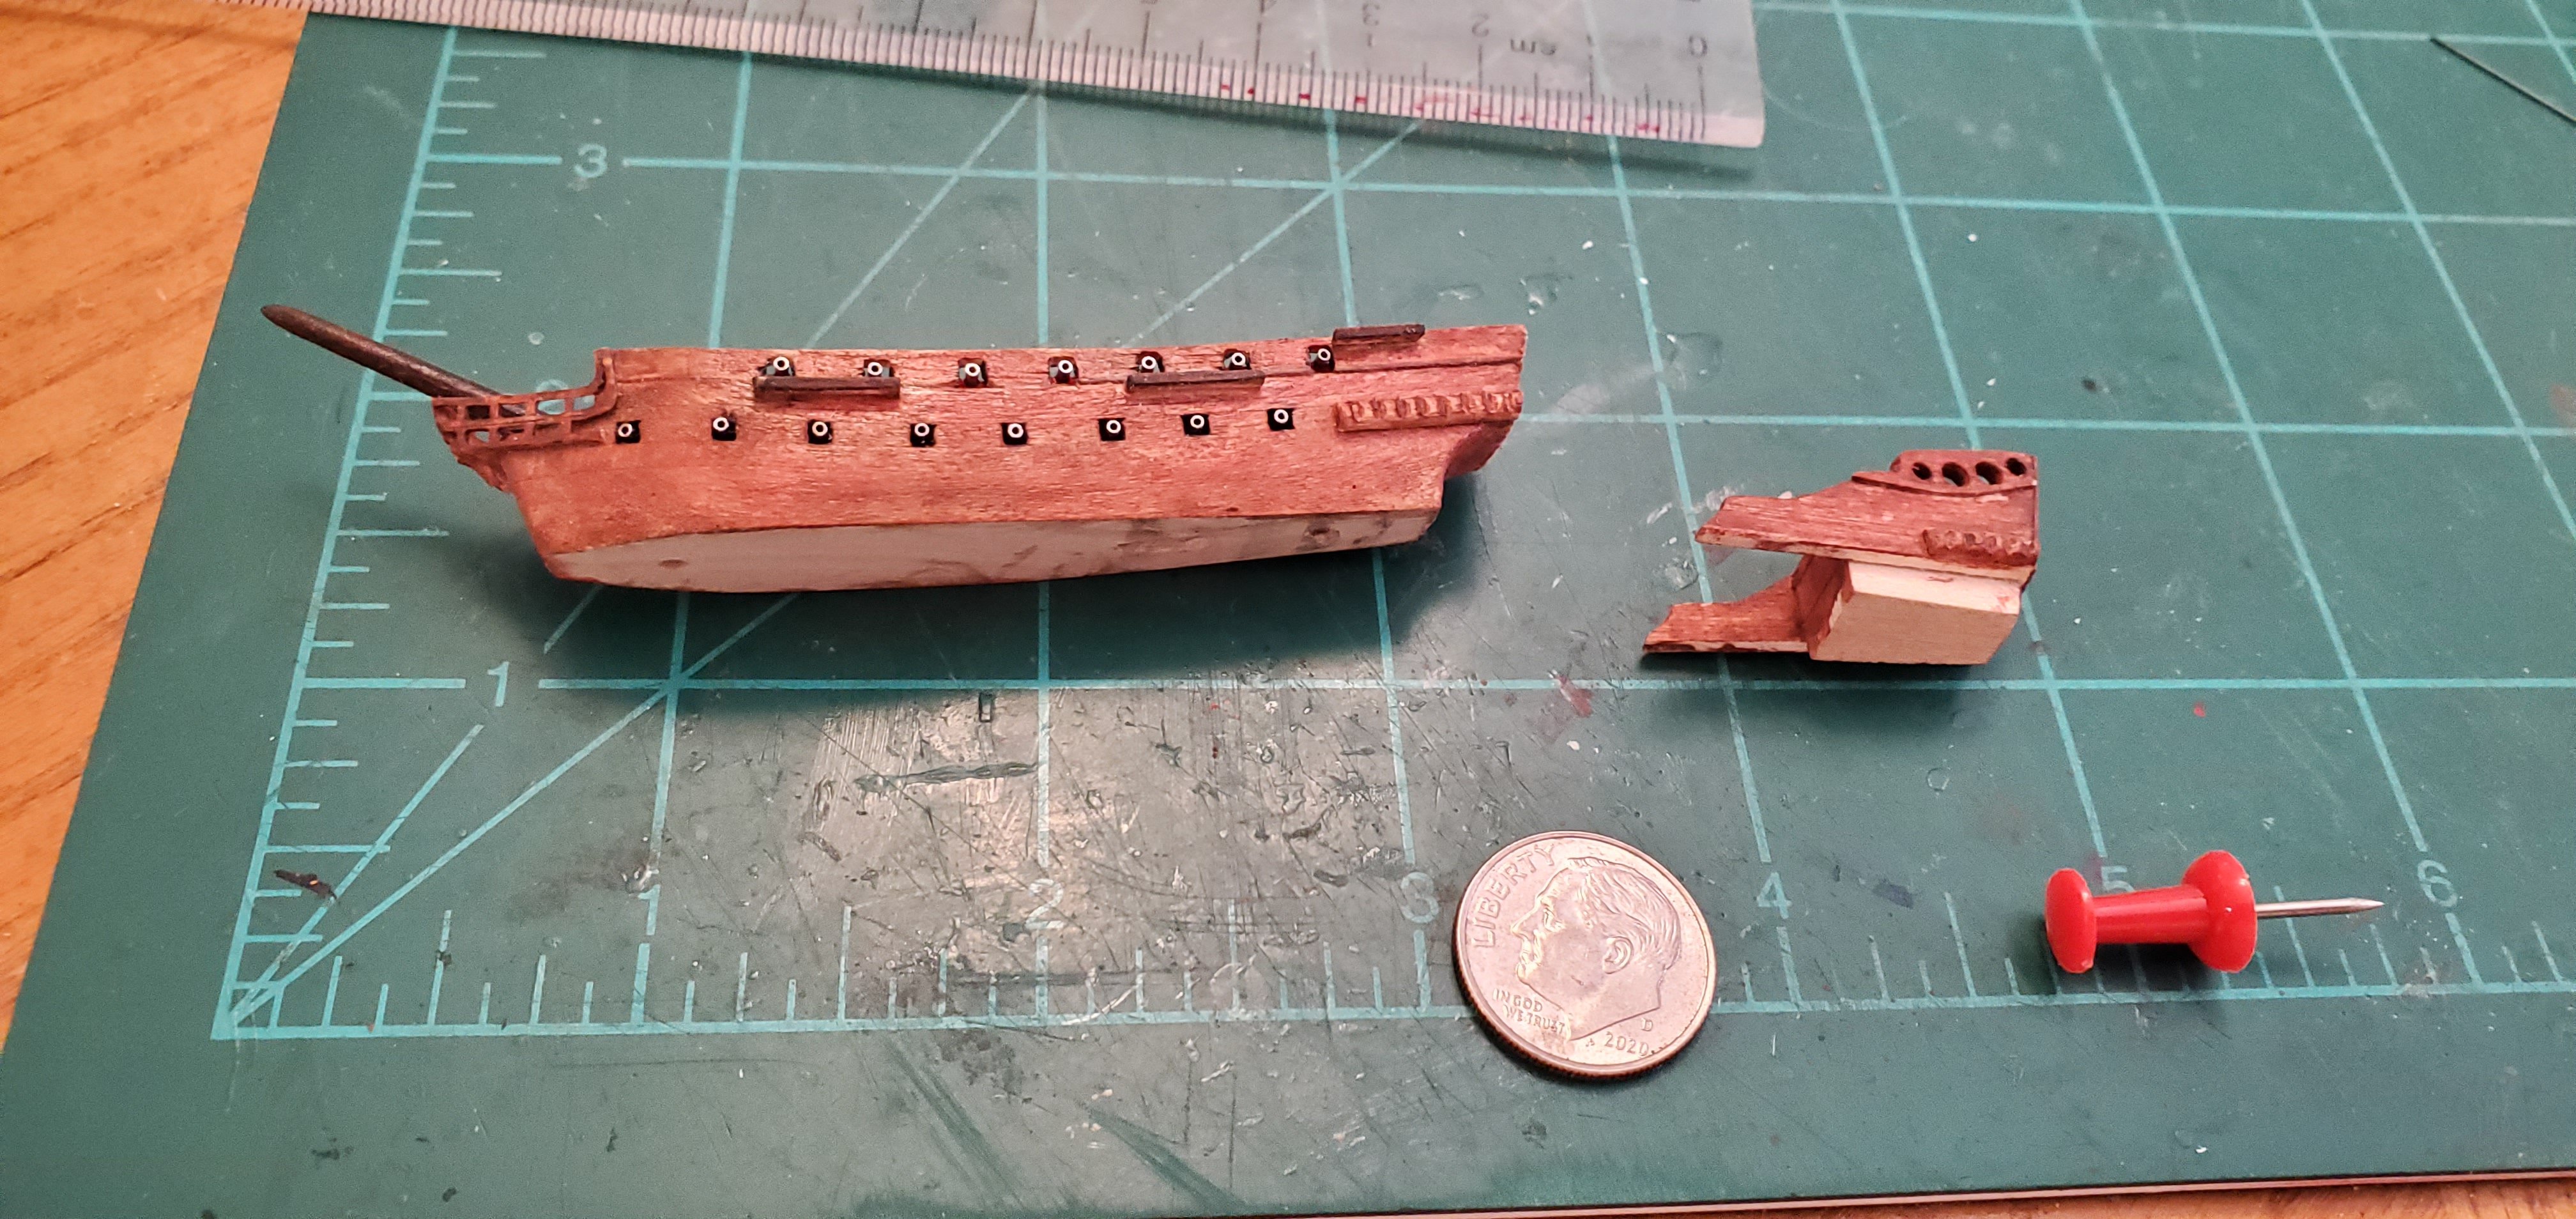
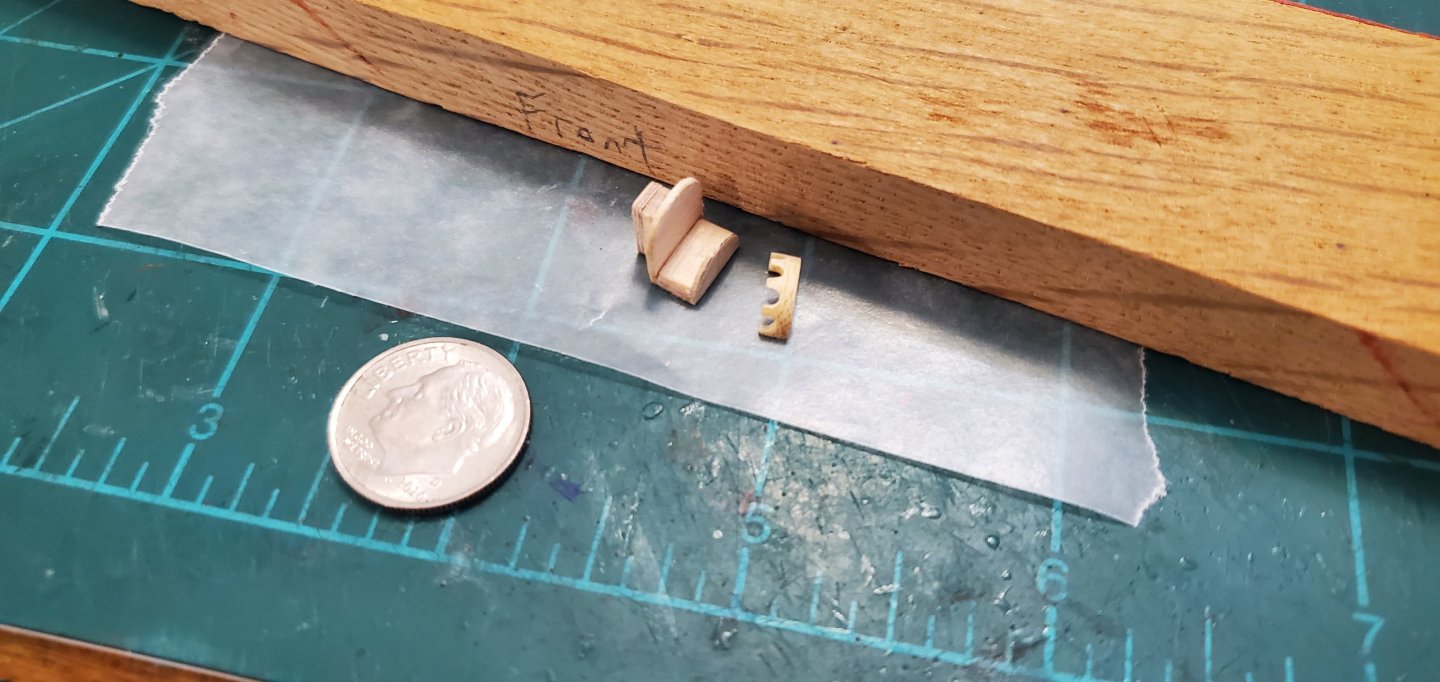
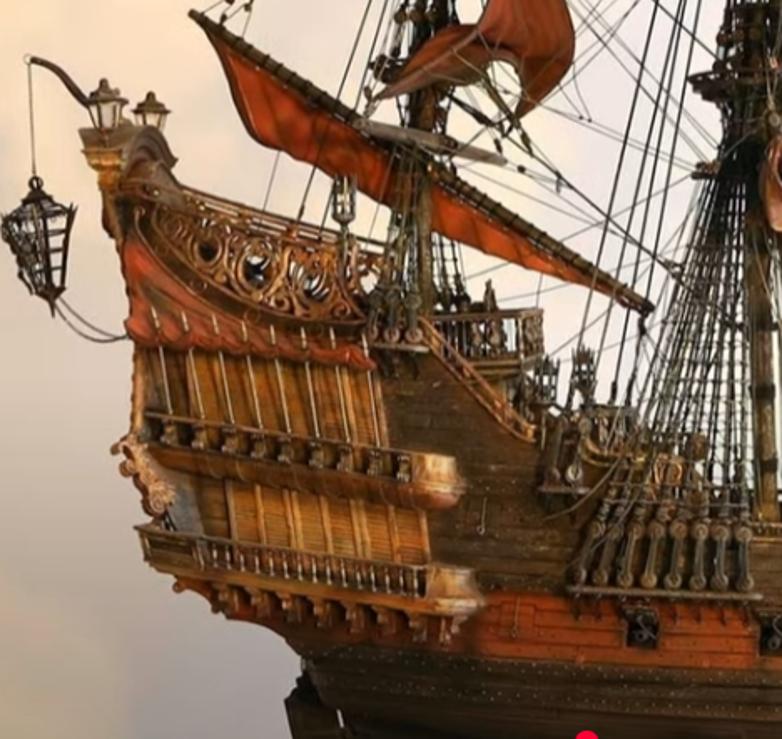
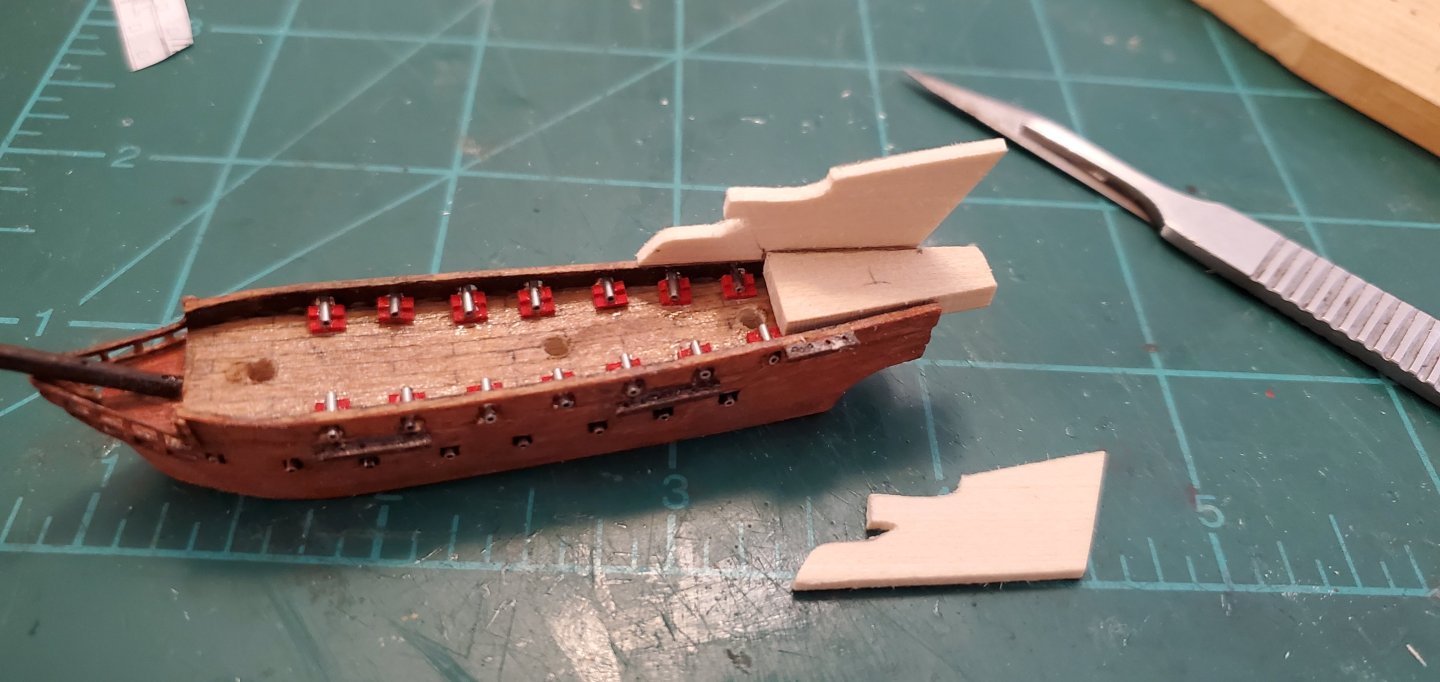
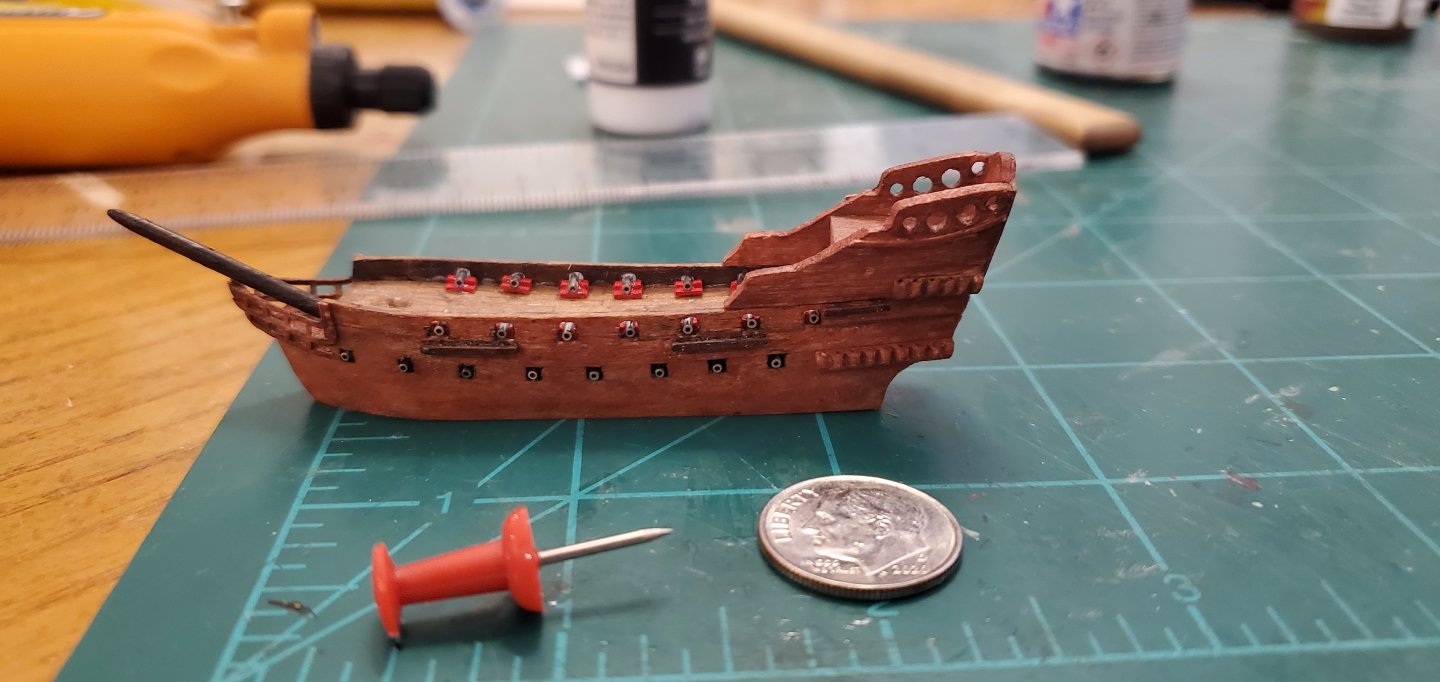
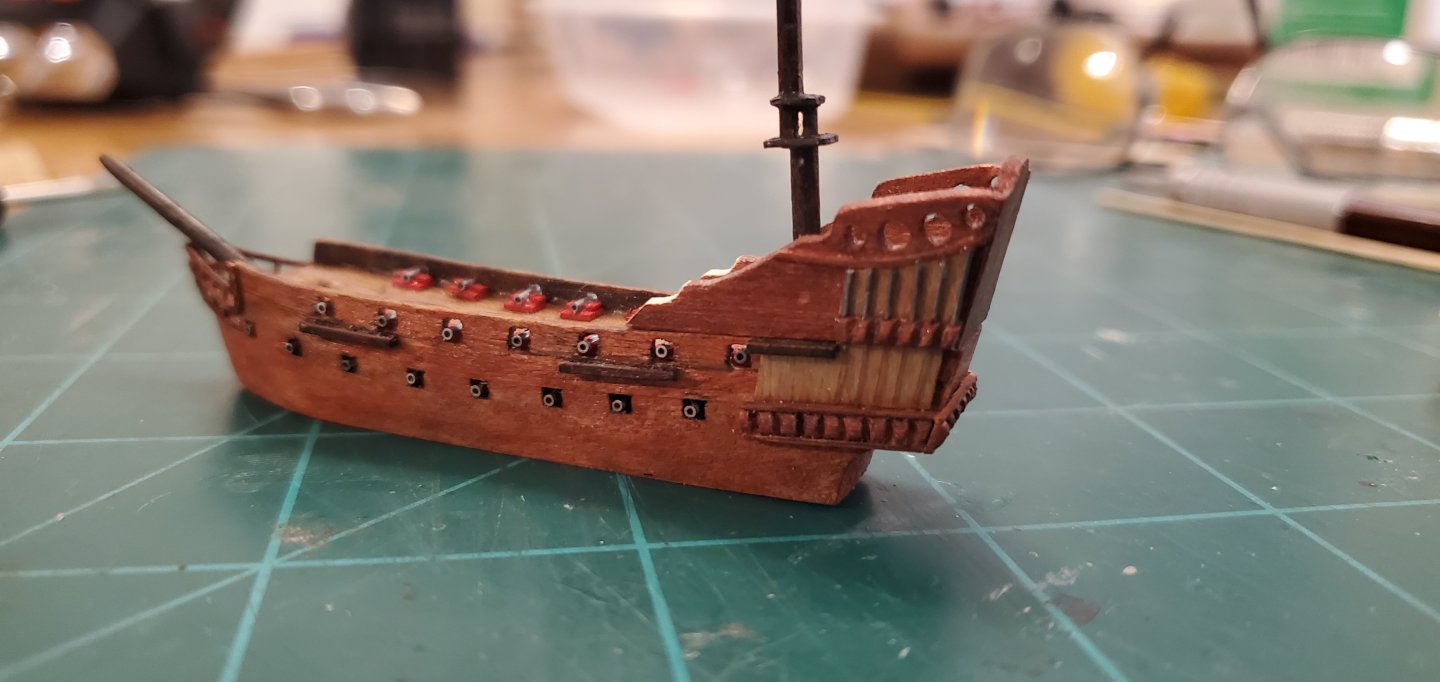
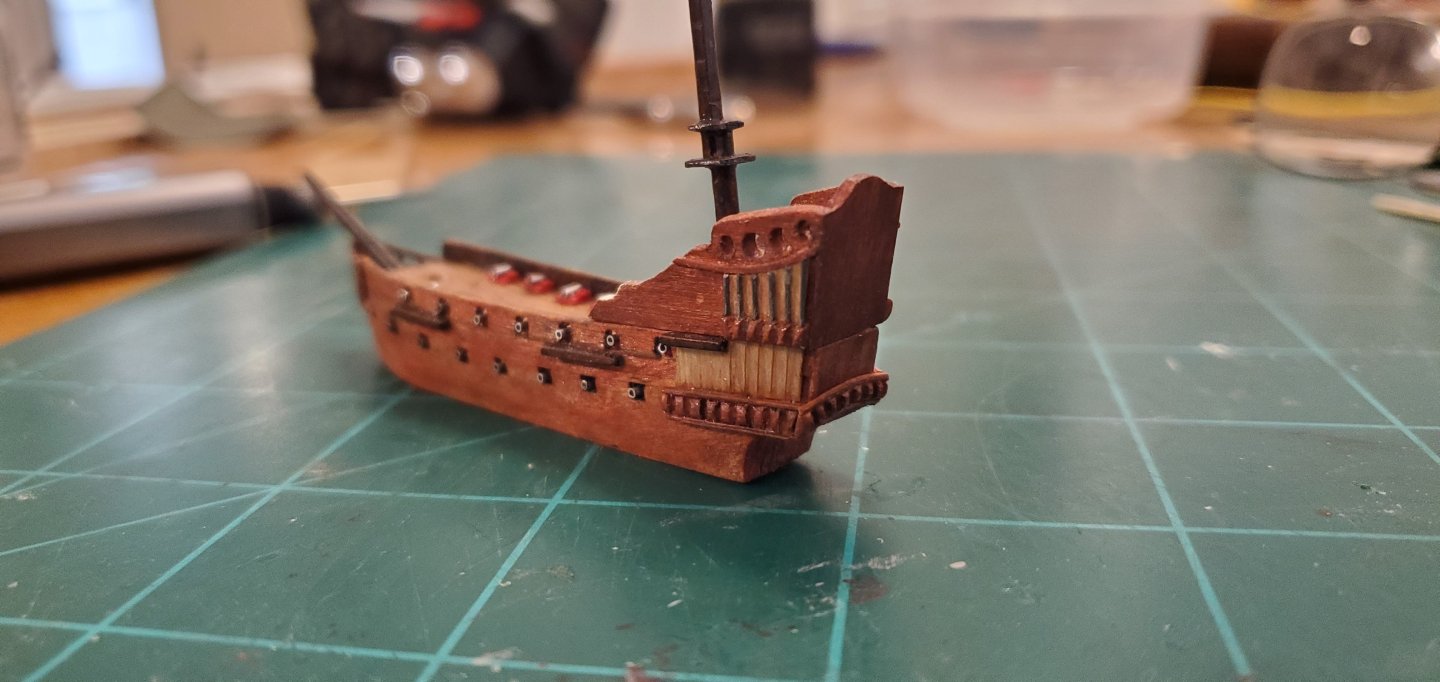
Next up is the very elaborate and high-rising stern structure. The goal is to have something that in some way resembles this: The structure causes the stern to be way too tall to fit thru the bottle's neck, so it will be built as a sub-assembly and installed after the ship is in the bottle. In fact, it will actually be 2 separately built sub-assemblies. The first will contain the sidewalls and stern wall as well as the deck behind the mizzen mast. The second will be the 2 balconies and their decking that protrude in front of the mizzen mast. The 2nd sub-assembly must also be added after insertion because it would get in the way of the main mast when it is folded to stern. Nothing complicated about the build process - just carving and sanding a number of tiny pieces and fitting them together. Test fit of the first piece. Once I was happy with the fit, I added the side railings, curved stern railing, and some other things to give a hint of the stern area decorative elements from the real thing. Also, you can see that I did a bit more carving to the descending side wall to make it look more like the real thing.

- 156 replies
-
- 18
-
-
-
- Queen Annes Revenge
- bottle
- (and 1 more)
-
That's a reasonable suggestion, Keith. However, I spent such a ridiculous amount of time getting the hull color the way I wanted, there's no way I would paint over it. Plus, the railing is so small I figured that if I could get a fairly close match to the hull color, it would not be noticeable. Hmmm. If I agreed to put a penguin on the build, it must have been the Bundy rum talking. I am not responsible for any typing done under the influence of @BANYAN's Aussie firewater.
- 156 replies
-
- 9
-
-
-
- Queen Annes Revenge
- bottle
- (and 1 more)