Glen McGuire
-
Posts
1,978 -
Joined
-
Last visited
Content Type
Profiles
Forums
Gallery
Events
Everything posted by Glen McGuire
-
 Such a unique subject and very well executed. Congratulations, Keith!
- 457 replies
-
- 4
-

-

-
- sternwheeler
- Hard Coal Navy
- (and 1 more)
-
She's my hunka hunka burning love, Keith! The next task is to try and create something that resembles the railing on the bow. I went to a dear friend's wedding in Philly last summer and they were handing out little fans because the temps were a bit warm. The 90 degree weather felt like a nice fall afternoon for me but I took a fan anyway. Then I noticed the ribs were made of super-thin bamboo, so I kept it knowing I'd find a good use for it. The ribs are 0.4mm in thickness which I thought might work well for the railing. For the 2 curved portions of the railing, it's way too small and frail to try and bend, so I took a diamond crusted grinding bit and gently carved it to shape. It's shaved down to about 0.5mm in the 2nd pic below. The vertical sections of the railing were pretty much specks that were difficult to pick up and put in place even with my finest point tweezers. Here's the railing in place.. It's here where I realized I should not have painted the hull yet. It was a varying mix of 4 different colors plus some thinner to get the look I wanted, but now I needed to match it and unfortunately, I didn't pay much attention to how I mixed things earlier. So I did my best to get a match. I will have the same problem when I build the tall, rising back end of the ship.


- 156 replies
-
- 18
-
-

-
- Queen Annes Revenge
- bottle
- (and 1 more)
-
I'd say the blind hog found a 5 gallon bucker full of acorns. The whole build is fantastic. Well done, Keith!
- 457 replies
-
- 5
-
-
-
- sternwheeler
- Hard Coal Navy
- (and 1 more)
-
That's hard to believe that it's your first big planking job, Kenny. Looks like the work of a seasoned pro.
-
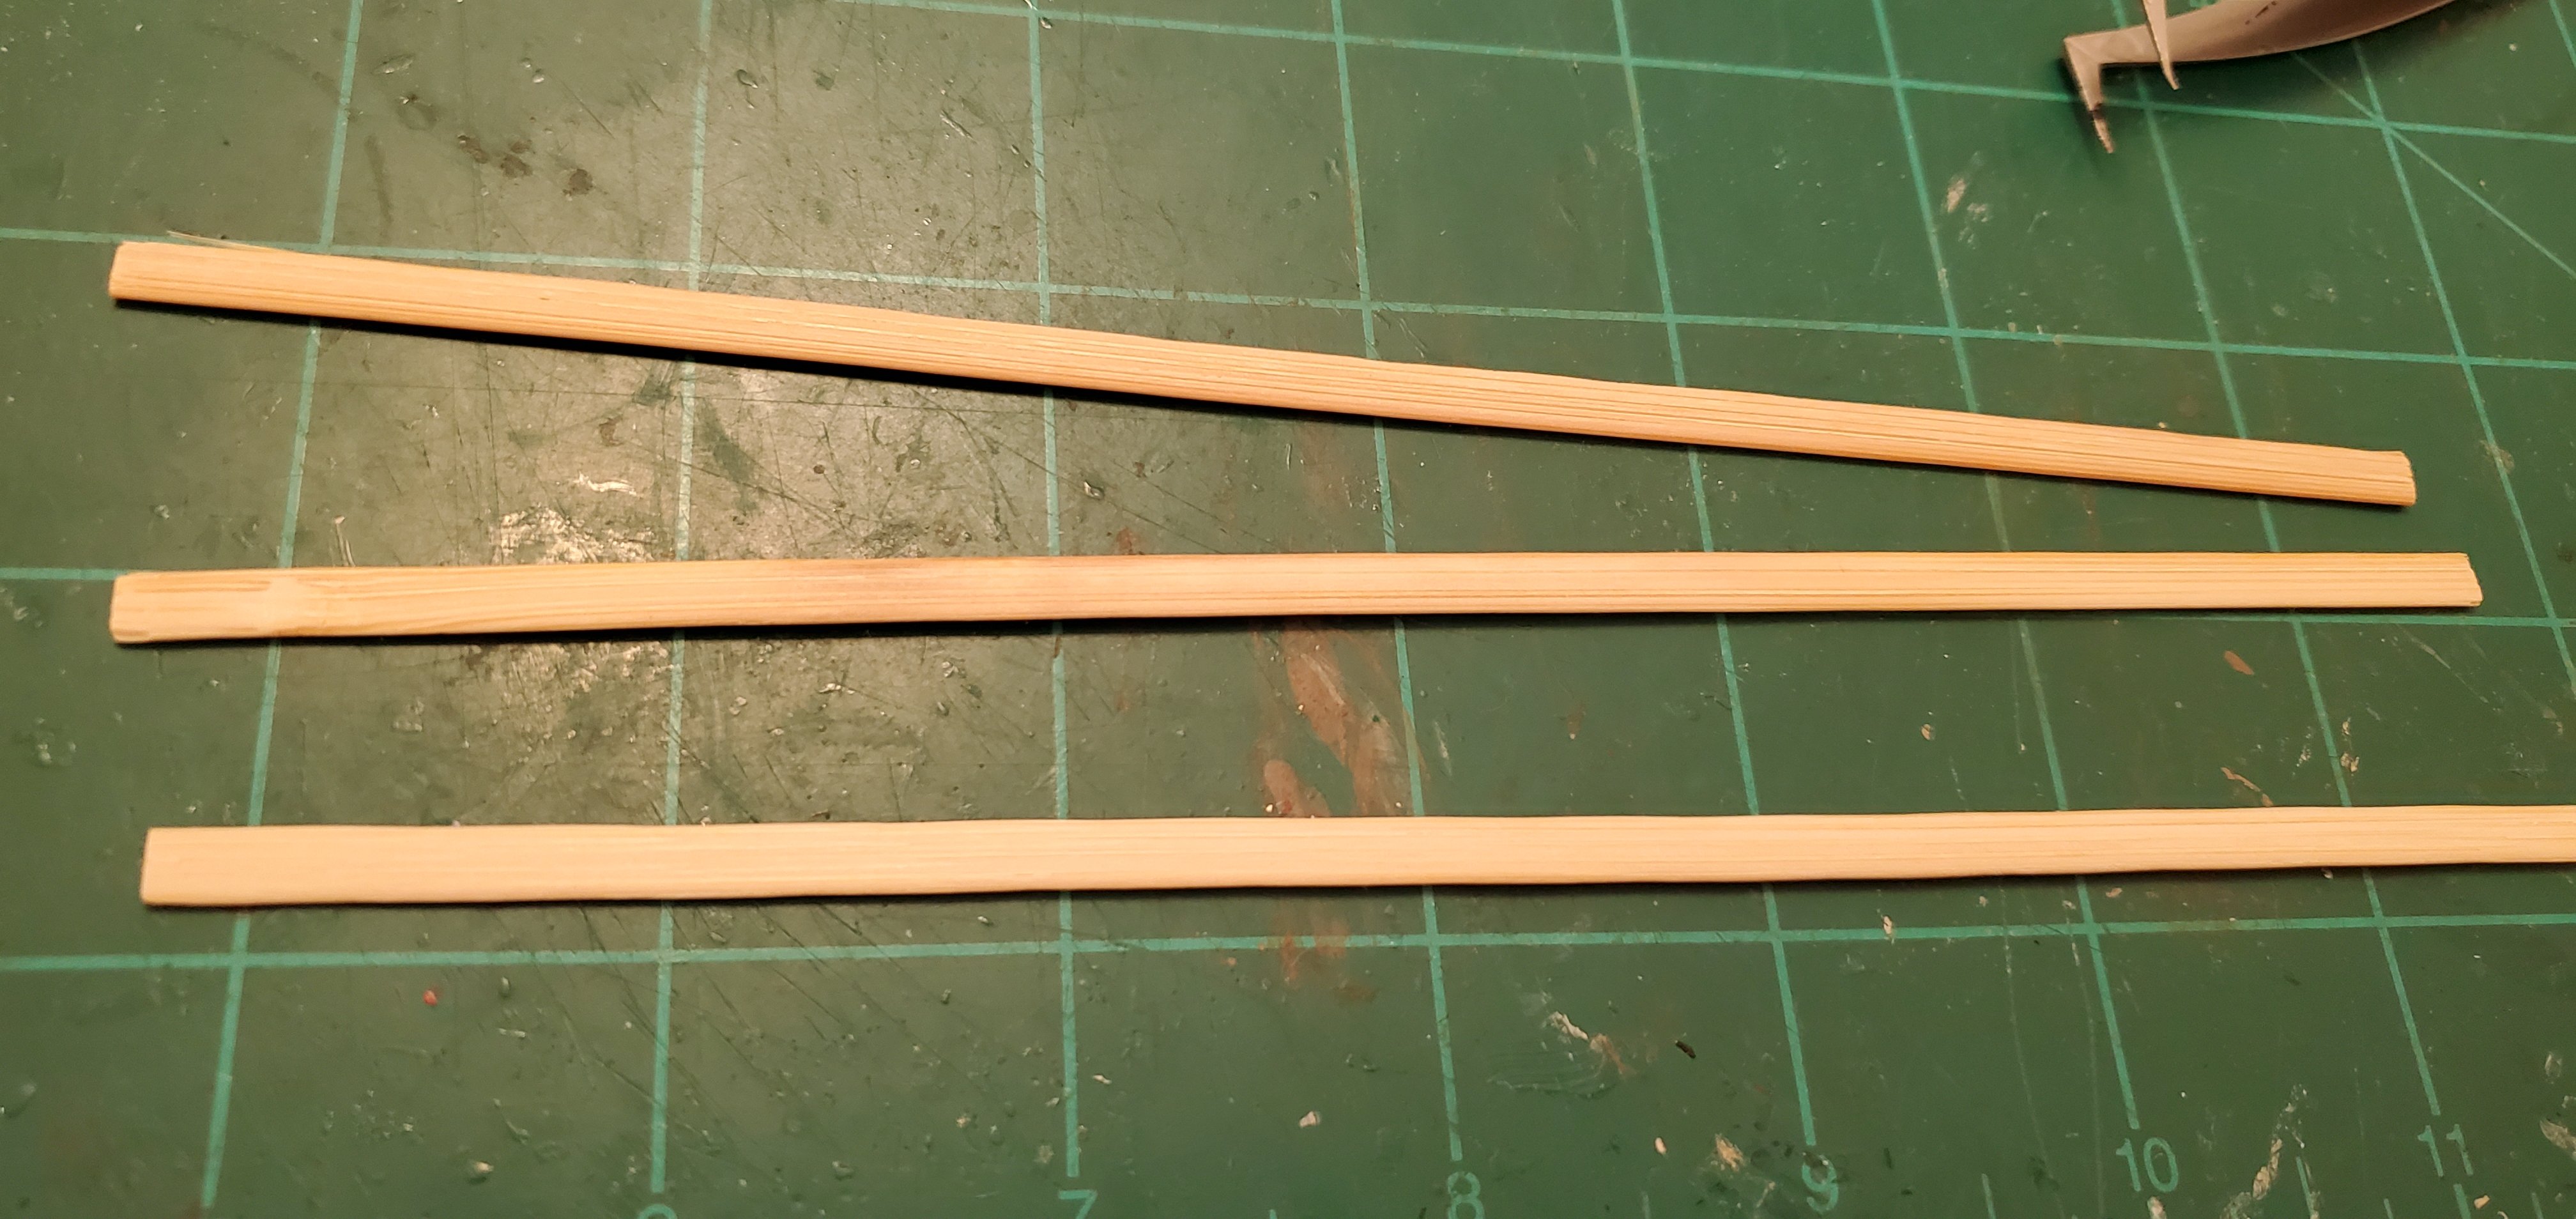
On to the mast and yards. Again I start with bamboo toothpicks since I have to drill small holes for the pull threads and the shrouds. Here are the mast sections. I already hinged the lower masts using a crude version of the hidden hinge method that I borrowed from @John Fox III. I've covered that in several previous build logs so I won't go into detail here. For the mast tops, I take another bamboo stir stick and shave it down to about .5 mm and square off the sides. Then I carve out a hole in the middle, drill tiny holes for the upper shrouds, and cut them to shape. Here are the masts fully assembled.


- 156 replies
-
- 18
-
-
-
- Queen Annes Revenge
- bottle
- (and 1 more)
-
Your cabins are looking sharp, Paul. Nice work. Also, what is this thing you are using as a weight?
-
Another ingenious use of Lego blocks! Hadn't seen that one before.
-
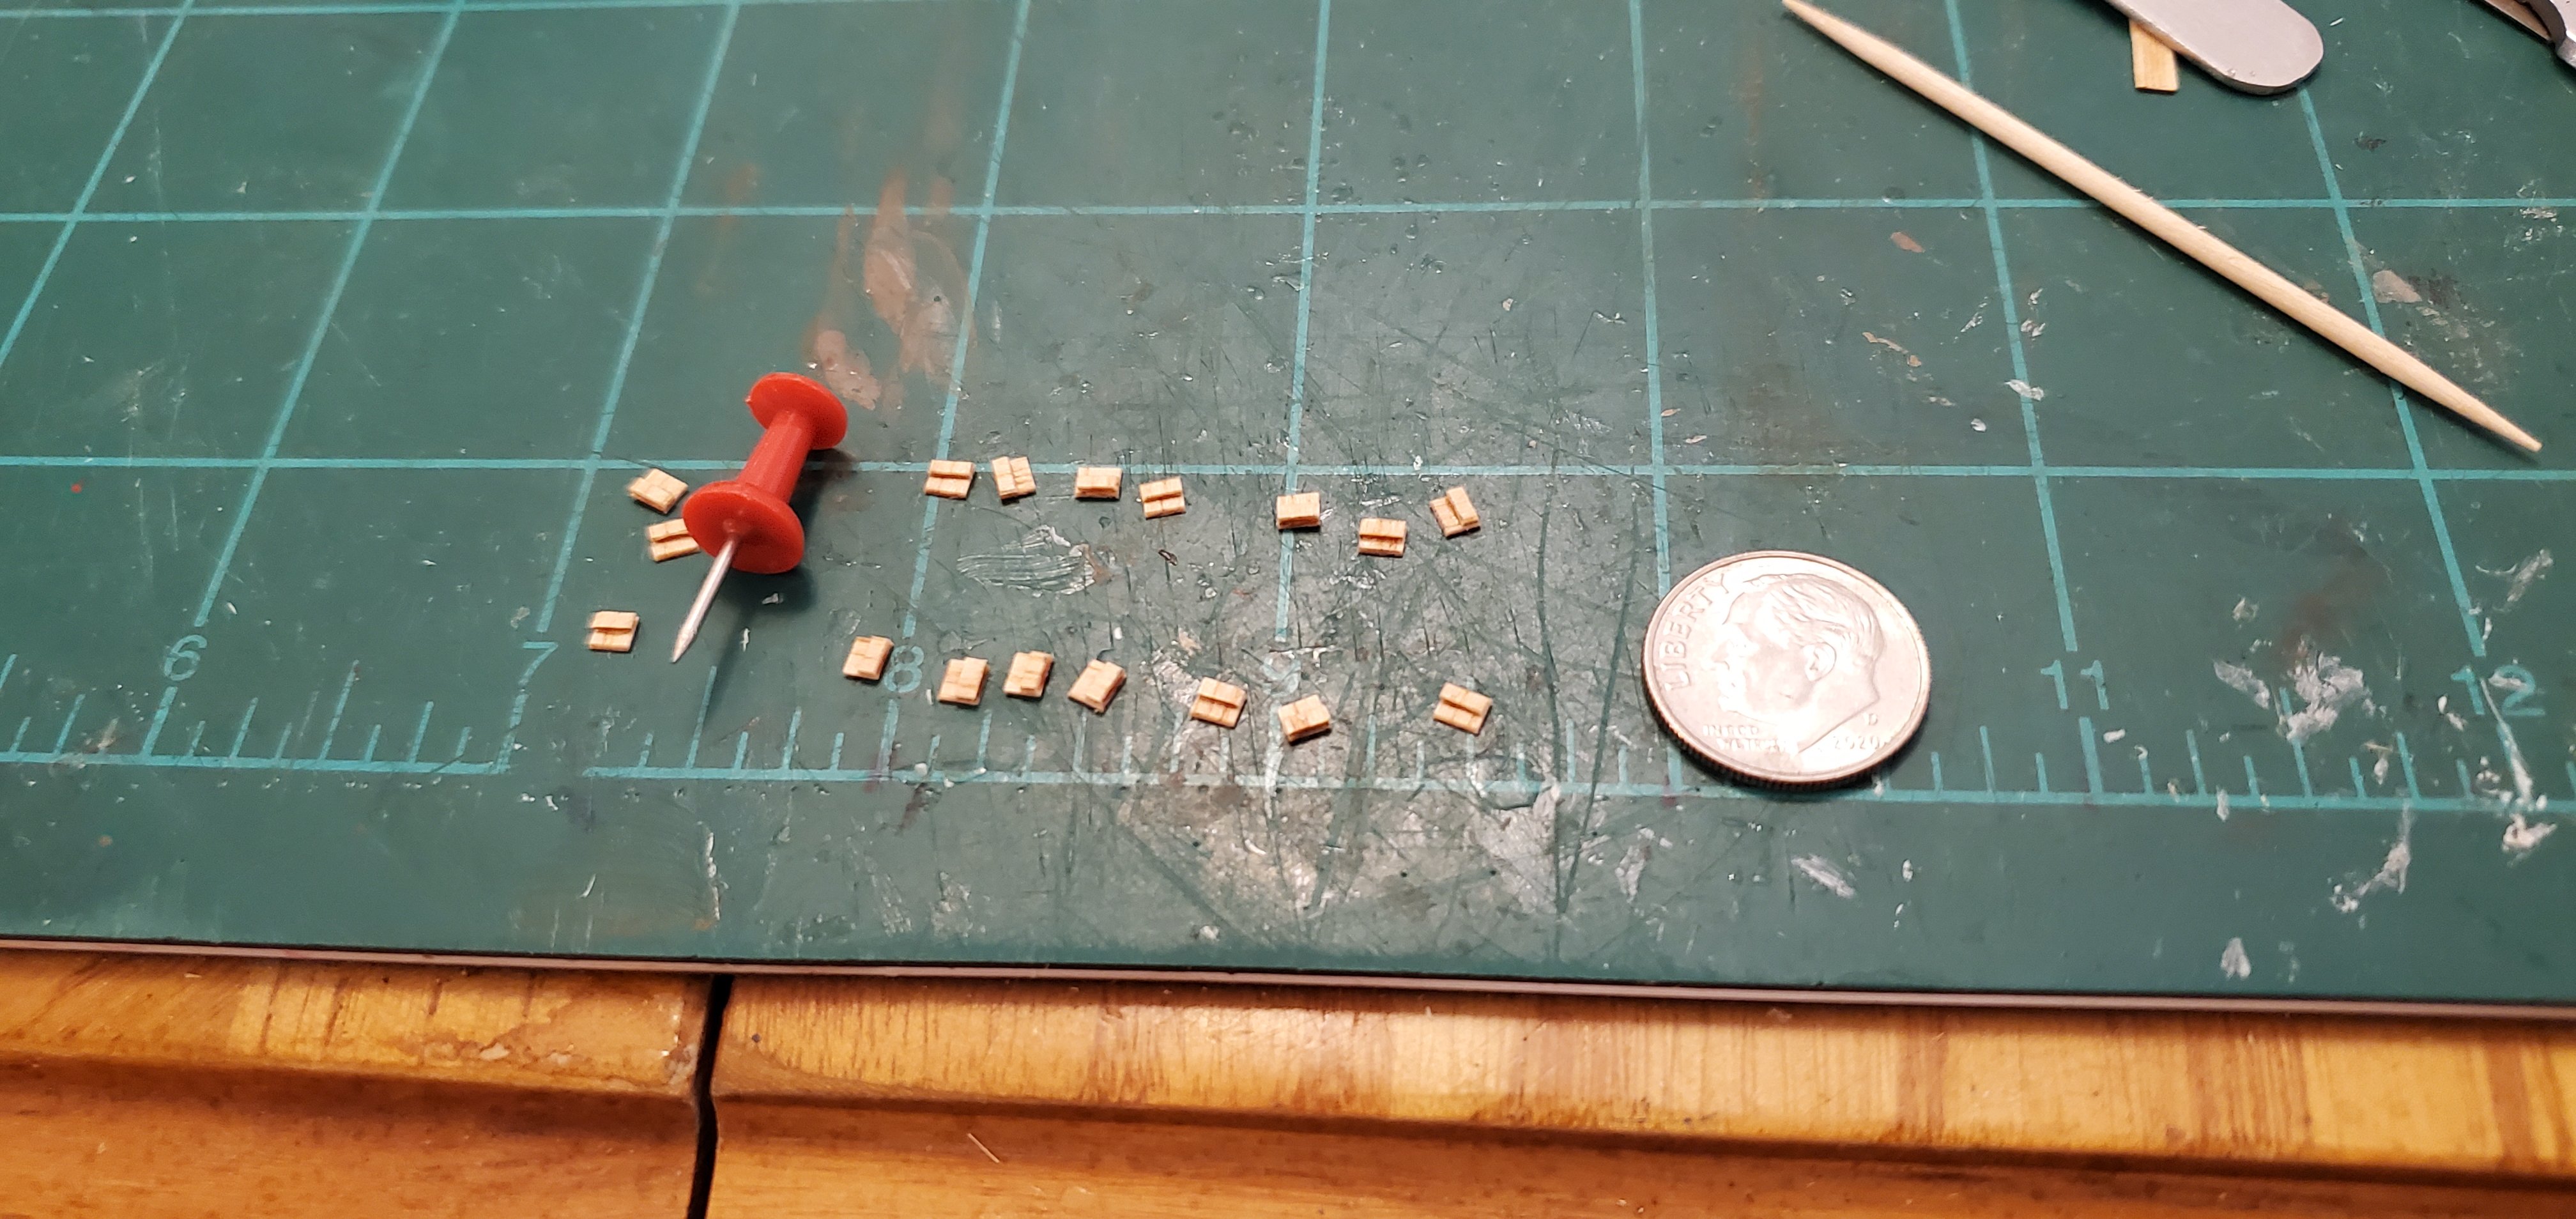
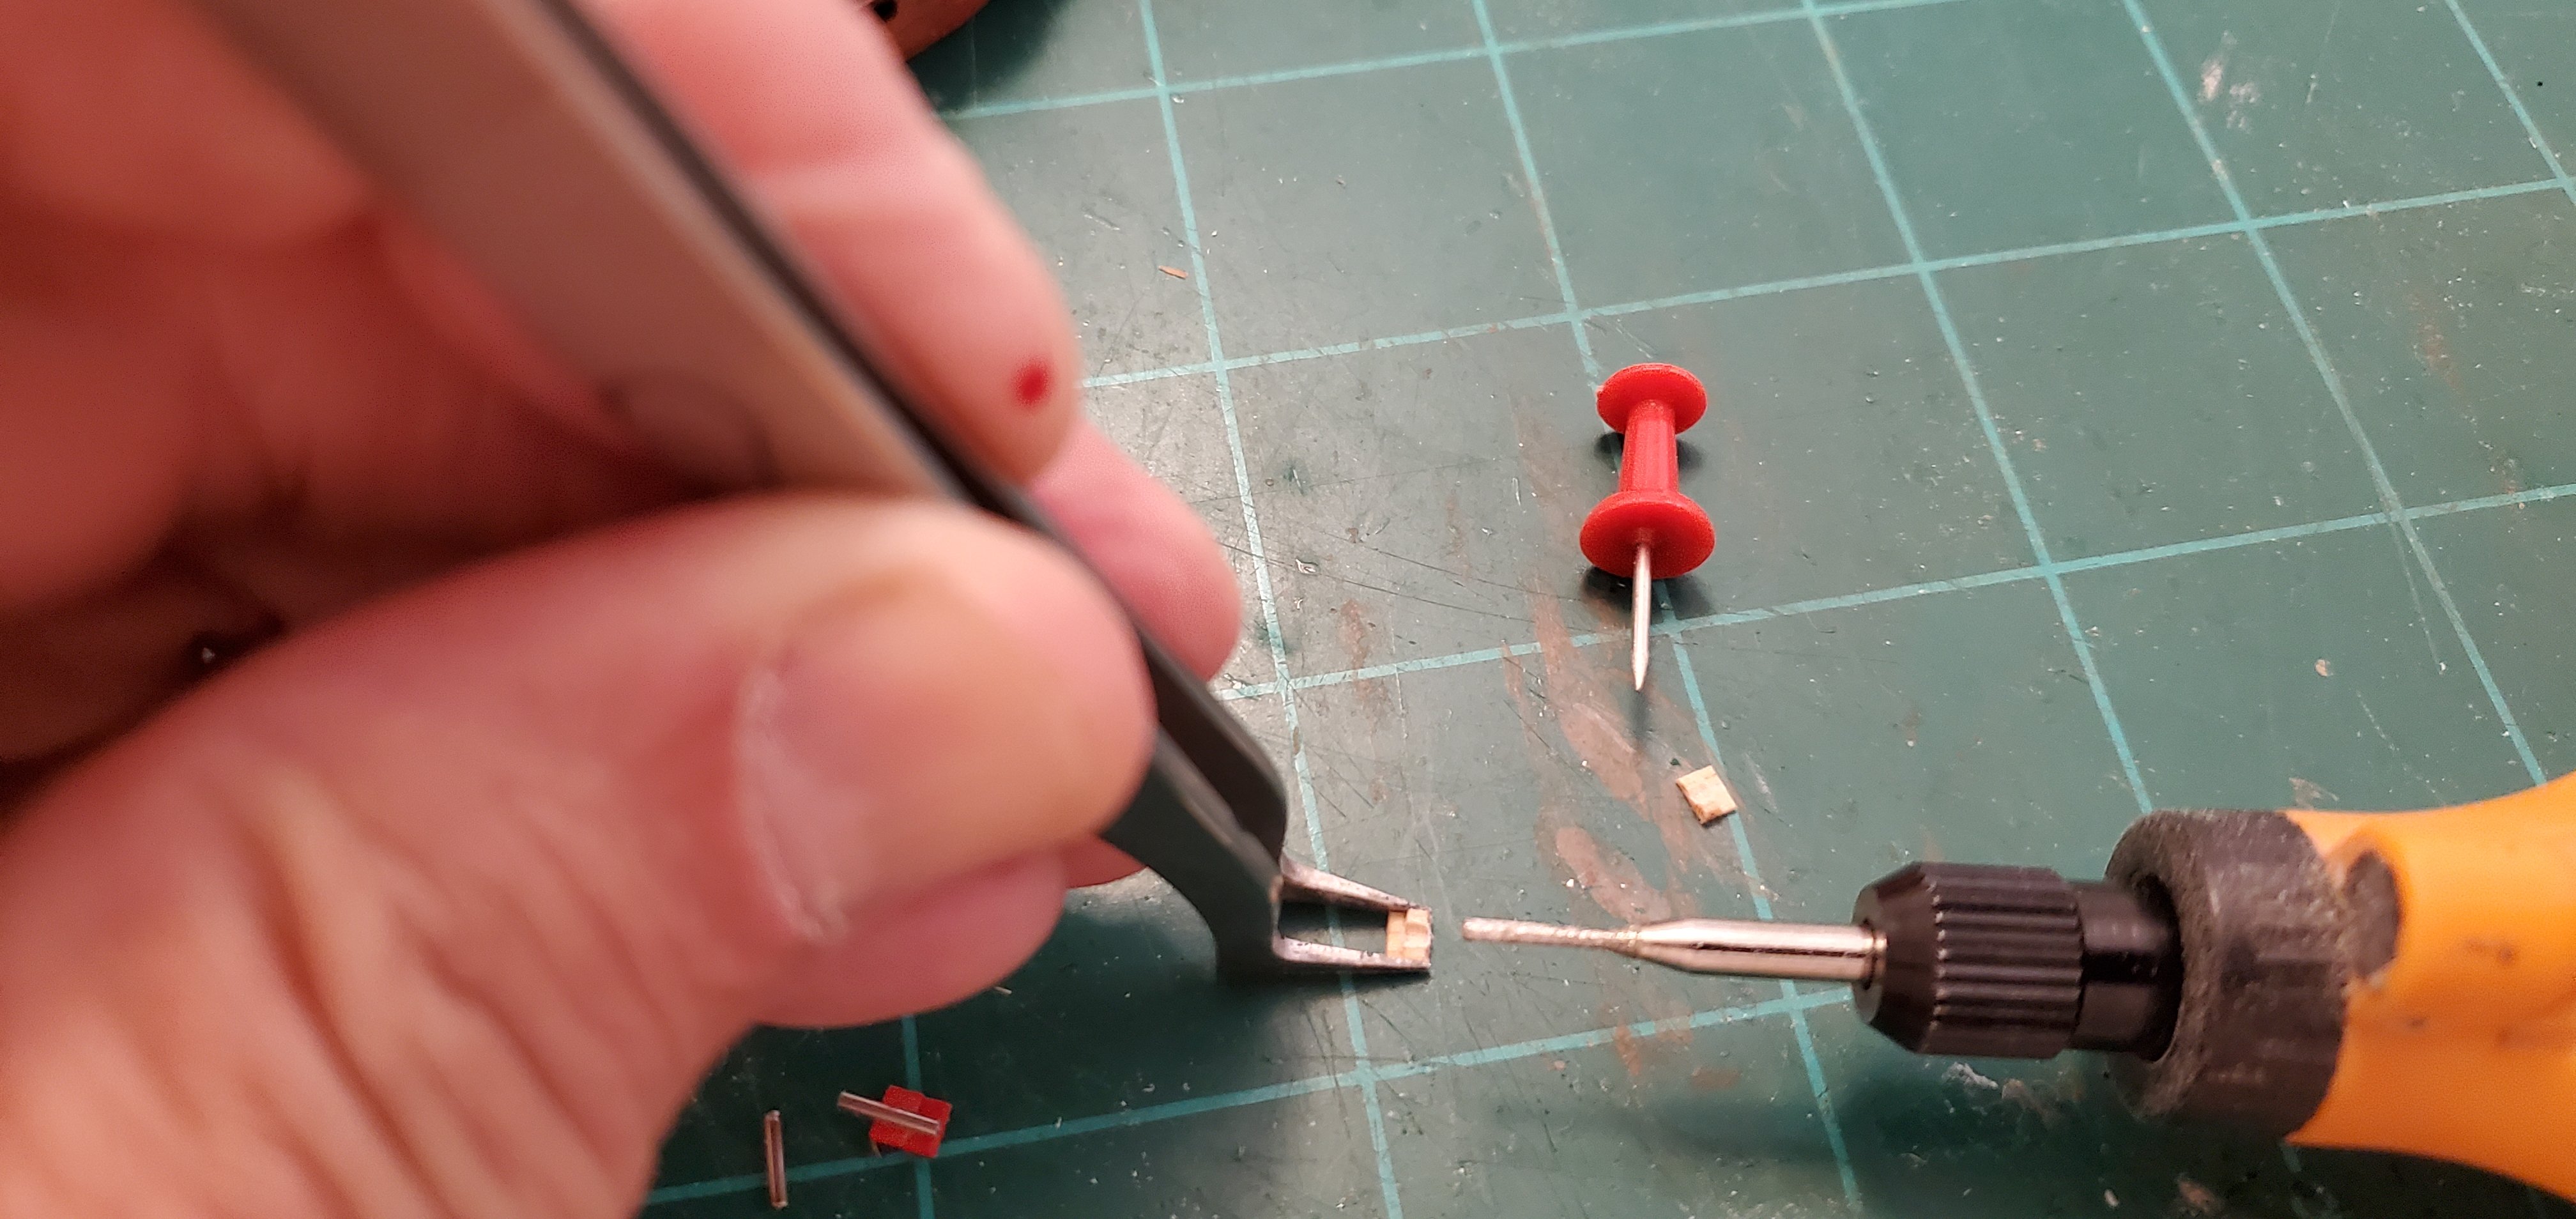
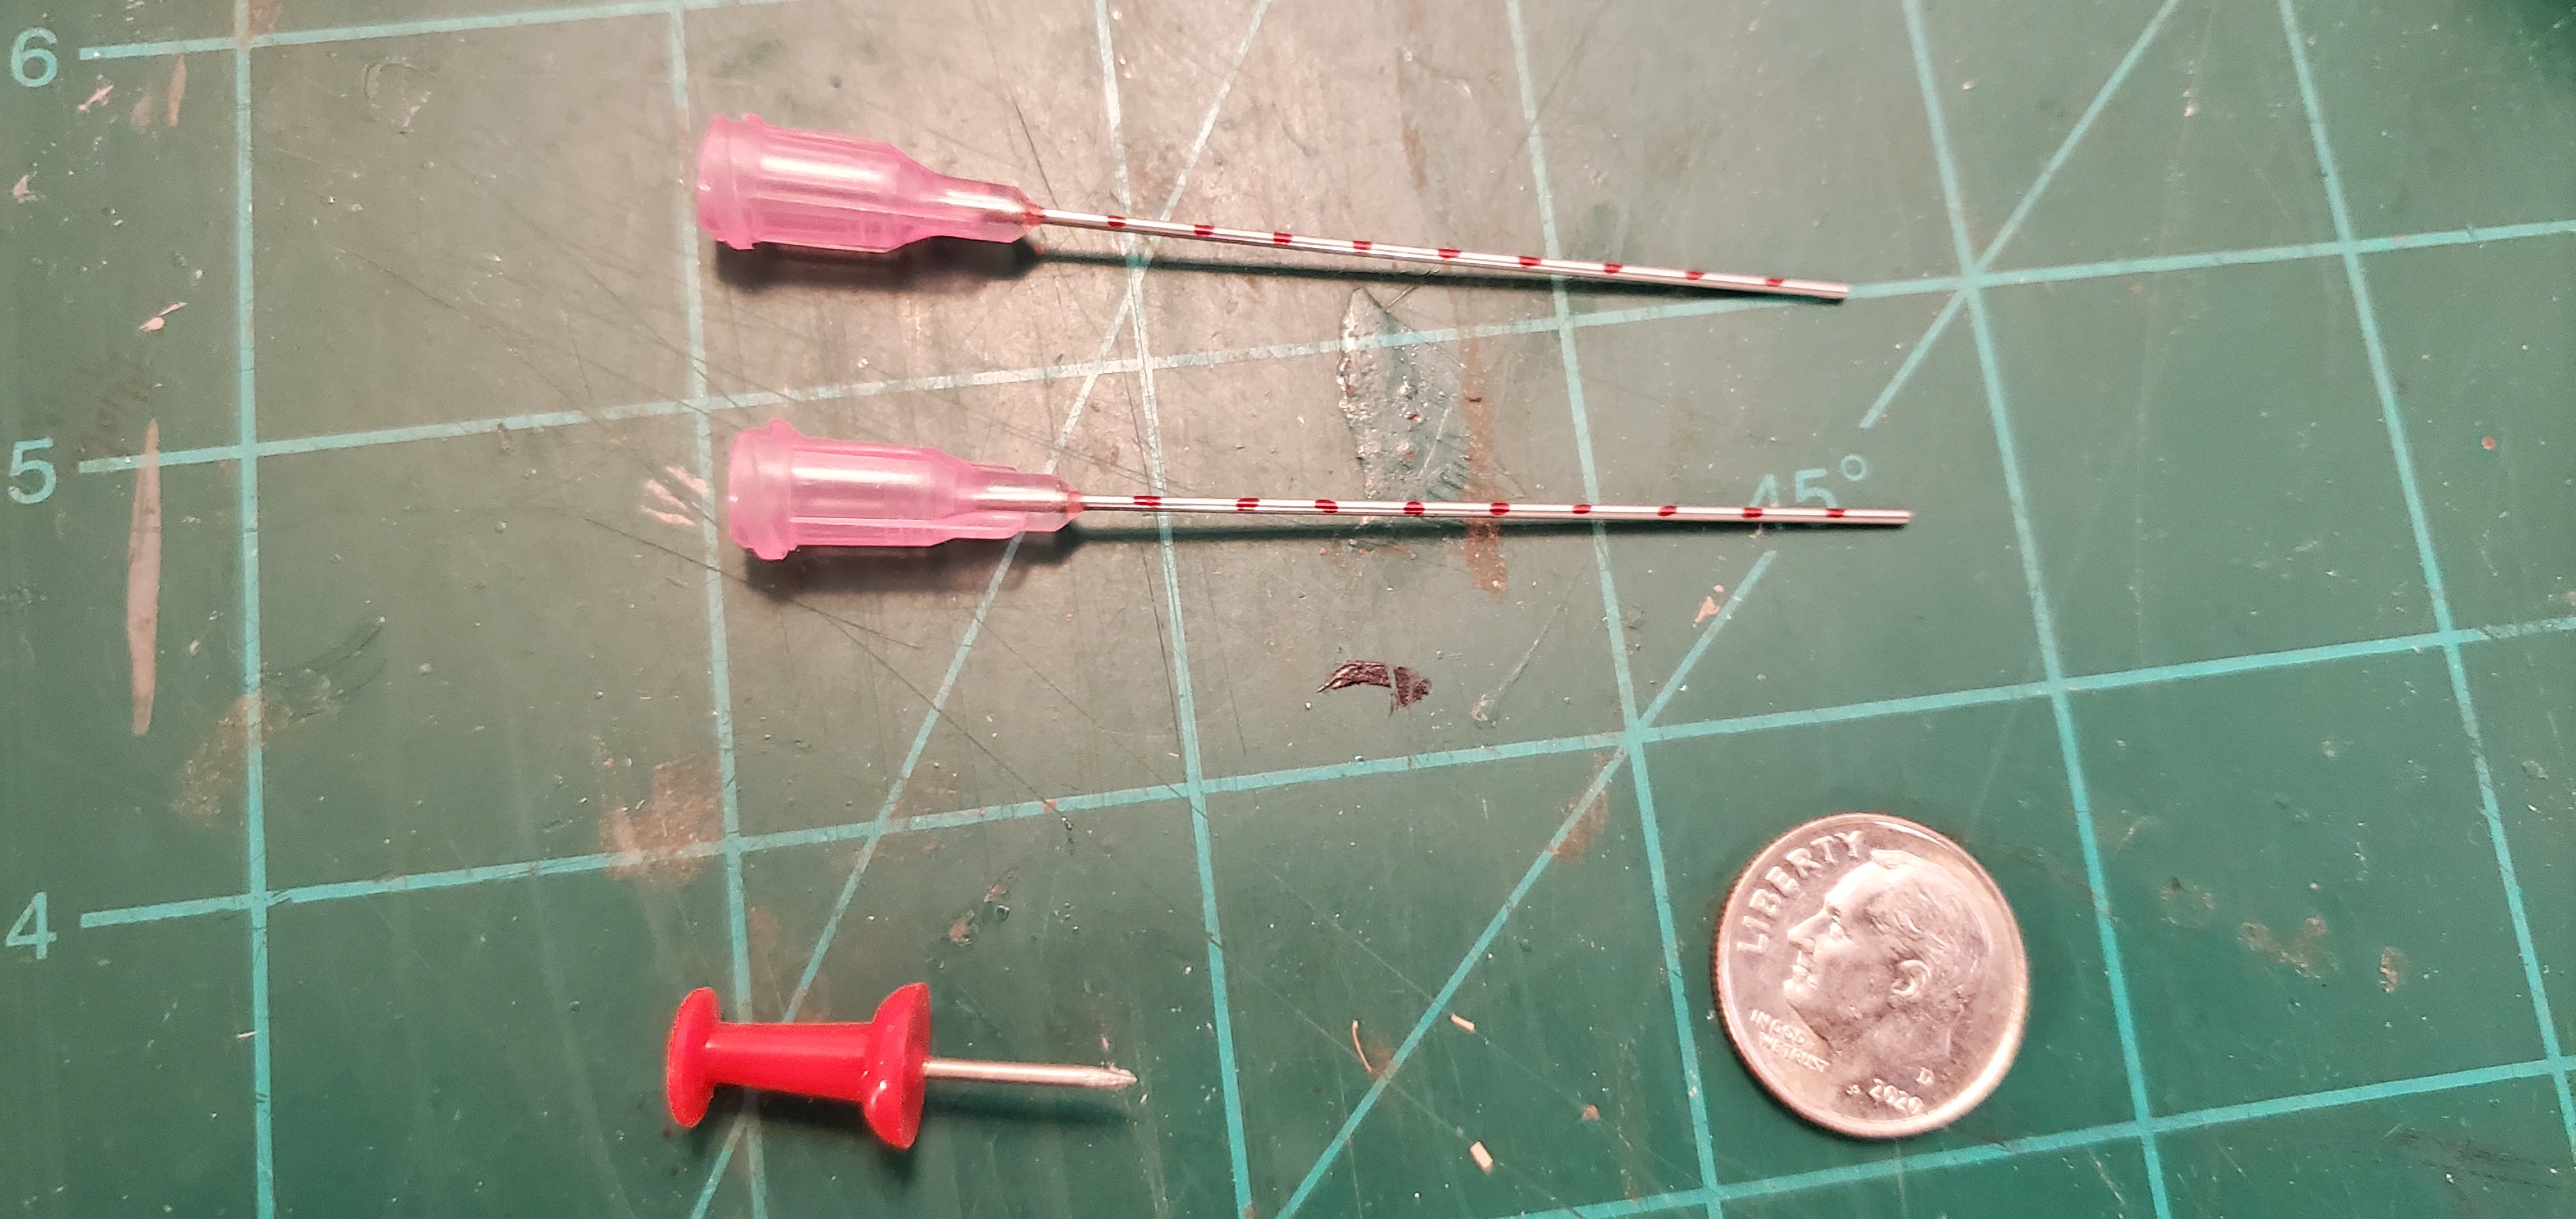
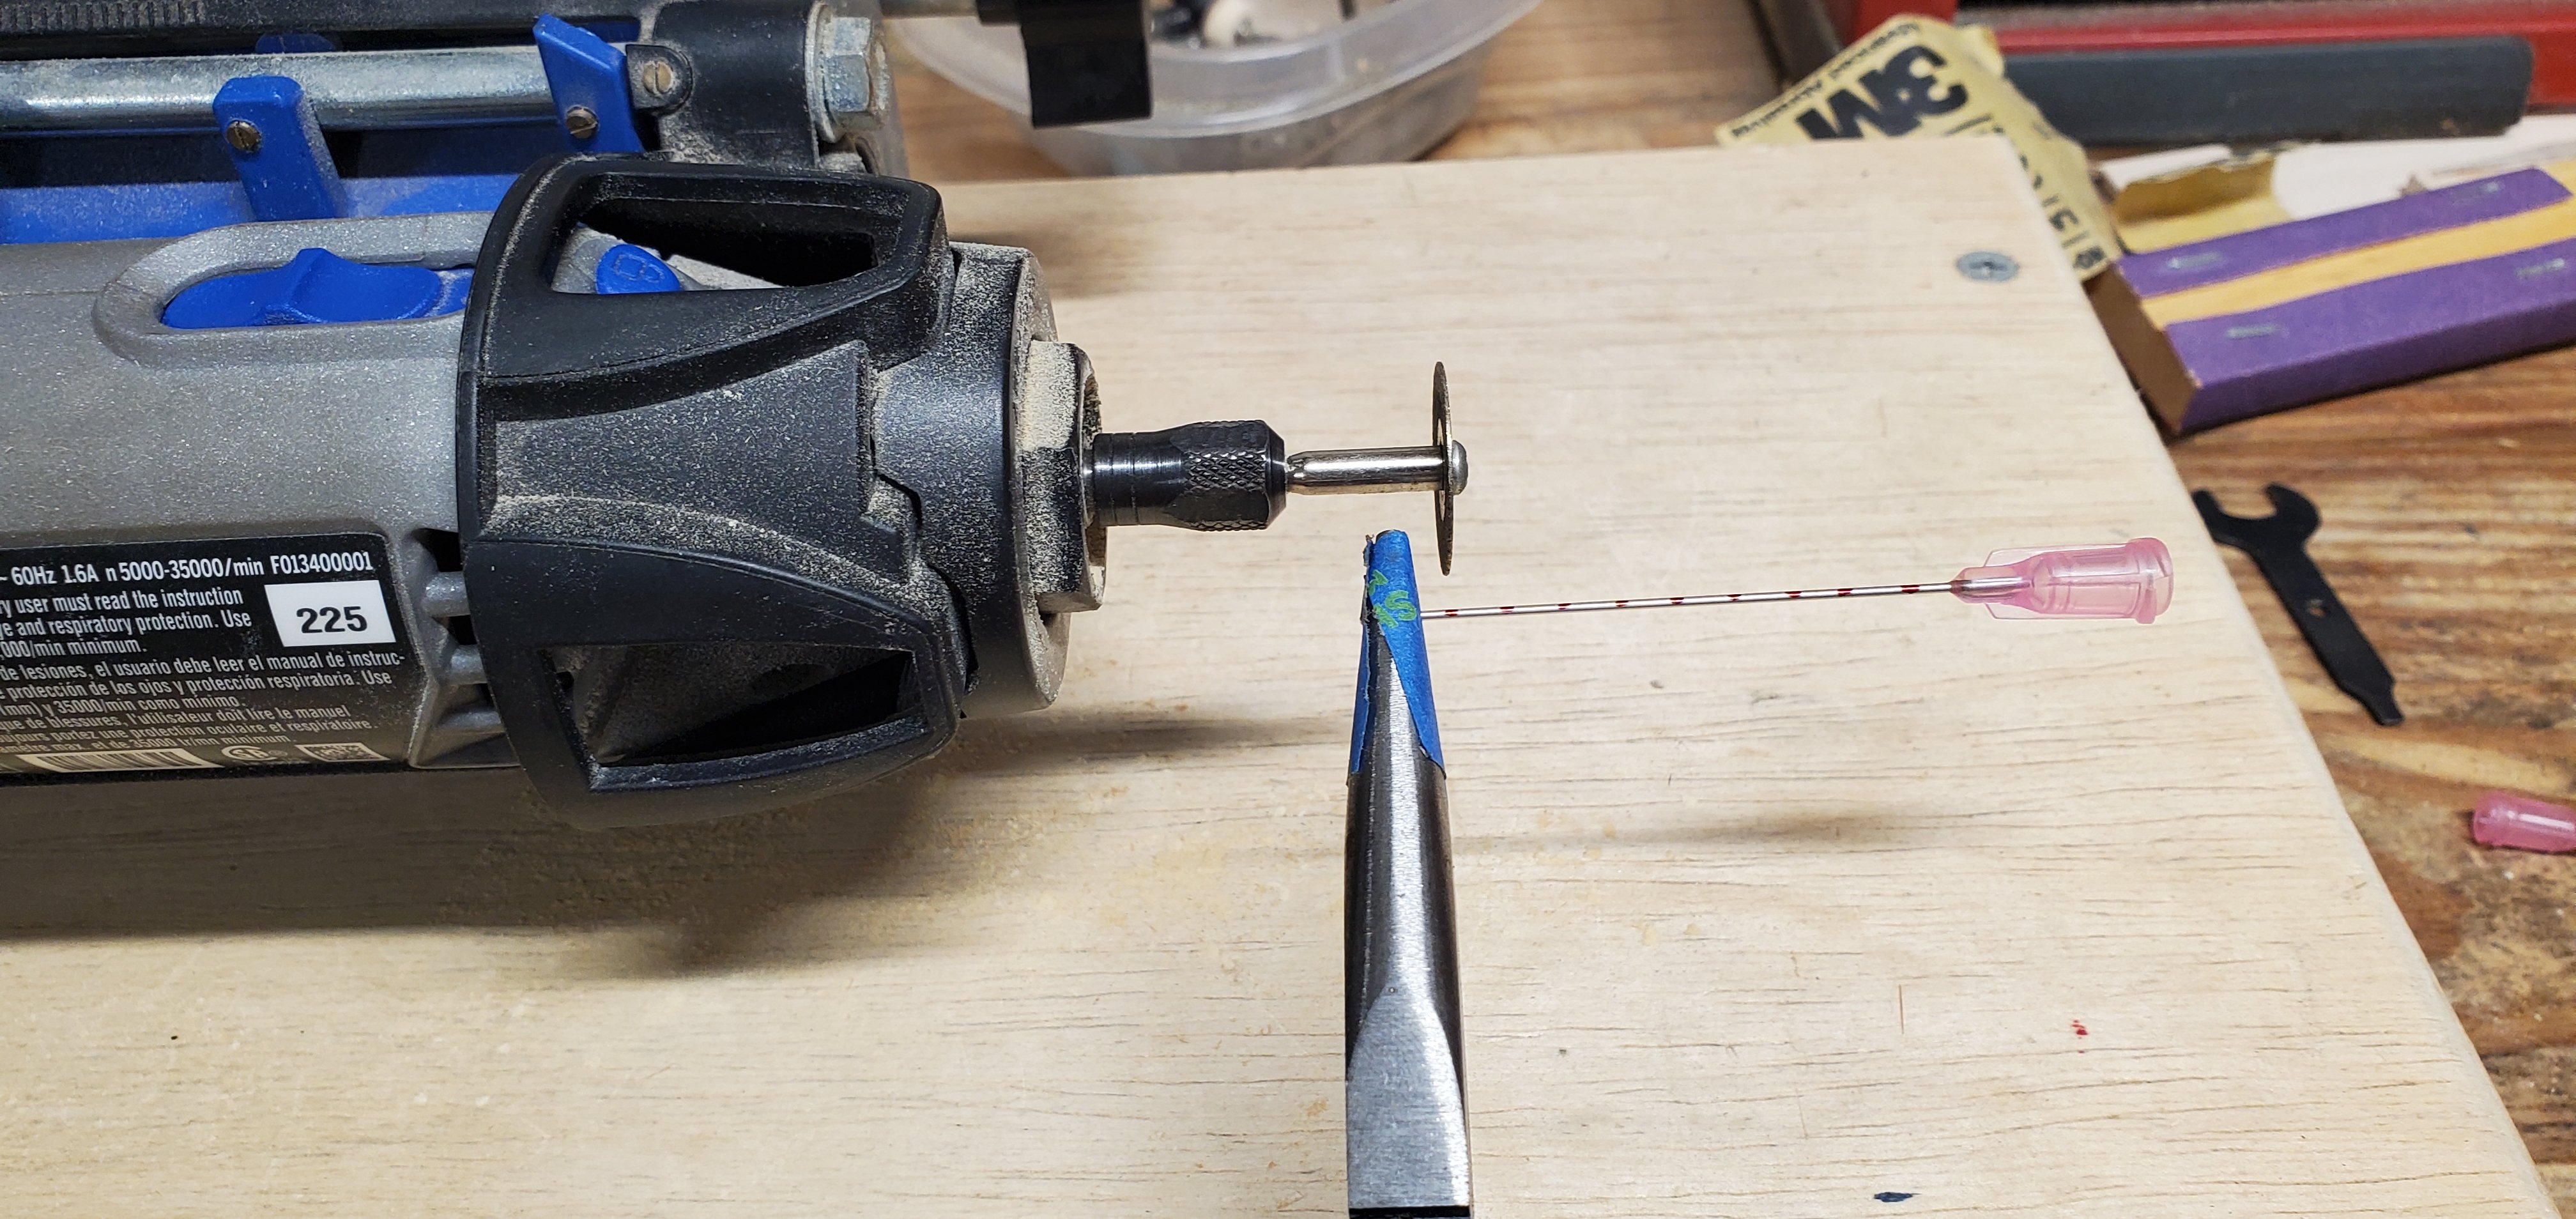
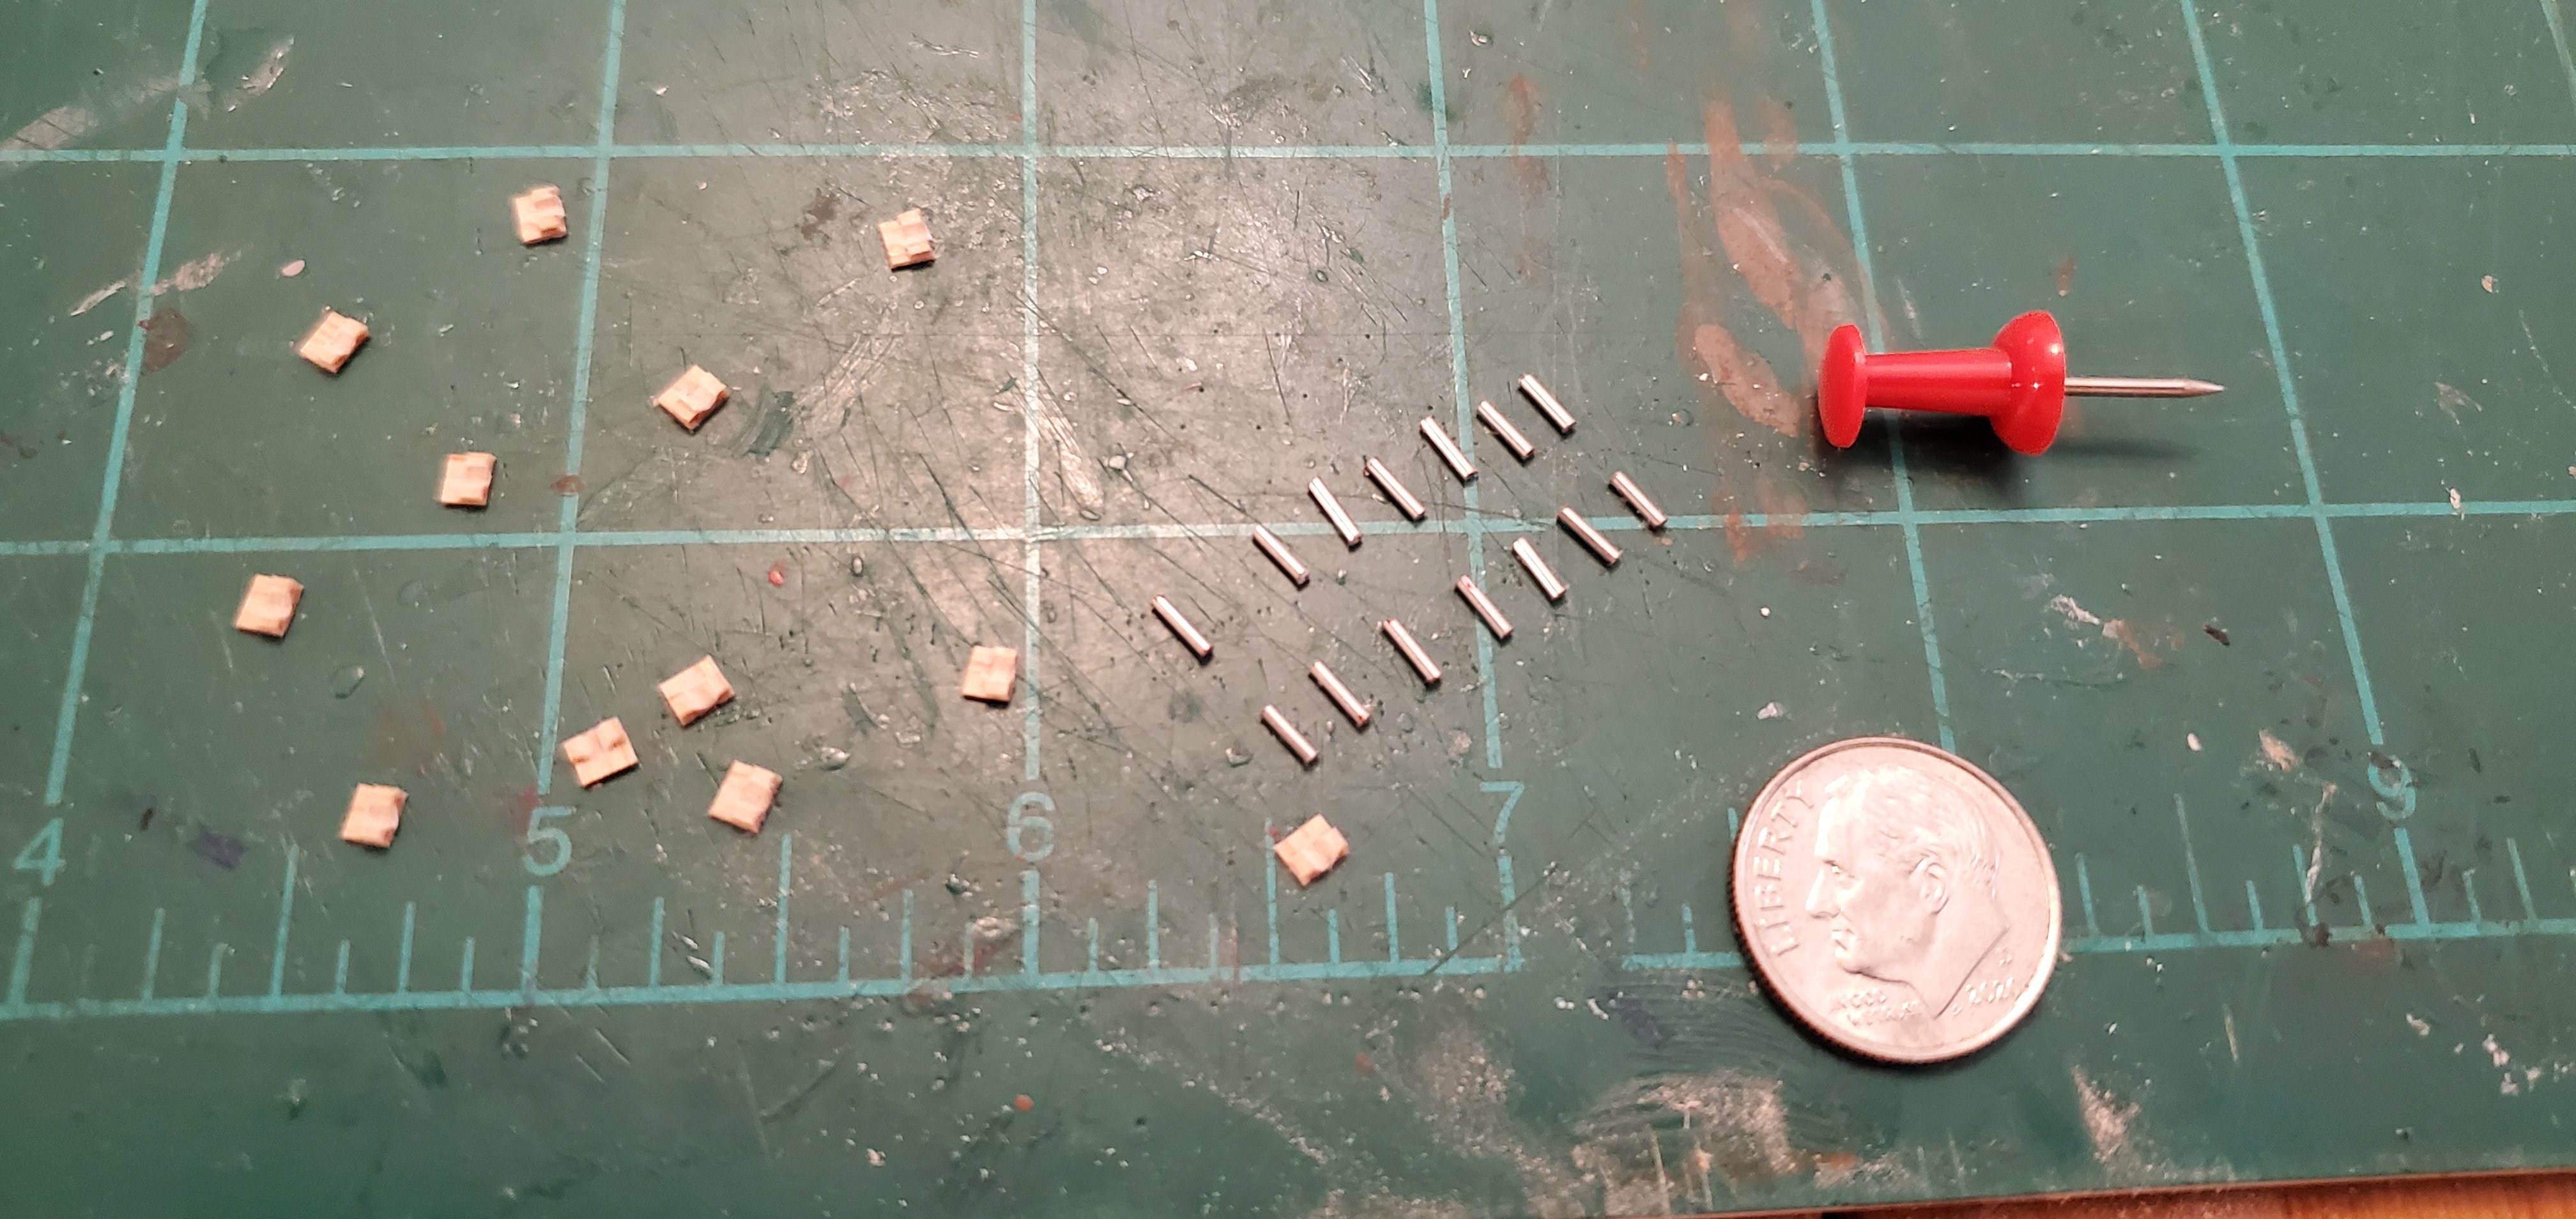
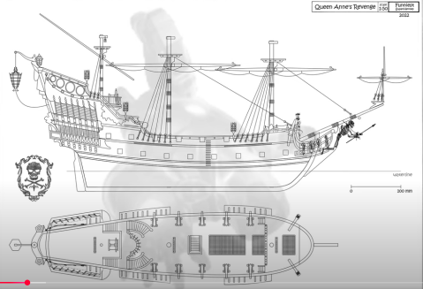
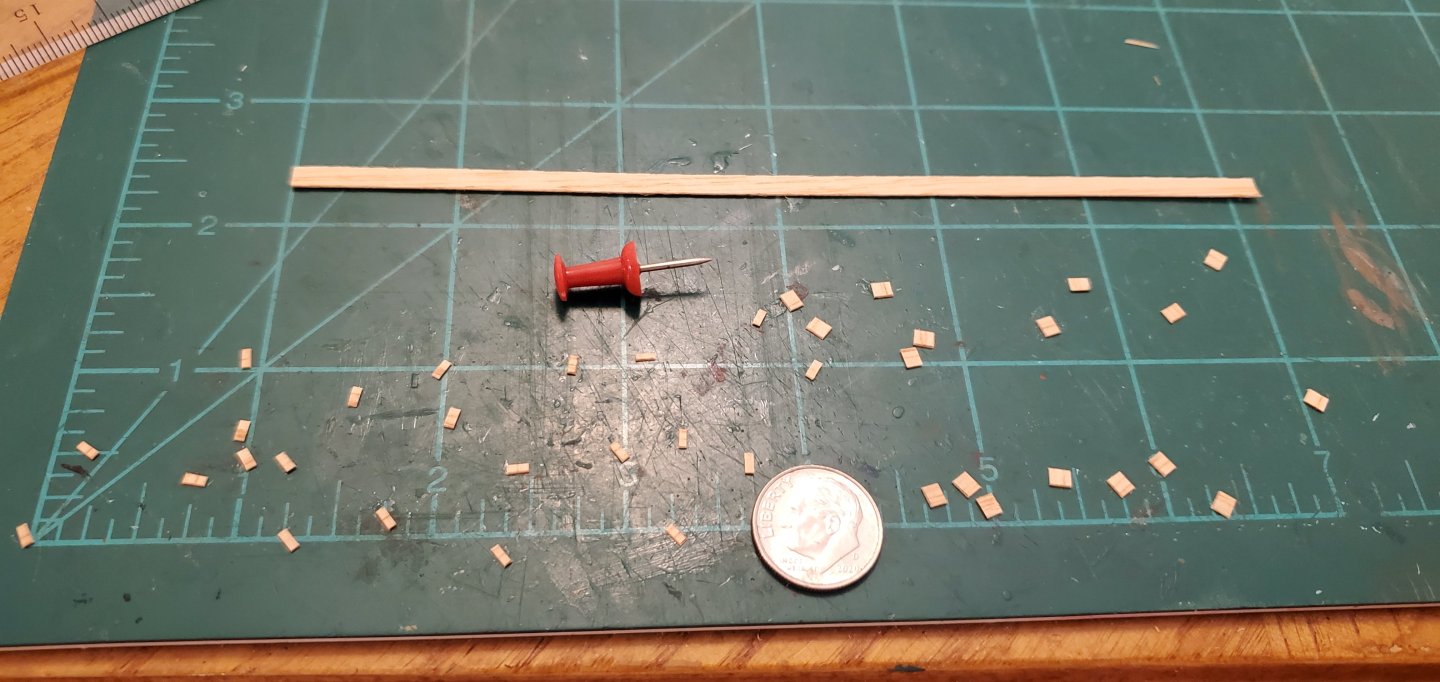
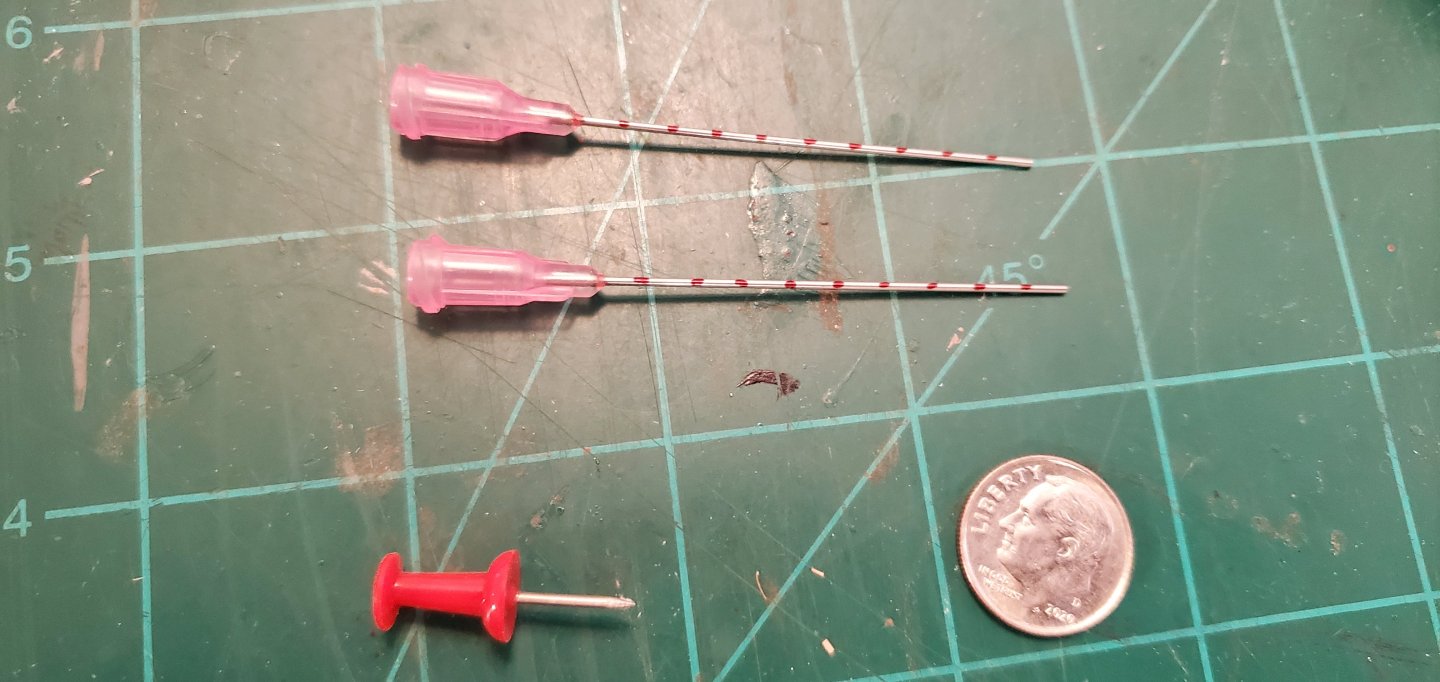
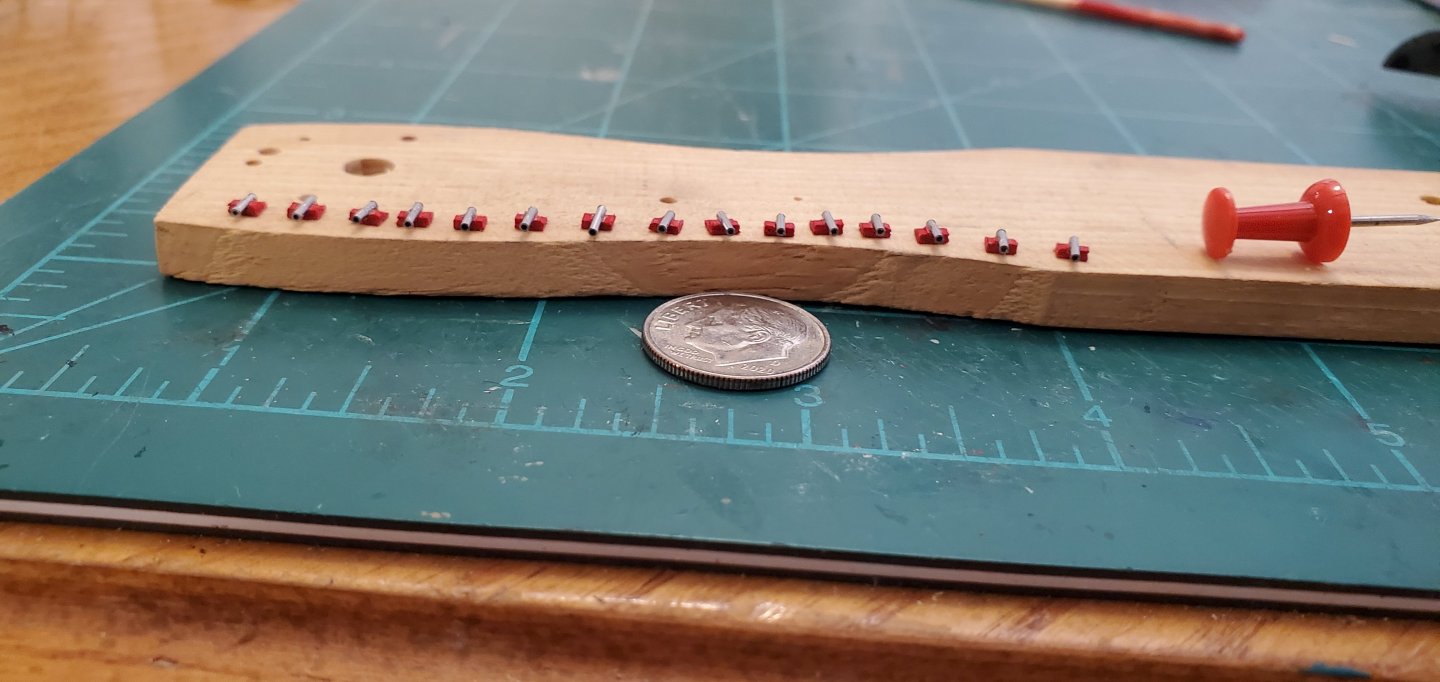
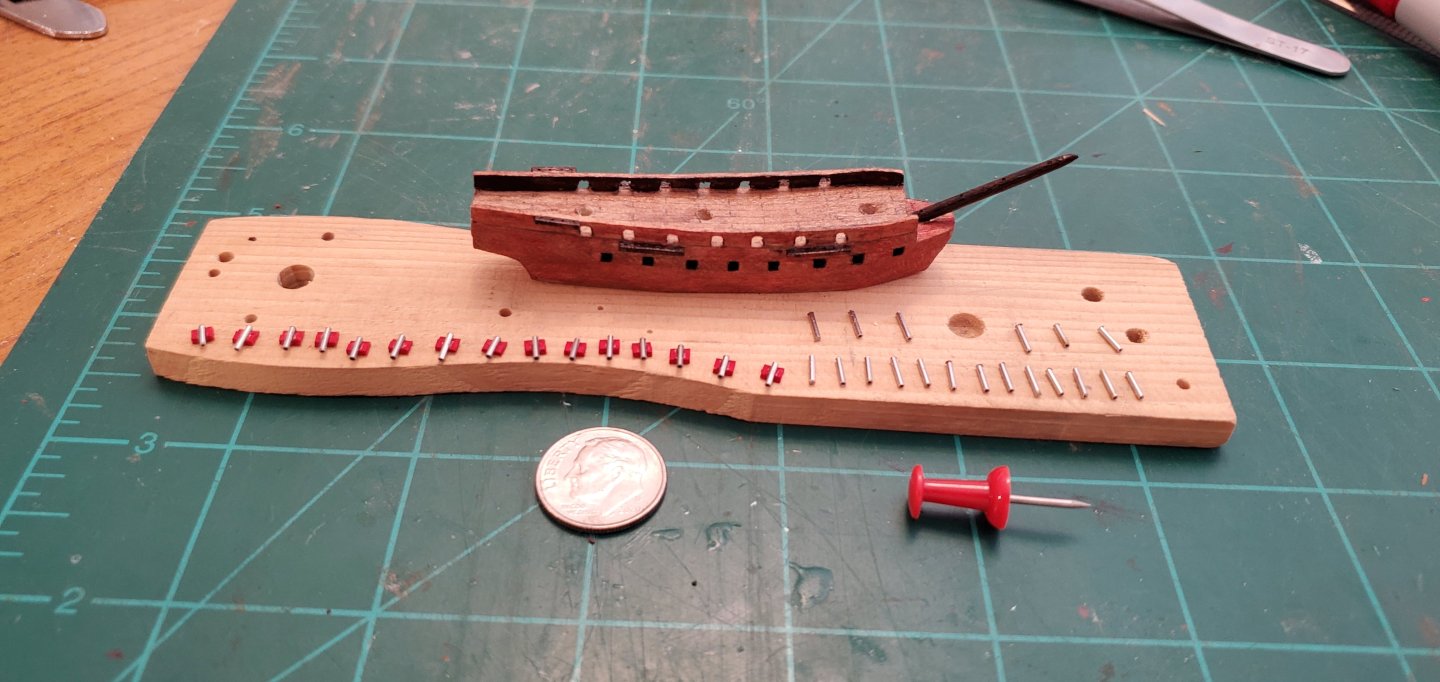
Penguins aside, it's time to work on the Queen's armament. I'm using the diagram below as a guide. It shows 7 gun ports on the main deck bulwark and 8 gun ports on the gun deck, so I'll make cannons to fit that configuration. I start with the 14 carriages needed for the main deck guns. Taking a thin (0.4 mm) piece of planking from my Constellation kit, I narrow it to 3mm wide. Then I cut a bunch of pieces 1/8" long and an equal bunch of pieces 1/16" long. Next, I glue the 1/16" pieces on top of the 1/8" pieces to give each carriage the semblance of the stairstep look you see from the side of carriages. Next I take a small diamond grinding bit in my cordless rotary tool and hollow out a cradle for the cannon barrel. The next step is making the cannon barrels. I start with 20 gauge veterinary needles that are 0.8mm in diameter. I like using vet needles because they are hollow like a real cannon barrel. It's hard to see inside the bottle, but when you look at them close enough they look much better than the solid wire cannon barrels I used in my first SIB efforts. I mark them off in 4mm lengths, then use a thin cutting wheel on my Dremel drill press to cut them into pieces. The last steps are gluing the barrels into the carriage cradles and painting. The gun deck cannons are much simpler since I don't build carriages for them. I just cut slightly longer cannon barrels from the needles. When the time comes, I will drill holes into the ports on the gun deck and insert these cannon barrels. Here's the full armament ready to equip the Queen.


- 156 replies
-
- 15
-
-
-
- Queen Annes Revenge
- bottle
- (and 1 more)
-
We made it dang near 2 pages before penguins got mentioned, which I think is a record! Maybe instead of the ship's cook getting roasted by the Greek Fire, I'll put a couple of penguins in the long boat. Y'all would call that penguins on the barbie, right Pat? 😄
- 156 replies
-
- 7
-
-

-
- Queen Annes Revenge
- bottle
- (and 1 more)
-
You are right on both counts, Ken. They work great in my Dremel drill press and are also very brittle. If I drop one from more than an inch above my workbench it breaks. Or if I do anything more than push it exactly straight in and straight out, it breaks. But with careful use they work great.
- 156 replies
-
- 3
-
-
- Queen Annes Revenge
- bottle
- (and 1 more)
-
Just noticed the link to this build in your signature. I'm on board. Looks like another AWESOME project! But I couldn't help but think of poor ol' neglected Tennessee...

-
Hey Kenny! Thanks for the kind words and I very much appreciate you following along. I've still got a long ways to go here but so far so good!
- 156 replies
-
- 3
-
-
- Queen Annes Revenge
- bottle
- (and 1 more)
-
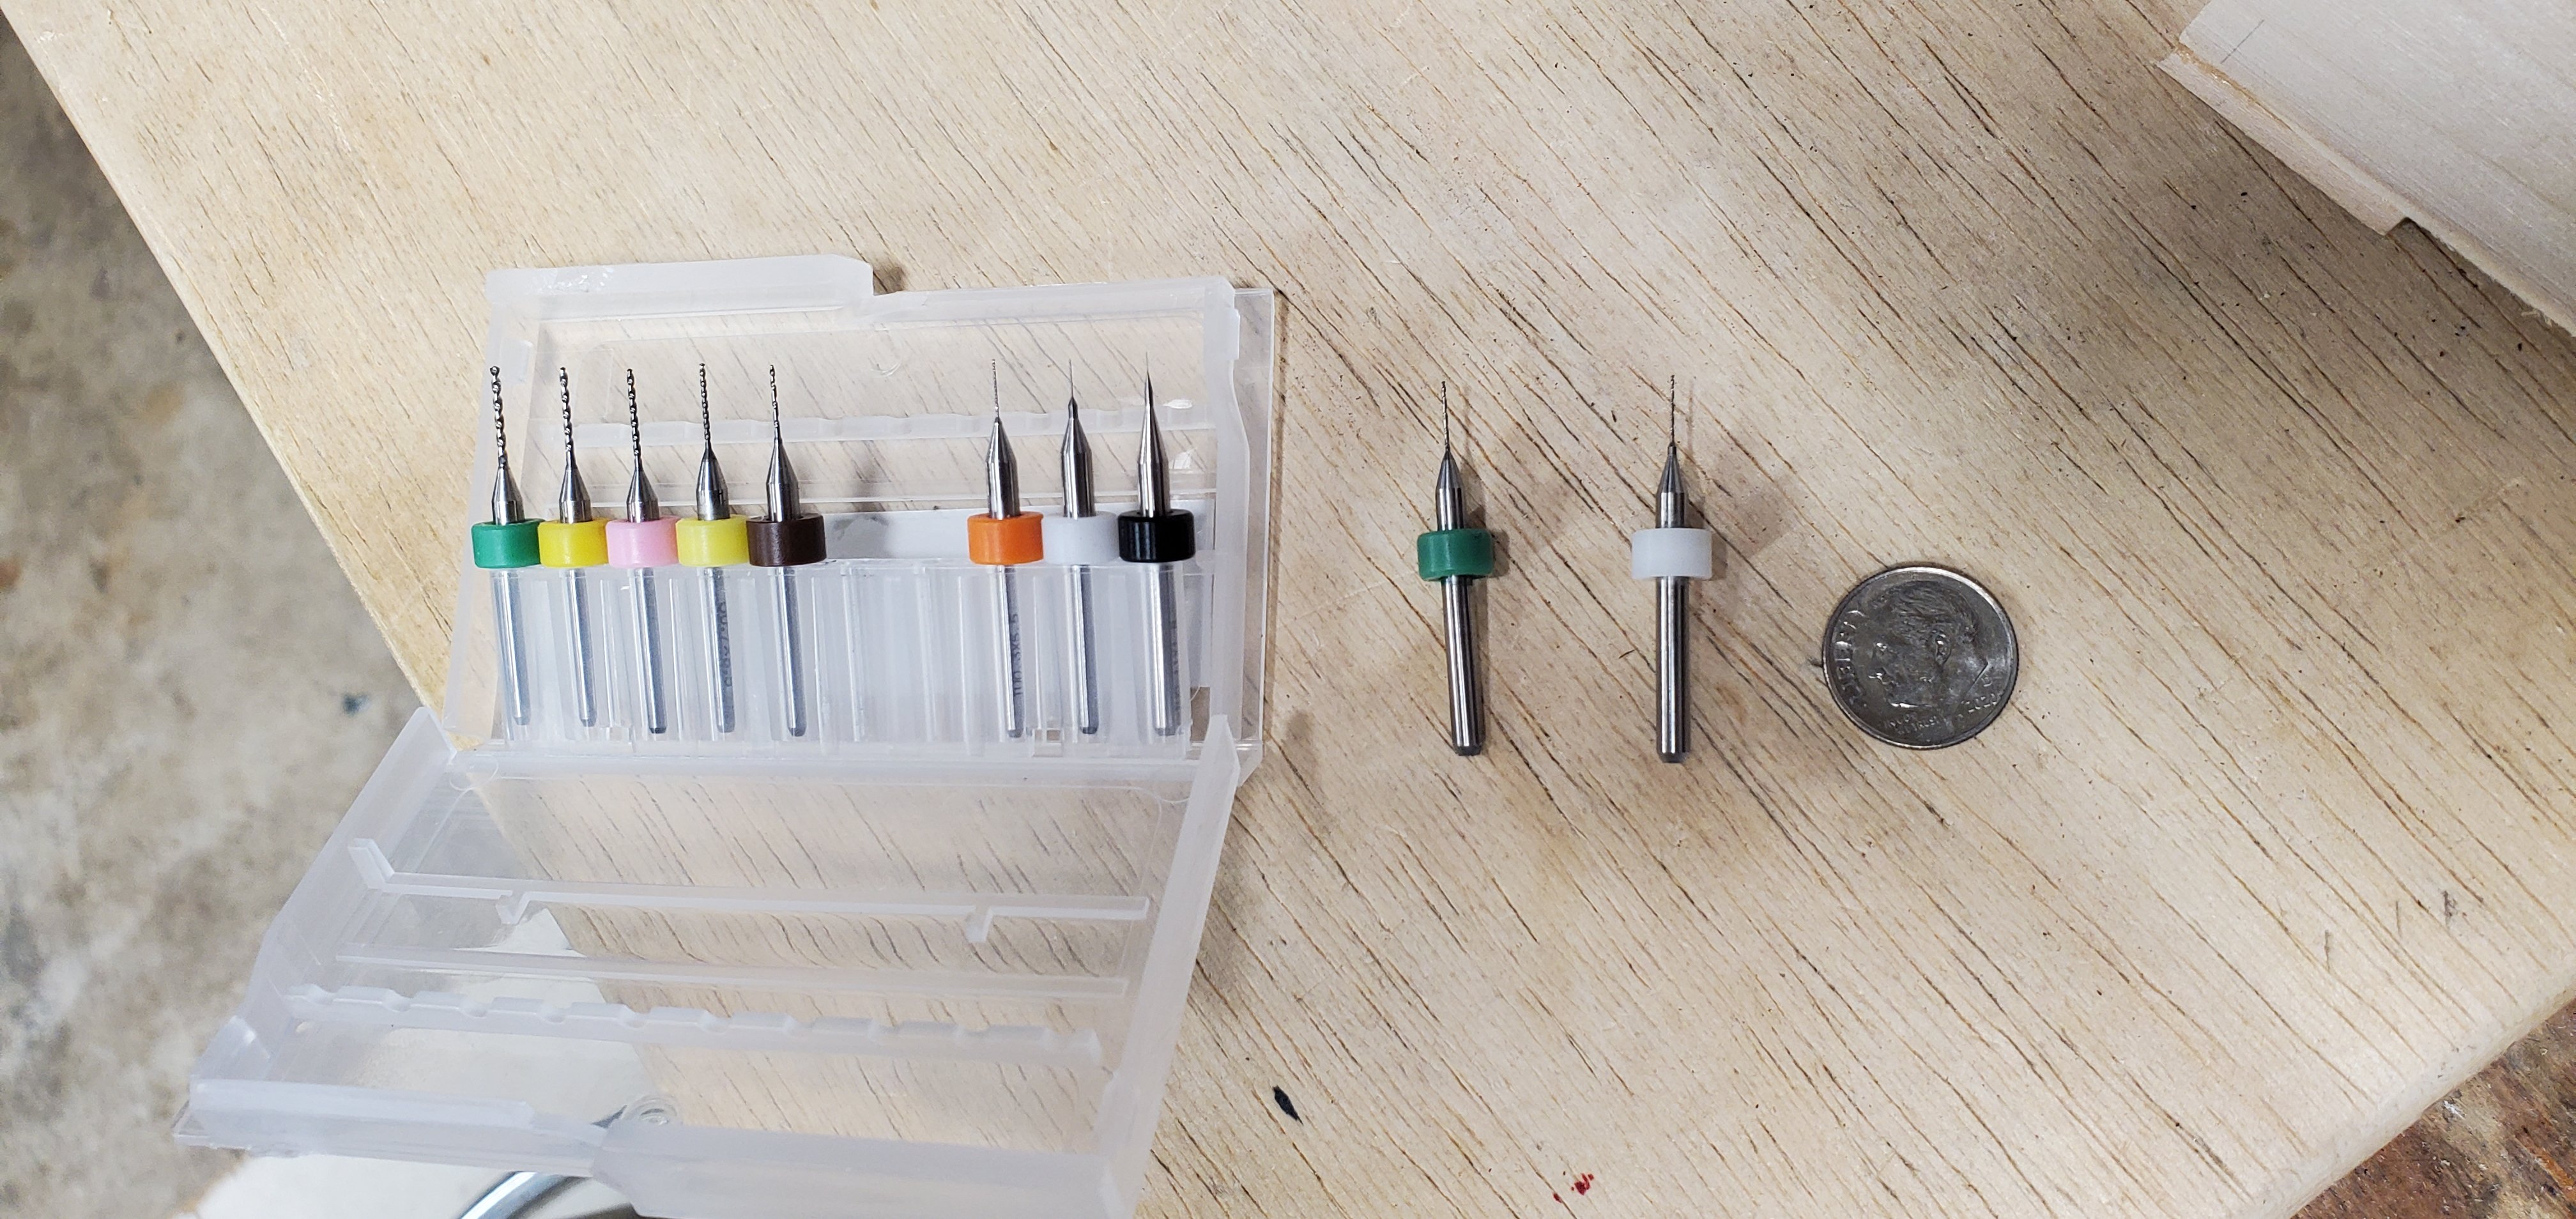
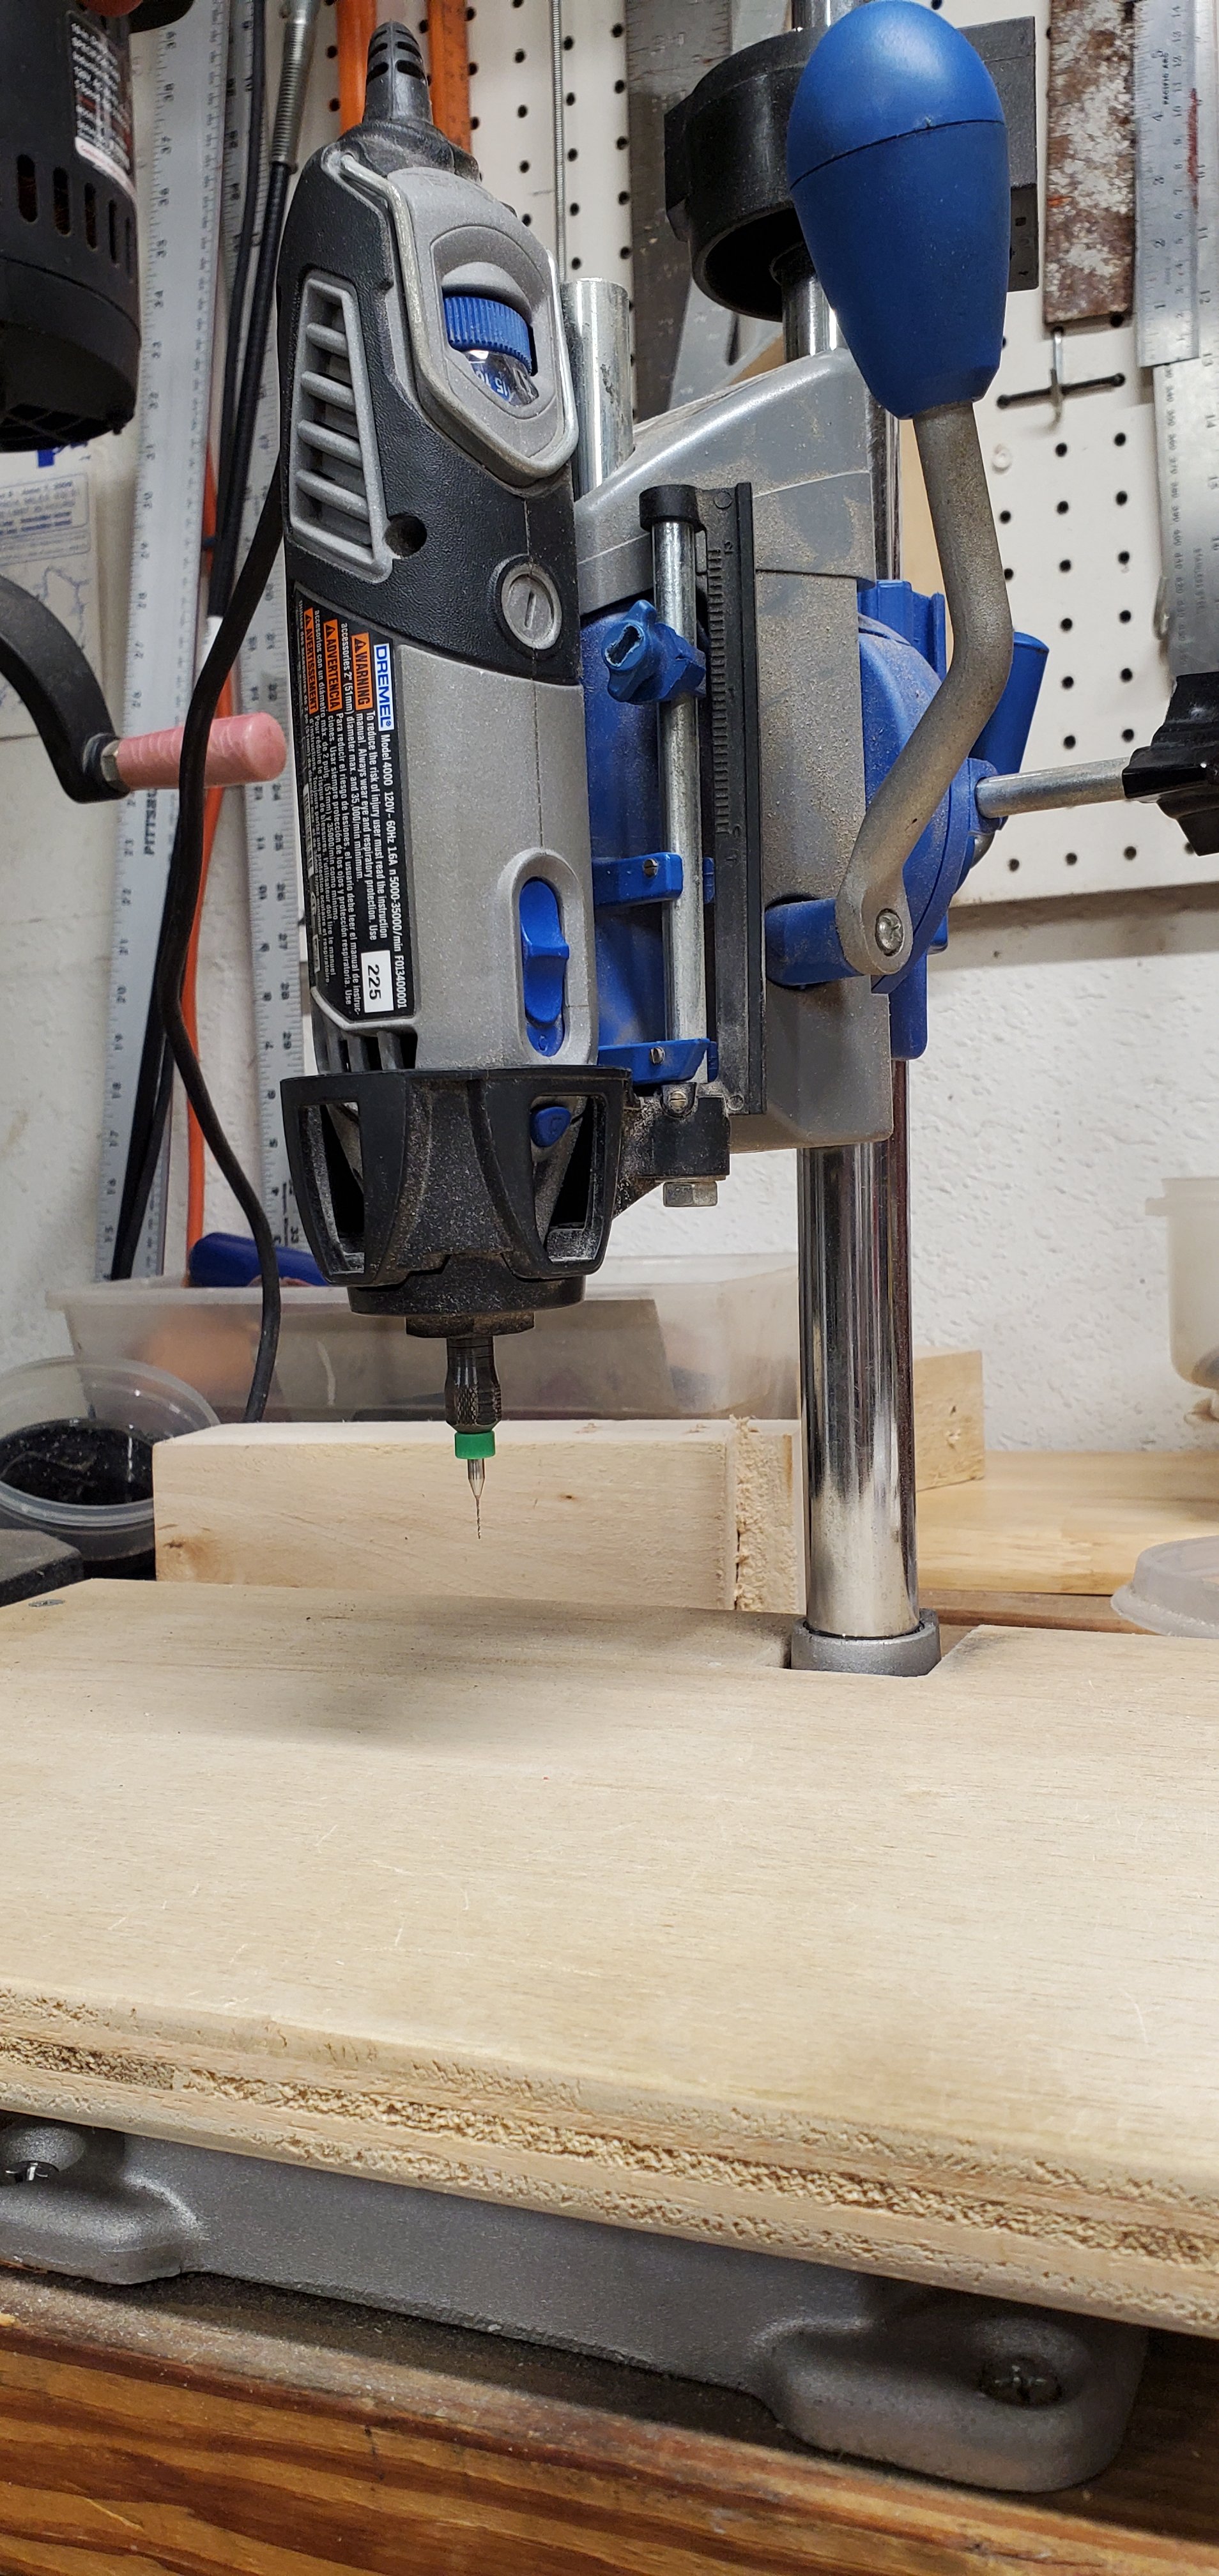
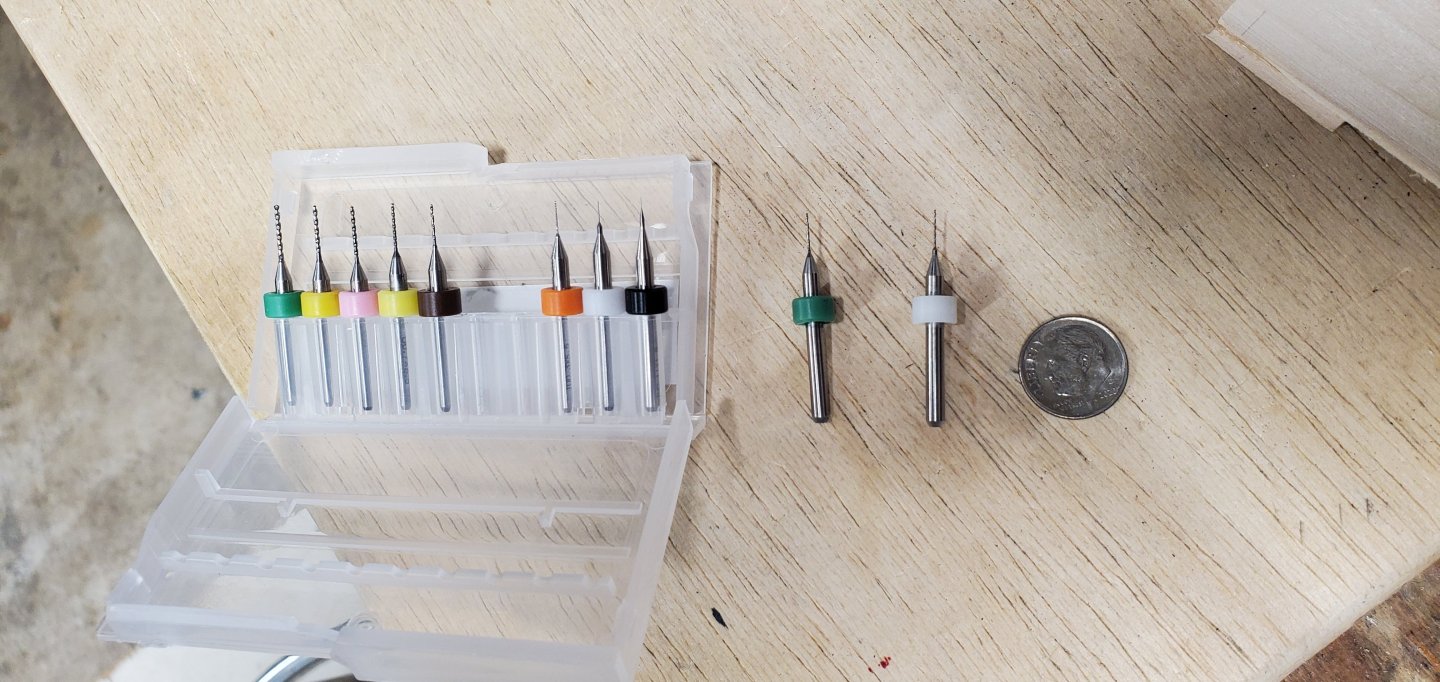
Thanks, Roel. Your earlier comment is the reason I went into detail on the process. Glad you found it worthwhile. And yes, I use CA glue for just about everything because I'm too impatient to wait for PVA glue to dry! The main exceptions are gluing the hull layers together (where I used wood glue with clamps) and when I need extended drying time like when I'm gluing things inside the bottle and need extra time to position things. For inside the bottle gluing I use 30 minute epoxy, which I've found really gives you about 15 minutes before it becomes unworkable. Also, you may be interested in what I use to drill the smallest holes. For a long time I tried regular regular hobby drill bits, fitting them into the smallest collets on my Dremel. But on the smallest bits, the collet could not keep the bit perfectly aligned and I would always have a bit of a wobble while spinning. And even the tiniest amount of wobble makes it very hard to drill precision holes that small. Then I discovered these circuit board routing bits on Amazon. https://www.amazon.com/dp/B0BWCPXYNP?ref_=ppx_hzsearch_conn_dt_b_fed_asin_title_2&th=1 They fit into a standard Dremel collet, have zero wobble, and are very cheap. I got the 6 pack in the link above because I break the tiniest ones fairly often.

- 156 replies
-
- 9
-
-
- Queen Annes Revenge
- bottle
- (and 1 more)
-
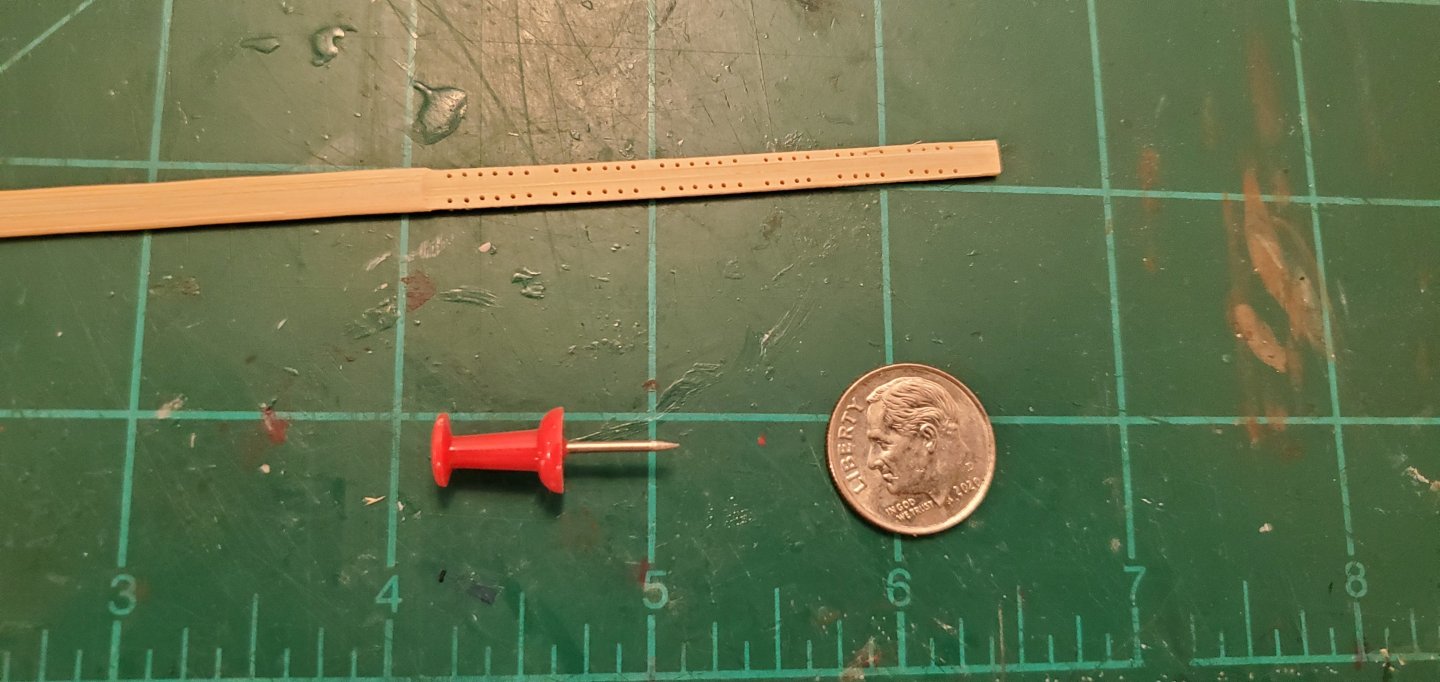
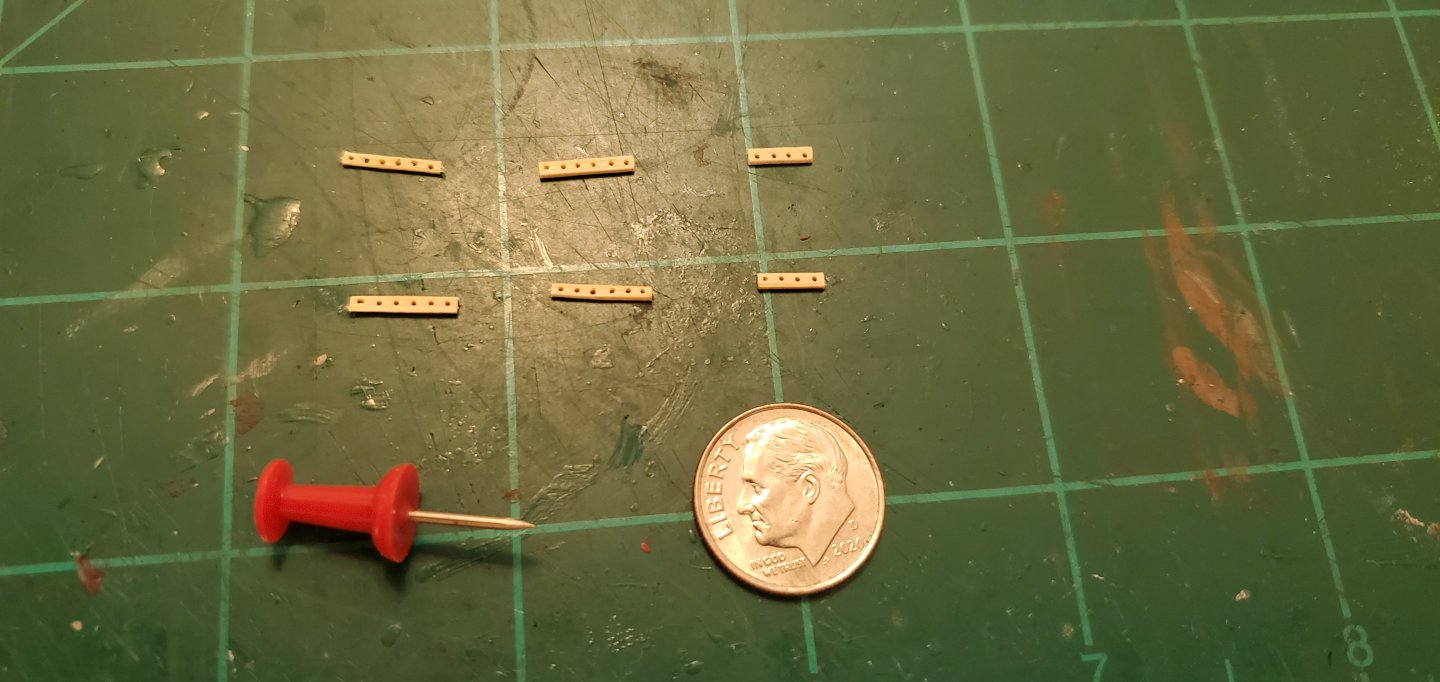
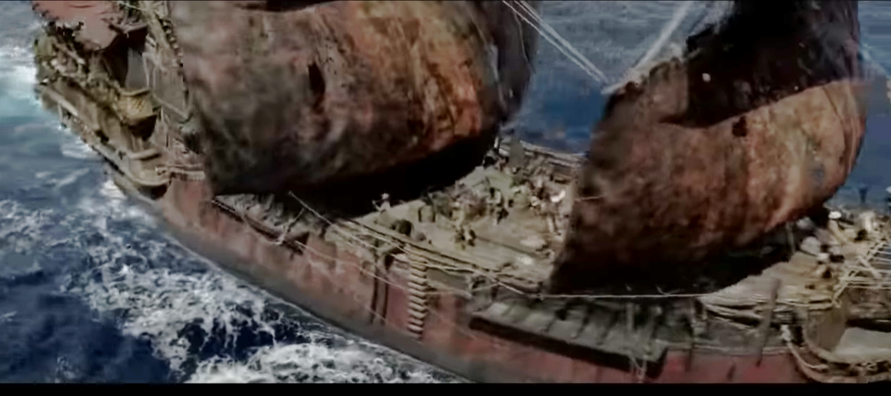
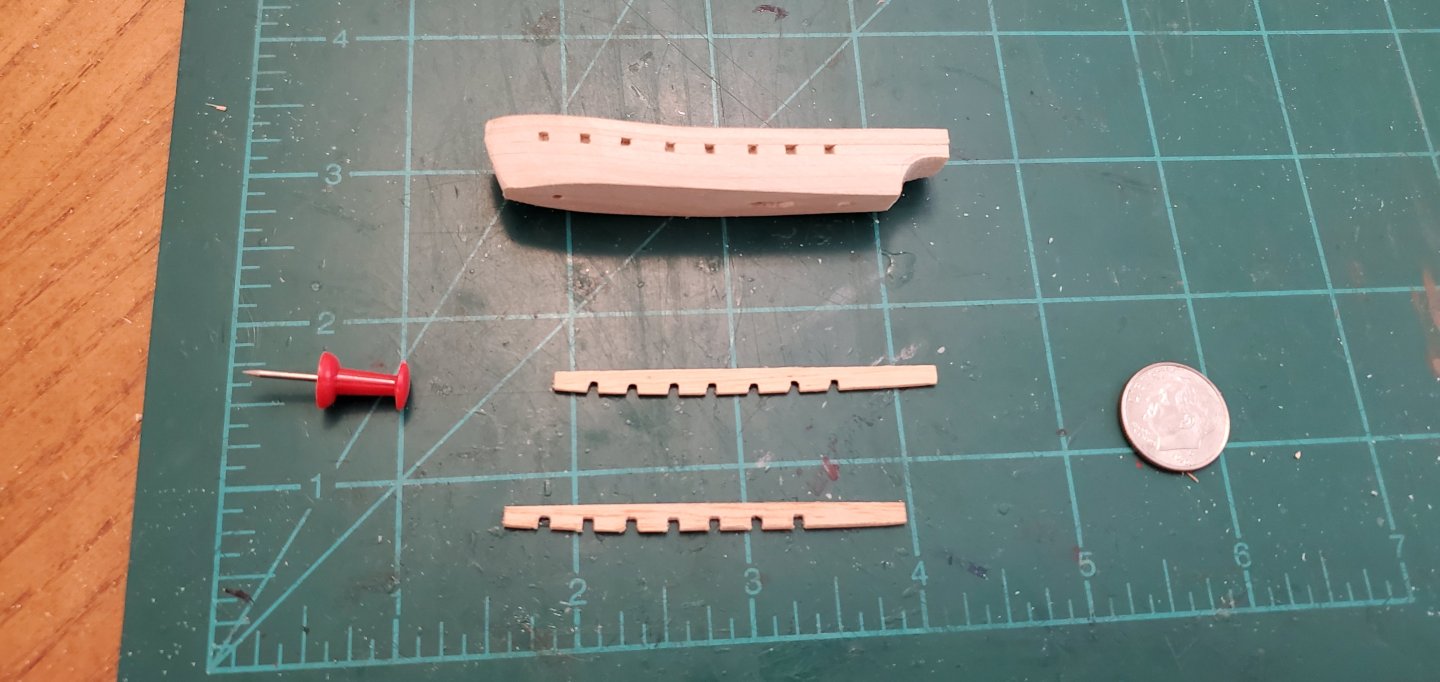
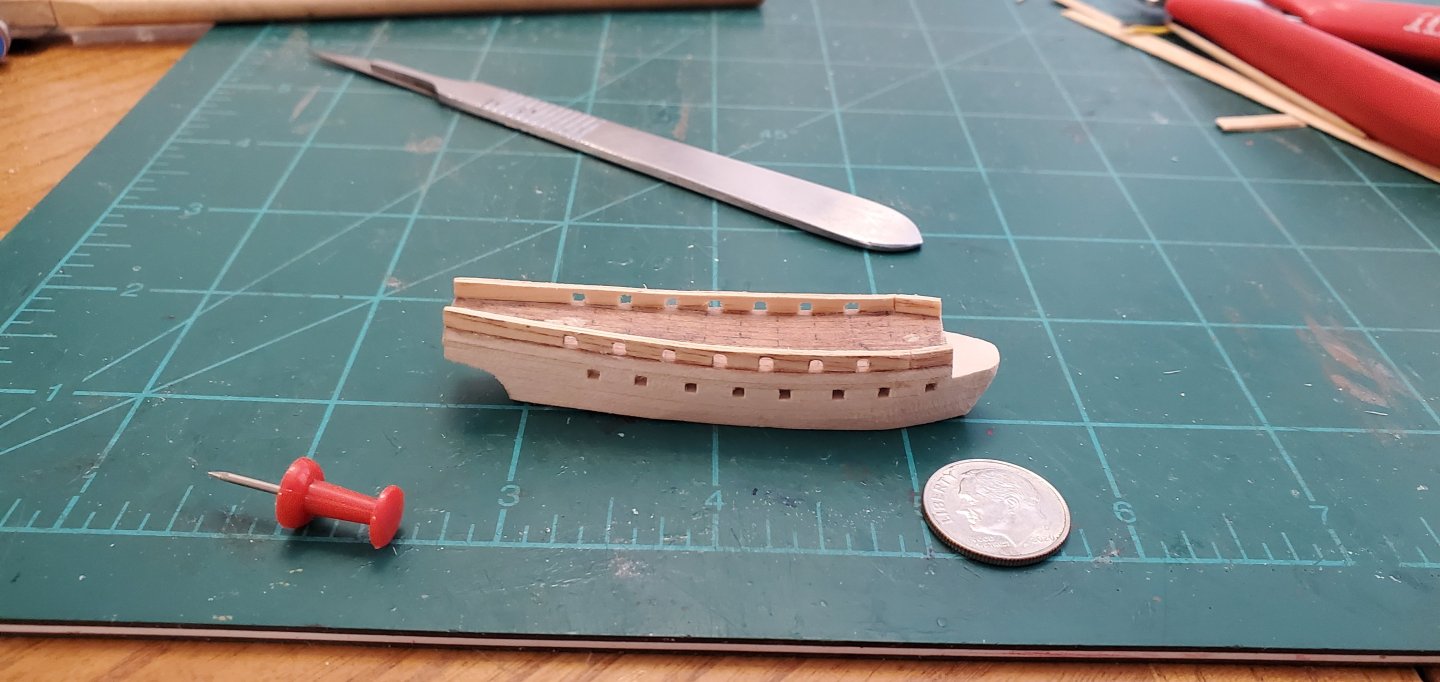
That is a really cool build, Ian. And my fireball is similar to the explosions on that sub with LED lighting and cotton balls for the explosion. Plus, that builder did a nice job with his colors using a paint brush. And glad to have you aboard here! At least you had the courtesy of not saying it reminded you of Disco Inferno! Any references to disco should be grounds for suspension from MSW. The next step for the ship is making the channels, which is always a painstaking chore. I'm not sure I've ever gone into much detail on how I make the channels so I'll give a little more info here. I start with bamboo stir sticks that I borrowed from a Panera Bread restaurant. I like to use bamboo on things I'm drilling tiny holes into because it does not splinter easily nor does it have any fuzz. You can make very tiny and very clean holes. The shape of the stir sticks is almost a very flat ellipse. So before drilling, I sand the tops and bottoms flat and square off the sides. Next, I mark the channel holes 1/16" apart - 6 holes for the fore and main (4 shrouds and 2 backstays) and 4 holes for the mizzen (3 shrouds and 1 backstay). Then I drill pilot holes with a .015" drill bit followed by the final hole at .018" diameter. Uniform spacing and straight alignment of the holes is the biggest challenge for me. To finish off the channels, I cut them apart then file down the sides as close as I can to the holes. The narrower the channels, the easier it should be to push the ship in the bottle. Without fail, however, my channels always seem to scrape the inside of the bottle's neck when I am inserting the ship. Ugh. After I took the pic below, I realized that I could get the margins closer to the holes on some of those channels, so I did. Once I was happy with the channel construction, I glued them in place and decided it was time to give the Queen's outer hull her first coat of paint. I took a screenshot from a movie clip to give me a color to try and match. The sides are kind of a dirty, faded red (with ugly sails to match). So here's my attempt at a color match. I think I got fairly close, but I still may do a bit of smudging to dirty it up just a bit more.


- 156 replies
-
- 15
-
-
-
- Queen Annes Revenge
- bottle
- (and 1 more)
-
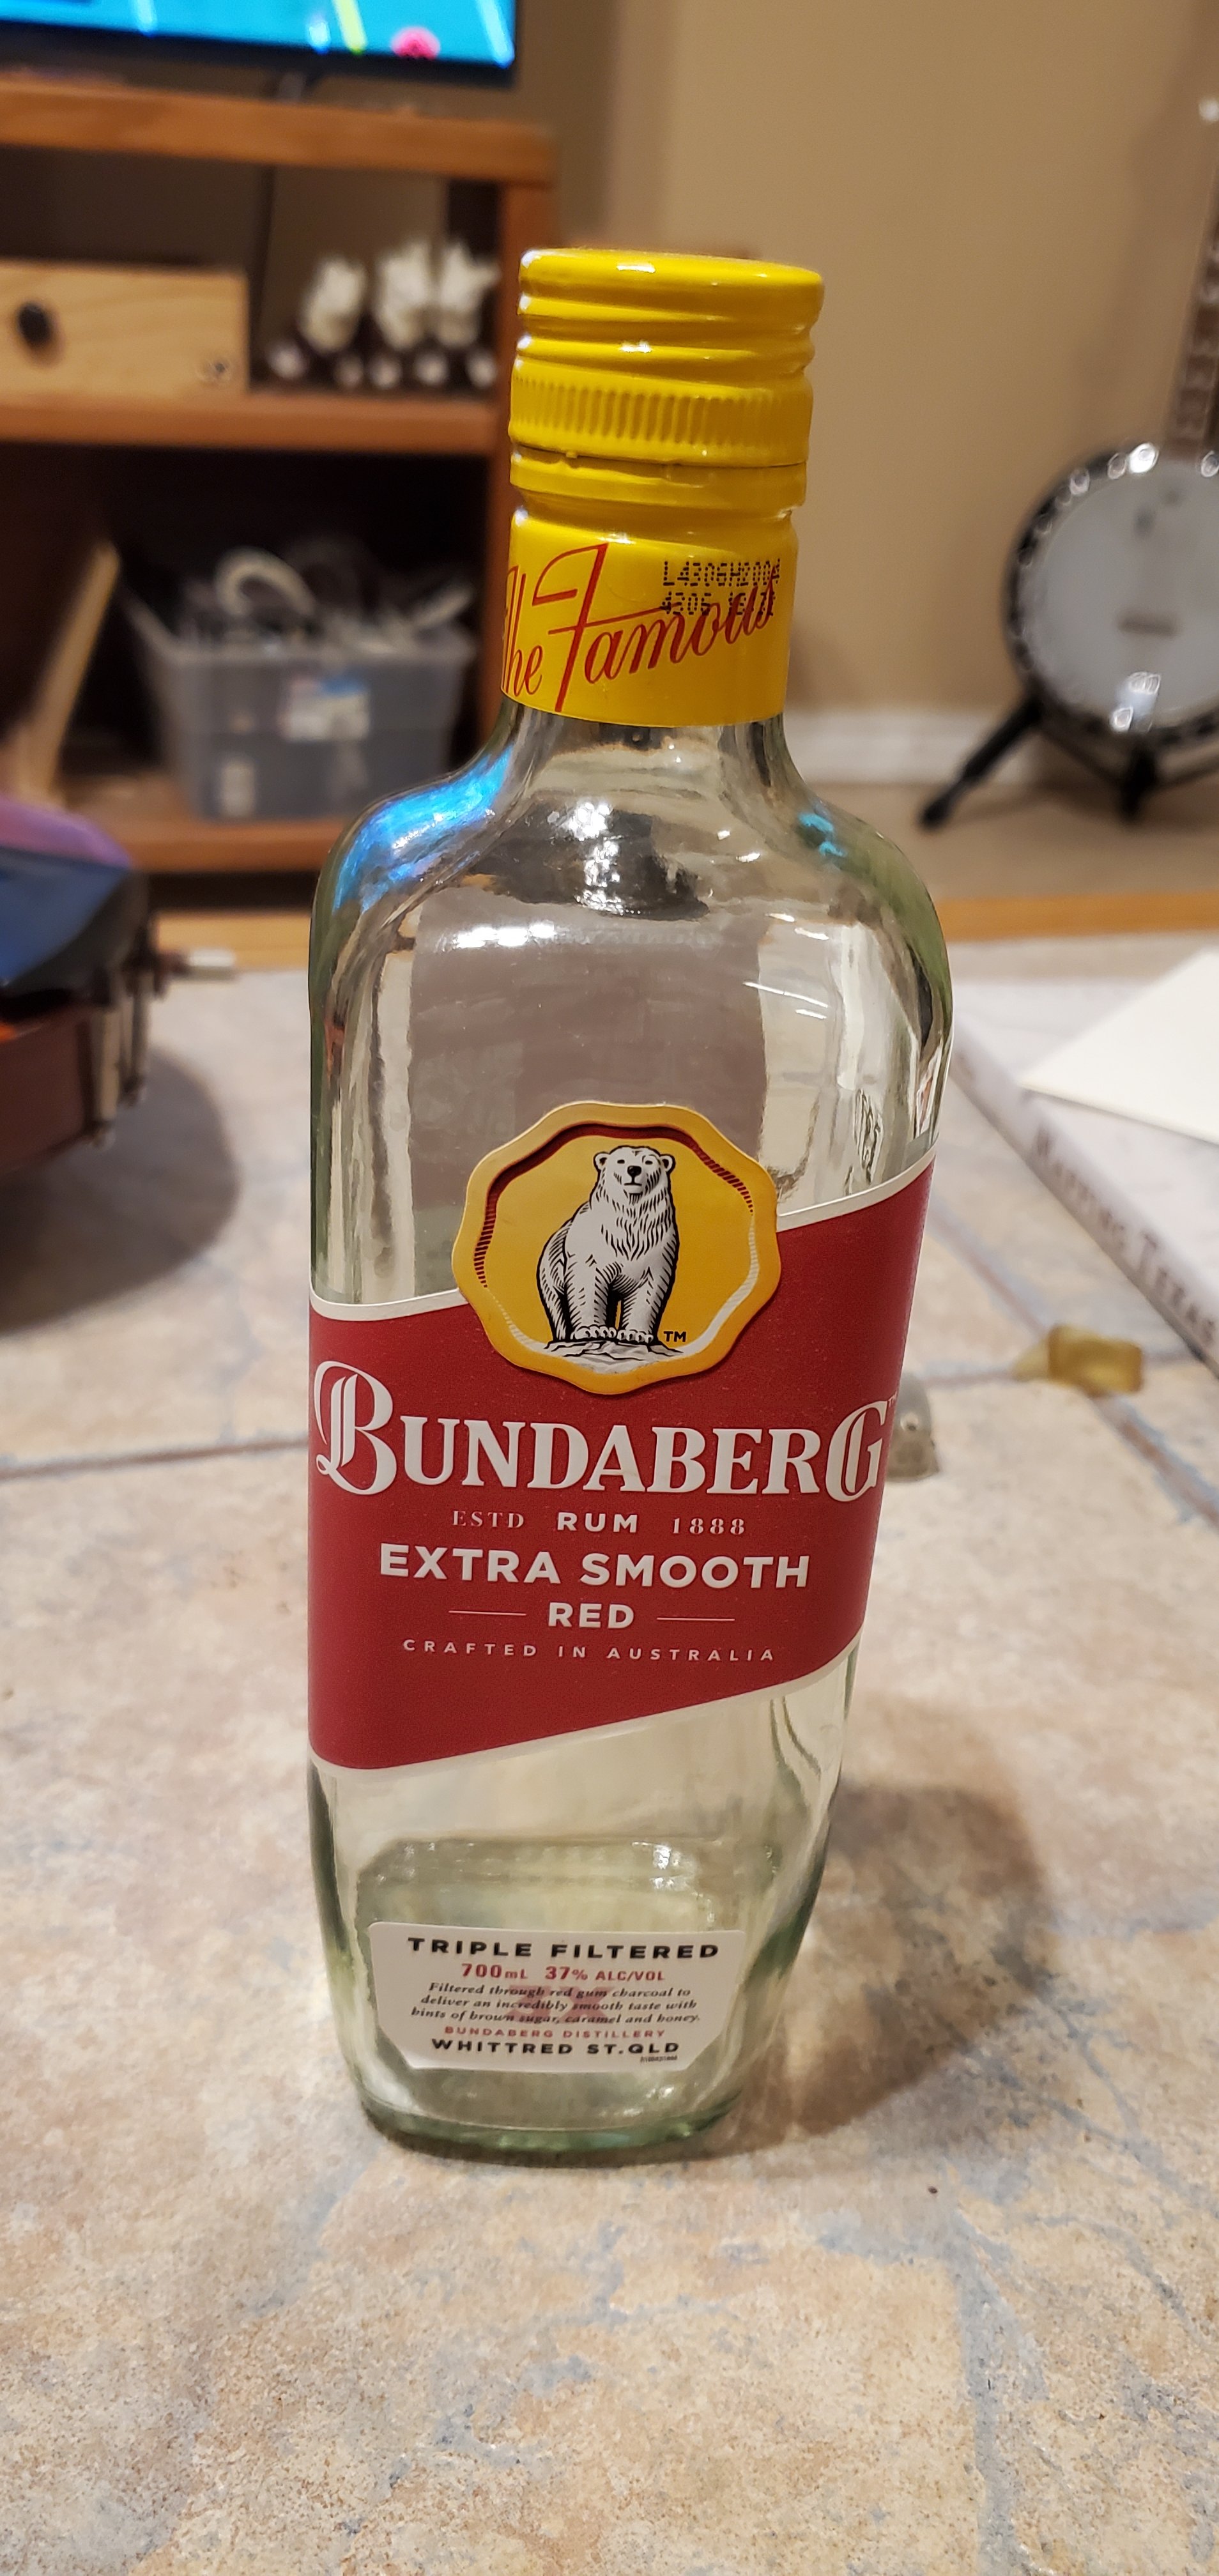
I decided it looks like a light saber! LOL! Well, I can't blame it on the Bundy you sent me as it's gone! But don't be surprised to see that bottle show up in a future inspiration, Pat!

- 156 replies
-
- 7
-
-
- Queen Annes Revenge
- bottle
- (and 1 more)
-
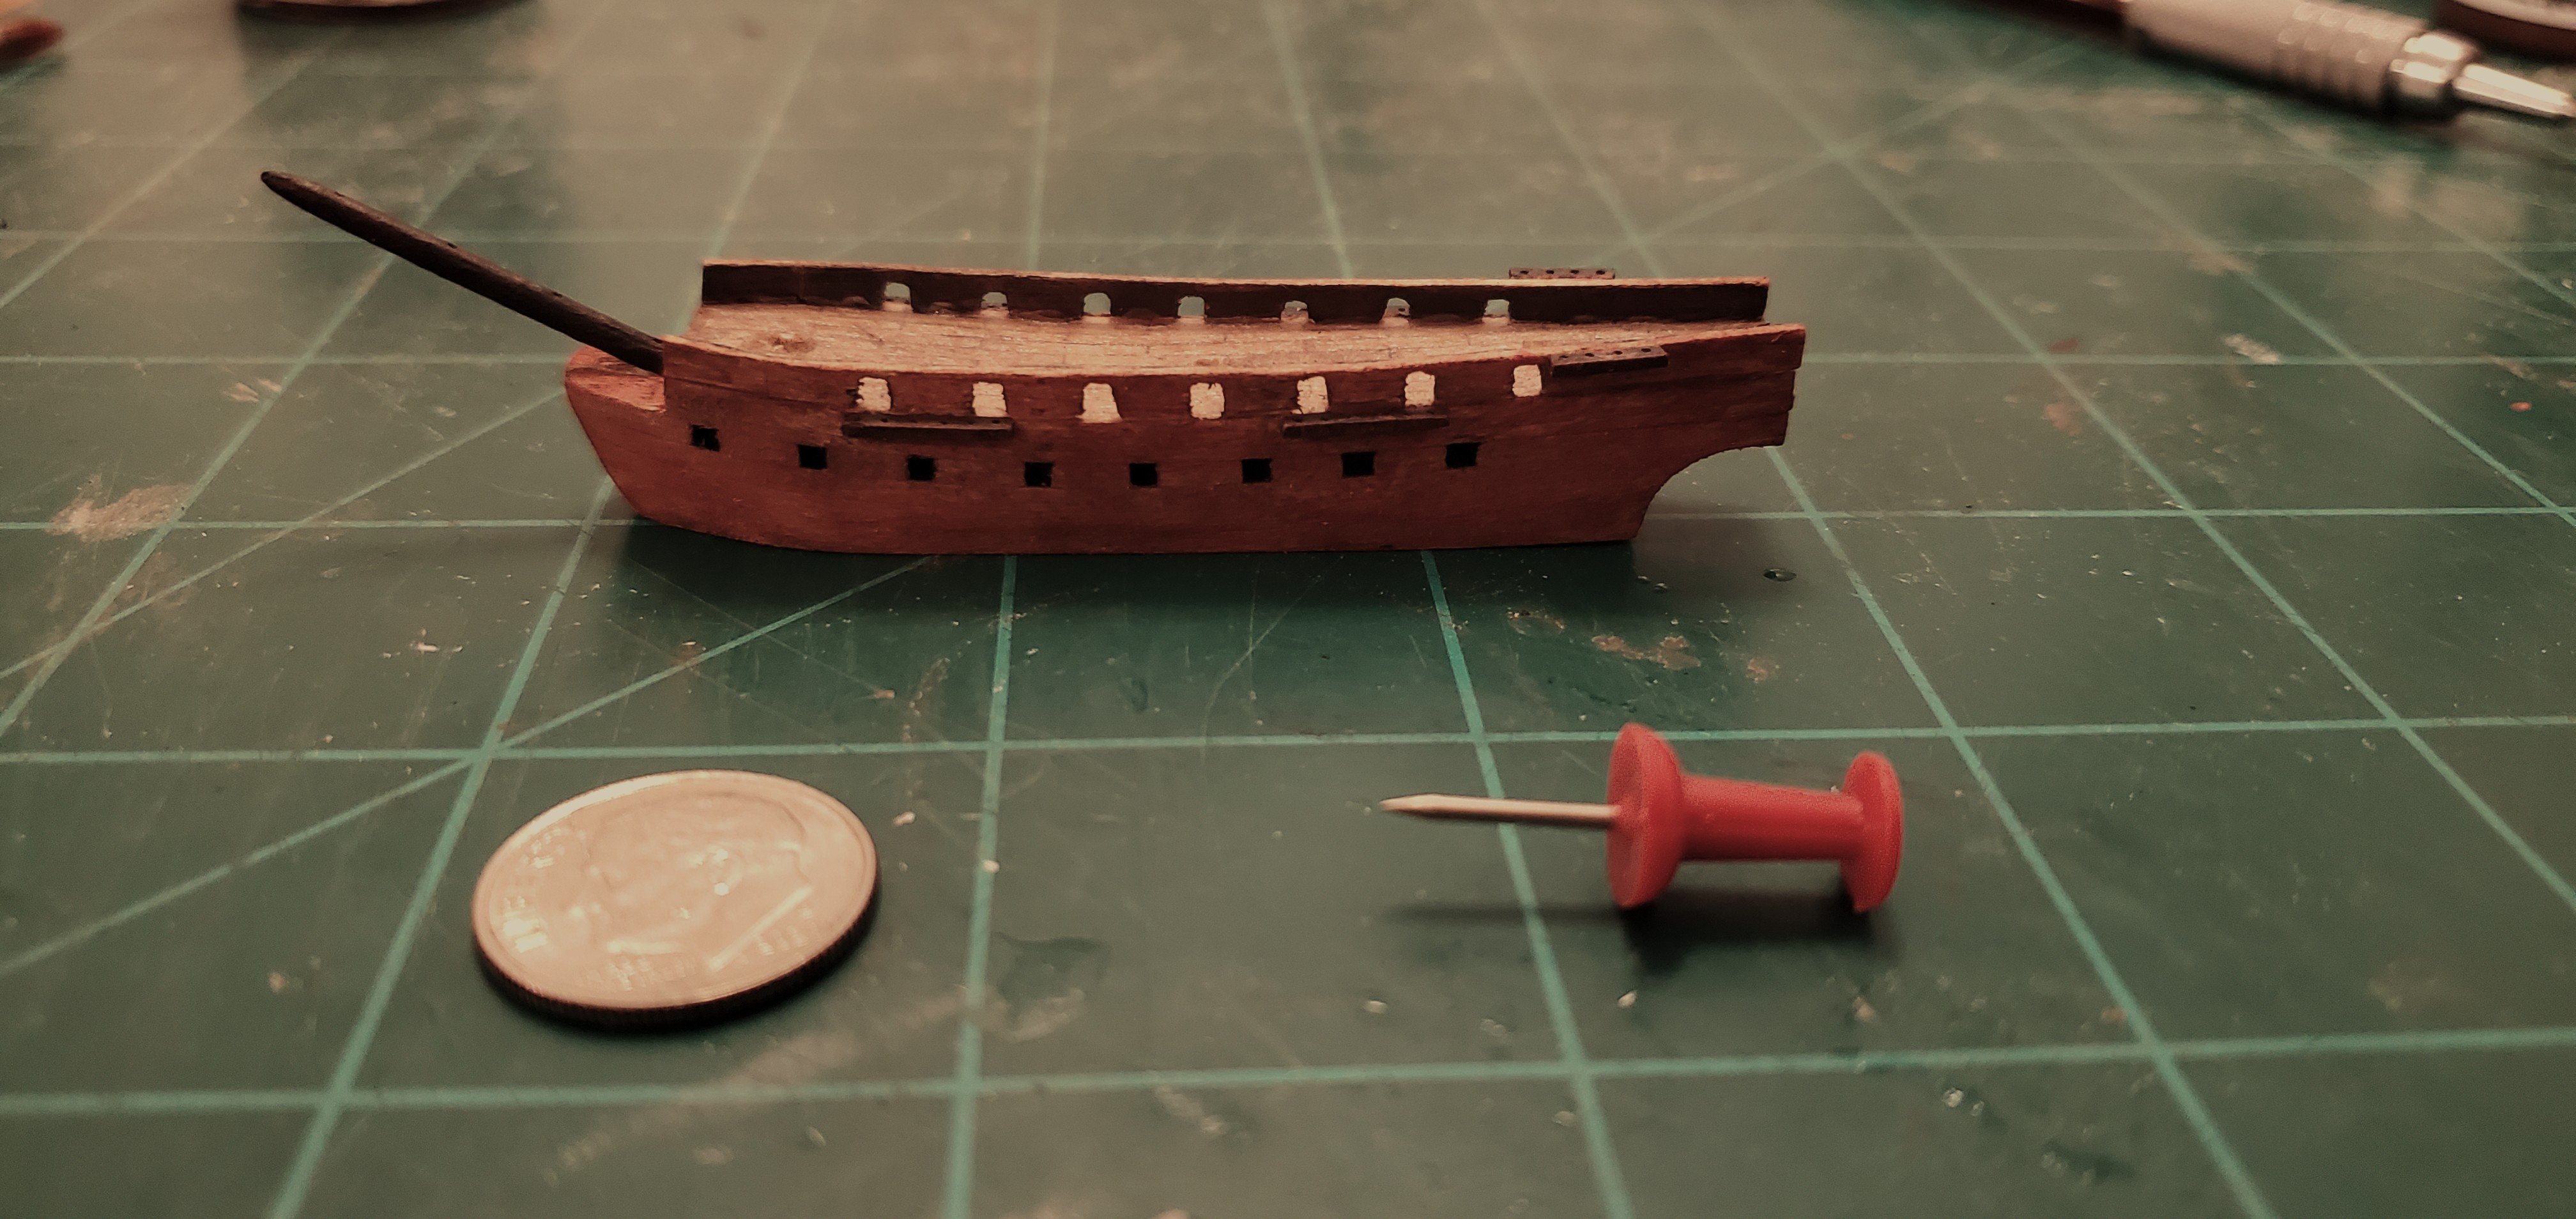
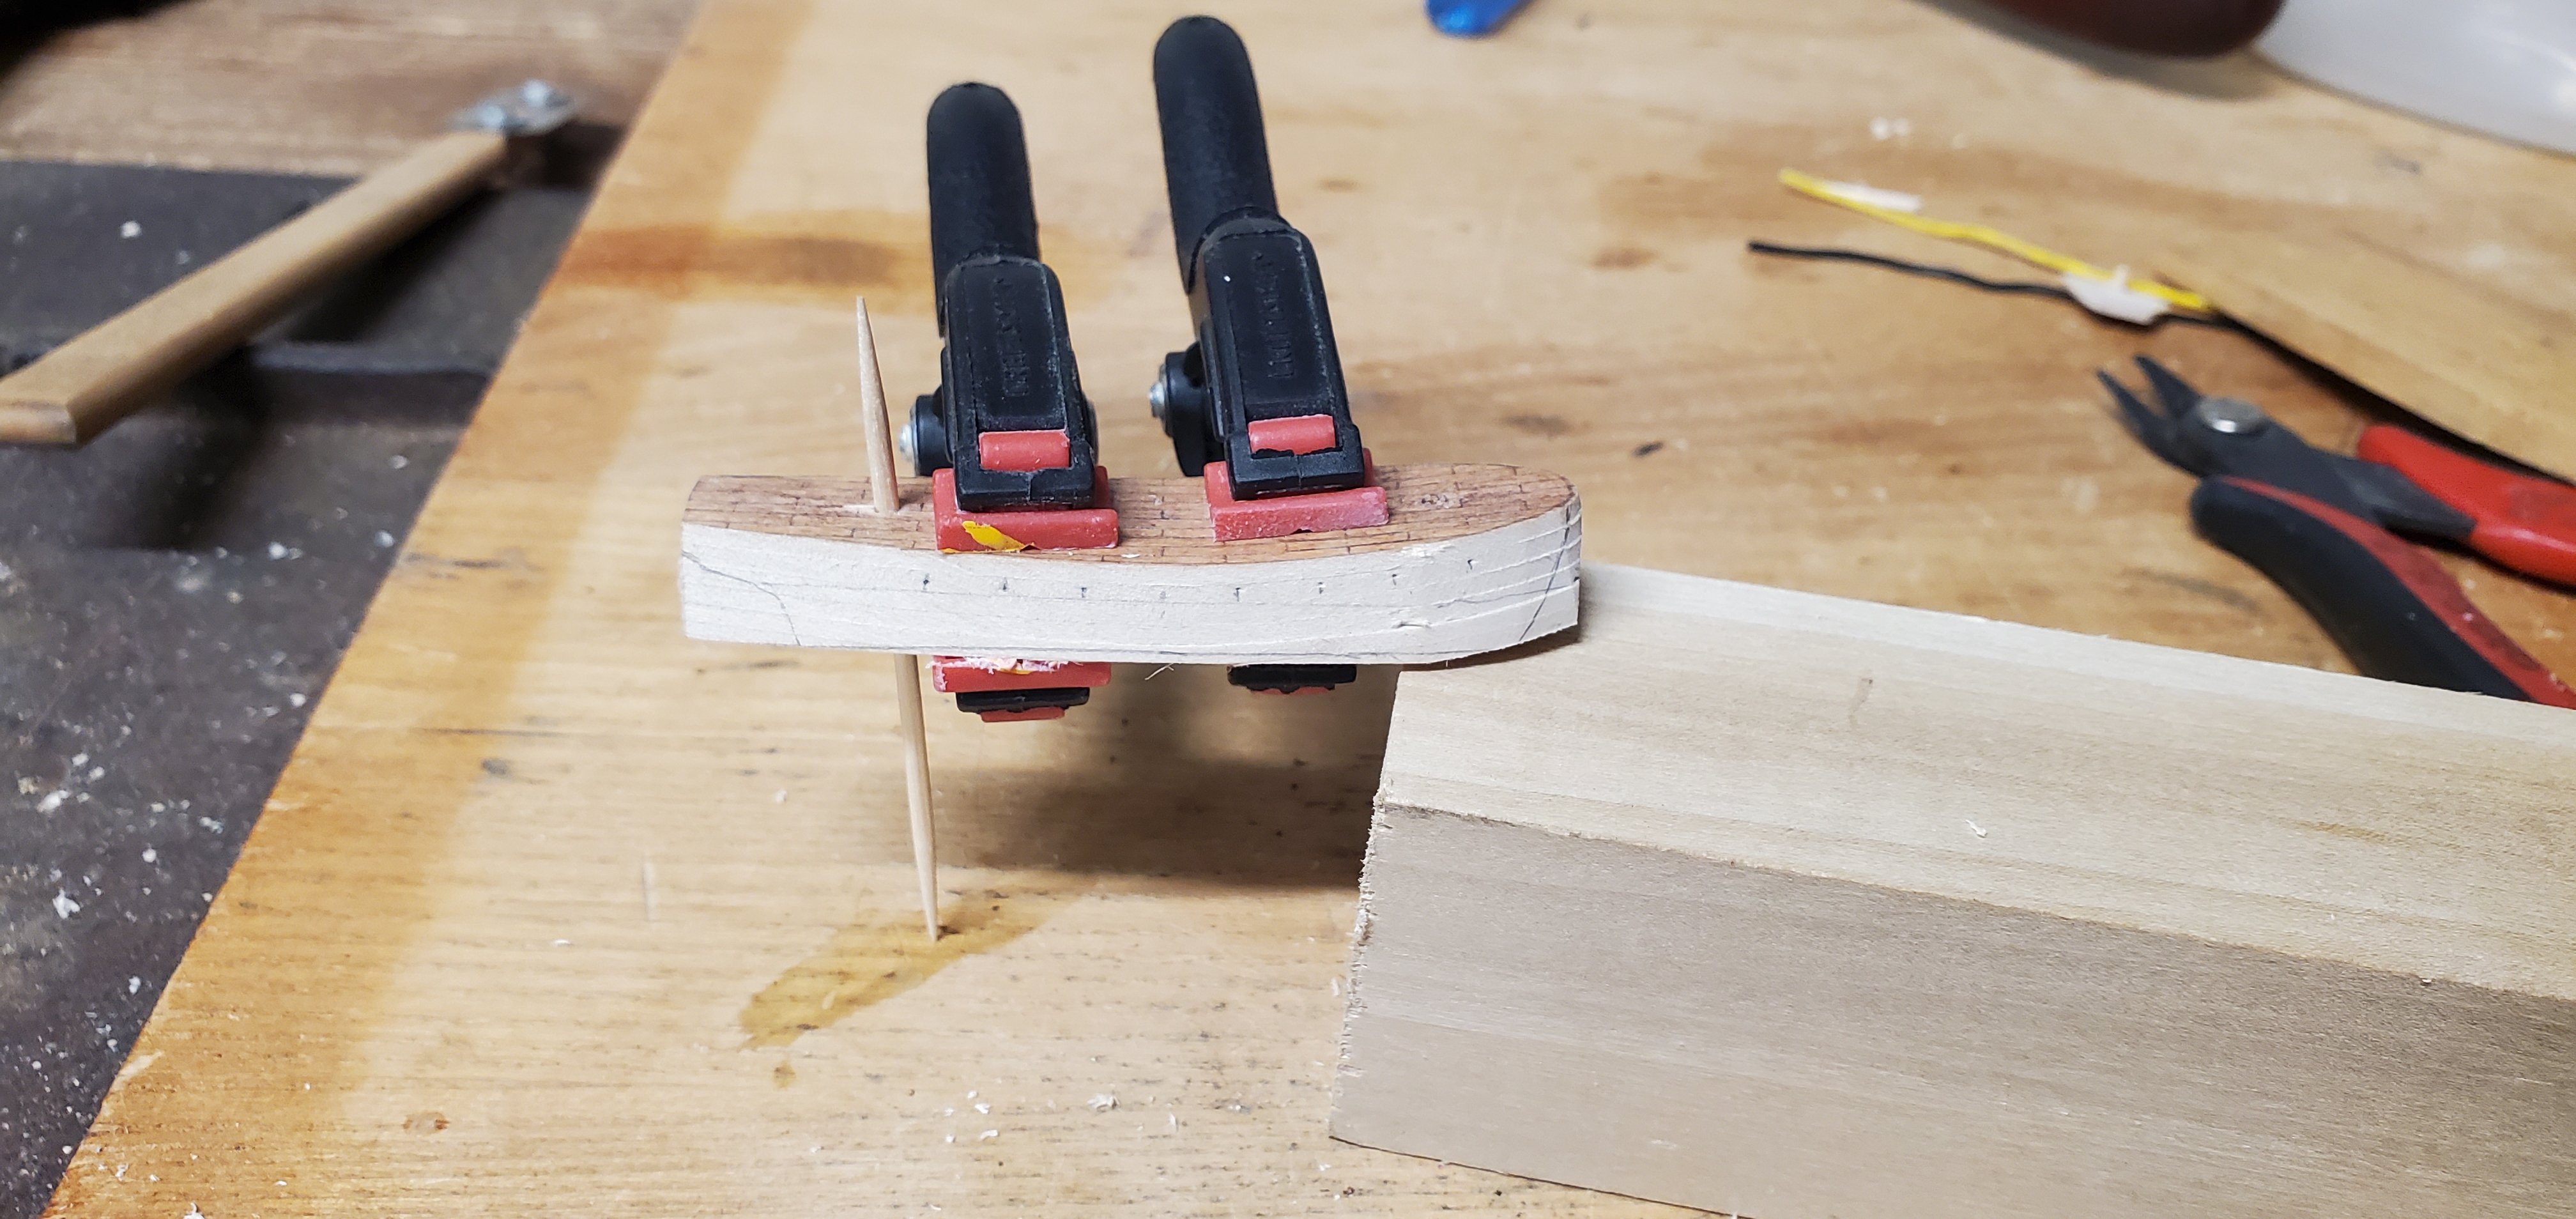
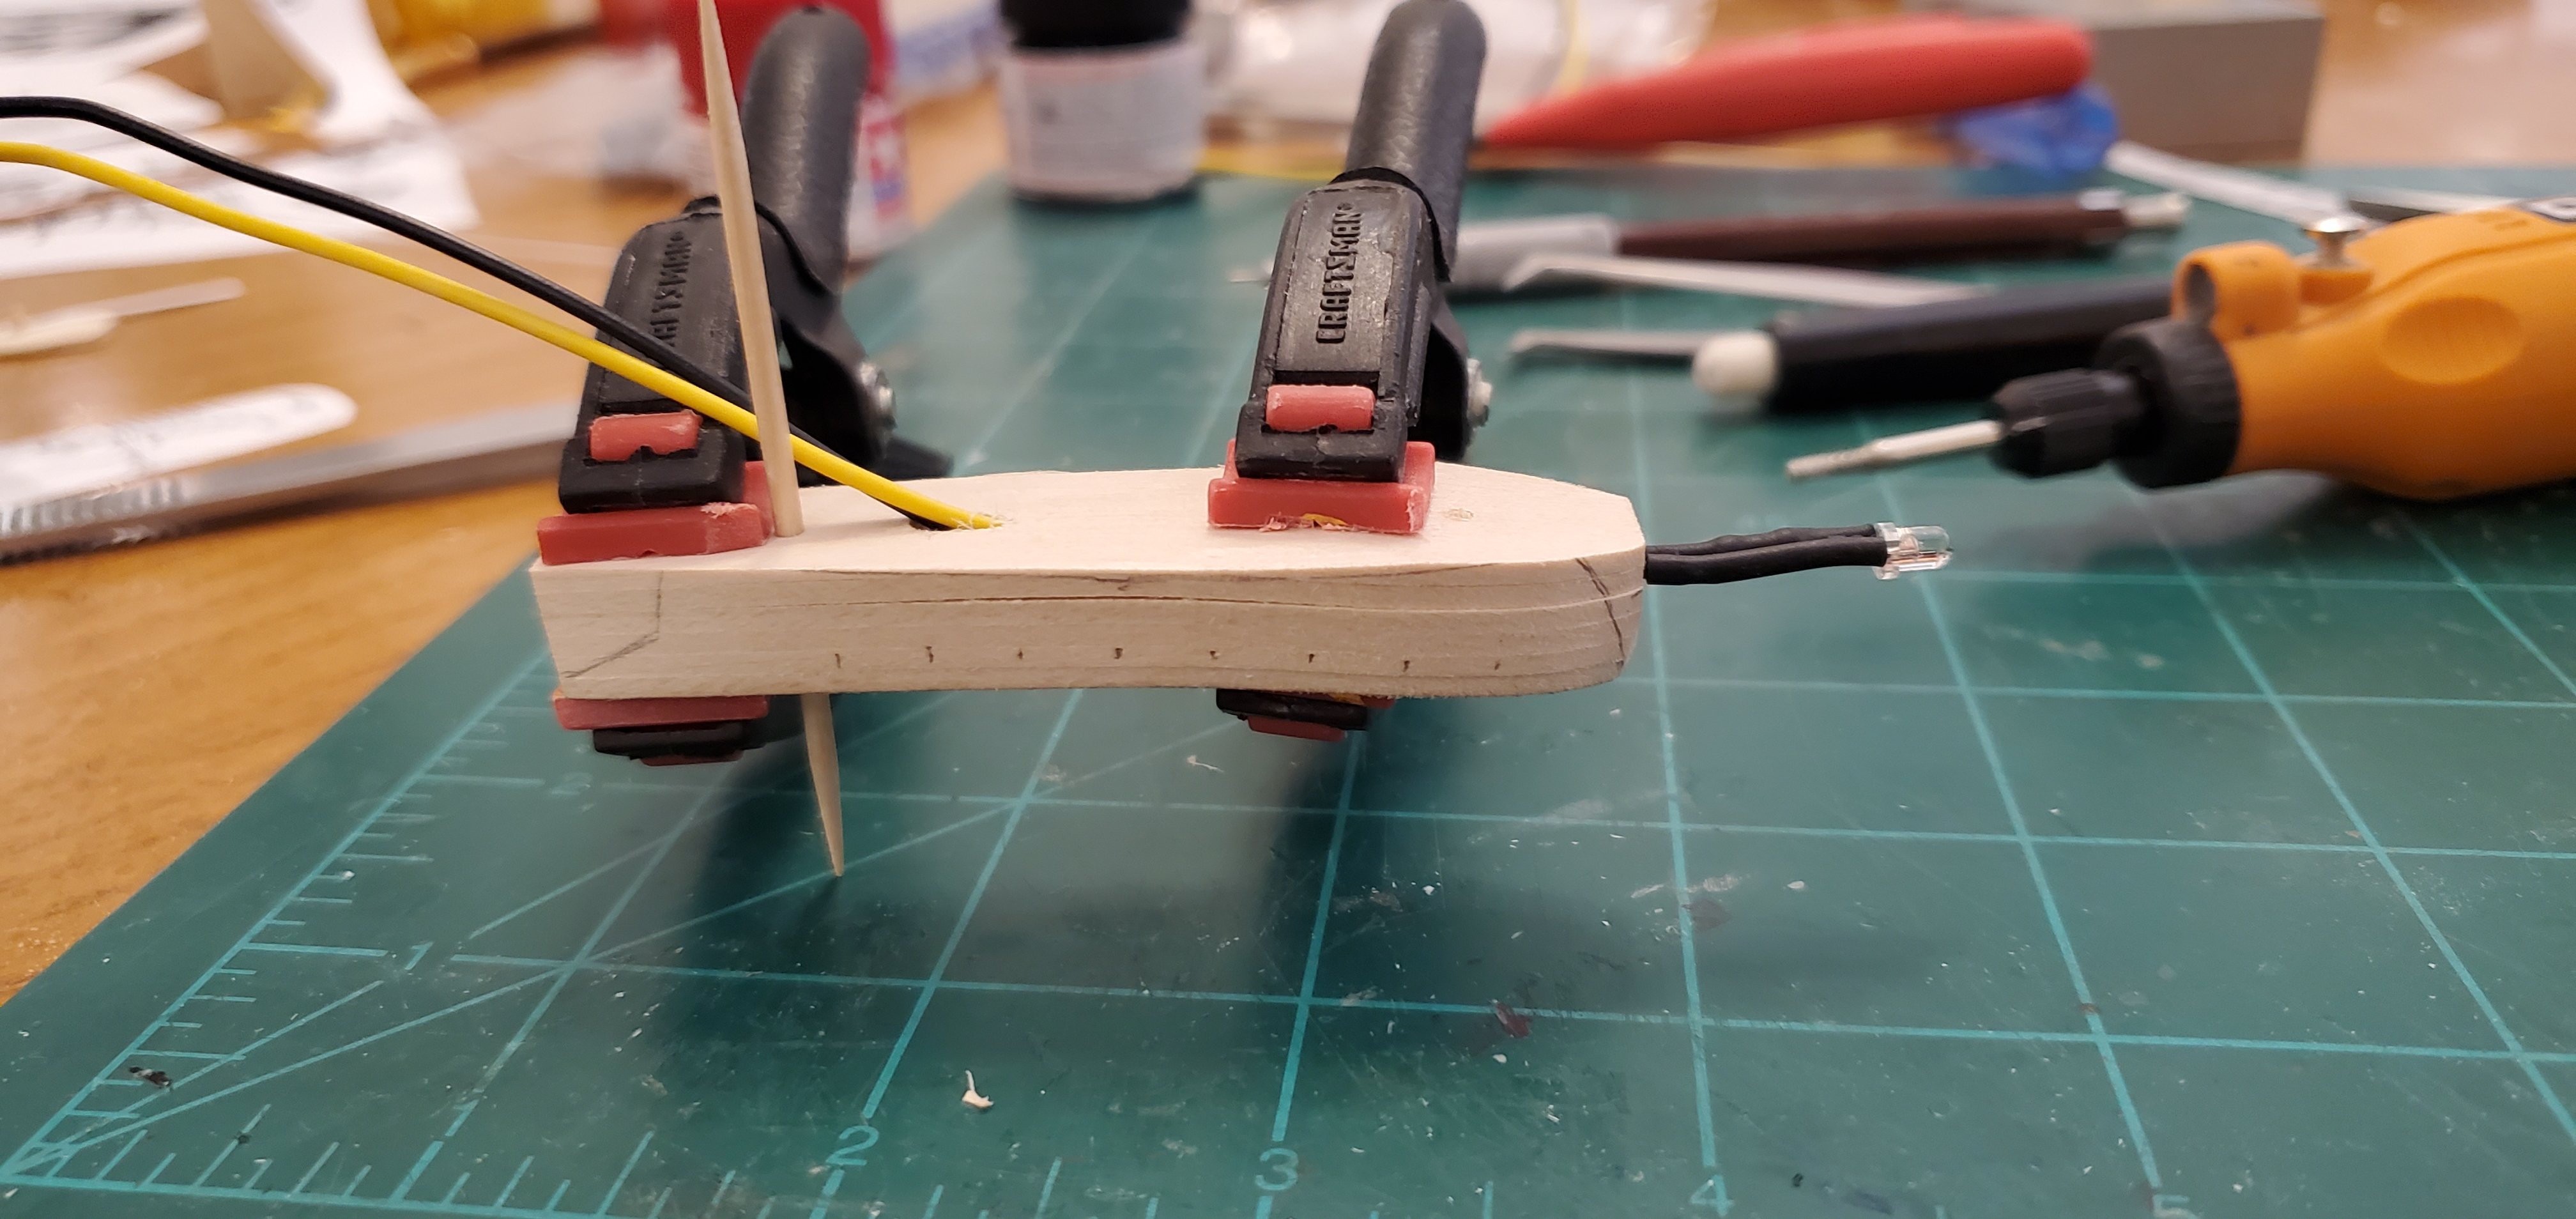
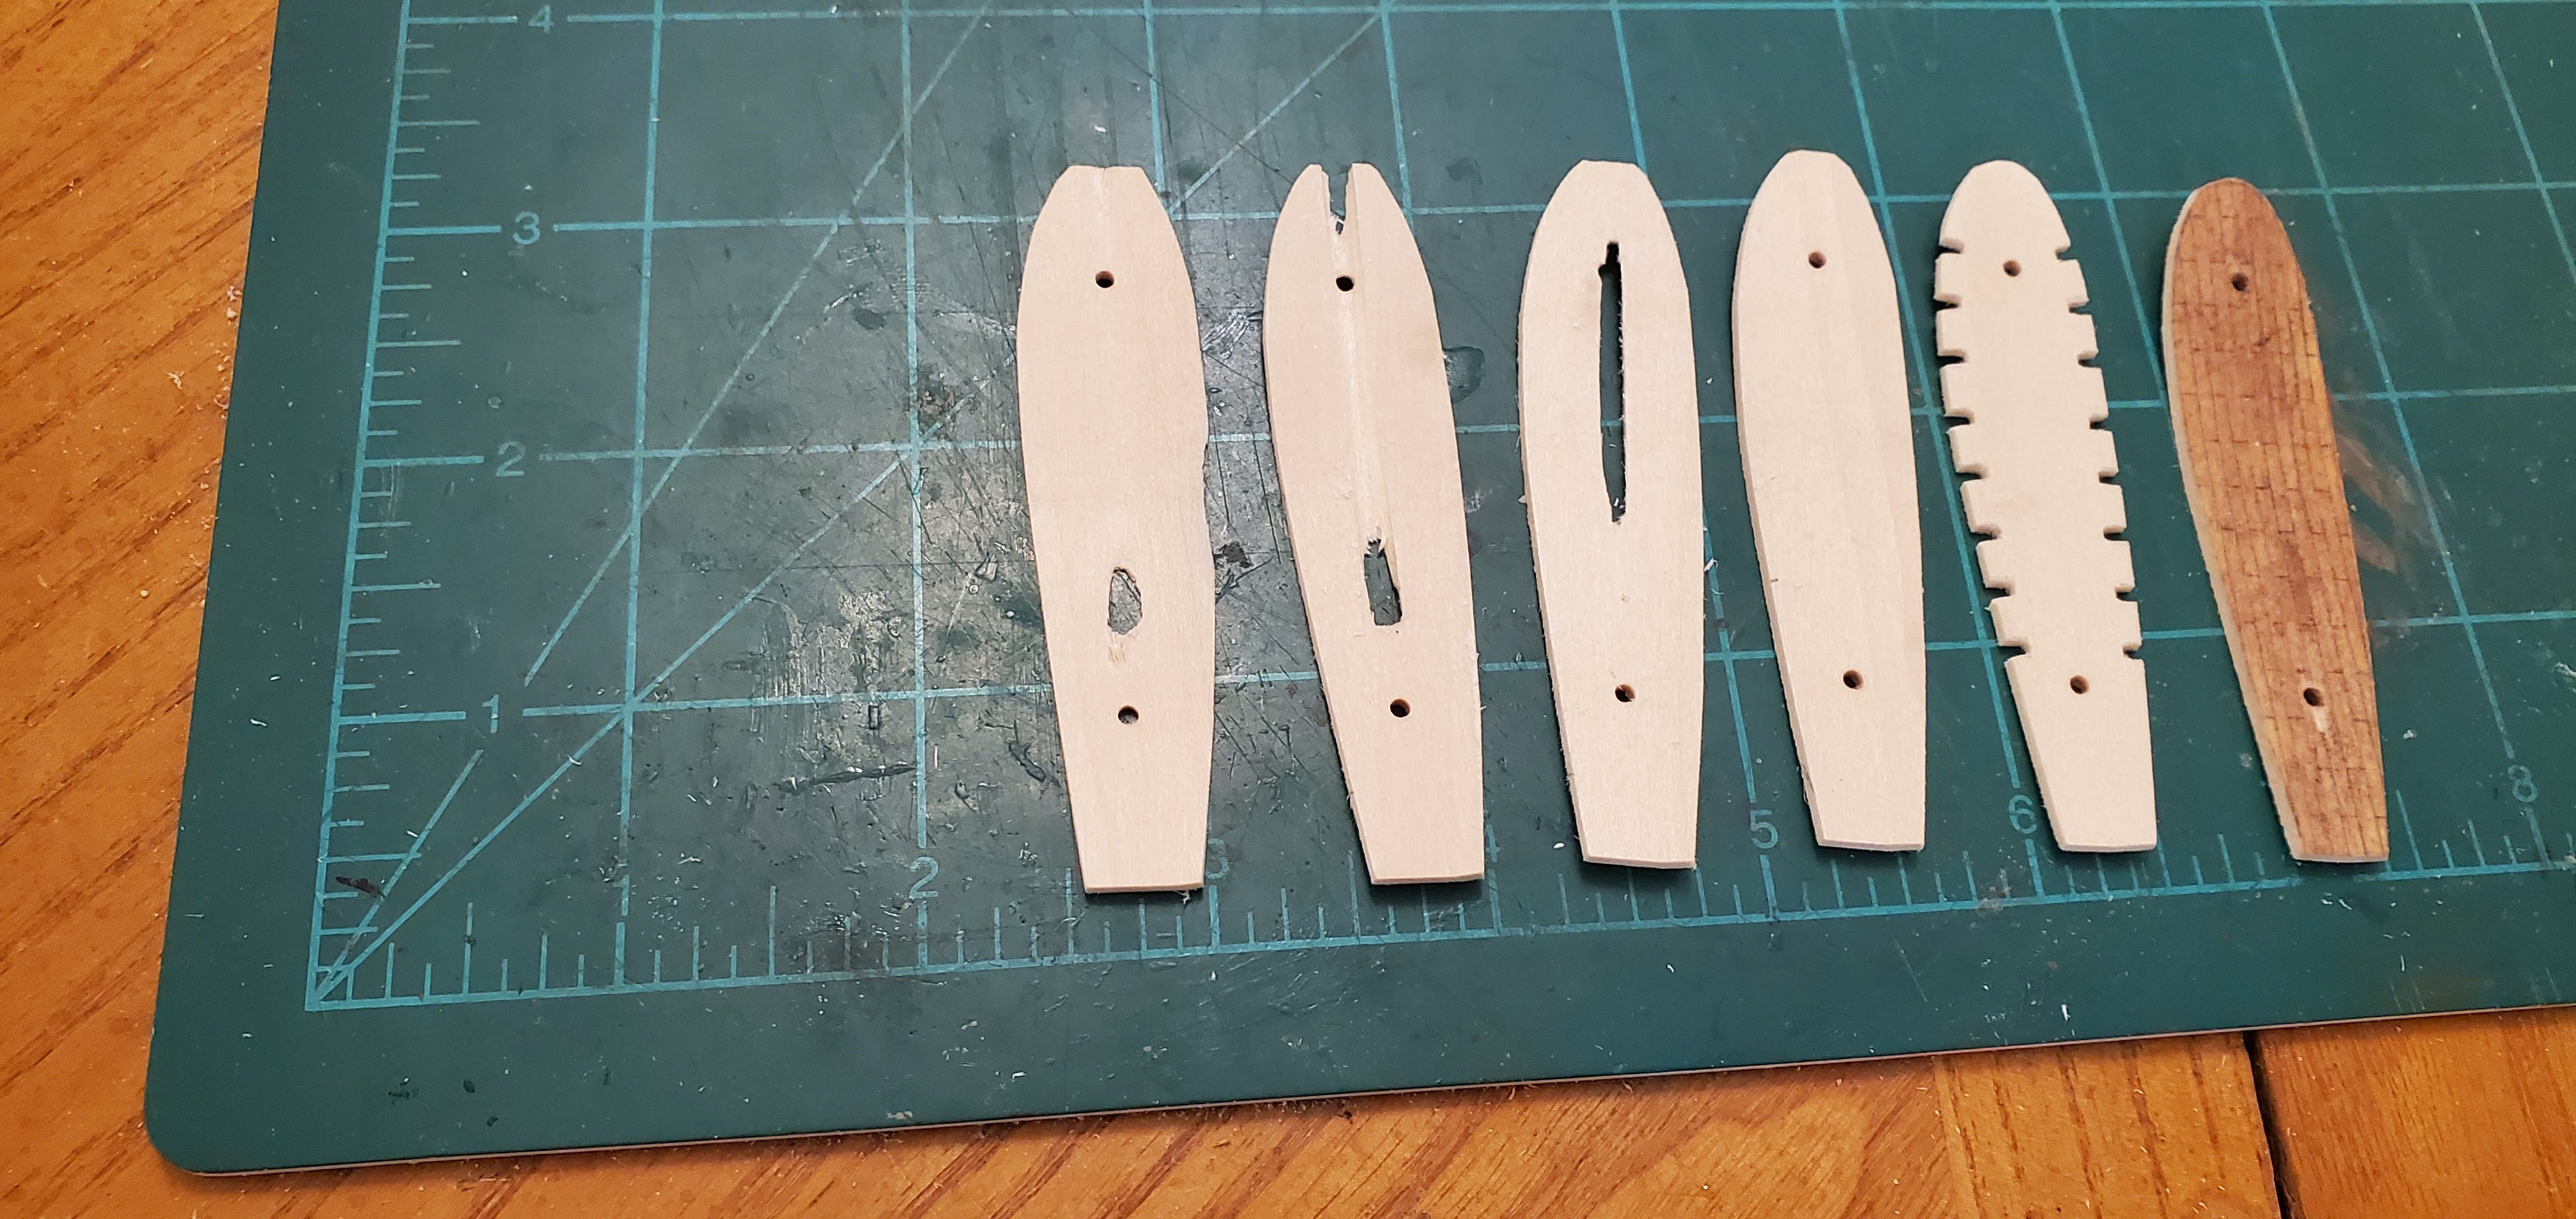
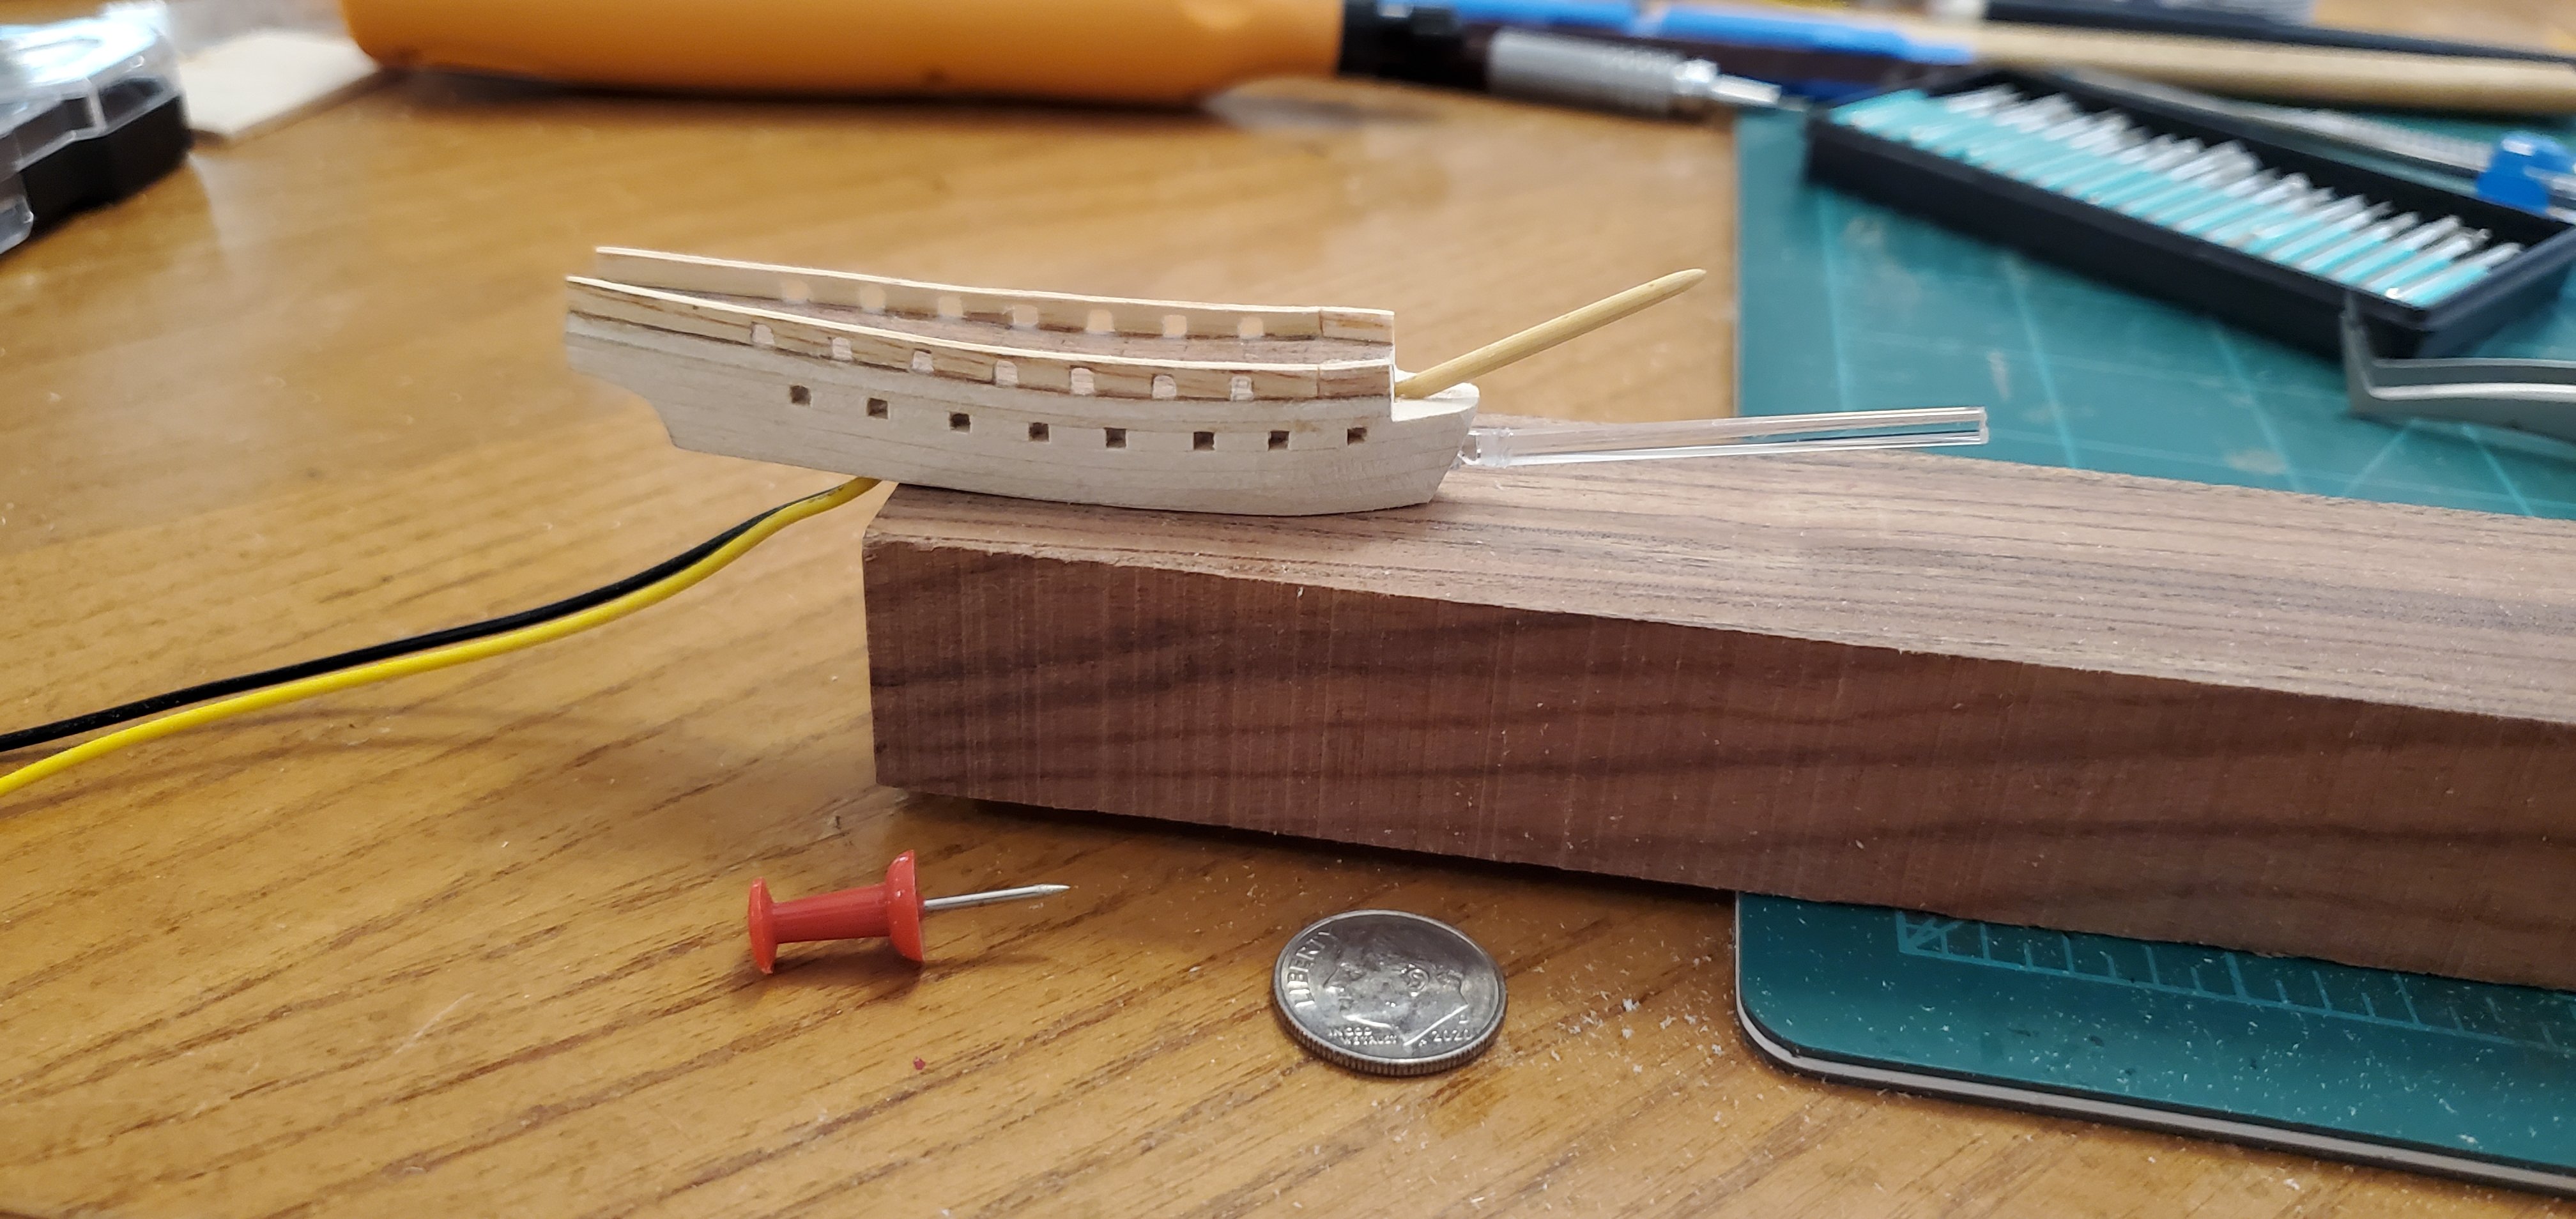
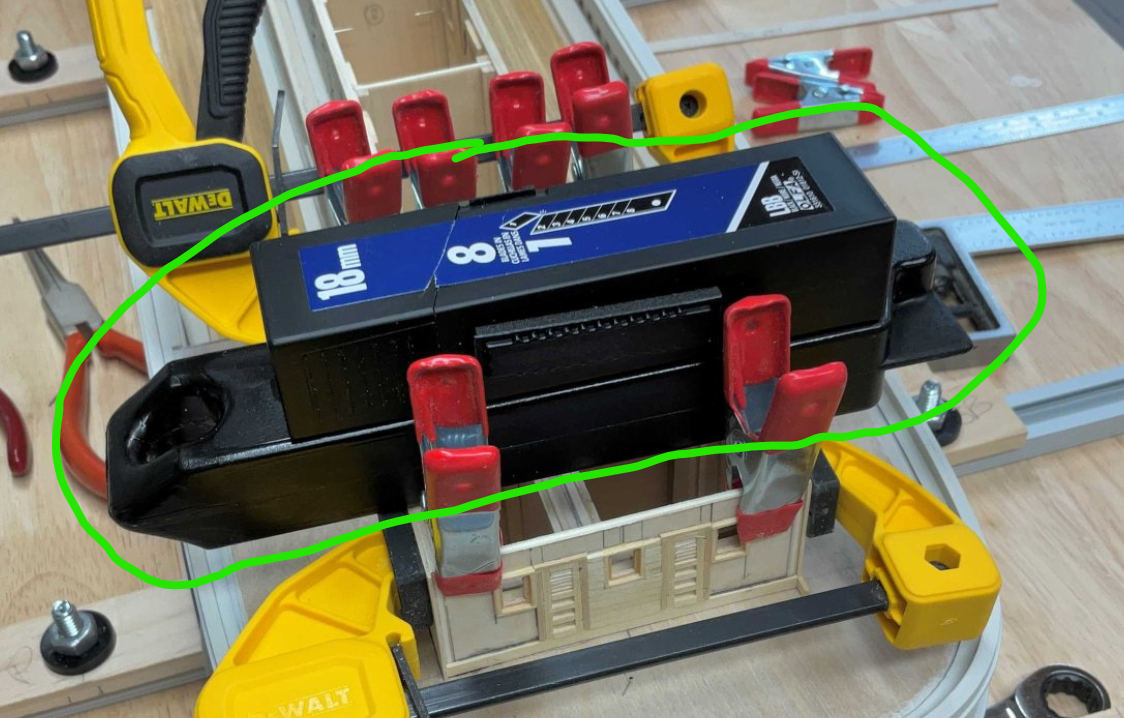
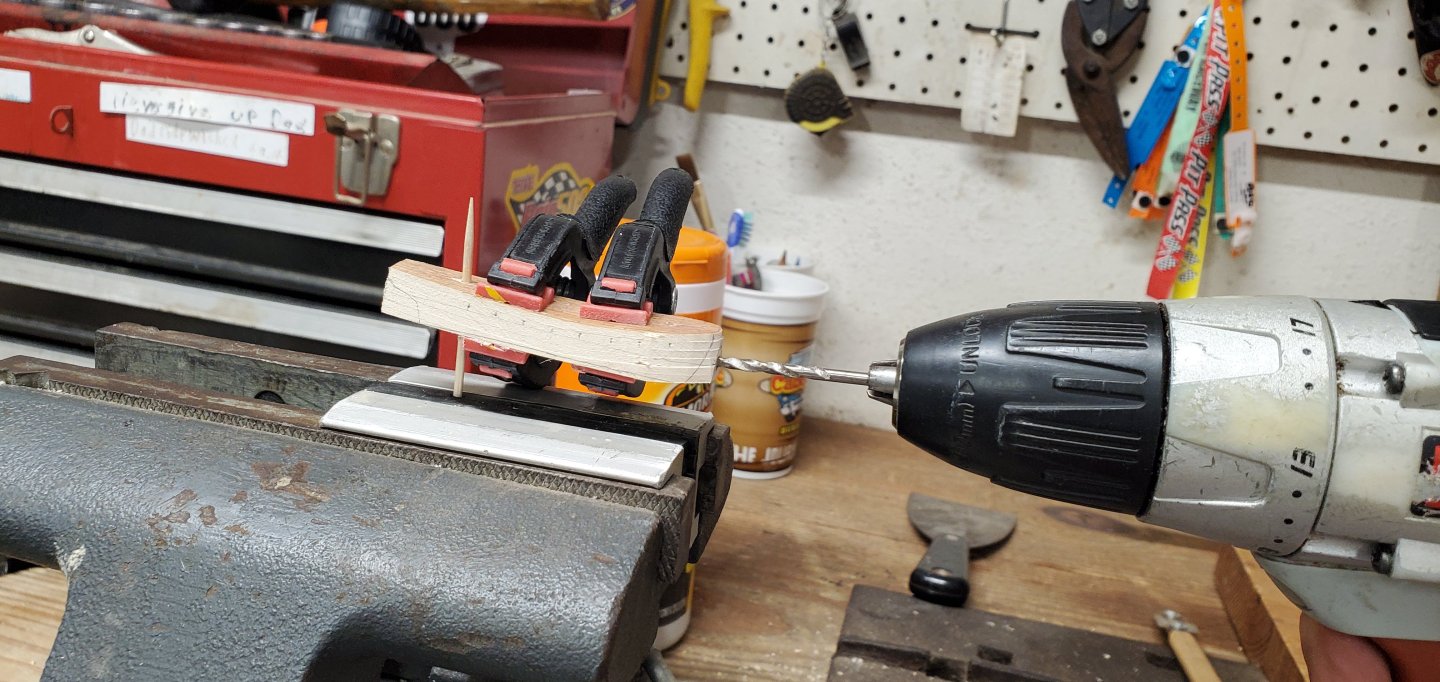
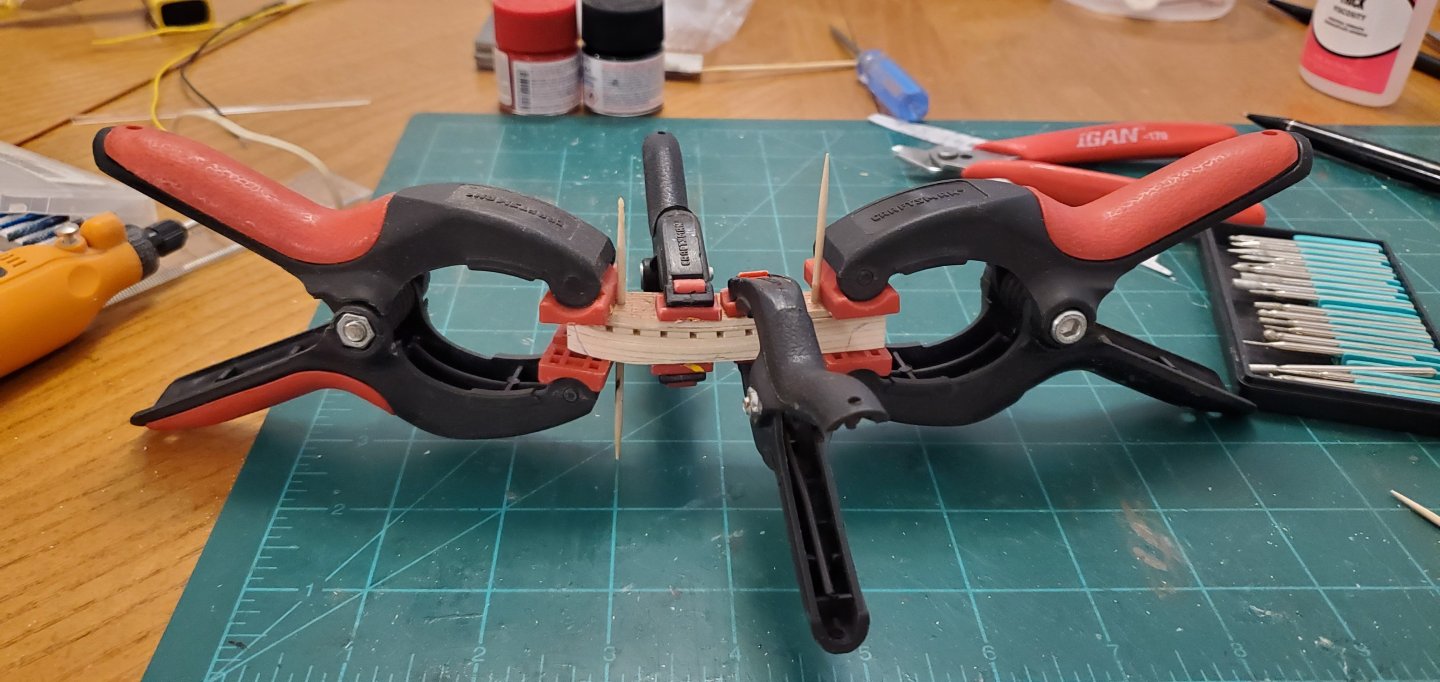
Yes, that would sure make these projects a lot less stressful!! Thanks, Gary. Glad to have you join the fun! Continuing the construction of the hull. I stacked my hull layers and sanded the down to the hull's basic shape. Before doing the final shaping, I decided to cut the tunnel for the LED and wires. I also decided to wait on gluing the layers together until I was satisfied with the tunnel, hence the heavy clamping below. The toothpick helps keep the layers aligned and gives me a way to secure the assembly in the vise for drilling the tunnel. I used a 1/8" drill bit for the tunnel. My main concern was keeping the bore straight and just below the gun deck (you can see the pencil marks for the gun ports below). And a test fit of the wires: Satisfied with the tunnel, I pulled the layers apart and cut the notches in the gun deck (2nd layer from right) where I will insert the cannon barrels later. The next step was to glue all the layers together. Next was additional shaping of the hull followed by work on the bulwarks. Bulwarks installed: Bowsprit added and another test fit of the LED (with light saber attached) and wires.


- 156 replies
-
- 15
-
-
-
- Queen Annes Revenge
- bottle
- (and 1 more)
-
When the master of oil tanker piping says you did a great job, Keith, you did a great job! Maybe a tanker for your next project??
- 457 replies
-
- 6
-
-
-
- sternwheeler
- Hard Coal Navy
- (and 1 more)
-
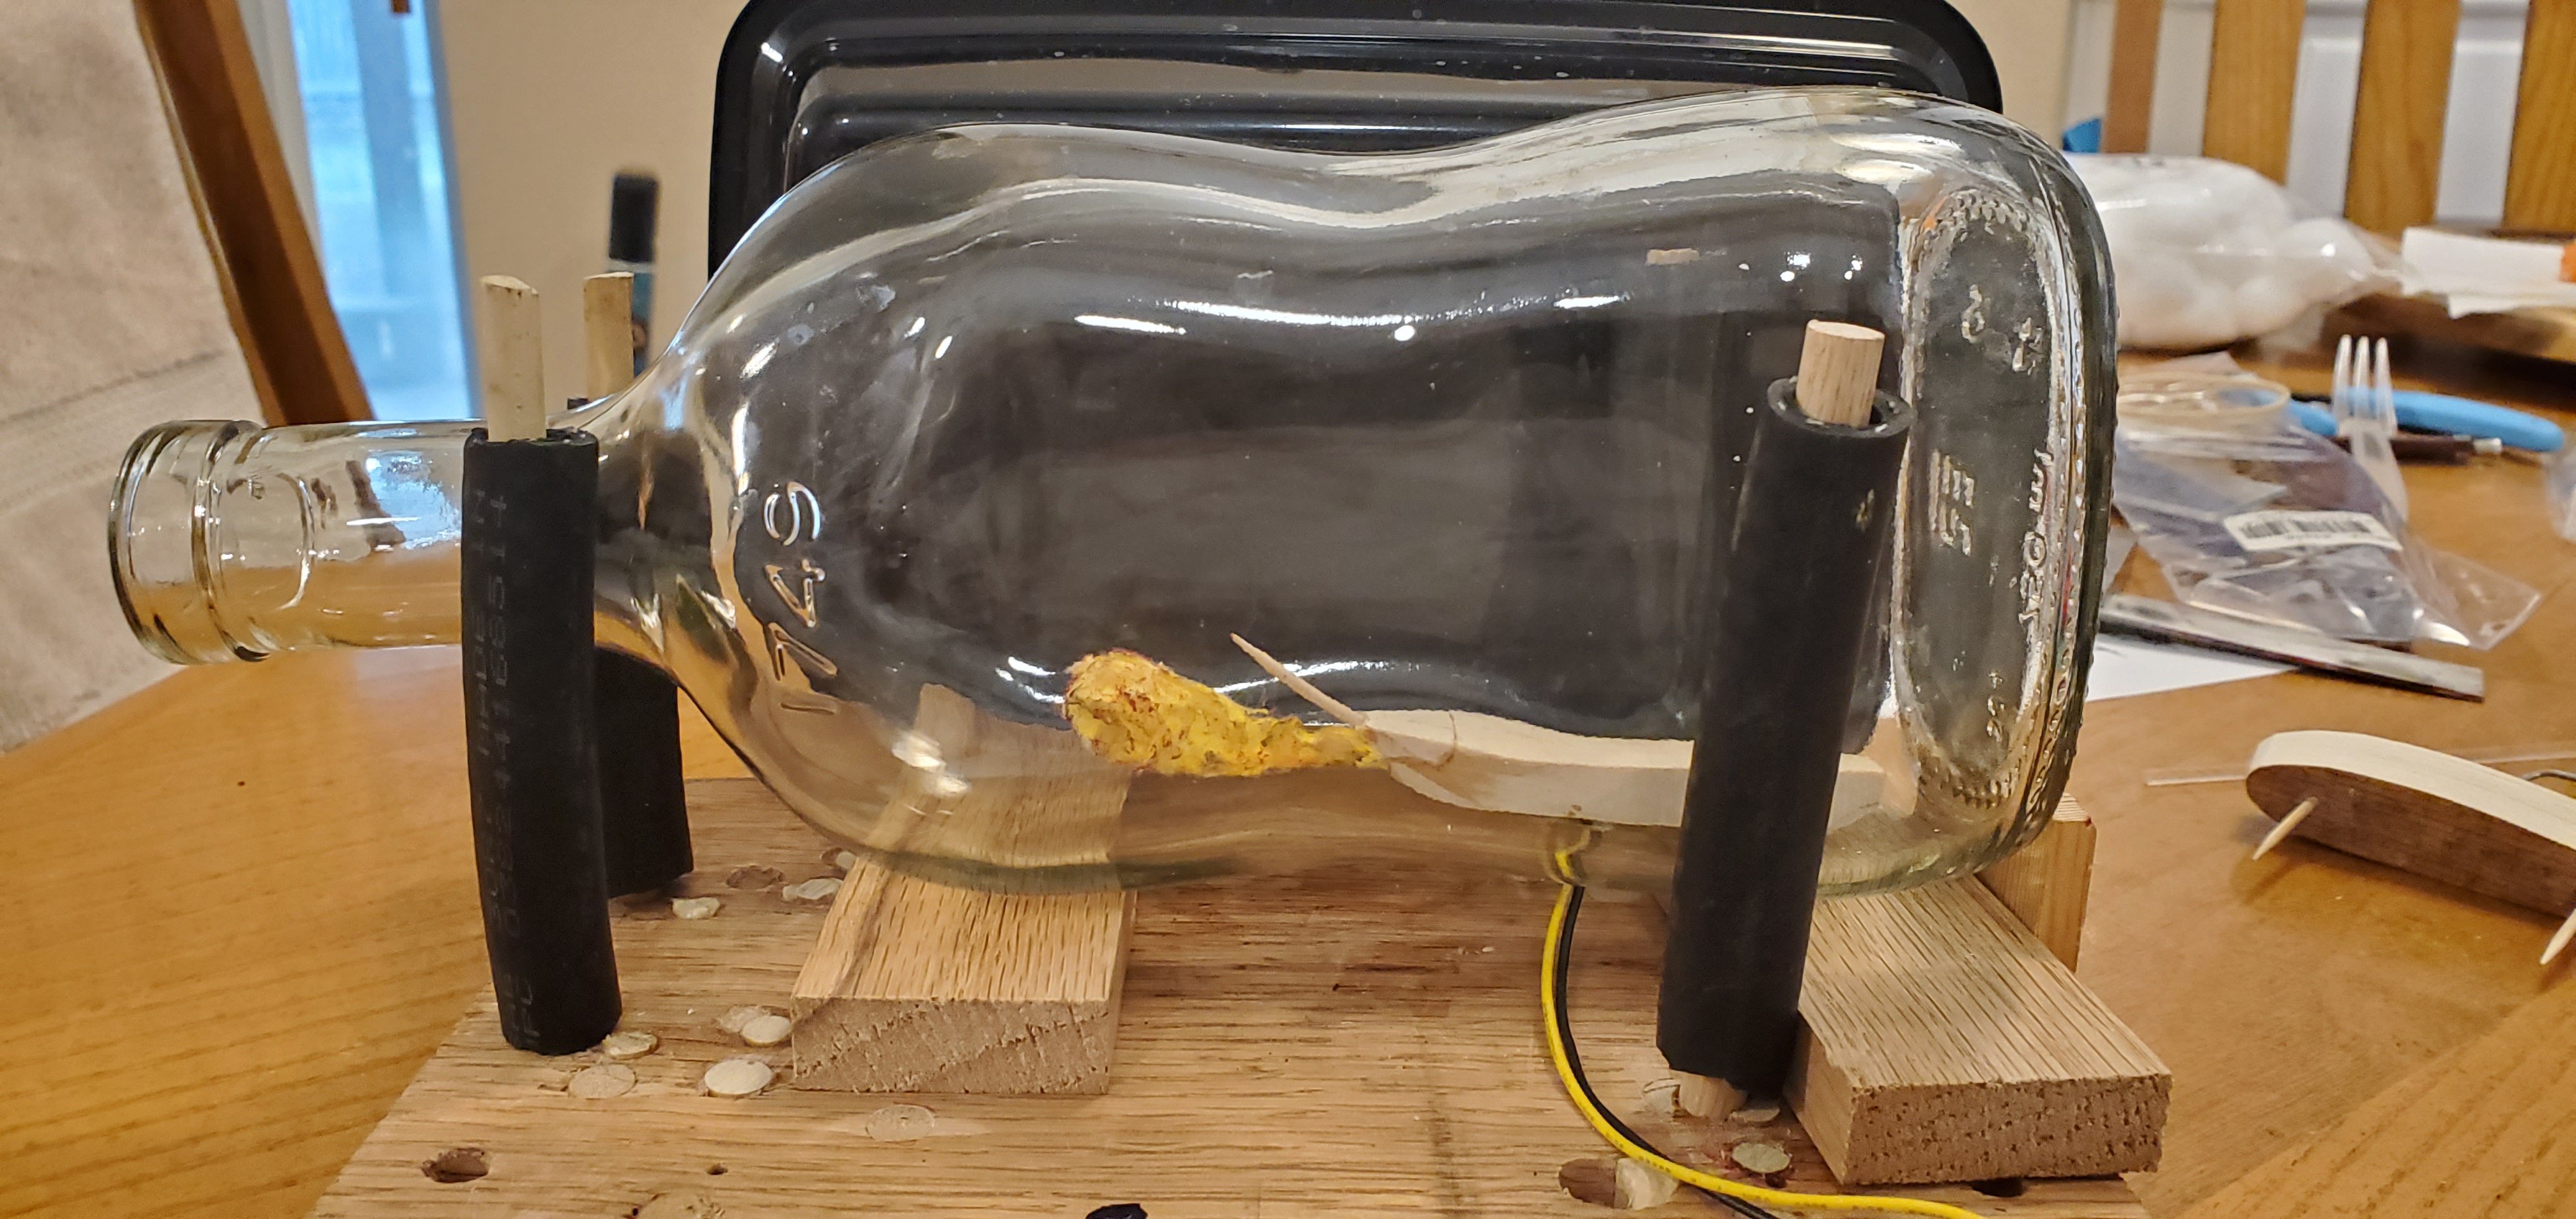
Tell the First Mate thank you very much, Bob!! Well Keith, you made me anxious to try a test run so here it is. It fit just fine without masts, yards, sails, etc. Hopefully I can say the same thing after the ship construction is completed. One thing I'm pretty sure of - the stern/poop deck area of the ship rises so high that it will have to be a separate piece and installed after the ship is in the bottle. Thanks for the suggestion, Kauz. I had not heard of those. I found a marker sprayer on Amazon that I think is similar to what you are talking about and just ordered it. Much cheaper than an air brush. We will see how it works. Glad to have you here, Grant! Thanks for following along. Thanks, Paul! Glad to have you here as well. Now that I've made a decent hole in the bottle and convinced myself I can make a reasonable looking fireball with the requisite wiring, it's time to begin the real construction of the ship.

- 156 replies
-
- 9
-
-
- Queen Annes Revenge
- bottle
- (and 1 more)
-
Despite your frustrations, Mark, your deck looks very nice. I agree with Steve above and really like the look of the wood, especially the coloring.
-
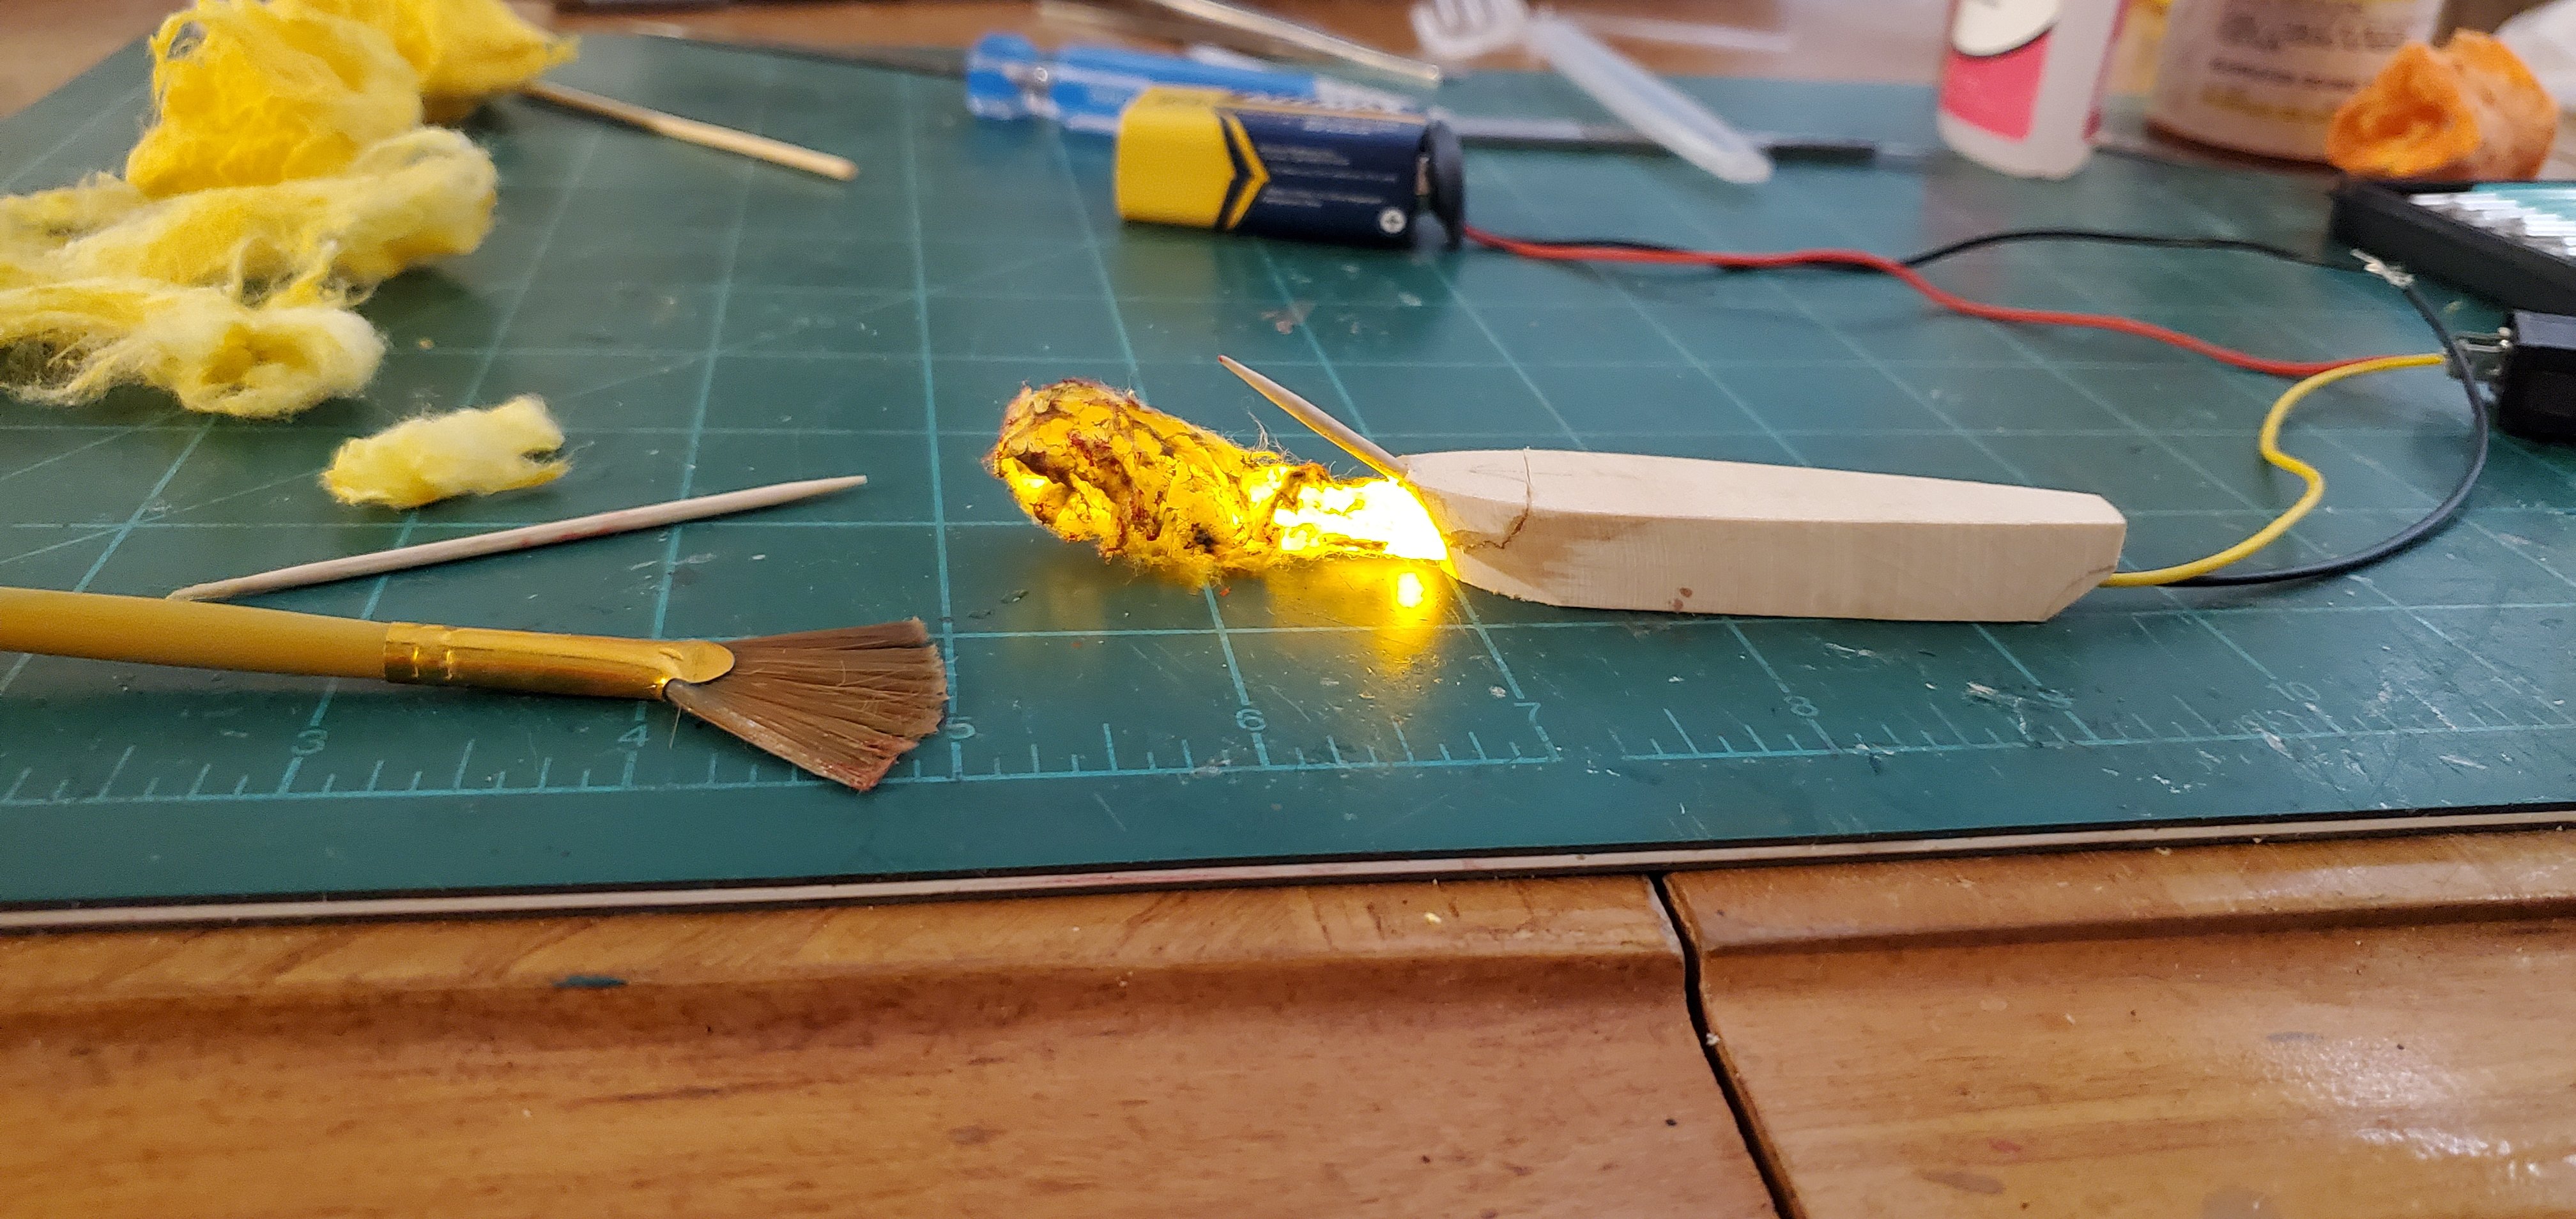
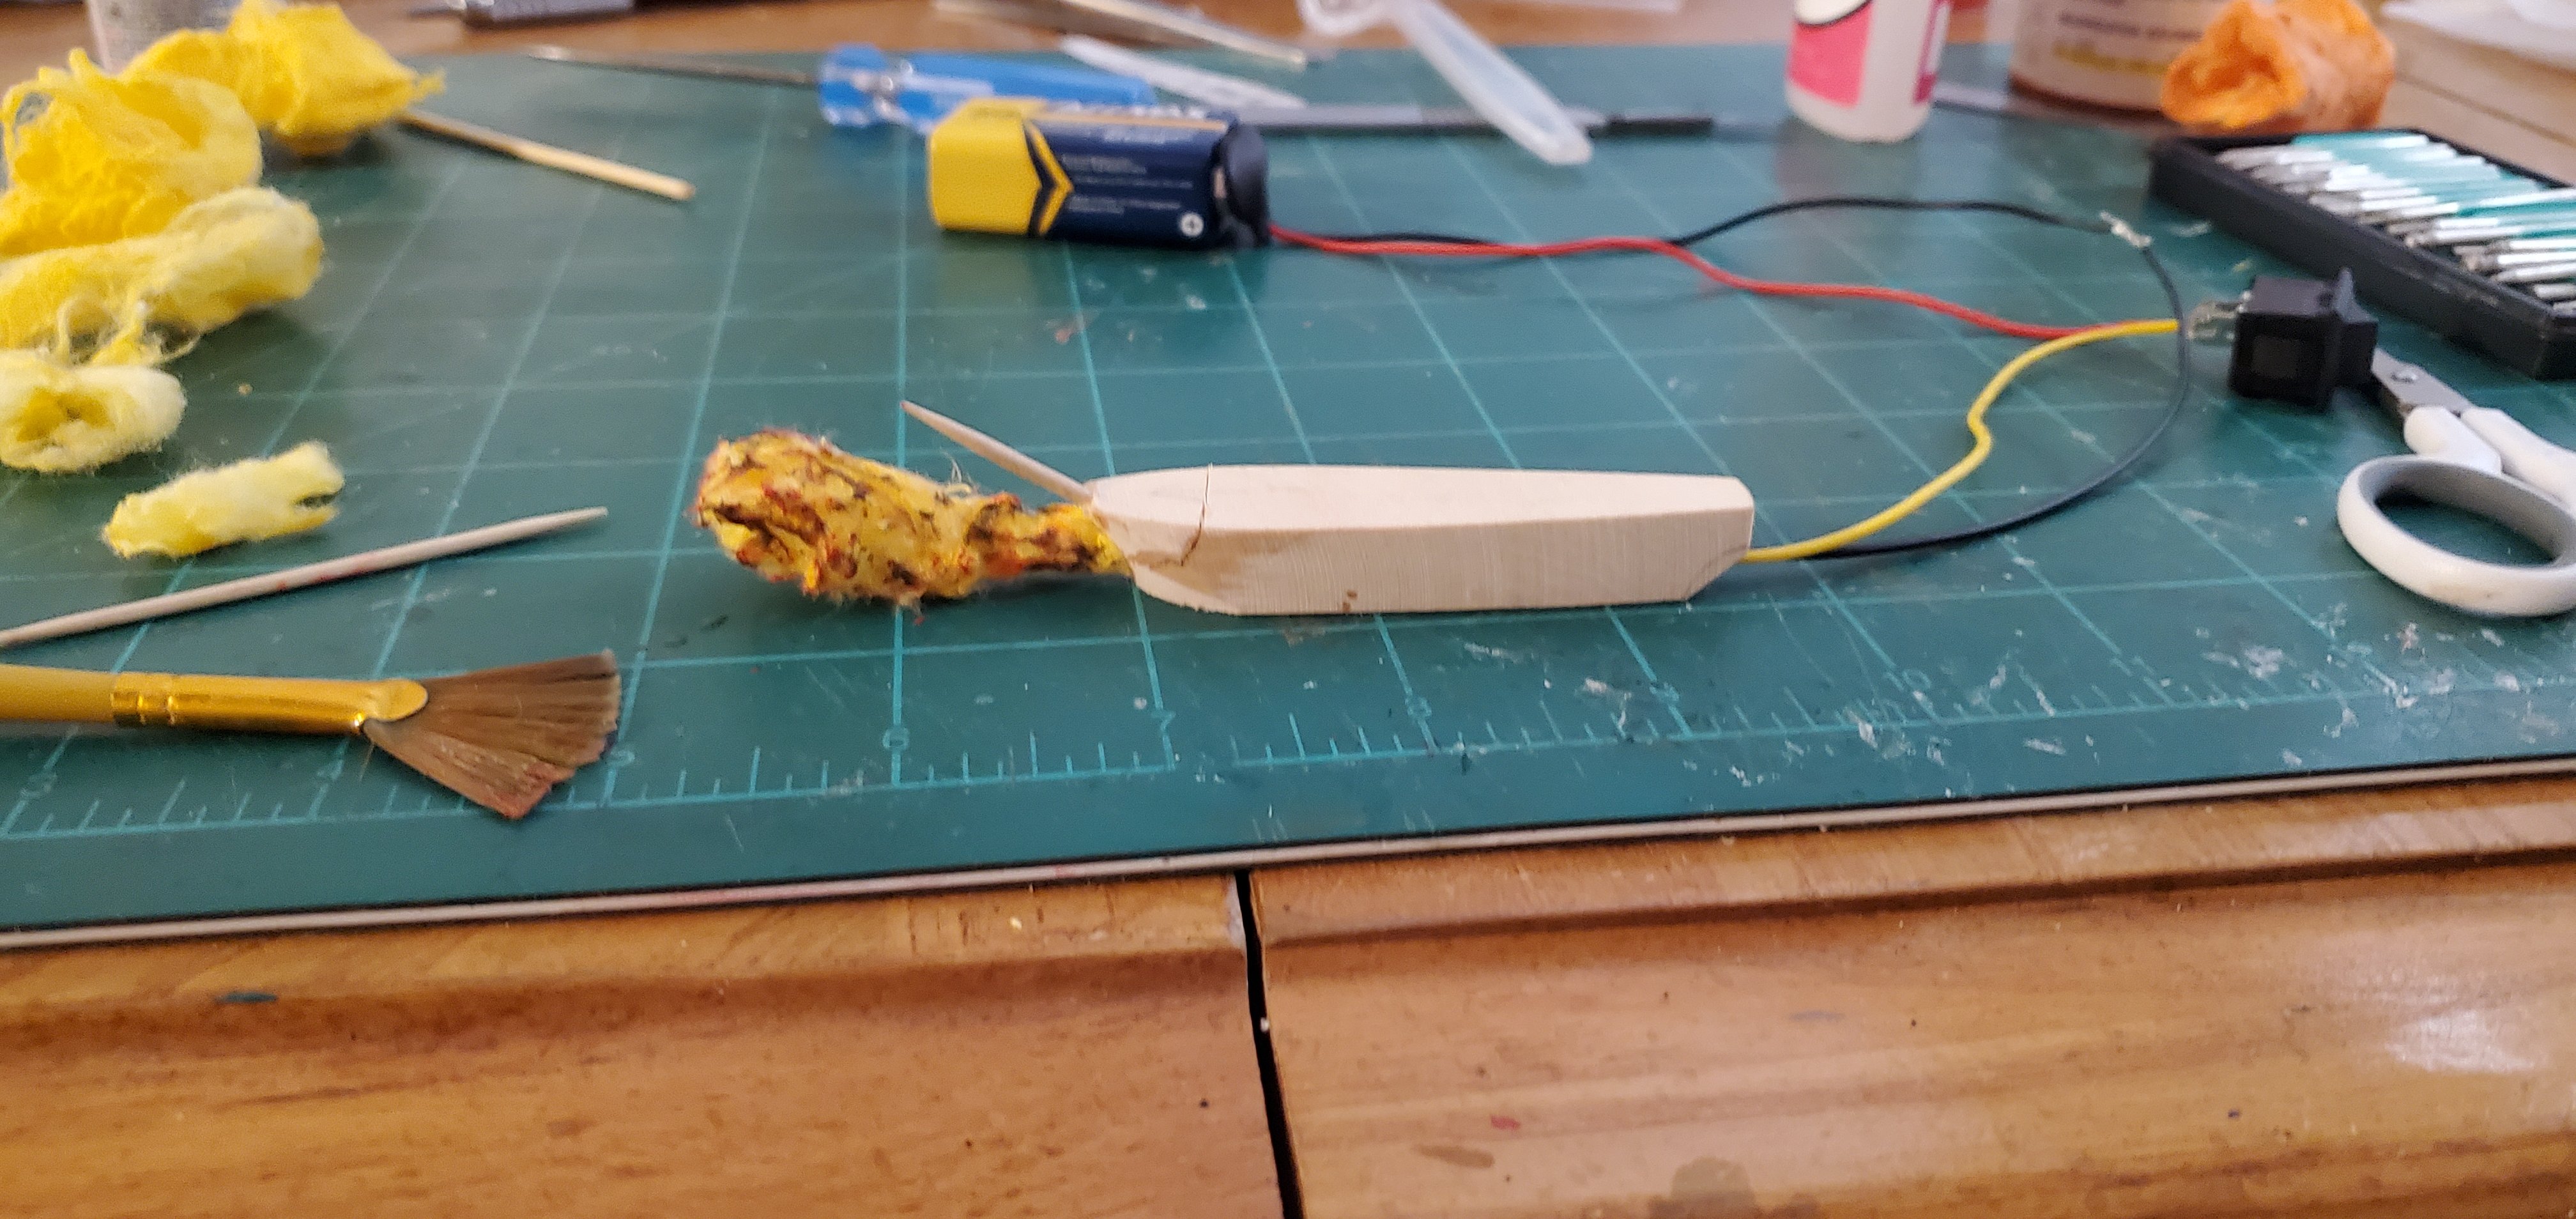
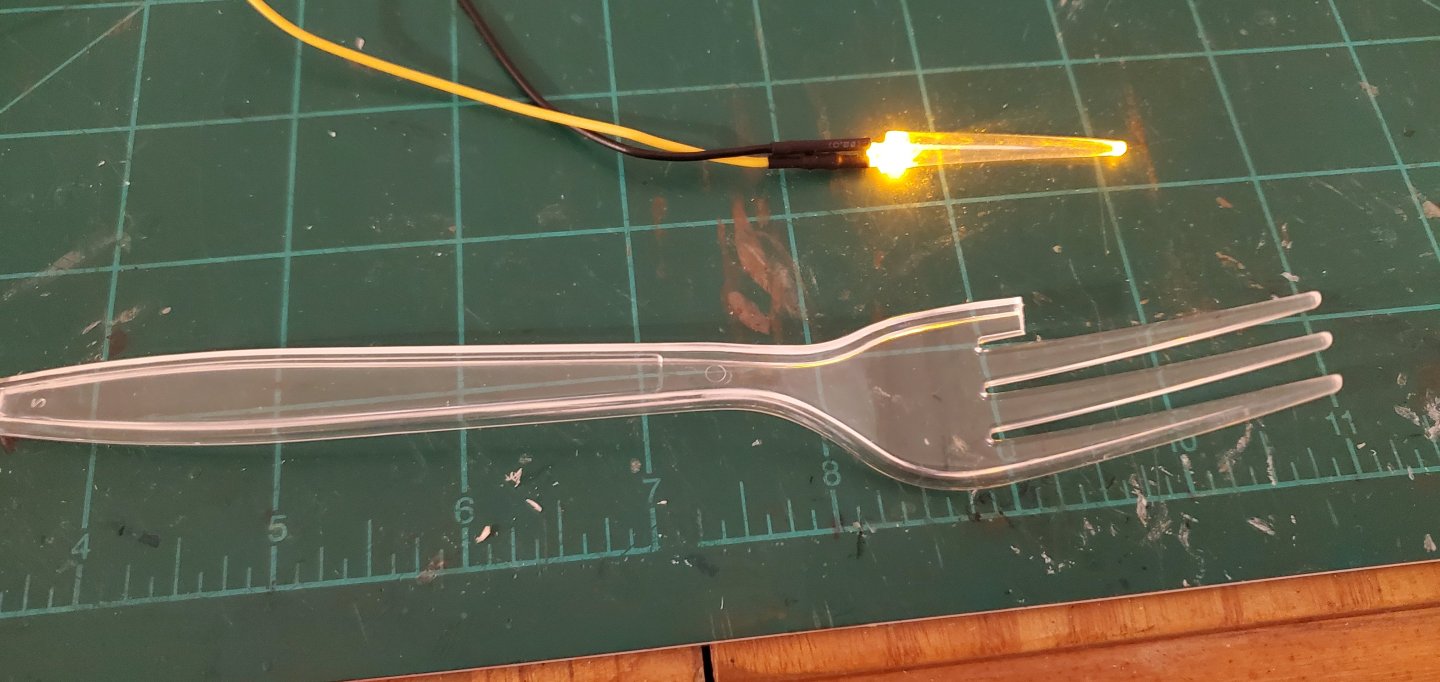
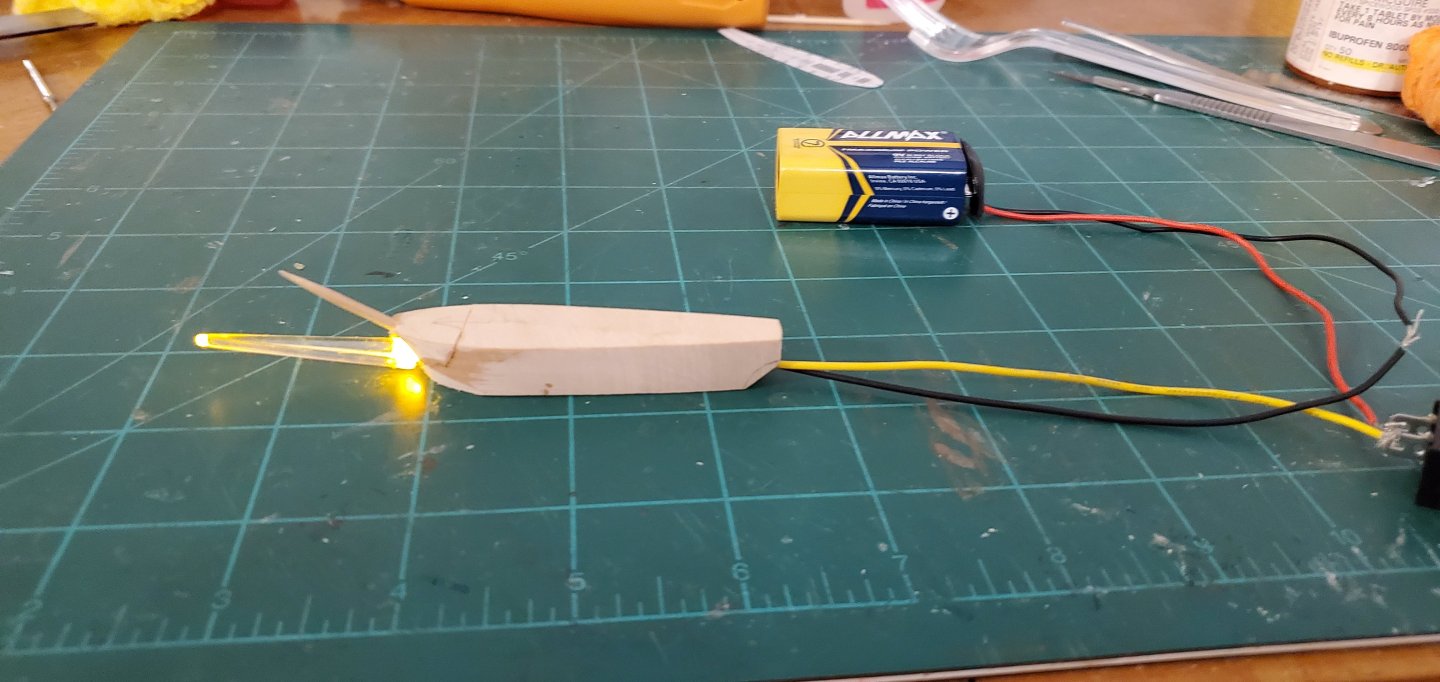
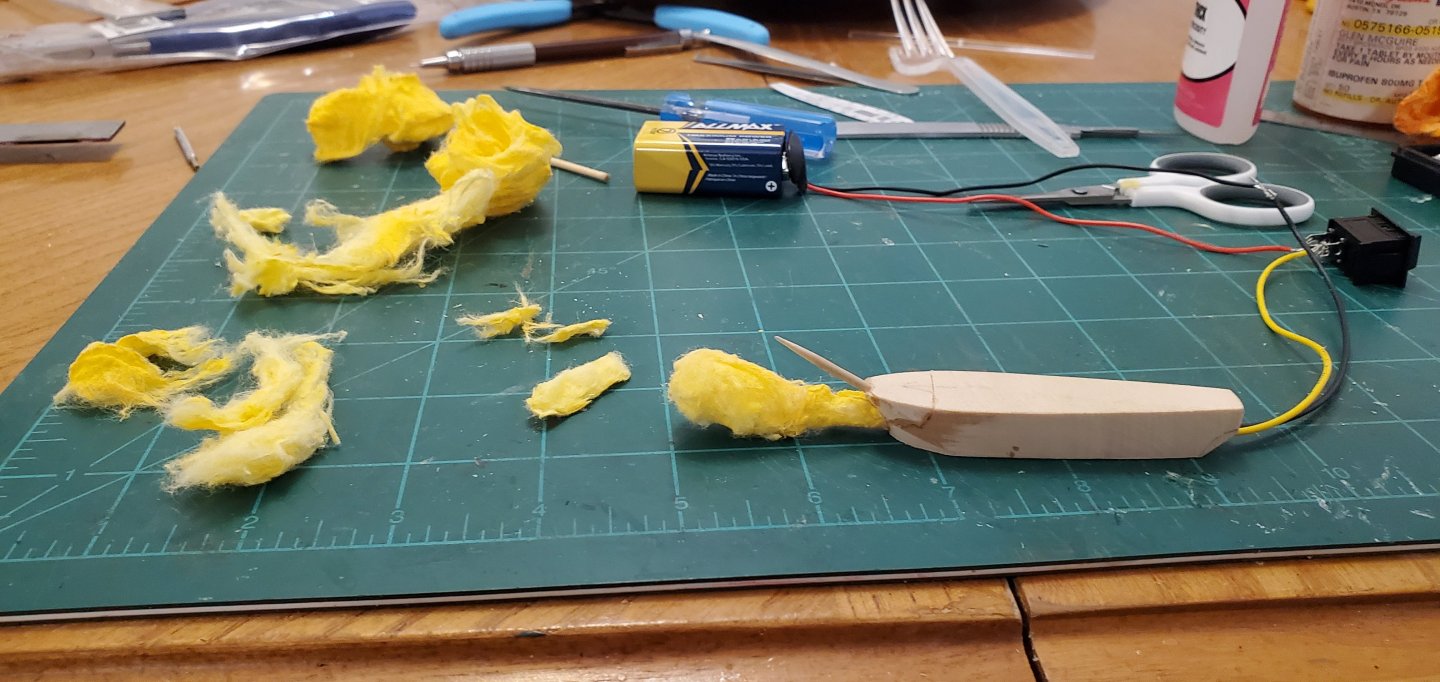
Those are cool pics, Roel. Thanks for sharing. But the project seems to be missing something, to me anyway. Oh yes, a bottle!! I'm making a test run at a small fireball. For the test, I made a dummy hull with bowsprit and drilled a hole from bow through the stern to insert the LED light and wires. For the real thing I will run the wires thru the bottom of the hull, but running them out the back is easier for now. The fireball is going to be around 2" long, but the LED is only 3/16" long so I need a way for the LED light to travel the length of the entire fireball. For this test, I decided to see if the light would travel through clear plastic and provide a sufficient glow. I broke off the tine of a clear plastic fork and glued it to the tip of the LED. Then I glued it onto the bow just below the bowsprit and ran the wires out the back to the battery. The plastic fork tine did not provide a uniform distribution of the light, but it's not too bad. Now for the fireball. I decided the orange cotton balls were too dark for a base color, so I went with the yellow ones. I tore one into pieces and built up (CA glued) the fireball around the LED and fork tine. Then I took a fan brush and gave it some red and black highlights. And here's how the test fireball looks with it lit up by the LED. The picture really glares the spot where the fireball is coming out of the bow. It's a much softer glow in person. I think I can do better with my red and black shading (an airbrush might help too), but I also think I'm on the right track.


- 156 replies
-
- 15
-
-
-
- Queen Annes Revenge
- bottle
- (and 1 more)
-
The precision in your work is outstanding, Paul.
-
I've been been procrastinating, waiting for you to get here, Roel. Now we can get this party started! As for your suggestion about using cotton balls for the ball of fire, you're right on the money as usual. That is what I'm going to try first as you will see below. Welcome aboard, Ken! Glad to have you along for the ride and glad you got your safety gear on! As for the LED lights, like Roel, you are on the money as well. After some research, the grain of wheat bulb lights seem to be about the same size as the LEDs I got, so I'll likely go with them. I also found some flickering ones as you suggest. It's been quite a busy September around here and I have not completed any subassemblies or sub-steps yet. My progress has been kind of scattershooting so far, but I will post a few updates below. First, like Roel suggested, I'm making a run at the fireball using cotton balls. I heavily diluted some acrylic orange and yellow paint to dip the cotton balls into. After tightly squeezing the out the paint, I teased the cotton balls back out and let them dry. I plan to pull apart small pieces and fluff them up to give the fireball its final shape. I've still got to do some dusting of red and black paint onto the cotton. An airbrush would probably work best but I don't have one. I'm going to try with a fan brush, but if I can't make that work I may have to invest in an airbrush. I also began work on the hull for Queen Anne's Revenge. For those that have followed previous builds, I'm doing my usual laminated hull process. I lined in the deck planking and stained it but I haven't sanded it down to size yet. At the same time, I'm also testing out lighting ideas. As Ken suggested above, I've got flickering LEDs. These have a yellowish tint and a soft slow flicker which I think will work well. I also got some rocker switches and wired things up for a test light show. So no major milestones completed yet, but the work in progress seems to be heading in the right direction.


- 156 replies
-
- 13
-
-
- Queen Annes Revenge
- bottle
- (and 1 more)