Glen McGuire
-
Posts
1,985 -
Joined
-
Last visited
Content Type
Profiles
Forums
Gallery
Events
Everything posted by Glen McGuire
-
 That's no fun!! But I guess it's motivation to get to the finish line. You are doing a great job on this build, Bob. Love the way she looks so far.
- 261 replies
-
- 2
-

-
- Victory Models
- Pegasus
- (and 3 more)
-
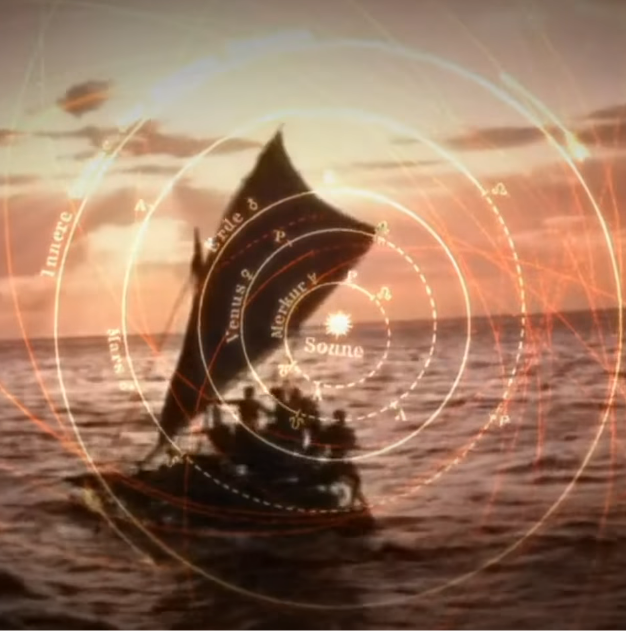
I agree about the plumeria midrib, but the sail footprint is really small compared to the size of the leaf, so I don't know if that will work or not. We will see in a day or two. I want to wait till the epoxy resin is fully hardened before I take the leaves out of their bath. I want to take them out, attach them, and get them in the bottle quickly, while they are at their most supple. Thank you, Ken! You have put my mind at ease. I was a big Star Trek fan of the original series but never watched much of its offspring. I youtube'd the Enterprise opening credits that you mention and saw the Polynesian vessel (see below). Very cool! I agree with you about their incredible navigational skills. The more I learn about this subject, the more fascinated I become.
- 174 replies
-
- 6
-
-
- Waa Kaulua
- bottle
- (and 1 more)
-
Glad to have you on board, Ponytail!!
-
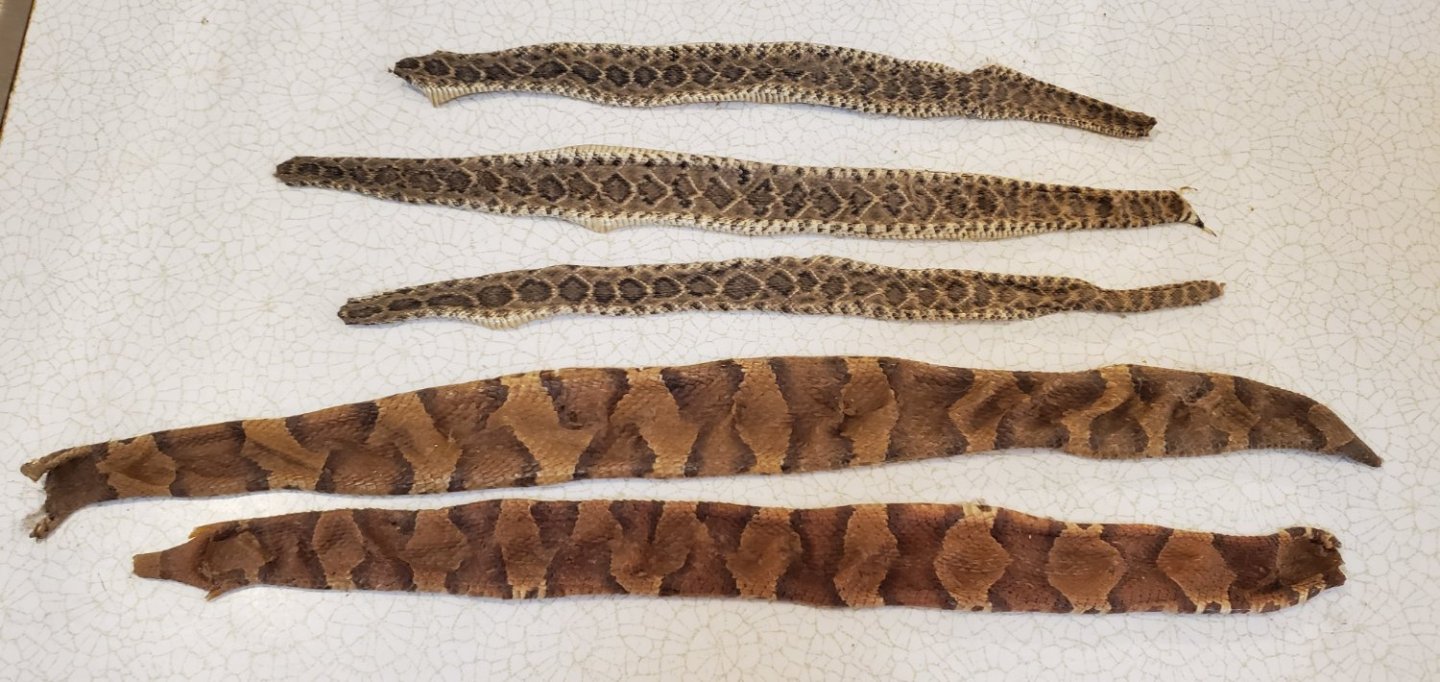
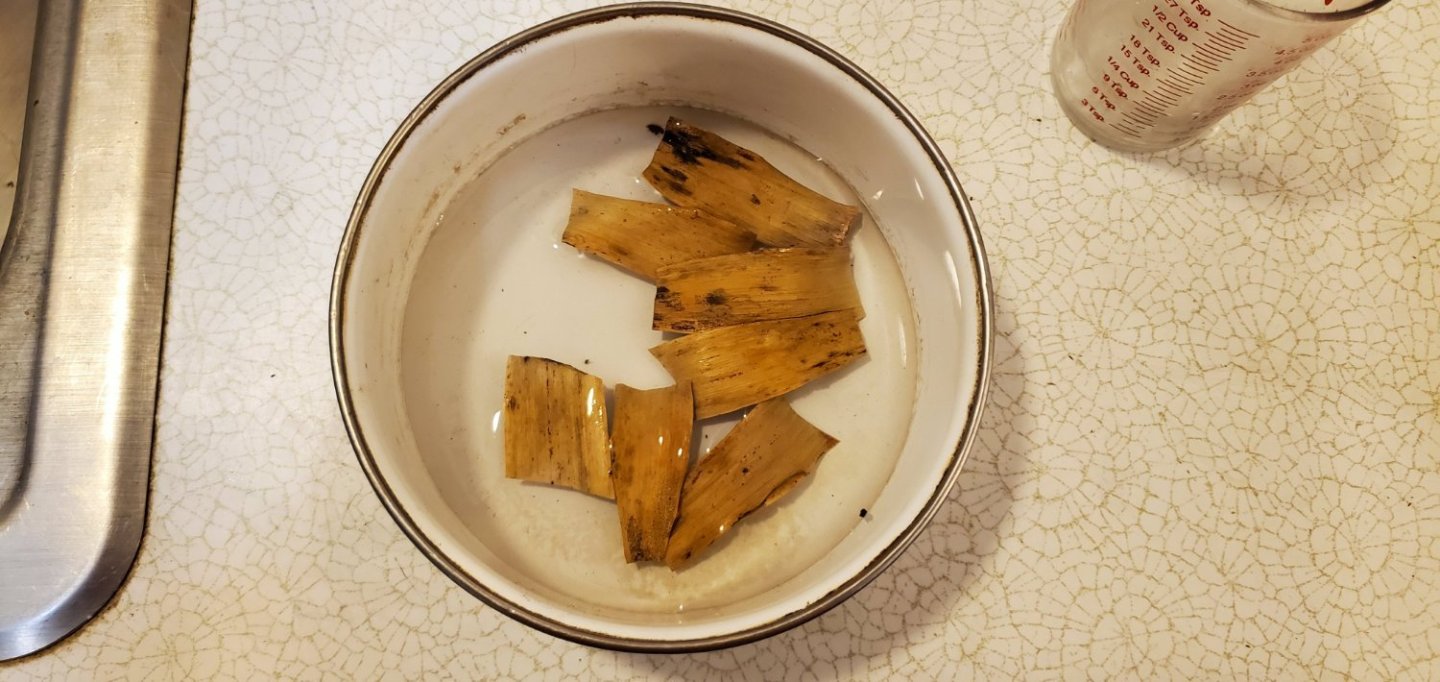
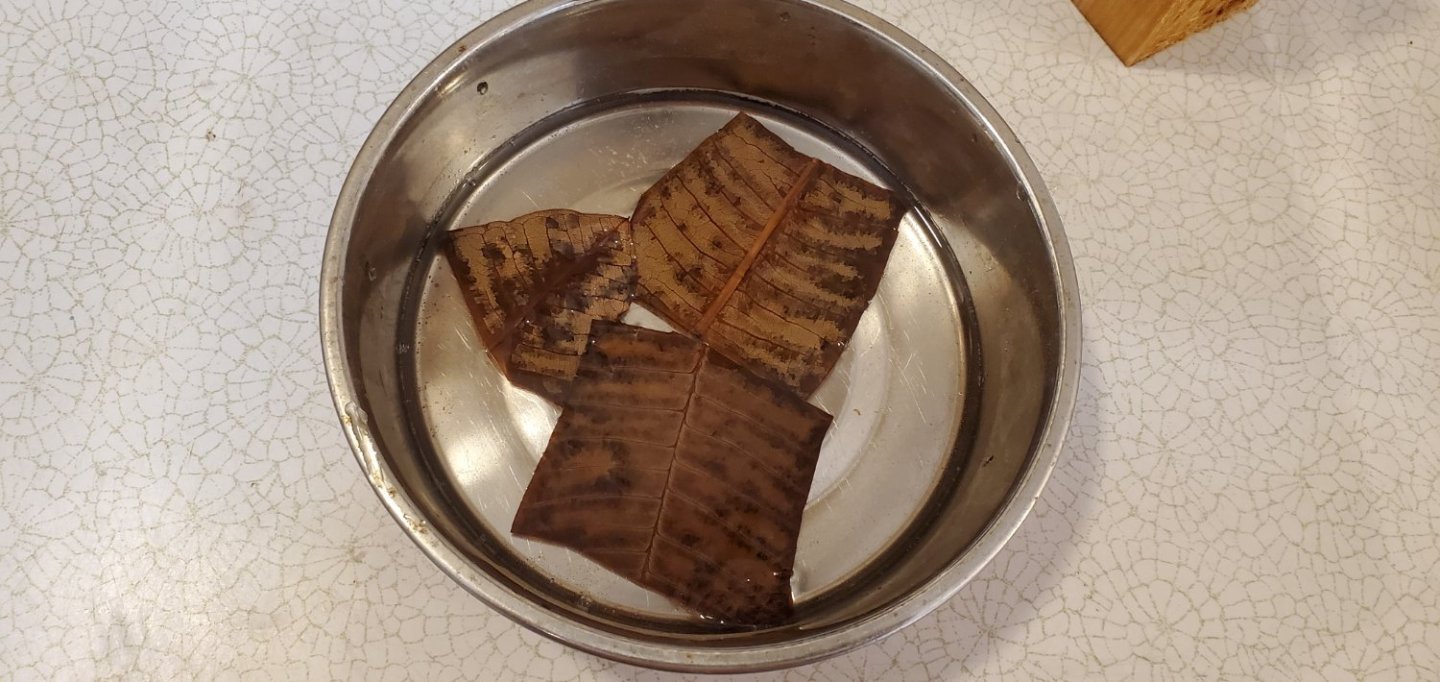
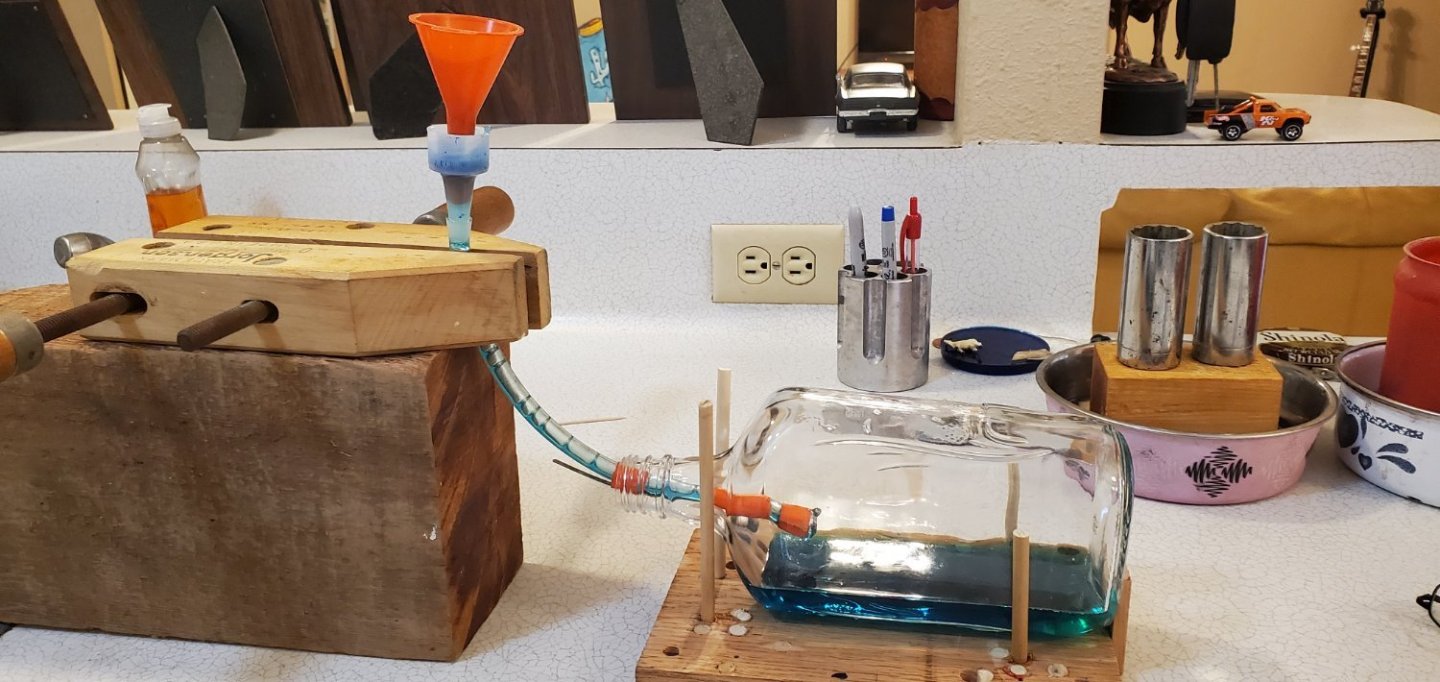
Time to dive into the sails or pe'a's as they wee called. Each pe'a is shaped like an upside down triangle with the upper section curved downward like the letter U. According to https://www.hemakeewaa.org, "the U in the sail serves as kind of a safety valve allowing wind to escape over the top of the sail thus reducing the force that could capsize a canoe." As far a construction of the pe'a, it was made from the leaves of the hala tree. The leaves (lauhala) were cut into very narrow strips, maybe 1/4" wide, then woven together to form mats about a foot and a half square. Finally, the mats were sewn together to create the full pe'a. So far, I've been trying to make as much of my wa'a kaulua as possible with native Hawaiian materials. There are no hala trees around here in central Texas, but I do have a pineapple plant and a plumeria tree which I am going to try and make the pe's's from. I took a couple of dead leaves from each because I need a brownish/yellowish color. Obviously, they were pretty crunchy, so I need a way to make them pliable again. Hmmmm. Several years ago, I killed a few small rattlesnakes and a couple of copper heads at my ranch. I preserved the skins by soaking them in a glycerin/water solution and to this day they are still soft. Would that same method work for leaves? There are people in the googleverse that say it will, so I'm giving it a try. The first pic shows the leaves from my pineapple plant and the second is from the plumeria. The plumeria is a little darker than I want, but I like the prominent veins that could maybe pass as sewing seams. We'll see how everything looks in a couple of days when they are done soaking. While the leaves are relaxing in their glycerin bath, I decided to get the water in the bottle. I went with more of a turquoise color instead of the deep sea dark blue I usually use. I also wanted it to be a little more transparent to indicate shallower water like you would find at the base of a waterfall.
- 174 replies
-
- 11
-
-
- Waa Kaulua
- bottle
- (and 1 more)
-
That had to be a gut wrenching decision to scrap those braces after the superb job you did with their complex curvature. But your remodeled ones look great. Very fine work, Steven.
-
You're trying to make me name names aren't you, Pat!! 🤐
- 174 replies
-
- 3
-

-
- Waa Kaulua
- bottle
- (and 1 more)
-
I think we might have a few Larrikins on MSW, but I won't name names!! 😃😃😃
- 174 replies
-
- 8
-
-
- Waa Kaulua
- bottle
- (and 1 more)
-
Thank you, Steven! I'm actually not too nervous about the insertion process this time as I know my hull assembly will fit easily and I think my deck/mast/sail assembly will not be too tight either. My concern right now is whether or not this idea I've got for the sails will work (speaking of weeds...). More on that in my next post. On another note, curiosity finally got the best of me. I'd been wondering for a while about your screen name and if there was a story behind it. My initial thought was that it sounded like some kind of gangster from the roaring 20's. So I googled and found that it's a mascot for a bug spray (Mortein)!! And I even listened to his jingle: Louie the Fly, I'm Louie the Fly, Straight from rubbish tin to you! Spreading disease with the greatest of ease, straight from rubbish tin to you! I'm bad and mean and mighty unclean, afraid of no one, except the man with the can of Mortein. Hate that word, Mortein! He even has his own Facebook page with 242,000 followers!!! And apparently I was on the right track with my initial thought because I read that the producers of the jingle wanted his voice to sound gravelly, like a Chicago-land gangster. So now I think you have the coolest screen name on MSW!!!
- 174 replies
-
- 8
-
-
- Waa Kaulua
- bottle
- (and 1 more)
-
The MSW display on my Samsung (Galaxy S10) has not changed.
-
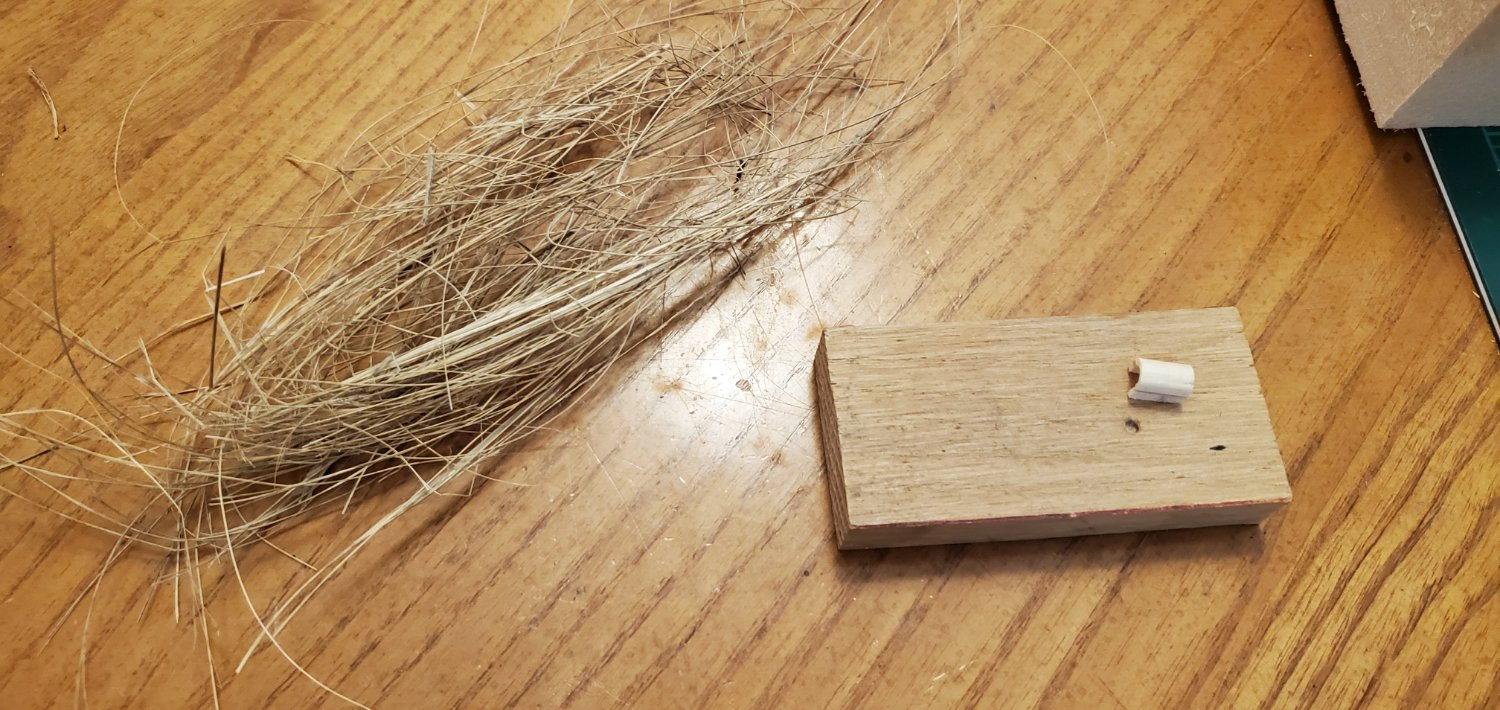
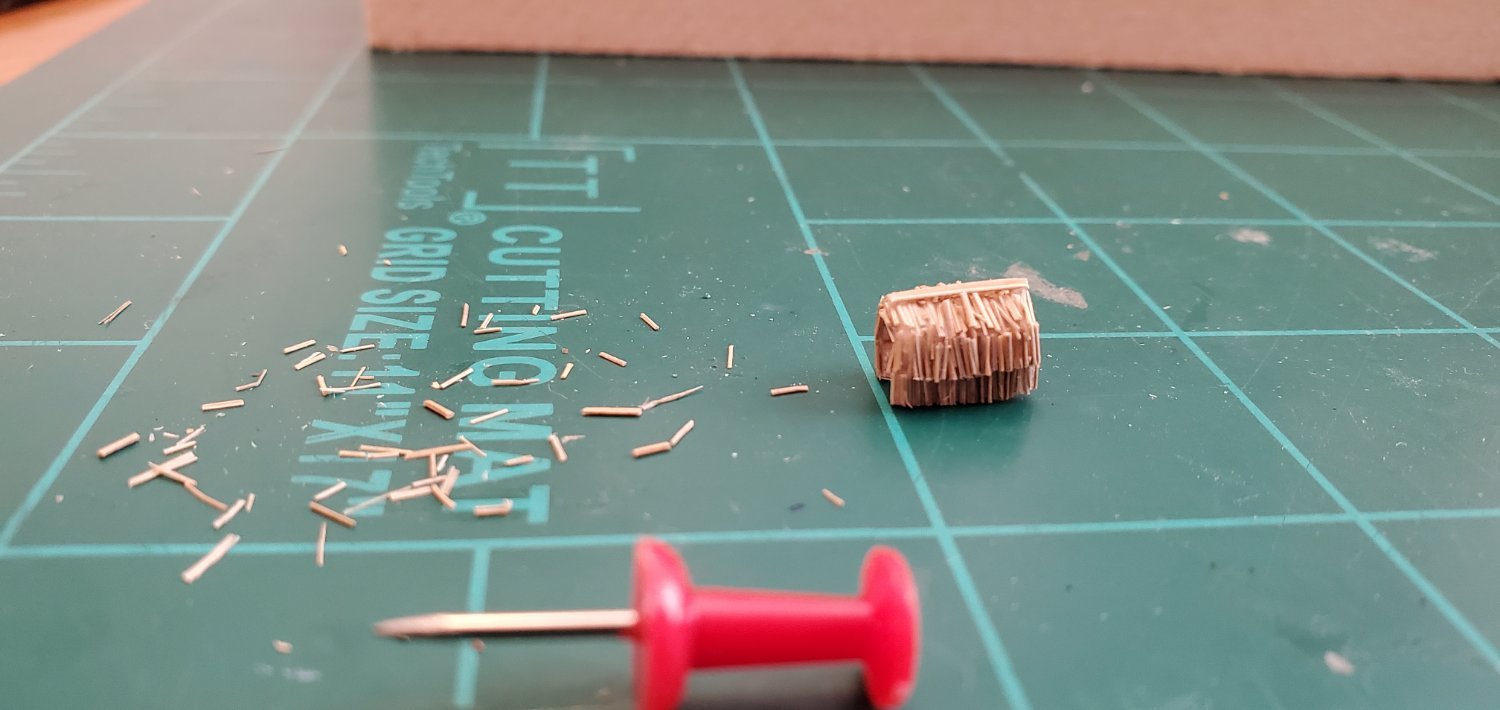
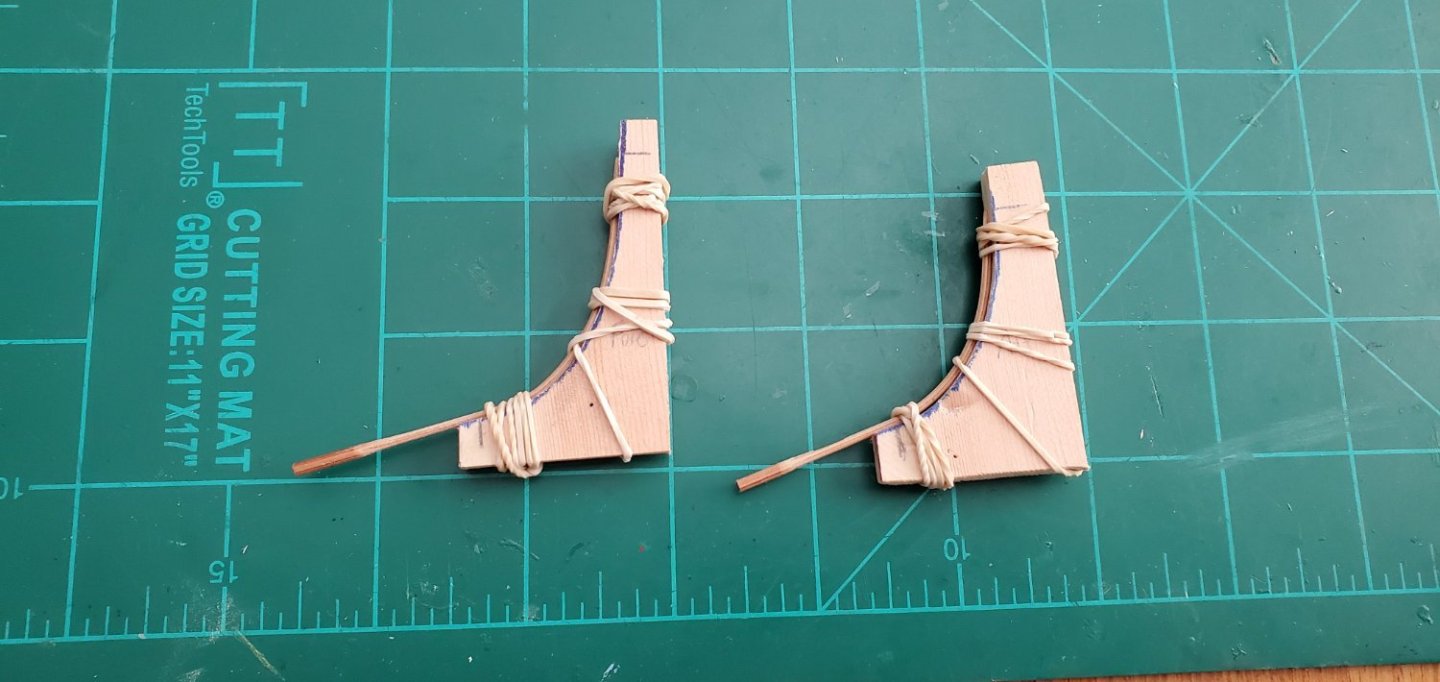
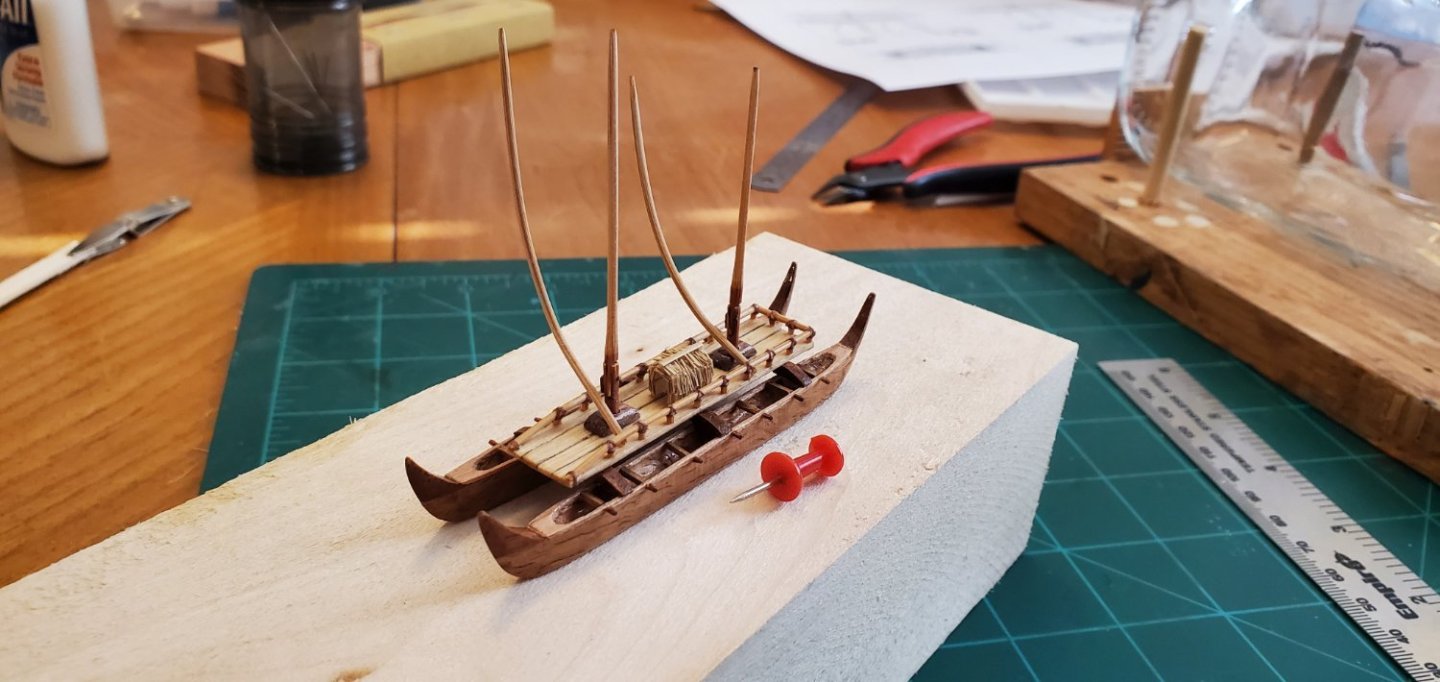
On to the masts, which are called kia's and look quite interesting. The wa'a kaulua sails were triangular in shape with a straight vertical kia (mast) and a 'o pe'a (curved spar). I made the kia in my usual way with a small bamboo rod hinged near the base and shaved down to 1.5mm above the hinge. For the 'o pe'a's, I boiled a couple of bamboo rods for 20 minutes, then rubber-banded them to a couple of wood scraps that I had shaped to the proper curve. While the curved 'o pe'a's were drying I went to work on the thatched structure that rests between the pe'a's, or doghouse as @Keith Black called it. I think it's called a halau wa'a, which translates to canoe house but I am not sure. I was out on a run yesterday and saw some very thin, hairy, dead grass growing out of a crack in the pavement. It looked perfect for small thatch like I needed. So I grabbed a handful and carried it home. I built a little halau wa'a out of a bamboo chopstick, chopped the grass into tiny pieces and glued it on. As with a lot of my deck fixtures, they look better the further you are away from them. By the time I finished the halau wa'a, the 'o pe'a's (curved spars) were done drying. Here's a pic of everything I've made so far, dry-fitted into place.


- 174 replies
-
- 14
-
-

-
- Waa Kaulua
- bottle
- (and 1 more)
-
Beautiful work on those doll houses!!
-
Whoa! That piping work makes rigging jobs look easy. Amazing!!
-
First, welcome aboard Brian! My answer to the above question is: I thought ship modeling was a solitary activity until I found Model Ship World. Now, when I've got a build log going here, I feel like I've got a bunch of people from all over the world helping me work on my models. There are so many amazing craftsmen out here that offer tip and suggestions, answer questions, and provide encouragement that I never feel like I'm working alone.
-
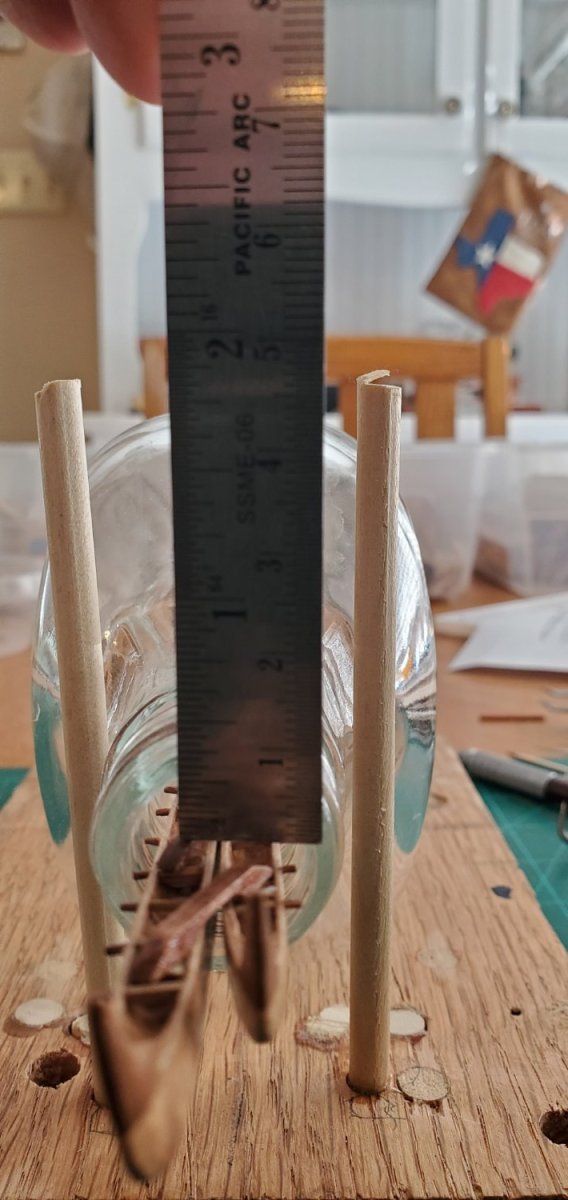
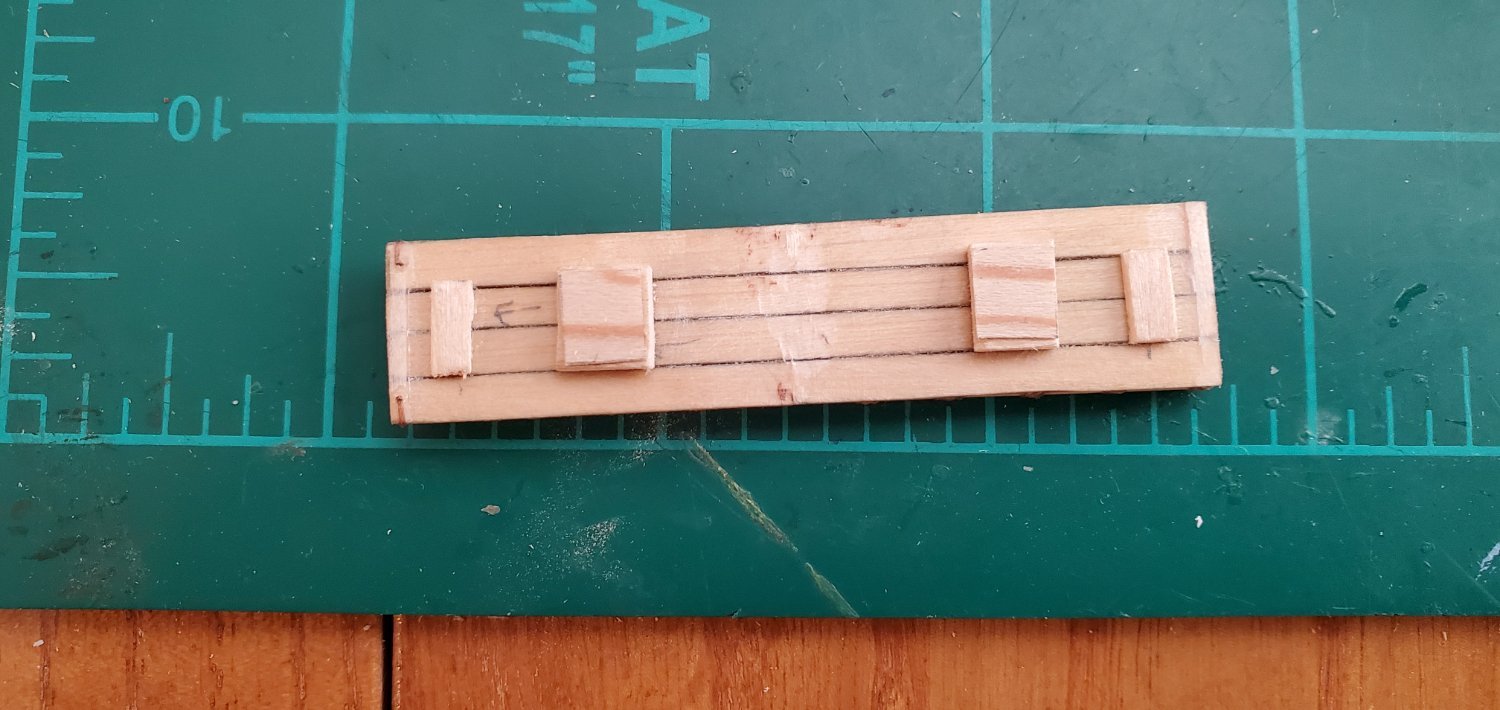
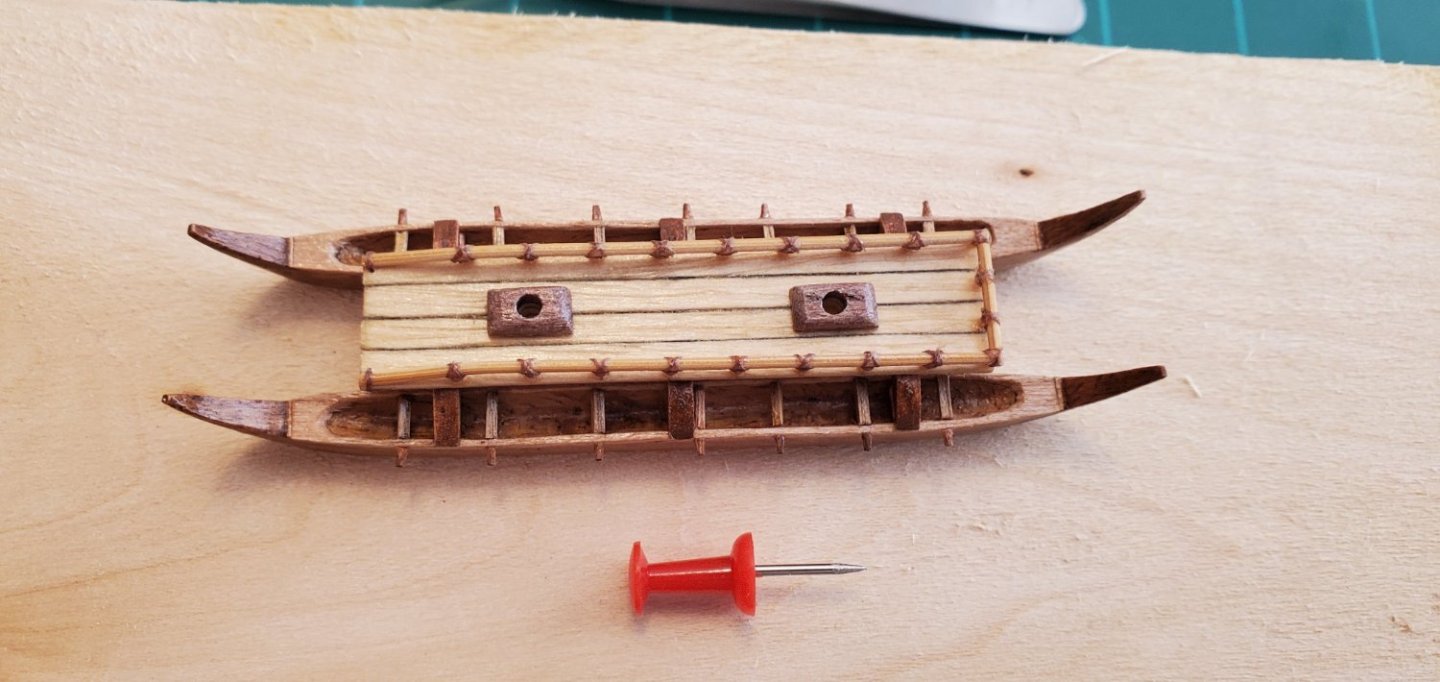
Thank you for the explanation, Ian. You helped the dim lightbulb flicker on. When I used to fly many years ago, I had to calculate the crosswind component for takeoffs and landings to ensure it fell within the limits of the aircraft. The term we had for "degrees off wind" was the "crosswind angle". We used it along with the wind velocity and runway heading to calculate the crosswind component. Your second paragraph makes perfect sense now when I relate it to course headings for planes. 💡💡💡 Yes to your 2nd question, Javelin. When I add the masts, the platform will be too tall to pass thru the neck. In the 1st pic below, you can see that I've got 7mm from the top of the Kūanueneu to the top of the bottle opening. I will need at least 13mm with the masts installed and hinged down. So I will definitely have to install the platform inside the bottle. I agree, that will be a challenge. My plan is to put the hull structure inside the bottle, align the hulls, and glue it down. I don't think that will be too difficult. Once secure, I'll drop the platform assembly on top. To help with dropping the platform straight like you say, I've added a couple of alignment pieces to the bottom of the platform. The 2nd pic below shows the bottom of the platform. The 2 larger squares of wood on the inside are mast "stops" and line up with the mast steps on top of the platform (they will help anchor the masts in place). The 2 smaller rectangles of wood are alignment stops that snug against the outside edge of the fore and aft Kūanueneu's when I drop the platform in place. I think these serve the same purpose as the stopping pins you suggest.


- 174 replies
-
- 10
-
-
- Waa Kaulua
- bottle
- (and 1 more)
-
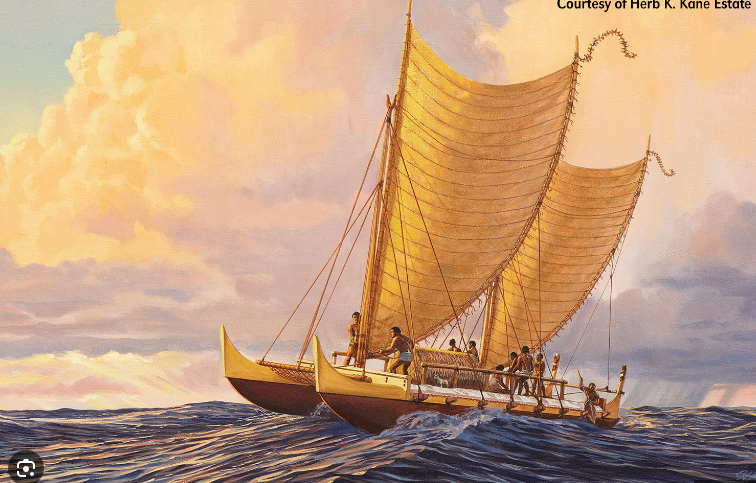
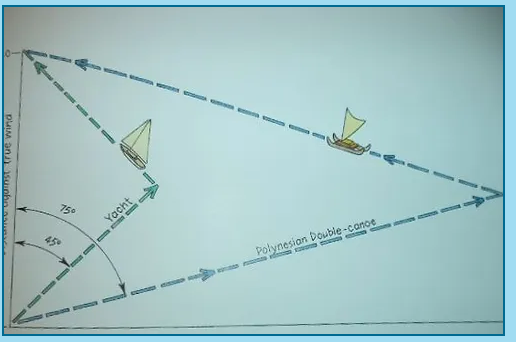
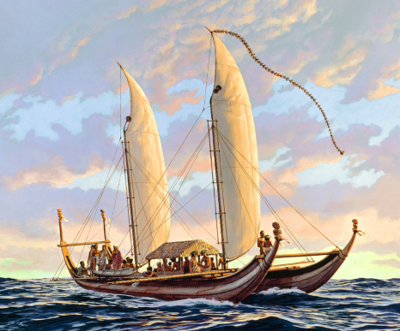
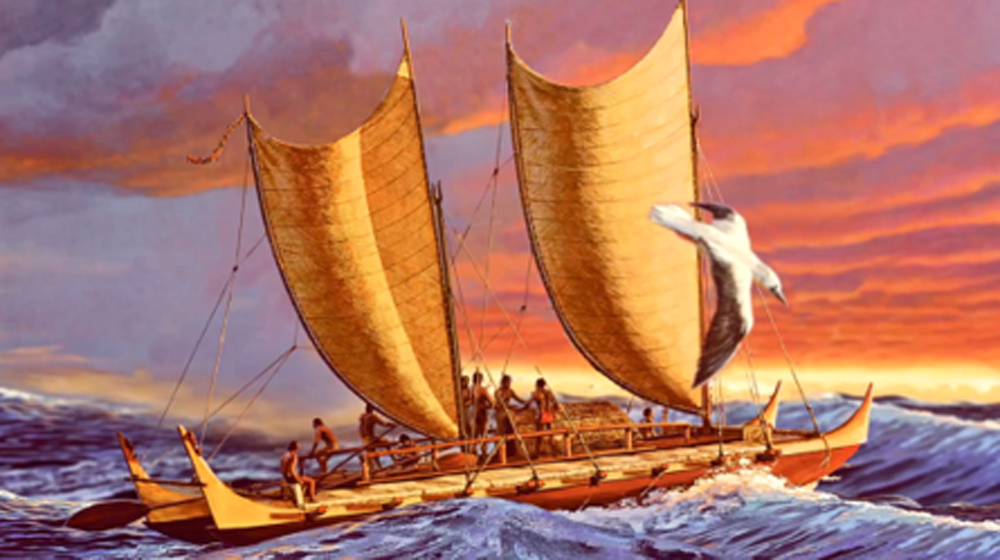
Thank you, Harvey. I looked at other paintings by the same artist - Herb” Kawainui Kāne (https://www.herbkanehawaii.com/) - he has done a few others where the canoes look like they are moving at a fairly pronounced angle into the wind or at least a quartering cross wind. Another site (https://www.hemakeewaa.org/hawaiiansail) has some detail on the sails and how they work in relation to the wind along with the diagram below - "The Hawaiian sail is very effective in sailing across the wind or down wind. It can sail windward at an angle of about 75 degrees off the wind. The round hull of the Hawaiian canoe however allows for significant lee drift. Early explores describe Hawaiians frequently paddling their canoes while under sail, especially when trying to sail to windward. Paddling while under sail allowed the canoe to travel higher to windward and reduced the lee drift significantly. Paddling while under sail makes the paddling much easier. It also can increase the canoe's windward ability making between 45 to 40 degrees off the wind." I would need someone that actually knows how to sail to explain all that to me in landlubber's terms (degrees off wind, significant lee drift, etc???).
- 174 replies
-
- 5
-
-
- Waa Kaulua
- bottle
- (and 1 more)
-
From @Keith Black on my Aurora log - "As close as I can figure......According to Mr Google, Antarctic penguins are 24 to 30 inches in height. A foot at 1:500 scale is .024 inches, correct? That would make 30 inches = to .060 inches." I wave the white flag on that one!! Regardless of penguins or no penguins, your water effects turned out really nice! Well done, Javelin!
-
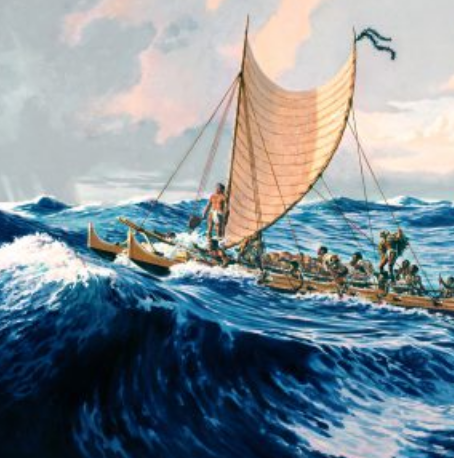
Clear coat fumes and a double tot and that boat will be going both directions at the same time!! Could be a bit of a quartering cross wind coming in from about 10 o'clock? Hard to tell. Regardless of what the artist did with the wind, I believe the native is sitting on the stern. The only difference it makes is that I have the railing curving downward towards the bow and there is a slight difference in the heights of the kupe's (the bow and stern ends that sweep upward). Otherwise, the whole thing is symetrical. Mine too!!
- 174 replies
-
- 4
-
-
- Waa Kaulua
- bottle
- (and 1 more)
-
Yes to your 2nd question. Definitely going to do some kind of thatched structure. Some illustrations show a doghouse like you call it, but others show more of a small pavilion-like thing. So I am TBD on exactly what I'm going to do, but I will do something. Probably add it separately inside the bottle like I did for the archer's tower on my quinquereme. As for your first question, it brings up something I've been uncertain about. And that is which end is the bow and which end is the stern. Here's the full pic below. I see the native sitting at the stern holding a long oar he is using to steer the boat. I think he would be looking forward as the boat rides up the backside of the waves. The waves look like they are moving left to right and the sea gull's wings look like he is gliding downwind. However, the curvature of the sails and the little stringy thing hanging from the top of the left sail make it look like the wind is coming from right to left, which would put the seated native at the bow. How about the way the rigging is tied? Seems like it is tied downward to the left which would mean the wind is moving from left to right, wouldn't it?
- 174 replies
-
- 5
-
-
- Waa Kaulua
- bottle
- (and 1 more)
-
I really like your color variation from wave tip to trough! Well done, Bryan! I've recently discovered Woodland Scenics products for water simulation. Their Water Ripples in particular makes a nice surface layer.
- 134 replies
-
- 1
-

-
- sea of galilee boat
- SE Miller
- (and 1 more)
-
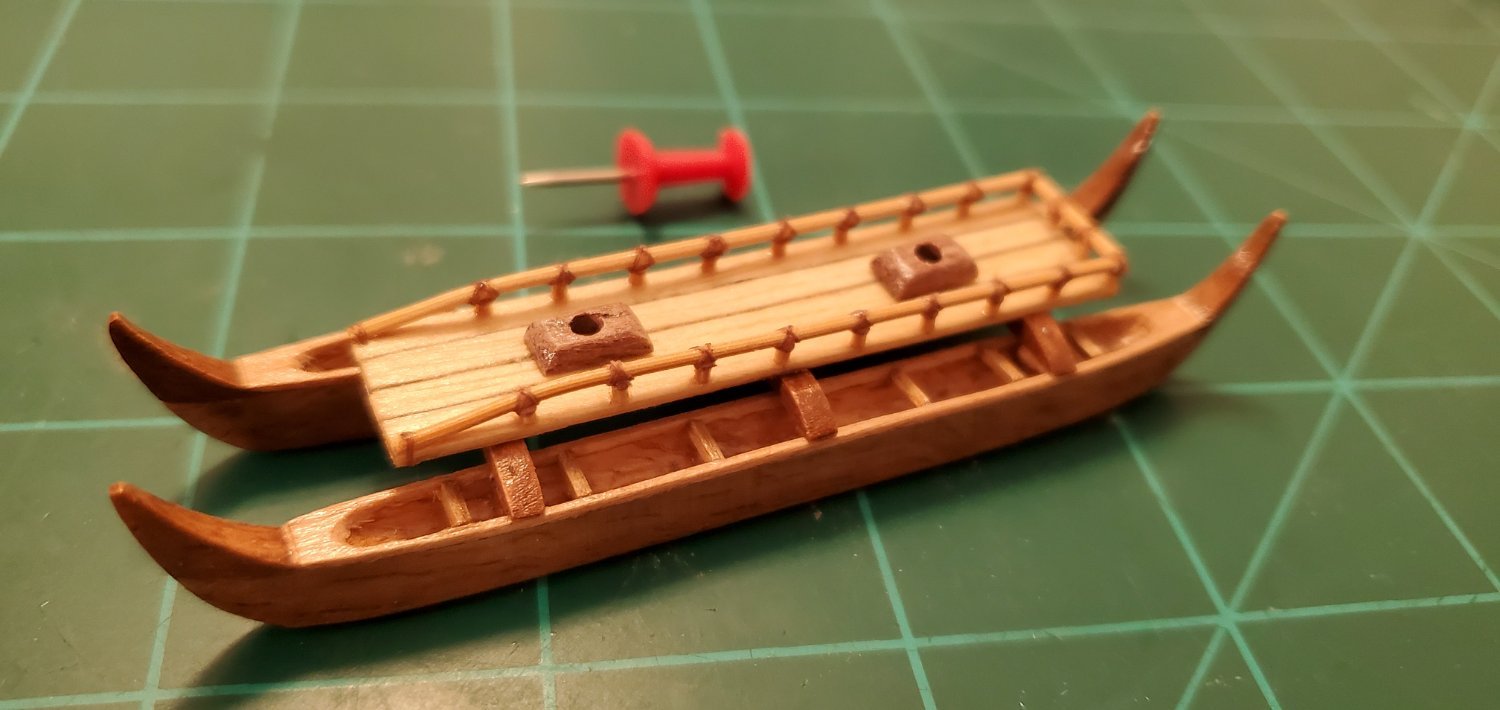
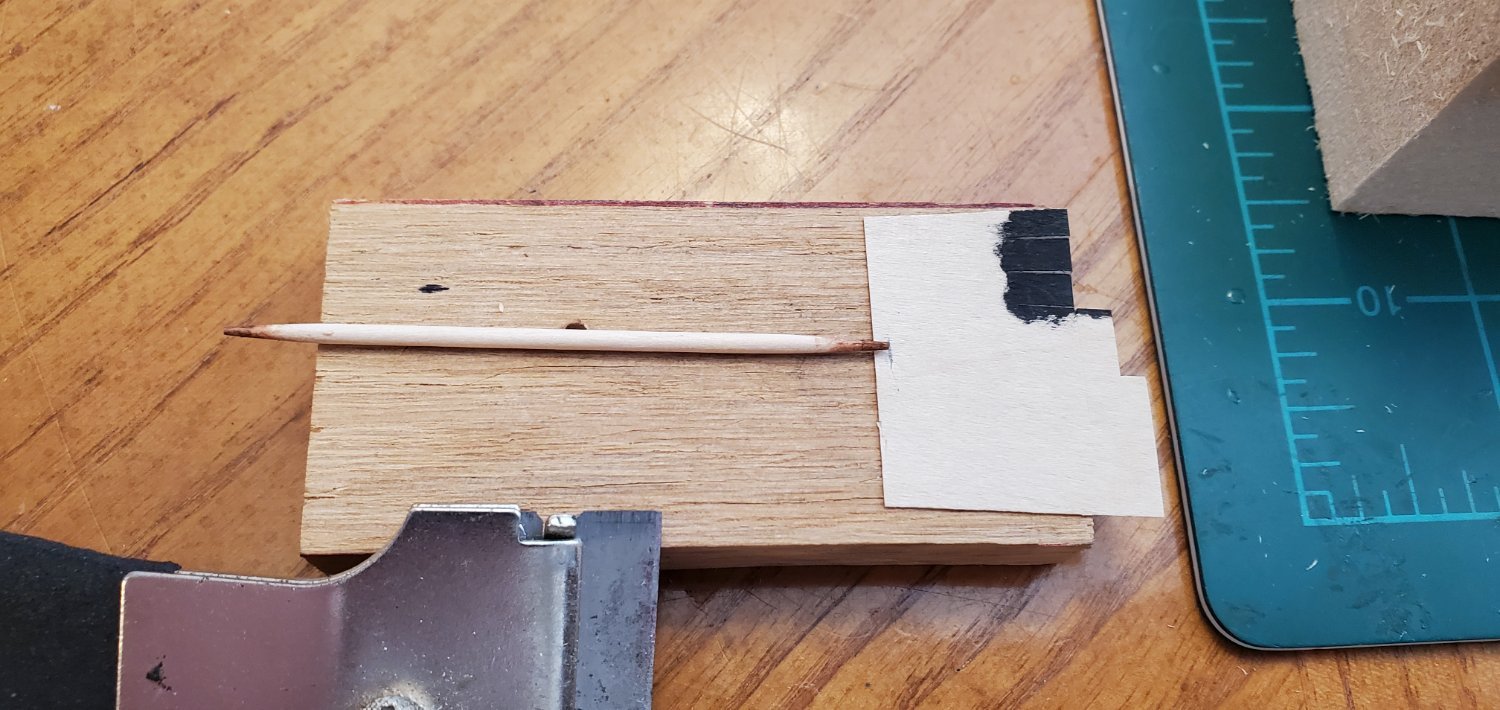
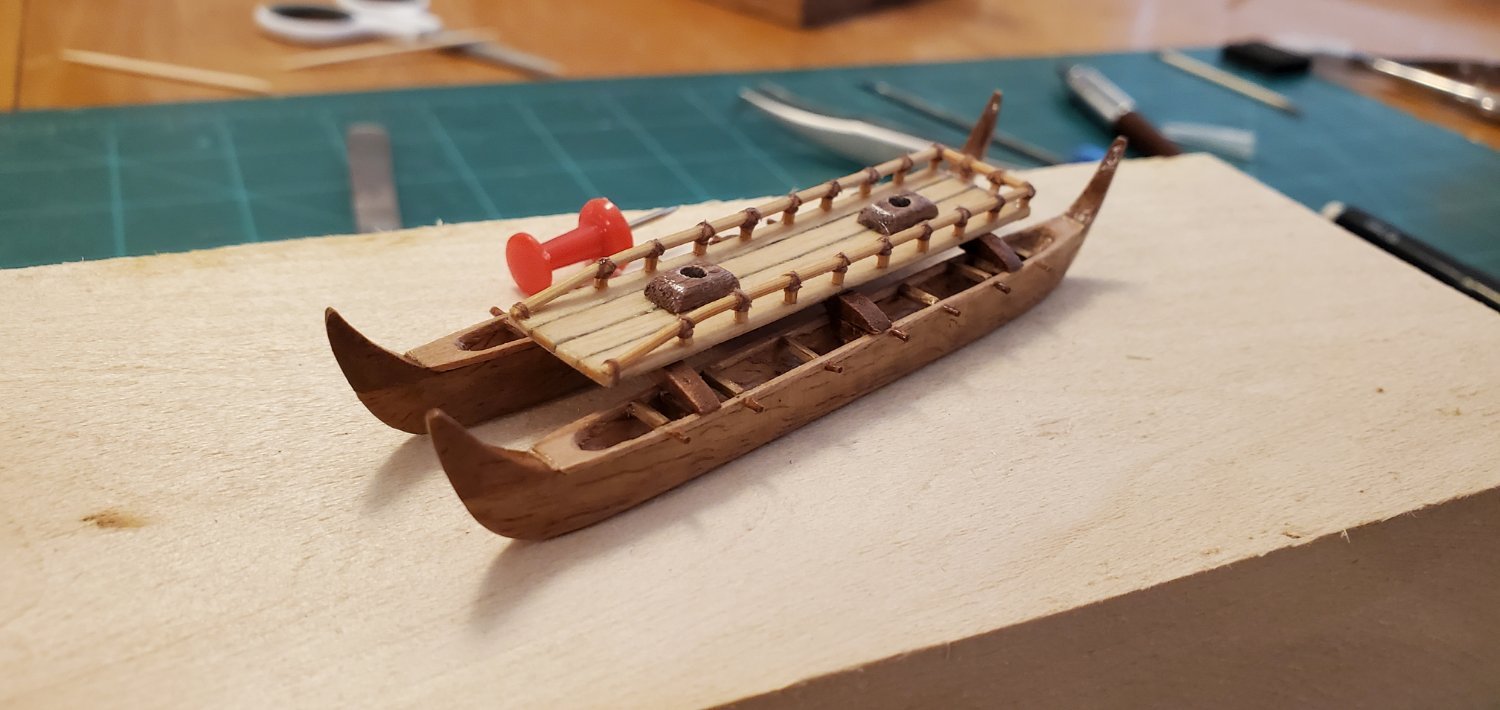
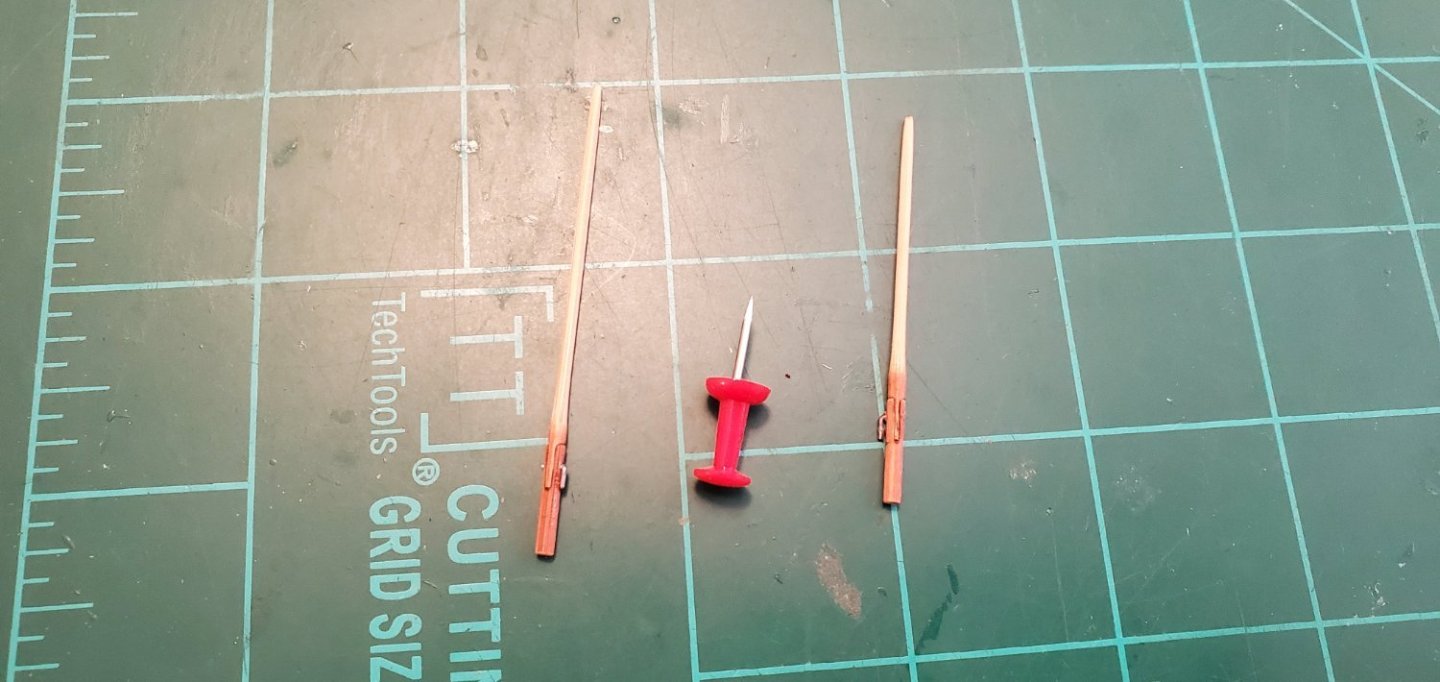
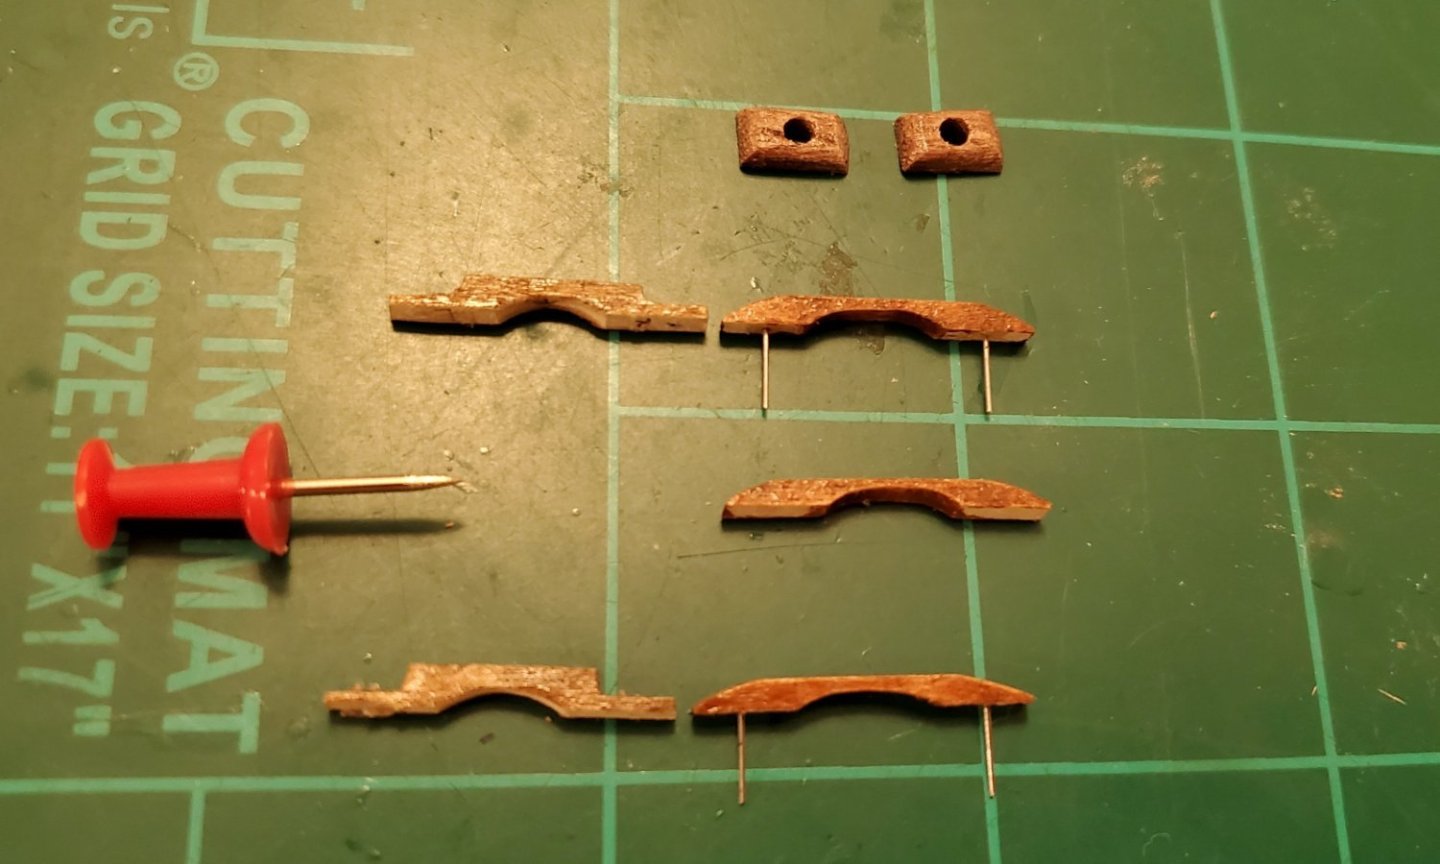
Who am I to argue with Pat. A double tot of Bundy it is!! After my double tot (or was it a triple tot?), I made the mistake of scrutinizing my work and I did not like a couple of things. First, the pola (deck) looked like it was sitting too high above the ka'ele's (hulls). I know it's supposed to ride high enough to give plenty of clearance between it and the water, but it's a bit tall compared to the illustrations I've been using as a guide. Second, I did not like the way I had squared off the Kūanuenue's (connecting ribs). I thought they would look better with a smooth curve going from the edge of the pola to the ka'ele. So time to backtrack just a little. In the pic below, the "before" Kūanuenue's are on the left and the "after" on the right. We're only talking about 1mm of height shaved off, but I think it makes a difference and gives a better overall look to the boat (compare the 2nd pic below to the pic above Pat's post directly above). I also went ahead and made a pair of mast steps. Those are made out of macadamia nut wood. Next, I started thinking about the masts and sails, which also made me think about the rigging. These boats did not have a lot of rigging, but the question I had looking at mine was where would the rigging be tied off (running rigging in particular)? So I went back to my main illustration and found a small detail I had missed. There are wooden protrusions which appear to be extensions of the wae's (the spreaders that look like seats). The running rigging is attached to these. The next question was how to make and add these without messing anything else up. The solution was toothpicks. After staining, I cut slightly less than 1mm of the tip and then CA glued them on. I think they ended up resembling an extension of the wae's poking thru the mo'o (gunwale). This seemed like such a simple little boat when I started!! 😵😵😵


- 174 replies
-
- 13
-
-
-
- Waa Kaulua
- bottle
- (and 1 more)
-
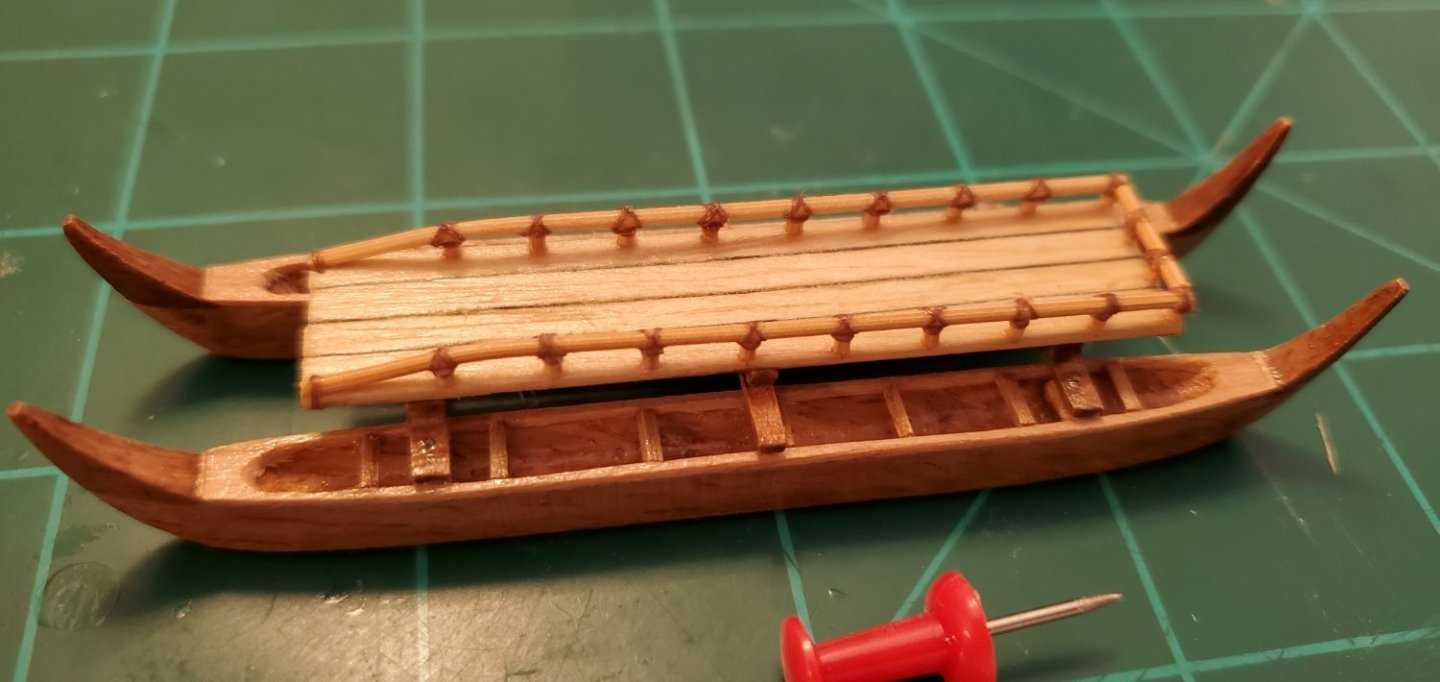
Glad to have you on board for another ride into the great unknown, Grant! A small update here (although not small in time spent, which was 3-4 hours of eye-crossing work). I added a back rail and then lashing to all the places where the tiny stanchions contact the rail. Almost made me want to go tie some ratlines. Almost, but not quite! 😃 The lashing is 136D 6/0W fly tying thread.
- 174 replies
-
- 15
-
-
-
- Waa Kaulua
- bottle
- (and 1 more)
-
@Keith Black tried to get me to do that at 1/500 on my Aurora build, but I could not pull it off! 1/2000?? Whoa!
-
Me too, Keith! I could not figure out how to make the hulls and deck fit into the bottle as 1 assembly. So, the plan is to take the hinged hull structure by itself and insert into the bottle. Then straighten it up and glue it down. After the glue is dry, I'll add the deck/mast/sail assembly as a single piece and glue it onto the ribs connecting the 2 hulls. The masts will be secured to the deck before insertion, hinged down flat towards the stern, then raised after all the glue is dry. That's the plan, anyway. But we know how well my plans end up sometimes! 😵
- 174 replies
-
- 7
-
-
- Waa Kaulua
- bottle
- (and 1 more)