Glen McGuire
-
Posts
1,974 -
Joined
-
Last visited
Content Type
Profiles
Forums
Gallery
Events
Everything posted by Glen McGuire
-
 I've encountered this as well with all my epoxy pours. For me, it's usually inside the bottle so it's not a problem because it's hard to distinguish raised edges from distortion looking thru the glass. However, when I did my base for Archimedes' Claw, the epoxy noticeably leeched upward into the rocks at the base of my seawall wall. I do not believe the center of the epoxy shrank during curing because I know what level I poured and the edges ended up higher than my original pour. The edges seem to crawl upward during curing as they are in contact with another surface. There's probably some chemistry or physics behind that, but it's well beyond my expertise. Perhaps @Roger Pellett could weigh in on this phenomena.
 -
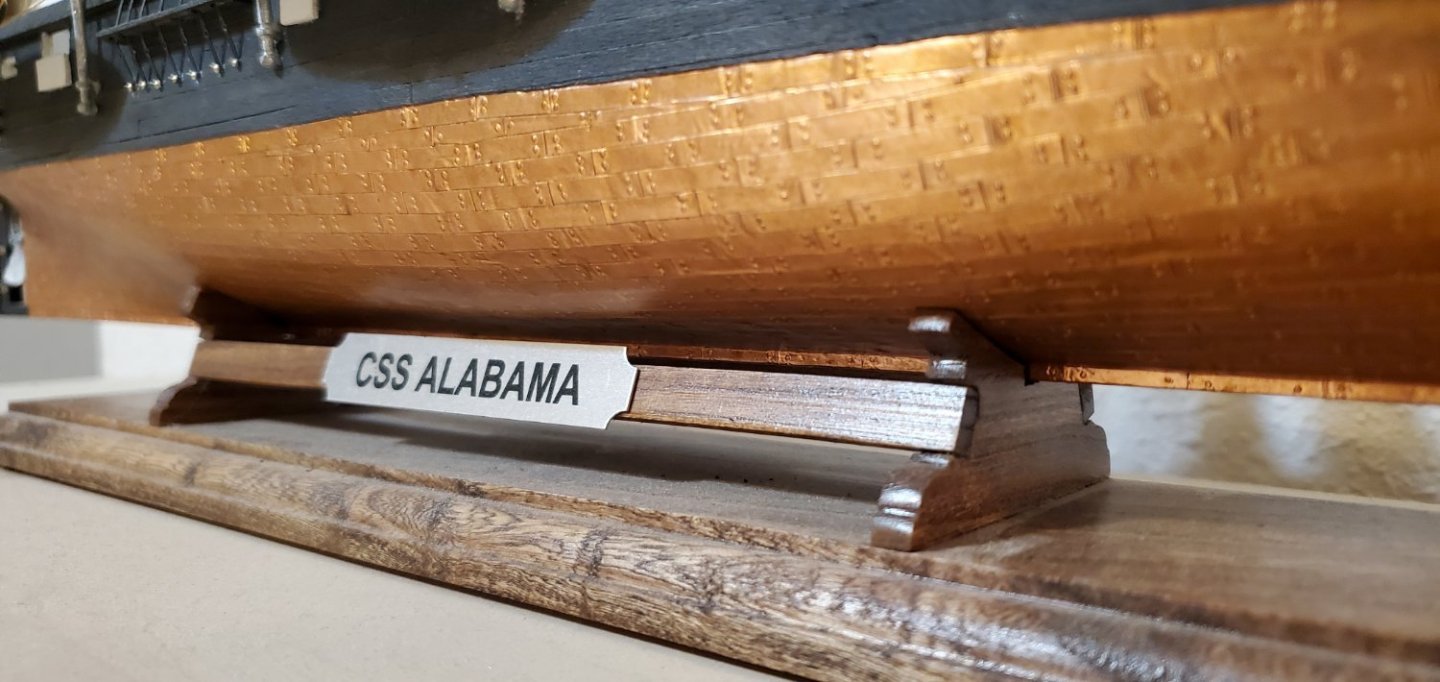
Hey Bob - for my one and only regular ship model, Mamoli's CSS Alabama, I sealed my copper plates with 3 coats of satin polyurethane. It's been almost 4 yrs now and I have handled it numerous times with no fingerprints. I wanted to maintain the copper coloring and it does not appear to have changed its tint at all in that time. And BTW, your stand looks great!!
- 261 replies
-
- 11
-

-

-
- Victory Models
- Pegasus
- (and 3 more)
-
I think you overcame the challenges quite nicely. The side shot showing the underwater part of the ship is very cool.
-
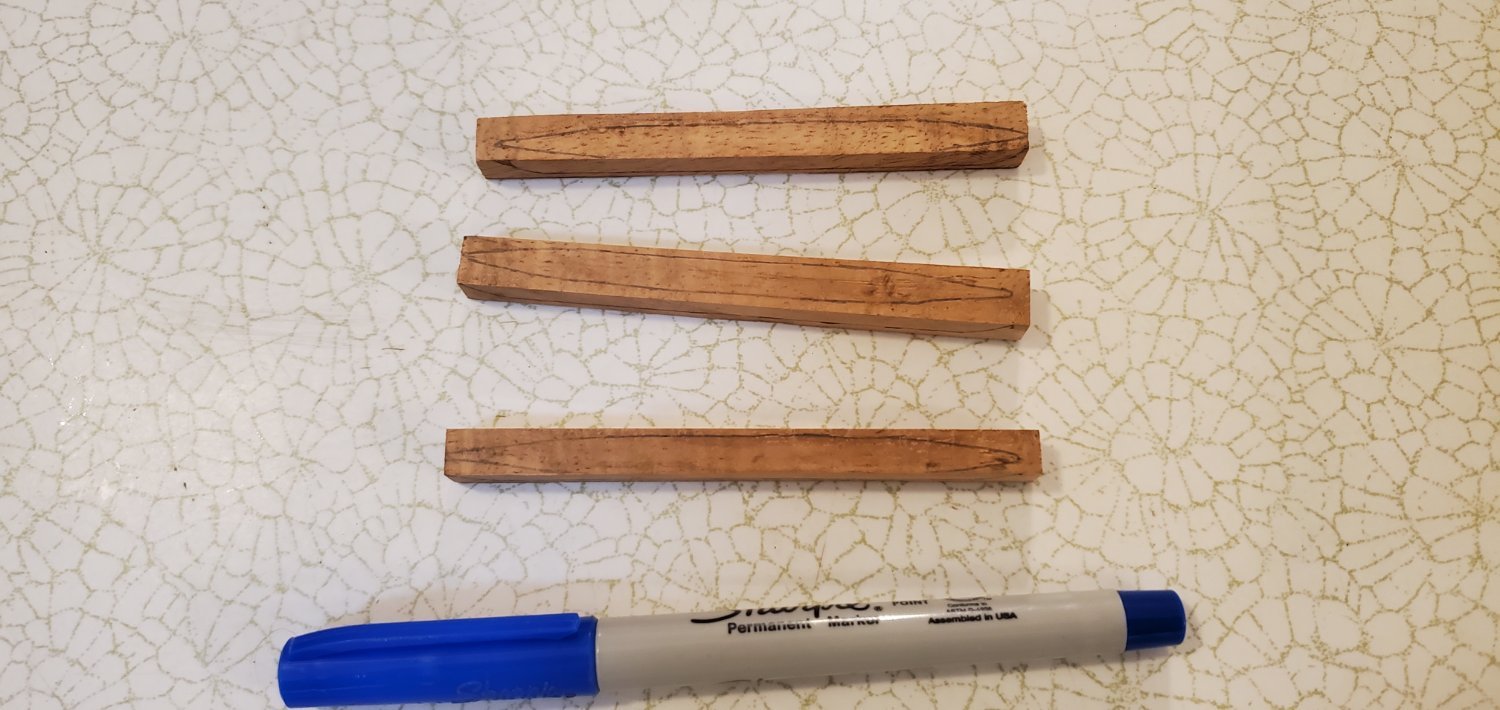
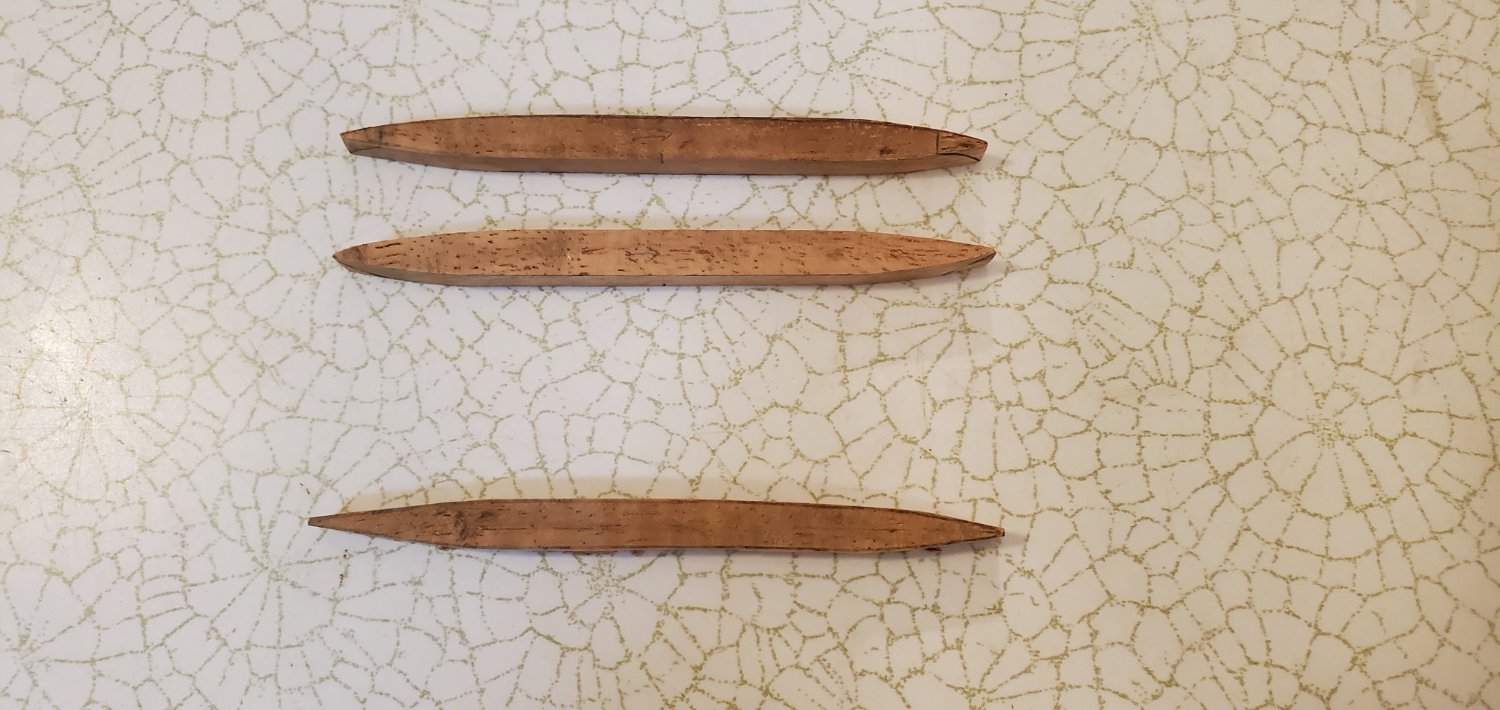
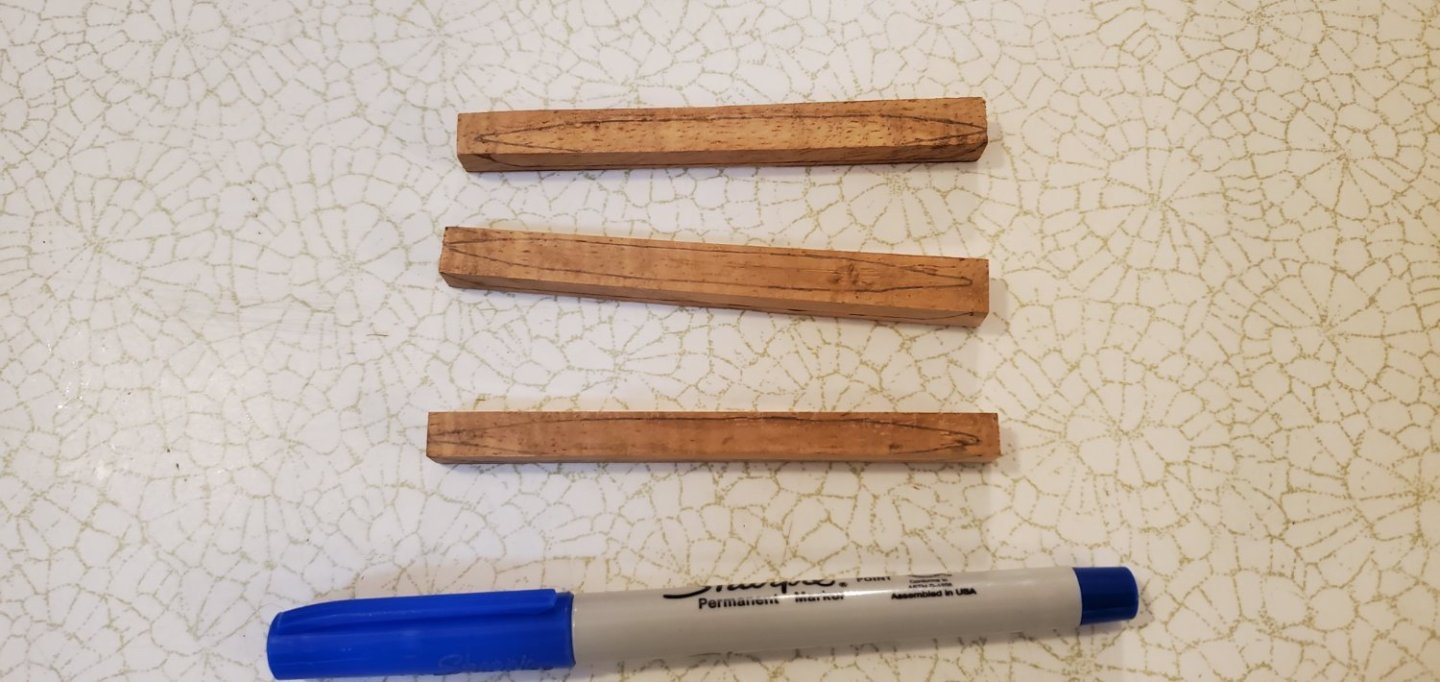
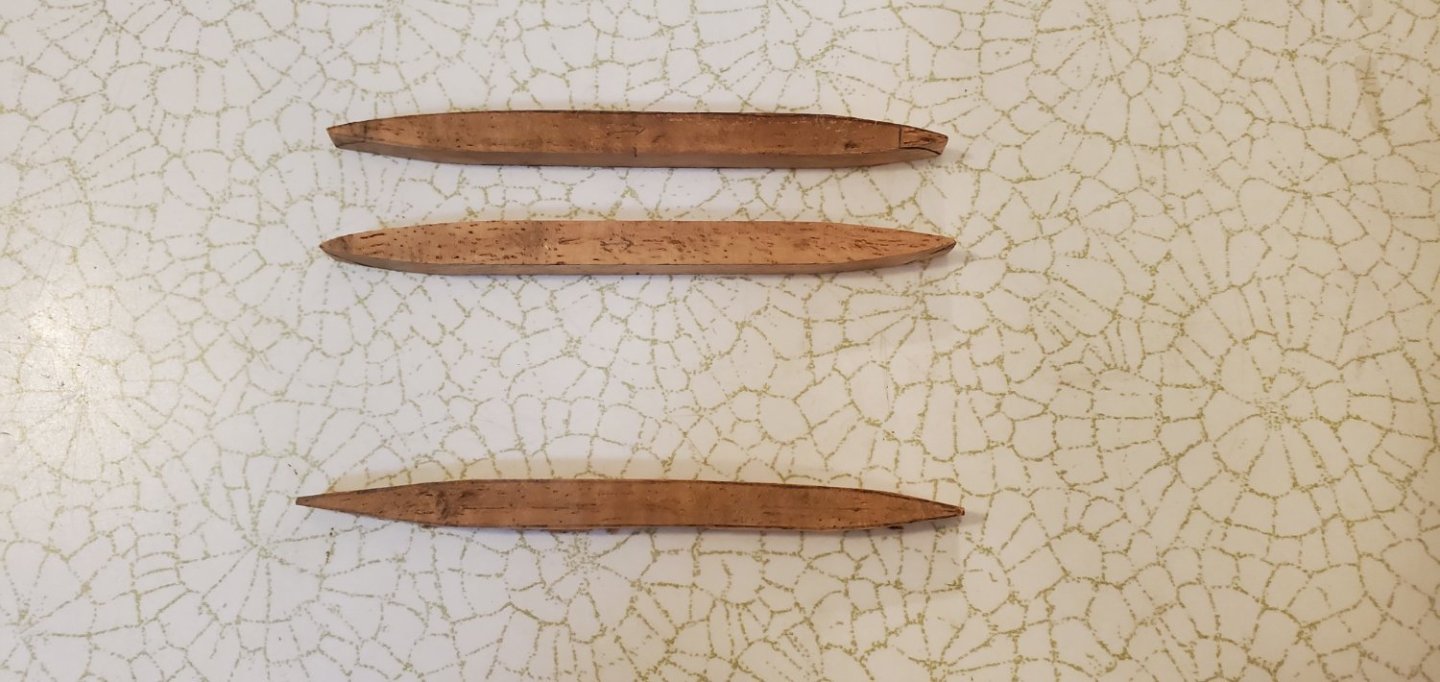
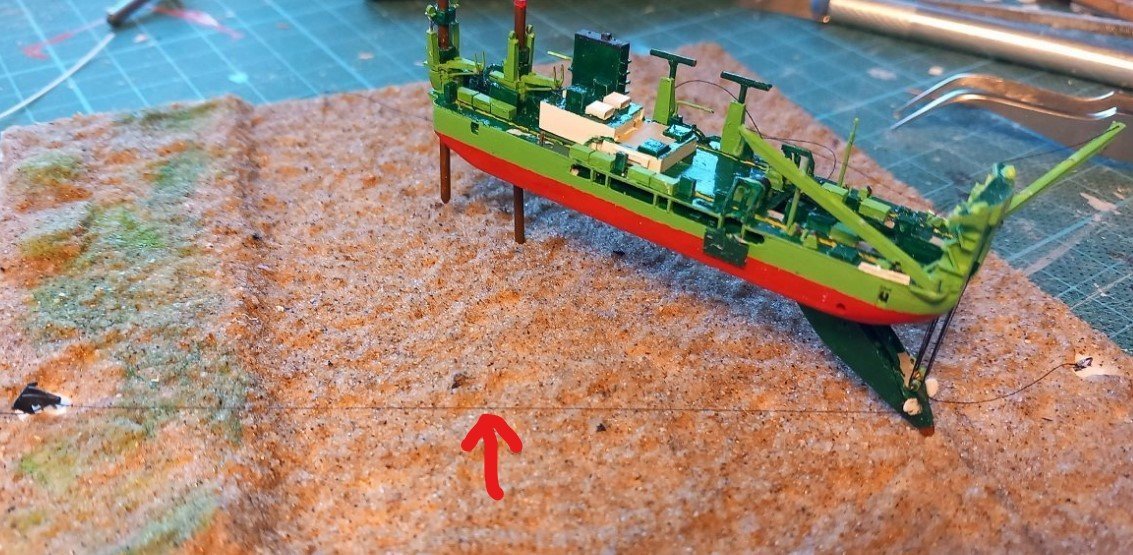
The first step for me is to shape and hollow out the hulls. The Hawaiian word for hull is ka'ele. Each ka'ele was hollowed from a single koa tree so it had to be a large and very old tree, likely 150-200 years old. After a suitable tree was found, the main canoe builder would meditate and sleep at the base of the tree to from a bond with the tree and obtain its consent to be used for the ka'ele. After felling the tree, it was partially hollowed out in the forest, then hauled to the shoreline to complete the construction process. The ka'ele was rounded like a U and did not have a keel. This made it easier to land and launch in the surf along shoreline as well as navigate in rough seas. To hollow out my ka'eles, I used a dremel with a round bit. The ka'ele also had an upsweep at the bow and stern called a kupe. It was a separate piece carved and added after after the ka'ele was shaped. That will be my next step.


- 174 replies
-
- 13
-
-

-
- Waa Kaulua
- bottle
- (and 1 more)
-
Thanks for the info, Harvey. I actually did run across Tommy Holmes in my research as another one of the original founders of the Polynesian Voyaging Society (in addition to Herb Kawainui Kāne who I quoted earlier). Mr. Holmes' book was appropriately titled "The Hawaiian Canoe". I would have loved to buy it, but $76 used on Amazon was a bit pricey for me. Thank you, Jacques! A very interesting site indeed - particularly the dragon junk ship. My son will be wanting me to do something like that next!
- 174 replies
-
- 5
-
-
- Waa Kaulua
- bottle
- (and 1 more)
-
Whenever I start one of these build logs, I know I am going to learn some interesting things from the comments. Such as: That is fascinating, John! I guess it reinforces how centric the canoe was to the Polynesian thinking and way of life. Than makes two of us, Javelin! I don't really have a plan yet which is why I started on the canoe first. Only if you promise to do the same and outfit your quadrireme with a full rowing crew, Ian!! 😃 I had not thought of that. Thank you for the heads-up!
- 174 replies
-
- 4
-
-
- Waa Kaulua
- bottle
- (and 1 more)
-
Excellent work, Javelin! She looks superb with the water and sea floor. Very well done!!
- 51 replies
-
- 3
-
-
- Sea Installer
- Bottle
- (and 1 more)
-
Interesting indeed, Steven. In my research, I ran across a number of terms for these types of canoes that seemed somewhat interchangeable - ama, aka, vaka, waka. I guess this should not be surprising given the wide geographical reach of Polynesia and the variety of cultures within. Vaka seemed to be the most prevalent term so that's what I referenced in my post. Thanks for sharing that build log. @John Allen did an absolutely marvelous job with his Waka-Maori war canoe. I had actually run across an aborted build log of his that he apparently started before tackling the Maori war canoe. He started a log on the Holukea, which is a modern replica of a Wa'a Kaulua - https://modelshipworld.com/topic/13001-polynesian-canoe-holukea/#comment-395968. But unfortunately, there are only a few posts. The Hokulea was built in 1975 with the purpose of making long, ocean voyages in the tradition of ancient Hawaiian voyaging and navigation traditions. To date, it has reportedly sailed over 162,000 nm across the Pacific. While I am not trying to duplicate the Holukea (no solar panels on my Wa'a Kaulua!), there are some decent plans available for it that I may draw from for my build.
- 174 replies
-
- 4
-
-
- Waa Kaulua
- bottle
- (and 1 more)
-
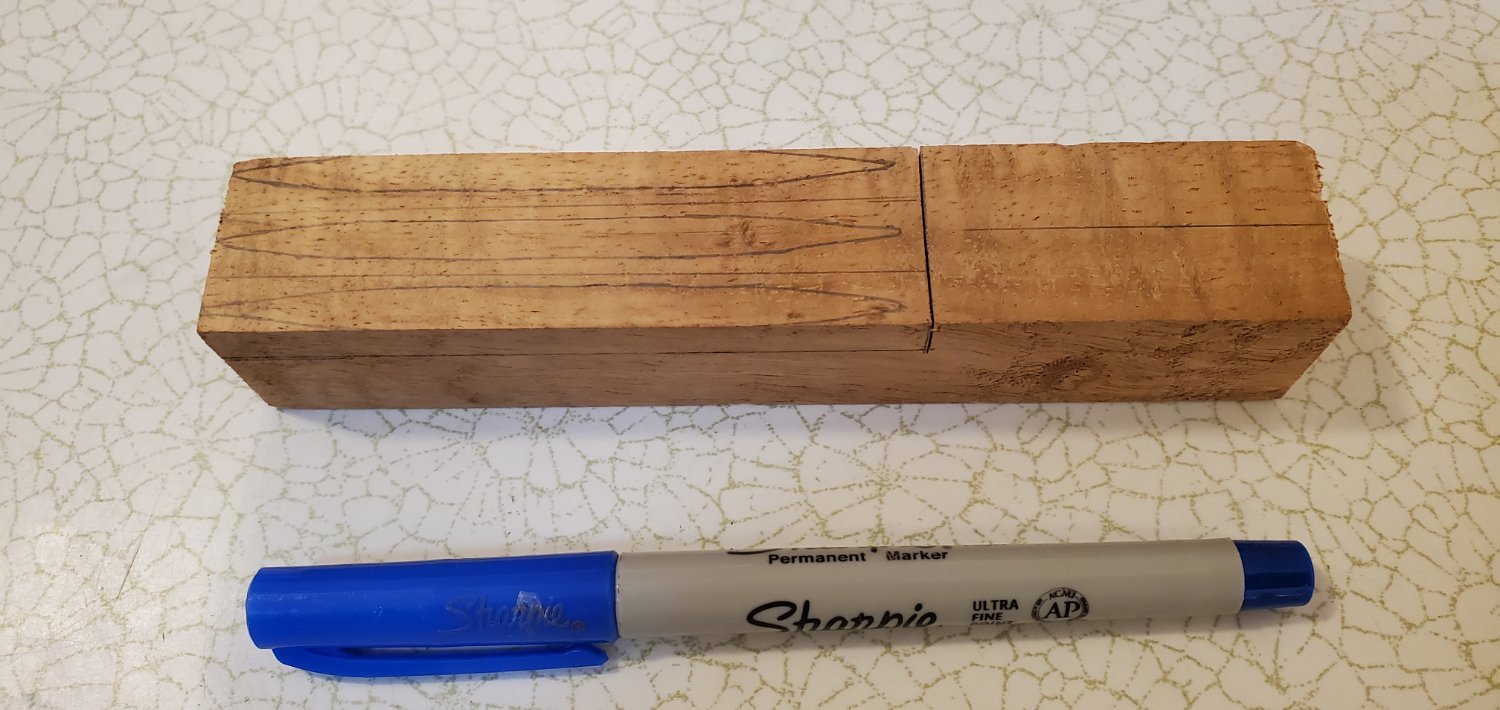
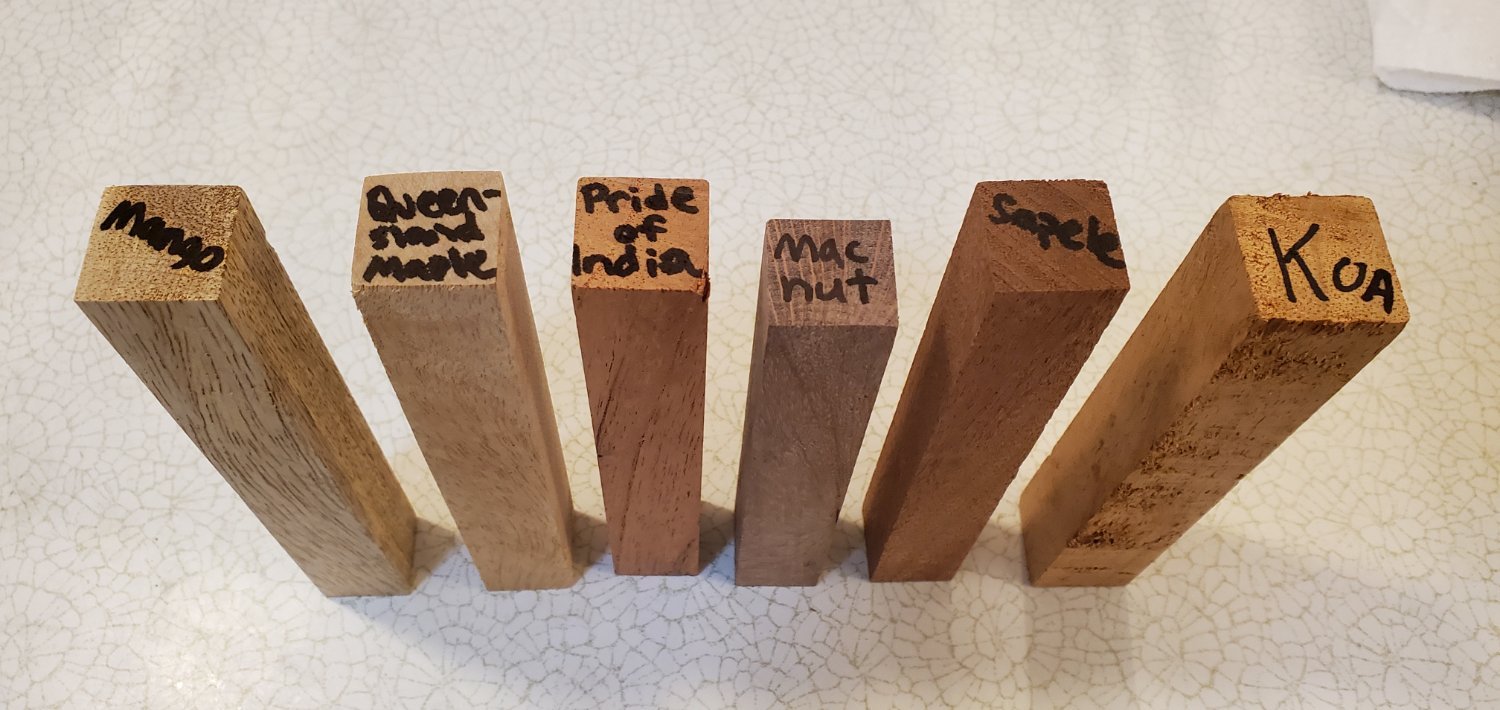
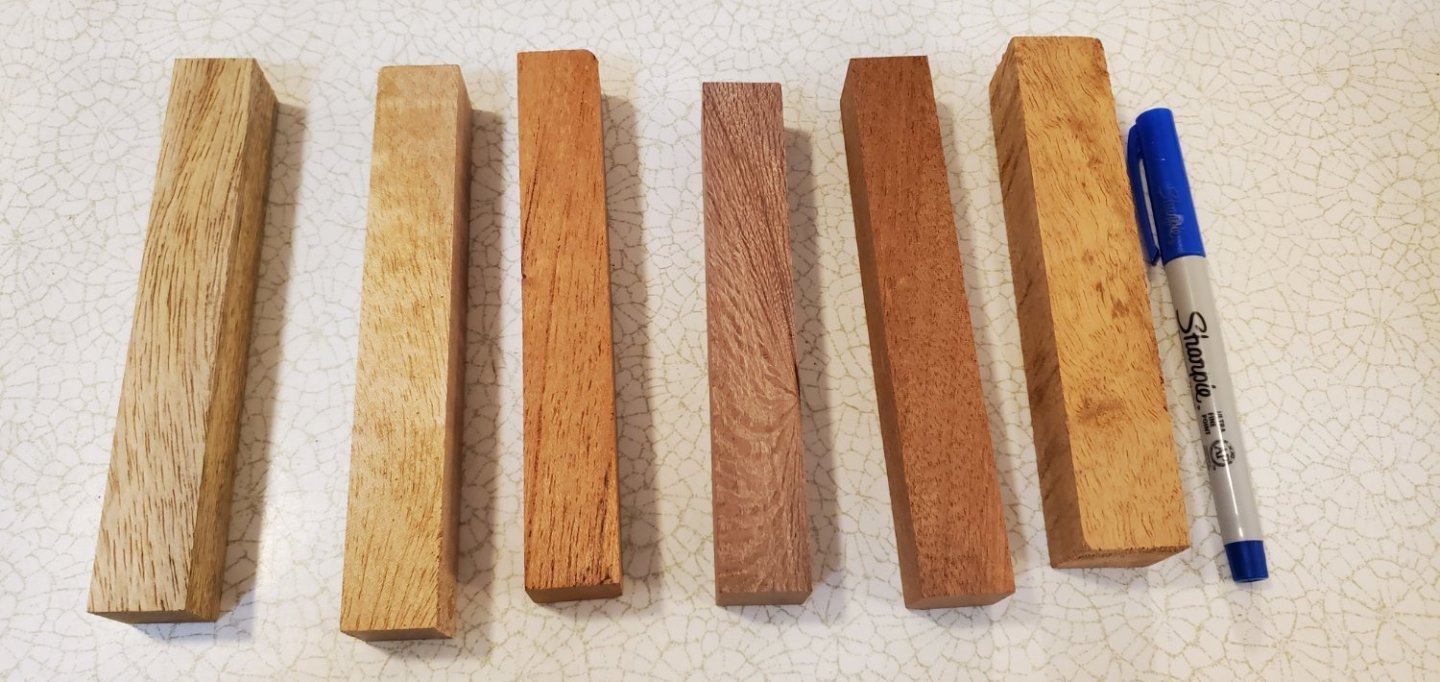
For this project, I’m going to start with the ship itself. As mentioned in the previous post, the Polynesians, and in particular the Hawaiians, held a special reverence for their ocean voyagers. Hawaiian historian, artist, and founder of the Polynesian Voyaging Society, Herb Kawainui Kāne described it as such, “The Wa'a shaped the Hawaiian people physically, intellectually and spiritually as much as the Hawaiians shaped the logs that became their canoes.” This spiritual bond began with the selection of the tree used for the hulls. On the Big Island, the Koa tree was large enough so that it’s trunk could be hollowed out to form a one-piece canoe hull. Thus, the koa became the tree of choice for the Wa’a hulls. Most Wa’a hulls were between 20 feet and 30 feet long, but some extended as far as 60 feet in length. My hulls will be 3.5” long, so I am pegging the scale at 1/100. Actual construction of the Wa’a involved many people as well as sacred cultural and spiritual traditions. The website https://www.hemakeewaa.org describes the beginning of the construction process as follows: “First, a kahuna, or Hawaiian priest, had to search for the perfect site and tree by following the ‘elepaio, or Hawaiian forest bird, into the forest. Since the ‘elepaio was attracted to rotting Koa wood, if the bird began pecking at the tree, that meant the wood was not solid and the tree would be useless for the strong structure it took to build a canoe. Once finding the perfect tree, the kahuna would then gather the canoe builders and workers, staying throughout the building process to offer prayers and blessings.” I want to be as historically accurate as I can (within reason), so I thought it would be cool to make my hulls out of koa wood. I scrounged around the internet and found a company in Hawaii that sells exotic wood blanks, including koa. I ordered a sampler pack and received in interesting mix of hardwoods – koa, sapele, macadamia nut, pride of India, Queensland maple, and mango. I think the one piece of koa is large enough to give me a couple of tries at making my hulls in case I mess up the hollowing out process.

- 174 replies
-
- 14
-
-
-
- Waa Kaulua
- bottle
- (and 1 more)
-
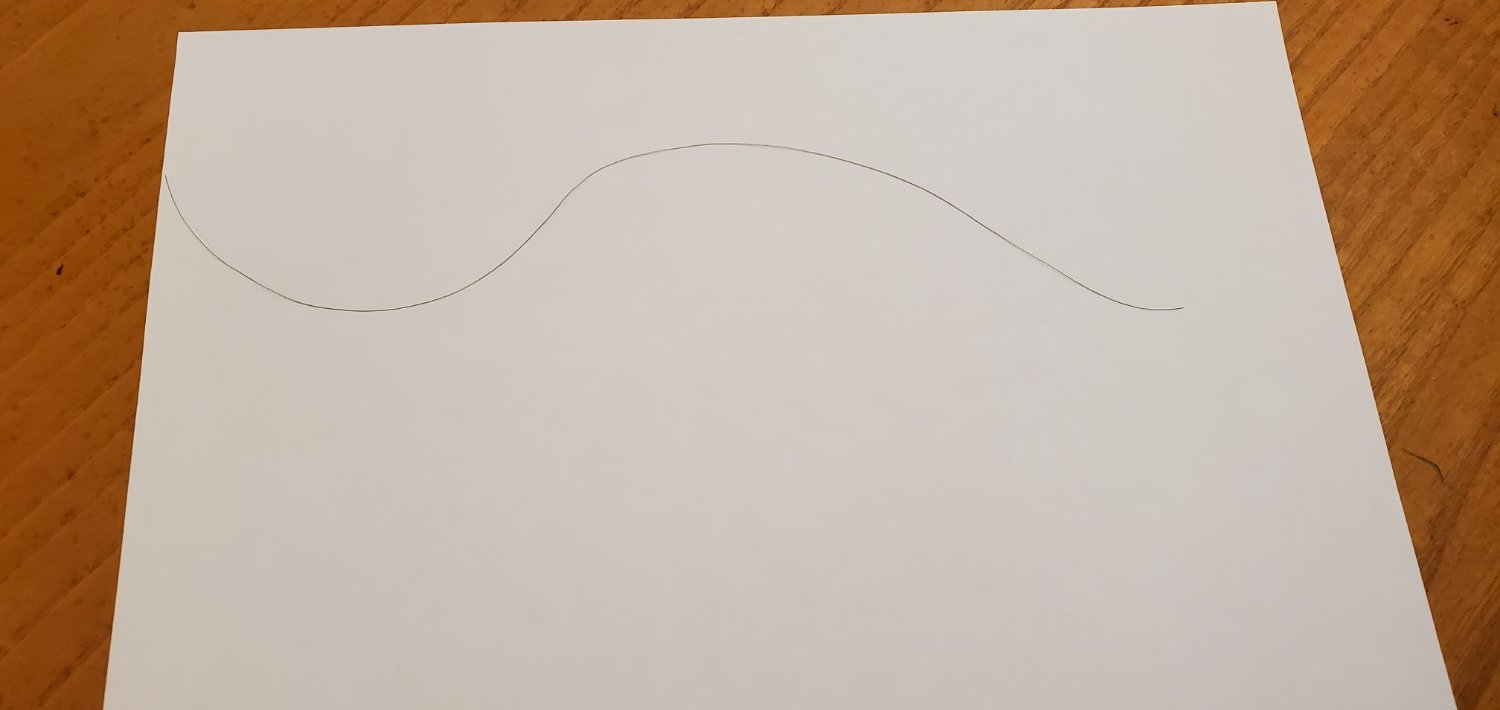
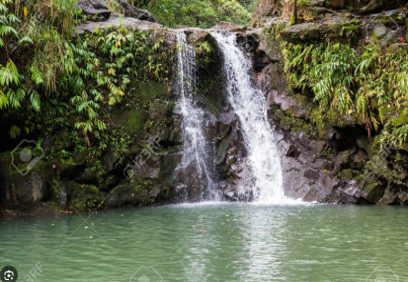
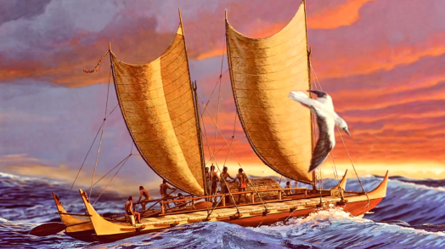
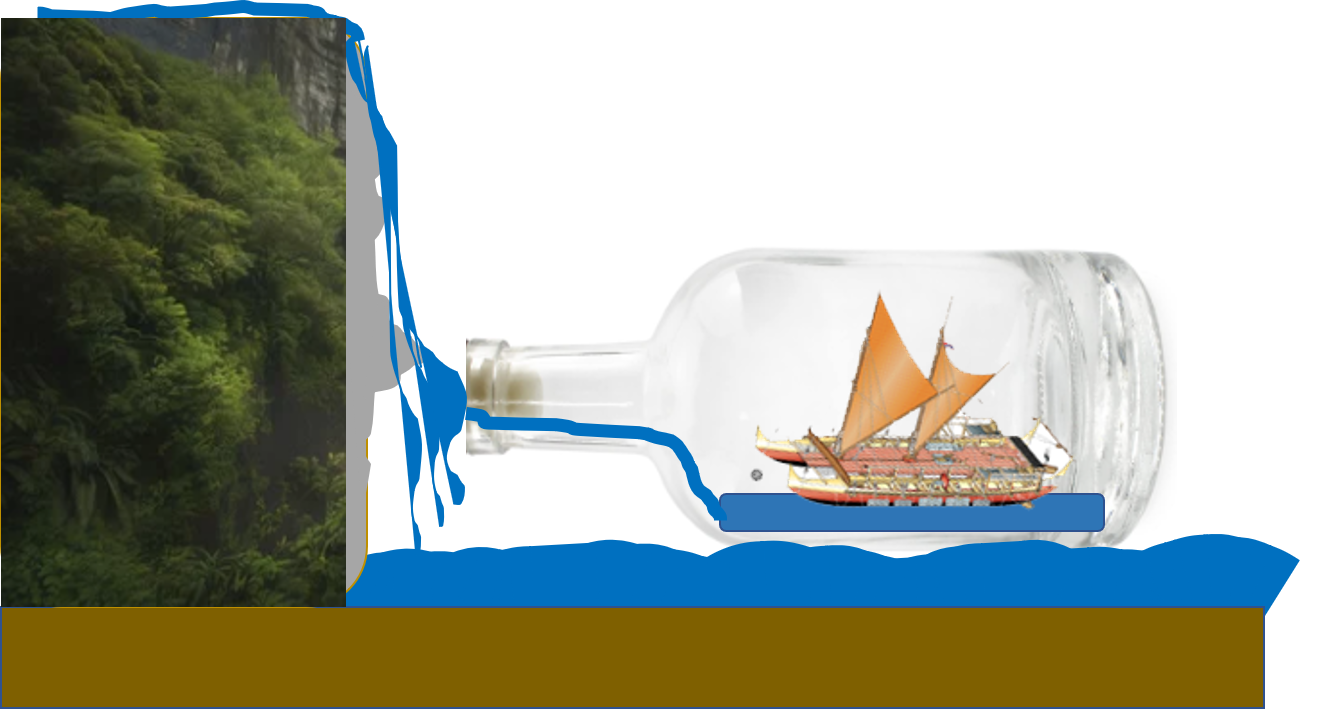
I’ve really enjoyed the challenge of doing different water effects for the base of my last two projects – the Kraken and Archimedes’ Claw. I wanted to continue along those lines with the next project, but still try something new. I’ve always loved waterfalls, so why not try to build a SIB project around one? OK. Waterfall for the base. Now what? When I think of waterfalls, I think of Hawaii. So I decided that I’d go for what I consider a typical Hawaiian waterfall – ribbons of water bouncing down a broken rock face into a pool of pristine water surrounded by lush greenery. Something like this: As for the ship in the bottle, my first thought was a traditional age of sail ship with a historical connection to the Hawaiian islands. One option was Captain James Cook’s HMS Resolution, which he was aboard when he discovered Kauai in 1778. Another possibility was Cleopatra’s Barge which was a two-masted brigantine purchased by King Kamehameha II in 1820. However, after doing a lot of reading about ancient Hawaiian and Polynesian ocean travel, I became fascinated with the early voyager canoes that were used by natives to travel long distances between islands on rough, open seas. I was also fascinated by the almost spiritual reverence the Polynesians held for these vessels, which was evident in both their construction methods and subsequent care. Polynesia encompasses almost 120,000 square miles of the Pacific Ocean and includes over 1000 islands. The names, construction and function of the voyager canoes varied depending upon where in this vast expanse they were primarily used. For the ancient Hawaiians, the traditional name for a canoe was Wa’a. The design of the Wa’a evolved from earlier Polynesian ocean canoes called Vakas. The Wa’a was designed for propulsion by both sail and oar and tailored to the geography surrounding the Hawiian islands. With no barrier reefs protecting the Hawaiian Islands, the Wa’a had to be able to navigate large ocean swells closer to shore. For my project, I made the decision to build a double-hulled Hawaiian canoe which is called a Wa’a Kaulua. OK. Waterfall base – check. Wa’a Kaulua canoe in the bottle – check. Now, does the bottle just sit in the pool of water at the base of the waterfall? Hmmmmm. That seems kind of boring. Then an idea popped into mind – what about having the bottle opening nestle up against the waterfall’s cascade, but a portion of the falling water splashes off a small outcropping and diverts into the bottle as it it’s filling up the bottle with water? Crude powerpoint illustration: So that’s the plan! And without further ado, here we go!
- 174 replies
-
- 15
-
-
- Waa Kaulua
- bottle
- (and 1 more)
-
Welcome aboard, ensor!!!
-
Your choice of ships to build is always most interesting! Looking forward to your work on this one as well.
-
I find it interesting that you weigh your amounts of resin and hardener. I assume that's per the product's instructions. The epoxy resin that I use is very strict about measuring equal amounts of resin and hardener before mixing but does not mention weight. I would think there might be a slight difference in weight between the hardener and resin because their viscosities seem a bit different, but I've never considered it before. Do you use equal measures of resin and hardener based on weight?
-
I think you are fixing to be an expert at coppering hulls! Great job so far!
- 261 replies
-
- 7
-
-
-
- Victory Models
- Pegasus
- (and 3 more)
-
Nice work with the brush. Your paint job looks great!
-
Great idea! This is such a unique rigging job. Very cool to watch and see you pull it all together.
-
Thanks for the diagram and explanation of all the wiring. That really helps to understand what I'm looking at in your model. Back to your original question about keeping that thin thread in the shape you want, rather than wrapping around itself. The thinnest thread I use is Uni fly-tying thread 72D, 8/0. To eliminate the natural curves and loops it has from being wound around the spool, I will cut a piece, drag it thru Aleene's Fusion Fabric Glue, pull it taut, and let it dry (the glue dries flexible so the thread is still workable). See pic below where I did all of that and then lay the thread on a piece of paper with a couple of smooth curves. It is just resting on the paper, not glued to it.

-
This is such a unique ship, I'm having a hard time figuring out what parts of the ship you are referring to. Is this the anchor hoisting wire you are talking about?
-
It's fascinating to watch your problem solving skills put to the test with each step! Such an interesting project.
-
Totally agree with Chris. The carving skills on display with the small parts are particularly impressive. Well done, John.
- 282 replies
-
- 1
-
-
- Bluenose
- Model Shipways
- (and 1 more)
-
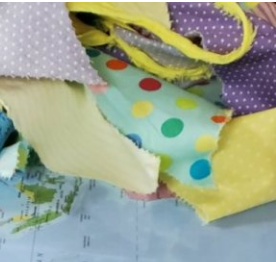
Hey O.B.one, sorry I'm way late to the build log. Just stumbled upon it today. That is a well-crafted ship. Looks very nice inside the bottle. I'm anxious to see how your sails turn out (I prefer fabric ones myself). I hope you are saving that polka dot material for your next build!