HOLIDAY DONATION DRIVE - SUPPORT MSW - DO YOUR PART TO KEEP THIS GREAT FORUM GOING! (Only 20 donations so far - C'mon guys!)
×


Glen McGuire
-
Posts
1,957 -
Joined
-
Last visited
Content Type
Profiles
Forums
Gallery
Events
Everything posted by Glen McGuire
-
 Thank you for the kind words and the pirate toast, Grant! But this... OMG! I just did another forehead slap. 😃🙄
- 134 replies
-
- 4
-

-

-
- Captain Kidd
- bottle
- (and 3 more)
-
Thank you, Knocklouder! And dang, I wish I'd thought of using the toasting pirates emoji!! Thank you, Keith! I appreciate your insight and good sense of humor along the way. You always keep me in good spirits! Thank you, Dave. I really appreciate you following this build! Thank you, Ian! I thought about having a little pirate with a peg leg holding the lid open. But I figured if I can't even carve a simple penguin, no way could I do a pirate!
- 134 replies
-
- 3
-
-
- Captain Kidd
- bottle
- (and 3 more)
-
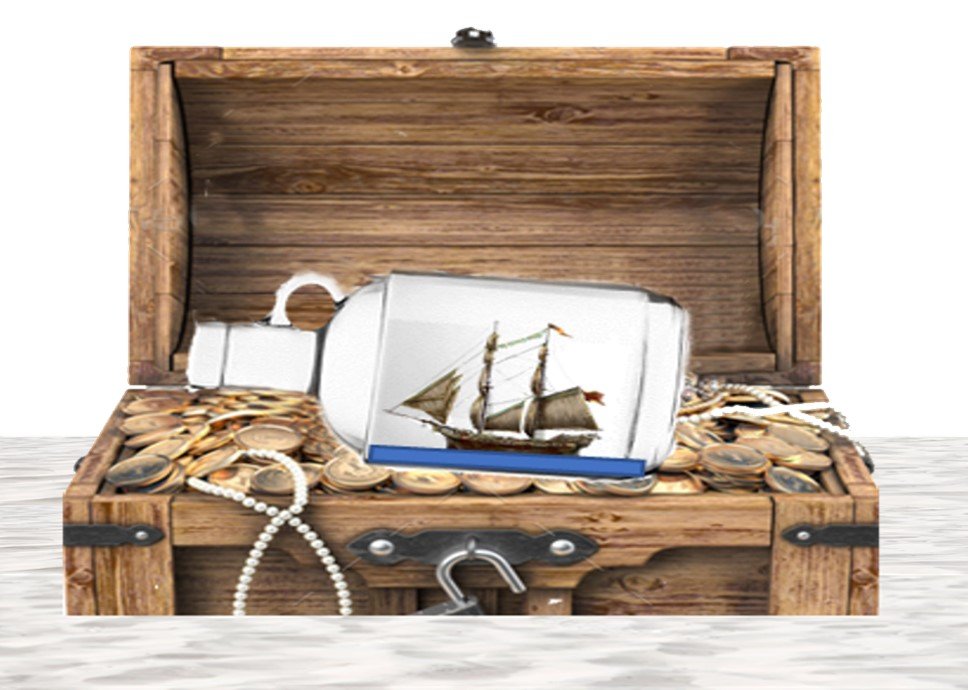
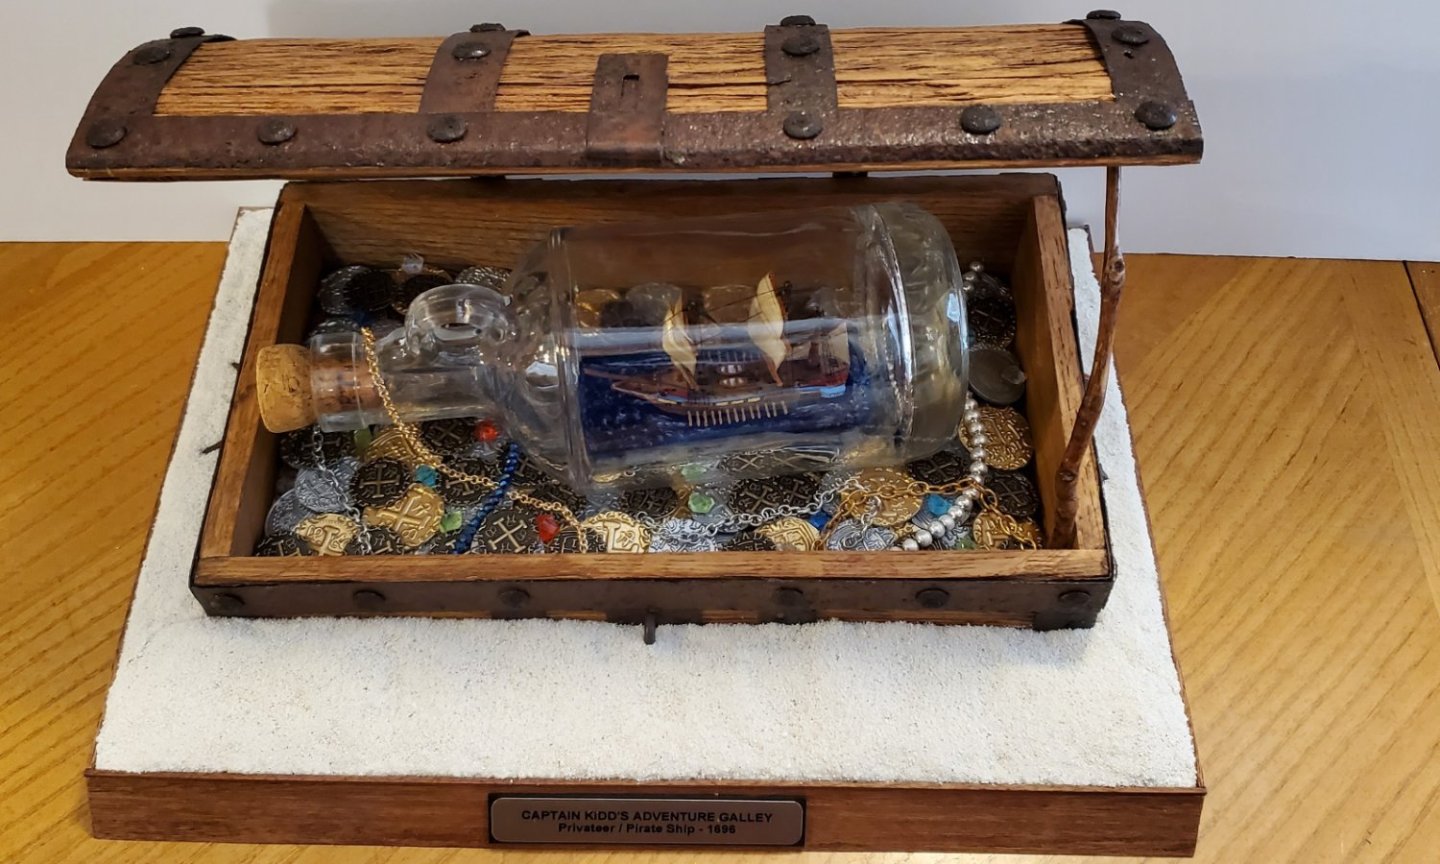
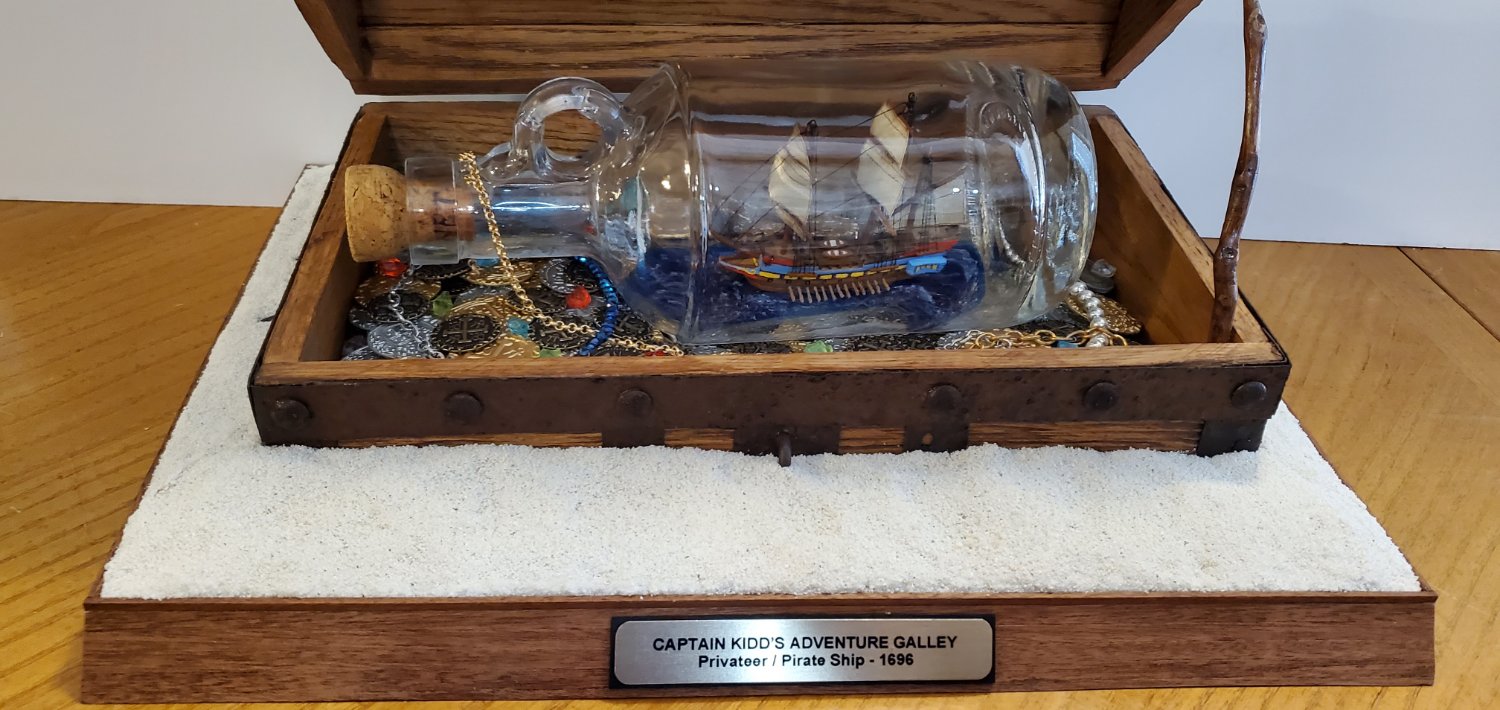
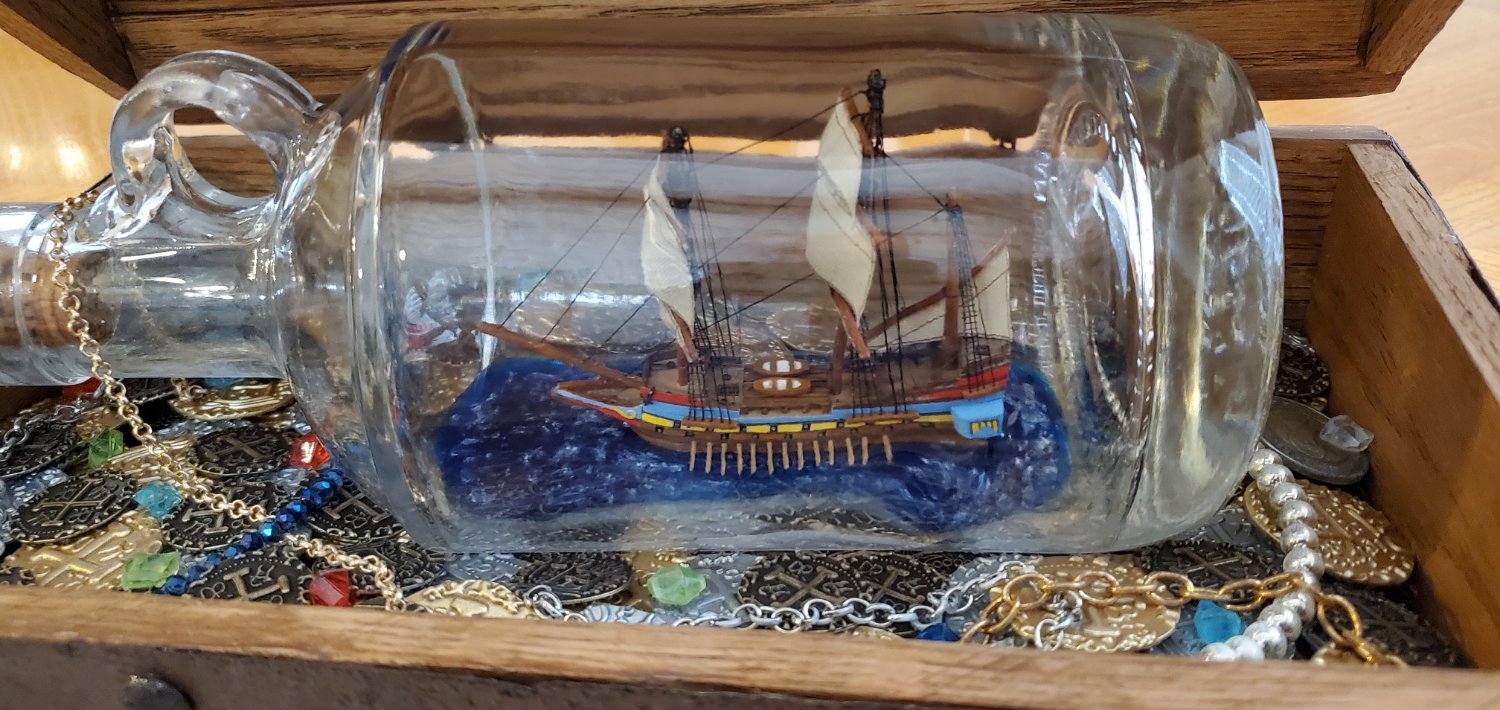
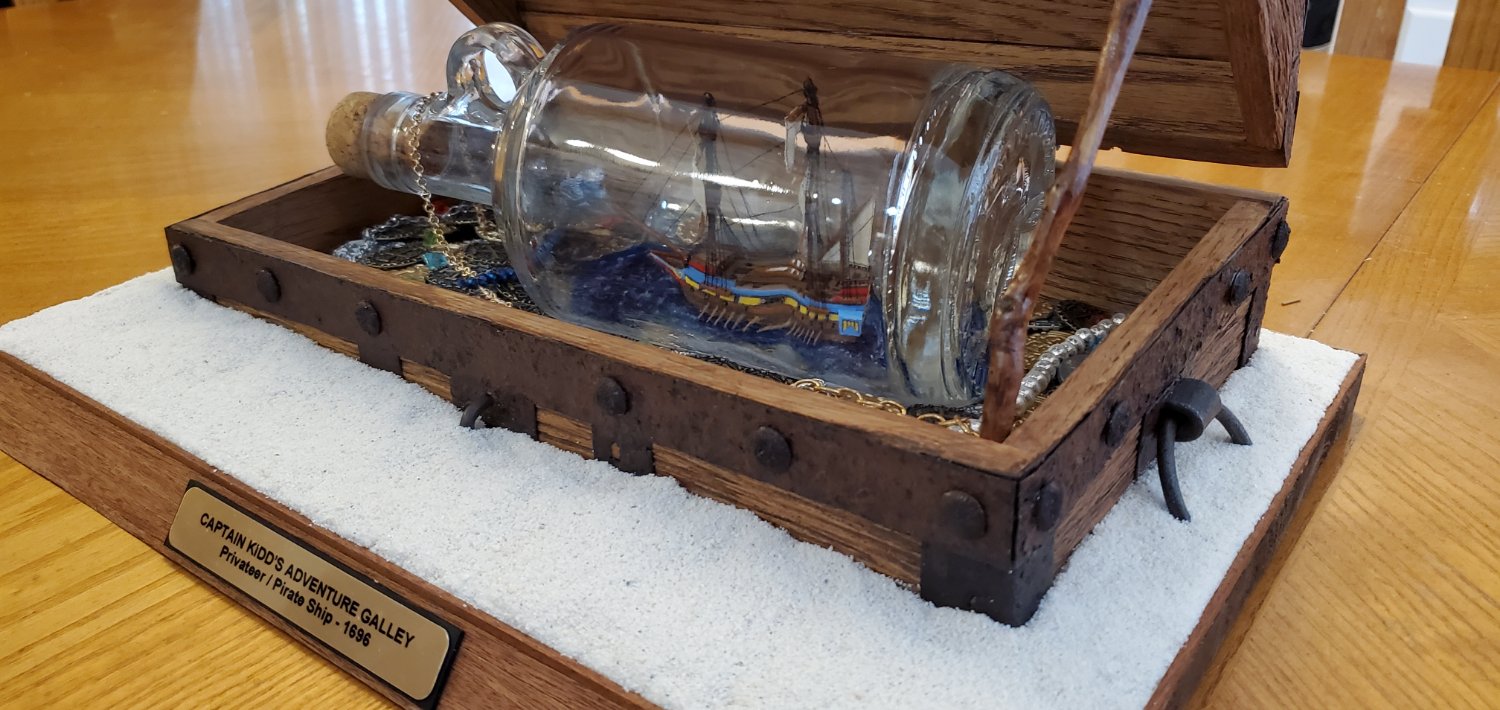
The adventure with the Adventure Galley comes to an end! I mounted the bottle inside the chest, surrounded it with pirate bling, and called it a wrap. For comparison, the first pic below is the original concept for this project roughed out in powerpoint. Despite the countless bumbles along the way, I'm pretty happy with how things turned out. Time to yo-ho-ho with a bottle of rum!


- 134 replies
-
- 17
-

-
-
- Captain Kidd
- bottle
- (and 3 more)
-
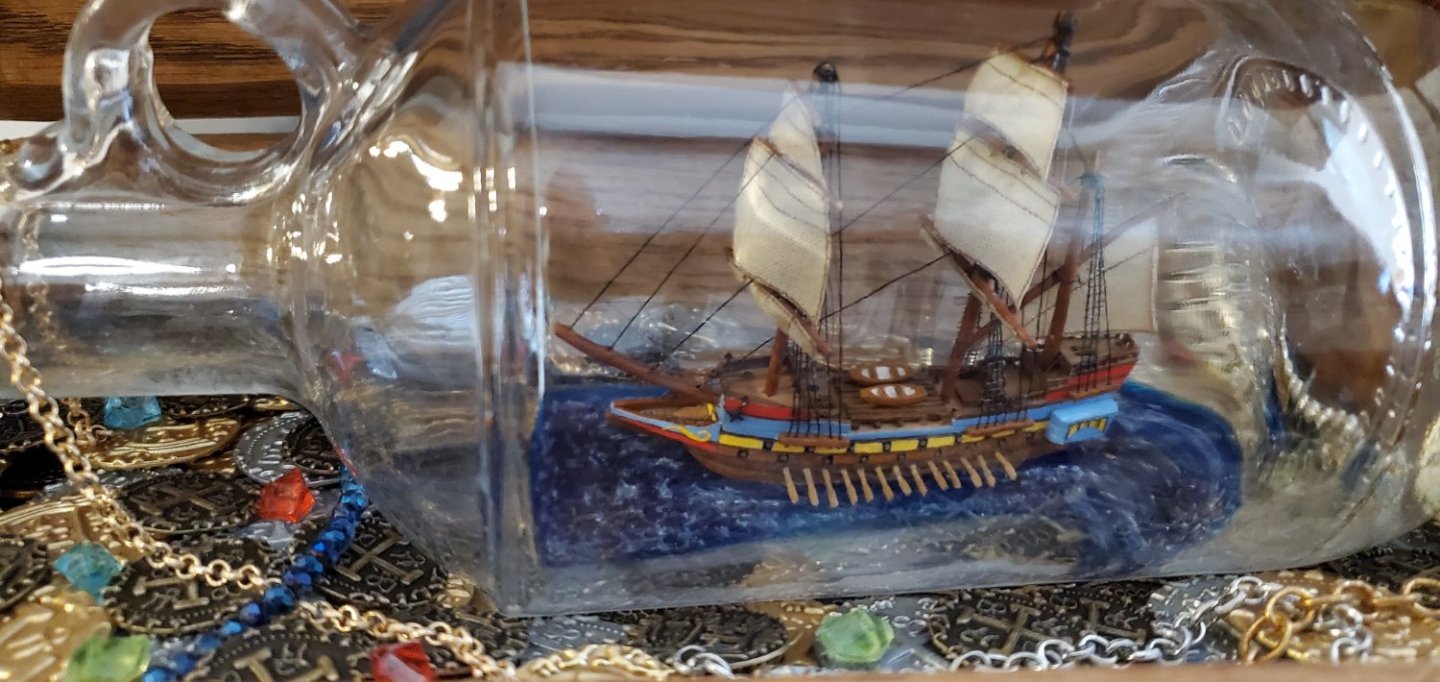
On my models, the really close-up pics expose all the flaws and make things look worse. Somehow, yours is the opposite. The closer the picture, the more realistic it looks! That last pic is just amazing!
-
Let me add my congratulations to the group on such a fine build. It's been a real pleasure watching your work, John.
- 238 replies
-
- 3
-
-

-
- Robert E Lee
- steamboat
- (and 3 more)
-
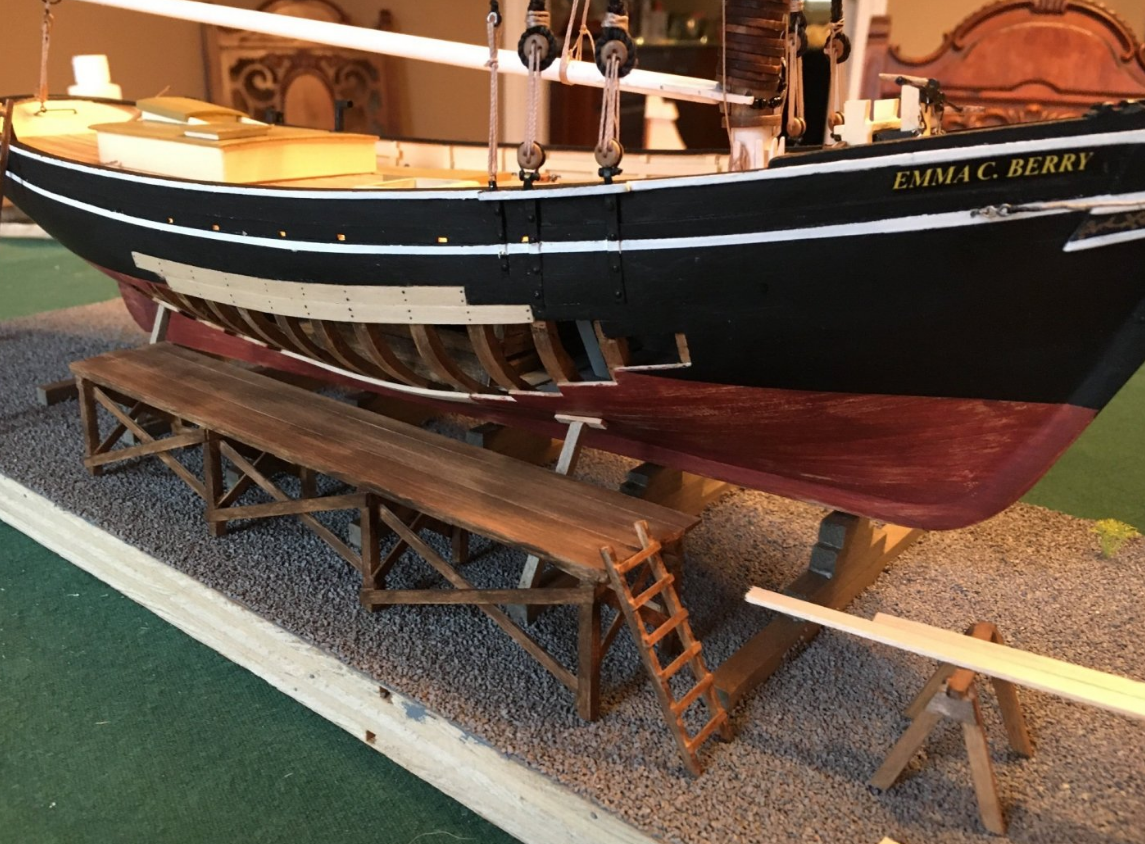
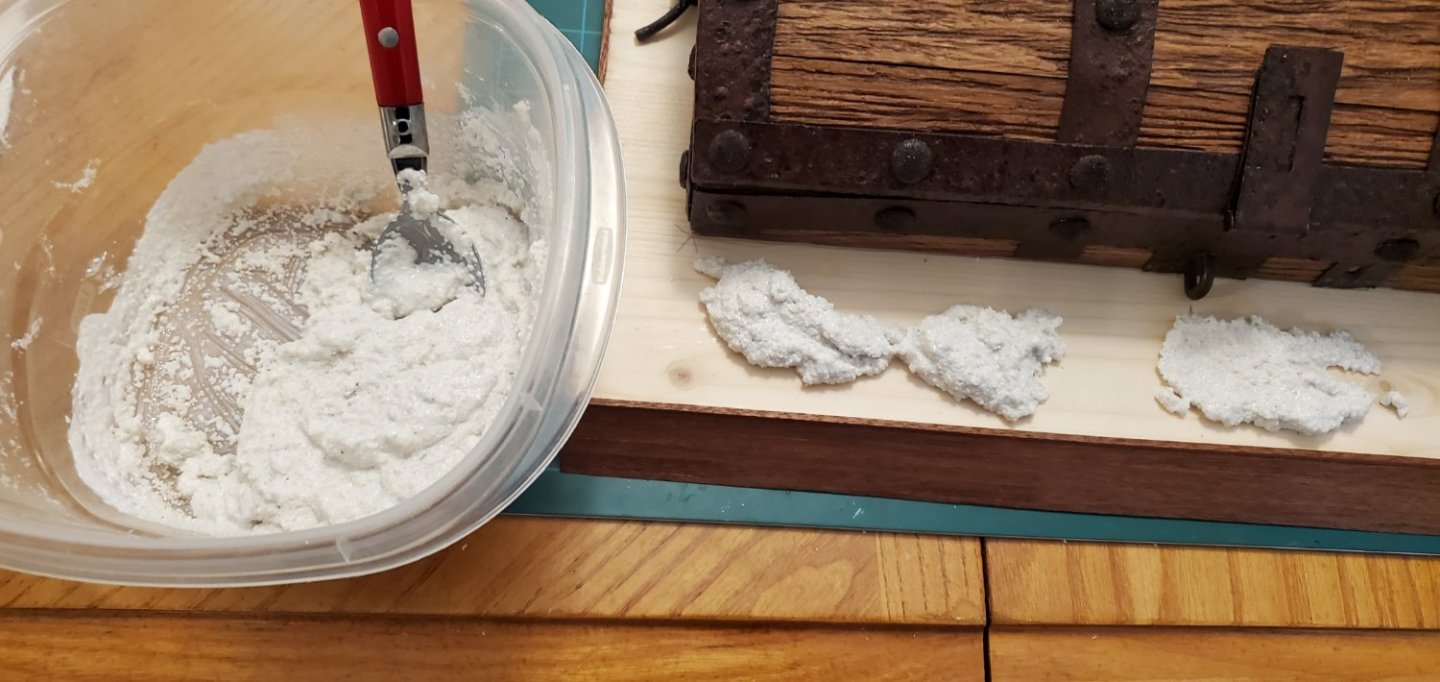
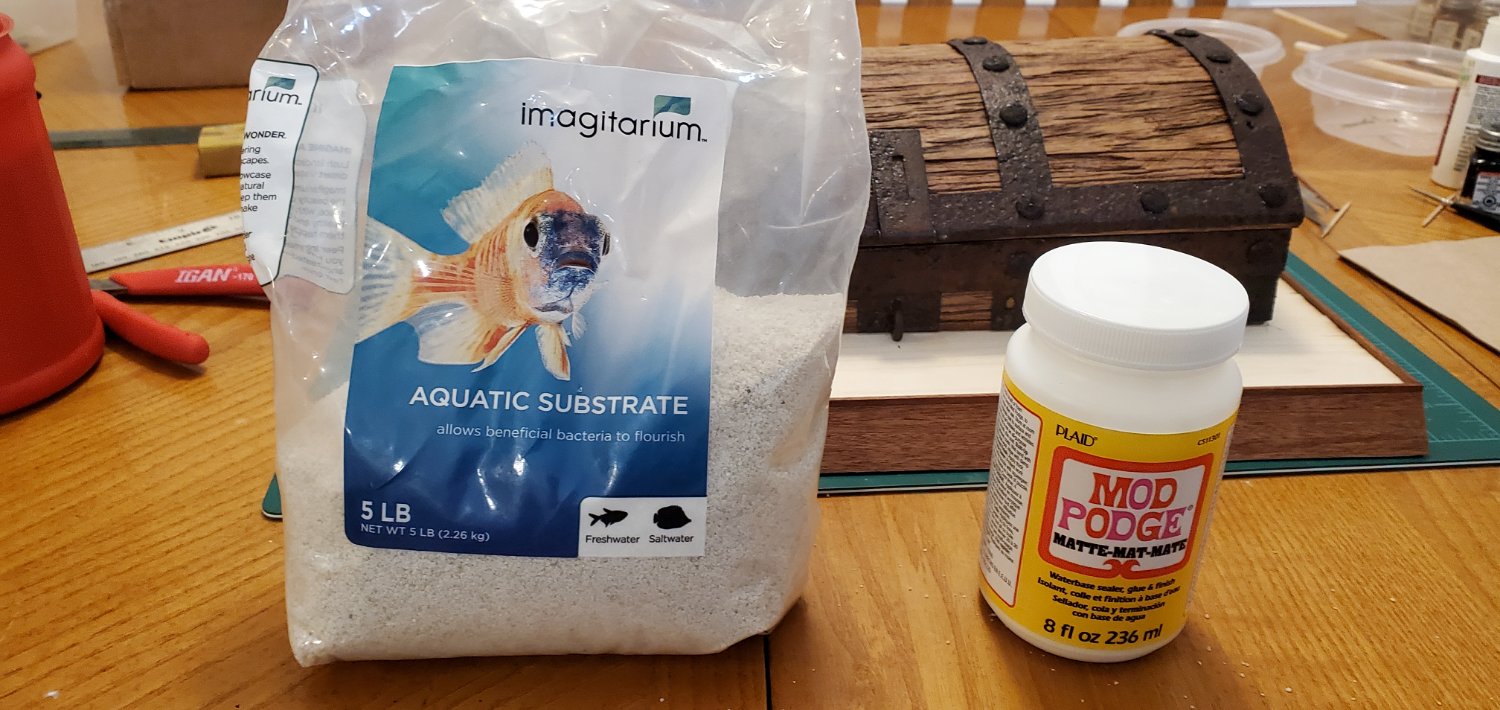
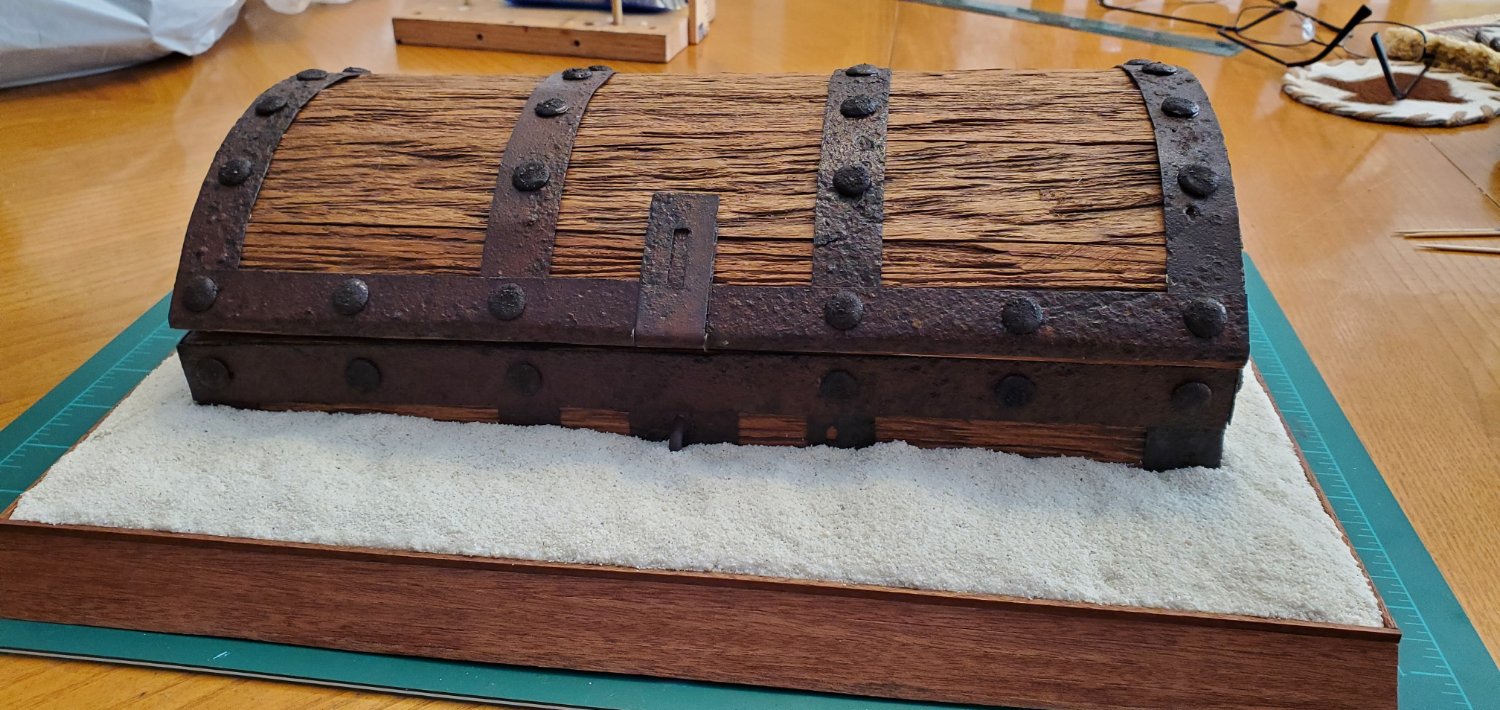
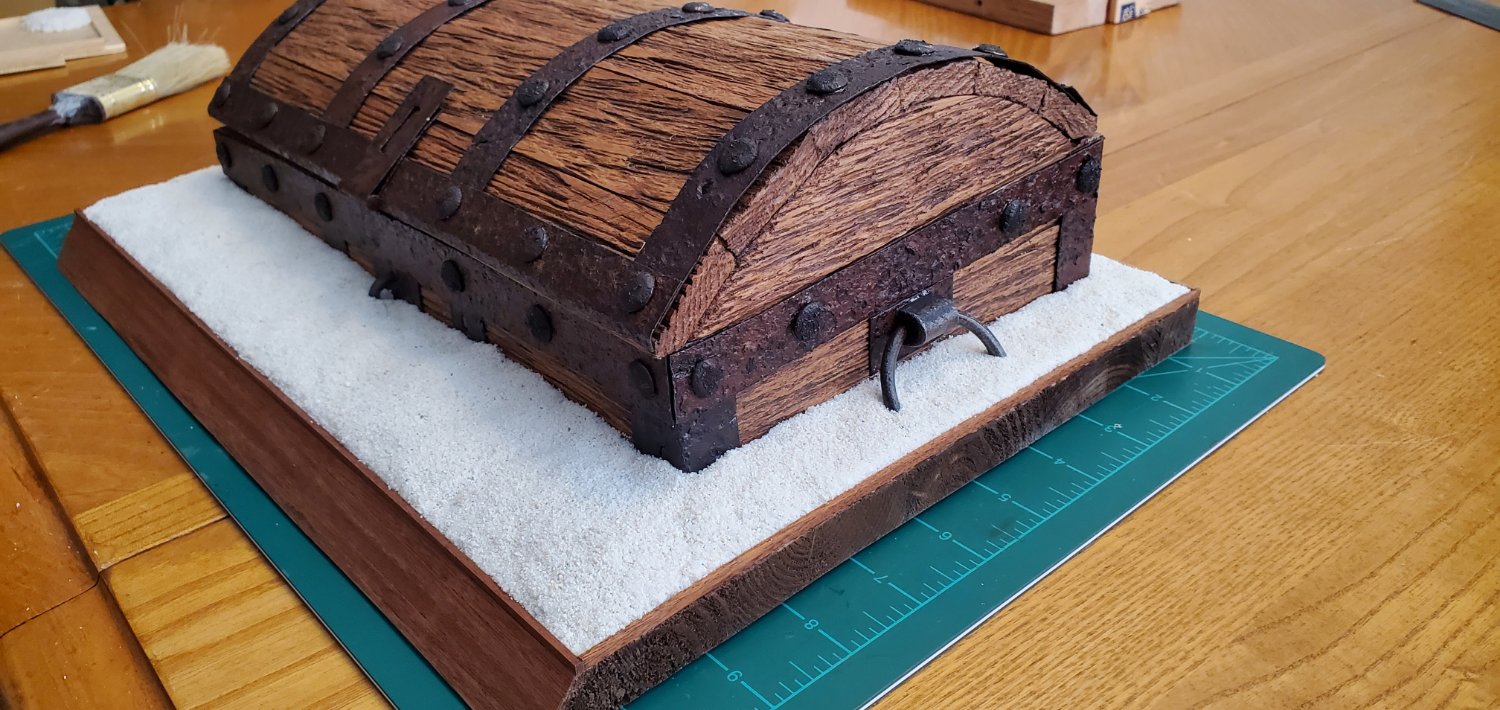
Back to the display to finish this whole thing up. First up was adding a layer of sand around the chest to make it look like it had been recently unearthed. Going into this project, I had no idea what I was going to do for the sand. A few weeks ago, a friend of mine bought some Mod Podge for a small project. She barely used any of the bottle and asked me if I might need it for my SIB work. I had never even heard of the stuff, so I told her that I’d look around the MSW website to see if any other modelers used it. Sure enough, it looks like a fairly popular product. Then I found one build log where the light bulb went on and bells started dinging. @turangi, For his Emma C Berry – Model Shipways build, used Mod Podge to make a gravel base for the display. He had really cool concept where he showed the ship in drydock having repairs made to the hull (see 1st pic below from his build log). His gravel base looked like what I had in mind for the sand around my treasure chest. So I decided to follow Turangi’s lead and see if the Mod Podge would work for my display. I mixed up a glop of sand and Podge, dabbed it around the treasure chest, worked it to the edges, and then mashed it around a bit to create an uneven surface. Then I sprinkled a layer of dry sand over the whole thing to give it a realistic texture. I let the whole thing dry overnight and then dusted off the loose sand. It came out pretty much like I had originally envisioned. So a big THANK YOU to Turangi for an excellent build log and showing me a great use for Mod Podge!


- 134 replies
-
- 8
-
-
-
- Captain Kidd
- bottle
- (and 3 more)
-
Hi Everyone from Savannah GA
Glen McGuire replied to bgilbertsound's topic in New member Introductions
Welcome to MSW, BG! Lots of amazing folks out here. I learn something from them almost daily! -
Hi everyone from Brisbane Australia
Glen McGuire replied to Ray Durant's topic in New member Introductions
Welcome, Ray! Glad to have you aboard! -
LOL!!! You are absolutely correct, Mike. The bowsprit on this ship had a much higher angle than my previous builds. I noticed that right away and had the same concern as you. I did some early test fitting to see what impact the sharp angle might have on the insertion process and was prepared to lower it if necessary. Fortunately, I was able to keep the same angle as I had originally planned. But to your point, had the bottle's neck been any longer I would have been forced to take some artistic license. You are correct again. And all the concerns you mention are the reason I've done it that way for the last four builds (along with haunting memories of my Amati Hannah disaster when my ship sank in the soft acrylic paint water). As I know you are aware, it's difficult trying to place the hull in it's exact position with tweezers or whatever you are using for grasping. I've found it so much easier (and less stressful) to just drop the ship anywhere inside the bottle, add epoxy to the dry resin, and then move the ship onto the epoxy. As for pouring the resin once the ship is inside the bottle, I know there are some very skilled people out there that do it that way. For me, there's just too many things that can go wrong. And I believe most of those things would be almost impossible to recover from. Thanks for your all thoughtful comments, Mike. I always appreciate your insight.
- 134 replies
-
- 4
-
-
- Captain Kidd
- bottle
- (and 3 more)
-
That is an excellent point, Keith. One that I had not considered. I went back to the video and did a screenshot (see below). It looks like I had plenty of room for 1 boat on the starboard side but maybe not on the port. Perhaps it was a blessing in disguise! Thank you, Pat! And thanks especially for adding extra pressure to the next project!!
- 134 replies
-
- 5
-
-
- Captain Kidd
- bottle
- (and 3 more)
-
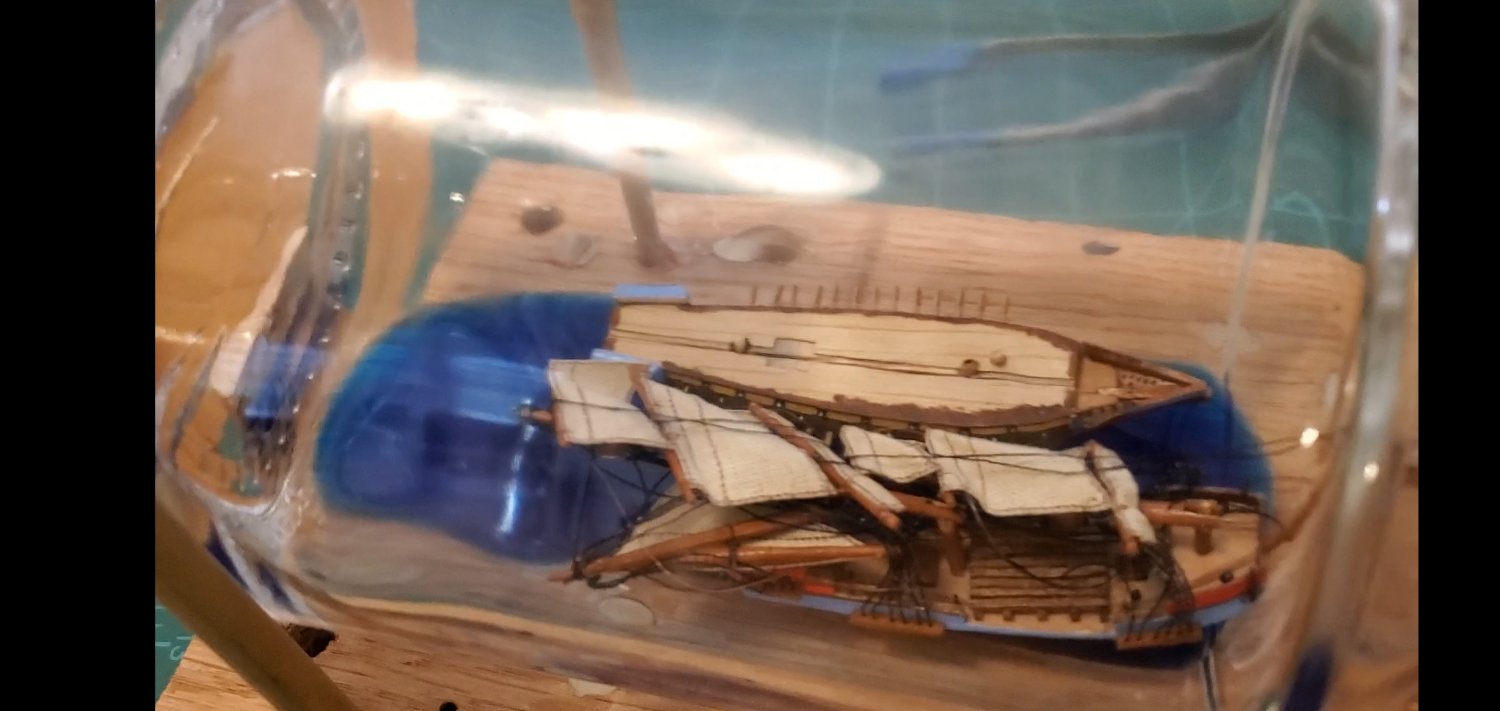
Well, heck. I thought the drama was over. But noooooooo, the palm-to-forehead slaps keep piling up on this project! I got up this morning feeling smug about my work, took an admiring look at the ship resting snug and secure inside the bottle, and began snipping the pull threads below the bowsprit. And then I realized I had forgotten to attach the ship's boats before putting the whole thing in the bottle. Yet another dodo moment. Ugh. Ugh. Ugh. Fortunately, it was not too difficult to put the little devils in place on top of the crutch. Then I added some texture and whitecaps to the water. With that, the work inside the bottle is officially complete! Now it's back to the display to finish things up. On the homestretch now!!
.thumb.jpg.a4867d7aa37d83e4737f78cbcb1b54b9.jpg)

- 134 replies
-
- 12
-
-
-
- Captain Kidd
- bottle
- (and 3 more)
-
That is a great analogy, Keith! I could not believe the video was only 4 minutes long when I looked at it afterwards. It seriously felt like it took a half hour to get that dang thing inside the bottle! That is so cool, Dave!! Now I'm really glad I edited out all the swearing and cursing like Grant said! 😃
- 134 replies
-
- 5
-
-
- Captain Kidd
- bottle
- (and 3 more)
-
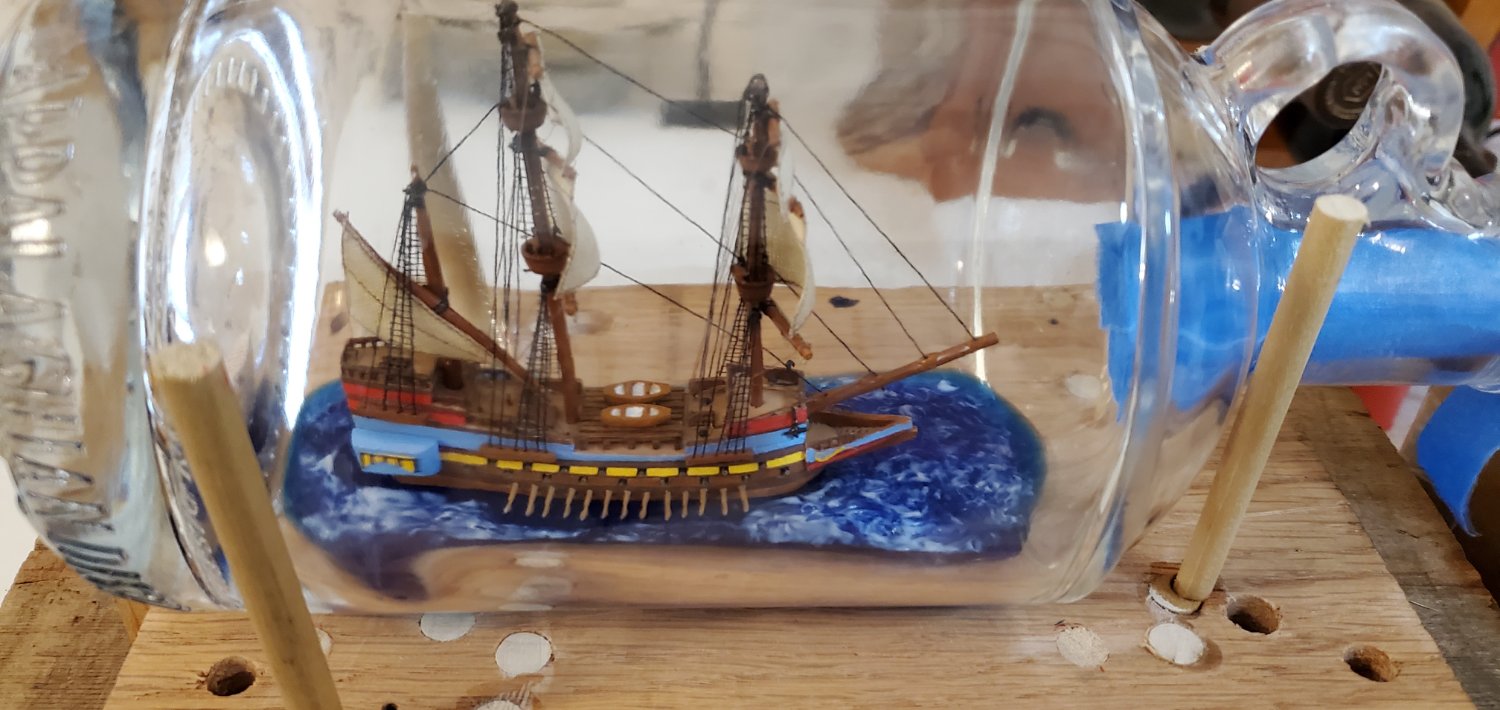
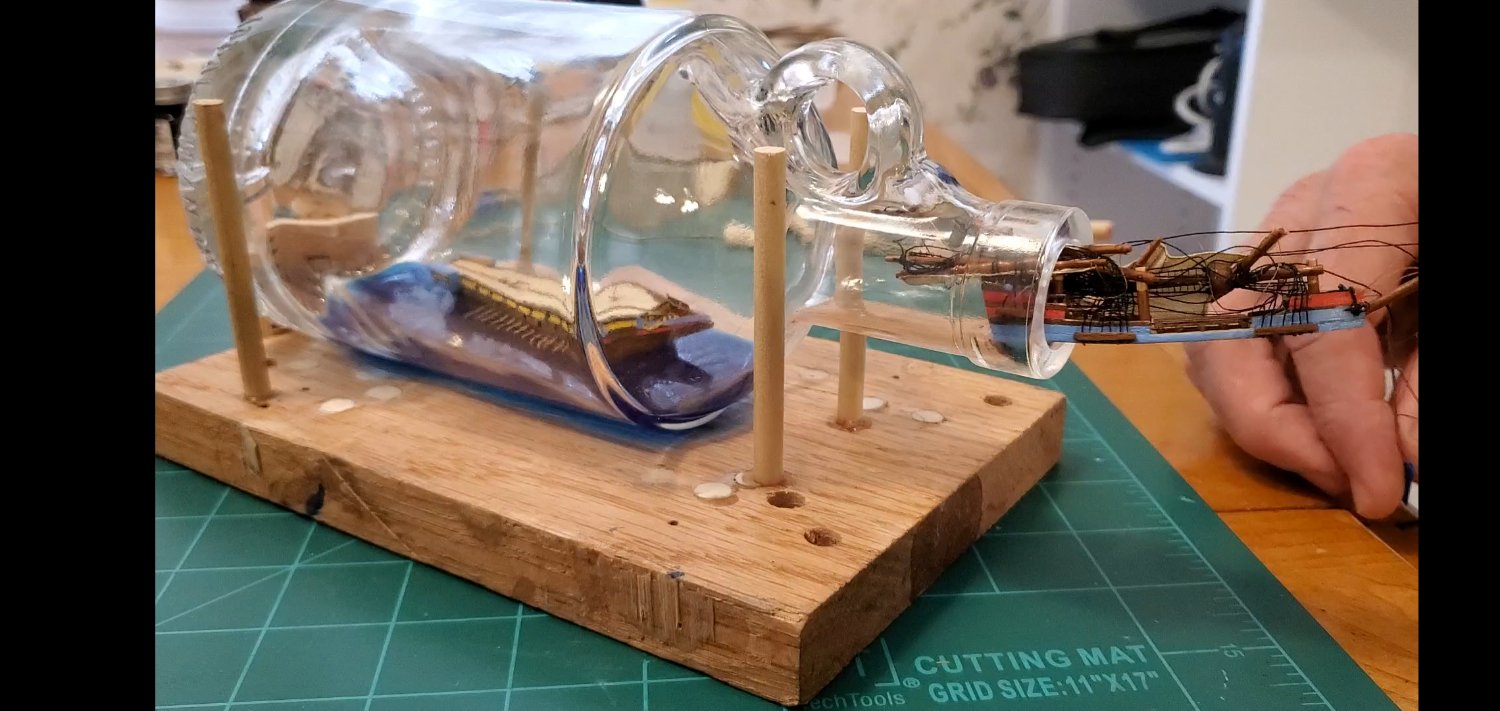
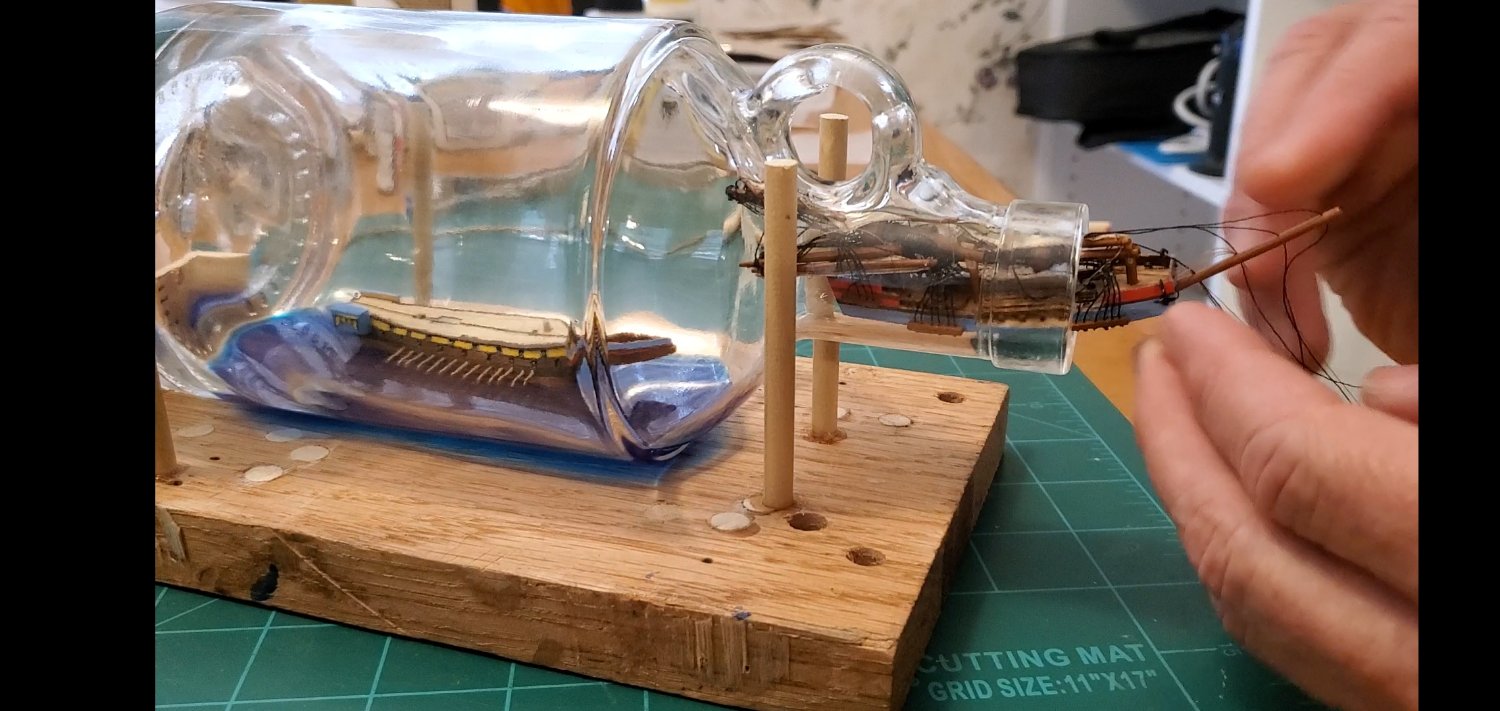
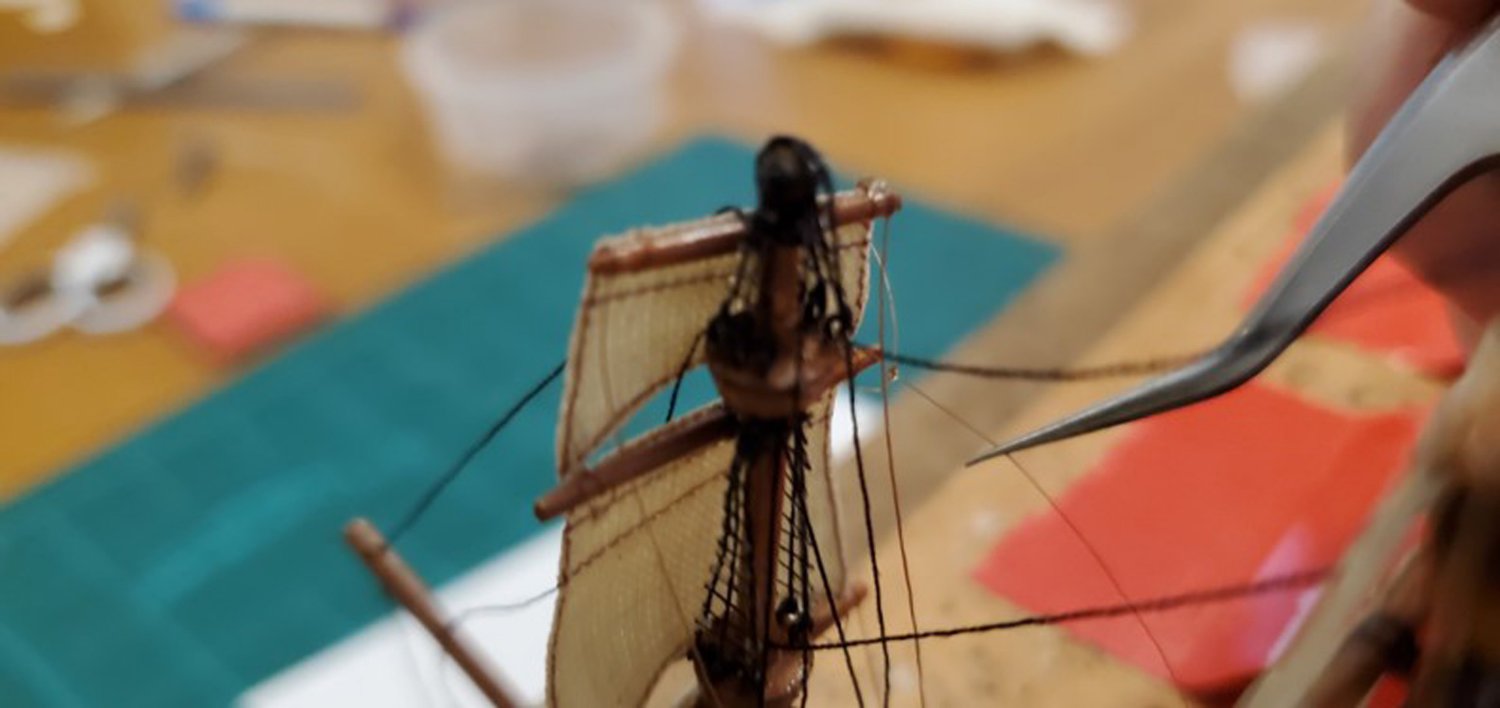
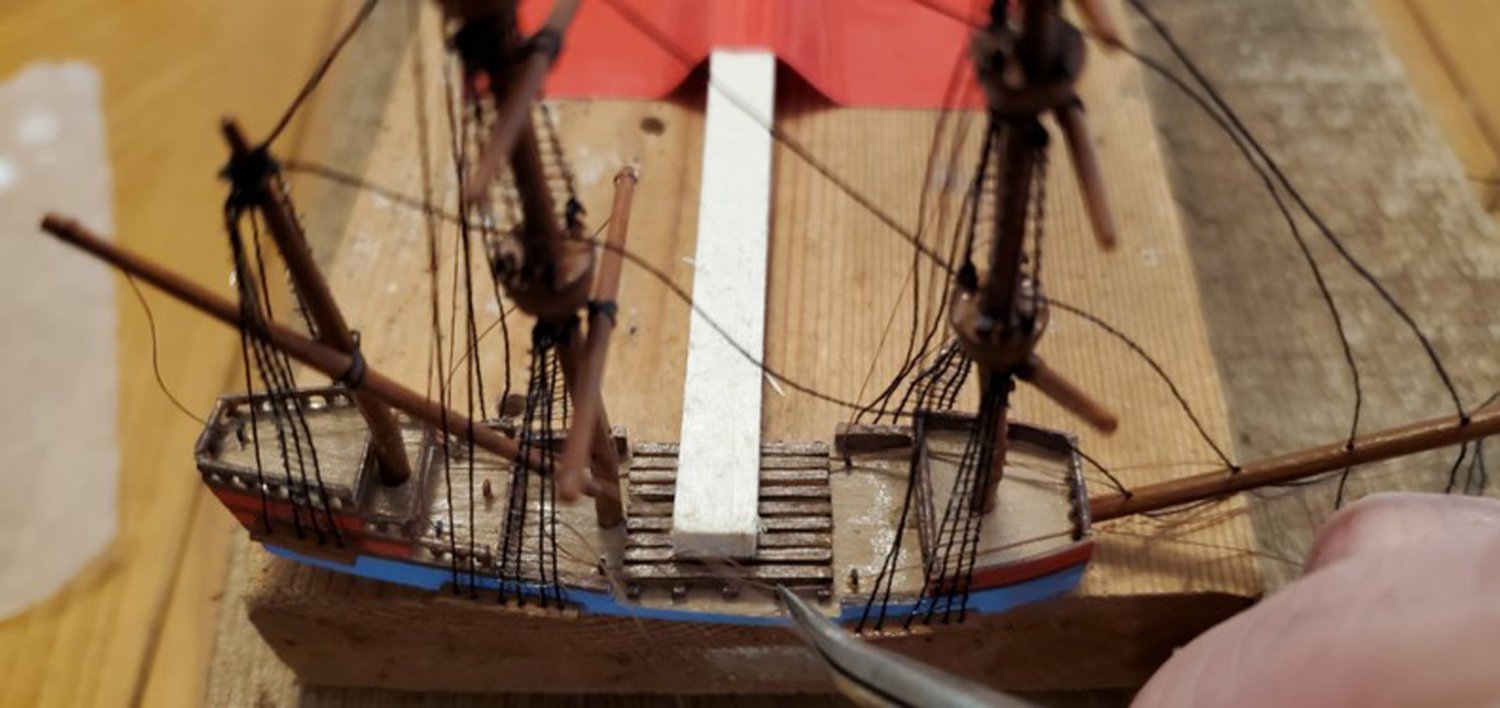
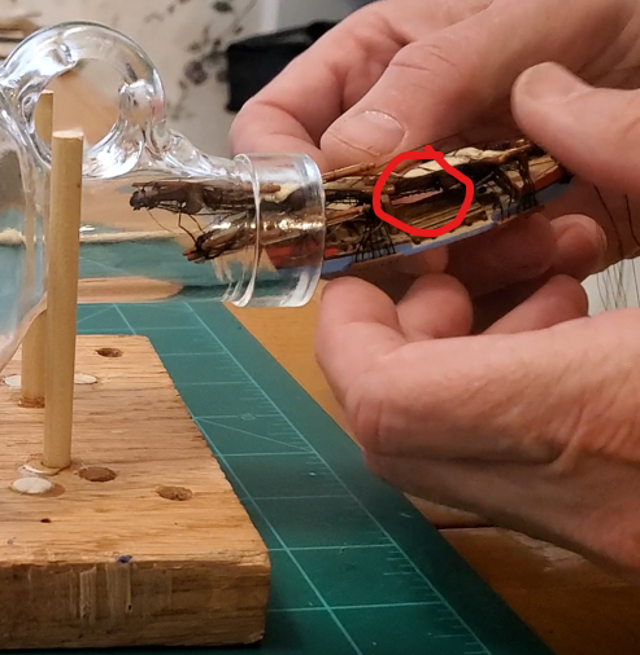
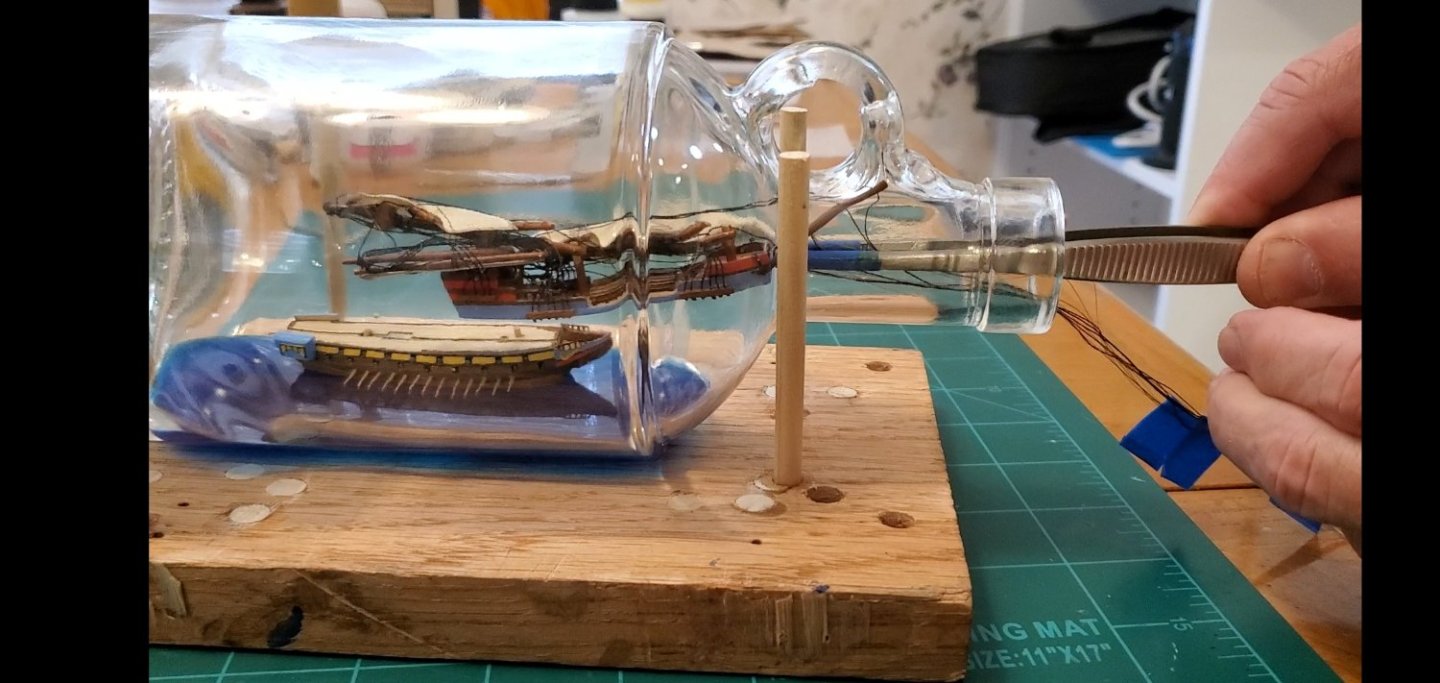
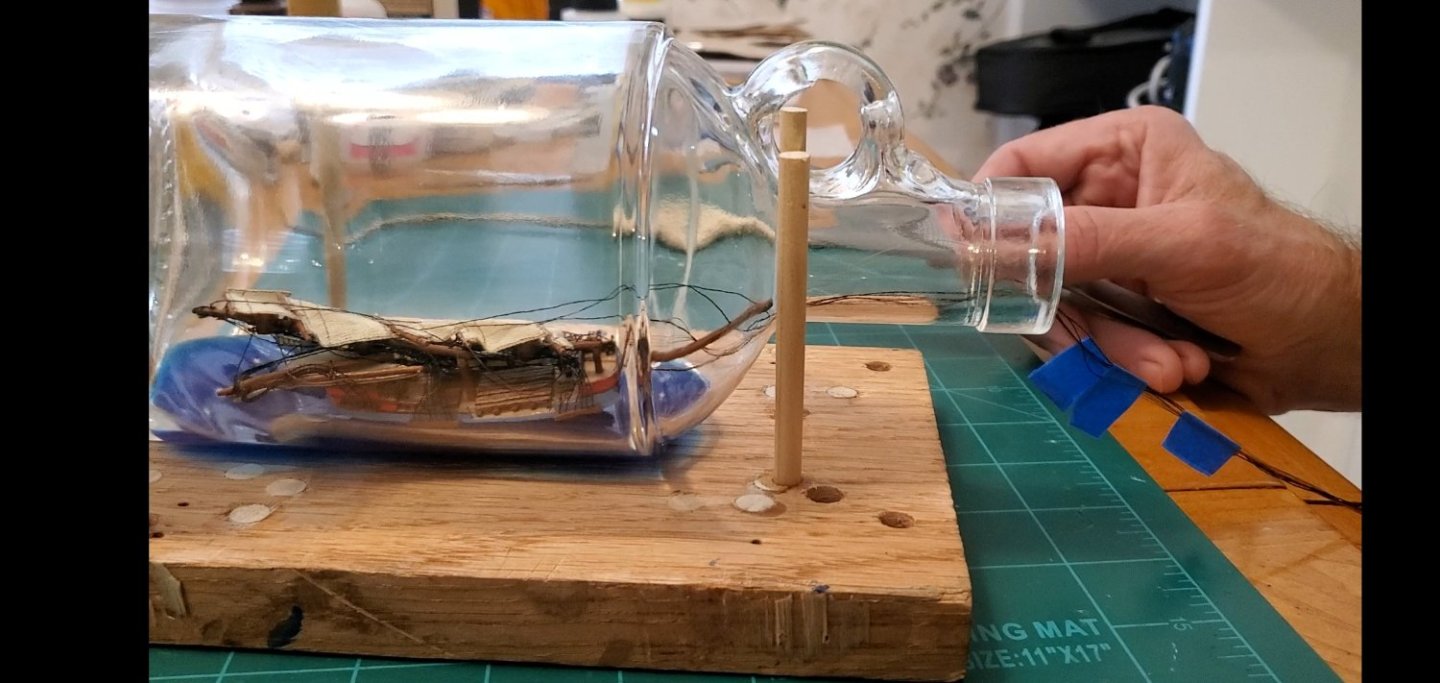
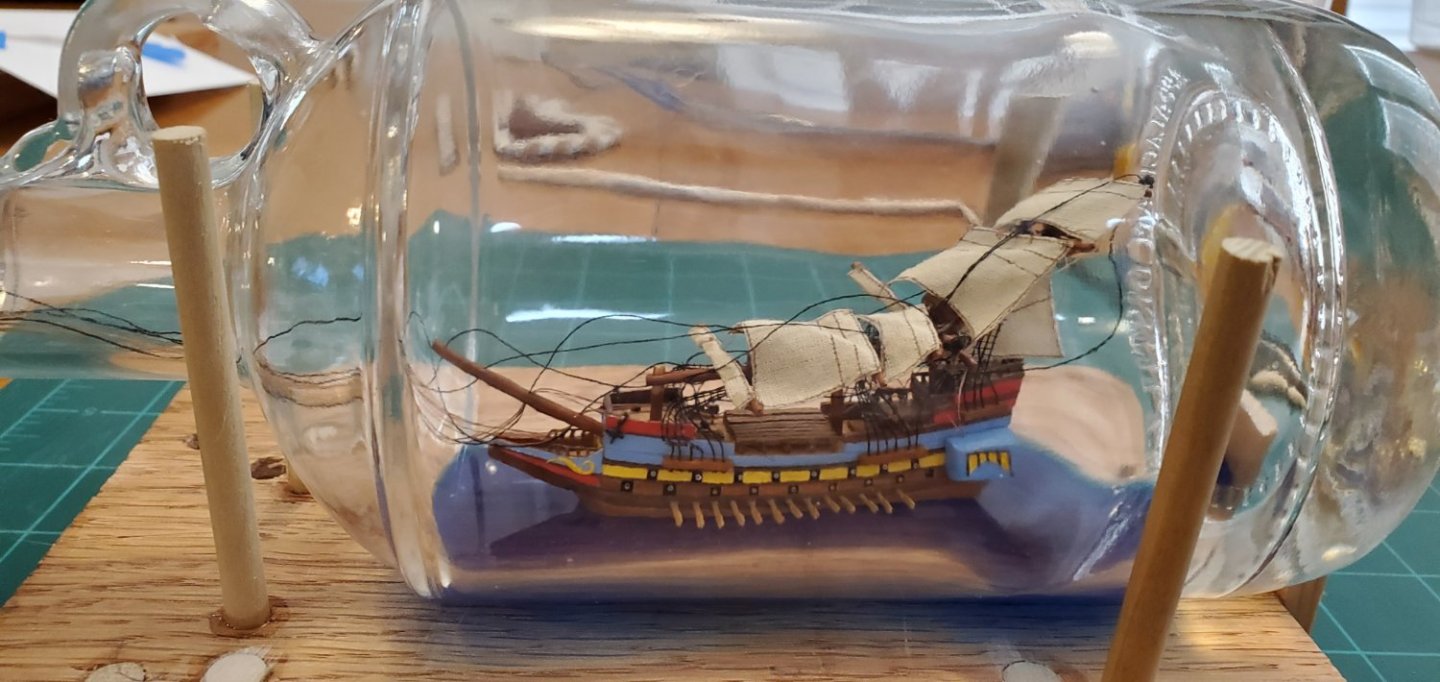
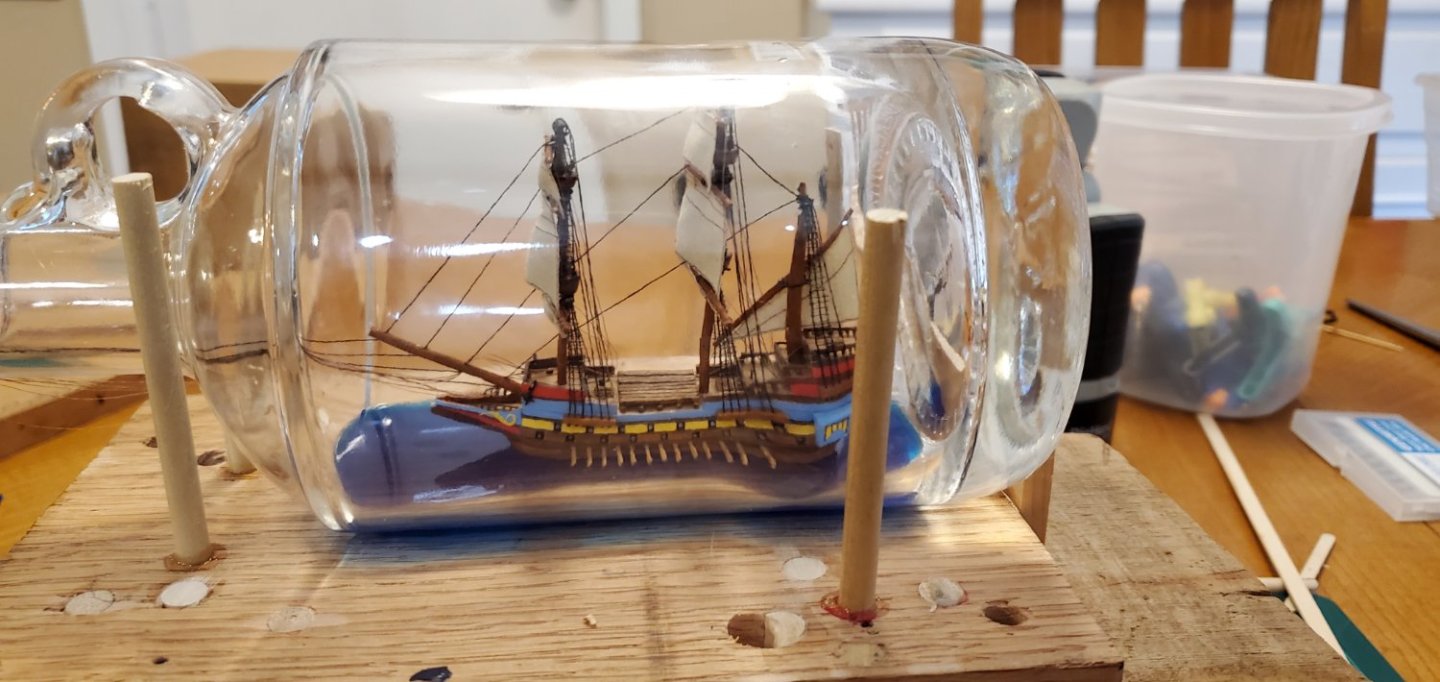
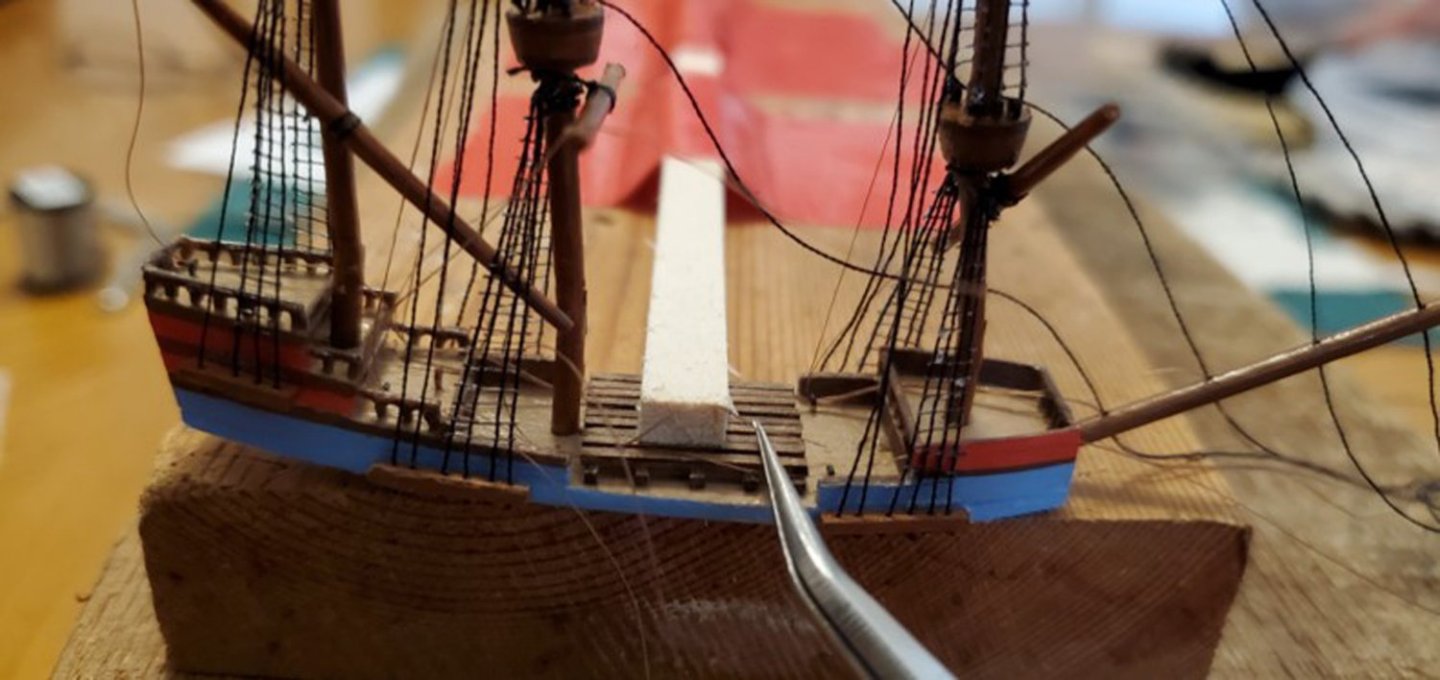
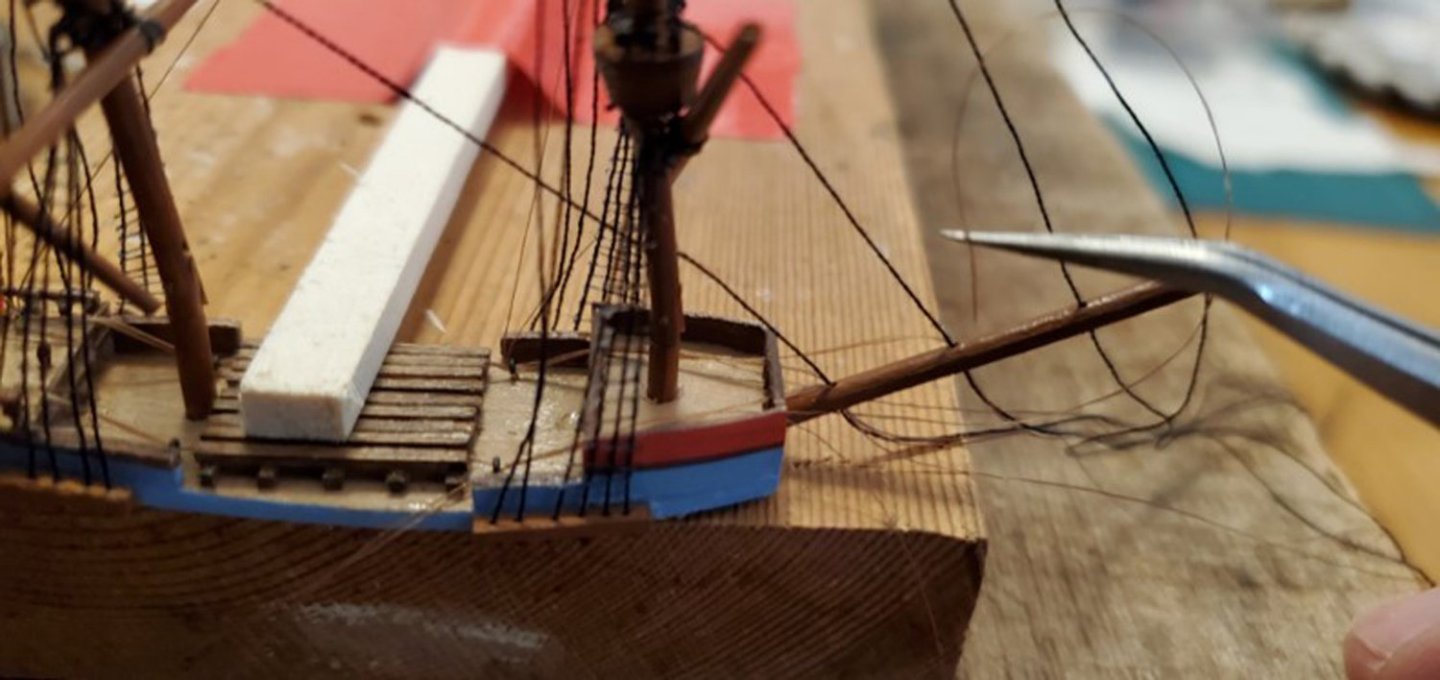
The real moment of truth was the next step – smashing down all the masts, yards, and sails and pushing the top half of the mast into the bottle. I made all 3 the mast hinges with slightly different angles so they would lie down next to each other rather than on top of each other. This proved crucial as there was zero room to spare. Part of the challenge was the crow’s nests taking up more space than simple mast tops. After quite a bit of starting/stopping/adjusting/nudging/and gentle persuasion, it finally passed thru the neck and into the bottle. And the best part was that I heard no pops nor did I feel any snaps! So I was pretty confident I had not broken anything. After a huge sigh of relief, I added epoxy to the top of the bottom half of the hull and laid the top half in place. I let that sit overnight and then raised the masts the next morning. Everything was intact and the top of the main mast cleared the inside top of the bottle by about 1mm!! Another huge sigh of relief. The 3-piece ship idea actually worked!!! If anyone would like to see the full insertion process for the top half of the ship, I made about a 4-minute video and posted it here: https://www.youtube.com/watch?v=WO8o8WckMl4


- 134 replies
-
- 16
-
-
-
- Captain Kidd
- bottle
- (and 3 more)
-
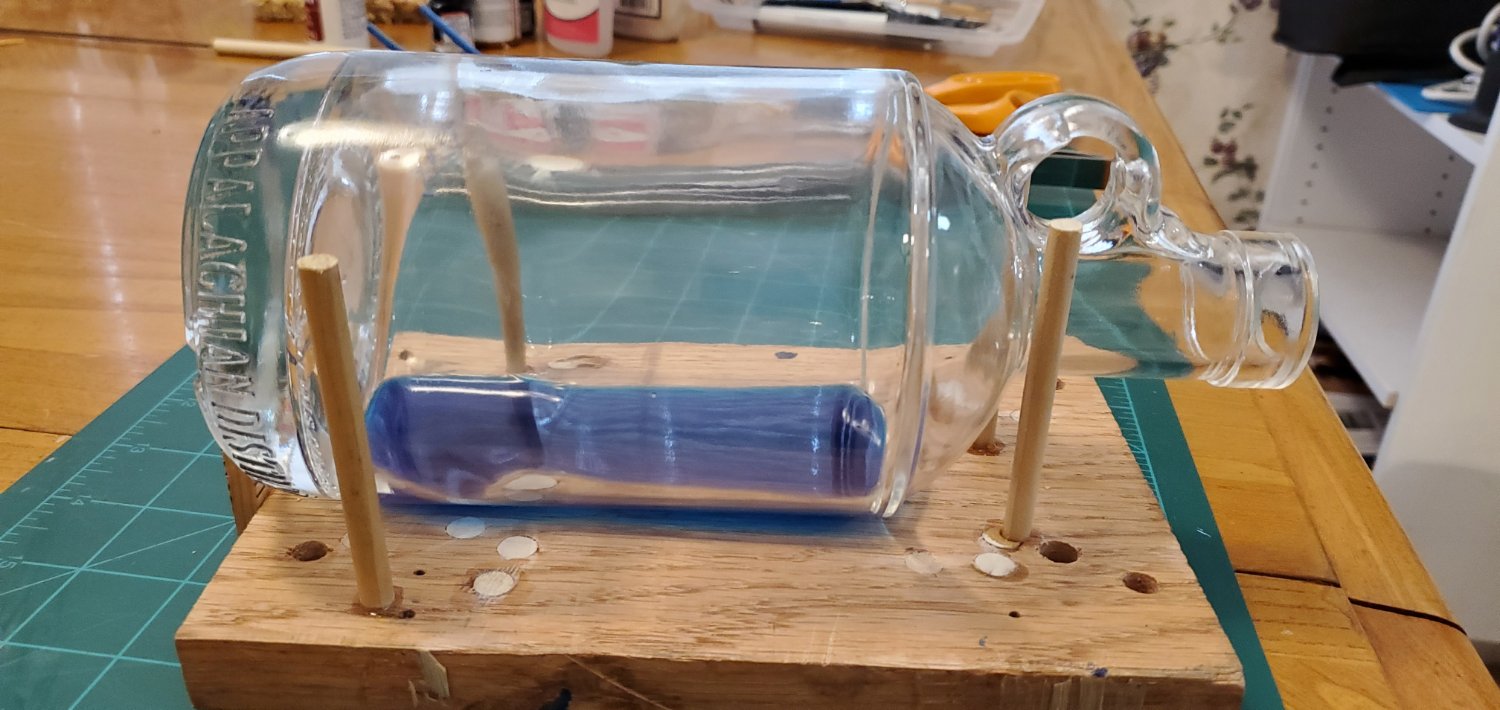
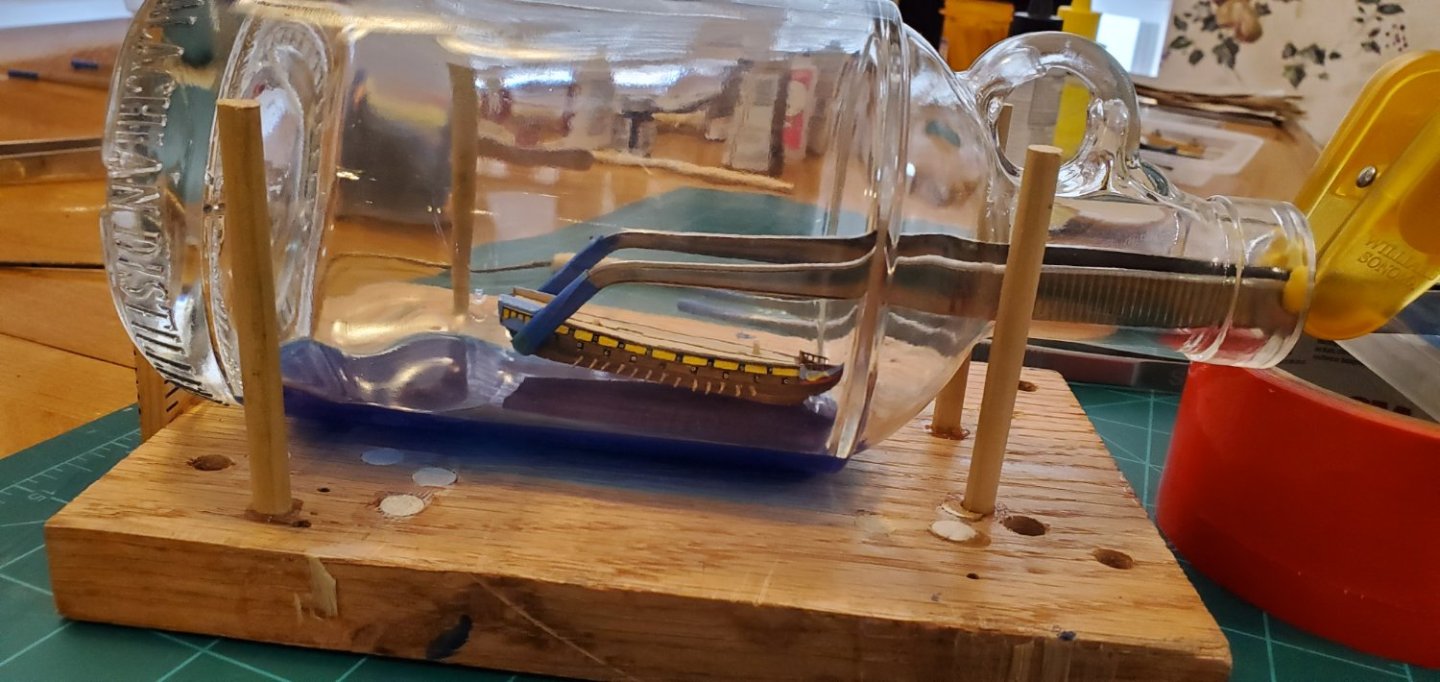
The boat is afloat! In preparation for trying to put the ship in the bottle, I practiced breathing thru my eyelids as @Keith Black recommended. I think it helped. I got the epoxy resin water poured into the bottle. But it also highlighted another mistake on my part. My earlier measurement of the inside bottle height was off by 1/8”. This meant I was not able to put as much “water” inside the bottle as planned. So the sea is a little shallow, but at least I figured that out before I poured the epoxy and inserted the ship! The next step was inserting the 2 halves of the lower hull and gluing them together. Both fit inside rather easily and I had no problem joining them inside the bottle.

- 134 replies
-
- 8
-
-
-
- Captain Kidd
- bottle
- (and 3 more)
-
Hey Grant, I looked into silkspan after the success you had with your Amati Hannah sails. I was going to order some from Sig but they were out of stock on the light and medium. I tried a couple of local hobby stores here in Austin and they didn't even know what I was talking about. I just checked the Sig site again and they are still out. So if I could find some I would definitely give it a try.
- 134 replies
-
- 5
-
-
- Captain Kidd
- bottle
- (and 3 more)
-
Thank you, Keith! I went just a shade darker this time and I like it better than my previous efforts.
- 134 replies
-
- 3
-
-
- Captain Kidd
- bottle
- (and 3 more)
-
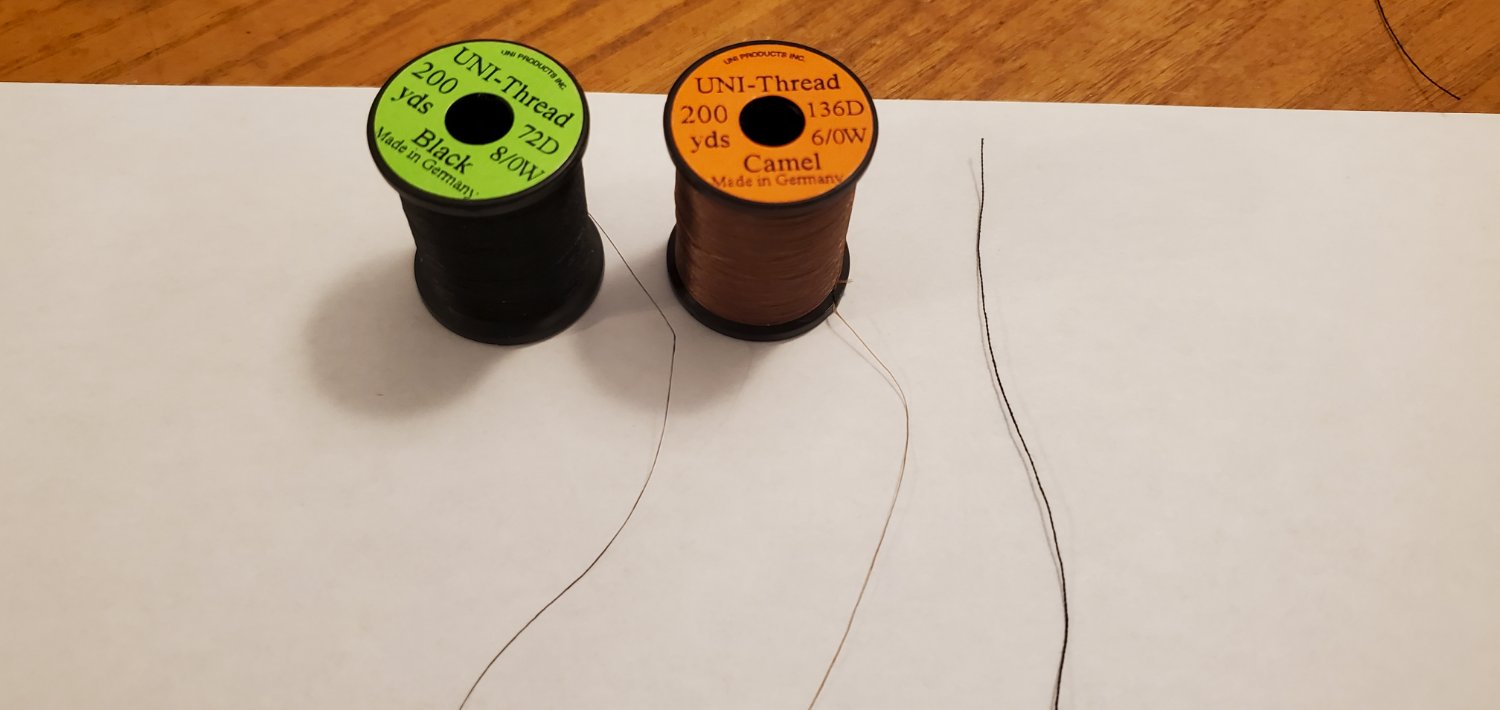
I think it would work well. I used regular thread for my 1/120 CSS Alabama ratlines and in hindsight, it looks a little thick. With the fly-tying thread for these bottle projects, I use 2 thicknesses. The pic below shows the 2 thicknesses I use next to a piece of regular all-purpose thread. The black fly-tying thread (72 denier) is the thinnest and I use it for the ratlines. The camel colored (136 denier) is almost twice as thick (believe it or not) and I use it for the the braces. I believe the 136D would be good for raltines at 1/150 scale. I get them from Amazon for about $7 per spool. As far as knot tying, it is definitely tedious. It helps to have some very fine point tweezers and super magnifying reading glasses. But they do tie into very nice knots and once I get going, it actually goes pretty smoothly. Afterwards, I put a small drop of CA glue on the knot to lock it in then clip the excess strands with cuticle trimmers (highly recommended tool for thread this small). Very secure knot.

- 134 replies
-
- 6
-
-
- Captain Kidd
- bottle
- (and 3 more)
-
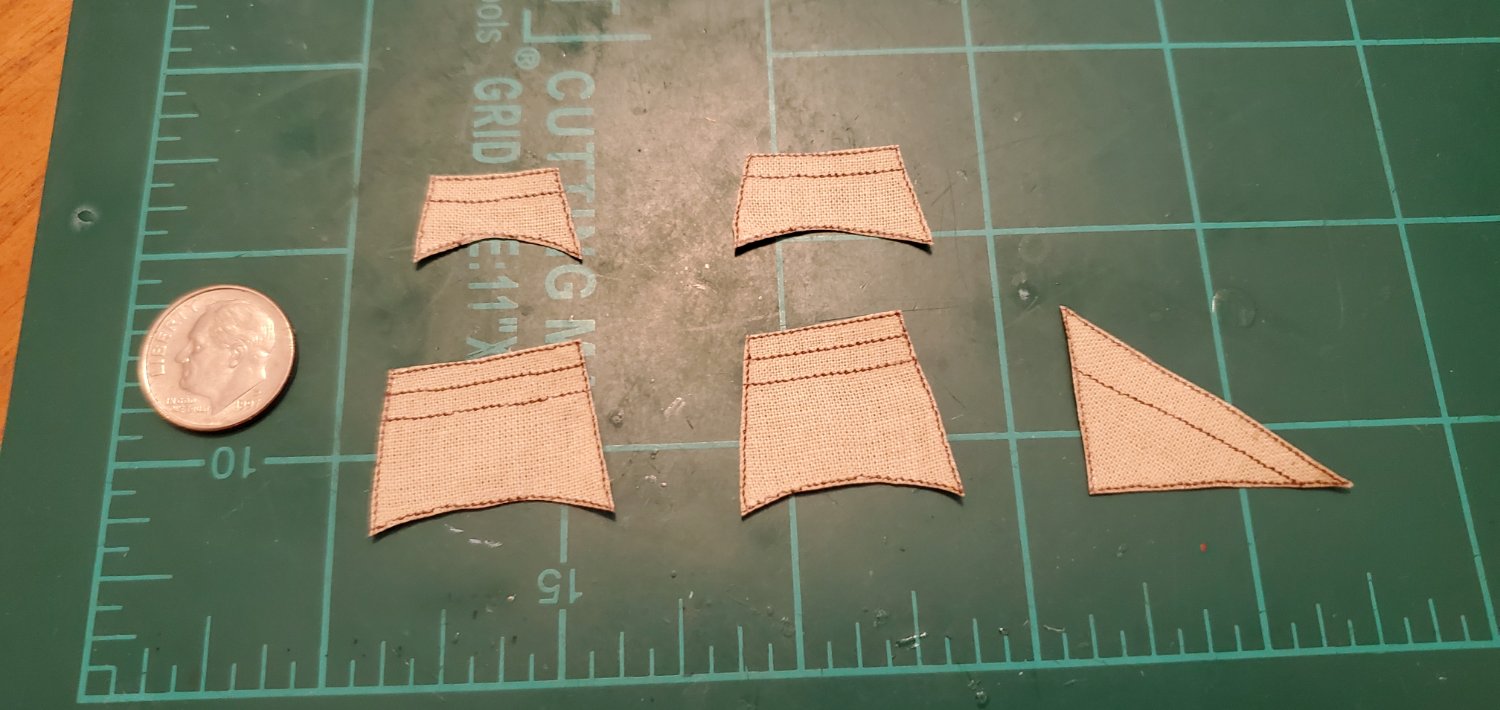
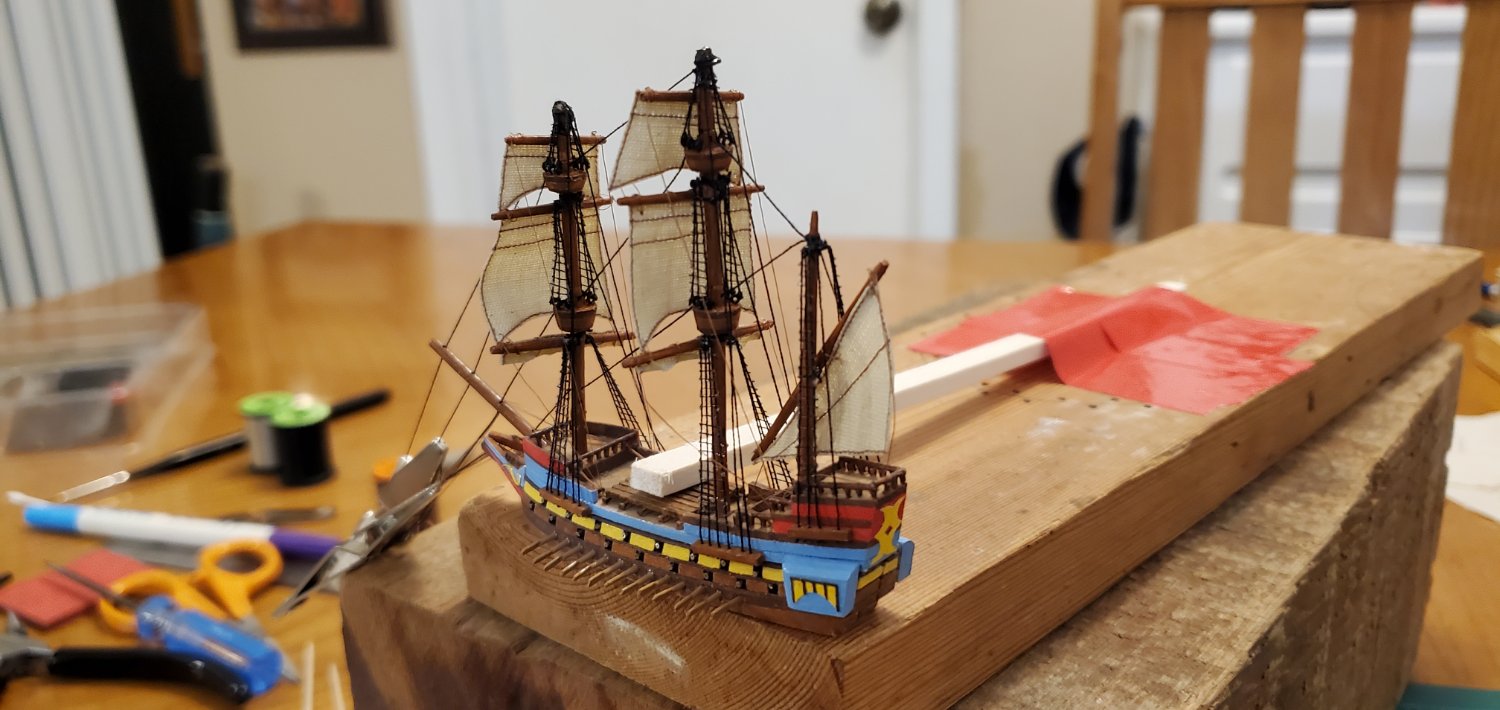
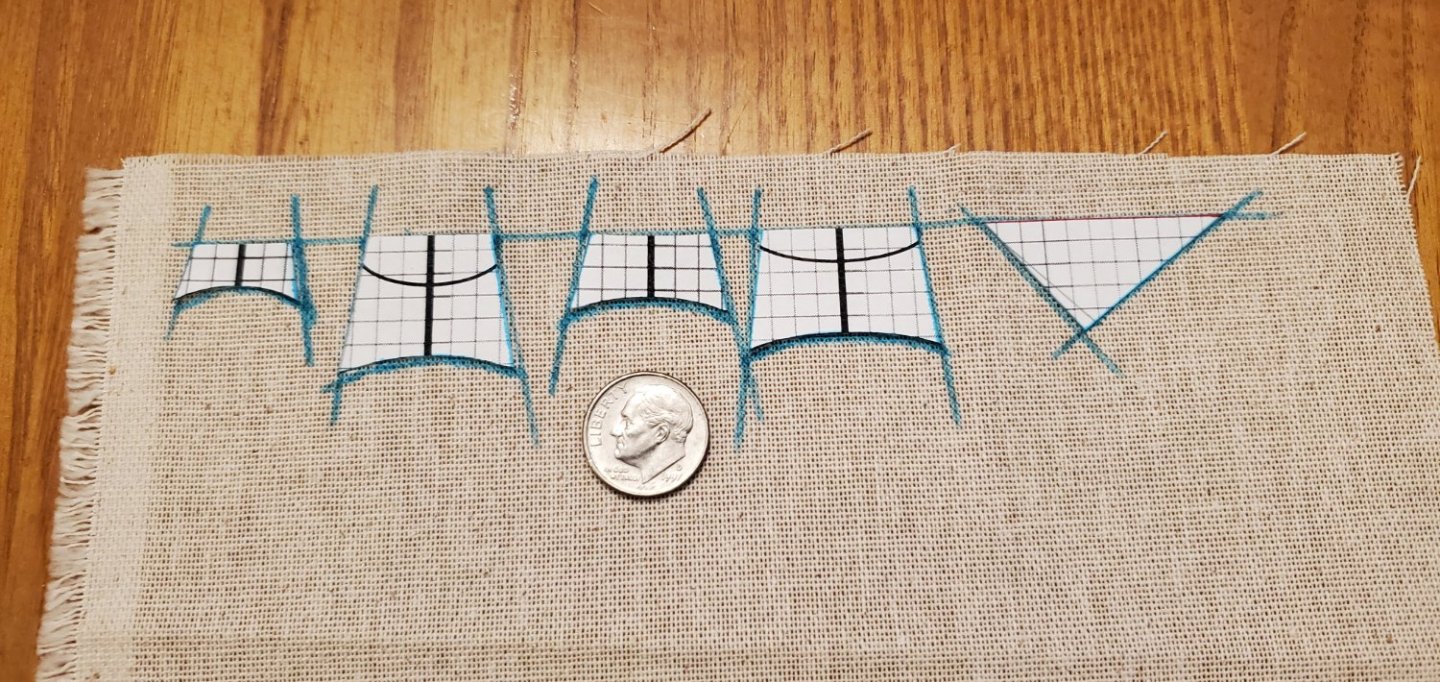
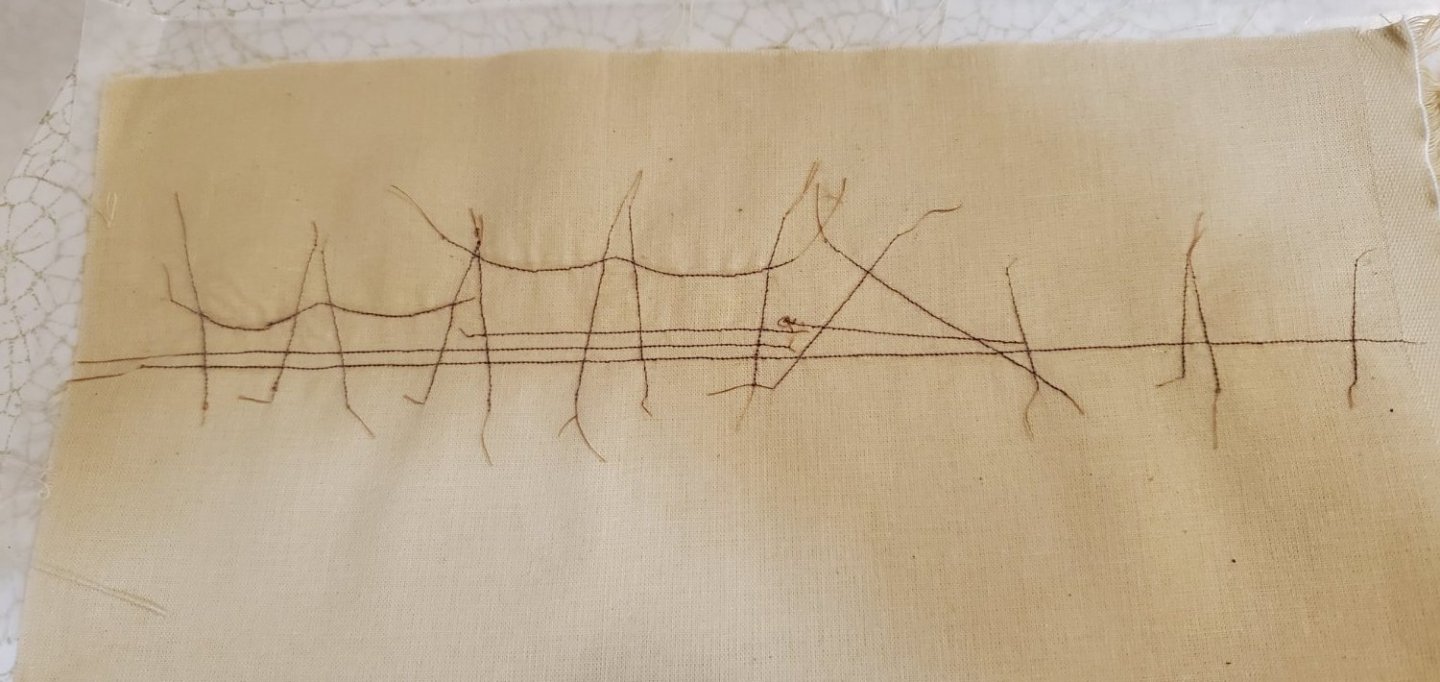
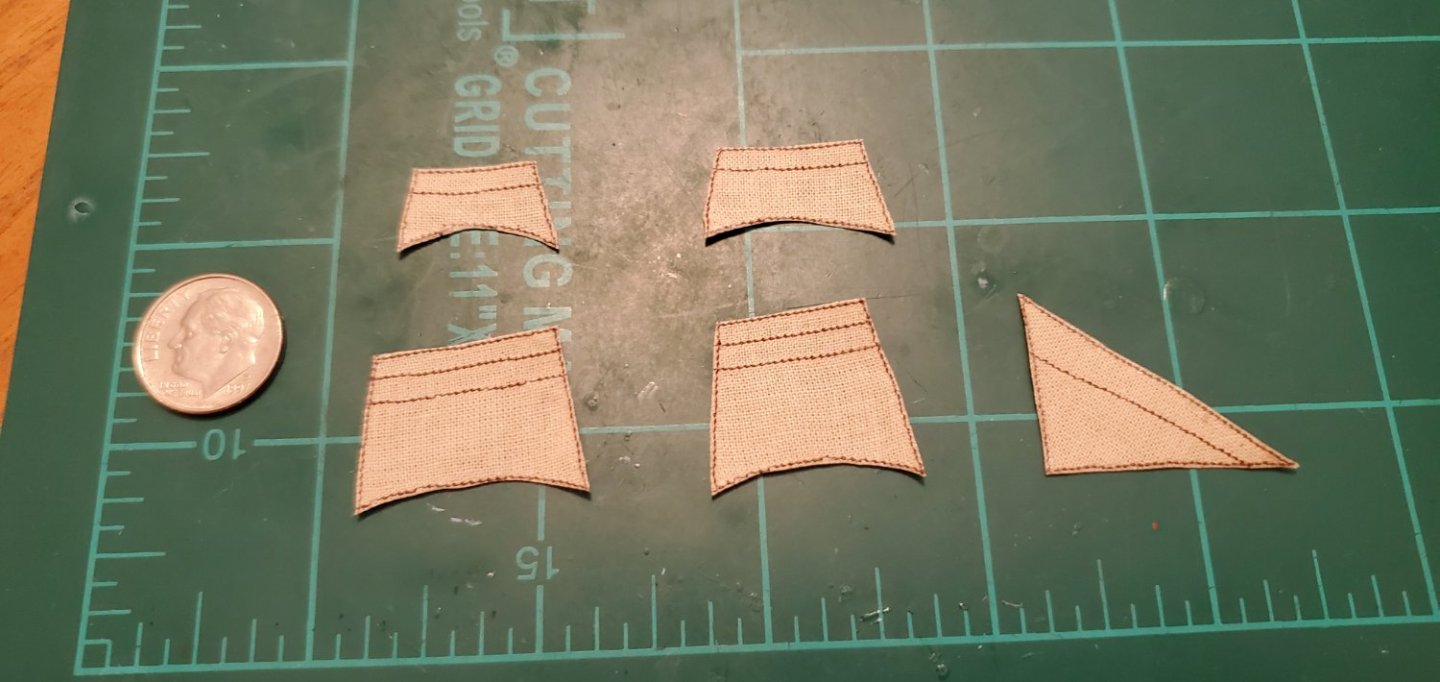
Today I worked on the sails. The pics show the basic process steps. They are made from muslin and the thread for the bolt ropes and reef bands is fly-tying thread again. I've still got to make some anchors, add the ship's boats and maybe some misc deck fittings. Getting very close! I know the bottom halves of the hull will fit inside the bottle easily. Not sure about the top with all the sails, yards, and crow's nests. I have a feeling it's going to be another tight squeeze!


- 134 replies
-
- 9
-
-
-
- Captain Kidd
- bottle
- (and 3 more)
-
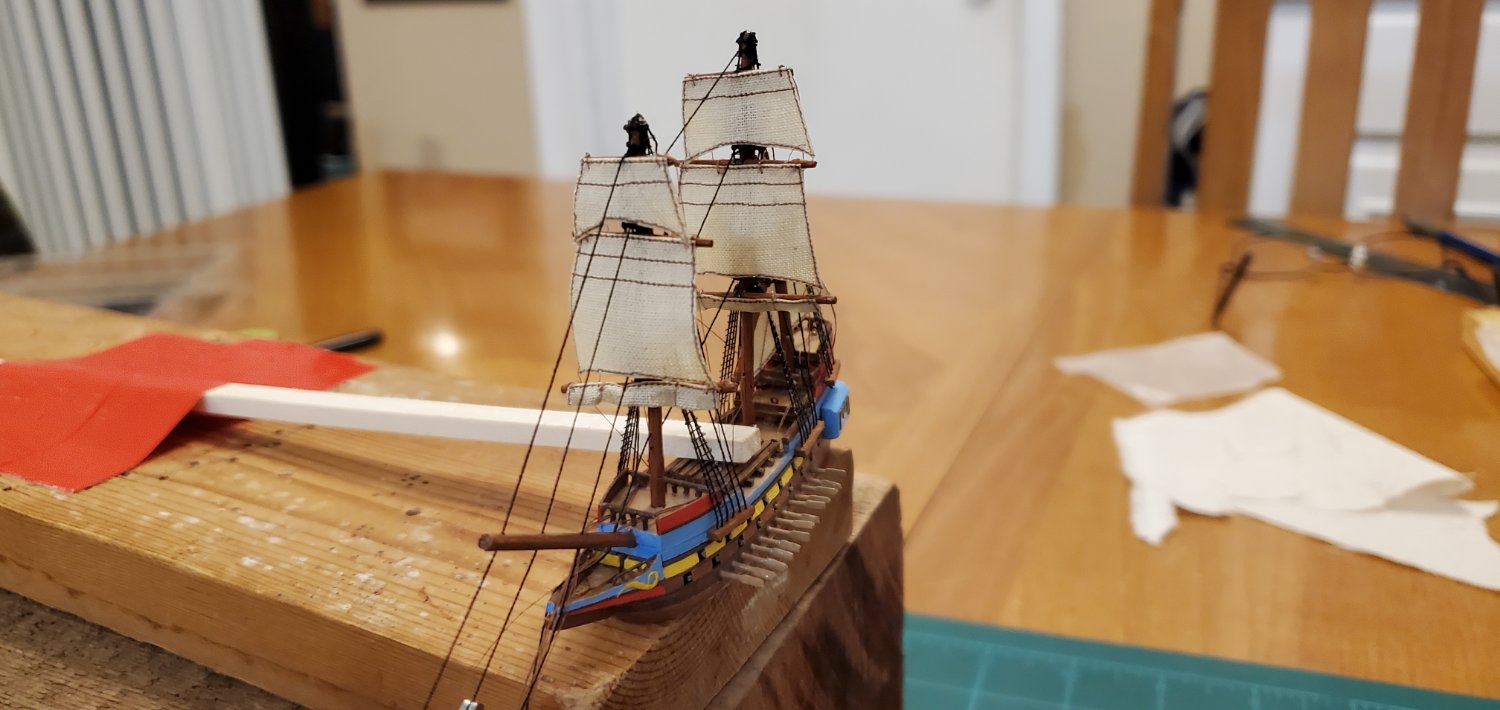
So true, Keith! I'm hoping to avoid another horse pucky moment! Got the braces strung and threaded yesterday. They are tied to the yard ends then strung thru tiny eye bolts along the sides of the deck, over the bow, and thru the bowsprit. The brace threads are long and extend thru the neck of the bottle so I can adjust the yards angles after insertion.

- 134 replies
-
- 9
-
-
- Captain Kidd
- bottle
- (and 3 more)
-
Thanks, Benjamin! Fingers crossed it still looks like that after being stuffed into the bottle and reassembled! I'm getting nervous just thinking about it. 😳
- 134 replies
-
- 4
-
-
- Captain Kidd
- bottle
- (and 3 more)


.jpg.95f70ac565328db1b2224892cadc22cf.jpg)