Glen McGuire
-
Posts
1,984 -
Joined
-
Last visited
Content Type
Profiles
Forums
Gallery
Events
Everything posted by Glen McGuire
-
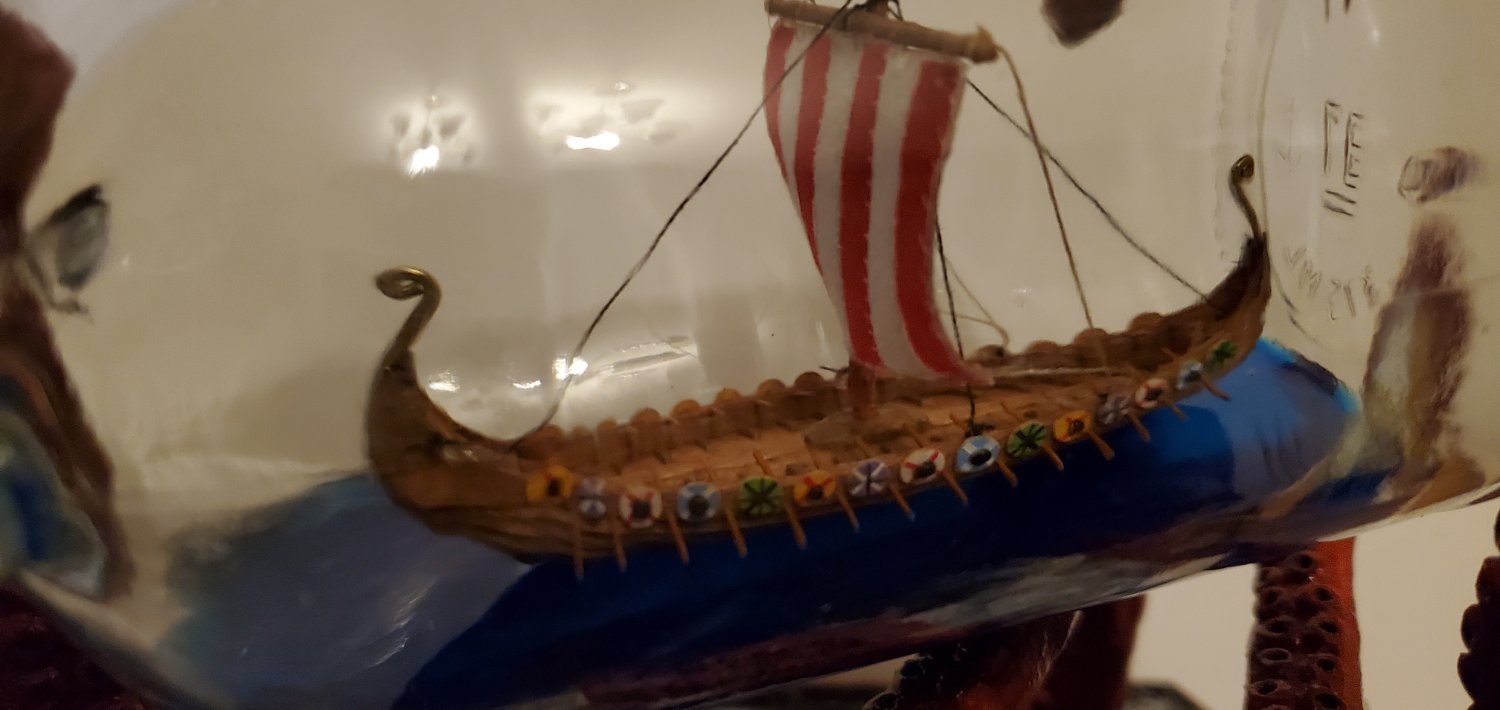
 Those sails look great, Steven. What kind of paint did you use?
- 740 replies
-
- 2
-

-
- Tudor
- restoration
- (and 4 more)
-
That is very interesting! And I was certain Pat and the rest of the proud Aussies were trying to confuse me again with their lingo. Too bad they don't sell that Bundaberg rum here in Texas or I'd help myself to more than a tot!
-
If you did not tell us about the issues, we would not notice them. In fact, I'm not sure I see any as it is. It's in the bottle, standing up on all 4 legs, crane towering over everything, and looking fantastic! Superb work!!
- 51 replies
-
- 5
-
-
- Sea Installer
- Bottle
- (and 1 more)
-
Once again I fail the Aussie vocabulary test. What is a "tot"? A drink of some kind maybe?
-
Oh man, been there done that! Very nice save on your part to get the hull pieces separated and back out of the bottle. Sounds like you have a good plan for round 2 by fixing the ship in place before additional construction. I am anxious to hear how it goes. Like Bob above, I am also in the rooting section!
- 51 replies
-
- 4
-
-
- Sea Installer
- Bottle
- (and 1 more)
-
LOL!!! Like just about everything else, if you deep fry it long enough, it tastes pretty good!
-
Those tiny propellers are amazing! Nice work. Almost time for the exciting moment of truth! Good luck with the bottling process!! To your question - yes, I have reused the hose and funnel several times. As soon as I'm done pouring the epoxy resin, I take a can of brake cleaner and liberally spray the inside of the hose and funnel. After that treatment they are good to go again!
- 51 replies
-
- 3
-
-
- Sea Installer
- Bottle
- (and 1 more)
-
Thank you for all the kind words. Each of you had a helping hand throughout this build and were truly instrumental in bringing my crazy idea to life. I am really blessed to be surrounded by so many incredibly talented (and entertaining) modelers. My hat tips to all of y'all!
-
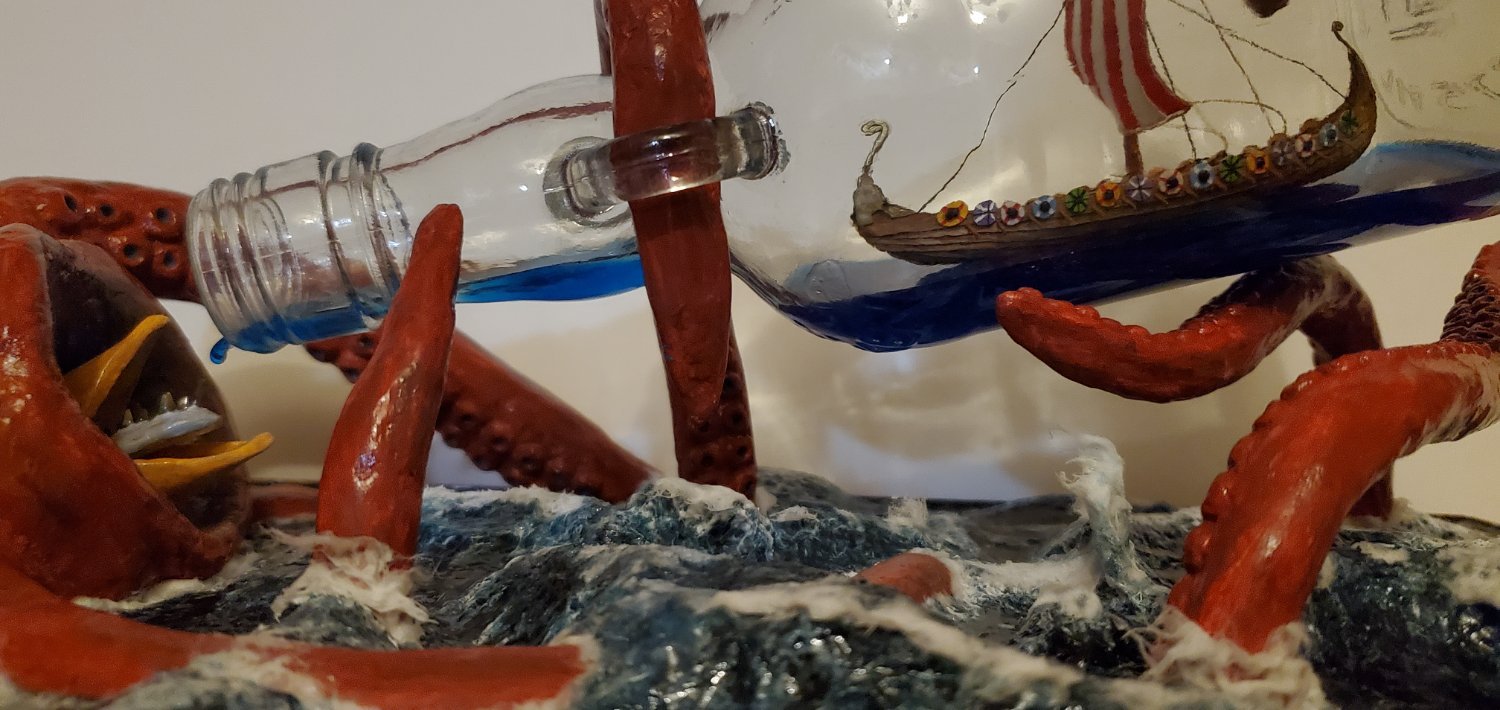
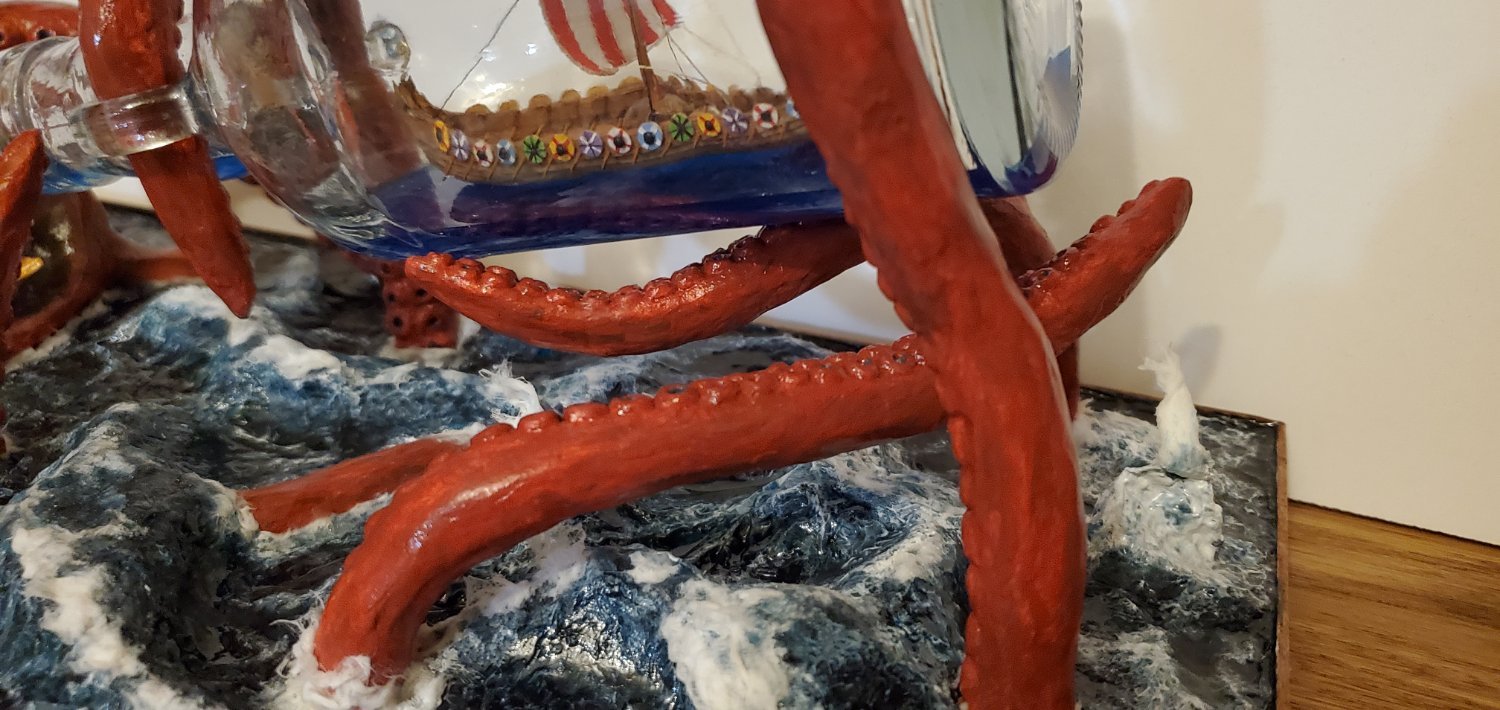
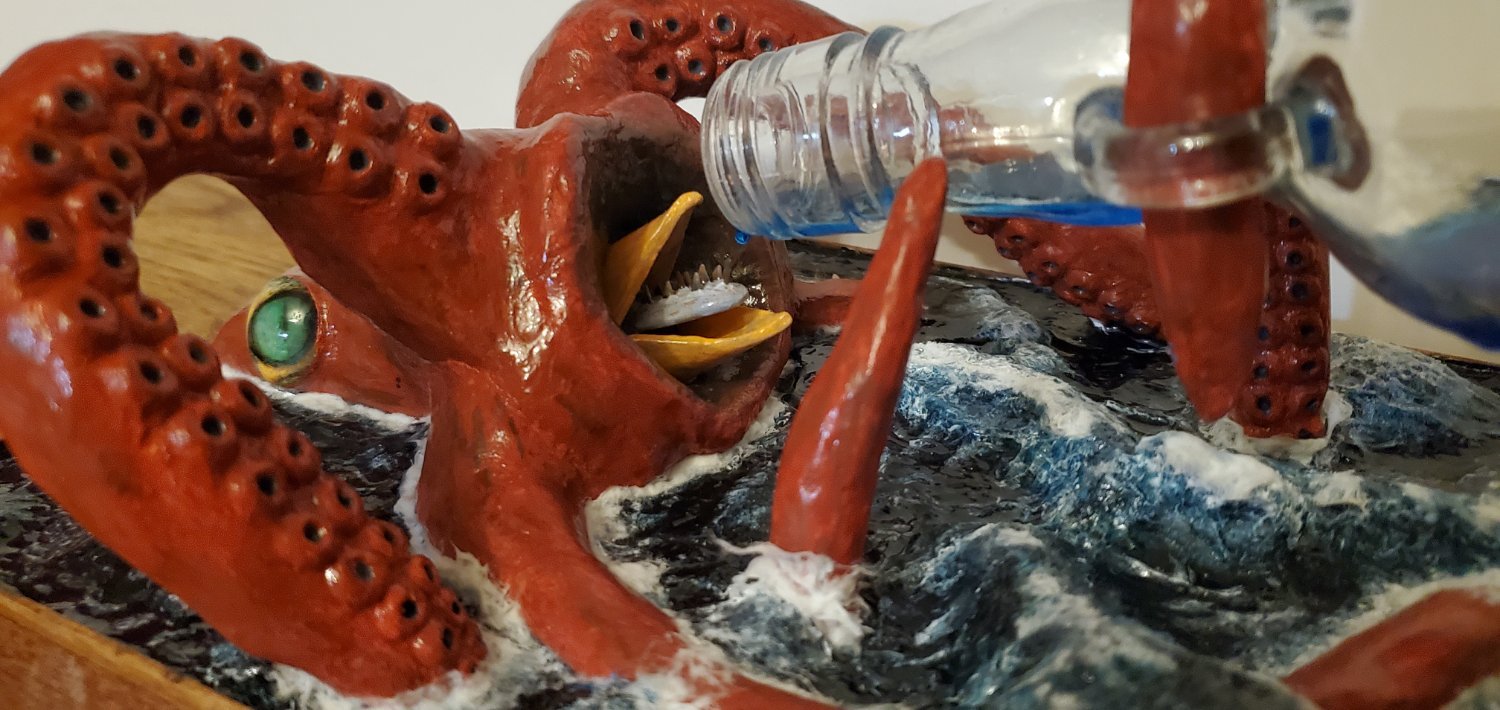
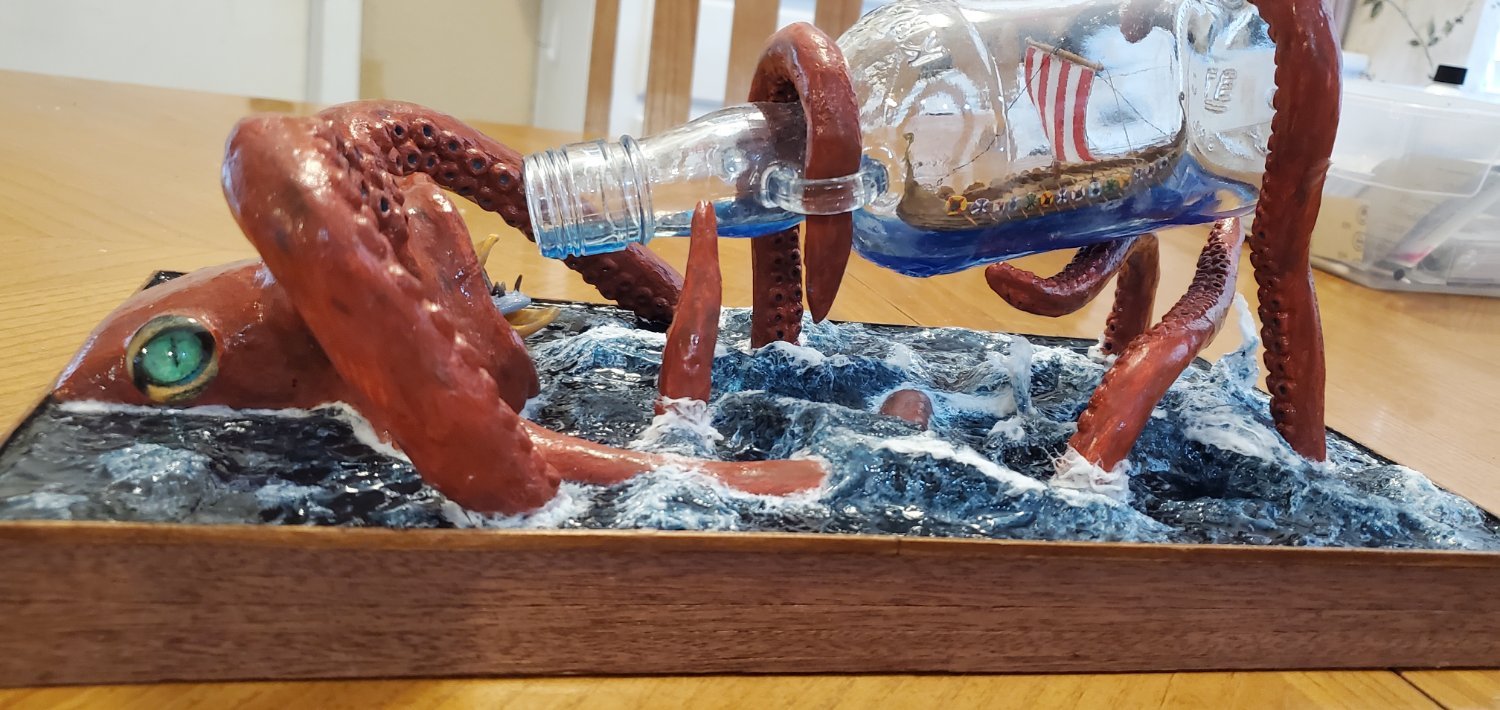
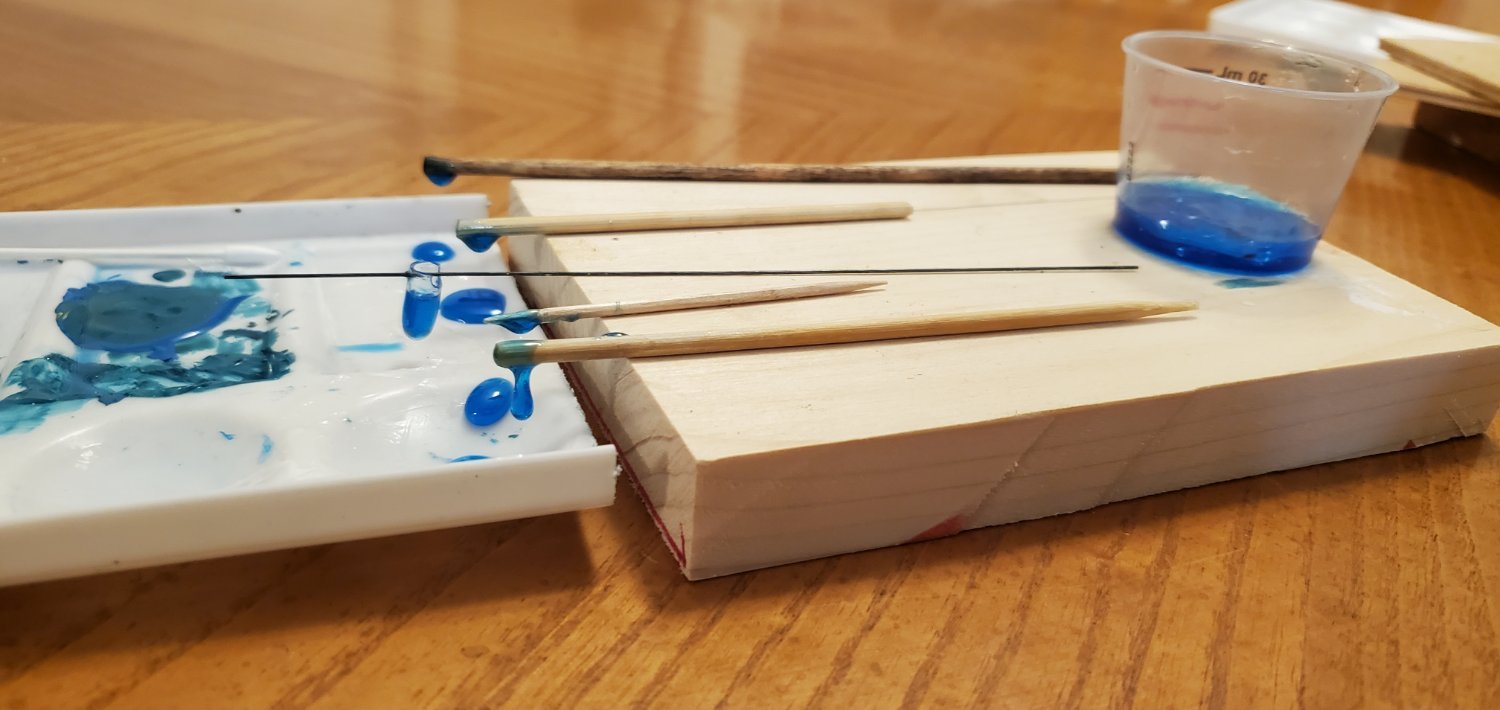
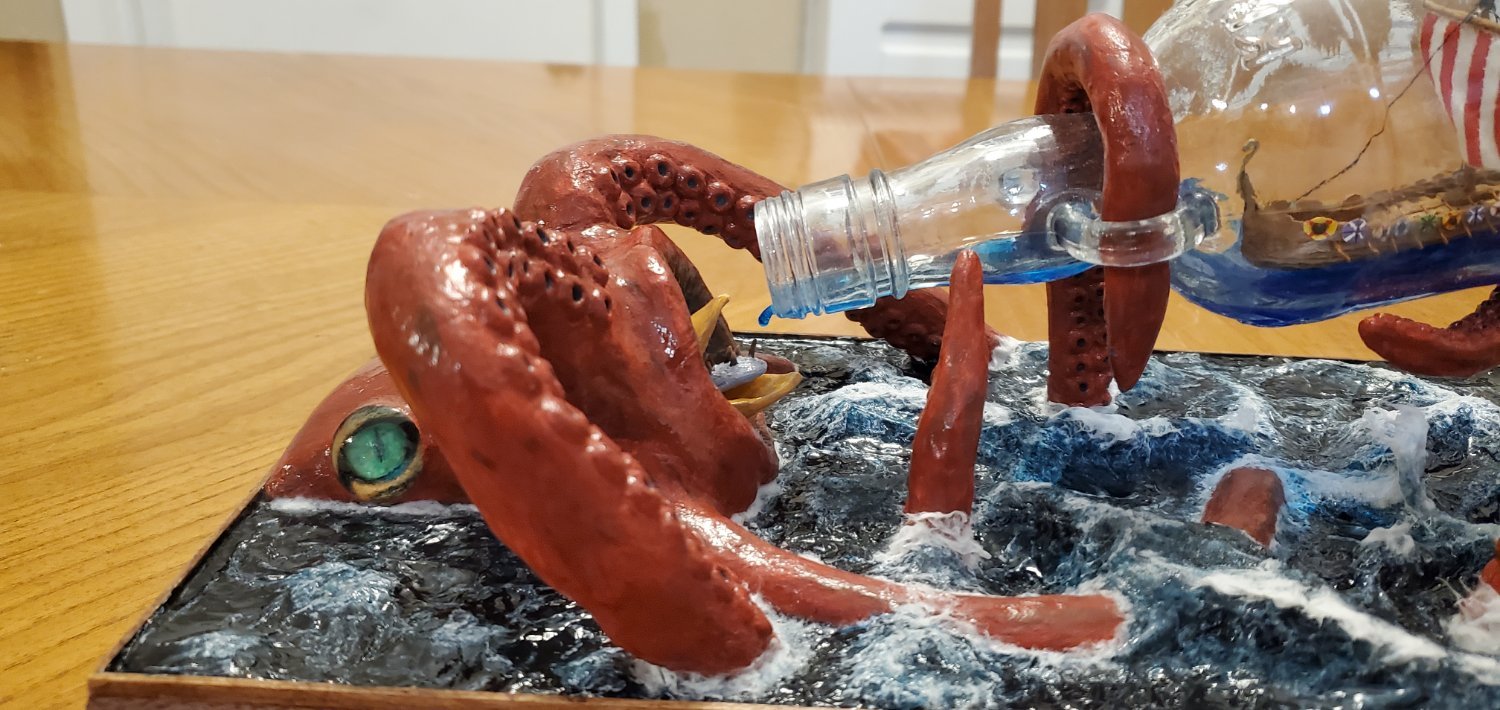
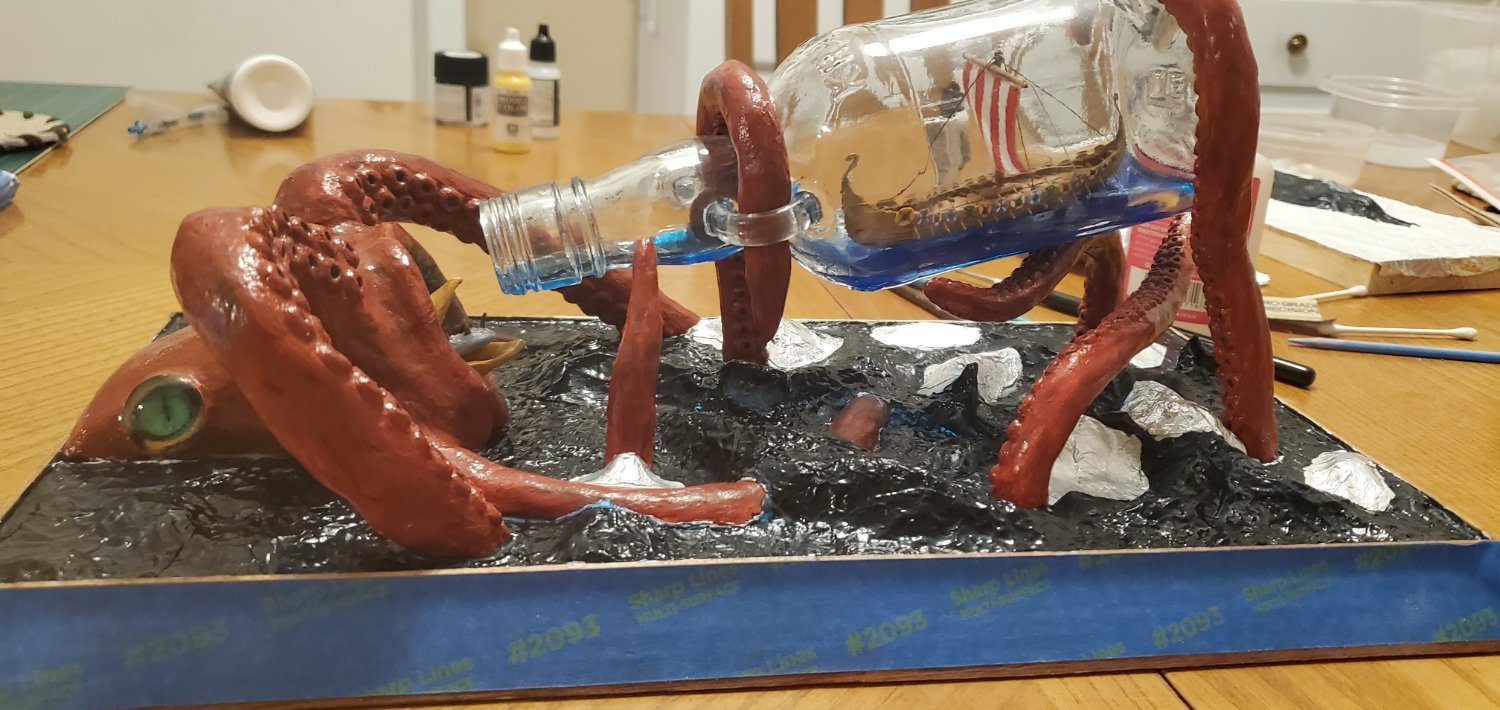
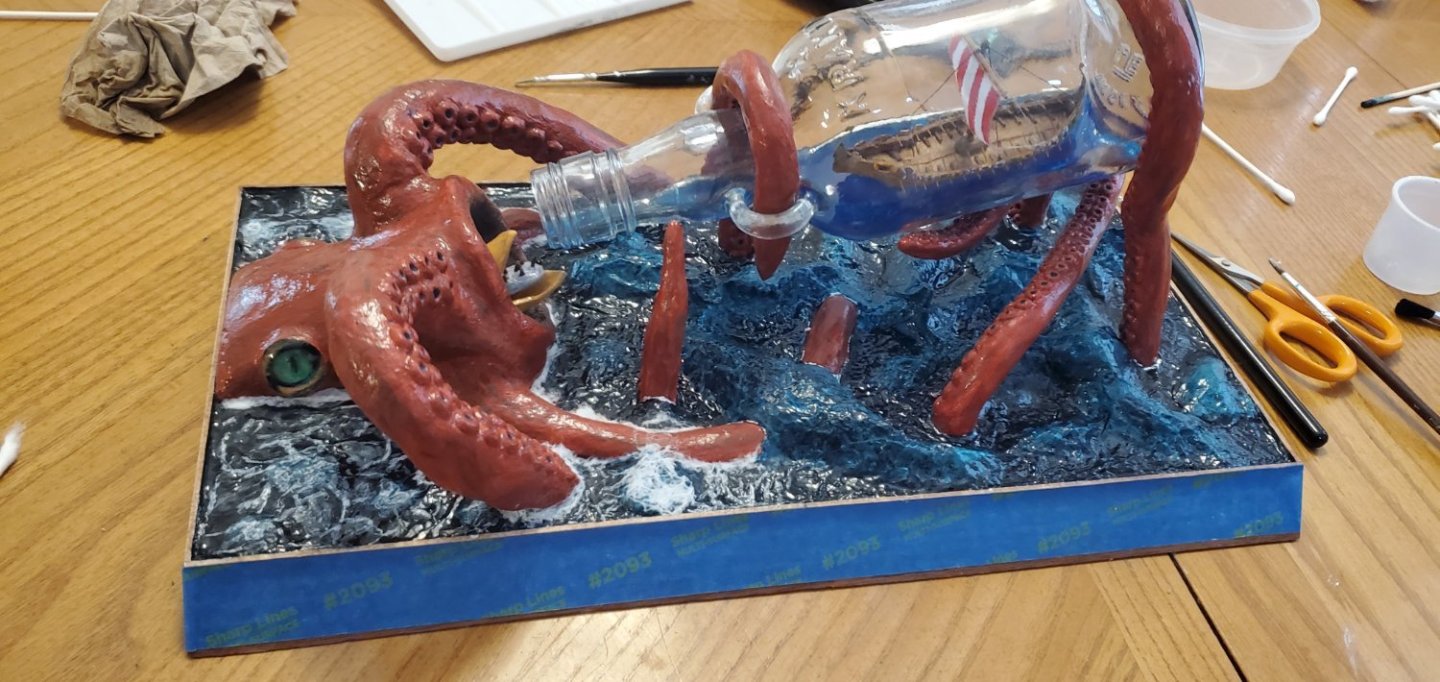
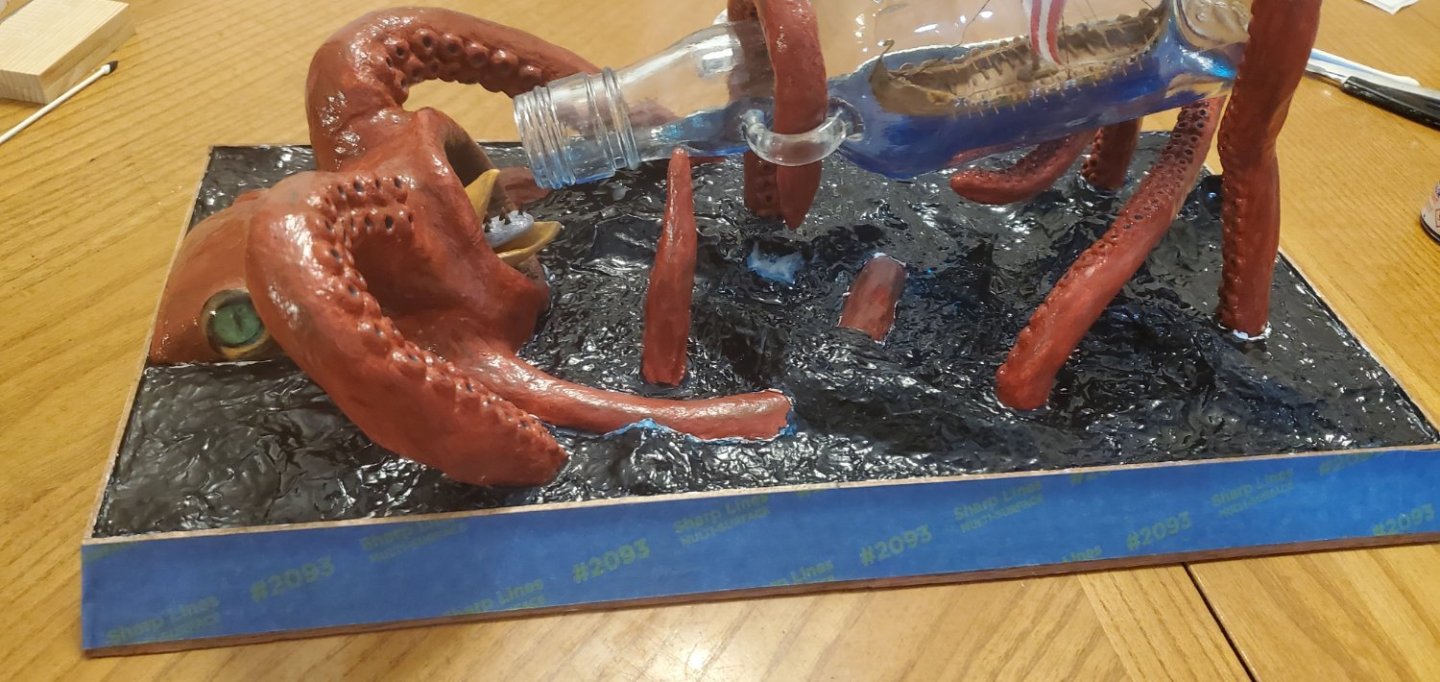
As Jerry Garcia said, “What a long, strange trip it’s been.” More strange than long though. When I look at the build logs on MSW for full-size ship models, I am constantly amazed at the perseverance the craftsmen have focusing on a project that can take years to complete. It makes the 3 months I spent on this Kraken SIB pale in comparison. So we’ll just call it a strange trip. Before I describe the final efforts of this past week, I want to take a moment and give a big THANK YOU to all the amazing people that have been a part of the adventure: @Keith Black, @mtaylor, @gjdale, @Ian_Grant, @Landlubber Mike, @Knocklouder, @FriedClams, @BANYAN, @GrandpaPhil, @Louie da fly, @gsdpic, @Javelin, @O.B.one, @Snug Harbor Johnny, @ccoyle, @John Fox III, @Roger Pellett, @Prowler901, @BLACK VIKING, @Charter33, @Paul Le Wol, @woodrat, @Jim Lad, @The Gimps Chimp, @Auger, @bolin, @Bryan Woods, @AJohnson, @DonBMichigan. When I post entries to this log and see your interest, likes, comments, suggestions, and humor, it's a large part of the enjoyment I get from these efforts. As with all my other SIB projects, y’all made this one much better than it would have been had I just stumbled thru it on my own. I cannot thank each of you enough. Now, the final chapter - the last pothole on this trip was trying to turn the water into a living, breathing, ocean. My thought was to have relatively calm water around the Kraken’s head with churning, active water underneath the bottle and around the tentacles. First, I added some minor froth where the head and tentacles of the Kraken meet the water. The froth was cotton pulled from the tips of Q-tips and heavily diluted with white glue. Then I did some paint shading on the waves to achieve a gradient of dark sea blue at the base to a lighter blue/turquoise tint at the tops. I used various mixtures of acrylic ultramarine, lake blue, yellow, and gel gloss for the different shades. Next was adding touches of white paint to the tops of the smaller waves and ripples, followed by adding wave crests to the tops of the larger waves (cotton again with diluted white glue). The final step was adding cotton splashes at the bases of the tentacles to give the appearance of tentacles violently coming out of the water. Here's an in-progress pic. I finished all that work on Tuesday and thought I was done. However, when I backed away and looked at it, something was not right. But I could not put my finger on it. I got up Wednesday morning, looked at it again, and it hit me. Instead of ocean waves, my water looked like snowy mountain ranges. And what’s the main thing about mountain ranges compared to ocean waves? Mountains are static. My ocean looked static. Blah. It needed some excitement, movement, churn, swirl, chaos. So back to google and studying pictures of ocean waves. Then it was a matter of repainting the sides of many of the waves and redoing a lot of the crests and froth. At the end, I think I was able to add a decent amount of life to the water and sort of make it look like it’s being whipped into a frenzy by thrashing tentacles. Comments and criticisms (good and bad) are much appreciated on the result. I was breathing this YUGE sigh of relief when a friend reminded me of something I’d mentioned to her a while back. She asked me, “What about the bit of water running out of the bottle’s mouth? Are you still going to do that?” Of course she was talking about @Javelin's suggestion which I had told her about. I had pretty much decided not to bother with that. But my friend pointed out that the water in the bottle would not just stop at the mouth’s edge, especially with the angle of the bottle. She was right. Furthermore, now that I looked at it, the water in the neck of the bottle looked kind of static just like my ocean had earlier. It needed an element of movement as well. So I mixed some epoxy and set up some various ways of capturing a drop. When they got good and sticky, but not quite hardened, I peeled off the one I like best and stuck it on to the lip of the bottle. And with that, my strange Oseberg/Kraken trip comes to an end! I will add some final pics on the next post.


- 240 replies
-
- 20
-

-
-
Dang! I am so sorry to see that happen.
-
Dang, Grant. Sorry to hear that. Hope you heal up really quick. But I gotta say, you need a better cover story than that. Like maybe you got attacked by a wild hoard of death kangaroos or maybe you were swimming the reef and tangled with a great white shark! We need something more than veggies. 😃
- 333 replies
-
- 10
-

-
That's an understatement, Steven. Wow. Very impressive work sorting everything out so far.
- 740 replies
-
- 5
-
-
- Tudor
- restoration
- (and 4 more)
-
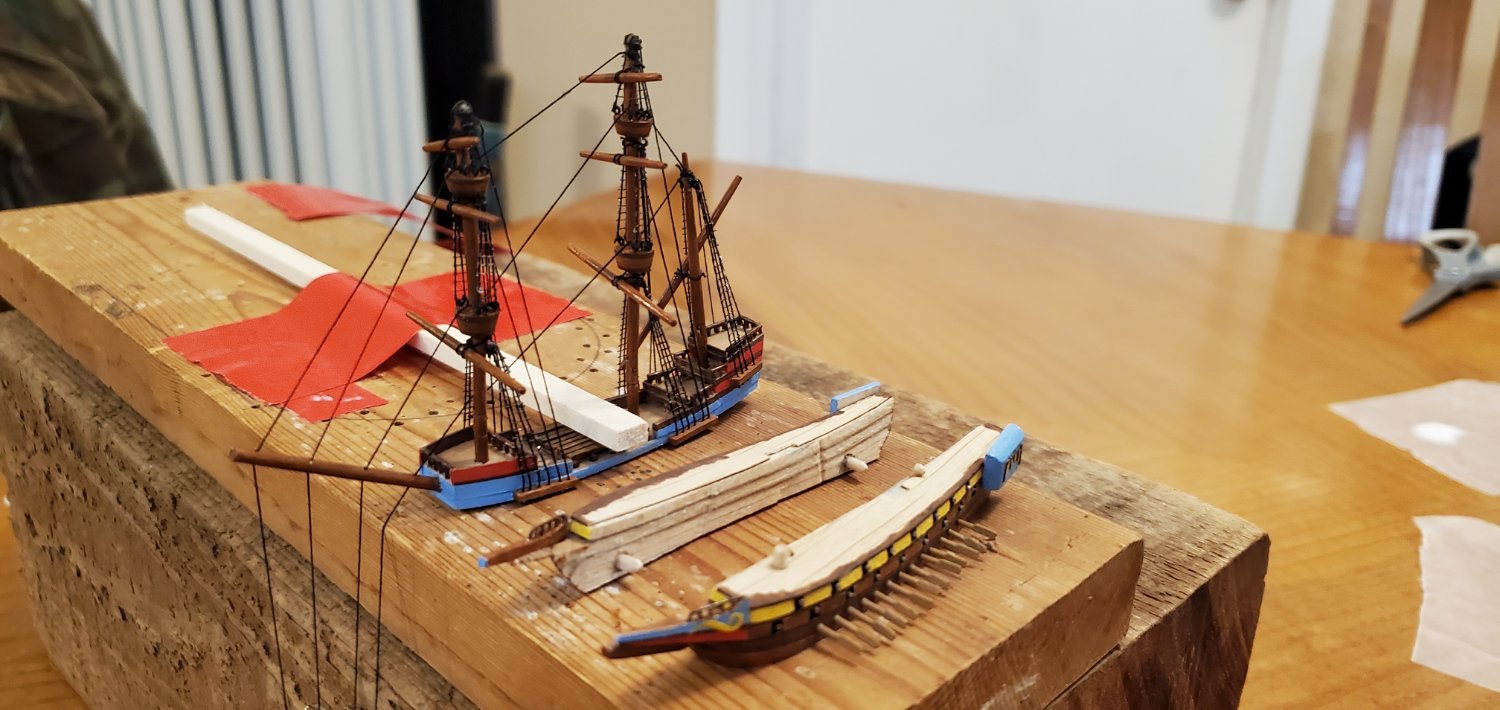
The paint job looks great! Regarding the oars, looks like you've already got a split hull. Can you add the oars outside the bottle, insert each half of the hull, and then fit the halves together inside the bottle? That's what I had to do with my Captain Kidd Adventure Galley for the same reason.

-
Yes, totally agree with you. That's on my list of remaining items but have not figured out how to pull it off. I will do some experimenting with your suggestions! And of course when you said what's missing, my first thought went to penguins too! 😆 Thank you, Gus!
-
Welcome, Alex! You join an illustrious group of fellow Australians on this site. They are always giving me great advice on what kind of Aussie beer and rum to try and find here in Texas!
-
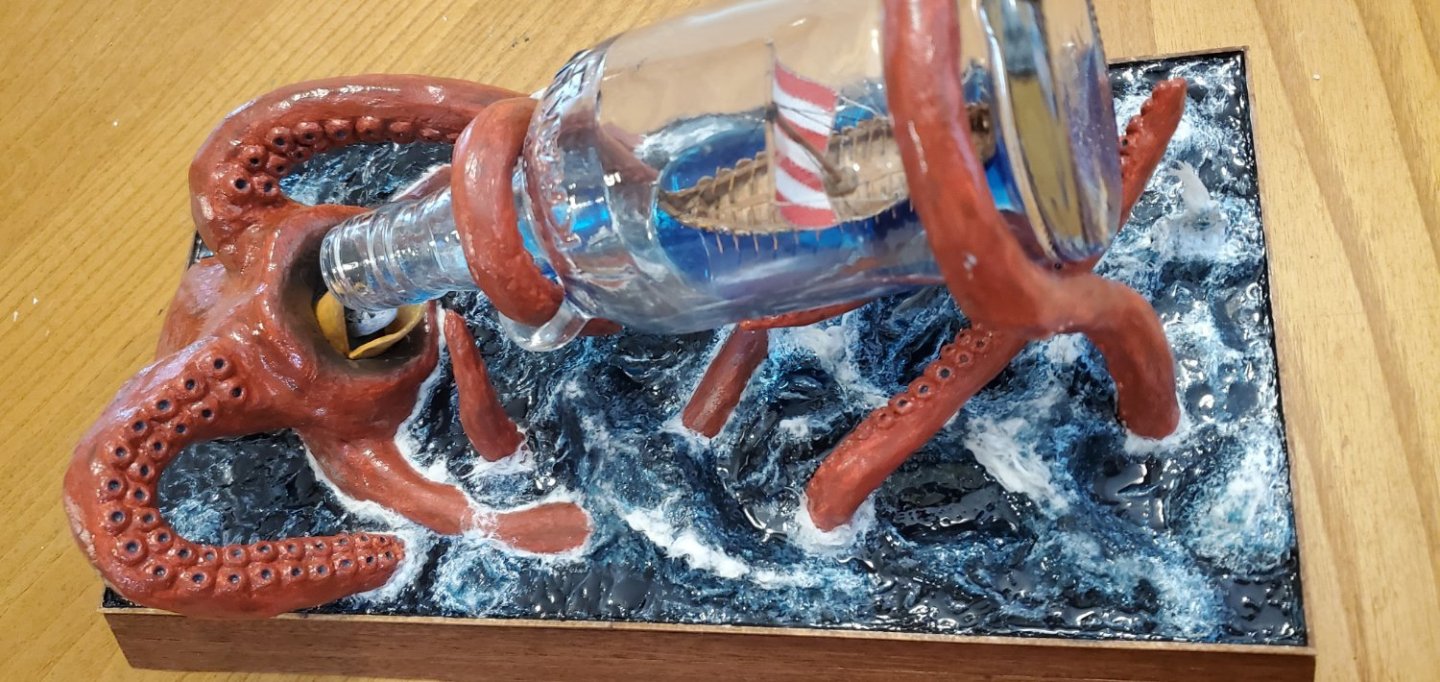
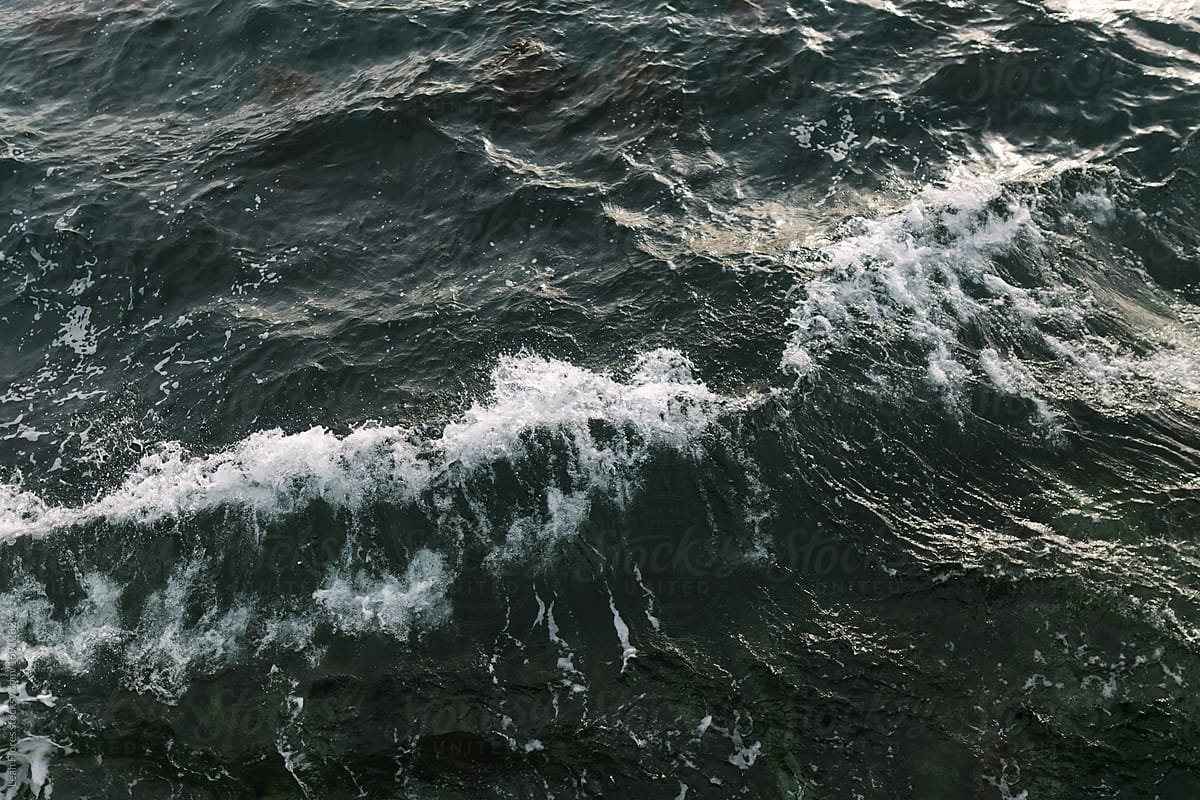
There oughta be a whole nuther thread for that debate, maybe in the Crew's Lounge! Small update here. I added a base layer of color to the water. I used Tamiya Sea Blue mixed with a tinge of Tamiya Clear Blue and brushed it on. I was trying to get a match for this color of ocean water below, erring on the blueish side if any. I think I got it pretty close. The I decided my water under the bottle was too calm. So I grabbed some globs of my modeling clay, built several more waves, and added more patchwork foil.

- 240 replies
-
- 13
-
-
-
With a last name like McGuire, you would think I might have heard of some of those words before. Nope. I'll join in with the other blank stares!
- 536 replies
-
- 2
-
-
- Quadrireme
- radio
- (and 1 more)
-
Now that I see where you put the windows, I agree. I think you did a good job!!
- 51 replies
-
- 5
-
-
- Sea Installer
- Bottle
- (and 1 more)
-
Had not heard of that before, but checked it out and Just ordered some. Thanks for the recommendation, Mike!
-
That makes two of us, Mark! I'm gonna need a Foster's lager and a canoe when this is done.