
HOLIDAY DONATION DRIVE - SUPPORT MSW - DO YOUR PART TO KEEP THIS GREAT FORUM GOING! (89 donations so far out of 49,000 members - C'mon guys!)
×


AJohnson
-
Posts
2,043 -
Joined
-
Last visited
Content Type
Profiles
Forums
Gallery
Events
Everything posted by AJohnson
-
 Keith wherever I look on MSW you are shepherding us along!
 -
Good luck with the remaining garden jobs before Autumn arrives, after all Keith you live in one of the driest place in England! 😆 My shed re-roofing will have to wait until next year now, other events in the house have taken over this year. I admire the neatness of the first planking close-up picture of the stern, so looking forward to seeing your second planking.
-
Yes, built like the proverbial "Brick Sh$*-house" as the crude old saying goes! 😆 Once all glued this is a very solid little model, it has been great fun so far and the hull form means I don't think planking will be too troublesome when we get to it.
-
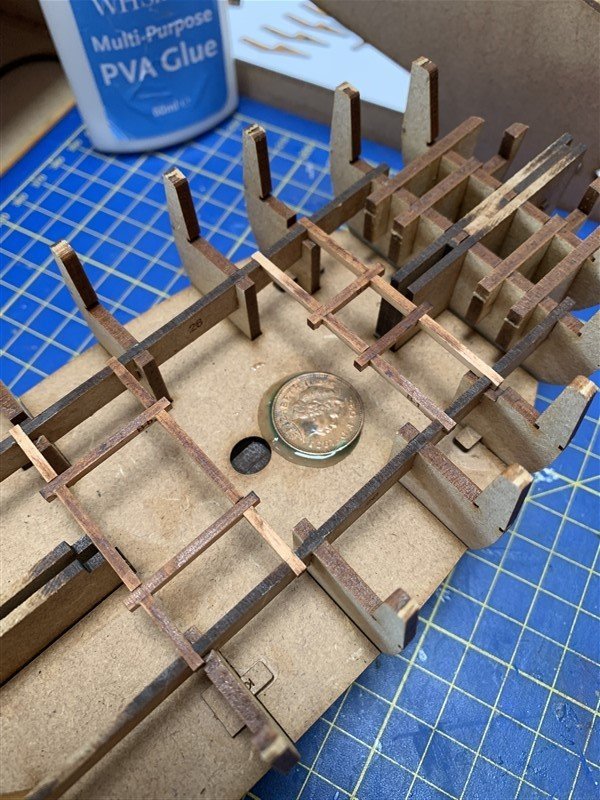
🤣 - we since got married and now have two "kids" at University, so every penny, included the ones down the back of the sofa, have been raided since 1999! This is just a penny we found recently, I have a little stash of pennies of various significant vintages for this purpose.
-
Blink and you miss Greg! 😆
-
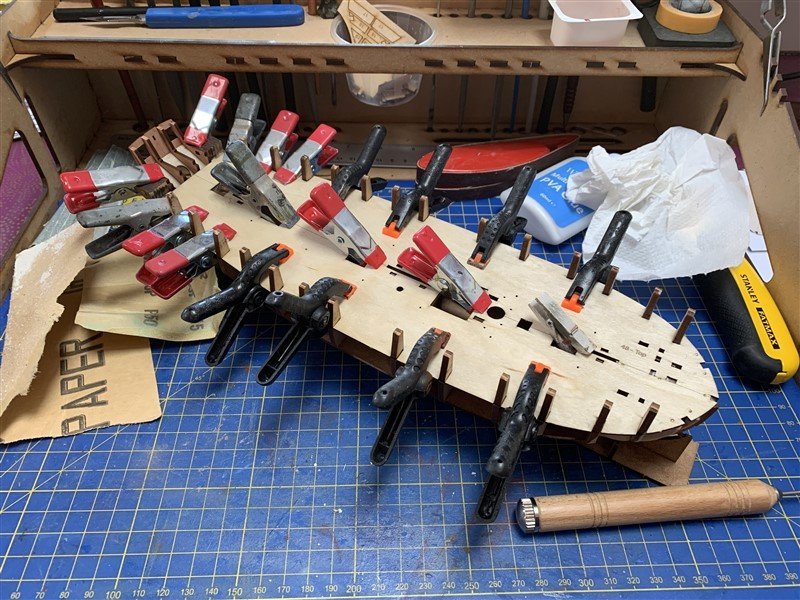
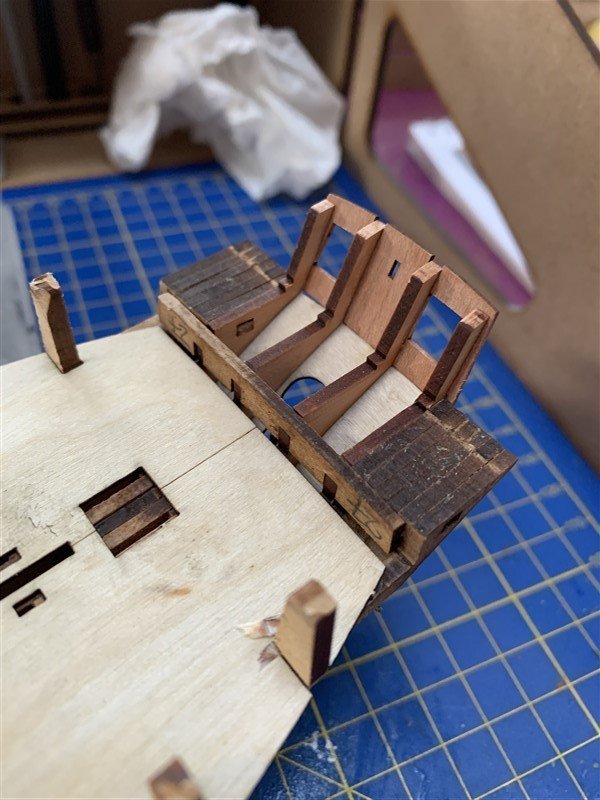
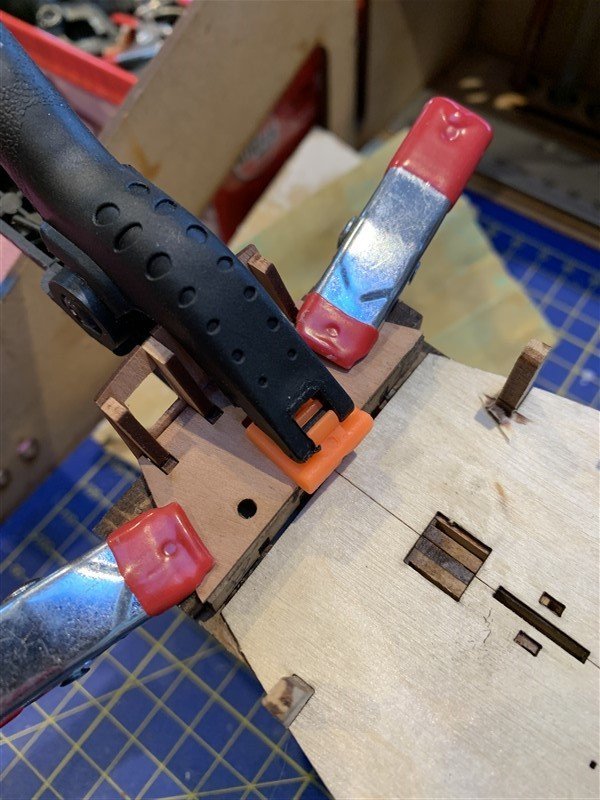
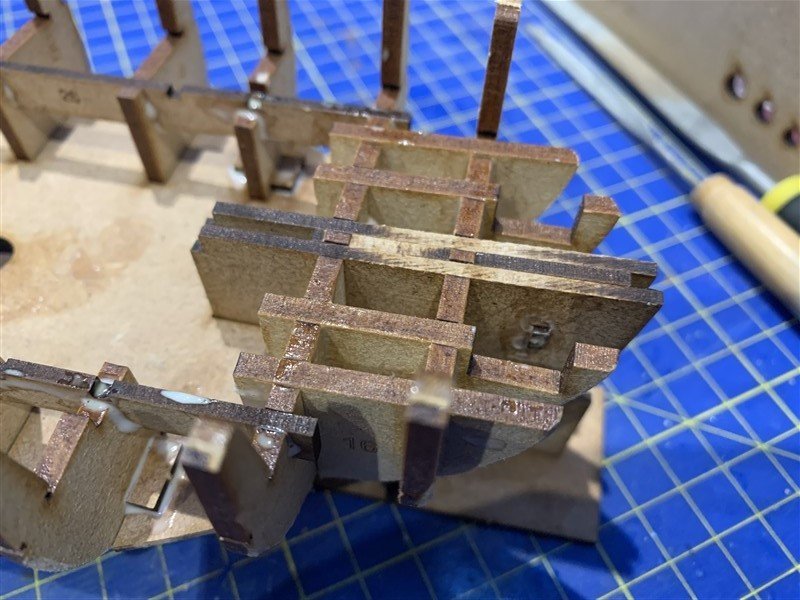
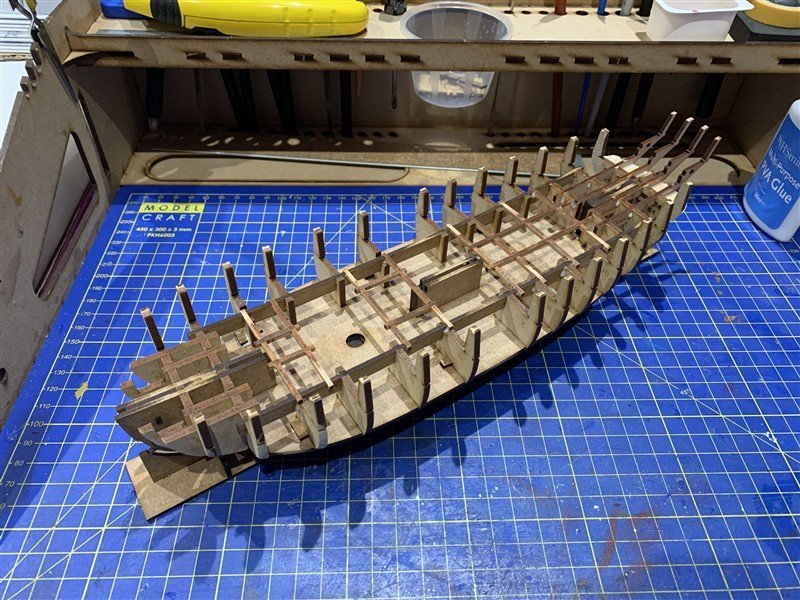
Thanks all for the encouragement at the start of this build. Last update for a bit, the Admiral wants me to do some suitcase packing! And while I am away I am hoping David @dunnock will leapfrog me on his "Trial" build so I can shamelessly copy him! Given his just brilliant HMS Diana he has recently finished, I will be in very good company. 😁 So, trying to keep "waffle" to a minimum @Jack-in-the-Blue 😉 - onwards! I was keen to get the Stern parts on in order to protect the stern frames from my inevitable "accidents" so I got the stern counter, Stern bulkheads, Transom and raised stern platform glued on as soon as I could after adding the stern filling patterns (most of these patterns get sanded off later.) - Phew all on and no broken bits! 😀 The false deck is also in place now and drying, but not until I had placed a "lucky" penny as close to the mast position as I could (from 1999, they year the Admiral and me first met.) The front end of the false deck I put in a few pins for good measure where I couldn't clamp it. This is where things will sit and dry for a bit now while real life takes centre stage for a couple of weeks. Over to you @dunnock to keep the campers entertained!

- 207 replies
-
- 12
-

-

-
Congratulations on your Grandson Gabe! I hope you buy him plenty of model kits to build and keep him busy / away from smartphones/gaming consoles as long as possible when the he is older! You did well to get anything done on the Agassiz with all that going on! Looking good. 👍
-
Hi David, I'll be following along and pinching any good ideas as I'm making the same kit! Great start, I was thinking about planking the lower deck, but decided against as I will have only one open companion way and may well add crew members to my build; can visualise a little "Powder-Monkey" running up from below, so unlikely to see below decks.
- 152 replies
-
- 2
-
-
- Vanguard Models
- Cutter
- (and 2 more)
-
Hi Mike, really good to see you on with your latest build. We are both doing a VM Cutter, so will be checking in to see how you are doing.
-
Welcome back Mike, hope you are all okay now, looking forward to your Dory. There are plenty of build logs on MSW to guide you.
-
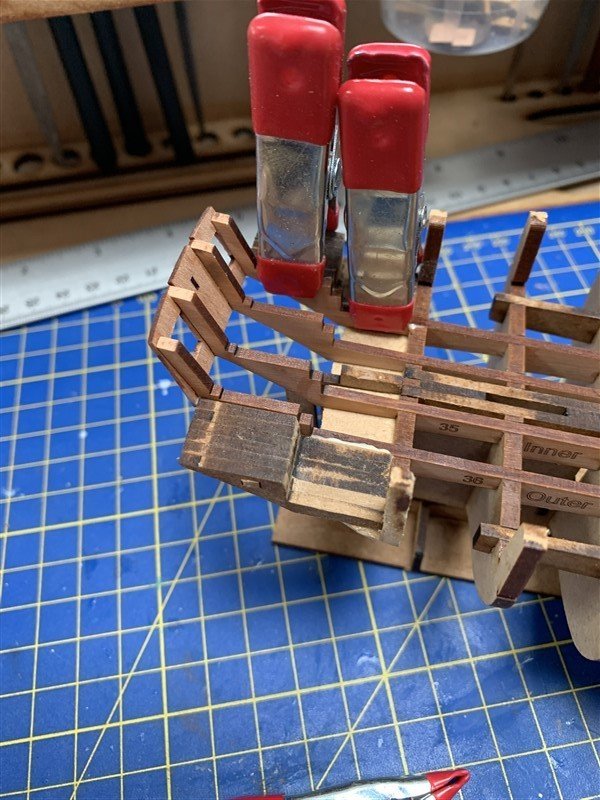
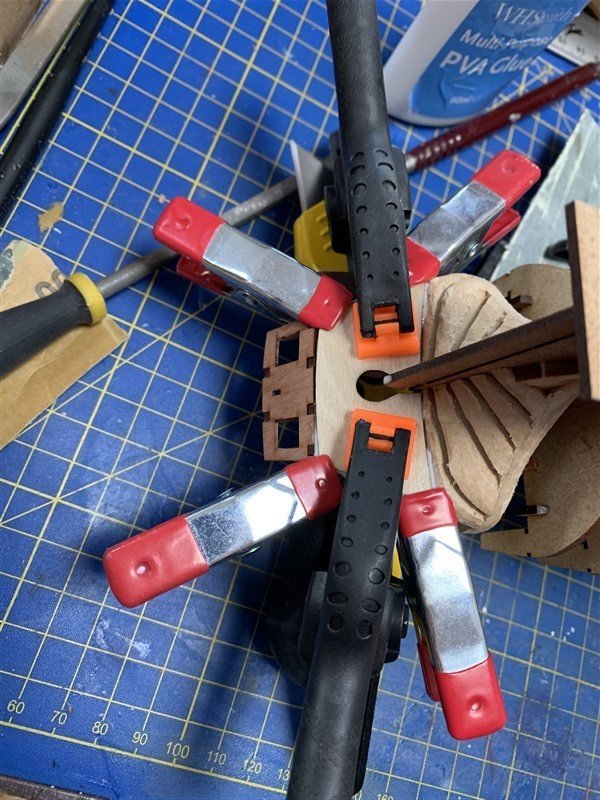
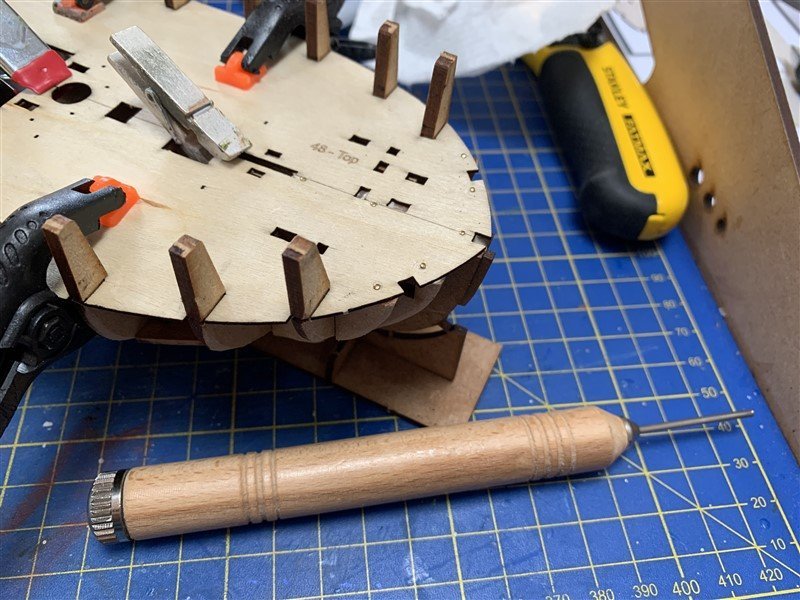
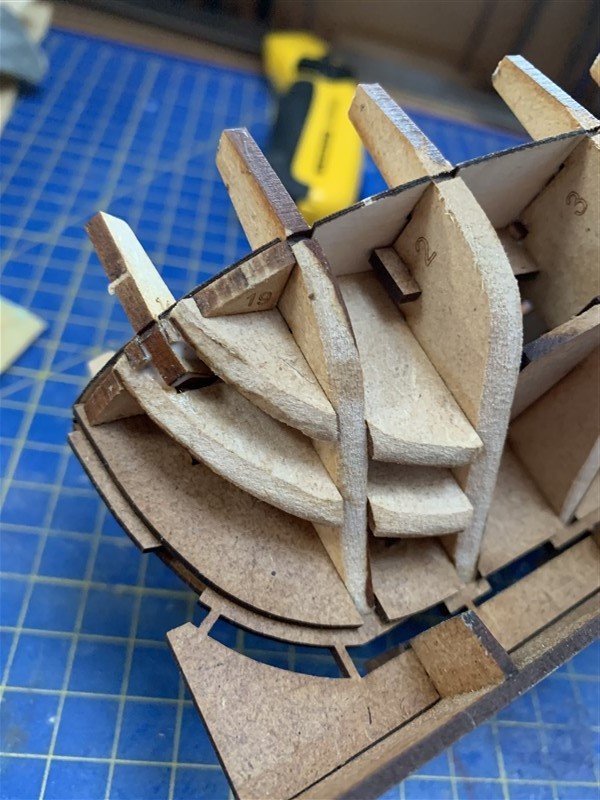
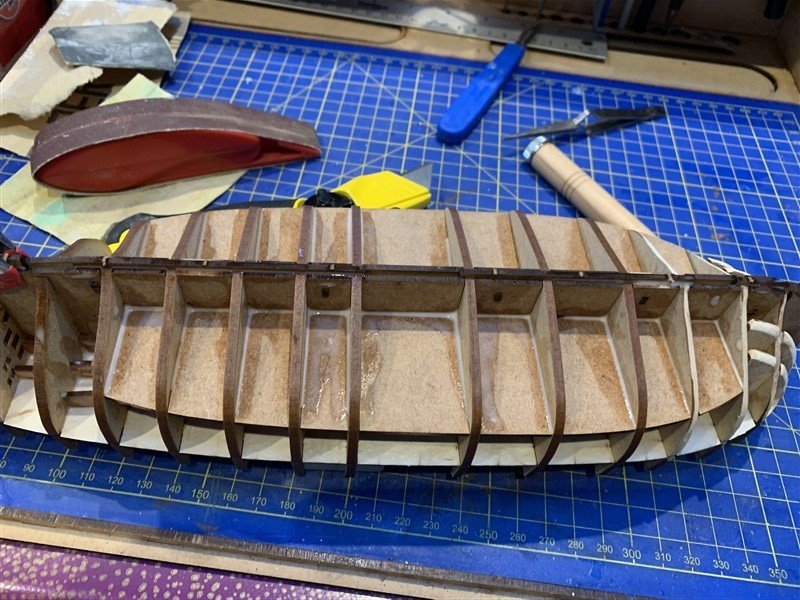
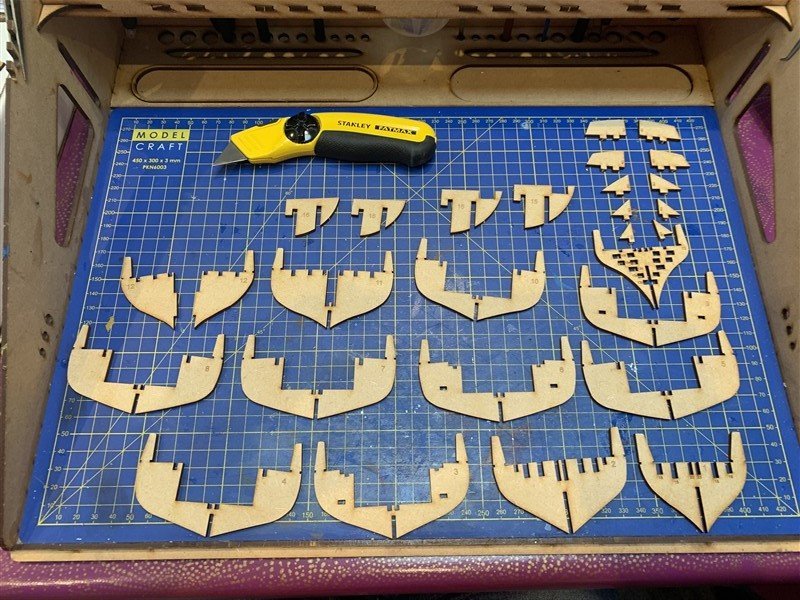
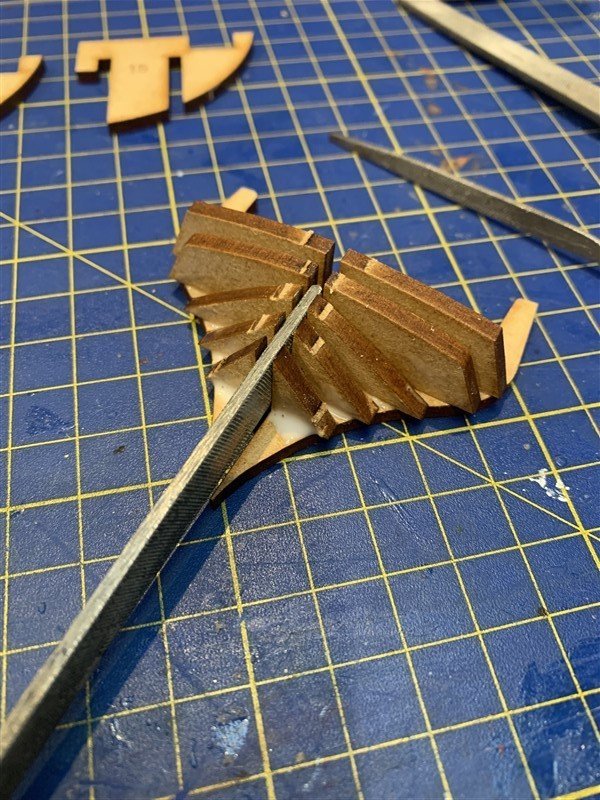
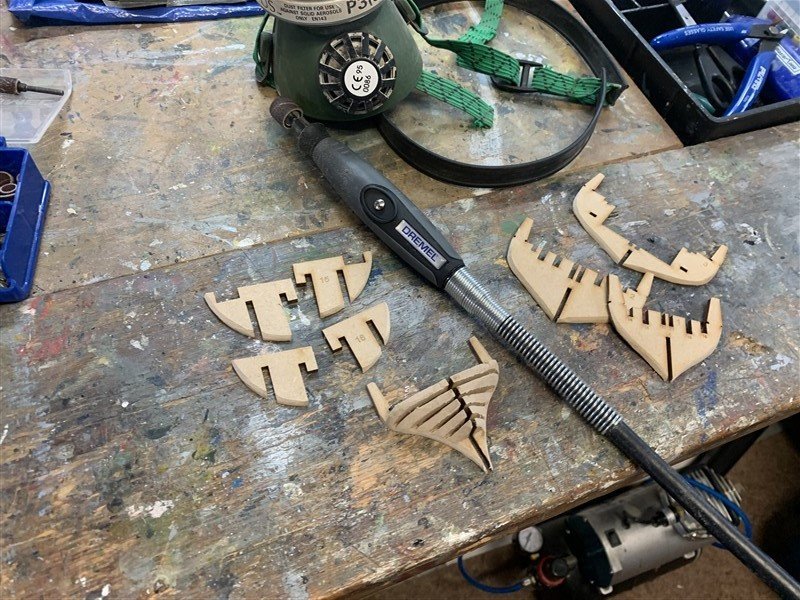
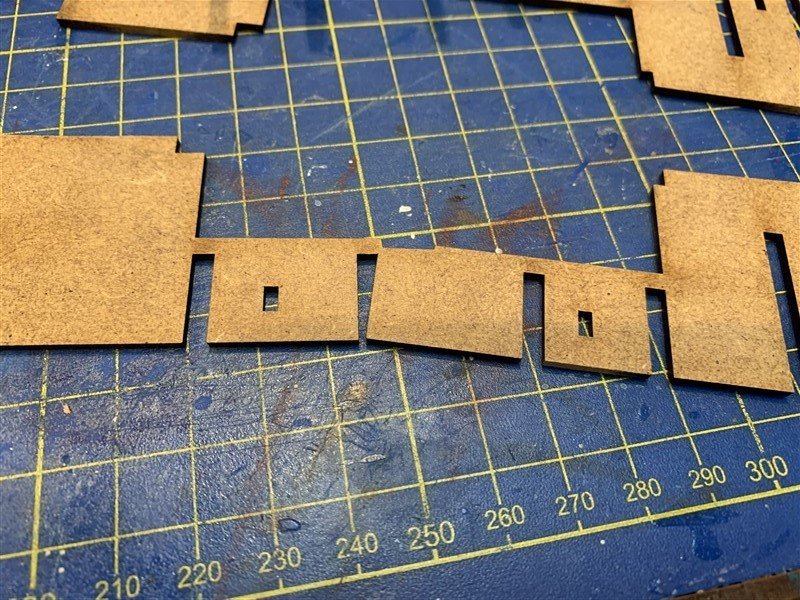
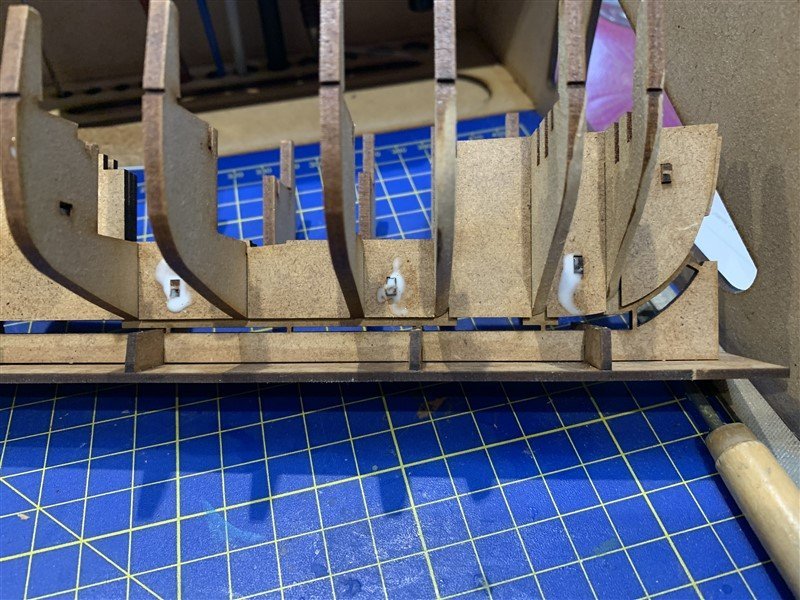
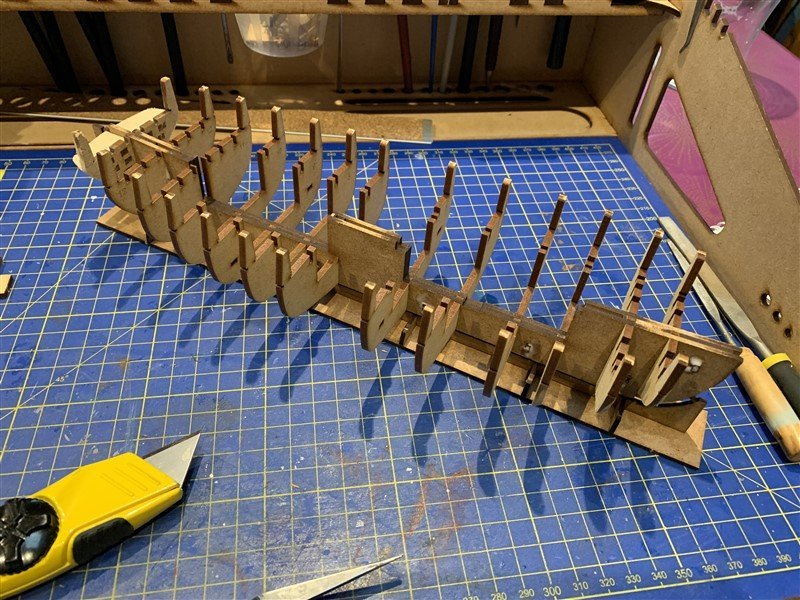
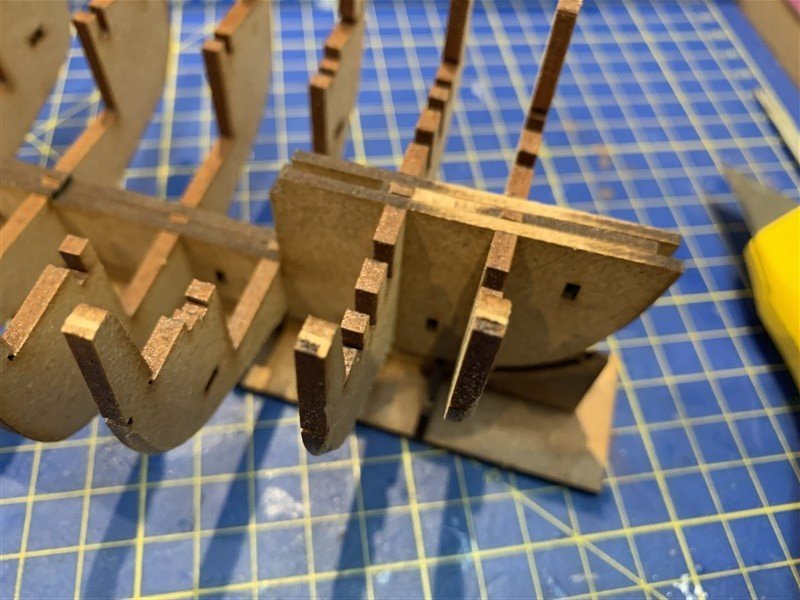
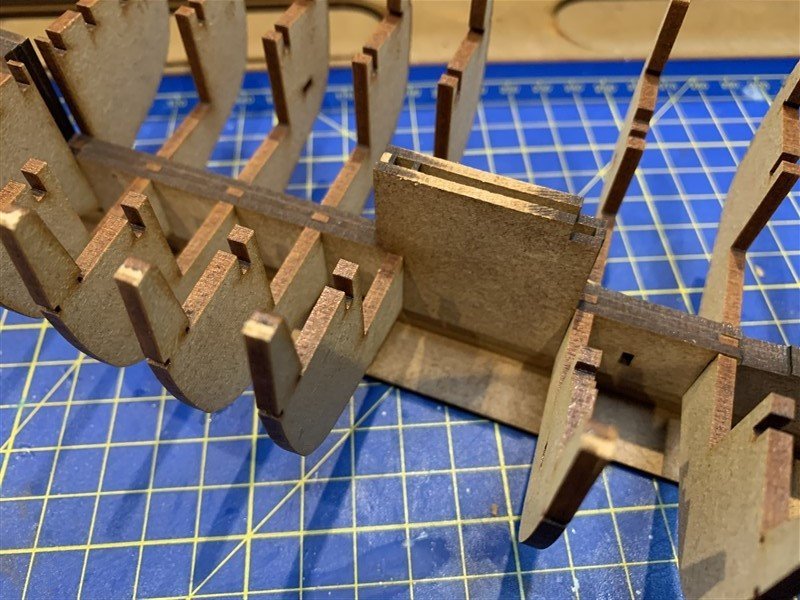
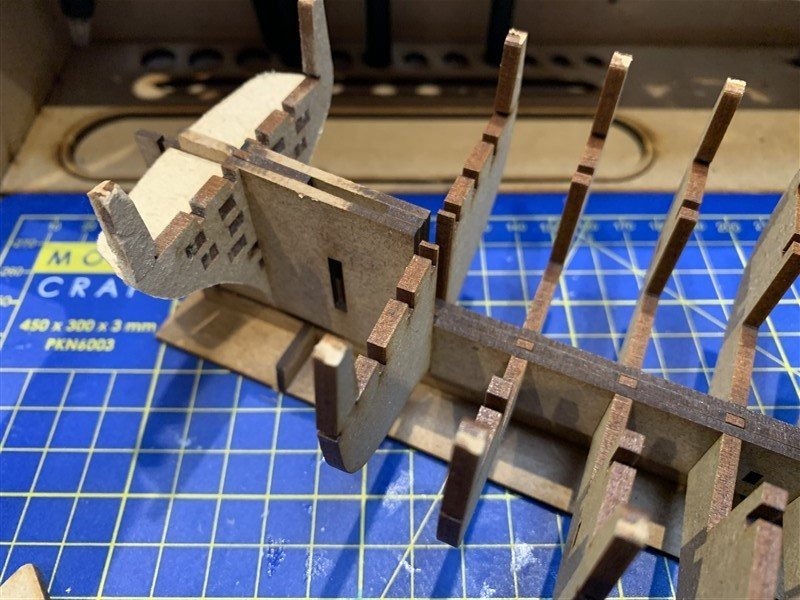
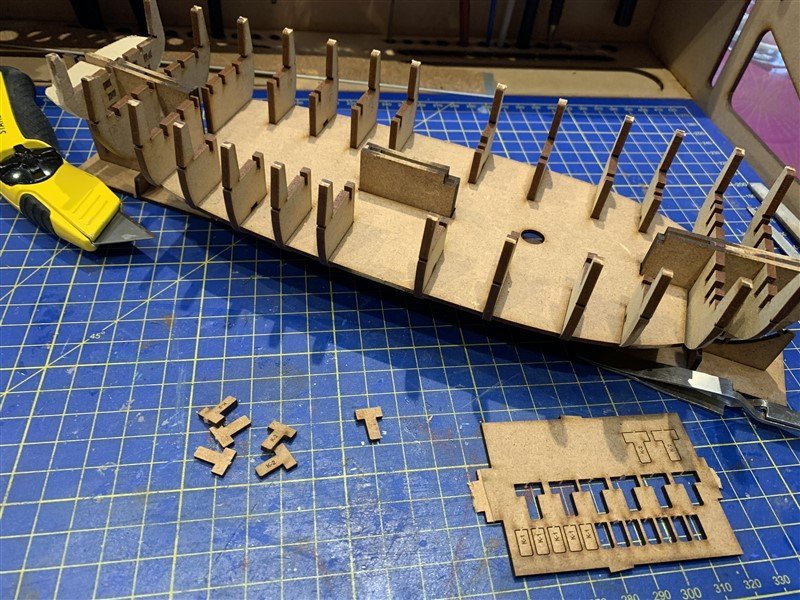
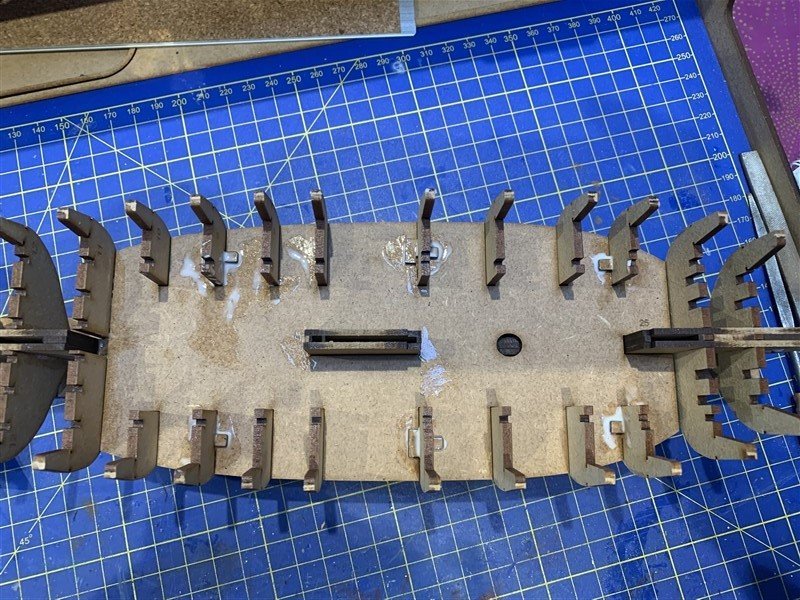
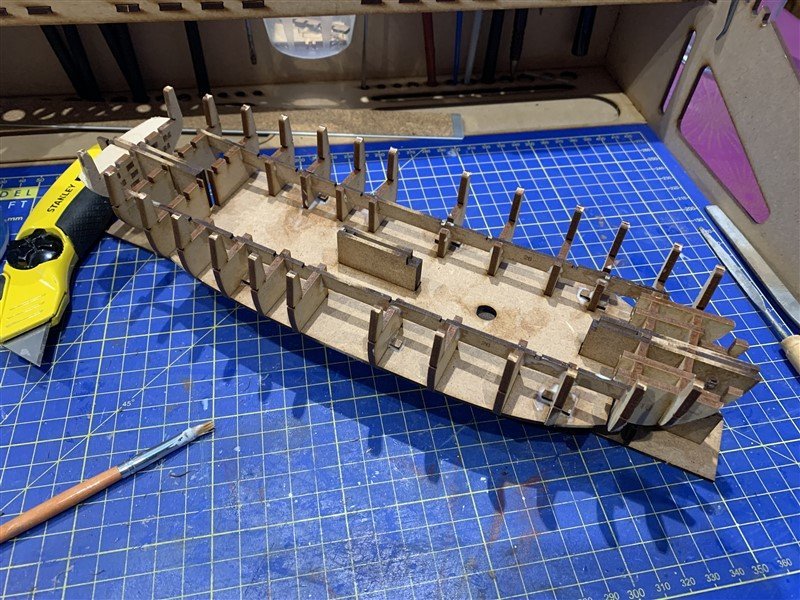
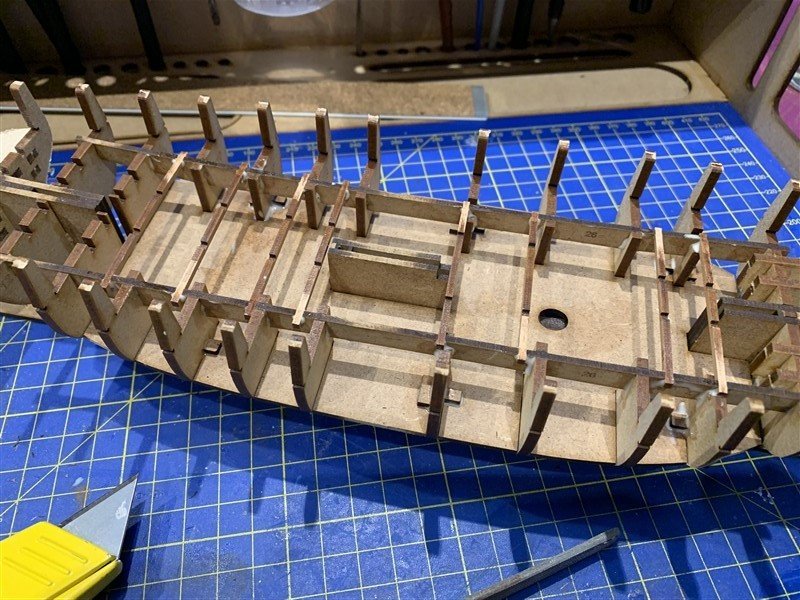
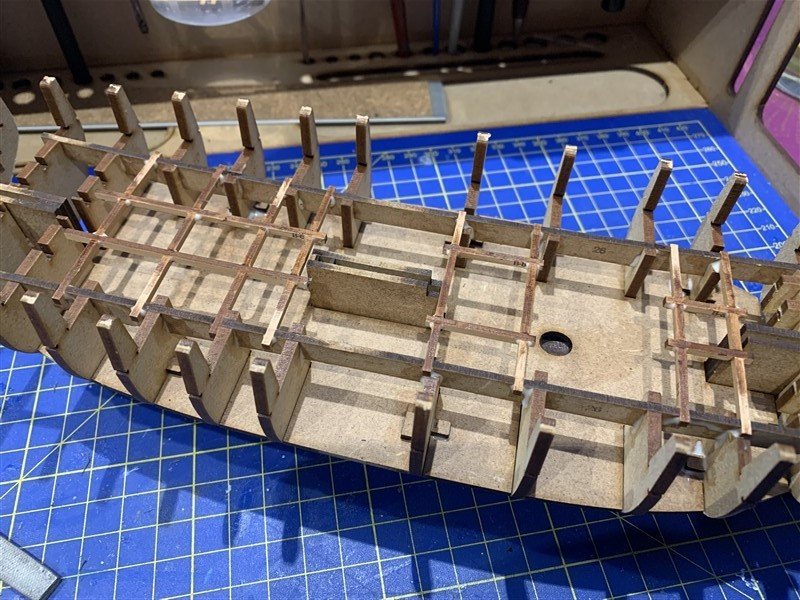
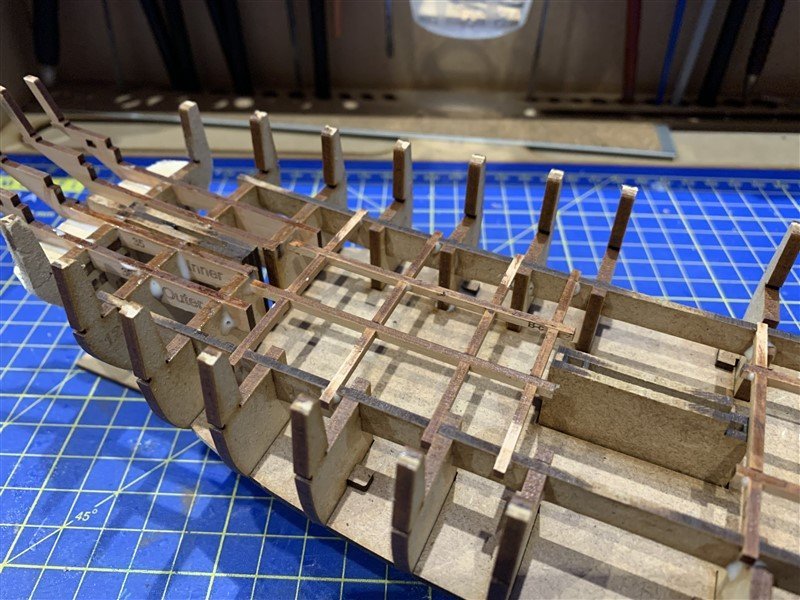
Well another typical UK Bank-holiday weekend ☔! So it means I make a start on Trial! 😁 And in one sitting, on a rainy afternoon I have, without rushing, made my way through steps 1 - 24 of the instructions. First up, I think I am addicted to the smell of laser cut wood! 🤓 I don't want to go over the instruction line by line as Chris's Prototype build-log says it all, but there were a few things I found building it for myself I will comment on. I do a lot of modelling with a Swann-Morton Scalpel, but as mentioned in the instructions, you just sometimes can't beat a heavier knife with a new blade and this stage with the cutting out of the MDF frames is one of those times. It was amazing how much the box emptied in the first hour of so of this, good fun. The first job was making the keel base/supports, almost like having a keel clamp included in the kit! The only messy bit for this first session was the pre-sanding of some of the bulkheads, so I did that in the garage with the Dremel and mask on. One point to note if you are familiar with Vanguard's beginners kits like Nisha I built recently, there are no etched guild lines on the bulkheads to sand down to. No problem, no other kits have that, so I was cautious and did what I thought matched the instructions, I can always do more later. Stage #6 warns builders to make sure they don't get glue in the slot of bulkhead #13 (stern patterns) I got around that by using a metal file to keep the PVA glue out of the slot that goes onto the keel. One slight warning note for other builders is that parts#14 that go on either side of the central keel (they form the three slots for the Trial's sliding keels) are a bit delicate once cut out of the former and through my own roughness/clumsiness one of them started to break; it didn't actually come apart, but it was a close thing. Once held in place by parts "K1" all was solid and no fear of it breaking. The lower deck part #25 makes everything much more rigid. Parts 26 and then parts 15/16 at the bow followed by the pear parts B-1 to B-6 form the false deck supports and these really brings things together; they are helpfully etched with which direction you need to face them. The Stern platform supports #35 & #36 bring to a close this opening session. This part of the build really did go together very easily, the tolerance on the slots was just right, snug, but not so tight you were worrying about braking anything pushing the parts together. There will be a slight pause now for a short holiday and then a final session with the contractors to restore the house following the loft leak, so the garage will temporarily be full of "stuff" hope to back on this soon! Thanks for looking in! 👓

- 207 replies
-
- 21
-
-
That is looking very nice Keith, those Ice-bumpers/channel guards are really chunky. Think you have the shape compared to the original plan/lines looking spot-on! 😎
-
Oh no another victim, sorry disciple!
-
She looks magnificent David, well done! Looking forward to seeing the case. I think from the the dimensions you give the minimum thickness might need to be 5mm to avoid flex of the main side panels. I used this company for my Nisha:- www.acrylicdisplaycases.co.uk but it wouldn't be cheap for a case that big. So if you have the skills, make your own might make more sense.
- 310 replies
-
- 1
-
-
- Diana
- Caldercraft
- (and 1 more)
-
Thanks Dave, yes, I think I might be Trial-ing a Vanguard model!
- 45 replies
-
- 2
-
-
- Earnslaw
- Paper Shipwright
- (and 2 more)
-
And none of us will tell anyone if you do! 🤣 But like Allan, we says, have every confidence! That rigging is, really really good!
-
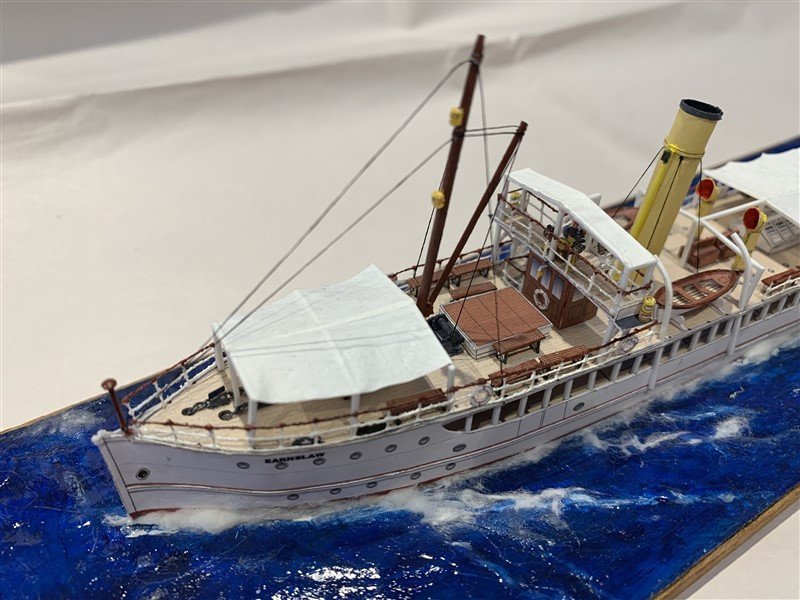
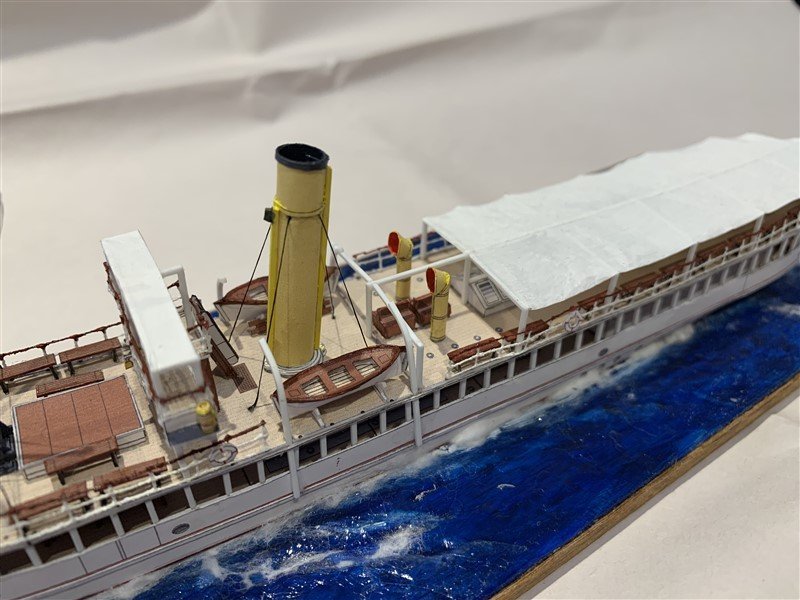
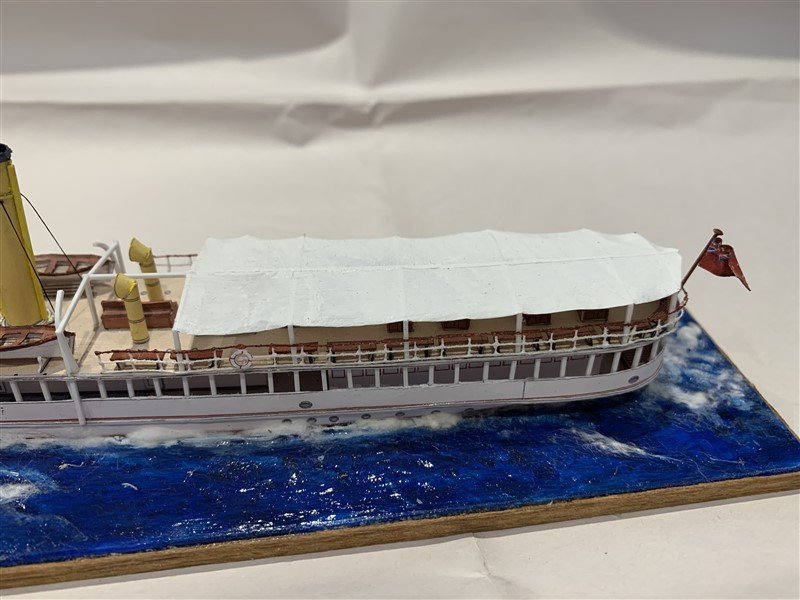
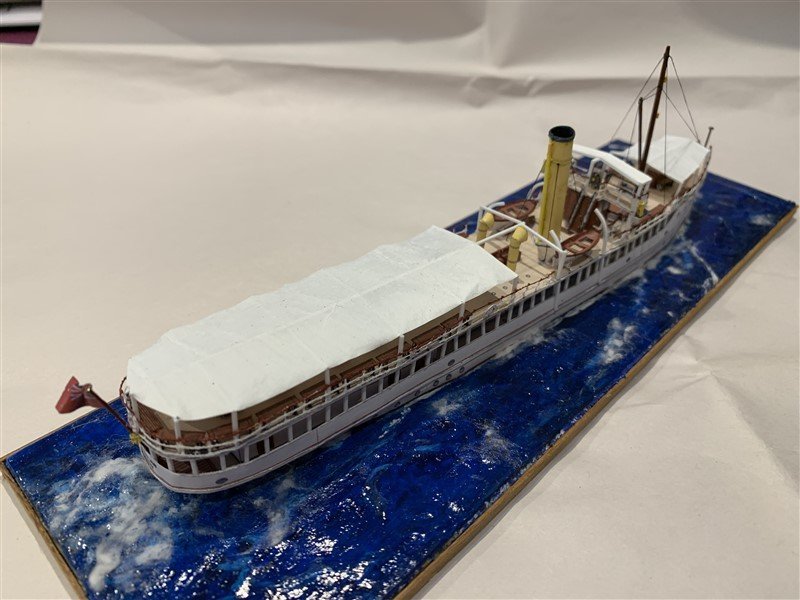
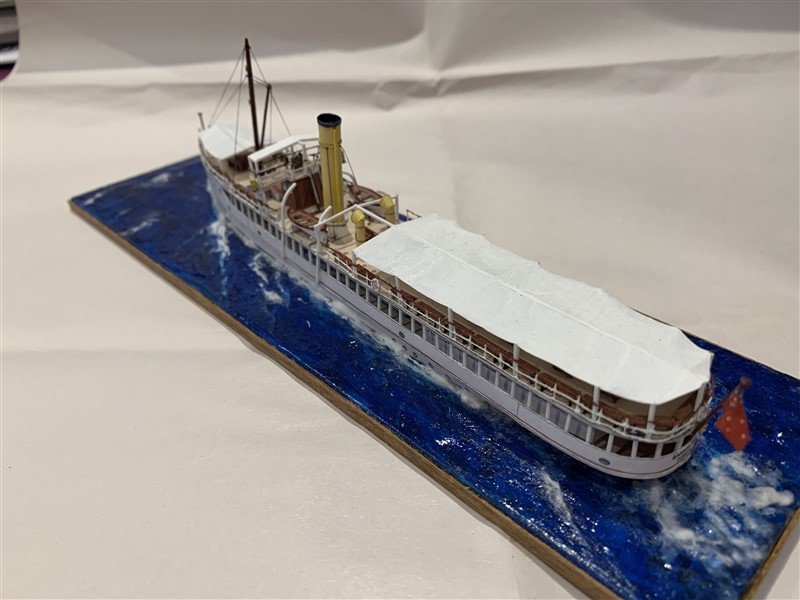
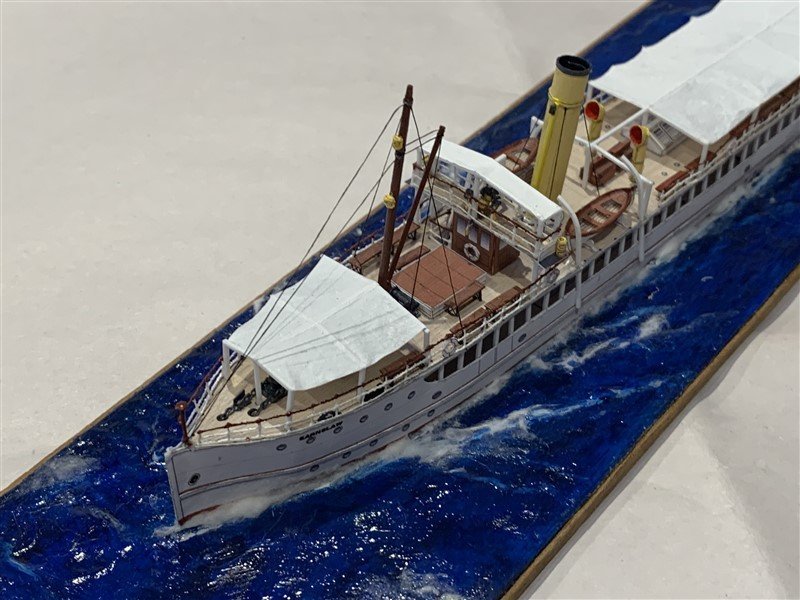
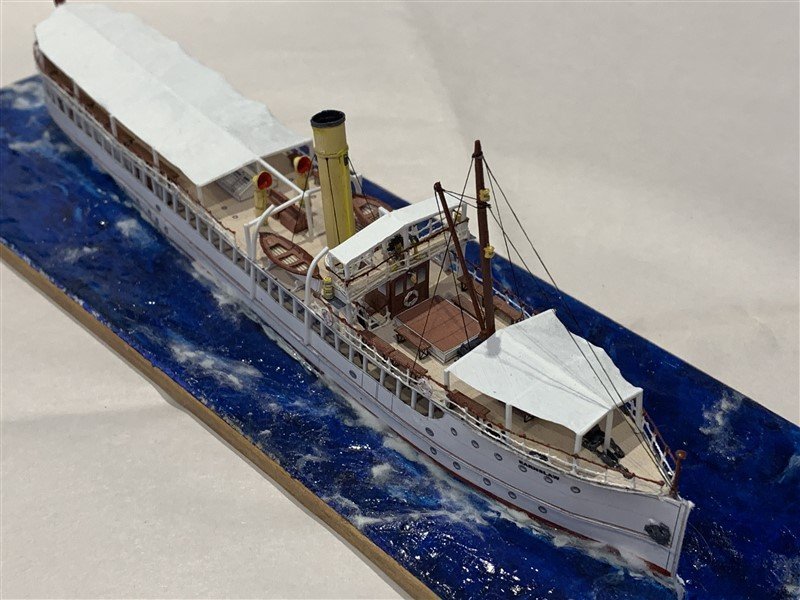
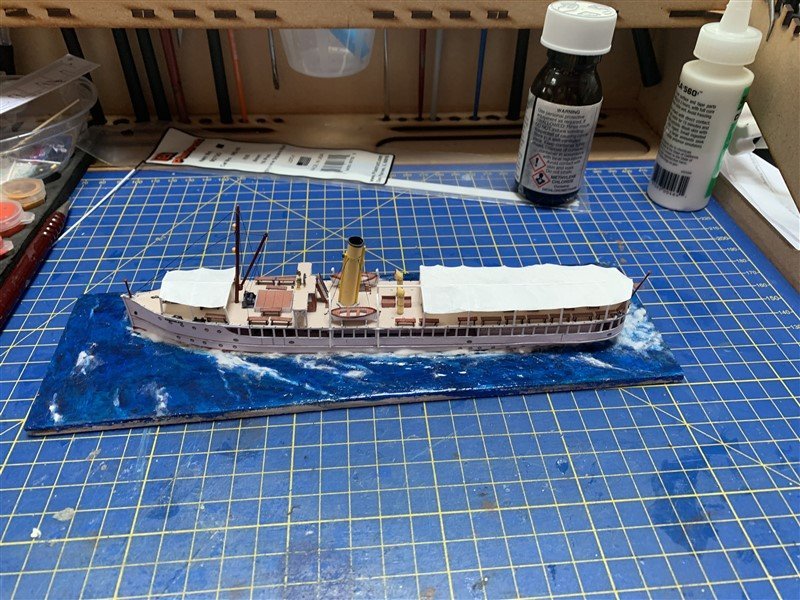
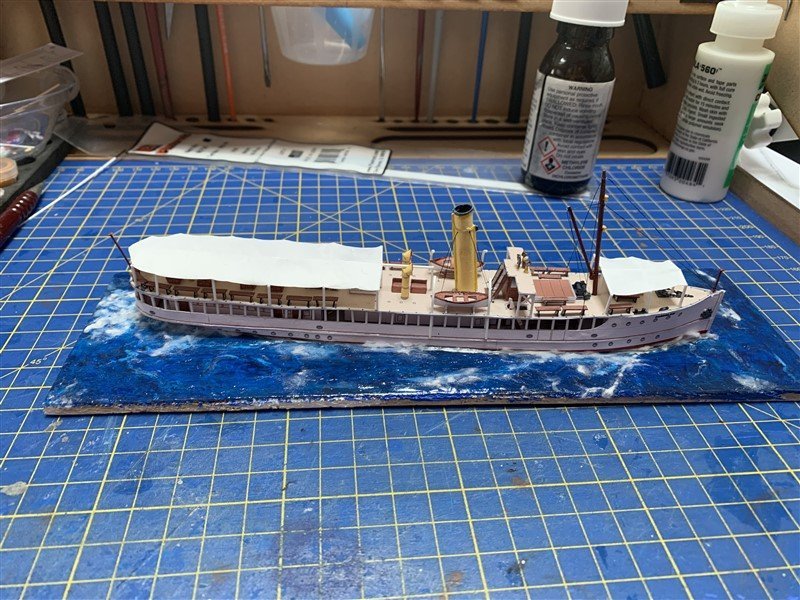
Well here we are folks, calling this one finished! Finishing touches were the Bridge framing, handrails, canopy and Navigation lights. Altogether a challenging but fun build (in places!) The limit of my paper skills at the moment. I have the "Brighton" in stock to do next time I feel the call of the "Card Side" 😵 Thank you all for following along and the encouragement. A final set of pictures for you.


- 45 replies
-
- 16
-

-
-
- Earnslaw
- Paper Shipwright
- (and 2 more)
-
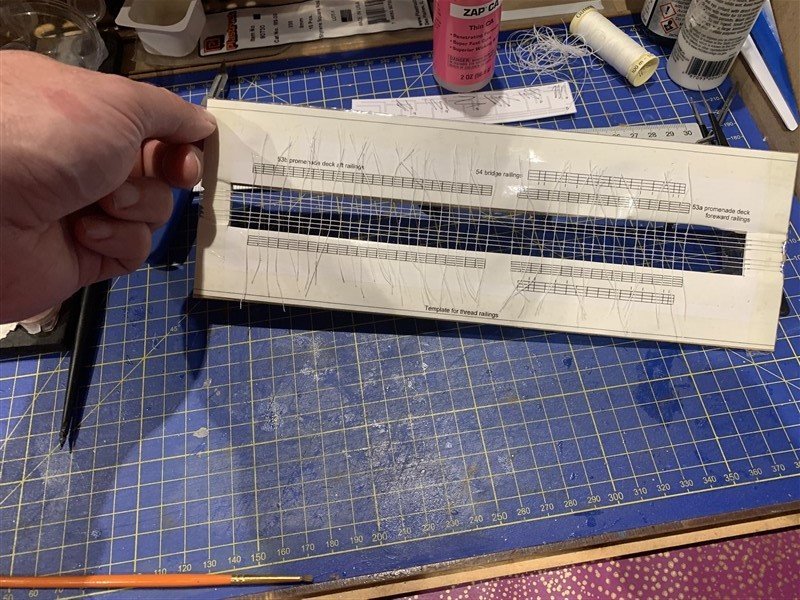
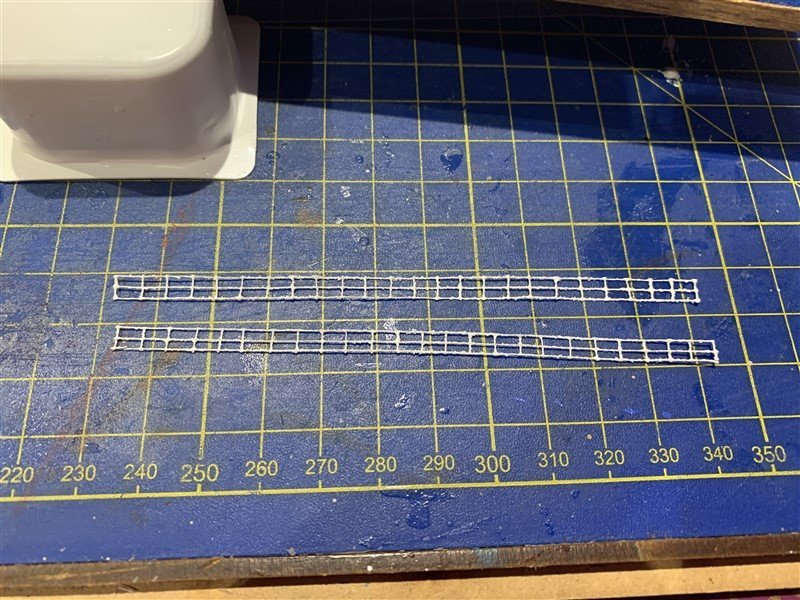
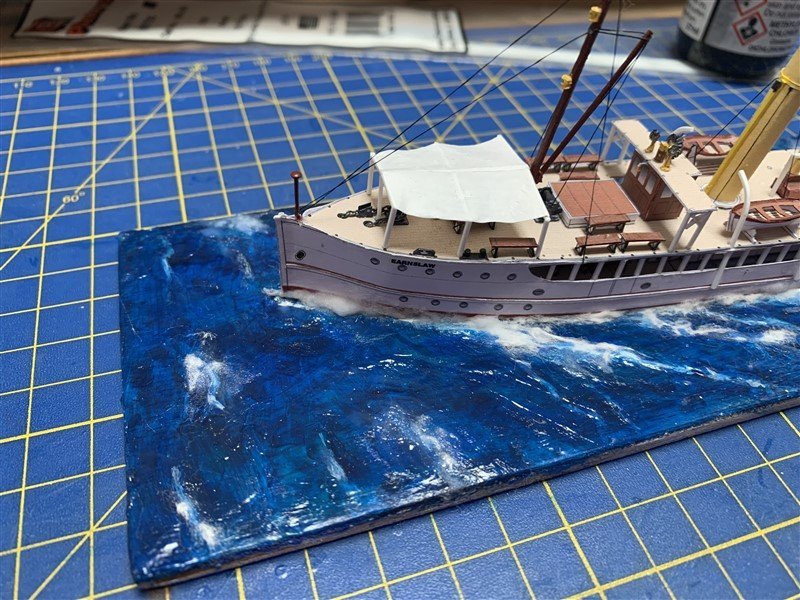
Small update today, showing progress with the railings; made from using the kit template and glued Gutermann white thread - top rail painted brown. I have done the main runs for the promenade deck and have attached the forward section and a few life rings for good measure. The styrene rod stock has arrived, so I have finished the main awning. Just need to complete the bridge awning and tissue covering, handrails for the bridge and some more navigation lights. Getting close now, if I can get a good evening or two at this, we might be getting to the finish line! 😲

- 45 replies
-
- 10
-
-
- Earnslaw
- Paper Shipwright
- (and 2 more)
-
Welcome to MSW Ian!
-
Another great build Chris!
-
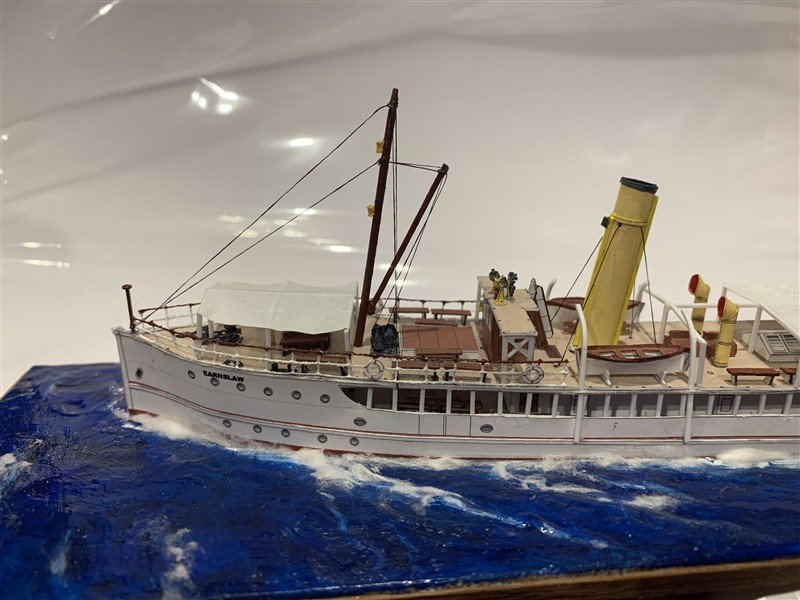
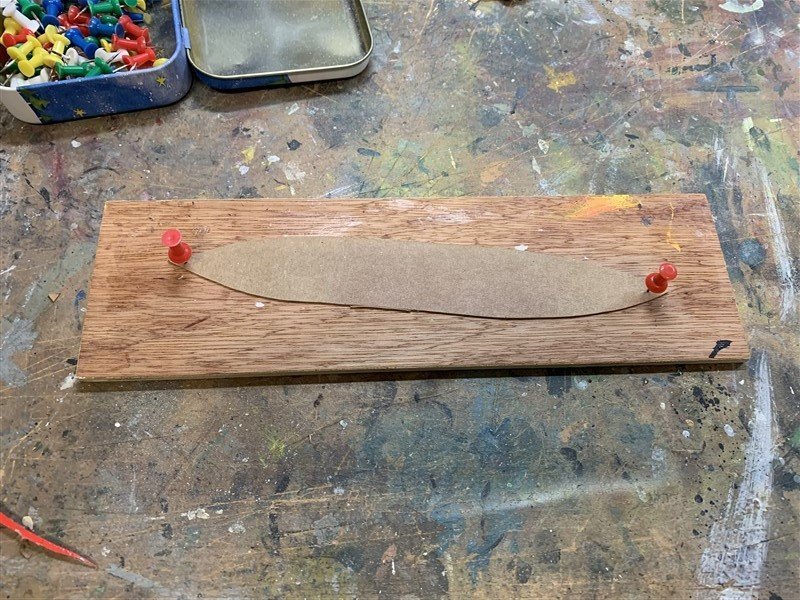
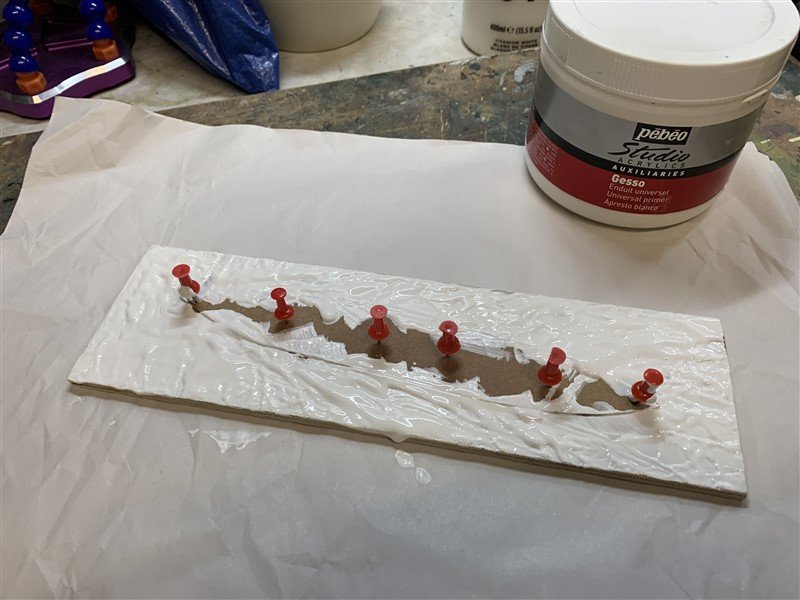
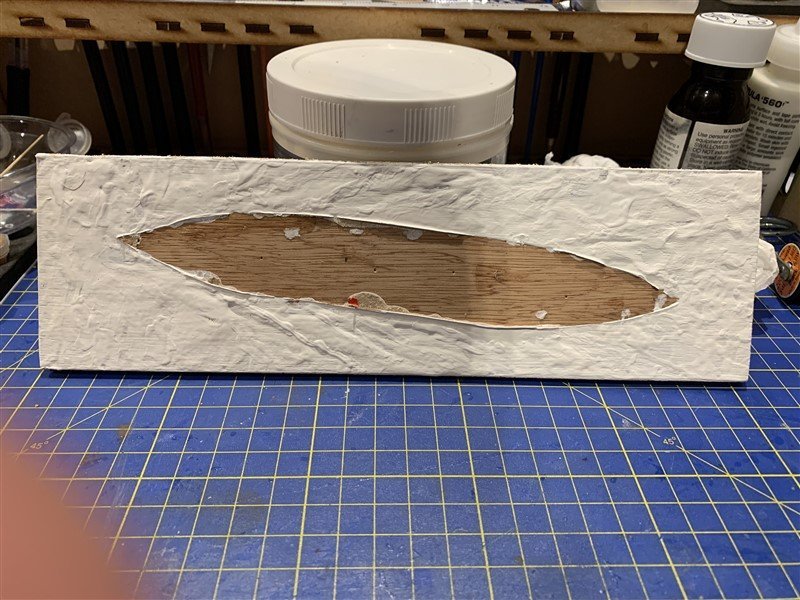
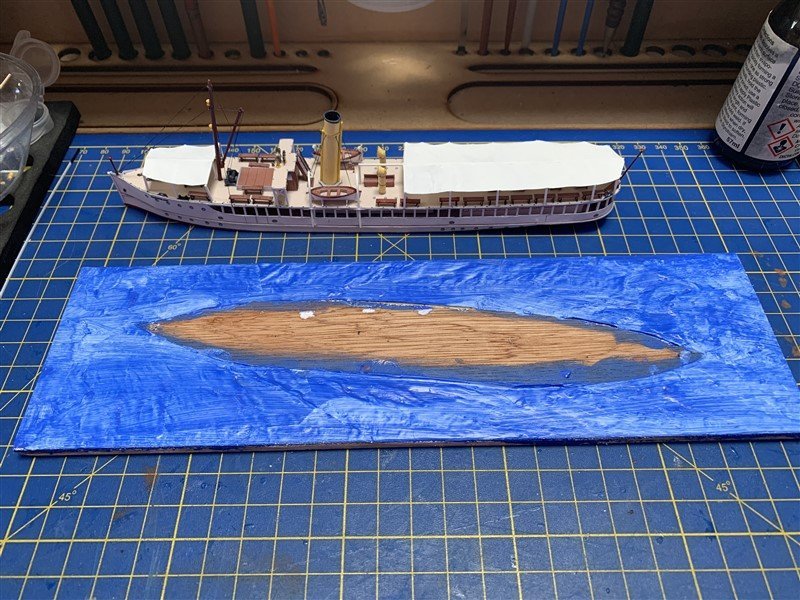
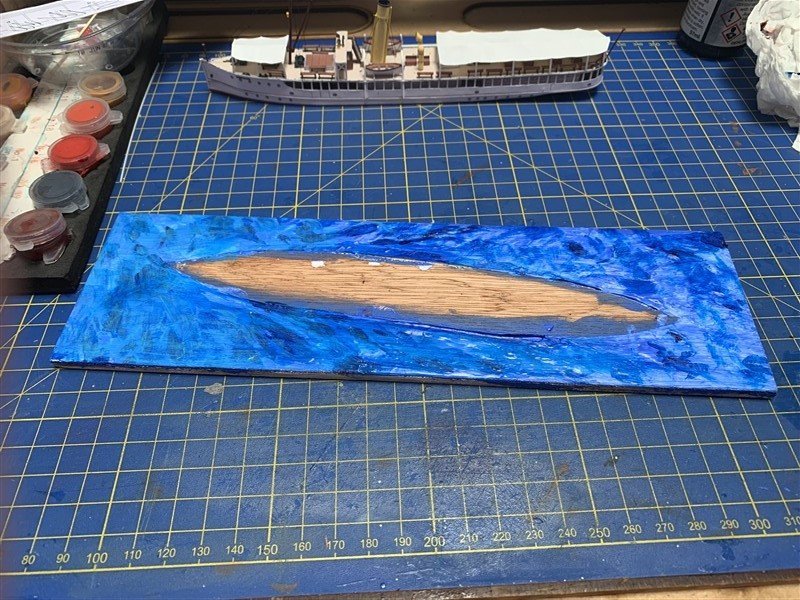
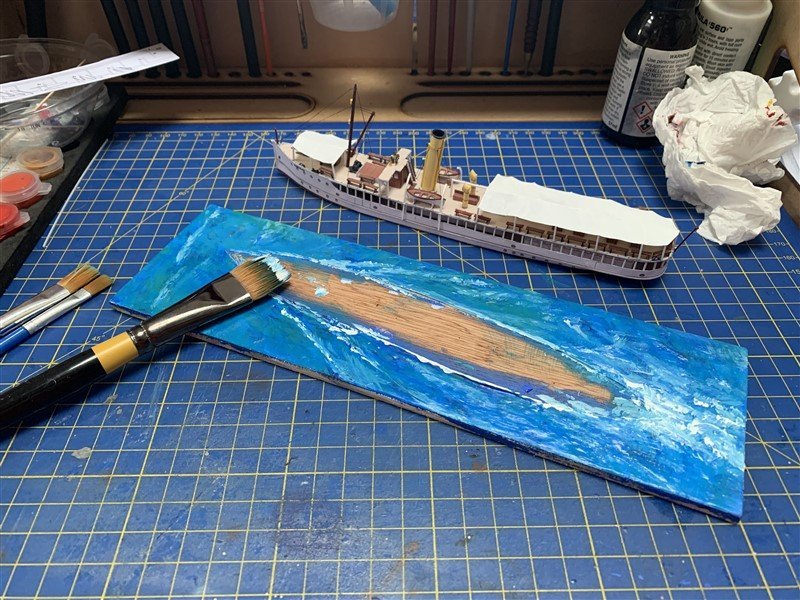
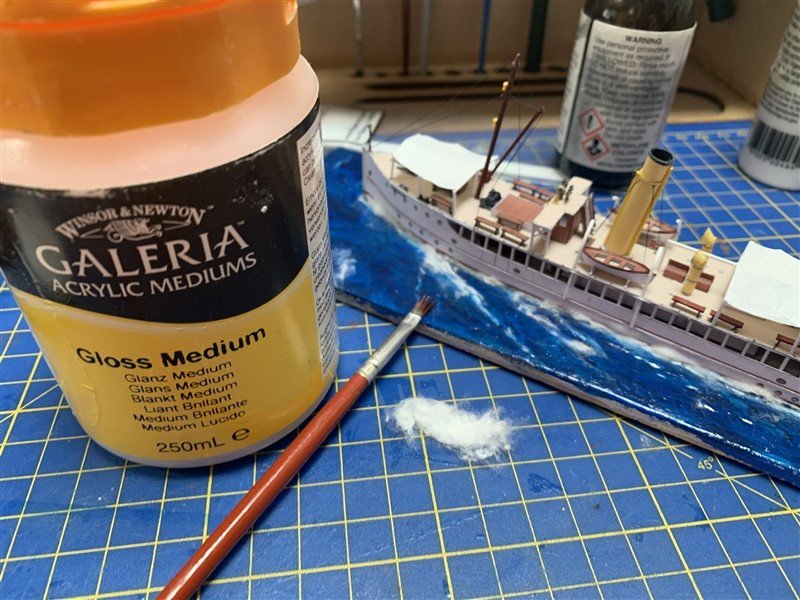
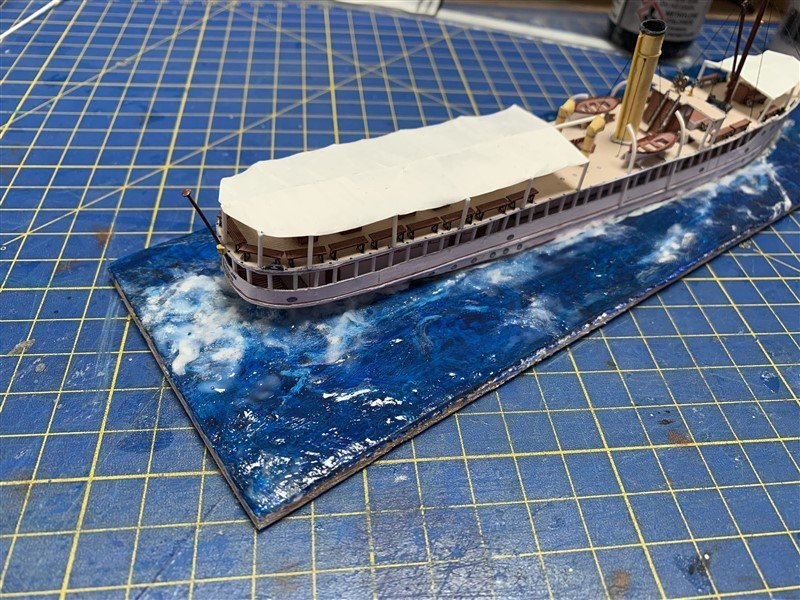
Recovering from the ignominy of rigging disasters (I have patched things up and fortunately no huge scars visible) I have completed the baseboard. The working baseboard was cleaned up a bit and a cardboard template of the Earnslaw pinned to the board. I then painted around this in thick Gesso to replicate the lake surface, nothing too rough as this is 1/250 scale and not the North Sea! This took a couple of applications to build-up the surface as the Gesso relaxed a little as it dried. It was then a case of many acrylic washes; some light, some dark to try and create a layered look. Once happy with the colouration I started with layers of Gloss medium and little strands of cotton wool to add a little interest and hide the waterline seams better. Overall fairly happy with the effect. My styrene road has arrived so I can finish the Bridge canopy and start on the thread handrailing. Hoping to do a better job of this than on my last build. Getting there, thanks for looking in!


- 45 replies
-
- 11
-
-
- Earnslaw
- Paper Shipwright
- (and 2 more)
-
That looks really neat Mike, the jig do they tell you how to build that? really tempted with this combo. Looking forward to seeing the catapult come together.
-
Welcome to MSW
