
HOLIDAY DONATION DRIVE - SUPPORT MSW - DO YOUR PART TO KEEP THIS GREAT FORUM GOING! (89 donations so far out of 49,000 members - C'mon guys!)
×


AJohnson
-
Posts
2,043 -
Joined
-
Last visited
Content Type
Profiles
Forums
Gallery
Events
Everything posted by AJohnson
-
 Well apparently you are going to Chris - good luck, may the force be with you!
 -
Welcome to MSW!
-
Hi Brian, lovely to see some progress on your Granado. Good luck with the rigging. Regarding rigging, I think the main thing is to make sure the blocks are “free” for thread to run through. I poke a pin through each block hole first to make sure a thread can follow.
-
Great job, really neat and crisp paint job.
-
Welcome to MSW!
-
Glad you are out Alan and good luck with your recovery. In the meantime I believe this emoji is now yours! you deserve at least one or two Rums. 🥃
-
Good to see your planking progress David and interesting what you say on banding of the planks, as Trial is small, the number of bands can only be two/three. As I am about to start the first planking I will try out either two or three bands of planking and see if that informs how I go on my second planking. Like you say, each go at planking is a means of improvement/learning for the next "big" project. 👍
- 152 replies
-
- 3
-

-
- Vanguard Models
- Cutter
- (and 2 more)
-
I found this:- "Shipbuilding in Ireland in the Nineteenth Century" - Shipbuilding in the United Kingdom in the Nineteenth Century (cambridge.org) Nothing specific on the RN. but the tonnages mentioned may have included Cutters/Brigs/Sloops at a push, maybe commercial vessels brought into the service as transports etc I could imagine, but don't know. Hopefully some history buffs on here know more. There obviously Harland & Wolff, but that is much later than the period you are interested in.
-
That's some of the neatest first-layer planing I've seen in a kit build!
-
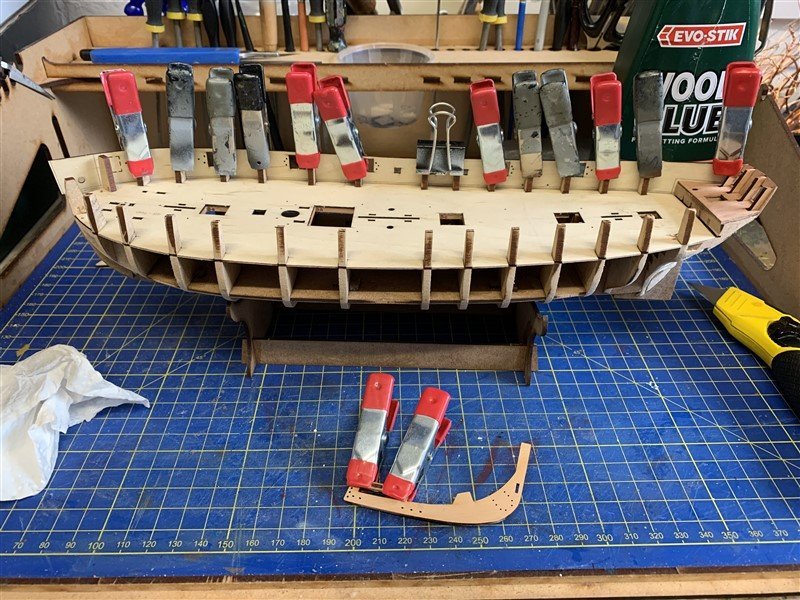
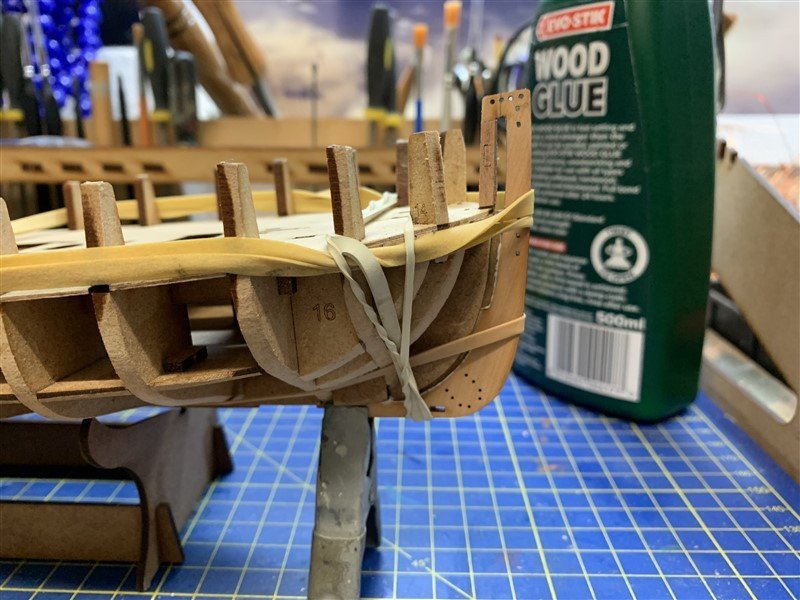
Just a little update, the house it getting back to normal and the garage where I do my modelling is now emptying of "stuff", so I can get at the Trial again! 😀 I've not done much, but very pleased to be back doing even a little. Assembled the Prow and glued in place, holding it straight and true with plenty of elastic bands and a clip to hold it straight to the keel. Leaving this to cure a day or so before I progress, but I have been dry fitting the bulwark templates to see how they will sit, showing so far I need to do a little more fairing of the hull yet. Hoping to keep David @dunnock company now with his Trial build.
- 207 replies
-
- 15
-
-
Agreed, a great looking and unusual project Richard. Following along with interest, the engine came out really well, I hope you will be able to some of it when the rest of the superstructure goes on.
- 18 replies
-
- 1
-
-
- Pevensey
- World of Paperships
- (and 2 more)
-
Agreed that is a very fine model.
-
That’s a very nice model Dan, well done!
-
Agreed, this is going to be so impressive when completed!
-
Looking good Alan, hope you don’t run out of blocks, can you get extra ones from anywhere?
-
Coming together well, nearly there!?
-
SU-85 WW2 Soviet Tank Destroyer by CDW - MiniArt - 1:35 Scale
AJohnson replied to CDW's topic in Non-ship/categorised builds
That 'frost'? effect on the larger plate is amazing, I know its plastic, but in looks like cold steel! 🥶 -
SU-85 WW2 Soviet Tank Destroyer by CDW - MiniArt - 1:35 Scale
AJohnson replied to CDW's topic in Non-ship/categorised builds
Ha! - Just how long did that hat last! Our pooch would have shredded it in no time, he looks great fun! 🐶 -
Hi David, I feel your frustration, brings back memories of my Sherborne. But as Chris says, people can get hung up on this stage of the build. I did line out and work out the plank widths on my Nisha, but that has a more forgiving bow shape!
- 152 replies
-
- 3
-
-
- Vanguard Models
- Cutter
- (and 2 more)
-
This will be good, I like the Whirlwind, often wondered if it would have done better or was more widely adopted if it had two merlin engines. 🤔
-
I’m sure if Chris did that Ancestry DNA test that by my Admiral is so into, we would see a whole linage of Coyles from Gdańsk! 🤣
-
Congratulations Chris on another fine example of the “Dark Arts” of card. Really outstanding and having tried card myself I really appreciate the skill and effort required to make yours look that good, wish I could get mine half way there!
-
Good save David, now this just the sort of “help” I was hoping for as I sit having a beer in Menorca! I promise to be alongside, messing things up in my own way, making you look the master you are, as your Diana stands testament!
- 152 replies
-
- 4
-
-
- Vanguard Models
- Cutter
- (and 2 more)

