


AJohnson
-
Posts
2,052 -
Joined
-
Last visited
Content Type
Profiles
Forums
Gallery
Events
Everything posted by AJohnson
-
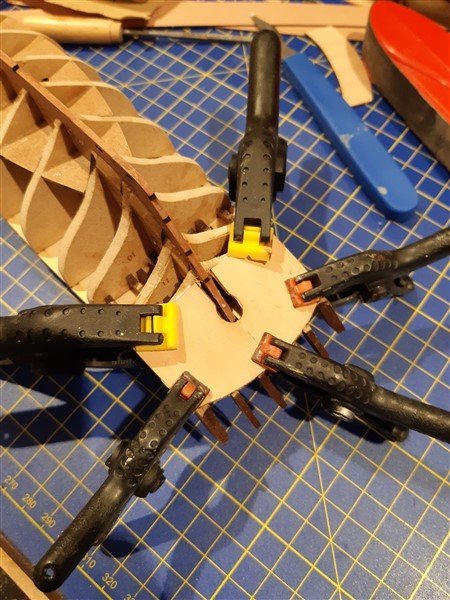
 You should be okay if the underlying profile is good, all will be hidden by the second planking, thats what I’m hoping on my “Nisha” stern counter also.
 -
It shows, your pictures look like James H’s when he is doing Vanguards prototype builds, 👍 Great start, 😀
-
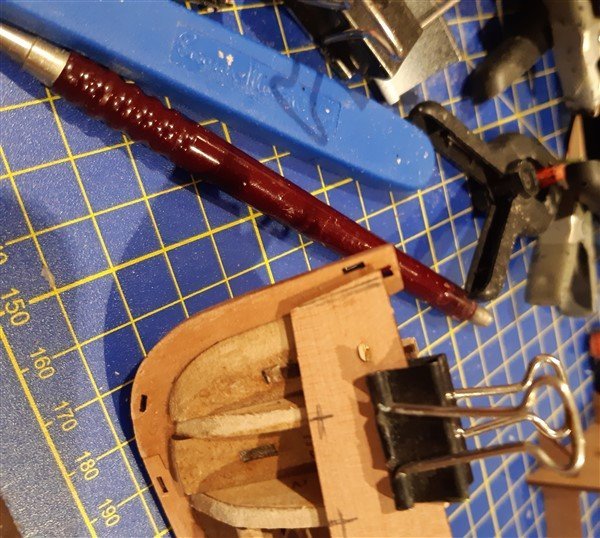
Yes I did, they were thinned to a fine edge at the front. @James H thanks - yep looks like more sanding required, the same needs doing at the stern also I think, next job before starting the planking. I am also doing some of the sub assemblies later on in the instructions (like the fish hatches) while I wait patiently for bulwarks to dry. But yes the sanding blocks / paper come out to play next, keen to do best I can of the first planking, as I have never been happy with my first planking on builds before.
- 206 replies
-
- 3
-

-
- Vanguard Models
- Brixham trawler
- (and 2 more)
-
Same here, I'm currently just starting her little sister "Nisha"
- 77 replies
-
- 2
-
-
- Erycina
- Vanguard Models
- (and 1 more)
-
Thank you, yes "Nisha" is diminutive, but I think there was a bit of distortion in that shot as it makes her look tiny. Picture below against a 12inch rule. Widest part of her beam will be just under 3 inches when finished. Her size and looks are a good thing.... firstly it opens up many more shelves and 'top' of book cases as "moorings" for model boats and the Admiral and my daughter likes these pretty little ones with red sails. So win - win! 😁

- 206 replies
-
- 7
-
-
- Vanguard Models
- Brixham trawler
- (and 2 more)
-
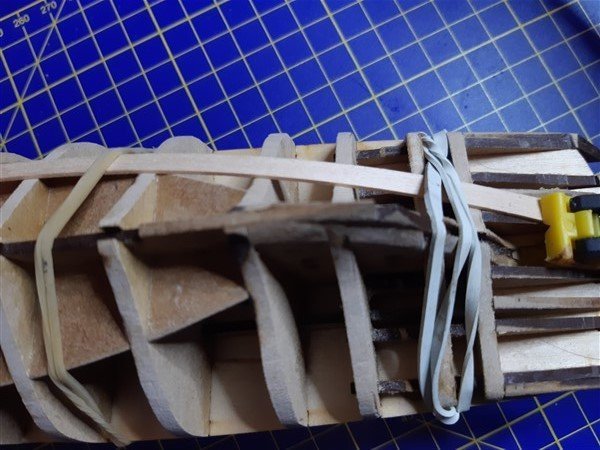
Update on progress over last couple of evenings, attaching the parts 45 & 46 the bulwarks. Took a few dry fits to see how they would line up to the lower of the two markers provided on the inside edge of each part and the front part needed sanding to sit flush on the bow, all covered in the instructions. Pinned and glued up to the level of the deck pattern. Leaving that to dry before moving onto the first planking. Also arrived today is a reference book I got from fleabay, that I have seen mentioned on MSW in connection with Chris's Erycina & Nisha and other threads - "Sailing Trawlers" by Edgar J. March and indeed from first looks it is going to be very useful , with plenty of photographs, drawings and plans; including the Nisha! 😁


- 206 replies
-
- 5
-
-
- Vanguard Models
- Brixham trawler
- (and 2 more)
-
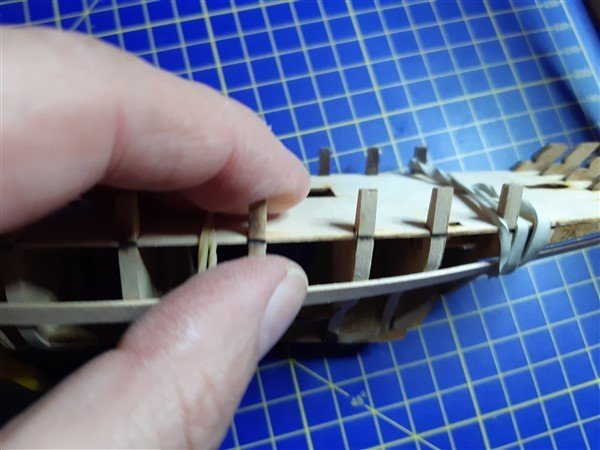
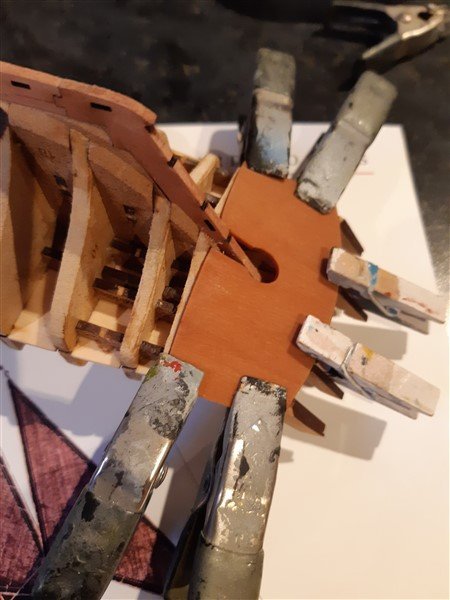
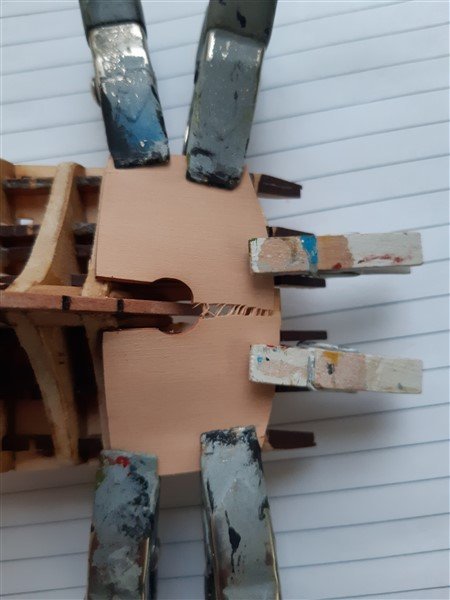
Thanks Andy, I will look out for your log when you start. I think what might have happened was one of the clips slipped, putting a strain across the counter pattern, which as it was soft from soaking, slowly split during the night. I have just checked it this morning and all is fixed now, all I need to do is a bit of sanding and delete a few posts on this log and no one will know! 😆
- 206 replies
-
- 2
-
-
- Vanguard Models
- Brixham trawler
- (and 2 more)
-
Thanks Craig, yes I:m hoping it will be okay once the covering part goes over it. Just need to make sure the underlying profile is correct with a bit of sanding. Onwards and upwards, 👍
- 206 replies
-
- 1
-
-
- Vanguard Models
- Brixham trawler
- (and 2 more)
-
Nice start 👏, good to see another little working boat on the forum, I'll be following along. Also good to see you got the deck pattern on without breaking any bulkhead nibs off, unlike some who are tackling another Vanguard kit at the moment. 🤐
-
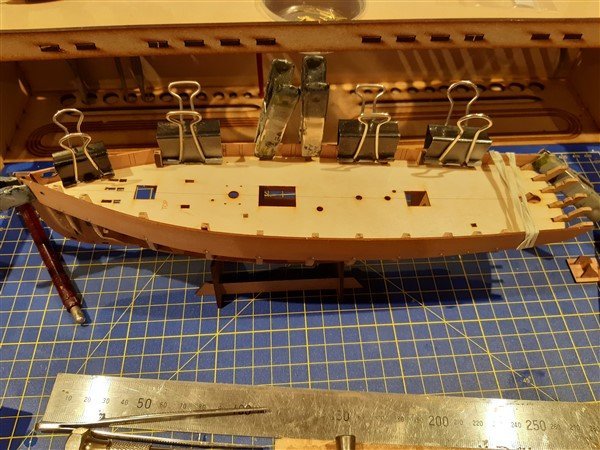
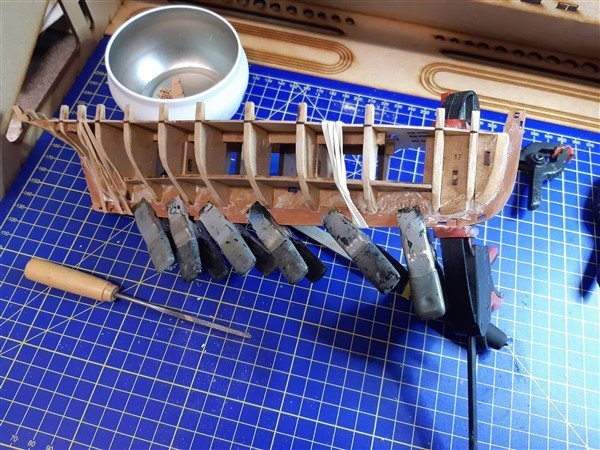
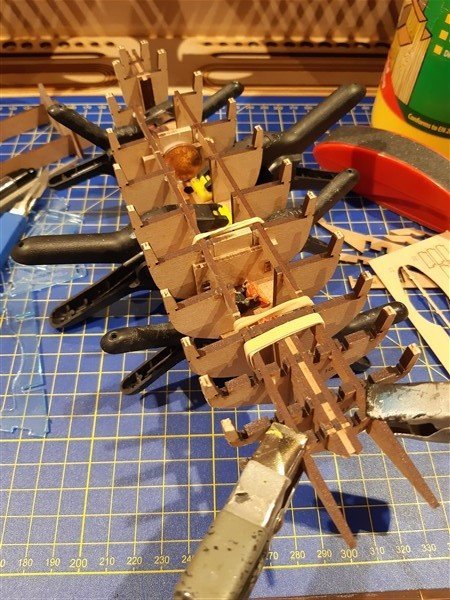
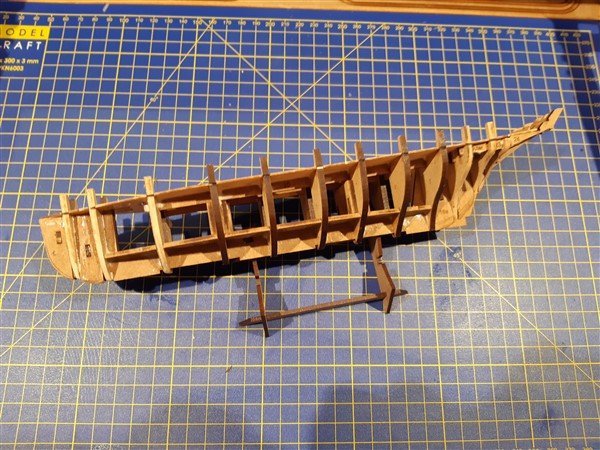
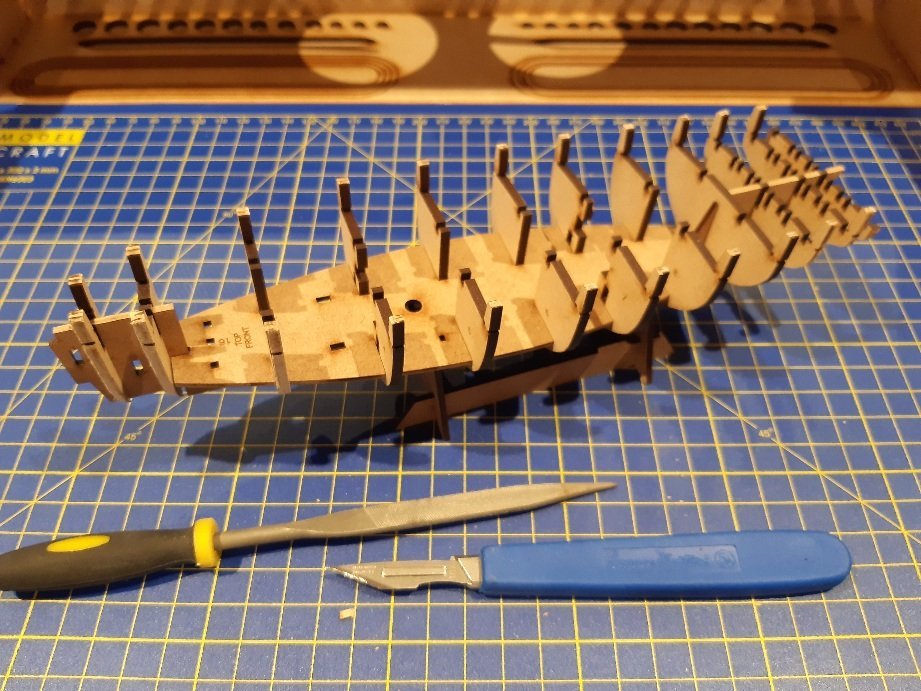
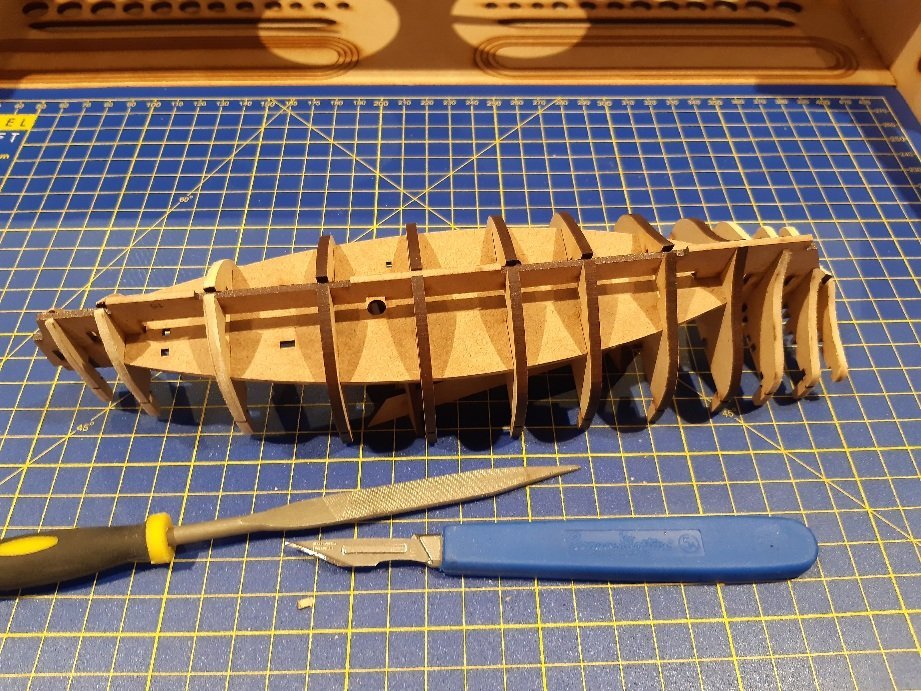
Progress so far on building up the hull ready for planking. So far I am up to stage 51 in the instructions, spent a fair amount of effort in sanding the bulkheads so that the first layer of planking will sit okay, running a plank up and down the bulkheads to make sure there were no areas that didn't sit right. There is a bit more to do yet in one or two spots, but happy with progress on at least this bit. Then attached the keel and stem patterns and stern post, there was a little opening of some of the bulkhead slots to do to get these in, but no really issues here. But then I tackled step 51 in the instructions and I've bust the kit again! 😖 In my defence I followed the instructions and soaked the stern counter pattern in hot water for half an hour then clamped it into position and left it overnight. I came back in the morning to the scene in the penultimate picture... oh dear. ☹️ So I've checked the alignment and just glued my new two-piece stern counter in place! Think it should be okay with a bit of sanding once dry, I will let you know when you tune into the next instalment of the good ship "Calamity" - "Nisha"! 😨

- 206 replies
-
- 7
-
-

-
- Vanguard Models
- Brixham trawler
- (and 2 more)
-
Really really nice build Chris, just wouldn't know it is a card model, very neat.
-
Well my first encounters with Vanguard are good, but still not fool (me) proof, I have broken two bits already, but they are conveniently hidden and glued under the false deck….. 🤐
-
Finished for Christmas then? 🎄
-
Looking good Dave, you realise you are doing all the hard work and I will hoover up all your "tips and tricks" when I finally get around to doing my CC Endeavour! 😆 👍
-
Best of luck next week Mark, hope all goes well for you. Your lovely Sphinx will still be there for you when you are up to wrangling with it again. 👍
- 505 replies
-
- 7
-
-
- vanguard models
- Sphinx
- (and 1 more)
-
Drum roll going for the big reveal! 🥁 Looks stunning already from this angle Chris 👏
-
Thanks Chris, yes a bit more bending was probably in order, but once a few slots had clicked into place I sort of panicked a bit and kept pushing the false deck home. All good in the end and the tabs come off later, so good tip folks - bend that false deck! See what happens when you release your precious kits into the world! - They are fine when gently caressed by you and James, but out in the wild, rough B@G&*ers like me start abusing them... 🤣
- 206 replies
-
- 6
-

-
- Vanguard Models
- Brixham trawler
- (and 2 more)
-
I must admit I just use trade wood glues, as I assume if joiners are happy to put furniture and the like together with it, then it should be more than adequate for a wooden model. I think I have a 1 Litre tube on the go at the moment from "Ever-build" but I also have some tubes of "Titebond" on the go. I did get some "model" PVA glues once, but the price/Litre is way more than trade for what I am sure is the same stuff.
- 206 replies
-
- 1
-

-
- Vanguard Models
- Brixham trawler
- (and 2 more)
-
It is a tight fit, but I was a bit nervous of bending the ply too much, think I should have tested it a bit first before committing to pushing the deck down, no going back once it is in I think, there are little slots on each bulkhead that hold it in place. Must say once together the whole sub-assembly is really well held together, glue hardly needed.
- 206 replies
-
- 3
-
-
- Vanguard Models
- Brixham trawler
- (and 2 more)
-
Hi Mark, do you think the black has been absorbed deep into the wood grain? Just wondering if a sharp razor blade might scrape the surface clean, rather than paint it over. A subtle yellow ochre would do the trick if not. Also thank you for sharing with us your "whoops" moments, as a leading poster/builder on here, if you can share those moments, then that must encourage newcomers to reach out for help on MSW when they hit problems. 👍 👏
- 505 replies
-
- 8
-
-
- vanguard models
- Sphinx
- (and 1 more)
-
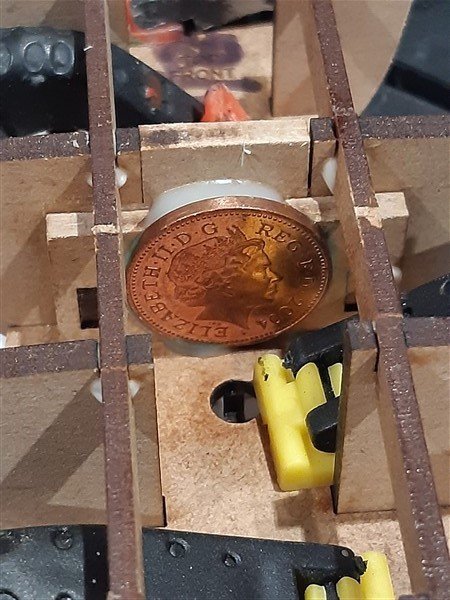
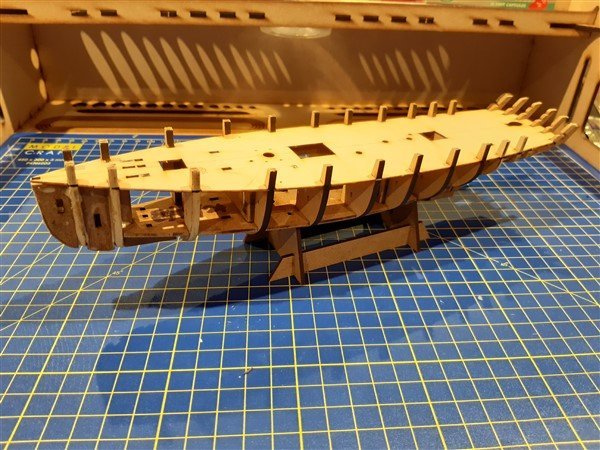
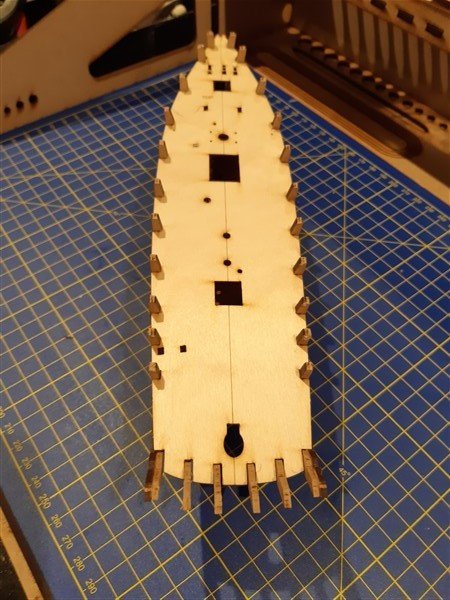
Another little update on the build so far. Thanks all for your likes and follows & @Jim Lad & @Andyrew @RockinBudgie for your encouragement. I've continued from yesterday by adding the bow and stern reinforcement parts (17 & 18) and midship reinforcement parts (4 & 7) that hold the lower deck in place. I did glue my "Lucky penny" near the mast hole, couldn't put it under it like the Victory as that might have caused an issue with seating the mast; for those of you thinking "What?" then this link might help explain why I did that... (coin from the year of my daughter's birth, as this little one is her's apparently - she likes the red sails! 😆) There are two longitudinal parts (20, that sit flush with the top of the bulkheads, all I can say here is that they don't like being forced into place! - Anyway glue is your friend! 🤐 🙄 Putting the 0.8mm ply deck in also needs a bit of care, I followed the instruction and dropped into the bulkheads slots on one side, but obviously didn't "flex" the deck enough to let in into place and a couple of the mdf bulkheads flexed a bit too much as I ham-fistedly shoved the deck down! Luckily these get removed later on in the build... Phew. Thanks for looking in, few more progress pics below...
- 206 replies
-
- 10
-
-
- Vanguard Models
- Brixham trawler
- (and 2 more)
-
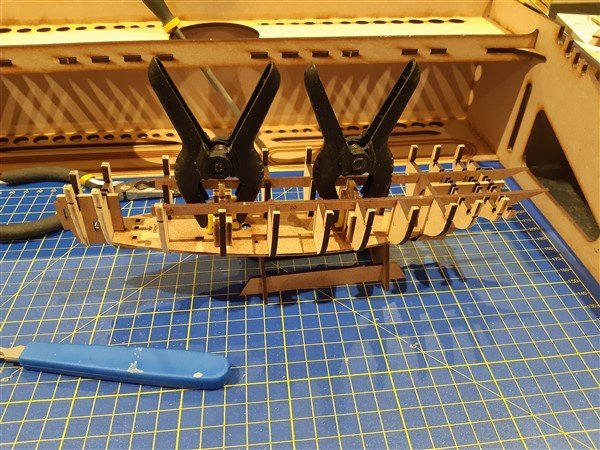
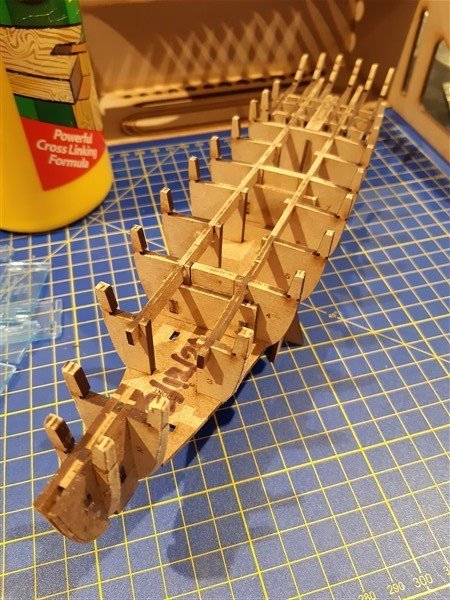
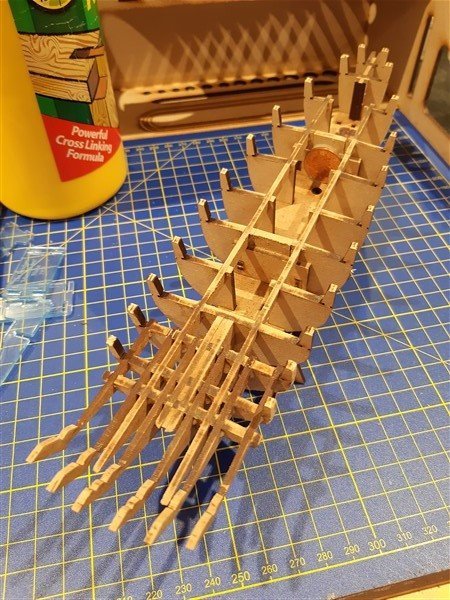
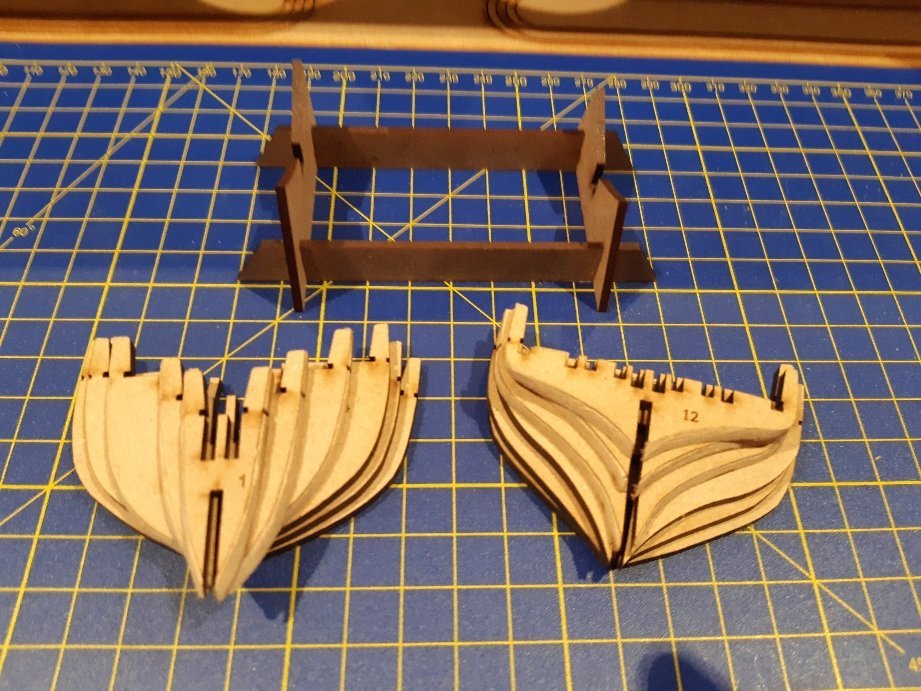
And we are off! Done a few of the initial stages, approx steps 1 to 16 in the instructions. Easy to follow and no fit problems at all, some of the bulkheads just slipped into place and some just need a light squeeze to get to sit snuggly. Sanded the leading and trailing bulkheads using the marker lines as a guide on the bulkheads that needed it used my Dremel and my mask as this was a dusty operation. Will leave it there for tonight, had my Covid booster yesterday and starting to feel the effects a bit.


- 206 replies
-
- 11
-
-
- Vanguard Models
- Brixham trawler
- (and 2 more)
-
Terrific coppering job Bug and tips by you and others about the glues and preparation etc. I did restart my Bounty coppering after a couple of hundred plates so 🙄, so nice to see such a neat job. One question about the keel, does the instructions say to copper the bottom of it? I only ask as I thought/seen/read somewhere (maybe here on MSW) that ships keels all had "false / sacrificial keel" timber battens on the very bottom and were not coppered?
- 419 replies
-
- 2
-
-
- Victory Models
- Pegasus
- (and 2 more)
-
Hopefully they will be with you tomorrow Craig, my Nisha arrived a day early compared to the UPS email/tracking, but fortunately someone was in to take it, otherwise I would have been in the same boat (without one.... 😟)
- 206 replies
-
- 1
-
-
- Vanguard Models
- Brixham trawler
- (and 2 more)