


AJohnson
-
Posts
2,053 -
Joined
-
Last visited
Content Type
Profiles
Forums
Gallery
Events
Everything posted by AJohnson
-

Vincent Black Shadow by CDW - Revell - 1:12 Scale
AJohnson replied to CDW's topic in Non-ship/categorised builds
That’s a huge improvement Craig, I’d say well worth it compared to the moulded spokes 👏 -
Looking good Brian. I do glue deadeyes and chains in place. Mainly to stop the deadeyes rotating when rigging, I just use dilute pva to keep everything still and in place, the rigging will fix all in place in the end.
-
With the other Vanguard models you’ve done I’m sure you will be fine! 😁
- 106 replies
-
- 1
-

-
- Grecian
- baltimore clipper
- (and 4 more)
-
Anyone out there working on a card model?
AJohnson replied to gagliano1770's topic in Card and Paper Models
If you have a smart phone with a camera, there are many apps like Google translate that will convert short passages of text into English. -
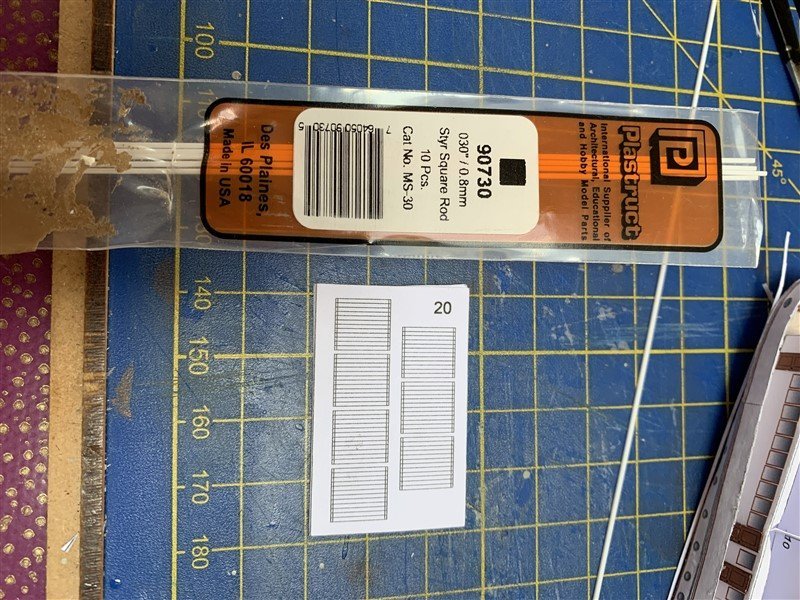
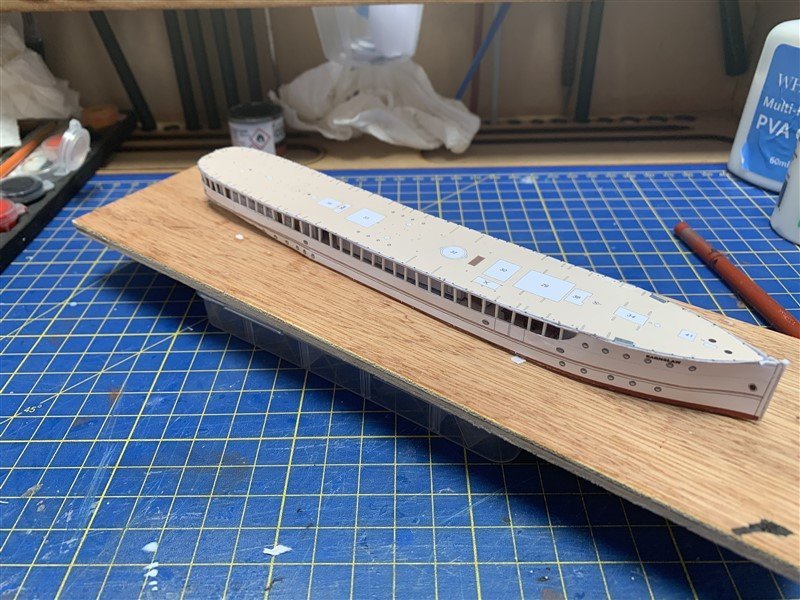
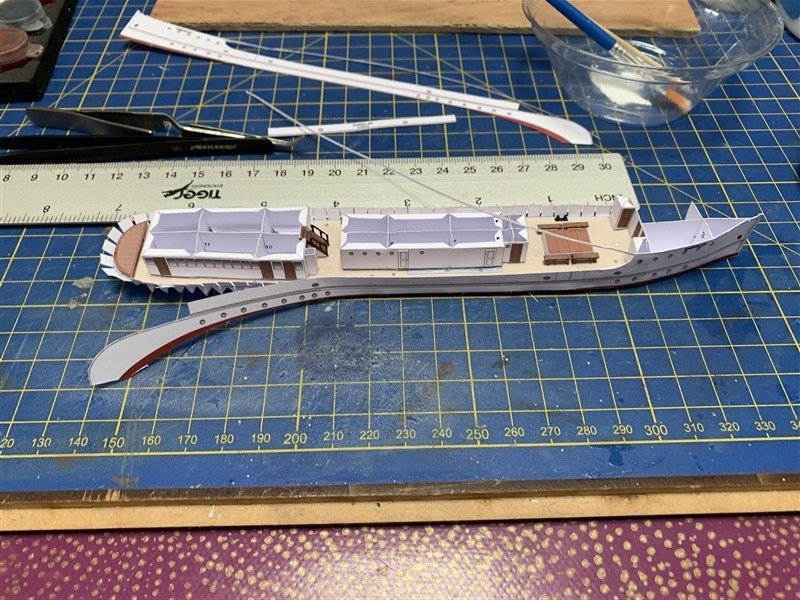
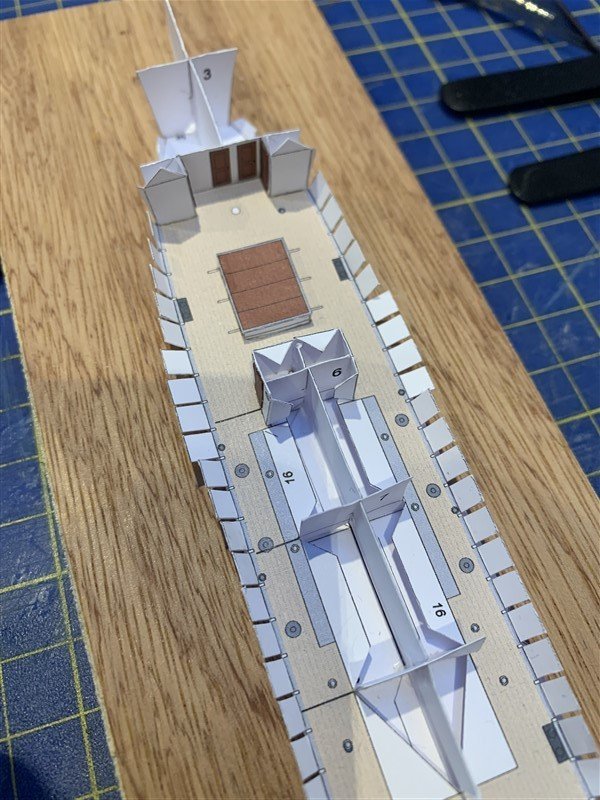
Deck support pillars, many support pillars! Well 84# I decided pretty quickly I was not going to be cutting them out of card and so cheated and used styrene instead. I was dreading this part, but actually once I got into a "flow" they went on alright and actually most lined up and touched the under side of the promenade deck; those that didn't quite were hidden a bit by the mercifully still attached antenna/deck edges! On a short break now, but when i'm back it is onto the more "visible" stuff... 😲
- 45 replies
-
- 14
-
-

-
- Earnslaw
- Paper Shipwright
- (and 2 more)
-
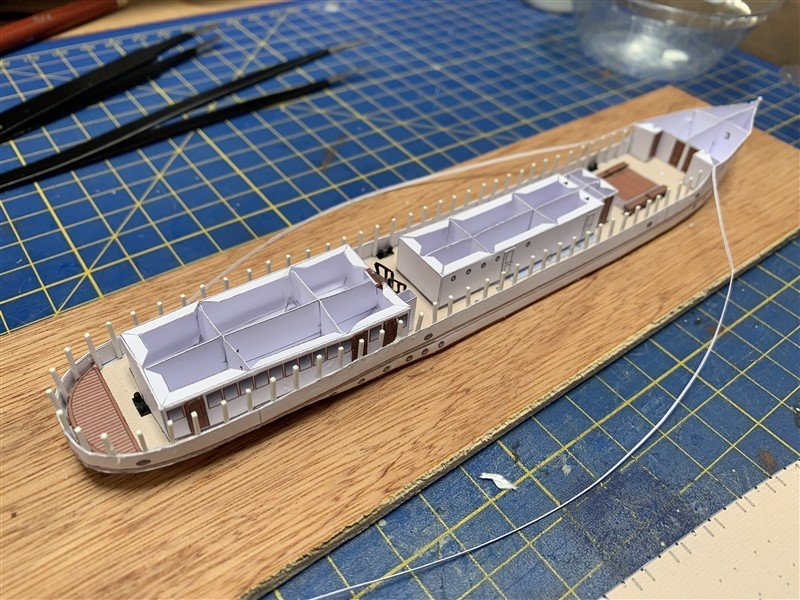
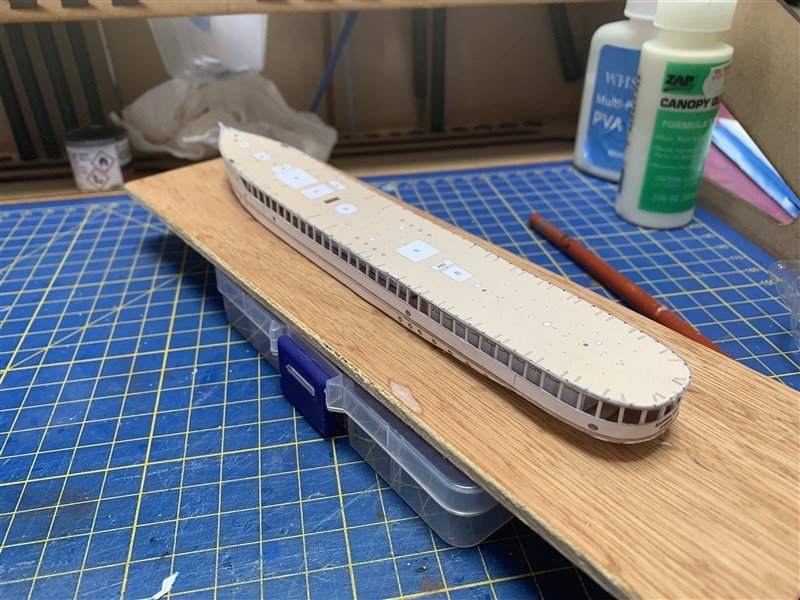
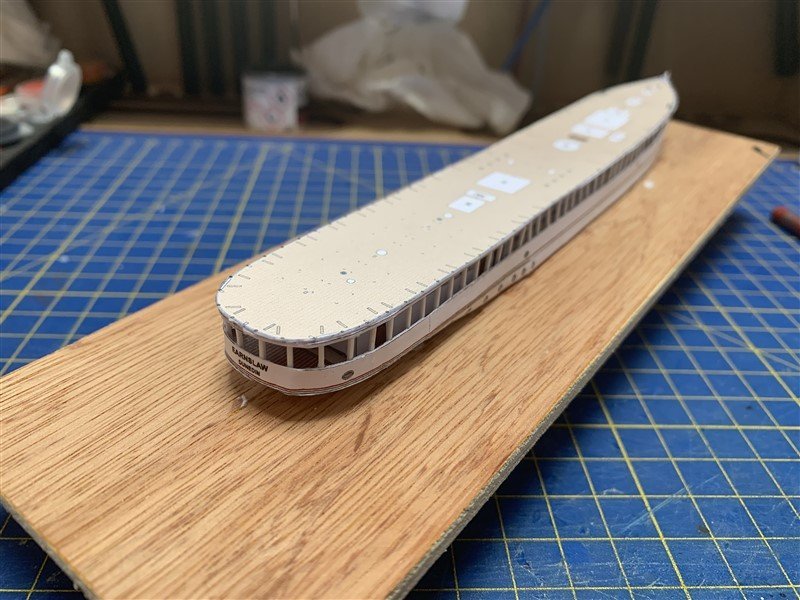
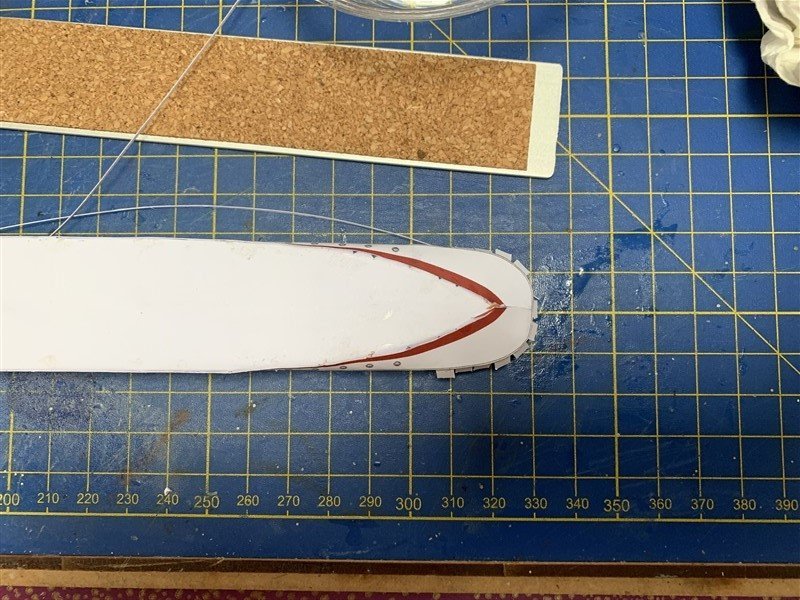
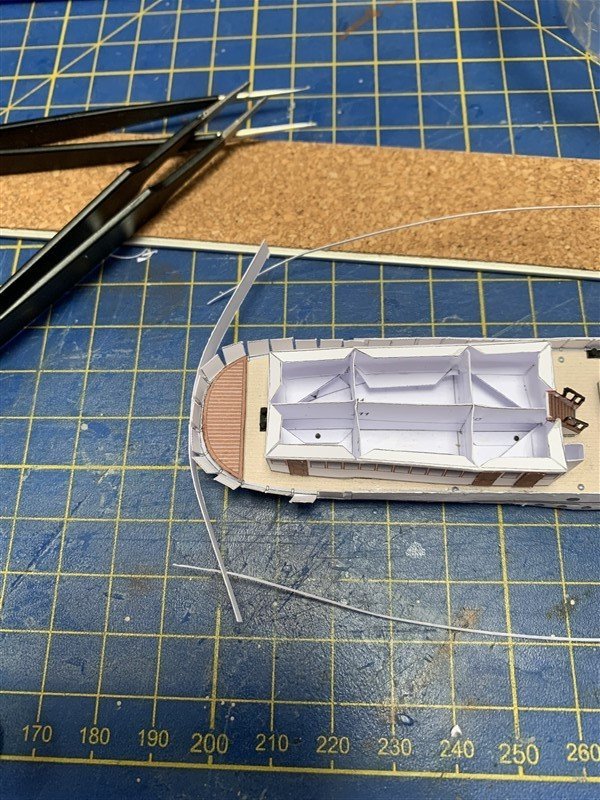
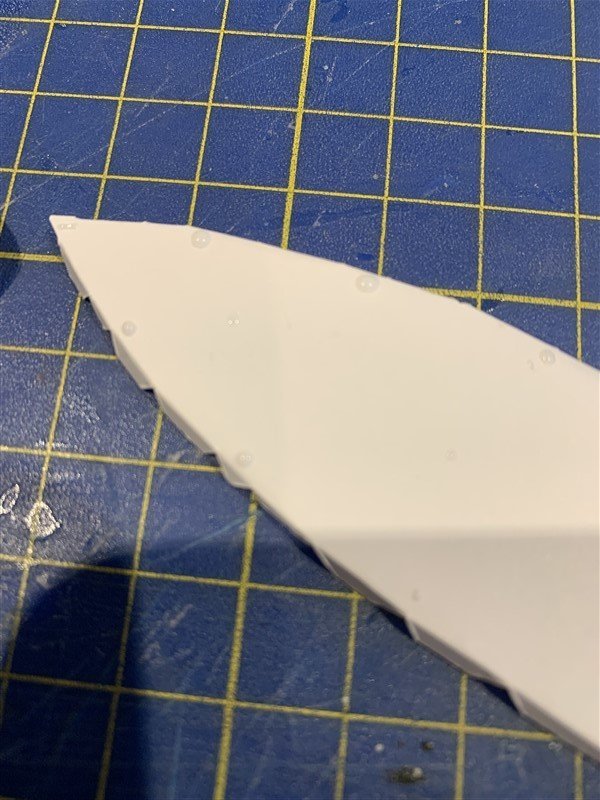
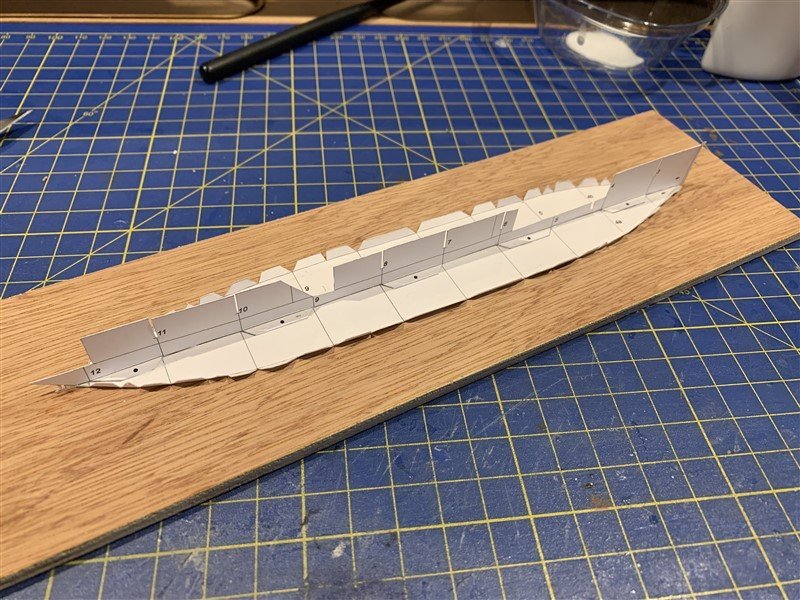
Much more progress to report! First set of photos show the hull sides going on, firstly gluing on the stern formers I had skipped earlier and glad to report that went okay! What was fiddly was cutting out the side and not snapping off the top deck trimming/edges that flapped about like two antennae... the number of time I nearly trapped them between the hull and sides. - but got there in the end. Next post the numerous deck support pillars.
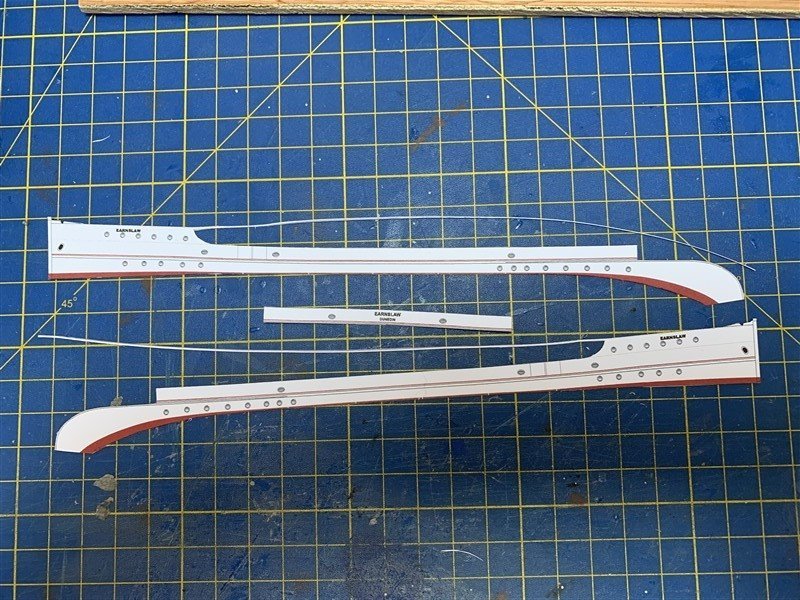

- 45 replies
-
- 10
-
-
- Earnslaw
- Paper Shipwright
- (and 2 more)
-
I like the extra anchor detailing you have done very much.
- 1,144 replies
-
- 2
-
-
- snake
- caldercraft
- (and 1 more)
-
Looking good Dave, you are making really good progress! 👍
-
Dan, wow, first out of the traps again! - Whoosh! 😁
-
Nice one Greg, this should be an interesting little build!
-
Vincent Black Shadow by CDW - Revell - 1:12 Scale
AJohnson replied to CDW's topic in Non-ship/categorised builds
What Mike said! -
Your making great progress Lyle, do you think you will have finished in time for your vacation? 😲
-
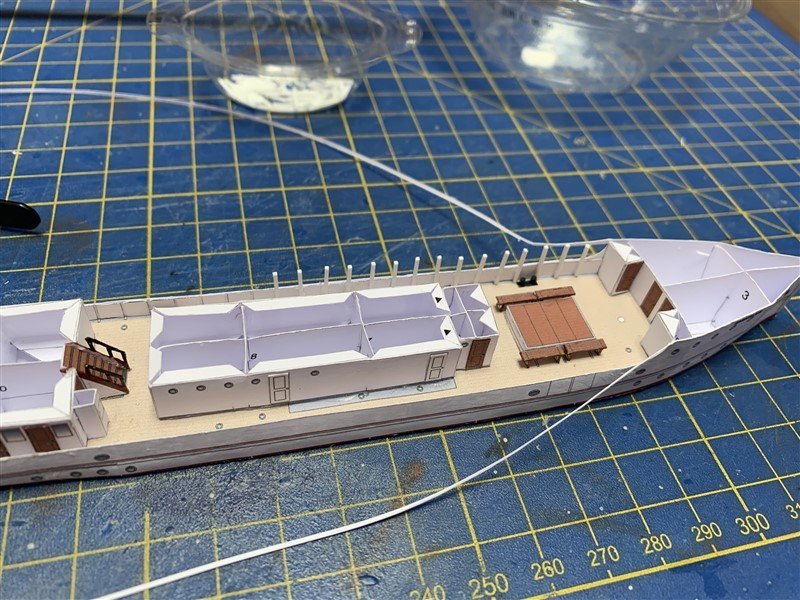
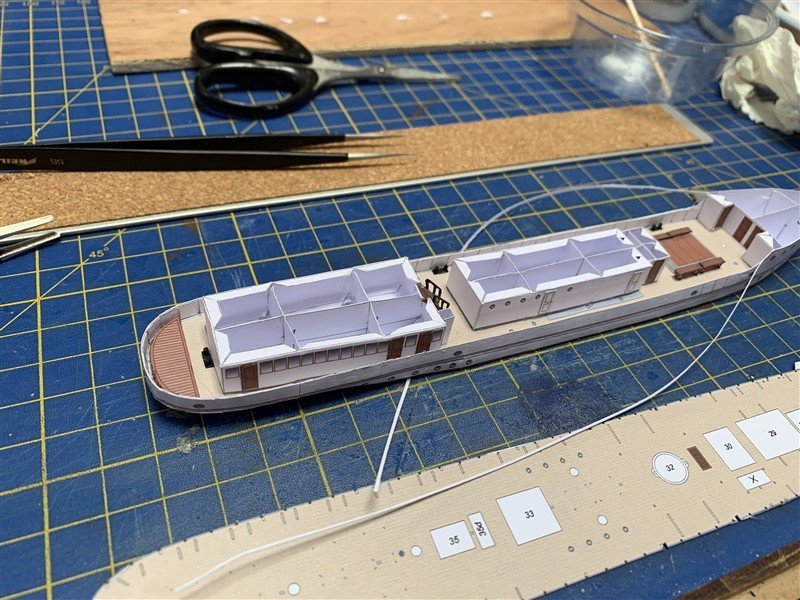
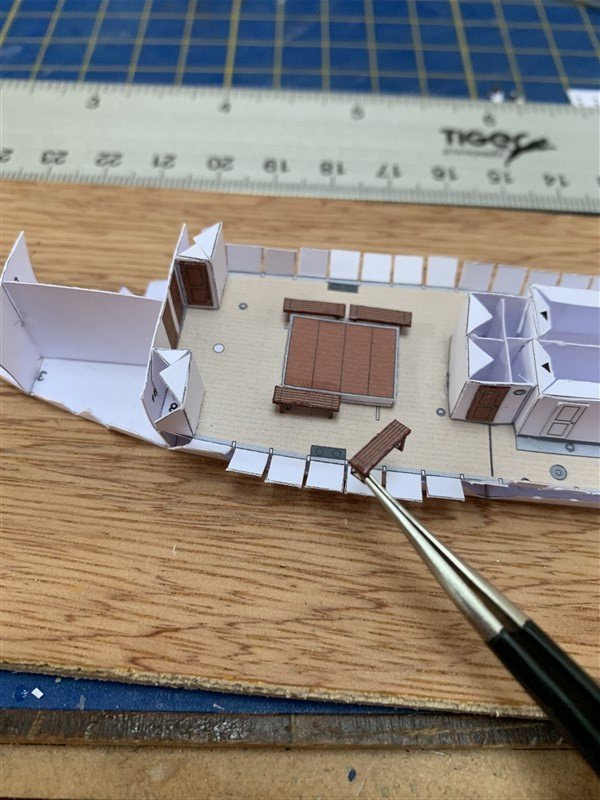
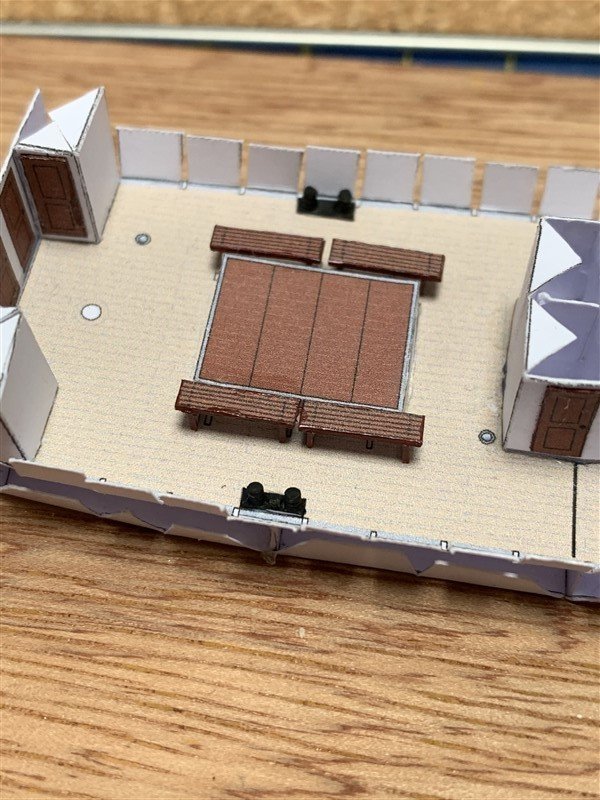
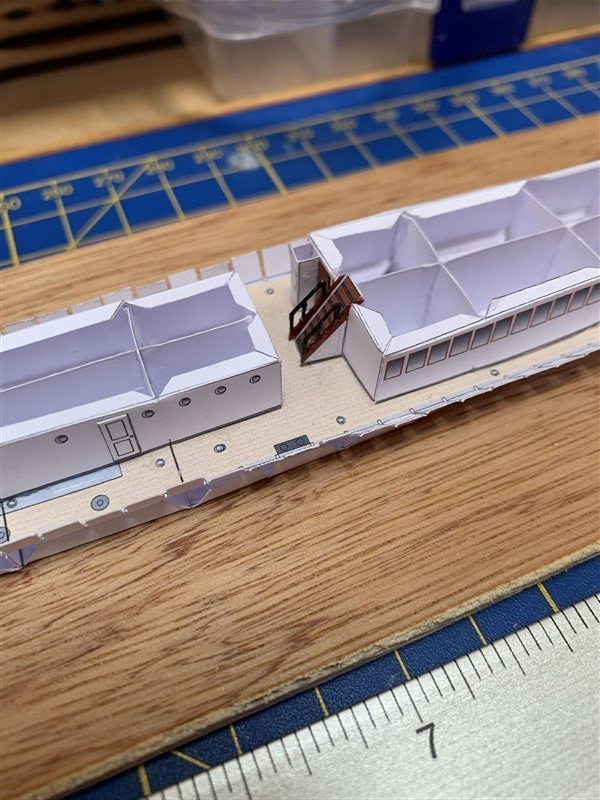
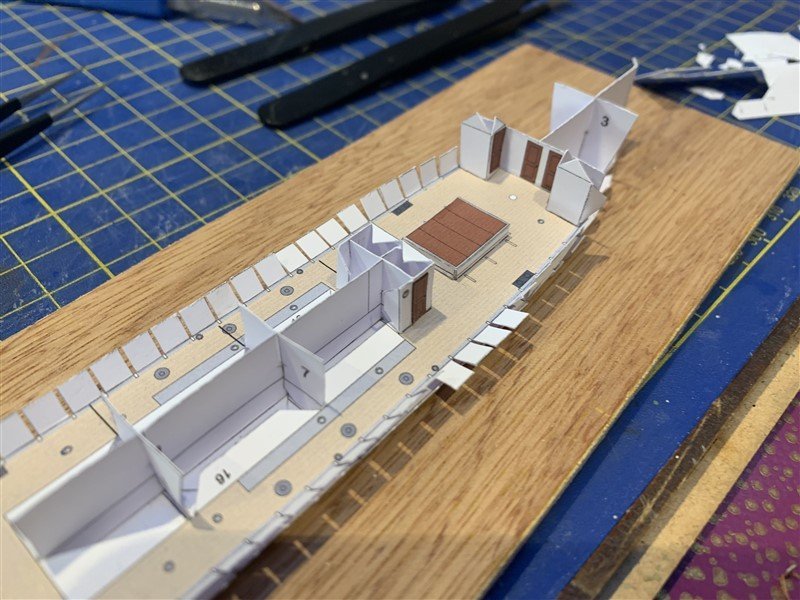
It's been a busy old week, so not much progress to report on in that time, but I have finished all the details on the main deck so I can now add the top deck and hull sides. These details included the steering gear grating, a couple of sets of bollards and benches around the main hatch. I also had a go at some smaller details and replaced the printed staircase handrails with cut-out versions, they don't look to hot up close, but this is about the limit of my card skills so far. Thanks for following along and the likes! 😁


- 45 replies
-
- 10
-
-
- Earnslaw
- Paper Shipwright
- (and 2 more)
-
And you have done a great job building it Mike!
-
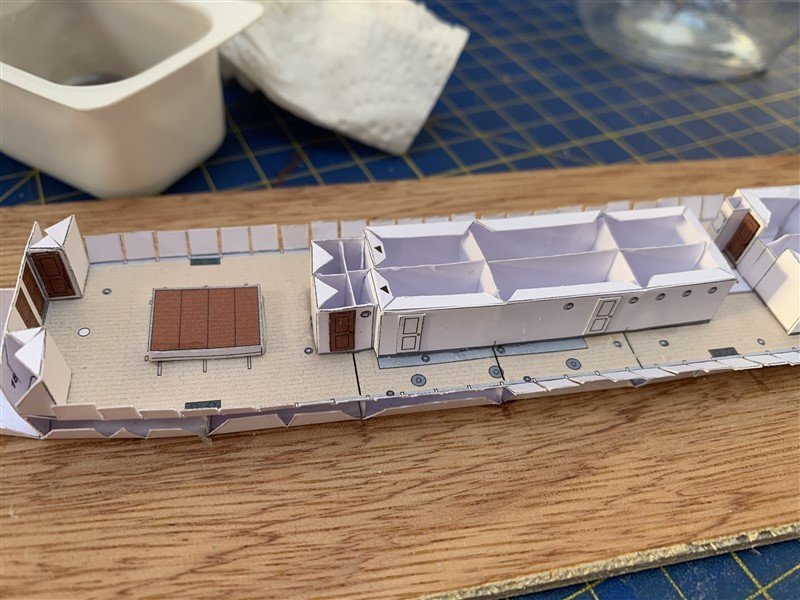
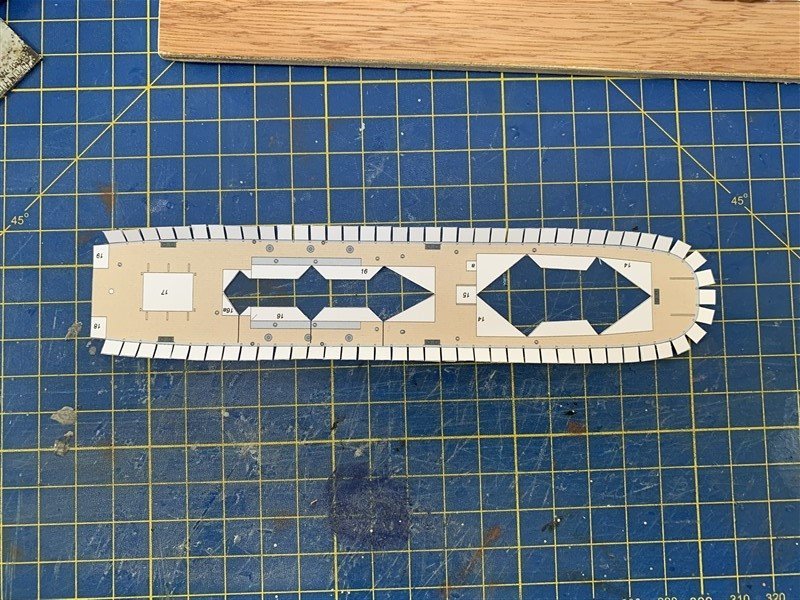
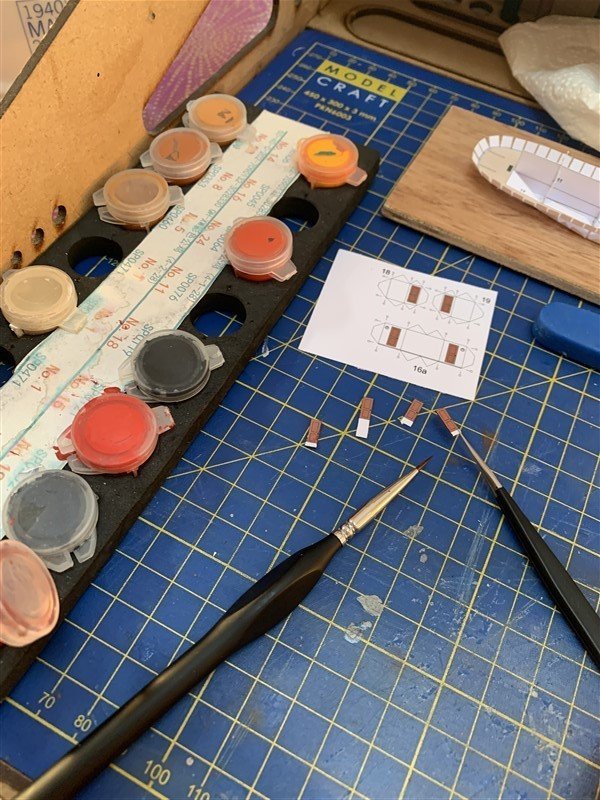
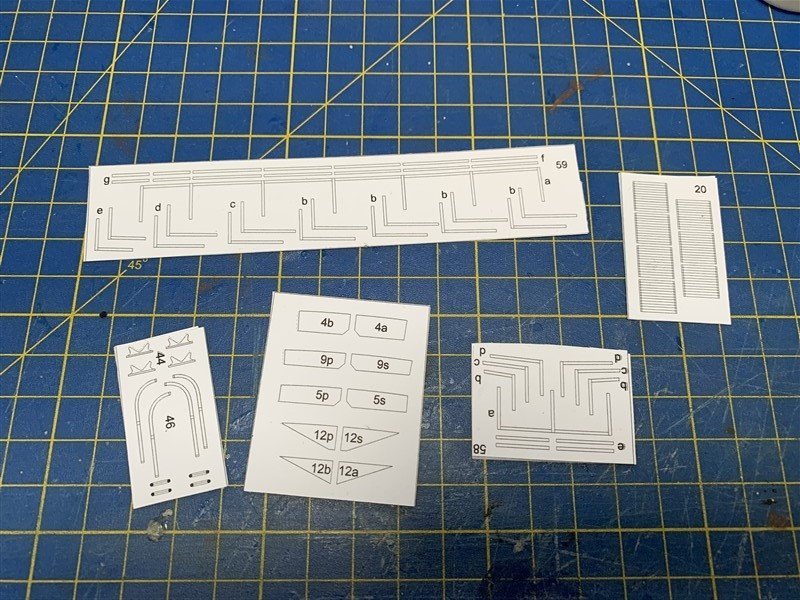
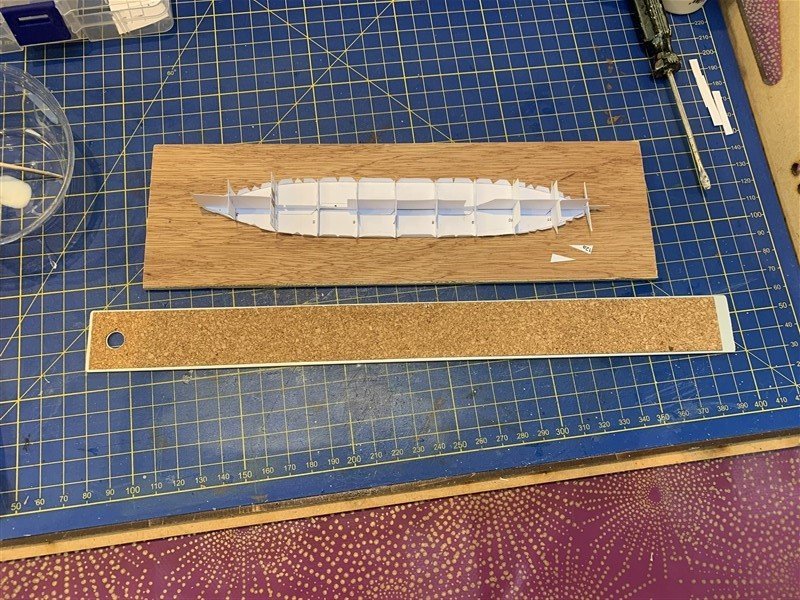
Hello all, I've made some progress on the main deck, firstly scoring and cutting out all the slots that will eventually provide supports to the hull side and upper deck support columns. I glued this onto the hull spine and formers and left to dry. I have decided to leave the stern lower formers until I temporarily separate the model from the building base later on, I didn't like the look of how they were glued on the other build log, they look very fragile and I'm not sure how I would glue them with enough strength. I am planning to add them once I'm at the stage of forming the stern, add the formers to the underside of the main deck, making sure they align and let them dry before forming the stern around them. Time will tell whether this is a "Cunning/Baldrick" plan... In the meantime the main deck needs a few details adding. So I have formed and glued on the cargo hatch, latrines, Engine room entrance. I cut out and pre-painted the cut edges of the optional doors before adding to these parts. Next up, working aft, will be the addition of the Engine room, Saloon & stairs to complete this section of the instructions. Thanks for the like and dropping by.

- 45 replies
-
- 9
-
-
- Earnslaw
- Paper Shipwright
- (and 2 more)
-
Agree with the comments above, really nice to see these additional details take shape and a detailed explanation of your process, trials and tribulations, as Alistair says, inspiring stuff!
-
Curtiss BF 2C-1 by CDW - FINISHED - Hasegawa - 1:32 scale
AJohnson replied to CDW's topic in Non-ship/categorised builds
Craig, another outstanding model. Really good to see something different, never heard of the aircraft until your build log, so thanks all for the education along the way! -
Looking very good David, nice tip on getting the stay tackles to hang. 👍
- 310 replies
-
- 3
-
-
- Diana
- Caldercraft
- (and 1 more)
-
So very sorry to hear of this, Kev was clearly a great guy as well as a talented model maker.
-
Your making excellent progress Dan, not much further to go! 👏
- 70 replies
-
- 3
-
-
- Alert
- Vanguard Models
- (and 1 more)
-
Well not too long searching the web and I found a build log on another site that gives me a few pointers as to how to tackle the stern formers:- https://www.kartonbau.de/forum/thema/35925-tss-earnslaw-paper-shipwright-1-250/?postID=580813 Onwards! 😁
- 45 replies
-
- 6
-
-
- Earnslaw
- Paper Shipwright
- (and 2 more)
-
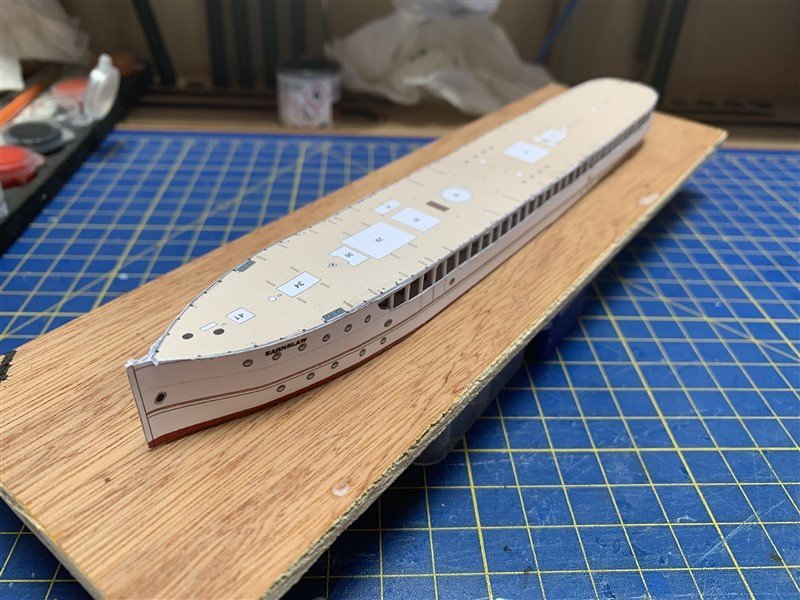
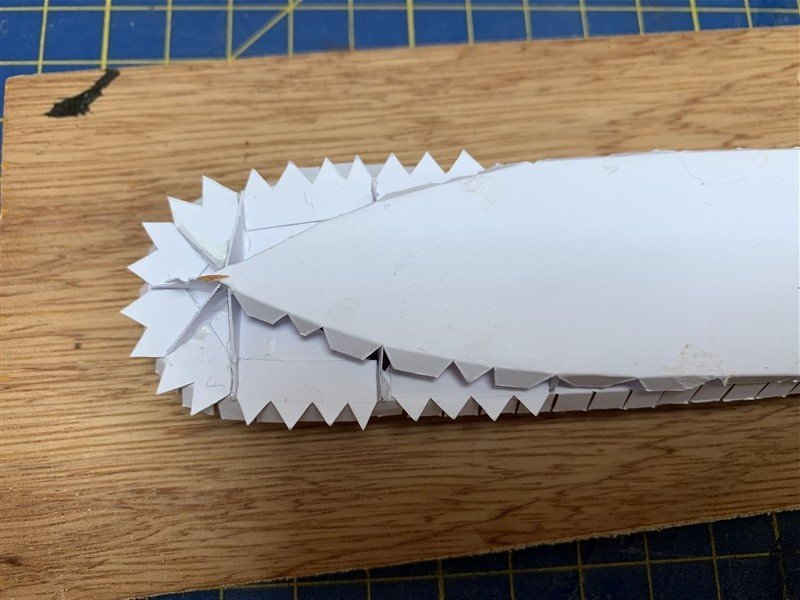
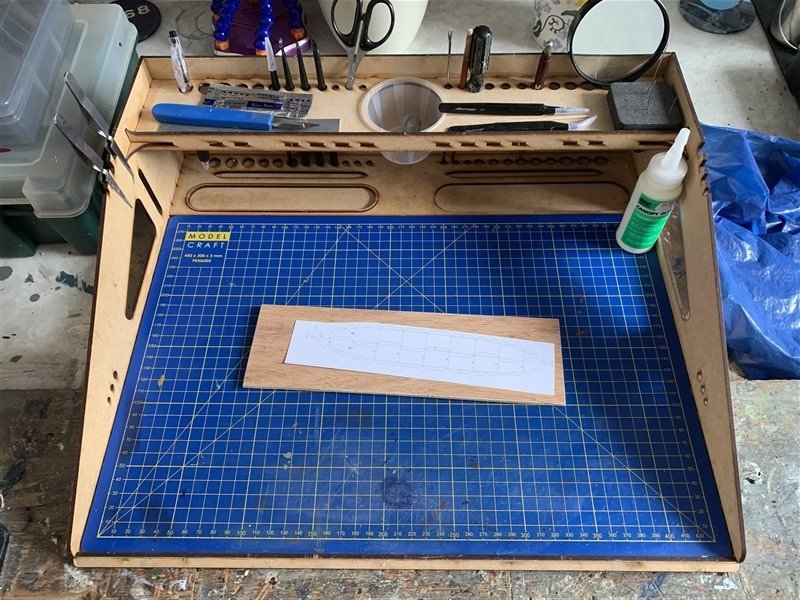
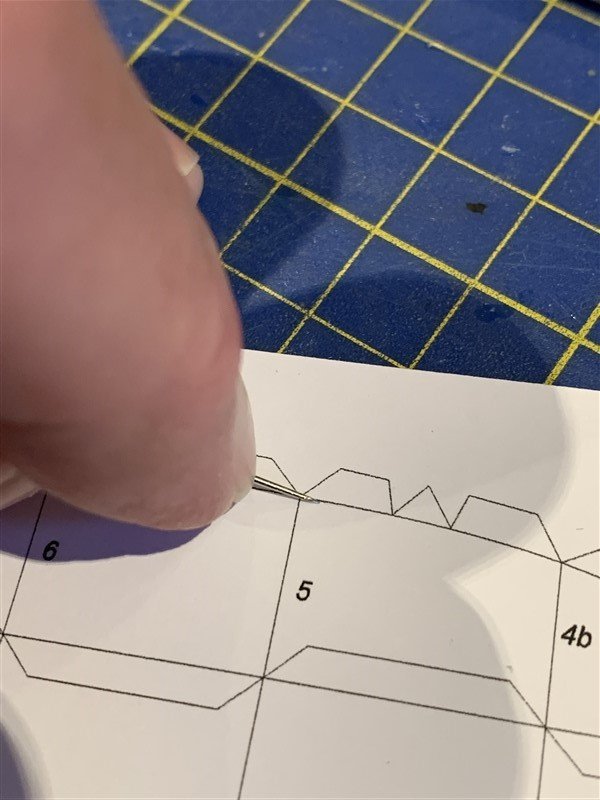
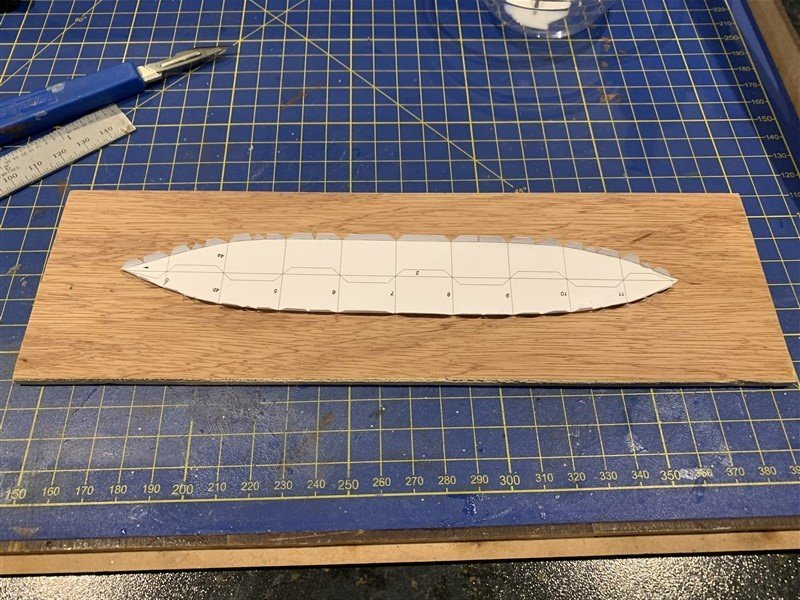
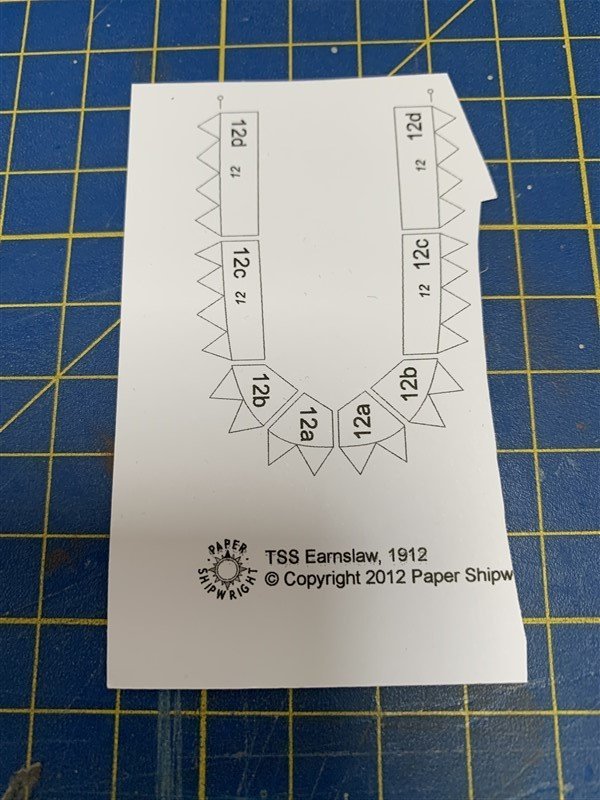
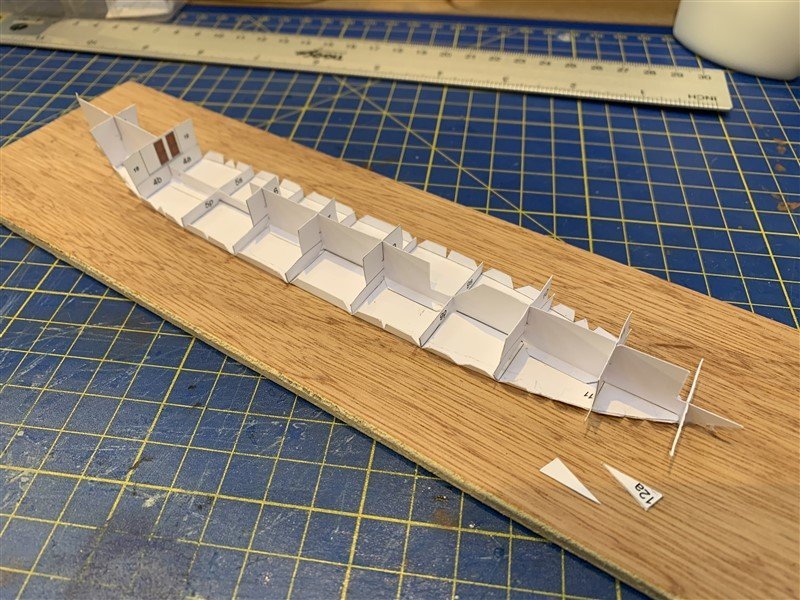
Well I have made a start and about completed step one of the instructions - apart from the last bit that has me temporarily stumped, more on that in a bit. Firstly I cut myself a wood building base, that if all goes well I might convert into a display base as I did with my card "Starlight" Puffer and do a little scene with the "Earnslaw" on water, we shall see if we get there! Next scored the fold lines on the hull base prior to cutting out and gluing temporarily to the building base with a perimeter of little glue dots. Then it was on to construction! The Hull spine and formers, I really tried my best to cut exactly on the lines with these as I don't think I was careful enough on the puffer and it caused a few issue with shape and fit, so fingers crossed its better this time. I've doubled and glued a few sections of the first sheet to form thicker parts for later and set to one side to dry under some weight. The bit I'm pondering now is the stern parts; 12a - 12f, the instructions simply state to "glue in place the lower stern formers", but there are no pictures to show exactly how this goes. They must form the curve of the stern, so need to get them in the right place.
- 45 replies
-
- 8
-
-
- Earnslaw
- Paper Shipwright
- (and 2 more)
-
Hi Brian, looking forward to seeing your progress with this one.
