


AJohnson
-
Posts
2,053 -
Joined
-
Last visited
Content Type
Profiles
Forums
Gallery
Events
Everything posted by AJohnson
-
 Hi Will, Good work there 👍 and I'm glad you found time to get back to your build, as I am hanging on your 'coat-tails' watching how you do the masts and rigging, as I am not too far behind you now. Though like you I might get slowed up for other reasons this next few weeks, as the Admiral has decided "we"( i.e. me) need to decorate my daughter's bedroom! 🙄 (Note to self put the mast hoops on before completing the mast build) I like your "helping/third" hand, might need to invest in one of those. Are you putting sails on your model? I am hoping to, toying with the idea of trying modelspan/silkspan ones as there are some great builds on MSW with those and thinking if I can't put sails on a little trawler, I might never put sails on a model... (Fall back position is of course the ones supplied by Chris 😆!)
 -
Hi Chris, having never built a card model it had never occurred to me that you needed to paint cut edges! Doh 🙄 Wow, matching printed to painted tone and colours is an art. 👏
-
Hi Kevin, Enjoyed watching your latest video 👏. I'm no scratch builder, but having examples like you to follow, then maybe one day... one day... 🤔
-
Hi Darren, nice to see another of Chris's little trawlers take shape. 👍 As Bob says good luck and enjoy, I will be following along. 🍿
-
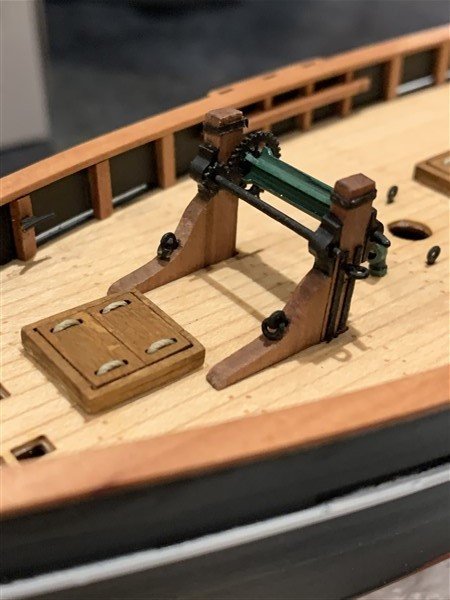
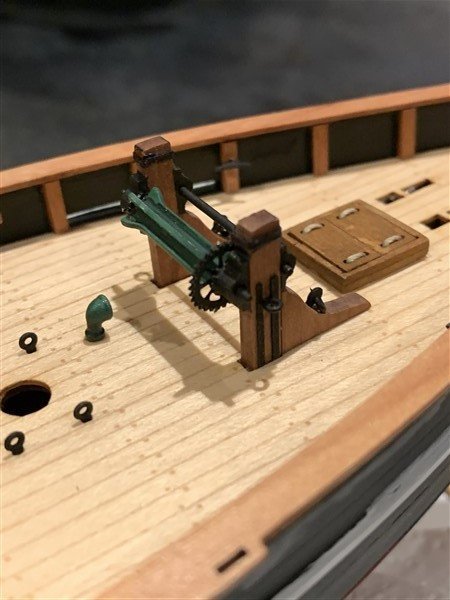
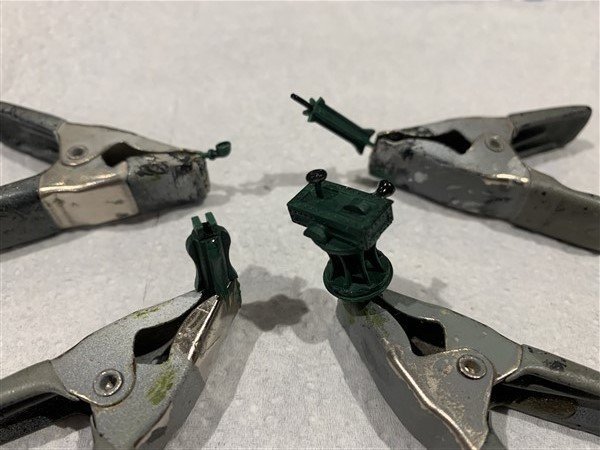
Small update today showing the completed winch assembly. I have added a few little details of my own from reference to Edgar J. Marsh. These being various iron reinforcement bands from black cartridge paper and ringbolts for winch handle storage and anchor lashing. Next thing to do, moving forward along the deck are the bitts for the Bowsprit. I'm just having to read and re-read Marsh to try and get my head around where the bowsprit heel rope starts from and finishes when the bowsprit is extended. Then hope to complete that assembly next. Also doing more on the small boat, but will do a separate update for that. Thank you all for the follows and likes again. 😄

- 206 replies
-
- 13
-

-
- Vanguard Models
- Brixham trawler
- (and 2 more)
-
Hi Ron, Was it this long running thread? It has been steadily growing for years it seems. I don't know if you do it Ron - don't want to teach people to suck eggs (especially as I have been back at MSW less than a year), but if I come across a useful old thread I "follow" it, as I know I will be doing just what you are now and months later think "now where was that useful tutorial/build log..." 😆 I now have several pages of "Followed" MSW content in my profile so I can get to it easier. Some are build logs on kits with really useful insights into building (even though the subject is perhaps not one I will do) and the rest are links like the one above. Anyway hope you find what you are looking for.
-
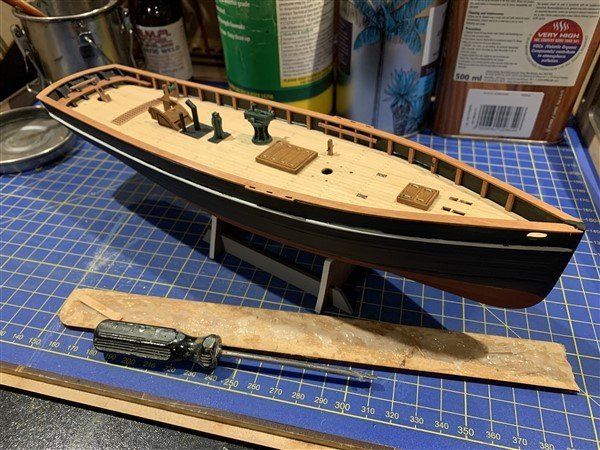
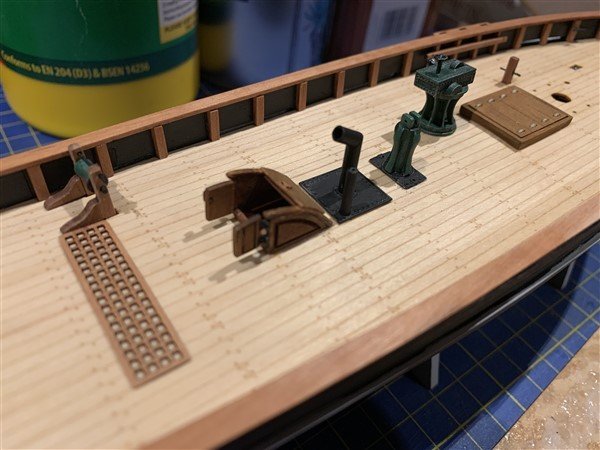
Update for work done over the weekend and tonight, added the bulwark stanchions and capping rails and now started to add the deck parts, working my way forward (with the exception of the tiller arm - pretty sure I will manage to break that off if I fit it now!) no real problems encountered and the bulwark stanchions were actually very therapeutic to add, just did them one at a time, sanded off the char and a little dab of glue job done, just took my time to make sure they lined up with the markings Chris provides on the inner bulwarks. I have wiped on a couple of light coats of Danish oil to bring out the deck and other wood parts in contrast to the bulwark black.

- 206 replies
-
- 12
-
-
- Vanguard Models
- Brixham trawler
- (and 2 more)
-
Morning Will, Yes I have a collection of old 'abused' clamps I use to hold smaller parts when painting, saves me getting green fingers! I do also use blutack or tape, just depends on the shape/size of the item to be painted.
-
Hi Brian, welcome looking forward to seeing your Granado build and your historical contributions given your background 😄👍
-
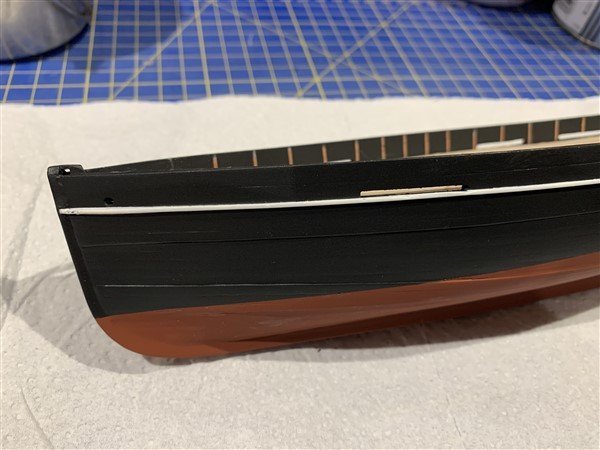
Thanks Will, some of the touching up due to the masking tape lifting the underlying red anti fouling paint, but only a few places. I’m watching your build closely to see how you do the masts and rigging l, so I can copy! 🤓
-
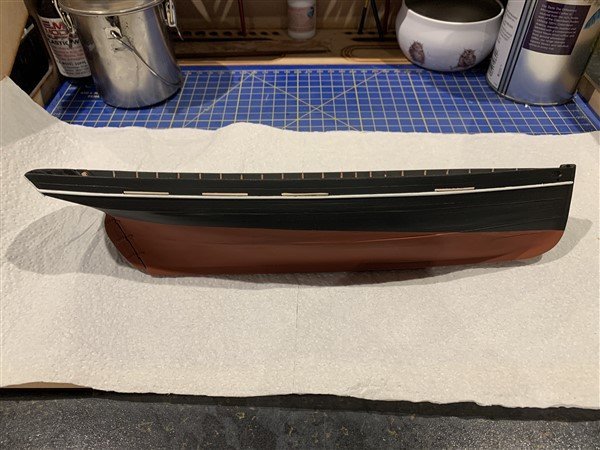
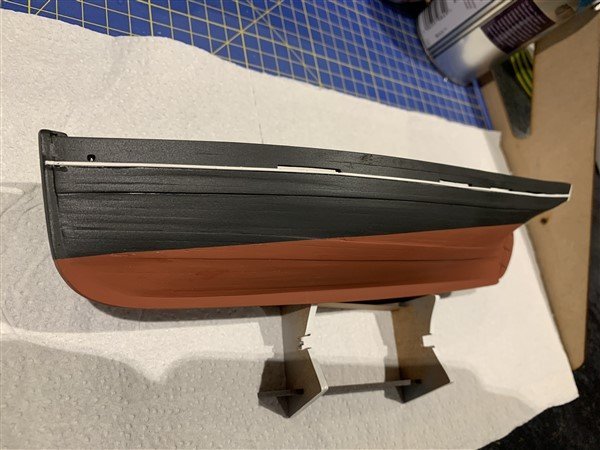
Update tonight of the hull now it has been painted. There are some minor areas to touch-up (as usual with my painting! 😮); where I have not quite got the masking right, but overall I think this is fairly close to what I wanted to achieve and looks similar to B.M. 45 "Pilgrim" in post #47, the black is Sovereign Paints' "Bomber black" which is not jet black, I think it looks like a slightly worn black paint which I personally like. I will seal everything in a matt varnish at a later stage. Also made a start on painting a few of the small parts. Next up need to add the deck and start on fixing all those fiddly little bulwark stanchions! Plus work on going on the little ship's boat... Thanks all for your continued likes and comments.

- 206 replies
-
- 13
-
-

-
- Vanguard Models
- Brixham trawler
- (and 2 more)
-
Hi Darren, I think it salvageable, but I have also seen you looking into a fishing trawler by Vanguard, which would also be a good reintroduction; I'm building one of them at the moment and the instructions are very good for someone "new-ish" to the hobby. You could always park this build and, do on of Chris's trawlers and armed with that experience tackle this one again? 👍 kind regards, Andrew
-
Those swivel guns are a delight, well done Big, you should be proud of those! 👏
- 419 replies
-
- 3
-
-
- Victory Models
- Pegasus
- (and 2 more)
-
Hi Brian, Rigging cannons is something I have yet to crack, I see some posts here on MSW that look brilliant, but the blocks used must be tiny! I think on the "heavy" frigate type builds the armament is bigger 18lb's etc. so there is a bit more room to play with, but at the other end on the scale, say 4lb -9lb'ers on smaller ships I am not sure us lesser mortals can fully rig cannons and make it look "scale" - but that is not going to stop us trying - right? 😁 Like you I would be interested to know what more experienced ship builders think. 🤔 Think you are making a great job with what you have got, I think the Caldercraft gun carriages are a bit crude, but can be replaced by Chuck's or Vanguards replacement sets, or for the more skilful replace from scratch. Interested to see how you get along with Chuck's blocks and rope.
-
Thanks Will, the paints I'm using are "Colourcoats" from here in the UK, enamel paints I use a fair bit on my aircraft builds. I marked off the waterline , masked and put down the first coat of black. Will see what that looks like tomorrow, can see the odd little area might need a flat down and touch up with the airbrush. 🤔 Thanks everyone for the encouragement and likes! 😀

- 206 replies
-
- 4
-
-
- Vanguard Models
- Brixham trawler
- (and 2 more)
-
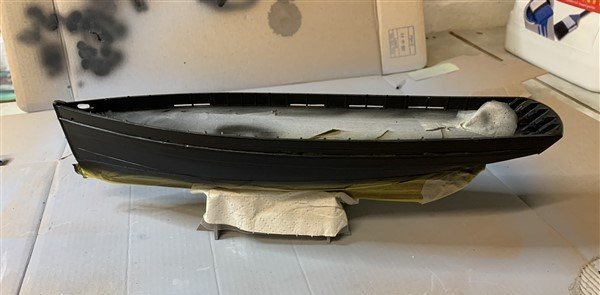
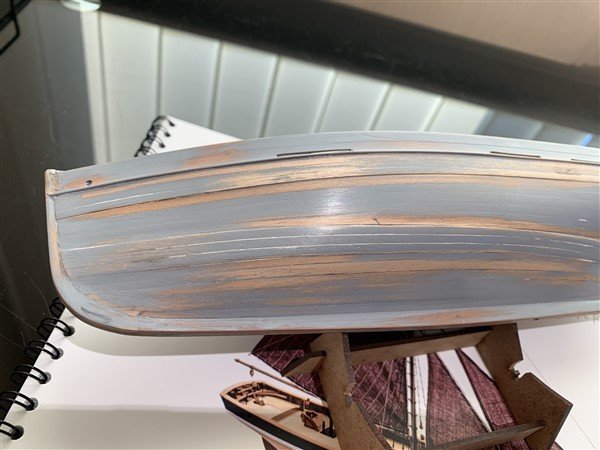
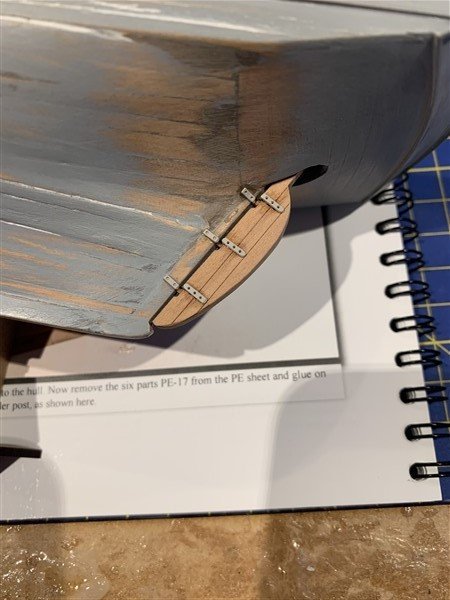
Quick update showing the sanding, filling & primer coats and first coat of anti fouling! For the sake of full disclosure, some pictures of the "ugly" stage when doing the filling and rubbing down, I took three goes at this process until I was happy with it, a fine balance I think between getting a good finish and not obliterating all trace of the planking! Also at this stage I assembled and attached the rudder, a lovely little detailed section with laser detailed pear and PE parts, hopefully won't knock this off in later stages. 😖 Between the coming days of painting and allowing 24 hours to dry I have made a start on a small boat; wish I had known about Chris's new clinker built ship’s boats he released recently, but will do the best I can with this resin version, updates to follow!


- 206 replies
-
- 10
-
-
- Vanguard Models
- Brixham trawler
- (and 2 more)
-
Hi Brian, thank you for your kind comments about my Bounty build, I have been sadly neglecting it since the arrival of a sailing Trawler from Vanguard models, but as the “Nisha” is a small kit, I hope it won’t be too much longer before I am back working on the “Bounty”. Looing forward to seeing your new blocks and tackle for your “Granado” cannons, it is a shame you cannot see much of your bow chasers once the deck went on top, the same with many builds people do on MSW of ships with armament underneath quarter decks and forecastle’s, all the lovingly built details get hidden! But at least with the build logs on here, we know it’s there 😅 I have been thinking about getting some new blocks and rope replacements, as the Caldercraft materials can be a bit variable; particularly the quality of some of the small blocks, so I will be interested to see how you get on with your excellent build. Cheers, Andrew
-
Hi Mike, glad the shipyard is back up and running after Christmas, you have made excellent progress and achieved a lot in the last two weeks. I am impressed with the efforts you are going to with the rigging and the tips you give about the “missing” steps from Caldercraft’s instructions - taking extra notes on that as “Snake” is my next major ship build. Also taking that away for my Caldercraft Bounty build before I fix the masts, phew glad I’m flowing 👍
- 109 replies
-
- 1
-
-
- snake
- caldercraft
- (and 1 more)
-
Hi there HHH, thanks for looking in on my Bounty build, I’ve been taking a look back through your log to see what you are up to, sad to say not seen your log until now! Your Granado build it very good and you are doing very well at this, wouldn’t know this is your second build; my Bounty was my second build and I gave up on it for ten years 🤣. Your planking is very neat and enjoyed following through your build of the various cannons. I’ve clicked the ‘follow’ link so I don’t miss any more of your build; guilty of not looking in often on the 1501-1750 build section, as my interests tended to be later, fixed that. 👍
-
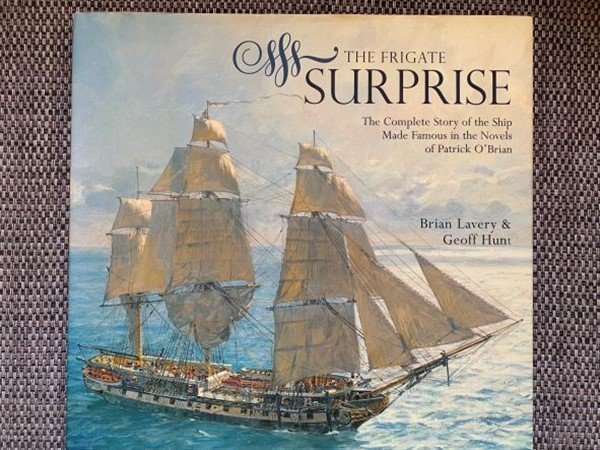
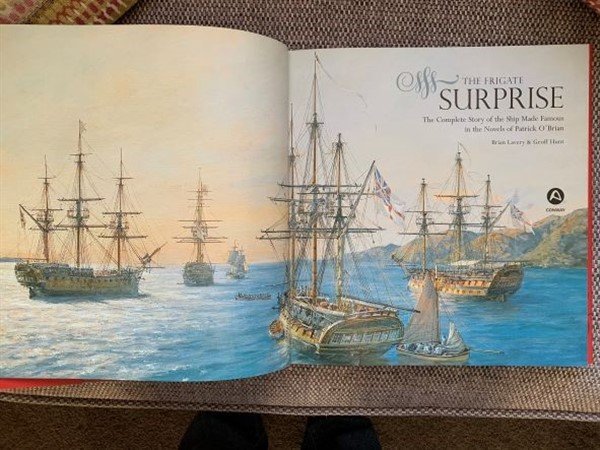
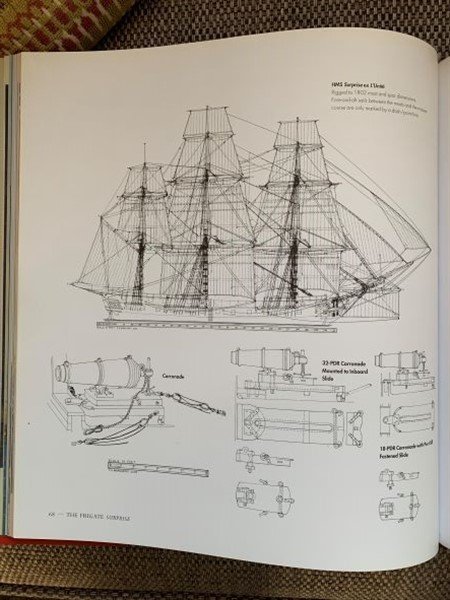
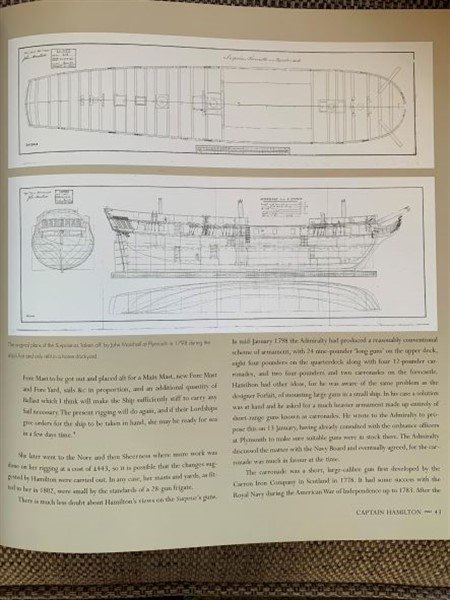
Another book I would recommend if you are an O'Brian fan is "The Frigate Surprise" by Brian Lavery & Geoff Hunt, by Conway Press. Full of background info and history, plans and Geoff Hunt's beautiful paintings.

-
Well can’t be a better example to follow than Dan and BE, but yes you are right sometimes plans and sketches in some sources don’t seem to take into account the crew who worked these vessels, I think ergonomics is the term for it nowadays.
- 419 replies
-
- 3
-
-
- Victory Models
- Pegasus
- (and 2 more)
-
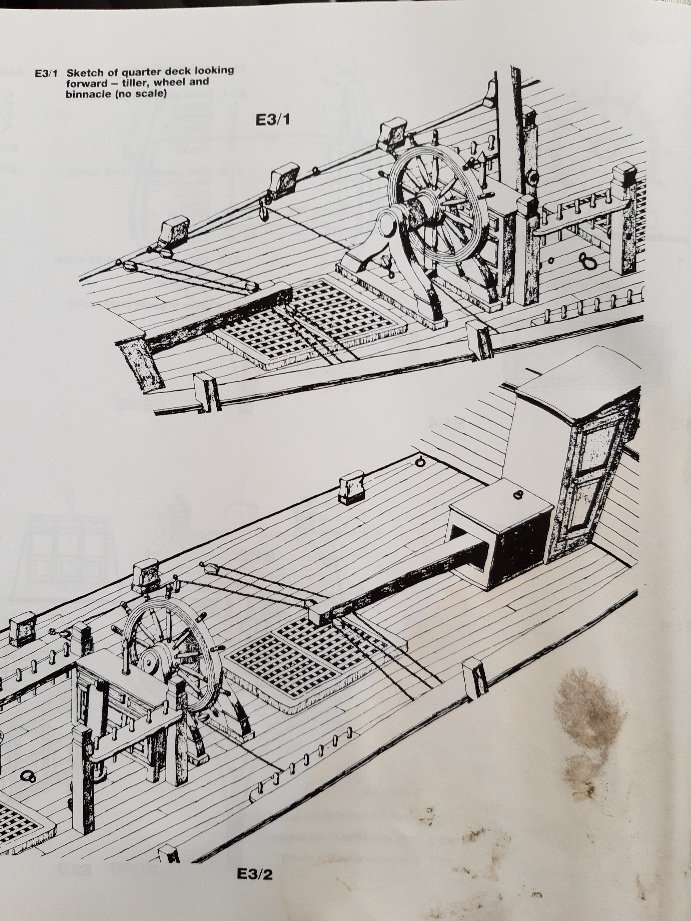
Nice work as usual Bug, like the replacement wheel. 👍 Is the way the ropes are attached to the tiller arm from the plans? Just wondering about the last length going up to the wheel axle at an angle, I have usually seen that rope go through two more blocks under the wheel axle then vertically up to the wheel? Attached the arrangement for the Bounty I am currently building. I know there are variations for this on different ships and i'm no expert, just curious.
- 419 replies
-
- 5
-
-
- Victory Models
- Pegasus
- (and 2 more)
-
Nice save on the Steam winch Will 👍 it was like building a mini kit on its own, though for once I didn't lose or break anything on mine! How did the decals go on Will? I have been thinking about them and how they might sit on wood grain without the decal backing "silvering" on the uneven surface, been thinking of using rub-on lettering? Did your rudder come off, mine not attached yet whilst I have sanding and filling still to do.
- 77 replies
-
- 1
-
-
- Erycina
- Vanguard Models
- (and 1 more)
-
How many kits do you have on the go at the moment?
AJohnson replied to CaptnBirdseye's topic in Wood ship model kits
Guilty as charged! Excluding untouched "stock" those on the crime sheet currently:- 🕵️♂️ Caldercraft "HMAV Bounty" Vanguard "Nisha" - fishing trawler Aeronaut "Ramborator" - modern RC pusher tug. Airfix Hawker Typhoon 1b - car door version (1/24) Along with @Kevin I'm promising not to get/start more in 2022 until the top two at least are done, but as I pre-ordered Airfix's new 1/24 Spitfire IXc, that might be a problem if it arrives too early in 2022, but I should be safe, as Airfix say it's release date is Summer 2022, so therefore Xmas 2022 might be more likely with them! 😂
