


AJohnson
-
Posts
2,052 -
Joined
-
Last visited
Content Type
Profiles
Forums
Gallery
Events
Everything posted by AJohnson
-
 Hi Dave, I have just gone through that process on my ‘Nisha’ and I permanently fix my models to the pedestals and bases, so I have firm foundation before adding delicate masts and small parts. Other builders keep them on detacheable cradles, think down to personal choice.
- 362 replies
-
- 3
-

-

-
- Amati
- Lady Nelson
- (and 2 more)
-
Hi Trond, have you seen the painting @michaelpsutton2 has done of the Bounty, lovely artwork, but one little detail Michael added I had not thought of until seeing your handrail stanchions going on, is the possibility of adding hammock ‘netting’s’ to the handrails, something I’m now considering on my ‘Bounty’.
-
Hi Grey just seen this after replying to you on my log. If I had my time over and actually “planned” 😱 in advance I think a fine razor saw as you mention would be the more controlled method to go with cutting scuppers in a solid bulwark. The other alternative is obviously more complicated and means building the bulwarks from scratch starting at the top edge of the scuppers. Either way I think some structural bulwark stanchions are needed to hold the bulwarks stiff along their length. Looking forward to seeing your further ideas being tried out.
-
@niwotwill good to hear you are on the mend, but yes think you are right that you take it slowly, even with vacations Covid can be tough for some. Take it easy and I am really looking forward to seeing your log updates on your rigging when you’re up to it. 👍
- 206 replies
-
- 1
-
-
- Vanguard Models
- Brixham trawler
- (and 2 more)
-
@Grey I didn’t go for full length scuppers because I only thought about them after I had built the hull, a bit of fore thought and I think it could be done. To stop the bulwarks flexing I think some of the bulwark stanchions could converted into ‘structural’ pieces by glueing and pinning to the deck, but to help in this perhaps a bit of local thickening under the false deck at the perimeter for there to be more for the pinned stanchions to attach to, but this obviously needs planning and doing before the planking is done. I don’t think all stanchions would need this modification, think perhaps half a dozen equally spaced on each side might be enough. I know what you mean about builders attacking Chris’s lovely kits and doing modifications, I hope he doesn’t mind, but I do know I am only able to try these things as the underlying kit is of such quality I don’t get frustrated doing the ‘basics’ and can get all “creative” 🤣 where I want to.
- 206 replies
-
- 1
-
-
- Vanguard Models
- Brixham trawler
- (and 2 more)
-
Hi Andy, how is your Nisha coming along? a few more Nishas have joined the MSW fleet to keep us company! 👍
- 32 replies
-
- 1
-
-
- Nisha
- Vanguard Models
- (and 1 more)
-
Going strong there Grey and you broke less parts of the hull than me getting the deck on! 👏
-
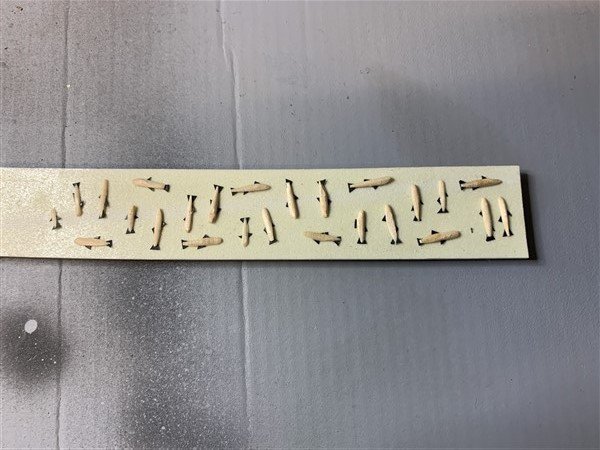
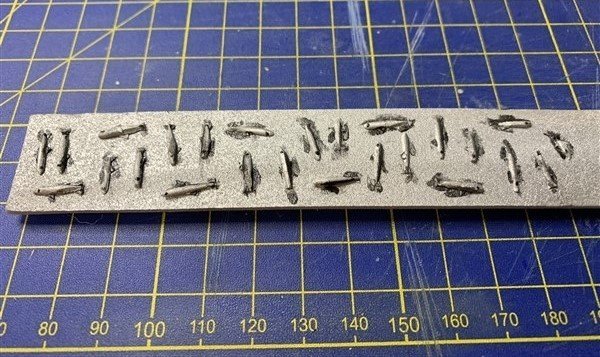
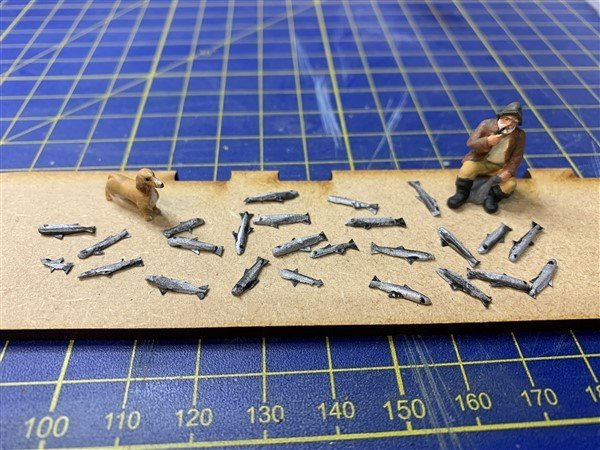
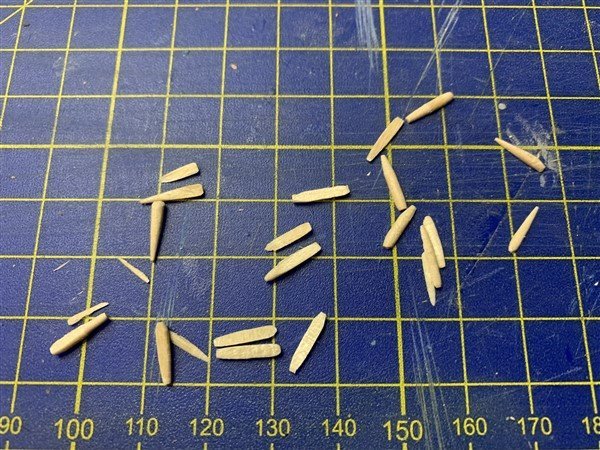
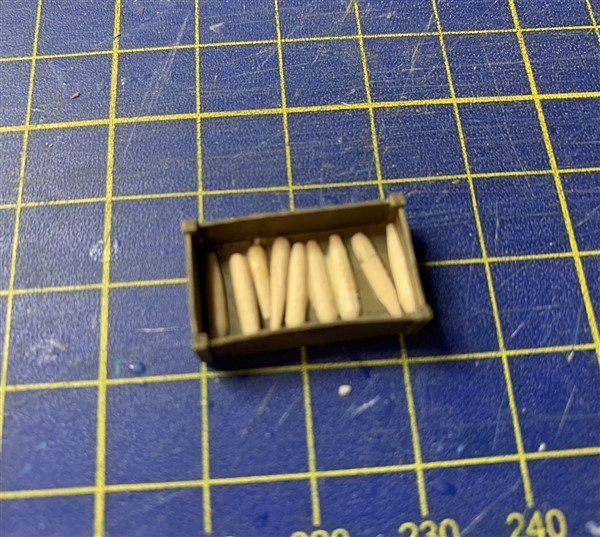
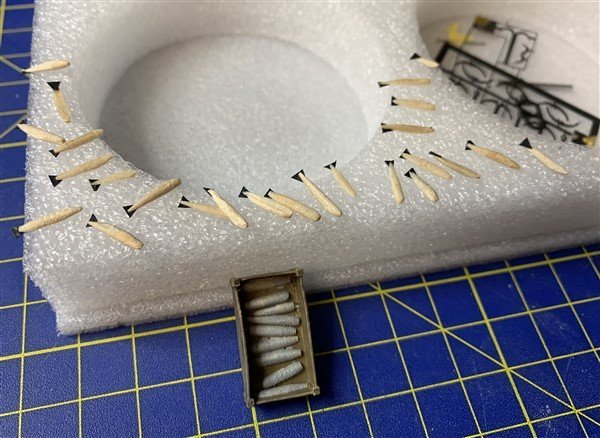
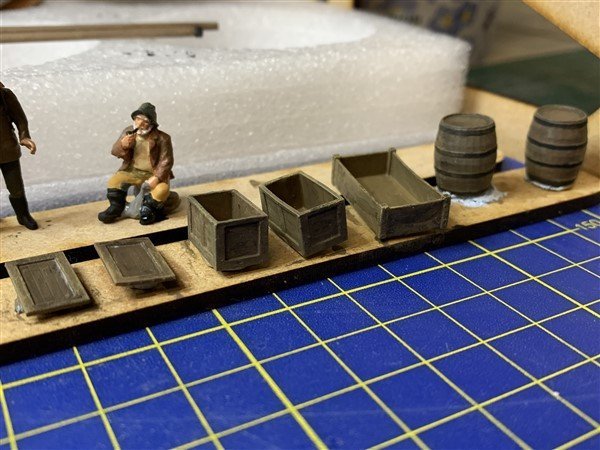
Okay, so there is something distinctly fishy about this update.... I have made some 🐟 to go in the lovely printed crates that I got from Chris that I painted in post #75. However any Fishermen 🎣 here on the MSW need to look away now! ....nothing to see here.... for fear I might do you all a mischief as you burst in fits of laughter! You have been warned if you read further.... > > > So these little beauties are the not so well know species of 🐡 called the "North Sea Cocktail stick fish", you get about 14 to the stick by cutting them about 10mm long, putting in the chuck of a drill and spinning them on sandpaper a bit to get a roughly 🐠 shape and then slicing them lengthways to get two and a flattened back so I could stick fins on them made of card. A spray of silver followed by some highlights in "gunmetal" and black to add a hint of detail and a few eyes and we are done. The plan is to stack these in the boxes with the best looking ones to the top. Note, to those of you who have been doing this hobby long enough will recognise the above as someone avoiding doing the next bit of their build they are not looking forward to, by mucking about and doing this sort of thing! 😆 Oh well, stopping blocks to eyelets and masts it is then... 🤔 Hope no one is on the floor in pain now after this post.... 😂

- 206 replies
-
- 12
-

-
-
- Vanguard Models
- Brixham trawler
- (and 2 more)
-
👏 Hi Grey, really looking forward to seeing another "Nisha" joining the flotilla! ⛵⛵⛵
-
Just found this log, beautiful first planking! 👏
-
Very neat looking Trond 👍
-
Morning Will, Firstly from reading your reply to my 'Nisha' build log I see you have had Covid! I hope you are well on the road to recovery with no side effects; my son had had it and still can't smell/taste properly yet. So look after yourself and take it easy. Regarding your rigging, did you make a start before you caught covid? I have not served any rigging on a model before, so that is not something I can advise, like you I am mulling over if I can 'add' anything to the rigging based on March's drawings, but not sure if I will yet.
-
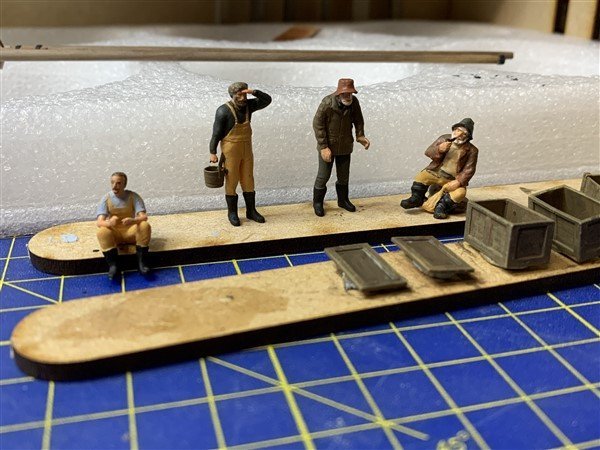
Hi Will, Thanks, yes I tend to mix my paints from standard enamel paints, the boxes all start out with an undercoat of a 'dark earth' colour, then the next coat is the same 'dark earth' plus a variation of 'rust' reds or 'cream' colours to vary the colours of each box or barrel slightly. When that is dry is I then applied a dark 'walnut wash' that highlighted a few of the inner edges and fine lines within the parts. Finally a 'dry coat' of a cream/tan lightly brushed over to hint at the effect of wear and tear of the boxes been used and 'fresh' wood then visible at edges/corners. There is a bit of mix of finishes on them at the moment; satin etc. (and the crew) so think the whole lot will get a light spray of matt varnish along with most of the rest of the build later.
- 206 replies
-
- 2
-
-
- Vanguard Models
- Brixham trawler
- (and 2 more)
-
Welcome to MSW 👋 Grey, you will enjoy the Nisha, a fun little model to build.
-
Had a break from working on the Nisha, as the Admiral has had me decorating my Daughter's bedroom at the moment, so time for building models has been restricted, but have managed to sneak a few visits to the workbench to do some painting of the crew figures and assorted boxes/barrels I got as accessories from Chris. May yet add some fish in the larger open crate, just thinking on how to make some fish. 🤔 Hope to be back doing the mast and adding updates soon. Thanks for looking in.
- 206 replies
-
- 8
-
-
- Vanguard Models
- Brixham trawler
- (and 2 more)
-
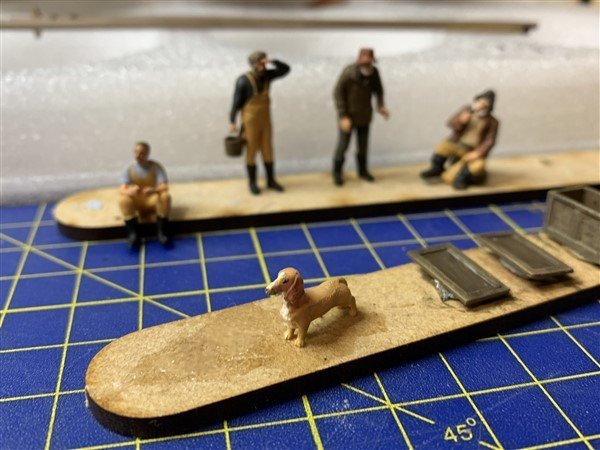
I recognise that Dog on the foc’sle, wow Indi is mush bigger than Nisha! 🤣
-
For inner bulwark colouring, dull red was fairly universal in that period, but there were always exceptions and the actual shade of "Red" is open to interpretation as I understand it ranging from almost Brown to Signal Red, other options are to leave unpainted, perhaps varnished "paid" I think the contemporary term was, with all sorts of varnish concoctions that could be quite dark in tone. (a not unlikely option given the 'lowly' status of the "Bounty") or perhaps Yellow Ochre. Less likely are white or the much later Greens.
-
Excellent, a future project perhaps? If you can do "Mars" I'm sure you could convert a Caldercraft "Cruizer" into an "Irene"! 😁 - The "Mars" & "Irene" would make an interesting 'pairing' with their joint Dutch/English histories etc.
-
Hi, thanks for your comments about my “Orestes” that was my second completed wooden model; though actually the third one started as I abandoned my “Bounty” build for about ten years as it was a bit of a challenge and only came back to it last year when I rejoined MSW. As you mentioned your research and mention E. W. Petrejus, have you come across his book Modelling the Brig-of-War “Irene”? It is a very good book and although detailing the conversion of an English Cruizer class Brig “Grasshopper” for service in the Dutch Navy (shoe on the other foot compared to Mars-Orestes!) Petrejus does cover other contemporary Dutch ships and practice’s. The English version is getting harder to find and more expensive, not sure if that’s the case with the original Dutch edition?

-
Glad to come across this log as I really enjoyed building this kit, though I largely did it ‘out of the box’ as HMS ‘Orestes’, I wasn’t back with MSW when I built it, so no build log I’m afraid but I have put a few pictures in the ‘completed’ gallery. I will be following along, don’t worry about the delays, my ‘Mars/Orestes’ took about four years. I’m Really impressed with your research into the ship and it is interesting to get the Dutch side of the story for a change and not the English version. I’m currently researching my next build and it is nearly as addictive as the actual building of the model itself.! (almost) 😅
-
Great model collection, welcome to MSW. 👋
-
All you (any of us) can do is the best our building skills and research time allows. As regard’s the Bounty it is only famous because of the mutiny; if the voyage had gone as planned, I doubt most of us would know or care about her. It was employed for a mundane and by modern standards an odious mission to transport sapling plants for food for slaves in the Caribbean. I doubt any unnecessary expense was used on her decorations. I have by convention (in the AOTS books etc.) gone with blue for the bulwarks outer colour, but I have not been confident about that since I committed brush to my model. Blue was (and still is) one of the most expensive pigments to use. So why use it for a ship transporting plants? I am no expert, but I am not at all confident the AOTS book is the definitive authority on the Bounty’s appearance and my Bounty might yet appear in black instead of blue bulwarks. Also who is going to say you are wrong? Ultimately it is down to you and what you are trying to produce n your build.
-
Good to see you back building your “Bounty” I’ve had a bit of a pause on my Bounty also, but that is because I started another project, not because of work like you. Hope you can keep doing a bit more now. 👍
-
She's really coming together nicely Will, looking forward to see the rigging going on, I can't quite see from the picture, but how did you tie the sails to the mast hoops? - They look neatly done.