


AJohnson
-
Posts
2,052 -
Joined
-
Last visited
Content Type
Profiles
Forums
Gallery
Events
Everything posted by AJohnson
-
 Well done Mike, looking very shipshape, as you say a significant milestone. 👏 Are you doing another model while you pause for breath on your Snake build?
 -
Welcome to MSW Dan 👋 I can only echo what the others have already said about initial models to have a go at, there a few of the Vanguard Trawlers being built on MSW at the moment, you can use the search facility to look them up in the kit build section of the forum.
-
Good progress Darren, the second planking is looking very neat. 👍
-
Hi James, Looking forward to seeing this one develop, enjoying building the "Nisha" at the moment so will be intrigued to see this one, as I have defacto approval from the Admiral to do a pair of trawlers! 😁 Also good to see little boats provided, I got an old CC resin one for the Nisha, but it doesn't look a patch on that one.
- 29 replies
-
- 3
-

-
- well smack
- Vanguard Models
- (and 2 more)
-
Thanks Dave, I used an Airbrush for the painting of the hull. Used my Harder and Steenbeck Evolution CR plus and Sovereign Model paints. It will inevitably need touching up as I finish the hull then varnish when completed. (I’m a messy so and so when building! 😅)
- 206 replies
-
- 2
-
-
- Vanguard Models
- Brixham trawler
- (and 2 more)
-
Hi Brian, I like that you have gone to the trouble of doing a mock-up first before committing to the deck of your Granado 👏 that rig and blocks look good to me, it is going to be a challenge at 1/64 to do blocks for smaller than larger cannons (18lbers plus I think imho) but then like you my eyes aren’t that good either! 🤣 Go on tell me that last picture is the view from your workshop as you build your Granado? Just to make us all envious 😃
-
I haven’t used the dimensions for ‘Master hand’, just the detail sketches for little details, stuck to your dimensions for the masts etc. which of course tie in with March and the plans he based his work on. It is just the 20ft, outboard given in March on the bowsprit leaves the inboard portion over the fore hatch, which is not as James had it in the prototype build. Just a query, hoping not to lay down problems now for me later on.
- 206 replies
-
- 1
-
-
- Vanguard Models
- Brixham trawler
- (and 2 more)
-
Yes, we like a good moan about our “grey” weather, but having sampled the extremes about the globe, I think we are very lucky! - on balance 😎
-
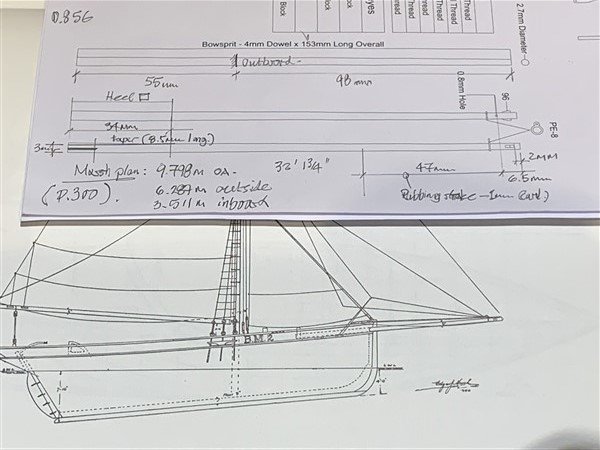
Hi Will, thanks for the input, page.202 lists the bowsprit as 32 foot so at 1/64 scale 153mm all fine and in line with my rough scaling of the book plans. Its the outboard portion that is causing me the issue with the heel over the fore hatch. page 202 states 20 foot outboard, so 95mm verses my rough measure again of 98mm. Yes I'm using the 'Master Hand' drawings as reference for details only, but keeping to Chris's dimension which match March's obviously. Probably over thinking it, I have drilled some holes and added a cleat on the starboard side of the bitt for the 'heel rope'. I think I will just mull on it while I finish the main mast and bowsprit then offer them up temporarily and temp use some thread for the stays to see how it "Looks" and decide then. I might cut out some temp paper fore sails to help with this. @niwotwill are the sail plans 1=1 scale on your Erycina, you have overlaid your dyed sails on, so hoping they are, not checked those yet on my Nisha plans.
-
Good progress Darren, as Bob said, hopefully the gap you have had to fill will be covered by the outer planking and paint. 👍
-
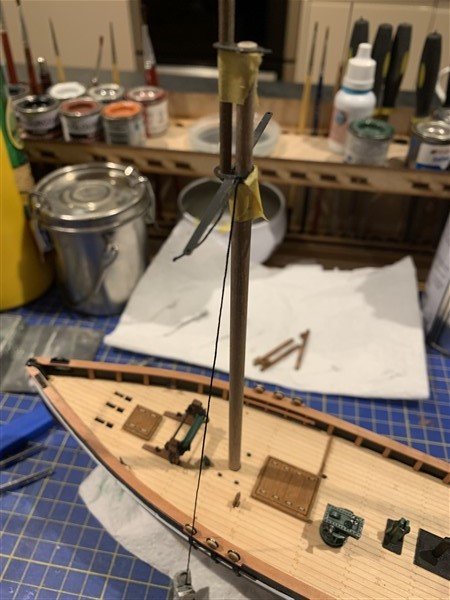
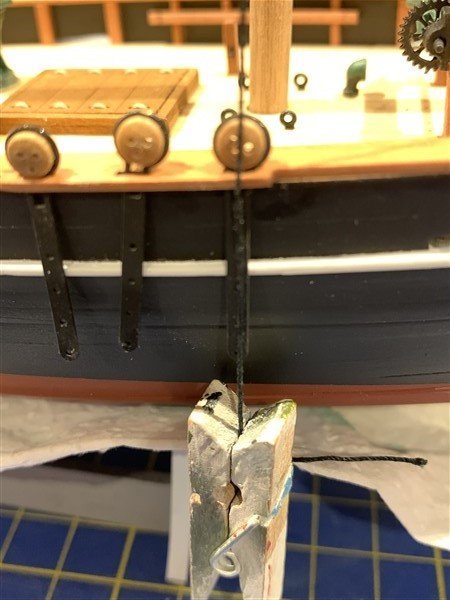
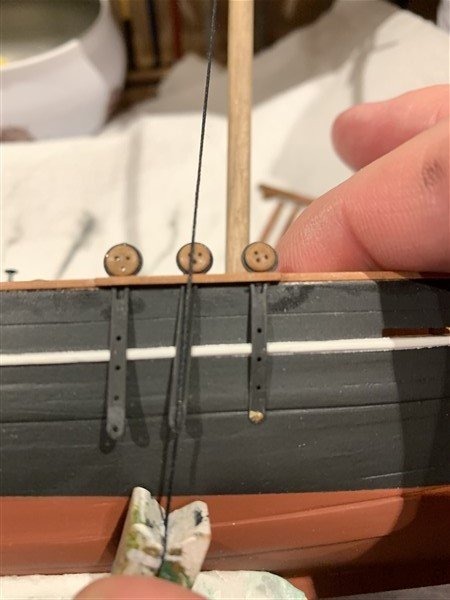
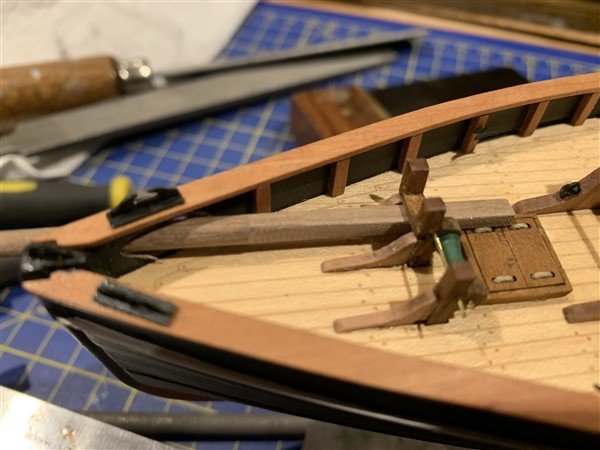
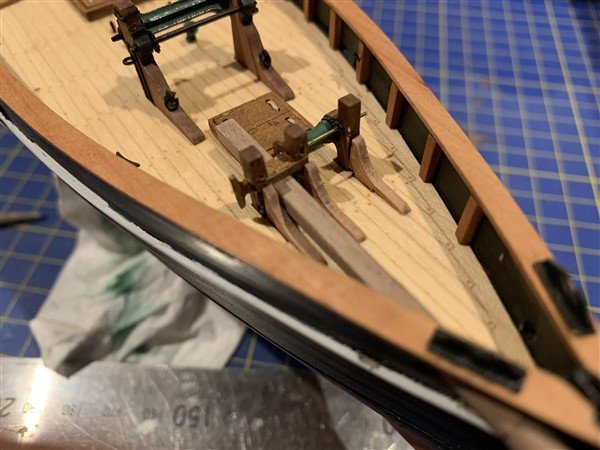
This update, I have started on the main mast and bowsprit. I had not attached the deadeyes and chain plates until I had roughly done the main mast, so I could use a thread to align the chain plates with the shrouds to be done later. So this I duly did, but more remains to clean up the main mast and start attaching the various P.E. items. Next up, where I have had a bit of a conundrum is the bowsprit. Unless I'm being a bit thick the length by which the bowsprit protrudes out of the bows is not given in the instructions and the drawings of the yards are not to scale, so I consulted Edgar J March and his plans of the Nisha. According to my scaling of the plans the bowsprit is 9.79m (32' 1.5") of which 6.27m (20' 7") or 98mm at 1/64 scale, is outboard, the remaining 55mm is inboard. I have tapered the dowel and squared it off at the in inside (as per. details from March), but when fitting the bowsprit - it partially covers the front hatch, which I'm not sure is right? Consulting @James H prototype build, James has the bowsprit further forward, so avoiding that. Suggestions? I would like to get this 'right', and hope I have not had a "whoops" moment! 😖😂
- 206 replies
-
- 6
-
-
- Vanguard Models
- Brixham trawler
- (and 2 more)
-
That's something to look forward to! 🎁 😁 Mine is in a couple of weeks time, but I need some workshop tools, rather than more models to build!
-
I’ll be watching this one, I love the Norfolk coast and alway make a point of visiting the lifeboat stations, ‘Lucy Lavers’ at Wells of course and the museums, a favourite being Rescue wooden boats at Stiffkey.
- 30 replies
-
- 2
-

-
-
- small
- clinker built
- (and 2 more)
-
They look to have come out very nicely Will, should really set off the hull and deck fittings well with the contrasting green highlights. 👍 These trawlers are very good looking models, looking forward to seeing the “Ranger” and “Saucy Jack” (think that’s their names), join vanguard’s range, I think are due out later this year?
-
Hi Will, looking forward to seeing the sails progress. Are you going for the same brown/red for all the sails, or are you going to mix them up a bit. Many of the old (obviously black and white) photographs of the the old trawlers hint at different shades for individual sails; clearly an effect of different ages and wear/repairs. Or you going for a uniform shade across all?
- 77 replies
-
- 1
-
-
- Erycina
- Vanguard Models
- (and 1 more)
-
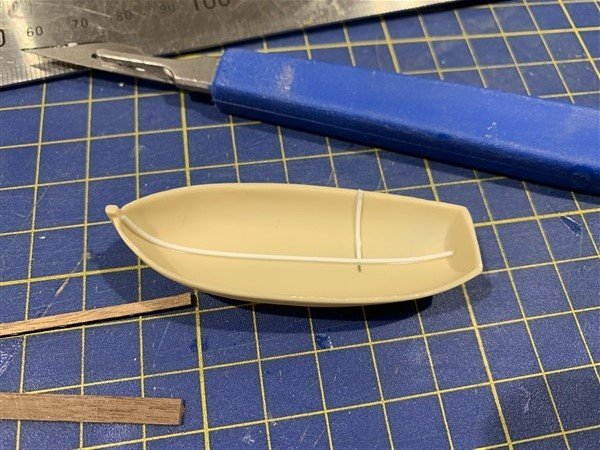
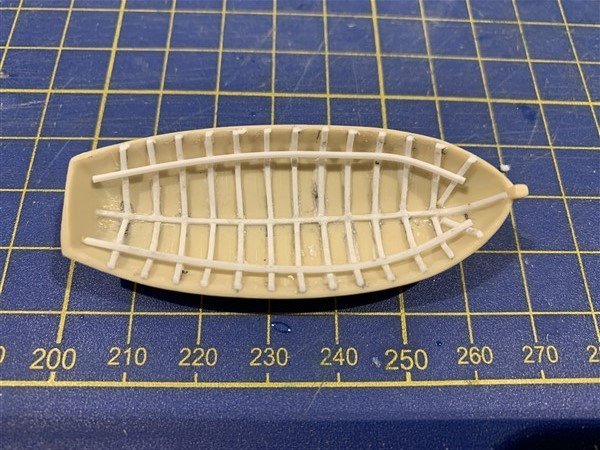
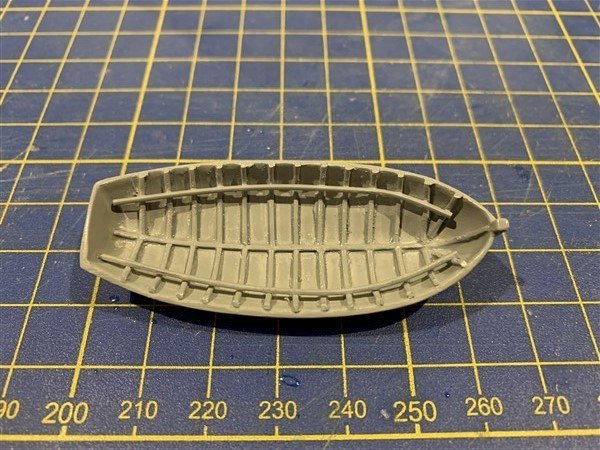
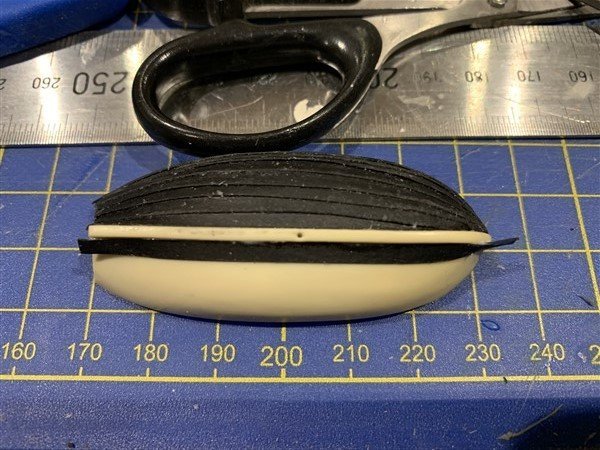
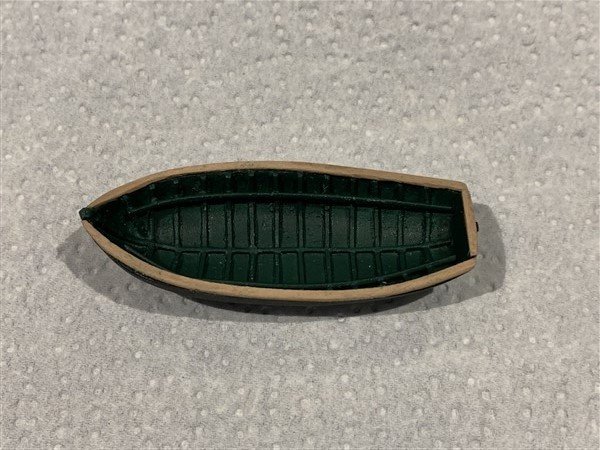
Update with progress pictures of the little boat I am adding, this is from Caldercraft; before I knew Chris at Vanguard was doing his own, so not as refined as his 3D printed ones, as resin the shell has no detail (and it is not quiet symmetrical!) - so added some of my own ribs with plastic strip. I also added a wood floor from left over pear strip from the second planking. The 'clinker' build was simulated with card, something I have seen @Beef Wellington do on his superb builds, so shamelessly copied him! 😁 seats and capping rail also from pear. I have added a "boat slide" for this on the deck of 'Nisha' and will fix at a later stage. Next update will be back on the 'Nisha' starting the masts.


- 206 replies
-
- 11
-
-

-
- Vanguard Models
- Brixham trawler
- (and 2 more)
-
Best wishes Dave, hope you recover quickly.
-
You and me both! I get lost in doing the bit I’m on and keen to do the next bit, so yes going too fast is a hard habit to kick, I think a symptom of our 100mph lives, we trying to cram so much into our spare time! Hopefully you have come across the “Modelling Techniques” resource at the top of MSW, which includes a “Planking” section, loads of good articles and downloads there. 👍
-
Excellent progress Darren, think you will be okay on the bulwarks, I couldn’t get them to line fully up on my ‘Nisha’ build either, a similar amount was visible at the bow as you have, but seem to have got away with it. Enjoy the planking, are you going to have a go at pre bending and shaping the planks as you go? (Look up Chuck’s planking technique using an iron and dampened planks) I had ago on my build and it helps.
-
Those are amazing, they look like the professional built Tamiya “Uber” kits that cost £100s 😲
-
Hi Will, Good work there 👍 and I'm glad you found time to get back to your build, as I am hanging on your 'coat-tails' watching how you do the masts and rigging, as I am not too far behind you now. Though like you I might get slowed up for other reasons this next few weeks, as the Admiral has decided "we"( i.e. me) need to decorate my daughter's bedroom! 🙄 (Note to self put the mast hoops on before completing the mast build) I like your "helping/third" hand, might need to invest in one of those. Are you putting sails on your model? I am hoping to, toying with the idea of trying modelspan/silkspan ones as there are some great builds on MSW with those and thinking if I can't put sails on a little trawler, I might never put sails on a model... (Fall back position is of course the ones supplied by Chris 😆!)
