


Trond
-
Posts
165 -
Joined
-
Last visited
Content Type
Profiles
Forums
Gallery
Events
Posts posted by Trond
-
-
Next is railing, cabinet and rudder. As normal I have to use the book, make some sketches with new measurement. It is a tidius work, but also learning.
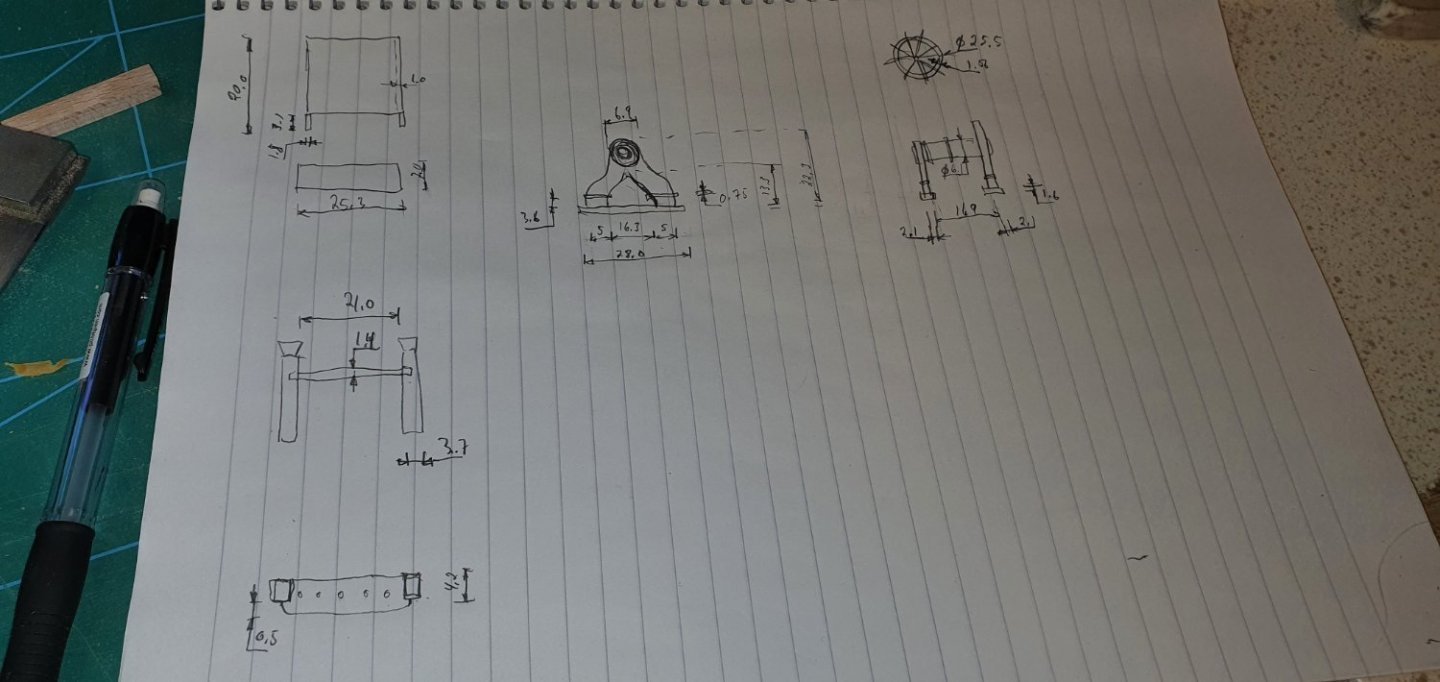
Found the rudder in the box, but wrong size and center fitting. Origninal size is 25.5mm and the one supplied is 15mm. So I either have to buy it from somewhere or make it my self.

So instead I made the senter railing close to the rudder.

I need to do some shoping for parts and wood, since it is either missing or wrong from the kit.
- Keith Black, GrandpaPhil, AJohnson and 1 other
-
 4
4
-
On 4/16/2022 at 12:52 AM, allanyed said:
For future, if you wish, I can PM you or anyone interested in the below plans for the 23 foot launch in high res PDF at whatever scale you want. It is based on RMG plans and info based on contemporary sources.
Allan
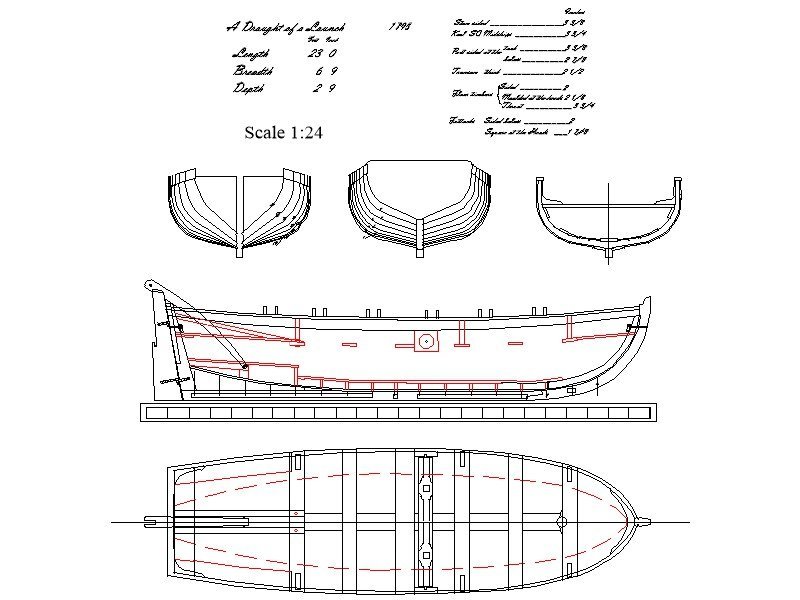
Is this the correct boat that would be on Bounty. If so I would appreciate if you could send over for 1:50 scale drawings and in mm if you had that.
Trond
-
I'll be checking clock maker shops for those tools you mentioned Snug. This I need to get before my next squre hole challange, since the anchor winch is in place and I don't risk damage the ship to get squre holes.
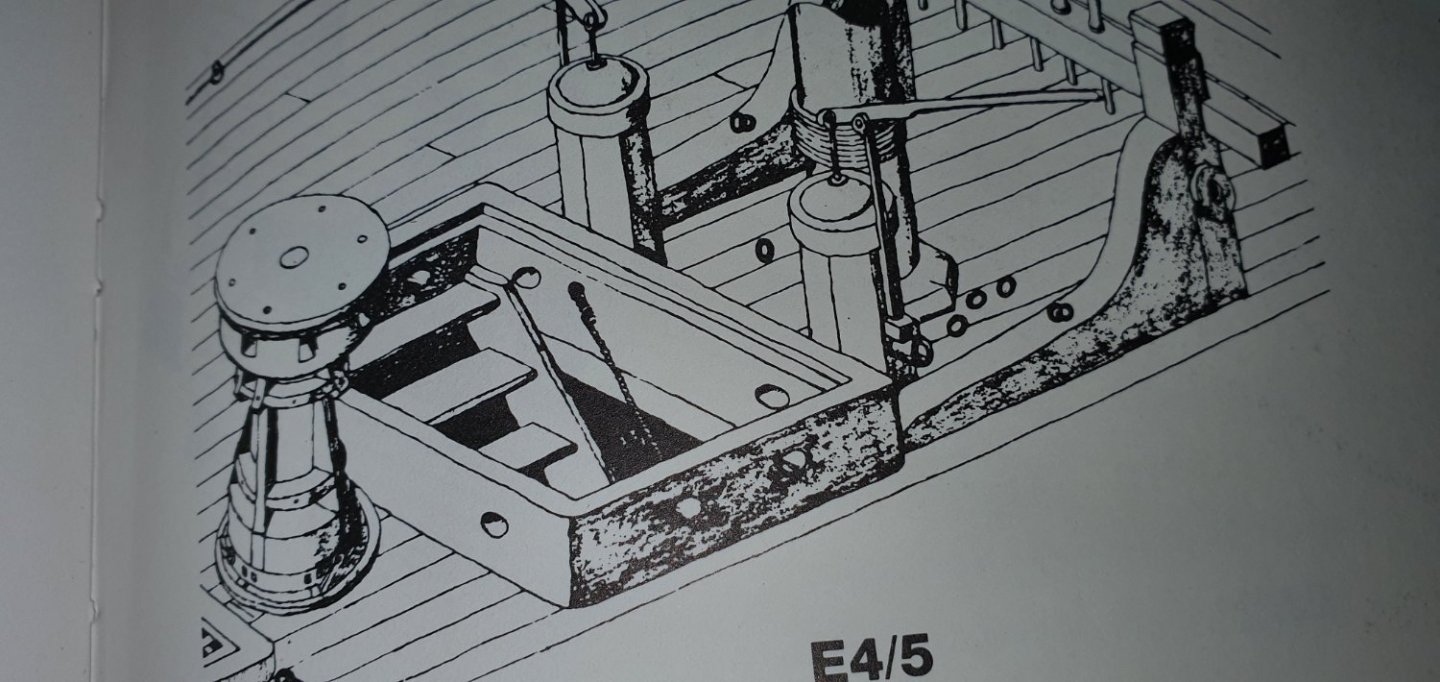
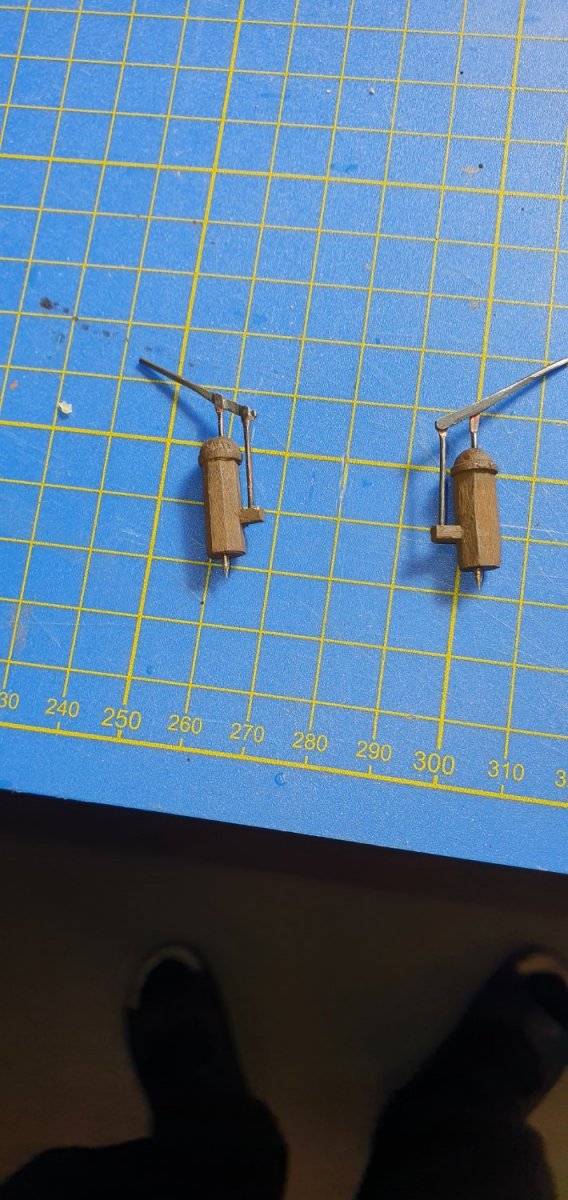
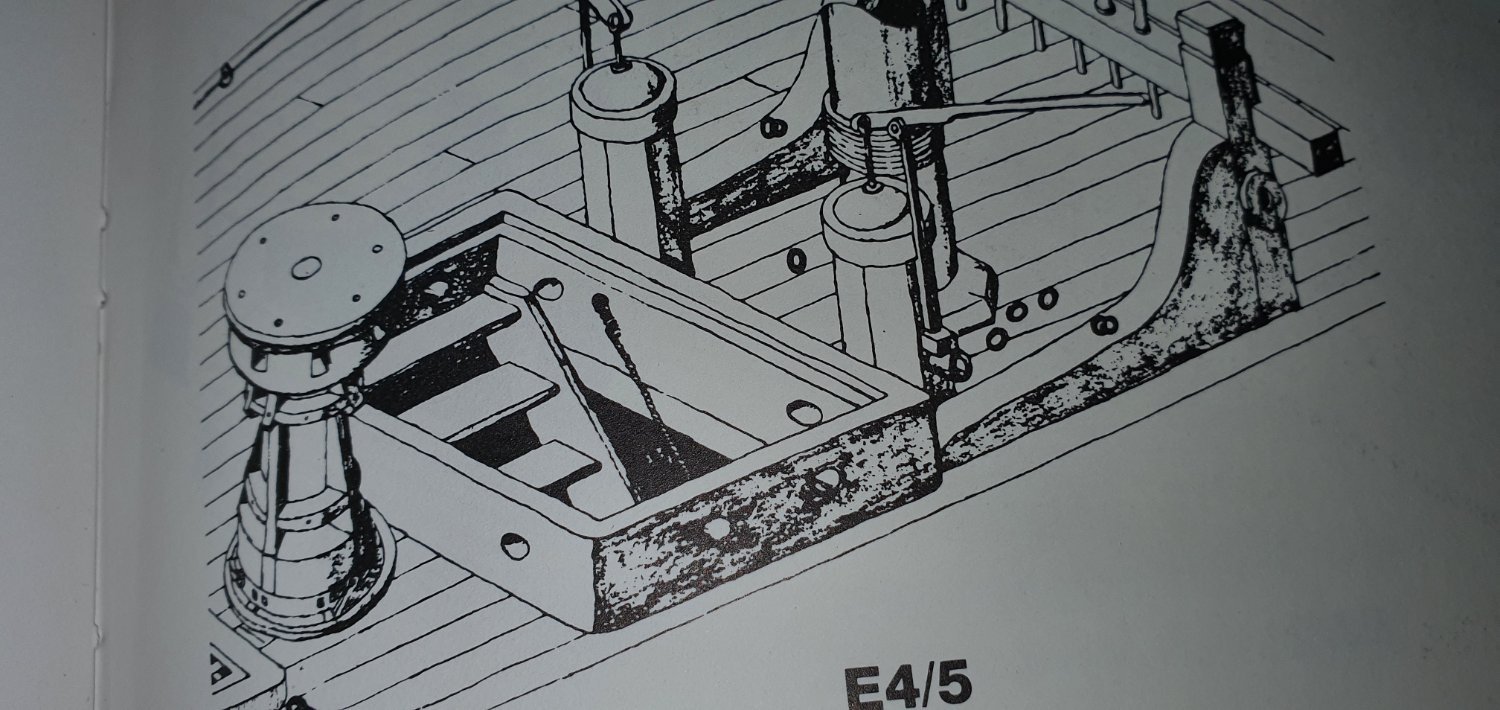
Well, in the mean time I've been working on the pumps, a lot of work. Started by making a lever with flexible joint, but I damaged one part and lost it on the floor. Couldn't find it so I had to make new ones, but this time I solder.
In the the "heat of battle" I set the lever on the wrong side, which I saw when it was gluied on.

But I can live with it. The work it self I'm satesfied with, only on the wrong side 😌
So here is the final outcome.

- DaveBaxt, Ian_Grant, chris watton and 5 others
-
8
-
11 minutes ago, Snug Harbor Johnny said:
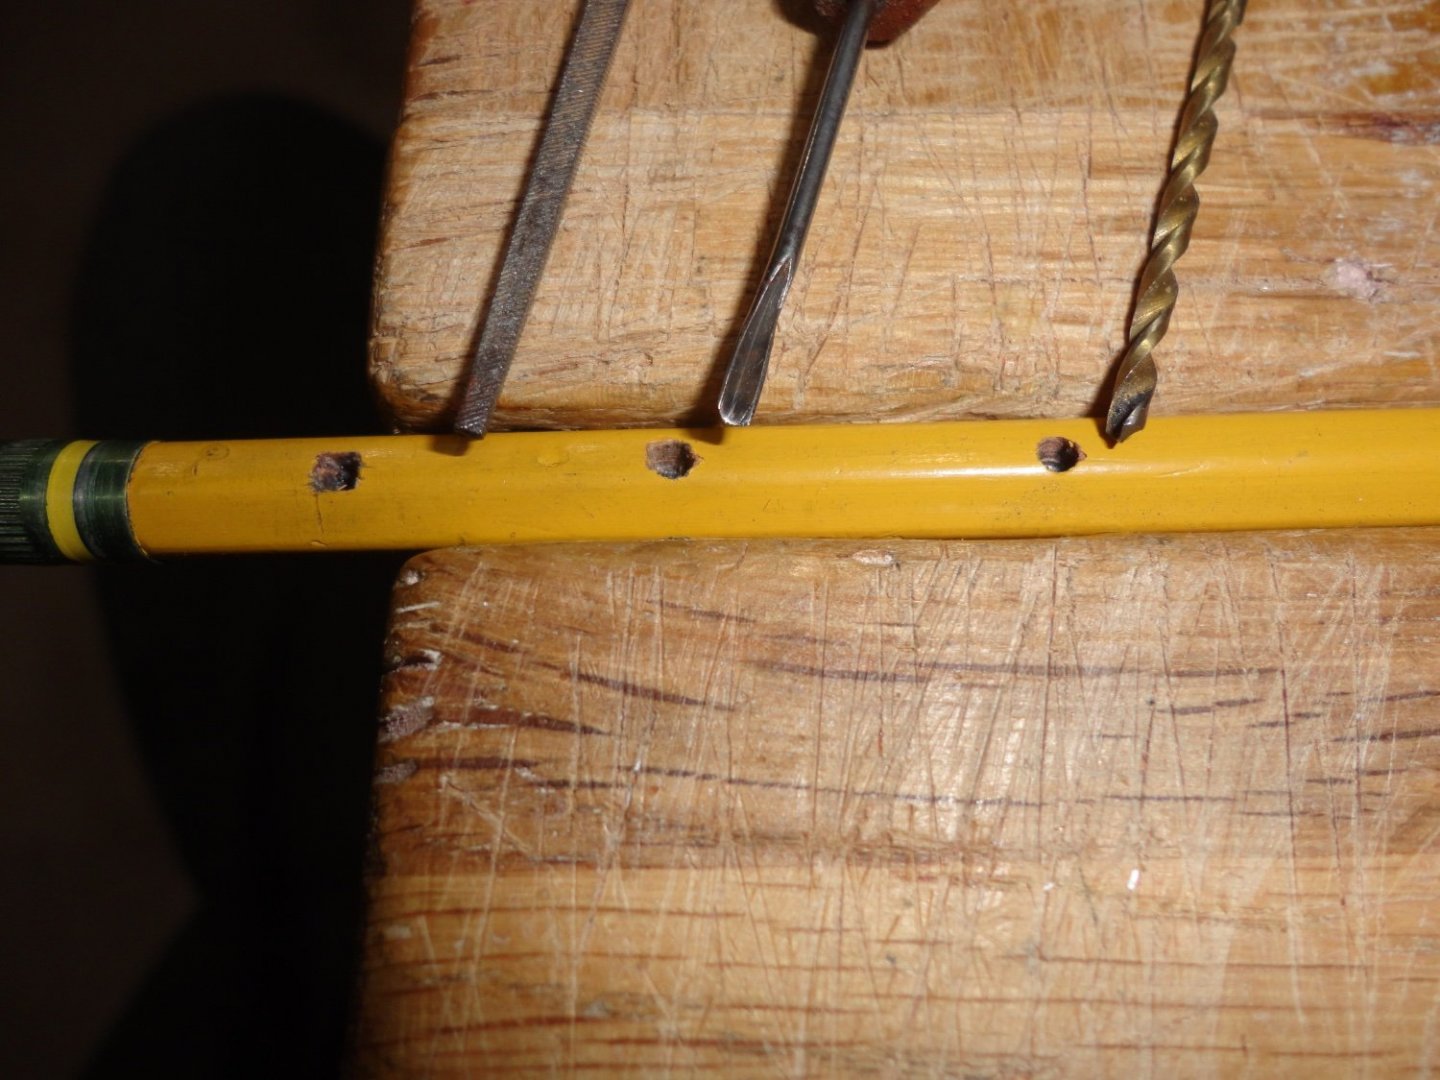
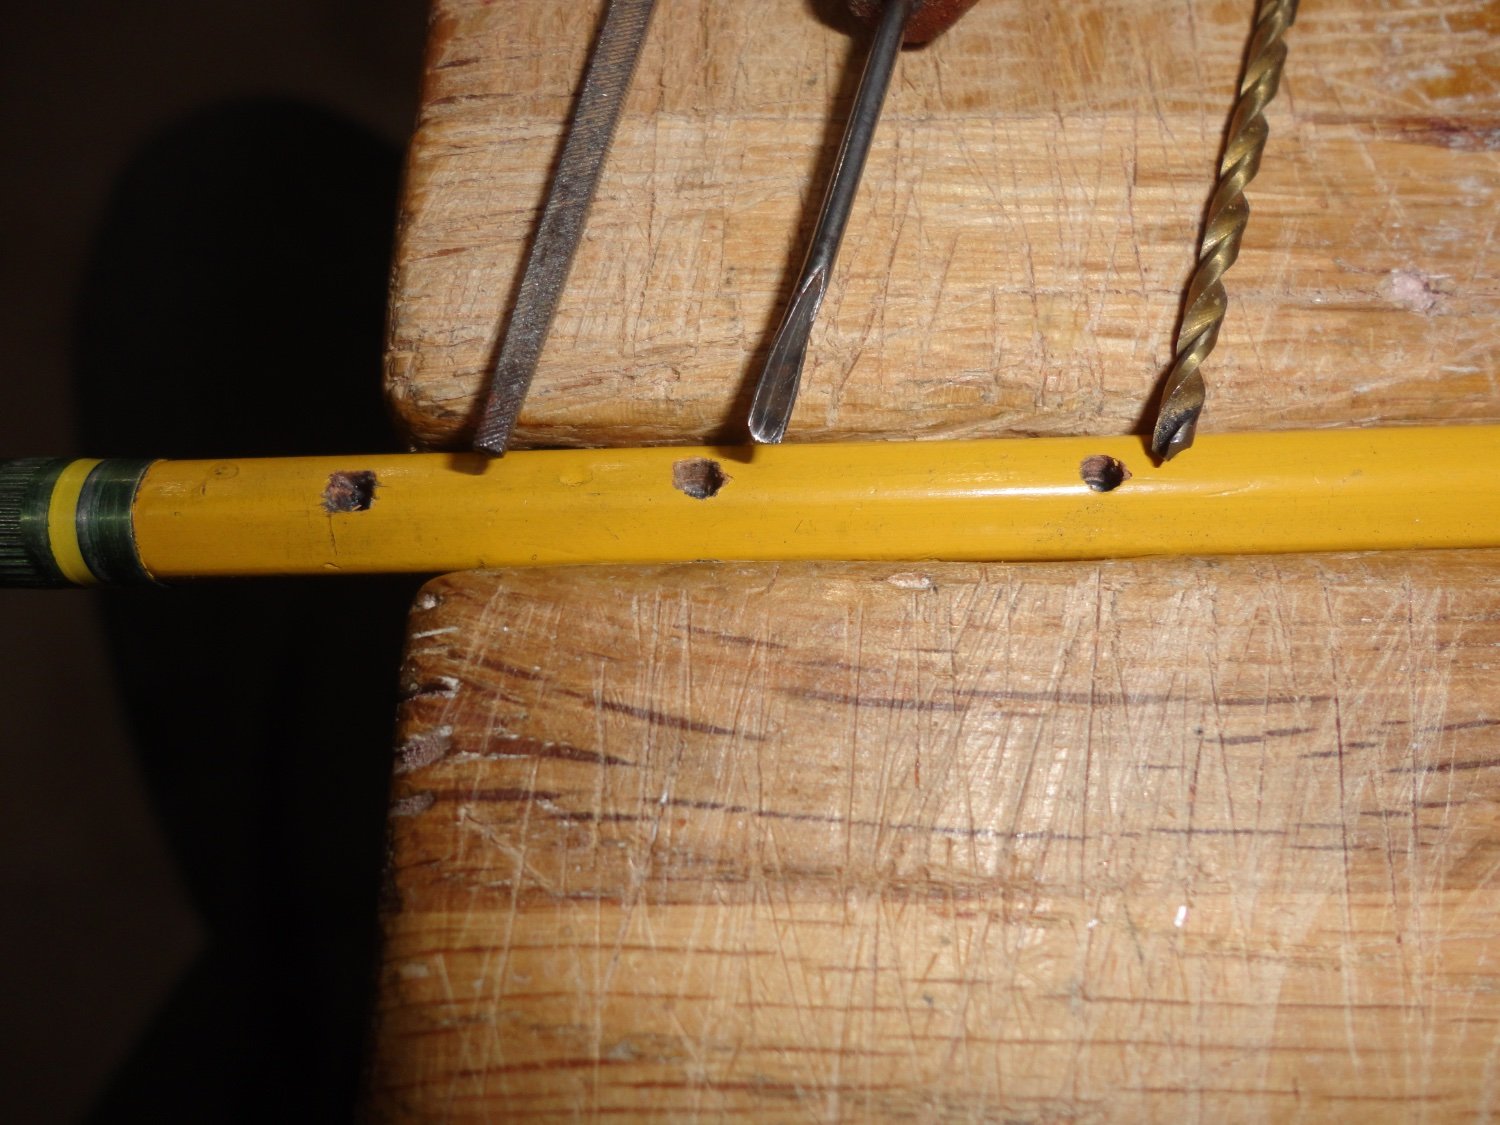
Hi Trond, I'm no photographer but I've attempted to show a test-of-concept. First, don't worry about the mortising tool mentioned - the smallest i think they come is 1/2" square and they are used in furniture making. It was the idea of slicing out a chip from the 'corners' that can make a round hole square. I took a pencil so one can get the idea of relative scale, and drilled three holes with whatever small drill I chanced to come upon (later measured as .085). I did not drill very deep since I soon hit pencil 'lead' (graphite). Obviously, once would not have this problem drilling into a solid wood dowel. The right-hand hole in the pencil was drilled with the drill (shown next to the round hole). The middle hole has just one corner 'nicked' with the mini 'duck carving' tool to square it.
The tool does not show the right angle tool as well as I'd like - but the hand-me-down camera is limited in close-ups (as is my skill -or lack of it - in photography). The hole on the left had a chip taken out of all four corners with the 'veiner' (right angle cutter), then I picked at the chips in the hole a little and was able to blow then out with my breath (a blast of 'dust-off' compressed air through the provided extension tube would work just fine for chip removal).
There is a tapered square file that I used to 'dress' the corners a little. Now there was a slight enlargement so that verniers showed the square hole to be .100 on each side. Now I've shown proof of concept. If I wanted a smaller square hole, I could always grind down the sides of the veining tool to make it smaller, and there are really TINY files available in sets having a variety of profiles (round, square, triangular) - but one only need used a square file to dress the hole. 'Hope this helps, and as they say 'Once picture is worth a thousand words. Johnny
Thanks Snug, very informative. I guess my next task is to get those very small tools. I have a set where squere is 1.4x1.4 to 2.7x2.7mm.
So I will use some time on the web to see if I can get smaller.
I guess that a large porttion of building in small scale / small size is to fine tool to fit.
-
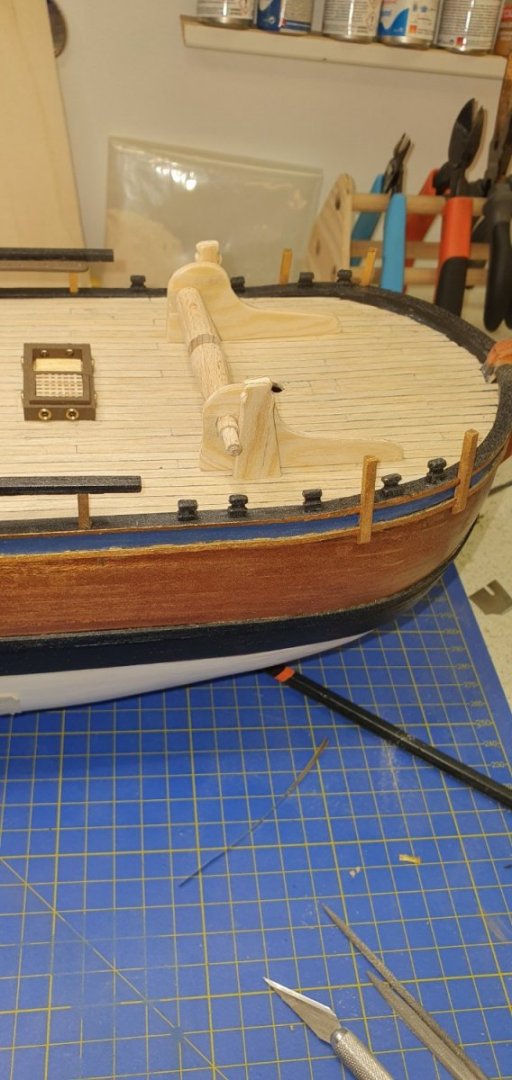
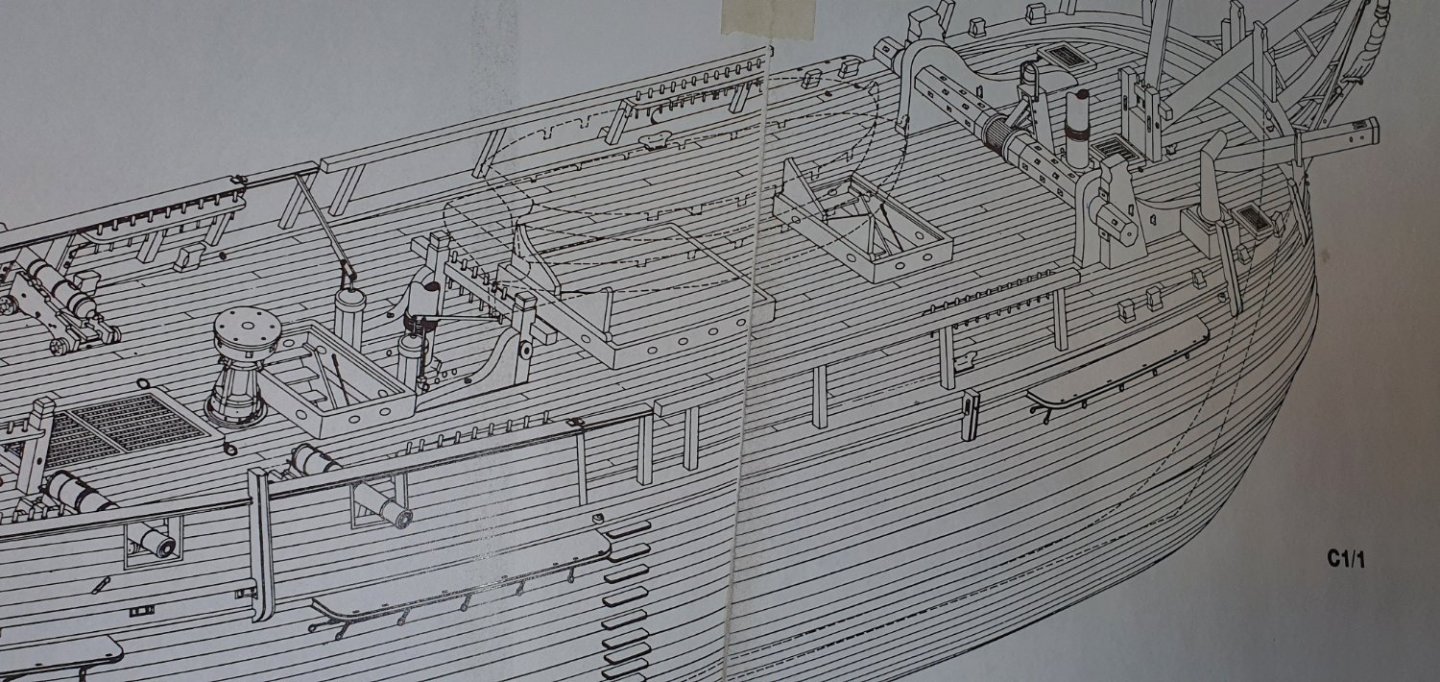
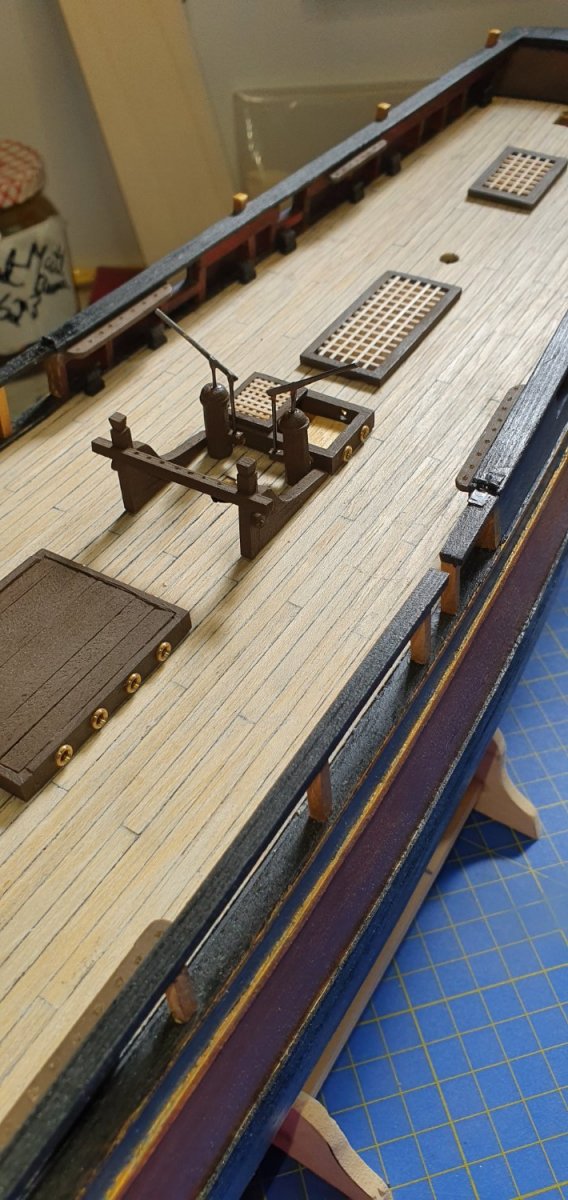
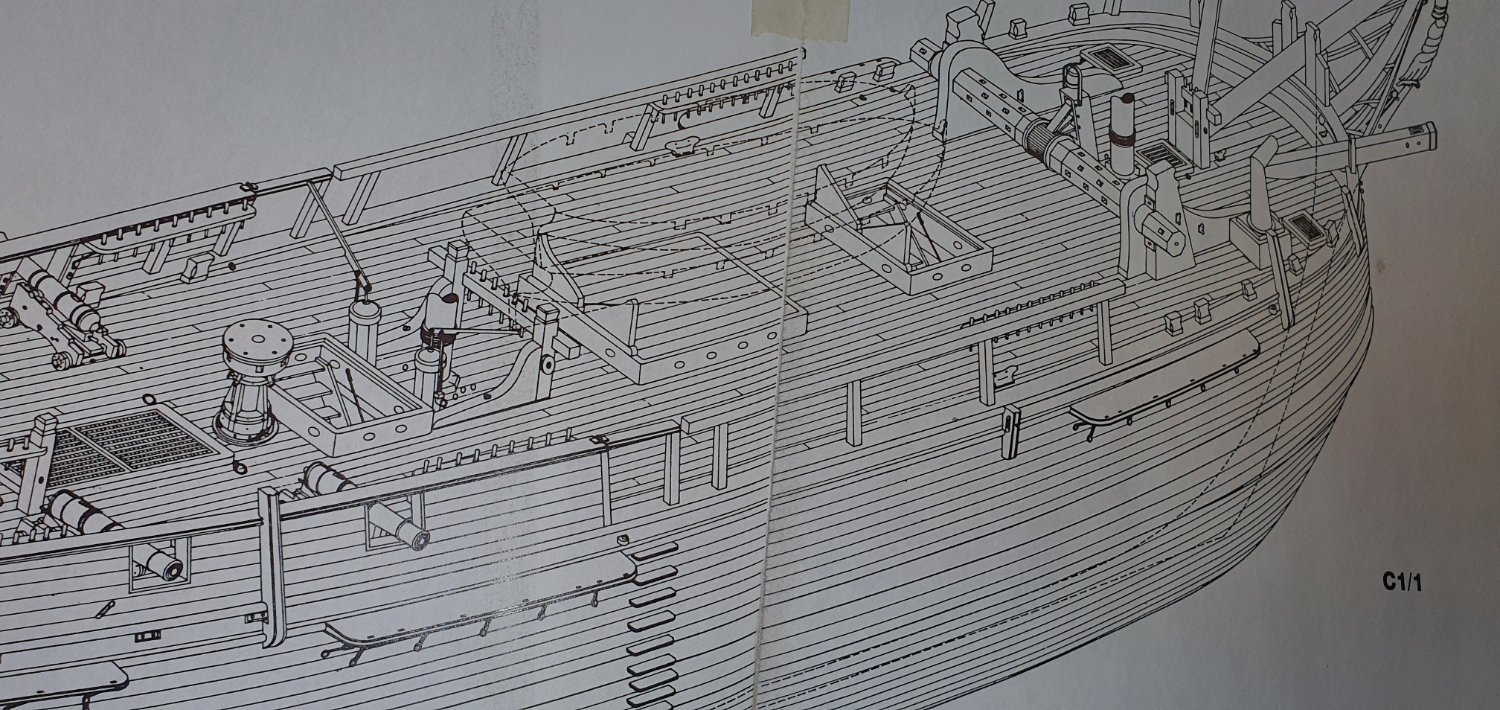
Anchor winch and fore brace bitts (according to Bounty book). .
I need to make some beams on each side of the anchor winch.
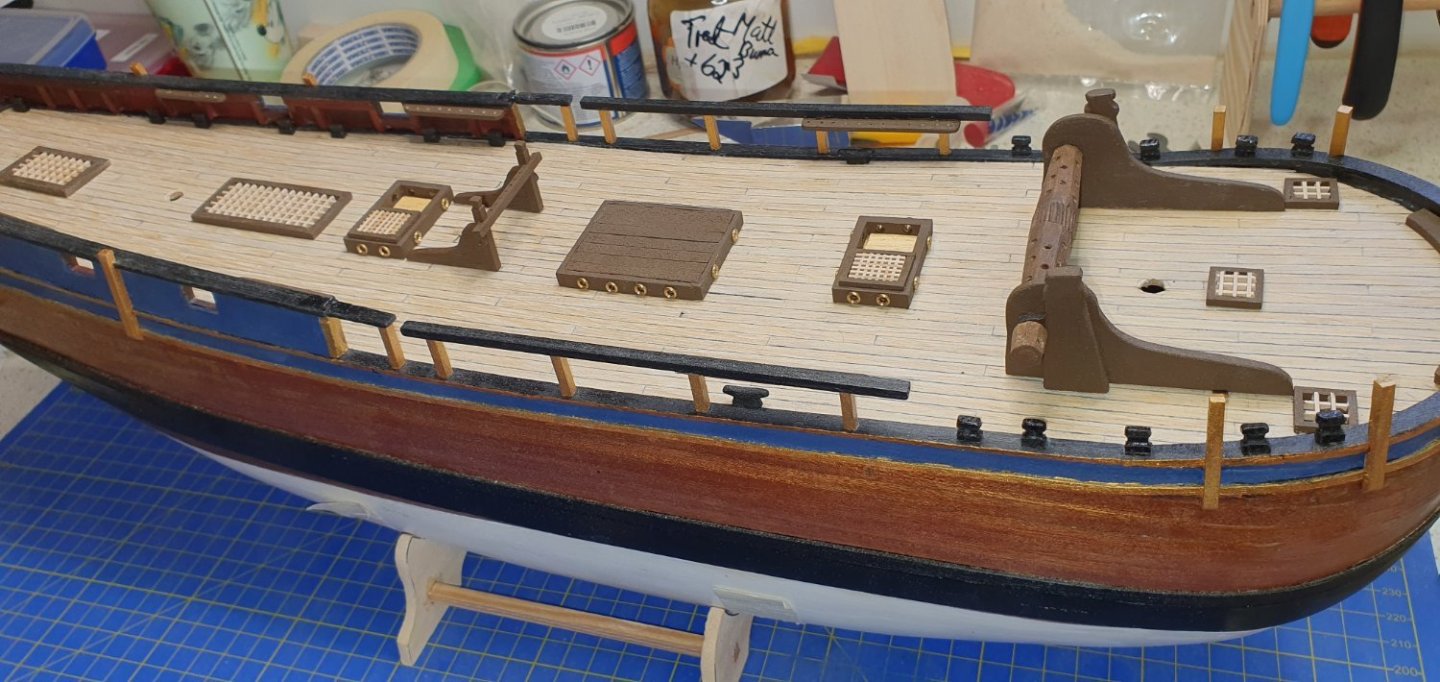
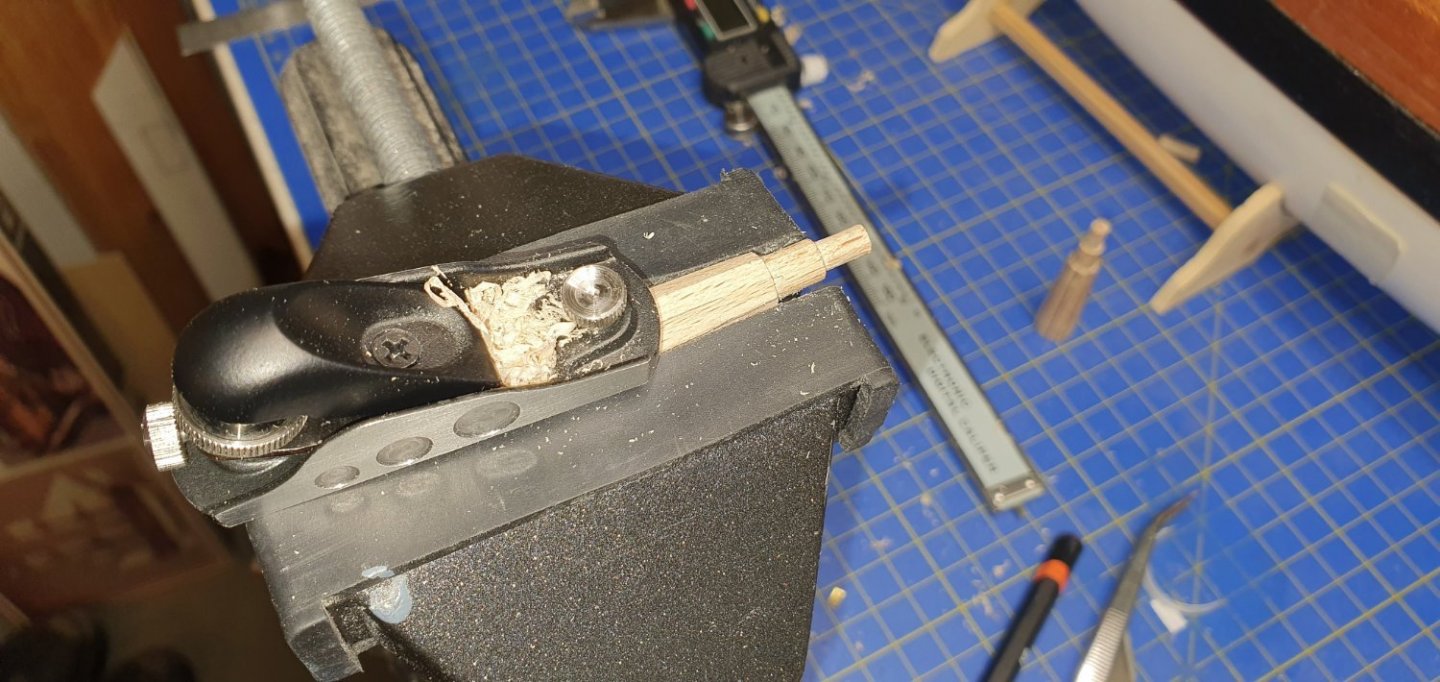
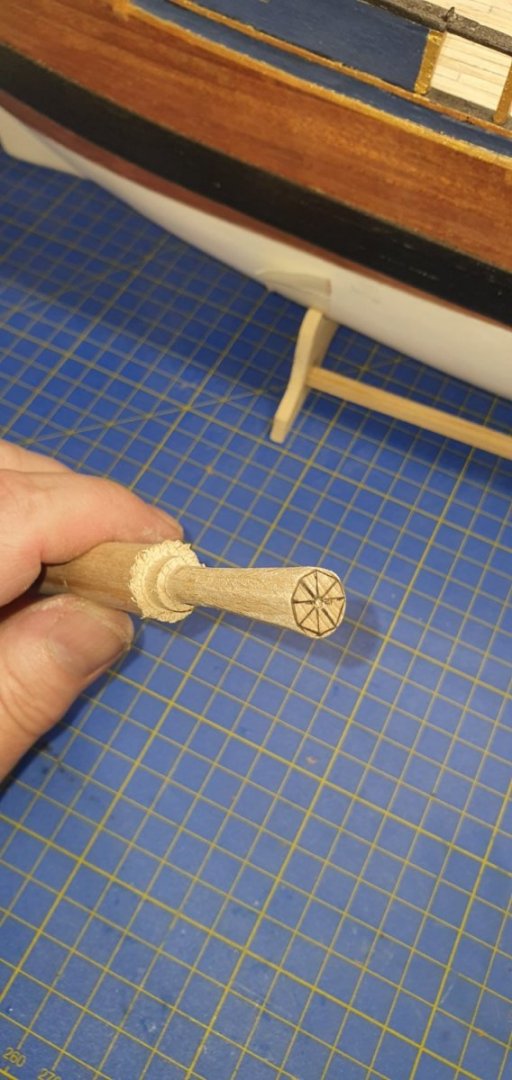
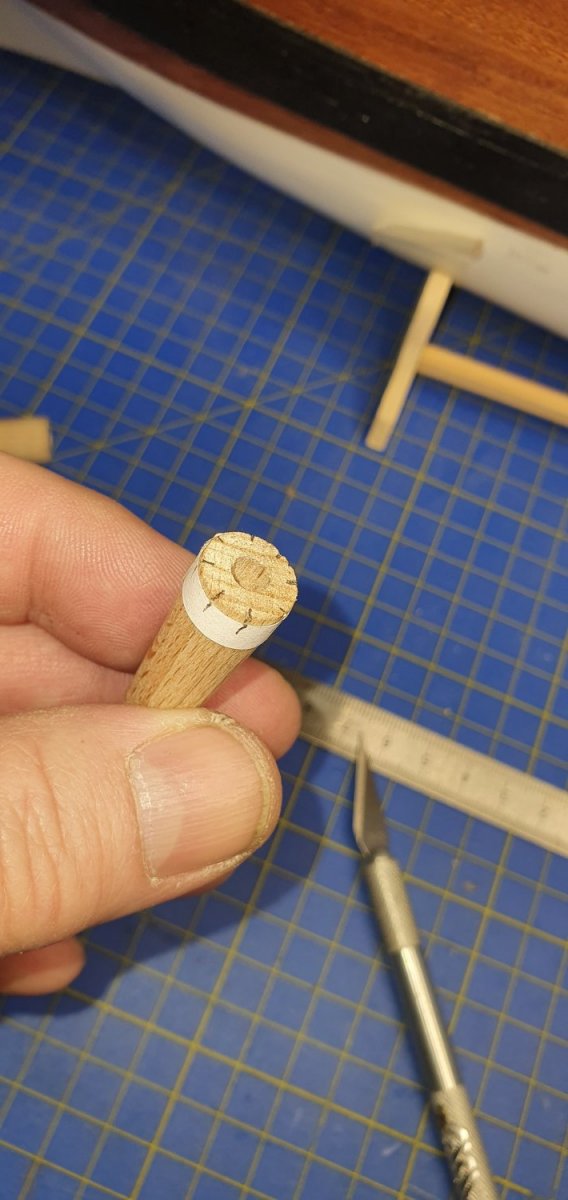
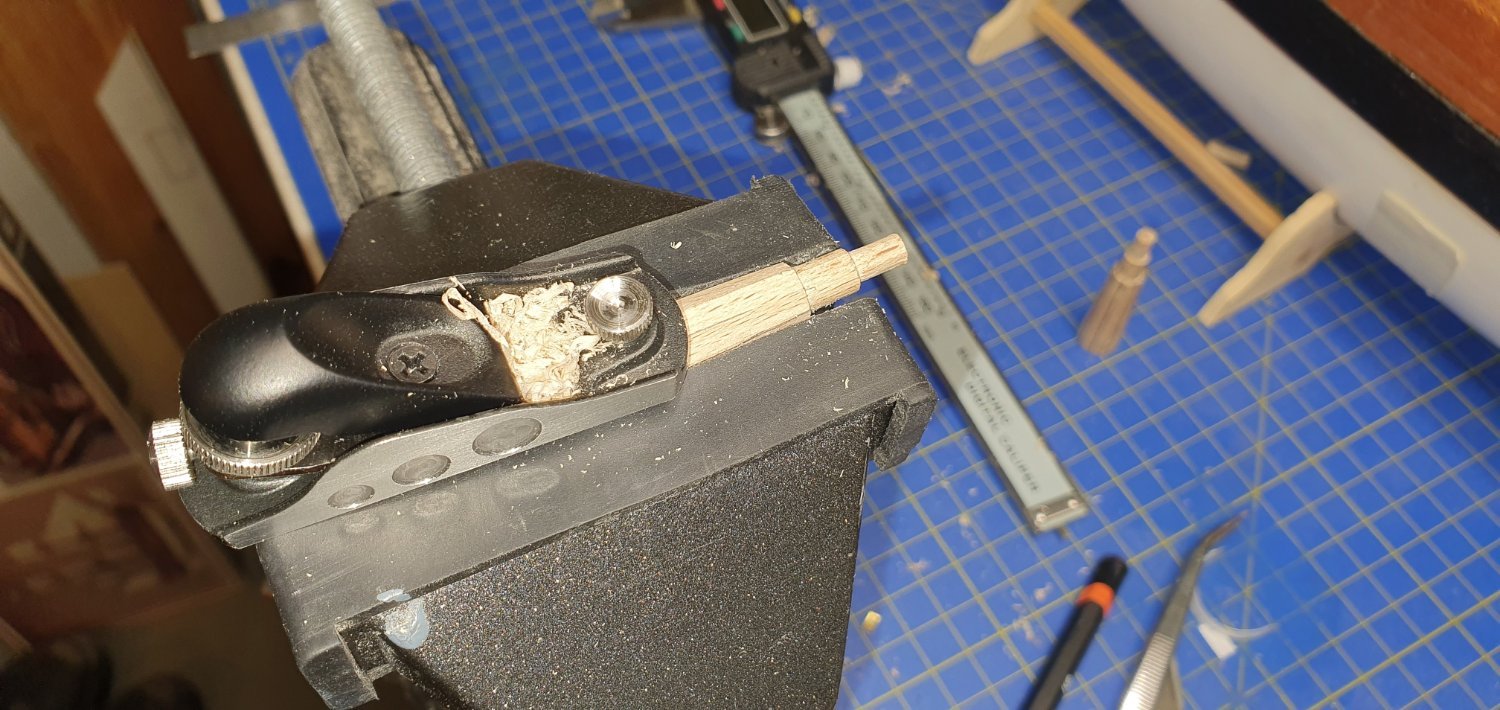
Started makeing pumps. Got to use my new plane again, it works great for makeing a round stock to 8 sided stock.

- AJohnson, GrandpaPhil, chris watton and 2 others
-
5
-
On 4/14/2022 at 11:08 PM, Snug Harbor Johnny said:
Trond, I think I have an approach to squaring your holes that may work. Mulling over the problem today, I chanced to recall using a mortising drill for furniture making. Yes, it is a way to 'drill' a square hole - in that there is a long square housing with side openings that has a wood auger inside. When used with a drill press on a piece of wood to get a mortice (for a tenon, of course) the auger cuts a round hole and the sharp, square corners of the holder follow and cut square corners. The chips from the round hole come up the flutes of the auger to come out the open sides of the square holder, and the chips sliced out of the corners just come up with everything else.
Now there is no such tool small enough for model applications, BUT there are miniature carvers made for bird and duck wood carving. I have such a set I used for old time gun smithing (got them from Woodcraft). One of the is a tiny square 'v' carver. The tools come both straight and with bent ends. The 'v' tool will cut a square corner into the round hole already drilled. One can judge 'by eye' where to make the other three chip cuts to square the other corners, but I suppose they could be marked with a pencil dot for a guide. The tiny chips that come out of the corners can either be blown out or 'winkled' out with a pin (or other implement) - I might try a dental tool.
Snug, do you have a picture or a drawing. I'm having a litle difficult to see it, but it sounds intersesting for later projects.
-
I have tried small squere nail and filed the nail with sharp endges, but didn't work. I didn't want to push to hard and split the wood.
And the jewlers file I have is a little to big. Need to get some very tiny files.
Now I need to make the iron fitting on each side for the axel
Question is should i paint the hole anchor handling brown?

- Gregory, AJohnson and Keith Black
-
3
-
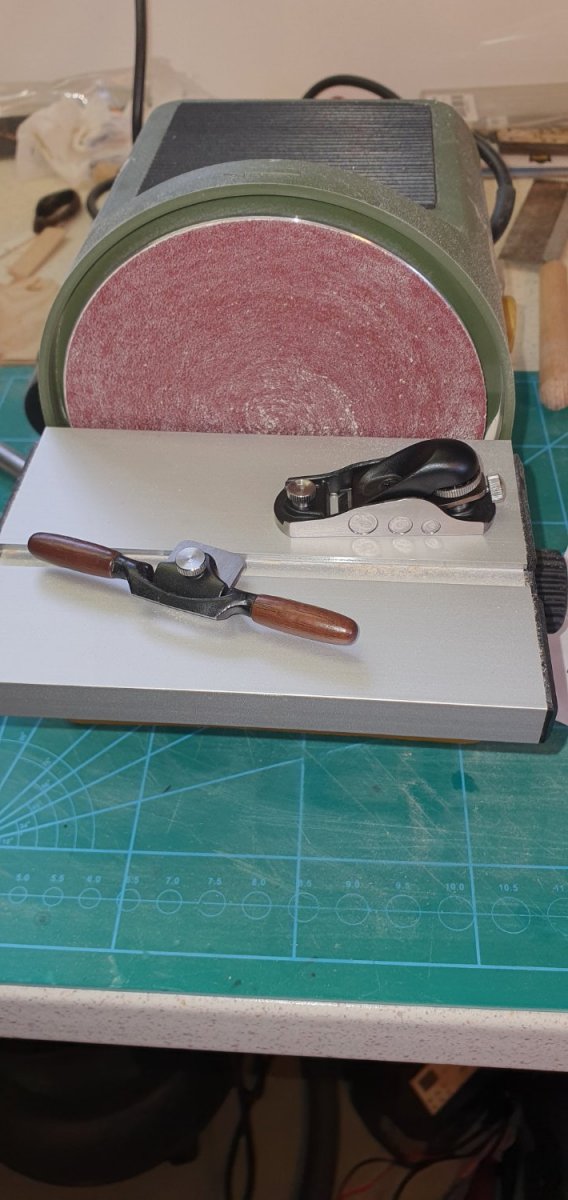
Agree Allan, I need more tools 😁, I love quality tools.
So today I brough my wife and we did some shoping, including dropping into my local specailis shop for wood work and bought some tool.
I'm really thankful to have a wife that understands hobbies require tools.
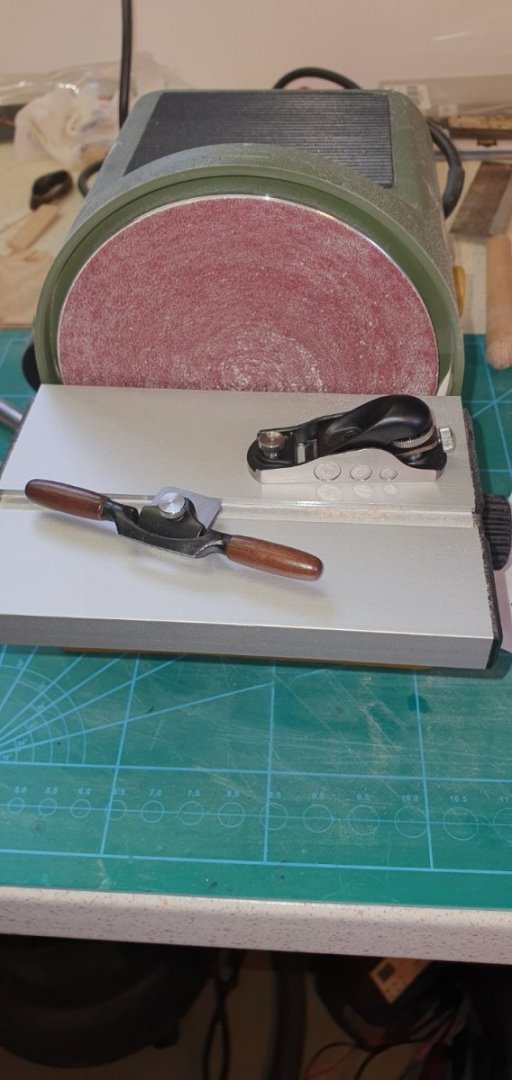
Veritas miniature tool serie.
I'we always said that good tools are at least half the job.
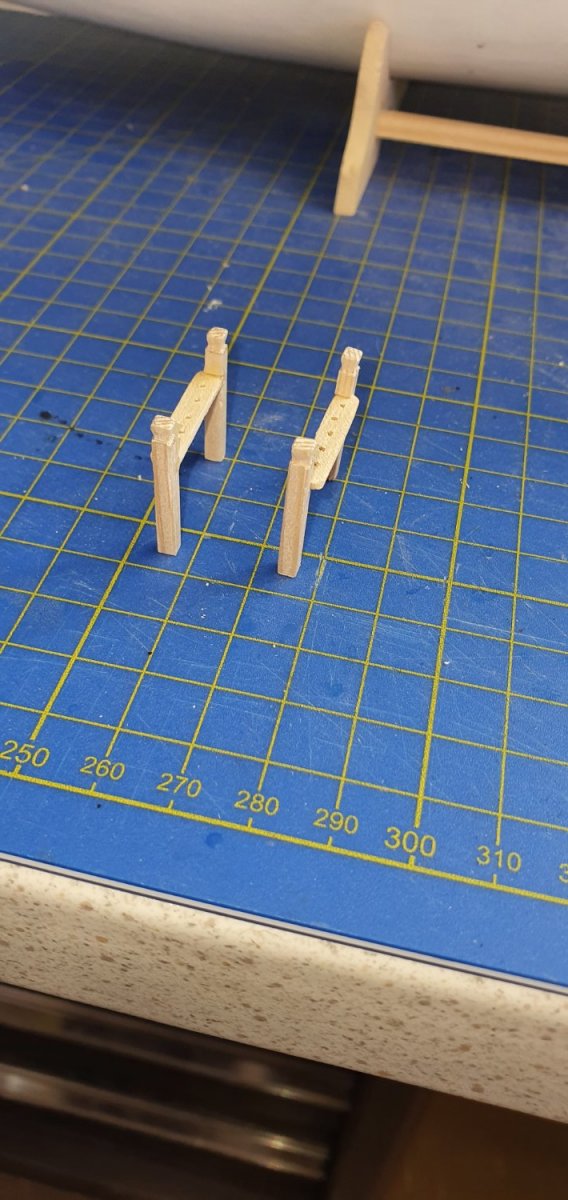
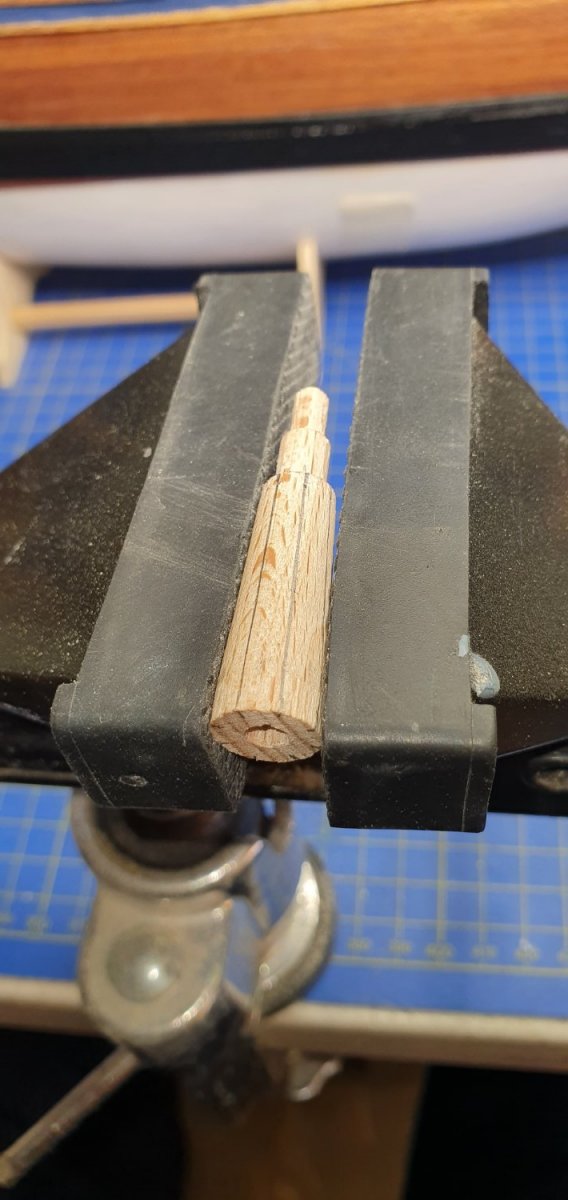
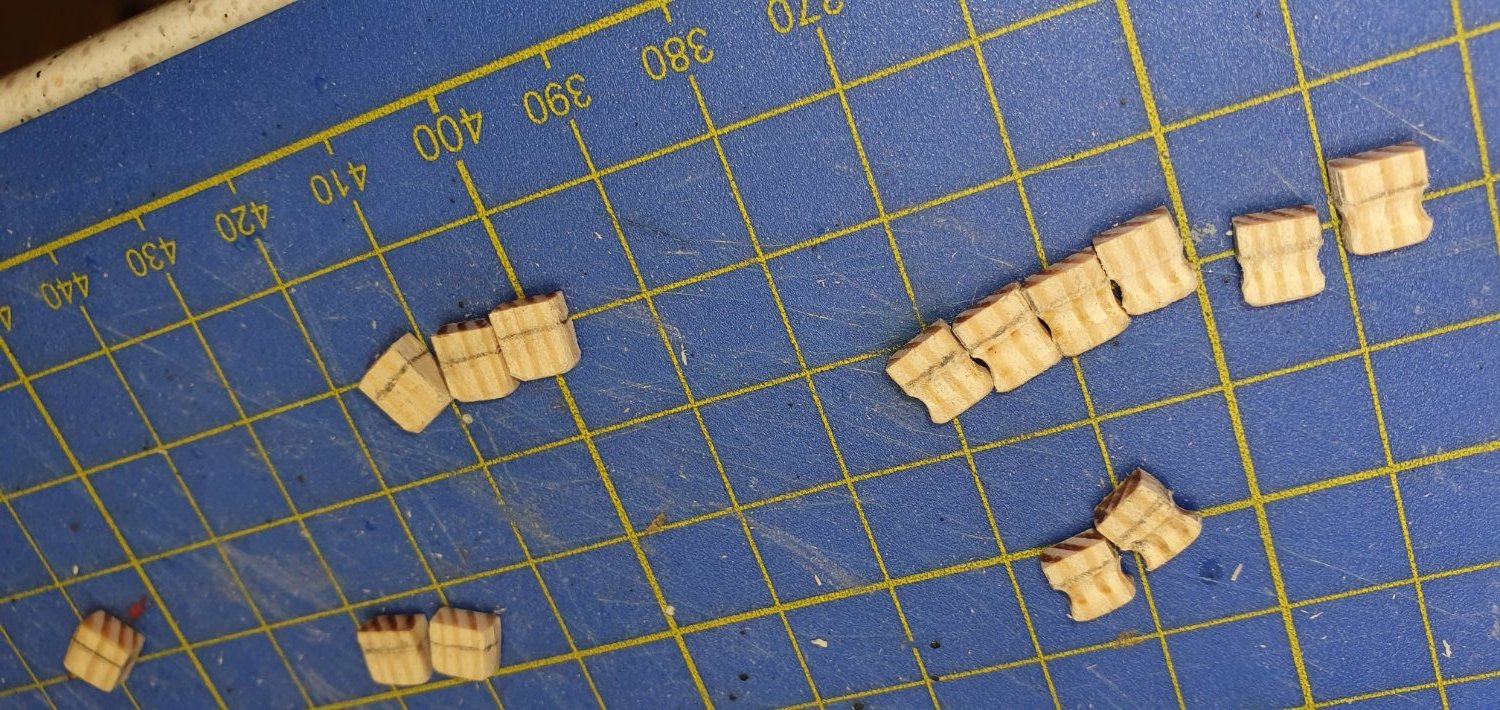
So I started making some strips with correct with of the 8 sides, one for top and one for bottom.

Than the lines.

And now my new tools, worked realy nice. Just needed some adjusting.
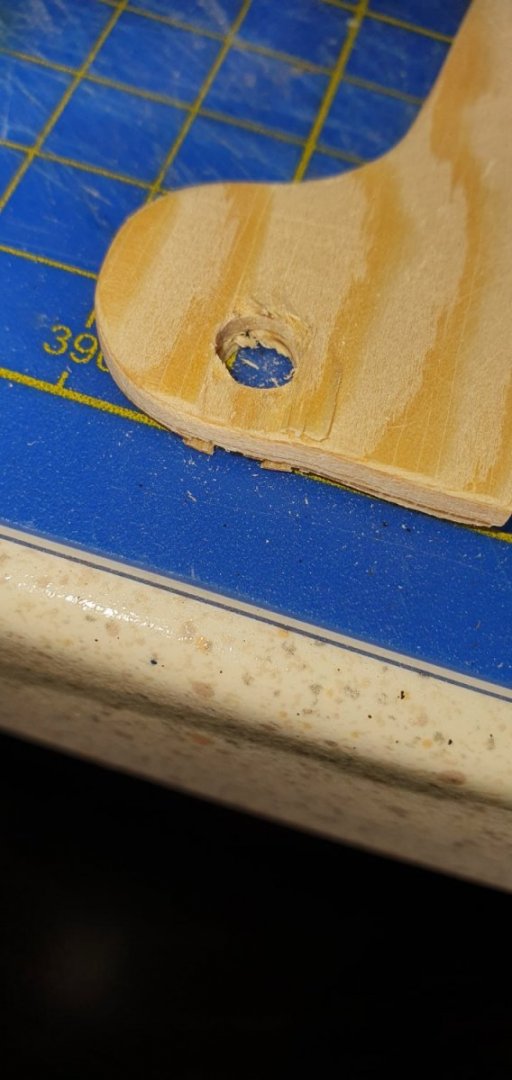
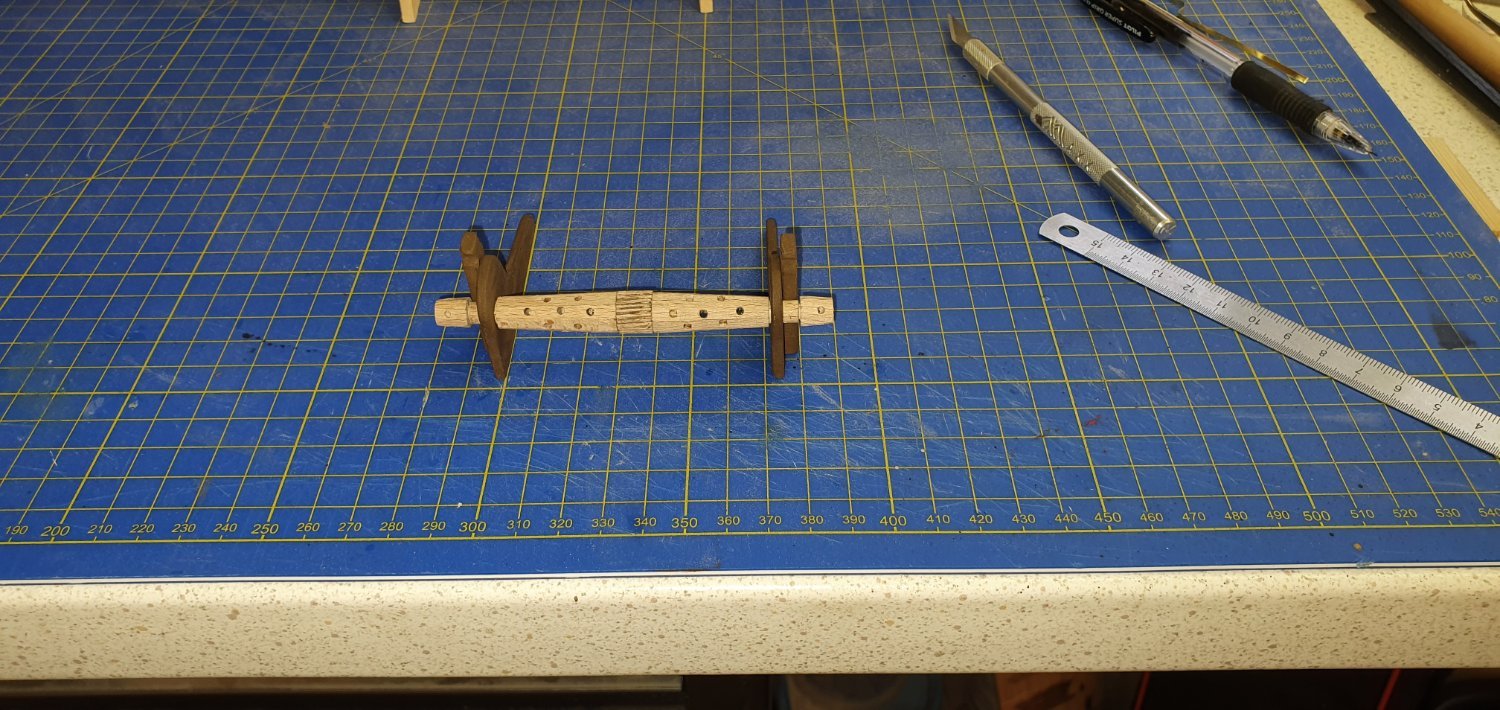
Her is the partially finished part with holes. I know the holes should be square, but I have no way of make so small square holes.

Now I need to make the center piece and the ends, but looking good so far
-
8 hours ago, allanyed said:
Start with square stock the taper to each end them mark out edges of each face of the octagon then plane or chisel or otherwise remove the material until you have 8 faces that are concentric. I like to use a machined vee block for this kind of thing. If you do not have one you can make one of wood or find a local machine shop and ask them to machine one. The local shop owners years back did it in scrap aluminum bar they had laying around for donuts and coffee.
Allan
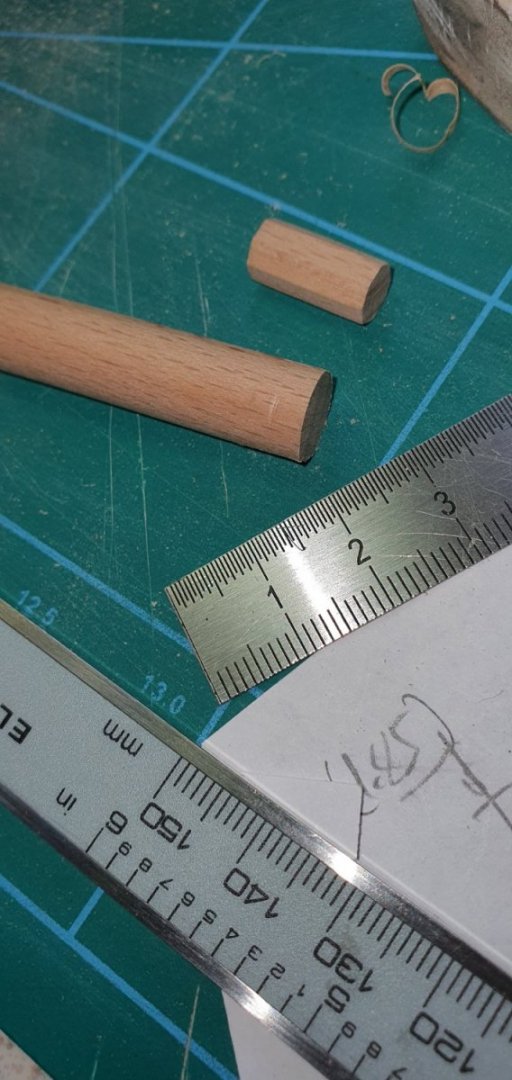
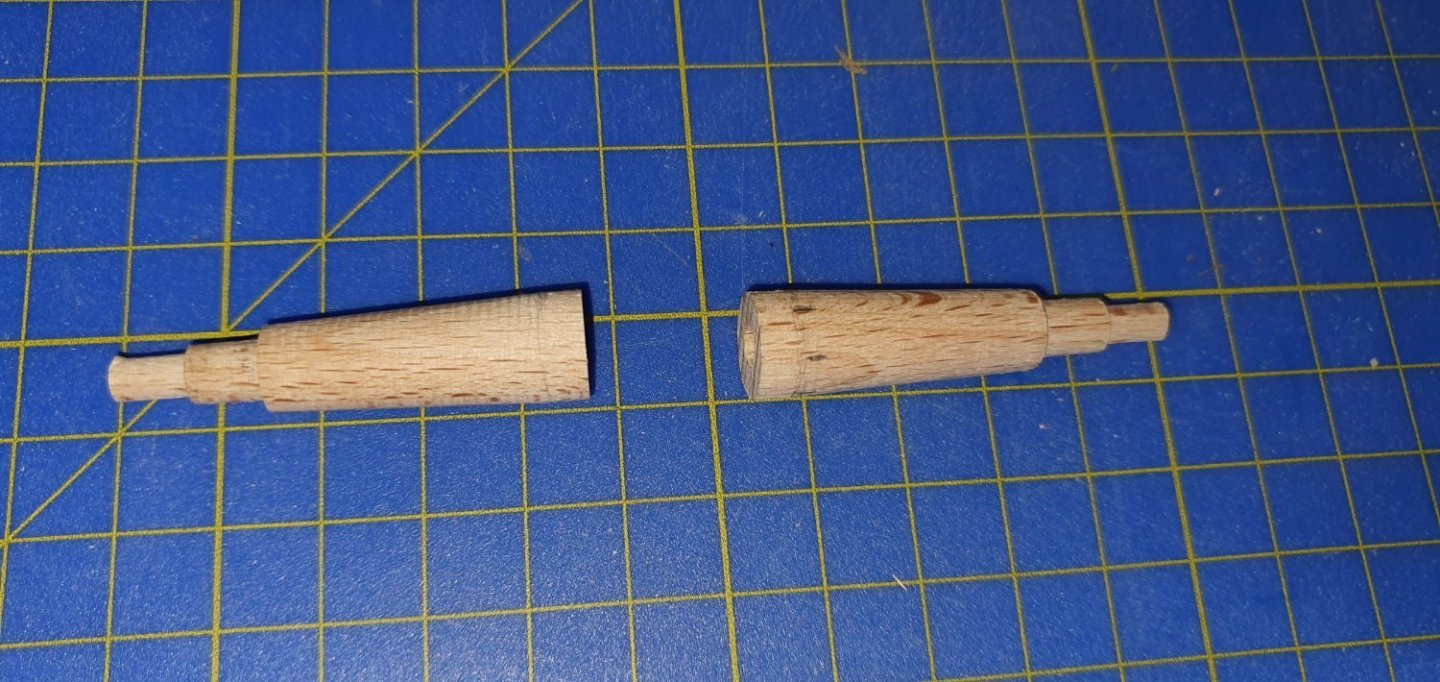
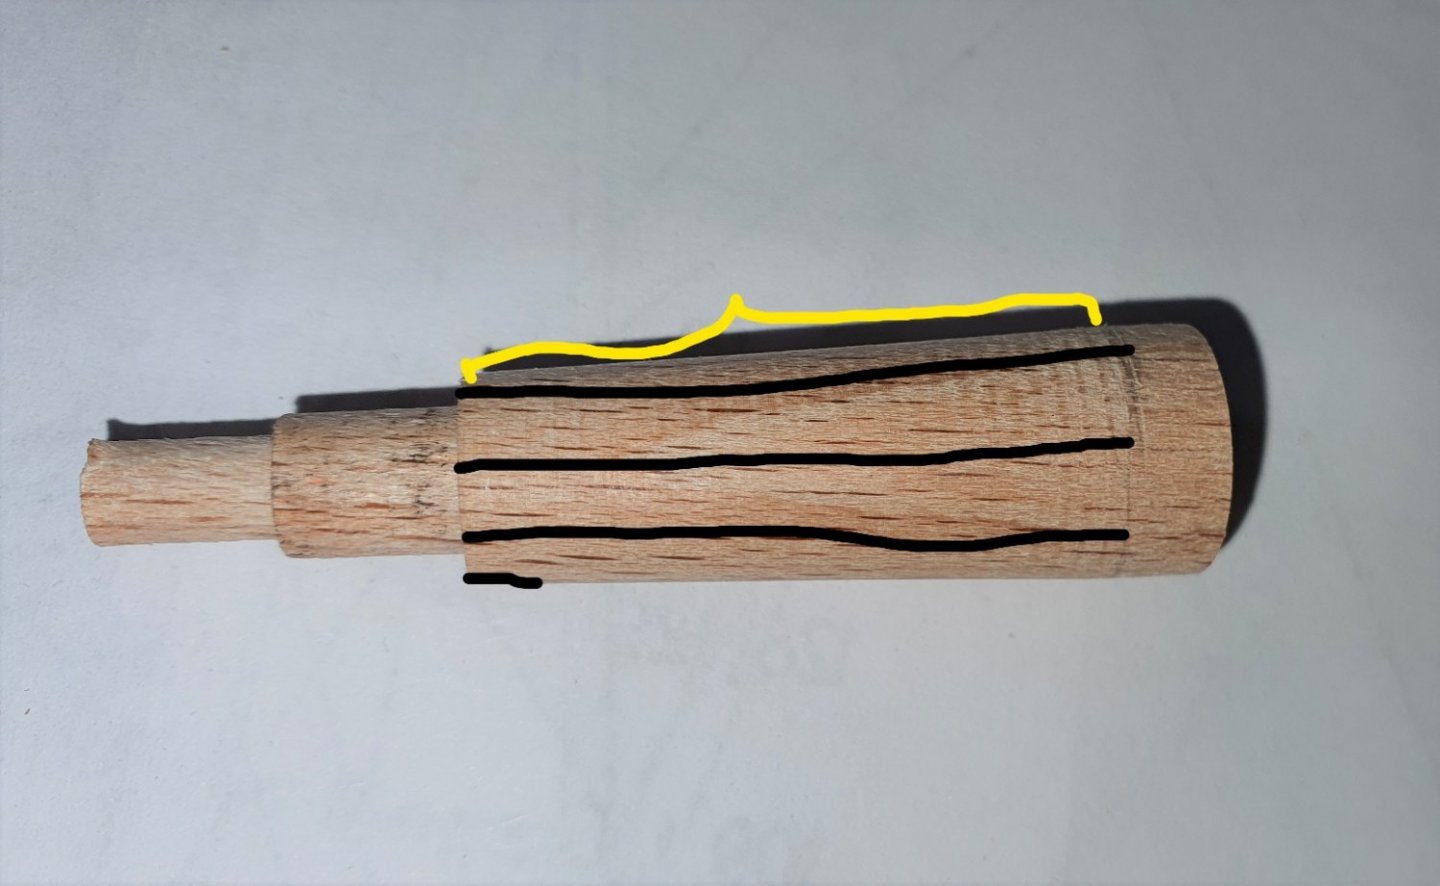
Sorry Allan, I didn't explain it good enough.
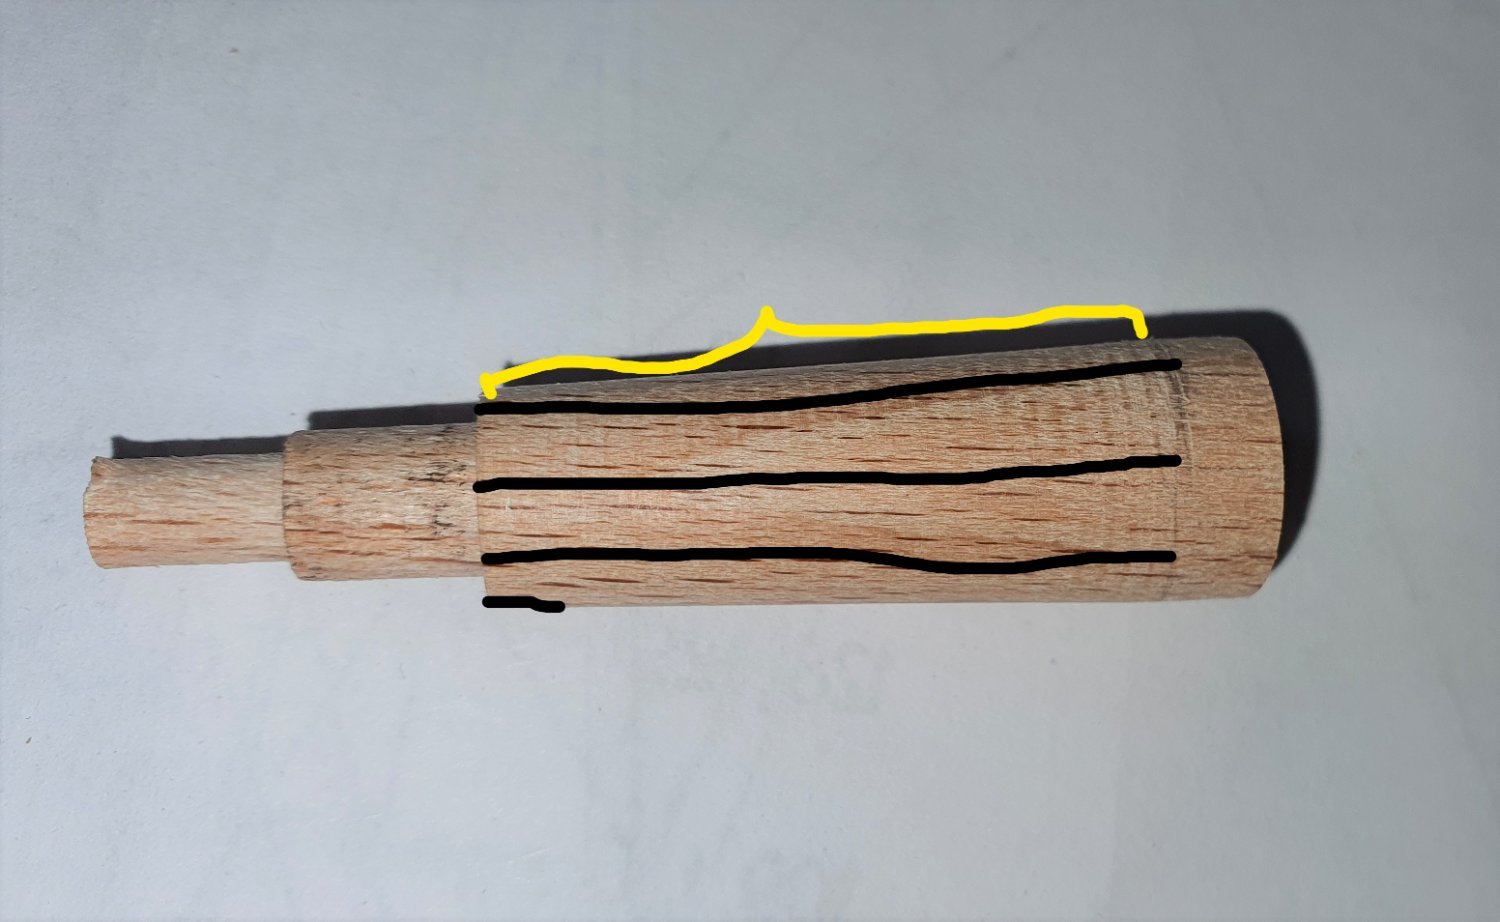
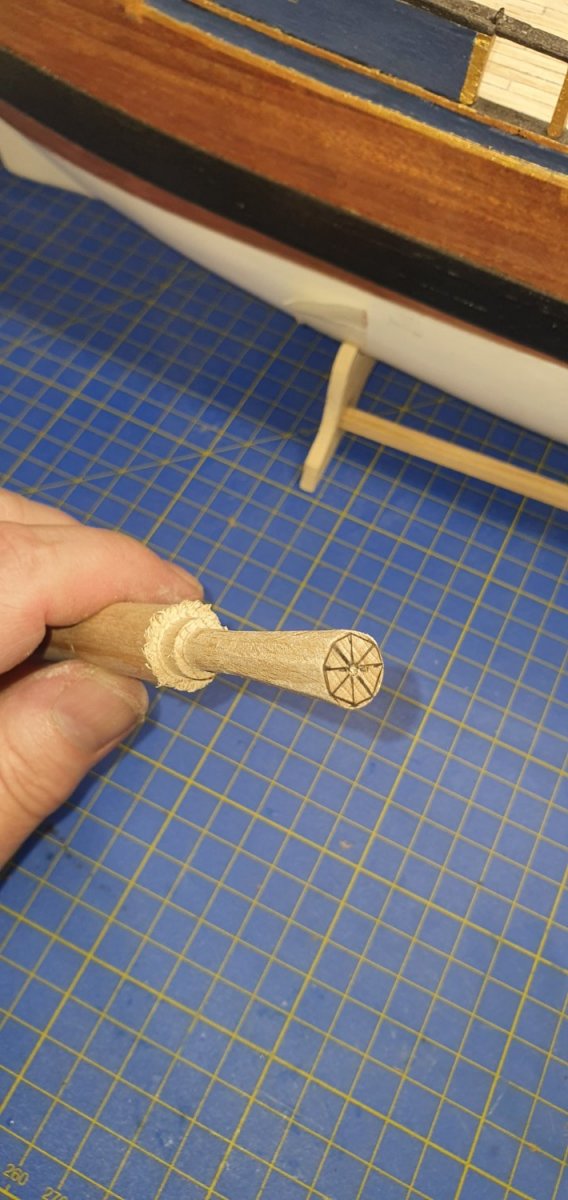
I've already made 2 of these in the lathe to get the correct diameter, angel and lenght. My challange is to make the section in yellow from round to octagon.
- Keith Black, DaveBaxt and AJohnson
-
3
-
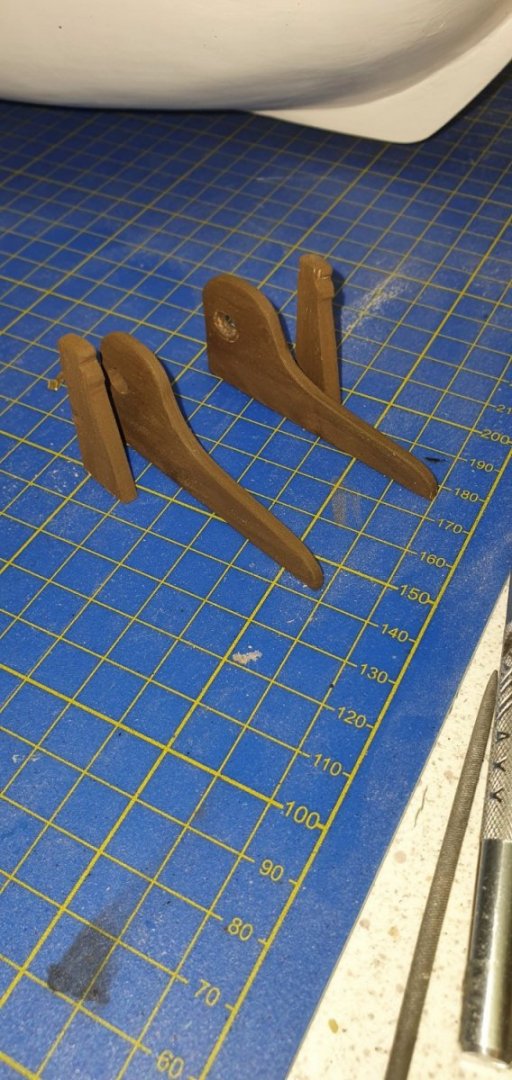
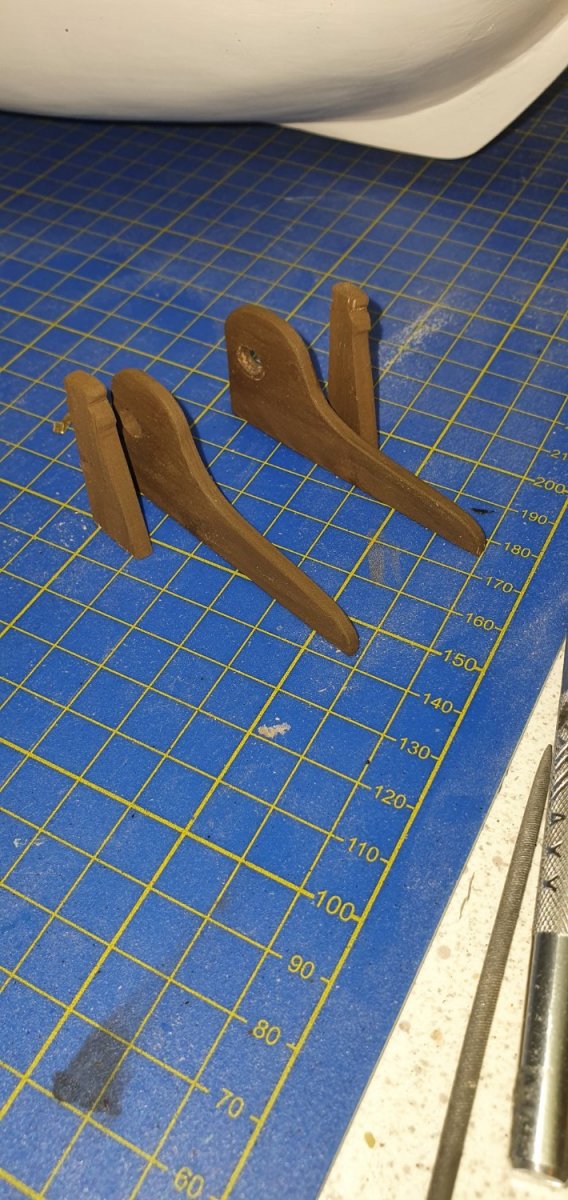
If it is the one than something else pops up. I was trilling to my new side support and forgot what I drilled in, playwood. So i got some damage that I had to repare.

Then I remebered last knights mistake with angel and made some new ones.
Not finished, but had to try it out.
and some paint
Does anyone have a good idea how to make 8 sided instead of round.
I doing some measurment, but not very good. Need to think on how to make does 8 sides...
-
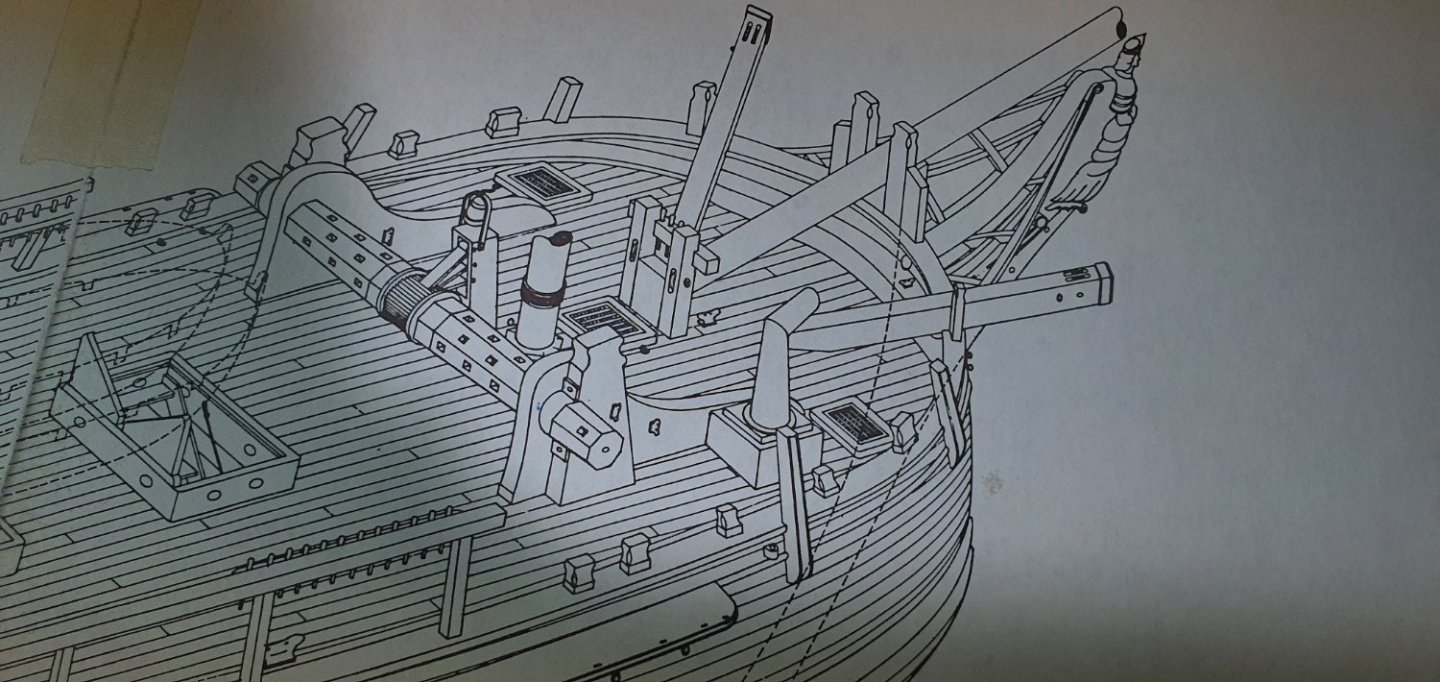
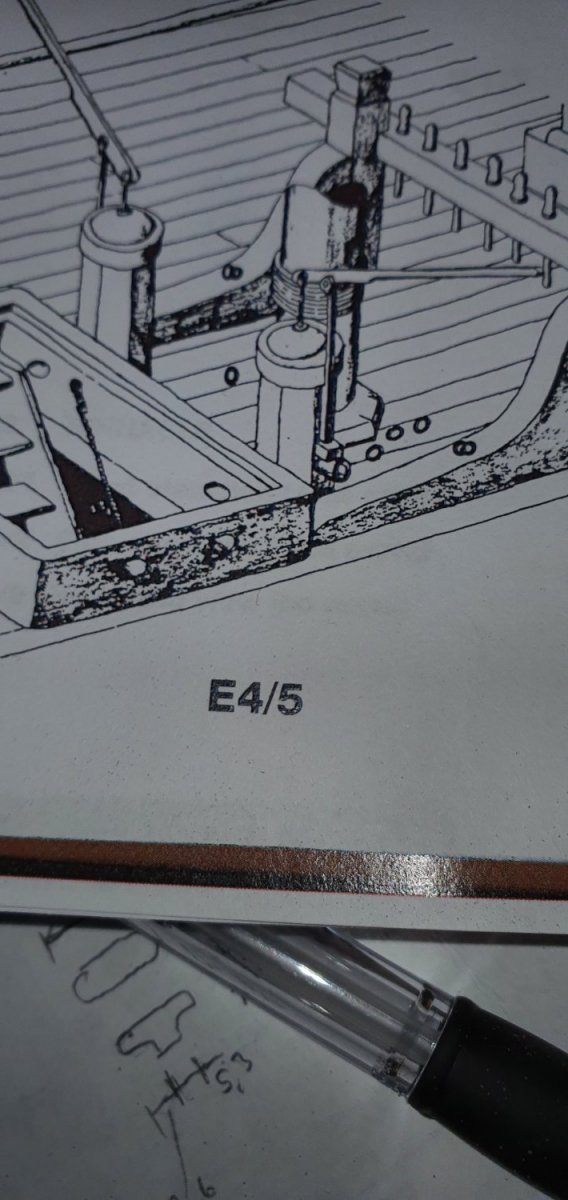
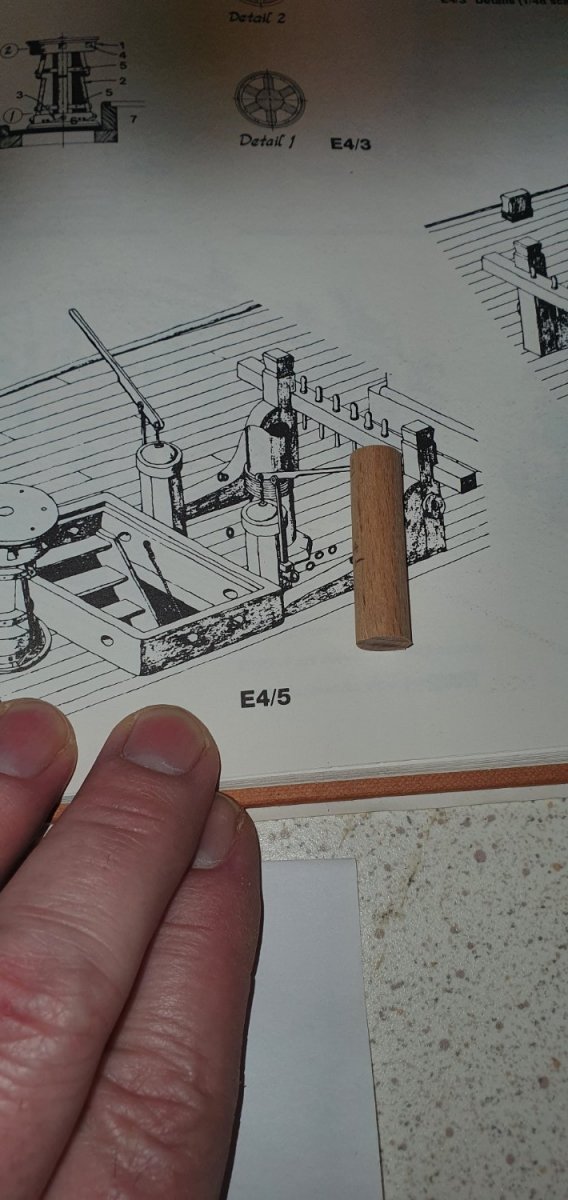
Onto to anchor winch.
Here is the drawing from th Bount book.
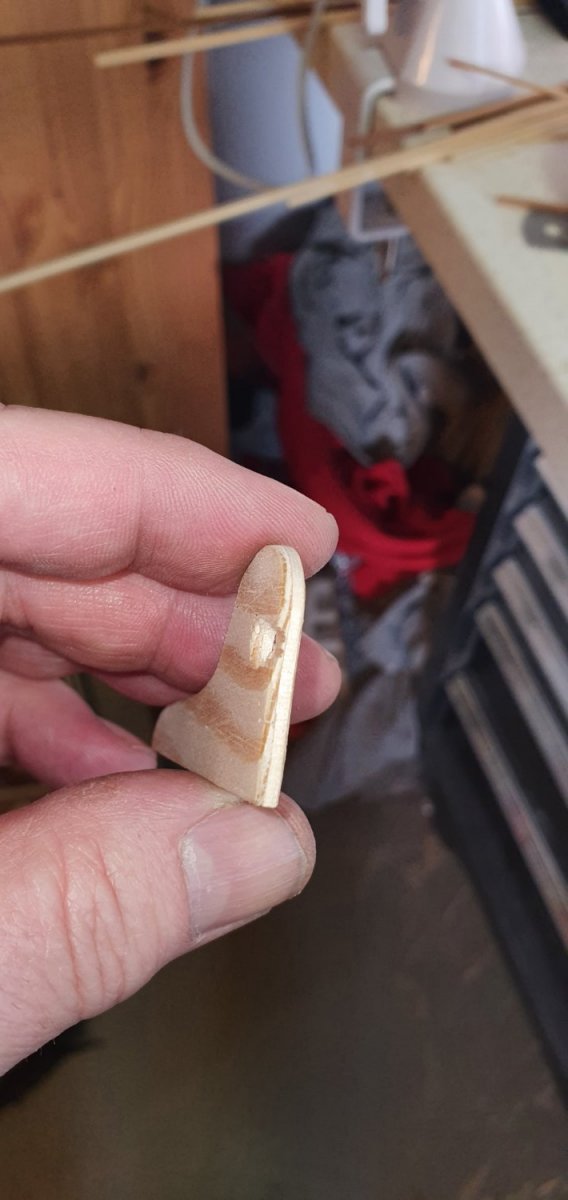
Here is the part from the kit

6 sides, not 8 which is on the drawing and the sides are bad.
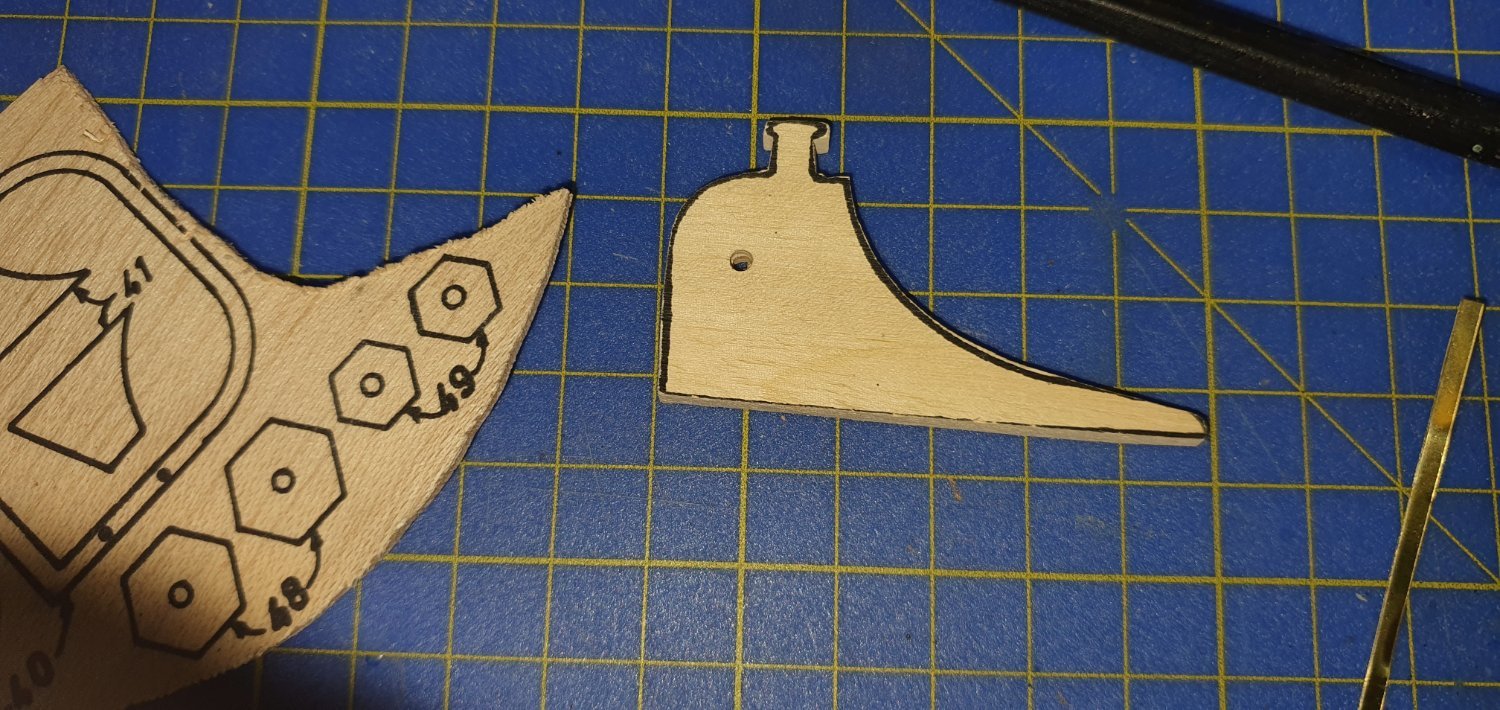
So I made my own according to the book.

They turn out pretty good. There is a lot of forth and back in the book trying to get som dimention.
And here is the commericent

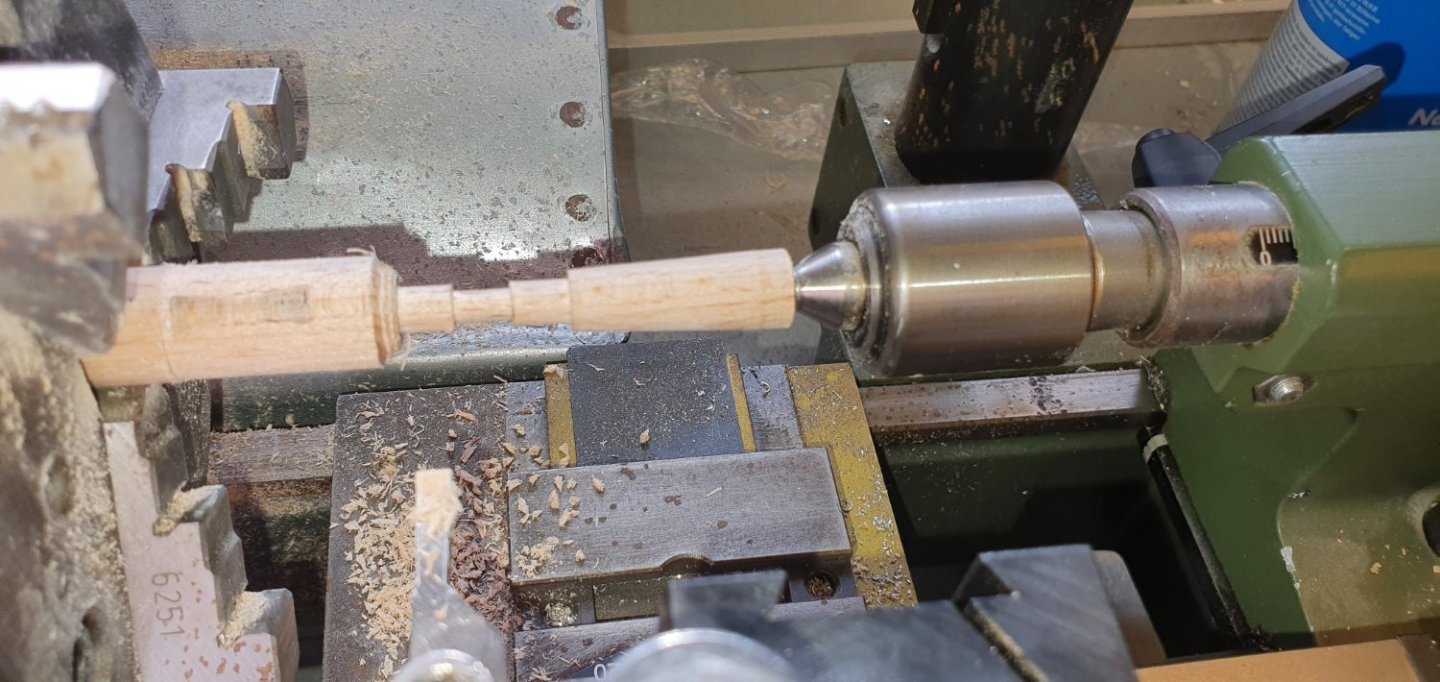
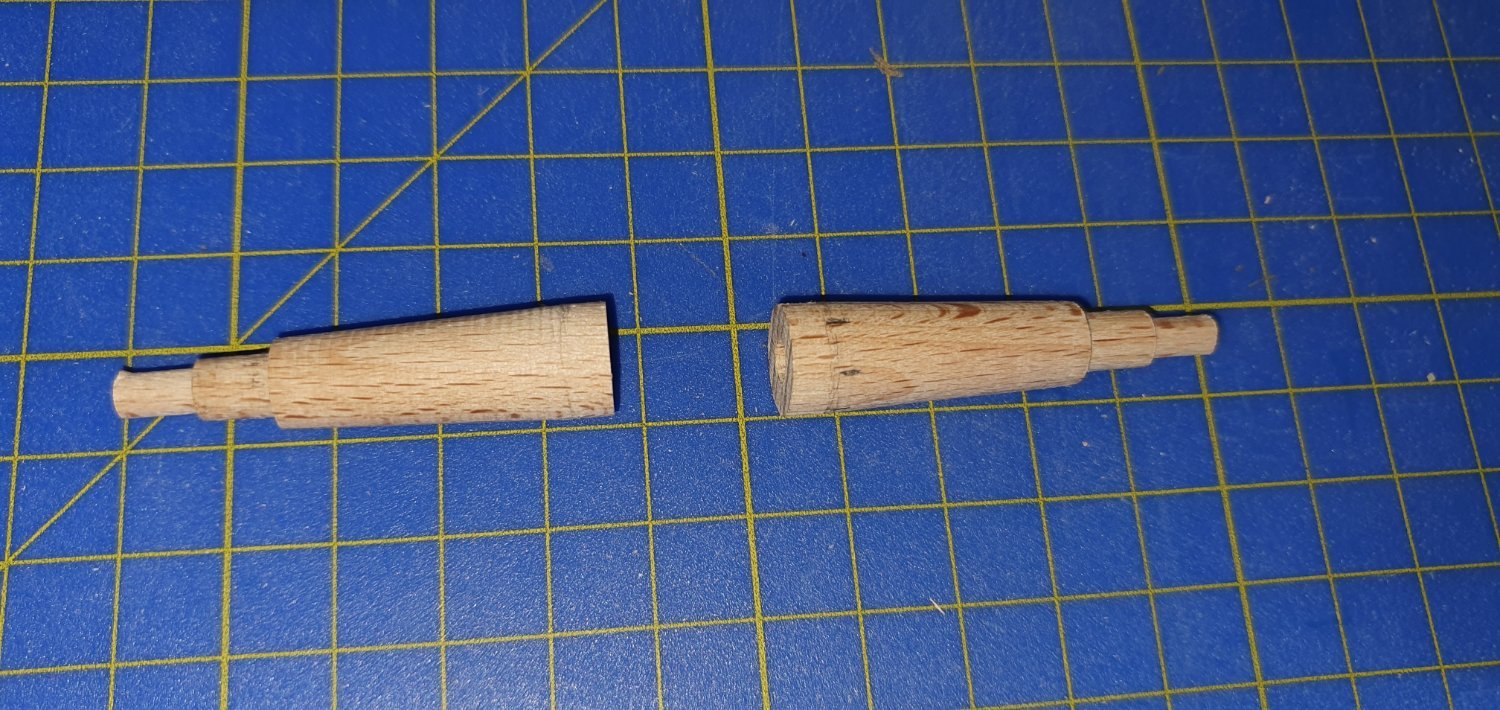
OK, now it was time for making the aksel and since I have a lath I useing that.
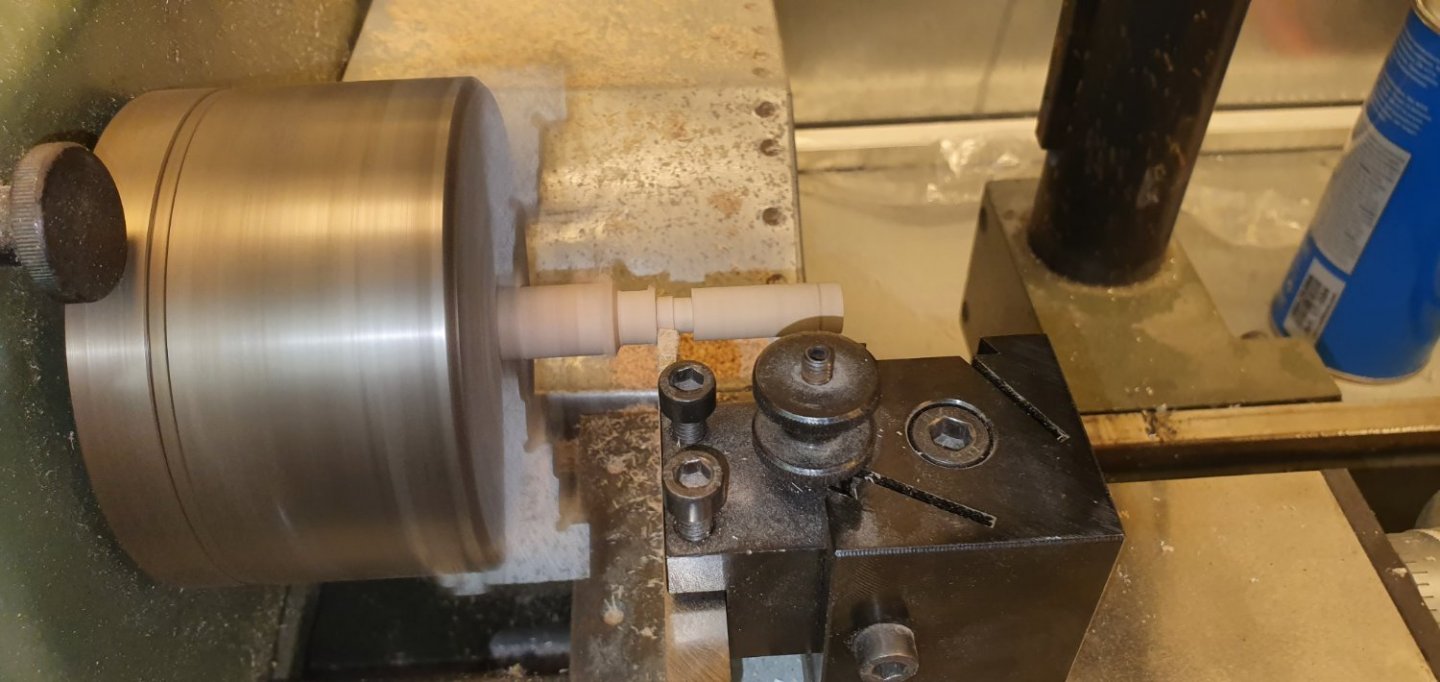
Looks good, but I mis calculated the angel and I will need to make new piece tomorrow

- LyleK1, ccoyle, Keith Black and 4 others
-
7
-
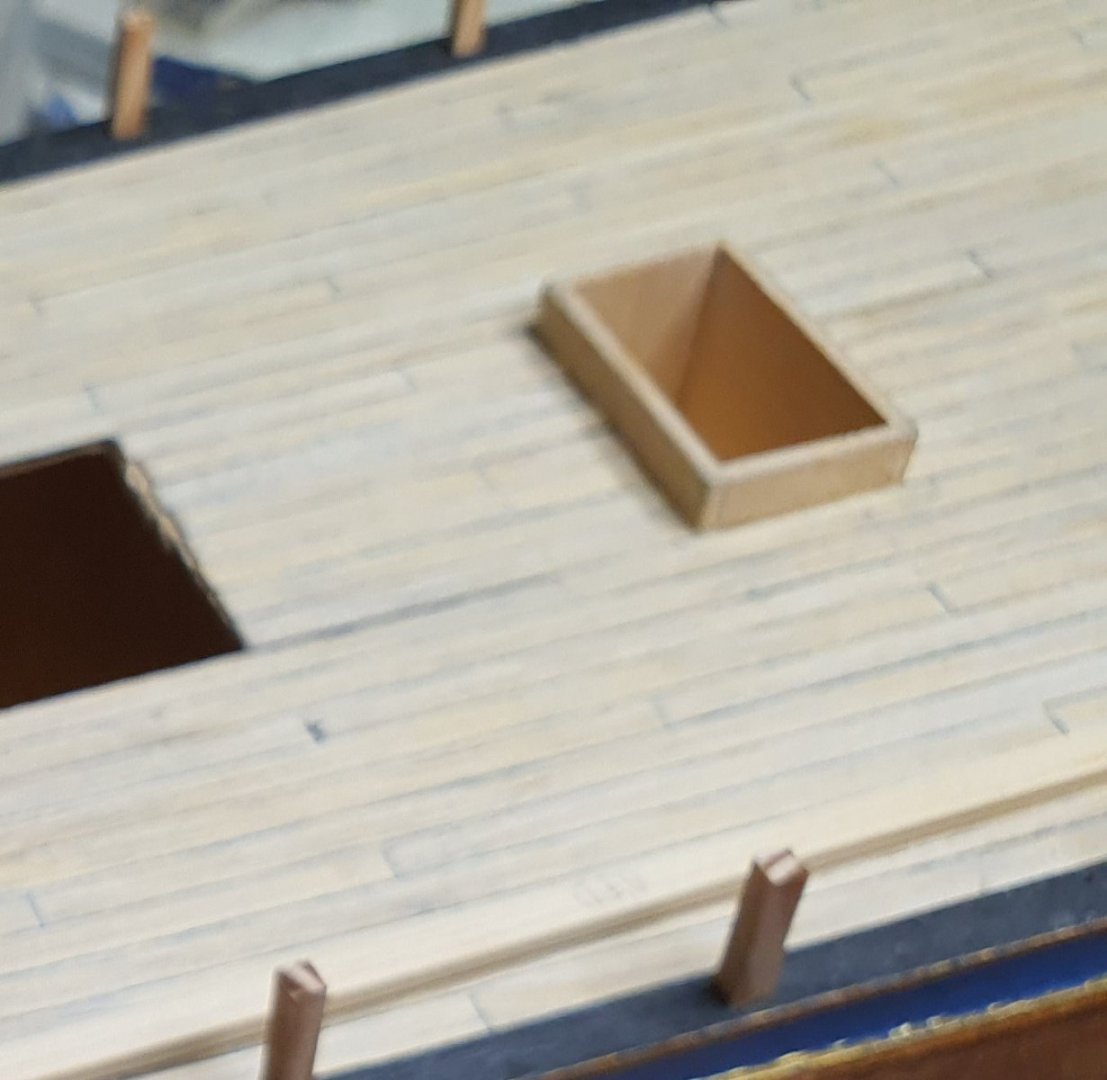
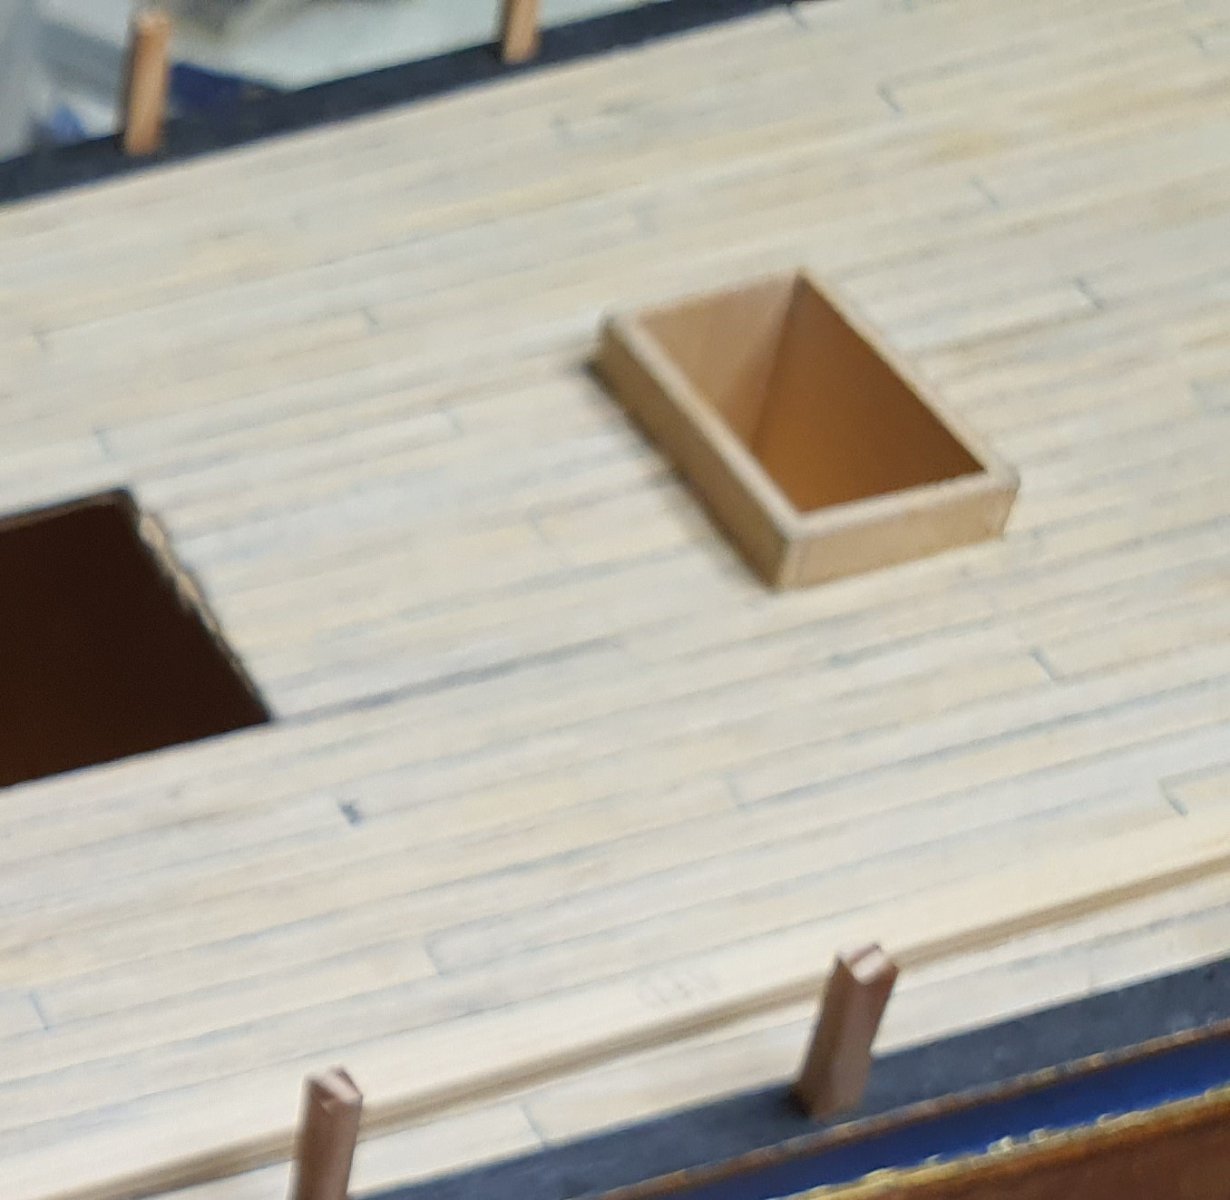
Here is a better picture on how it looks.

- ccoyle, Ian_Grant and Keith Black
-
3
-
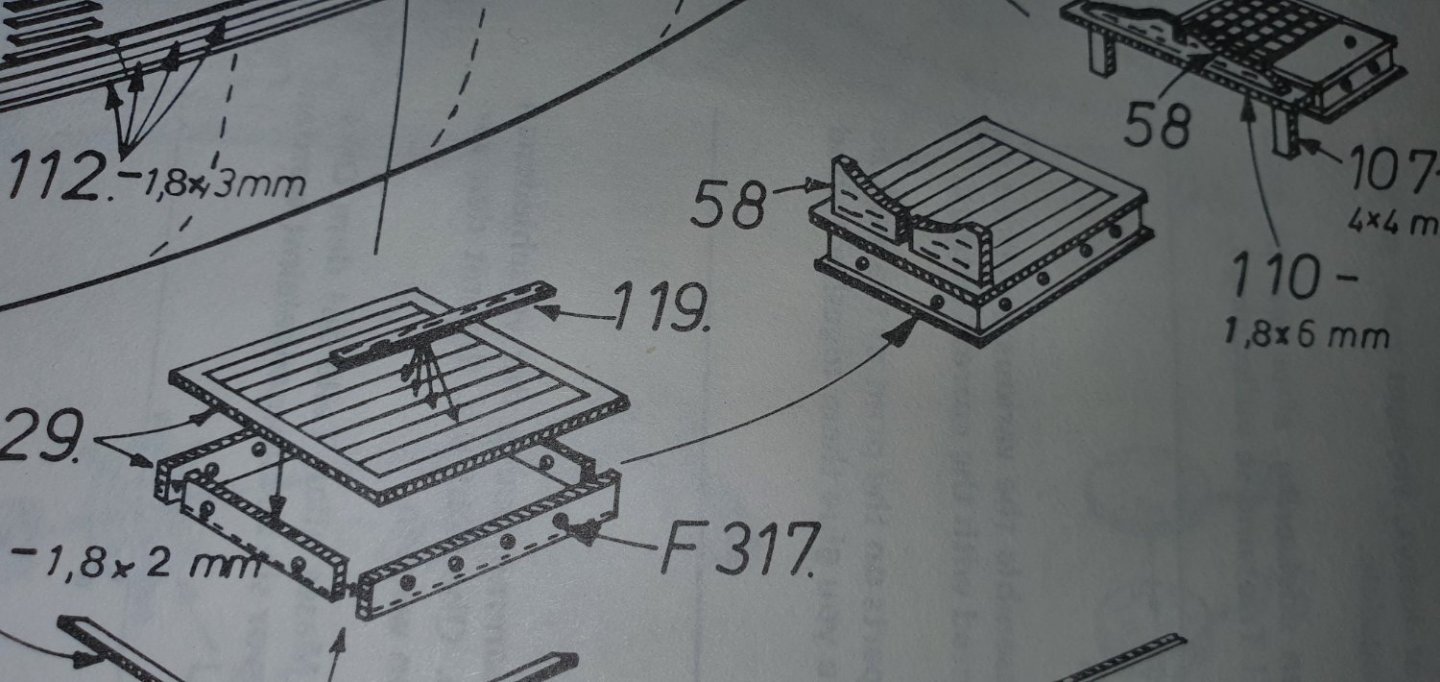
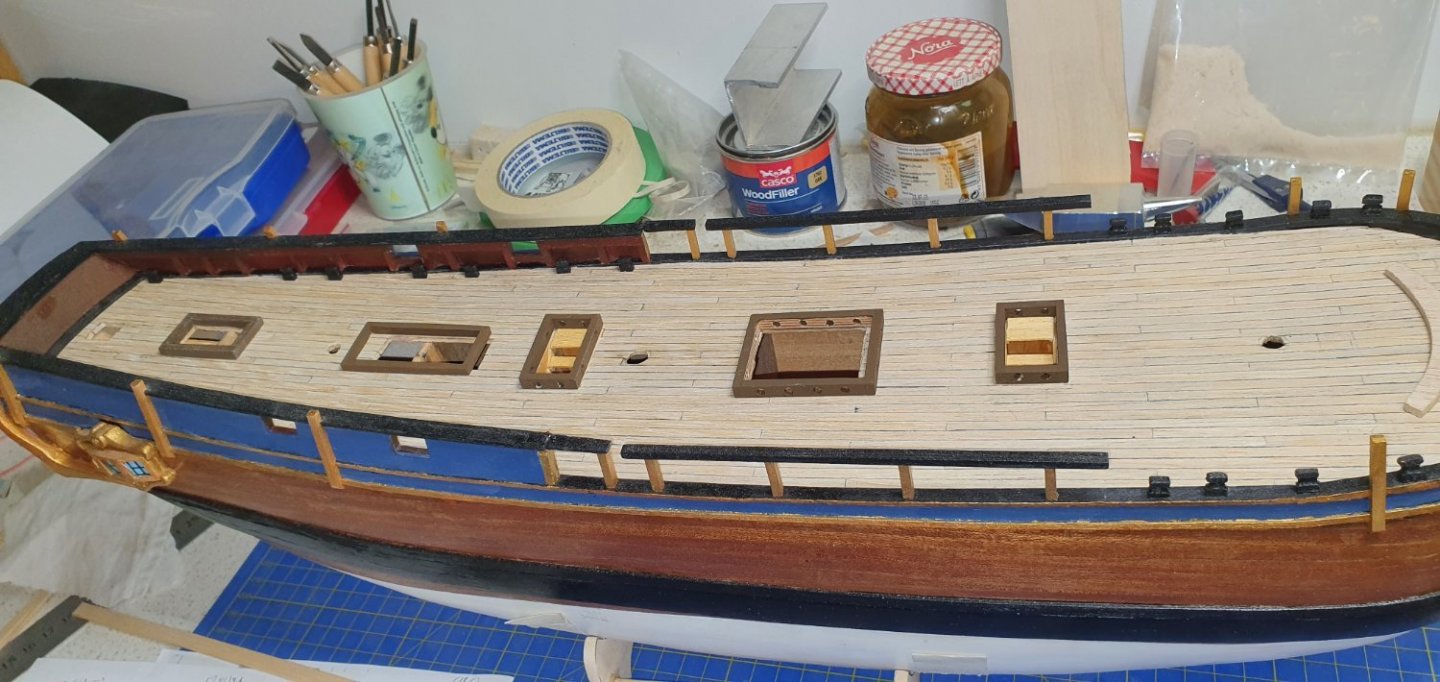
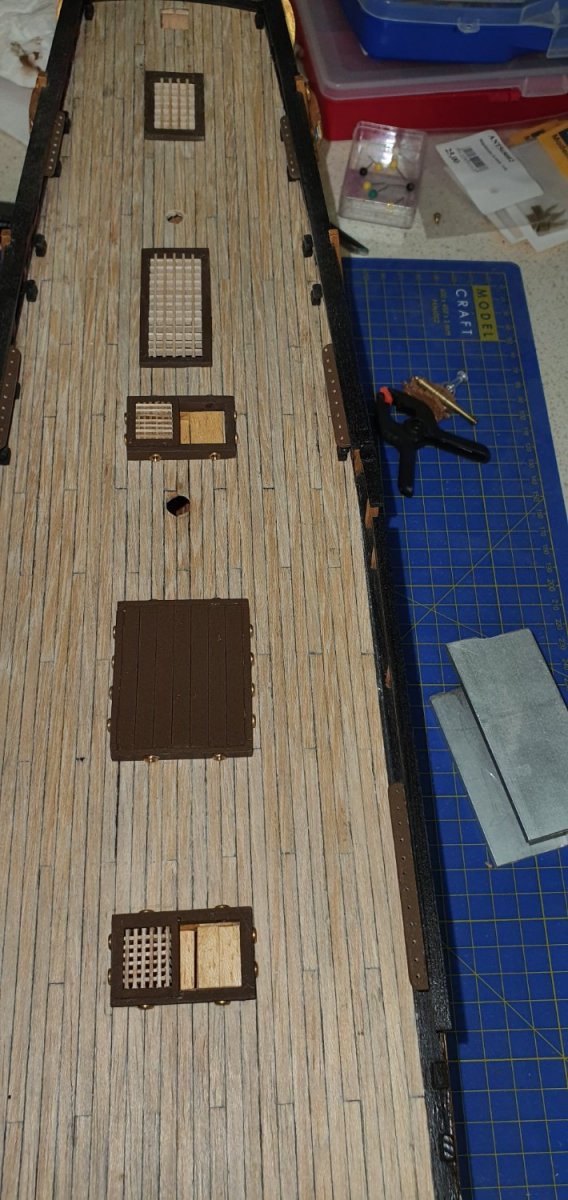
Finished gratings aft and on the hatches for the stair. It didn't turn out to bad. I know it is not to scale, but it is defiantly a learnig process.
Now I only need to finish the forward grating.

The picture is not very good I must admit, but will take som new ones that give å better perspective on how it look
- AJohnson and Keith Black
-
2
-
20 minutes ago, DaveBaxt said:
If indeed these holes exsisted there would probably have been a means of closing them off in bad weather as would the open. If not they would be burnt out working those bilge pumps. Just a thought but correct me if I am wrong..
I would agree, but I think I'm going to leave that detail out 😉
- DaveBaxt, Ryland Craze, Keith Black and 1 other
-
4
-
12 hours ago, allanyed said:
Trond,
I cannot find any contemporary plan, model, painting or other that indicates there are tiny windows or ports of any kind in any coaming. I may be wrong, but it may be from someone's fantasy when they drew up the kit. Actually, I do not recall ever seeing these on any ship in the 18th century or earlier. Of course port holes are seen in deck houses, but I would be interested to see if anyone here at MSW has seen such an opening in a hatch coaming.
It may be too late to fix unless you make new coamings and head ledges, but at least it something to watch out for in the future. It is always good to check out every detail from a kit against contemporary information the same as if it was a scratch build.
Ha en flott dag!
Allan
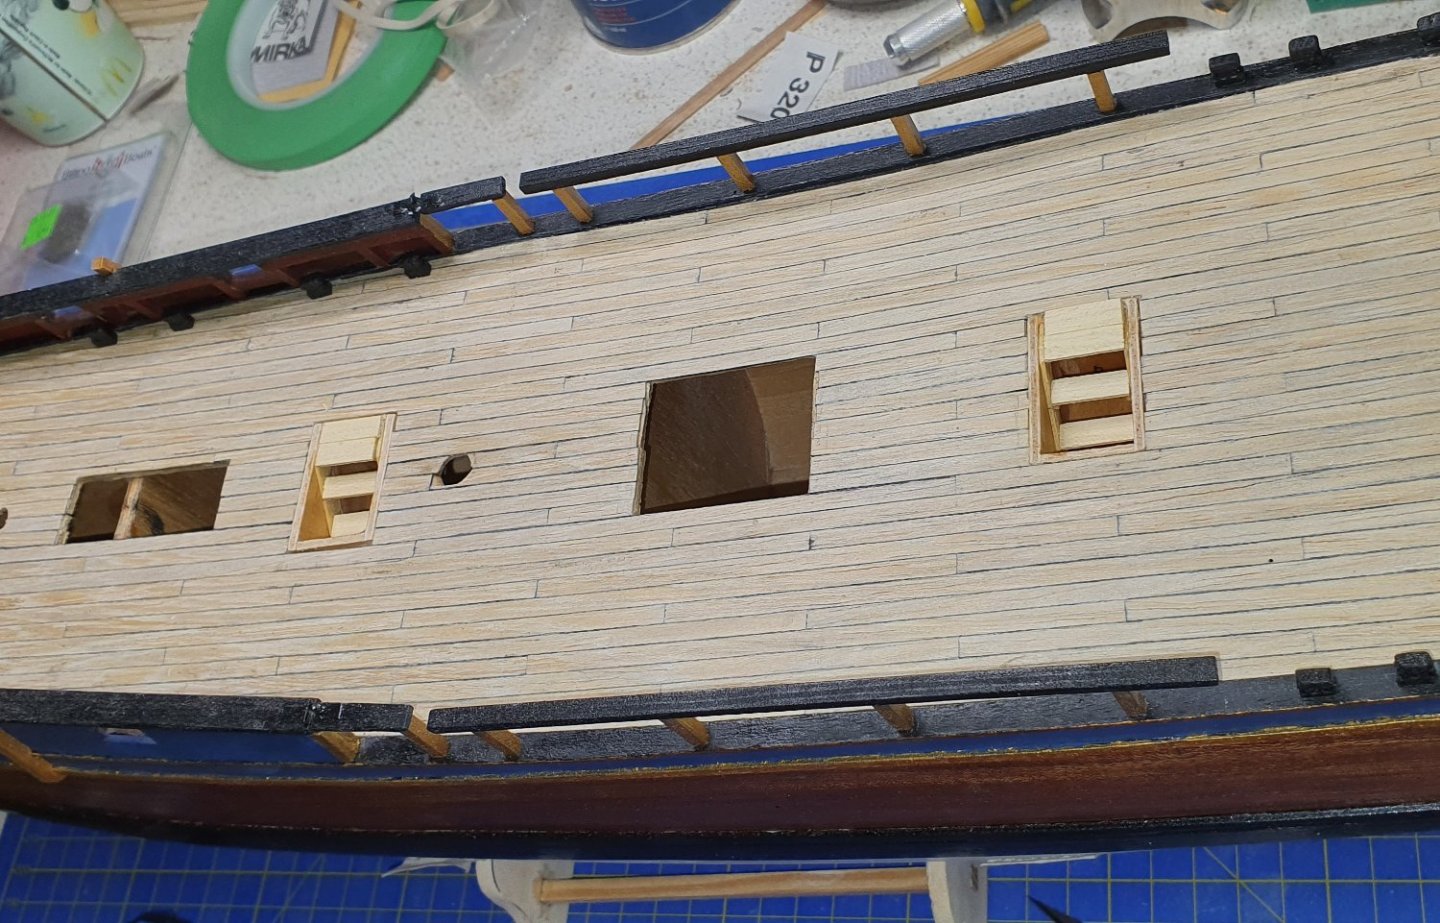
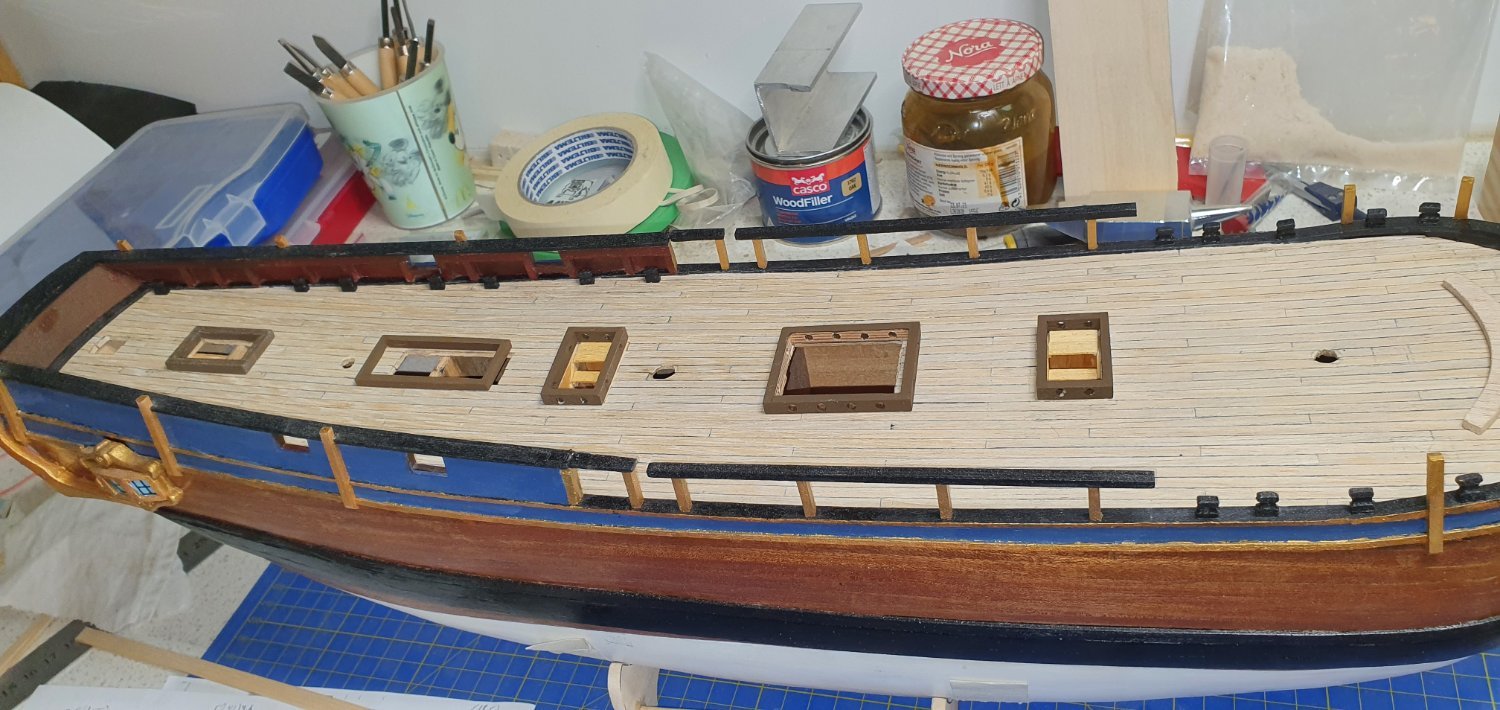
Sorry for a bad explanation. I'll try again.
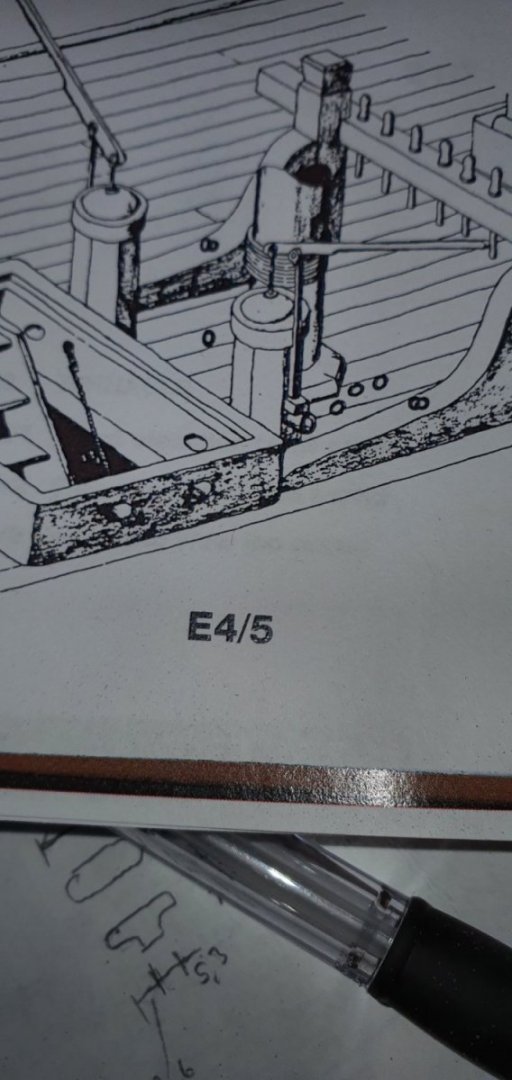
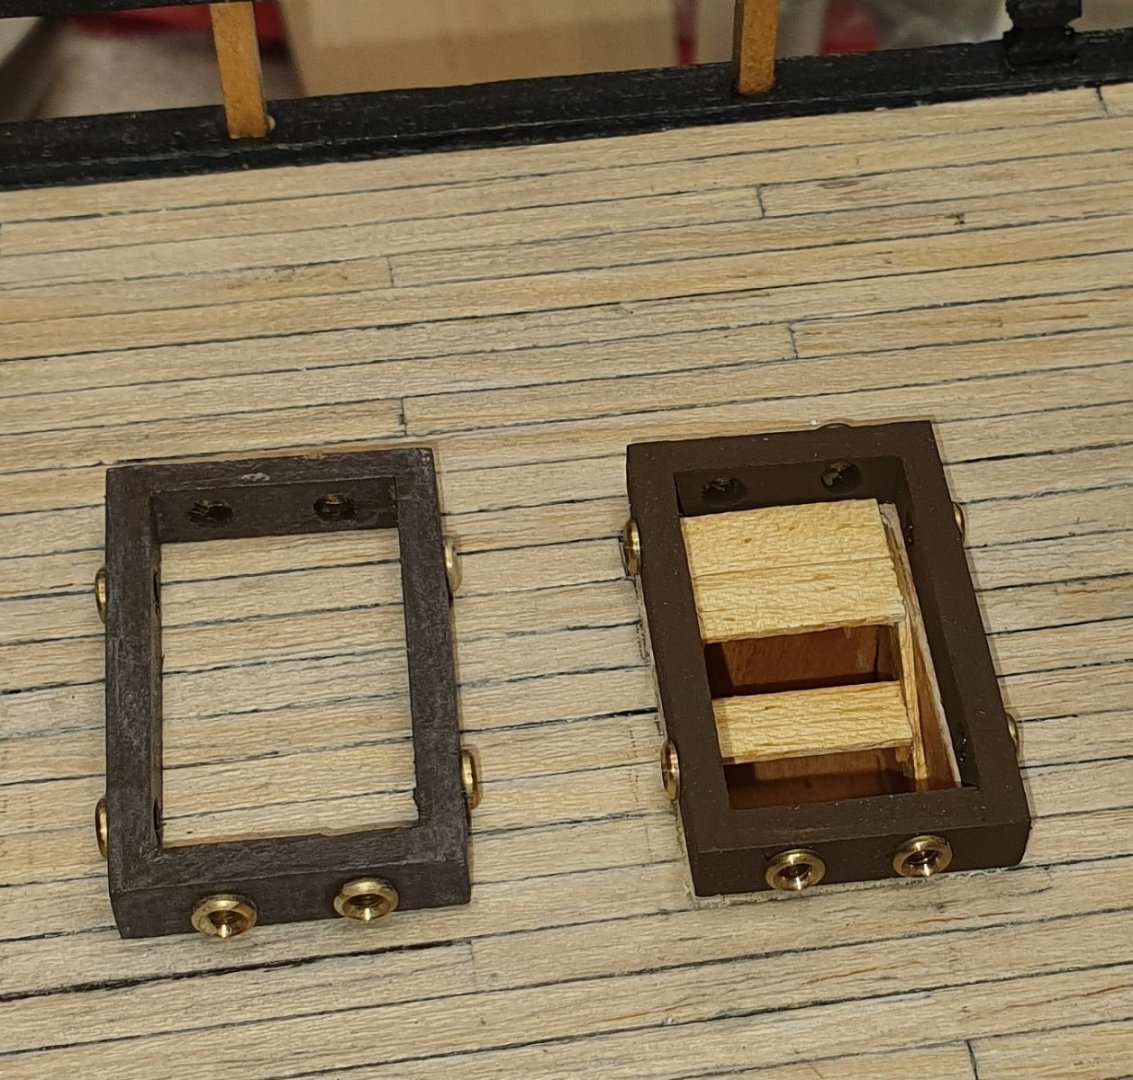
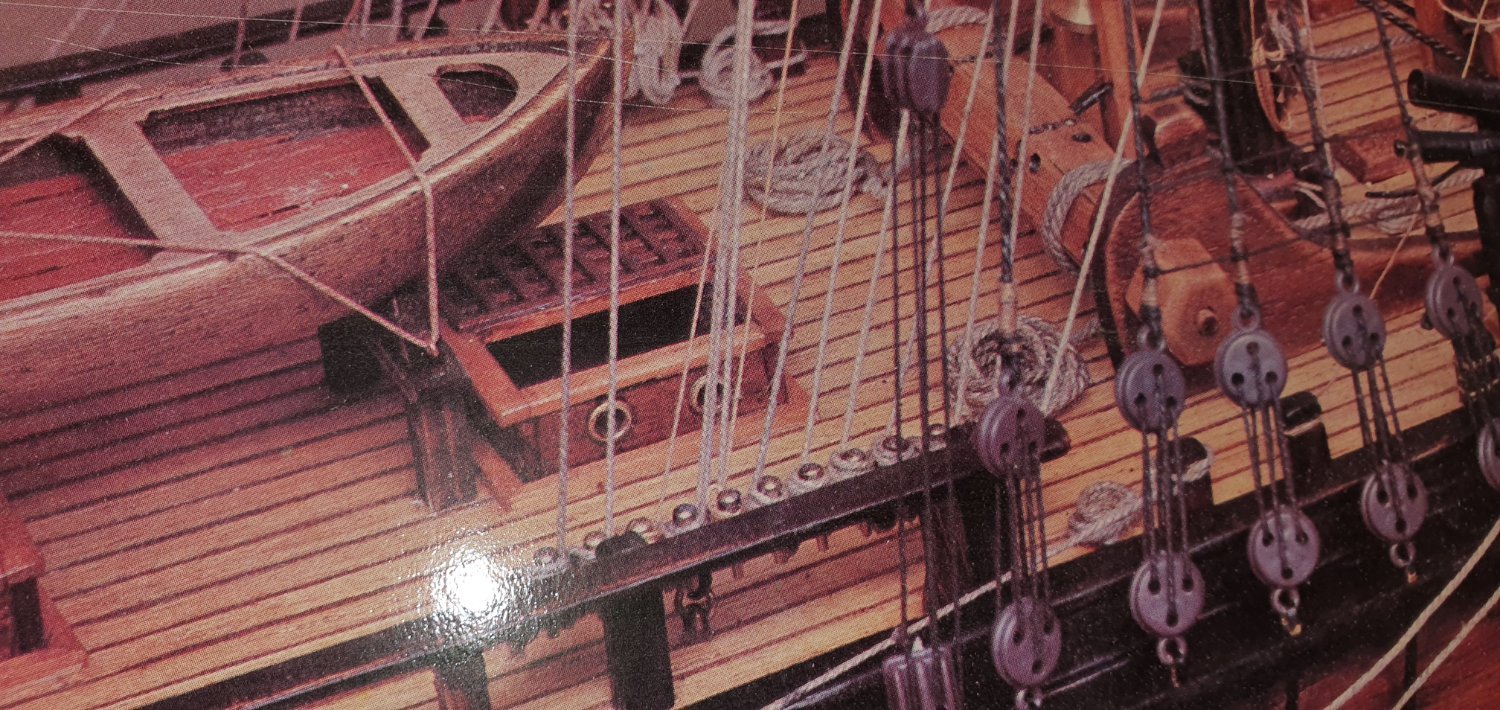
This first two picture is from the Bounty book where you can see circular holes/"windows" and the last two are from instruction manual and picture on the front of the box.

When I bought the kit I also bought the extra kit with canons, block, anchor etc. This was in the begining of 1990 and fortunately the world has move forward, including quality of model ships. In the extra kit these brass "rings/windows" was part of it.
I do agree Alan that after you mentioned it I haven't seen other models with this "windows"
Looking at it in perspective of what the intention of the Bounty was, moving plants. On could argue that they would be holes for air circulation. In the Bounty book there is two version of the ship, one before the assigment without canons and "windows" and one with canons and "windows".
At least that is my interpretation of haveing two sets of deck plans for one ship.
Anyone other thoughts?
- AJohnson, Keith Black, Gregory and 1 other
-
4
-
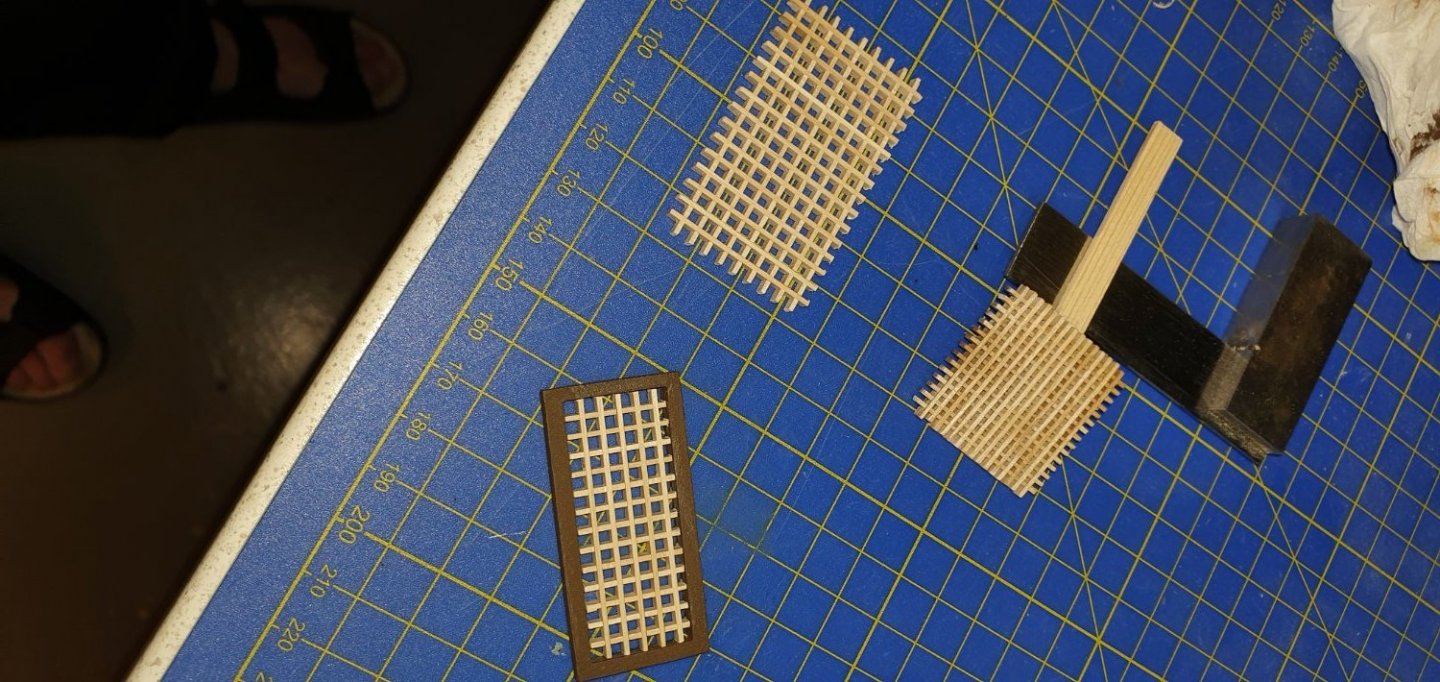
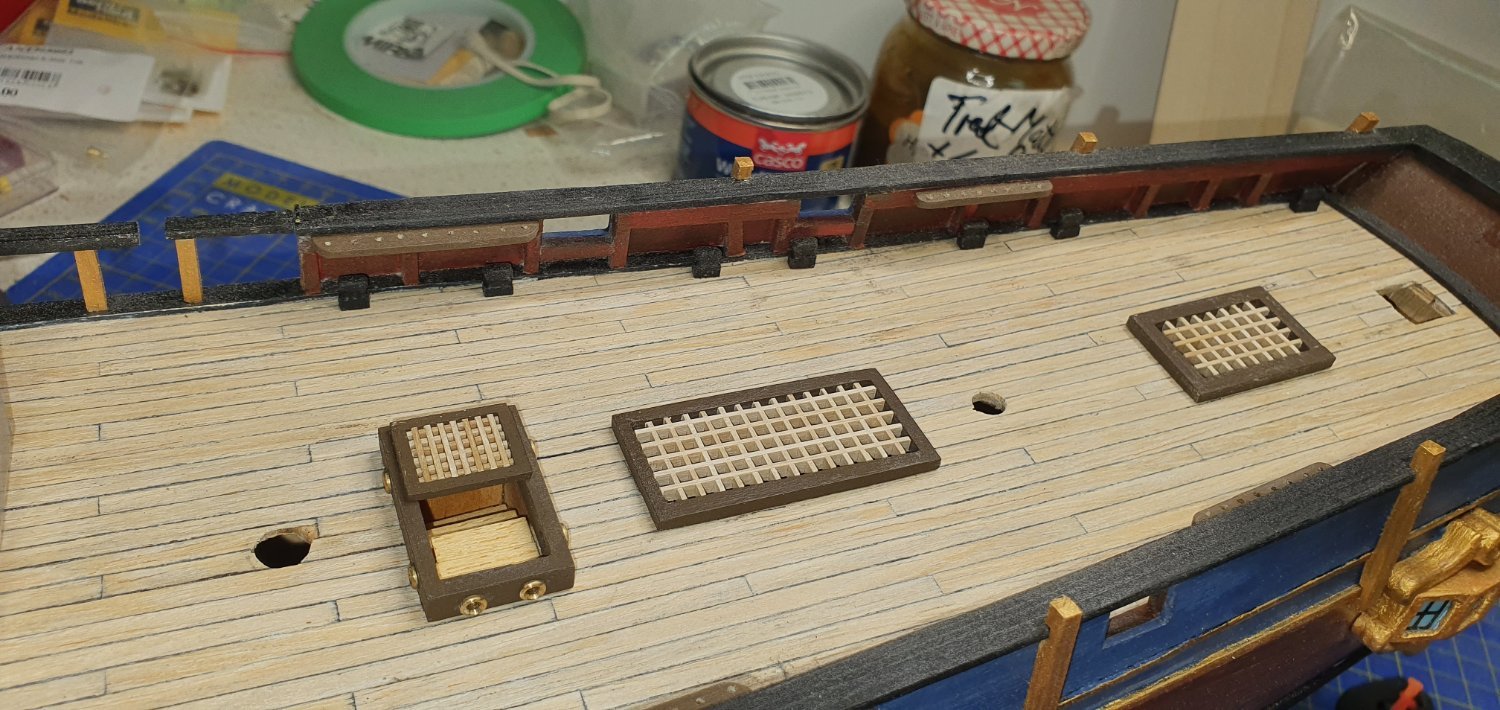
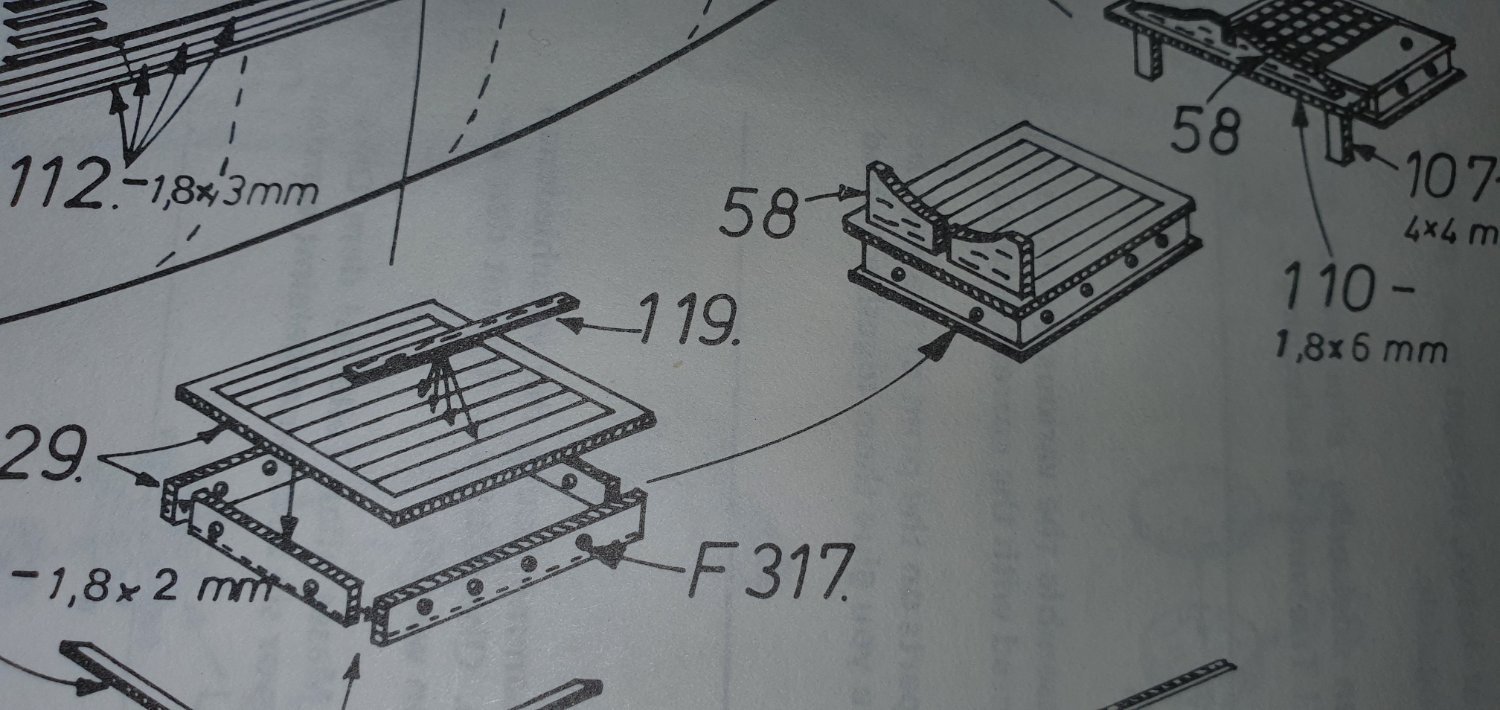
Here are the grating I bought. Must admit again that I forgot about scale when I bought it and saw it when I buildt them. I'm going to use the large one on the deck and will do some experiment with the small as hatch for the staircase.
- Keith Black, AJohnson and DaveBaxt
-
3
-
17 hours ago, allanyed said:
Hi Trond,
I second Lyle's comment on the gratings. If you cannot make your own, Syren is the best choice for accurate high quality gratings. He offers 1:64 and 1:48 so the latter should be great for your scale of 1:50. He has them with camber and the battens run fore and aft and the ledges athwartships as would be on the actual ship.
In your photo above, what are the brass rings on the coamings and head ledges? The coamings are no more than 6 inches high, maybe less depending on which deck, so I can't figure out what these would be.
Thanks
Allan
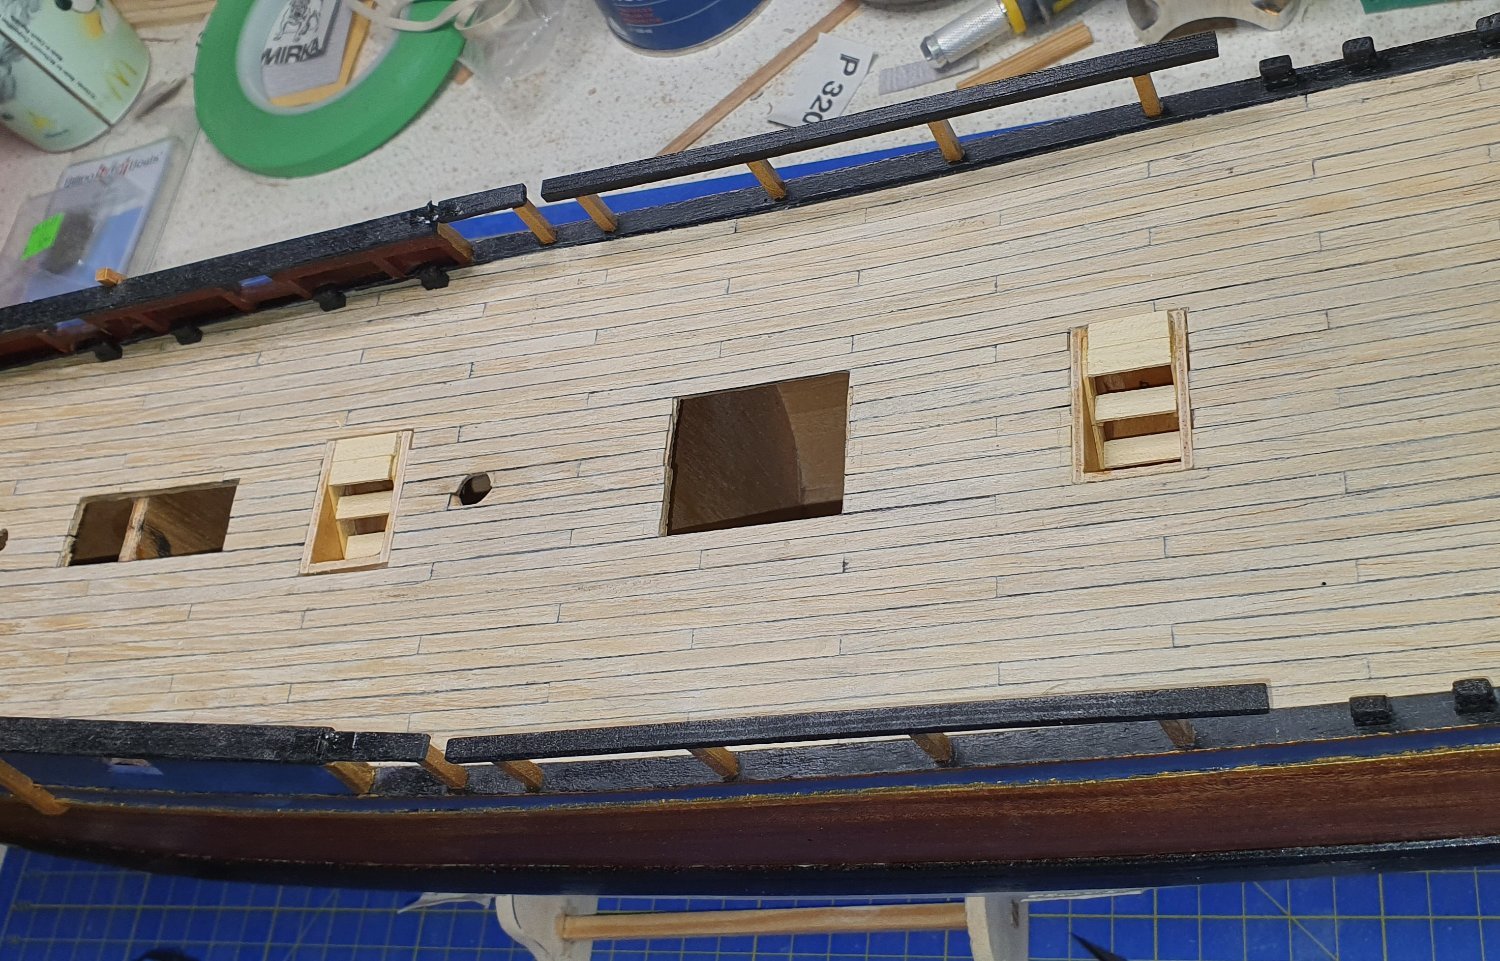
On my model they are suppose to be "windows", don't know the correct word. I guess they are for letting in light.
As you see they are to big with regard to scale. I saw i too, but then it was to late.
I must admit that there are some times that I cut some corners. The hole ship is so way of scale in all parts that I get very frustrated sometimes. The drawing/instructions are so bad, so I try to use the Bounty book as much as possible and scratch build, since all pieces in the kit is way off.
-
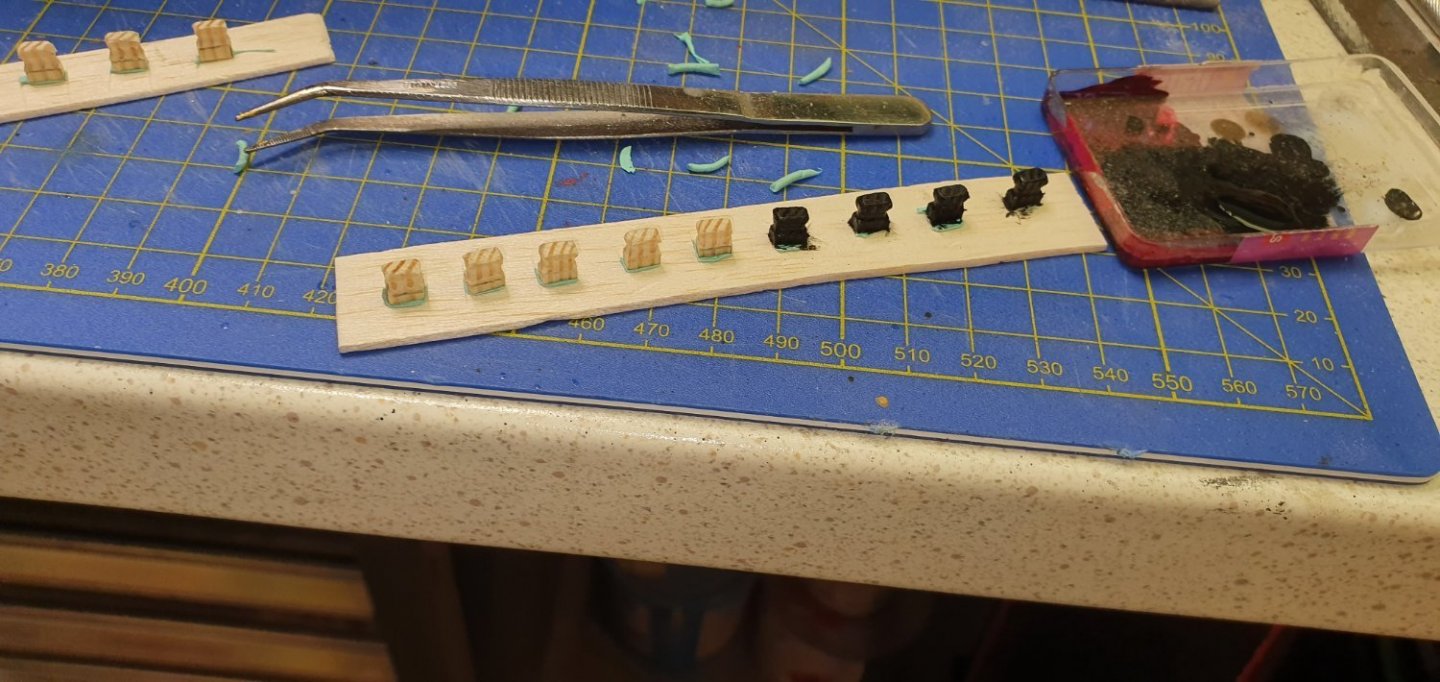
Though of maybe put some varnish on before glueuning to deck. Tried it out, but turned out get an outside grayish look, not good.
So had to paint them over again brown.
- LyleK1, AJohnson and Keith Black
-
3
-
2 hours ago, LyleK1 said:
Thanks Joe!
More updates this weekend! And pics!
Cannons are done and working on the steering system and anchors...
Totaly agree with Joe here, inspiration.
For a first timer like me, it is very inspiering and learing when looking at what experienced builder like you Lyle are doing.
-
Made the frame to the different hatches and gratings.
Been looking in different book and youtube and it seams that I dont have the correct tool (minitur table saw) to make the gratings.
So I need to buy them. The extra kit that I bough to the Bounty have some brass circular windows, I will glue them on the next couple of days.
- Keith Black and AJohnson
-
2
-
14 hours ago, AdamA said:
I have never had any problem removing CA after a day or two for quick holds. Is it supposed to be permanent? Hmm.
In the meantime I just ordered all the rest of Byrnes tools. I got the thickness sander last year (and it is a perfect piece of machinery) so I ordered his table saw and disk sander. It's going to be fun opening those boxes in a few weeks.
I've also been looking on his machines. The only problem is transportation cost and import tax to Norway. Have you tried his rope machine?
- Keith Black and mtaylor
-
2
-
The cleaves are in place and started on the staires. Unfortunate the work I did in the begining was not good to work with.
So I sanded it down with a power tool. One wrong move and .....
It went ok and I installed the stairs. Now I need to paint and make the frame around on deck.
- Keith Black and AJohnson
-
2
-
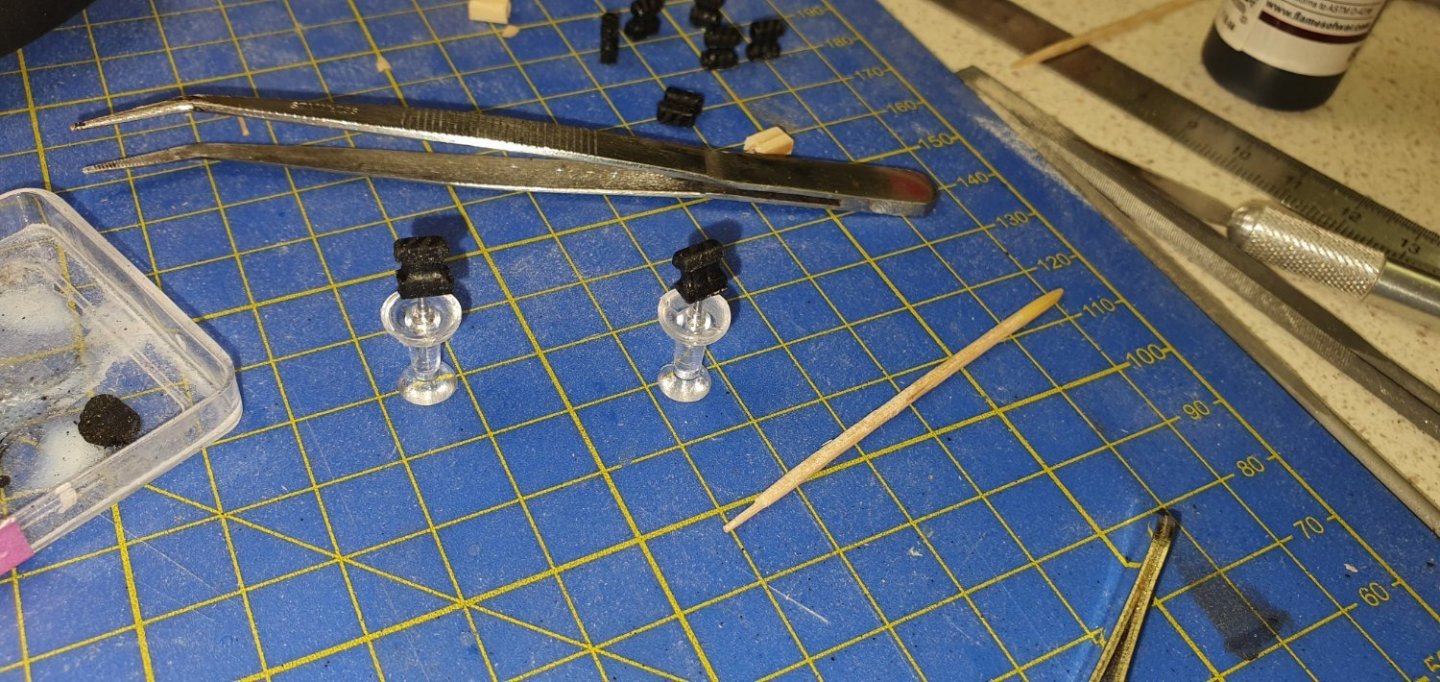
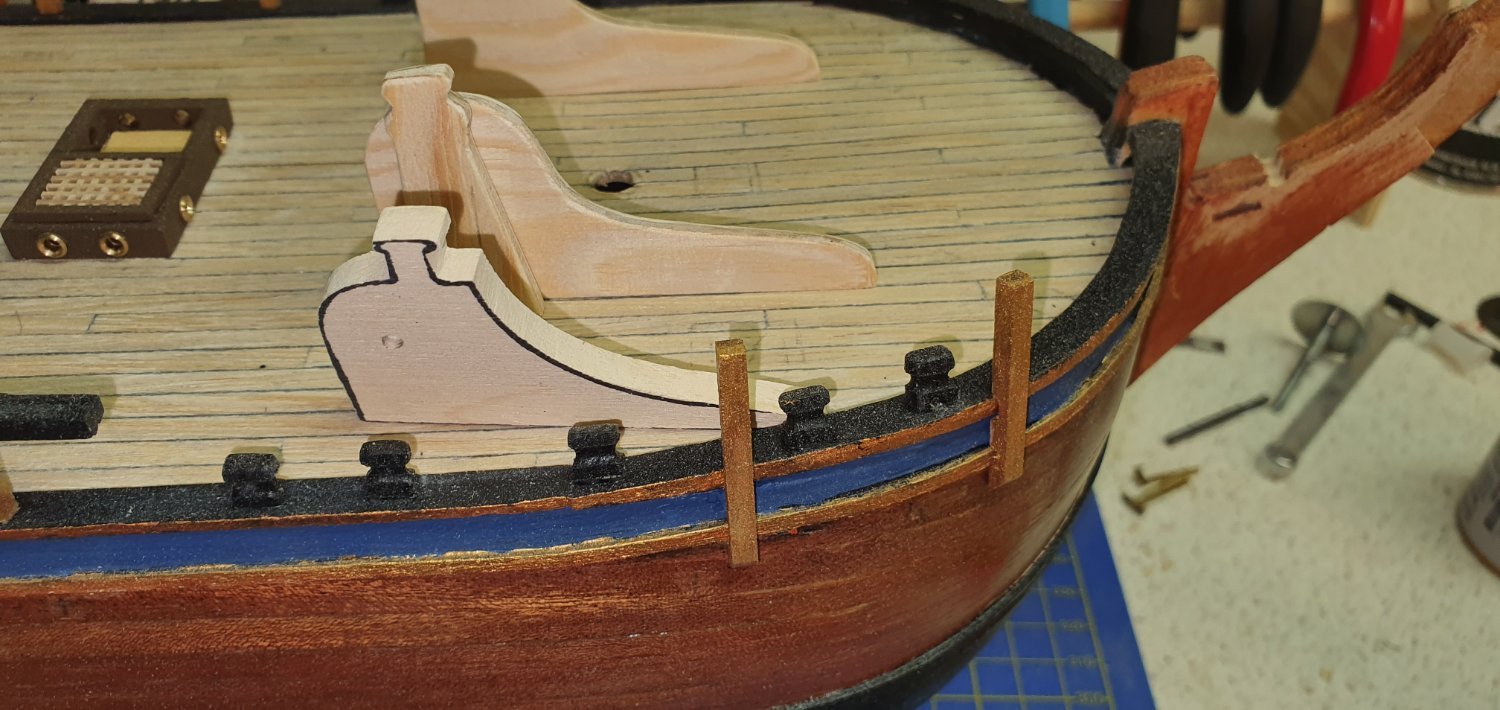
Started with the cleat or timber head, not sure what the difference is. In the Bounty book they look the same just different placing on deck.

- DaveBaxt, AJohnson and Keith Black
-
3
-
55 minutes ago, Gregory said:
We also had this discussion in another Bounty log a while back..
If they are suppose to be venting for the plant, it should be good enough with the two hatches and circulation. I would guess it would be a huge risk of getting sea water inside the ship if they are ventilation. Every time the ship have rough weather and the ship is "leaning over" due to sailing it is a big risk of getting water inside.
- AJohnson and Keith Black
-
2


HMS Bounty by Trond - Billing Boats - 1:50
in - Kit build logs for subjects built from 1751 - 1800
Posted
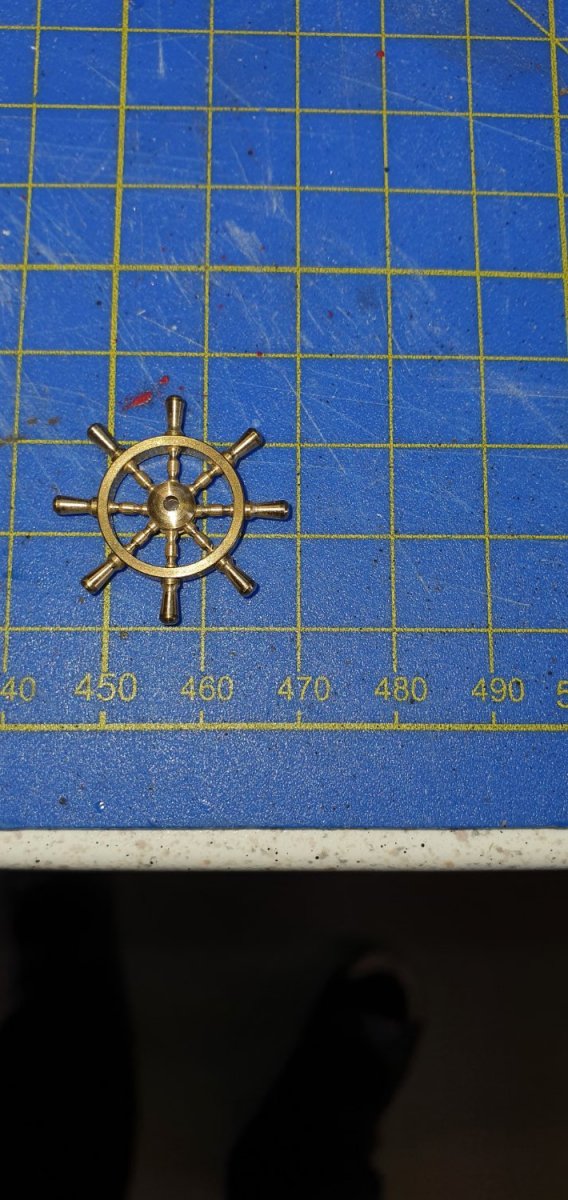
Finished the shelf by the helm and it turned out ok. Now I need to place it and attach some rope to deck, but I will do that after I finished the helm.
Tried making the helm by using my lath. After two attempts with braking the helm I know i need to get some harder wood, since pine is to soft.