


Joseph F.
-
Posts
76 -
Joined
-
Last visited
Content Type
Profiles
Forums
Gallery
Events
Posts posted by Joseph F.
-
-
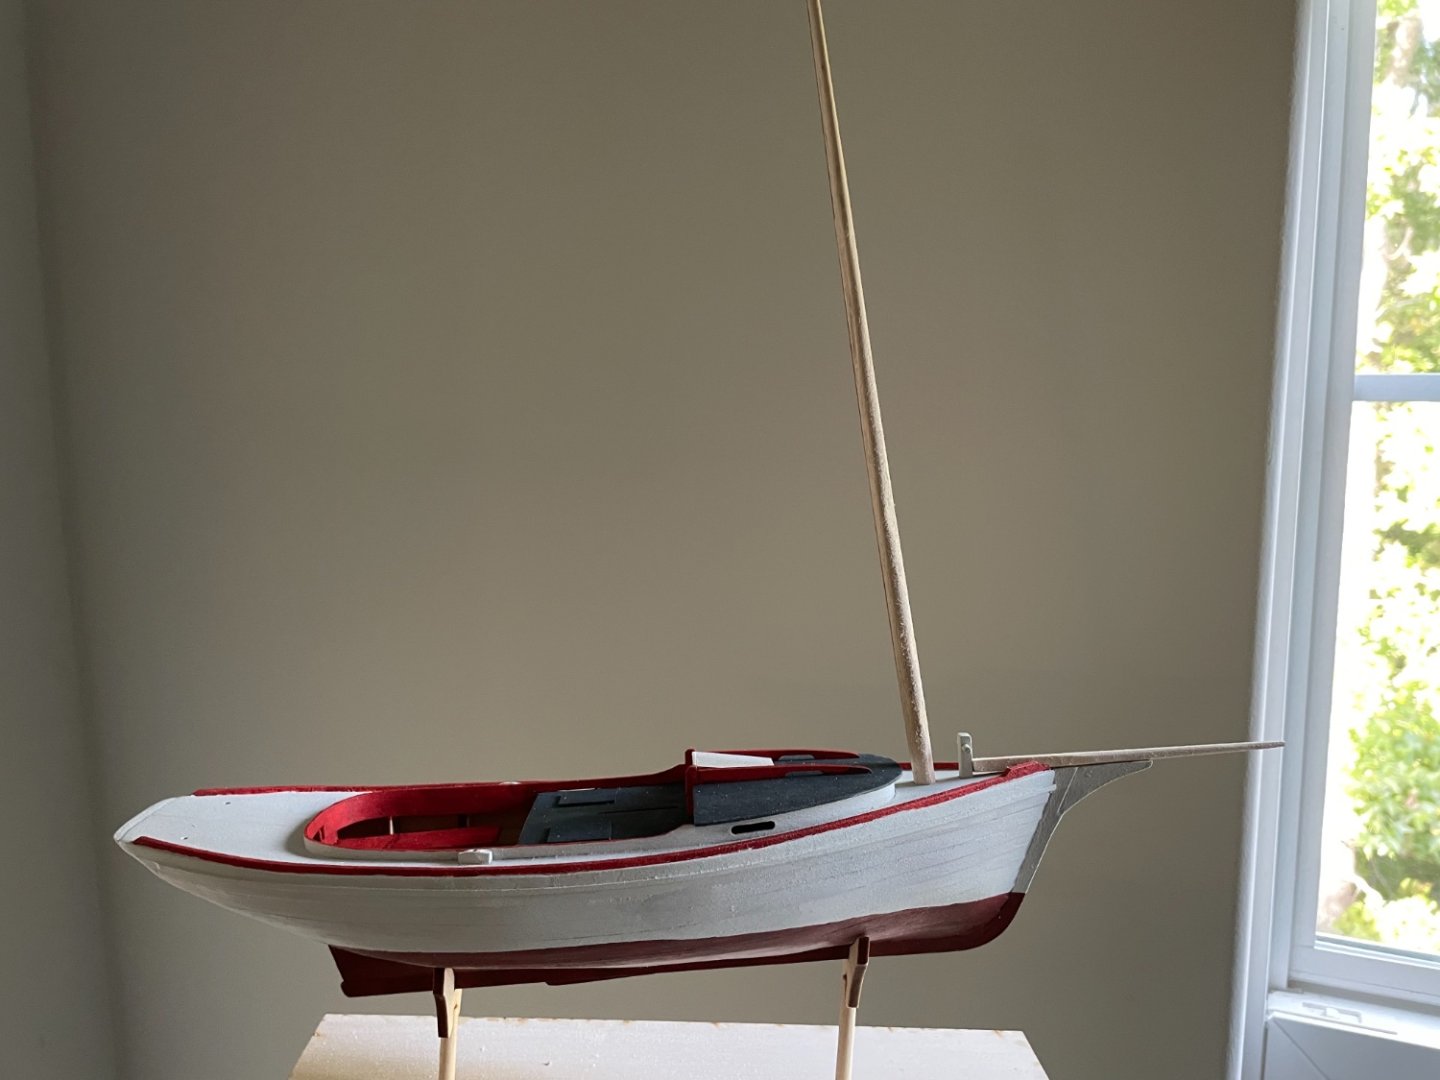
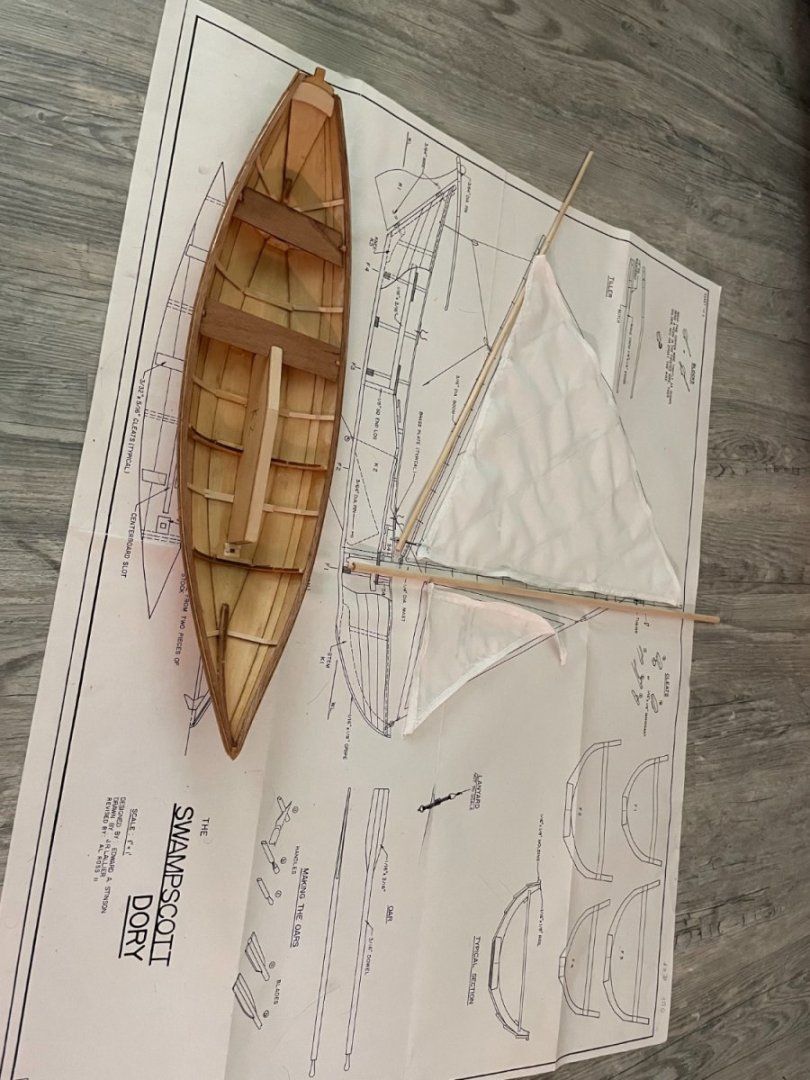
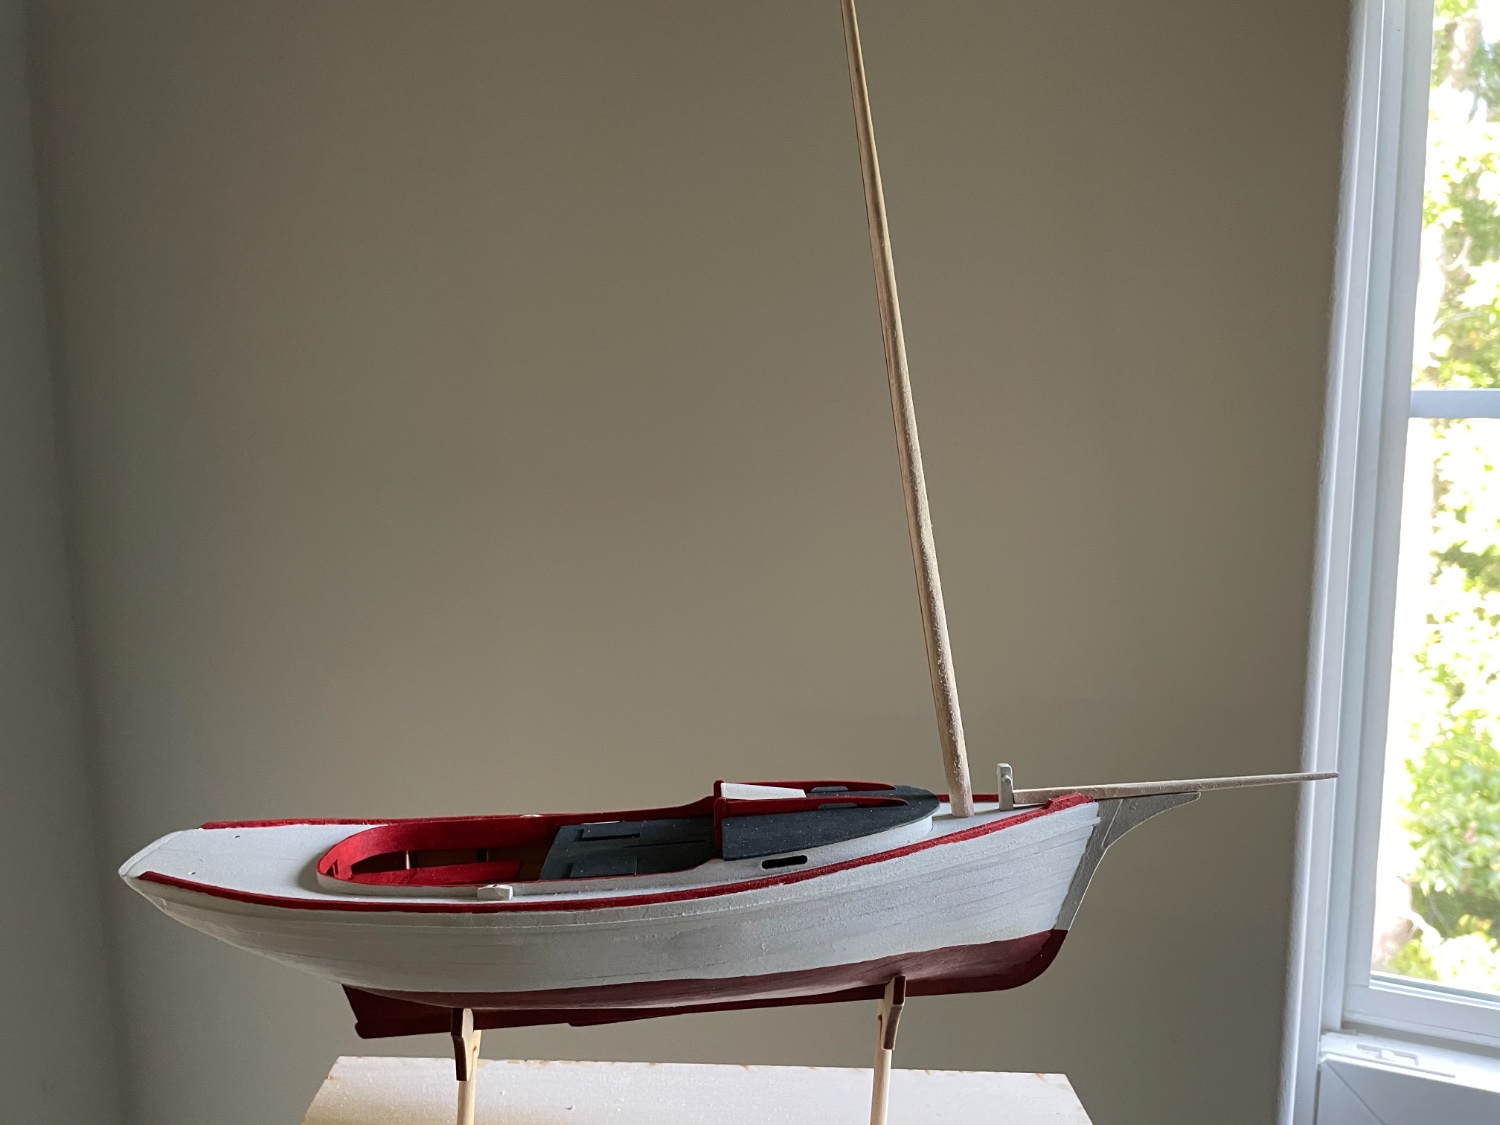
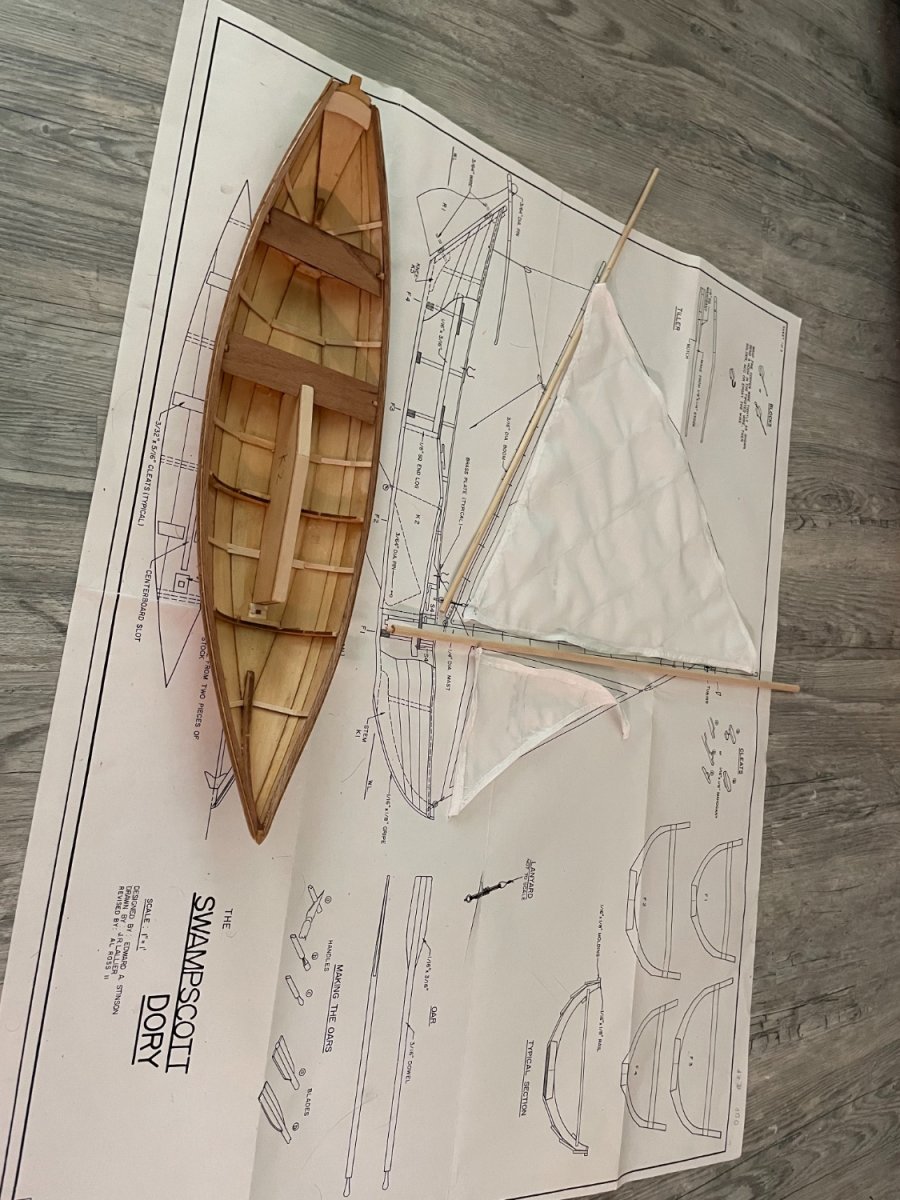
This is the progress which I have made since yesterday, with masts dryfitted and traveler installed.
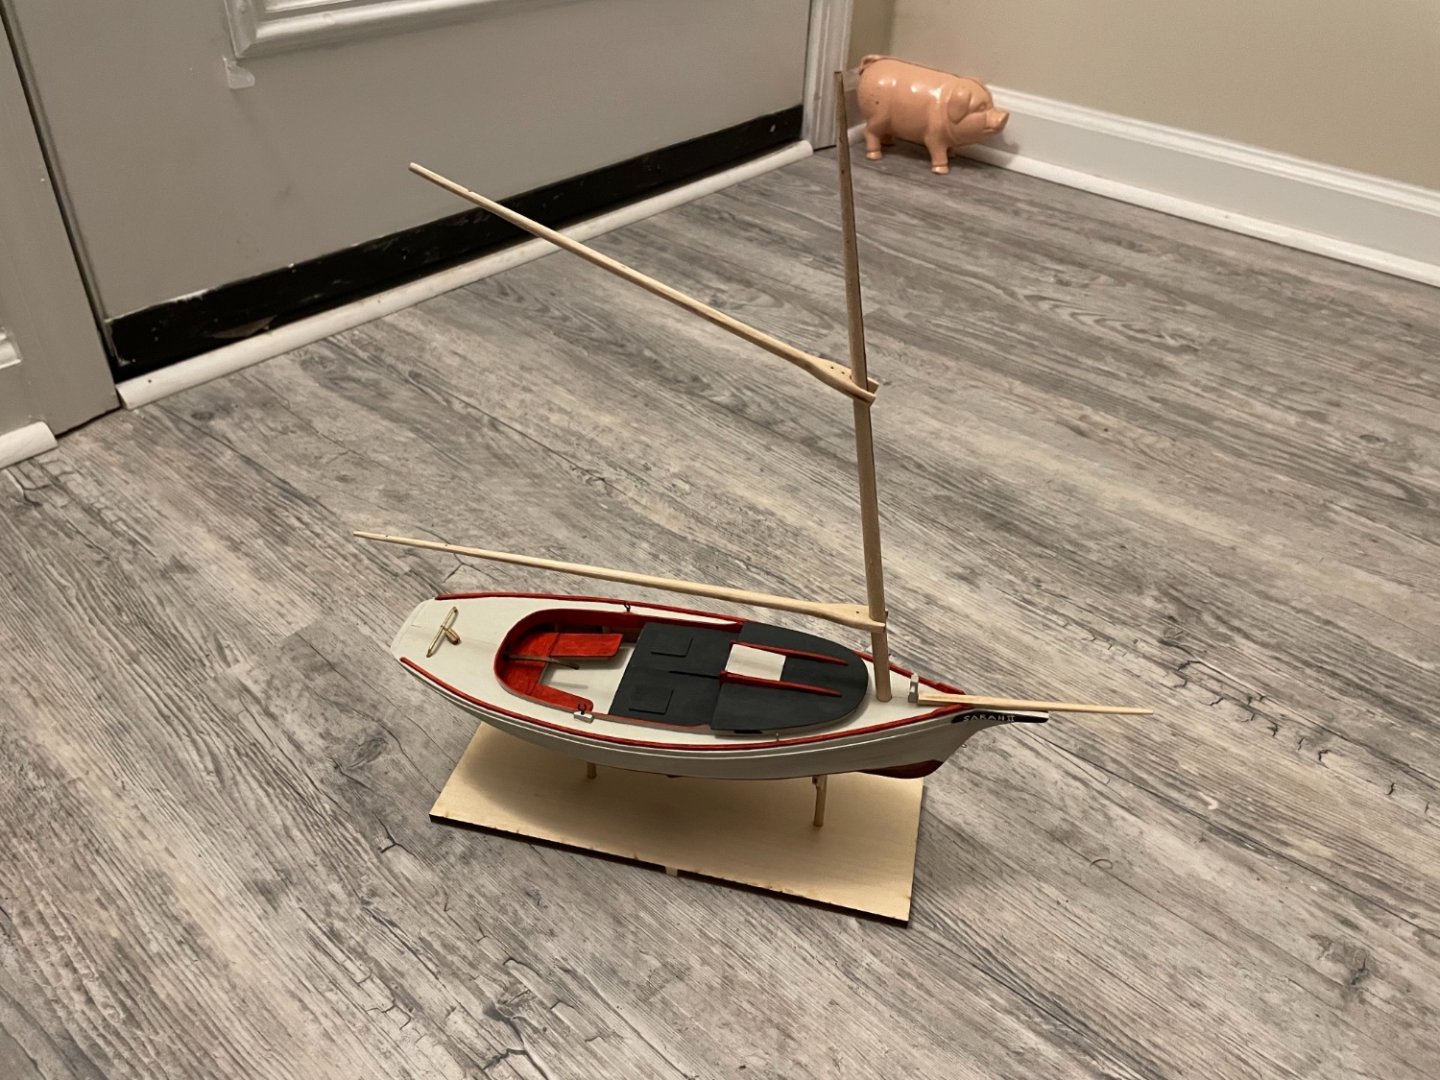
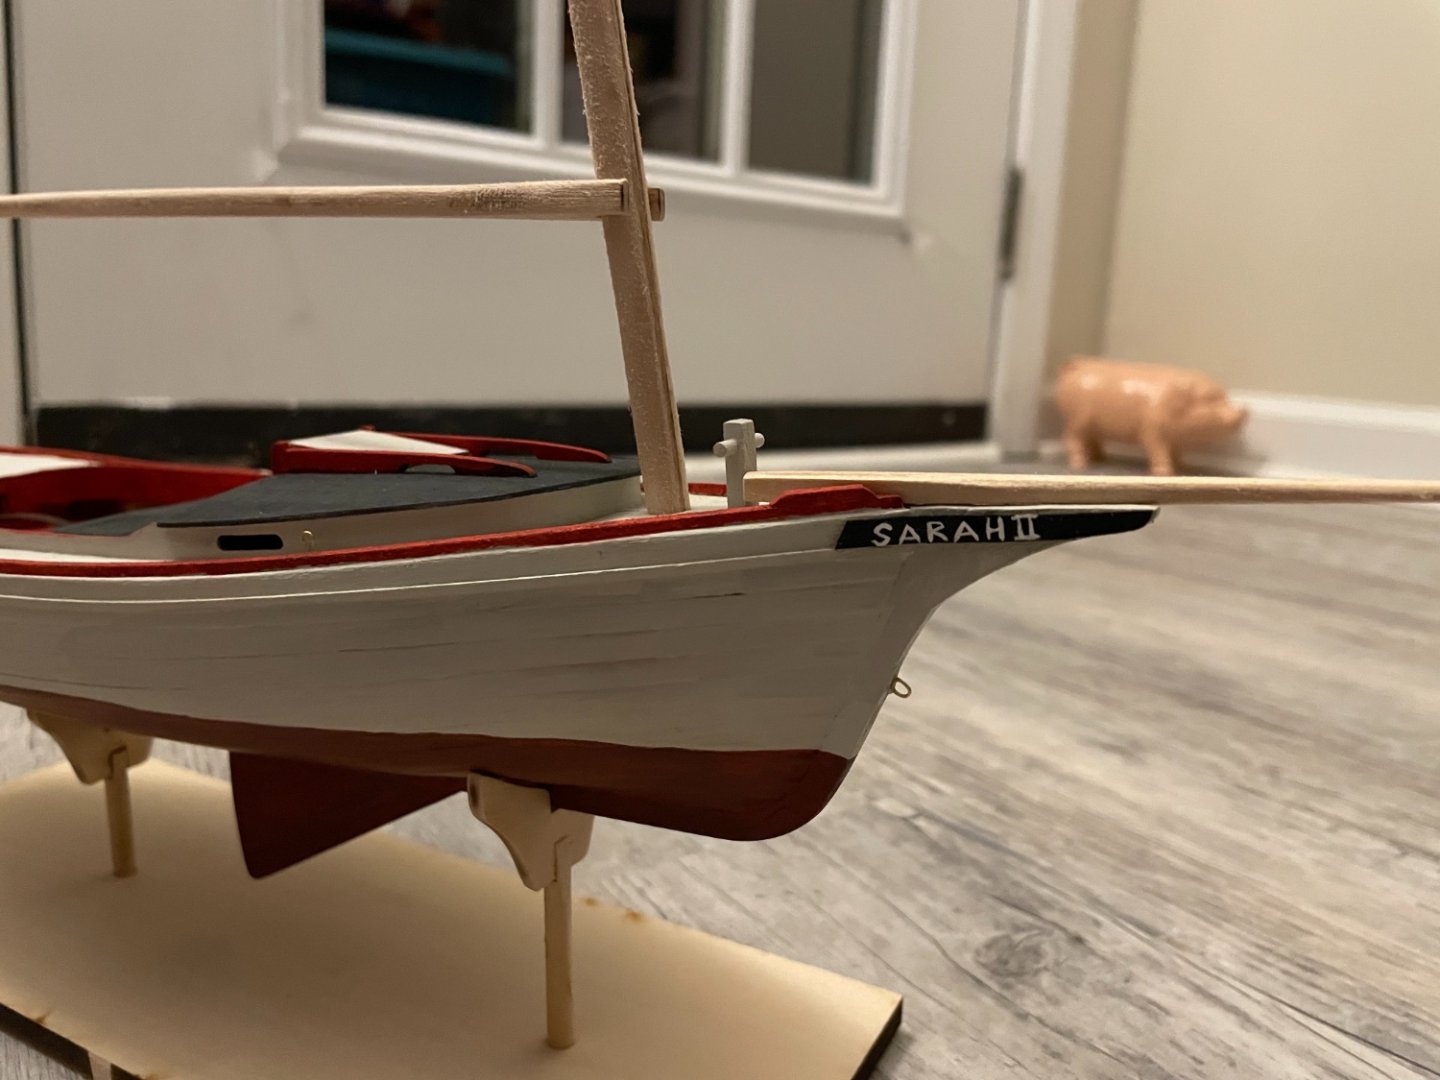
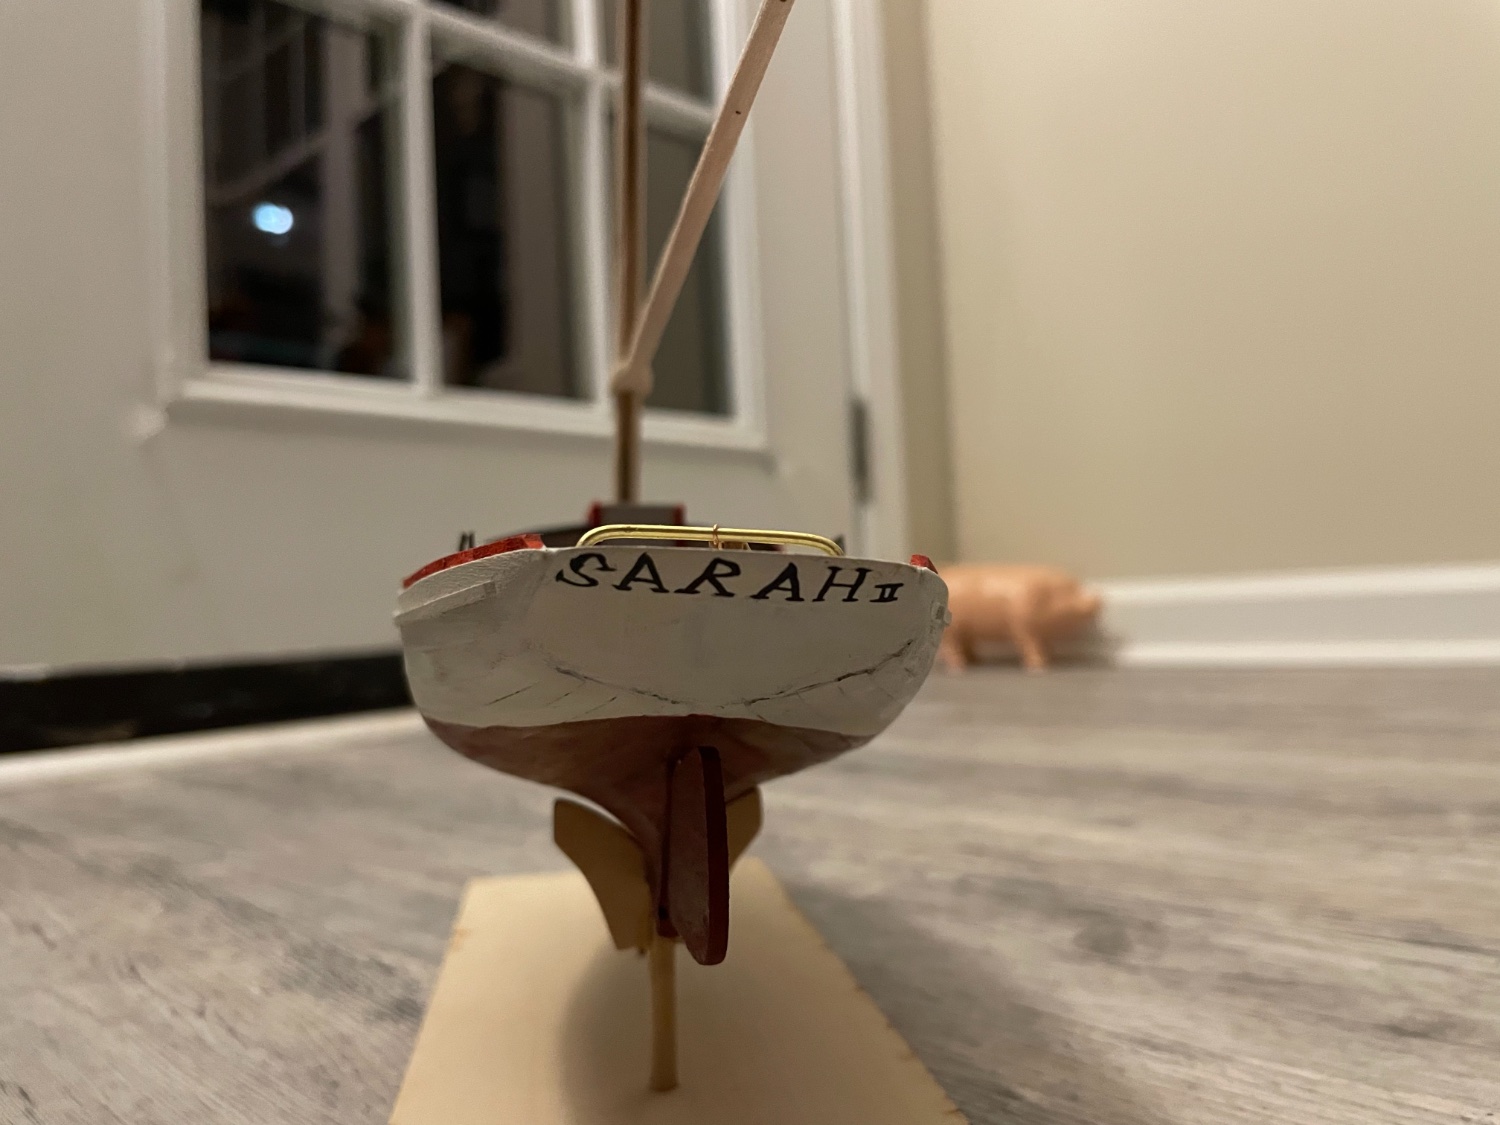
I was trying to come up with a name to paint on the back of the boat, and “Sarah II” came to mind. Just seemed right.
Also put the name on the trailboards, rather than the designs in the instructions. Did less well free-handing this.
And here’s the model on my shelf.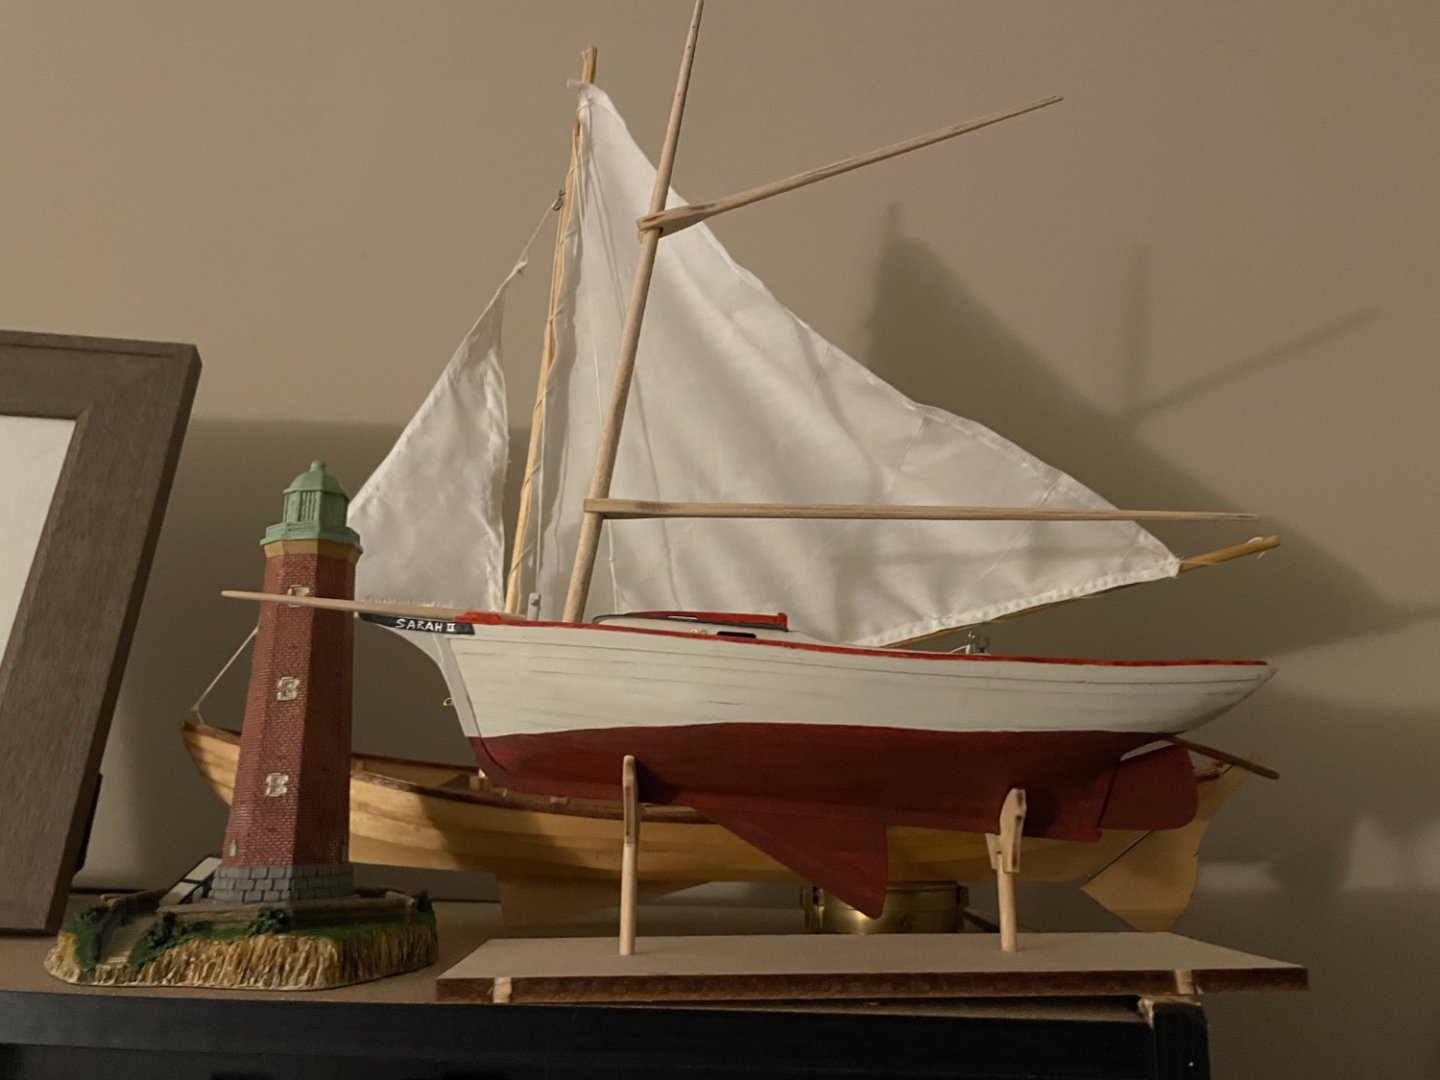
I may take a step back on this project while I wait for my wife to make sails. My next project is going to be the Picket Boat no. 1 from Model Shipways, and I have an idea to make it RC.
- druxey, Ryland Craze, Paul Le Wol and 1 other
-
 4
4
-
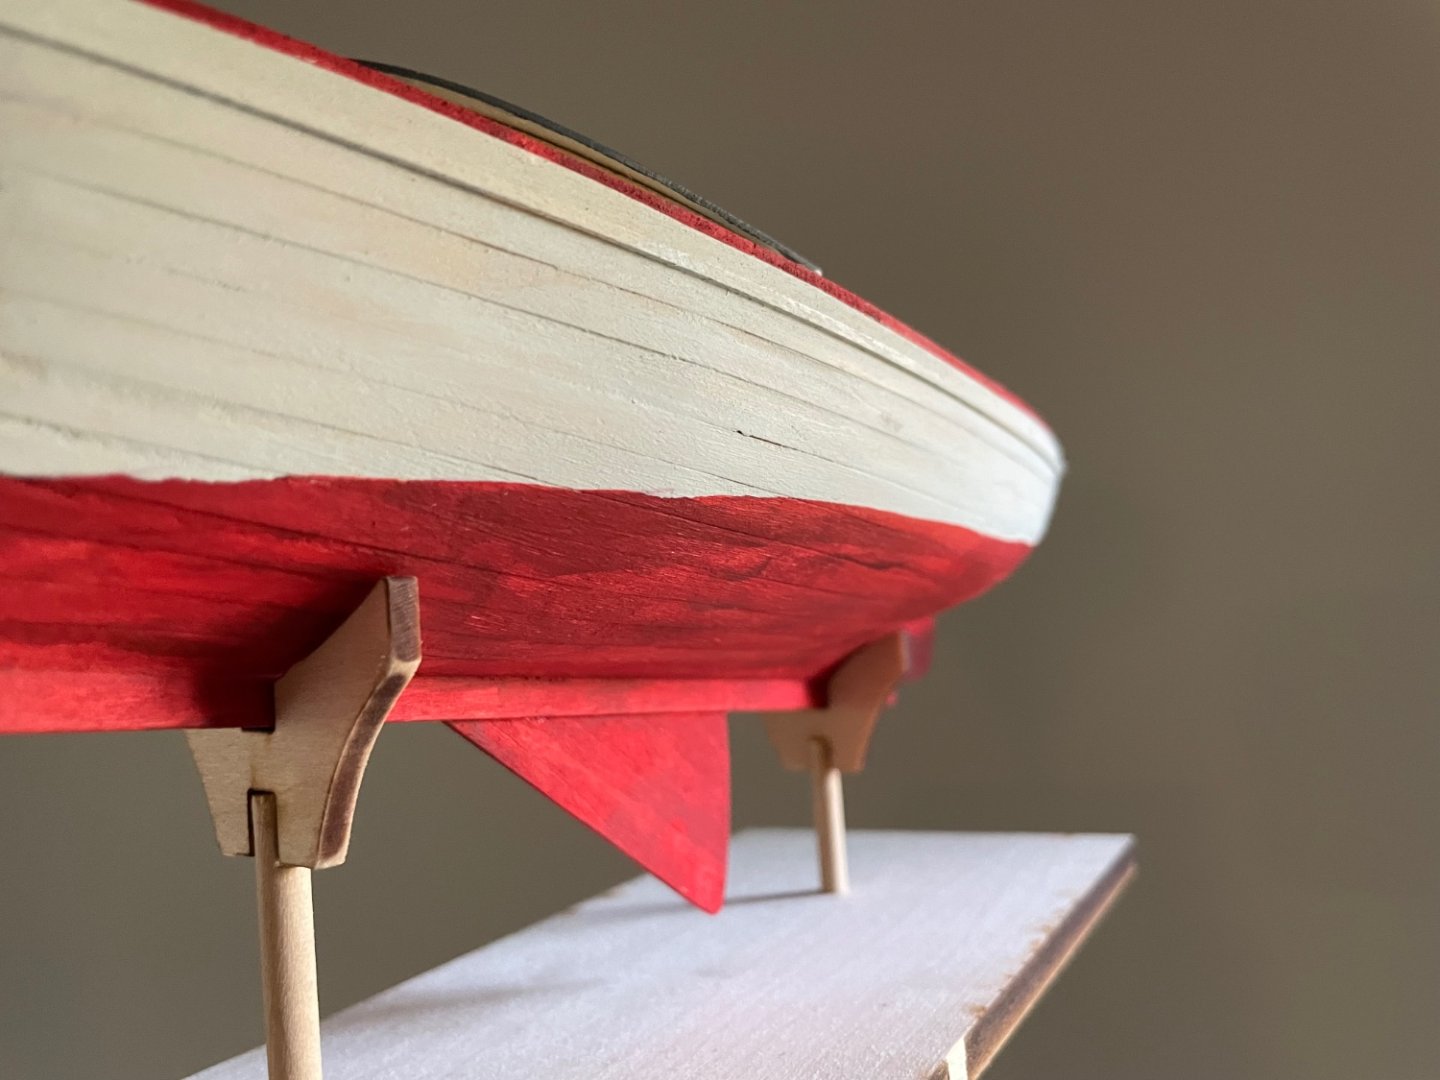
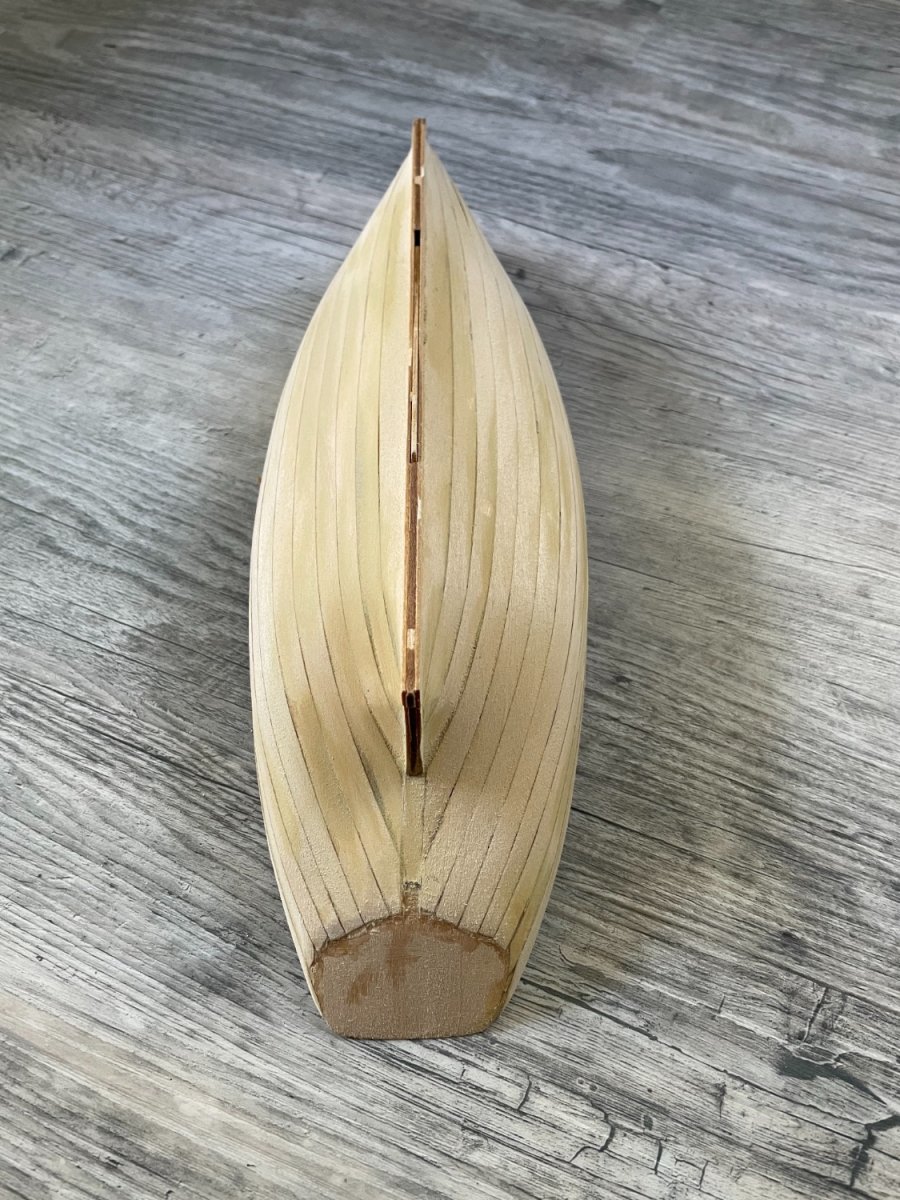
Repainted hull in a Red-Brown, I think the result is much better.
Also started roughing in the mast and bowsprit.

- druxey and Ryland Craze
-
2
-
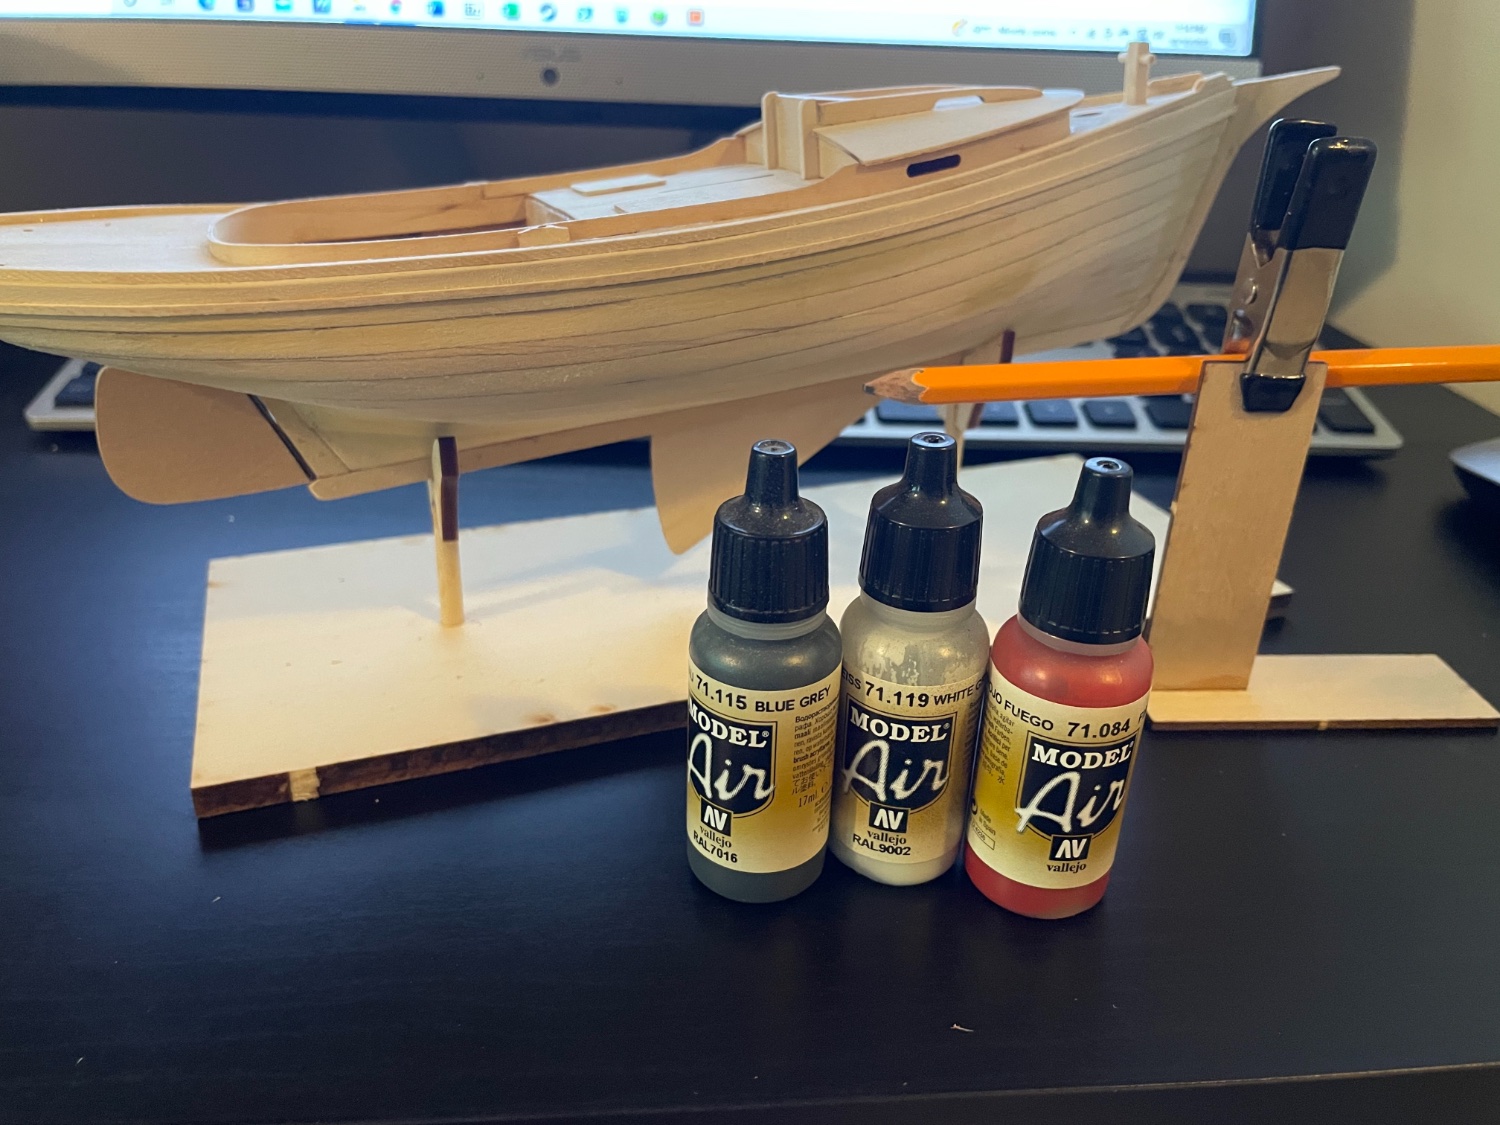
Decided to paint the boat using Vallejo Model Air, using brushes. It’s a prethinned paint, designed for airbrushes but works well brushed on too.
Colors are Blue Grey for the roof, Fire Red for the hull and seats and toe rails, and White Grey for just about everything else.
I’m very happy with the White-Grey and the Blue-Grey, however, I think the red could use another coat. Have also considered using a Red-brown on the hull.
In any case, the waterline needs to be cleaned up and the bottom given a second coat.
- Prowler901, Ryland Craze, druxey and 1 other
-
4
-
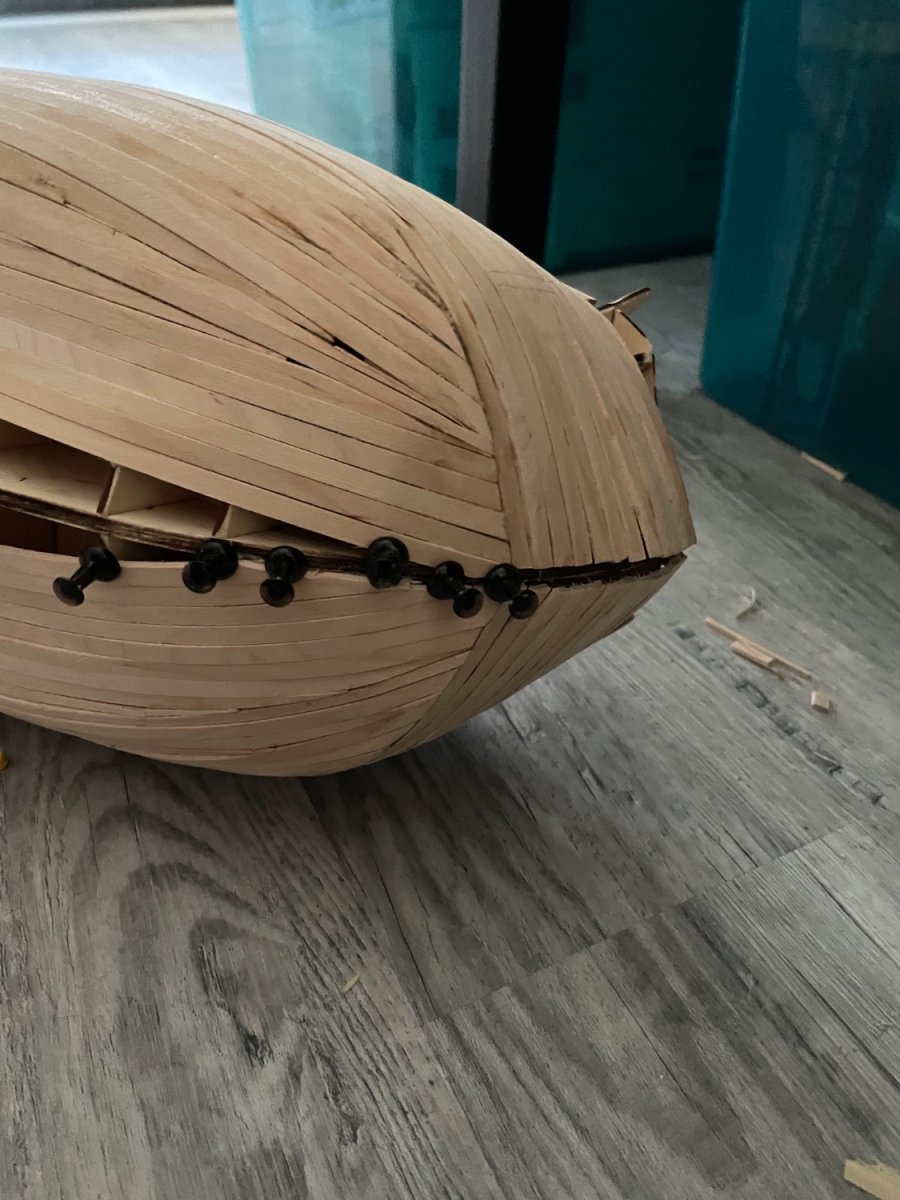
I found the timber supplied for the toe rail to be too thick for my liking.
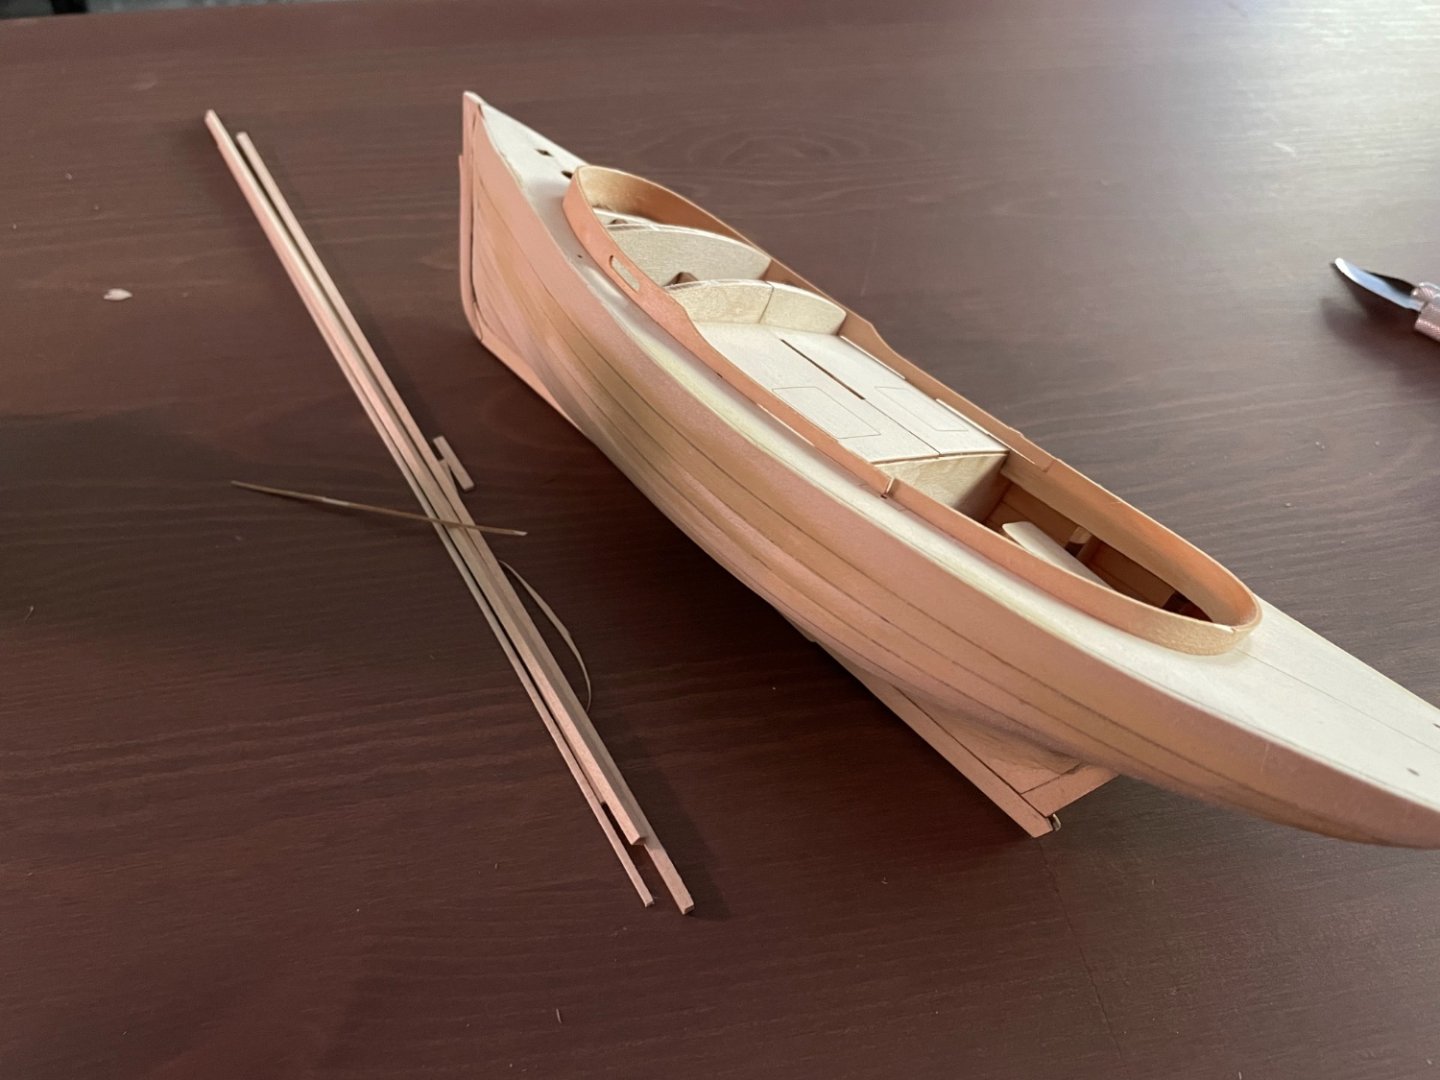
So I swapped it out for a thinner piece which was left unused from the Swampscott Dory.

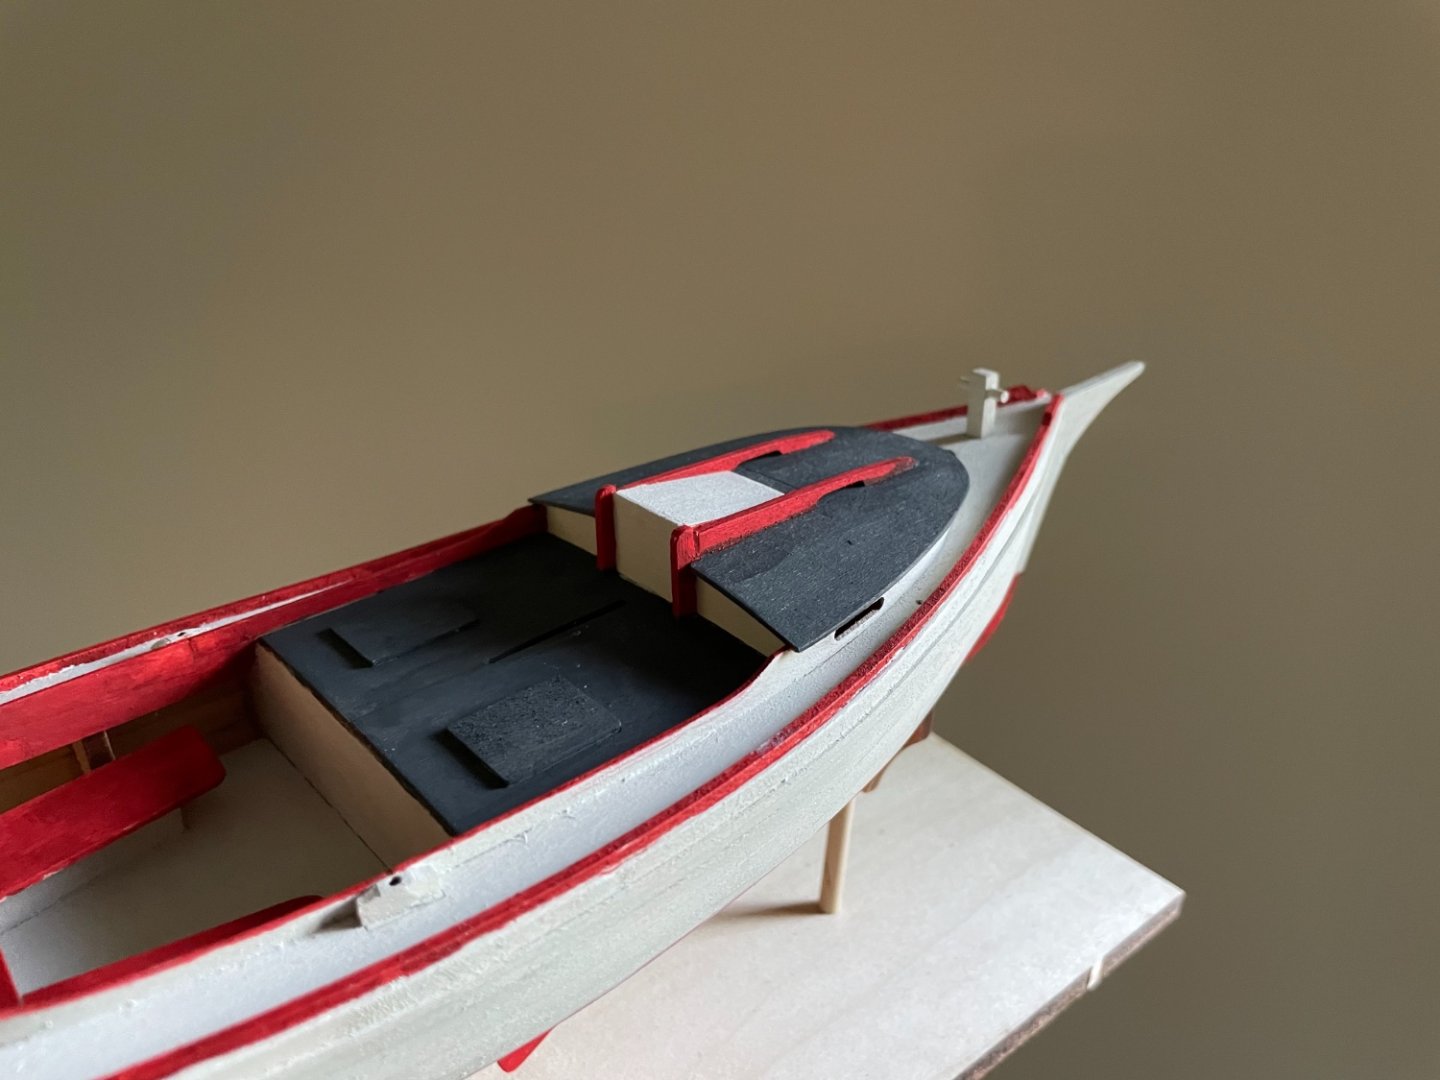
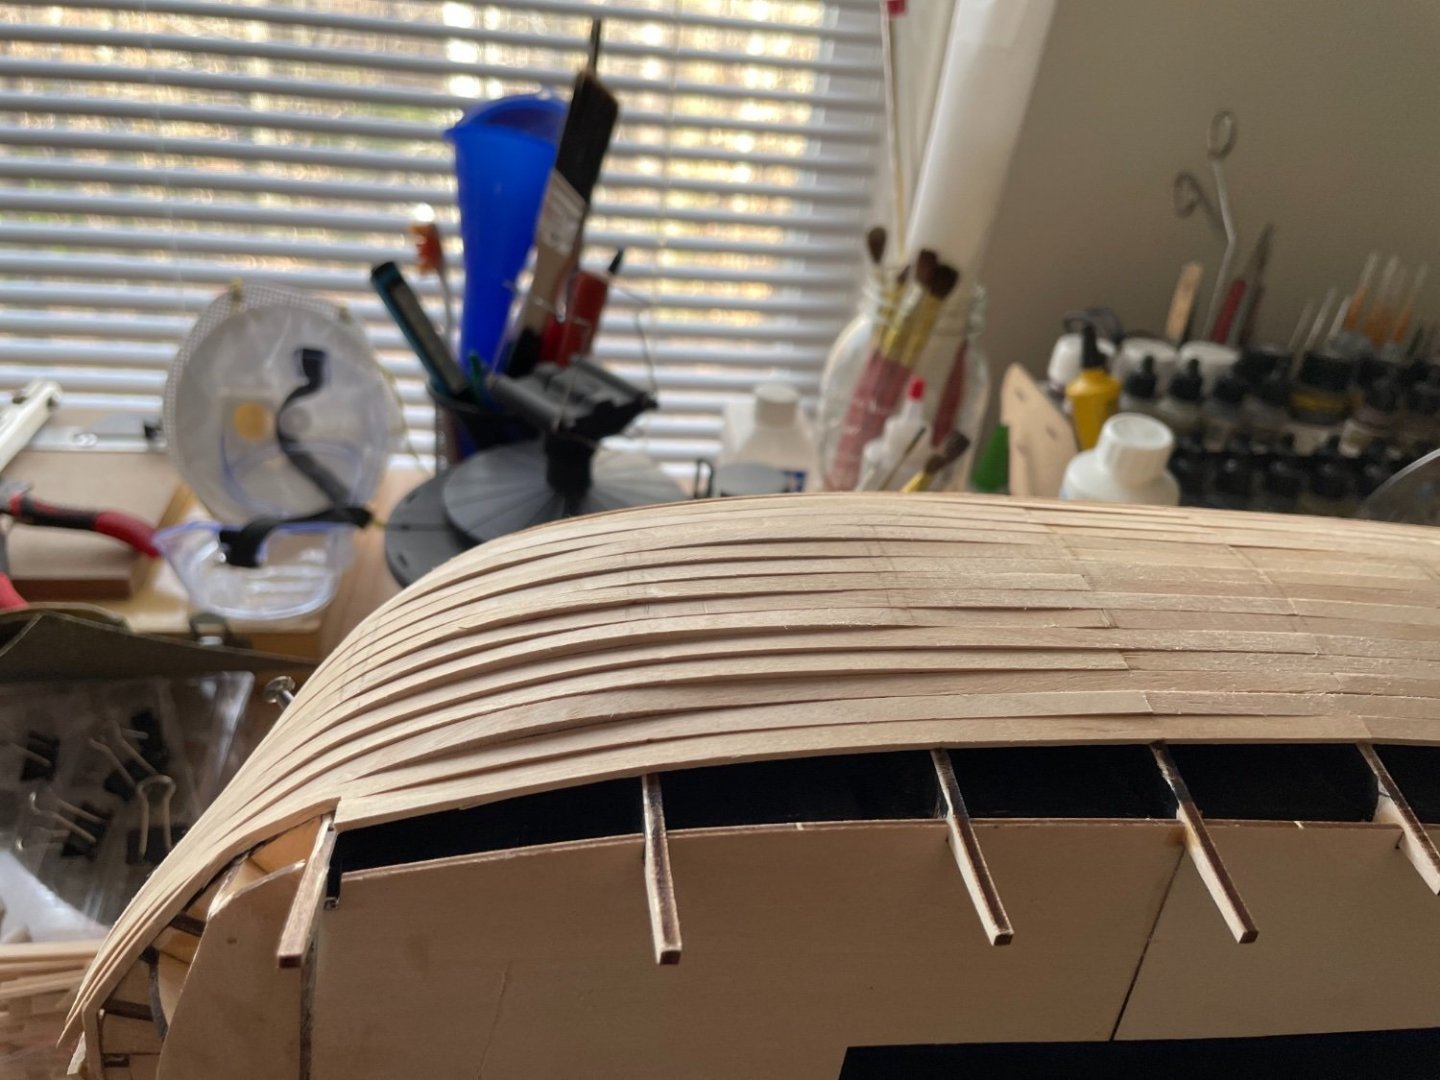
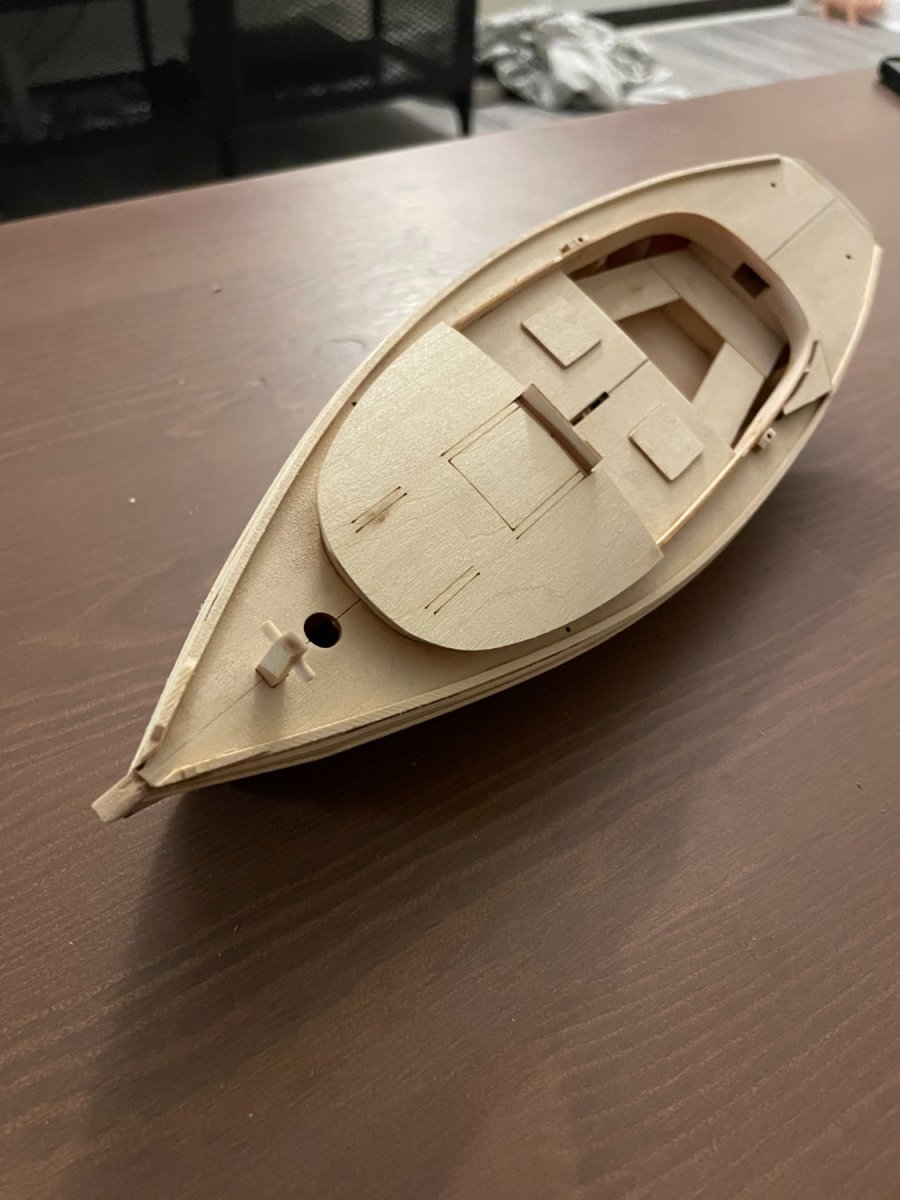
The deck furniture came together really quickly, the coaming around the cockpit and the cabin walls bent very easily after being wetted and steamed with an electric kettle.
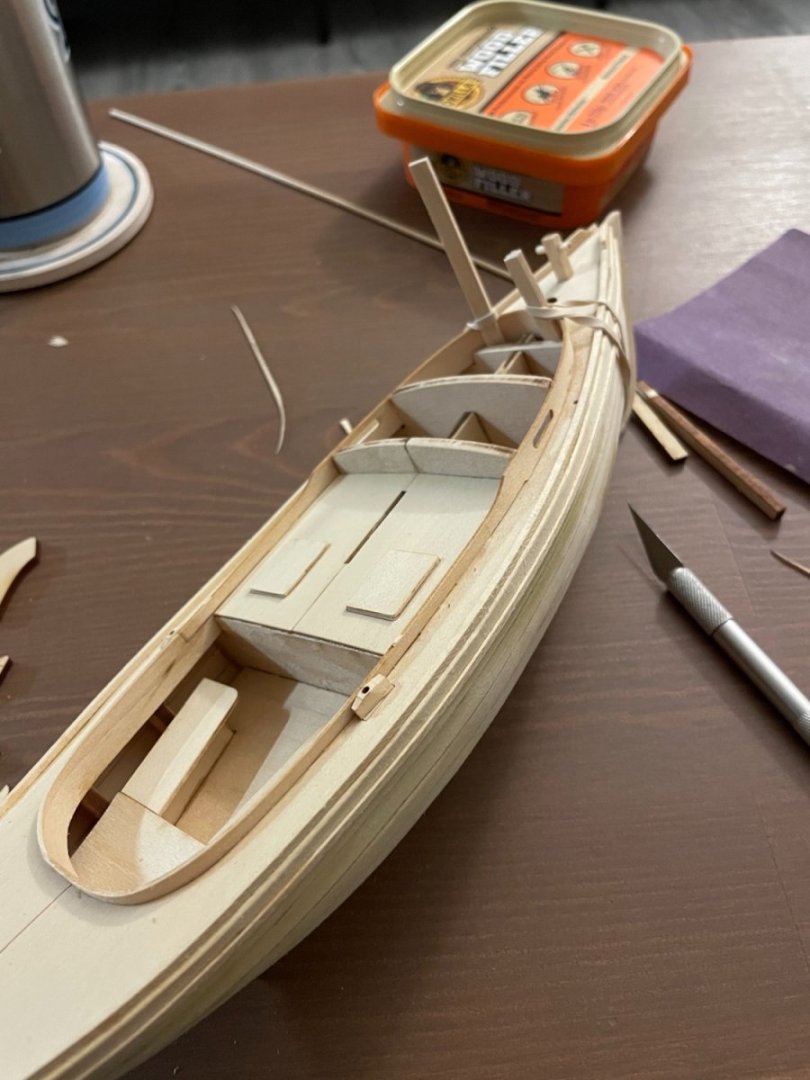
I didn’t realize that the Samson post was provided as two pieces on one of the lasercut sheets, so I ended up fashioning my own out of spare wood. I like mine better anyway.
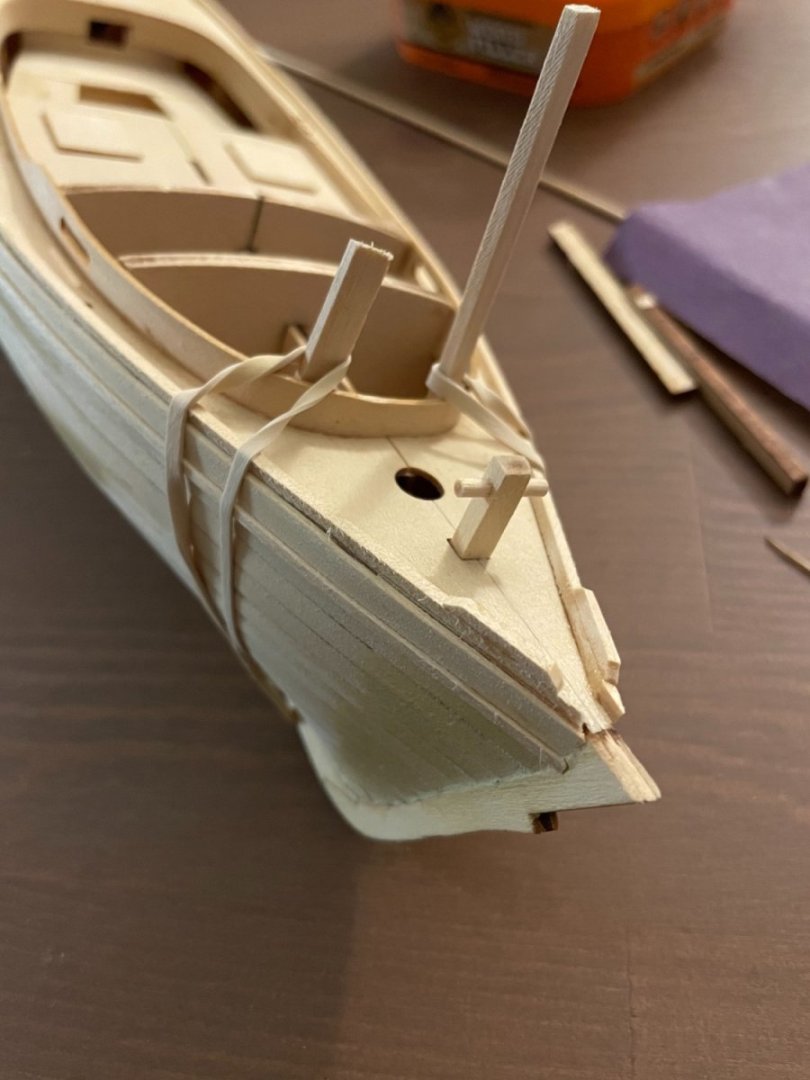
The last pieces I added were the cabin roof and door. There is a gap between the roof and door, but I think it can be covered by the sliding cabin door.

- Ryland Craze, ccoyle, Paul Le Wol and 3 others
-
6
-
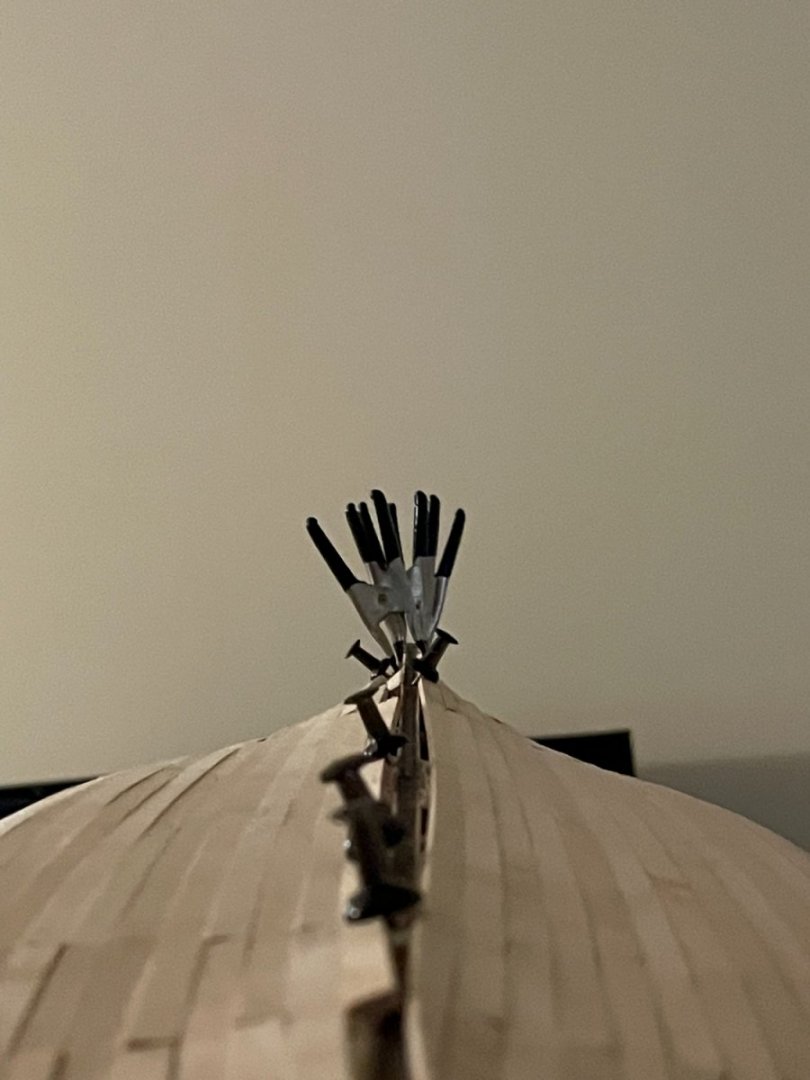
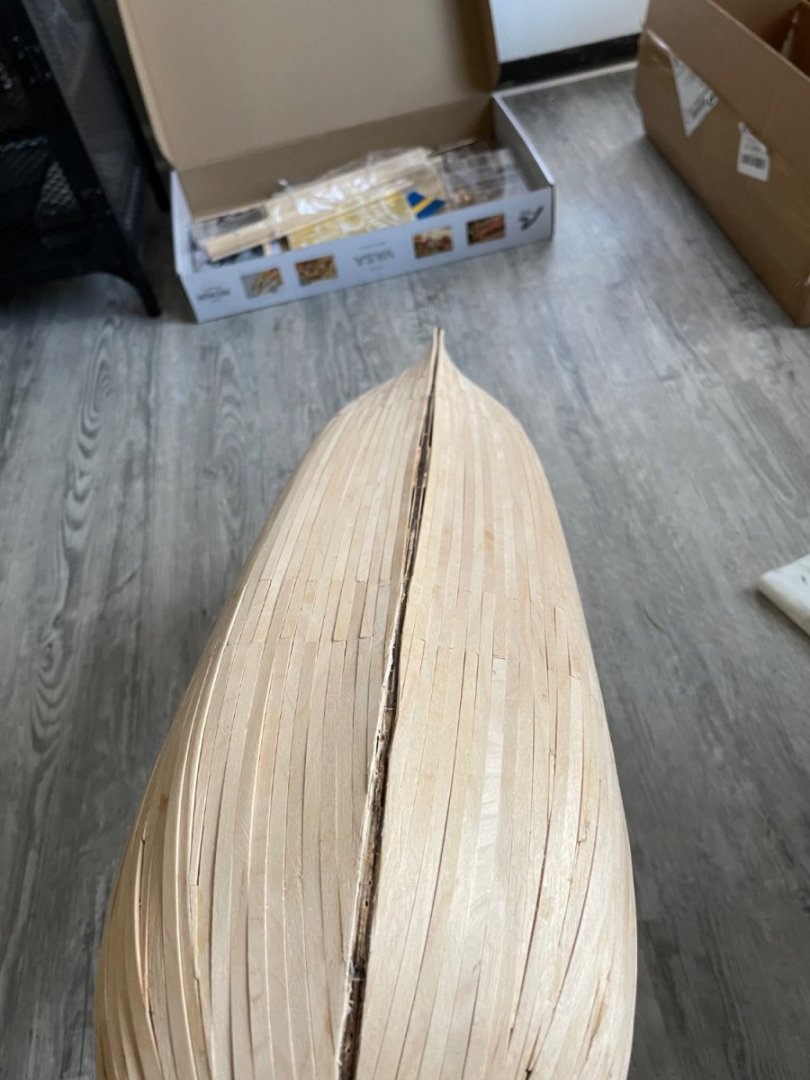
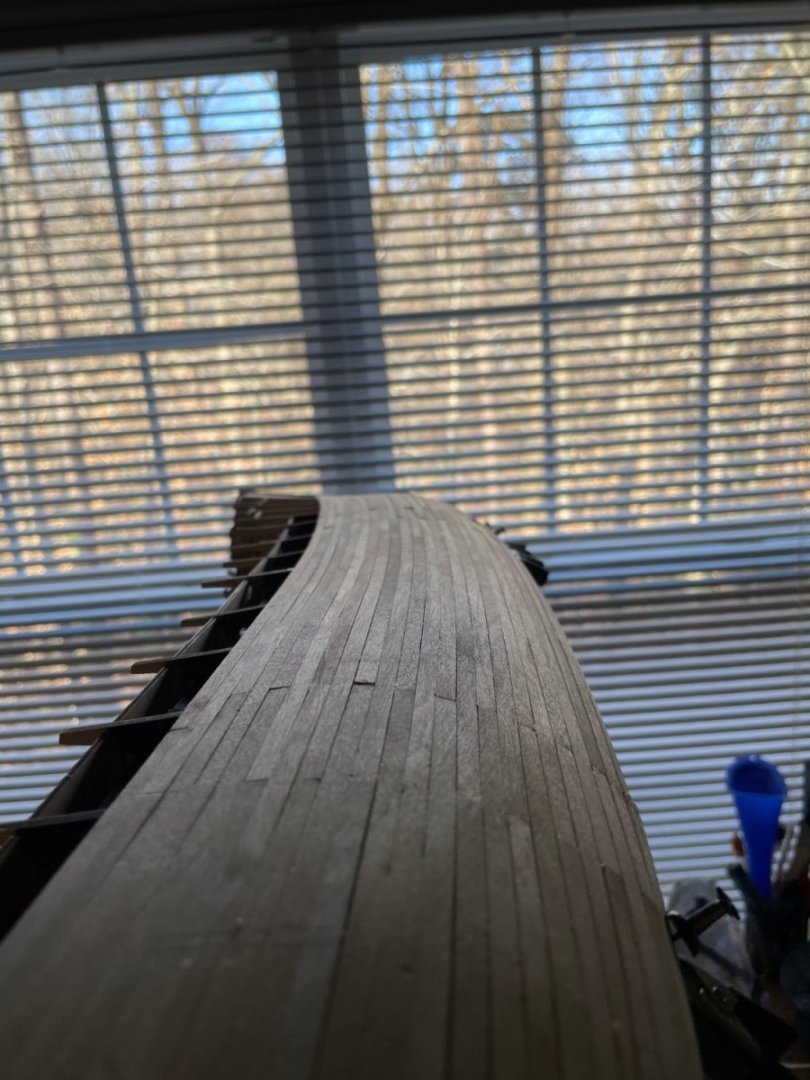
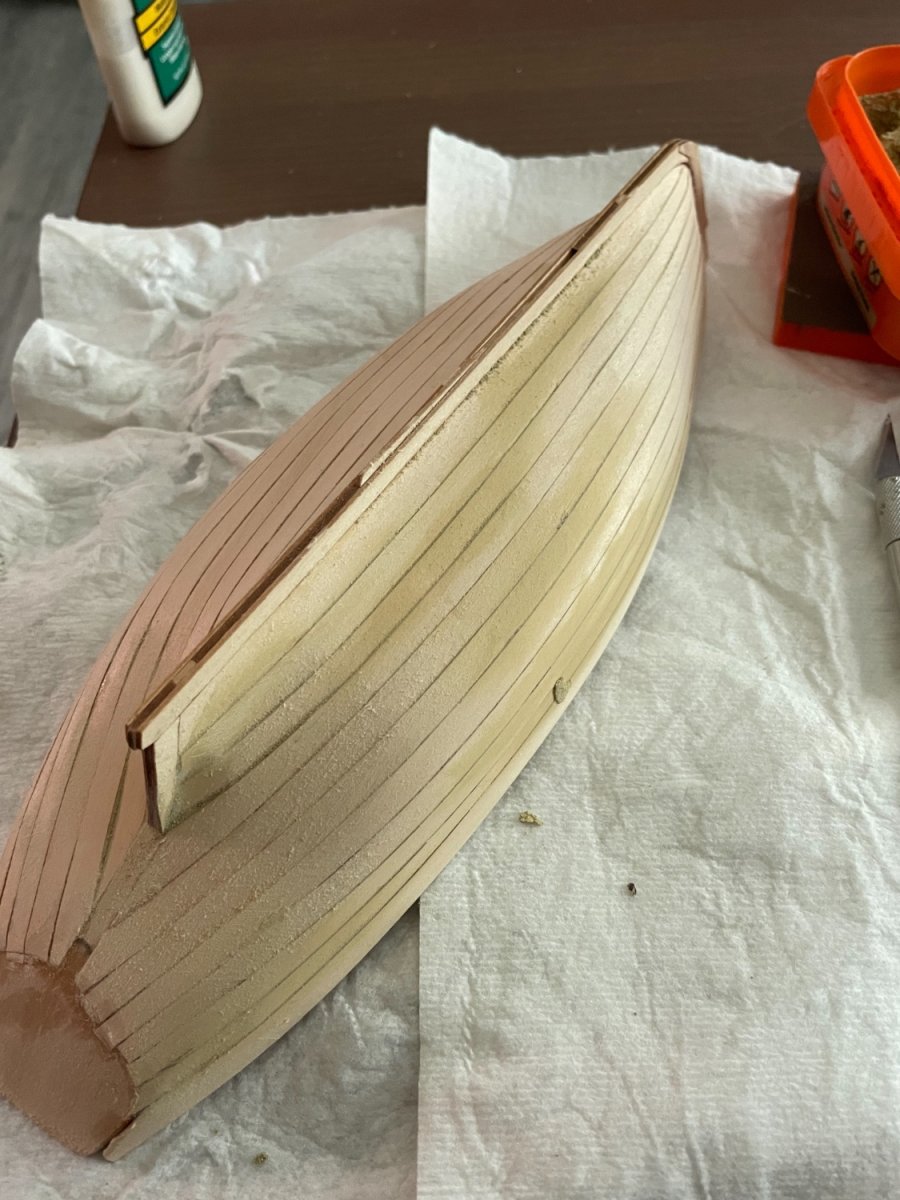
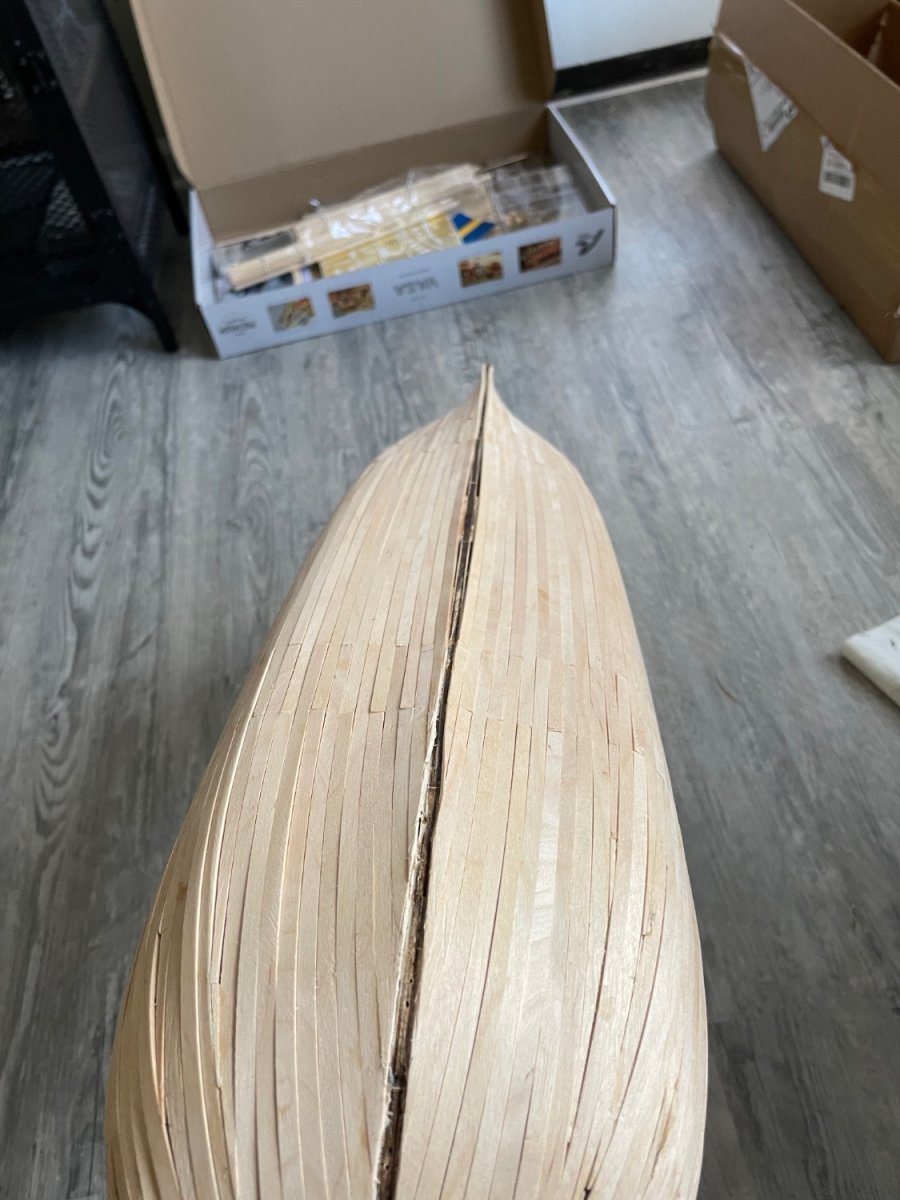
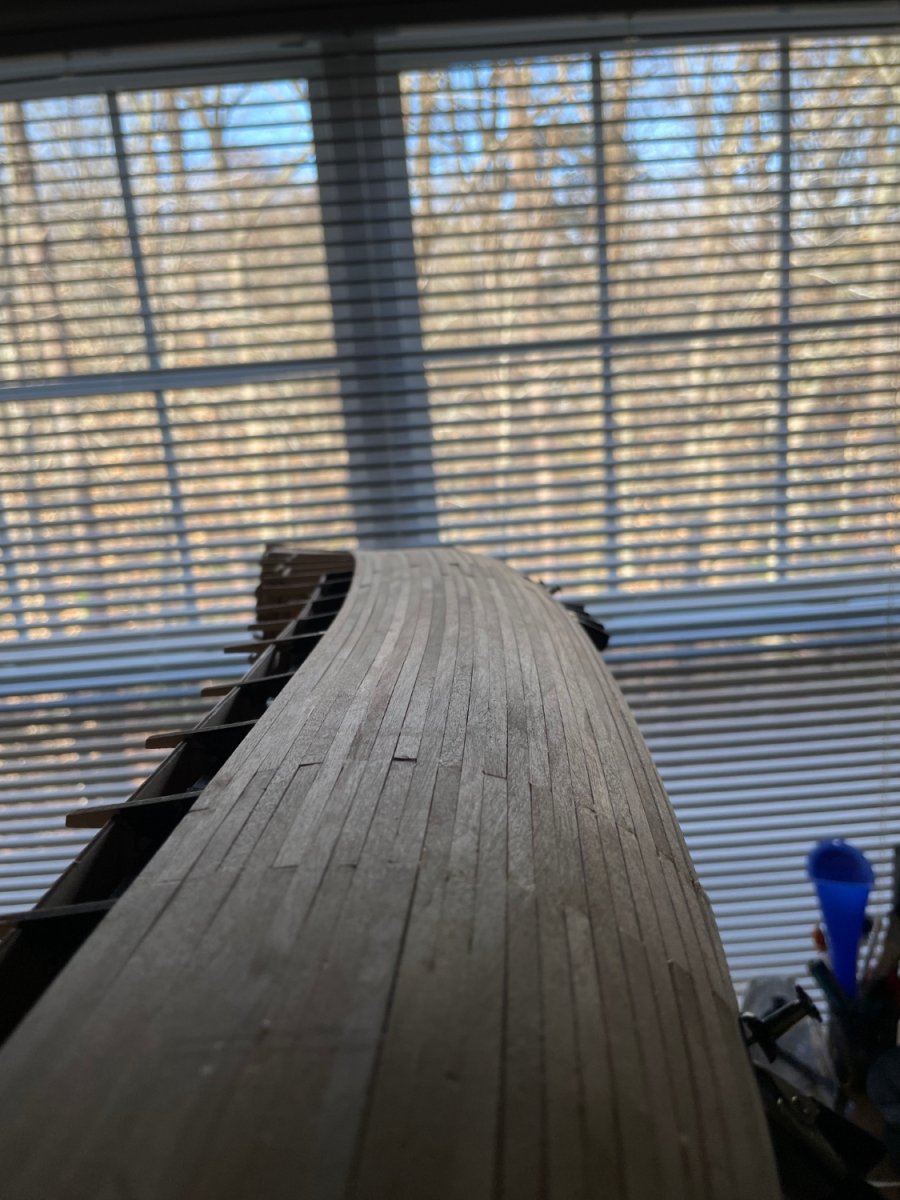
So as I laid the strake above the garboard, I decided to switch to superglue, which got the planking done in no time at all, especially with pre-cut strakes. So I managed to finish placing all the planks last night.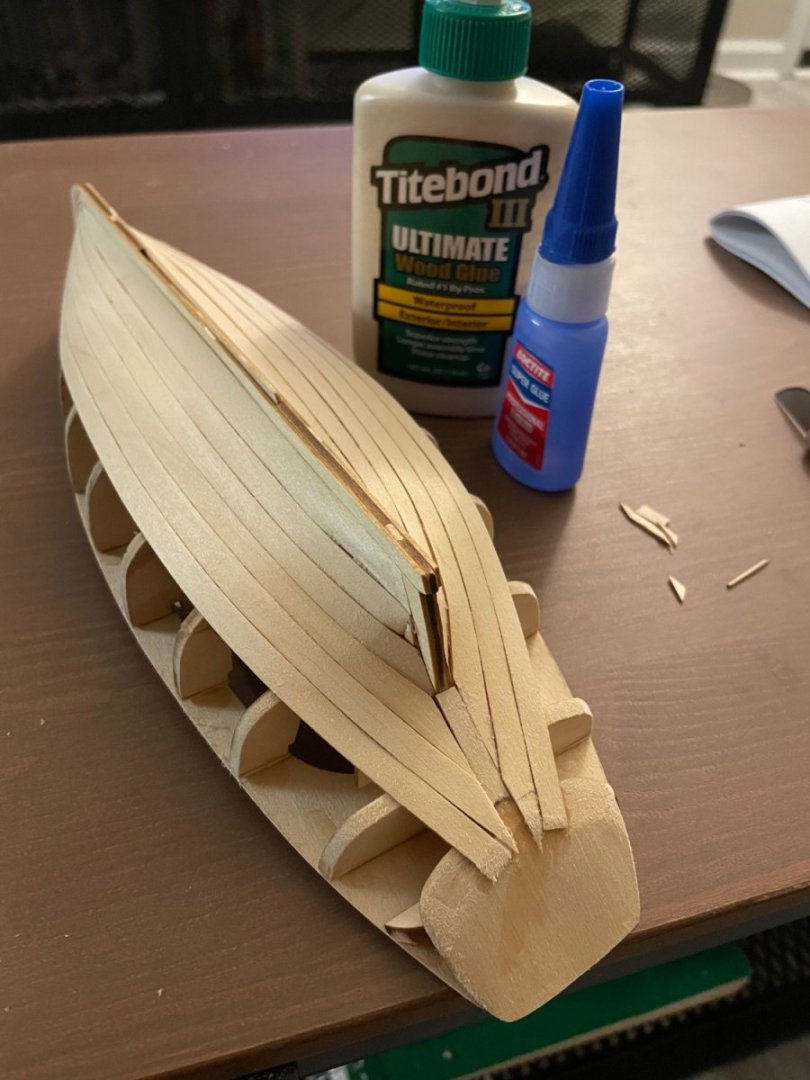
Here is a picture of the finished planking before sanding and filling.
I had seen many suggesting Elmer’s Wood Filler in another post, but I decided to try a similar product made by Gorilla, which is working well to my taste.
My goal is a less than seamlessly smooth finish which will show the outline of the planks when it is painted.
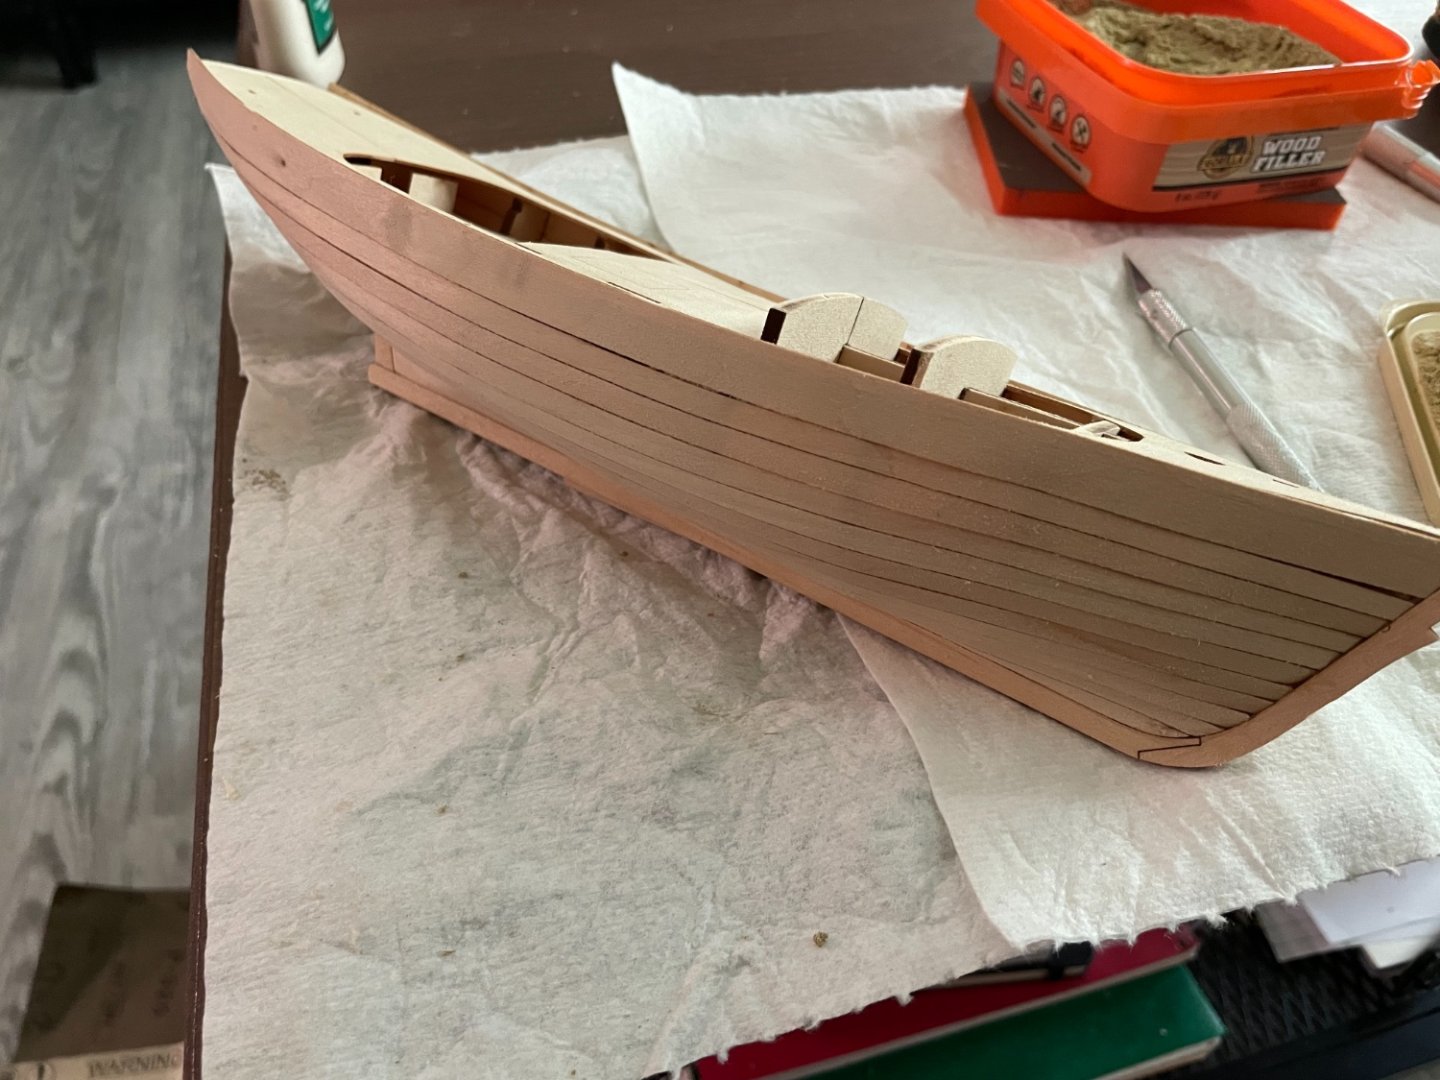
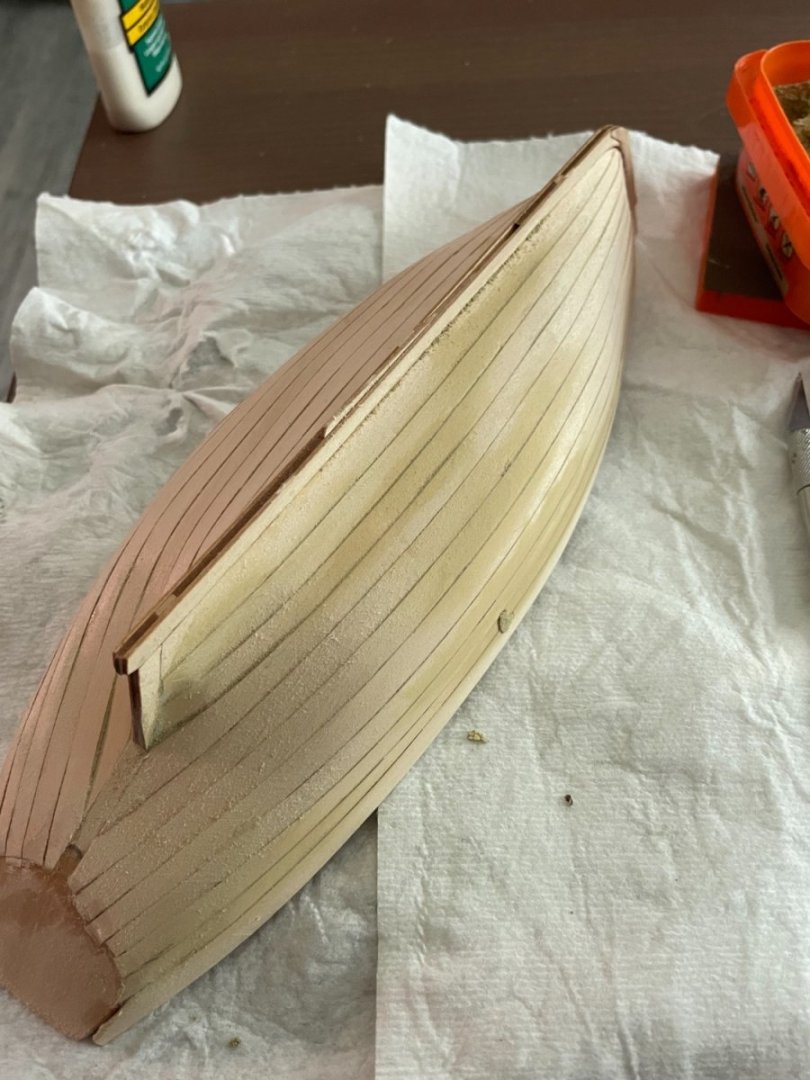
This is a picture of the boat after trimming and sanding the sheer strake.
So far this has been a very enjoyable and quick build, since I only started it on Saturday! Very happy with it so far.
- druxey, Prowler901, Mike Collier and 2 others
-
5
-
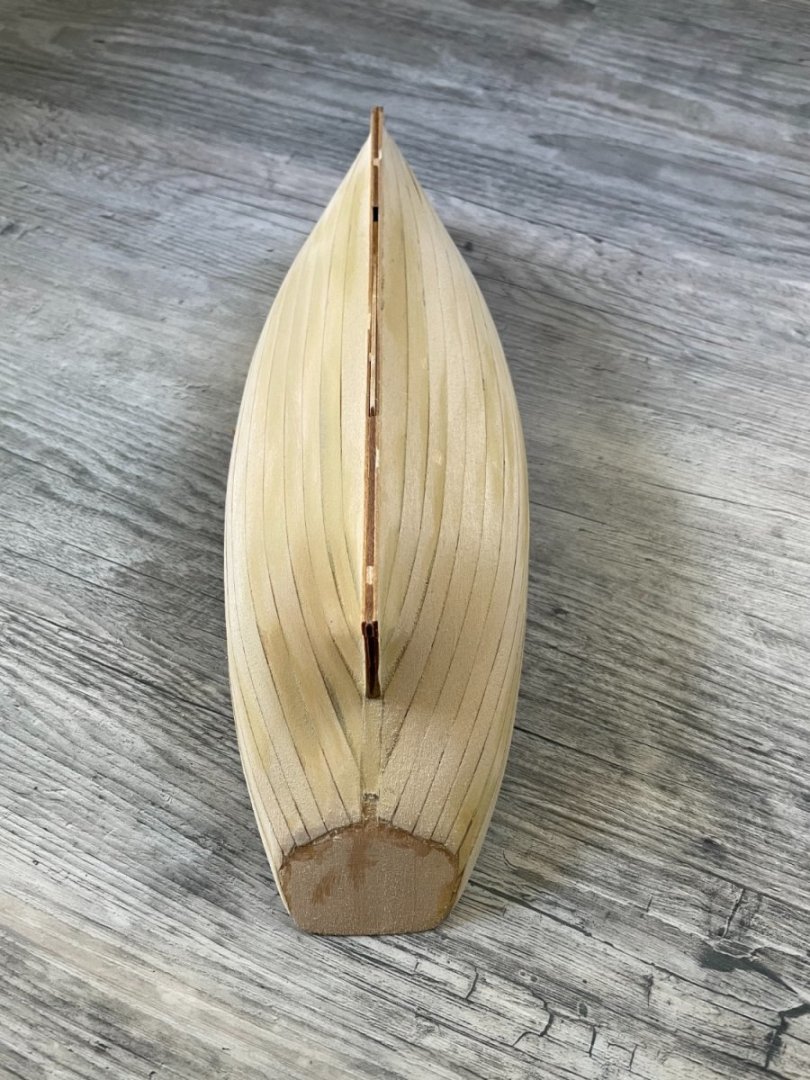
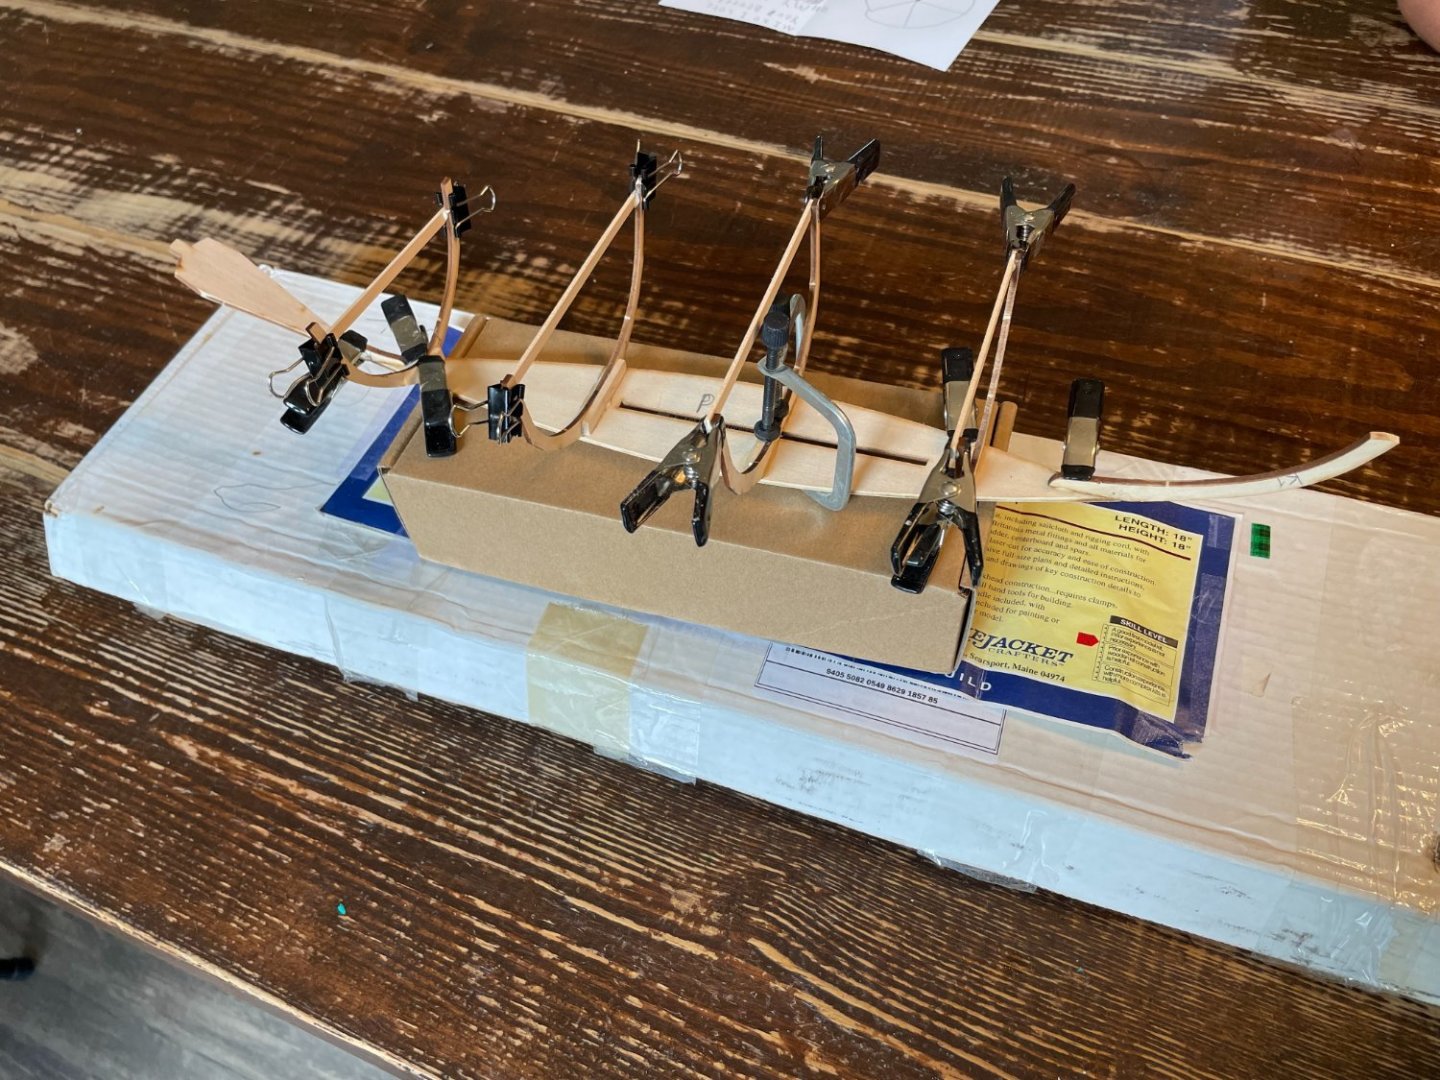
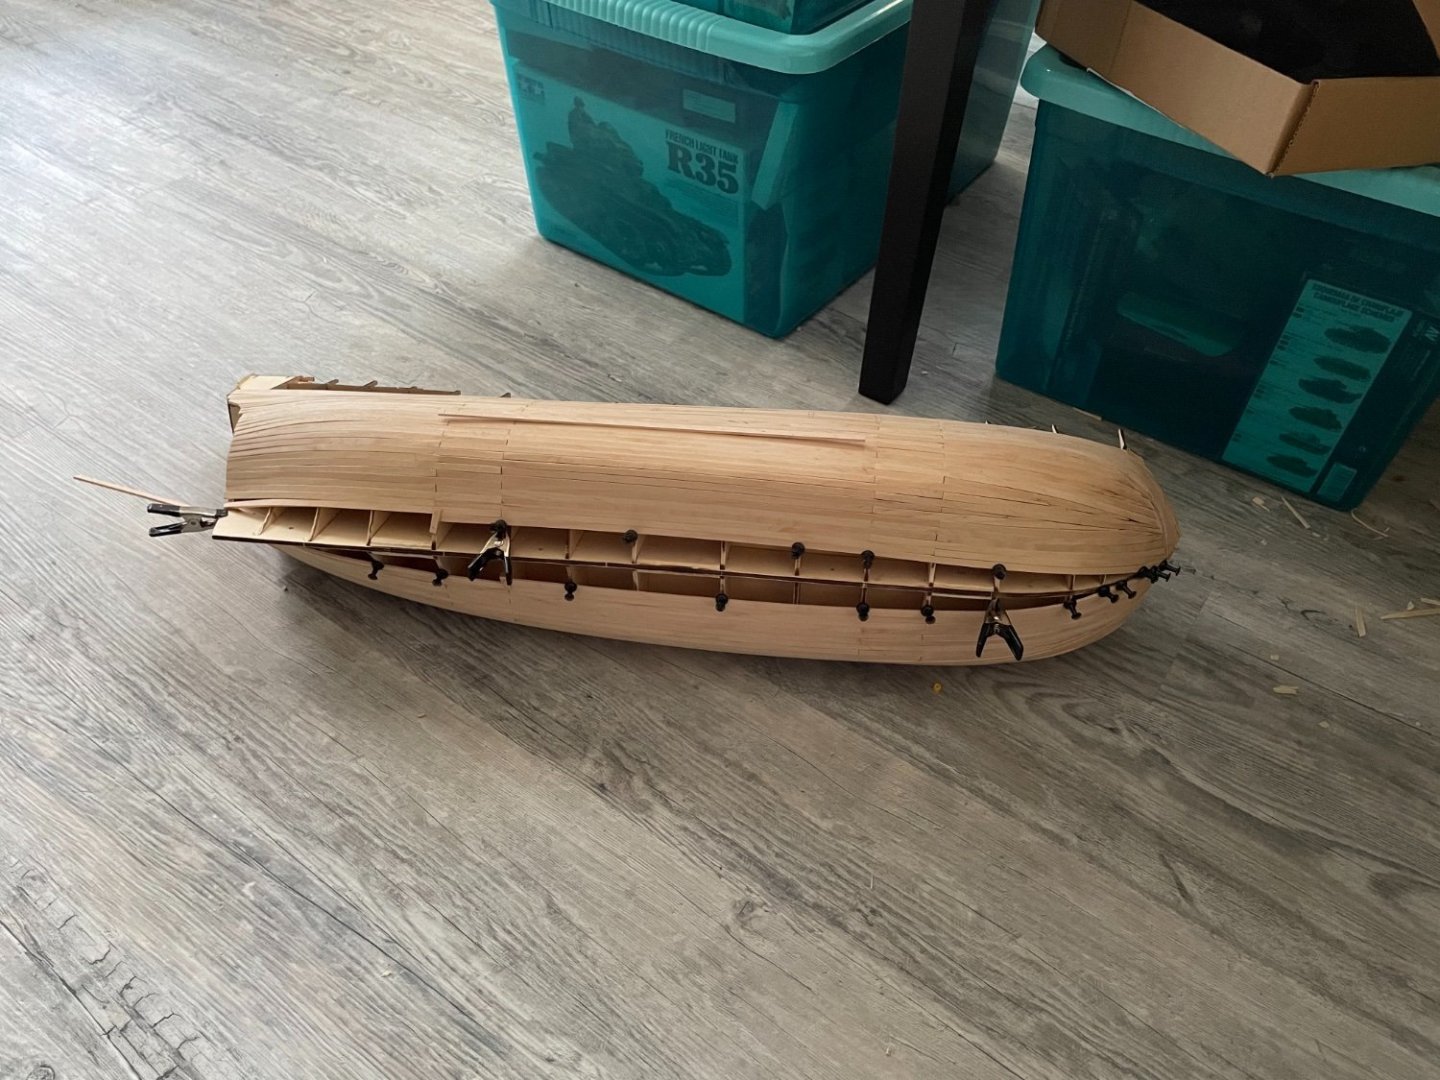
Have made progress fairing the frames, then glued on the last keel pieces. Now have wet the garboard strake and dry fit it to the hull.
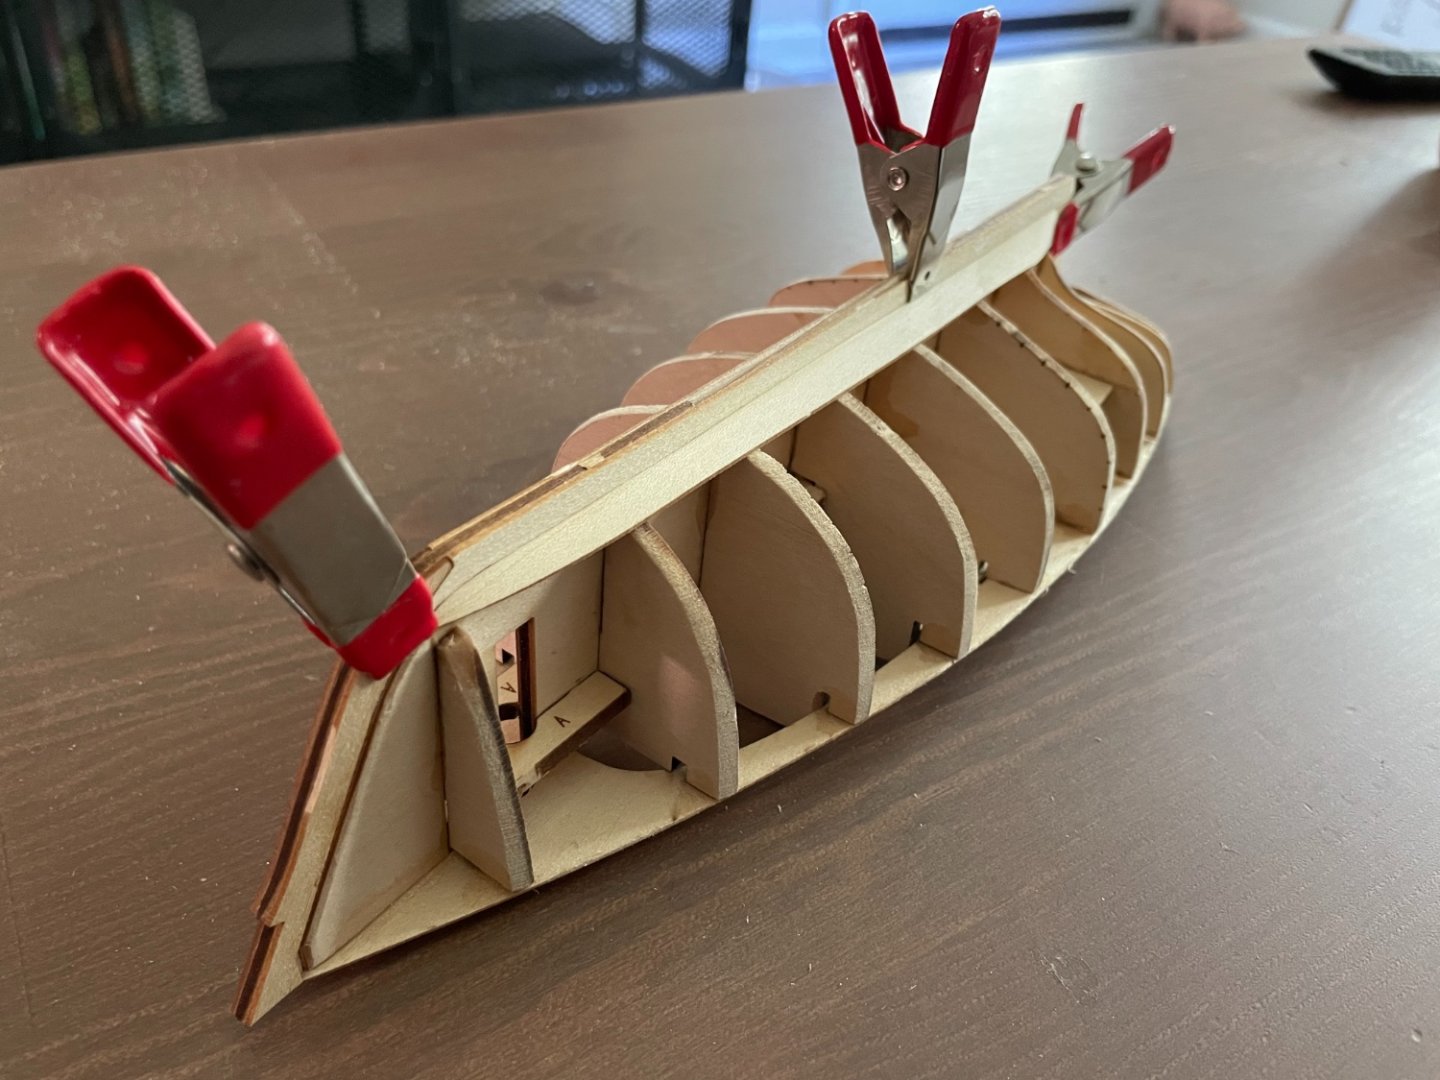
Note: There is no need to cut a rabbet on this model, only a little adjustment.
- Prowler901 and druxey
-
2
-
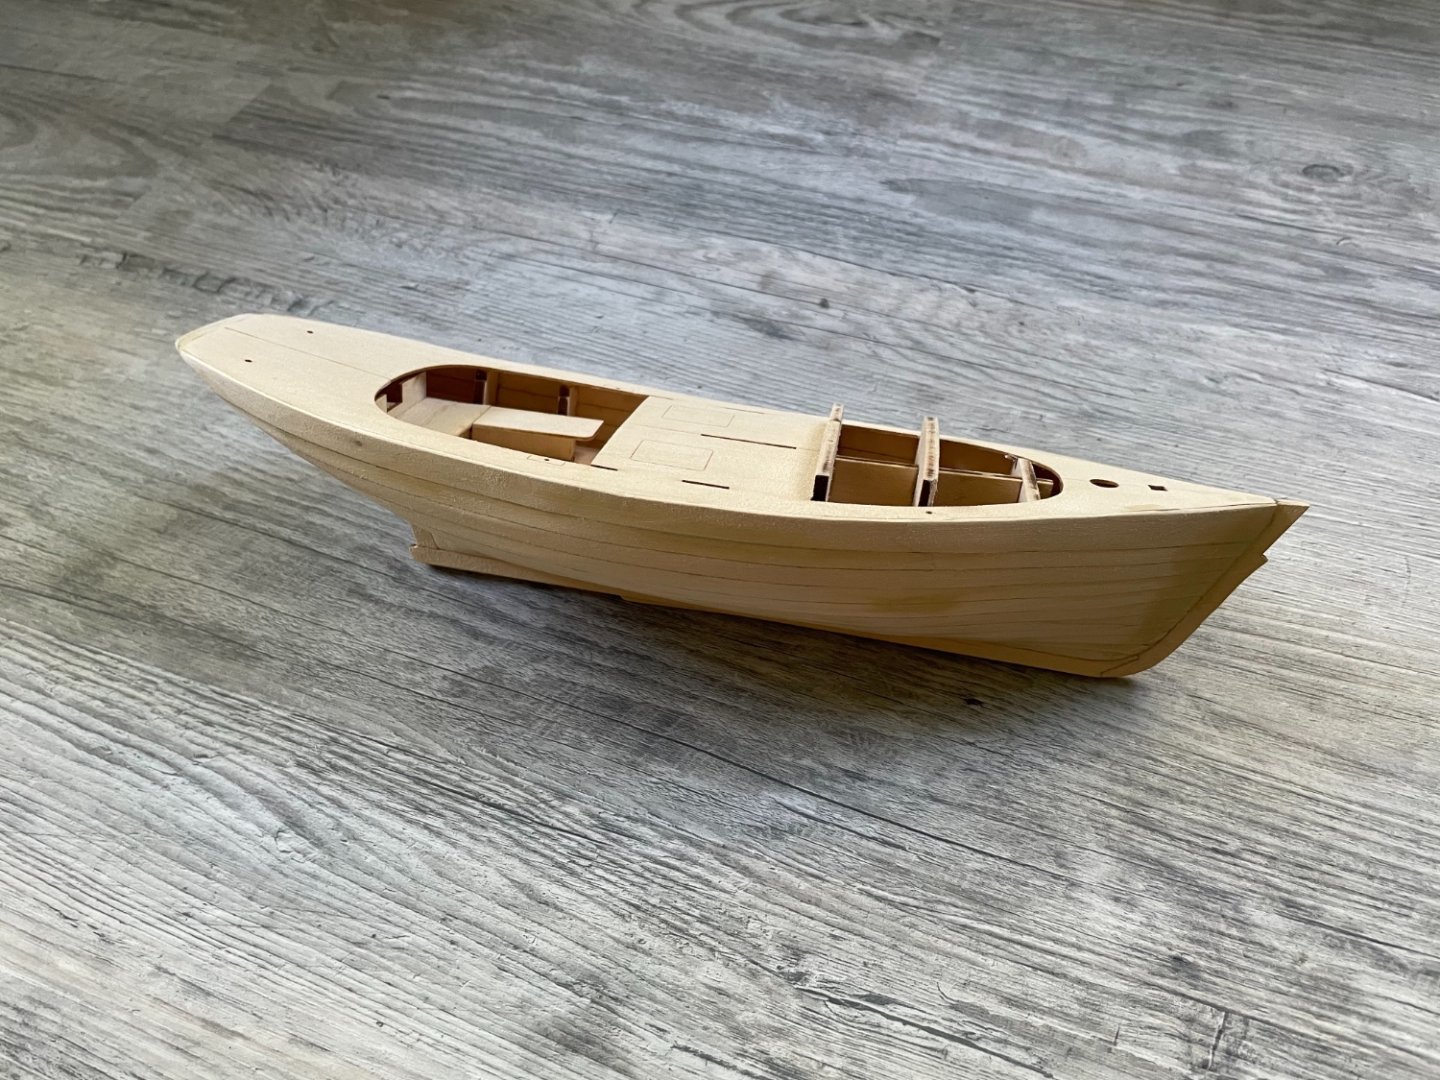
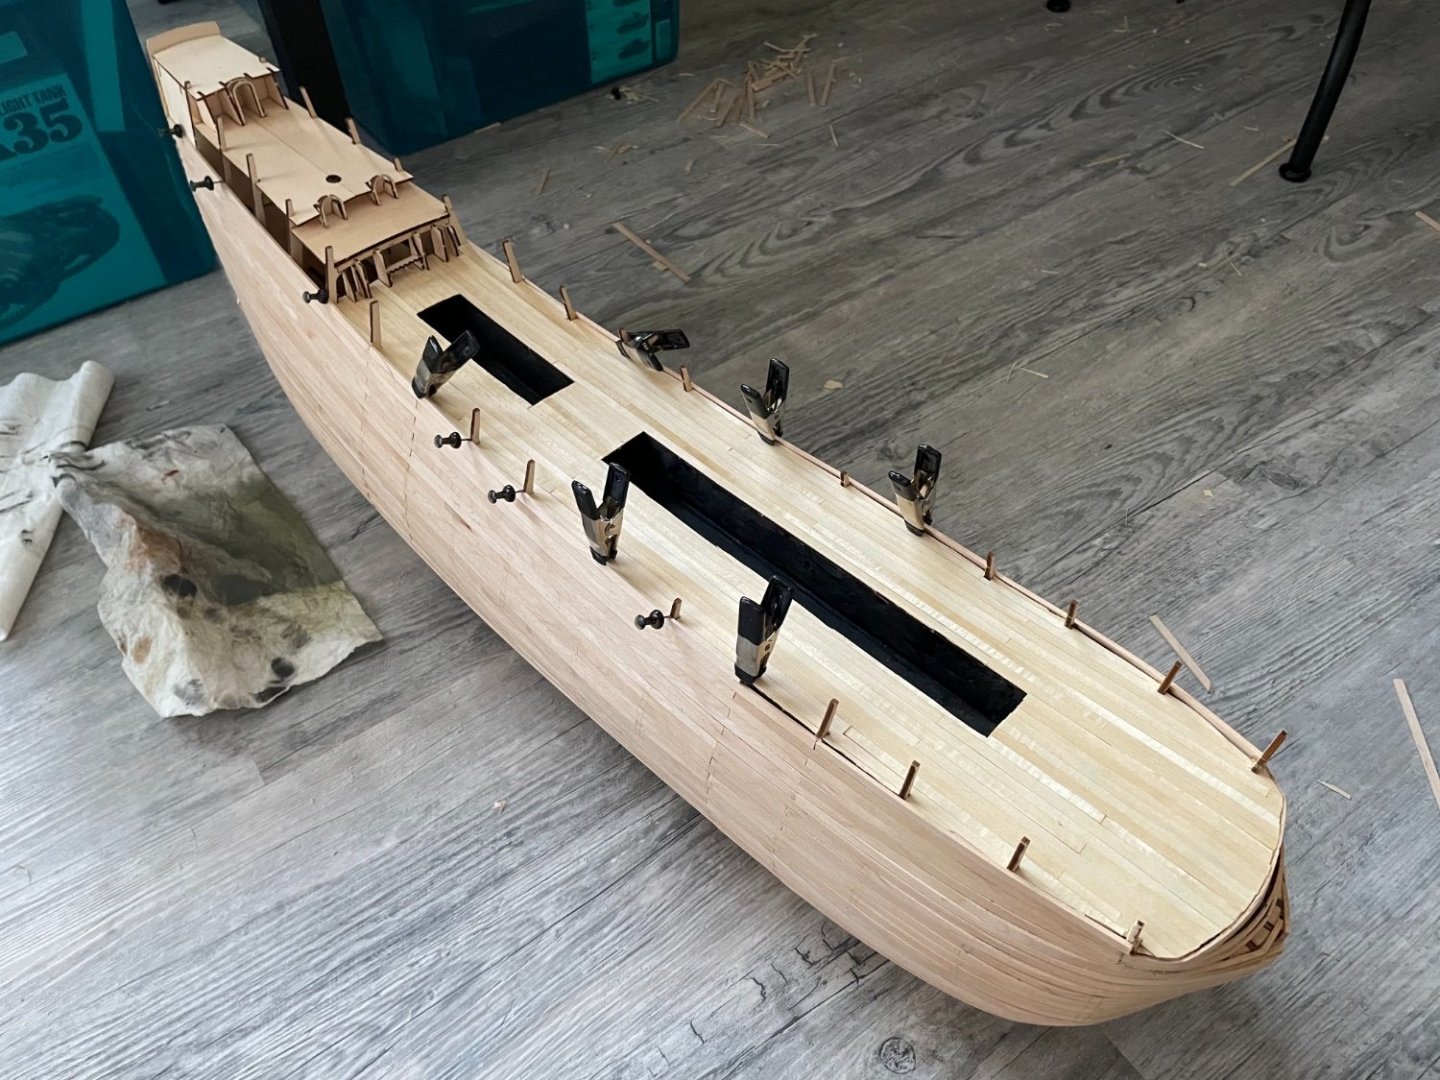
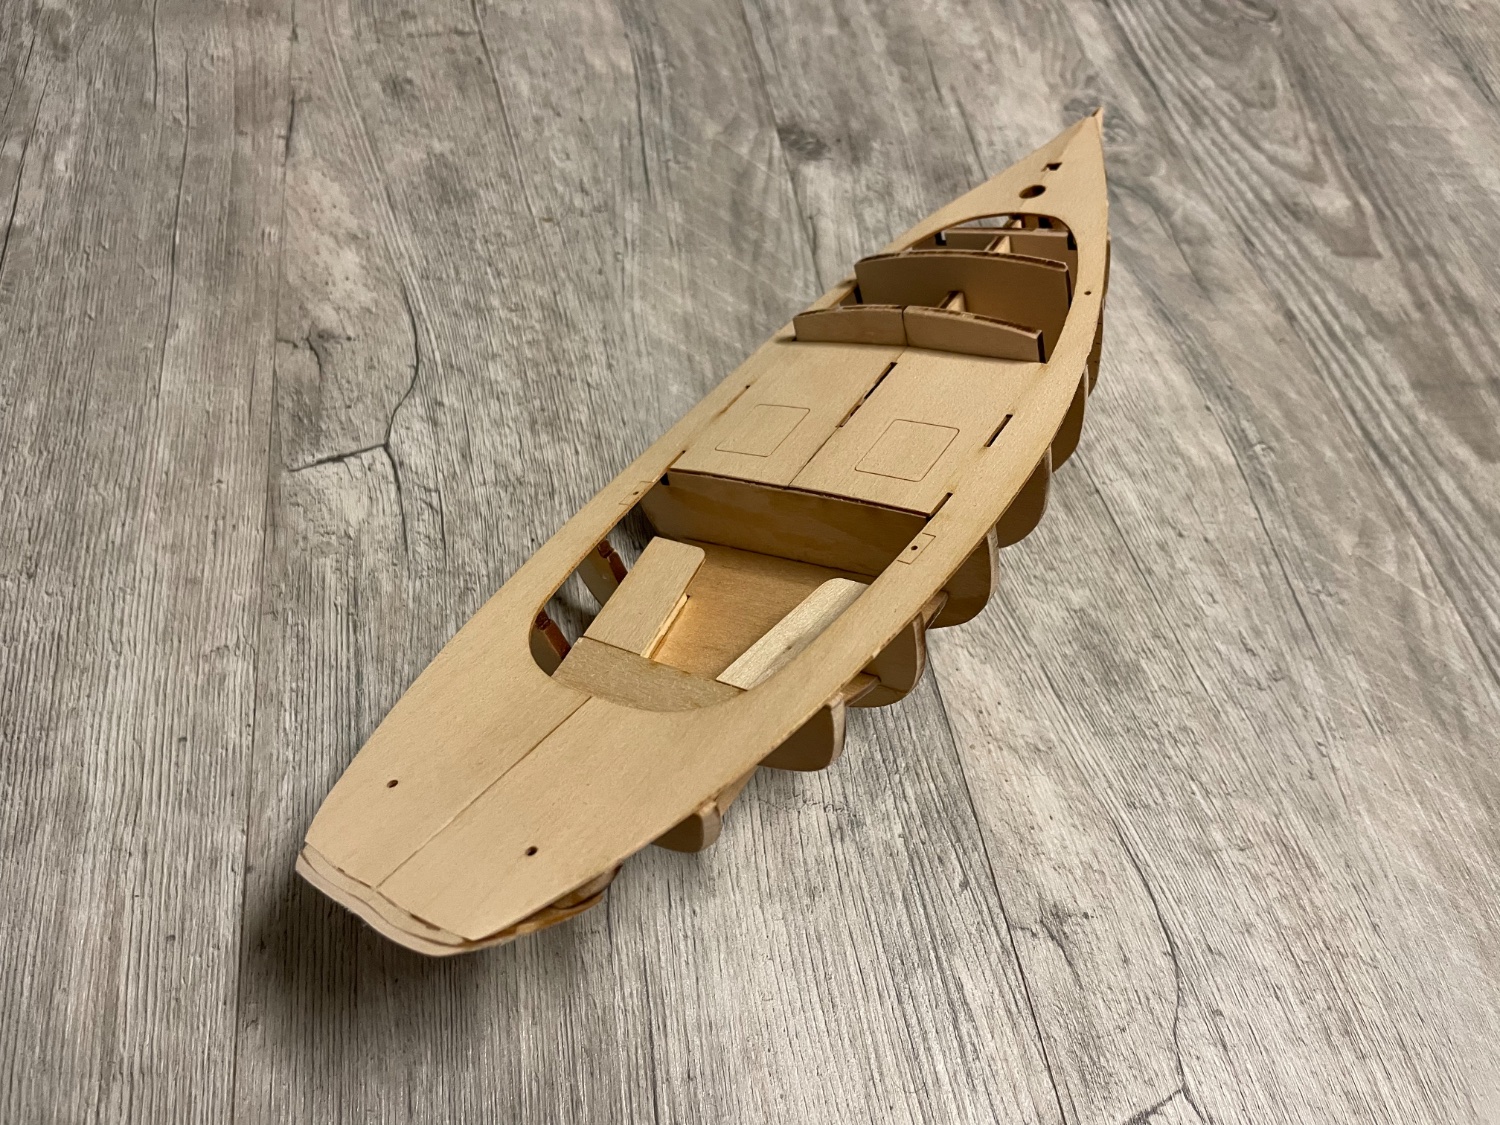
Also attached the transom and deck.
Some slight mistakes but overall very pleased with it.
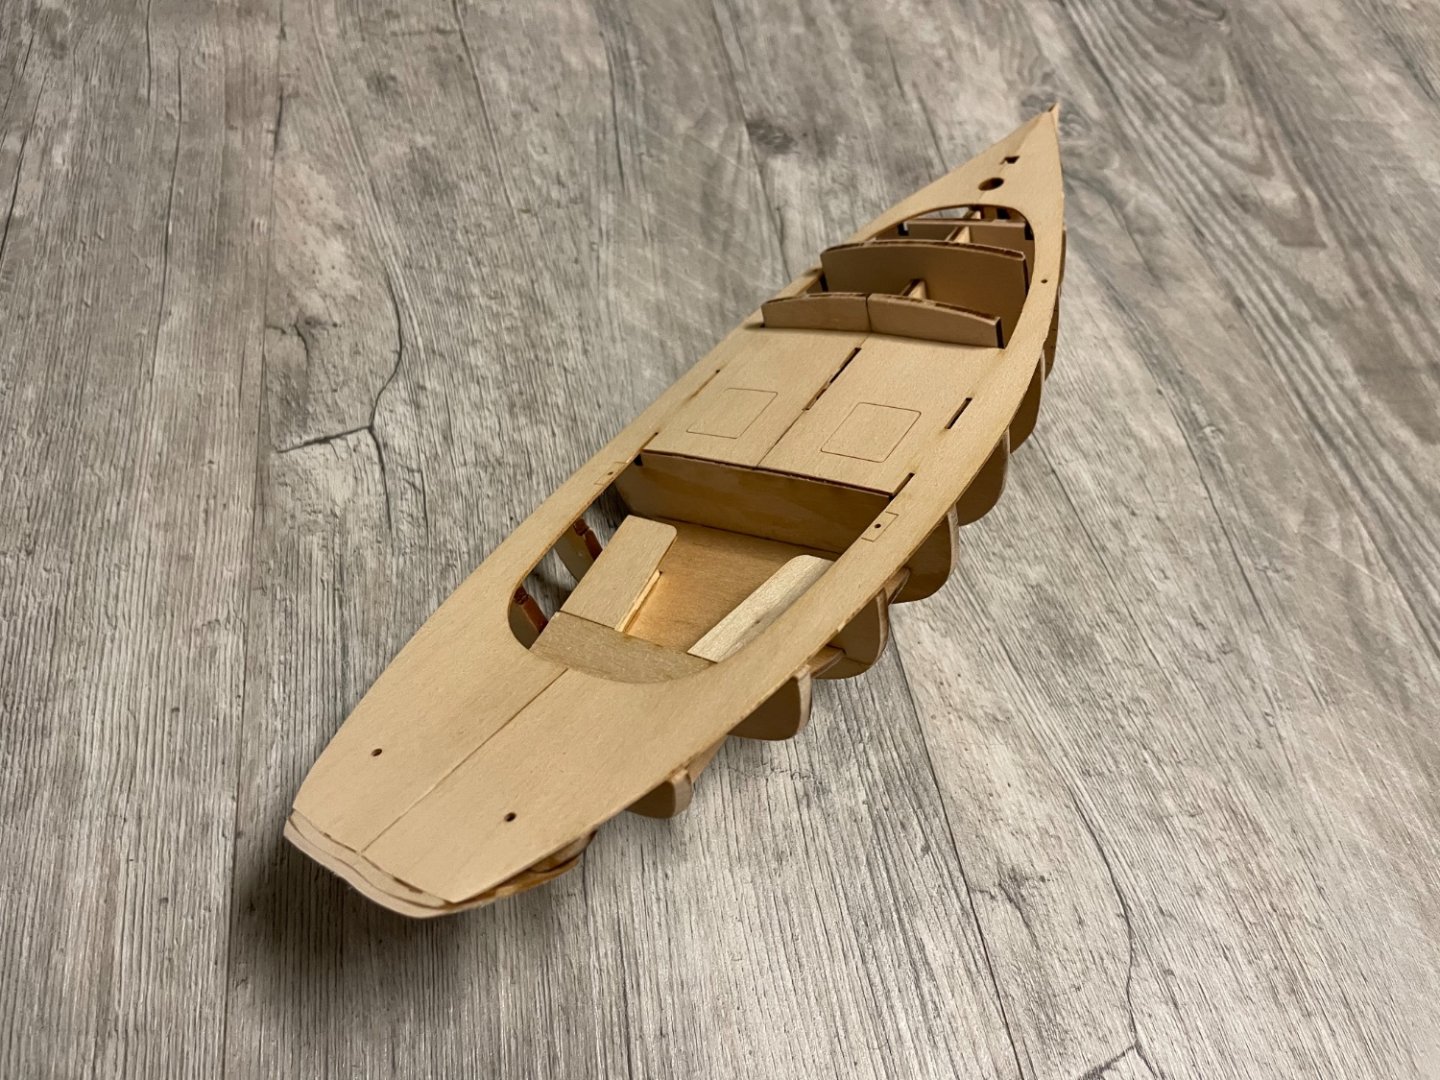
I will continue faring the frames and next will attach the last parts of the keel, then move on to planking.
- Ryland Craze and druxey
-
2
-
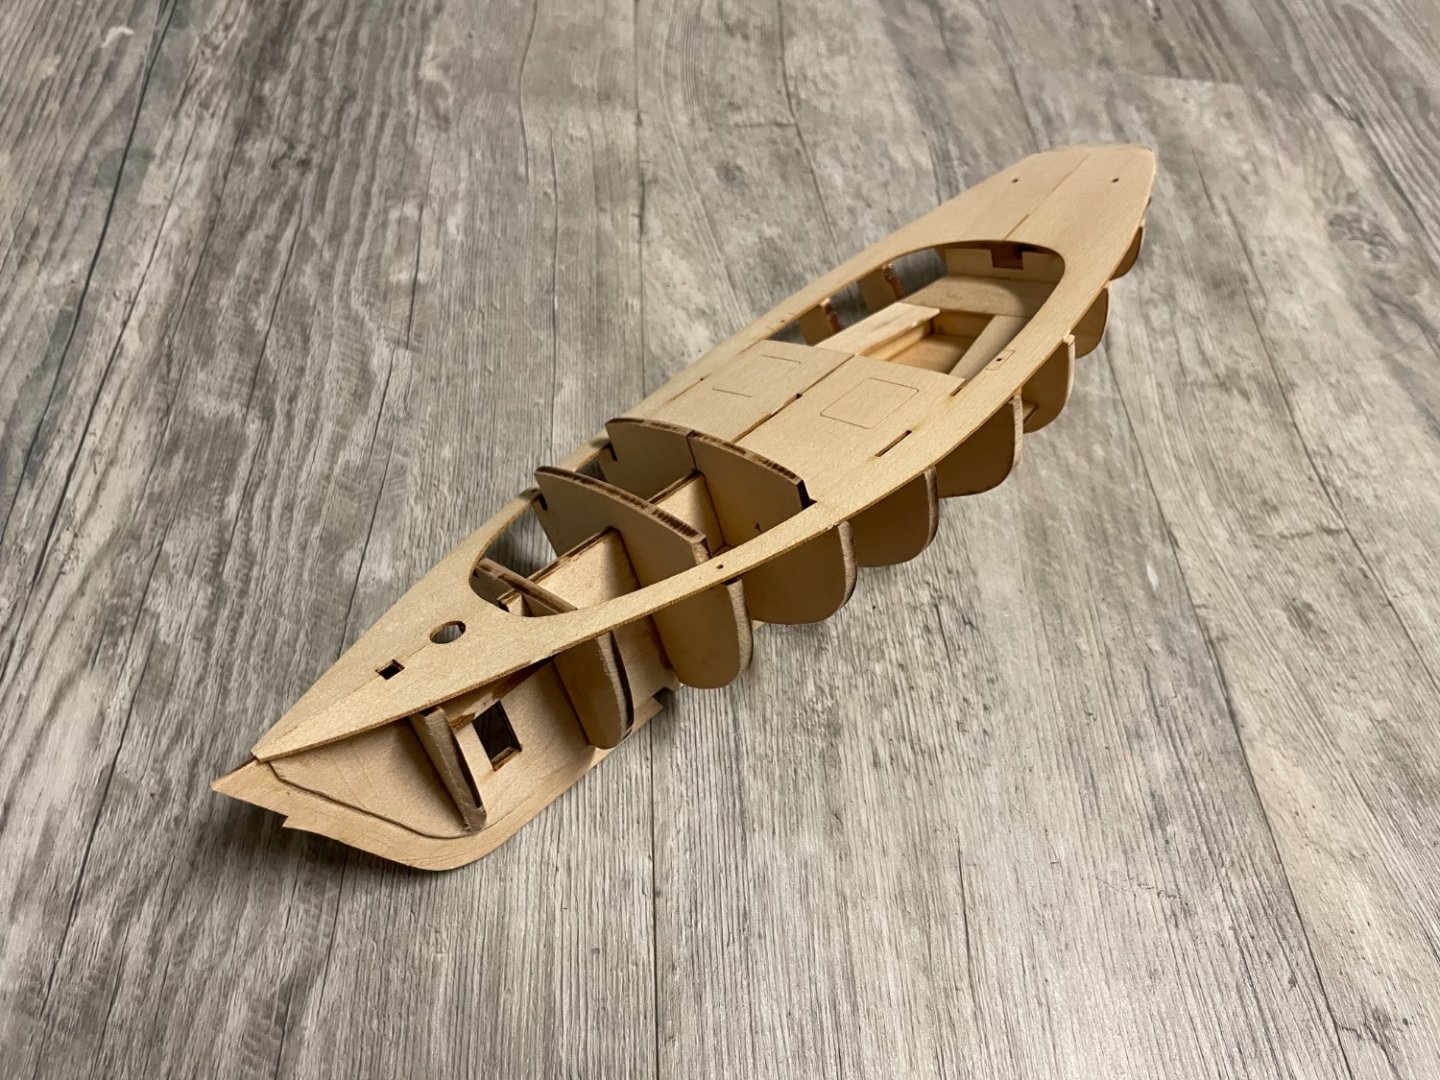
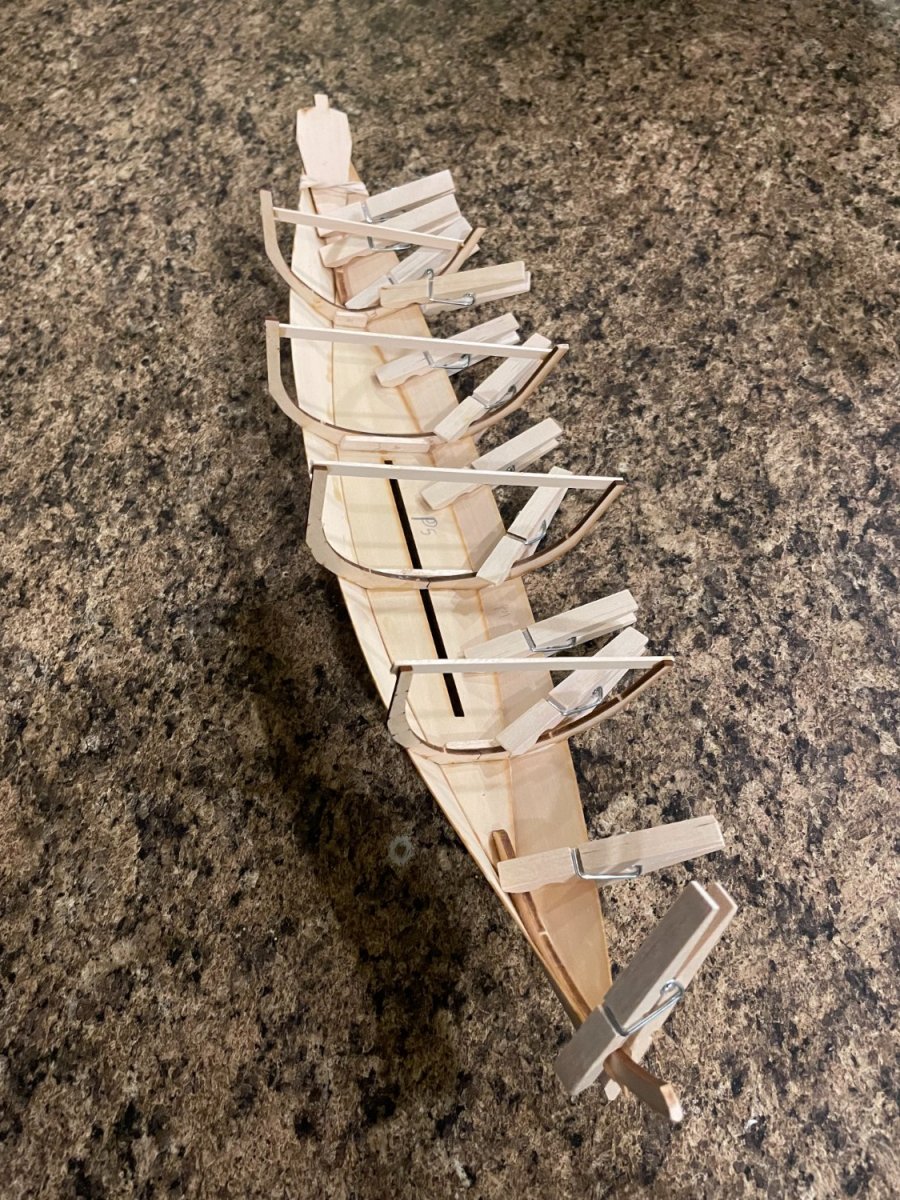
Have started to fair the frames and assembled the cockpit seats.

Also glued the transom together.
Next I will work on gluing the deck and finishing fairing the frames. So far it’s coming together very nicely.
- ccoyle, Ryland Craze and druxey
-
3
-
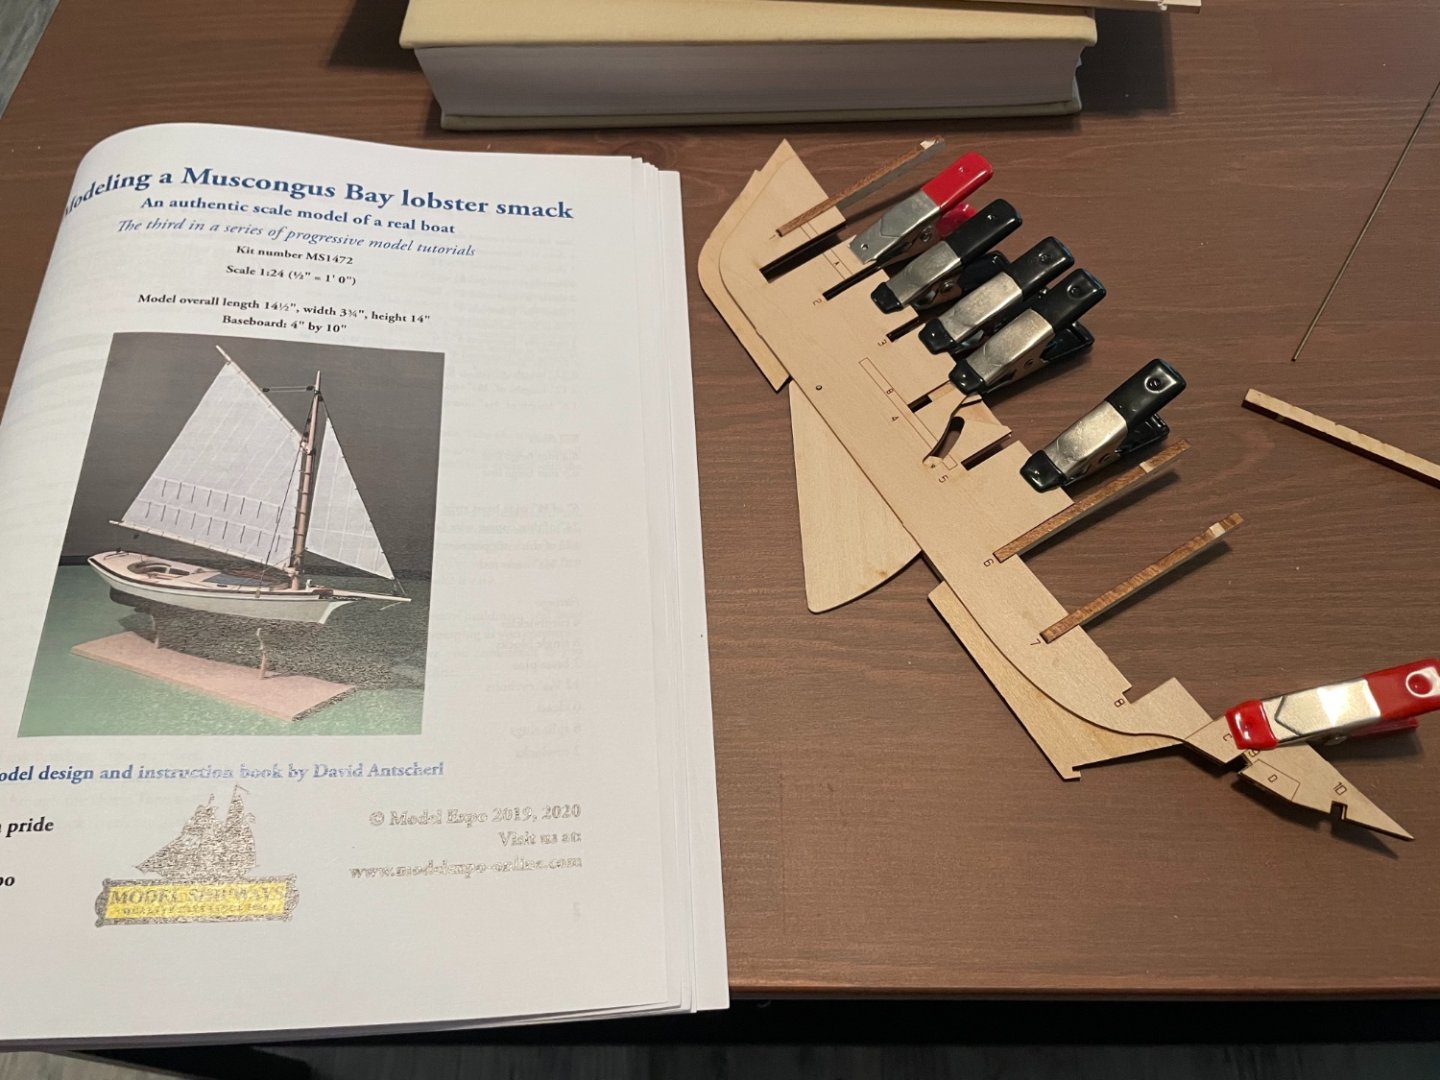
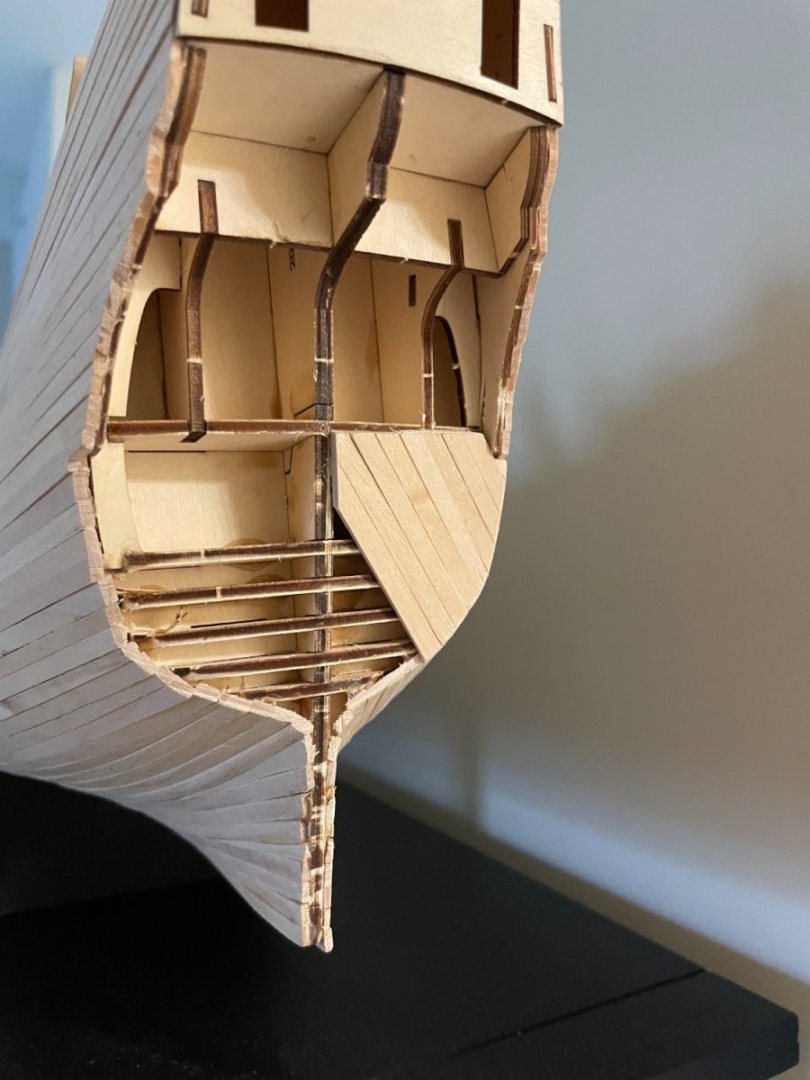
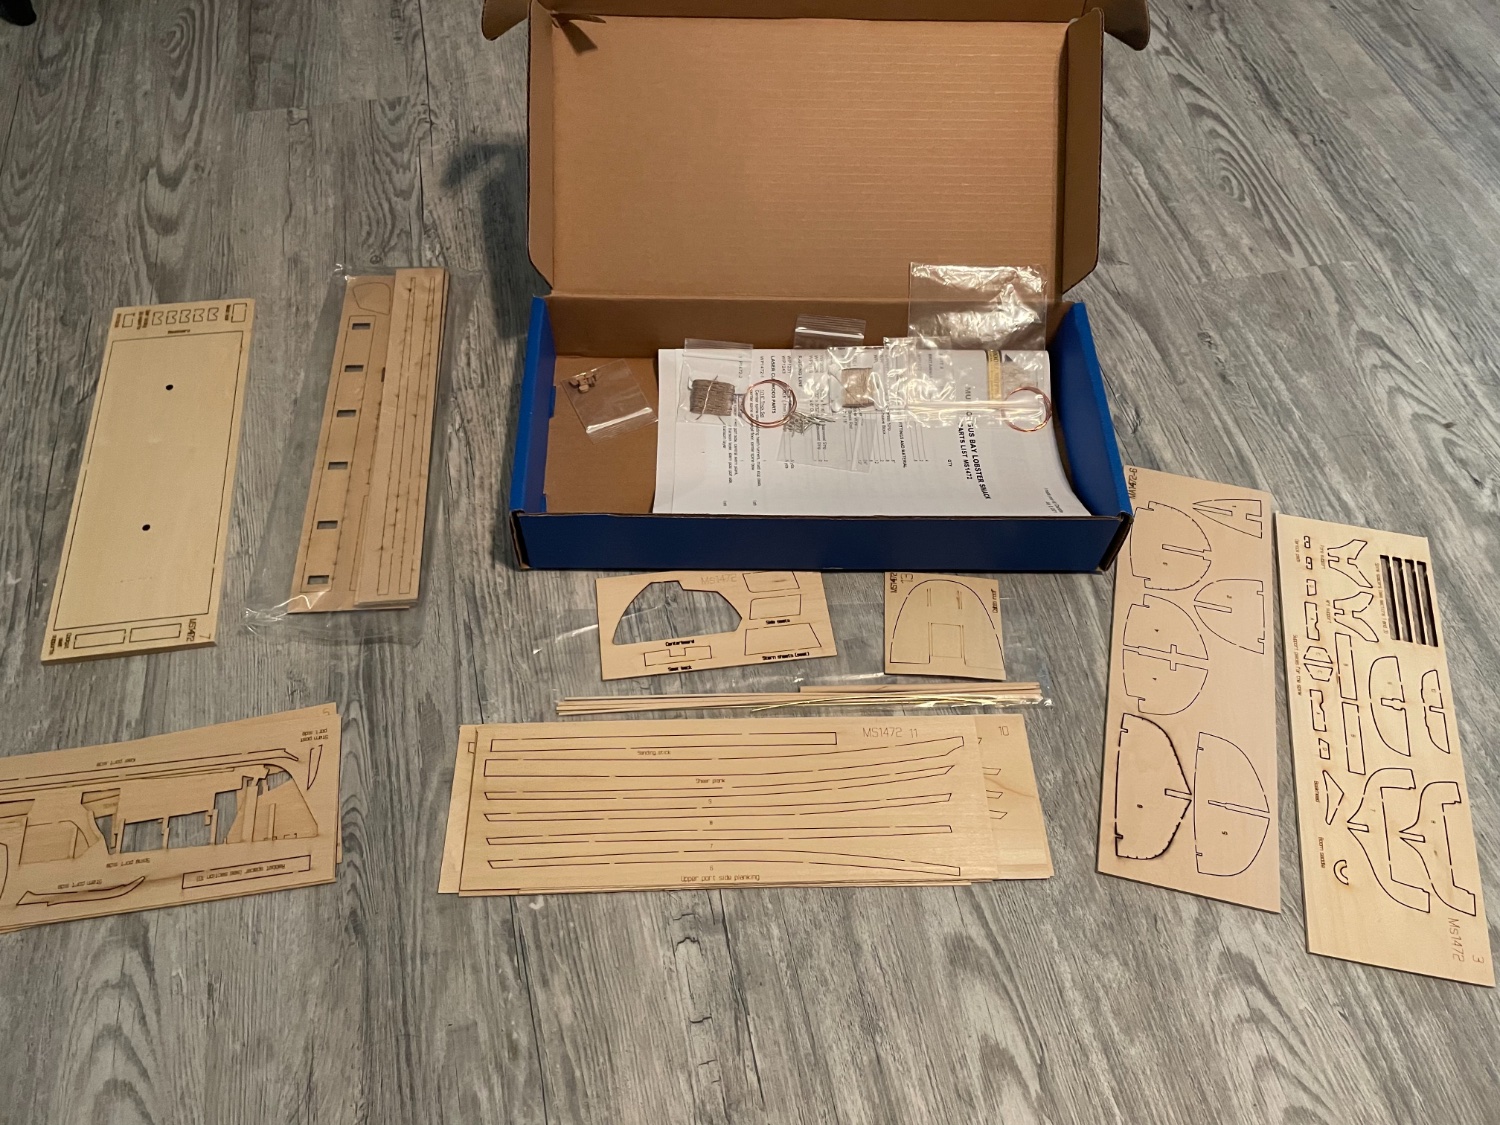
Having finished the Swampscott Dory, I now have moved onto the Muscongus Bay Lobster Smack, a delightfully named fishing boat from the late 19th Century. It’s the 3rd of David Antscherl’s Model Shipwright series, and given that, most of the pieces are lasercut, even the masts, with only a few planks. At this point, I believe I am past the beginner steps in this hobby, but I am hoping this will be an easy build to sharpen my skills.

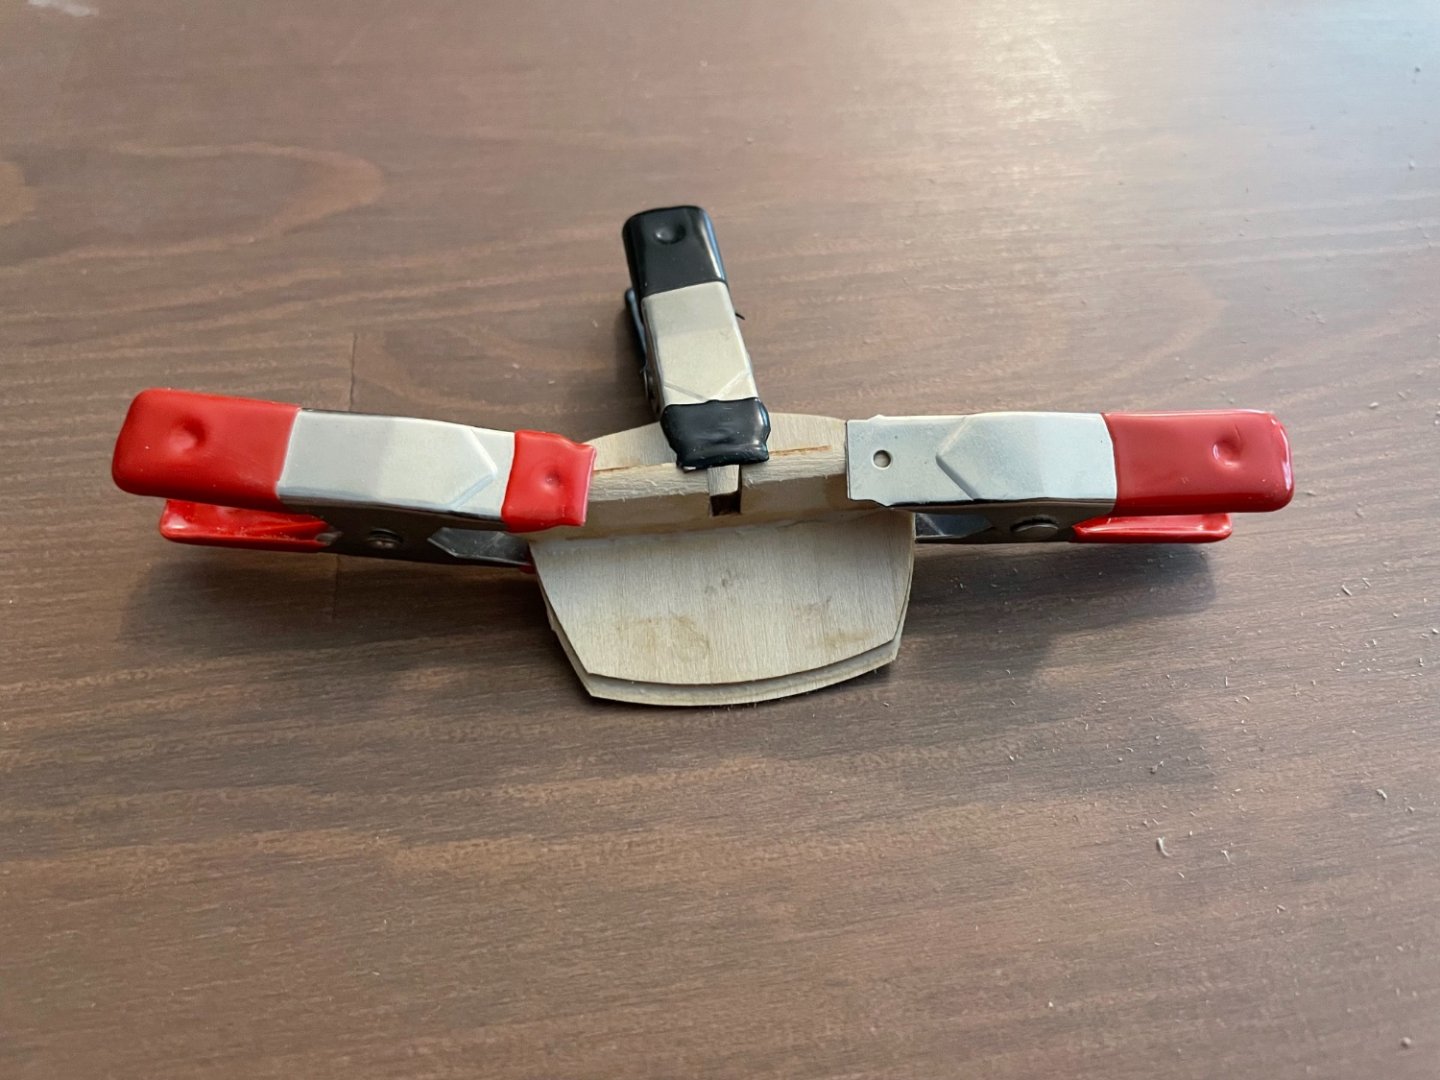
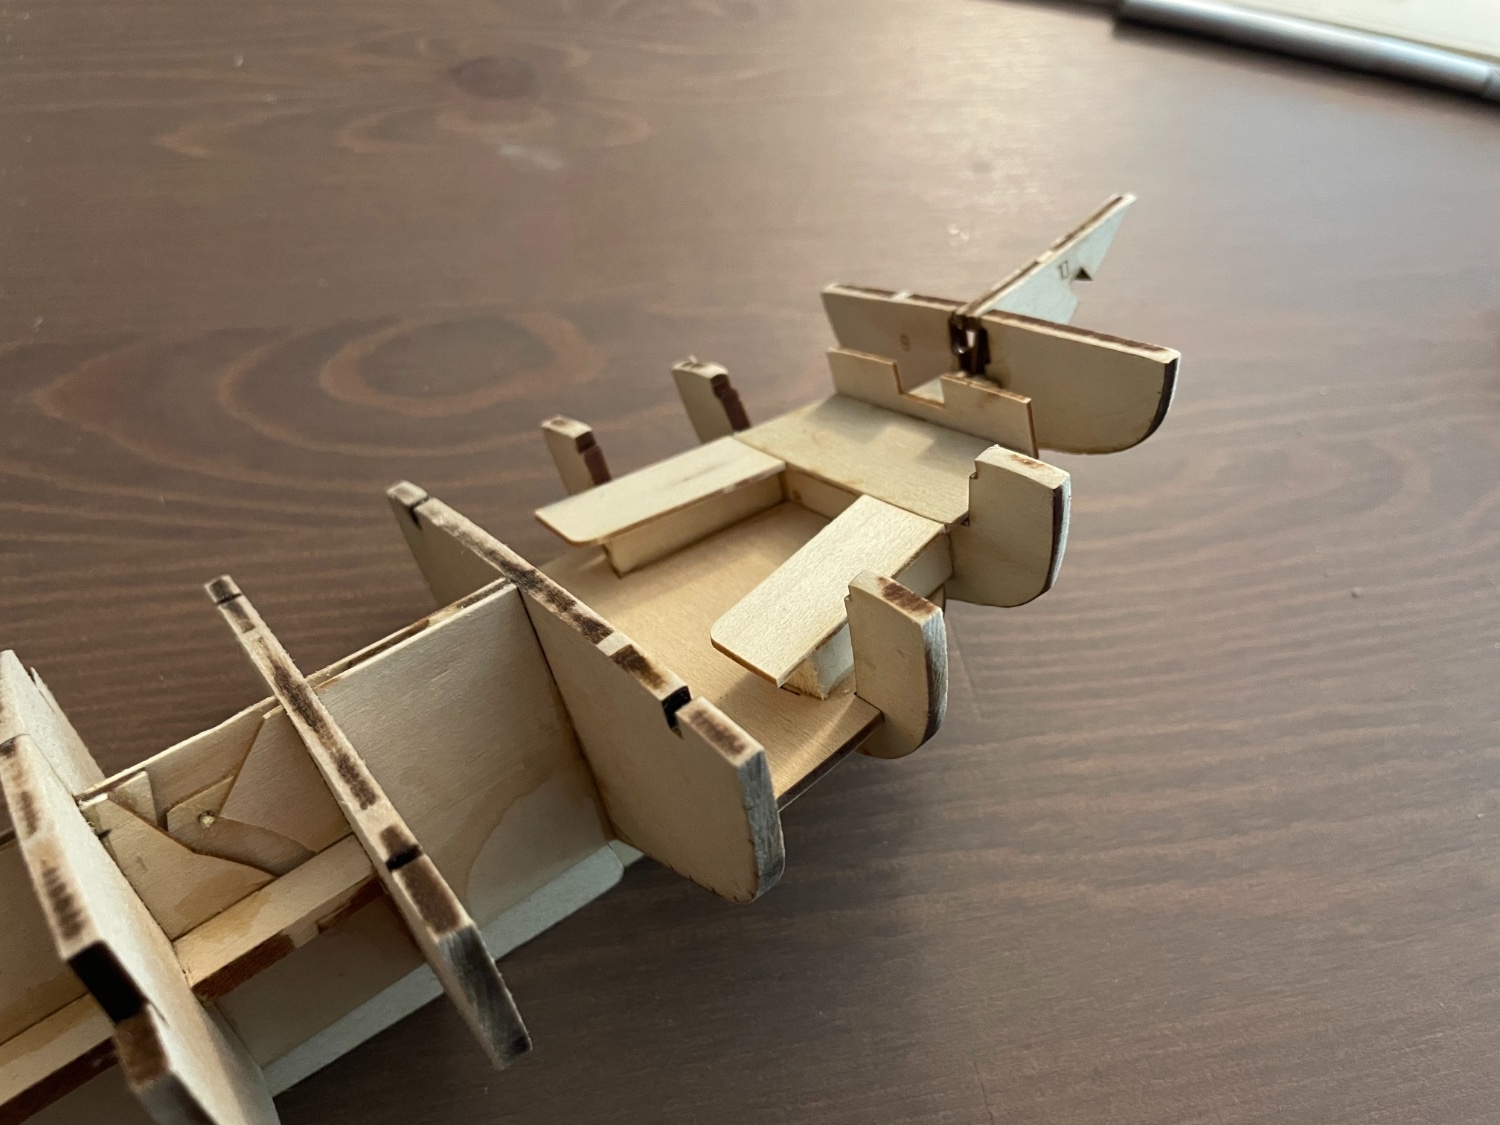
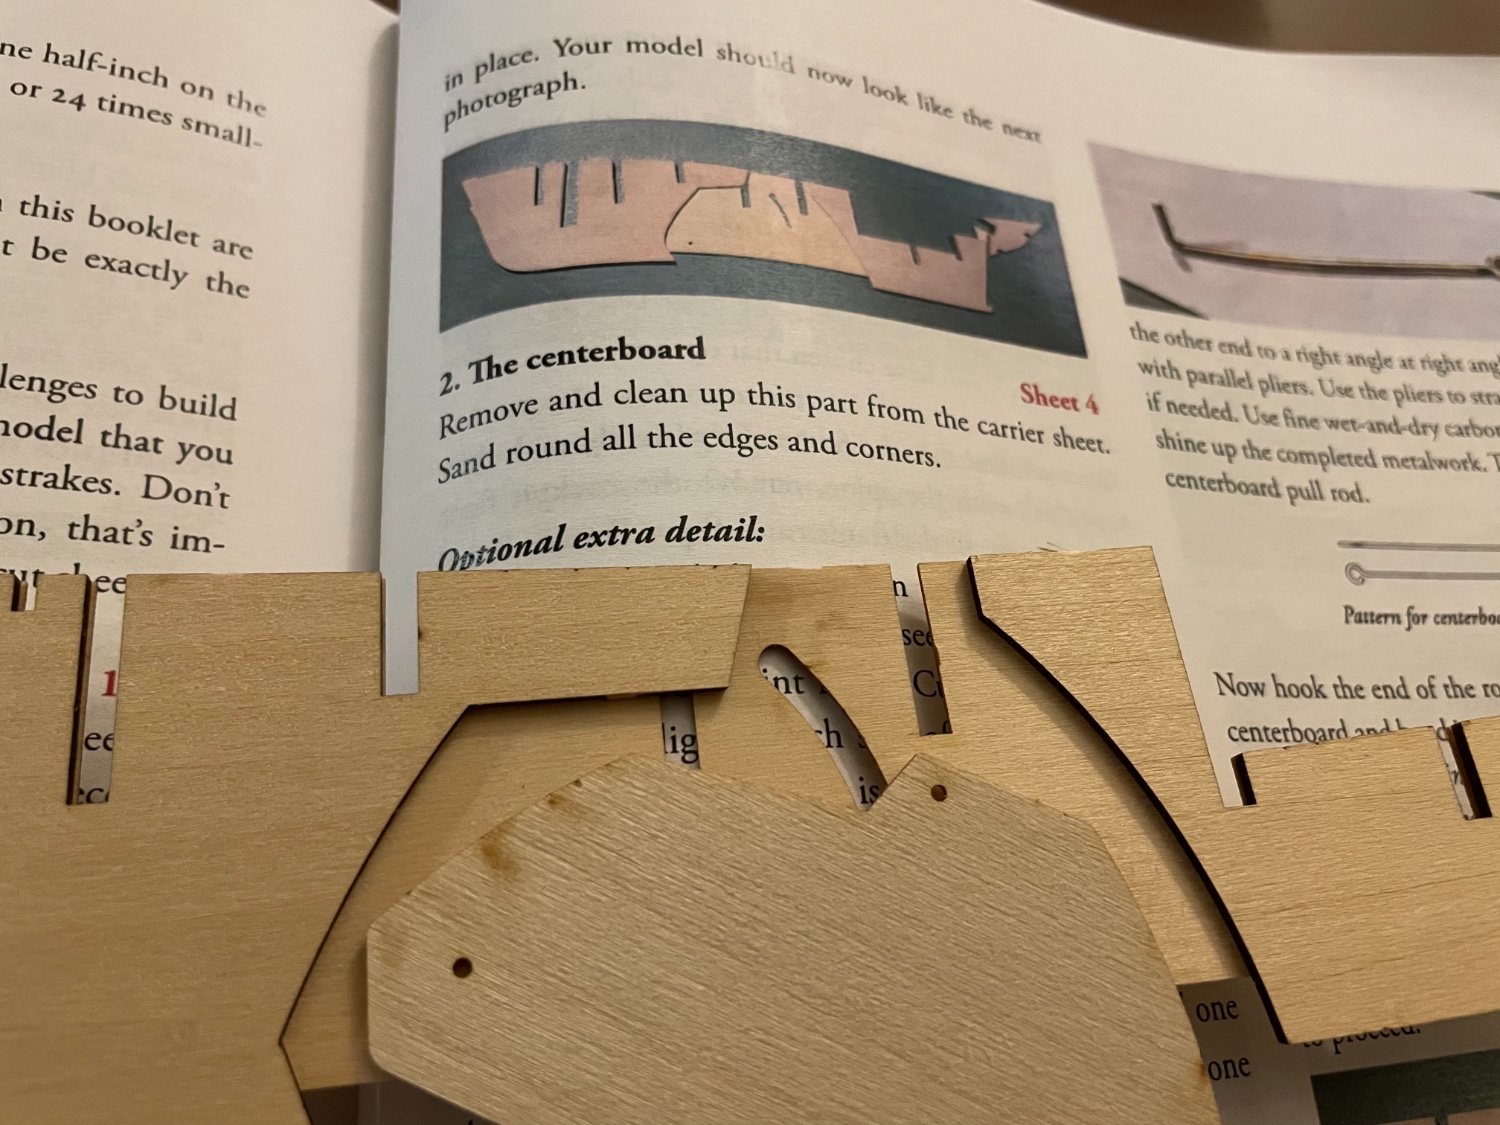
The first question in this build was whether to make the centerboard workable. The boat would look just as well if the centerboard was glued in place, but the instructions give a fairly detailed section on how to create a workable handle to deploy this piece. (Note: the keel is assembled in three layers, and the holes on the centerboard did not quite match the cut outs on these outer layers, so some adjustment was required on my model.)

However, I typically prefer to simplify pieces like these, preferring details that look simple and clean rather than complex and unsightly. So I made the centerboard workable with just two small pieces of brass rod superglued in the appropriate places.
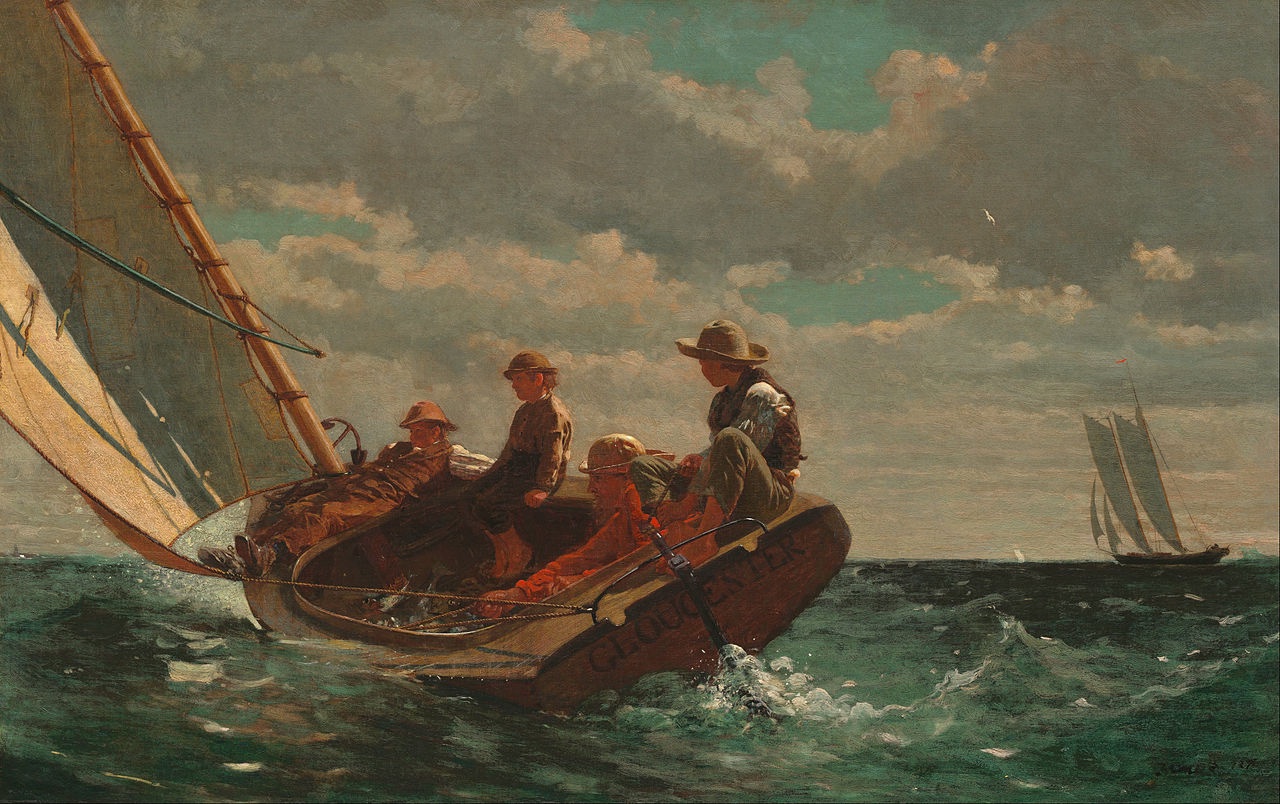
So the centerboard is workable, the three layers of the keel are laminated together, and things are progressing well. Here’s some of my inspiration for this project, “Breezing Up” by Winslow Homer:
-
@Mike Collier Thank you! It's probably some warped planking due to the transom and stem being misaligned by about 5 degrees. Made it really difficult to plank the port side.
@catopower I didn't even think about lowering the keel, thanks for pointing that out!
-
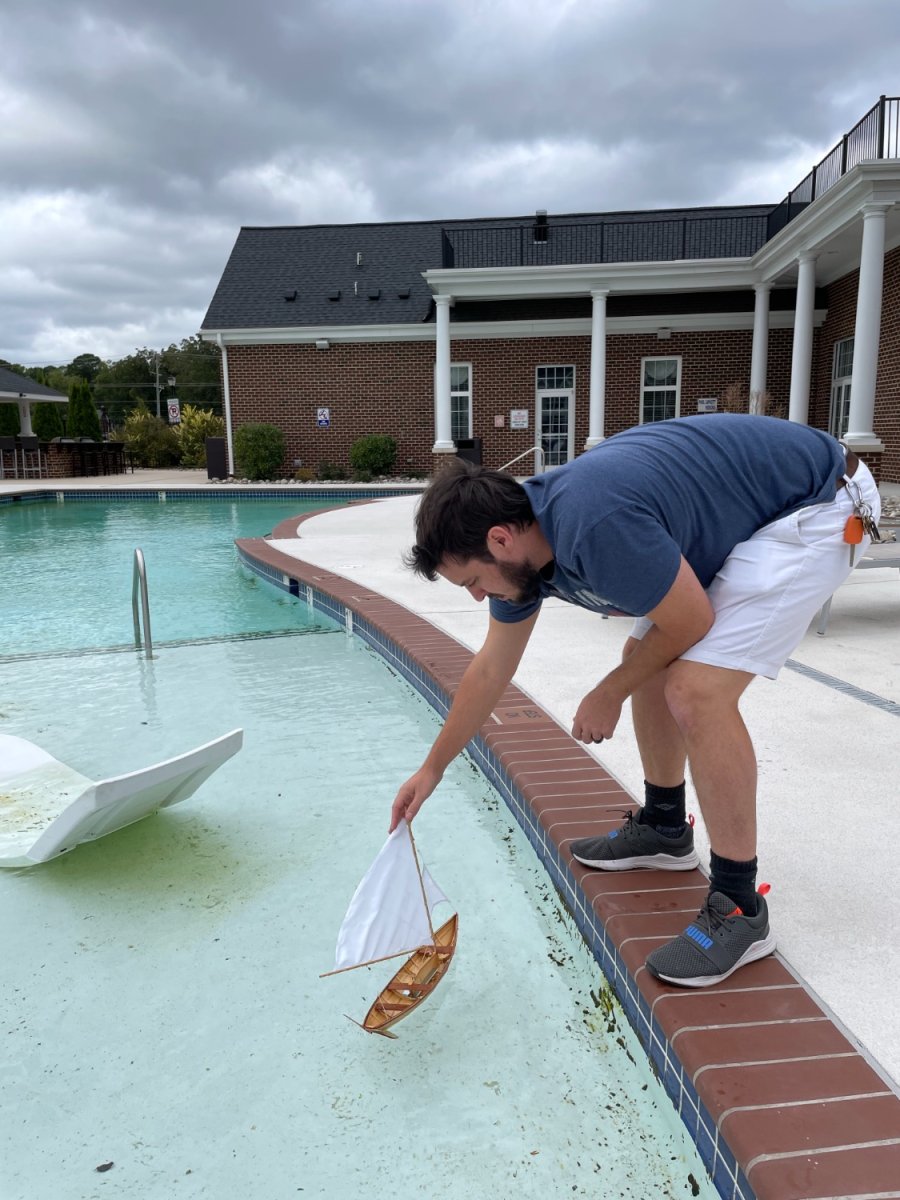
Ended up working on this boat all day yesterday and this morning.
Rigged the sails this morning and readied it for an attempt at sailing.

However this did not work out as intended, and it swamped twice in the pool.
I think there must be some holes in the boat, so I will plug those. Also, these pre-Hurricane Ian breezes probably do not help haha, so I’ll try it again on a day with a lighter breeze and more ballast.
-
It’s been a couple months since I’ve made an update but I’ve finally made some progress, added ribs and gunwales.
- HardeeHarHar, yvesvidal, gsdpic and 1 other
-
4
-
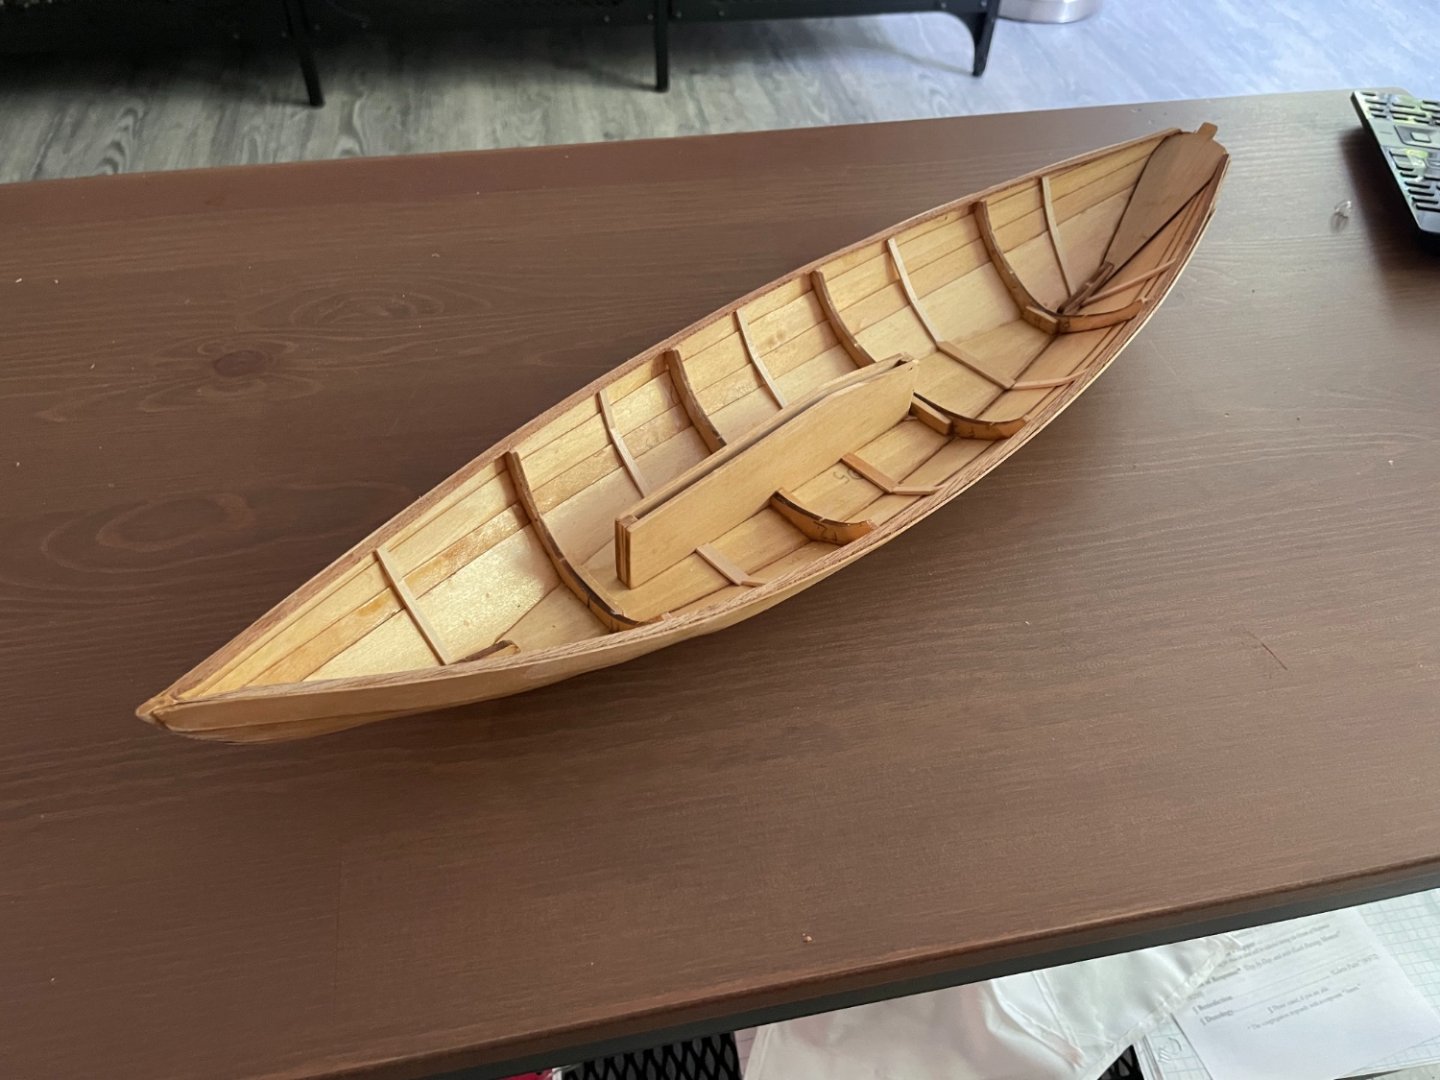
Have completed planking the Dory, and coated inside and out with Polyurethane.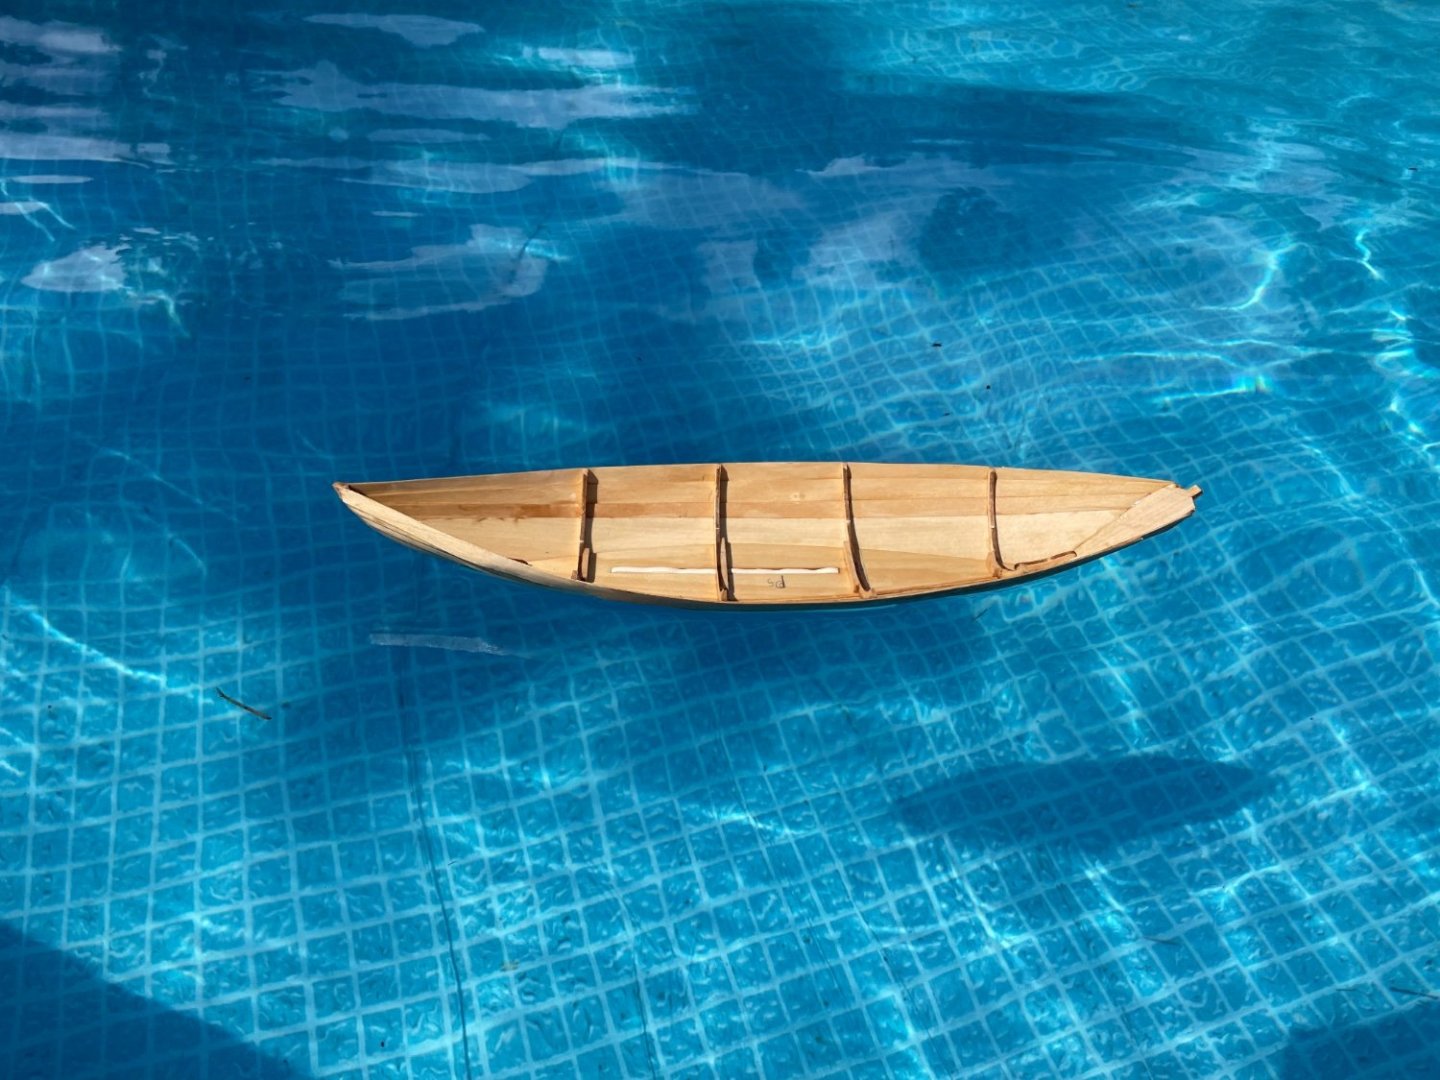
I packed the hole for the centerboard with clay and floated it in the pool, no leaks that I can find, so I am hoping this boat will actually sail when it’s done.
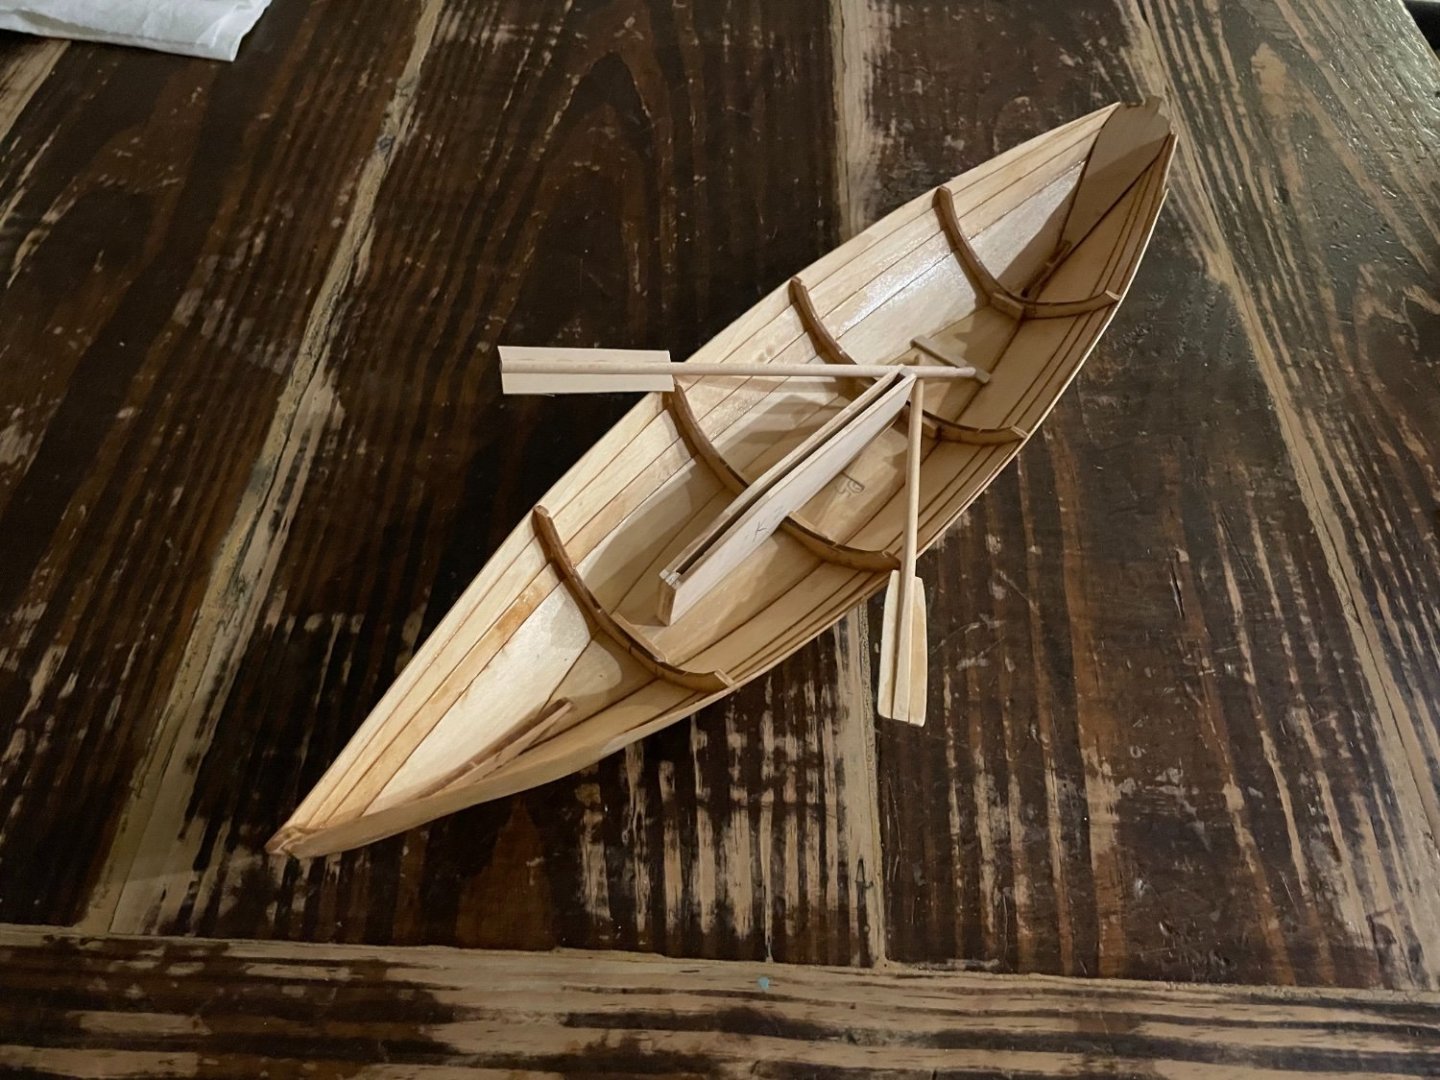
Started the centerboard channel and a second oar.
- ccoyle, yvesvidal and mark.bukovich
-
3
-
Continued progress, have fitted the garboard planks. Coming together fairly well.

- yvesvidal, catopower, GrandpaPhil and 2 others
-
5
-
Made a little progress on the boat on Saturday, the kids were helpful with sanding and gluing.

This is as far as we went, with the frames glued to the bottom.
Started sanding and fairing the frames, will commence to attach the garboard plank next time.
- gsdpic, mark.bukovich, GrandpaPhil and 1 other
-
4
-
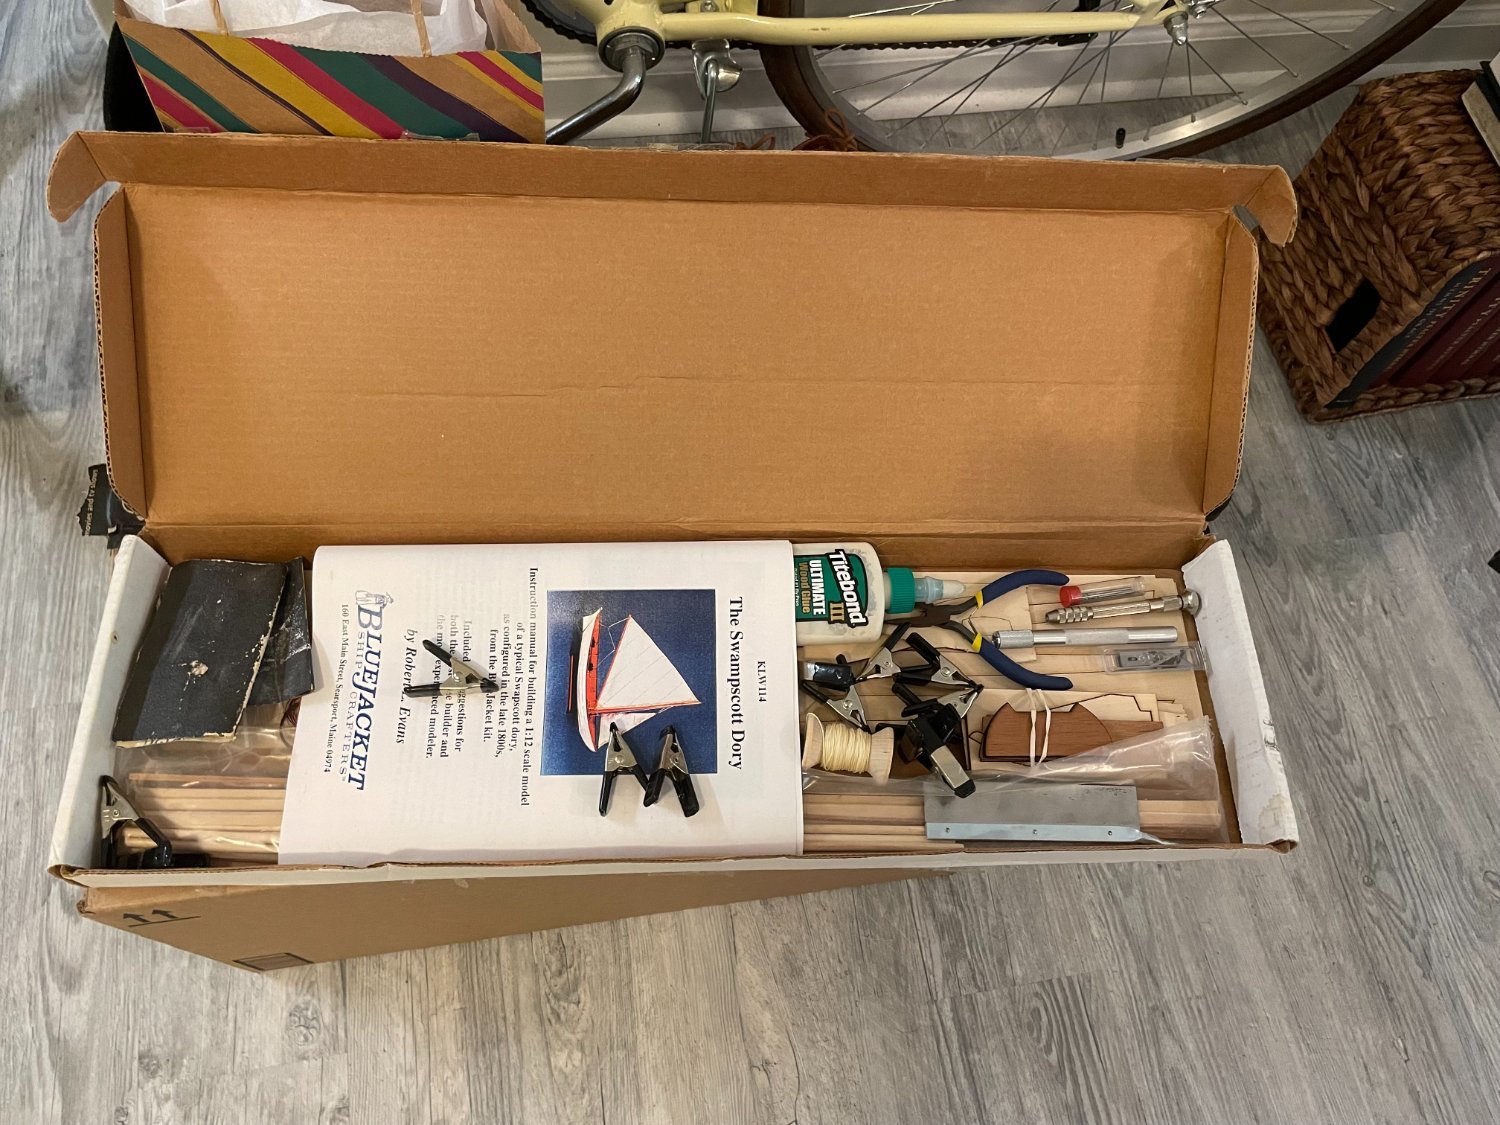
Purchased this kit used off eBay recently, was looking for a fairly easy kit to introduce my younger brothers-in-law to ship modelling, so they will be helping me out with this build. Am also eager to return to a larger-scale Dory, as my first ever build was the 1:24 Lowell Grand Banks Dory from MS.

Have gathered some essential tools for this build, which will be worked on when my wife and I visit her family.
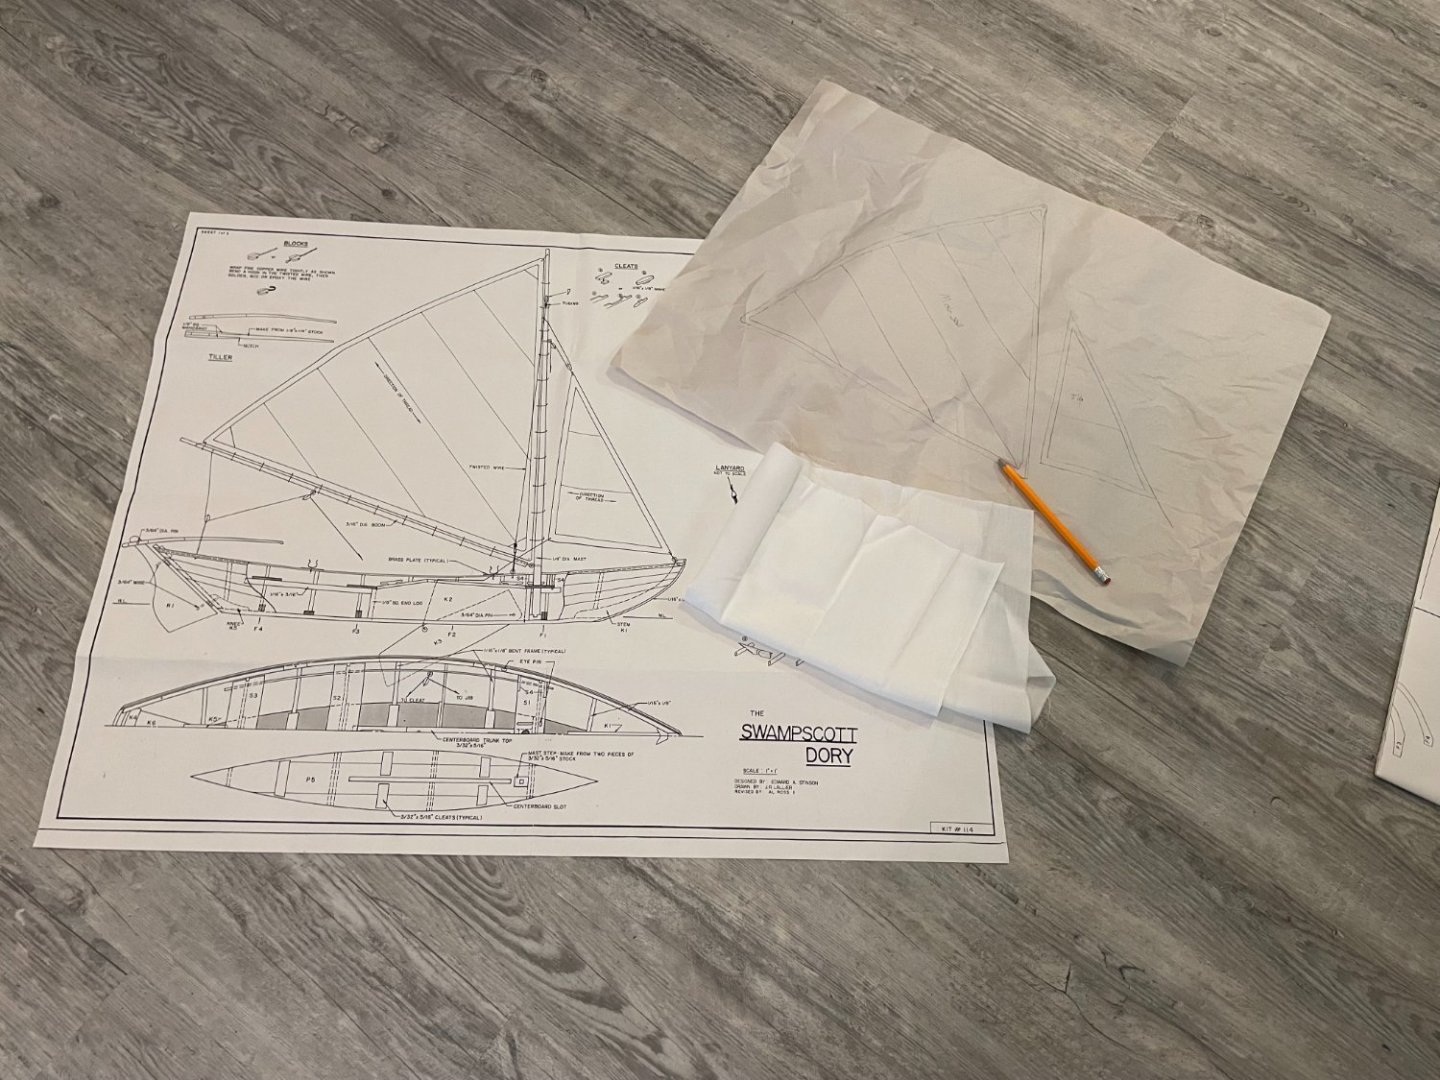
Have also traced the sails from the plans, which my wife will make. I'm hoping to make this boat water-tight so that it could potentially sail in the pool.
- gsdpic, yvesvidal, mark.bukovich and 3 others
-
6
-
Have decided to create the diagonal transom planks with the actual planks, rather than using the veneers as the instructions say
- chris watton, scrubbyj427, Baker and 1 other
-
4
-
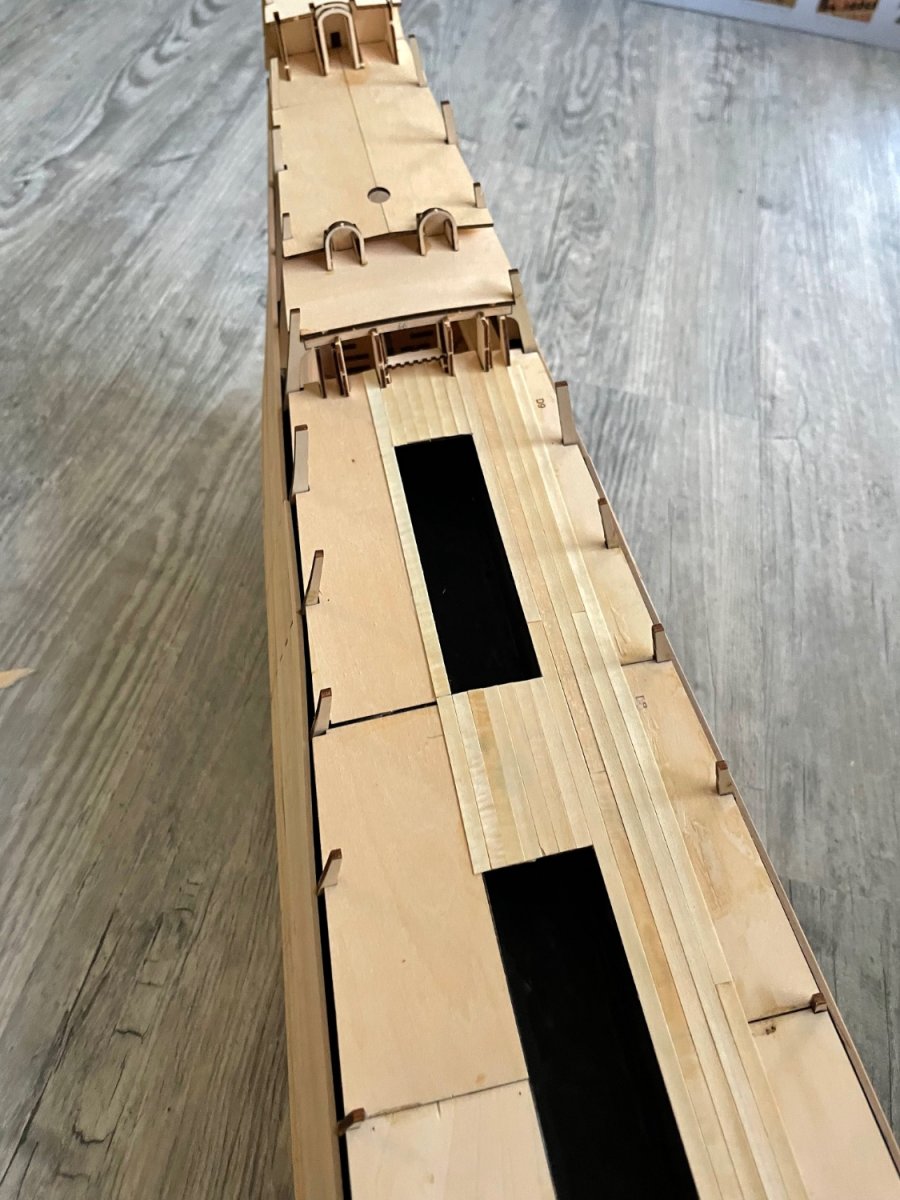
Have largely finished the main deck, now continuing to build up the gunwales.
- BLACK VIKING, GrandpaPhil and Baker
-
3
-
Finishing the bottom planking.
Still have some sanding and cutting, and a couple little slivers to add, but other than that it’s finished!
Started planking this bow section using some thin planks which bend much easier than the hull planks.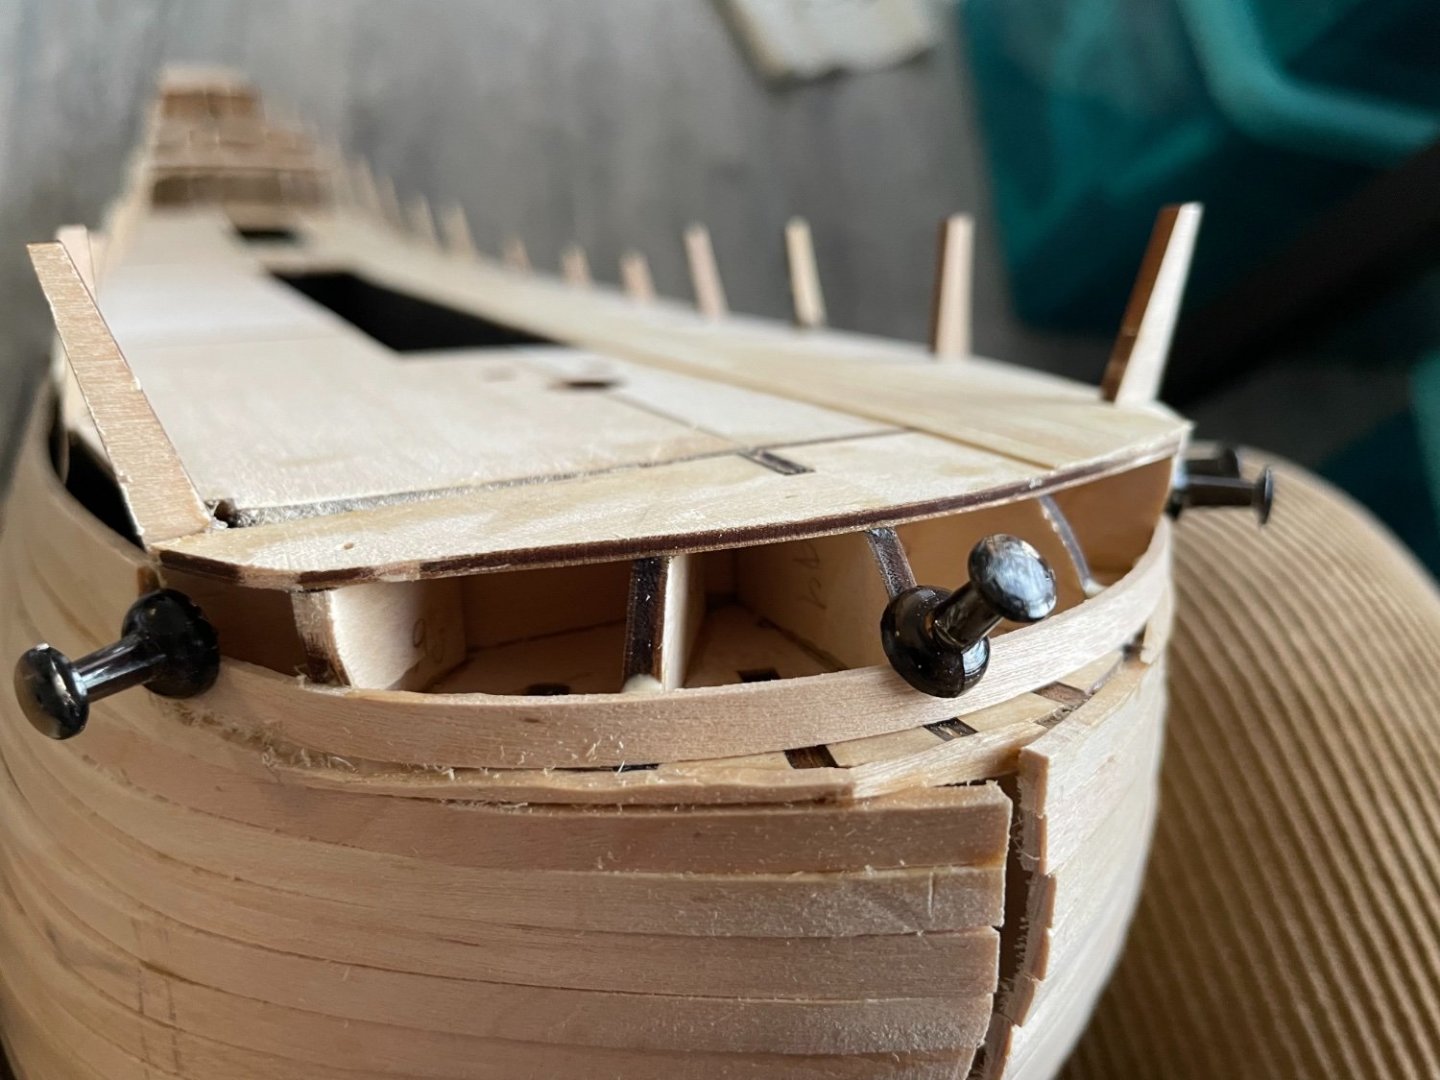
Also before I finish planking the upper hull, I am going to plank the decks, and this is my progress so far.

- scrubbyj427, GrandpaPhil and Baker
-
3
-
Seeing these planks slowly get to the keel is like watching the world’s slowest loading bar, but I am having a good time.
This is how the bow planking is shaping up. Imperfect, and still needs a lot of work, but I am happy with it. Hopefully most of it will be hidden by stain, and the white paint below the waterline.

Have also started veneering the deck, but I have no good pictures right now. (Had to rip up my work of one evening, fill and sand it down again)- GrandpaPhil and Baker
-
2
-
https://sketchfab.com/3d-models/vasa-ship-137c0e1436e947e0881ec6c3da8517e4
This link might be useful for any current or future Vasa Builders, a very nice 3D scan of the port side of Vasa from the Museum in Stockholm. Some close study will reveal differences between the real ship and the model in the instructions.
-
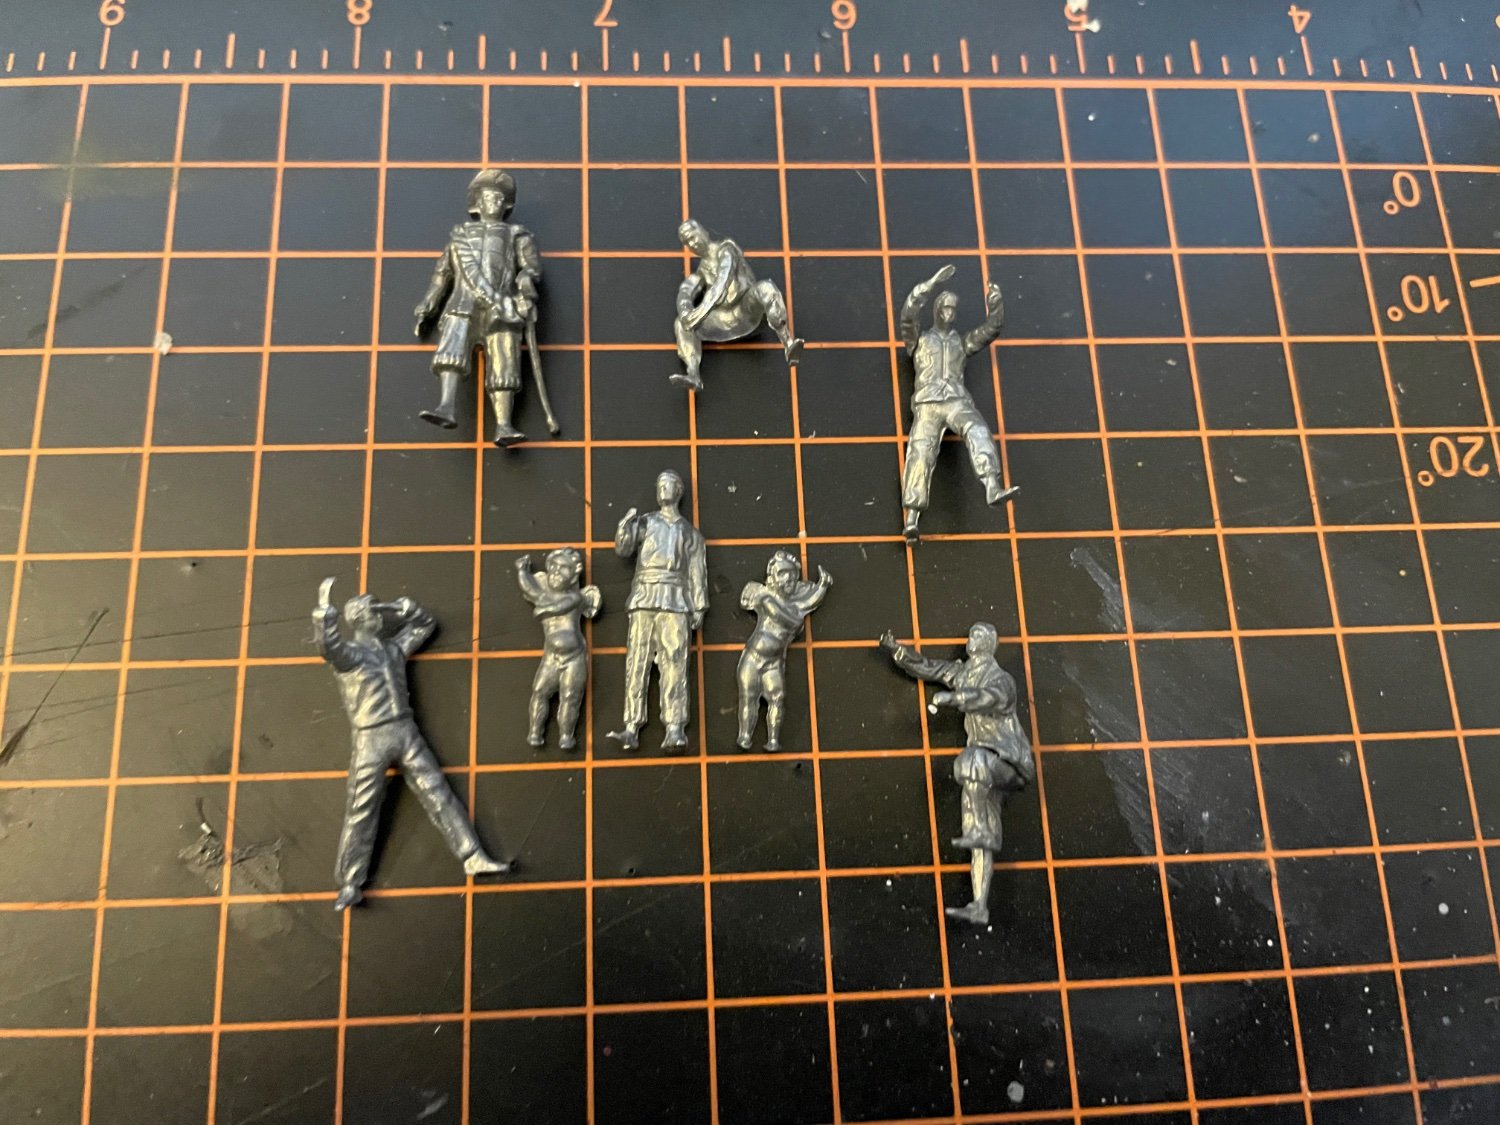
Also assembled the crew figures that come with the kit. Can confirm that the naked cherubs are in scale!

- GrandpaPhil and BLACK VIKING
-
2
-
Have not worked on this project much since November, but planking continues at a slow pace. Only twelve rows until I reach the keel!
This is a disheartening sight though, especially since I will have to cut gunports here eventually. But I will make it work, sandpaper and putty will cover a multitude of errors!
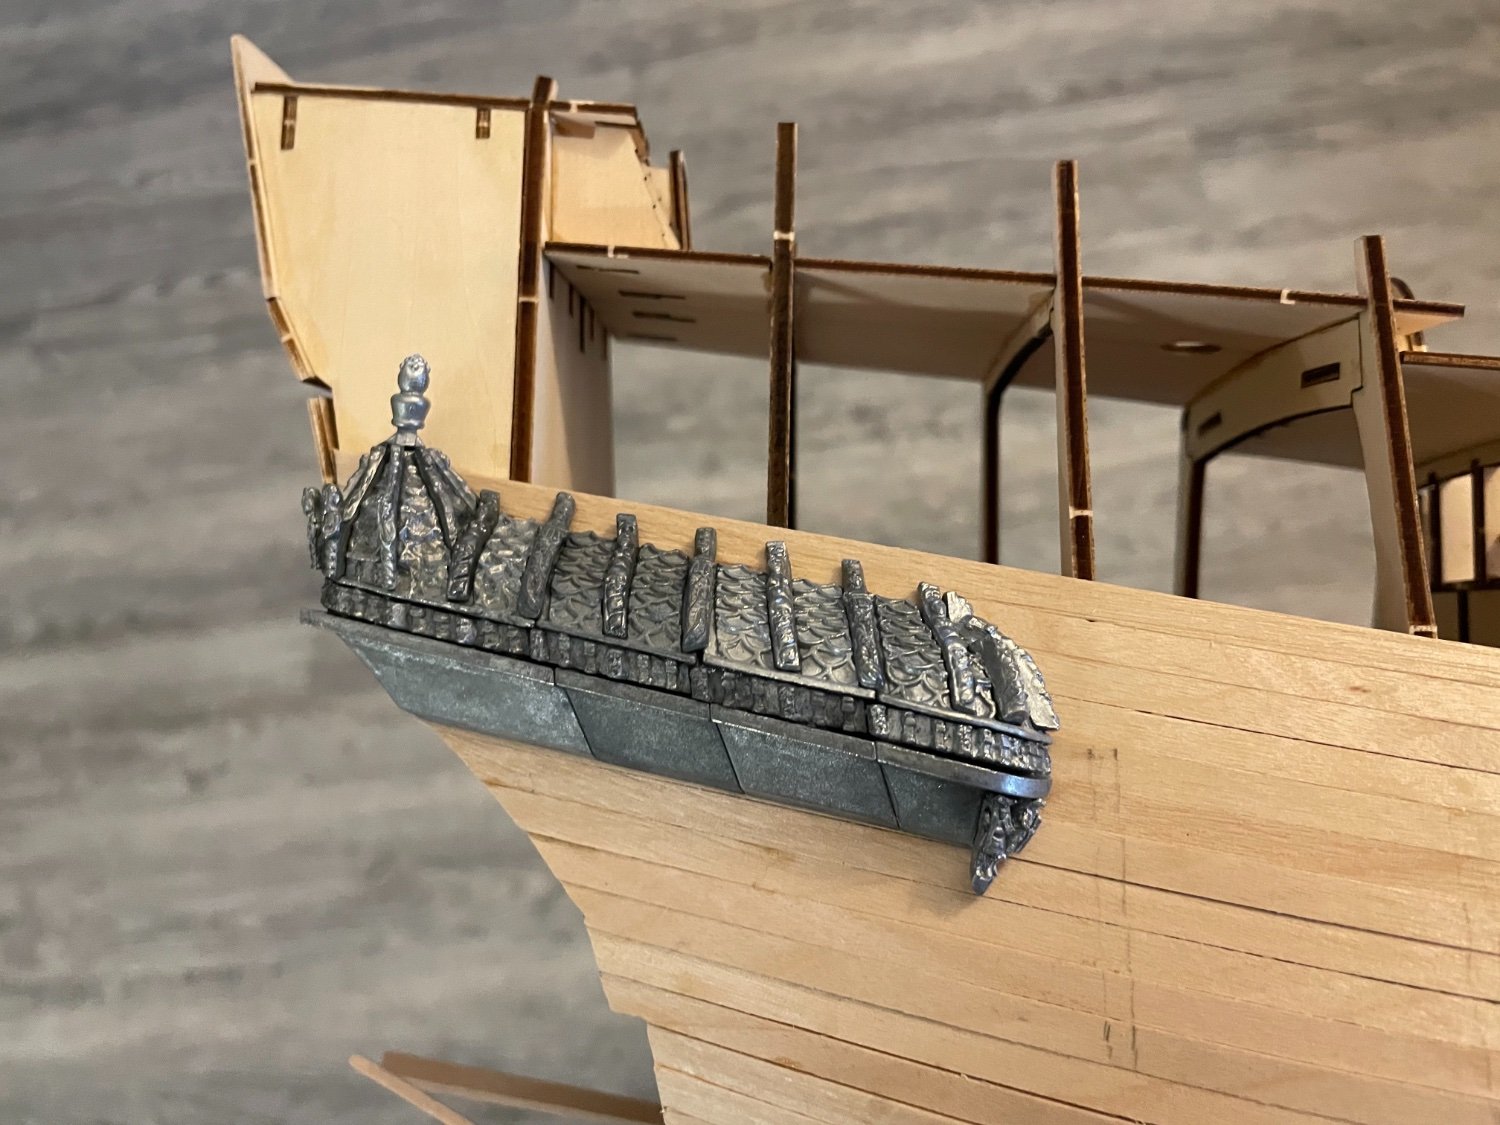
I have been eager to make sure that I have all the metal pieces for the stern decorations, so I began gluing the upper gallery on the starboard side. They fit together decently well, and are well detailed. I personally think this is a better way than painting each individual piece and then trying to glue them together, as the instructions would have you. (Note: I have not glued the gallery to the model yet)
I still have a long way to go on this project, but despite hiccups and mistakes I feel confident it will look alright in the end.
- BLACK VIKING and GrandpaPhil
-
2
-
Good idea @Roger Pellett really I need more shelving all around.
Here is the link to the reference photos, as promised. Let me know if the link doesn't work or if you don't have permission to access:
https://drive.google.com/drive/folders/1BUE6i8l-8UsupmQ88LXrb0ecgY-J32aq?usp=sharing- Ryland Craze and Roger Pellett
-
1
-
 1
1


Muscongus Bay Lobster Smack by Joseph F. - FINISHED - Model Shipways - 1:24
in - Kit build logs for subjects built from 1851 - 1900
Posted
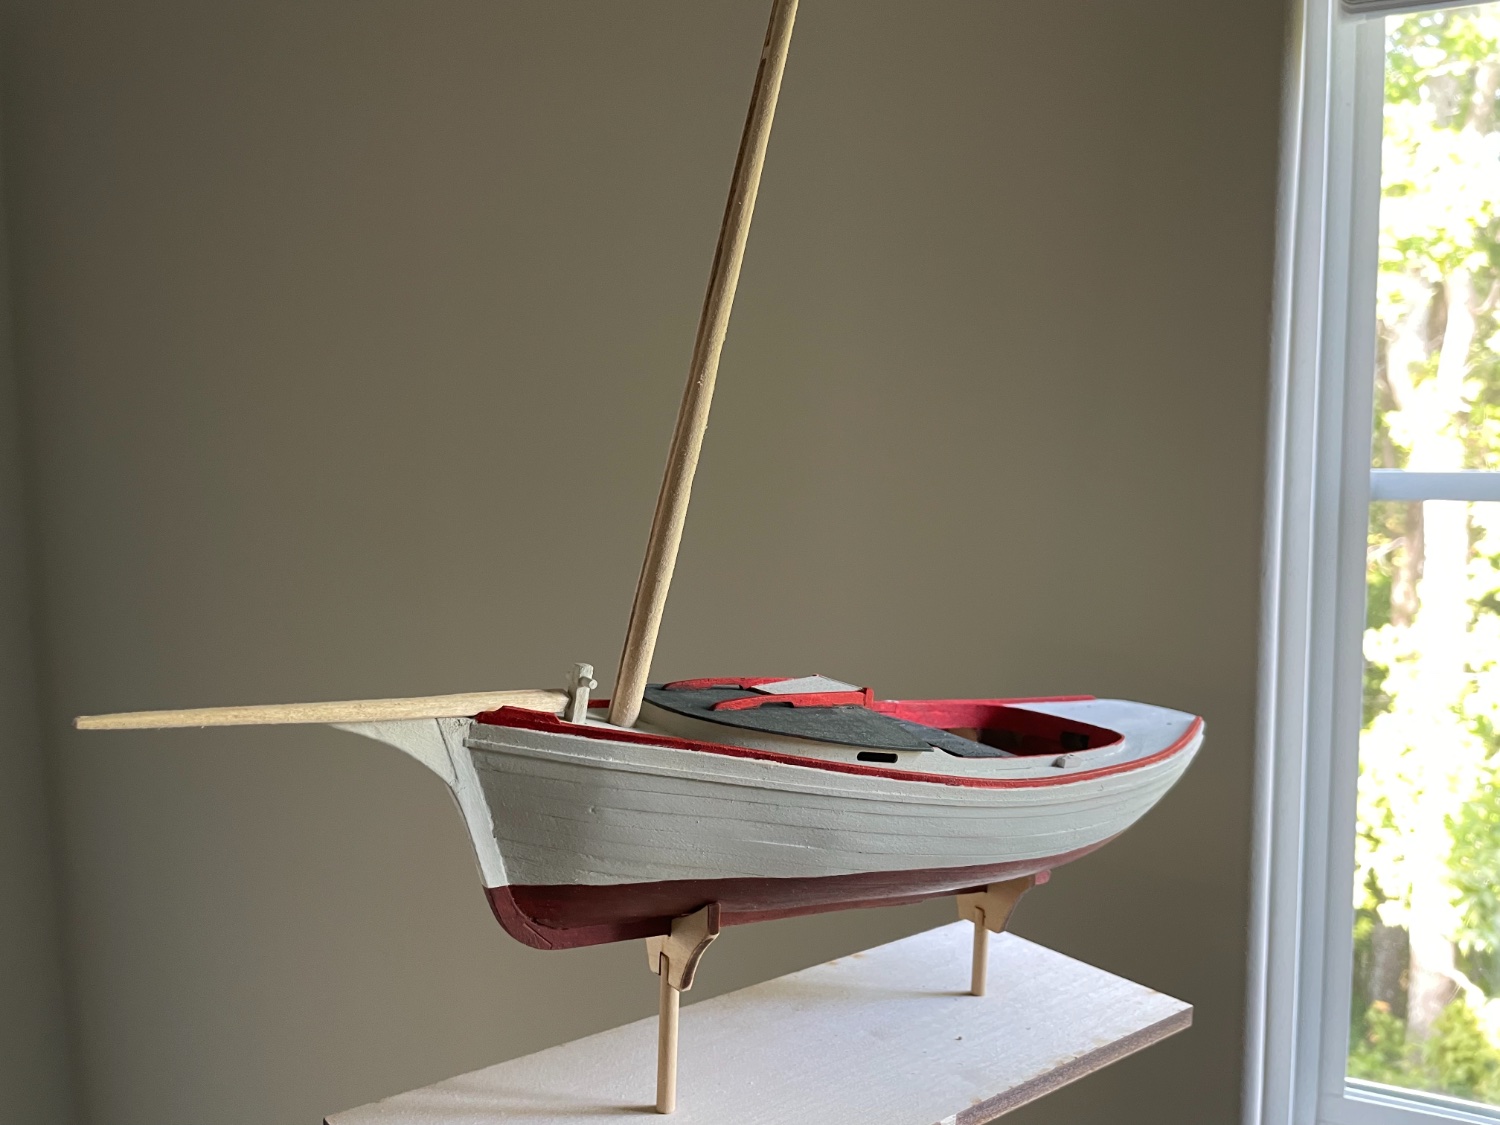
My wife finished making the sails for the boat this week, and I’ve been on a deadline to finish before Saturday so I can show it to my local ship modeling club and deliver it to the person to whom I’m giving it.
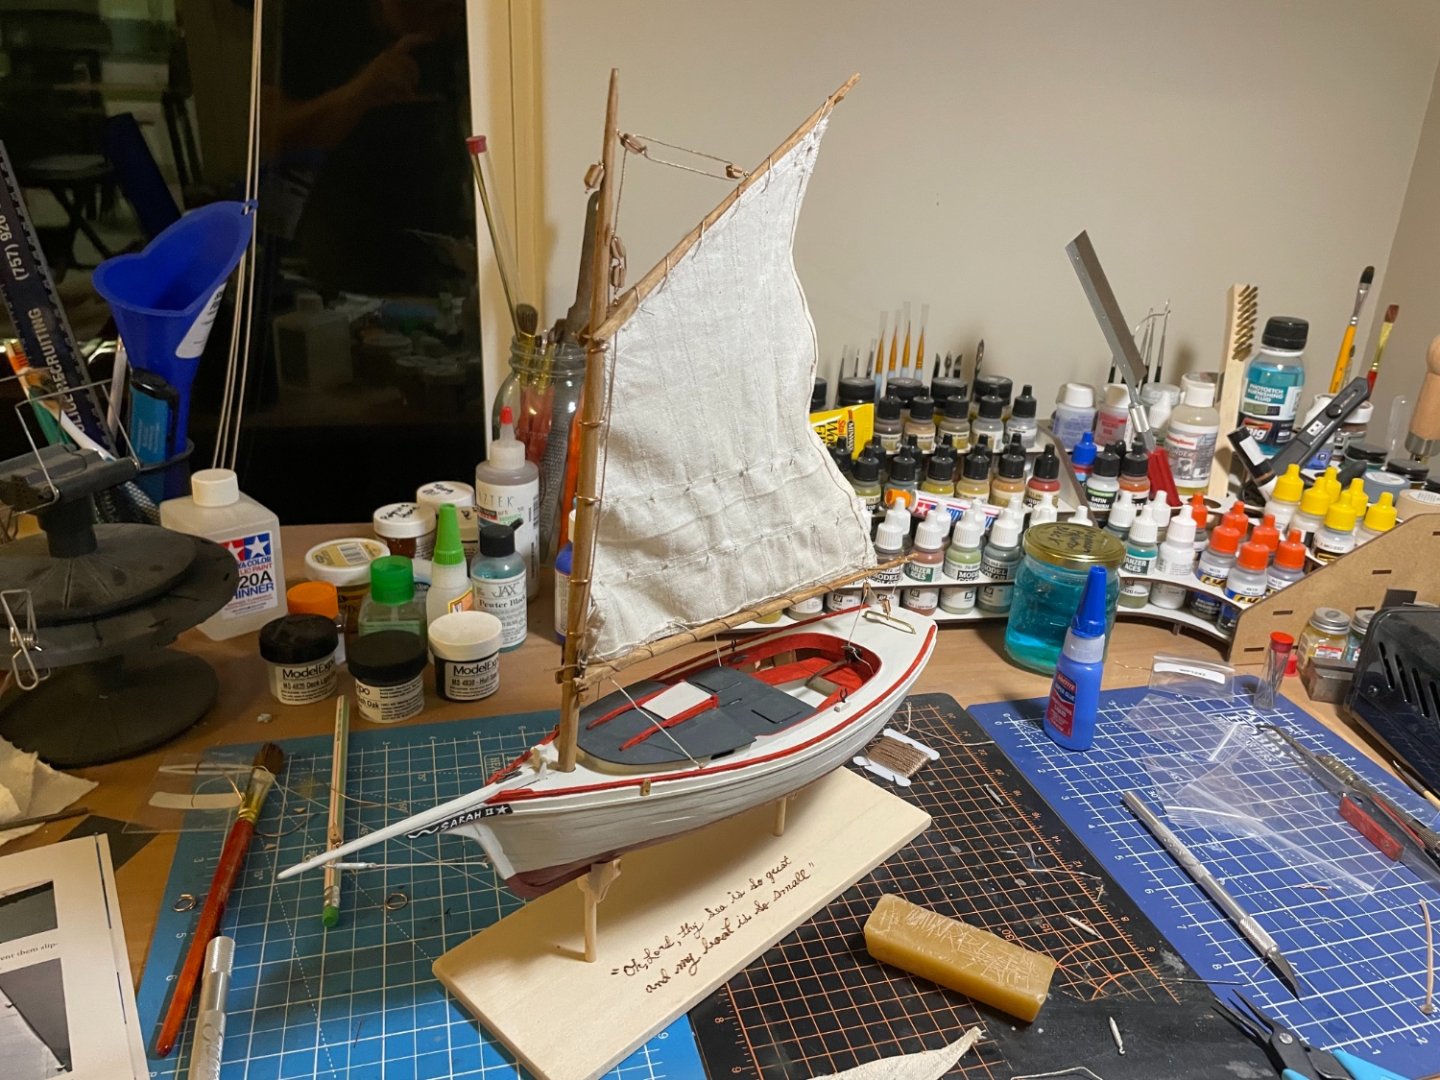
The day before yesterday I finished staining and rigging the mast and yards, and yesterday I rigged the boat.
Made a few mistakes with the tackling, and if I had more time I would have used thread and knots rather than copper wire.
The two turnbuckles on the bowsprit.
A view of the stern, with a look at the traveler and the lower boom.
A view of the cockpit and traveler.
Neglected to add the turnbuckles and lines securing the mast to the chainplates.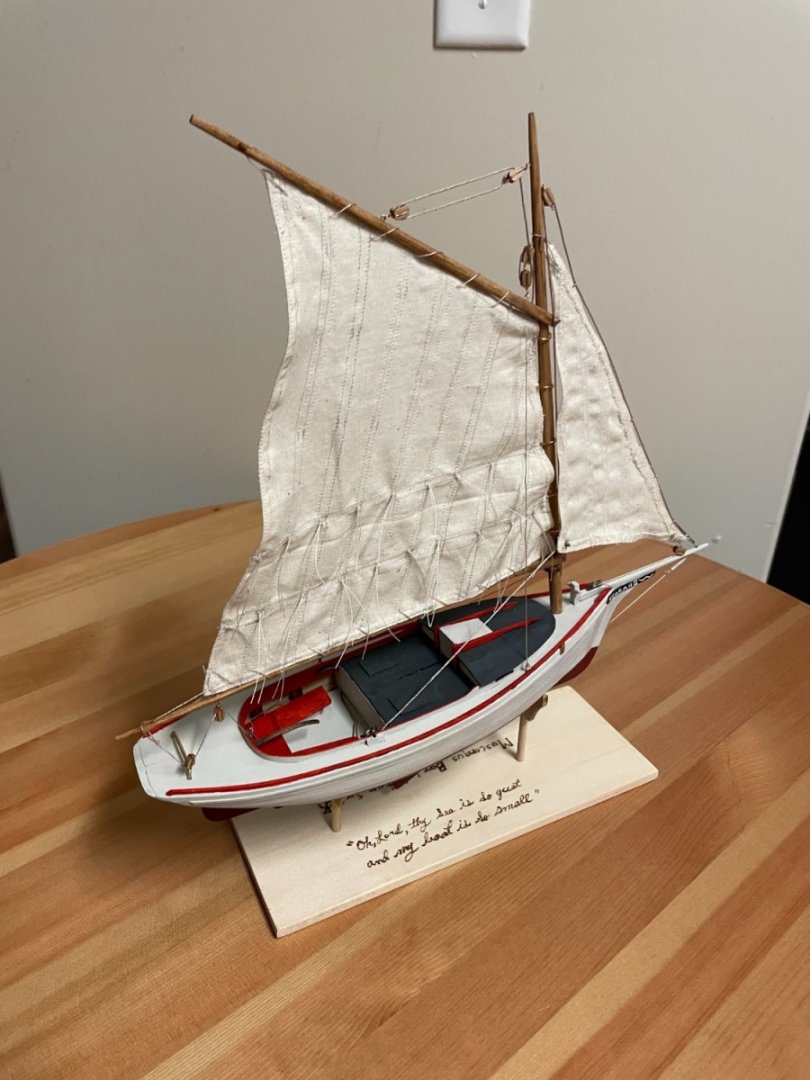
Here is a view of the completed boat with the base. My wife woodburnt an inscription on one side, the same phrase that was on President Kennedy‘s desk, slightly modified: Oh Lord, thy sea is so great and my boat is so small.
Finished