


Joseph F.
-
Posts
78 -
Joined
-
Last visited
Content Type
Profiles
Forums
Gallery
Events
Posts posted by Joseph F.
-
-
Good idea @Roger Pellett really I need more shelving all around.
Here is the link to the reference photos, as promised. Let me know if the link doesn't work or if you don't have permission to access:
https://drive.google.com/drive/folders/1BUE6i8l-8UsupmQ88LXrb0ecgY-J32aq?usp=sharing- Ryland Craze and Roger Pellett
-
 1
1
-
 1
1
-
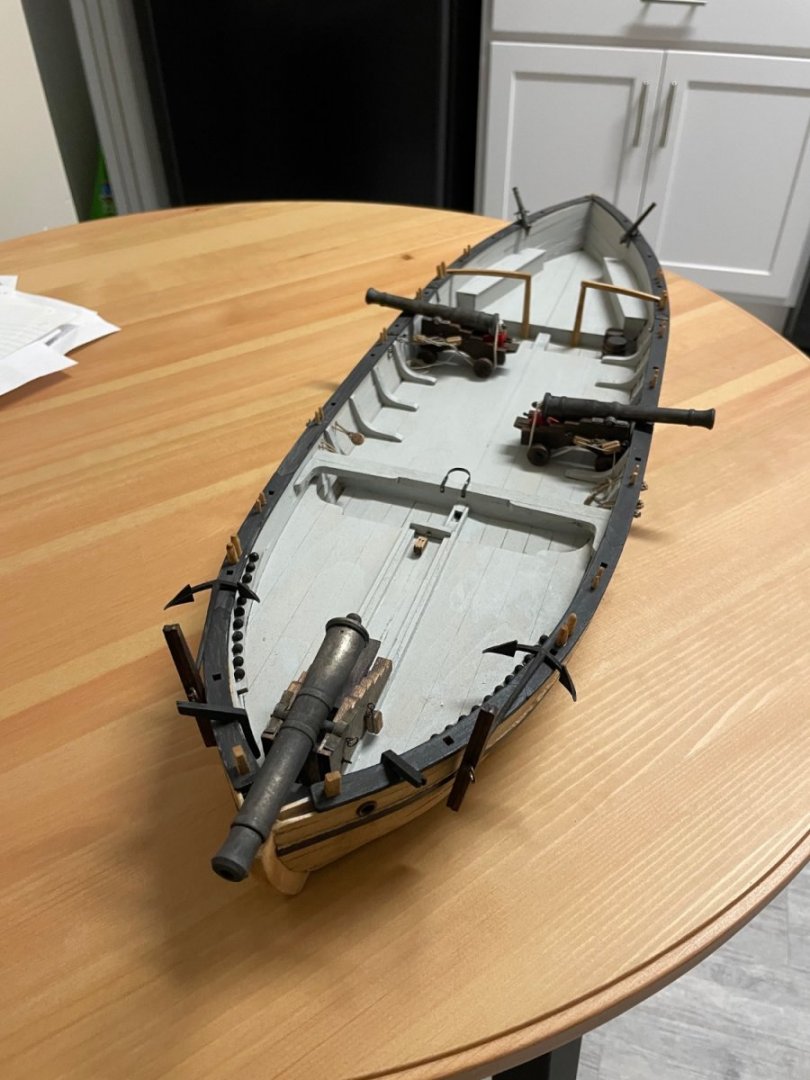
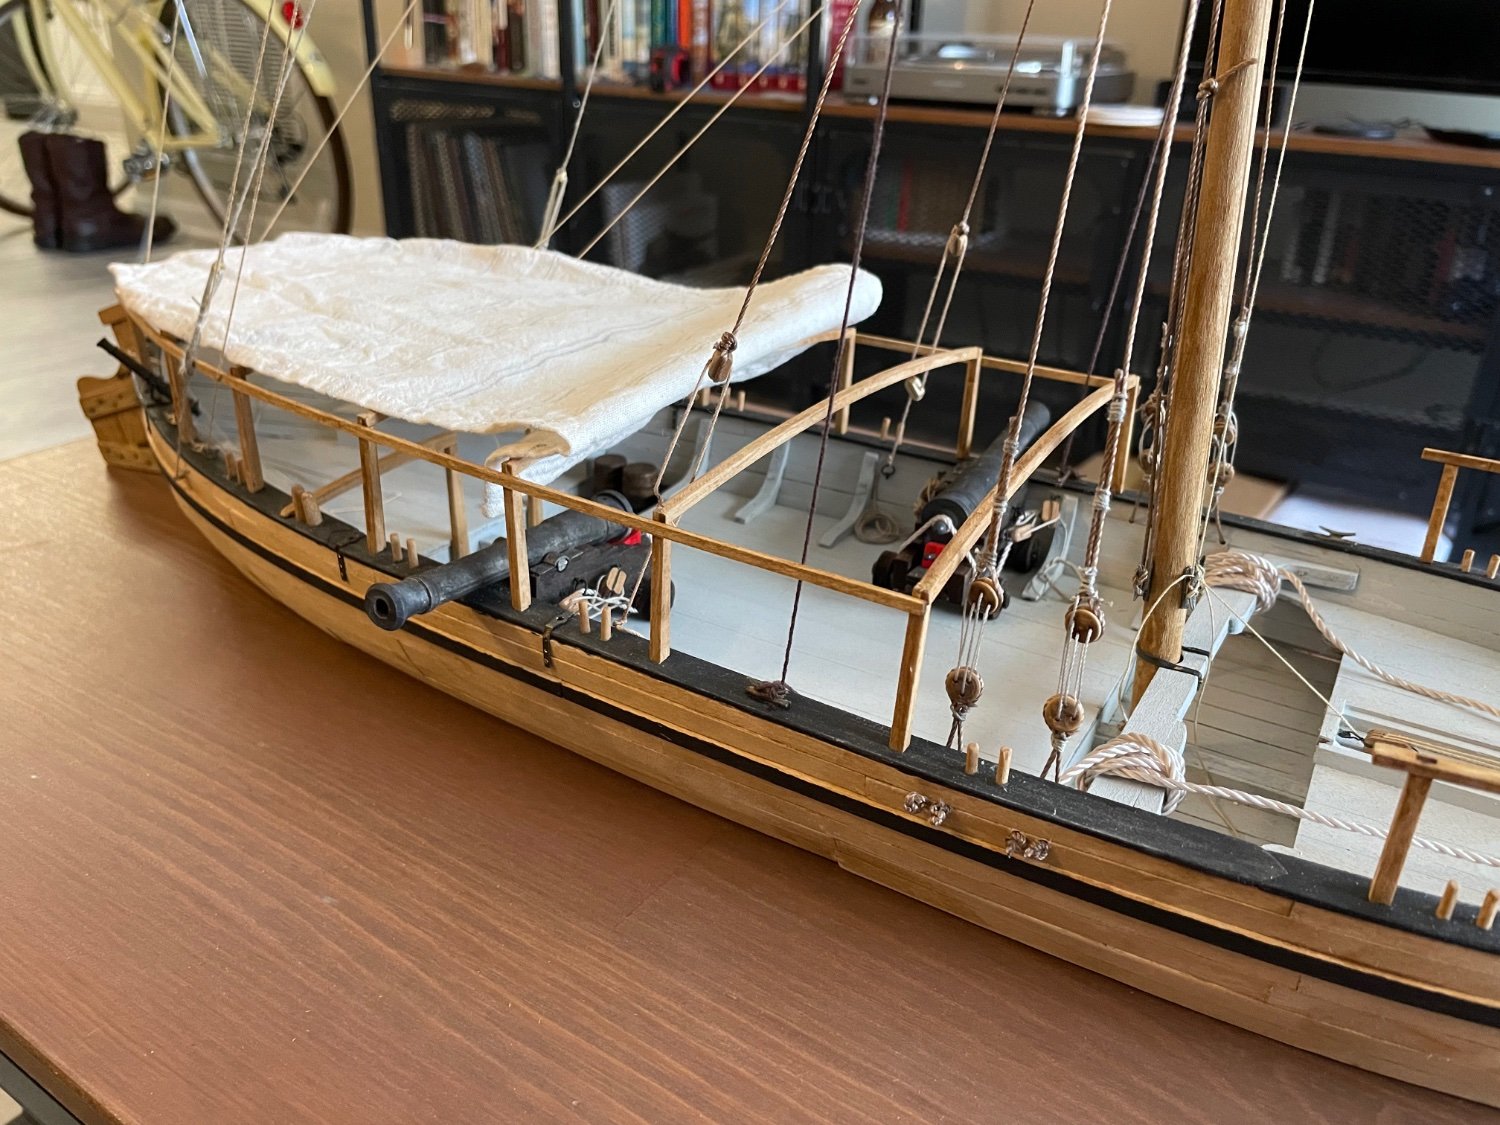
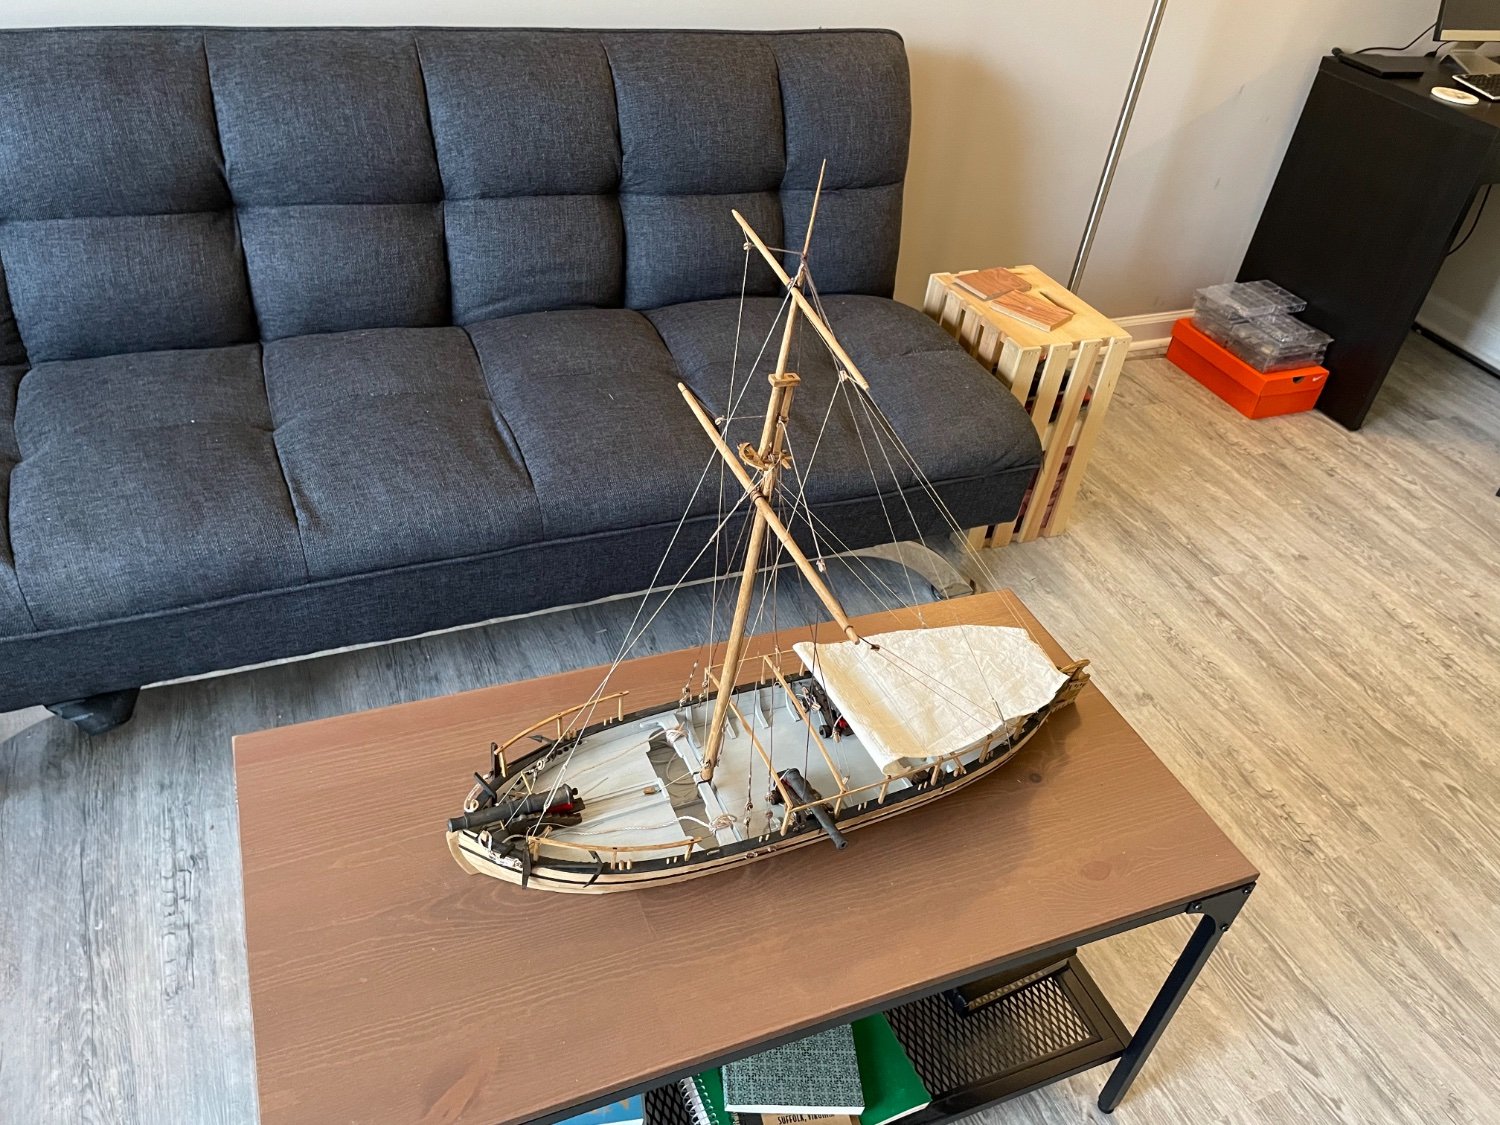
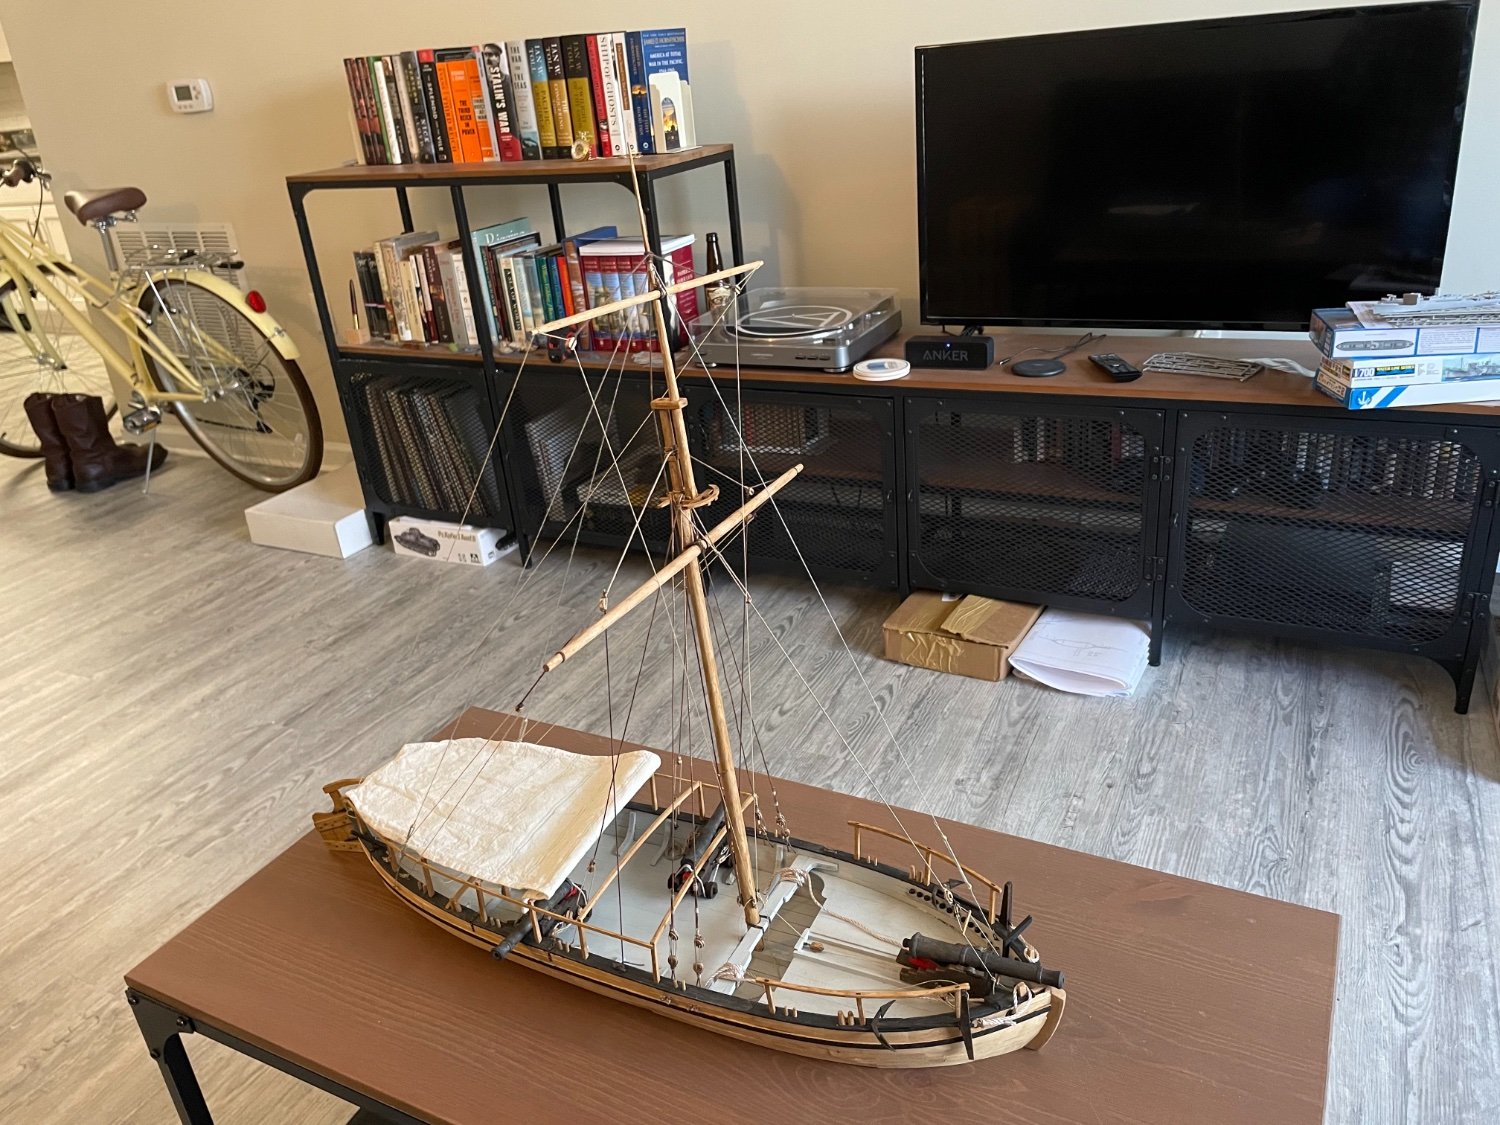
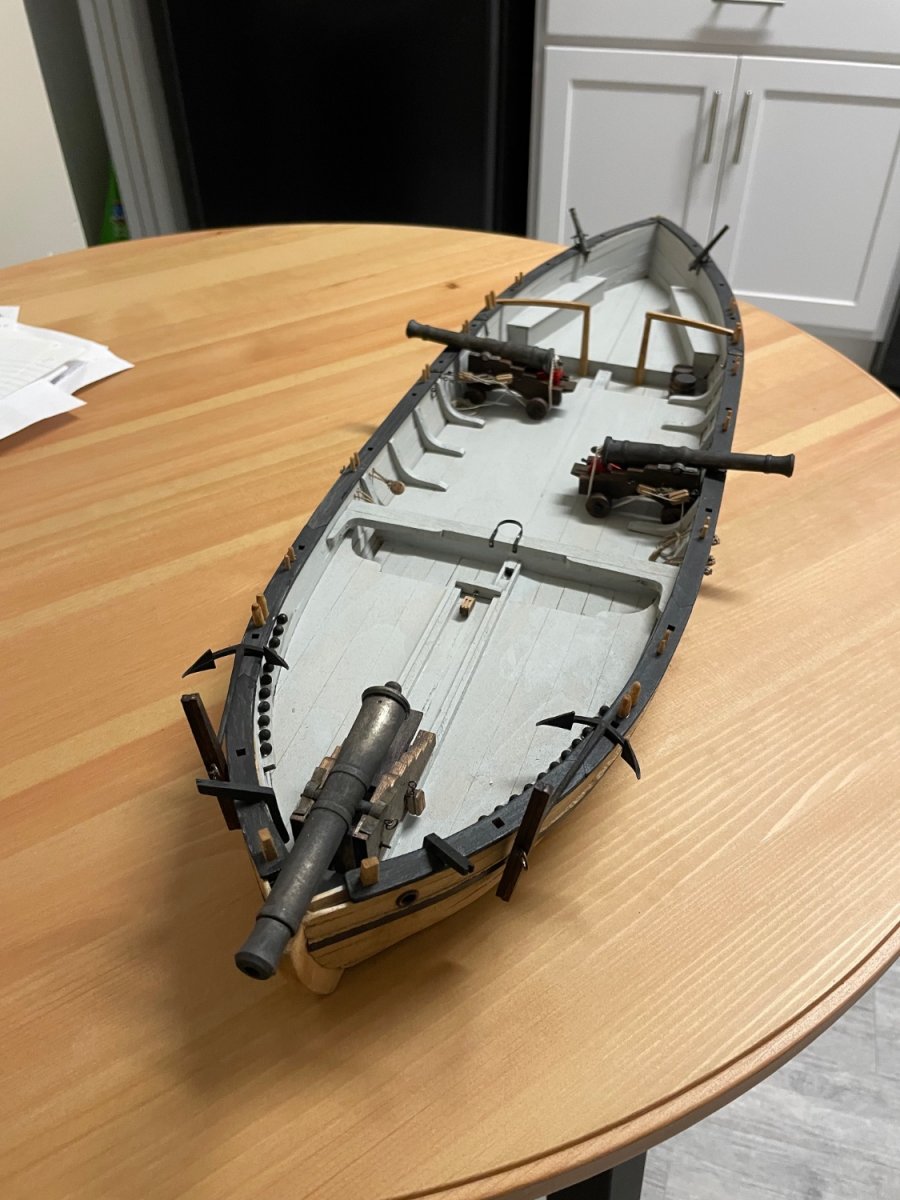
Finished rigging last night.
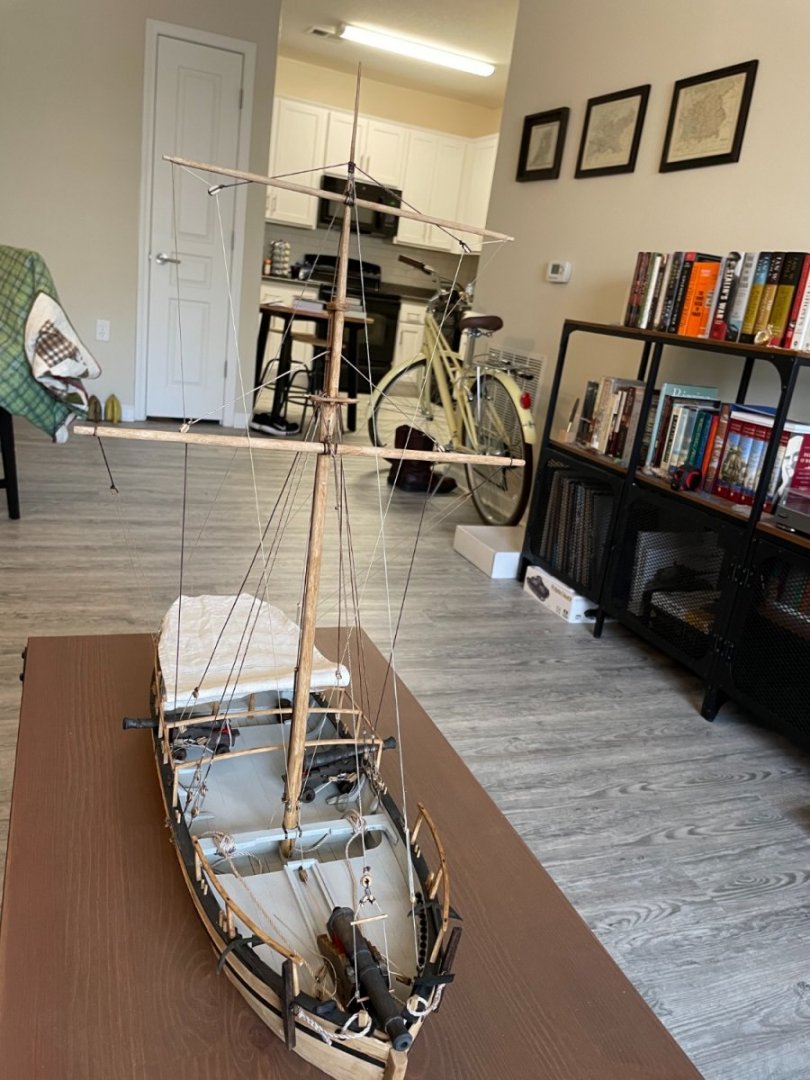
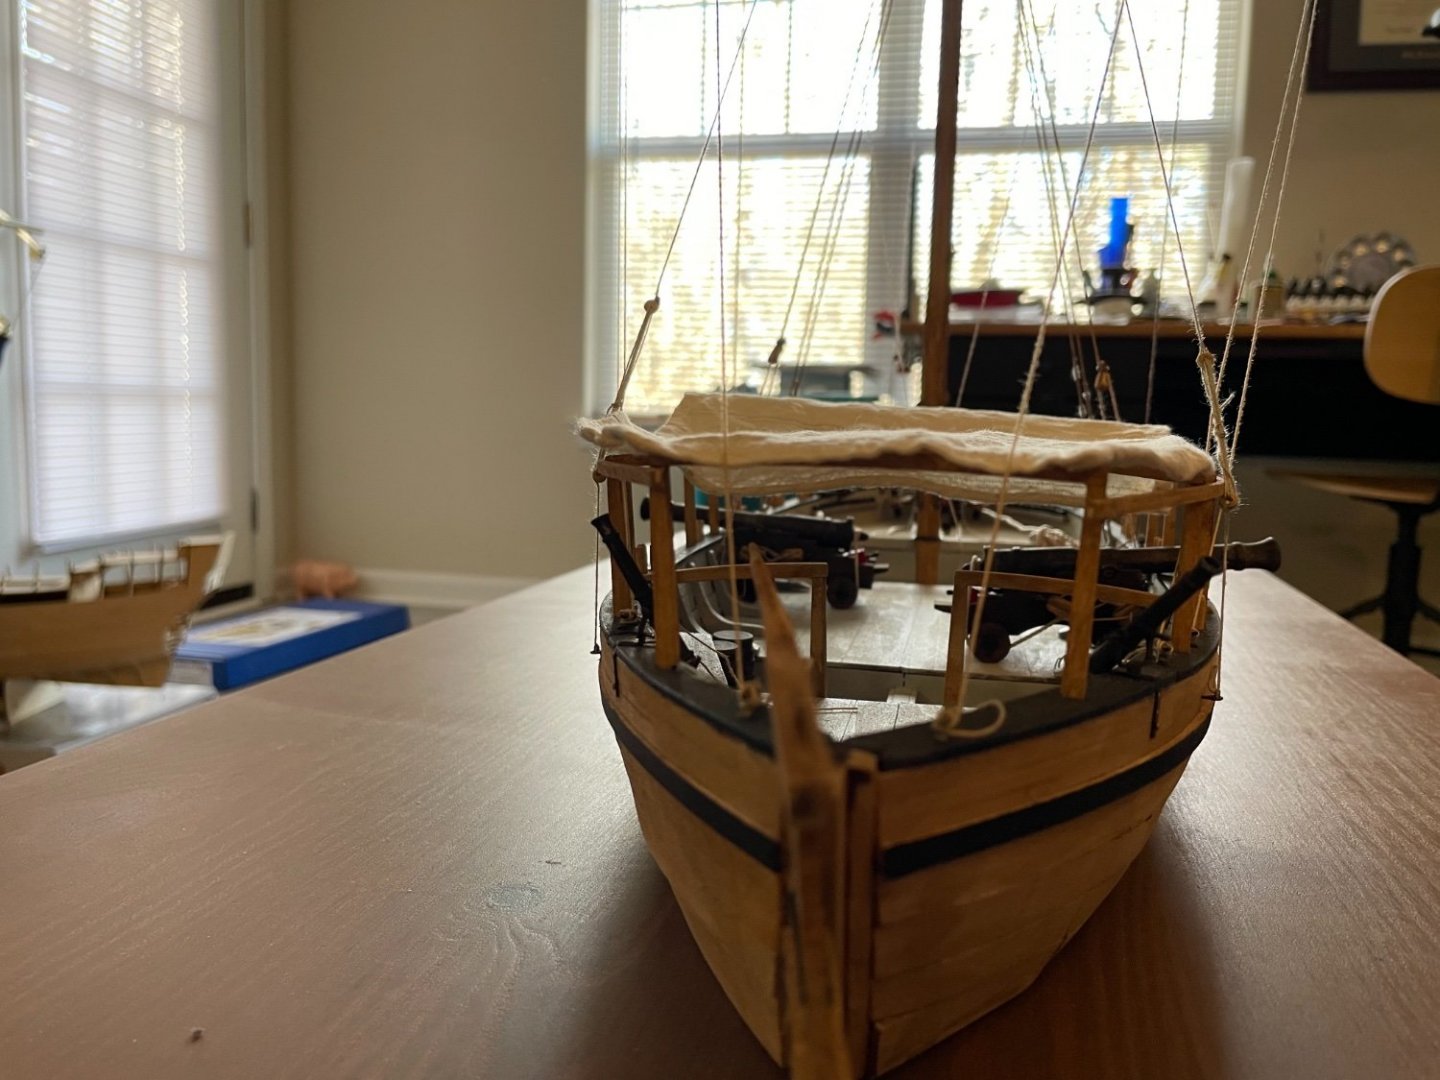
Worked on the awning structure and fore rails this morning.

There are a couple things missing, the breeching rope on the 12 pounder, the wooden rungs on one side of the shrouds, some rigging on the maintop, the oars, the stove, equipment racks on the awning, etc. I would eventually like to add a red pennant at the topmast.

I may come back and add those items, but for now I am finished with this boat.

I know it’s not the best Philadelphia ever built, but I am really proud of this boat.

This has been the most advanced kit I’ve ever built, and also the most fun.
I am especially proud of the rigging. I did cut some corners, but it came together really easily and gives me confidence for future projects.
I was given a set of reference photos by another modeler, which I will add to a Google Drive folder for future Philadelphia builders to use.
Again, there are some things I will go back and add later eventually, but for now I am finished with this project and very proud of it. Now to focus entirely on Vasa.

-
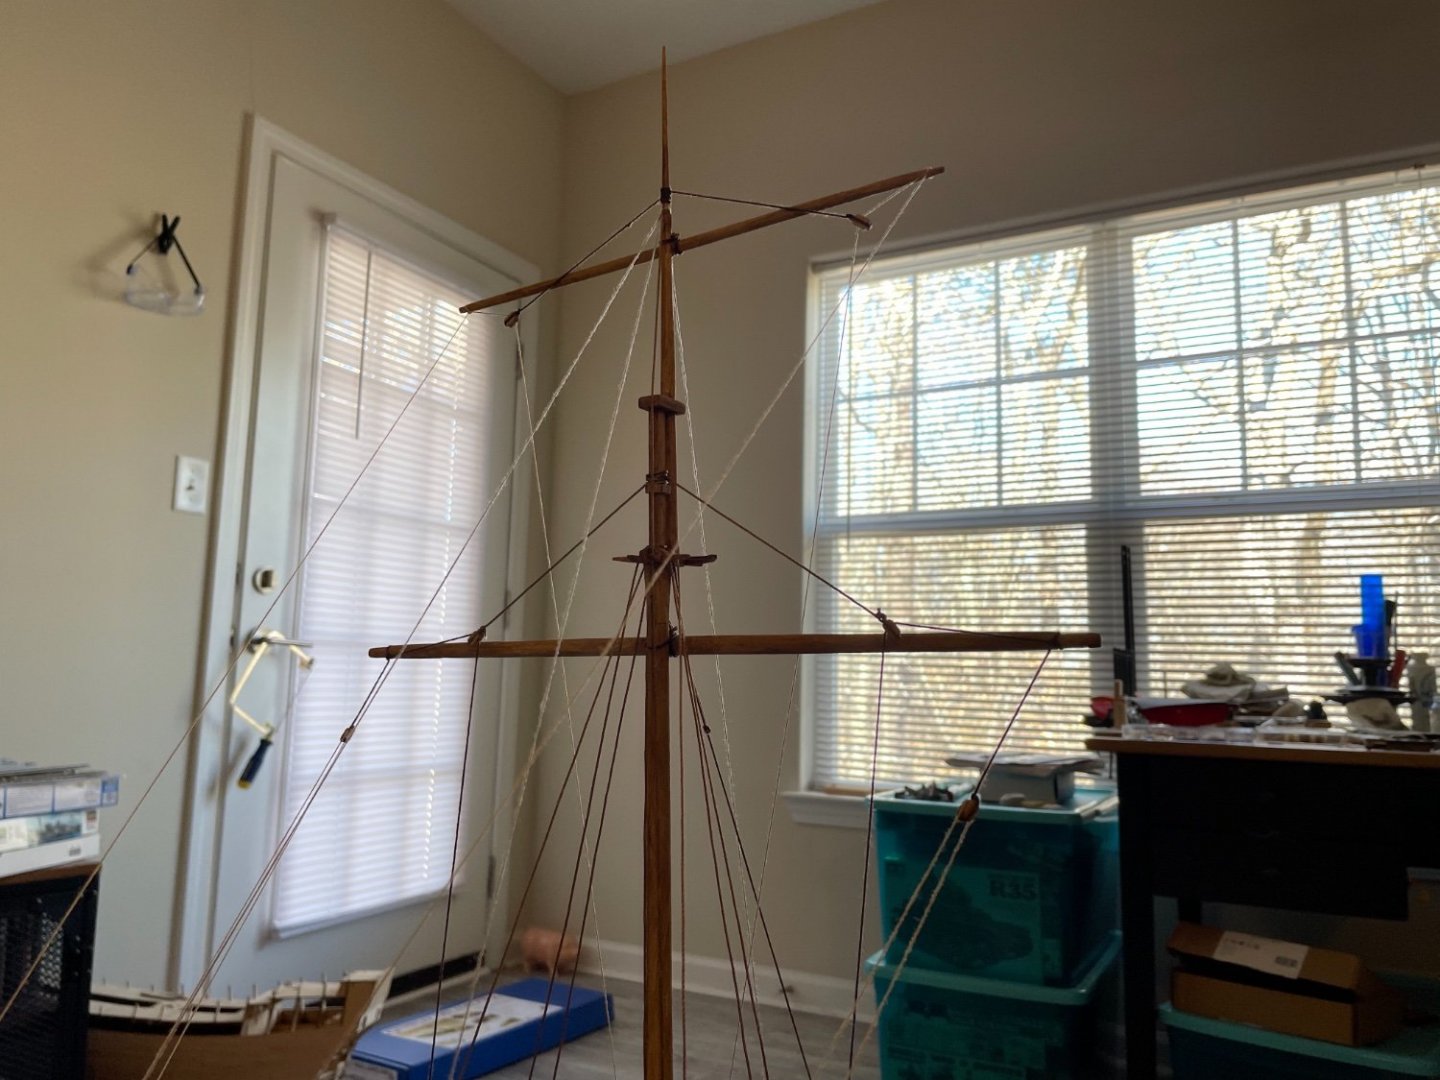
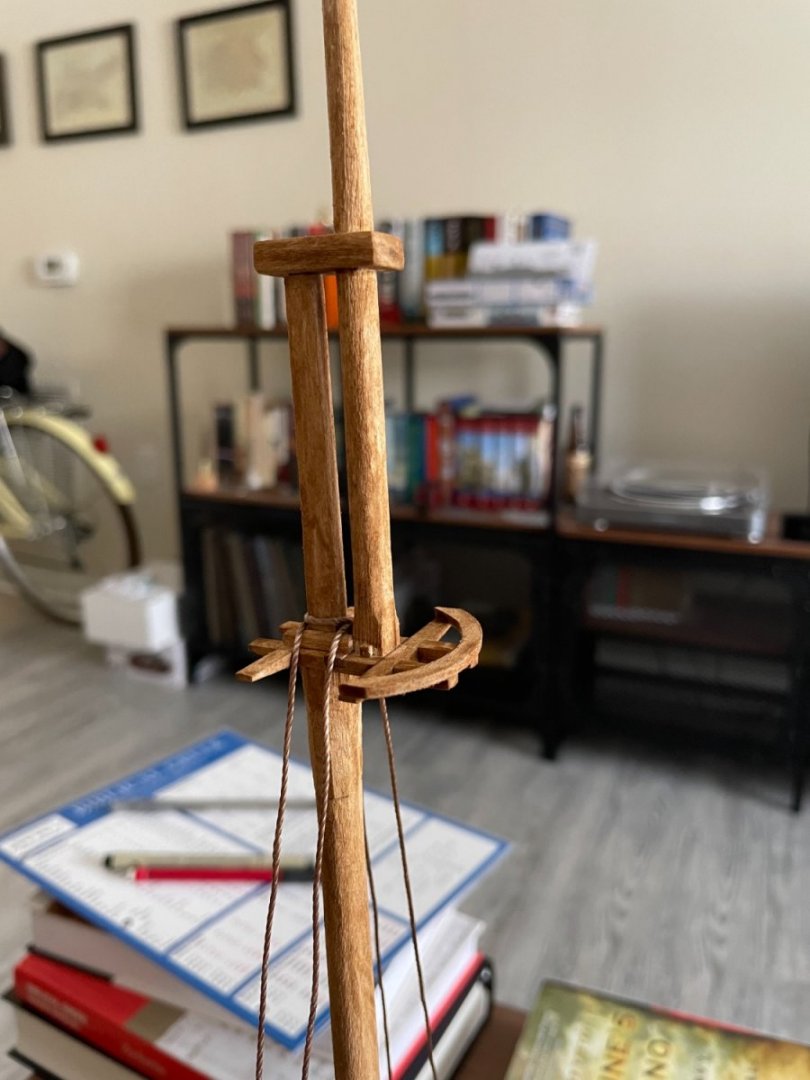
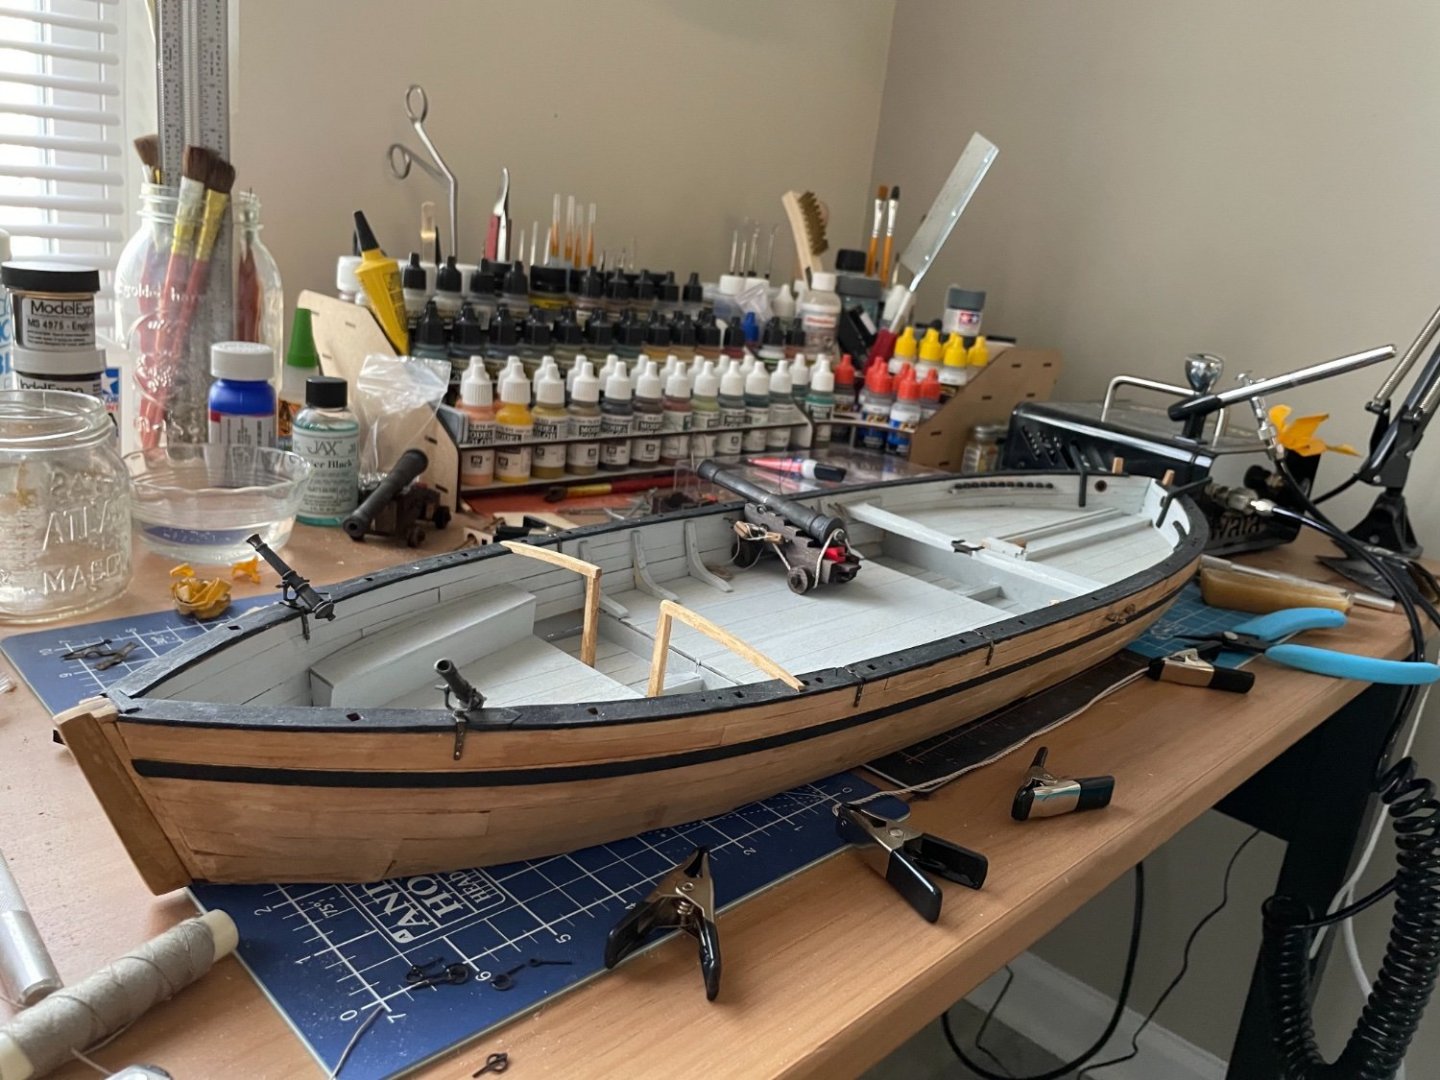
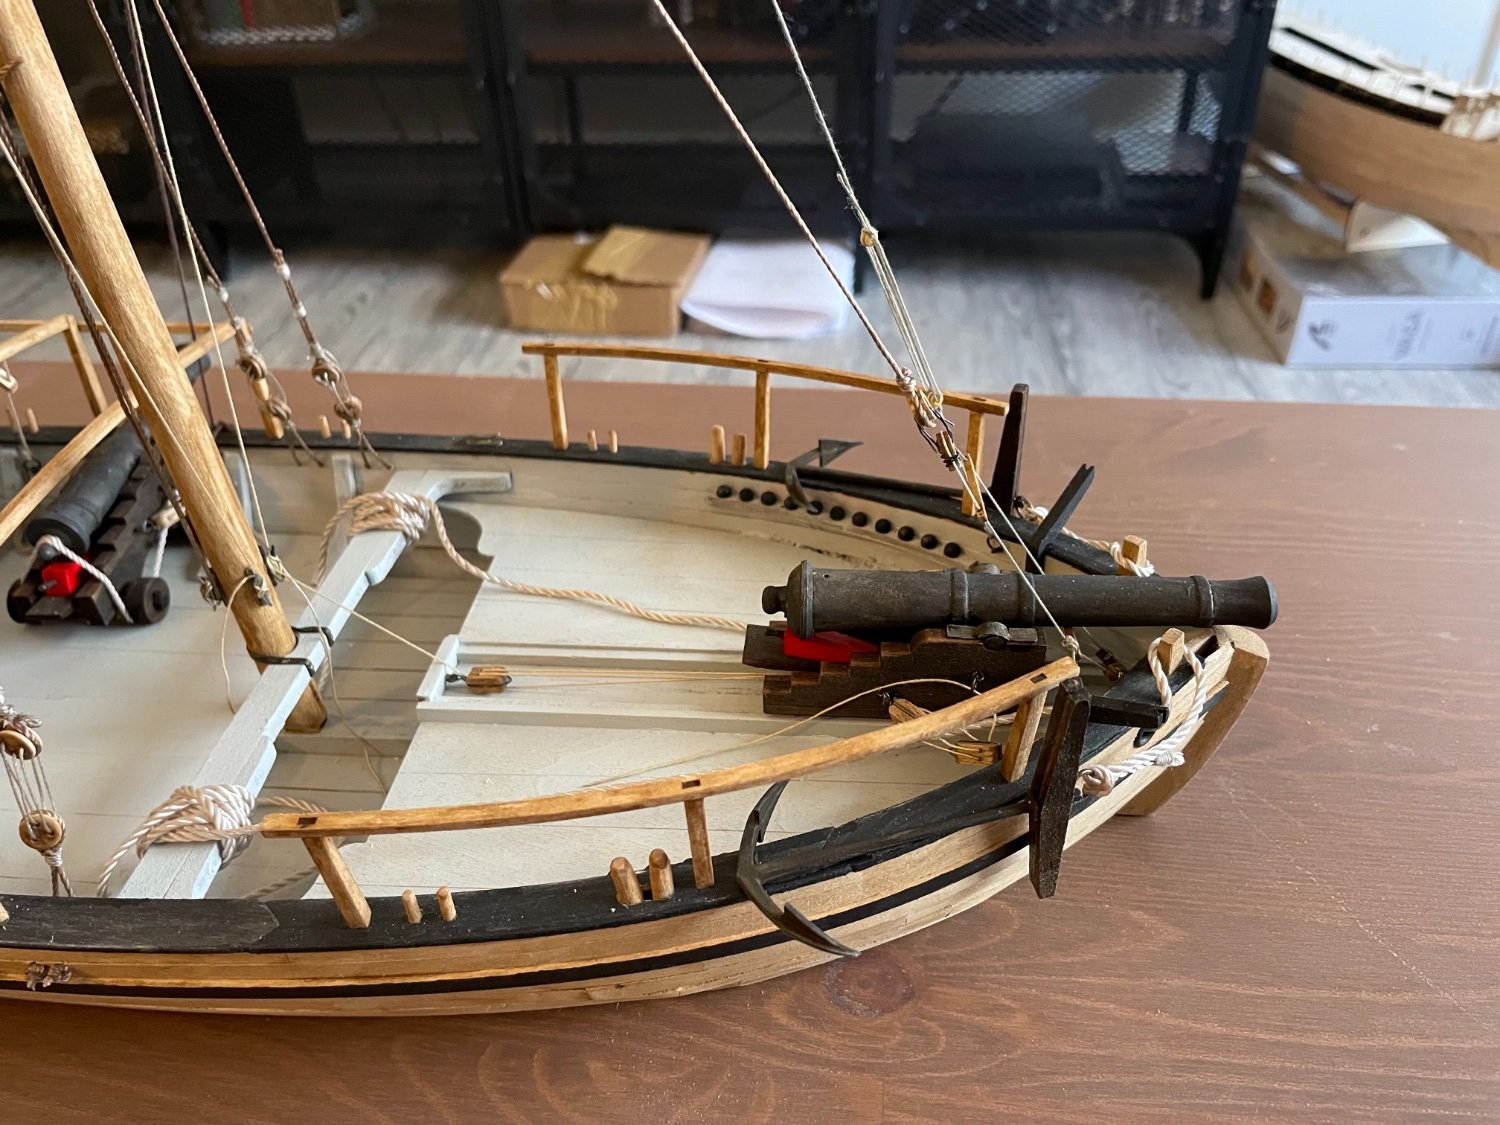
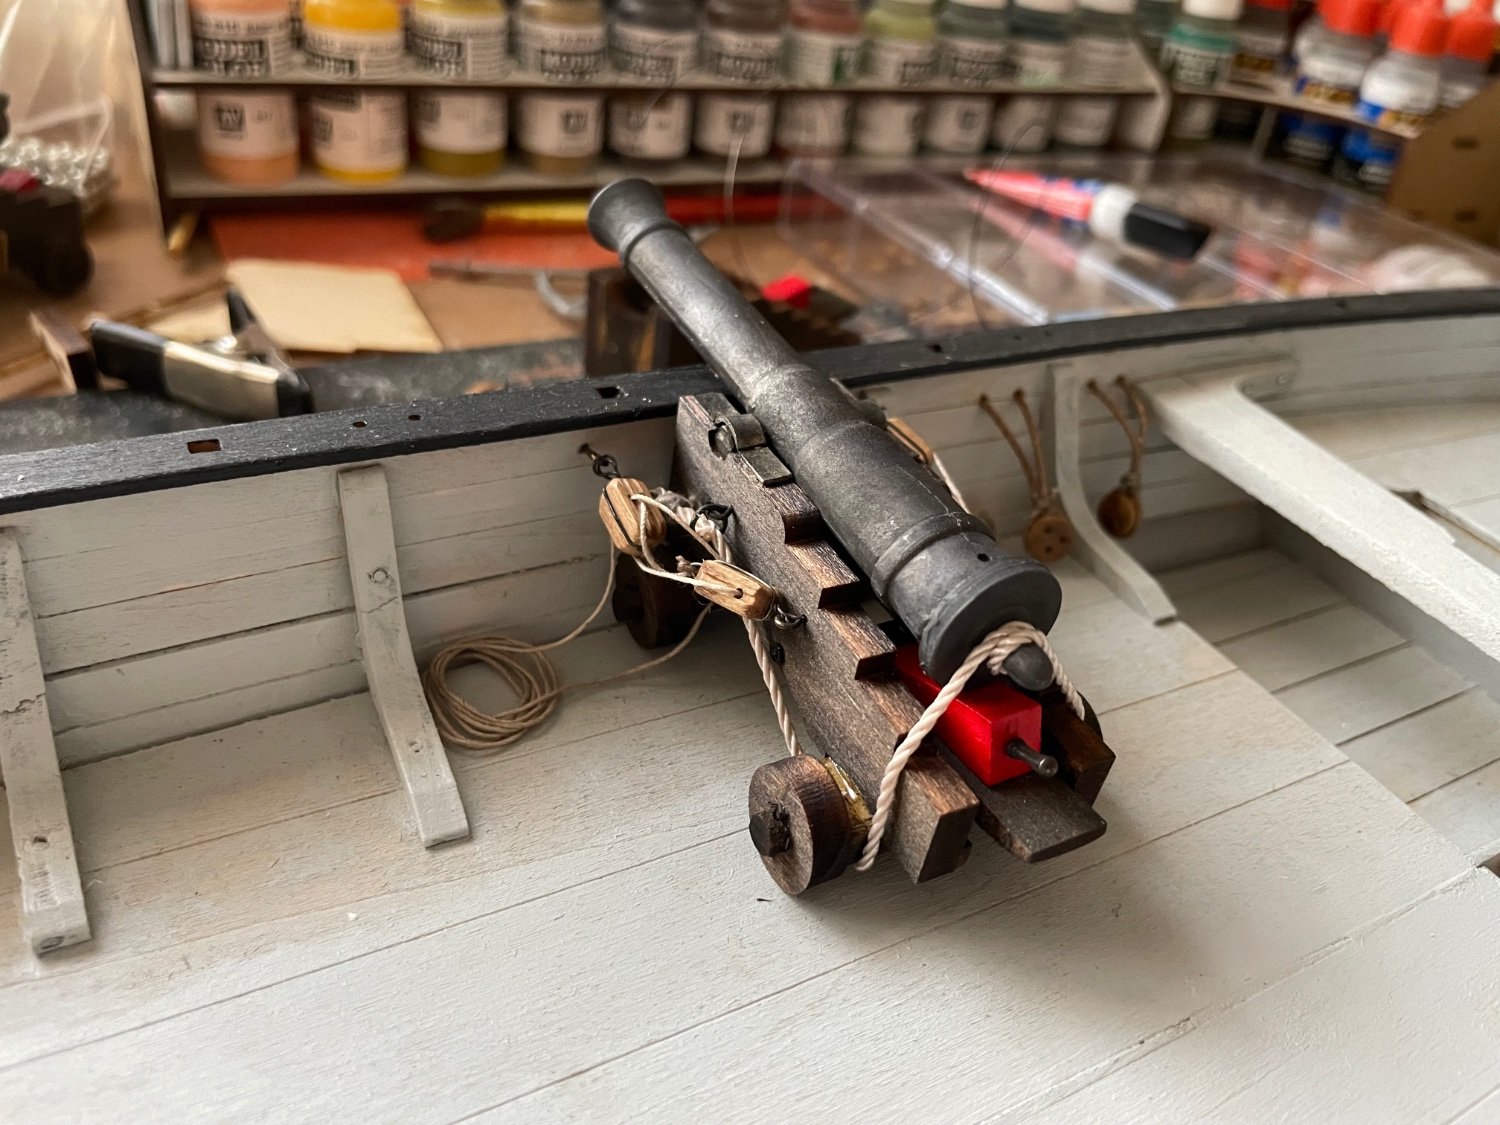
Have rigged the 12 pounder (minus the breeching rope) as well as the backstays and the forestay spreader.
Now I just have to rig the anchors, yards, and topmast, and to build the awning structure and I will be done with this project.
- Duanelaker, Ryland Craze, chris watton and 1 other
-
3
-
1
-
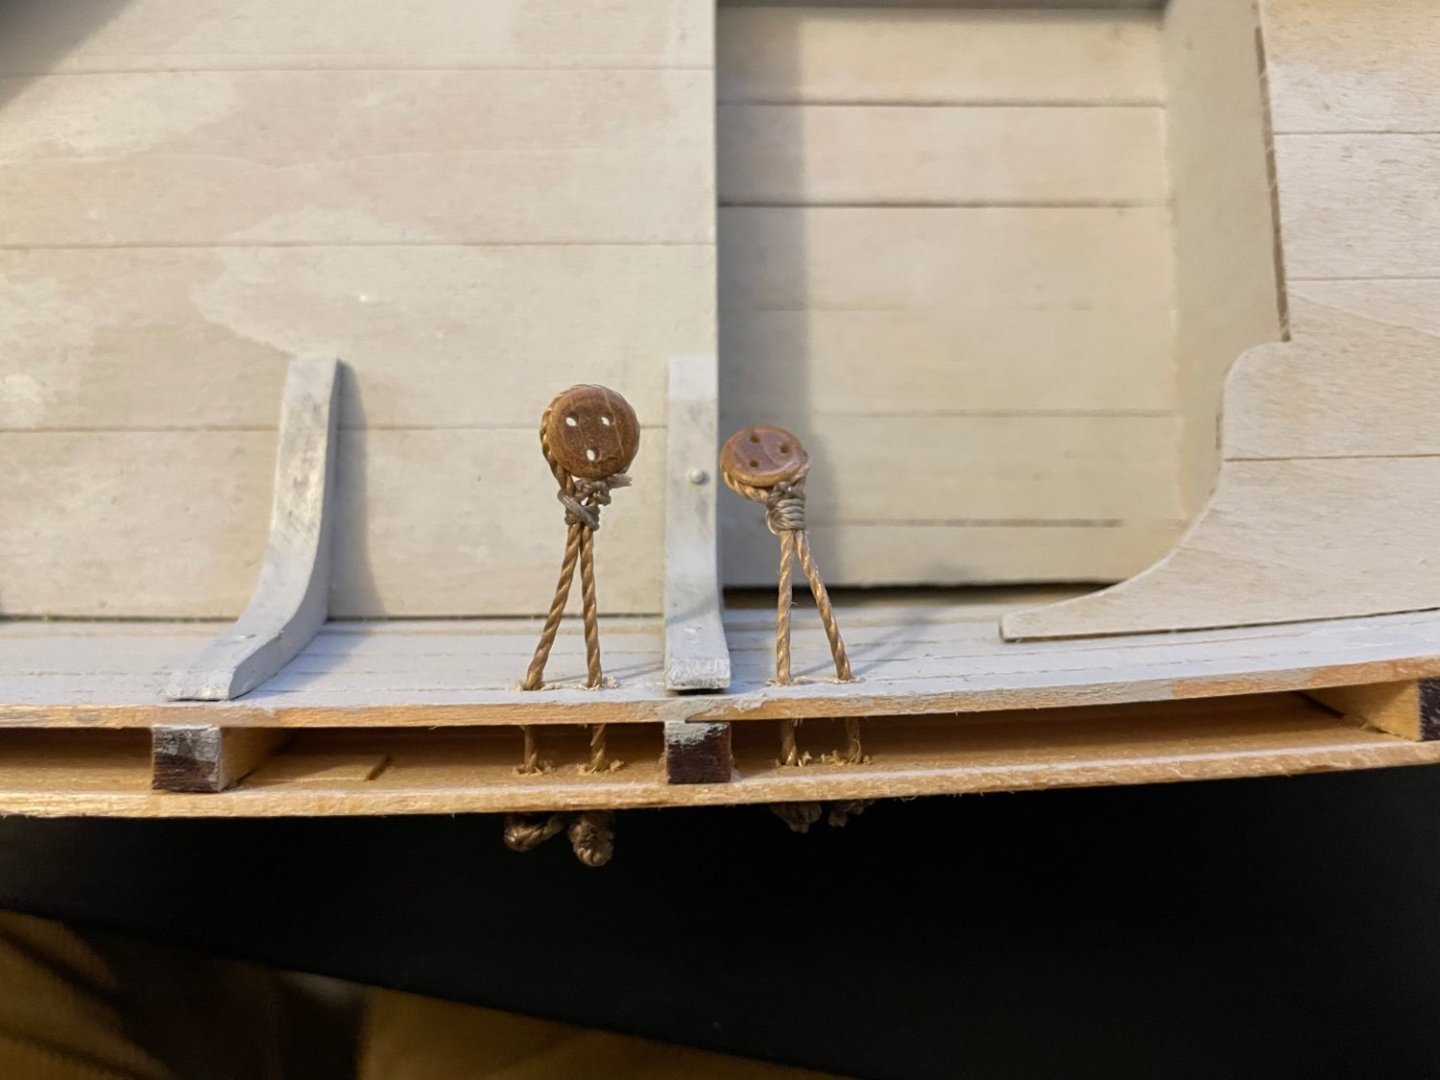
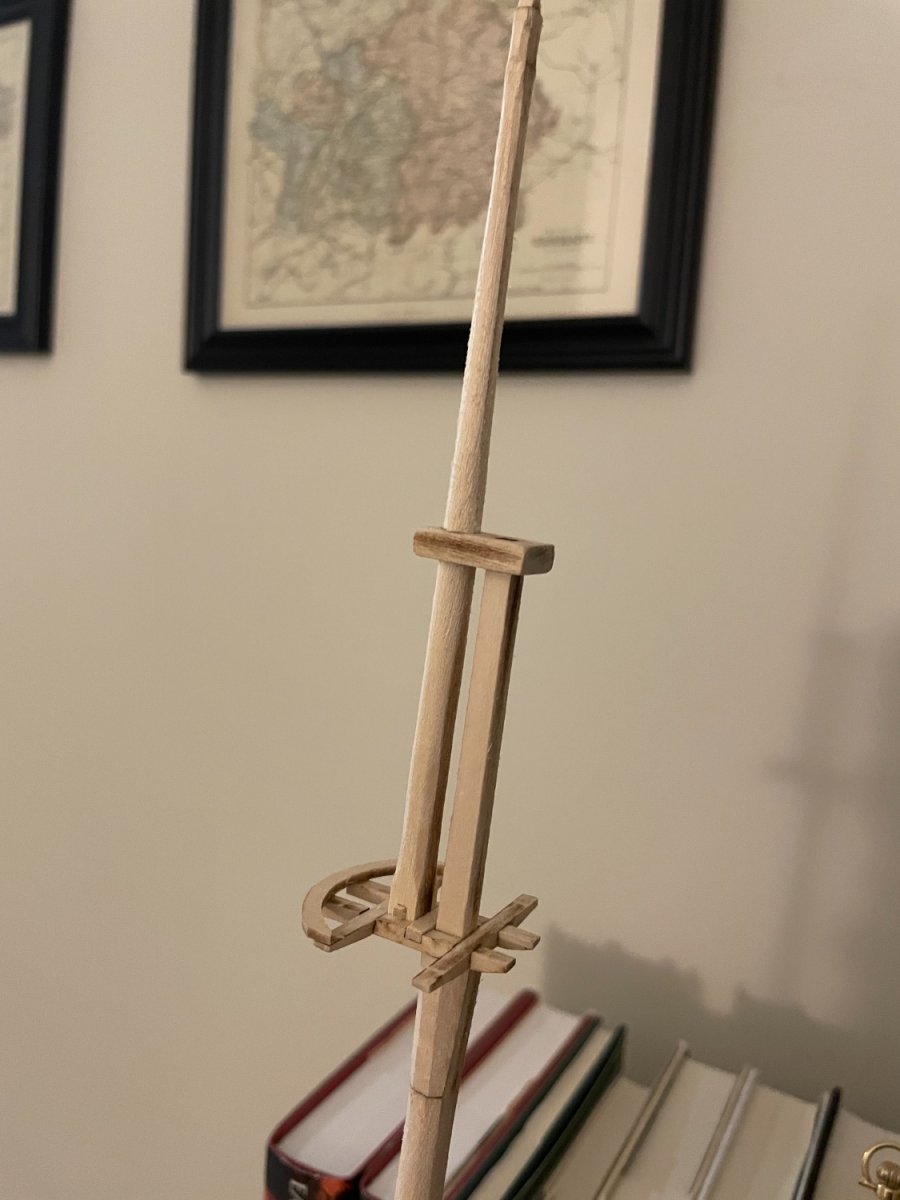
Stained the mast.
Installed cleats and started rigging deadeyes, which is easier because of the large size.

@Roger Pellett I did see that on another model, I’ll consider repainting the hawseholes
-
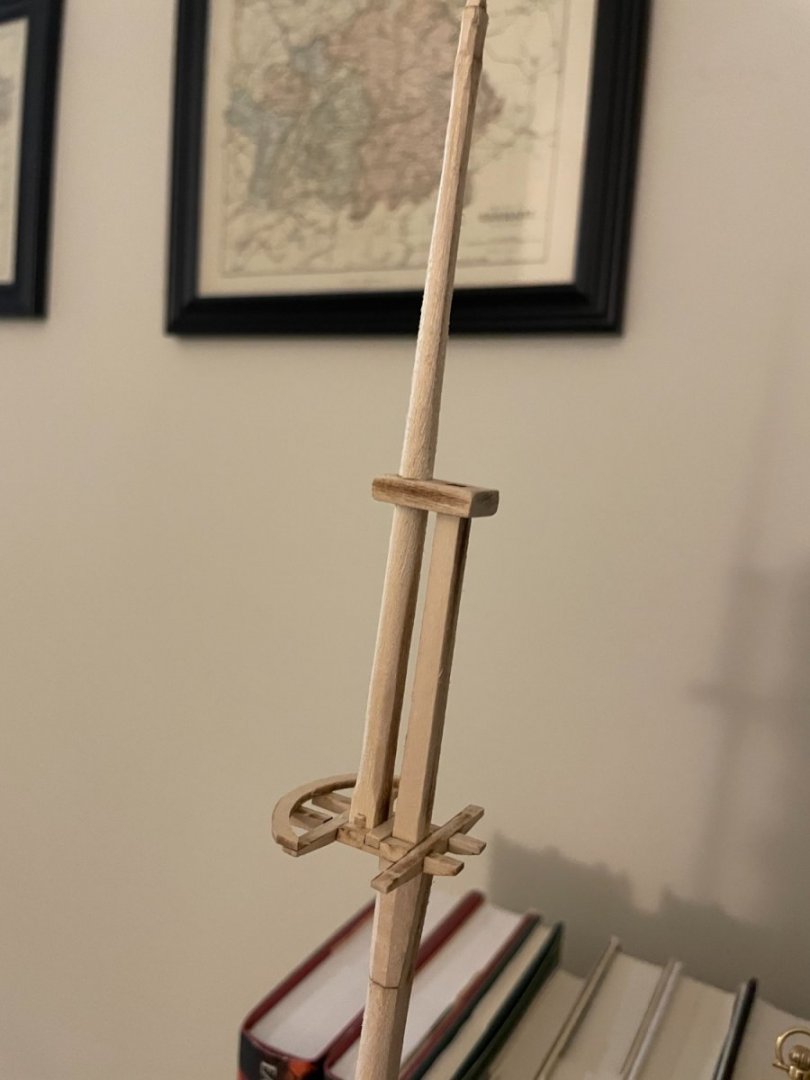
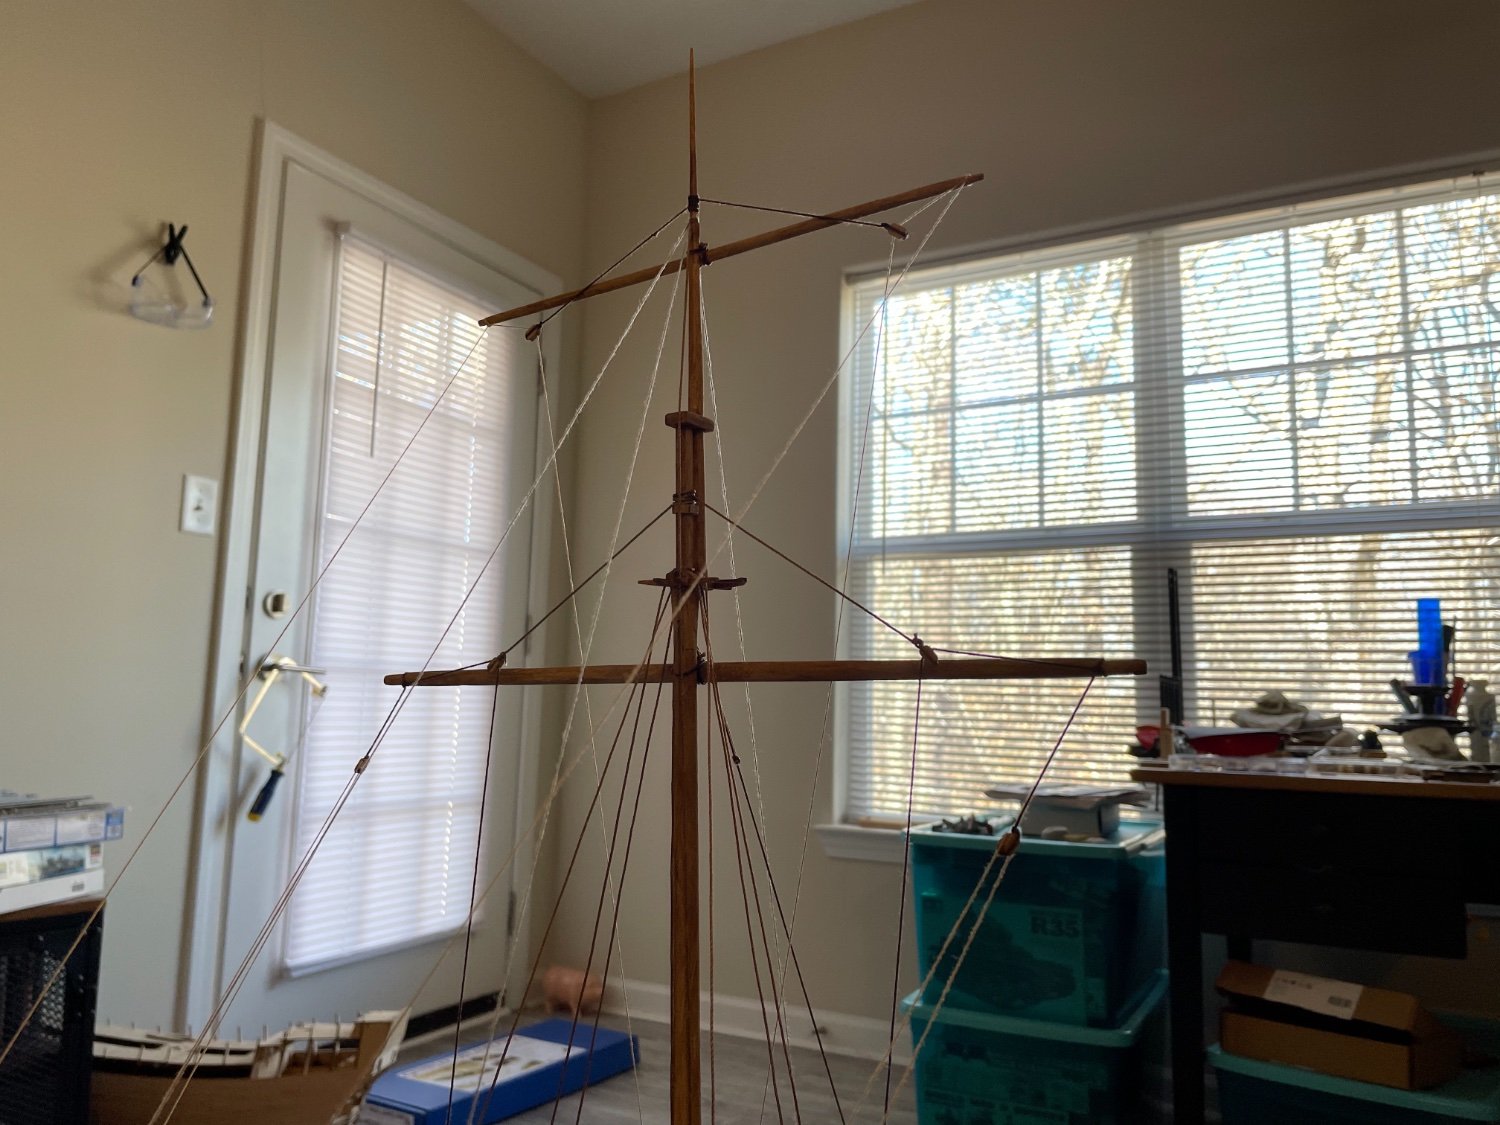
Started on the main and topsail yards.
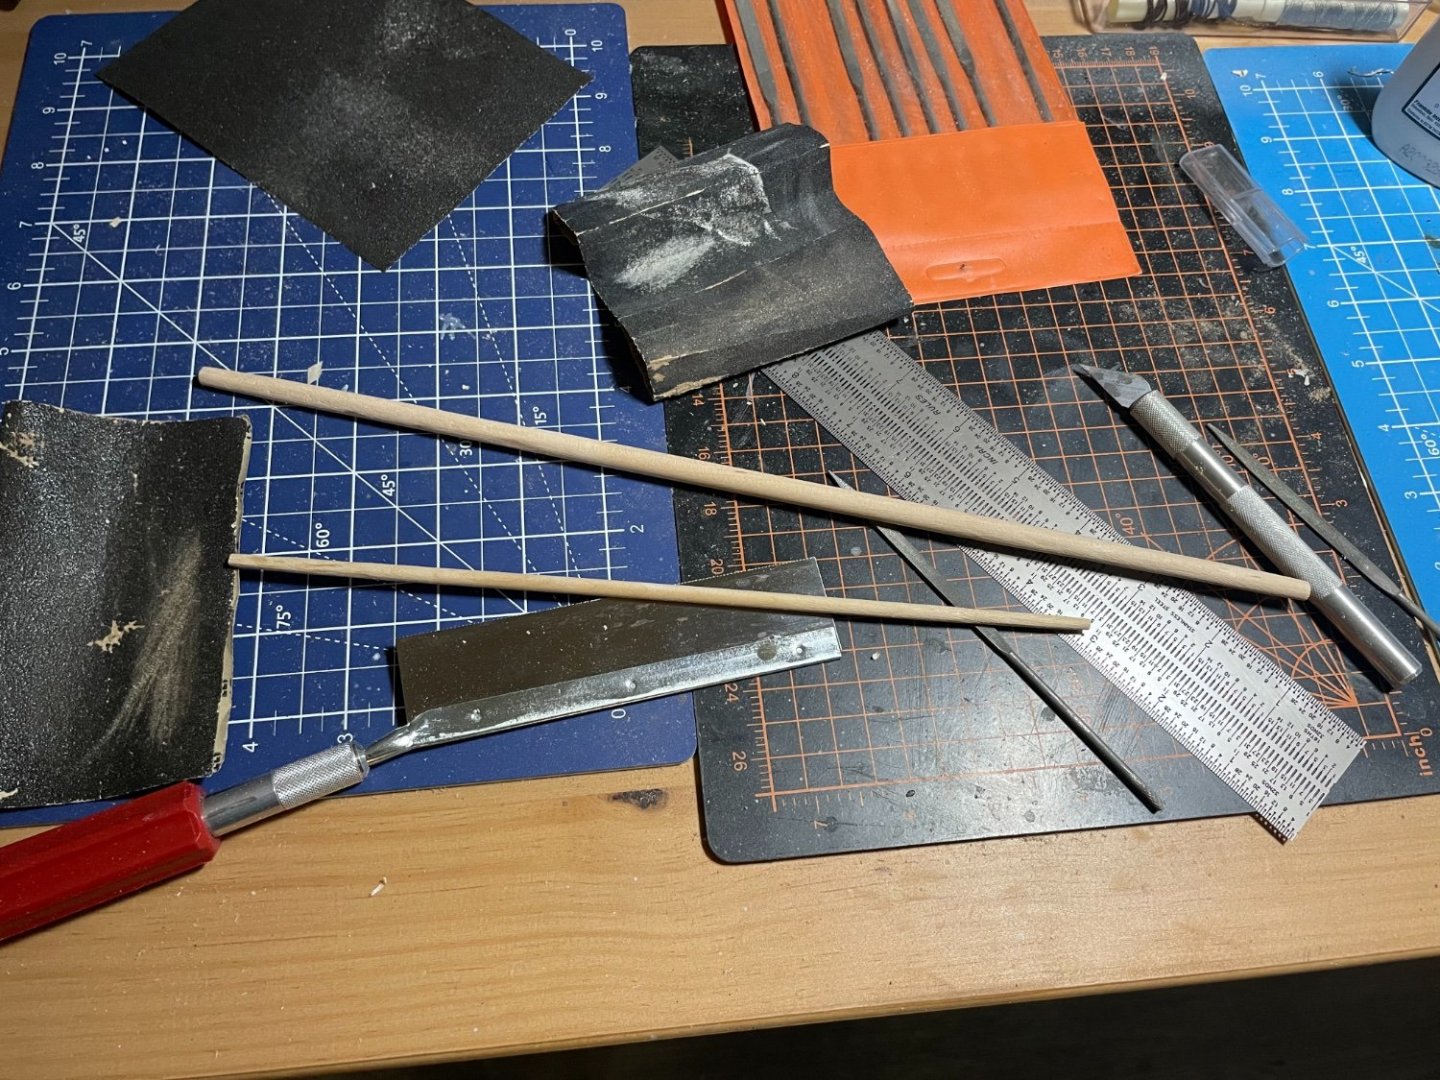
Fitted the main top, still rough, needs some more work.
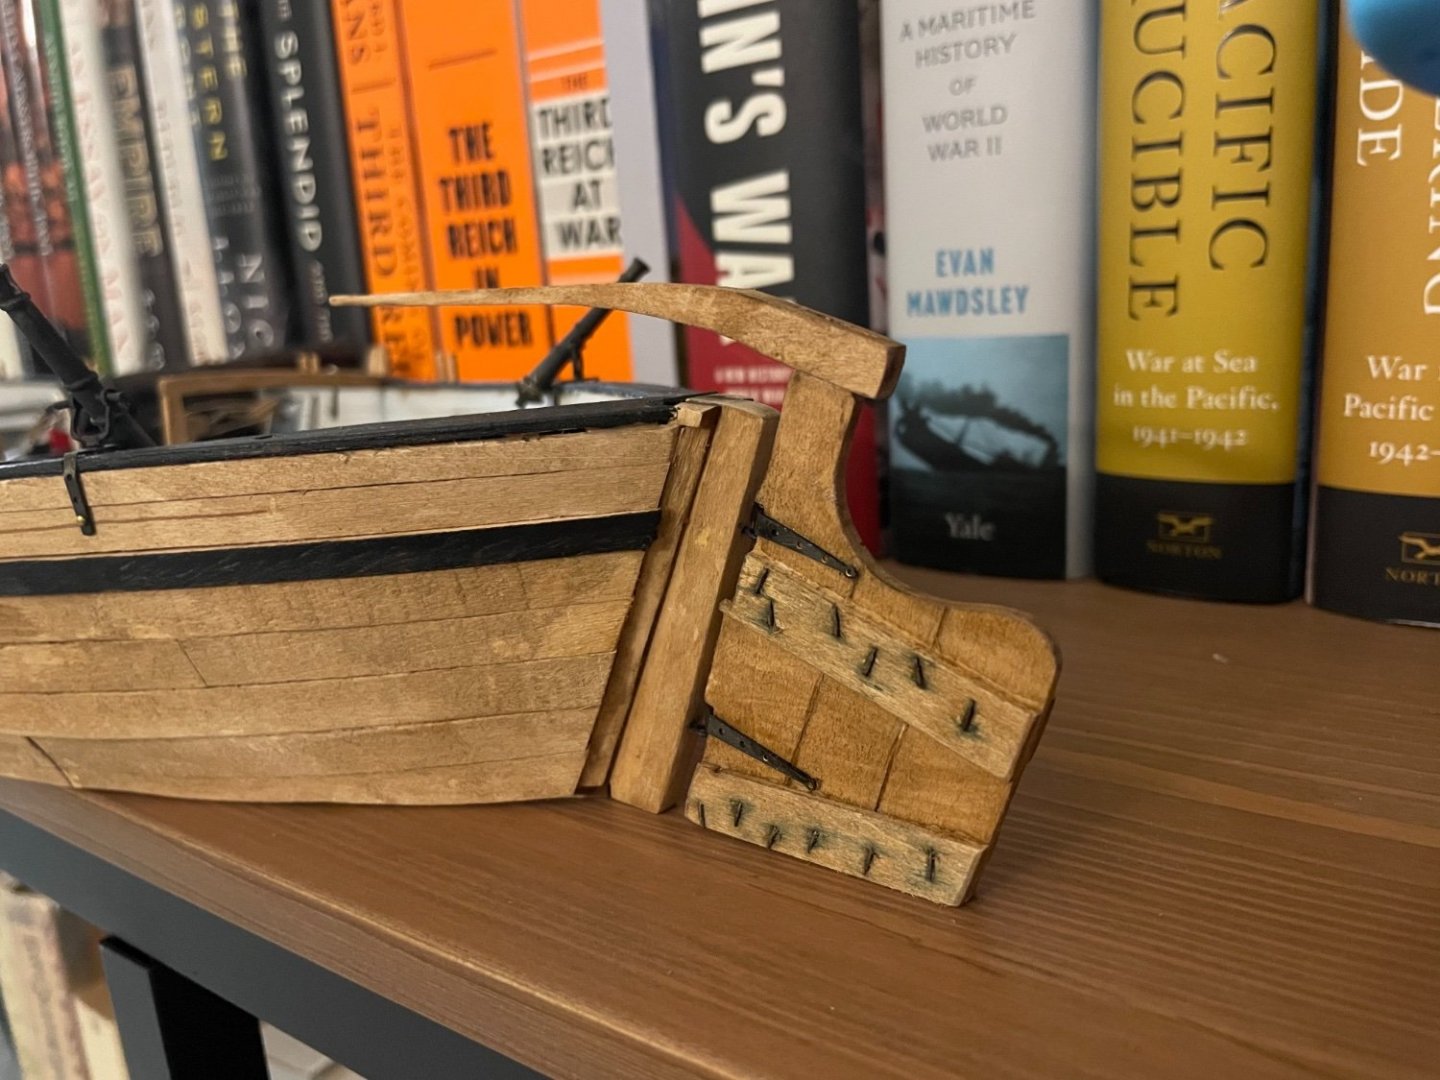
Finished the rudder. I got the idea to hammer over the ends of the nails from a picture of a larger Philadelphia model I had seen, but these are out of scale.
Soon I will be rigging the shrouds and forestay!
- Ryland Craze and DCooper
-
2
-
-
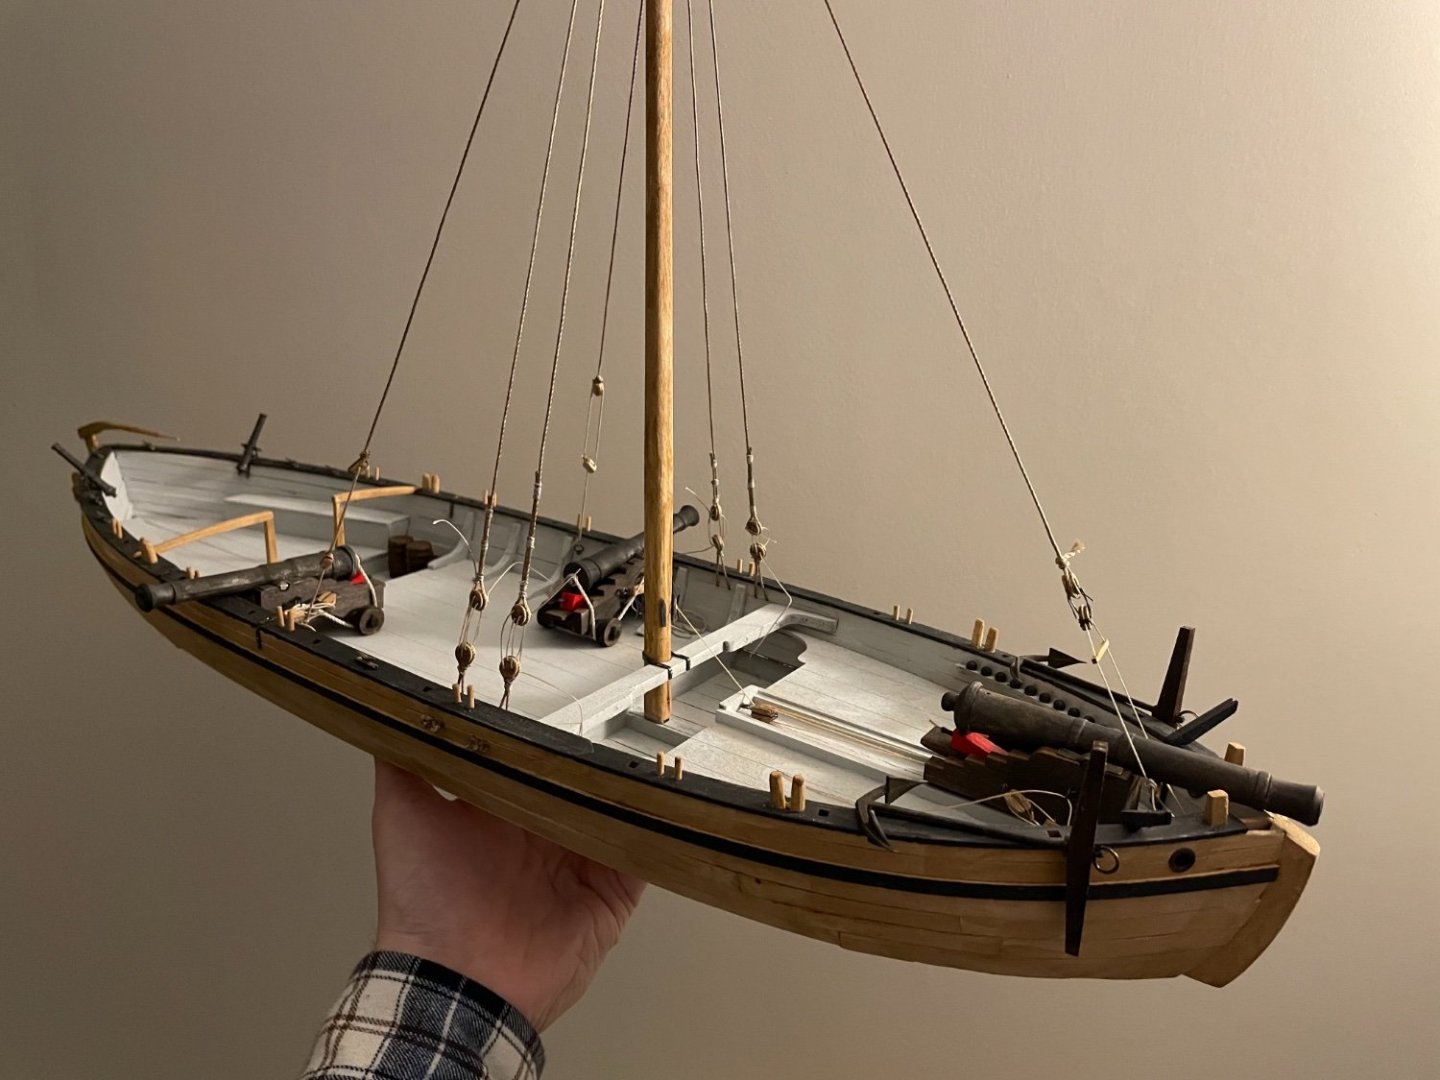
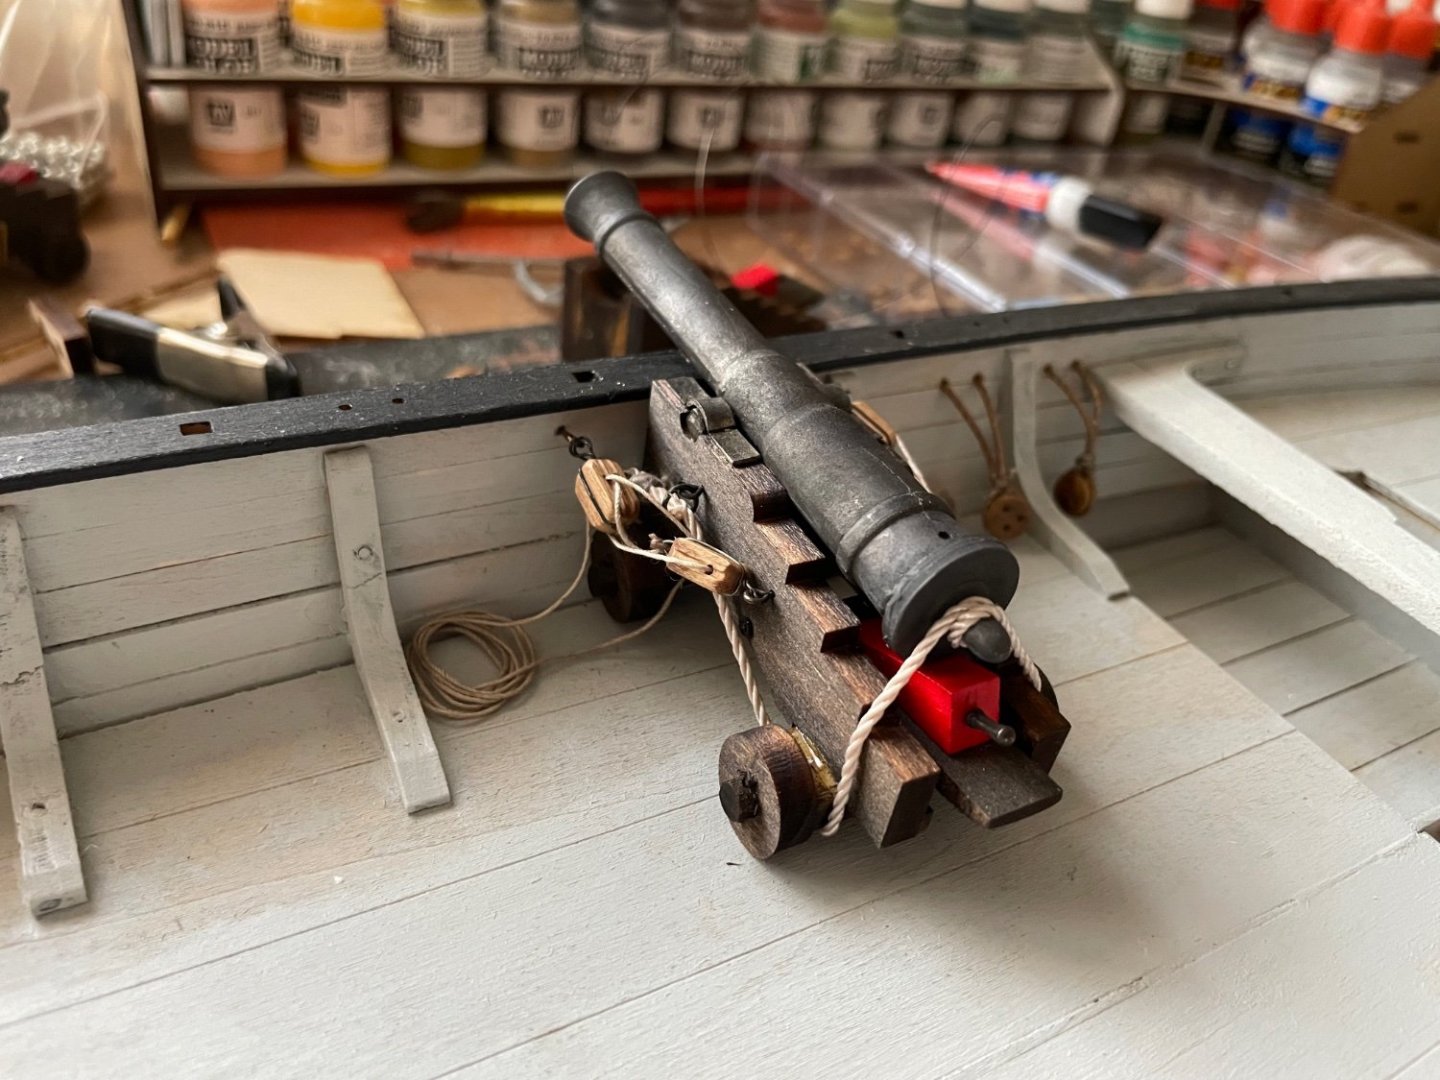
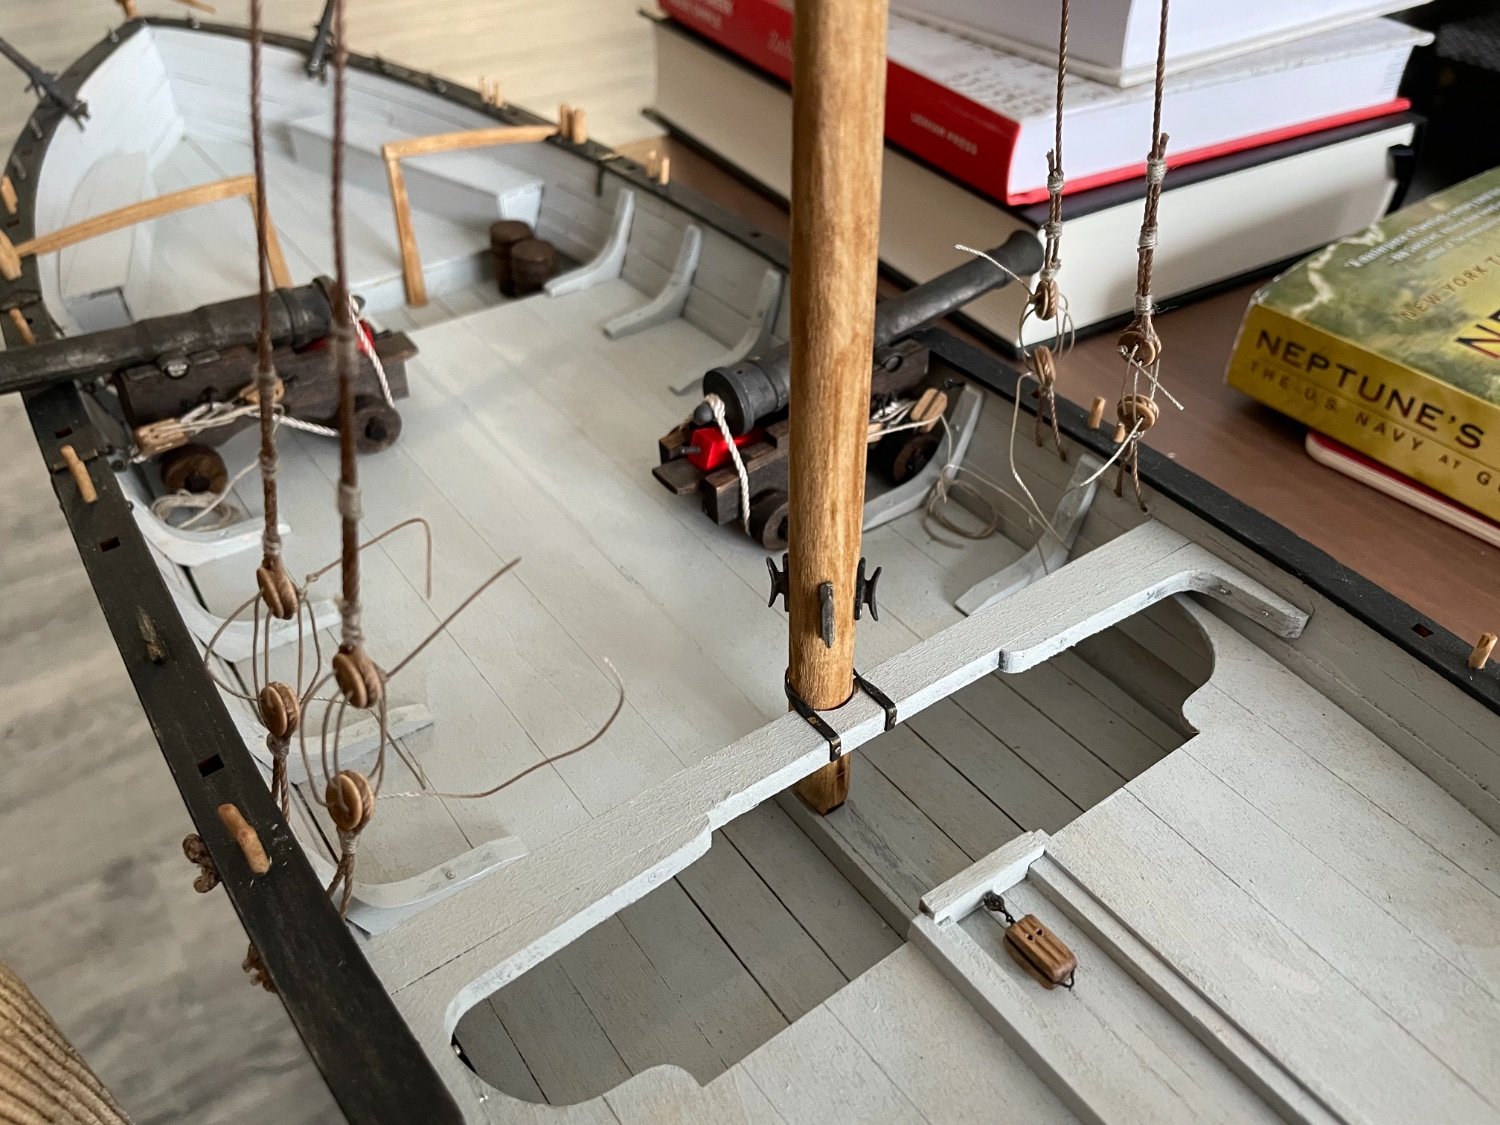
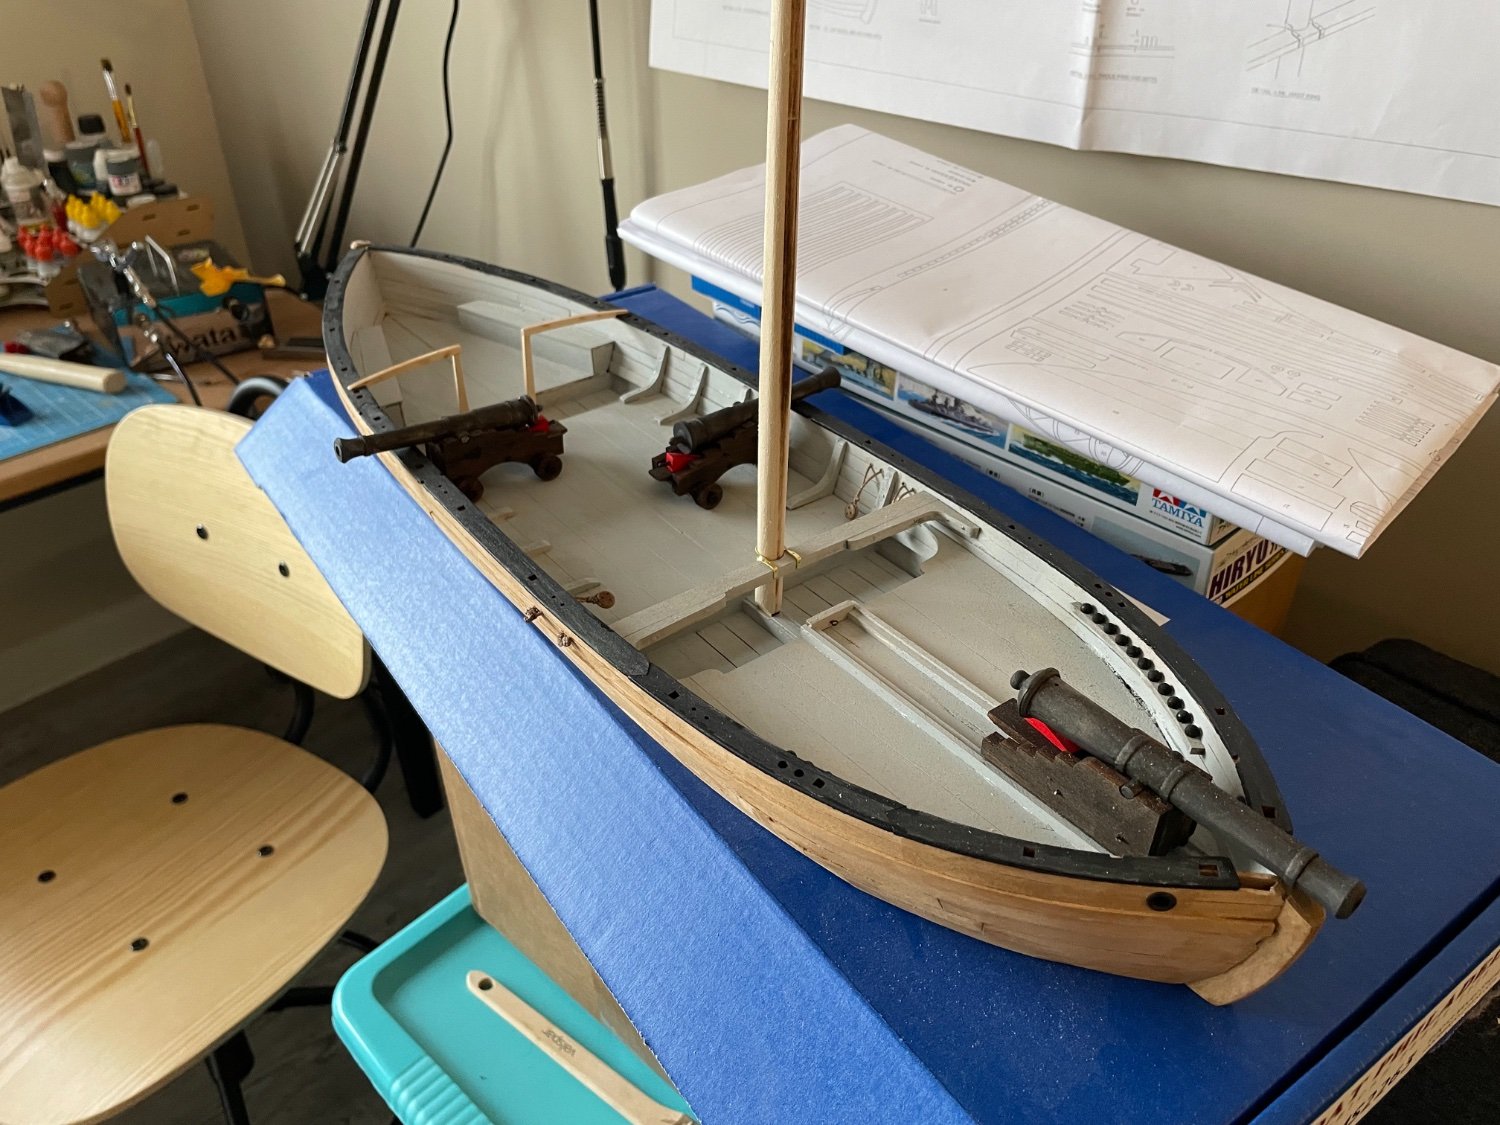
Both 9 pounders rigged, thole pins installed, anchors assembled. I used the metal anchors from my Vasa build, so I’ll have use another set of anchors on that kit.
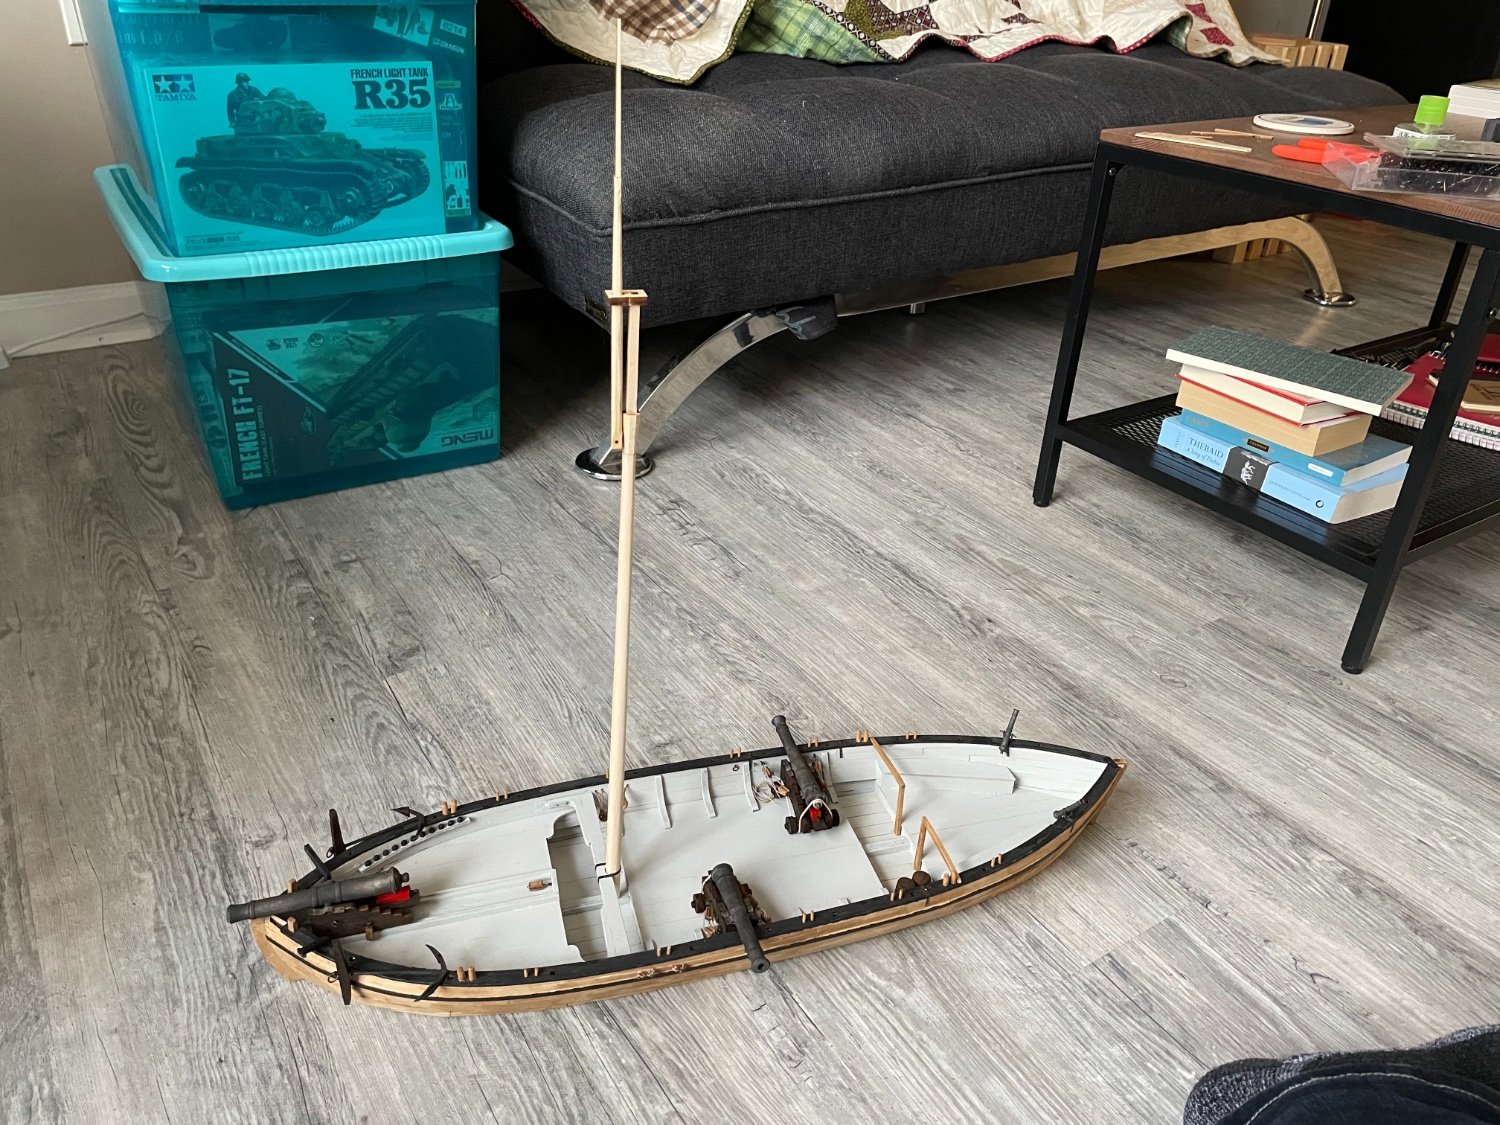
Still have to rig the 12 pounder, and assemble the awning, but I am going to start assembling the mast and rigging.
-
Have painted the rubbing strake black, and installed the swivels, stern rails, catheads and mooring bits.
Most proud of the rigging on the port side 9 pounder. It’s not perfect but it feels like a great milestone in this project.
Enjoying Jack Kelly’s book on the 1776 campaign on Lake Champlain. It’s nice to understand the significance of this vessel as I build it.
-
Touched up the gunwales. Started sanding the mainmast, and dry fitted the brass mast ring and the stern railings.

- Keith Black, DCooper and Duanelaker
-
3
-
-
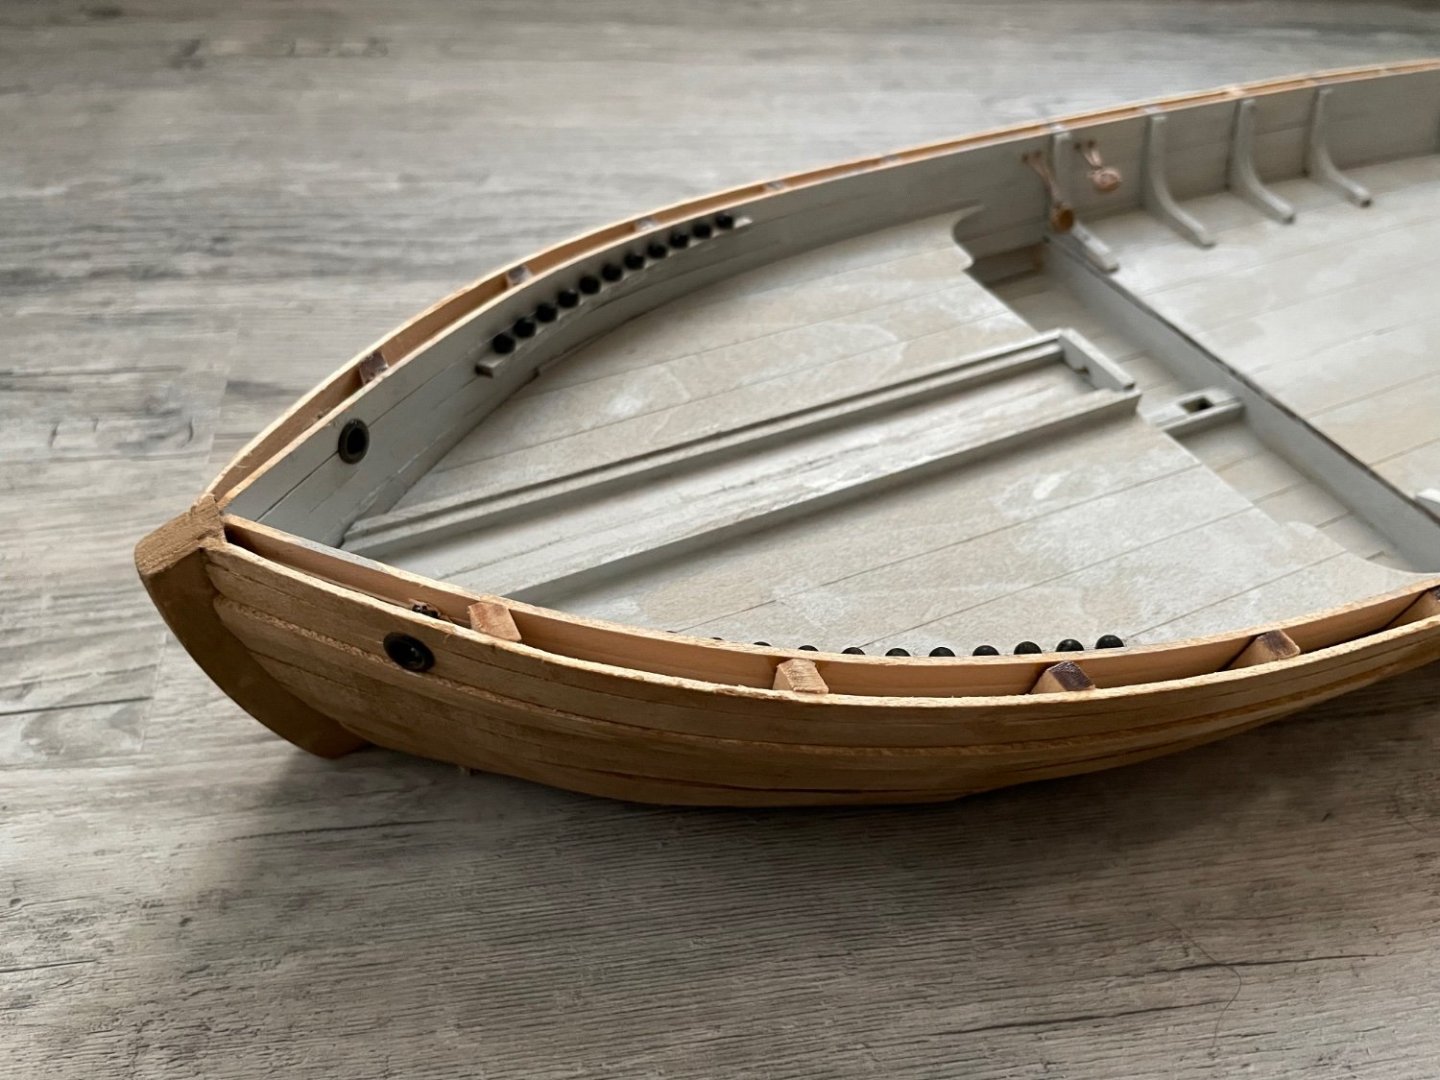
Got some 5/32” eyelets for the hawseholes, and some zinc coated .177 caliber BBs to imitate the cannonballs for the 12 pounder. Both were blackened with Birchwood Casey Brass Black.
- Ryland Craze and DCooper
-
2
-
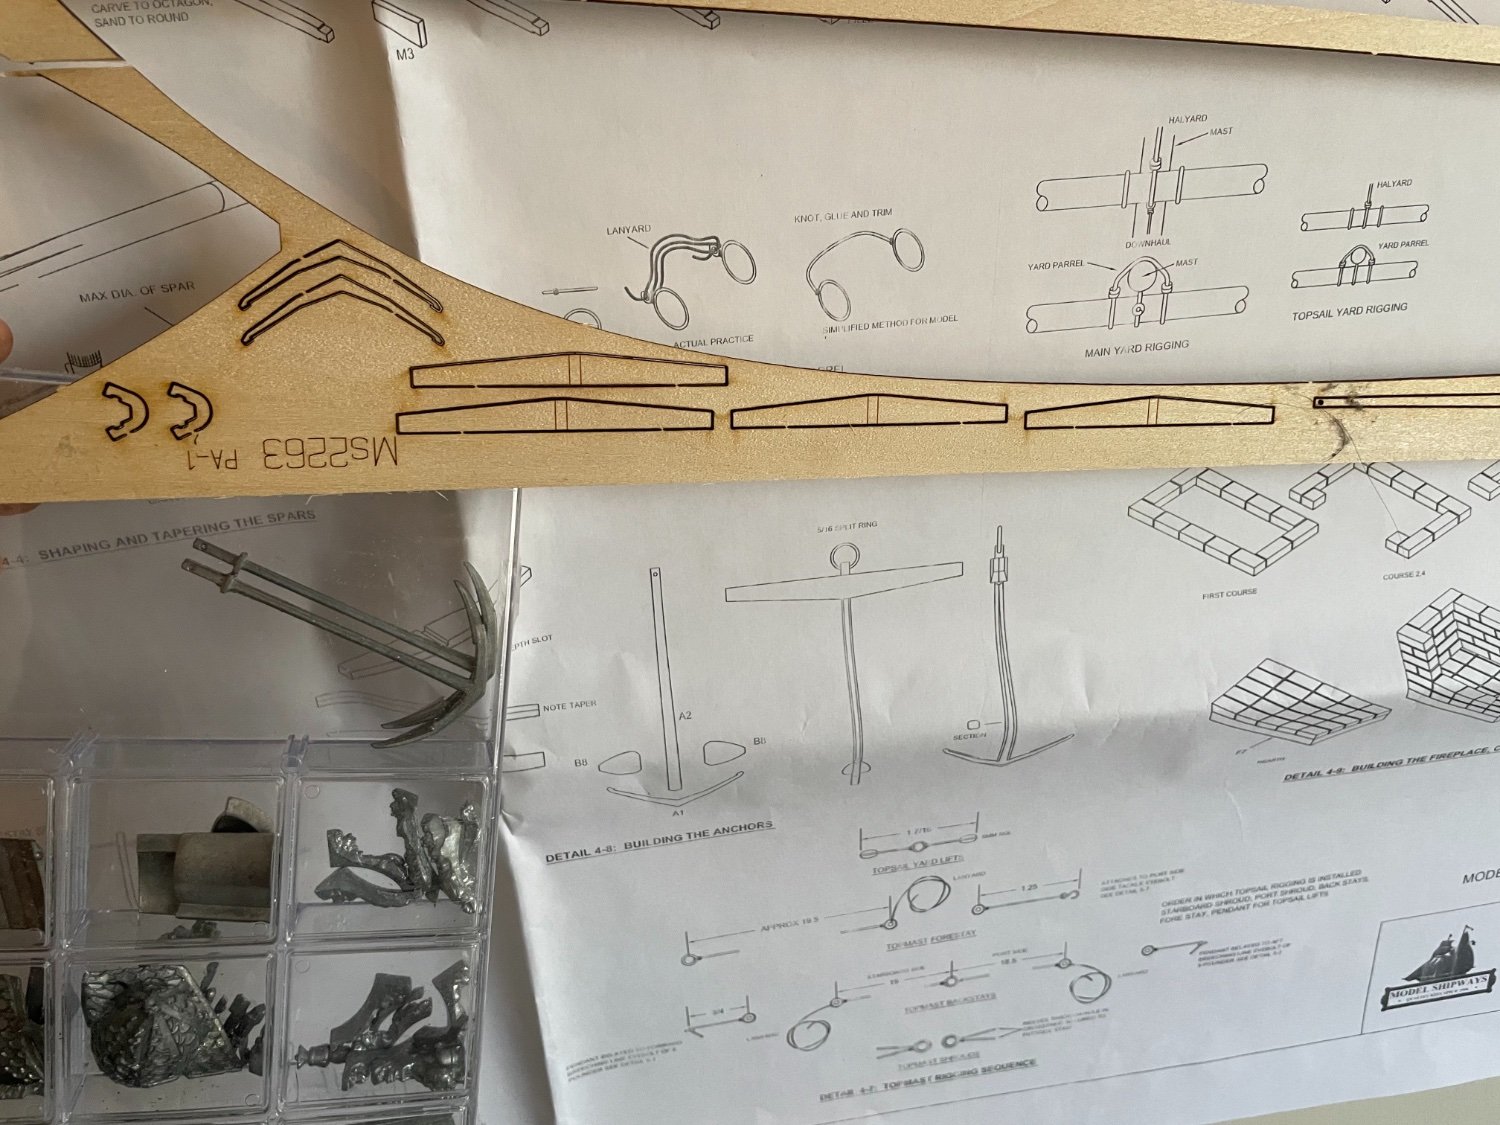
I had assumed my kit was missing a pair of metal anchors, but I have just realized in this kit that the anchors are assembled from wood. I am tempted to cannibalize the anchors from my Vasa build, since they are almost the perfect size.
Either that, or I may not include the anchors at all, since the anchors would only be hauled up while the boat was under sail.
- ccoyle, Snug Harbor Johnny, JpR62 and 1 other
-
4
-
Have started blackening and placing the brass fittings on the gun carriages. Trying to determine whether it will be easier to rig them directly to the boat, or assemble the gun rigging away from the boat…
Going to start on the gunwales soon, I may paint them black.
Thanks for the encouragement and the book recommendation @Roger Pellett
-
My first attempt at tying the deadeyes was so bad I lost steam on this project and laid it aside for over three months. But tonight I picked it back up and made somewhat decent deadeyes on the starboard beam.
Have also glued and clamped the pieces of the mainmast, looking ahead.

Have recently read Rick Atkinson’s first book on the Revolutionary War, which included a good chapter on the fighting around Lake Champlain in 1776. Also going to start Jack Kelly’s new book on the Battle of Valcour Island soon. These are giving me more impetus to continue this project.
-
Update on Vasa, have been on the long slow process of planking over the last month, I’m certainly 1/3 of the way through, and I am able to place 3-4 planks on at one time.
I ought to get started on painting the castings, or assembling gun carriages, but so far I haven’t had the inclination to do so. But soon!
- GrandpaPhil, Baker, Henke and 3 others
-
6
-
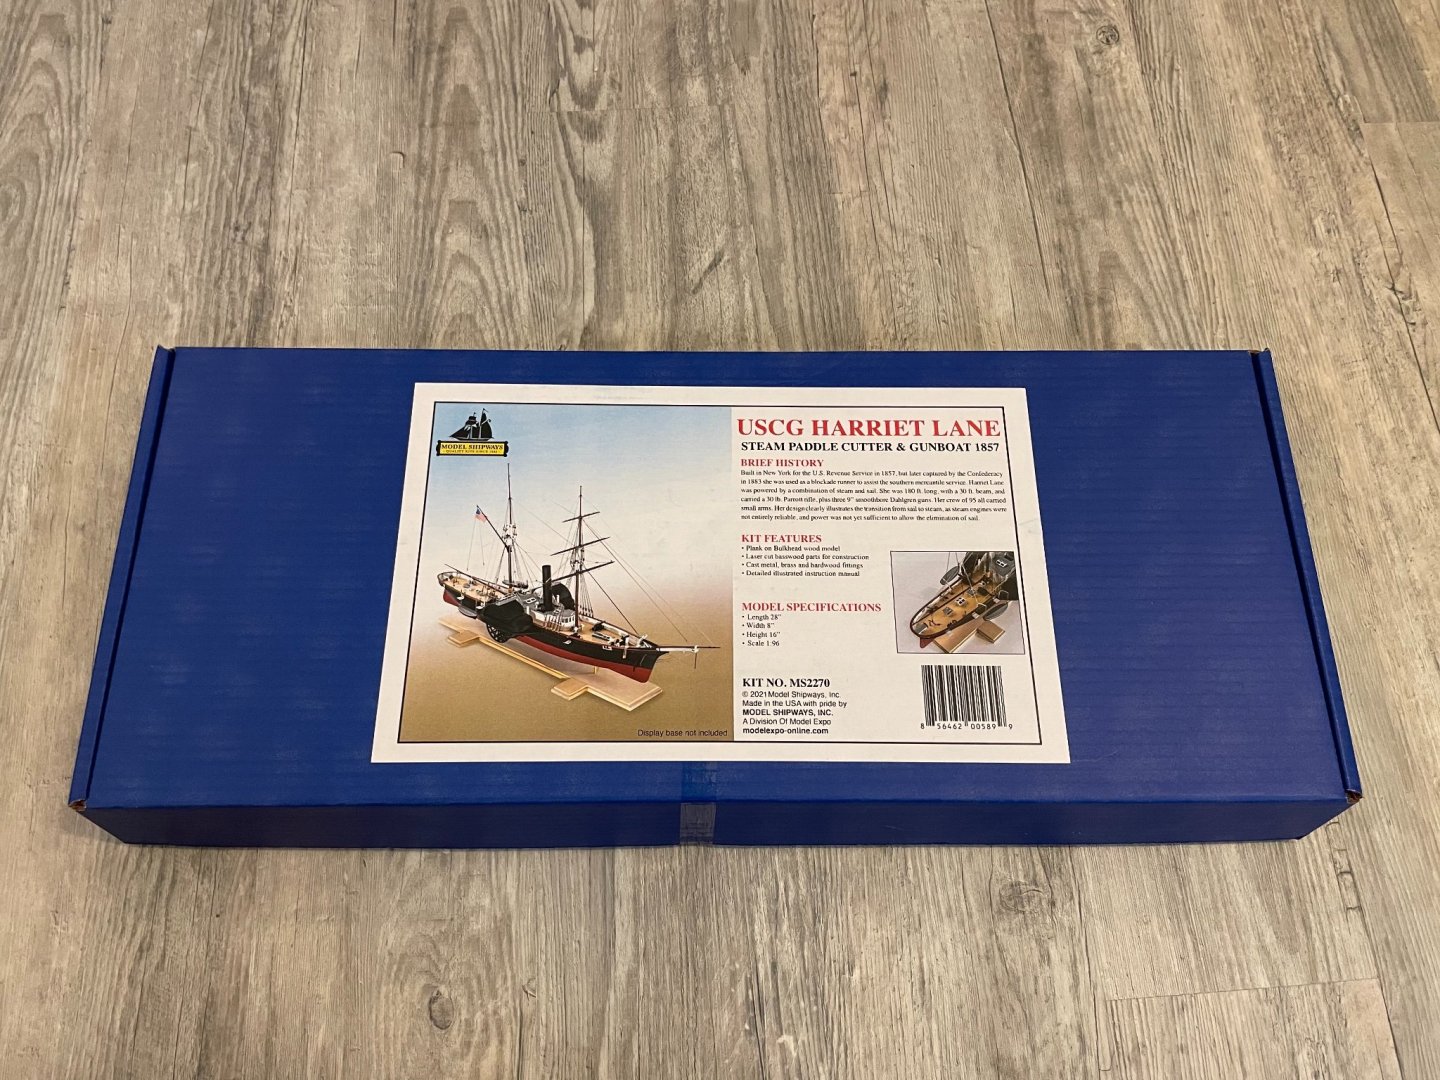
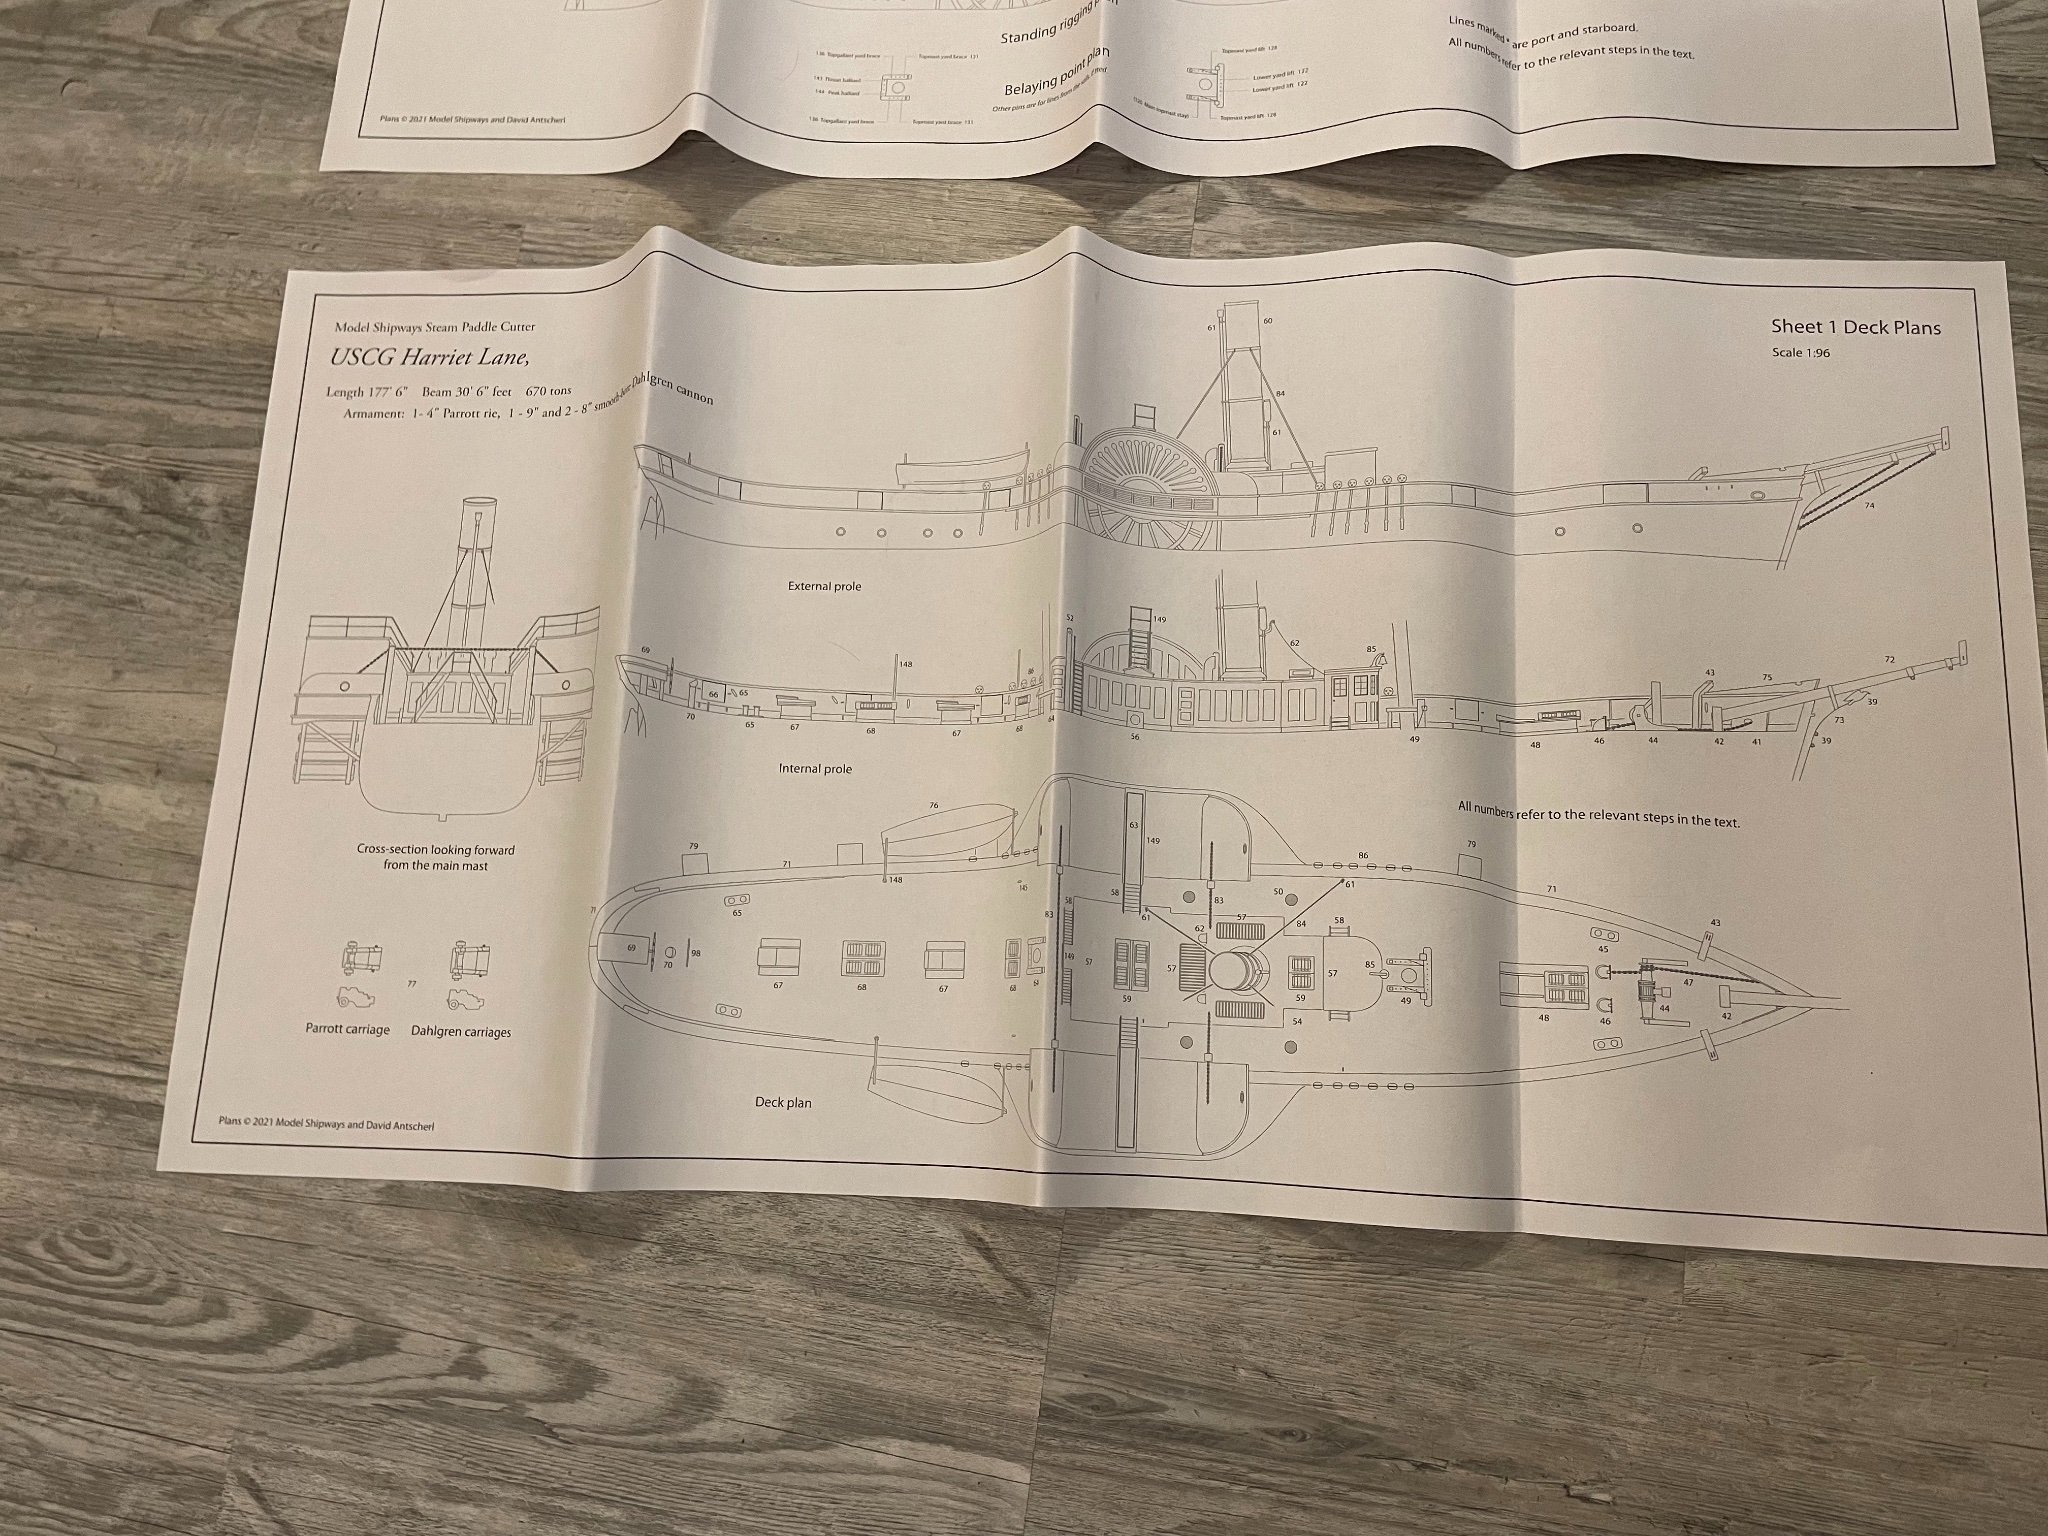
This is the latest kit from Model Shipways, and the fourth in their Model Shipwrights series, designed by David Antscherl. They have previously released kits of Harriet Lane in 1/128 and 1/144 scale, but this new kit is in 1/96 and promises to be 28 inches long. I purchased this kit from Model Expo on Sunday during their Halloween sale, enticed by its ease of construction, and personally interested in ships of the Civil War Era.
Kit comes with a 66 page, full color instruction manual, which also explains some of the ship’s history. Launched in 1859 as a Coast Guard Cutter, and named for President Buchanan’s niece, she served in the Civil War, first delivering supplies to a beleaguered Fort Sumter in 1861, then in the Gulf Squadron. She passed into Confederate hands during the Battle of Galveston in 1863, and served as a blockade runner thereafter. Interred in Cuba at the end of the war, she spent the rest of her career in civilian service.
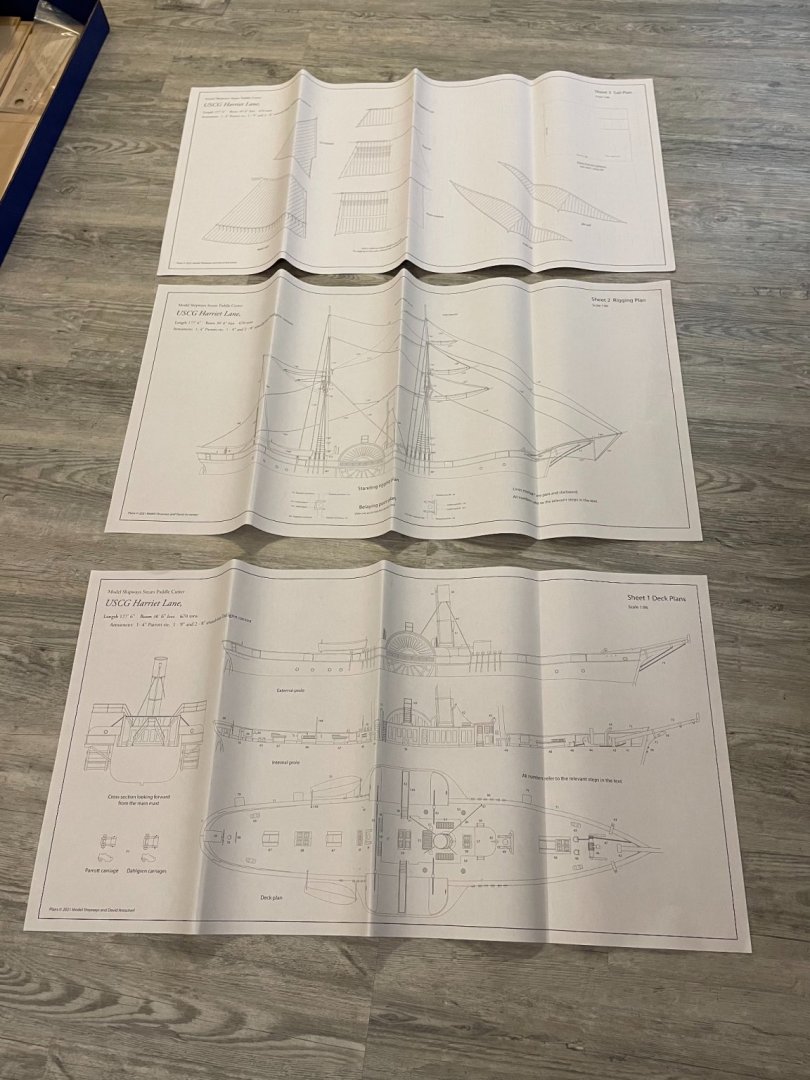
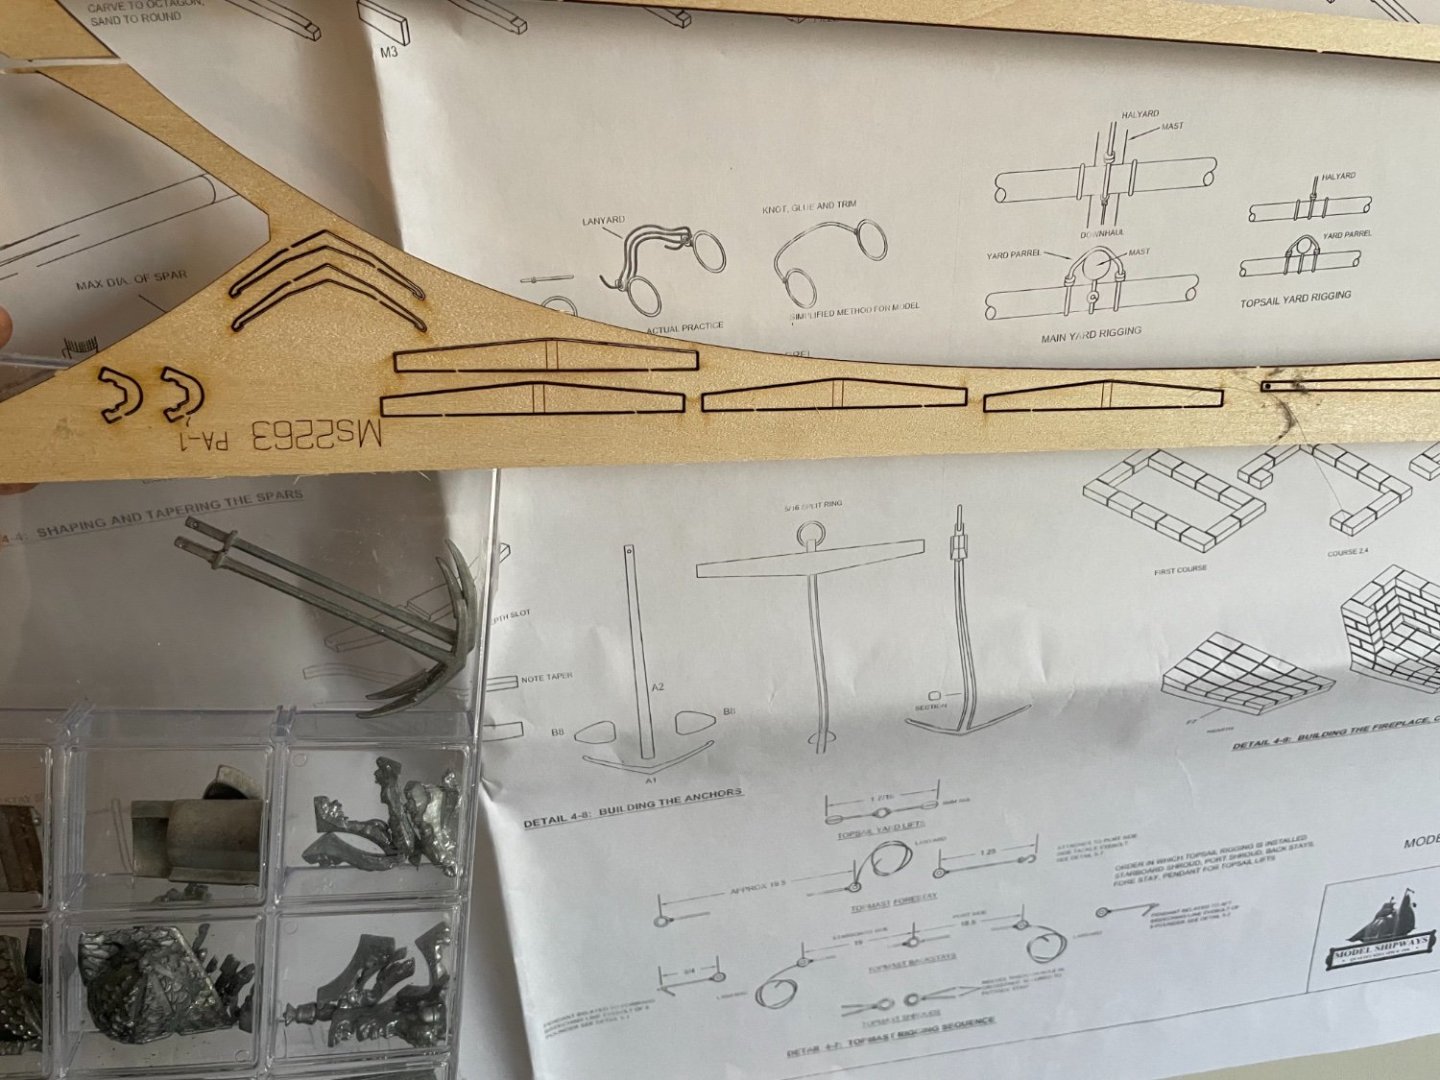
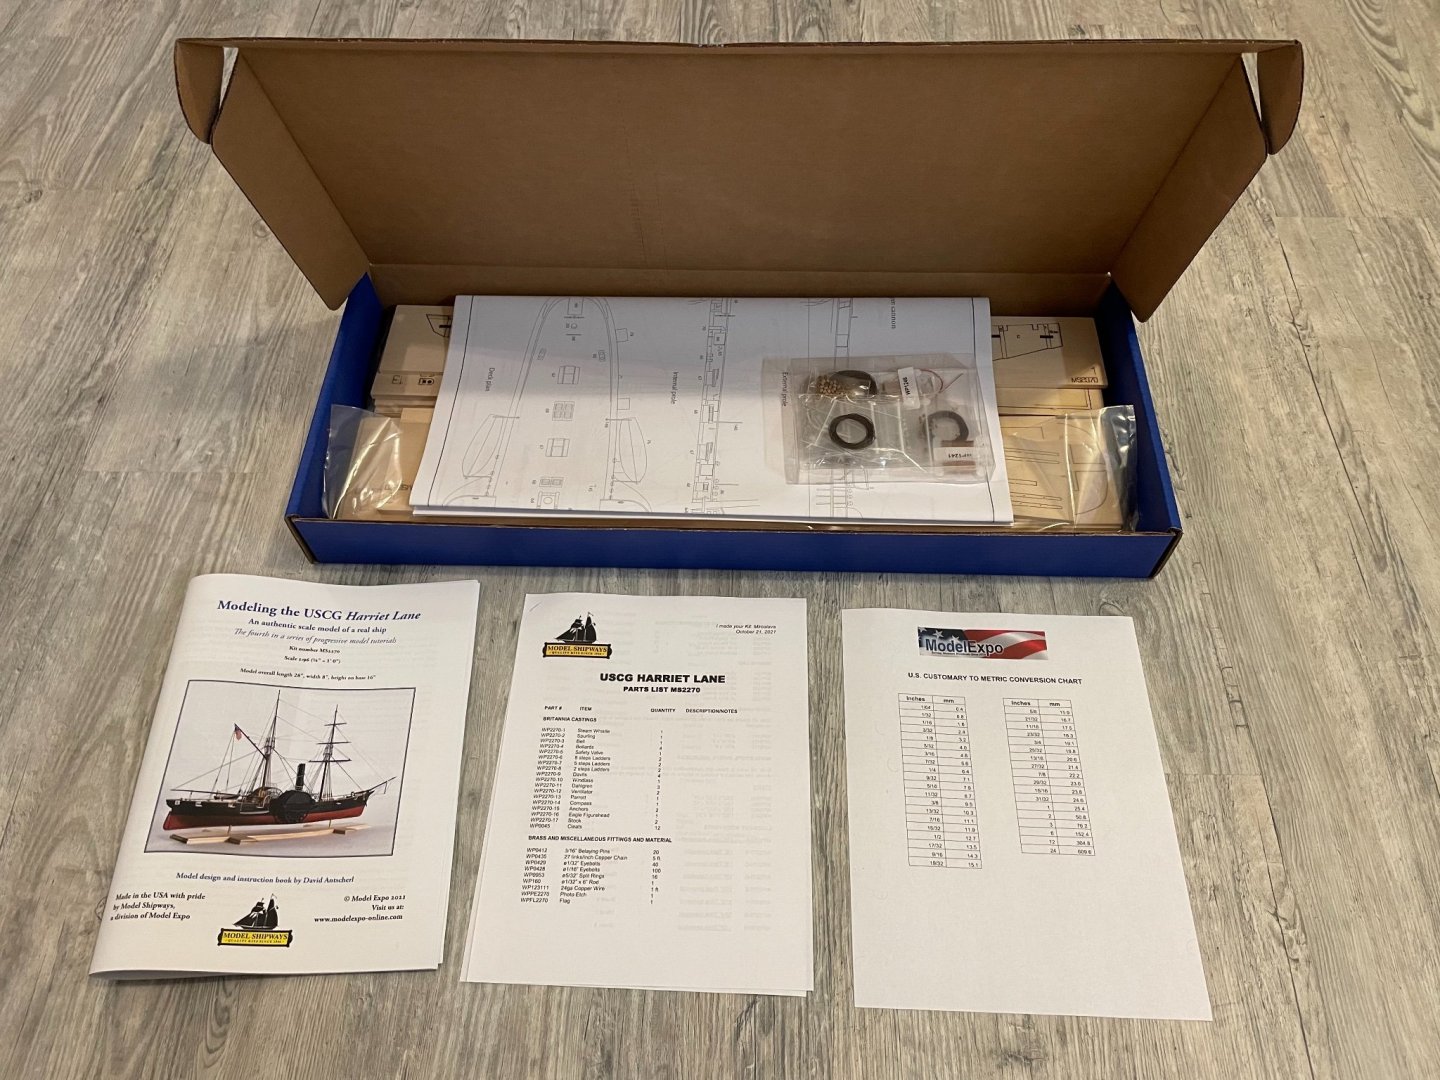
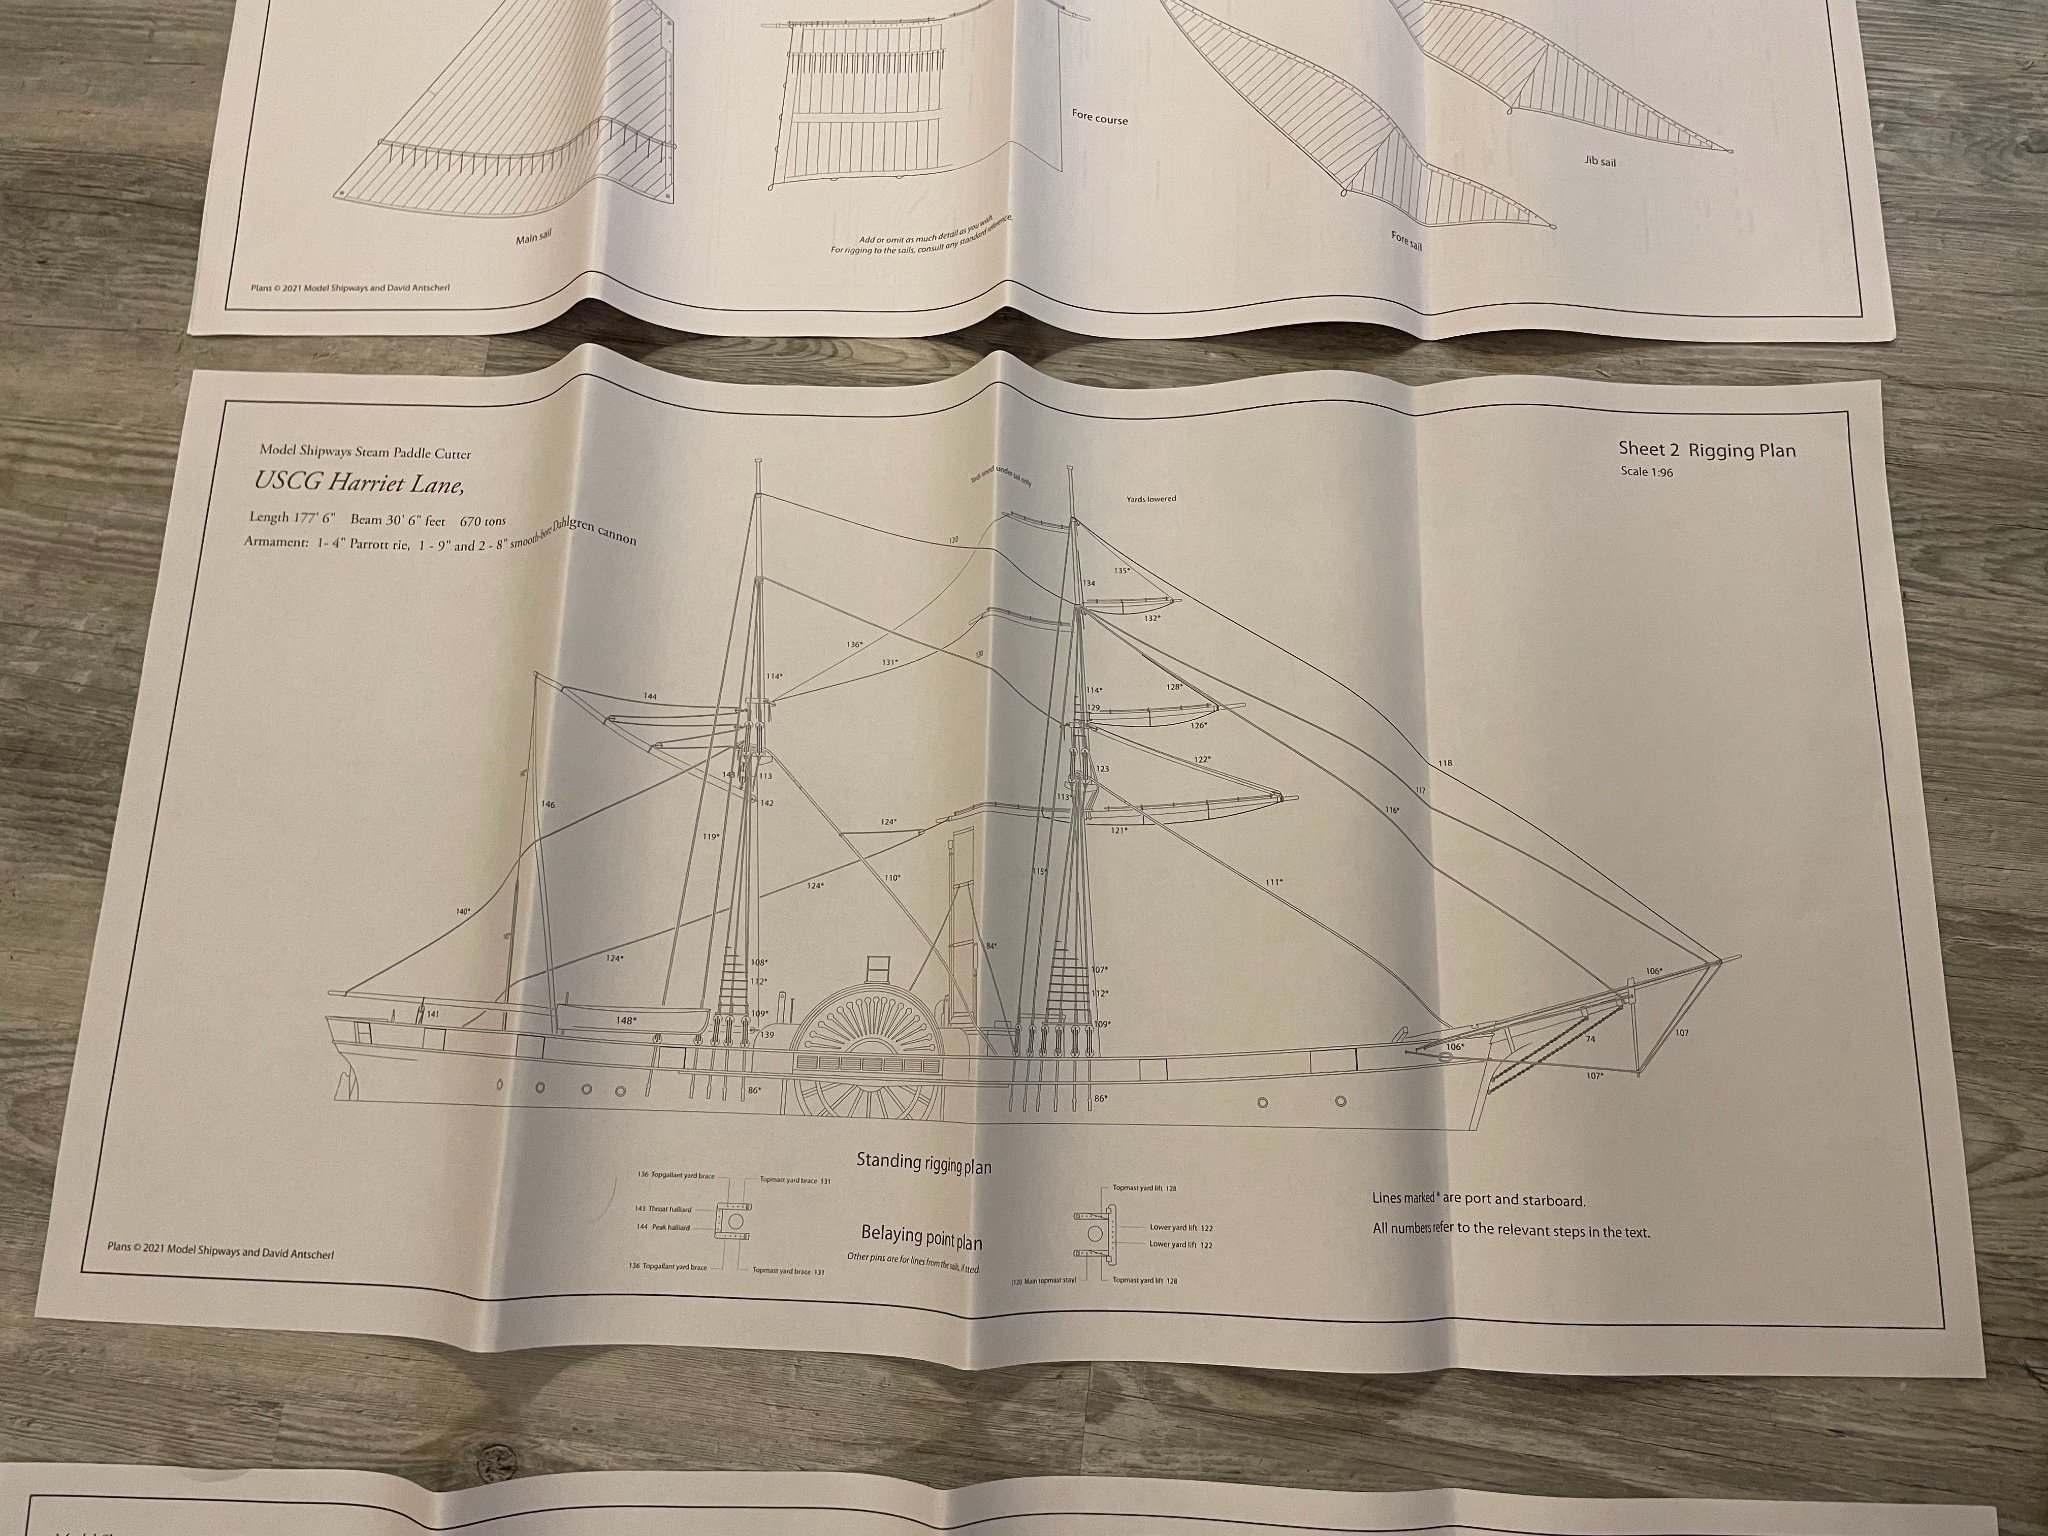
Kit comes with five full size plans, the three shown here and two more showing all the lasercut pieces.
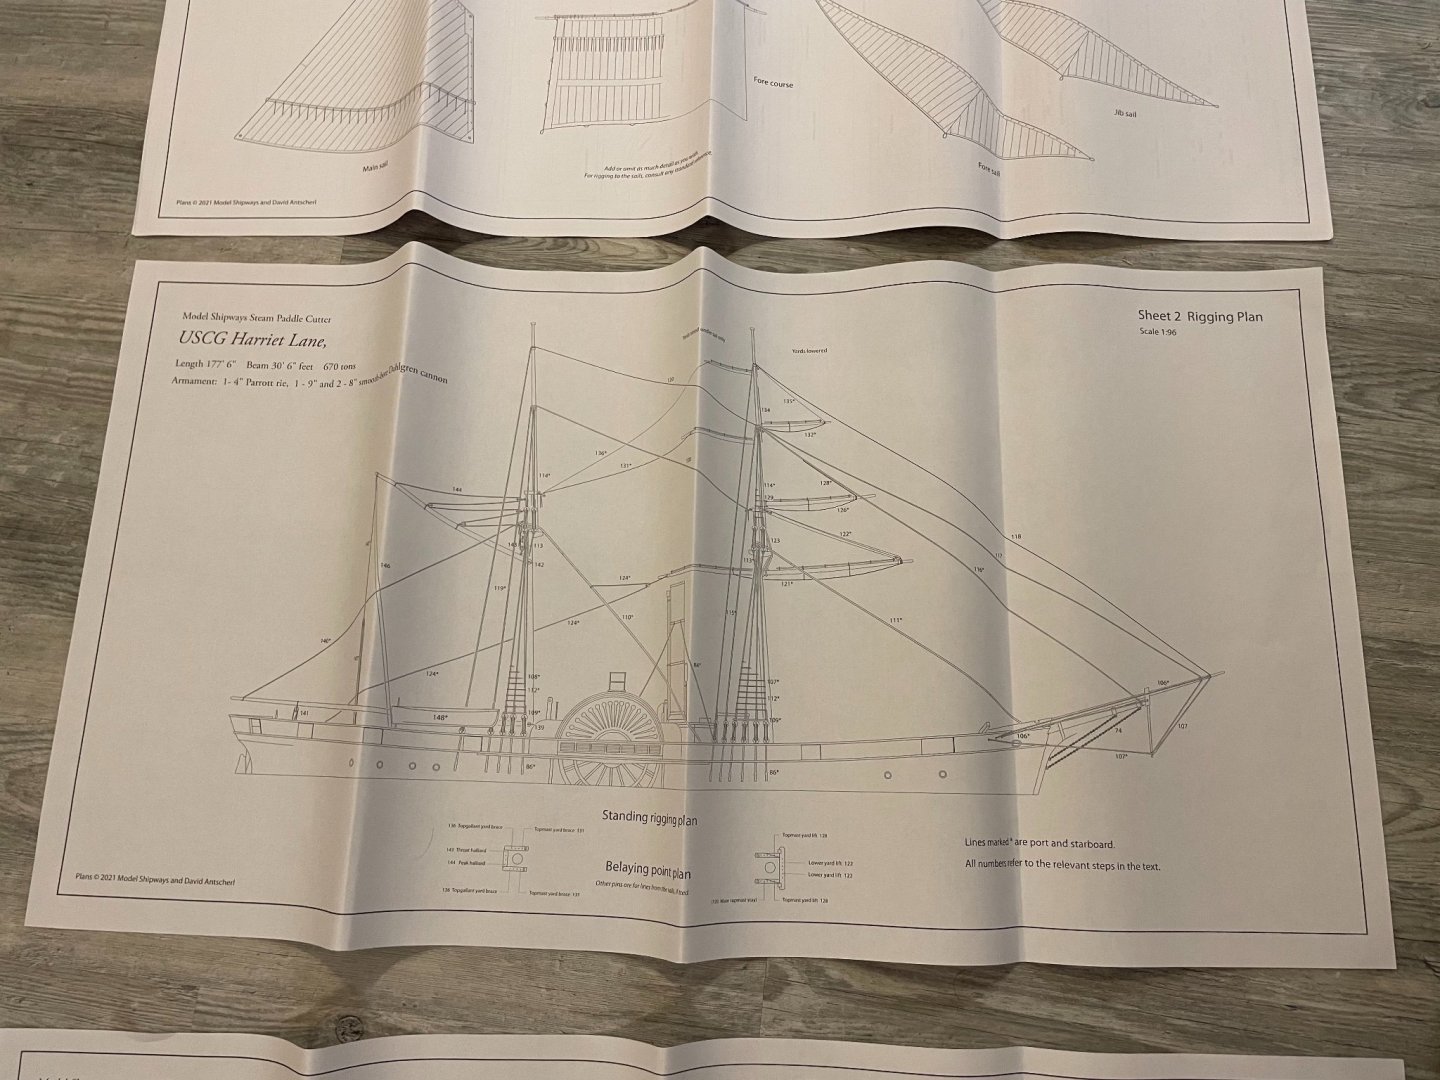
The rigging plan, as well as the sail plan above it.
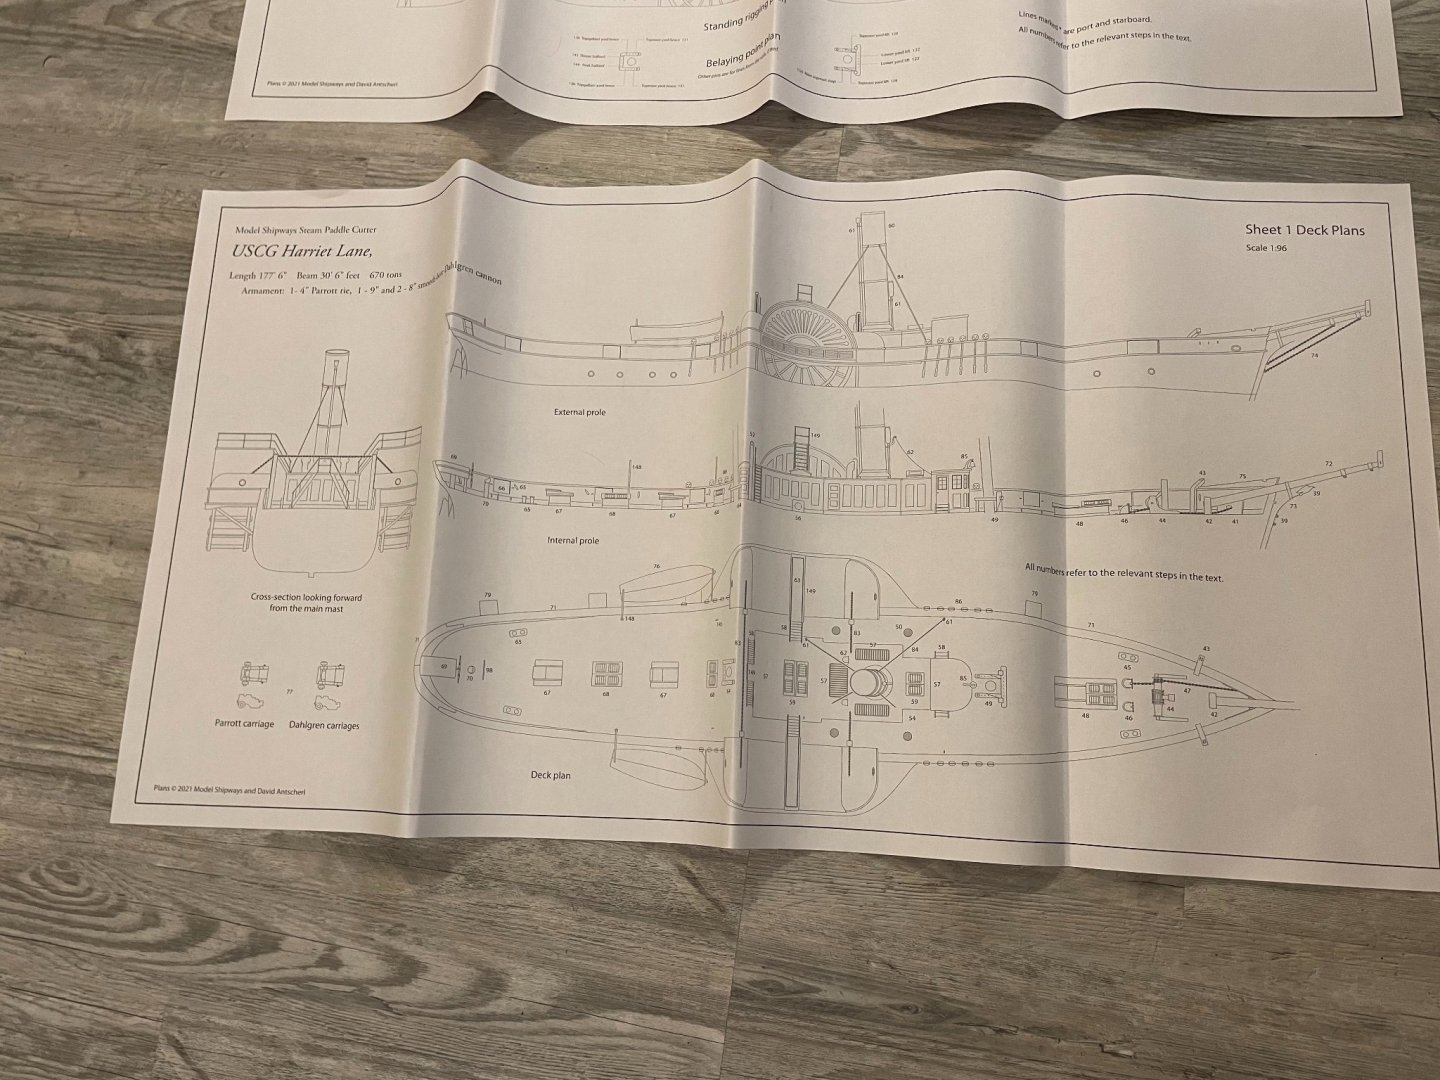
The deck plan, showing exact size.
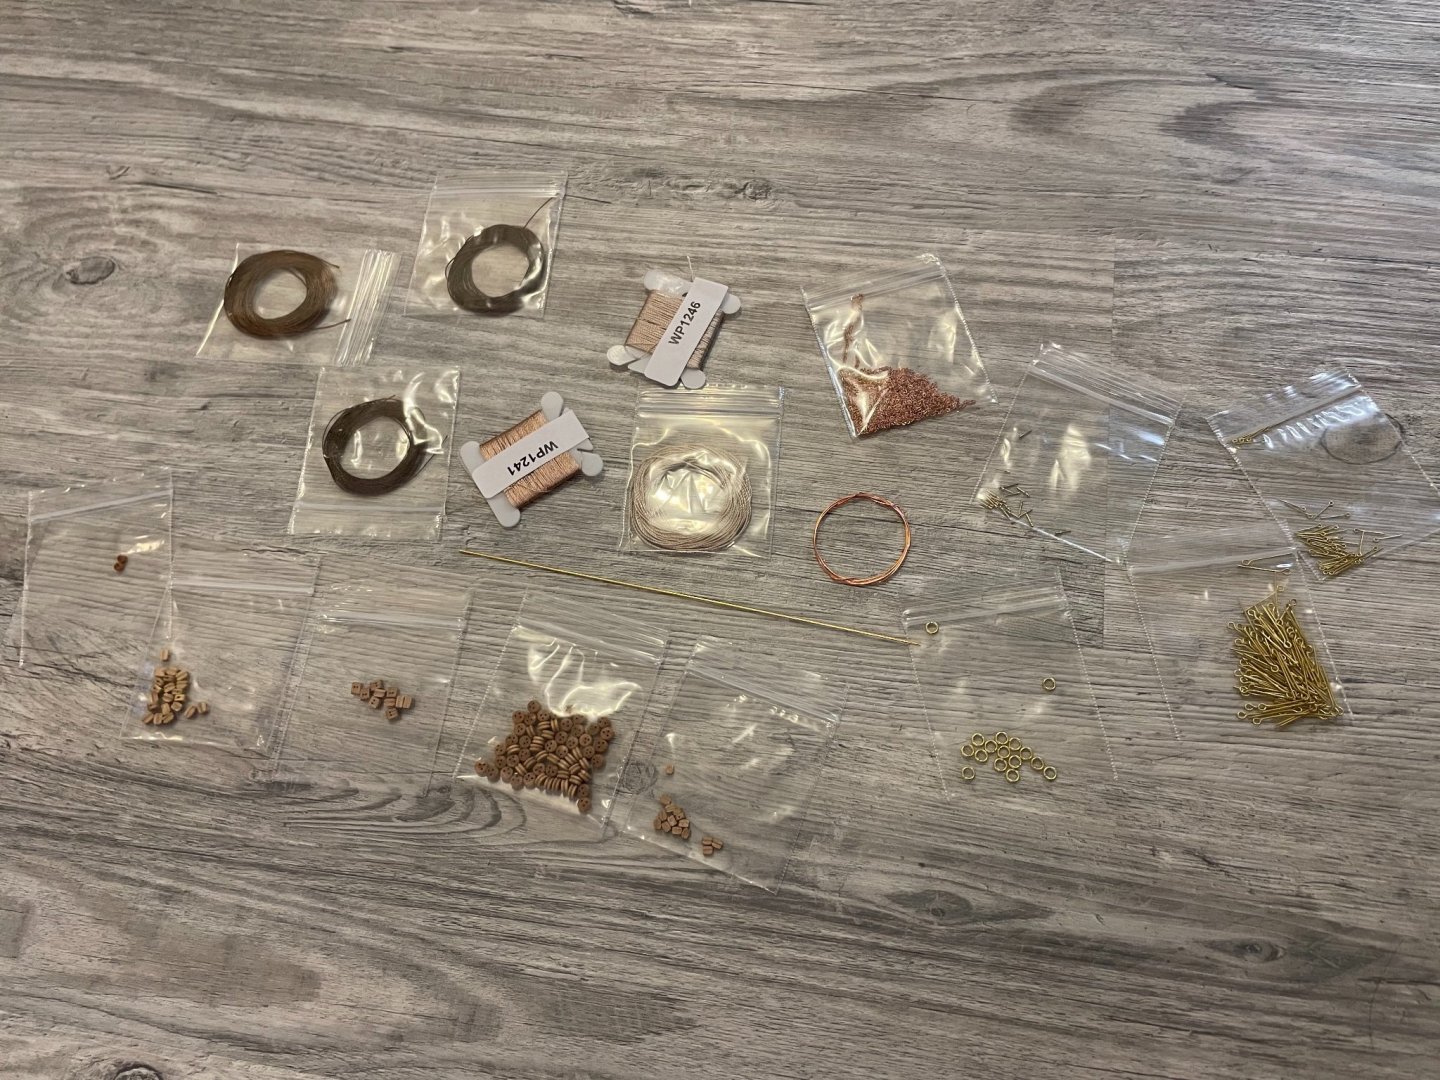
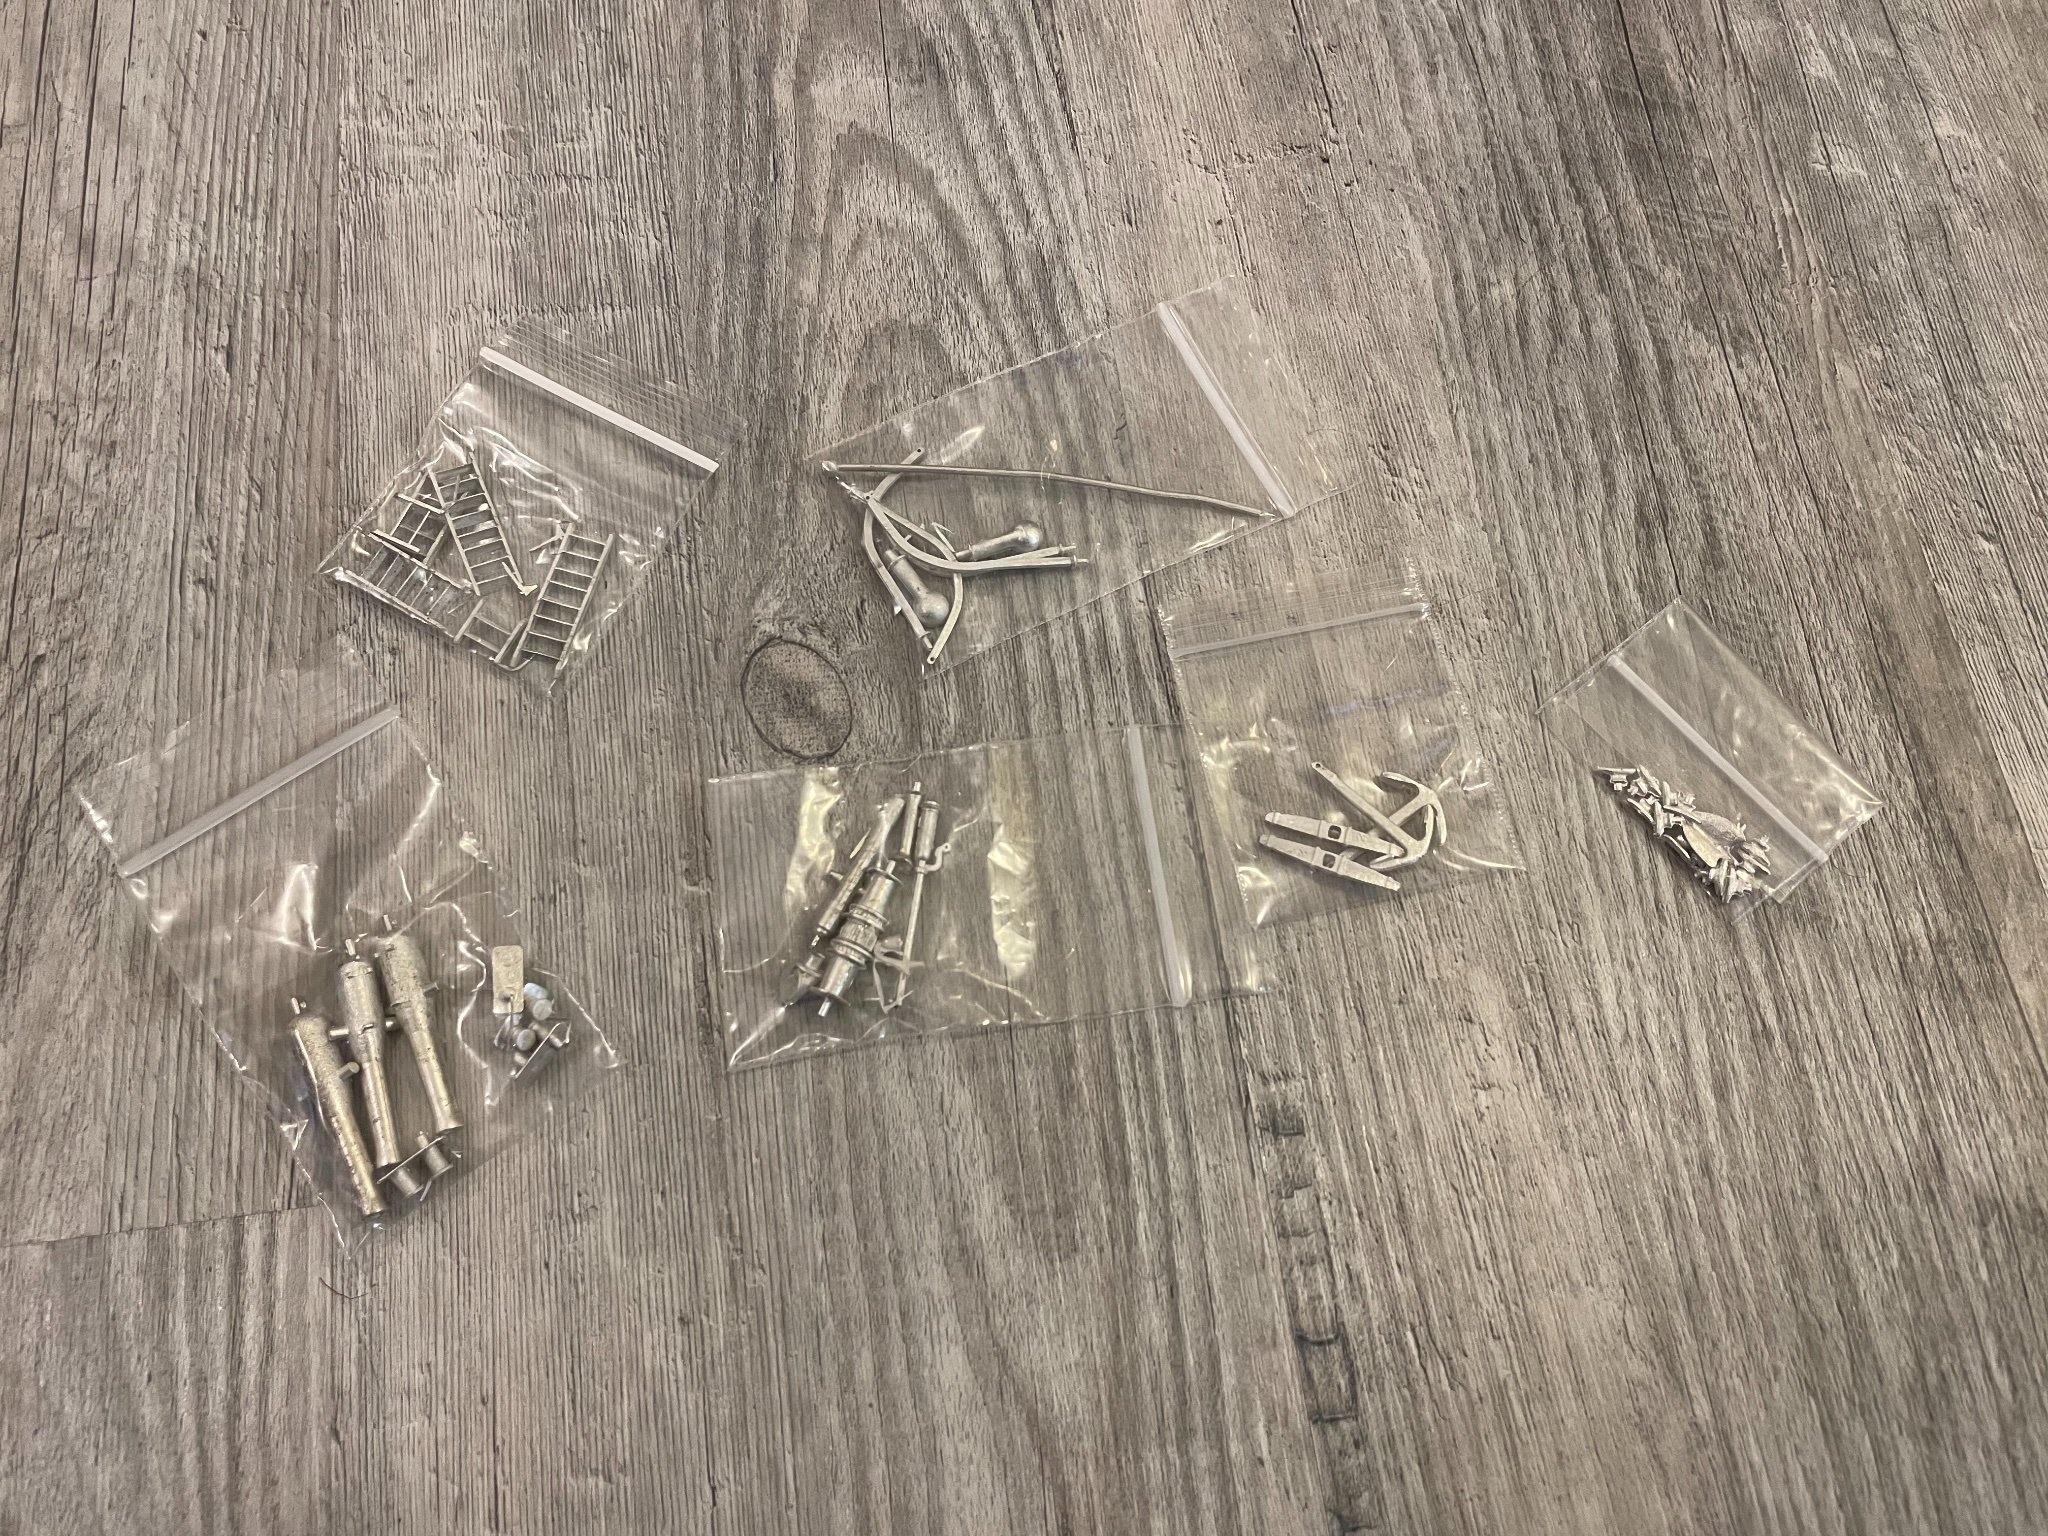
Rigging, chain, blocks, deadeyes, eyebolts, and tiny, tiny brass belaying pins.
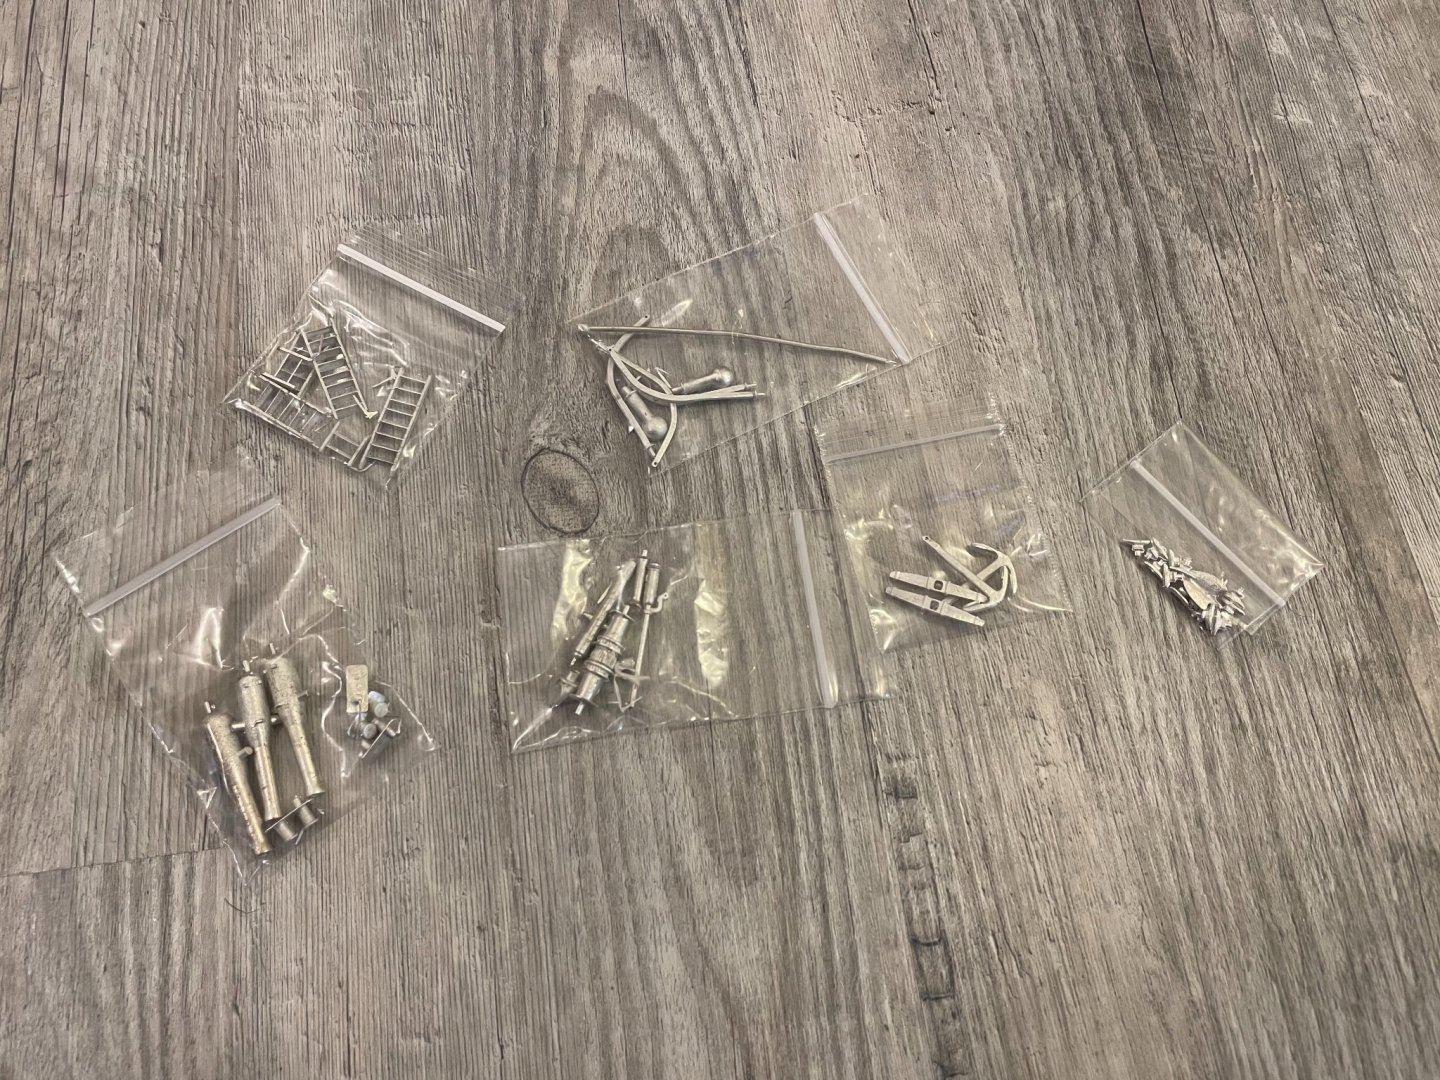
Very cleanly cast Britannia fittings, including cannon, stairs, anchors, windlass, and davits.
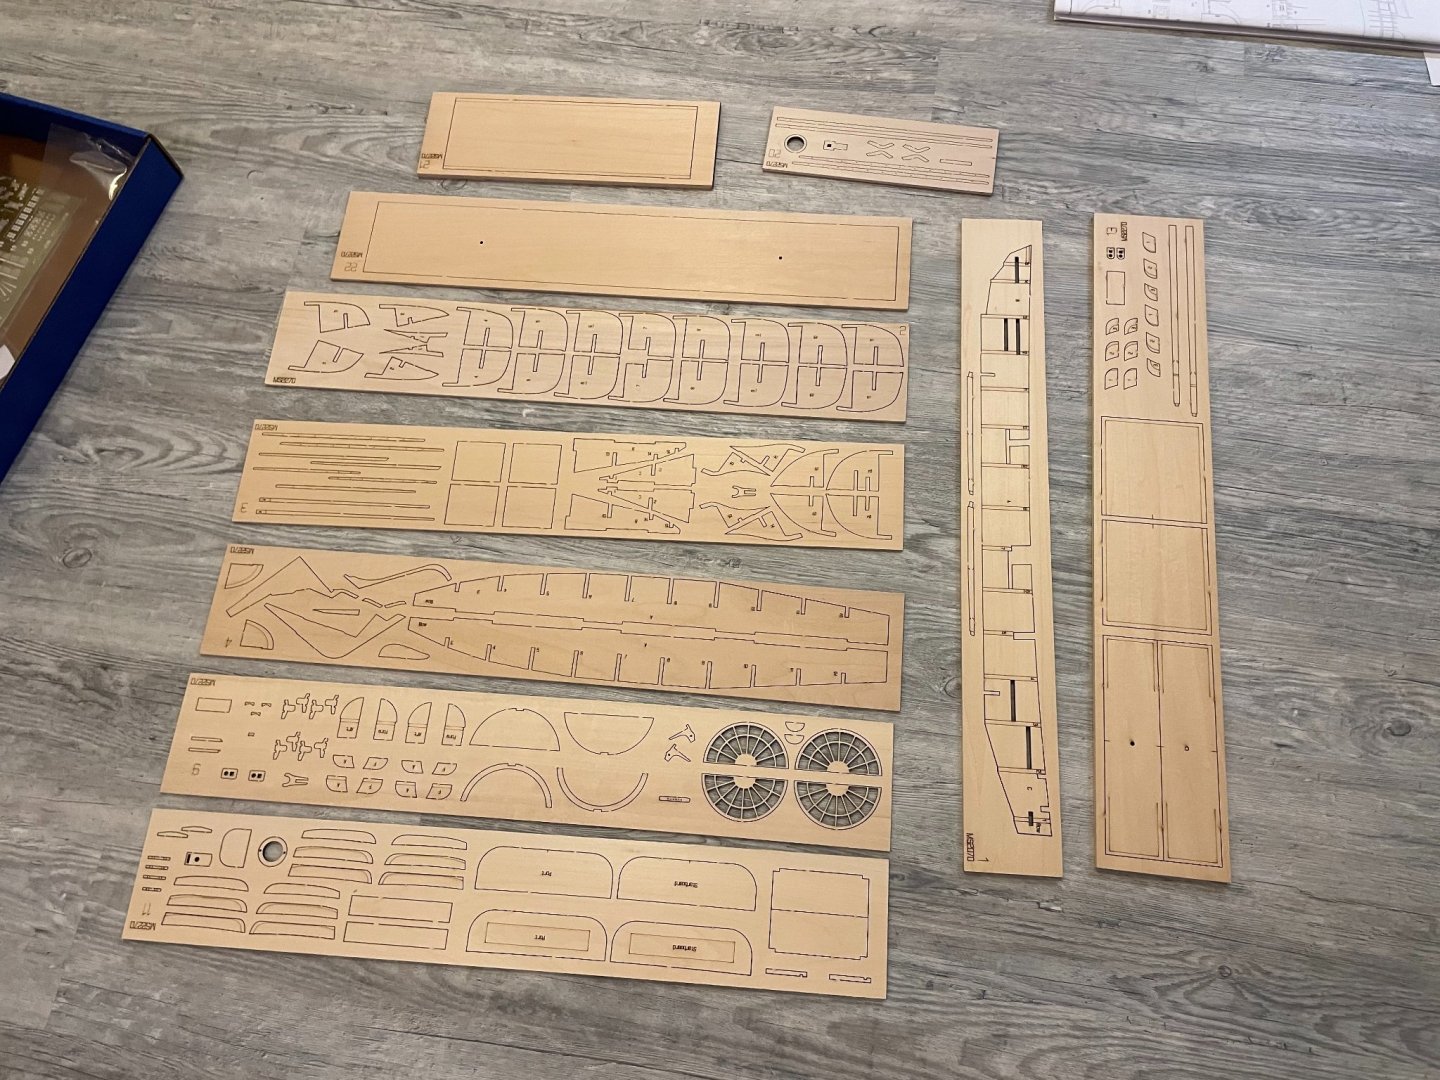
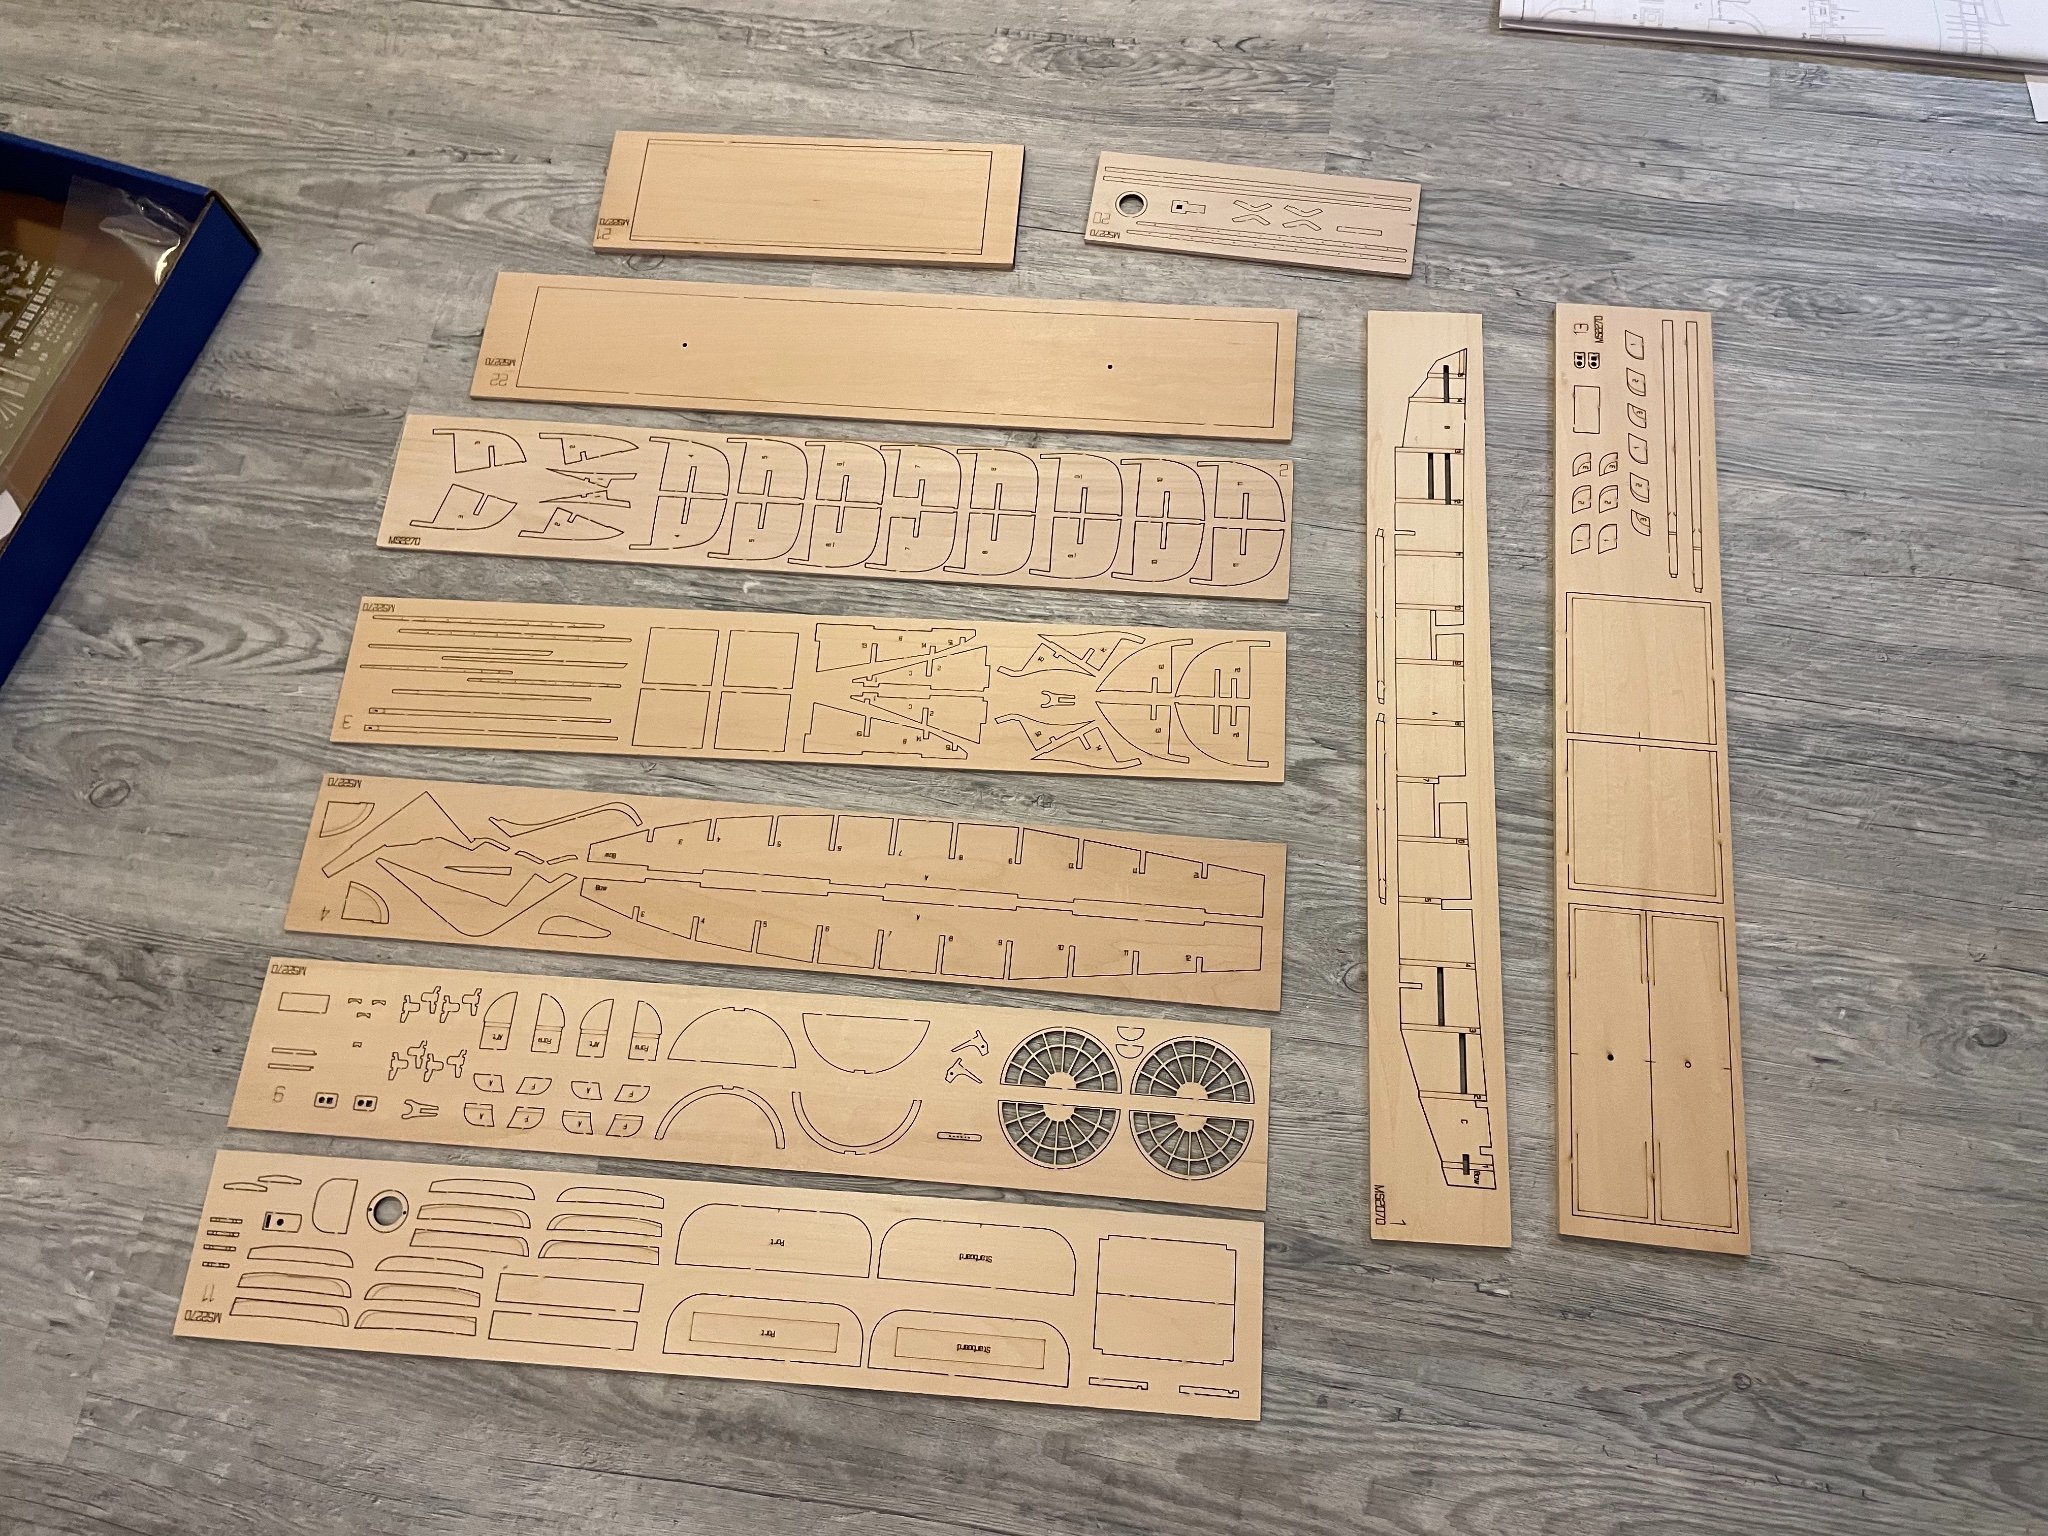
The first set of laser-cut sheets, including keel and bulkheads. Almost every piece in this kit is precut.
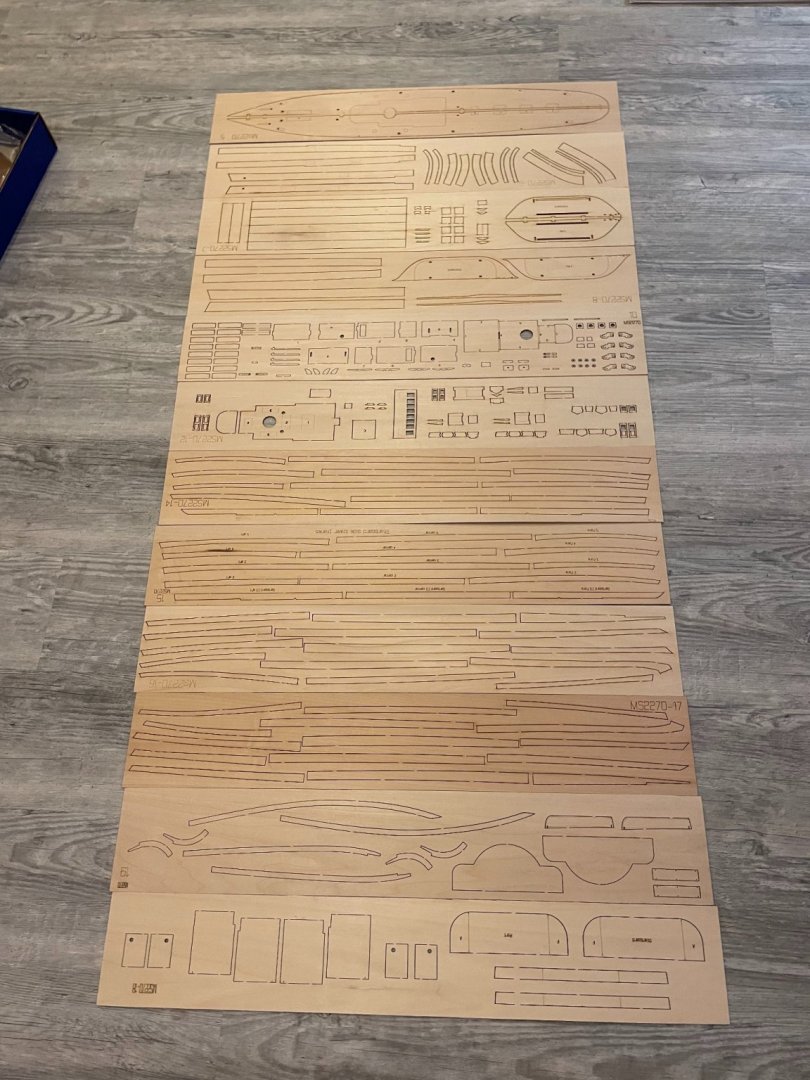
The second set of laser-cut, much thinner, including material for decking, deck furniture, and precut planks.

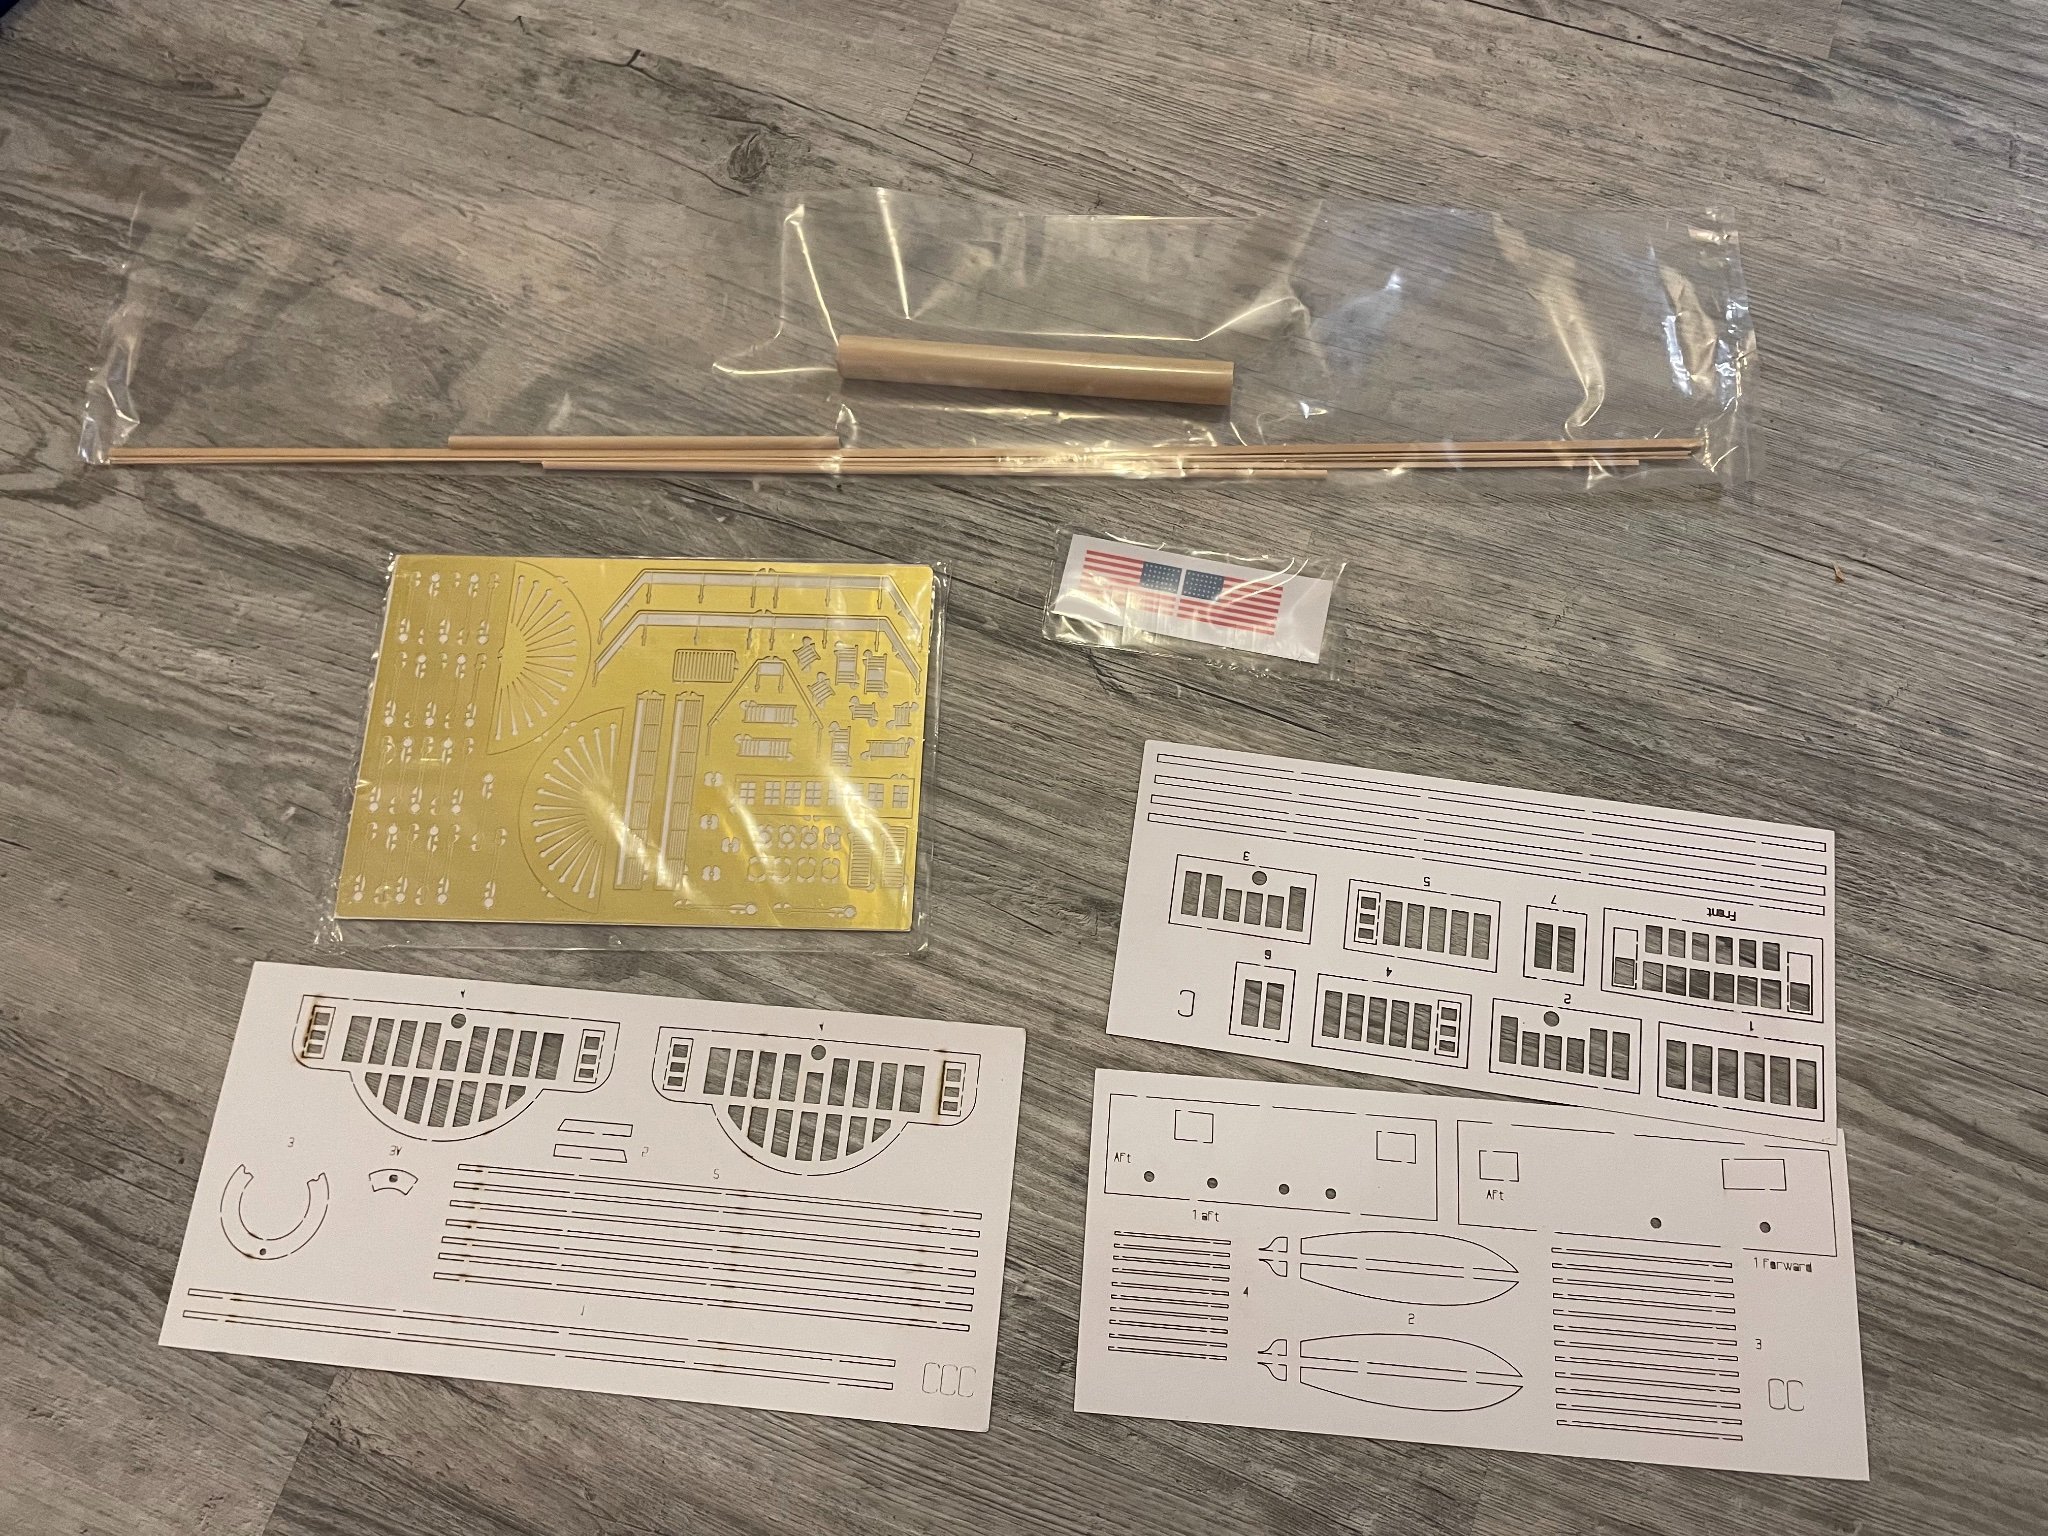
A sheet of brass photo-etch, three sheets of fine detailed deck furniture parts cut from heavy paper, a tiny American flag of the Civil War Era, and a small bag of lumber, the only lumber supplied in the kit.

I am personally very pleased with this kit, and excited to start it. Should be an excellent kit for the intermediate ship builder, and easy enough for beginners. Glad to see this in a larger scale, though 1/96 is still very small.
I hope this review will inform your purchase, and please let me know if you want any closer pictures.
- chris watton, GrandpaPhil, trippwj and 9 others
-
12
-
-
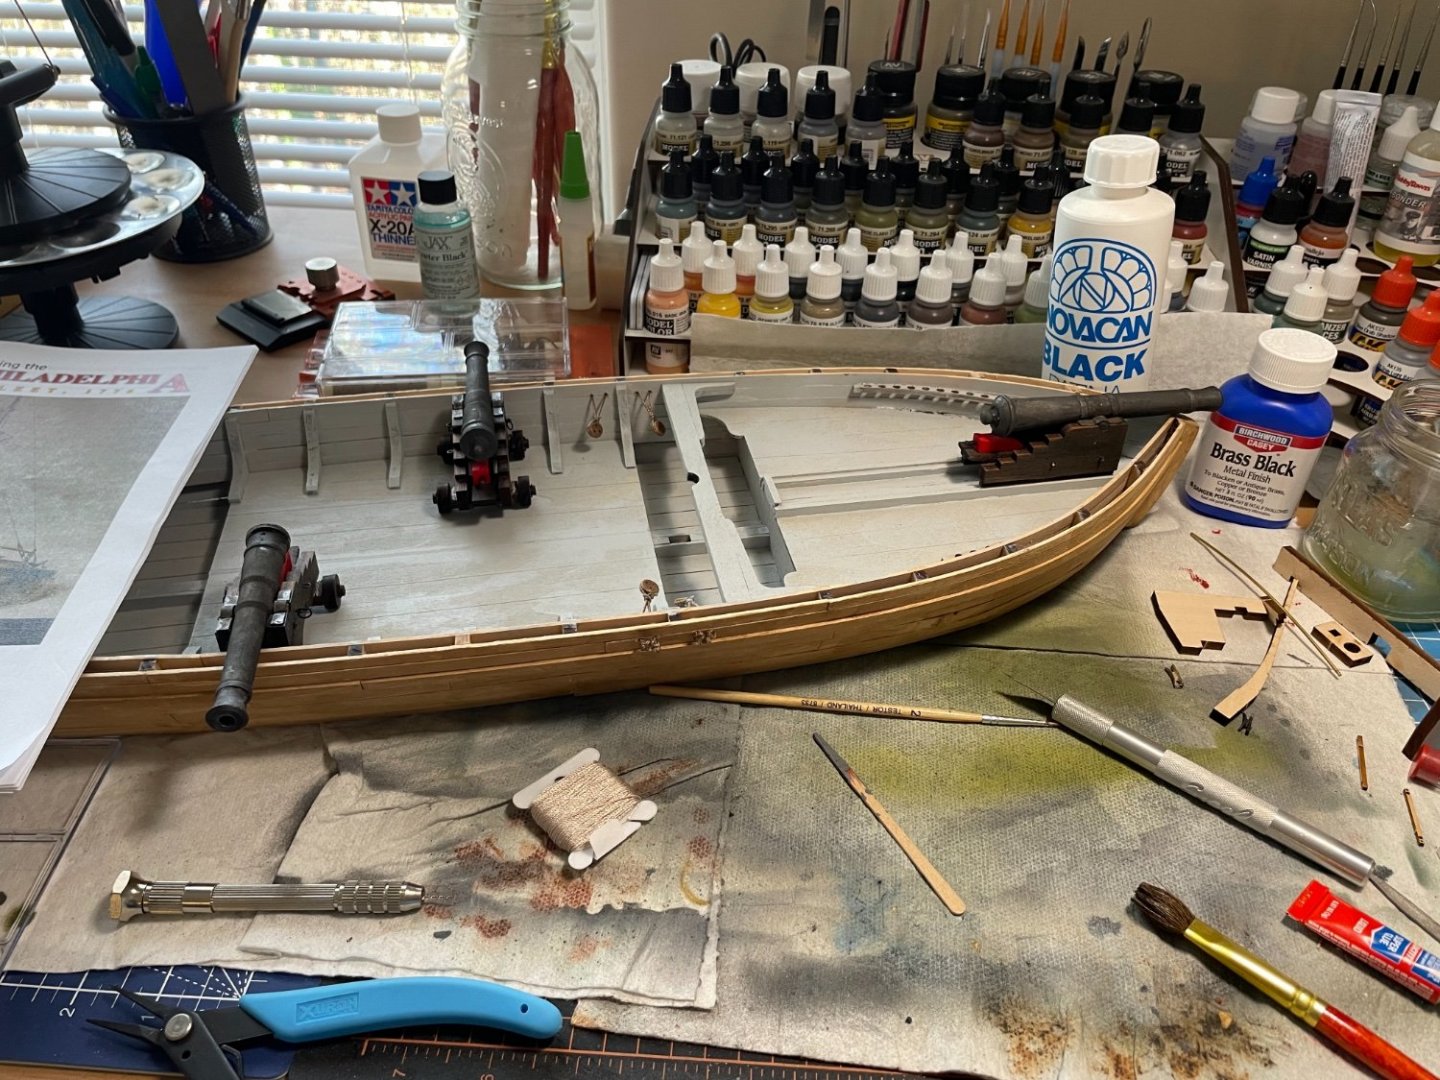
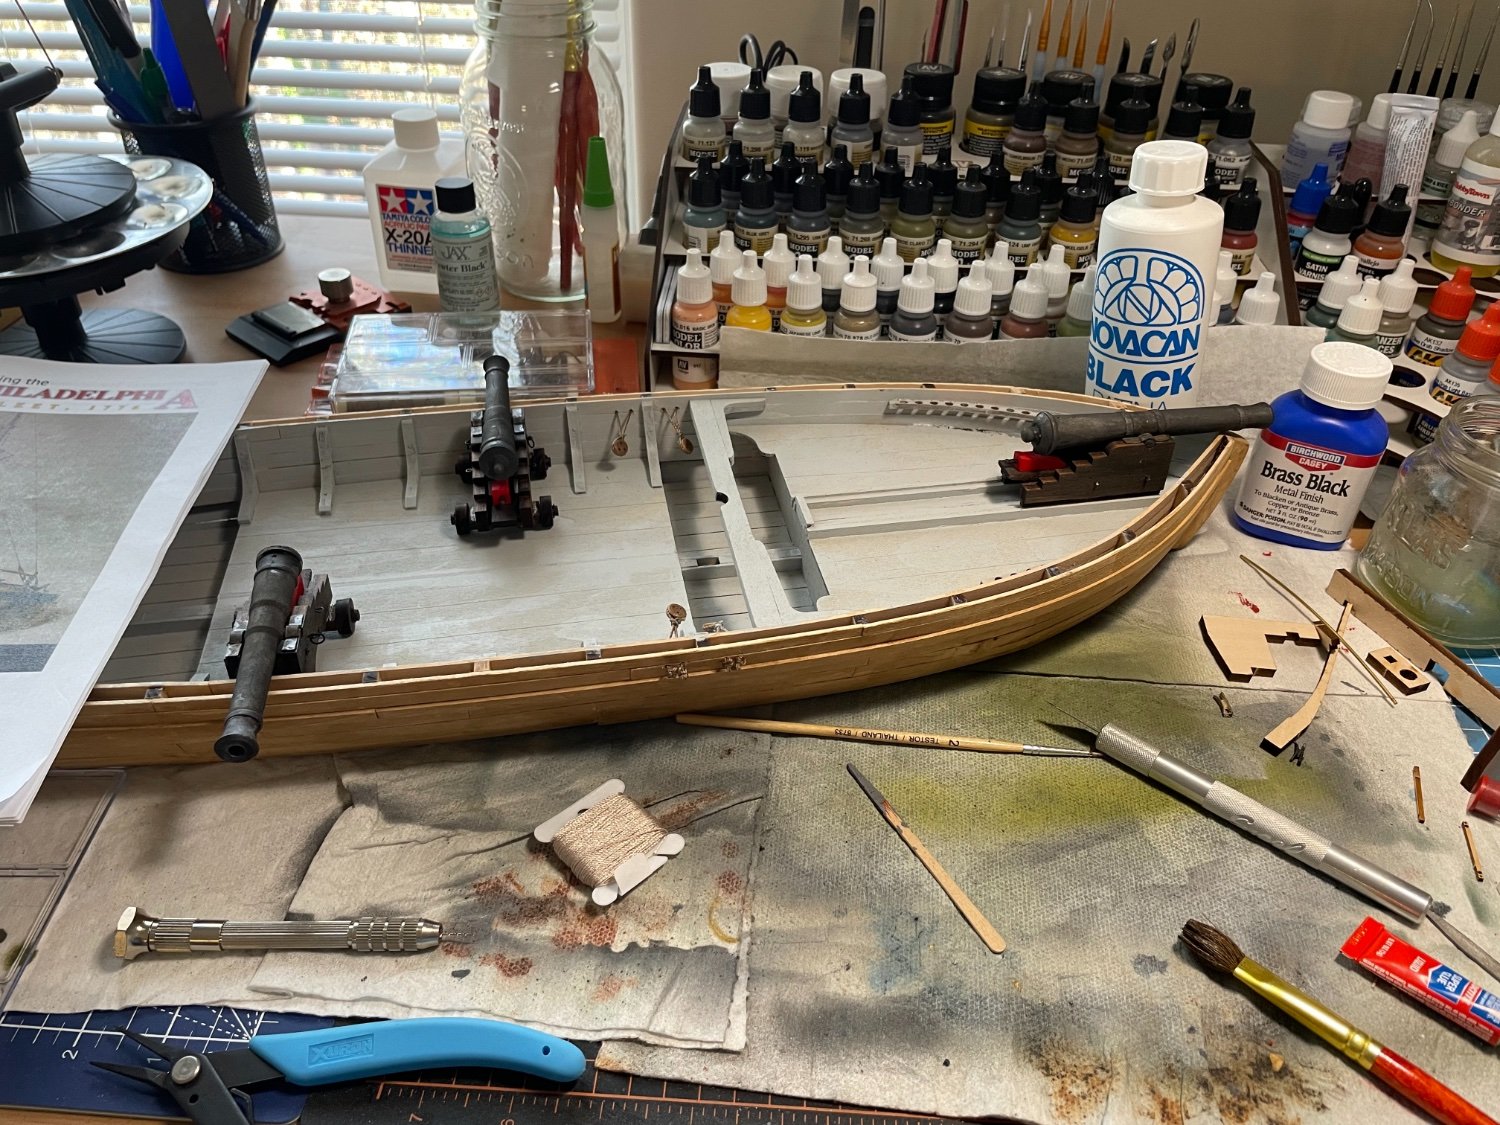
Small update on solutions to blackening Britannia metal:
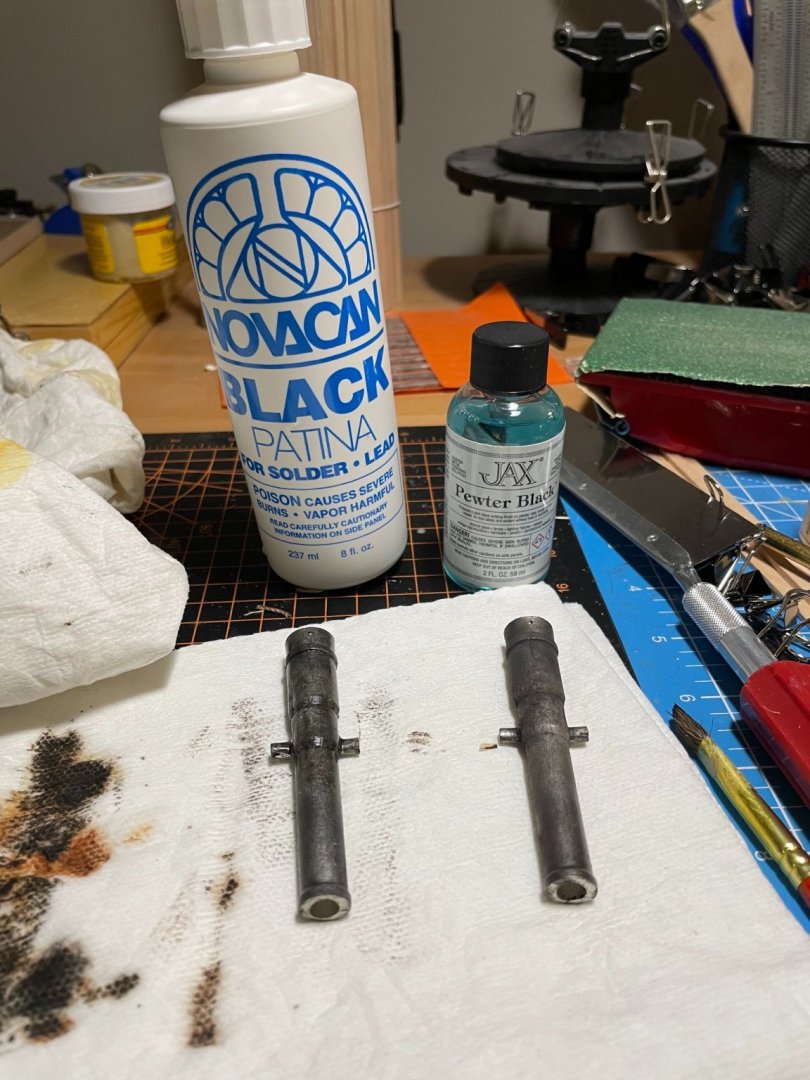
Tried two products on each of the 9 pounder cannons for the gunboat. Novacan black patina on the left, and Jax pewter black on the right. Both did the job well, Jax I feel gave a slightly more consistent finish, but both are good products and can be found on Amazon.I also have got some brass black solution I will be trying soon.
-
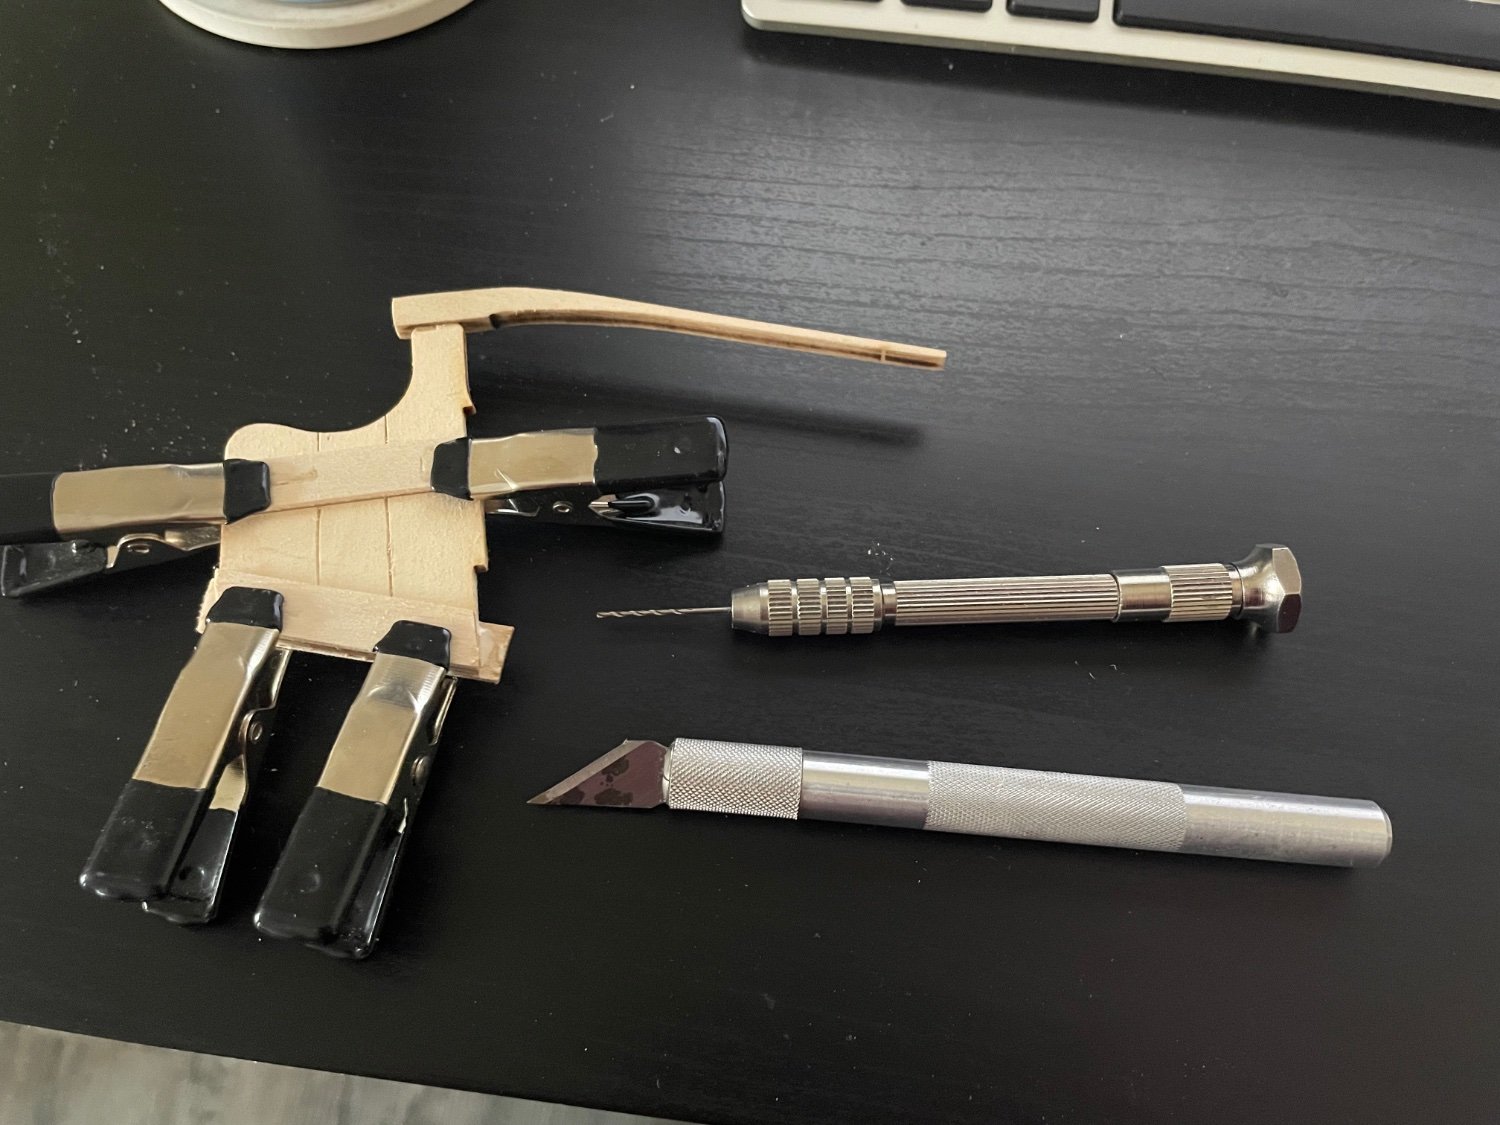
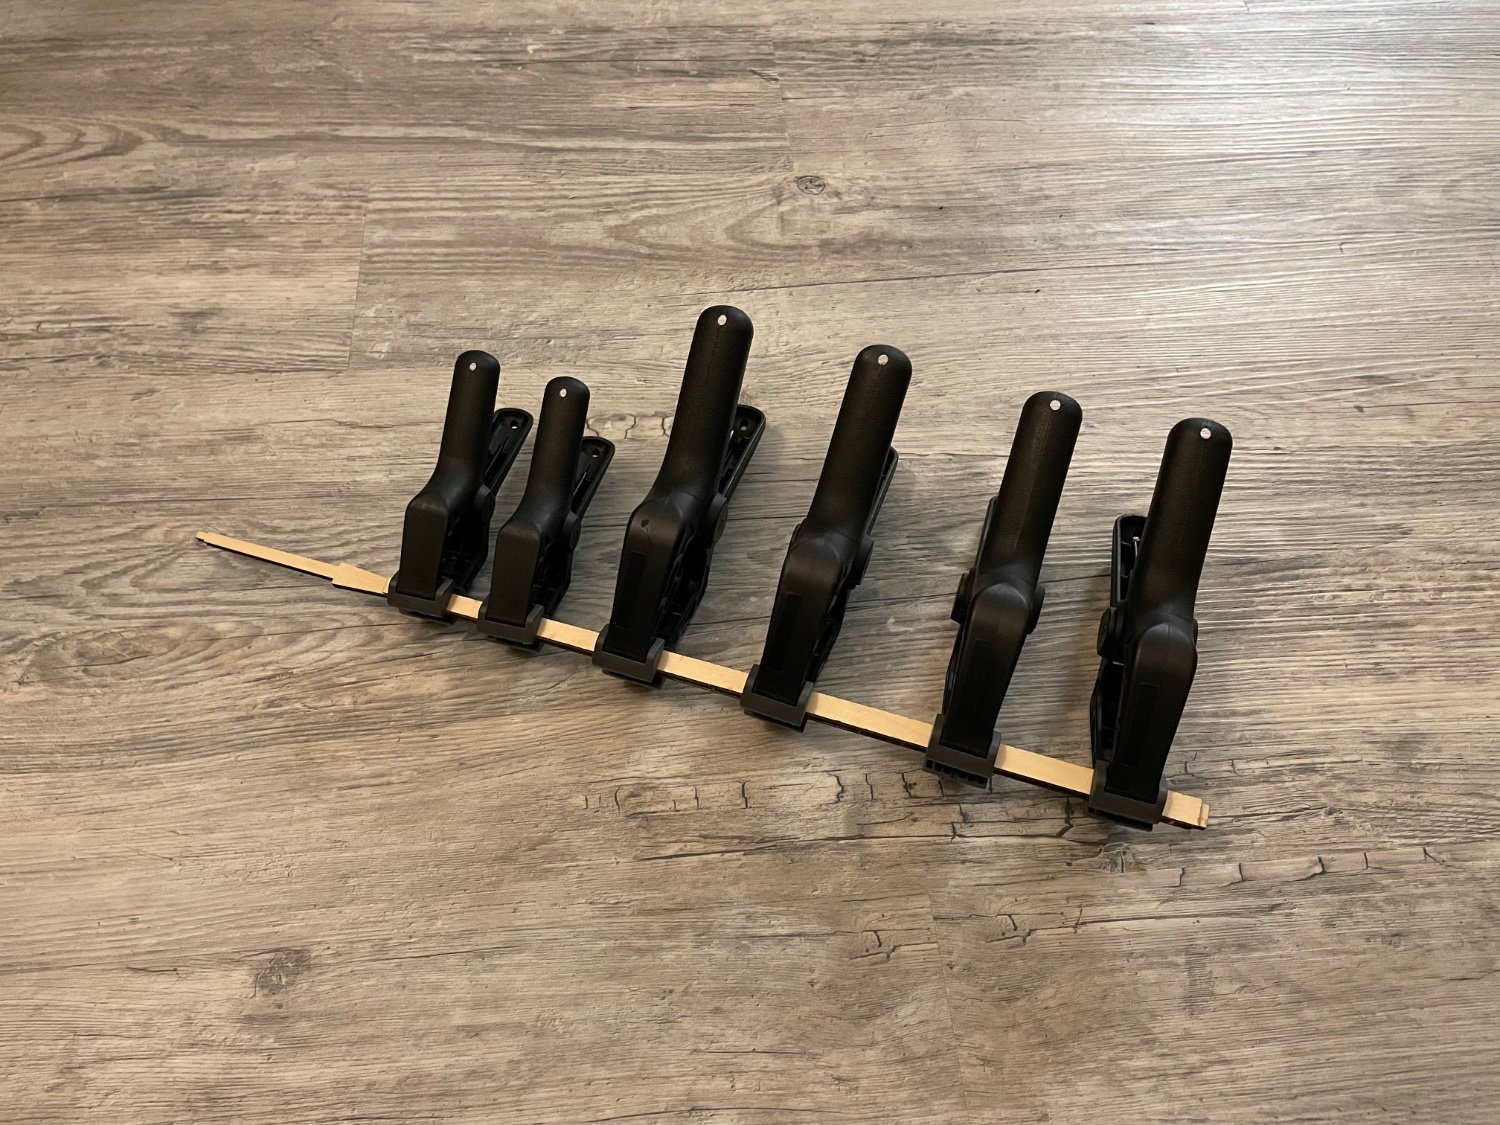
Started planking some today.
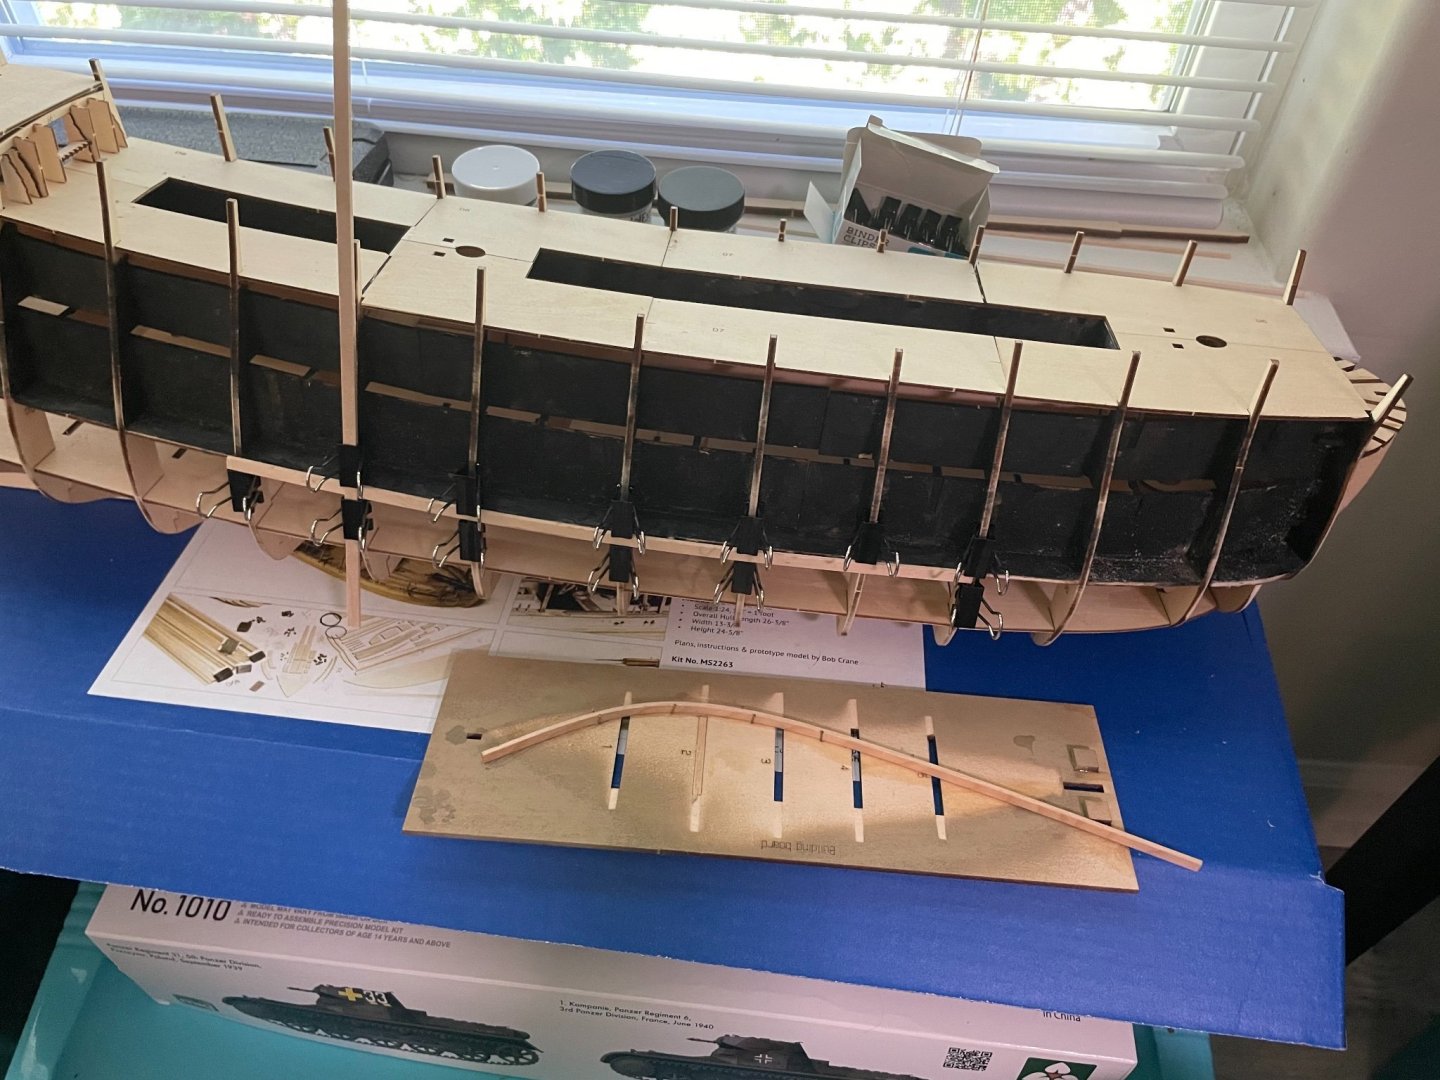
Laid the first plank and you can see my ad hoc wood bending jig.
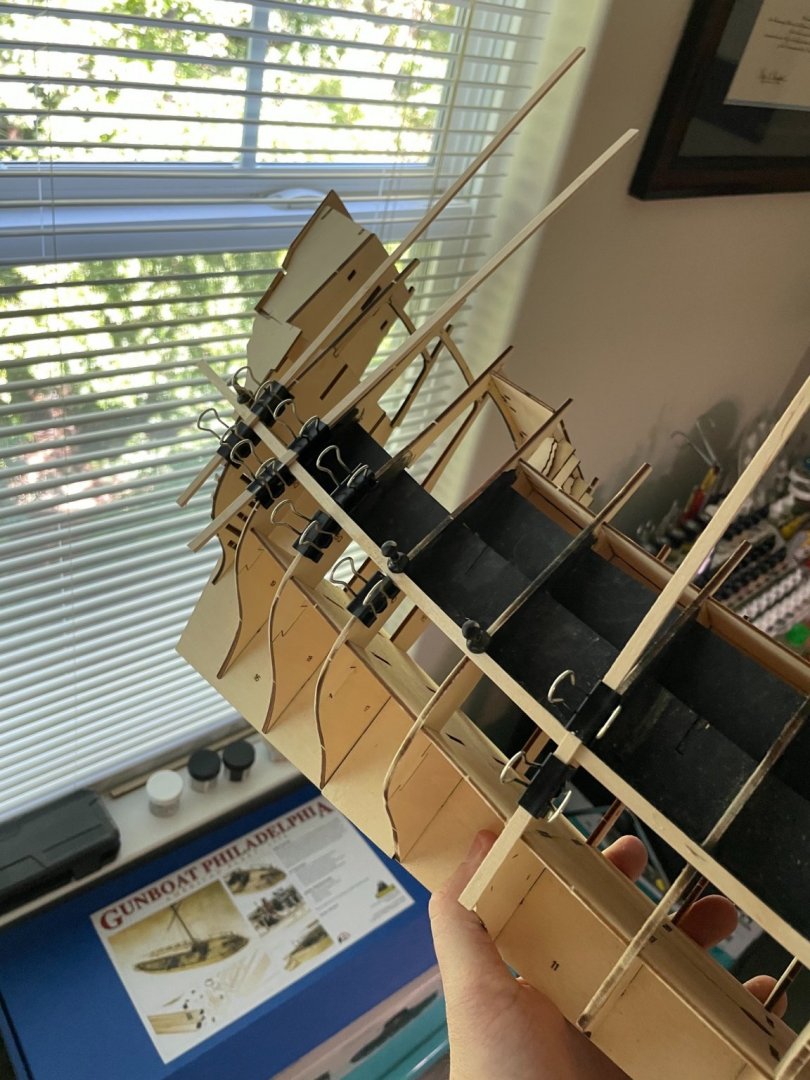
Binder clips and push pins do the job!
- Baker, GrandpaPhil, Daniel Filipe and 1 other
-
4
-
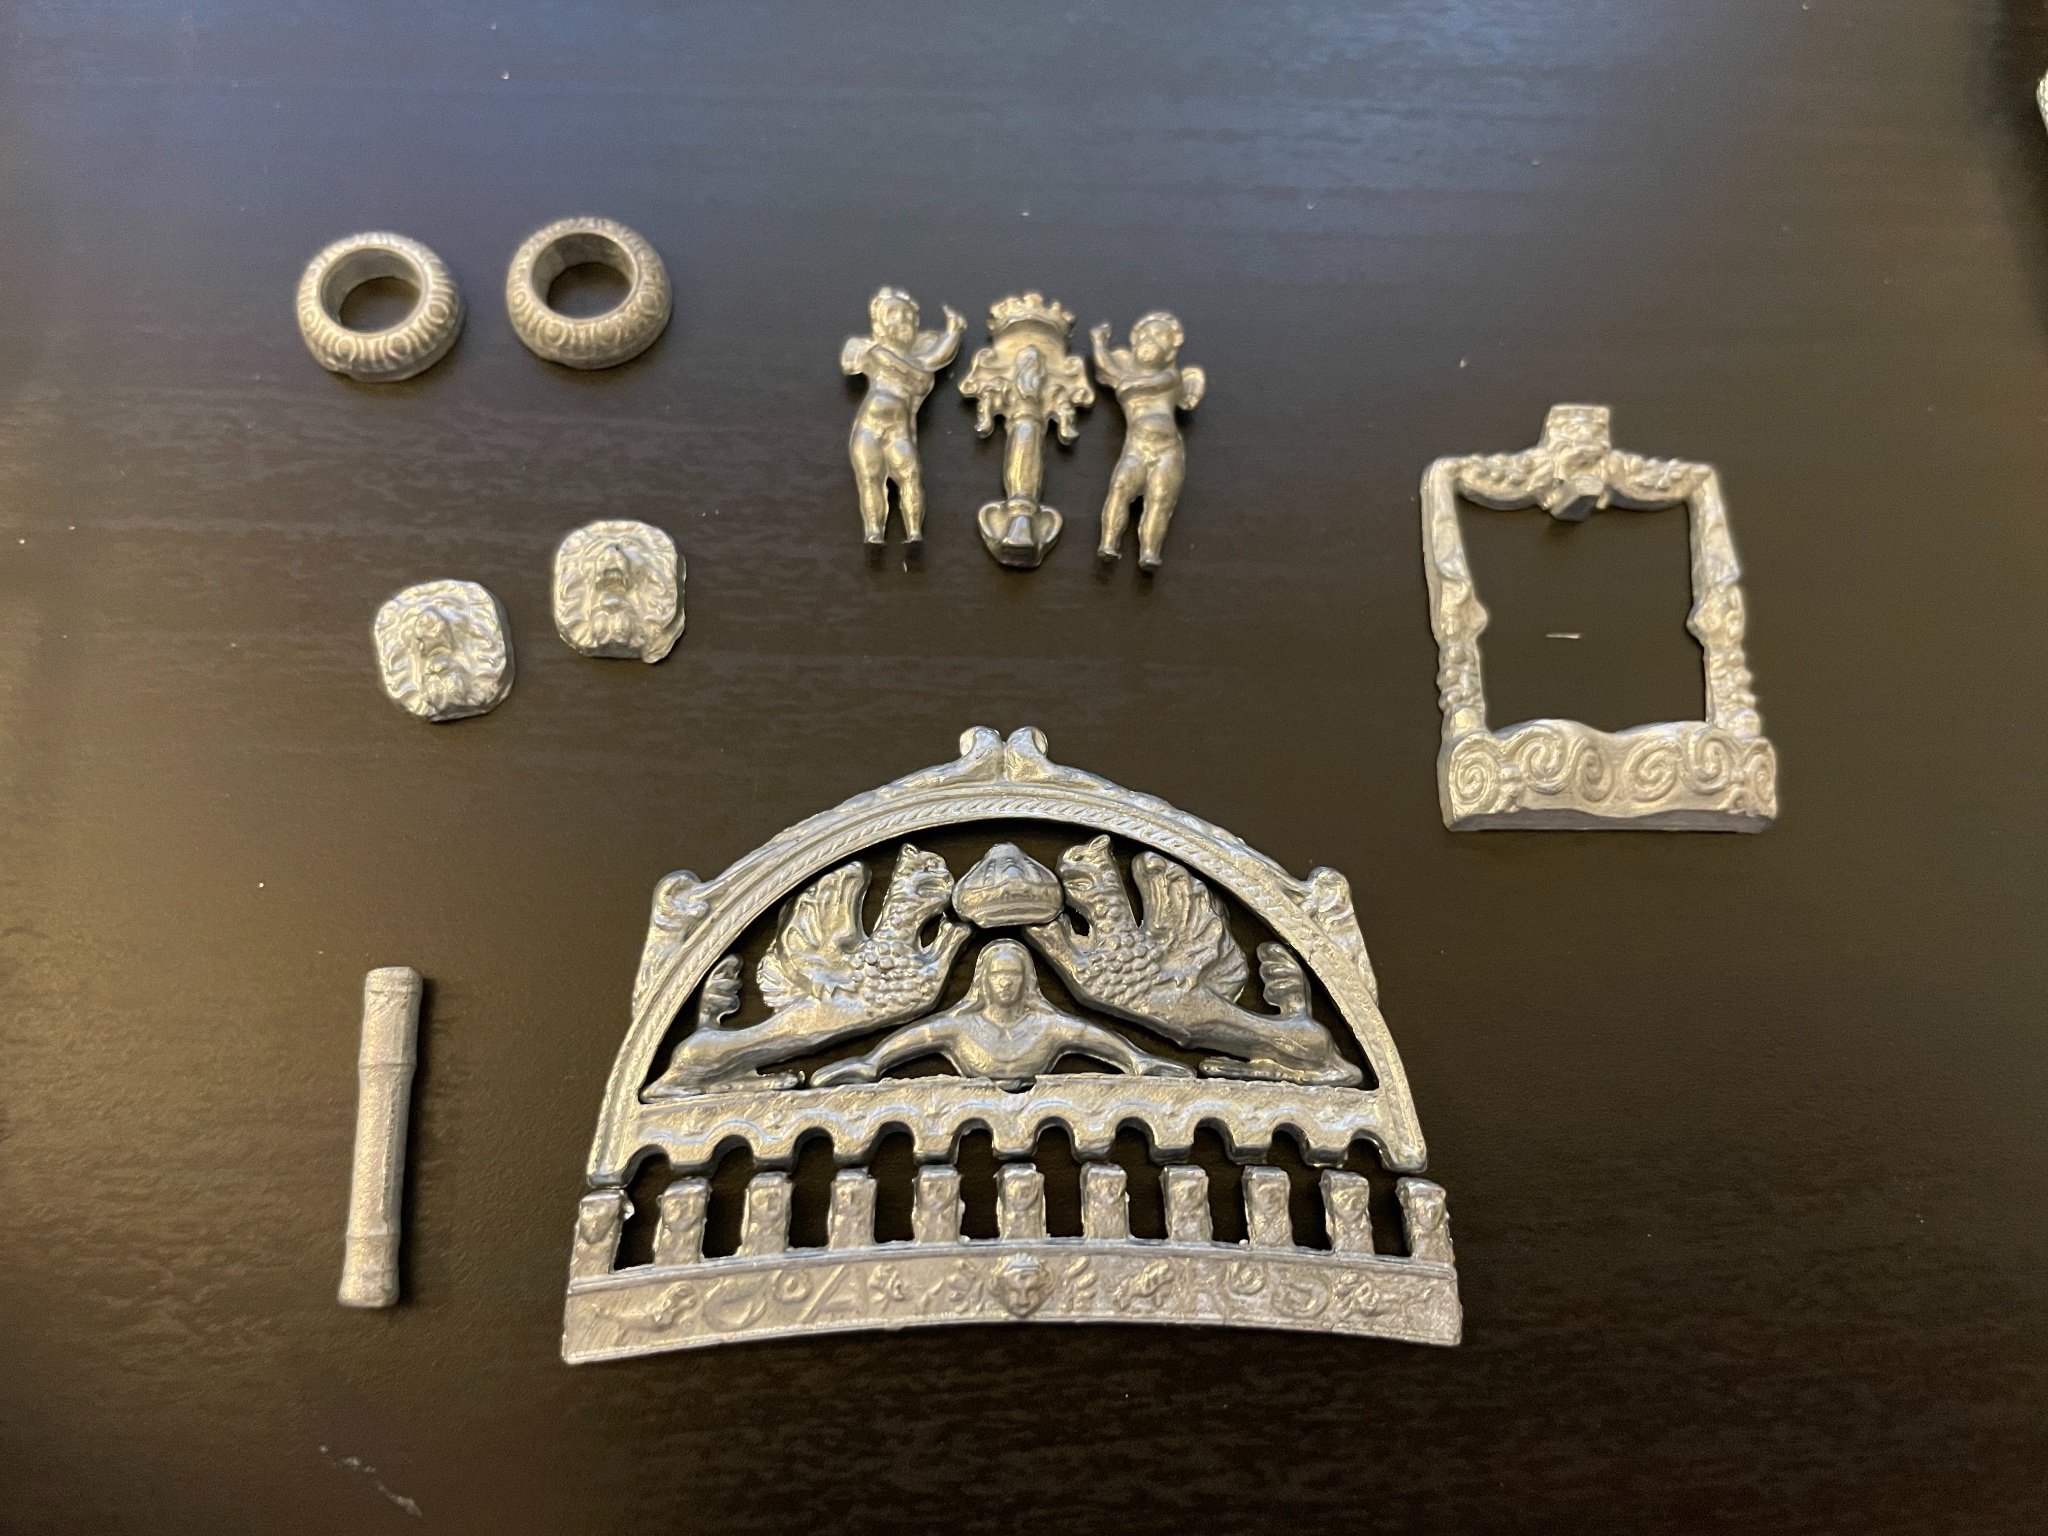
I opened up some of the boxes containing the cast pieces, to show their detail.
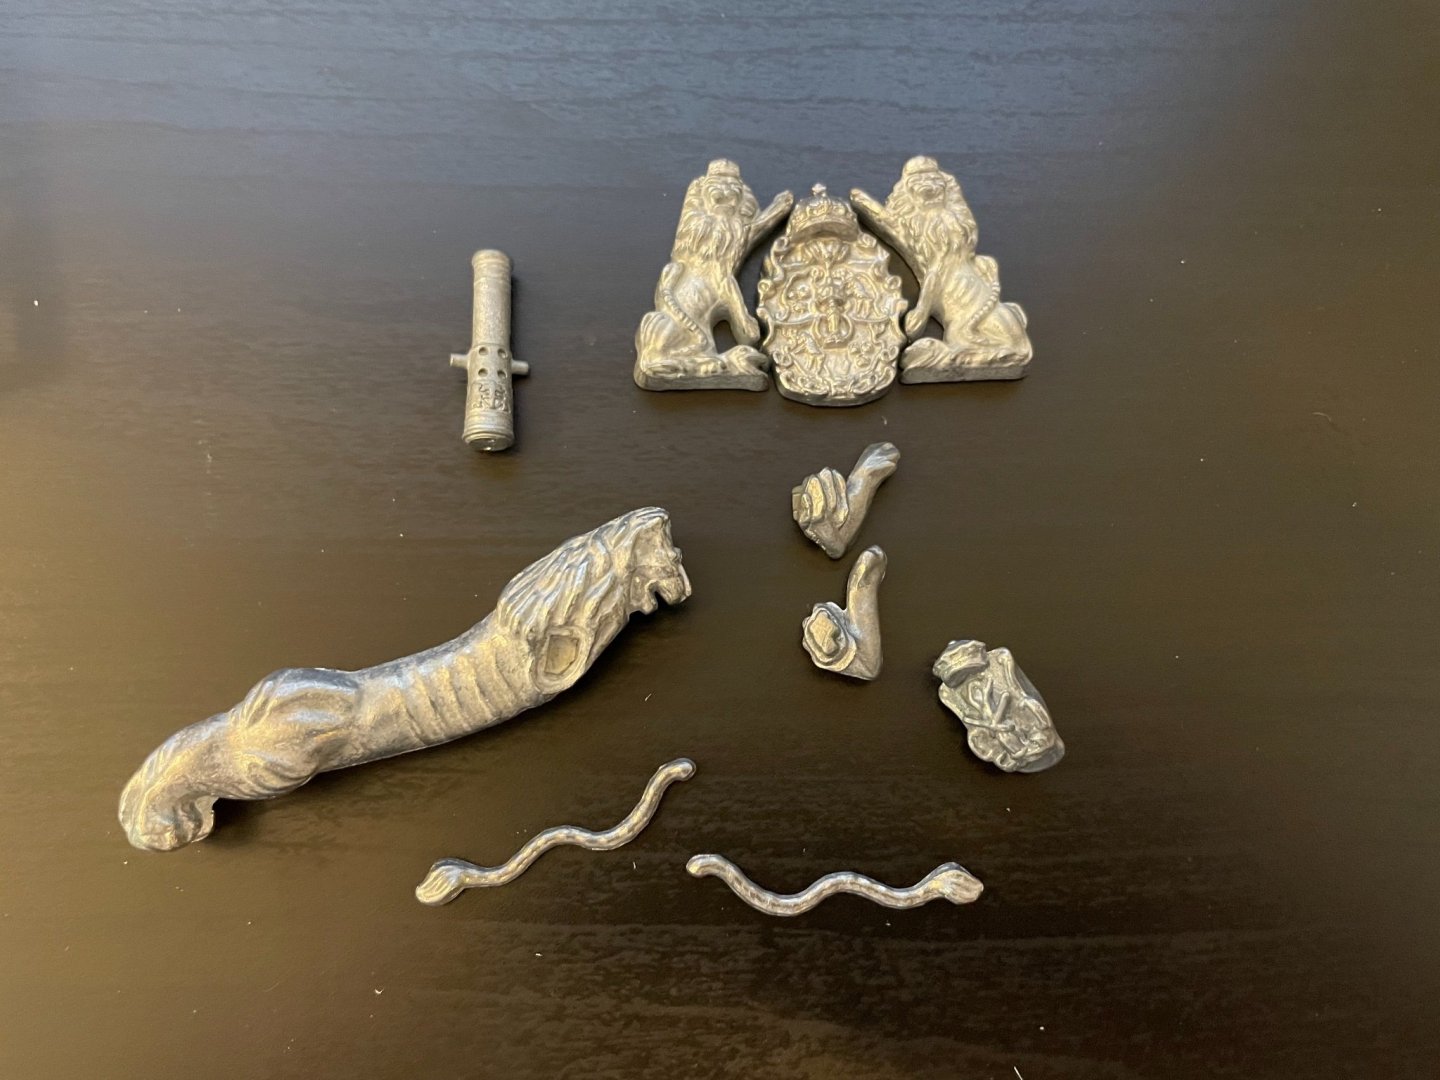
This is the figurehead and the coat of arms, and one of the short cannons, which have a smaller version of the coat of arms on them.
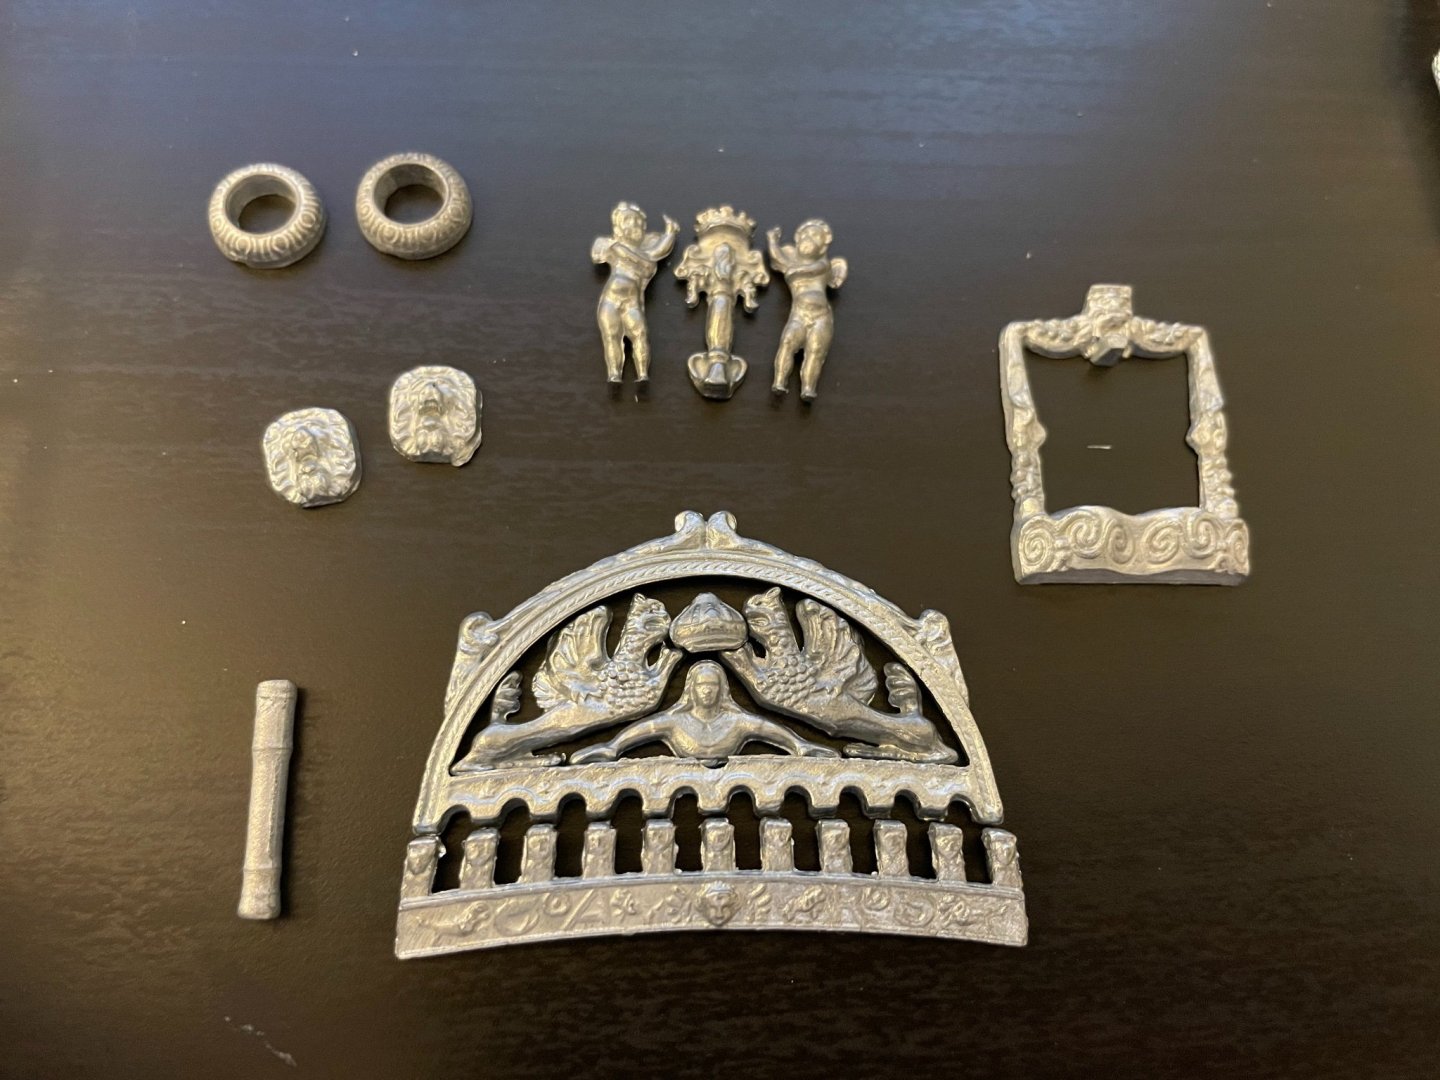
On the left, gunport molding for the main deck, as well as the lion heads for the lower deck gunports, and a dummy cannon. On the right, two stern decorations, a figure of the king being crowned by two griffons. (AR=Adolphus Rex?) Also the “Vasa” symbol, a sheaf of wheat shaped like a vase, flanked by two cherubs.
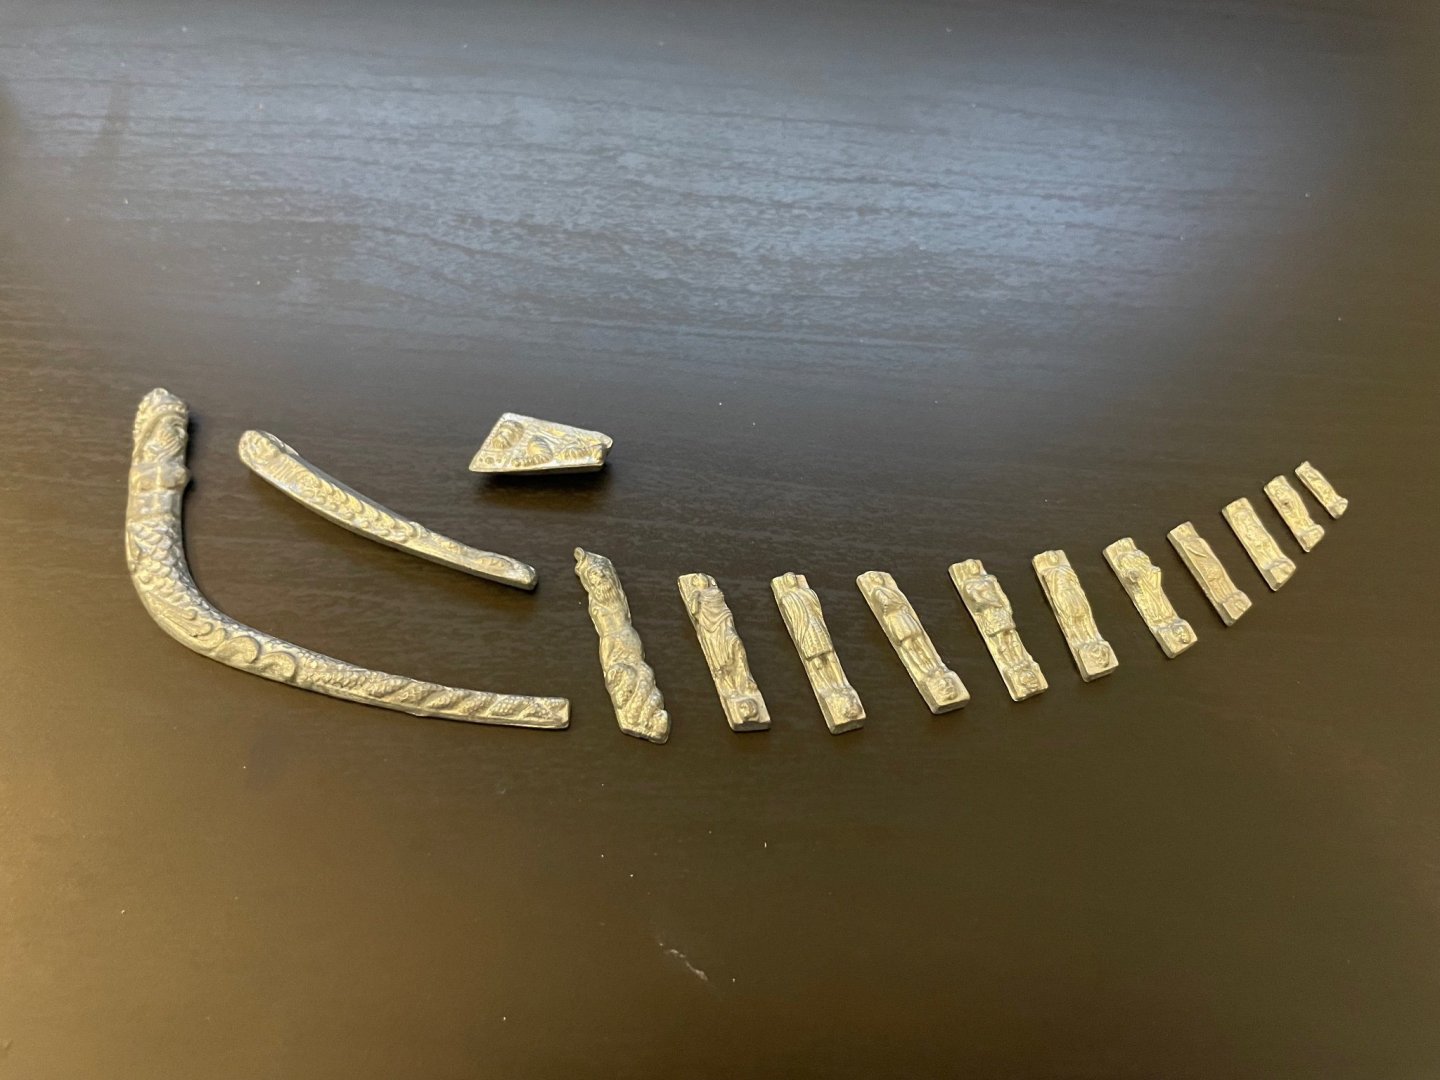
Molding for one side of the prow.

Molding for one of the shorter stern galleries. Will be posting more pictures as I work on these and begin to paint them.
-

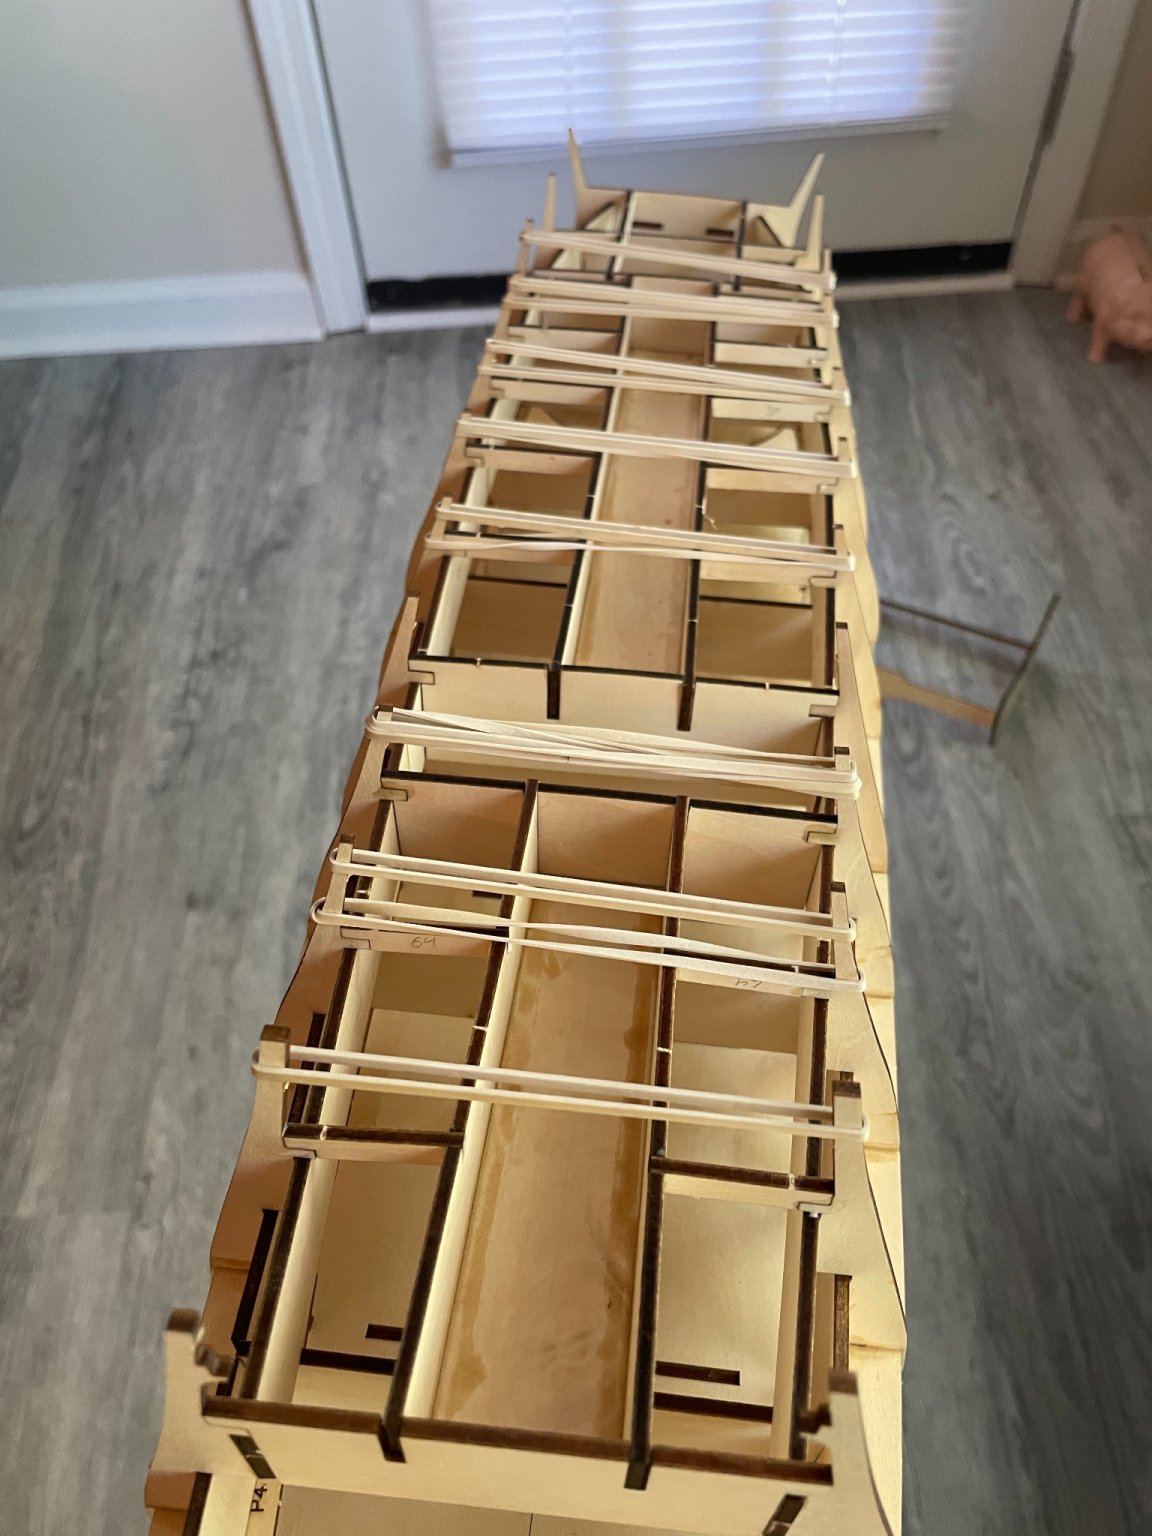
Rubber bands have been very helpful in building this kit so far. I’m going to be trying a couple different things I’ve picked up from other builders of big ships, including using binder clips and push pins in the planking.

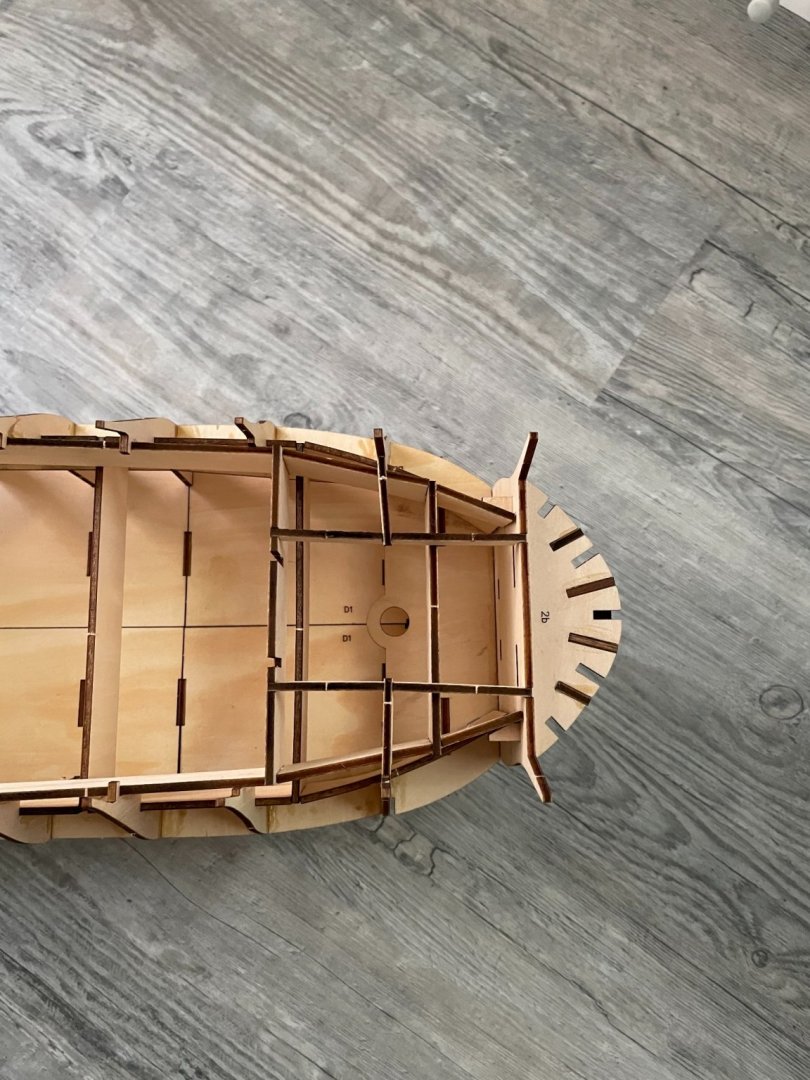
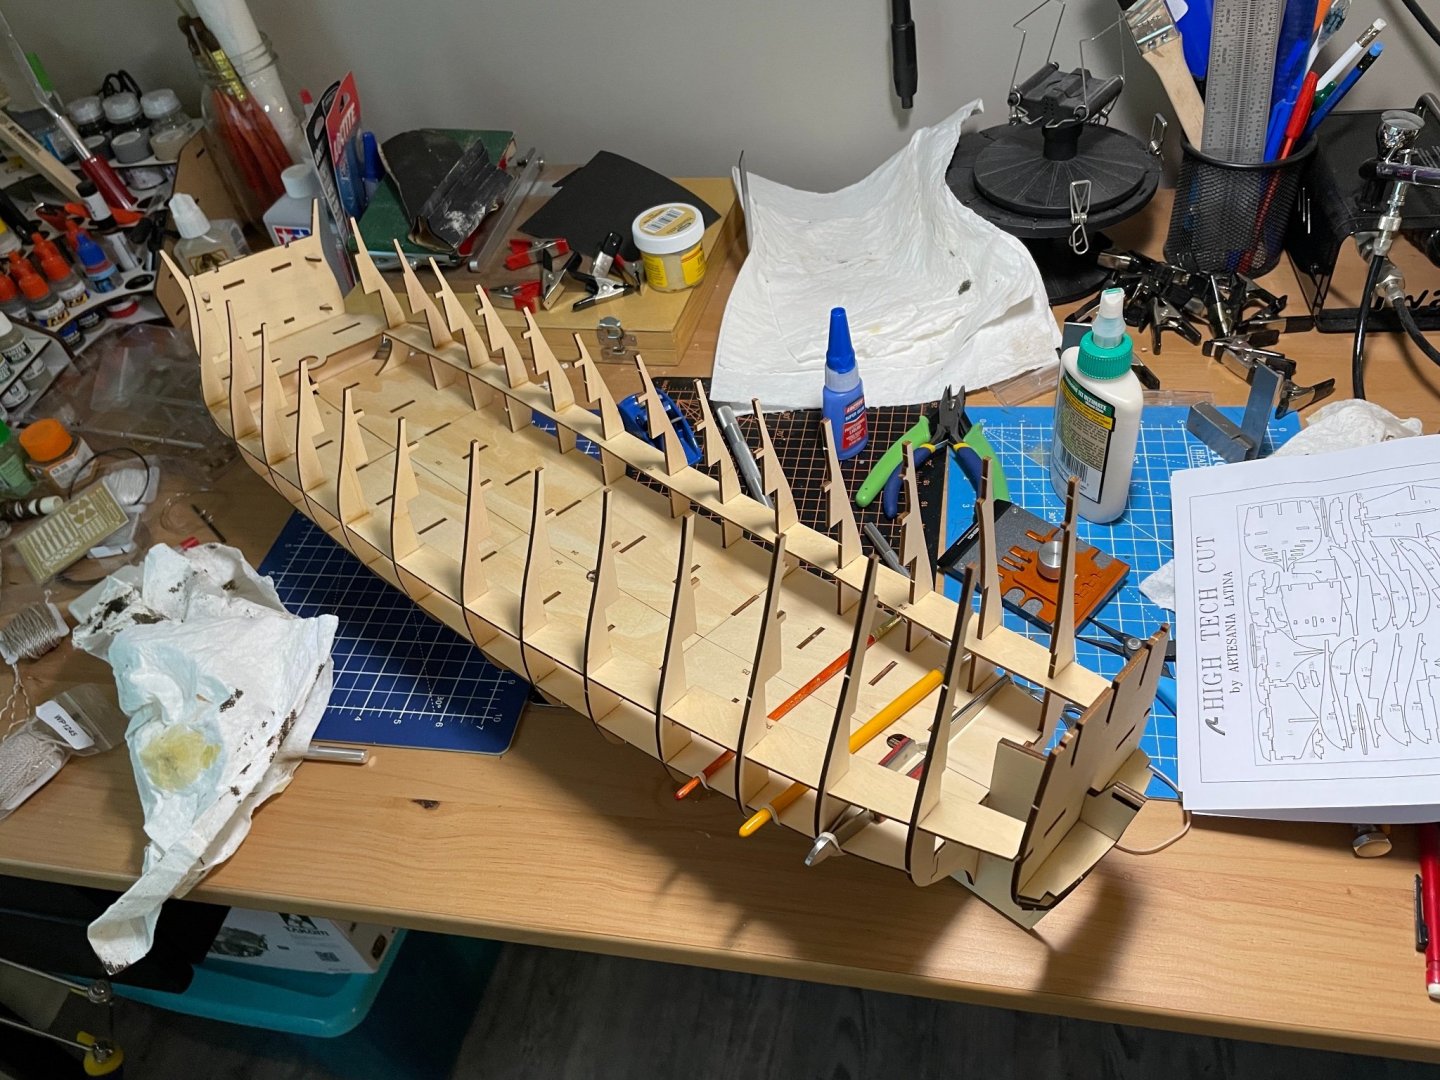
Trying to dry fit the decking has revealed some additional alignment issues in the frame, but nothing too bad. I was also concerned I had misaligned the frames, since there is a major cant in the main and mizzenmast, but this seems to correct, since they are swept back in the instructions.

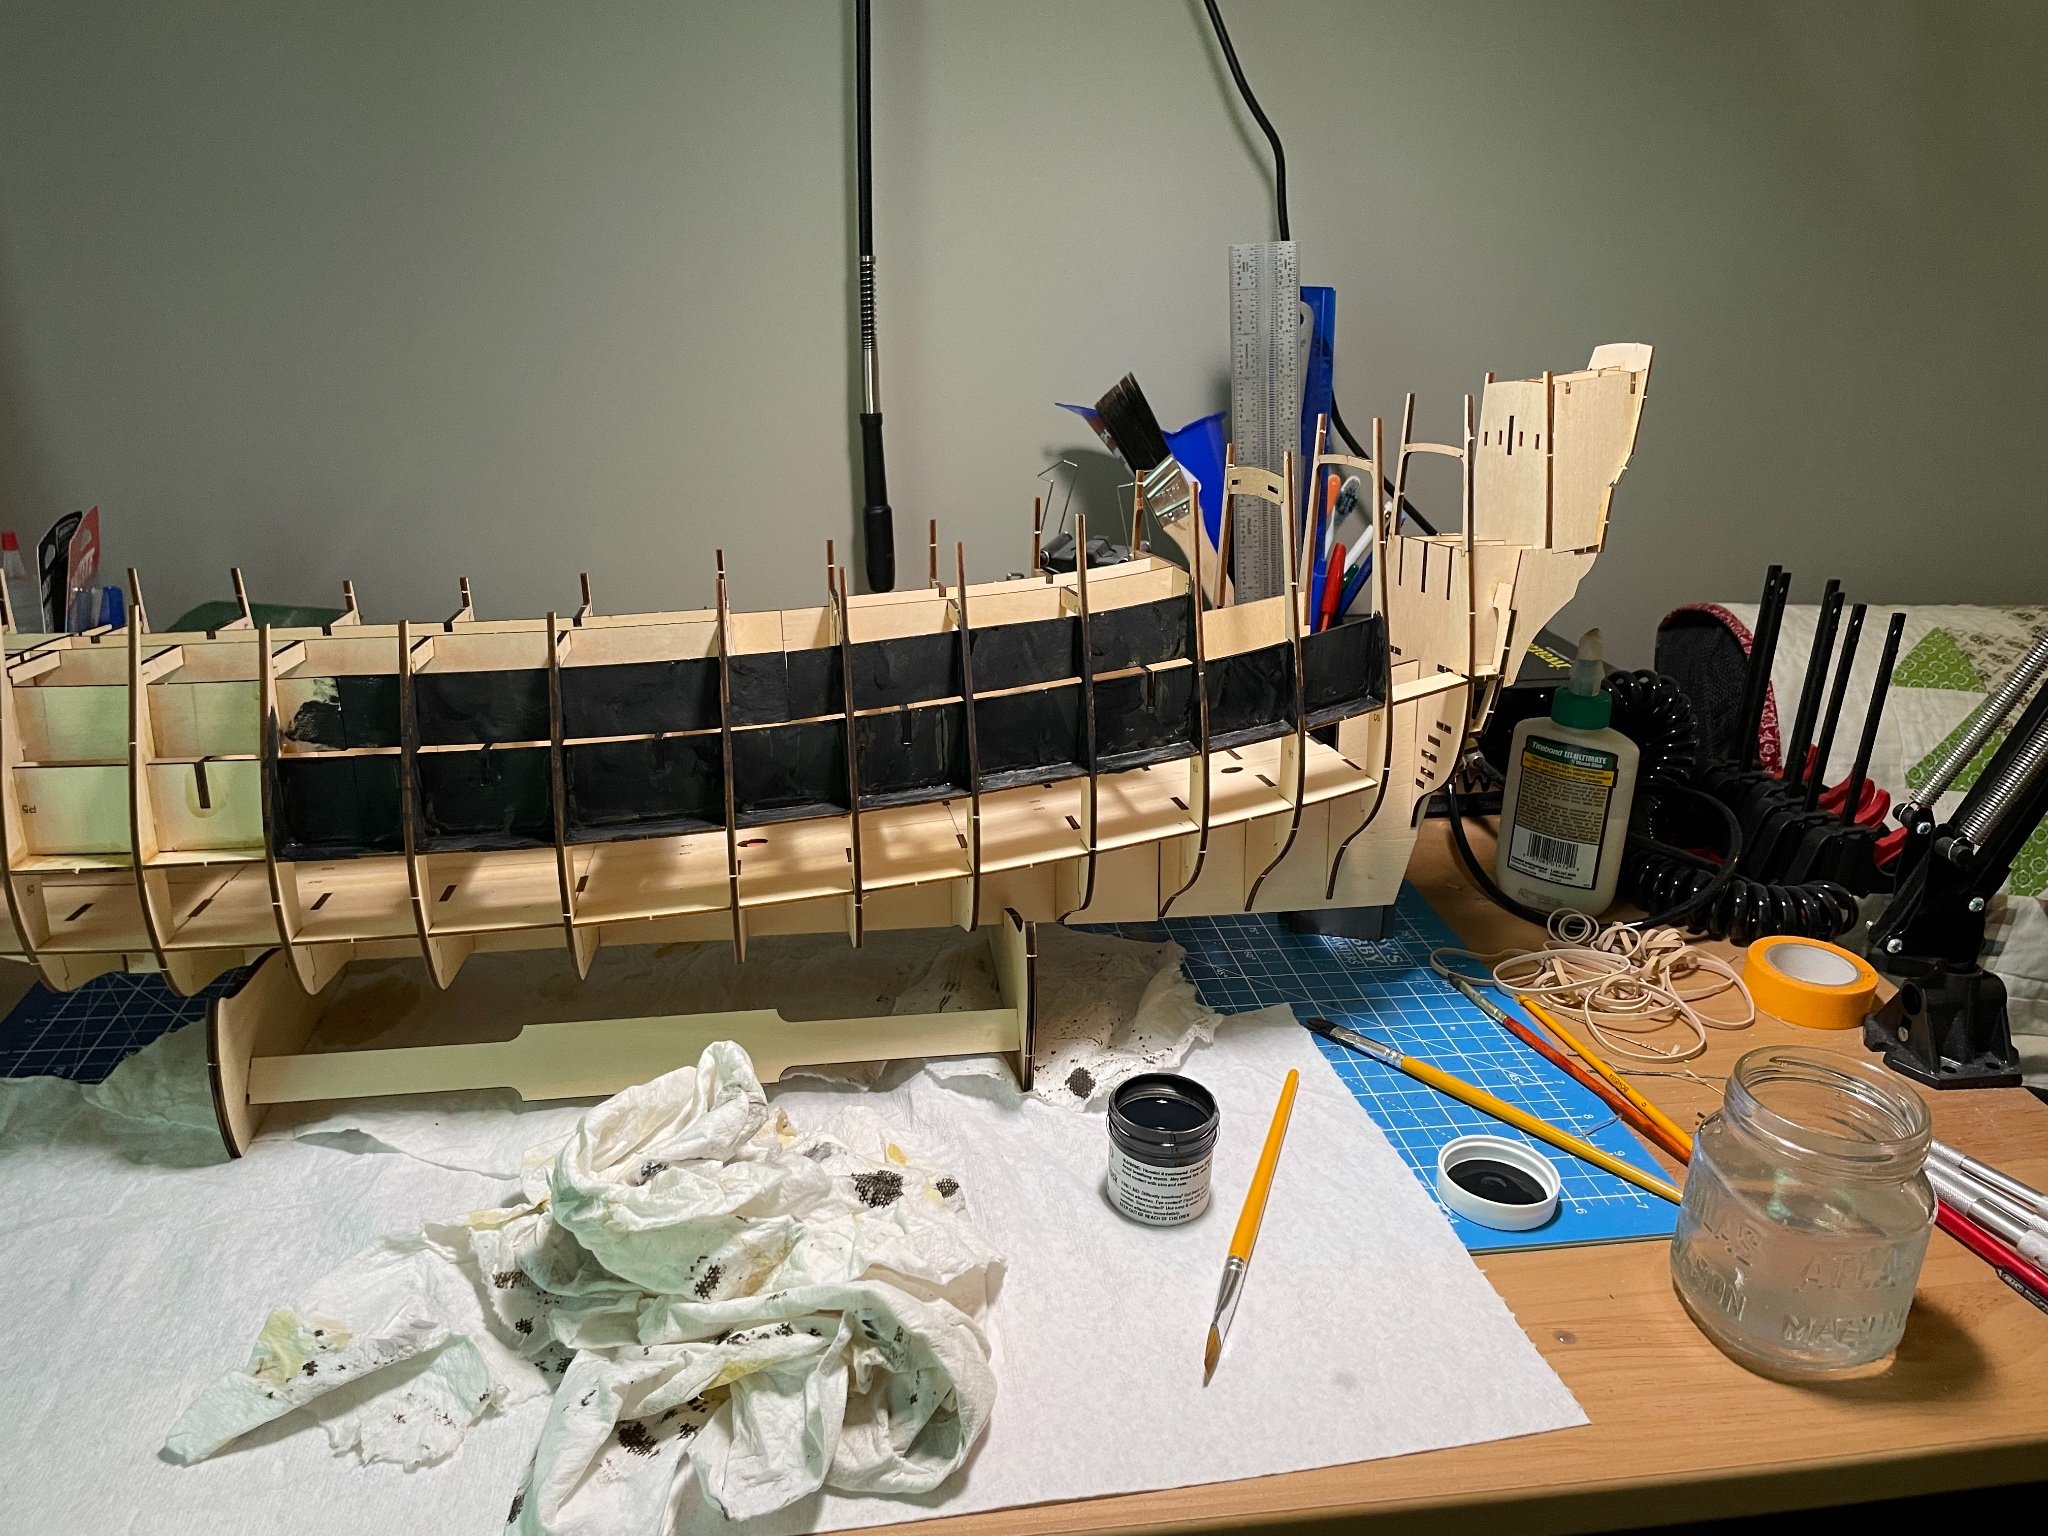
Used some Hull Spar Black from Model Expo to black out the gunports. It looks bluish in the jar but it dries to black, and so far I’m very pleased with all Model Expo’s paints and stains.
The instructions say to use veneers to plank the bottom of two gallery sections, but I decided to paint them black instead, since this detail will hardly be noticed in the finished model.
- GrandpaPhil and Baker
-
2
-
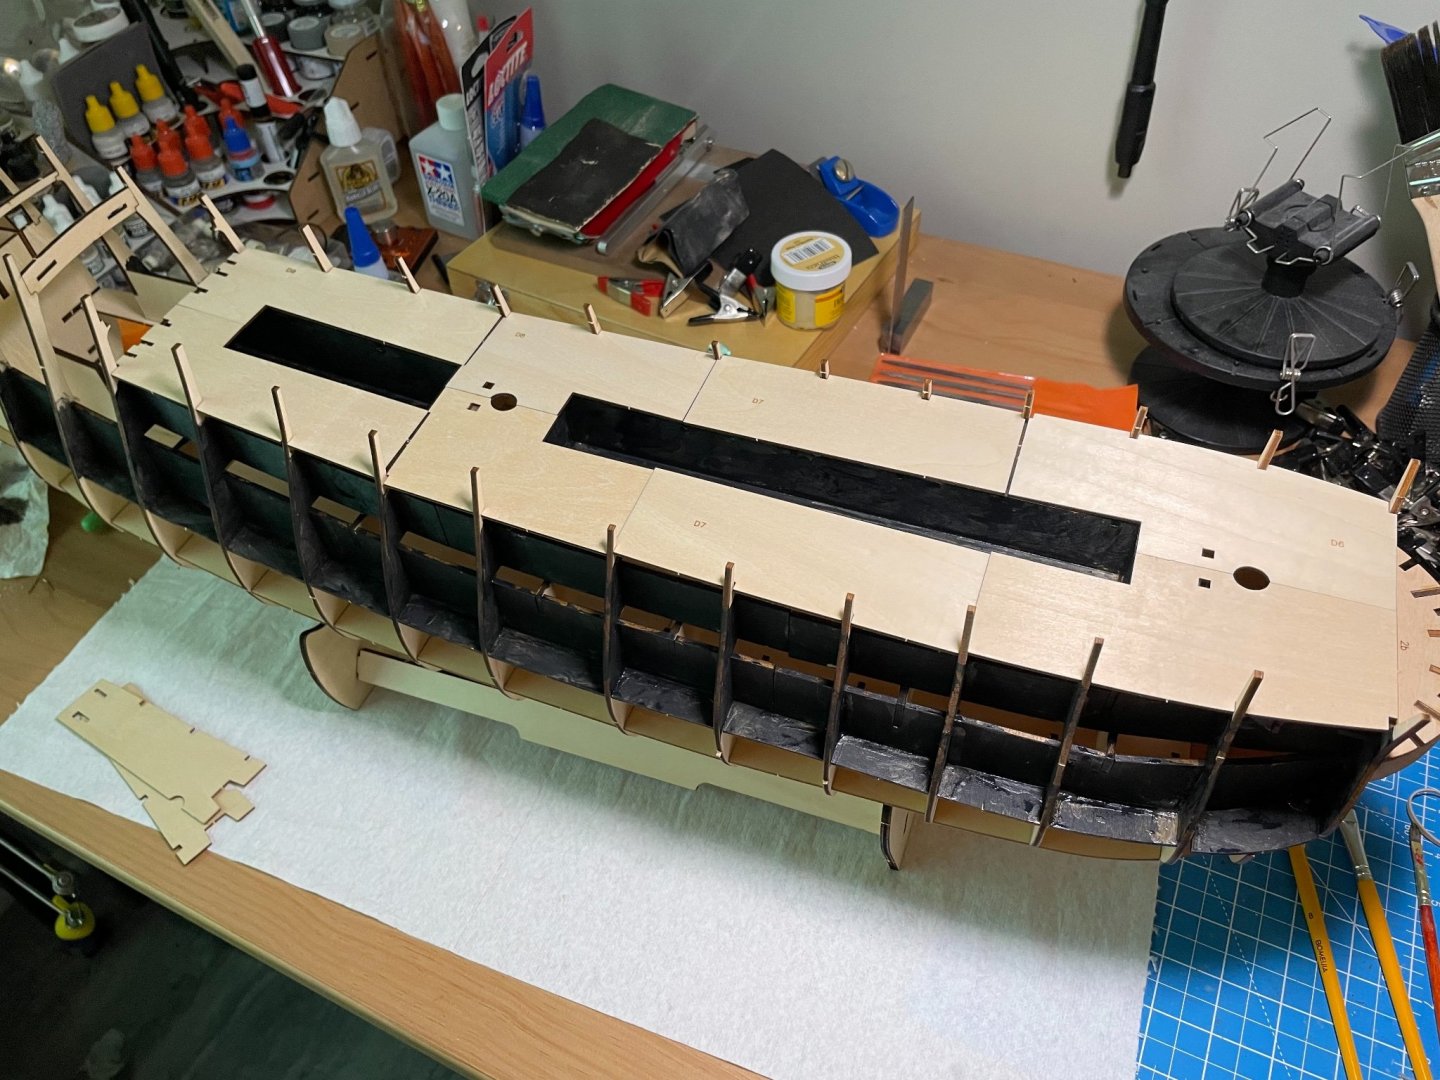
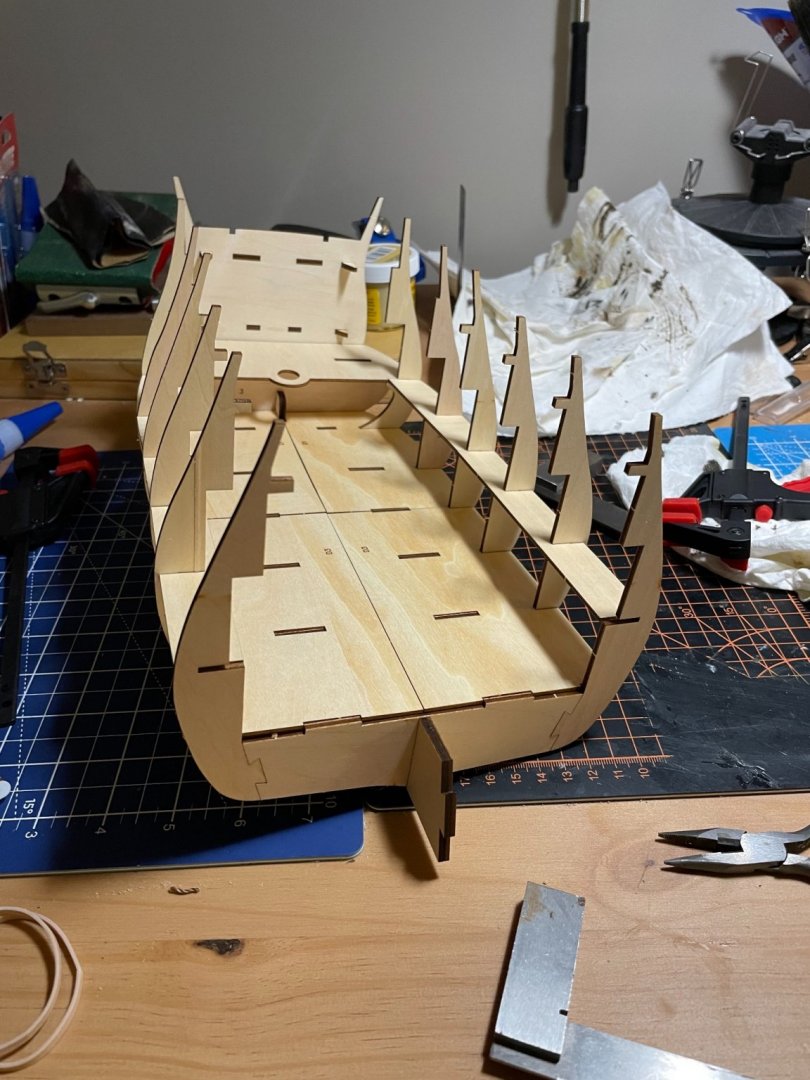
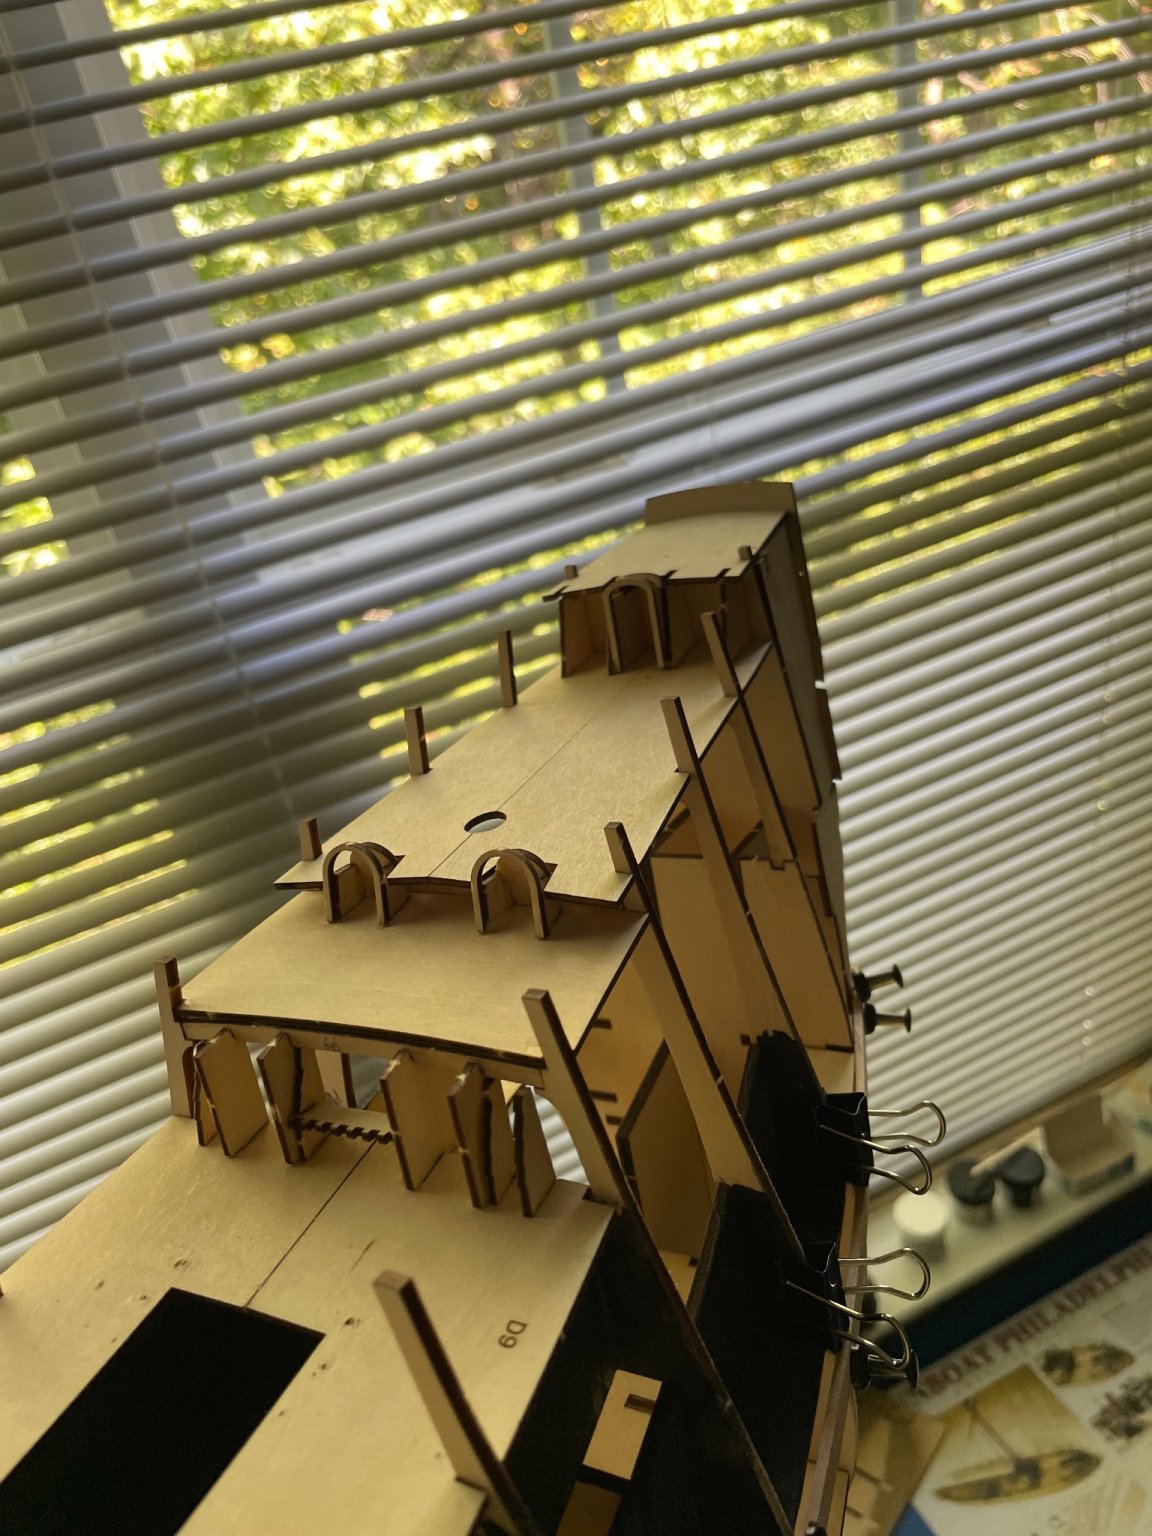
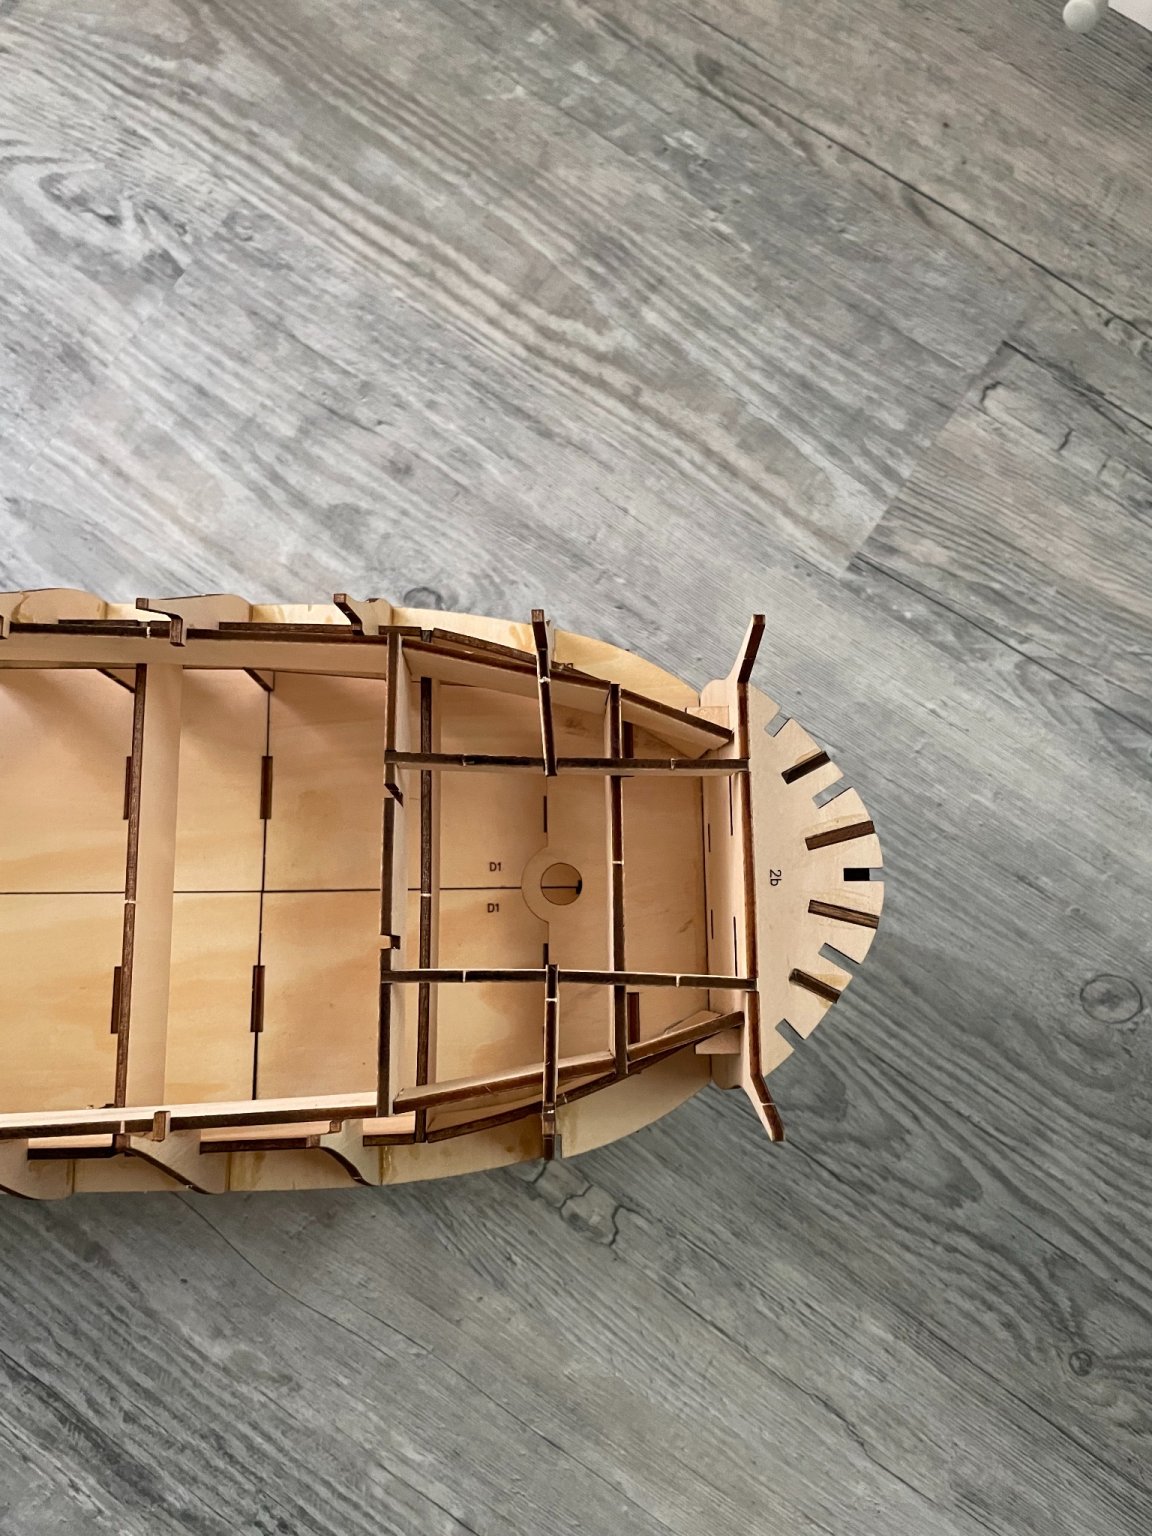
Installing more pieces of the interior frame. Required some soaking and bending of wood.
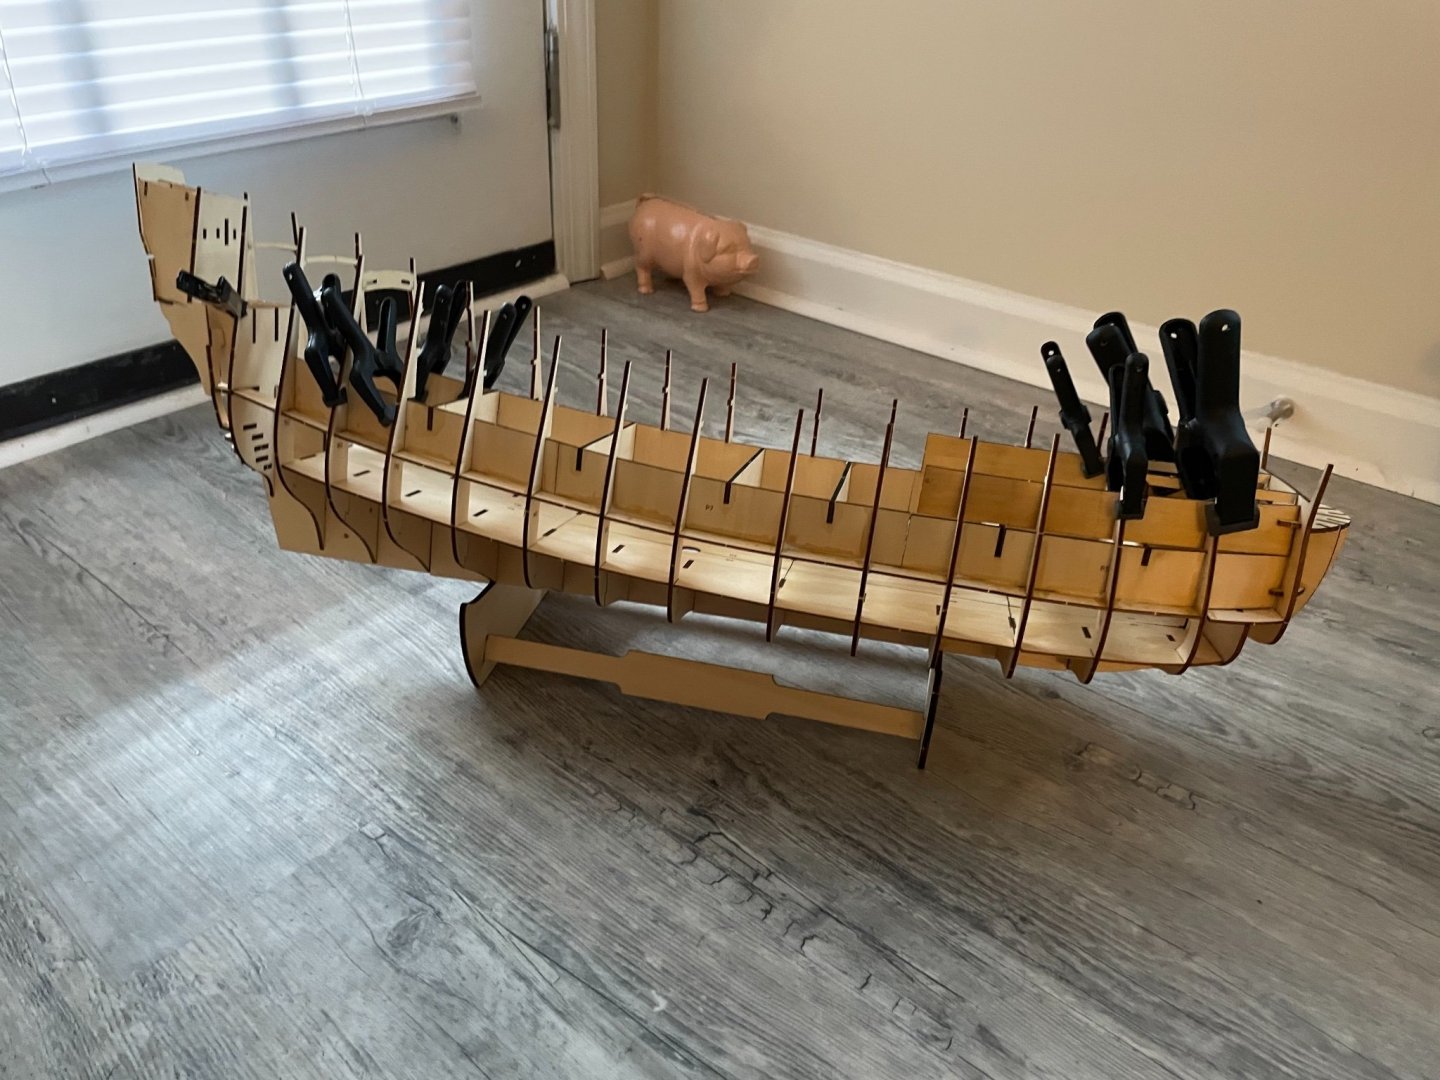
So far everything has fit very well, but I did discover an issue this morning…
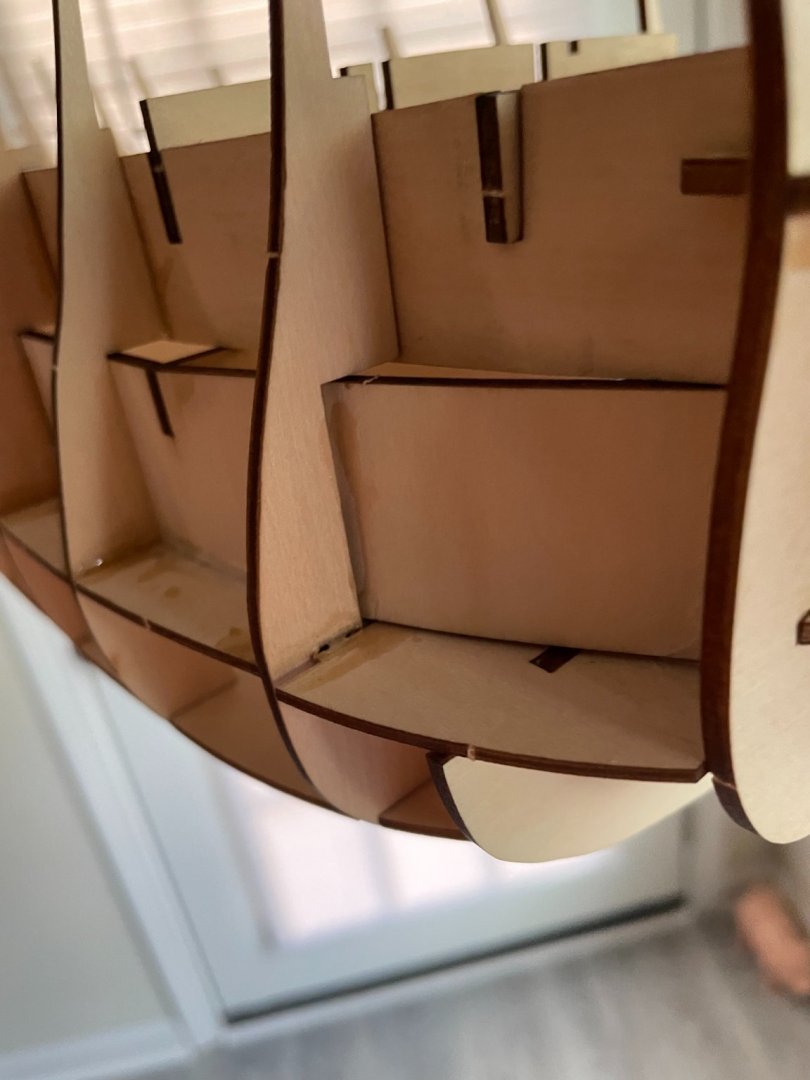
One of the forward starboard bulkheads separated from the rest of the frame, and this has caused some warping as you can see below.
I don’t think this will cause any major problems, but it is annoying. It’s not a fault of the frame, I should have caught it earlier.
-
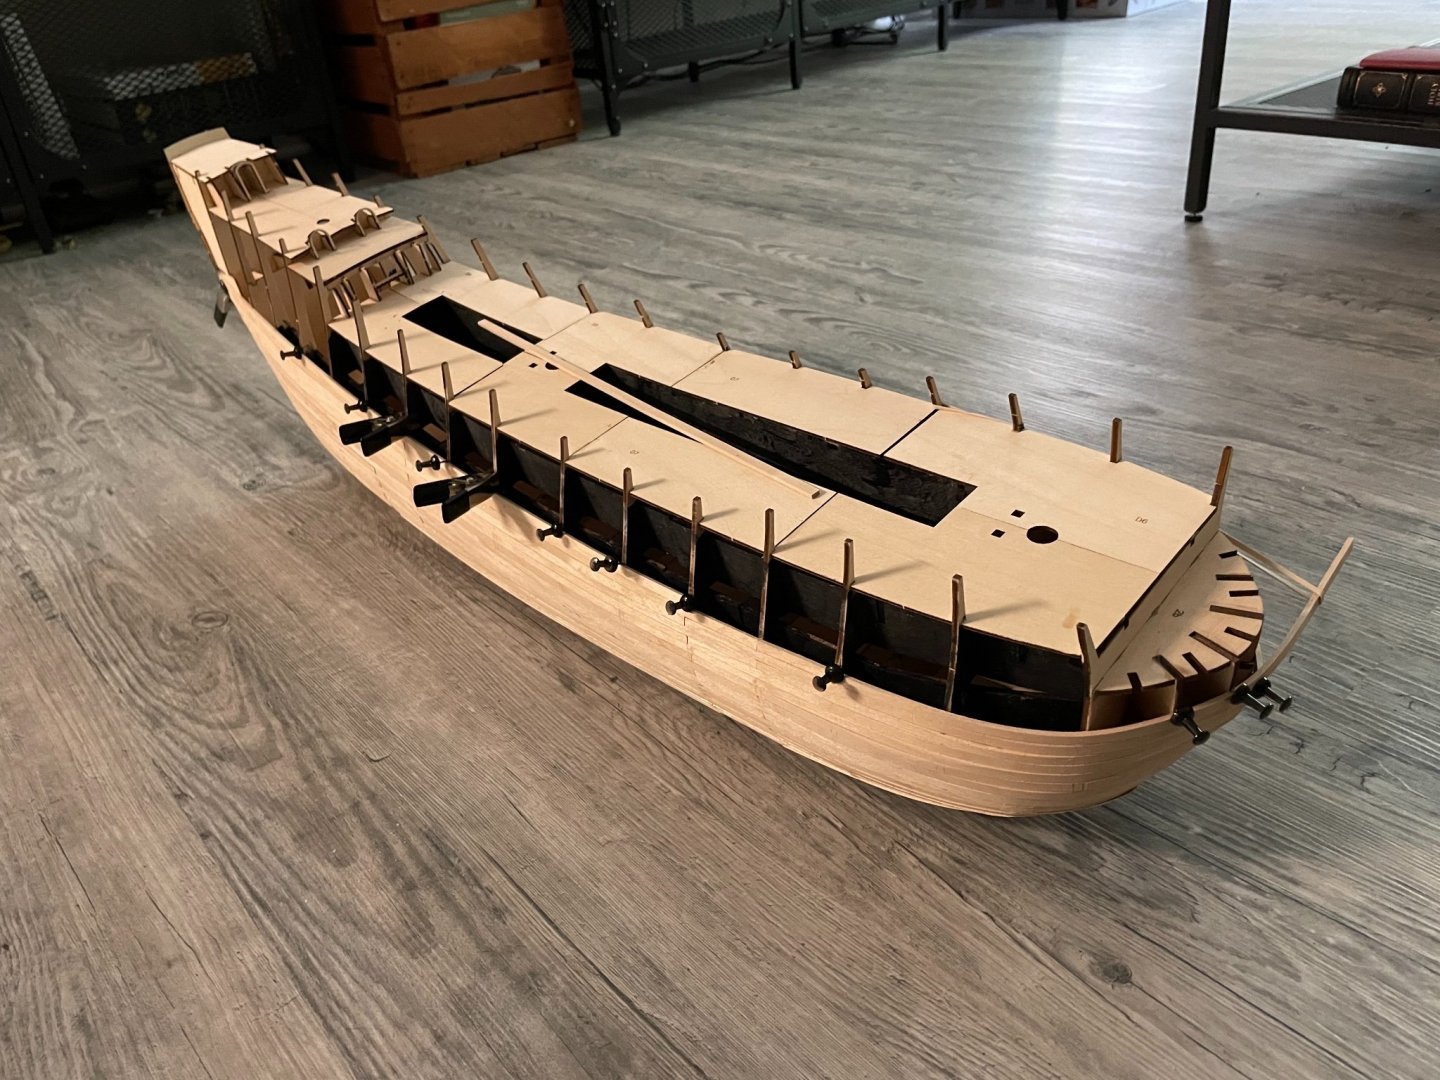
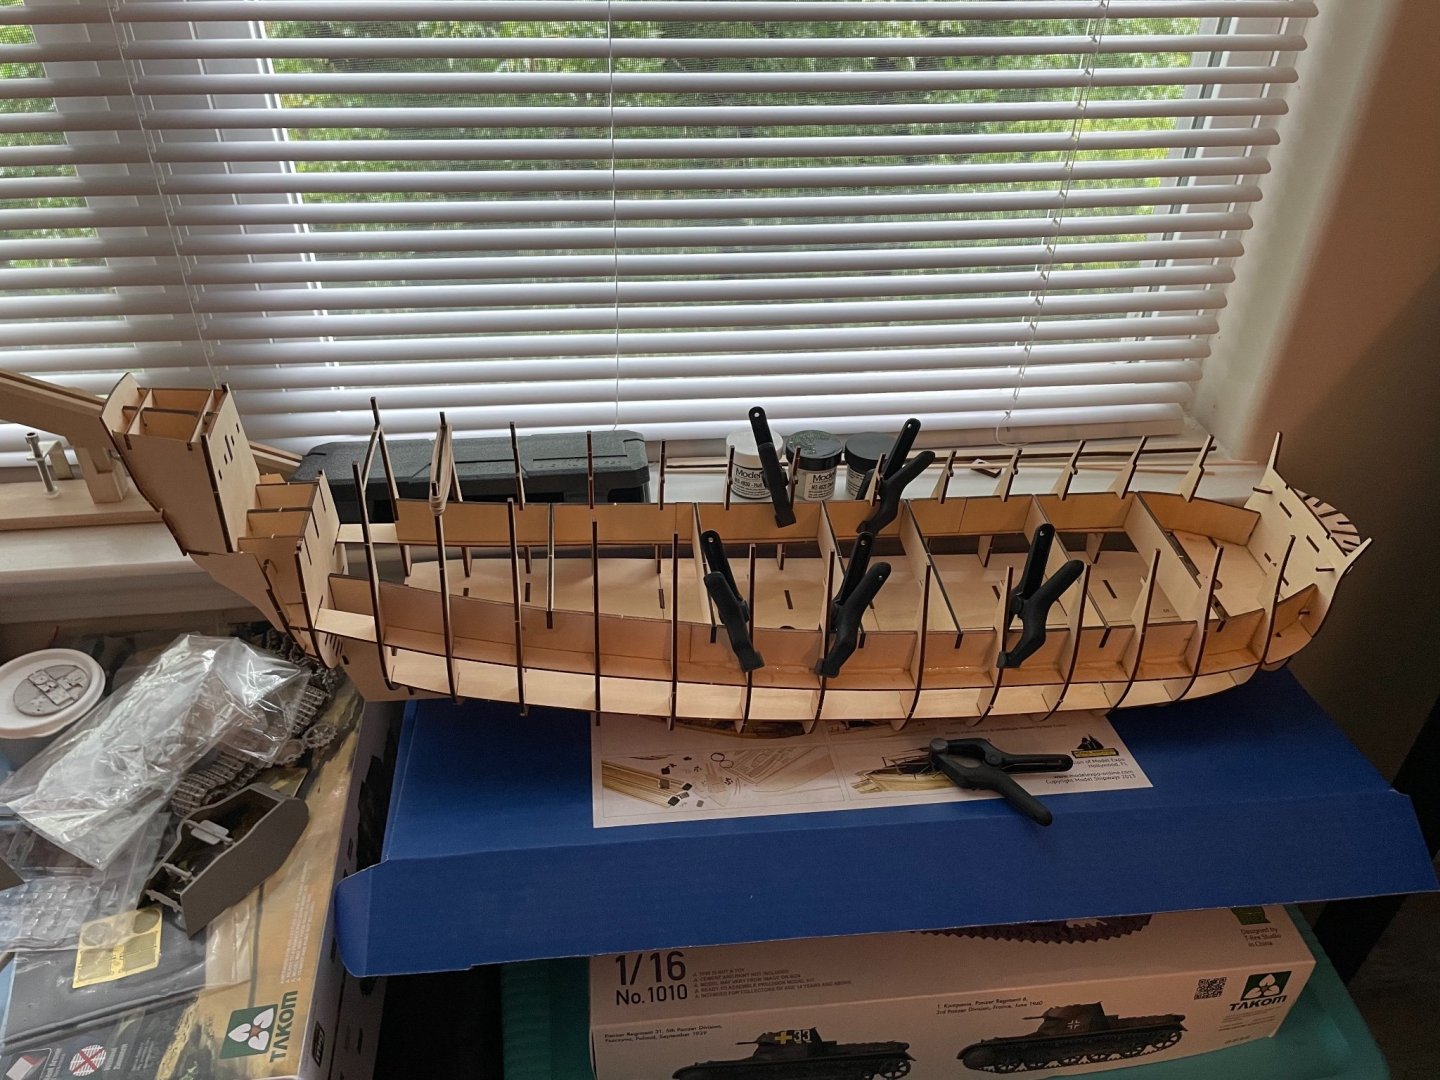
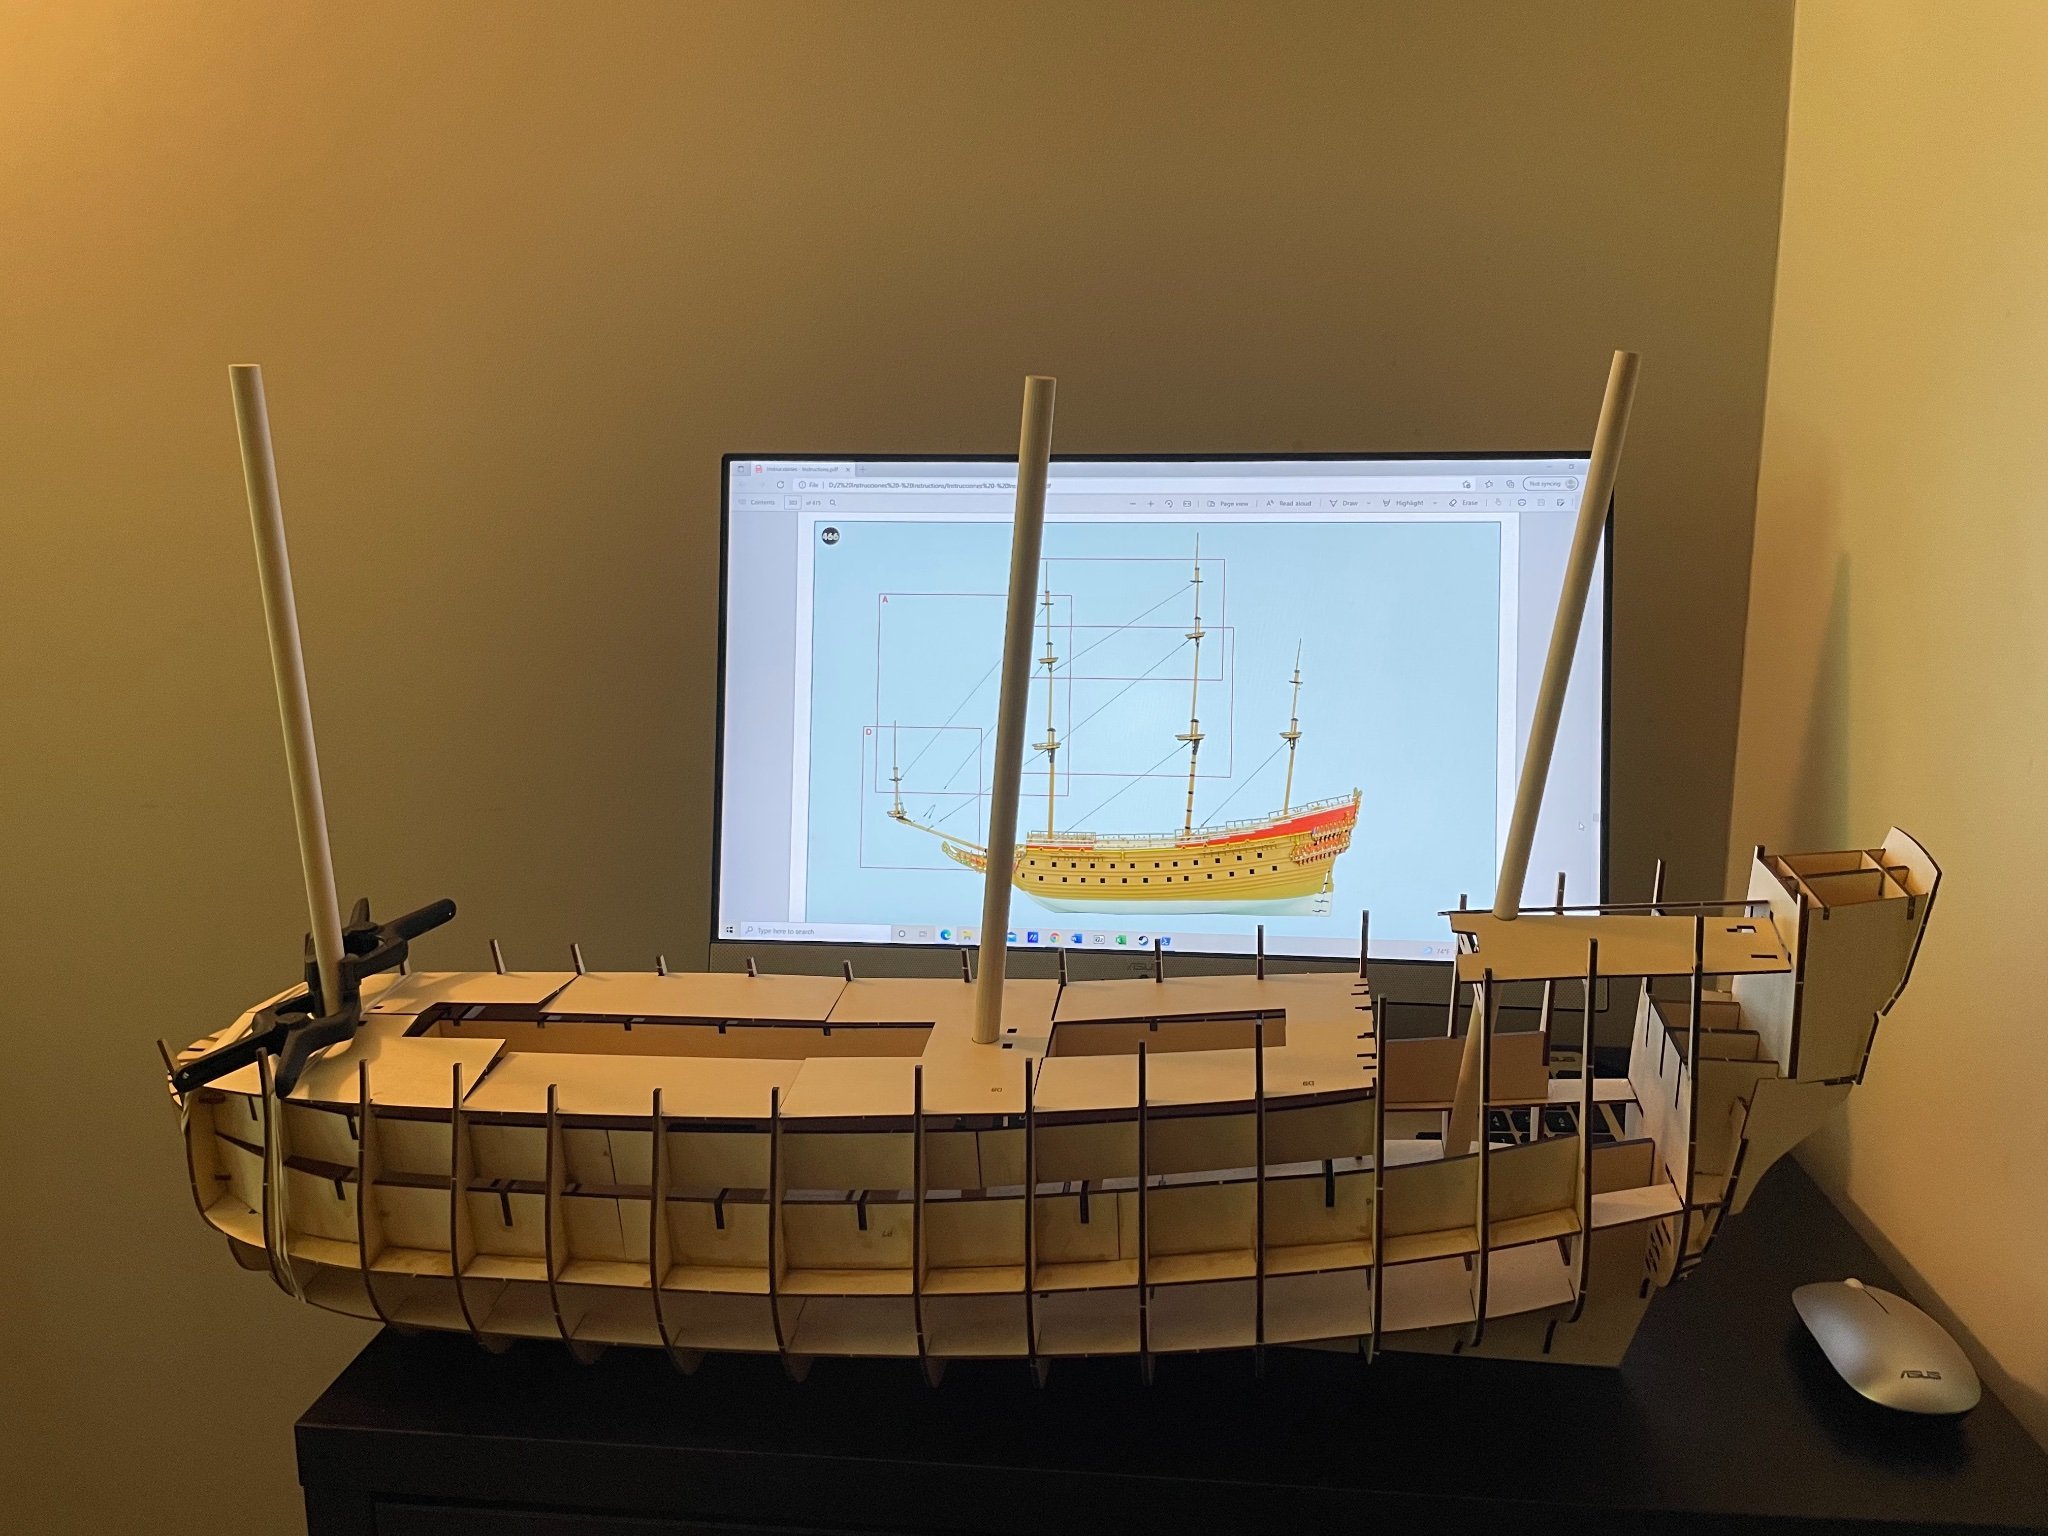
I couldn’t help but start building the frame.
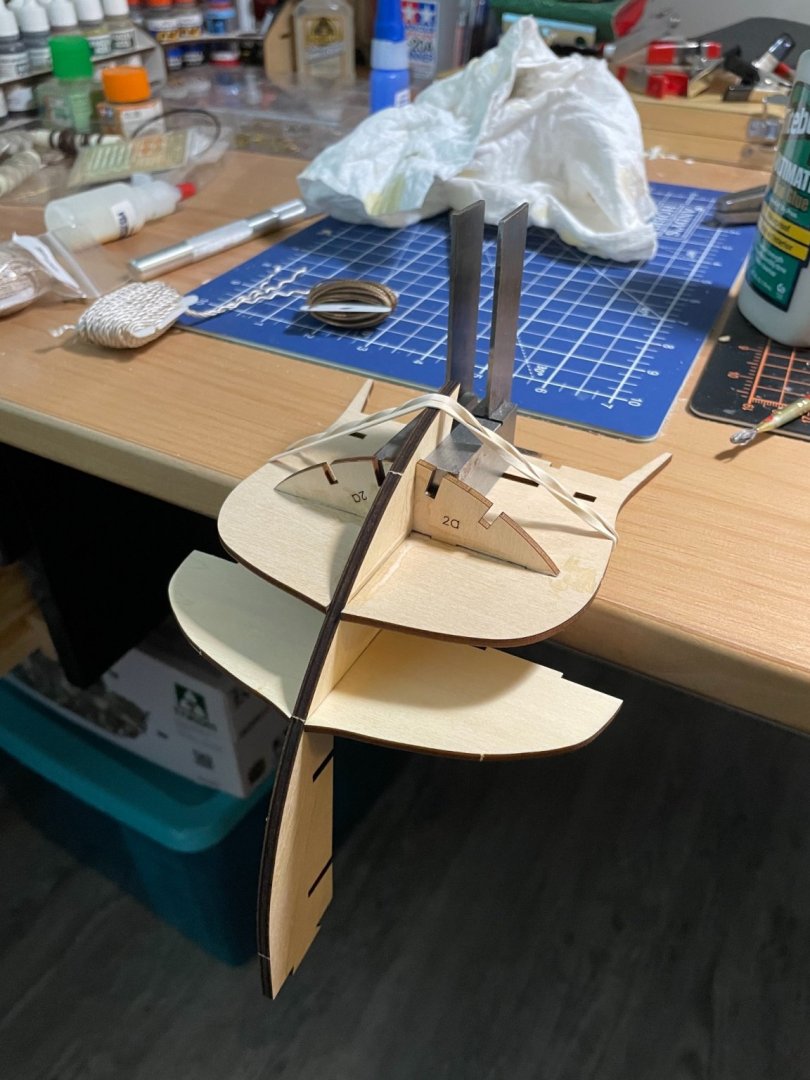
This is about as far as I got last night.
This ship is the biggest I’ve ever worked on, although the hull itself is only 28”, a little longer than the gunboat Philadelphia.
@Michel L. I think much of the price is for the cast figurines that come with the kit, you’re paying for metal when other Vasa kits have plastic or resin. The quality is nice, at least to me, but I’ll have more thoughts on that as I go along.
-
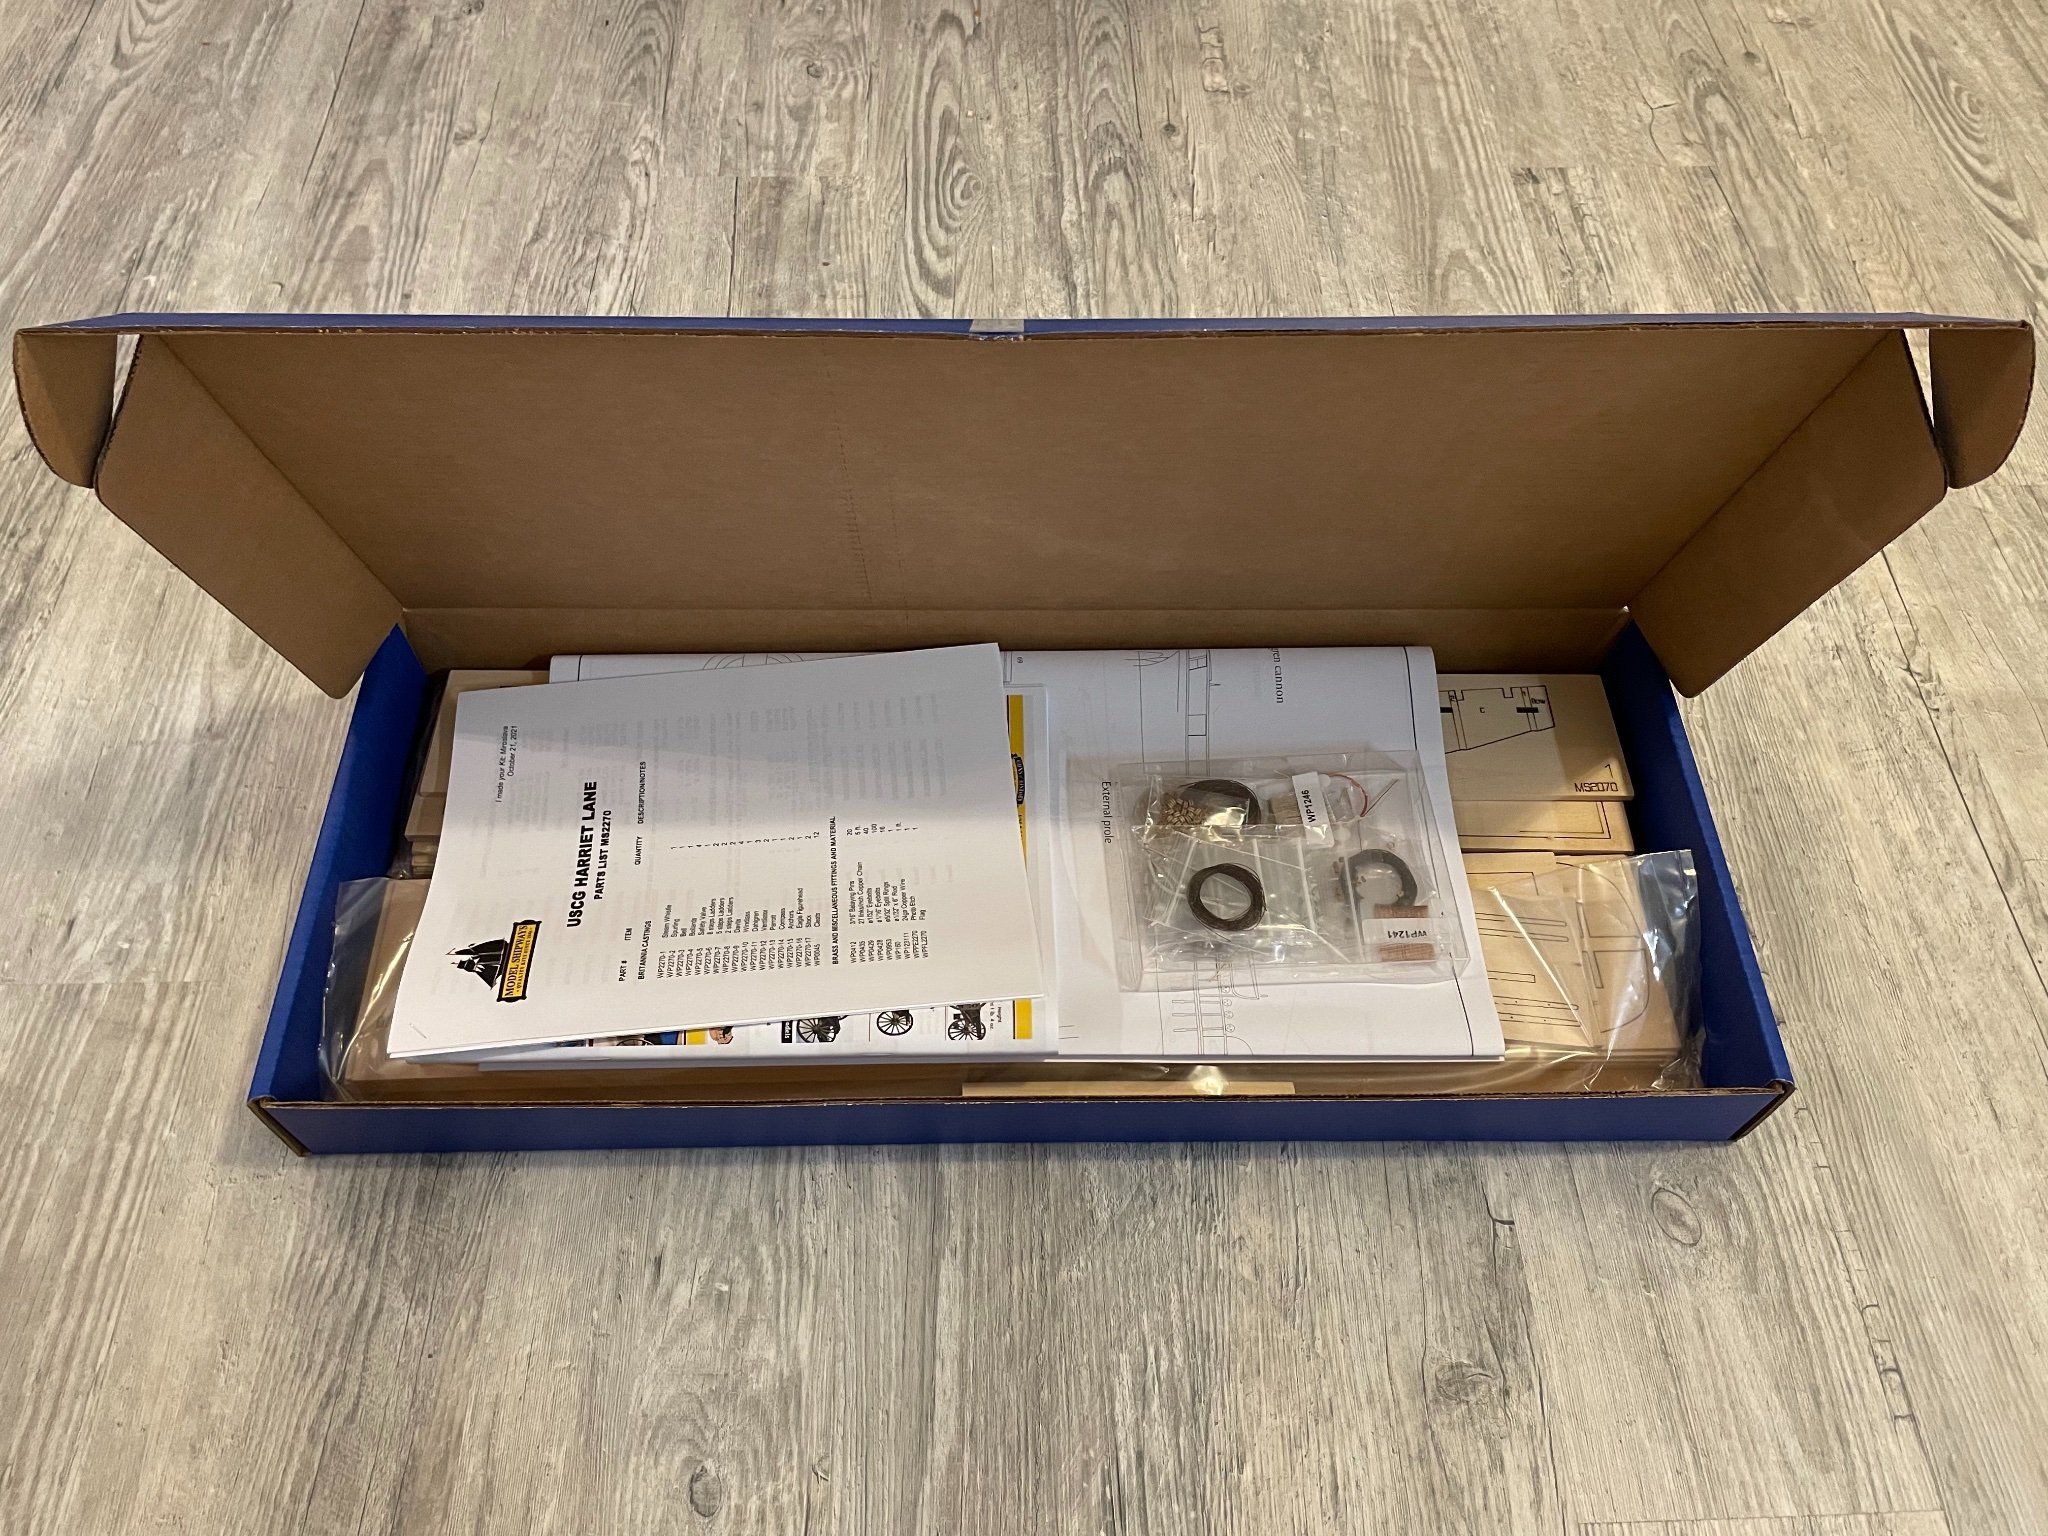
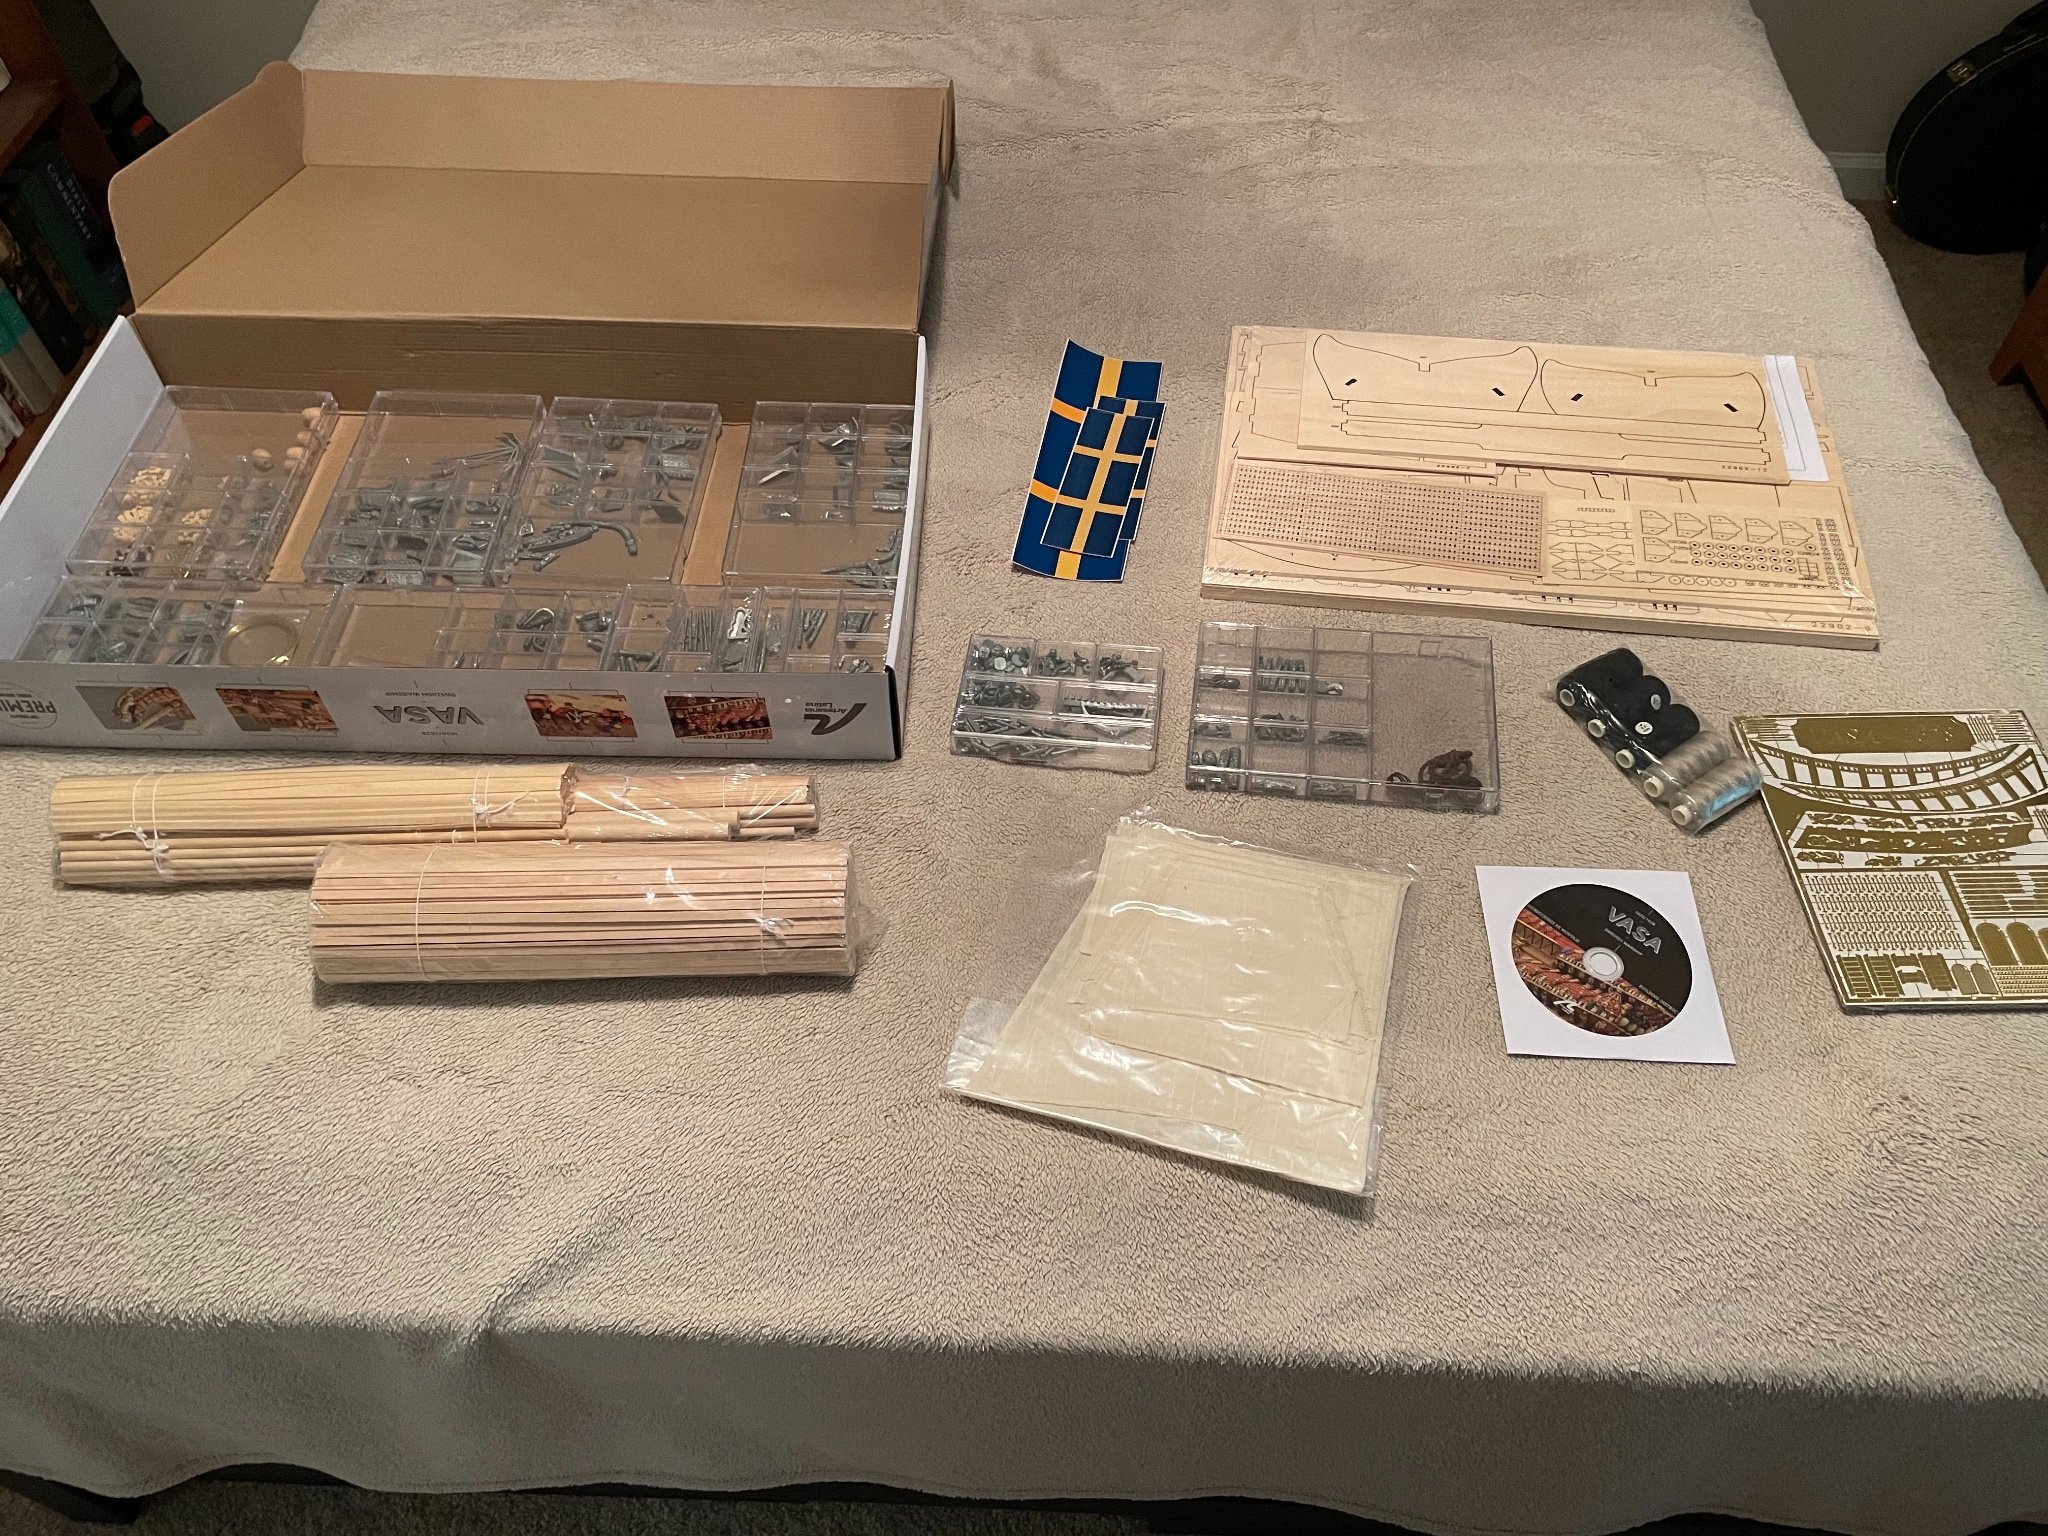
I bought this kit a couple months ago when I had more money than sense. Now I have less money and still no sense, and no room to put this 43” monster anywhere if and when I finish it. I am starting a build log for it, since it will be my next project after the Gunboat Philadelphia. Today I will post a brief review of the kit.
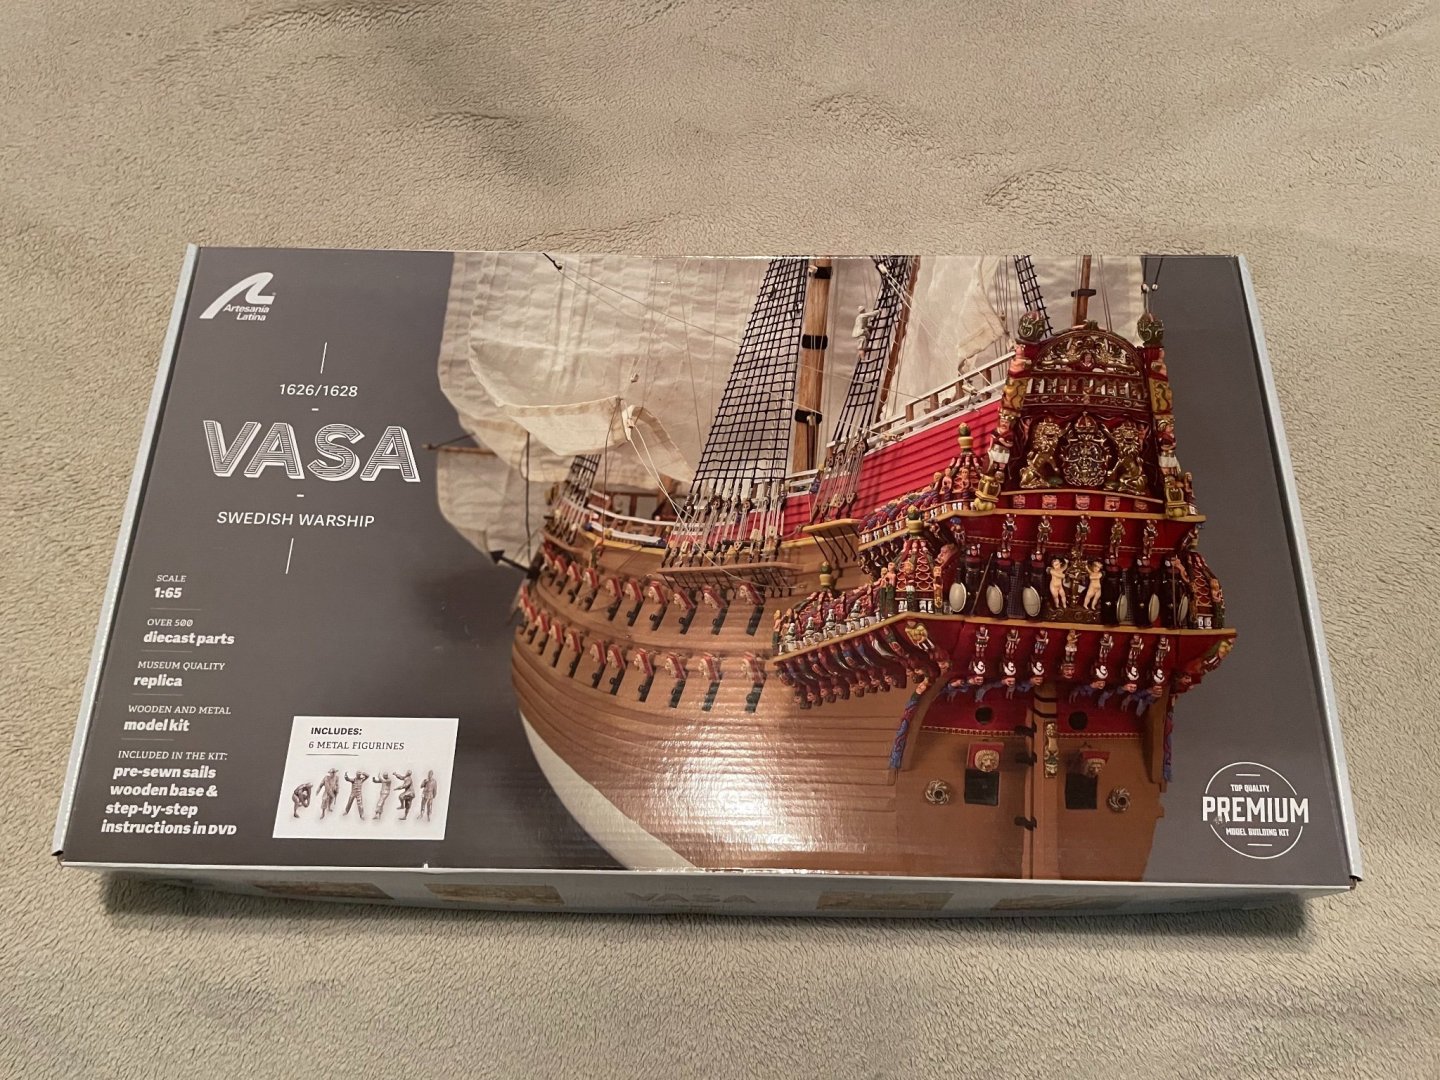
I ordered this 14lb box slightly below MSRP on eBay. Vasa is a fascinating story, and a beautiful subject. This seemed a very intimidating kit at first, but after reviewing the instructions on CD, it doesn’t entail anything more difficult than I’ve already encountered. Rigging should be interesting however…
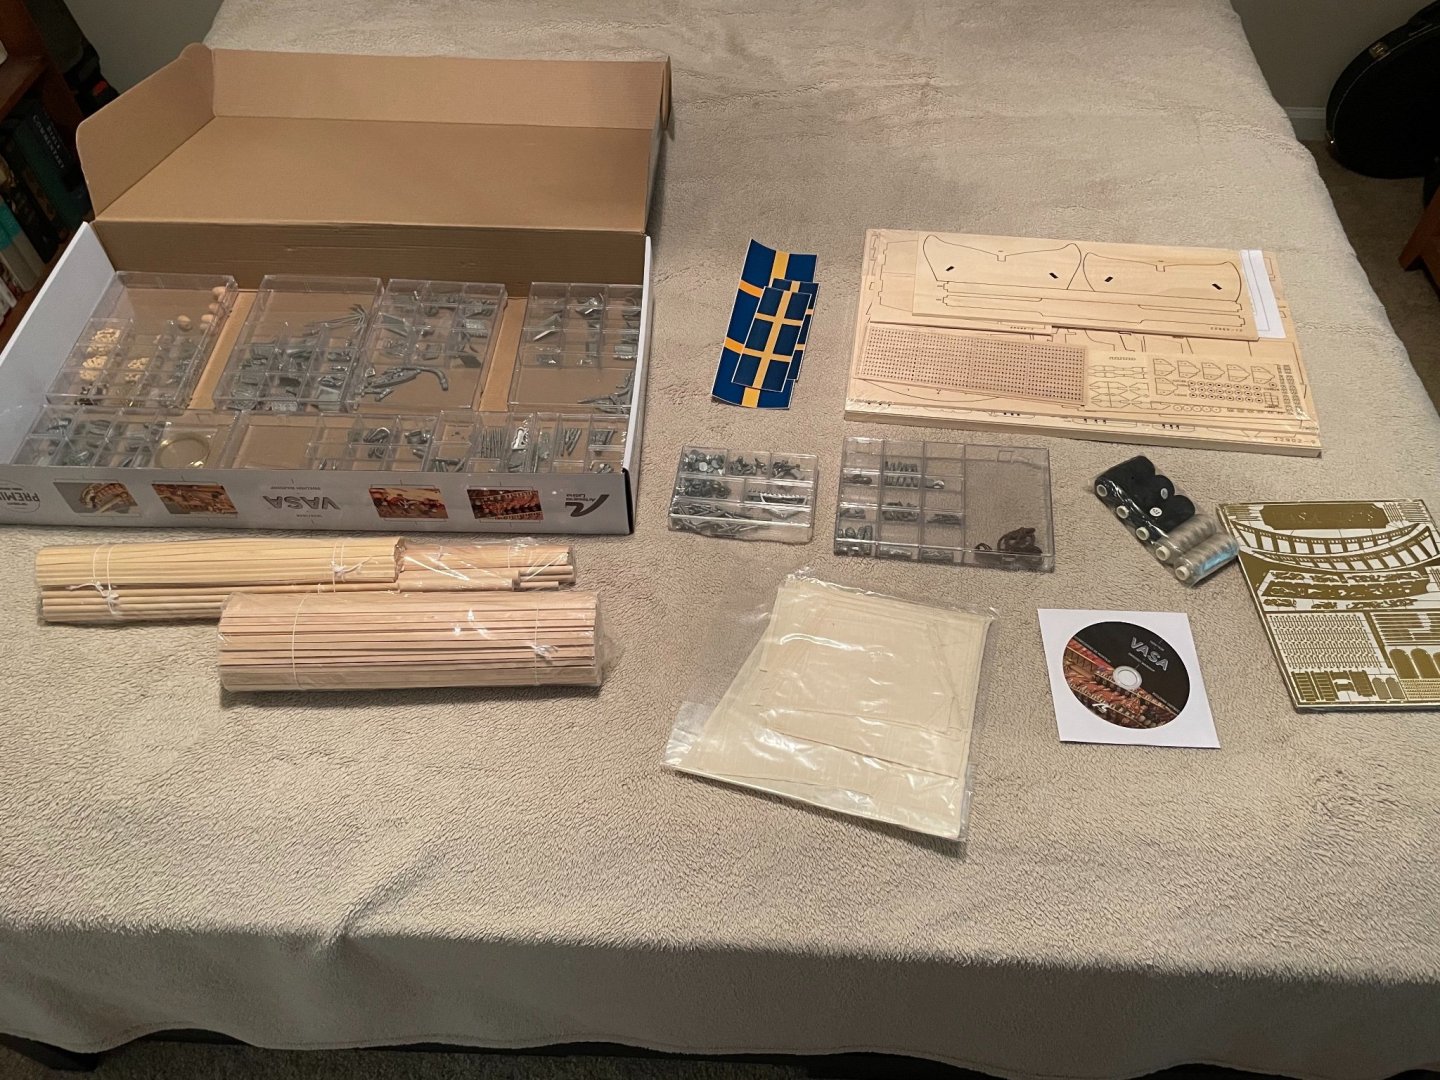
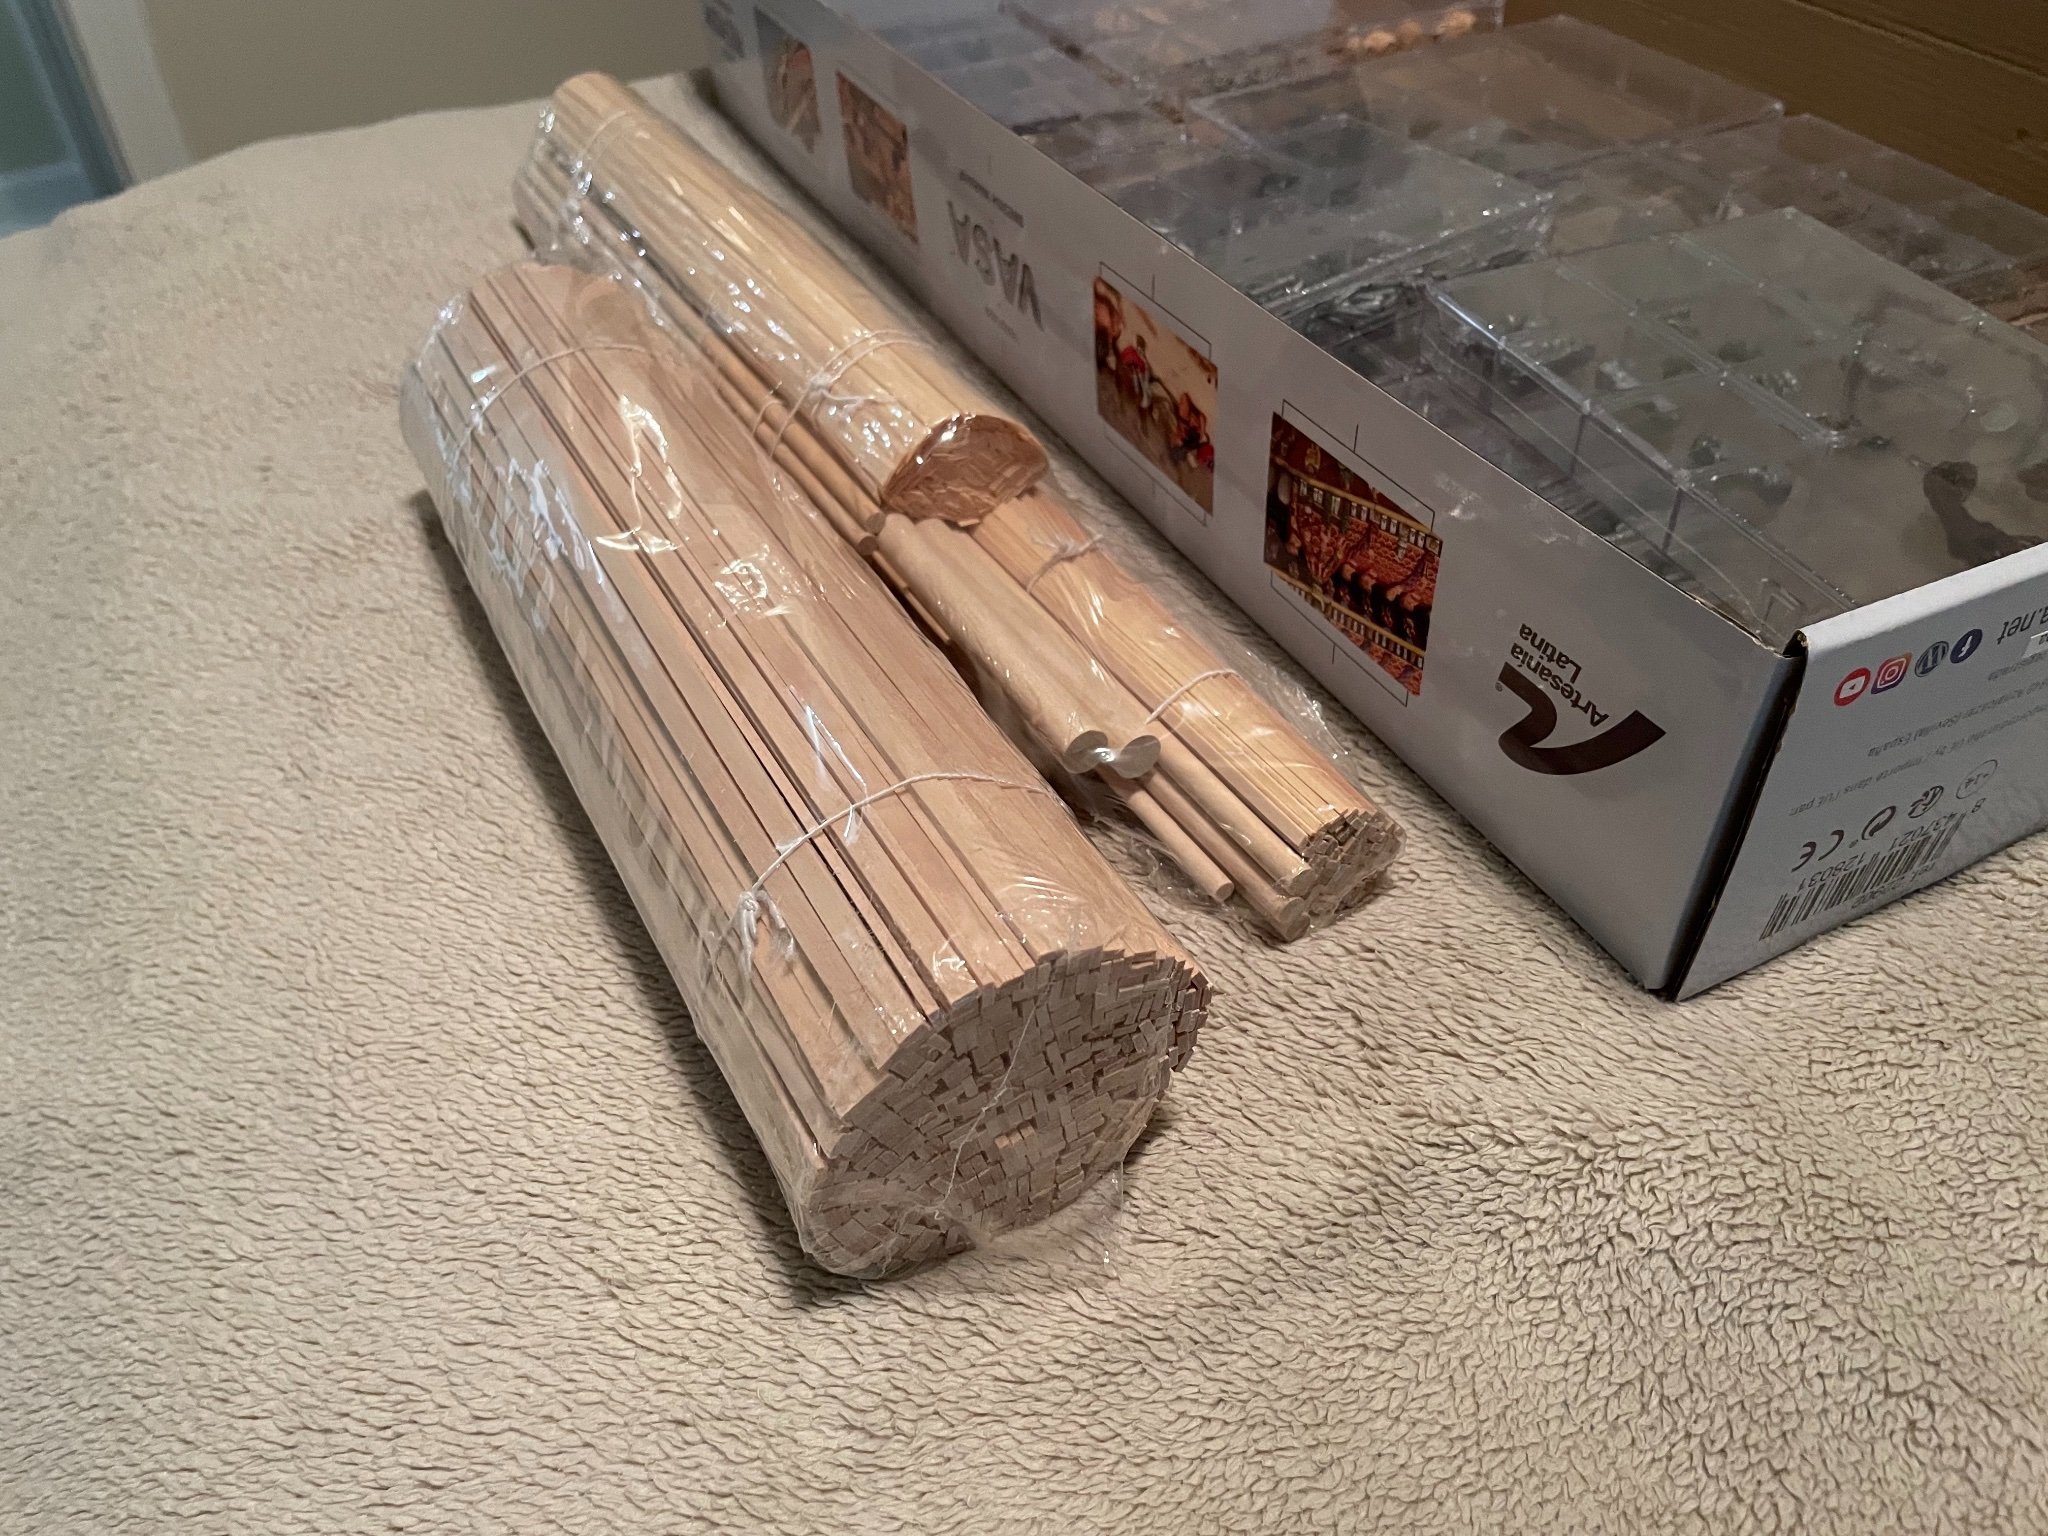
An overview of the box’s contents. Ten plastic boxes of metal fittings. Twelve or thirteen sheets of laser cut pieces. Two or three bundles of wood. Presewn sails. Big sheet of photoetch. Three Swedish flags. One reason I’m starting this project soon is so I can order replacements from the manufacturer if anything is missing.
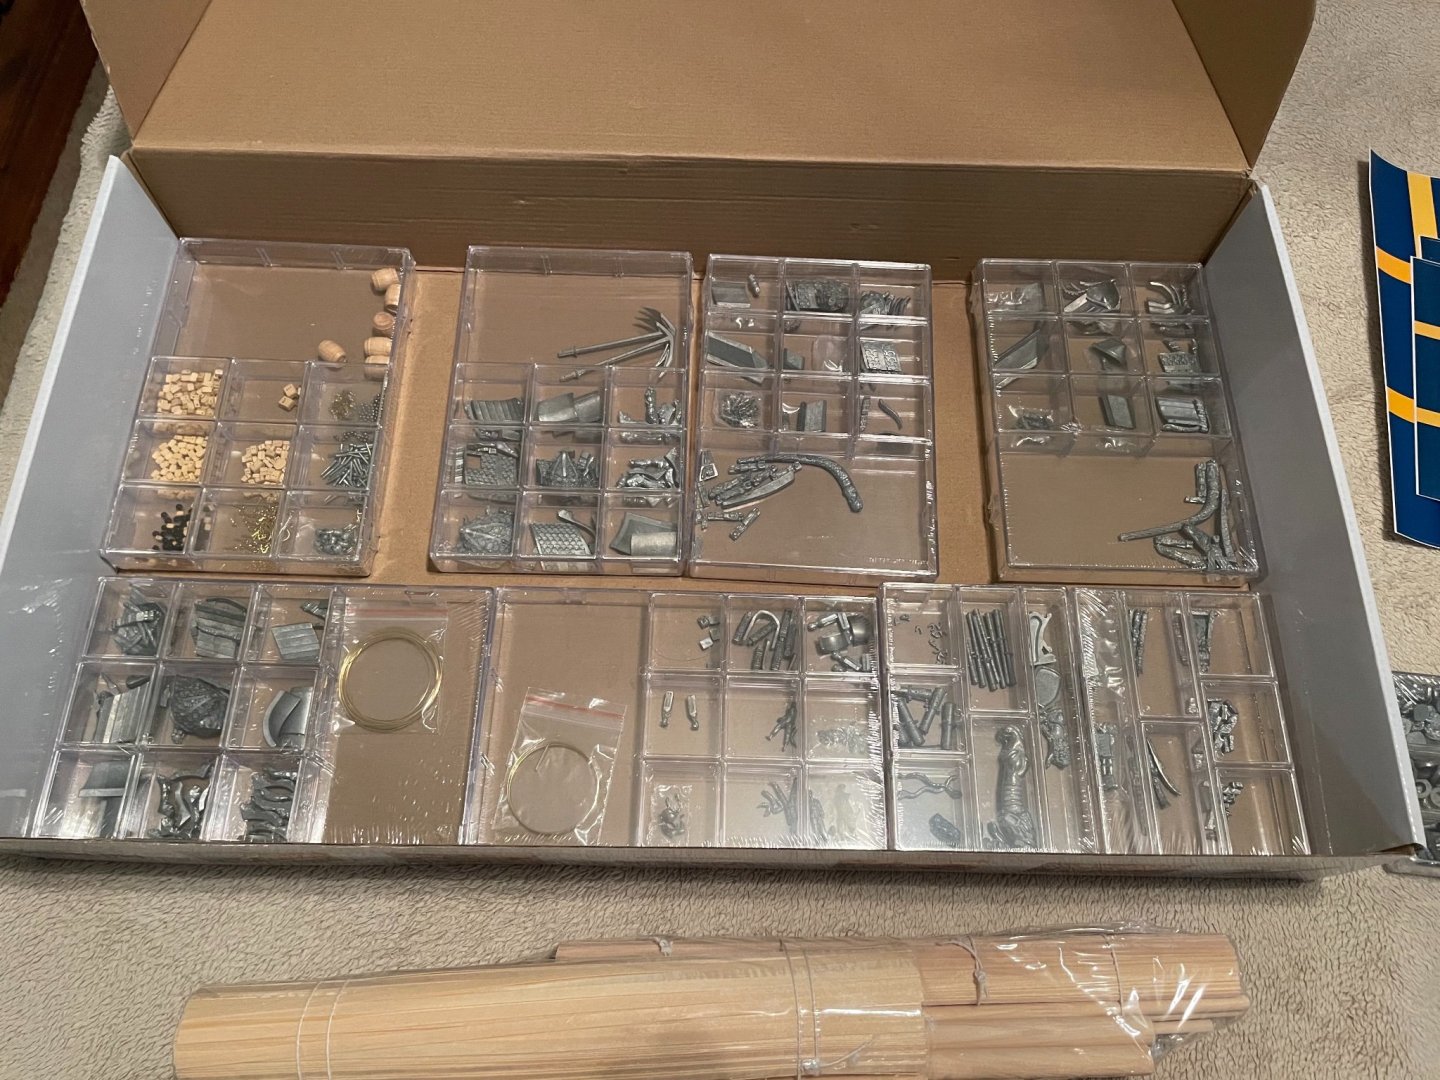
Closer image of plastic boxes, which make up most of the weight. They contain over 500 metal figurines to represent Vasa’s ornate carvings. I suspect painting them all is going to be a big portion of this project.
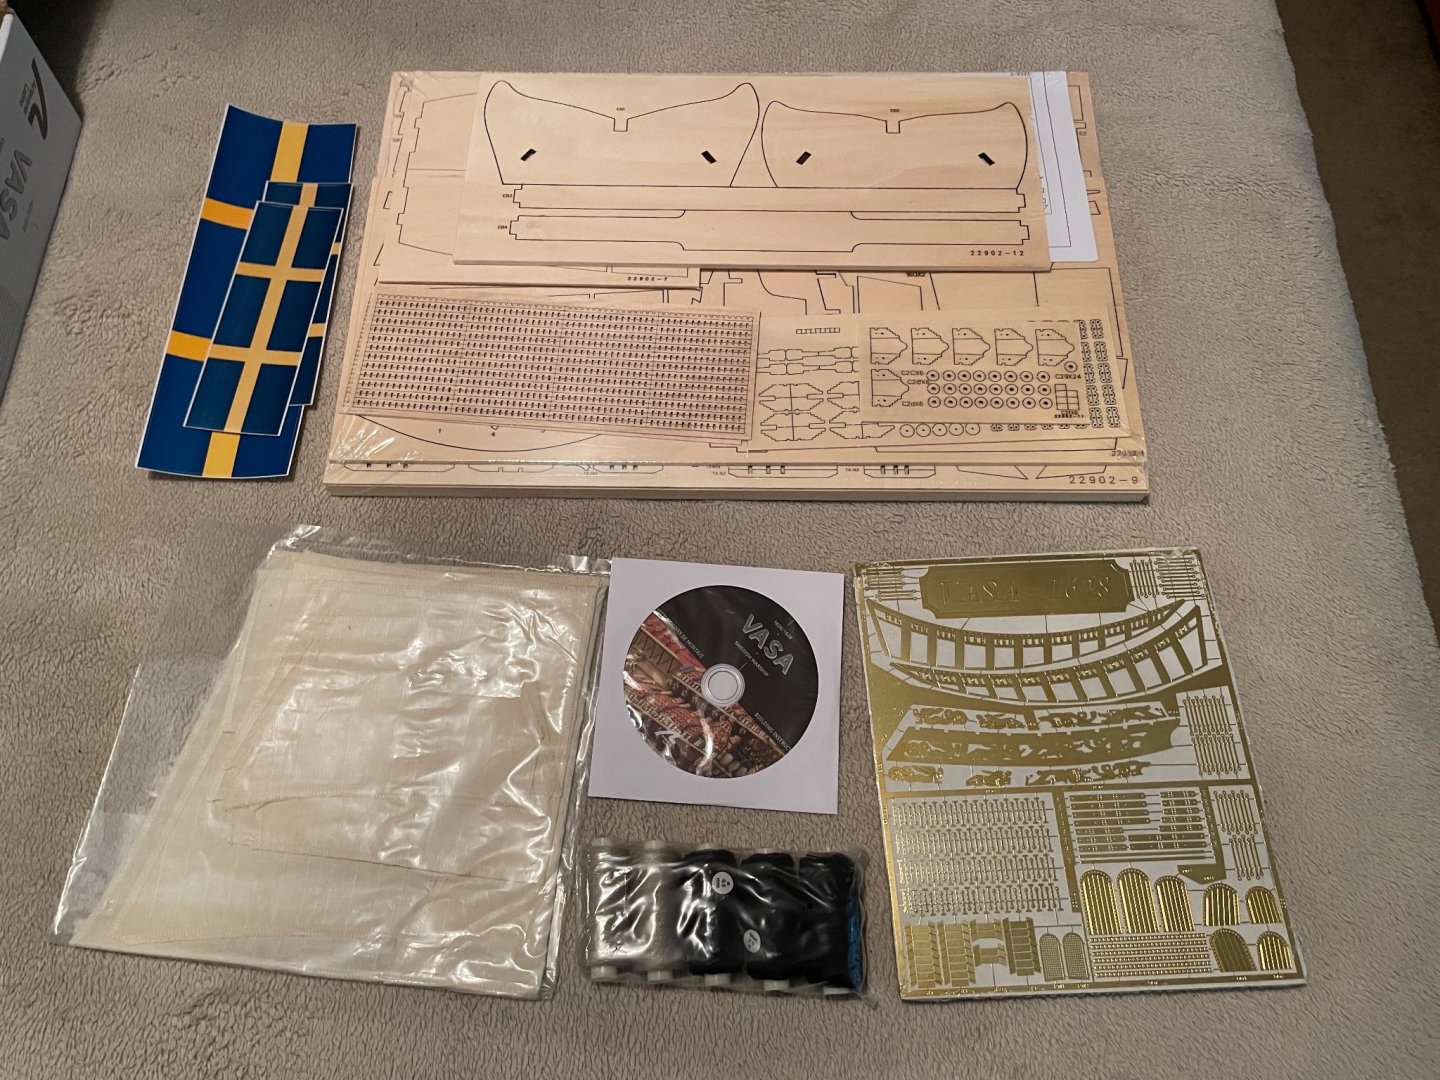
Close up of other items. I don’t like the photoetch ship’s stairs, I would like to make my own out of wood. I don’t mind the instructions on CD. I’m missing some patterns showing where the gunports are supposed to be cut. That’s gonna be a pain but I think I can make do.

Huge bundles of planks and dowels. I sincerely hope this will be enough.

The laser cut wooden pieces laid out. Just about every fitting on the ship is laser cut, including the triangular deadeyes from the 17th century.
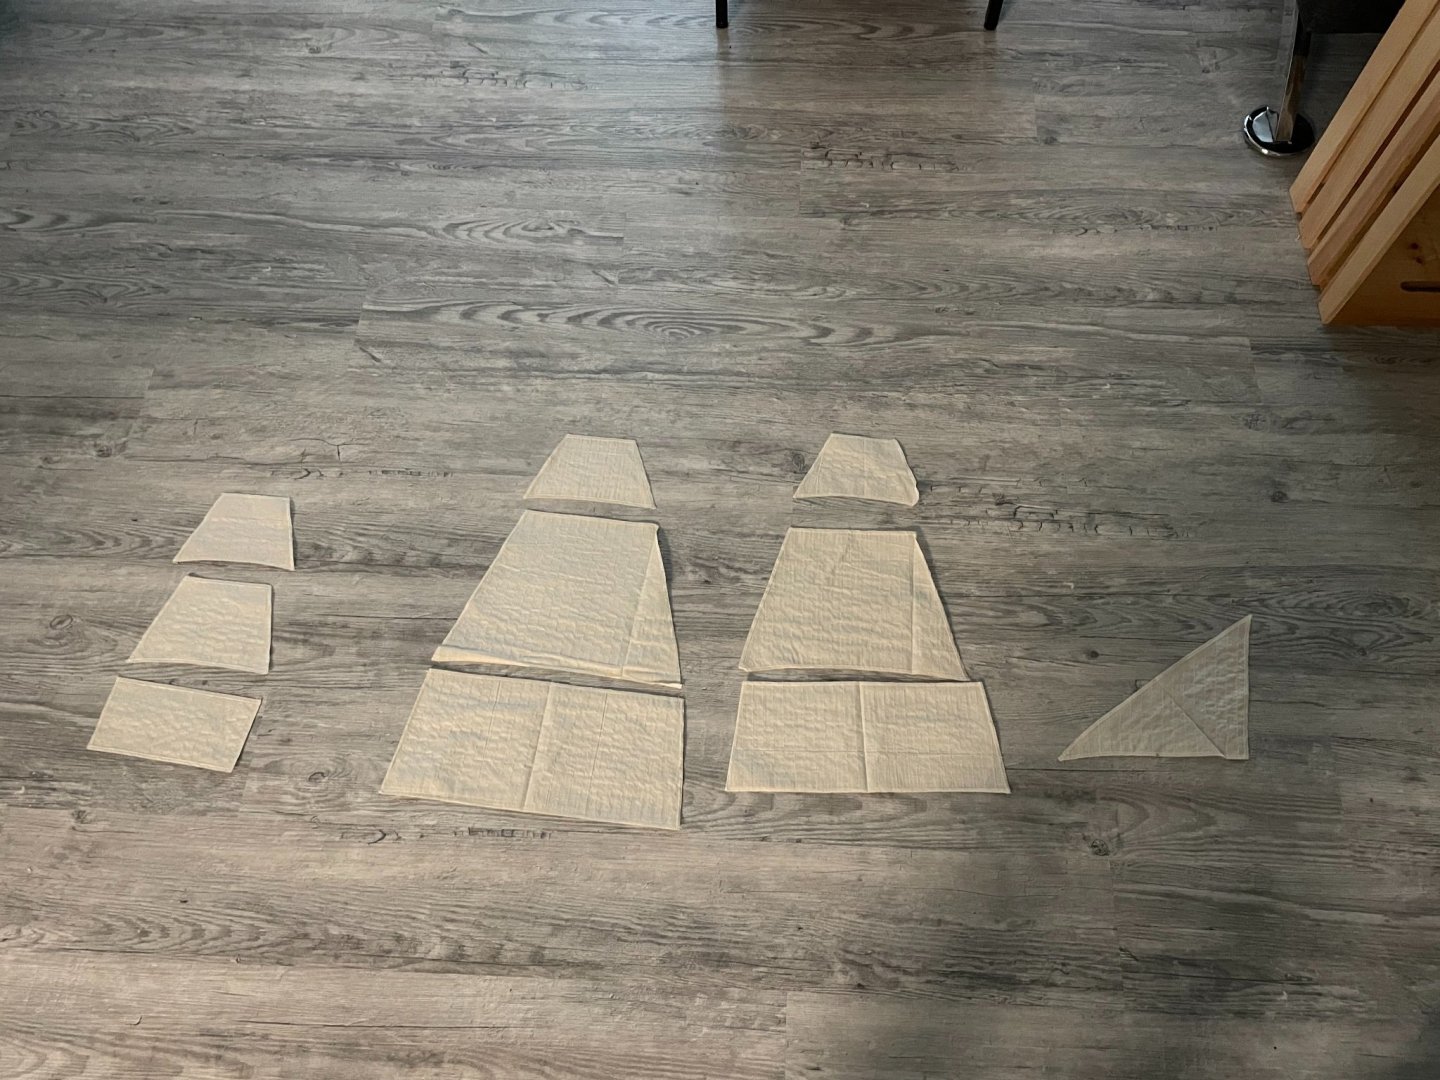
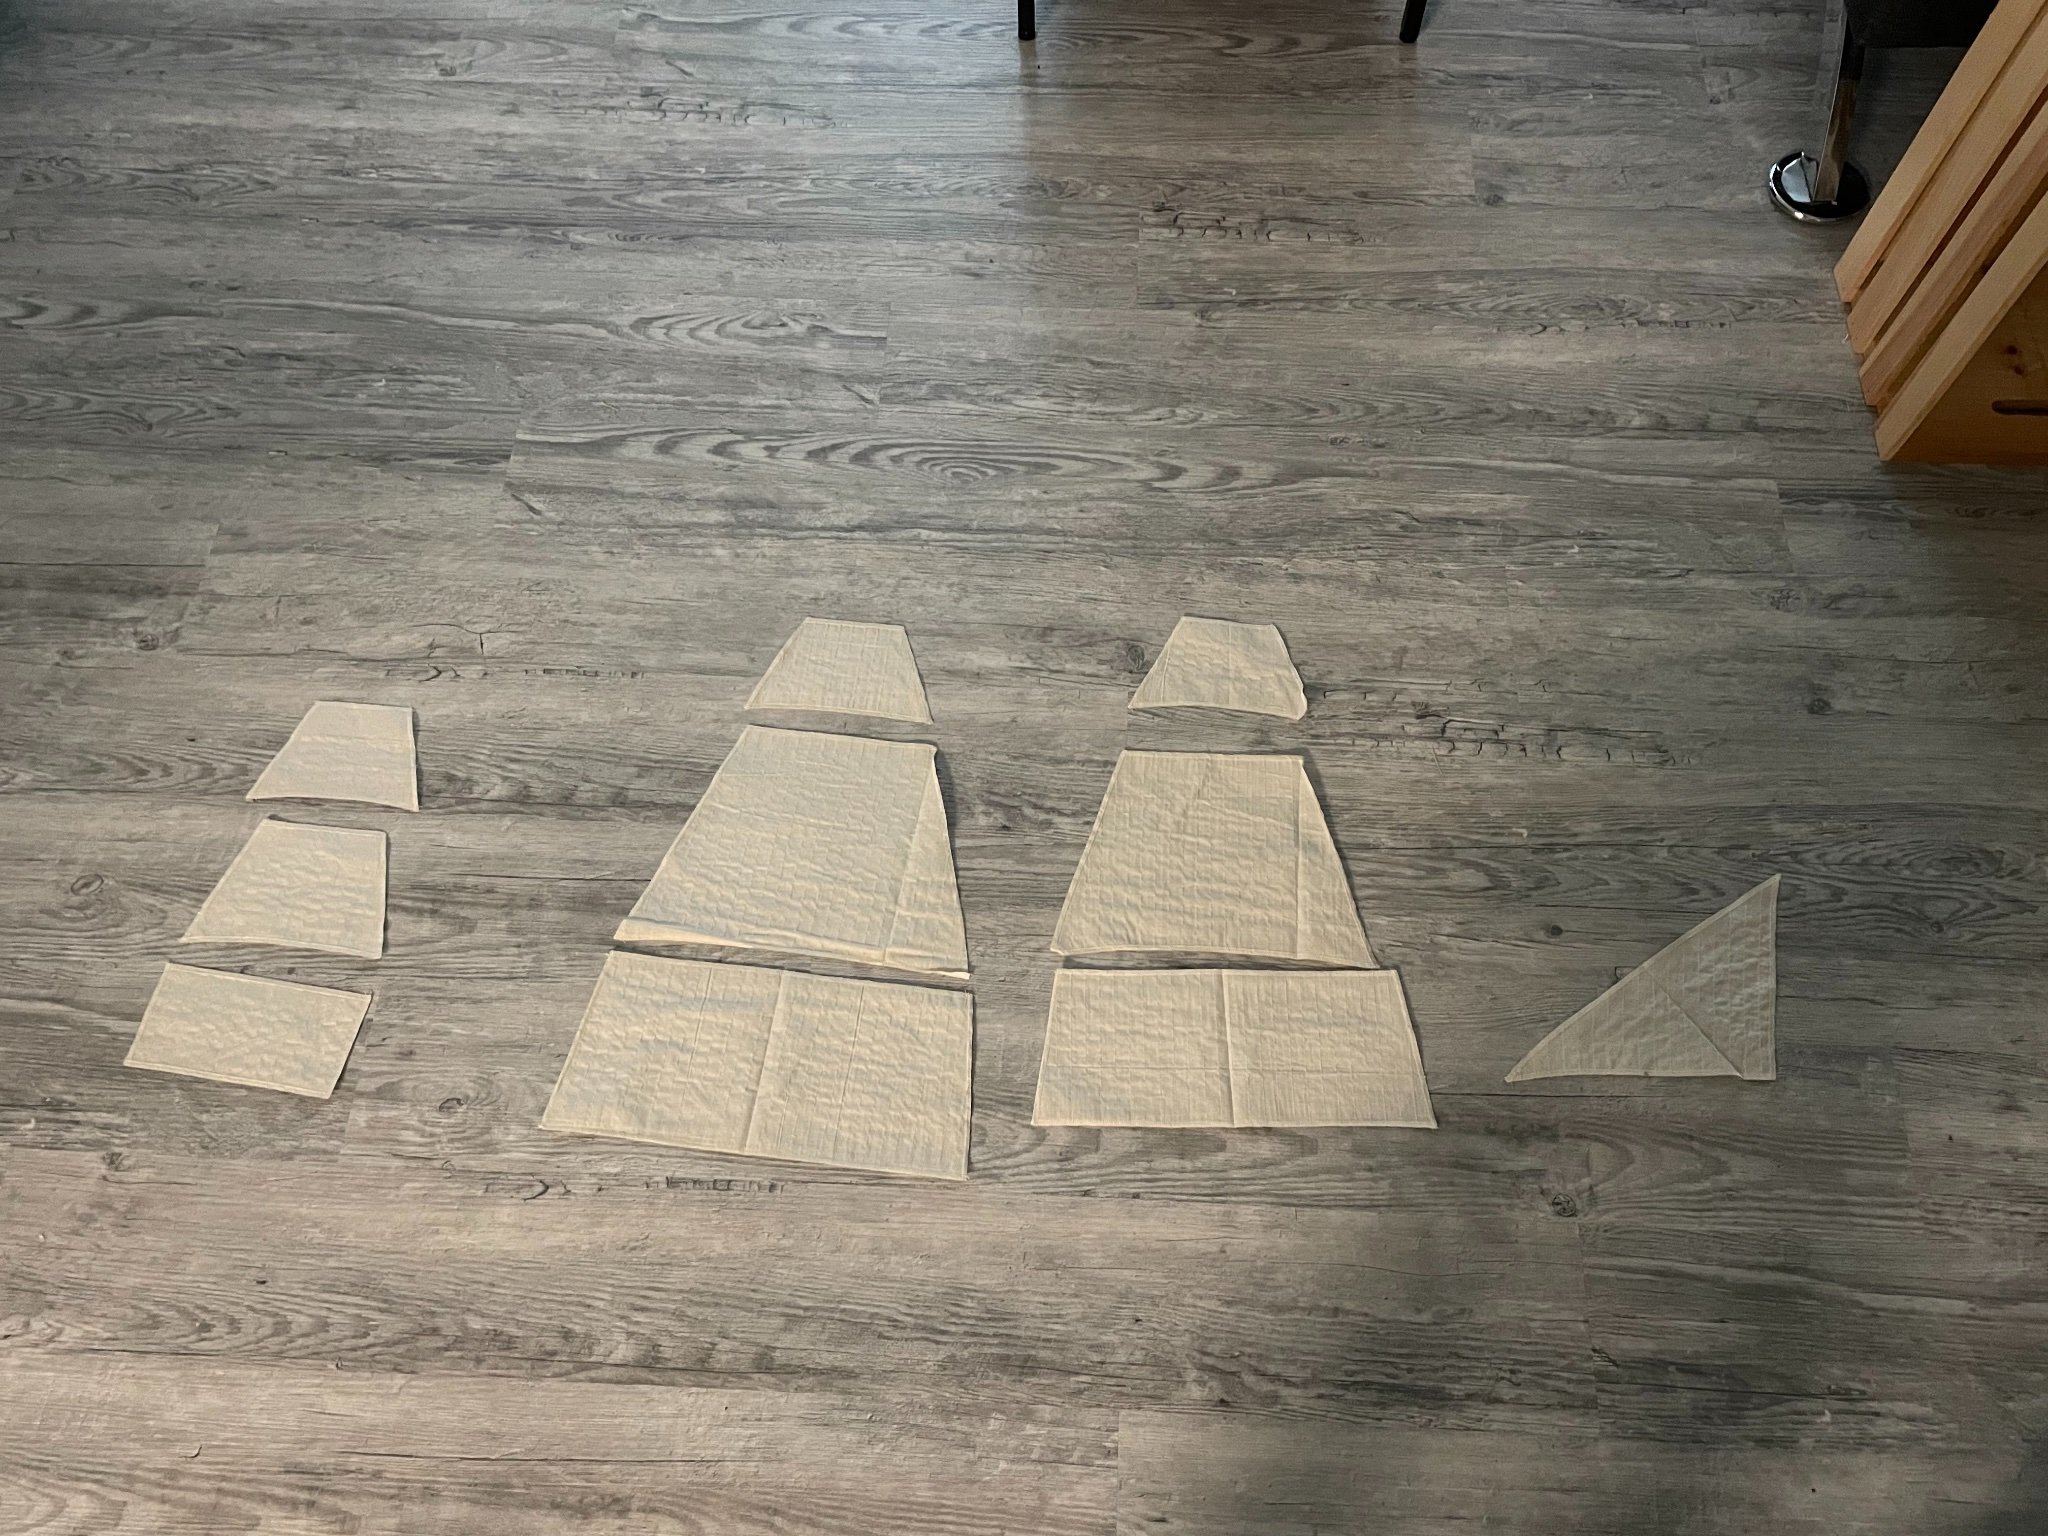
I should have all the sails! One of the topgallant sails goes on the mizzenmast actually… I’m excited to start this kit, and I feel I have enough skills now to do it right.


Vasa by Joseph F. - Artesania Latina - 1:65
in - Kit build logs for subjects built from 1501 - 1750
Posted · Edited by Joseph F.
Clarification
Have not worked on this project much since November, but planking continues at a slow pace. Only twelve rows until I reach the keel!
This is a disheartening sight though, especially since I will have to cut gunports here eventually. But I will make it work, sandpaper and putty will cover a multitude of errors!
I have been eager to make sure that I have all the metal pieces for the stern decorations, so I began gluing the upper gallery on the starboard side. They fit together decently well, and are well detailed. I personally think this is a better way than painting each individual piece and then trying to glue them together, as the instructions would have you. (Note: I have not glued the gallery to the model yet)
I still have a long way to go on this project, but despite hiccups and mistakes I feel confident it will look alright in the end.