

S.Coleman
-
Posts
1,145 -
Joined
-
Last visited
Content Type
Profiles
Forums
Gallery
Events
Posts posted by S.Coleman
-
-
-
I always start ratlines with the mizzen mast first. And work my way towards the bow. Anybody eles do this or is it just me

More to come soon.
-
She's starting to look dangerous now! Well done on a top job.
- mtaylor, CaptainSteve and Hennie
-
 3
3
-
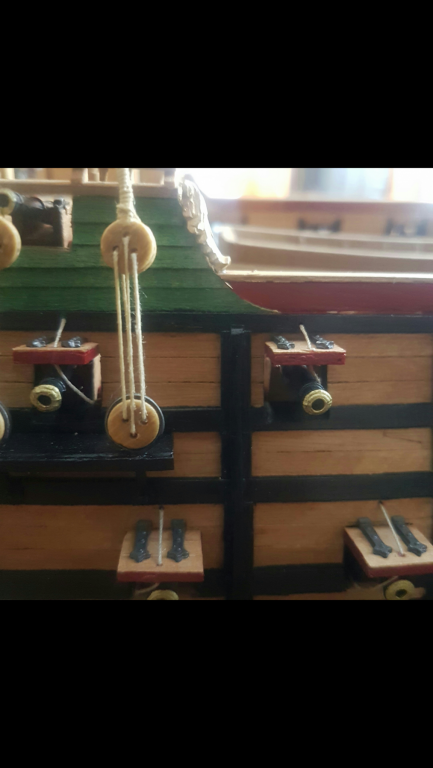
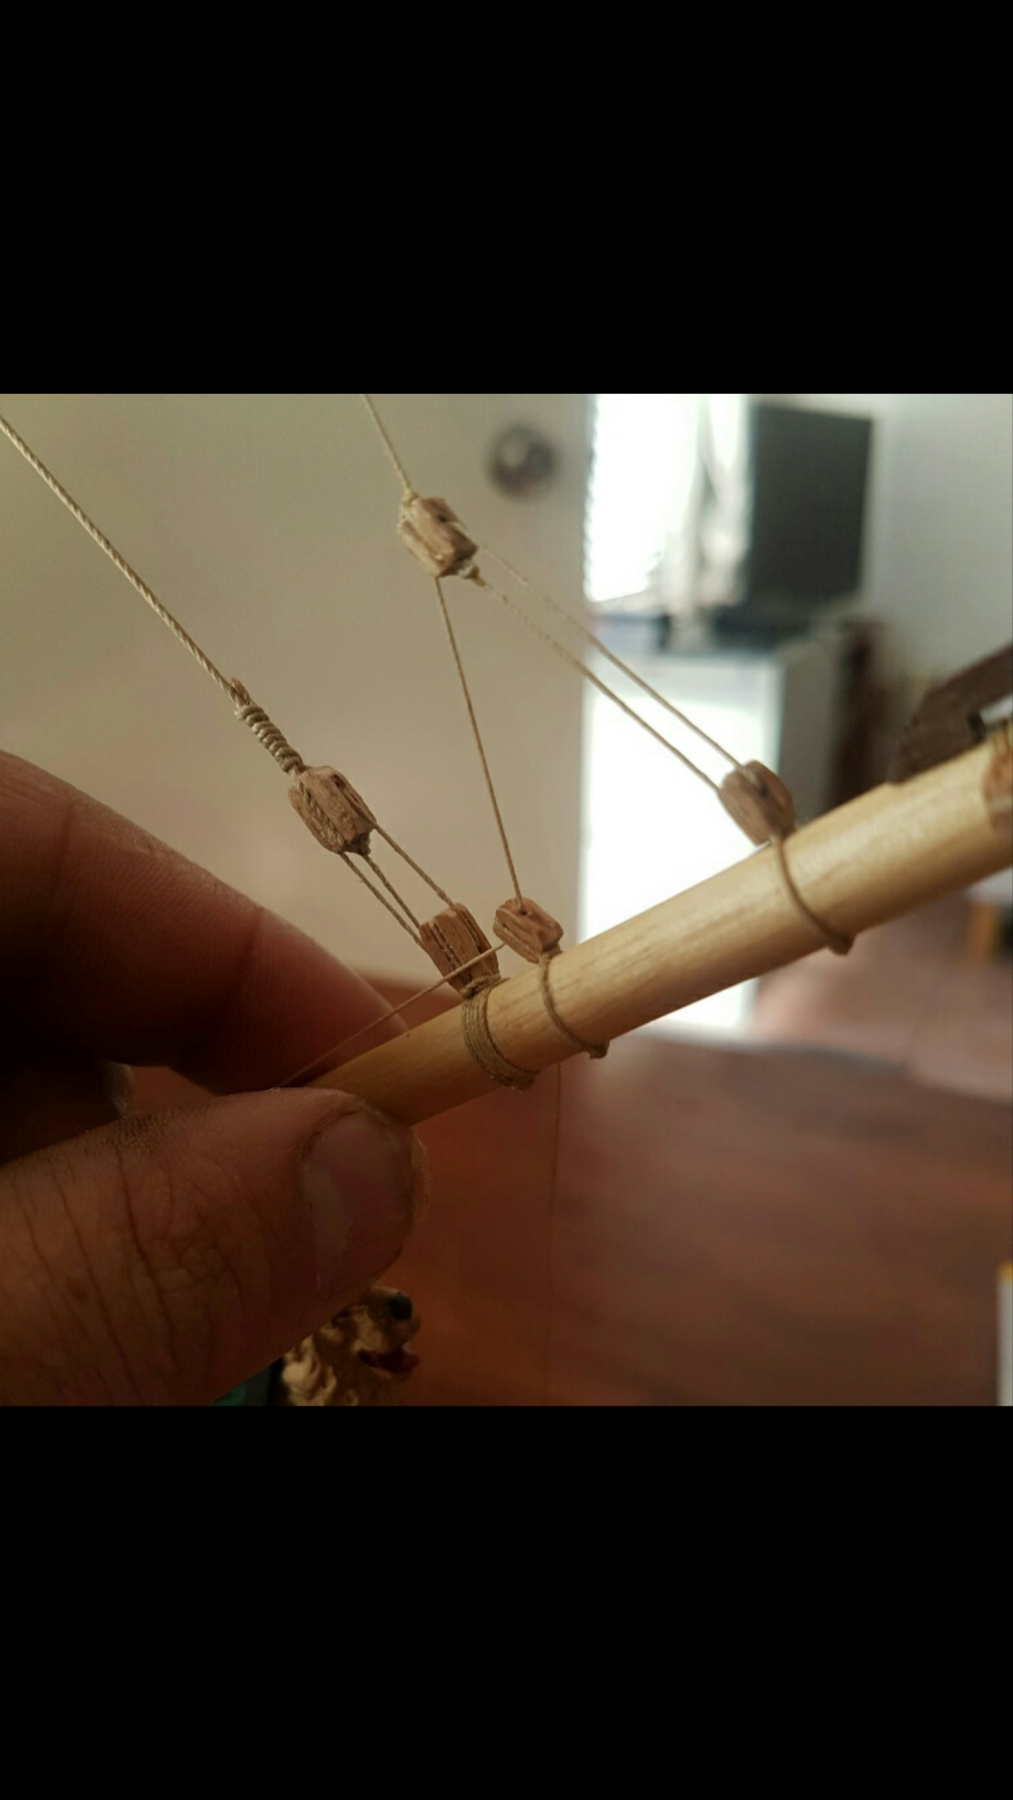
Close up of Deadeye assembly.
- coxswain, marktiedens, Sjors and 2 others
-
5
-
Cheers guys. I have back logged up until about now. So the build will progress slower now. Cheers for all the likes and comments.
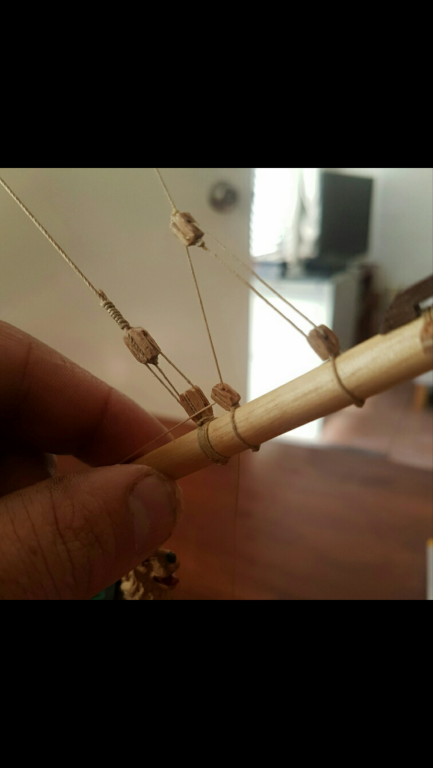
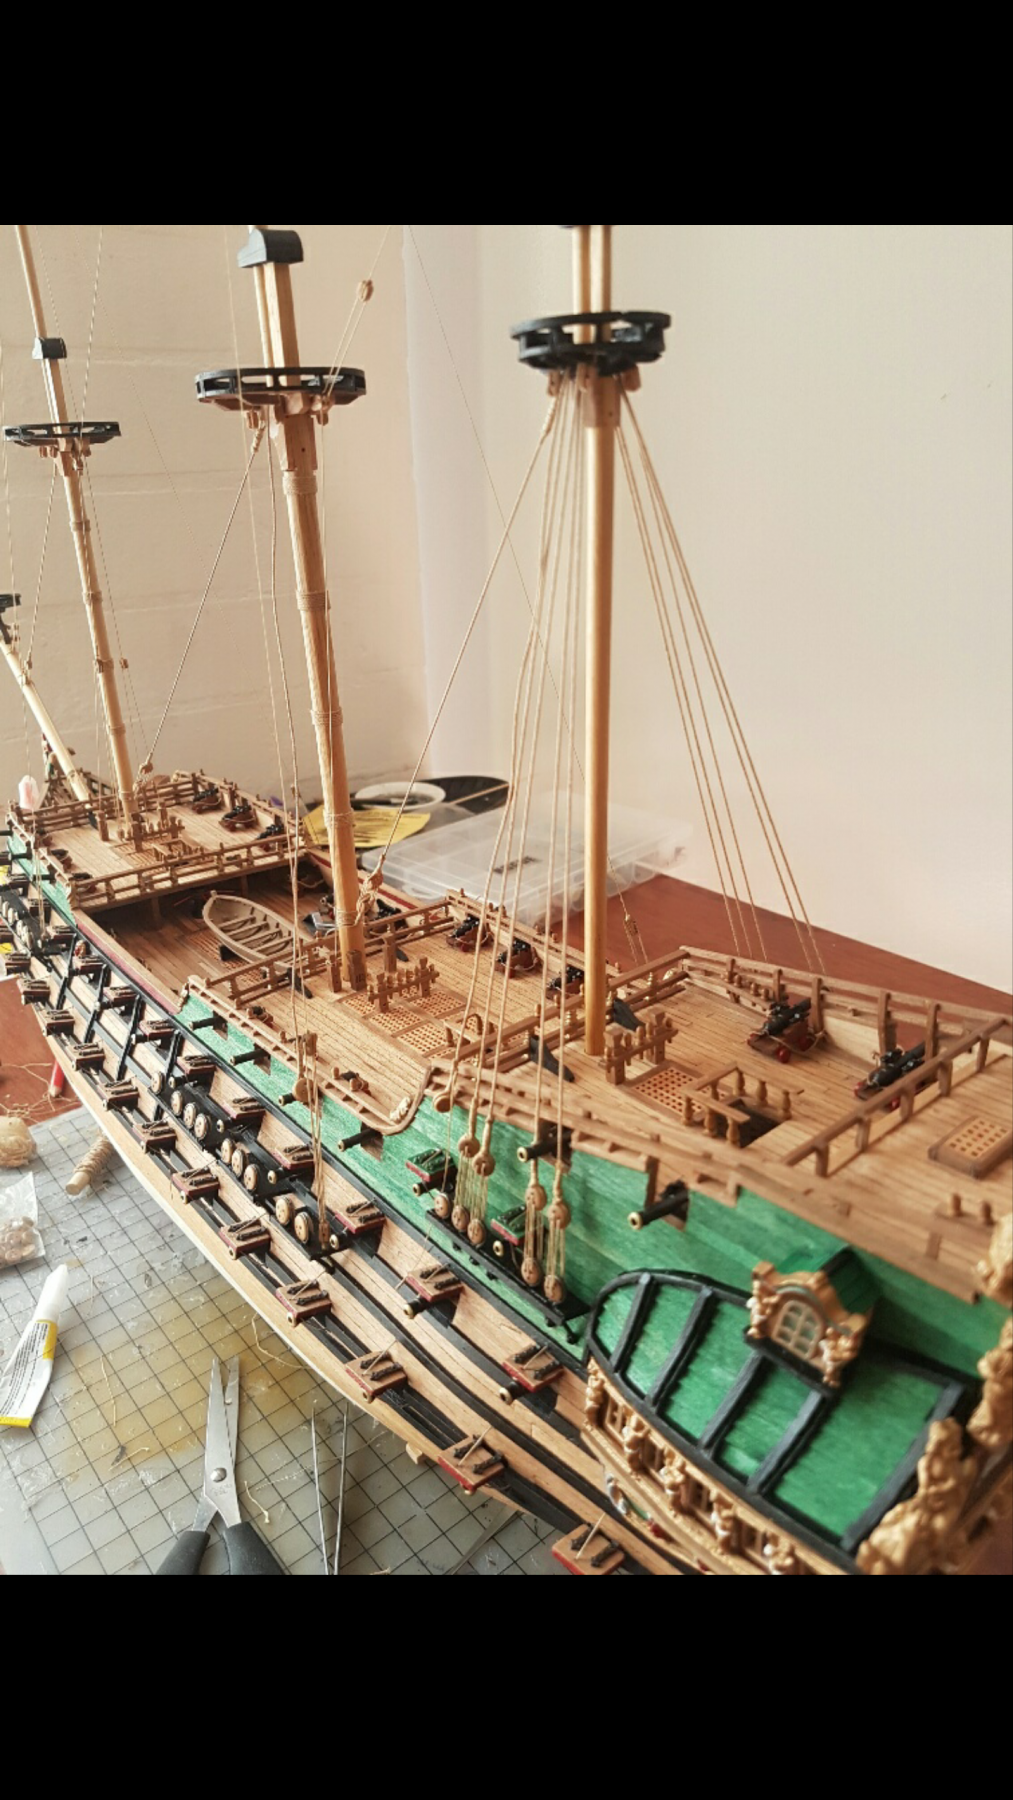
And it's off to a start in the Rigging. Starting of with all the ratlines, backstays and main mast supports.
I use CA to harden the ends of the threads to make it easier to pass through blocks Deadeyes etc.
All the knots on all are held by 50:50 PVA glue.

- CaptainSteve, coxswain, Sjors and 3 others
-
6
-
Yes not much between them scale wise. Still fair bit of work to go yet.
-
-
-
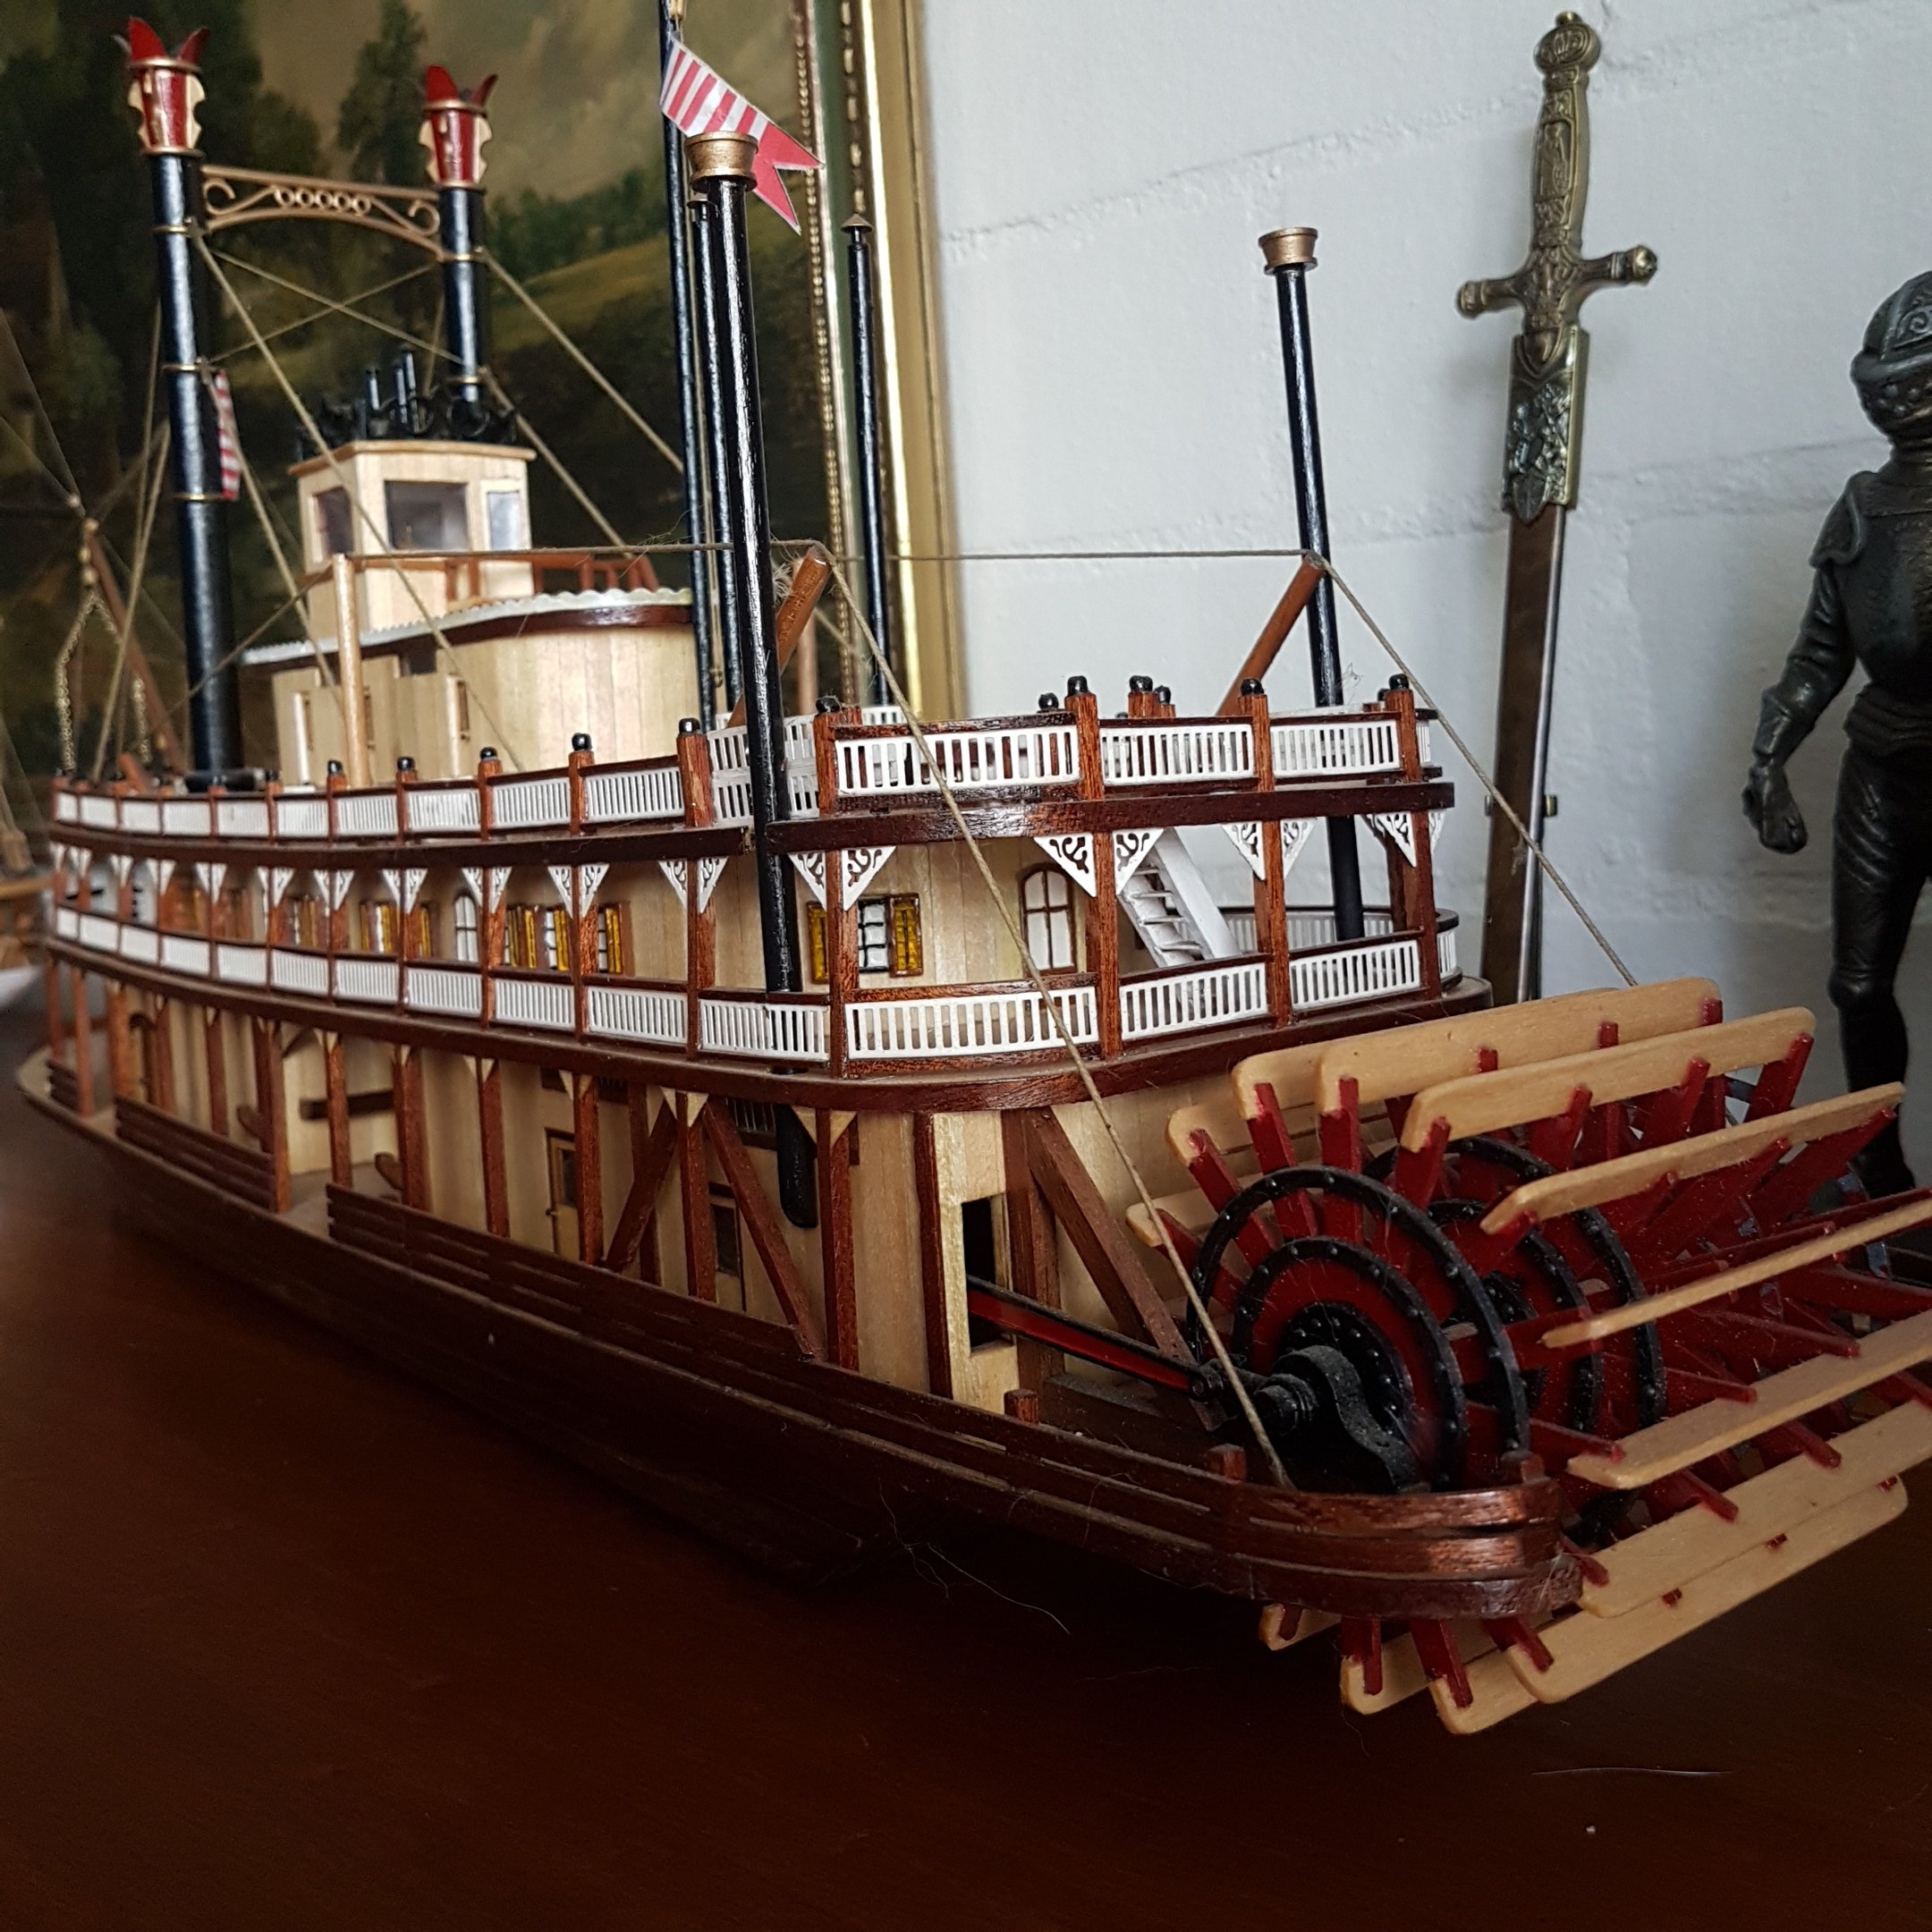
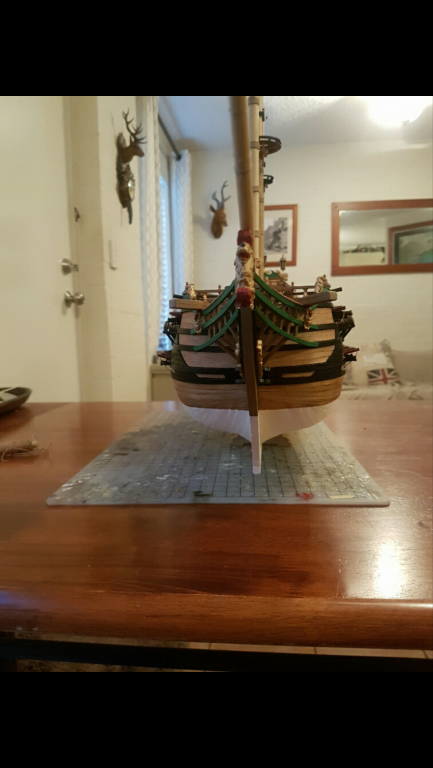
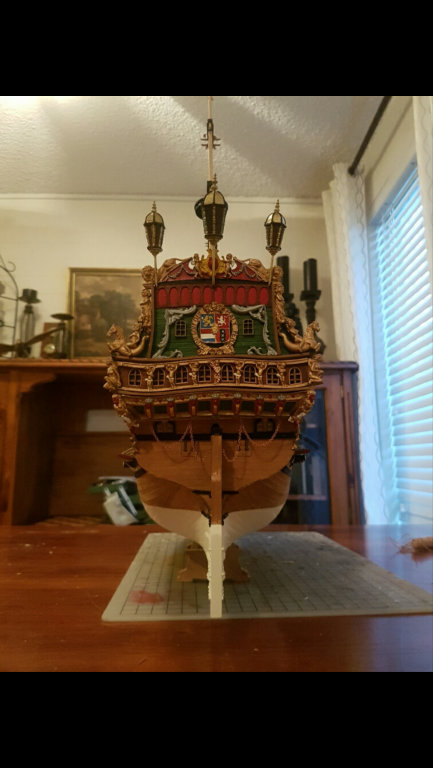
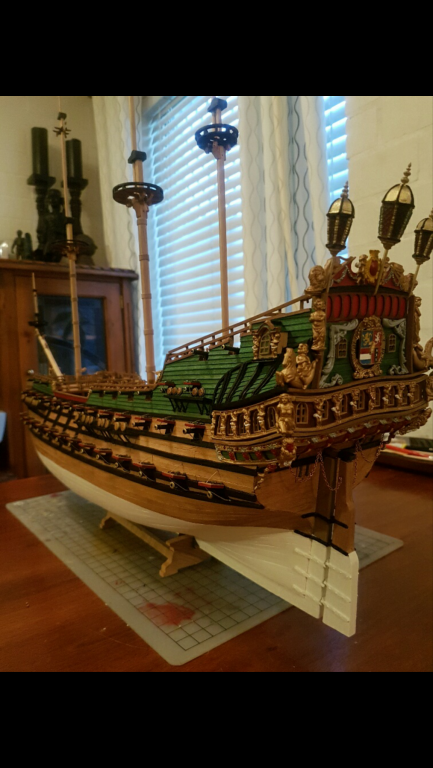
A few shots of Bow, Stern and overall shot. I think its looking good.

- granta, marktiedens, CaptainSteve and 3 others
-
6
-
Congratulations on the first strakes placed. She looking fine!
- CaptainSteve, Tallshiptragic, Hennie and 1 other
-
4
-
-
Used to have a hot works permit to drive an LV at Pluto LNG plant as it was classified as an ignition source.
Are you gearing up and getting ready for the gun ports cutting? After the Wales have been finalized of course.
Sorry I'm quite impatient when a good build is underway.
-
I shall leave her the way she is then. Cheers for your input guys.
-
Absolutely beautiful photo Cheers. I have a massive framed picture of the Endevour sailing. She is a beautiful ship.
-
Your build looks fantastic. Great work on the masts. I do like your nest rigging. Good work.
-
Cheers Grant. Thank you for your comment.
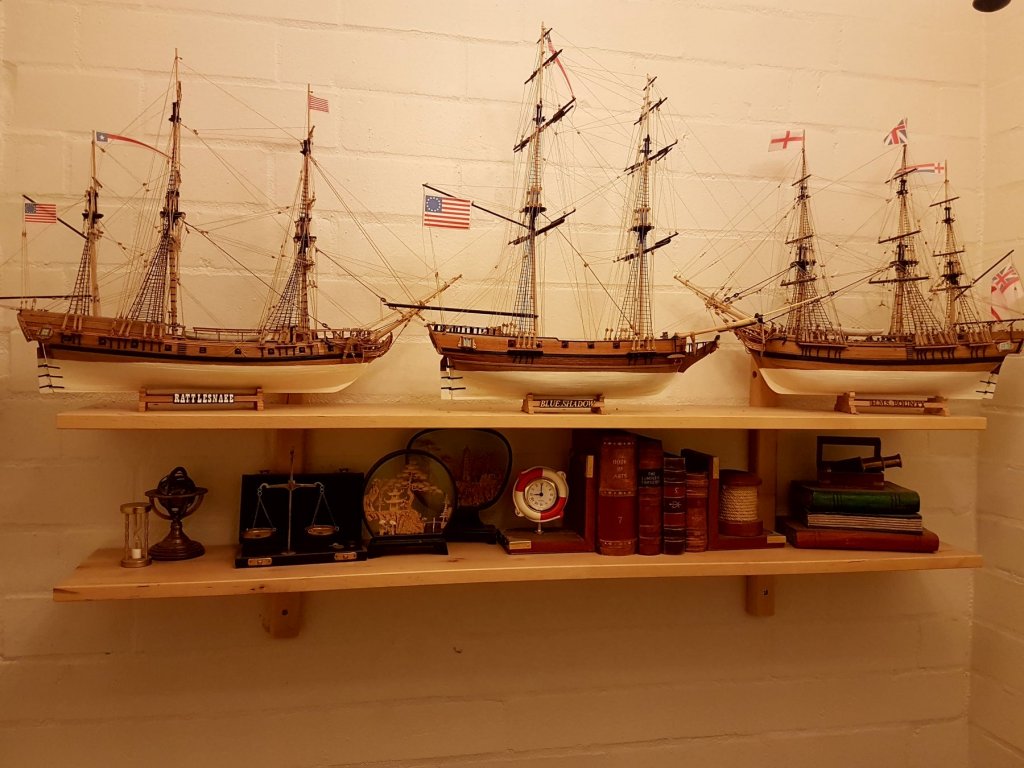
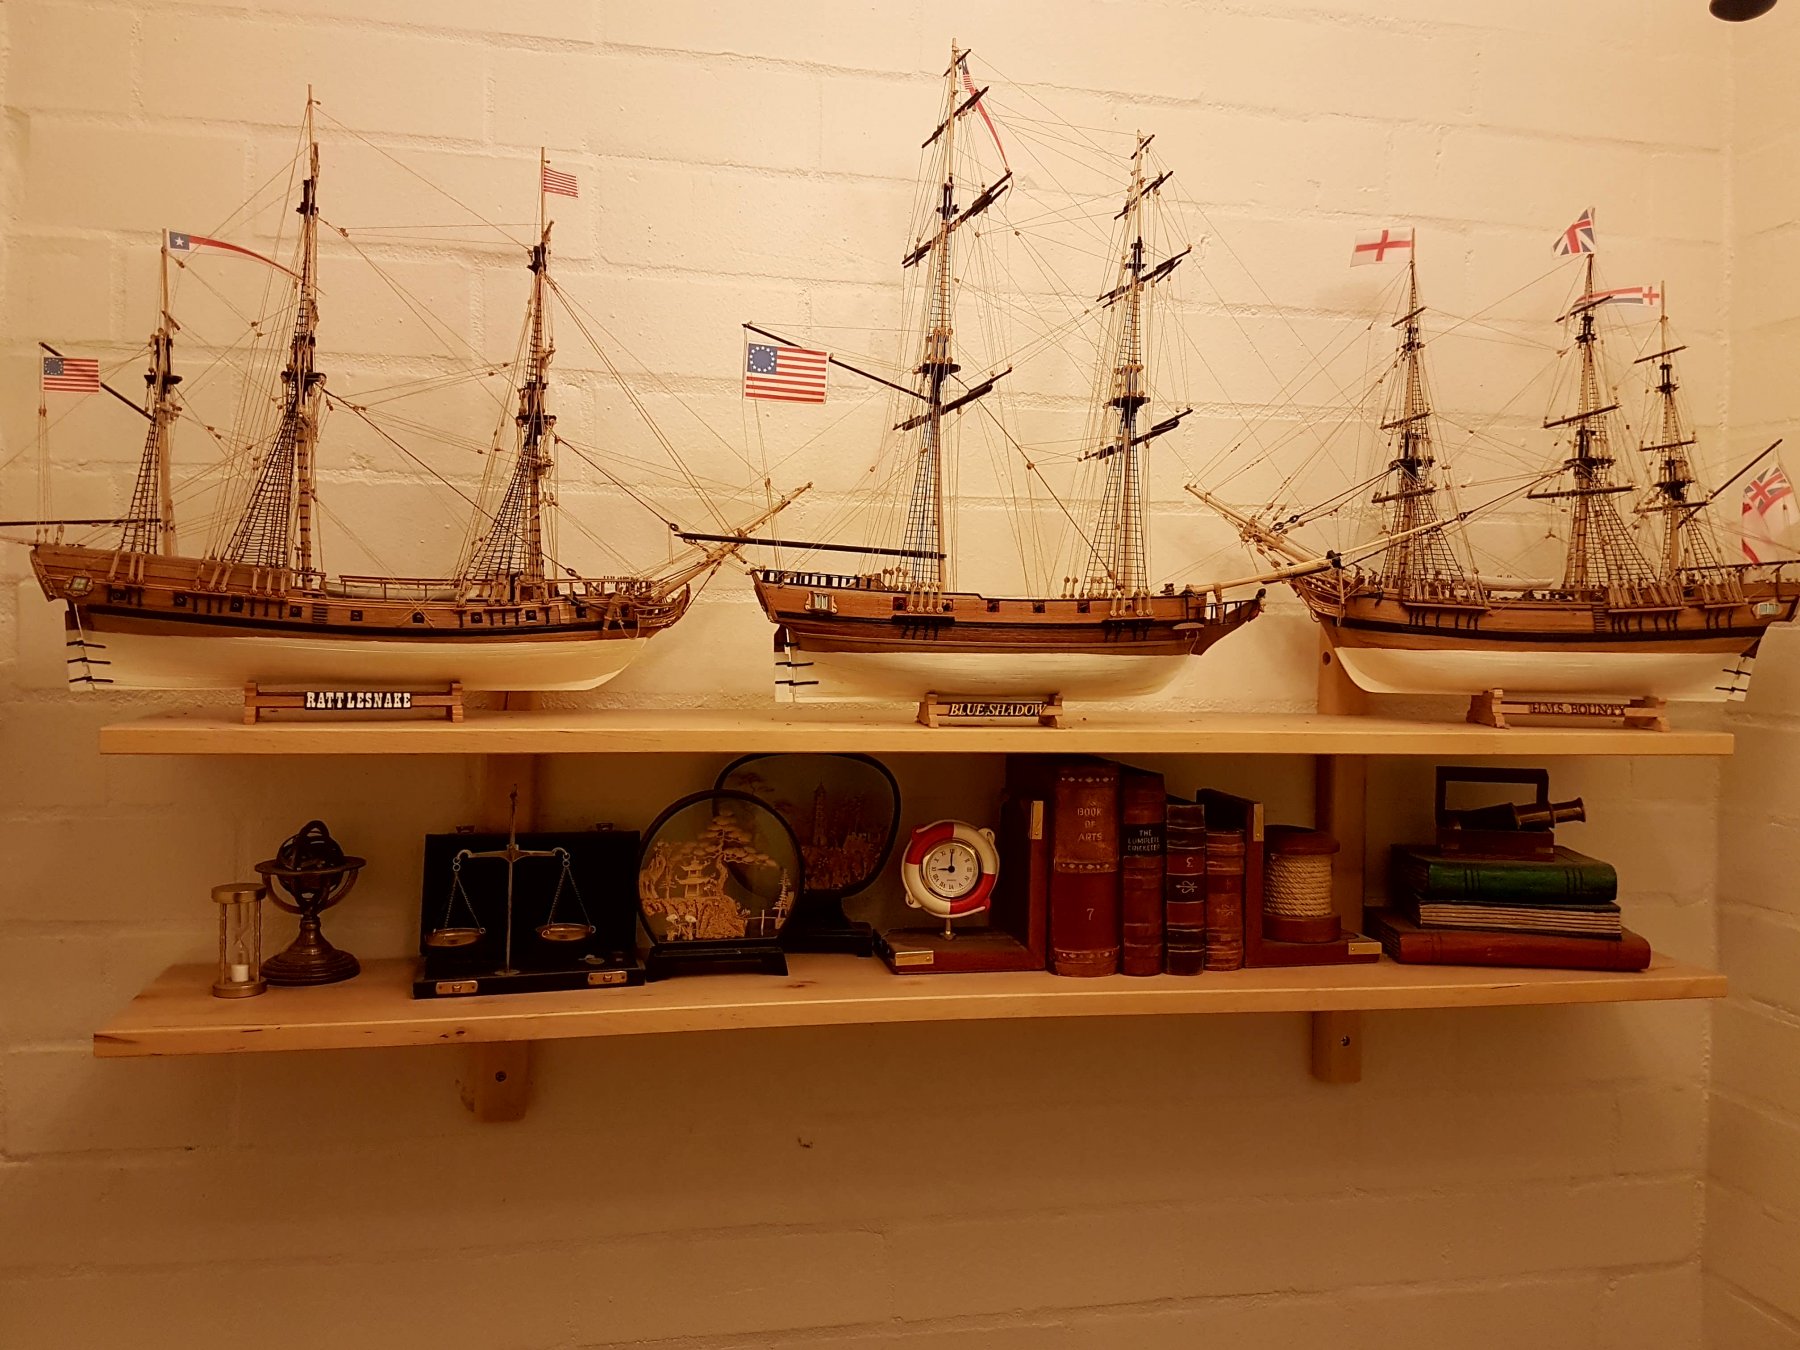
That's what i was thinking. On my previous builds I have simply painted them black like here on my mamoli Rattlesnake, Blue Shadow and HMS Bounty.
I like the look of them black but I want to change my ways to be more realistic of that period. Thanks.
- granta, coxswain, GrantGoodale and 3 others
-
6
-
Im unsure of the rudder hinges. I have the two above the water line painted black. Should I paint the hinges all black? What are your thoughts?
-
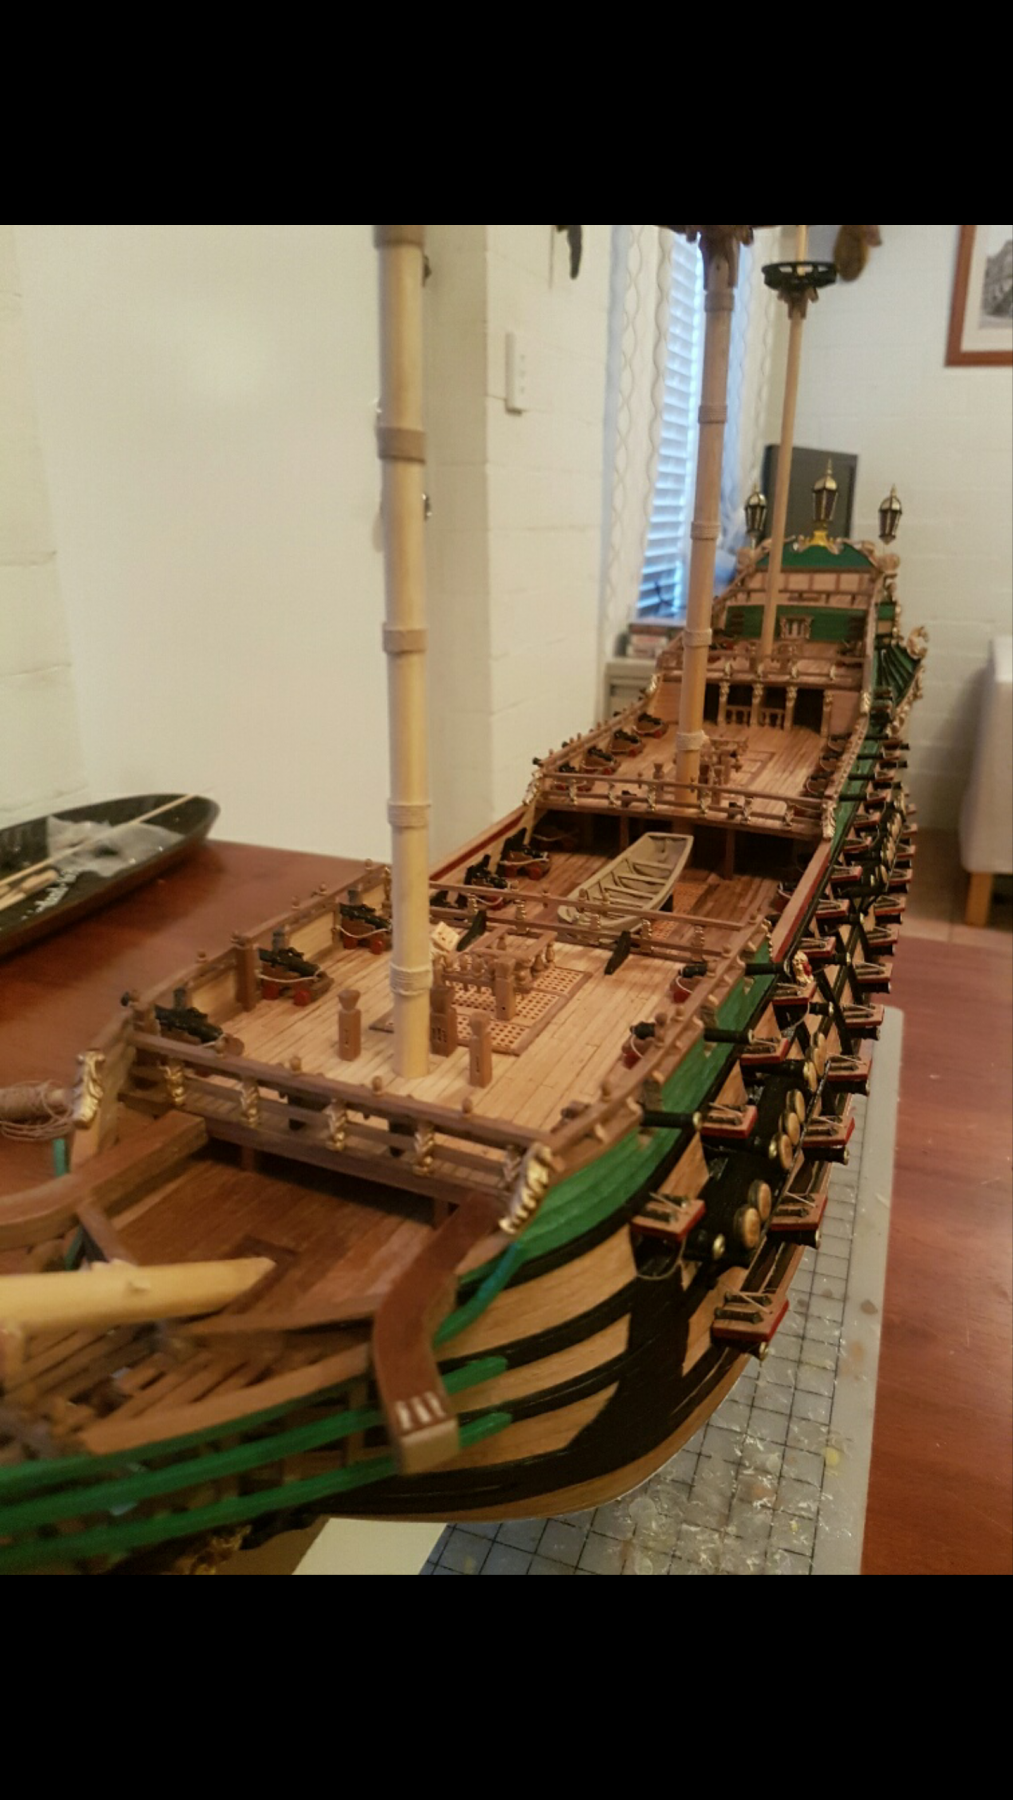
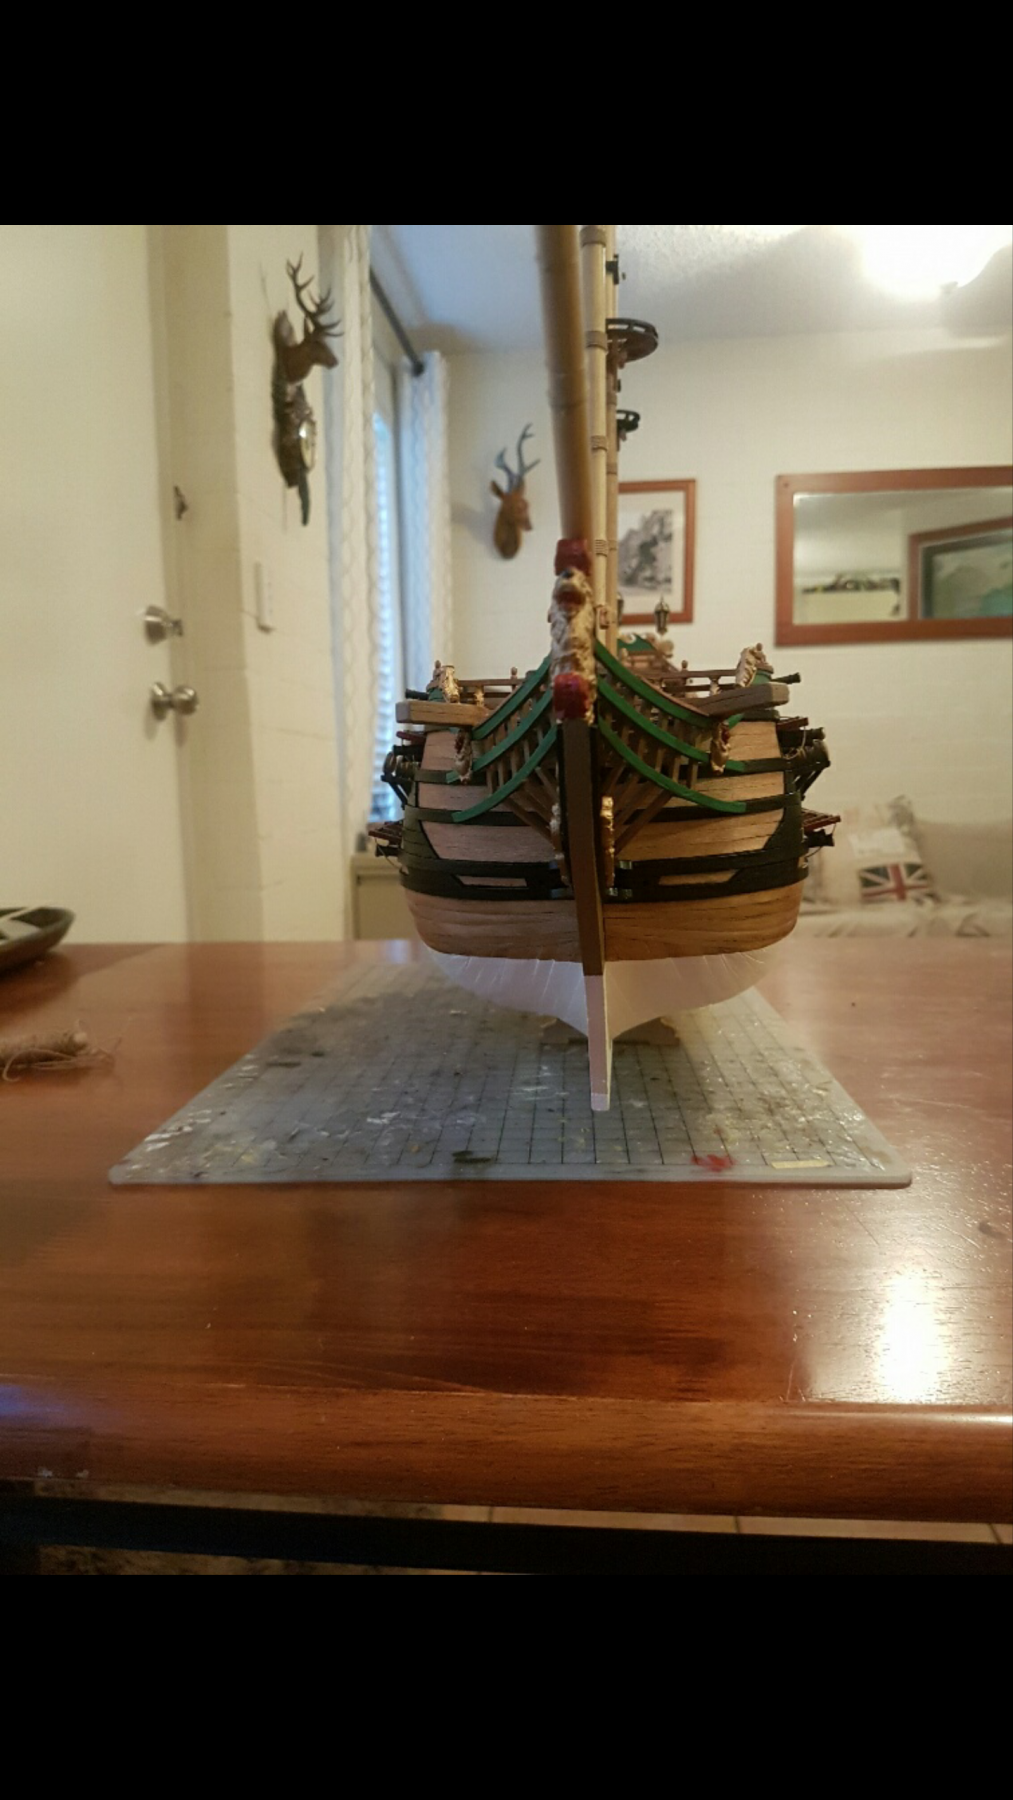
Masts completed with all blocks in place. Hull had also received two coats of "Off White". And the rudder chains also added.
Stern lanterns assembled and installed. If you with me to take any real close ups of a particular area or time of build please let me know


- GrantGoodale, granta, coxswain and 3 others
-
6
-
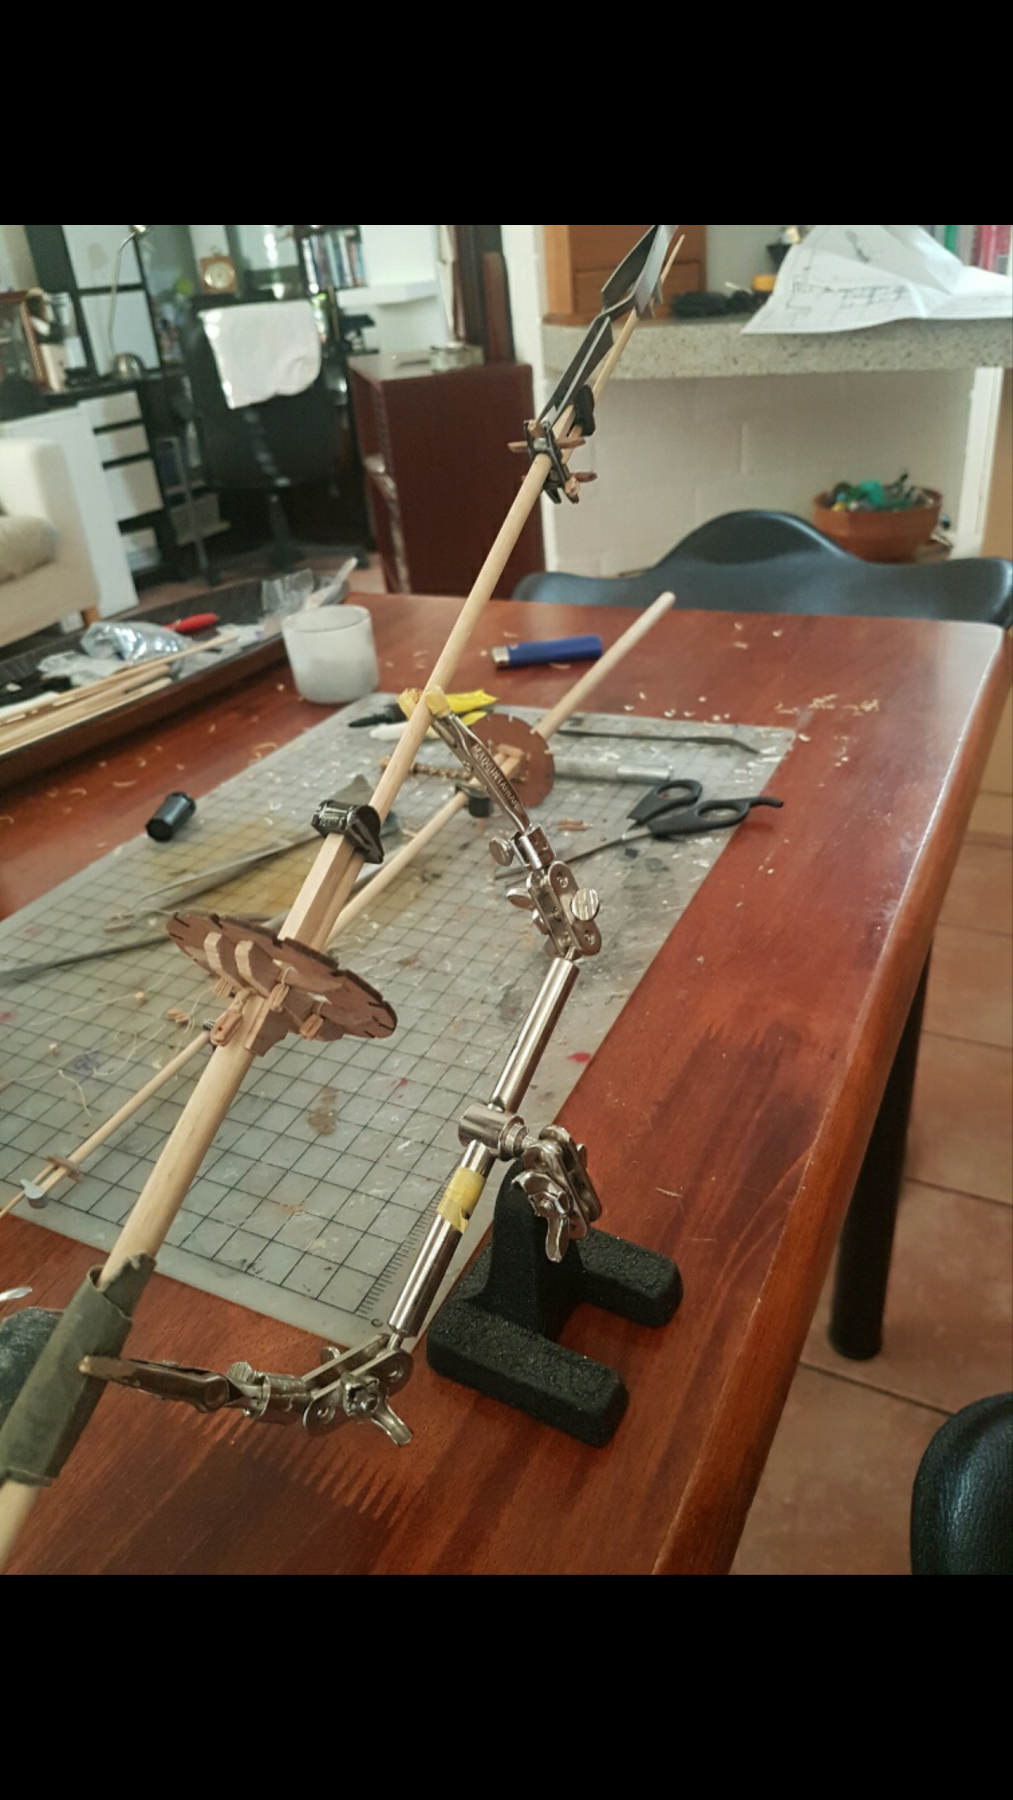
Onto construction of the 3 masts and bowsprit.
The cross tree timbers that hold the fighting tops are extremely brittle. And one wrong move can mean a split or a snap.
The masts caps are made of a hard metal painted black. And some filing and sanding with light emery paper had to be done to remove the unsightly burs.
To fit the caps on, The tops of each mast segment had to be squared off to fit the square hole in the bottom of the metal mast caps.
Further on the segment between the fighting tops and the masts cap had to be squared as well.
At this point all the blocks for the running rigging were attached now while the masts were easy to work on before installing on the ship.
Pictured here is the main mast, Fore mast in the background. Yet to be fabricated is the Mizzen mast.

-
Ah the task has a slight change to it. Time to review the JHA. Write out another take 5 and reveiw the SWMS Haha. Please make sure all shipyard workers sign on!!!
That brings me back to the old FIFO Jobs.
Little bits at a time.
As the saying goes, For a man to move mountains, he must start by moving pebbles. Good luck.
- CaptainSteve, Hennie and mtaylor
-
3
-
Cheers Grant. Yes the lower hull will be painted white. More of an off white colour. Thank you for checking in too
-
Nice one! Come to think of it, I still have lots of tanganika strips left over. I used them to plank the deck of the Friesland. 1000mm lengths from Modelers shipyard.
Keep an eye out for that long round cardboard tube!!!
- Tallshiptragic, mtaylor and Hennie
-
3
-
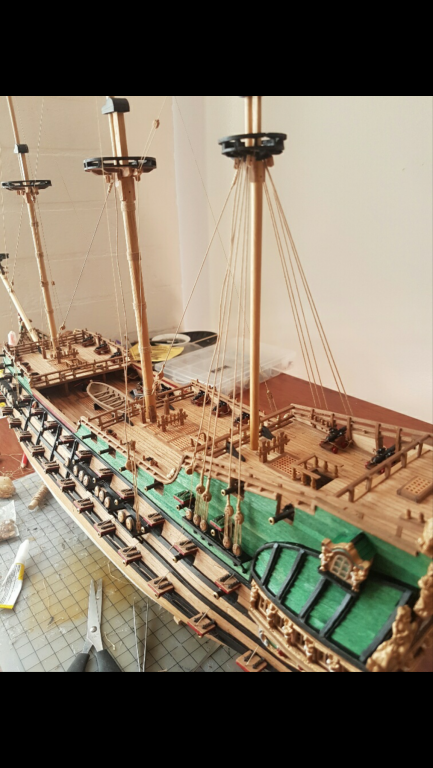
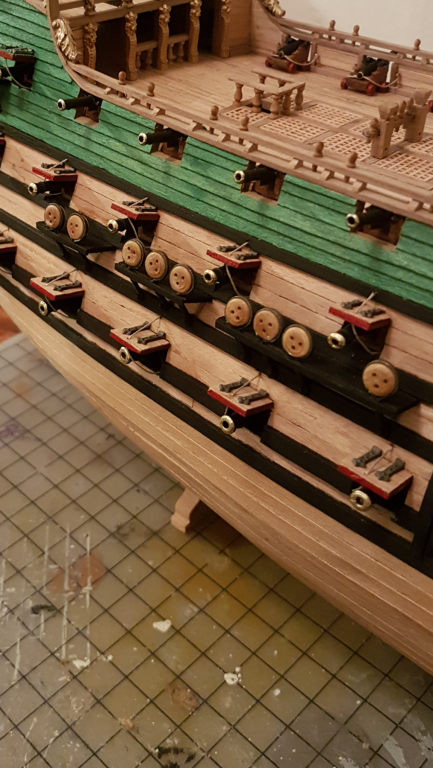
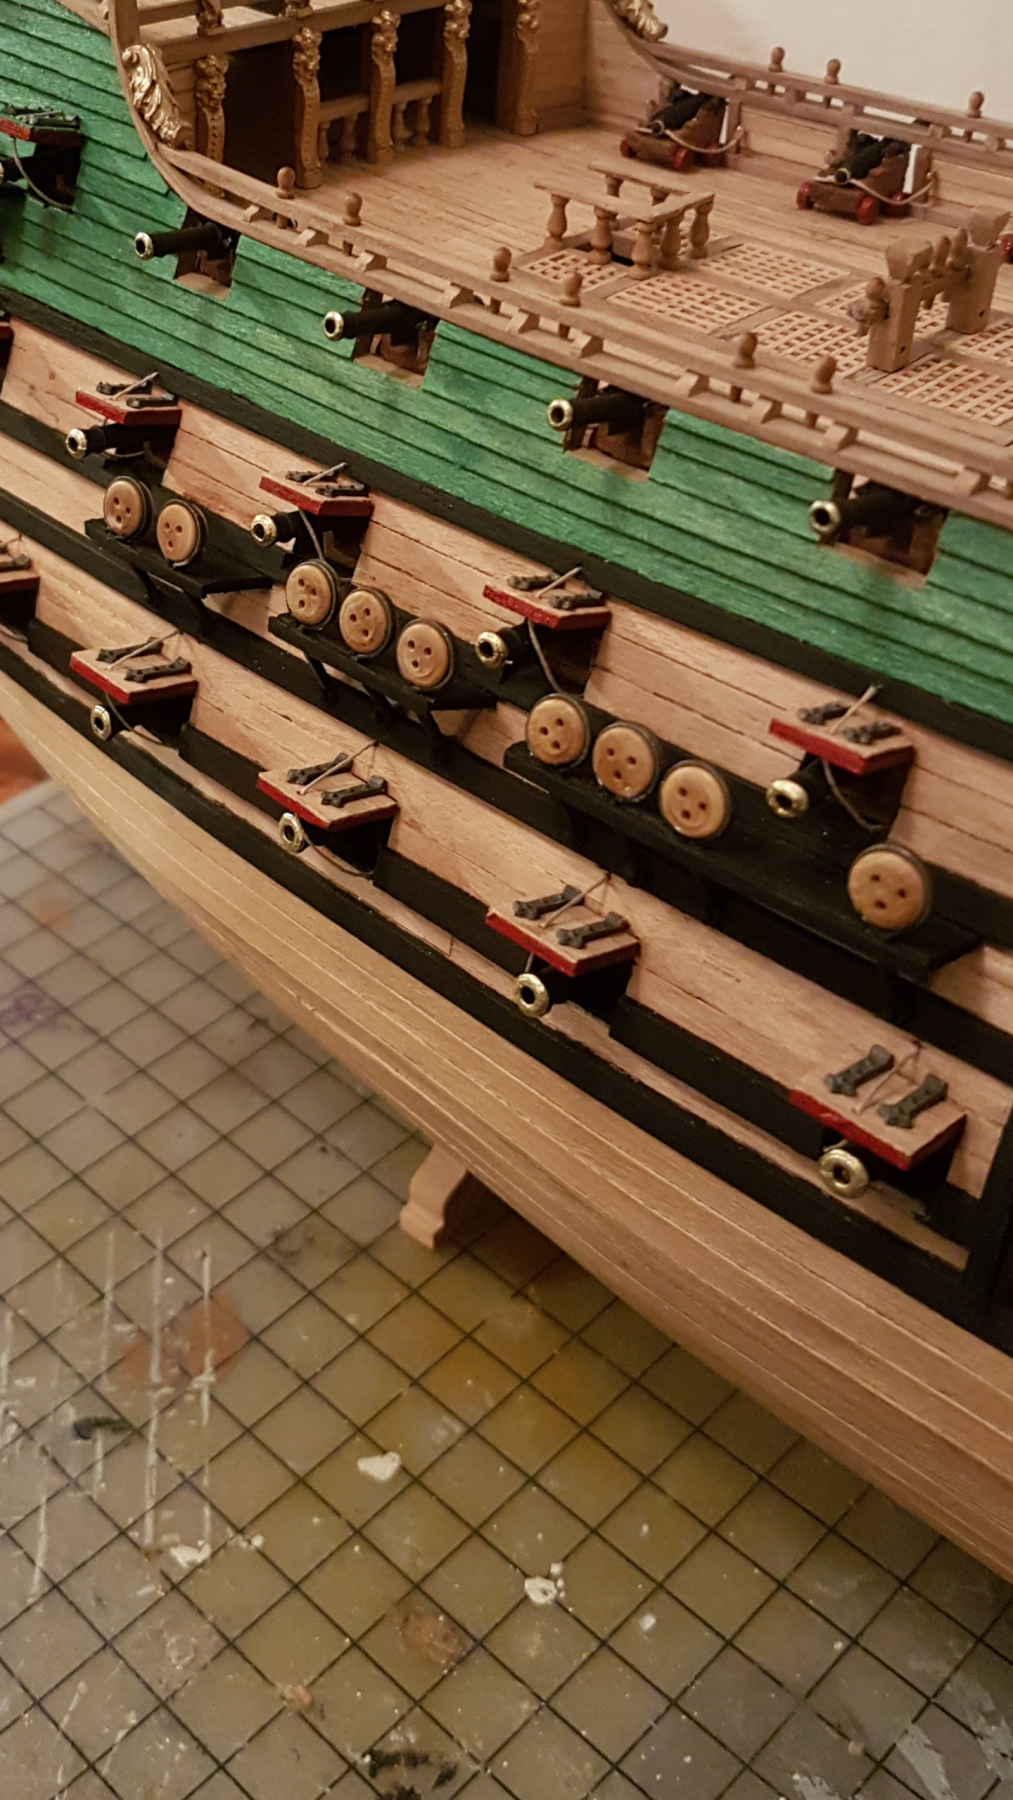
Channels and chain plates on, Deadeyes attached. Last of the ornaments and decorative peices fitted.
Ropes on all gunport doors. Bow figure head is installed. Dead eyes were simply crimped into the chain plate loops. This is so they can be rotated so that the holes line up perfectly with the rigging.

- coxswain, VACorsair, marktiedens and 2 others
-
5
-
What an absolute little gem. You have well and truly done a beautiful job of her. Congratulations Mike.
- Nirvana and Mike Dowling
-
2


Sovereign of the Seas by Tallshiptragic - Sergal - 1/78
in - Kit build logs for subjects built from 1751 - 1800
Posted
I bet you feel better getting all those cut out. Another milestone. Looks neatly done. Good job.