Dan Vadas
-
Posts
3,261 -
Joined
-
Last visited
Content Type
Profiles
Forums
Gallery
Events
Everything posted by Dan Vadas
-
No I don't, but I doubt it would have been anything very fancy. Perhaps as simple as a knotted rope which passes through a hook. Danny
-
Hi Toni, Oops - Stop right there - the windows need to swing IN. A problem I encountered after I'd almost completed the ship. Druxey will tell you the same. See THIS exchange of opinions and the results in my build log. You'll need to "fast-forward" a bit over some other comments. Danny
-
Hi Skip, Chuck Passarro is one of the Administrators of this site (if you didn't know already). Apart from designing kits for Model Shipways he has his own company, Syren Ship Models, which makes "kits" for the more advanced builders and supplies a large range of excellent quality fittings etc. He's nearly always available on this site as well, so I'm sure he will answer your question shortly . Here's one of his Kits : 18th Century Longboat presented as a Build Log on this site. Danny
-
Very nice Grant. Did I give you the Cap Squares as well, I don't remember? If not I'll send you a couple of sets (providing I have enough left for my Vulture Cross-section ). I hope you are going to file off the flash and drill the bore? Danny
- 456 replies
-
- 5
-

-
- finished
- bomb ketch
- (and 2 more)
-
Happy Birthday mate, hope to see an update shortly. Danny
- 456 replies
-
- 4
-
-
- finished
- bomb ketch
- (and 2 more)
-
Don't get stressed - you won't break anything because you've done everything right (and then some ). The Castello can take a LOT of strain without any damage. Danny
- 222 replies
-
- 5
-
-
- 18th century longboat
- model shipways
- (and 2 more)
-
Not bad Maury . Also, work your way from the outer end back toward the chuck to avoid flex. Danny
-
That's how I do them as well, but I use PVA instead. Danny
- 222 replies
-
- 5
-
-
- 18th century longboat
- model shipways
- (and 2 more)
-
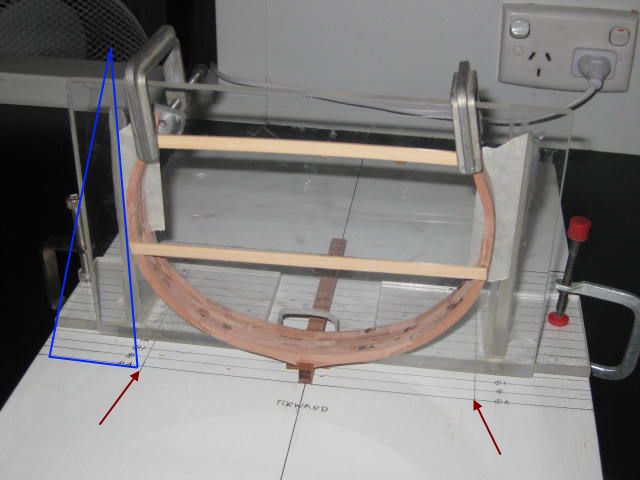
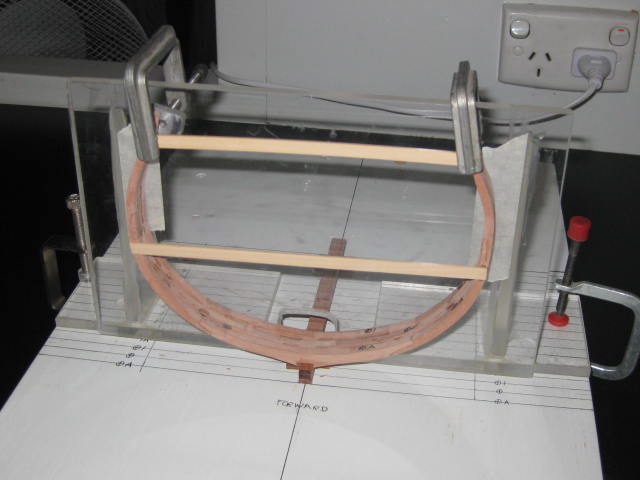
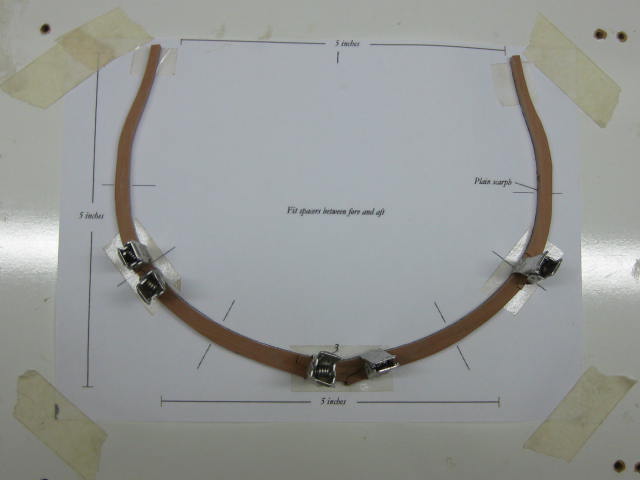
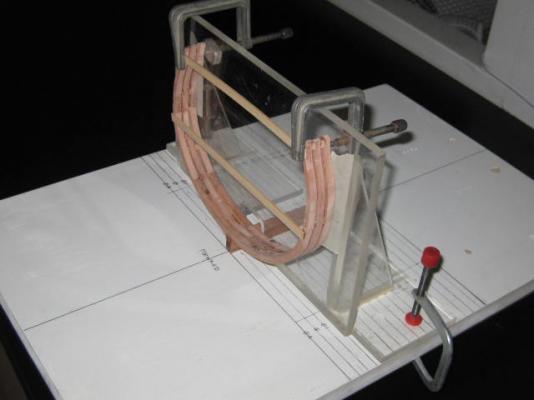
The keel is screwed to the baseboard from underneath using the mounting nuts I previously fitted to the keel. It's rigid enough to stop less than a very hard push to either side. The clamps on top of the acrylic square keep things in position until each frame dries. I also make pencil marks on the tape stuck to the square to check that nothing has moved. Initial setup looks a bit like this. The red arrows point to the lines I've drawn for the extreme width of each frame : Danny

- 268 replies
-
- 25
-
-
Thanks for the comments Greg, Sam and Russell . The height is set when I cut the frames using the templates. I've allowed an extra 2mm just in case. I'll trim them to the correct height when they are all fitted. Maybe because you're building a different ship Russell? Danny
-
The Deadflat frames are those in the centre of the ship. All the others are of a diminishing size in one area or another going either forward or aft. Danny
-
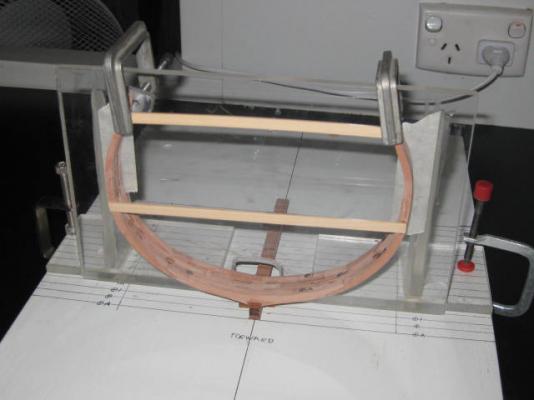
Thank you John, Ben, David and Greg. All the frames have been assembled, now I can start fitting them to the keel. I started by gluing the three Deadflat frames together, using spacers and Fillers of the appropriate thickness : Then I set the assembly up on the board, using the acrylic square I built for Vulture's frames. A little bit of finessing on the slots for the keel was needed to get a good tight fit. The board and square, and also the two temporary supports, ensure that each frame goes up correctly : Danny


- 268 replies
-
- 29
-
-
Nice Sweeps Erik. One point to note in future is that the outer ends of them flare out wider before cutting back to the handgrips. This aids in balancing them. See THIS link to the ones I made for the longboat in a bottle. Danny
- 222 replies
-
- 4
-
-
- 18th century longboat
- model shipways
- (and 2 more)
-
It's OK for thicker sections, but gets rather tricky when you get under 2mm or so as the wood flexes too much. A Follower Rest is needed, but is still slower than using a V-block and chisel IMO. Danny
-
Quite a good idea Maury. It's always a bit of a pain centering a 4-jaw chuck, which is why I also have a self-centering one . A tip I use for the independent chuck when making numerous pieces of the same size is to mark two jaws with a felt pen and loosen just those two when replacing the stock. The other two jaws will center the next piece again if you don't touch them. Danny
-
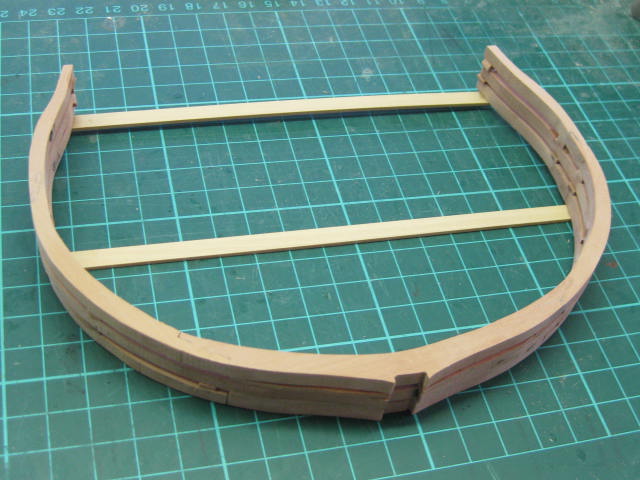
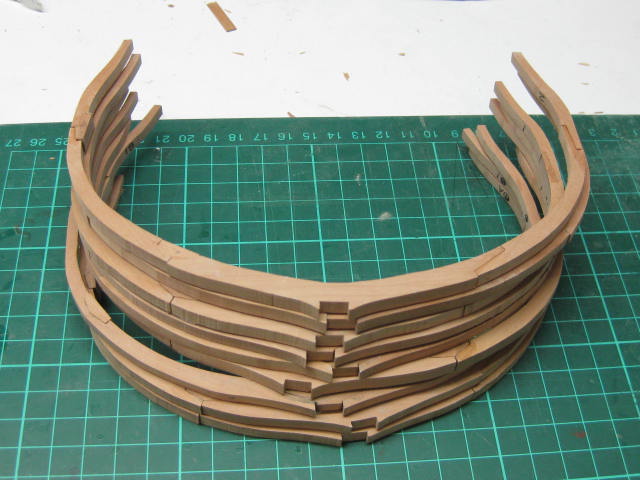
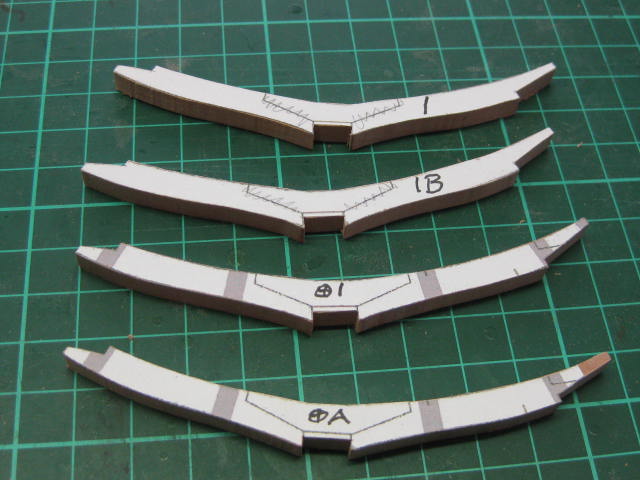
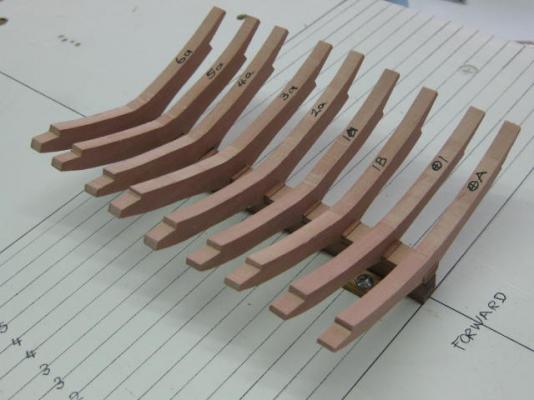
I'm getting there - 10 frames glued together, 7 left to go. To hold each frame in position I use double-sided tape to stick it to the template, and then hair clips to keep the joint tight until it dries. Like I did with the full model, I'm using scarph joints in the port side and chocks in the open starboard side : Danny


- 268 replies
-
- 33
-
-
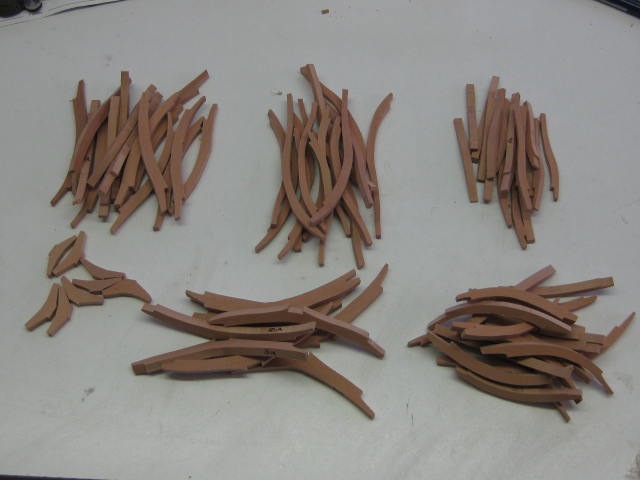
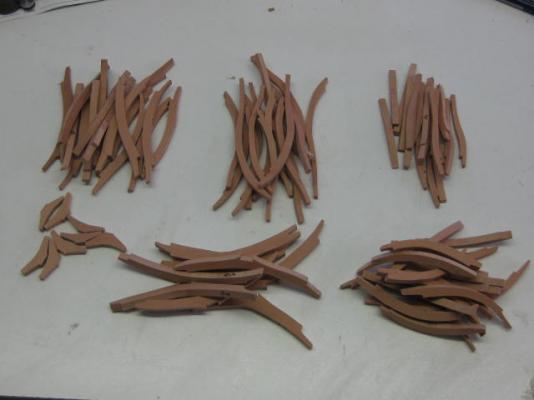
Thank you Greg and Albert . In case you thought I hadn't been doing much lately (yeah, a bit of "life" did get in the way ) I've cut all the frame pieces. Who'd have thought there were THIS many just for a little cross-section : Danny
- 268 replies
-
- 28
-
-
Lionfish, here's your answer from the description in the "Modelling Tools and Workshop Equipment" forum : Danny
-
Thanks Crackers, but I didn't see anything out of the ordinary in that commercial - that's the various ways we have of opening beer "Down Under". Can't imagine why it would be banned, probably the guy who opened it with his forehead :D . Danny
-
Thanks Greg. The first pieces of the frames have been cut. I've made all the Floors first, as they are the thickest at 10 (scale) inches thick. If I run out of Pear before the new stock arrives I'll be able to run the remainder of my thicker stuff, including the leftover from the 10", through my Thickness Sander to get the thinner Futtocks and Toptimbers. The Port side of this Cross-section will be fully planked inside and out as was the full model. I'm using simple scarph joints on the planked side - the open side will have Chocks between all the futtocks. Note that these pieces are virtually straight off the scroll saw - there's a bit of finessing to be done yet. Every 2nd frame has a Floor, so only half of them are in these pics. Nothing has been glued in yet : Danny

- 268 replies
-
- 36
-