


Dan Vadas
-
Posts
3,261 -
Joined
-
Last visited
Content Type
Profiles
Forums
Gallery
Events
Posts posted by Dan Vadas
-
-
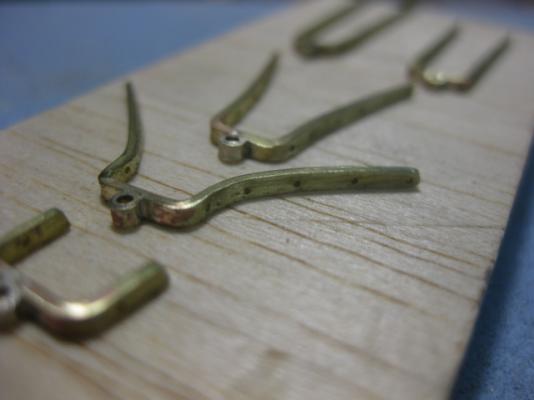
Gudgeons
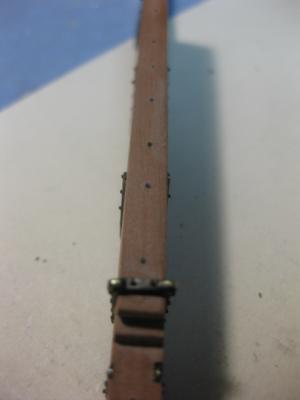
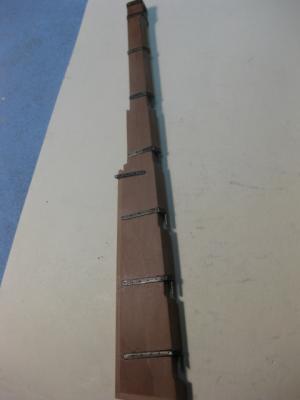
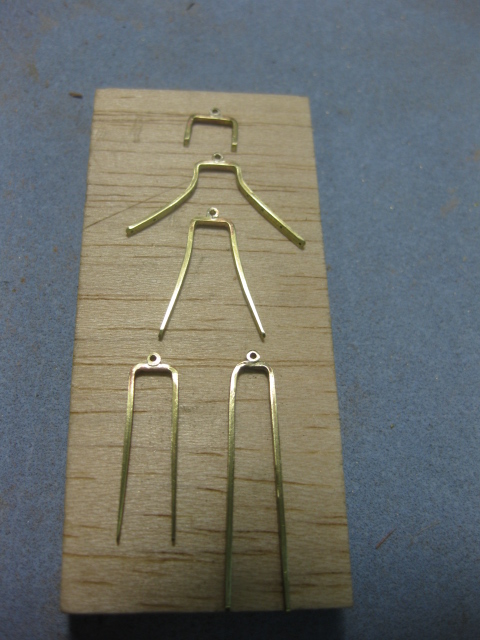
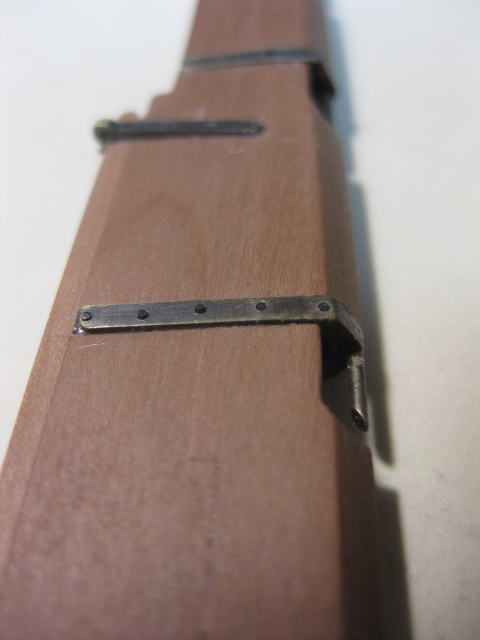
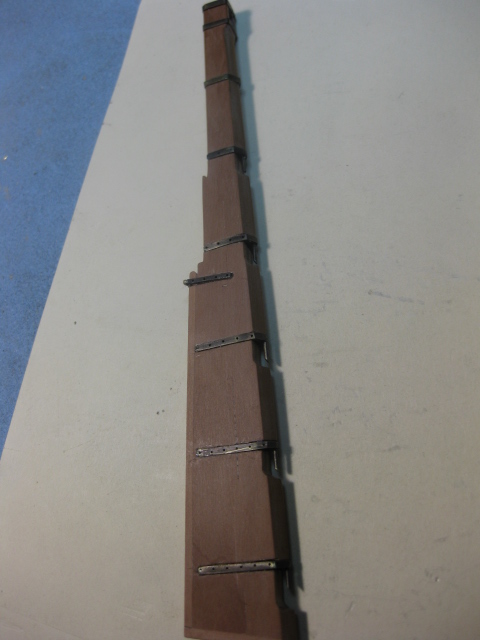
First I marked out the position and length of each gudgeon on the hull - I used a square to mark out the forward end of each from the sheer plan and then used cardboard strips to work out the actual length of each one from the centre of the sternpost:

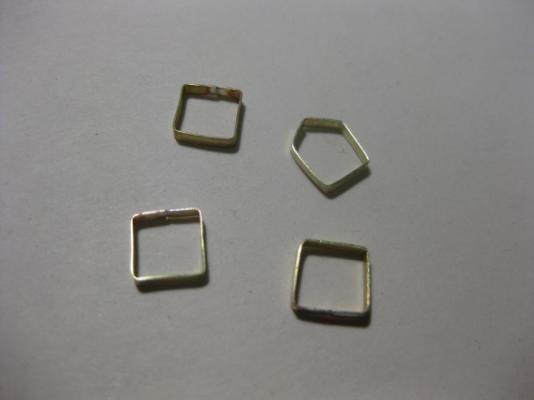
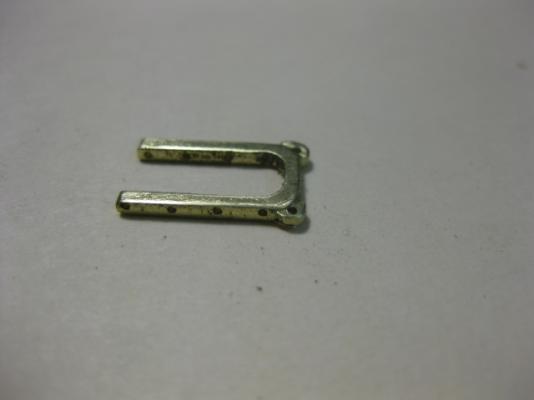
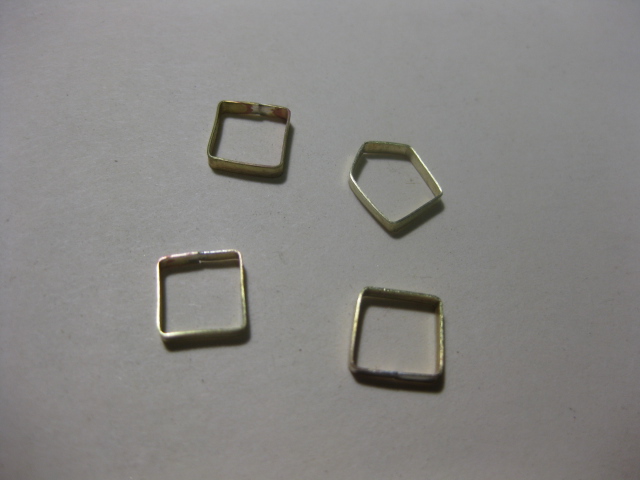
I fabricated the Gudgeons from 1.6mm square brass. I milled it to 1mm on one face, drilled the holes for the bolts and tapered each one to 0.5mm at the forward end. Then I filed a groove and silver soldered a small section of 1mm ID brass tubing into the centre for the eye.
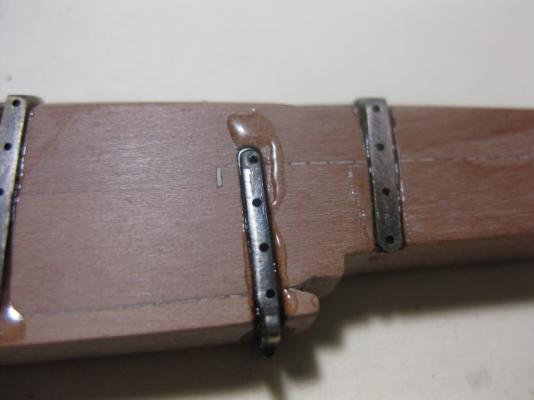
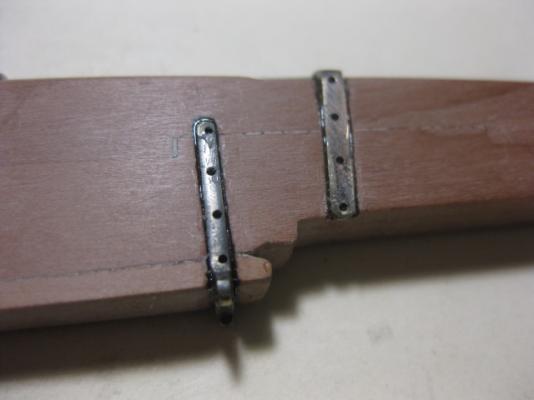
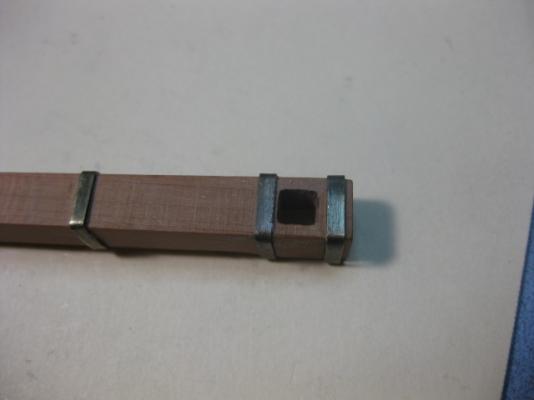
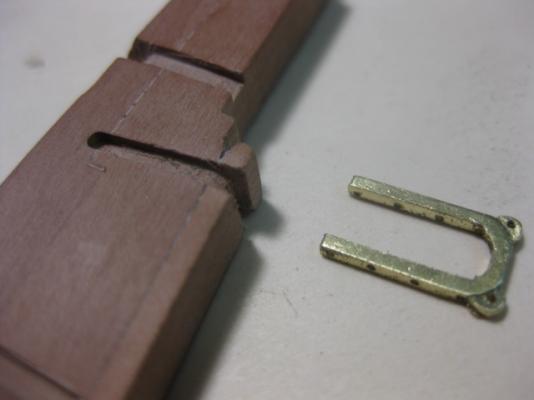
Next I cut and bent each piece to shape, holding the rudder in place to align them properly. The aft end of the sternpost needed notching out to bring each forward part of the gudgeon's eye almost flush with the aft end of the post - there should be just a bare minimum of gap between it and the forward edge of the rudder.

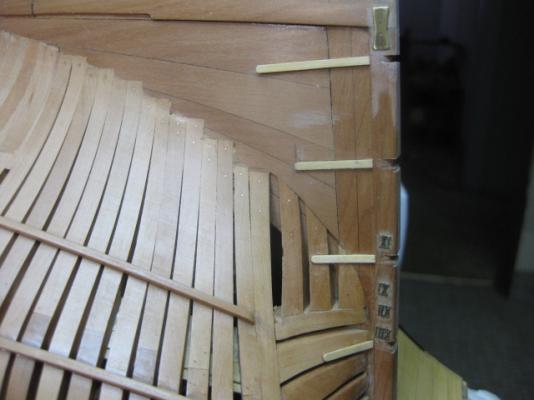
As the gudgeons are fitted to the surface of the planking and not to the frames I fitted four slivers of Castello into the positions of the gudgeons on the unplanked side to bring them to the correct height. I'm hoping this will look OK when everything is glued in place
 :
:
 Danny
Danny- mtaylor, Dubz, CaptainSteve and 1 other
-
 4
4
-
Thanks go out to Randy, Robbyn, Grant, Wayne, Adrieke, Mark and Brian - I appreciate your interest and comments
 .
.I generally just lurk on your log
Good to see you come out of the closet Wayne
 .
.North west suburbs near castle hill
Can't get much closer than that Adrieke
. Make a family day of it and take them to the vineyards afterwards (lots of things for kids to do at Hunter Valley Gardens) and allow 1.5 hours for the trip each way. BTW - my best time from the start of the F3 to Abermain was 38 minutes in an A9X Torana back in my younger (and sillier) days - don't even THINK of trying to do it that quick .... I was doing 250kph in some parts of the freeway . Danny -
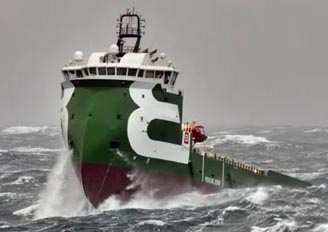
Correct Wayne. This is the Bourbon Mistral (and she's not actually sinking
) - your turn. Danny -
Sorry Anja - try again.
Danny -
I suspect you have been there!
Not yet
.Here's my next ship:
 Danny
Danny -
-
wish you lived up the road from me so you can teach me
Depending on which bit of Sydney you live in it's only a bit over an hour's drive Adrieke
. Danny -
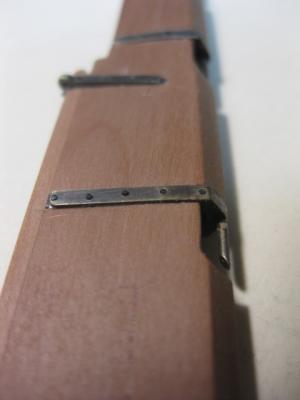
The final pieces of the rudder itself - I've inserted 52 blackened brass "bolts" into the pintles and also the 19 bolts that go through the main piece and blade to hold them together :
 Danny
Danny -
Thanks for looking in again John, Druxey, Adeline, Ben, Allan and Pat.
I see you rebated for the spectacle plate as well, wasn't it normally above the water line?
Right on the waterline Ben. The way it's been drawn in TFFM leads me to believe it's rebated, though it isn't mentioned in the text.
Hi all,
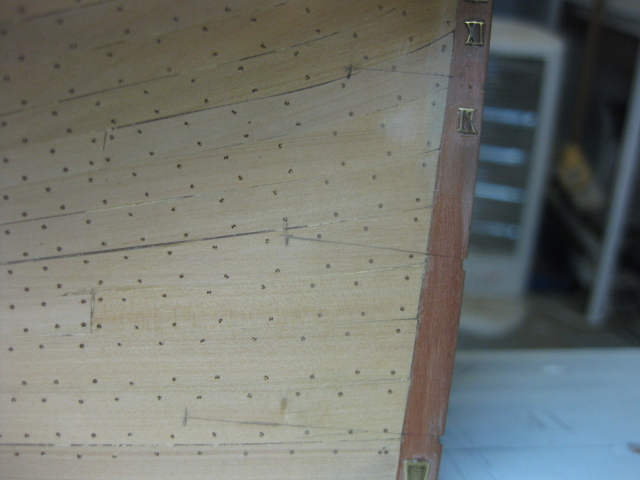
There are three Bands around the upper section of the rudder to strengthen it. These were hammered on hot on the real ship and not bolted, although I don't know how they would have done that with the lower one - the rudder is thinner in section at that point than it is at the top. I silver soldered the two top ones and just epoxied the lower one.
All the pintles, bands and spectacle plate have been epoxied in place - they will also be "bolted". The epoxy makes a bit of a mess, especially when you make a slip with the toothpick. It's easily cut off after 15 minutes drying time - a lot better than trying to wipe it off when wet ... that makes an even bigger mess
.The hole for the Tiller has also been cut in - this hole tapers from 9" square to 7" square at the aft end - quite a trick to get right. I made the taper on the tiller as well to ensure it will fit later on.
 Danny
Danny -
-
Hi Sjors,
You came up by your self with that or have you seen it some where?
Not me - it was mentioned in TFFM. I hope I got it right
.Hi Mark,
I asked about the heat treating since I thought the grinding would cause the bit to lose its temper and not stay sharp.
Oh, that bit. I thought you meant the pintle pin. No, it didn't even get warm when I ground it so I didn't bother. It cuts wood just fine, don't know how it would go in metal though.
Danny -
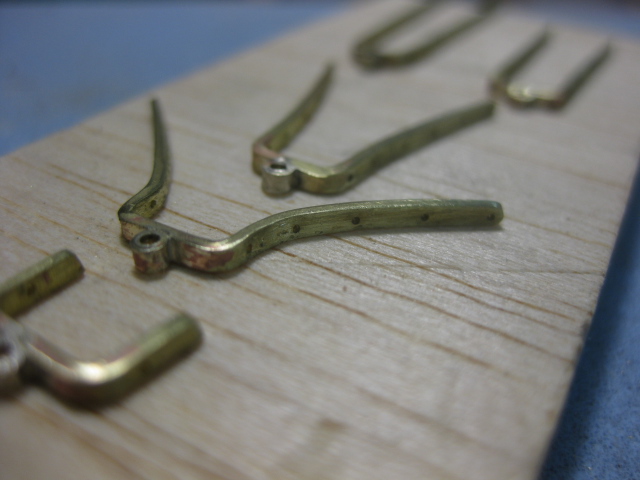
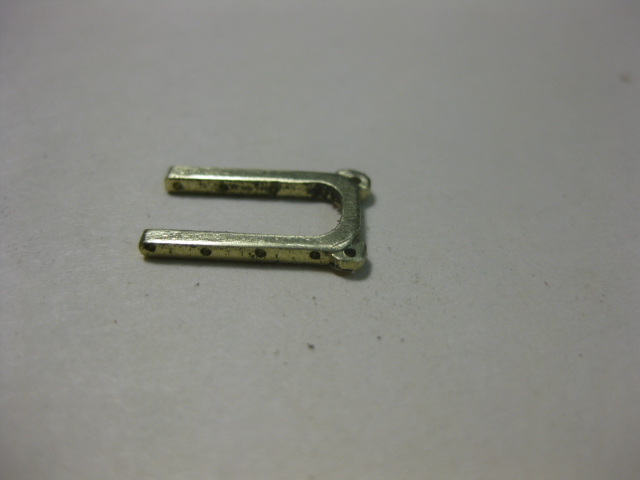
Spectacle Plate
The Spectacle Plate holds the two chains to the rudder. These prevented the total loss of the rudder if it became accidentally unshipped, and could also be used as emergency steering if there was damage to the ships wheel etc.
I made this in similar fashion to the Pintles from one piece. Note the thinning of the eyes :

I actually had to make two of these - I measured the wrong part of the rudder the first time and finished up 3mm too short
 . It took me about 2 hours to mill, drill and file each one.I also made another lower Pintle - if you look back at one of the previous pics where I dry-fitted the blackened pintles you'll notice that the lowest one is a little short. That's now fixed. Danny
 -
Thank you Mark, Brian, John, Druxey, Grant, Randy, Russell, Robbyn, Ben, Geoff and Sherry
.Did you heat treat the bit after trimming it flat on the end?
No, should I have
 ?
?Rebates for pintles? Holycow, I've not seen this before! Is this usually done on the real thang?
Yes Brian, at least on the Swan Class ships. It created a little less drag in a straight line.
Waht have you been giving the rigging spiders to drink? Obviously it's far too strong!
Bundy and Coke - maybe you're right
.I will just mail you my Syren kit, and watch you build her...that way I will be assured of getting the result I want

Whoah Back Robbyn - I already have three other ships I need to finish for someone else
.you could work in my blasksmith shop any time
Nah - sounds too much like hard work. Appreciate the offer though Geoff
. Danny -
Bingo - you've got it. I thought you may have used the clue in the original post as to the ship's name. The Australian National Maritime Museum is in Sydney, and they have an exhibit of all the "HMAS Sydneys" that existed (see here).
Over to you David.
Danny -
Keep guessing
. Danny -
Nope.
-
Yes David - now it's only a matter of deducting WHICH one
. Danny -
Sorry David, not HMAS Newcastle.
Danny -
Thanks Adrieke - I read something about her a while ago and it jogged my memory
.Here's a pic of a model in the Australian National Maritime Museum :
 Danny
Danny -
The largest iron hulled sailing ship still afloat - Wavertree.
Danny -
Hi Sjors,
No pictures of the ship for a while…..
Reason?
I have to change a lot like the chainplates, shrouds , maybe the reeling.
At this moment I put her on a shelf for a while.
The joy of building at her is gone for the moment.
Then it is better to quit before it turns into firewood.
She will be finished someday but not this time.
I go back to the San Ildefonso.
Oh dear, I hope it wasn't something I said
. Don't worry Sjors, a couple of weeks of vacation will soon have you wanting to keep building Mirage I'm sure .
I know that nobody force me to change the plates but the big problem for me is, when I'm doing it the wrong way and they show me pictures how it should have been done, then i want to change it!
I don't have to change it but every time when I look at it, it gives me that funny feeling…..and thoughts of…..If I had change it, how will it looks then?
Trust me - it will look great, and you'll be wondering why you were worrying about making such any easy "fix" in the first place
.It's nowhere near as big a job as when I pulled up the entire quarterdeck on "Supply" because the kit plans were wrong, or when Grant pulled off the whole stern of his Victory because he wasn't happy with his first efforts. You'll finish up a much better modeller after you have done it and you realize that ANYTHING can be fixed - and it's not anywhere near as hard as you thought it would be
. Danny -
Correct David - your turn.
Danny -
Not a sailing ship (for a change) or a Norwegian Tug
 :
: Danny
Danny -
FS246, renamed to "Lieutenant Raymond Zussman" and later renamed again to "Penguin II".
Danny


Name the Ship Game
in Nautical/Naval History
Posted
http://warshipsresearch.blogspot.com.au/2011/09/dutch-ironclad-hr-ms-hertog-hendrik.html