-
Posts
3,261 -
Joined
-
Last visited
Content Type
Profiles
Forums
Gallery
Events
Posts posted by Dan Vadas
-
-
HMS Royal Arthur.
 Danny
Danny -
Sorry Crackers - different ship (a few years earlier).
EDIT - just saw "st george" s post - give the man a cigar and let him have the next go
 .
. Danny
Danny -
-
HMS Frigate Unicorn.
 Danny
Danny -
Hi Philo,
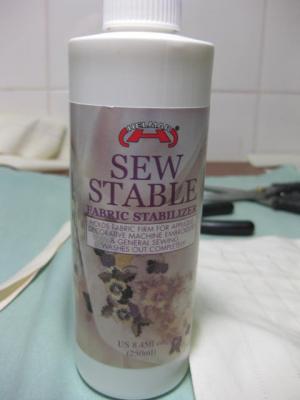
A product that is easier to use than starch is this one :
It does all that Frankie mentions above about using starch, but is a simple "paint-on" application. It washes out in water when you've finished cutting, sewing etc. It's also available from most Sewing Stores.
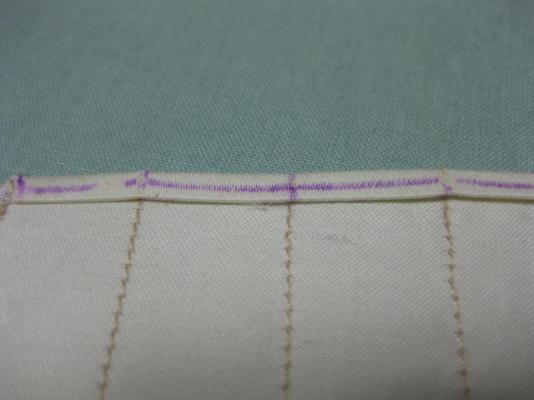
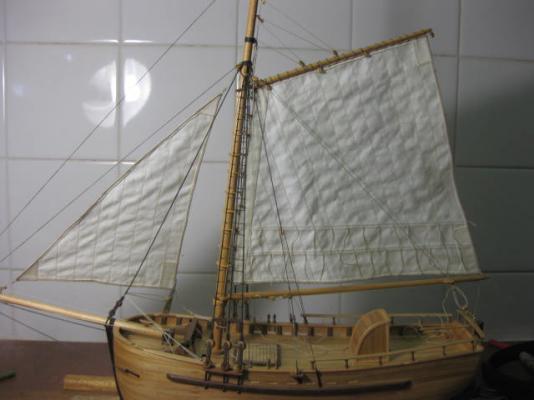
My preferred material for sails is Egyptian Cotton, with the smallest weave you can get (1,500 TPI - threads per inch - is good, 2000 TPI is even better but a lot more expensive). One Pillowcase is enough to do all the sails for a 1:48 Cutty Sark with some left over
 . Here's a pic of my 1:36 scale Norfolk Sloop's Gaff sail. Note the fine weave - the stitches are 0.75mm long :
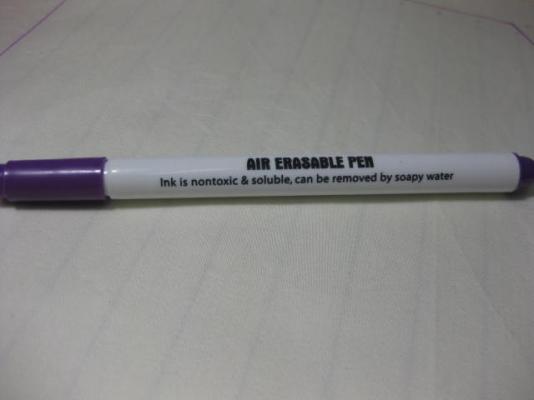
The purple pen markings you can see are a "Disappearing Ink" pen also available from sewing stores. Much better than using a pencil for marking out the sails - pencil marks are very hard to remove (but as Frankie mentions work OK for Bands etc on smaller scale models) :
 Danny
Danny -
I've read that the way to sharpen a draw plate is to rub it on fine grit sandpaper or stone with the small holes against the paper/stone. The small holes should be flush on that side of the plate so it will sharpen the edge without changing the hole size. This assumed the hole is right on the surface and not dimpled in (like my unusable draw plate).
I can see the hole getting larger after lots of sharpening, but the increase in diameter should be very small for a long time..
Hope that helps.
Thanks,
Harvey
Thanks for the tip Harvey. Actually, if you hold the drawplate nice and flat on the sandpaper the holes should all be enlarged by the same amount - that's not really a problem. You'd have to allow for this on the Byrnes drawplate which has the hole sizes marked next to them and simply shift to the next size smaller hole (or two) which would now be the correct size.
It would take quite a bit of sanding to get anywhere though - that Byrnes plate is VERY hard steel
 .
. Danny
Danny -
what kind of wood are you using in your drawplate?
Bamboo. Actually, it's not a wood - it's a grass. The perfectly straight grain and it's toughness make it relatively easy to pull through a drawplate. It also accepts a stain to a certain degree - I give the piece to be drawn a wipe with Walnut stain before inserting the treenails - it gives them a more realistic appearance.
 Danny
Danny -
Thanks Ben and John.
Have you considered using a more friendly wood and staining it black?
The problem there John is that I have to finish it flush with the top of the trundlehead, and the best way of doing that is sanding it down. Stained wood might come out a bit uneven if the stain doesn't penetrate far enough. Soaking the piece in stain for half an hour might work though, as the end grain is at the top and would take stain more readily.
Anyway, I'd rather not find out that it DOESN'T work - removing a poorly stained ring would be a real pain

 .
.  Danny
Danny -
Thanks Brian and Adeline.
Are there other blackish woods less fragile than ebony?
None that are as black. It was more to do with my cutting technique I think - I probably didn't have the lathe speed fast enough and the feed too fast. No real problem though (apart from finding the pieces
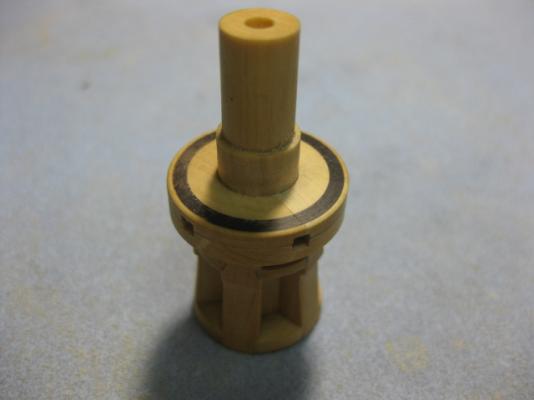
 ) - here's the finished result after sanding the ring flush :
 Danny
Danny -
The Drawplate definitely doesn't qualify for this list - although some of the inferior quality ones probably do. I've used my Byrnes Drawplate to make over 25,000 bamboo treenails for my last two ships and it's still working perfectly. That's about 80 METRES of bamboo

 .
.It could well be that I simply had unrealistic expectations for what it would allow me to do.
That's more to the point Frankie - you've tried to use it for a purpose it wasn't intended to do. Most timbers won't "draw" very well without snapping off in the smaller sizes. Also, the drawplate only makes parallel cuts - yards are tapered, so it's useless for attempting to shape them.
And like all cutting tools it needs to be kept sharp.
Bob - how do you sharpen a Drawplate without enlarging the holes
 ?
? Danny
Danny -
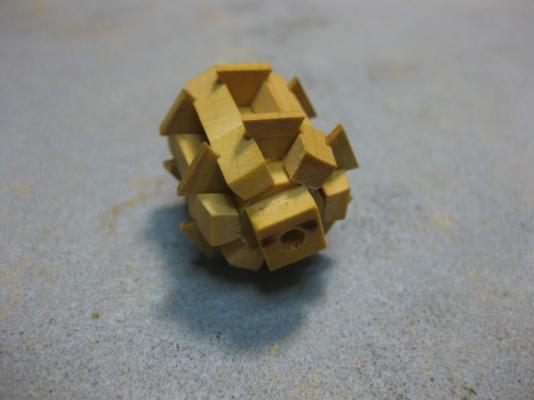
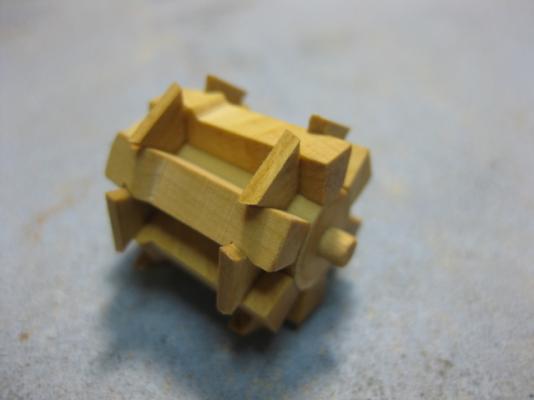
Thanks for dropping in again Christian, John, David, Sjors and David
 . Yeah, it reminded me of a Rubic's Cube or Chinese Puzzle when I took the pics
  .
.How many parts are in that assembly if I might ask.
37 so far David - there are quite a few more to come

 .
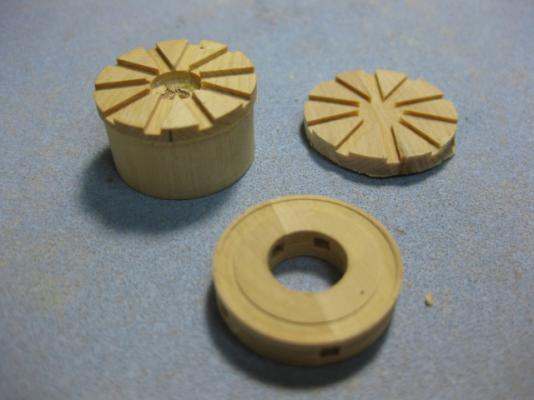
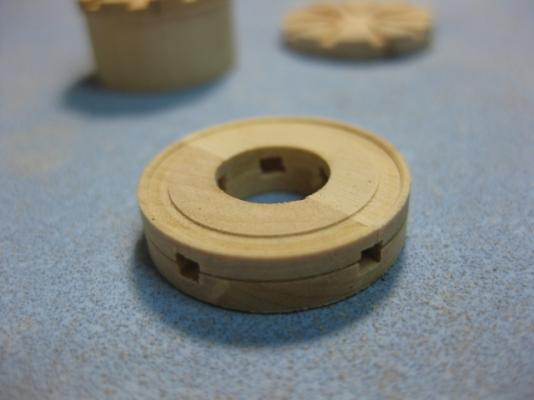
.Here's the next stage of the Trundlehead and Drumhead. I've glued the two pieces of trundlehead together and turned out the recess for an "iron" strengthening ring. This will be made from Ebony. There are actually two of these for each head - one in the lower section and one in the upper of both. I'm only doing the upper ones, as the lower ones can't be seen. I've also milled out the ten slots for the Upper Capstan Bars into the Drumhead :
I turned the ebony ("iron") ring about three times thicker than needed - it still snapped into 5 pieces on the final cut

 . It took a while to find the pieces around the lathe, and a bit longer to sort out which one went where, but they eventually fitted into place with very little sign of breakage. I'll sand them flush on the lathe after the glue dries. I'm hoping for a better result for the very visible Drumhead rings :
 Danny
Danny -
Thanks John and Mark
 .
.Next comes the Trundle Head - this is made from four pieces of timber. Two are edge-glued to make the 1'9" wide piece needed. I made sure the grain was running in different directions to make it stand out as two actual pieces later. The other two were treated in similar fashion.
NOTE: I didn't really need to do this for the trundlehead, but I thought it would be a good practice for the Upper Capstan's Drumhead which is a lot more visible - turns out it was, I made a setup error that would have stood out later on.
Then I turned up a "dummy shaft" which could be chucked in the 3-jaw chuck. I spot-glued the head to it for the machining work.
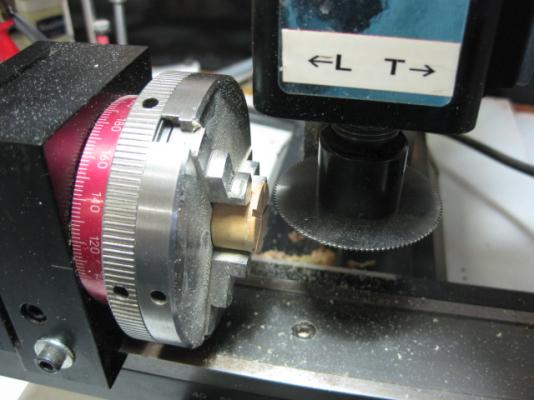
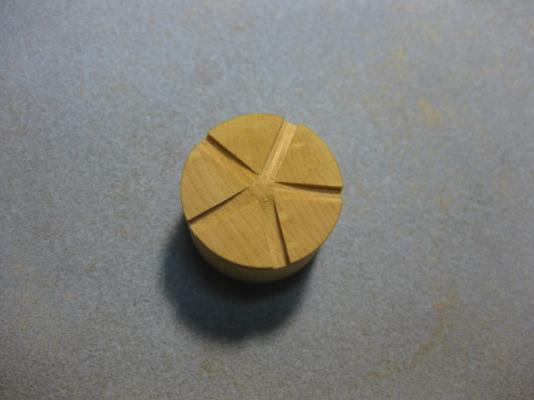
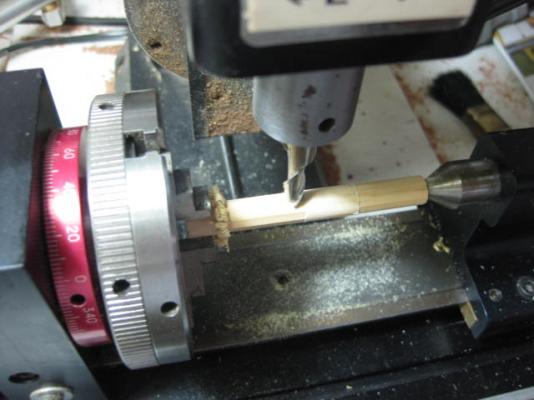
The square cuts for the Capstan Bars were milled in next, using the dividing head again. Not possessing a mill cutter of the required diameter (0.73mm) I used a 0.38" slitting saw which needed setting up twice for each cut :
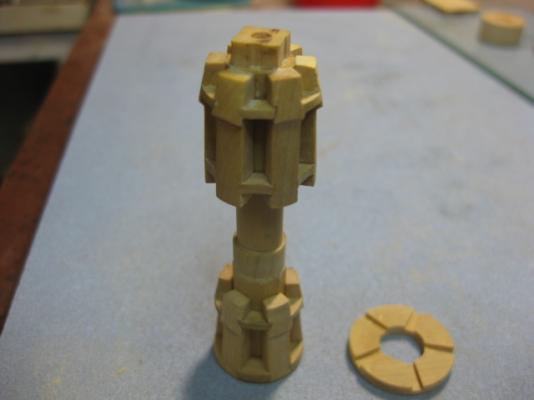
Then I chucked both parts of the Capstan Barrel complete with Whelps and Chocks back into the lathe and trimmed down all the chocks. I also used a Boring Bar to take out the inside diameter of the trundle head where it fits to the barrel. I should have done this earlier while it was still in the lathe, but no biggie - it was still glued to the dummy shaft. I separated the head from the dummy shaft with Isopropyl :
The lower chocks in each section have a Concave outer edge. I filed these in with a half-round needle file :
 Danny
Danny- dvm27, freewheelinguy, egen and 2 others
-
 5
5
-
Thank you John and Grant - you ain't seen nuthin' yet
 .
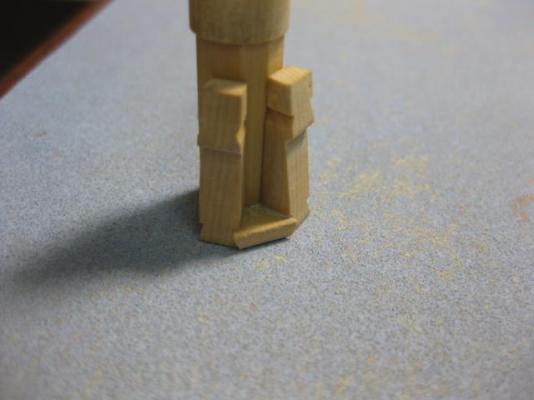
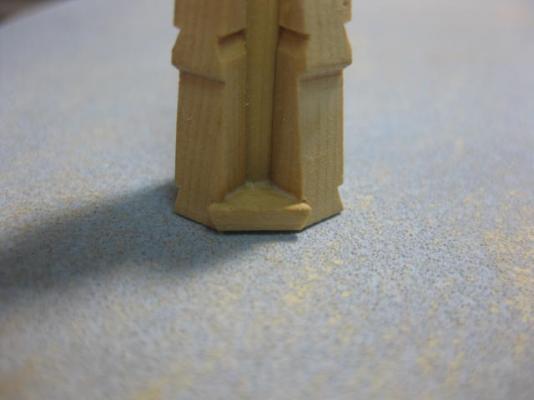
.Next trick was making the Chocks. The five lower Lower Capstan ones are 3 3/4" thick, the six lower Upper Capstan ones are 3 1/8" and both sets of upper chocks are 2" thick - keeping them separate was a trick
 .
.The chocks taper inwards and are also bevelled for the scarphs. The upper capstan ones have a slightly different angle to the lower ones. I started by sanding one edge on the Byrnes disc sander using both the angle gauge and tilt table. Then I cut them all to width on the Byrnes saw using the angle gauge for the other edge, and freehand sanded the bevel into each one :
Then I glued the Whelps and Chocks to the Barrels :
I left all the chocks oversize on the outer edges at this stage. They will be turned down to size in the next stage :
 Danny
Danny- freewheelinguy, egen, Remcohe and 3 others
-
 6
6
-
Thank you very much for the kind comments Eric and Frank
 .
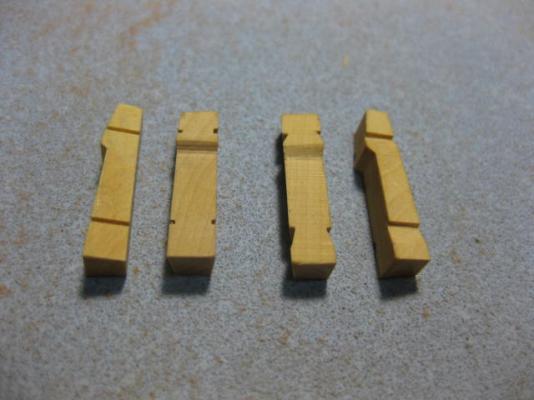
.Continuing on with the Capstan, the next job was to finish shaping the Whelps. Looking from above they form a wedge shape, with the outer edge 2" thicker than the inner. To cut these angles I made a wedge-shaped block of scrap timber which I lightly PVA'd to the underside of the piece that I'd Milled the faces to. I cut one edge on all 11 pieces, then I used Isopropyl to remove the wedge, let the alcohol evaporate thoroughly, and glued it back to the opposite side to cut the other angle :
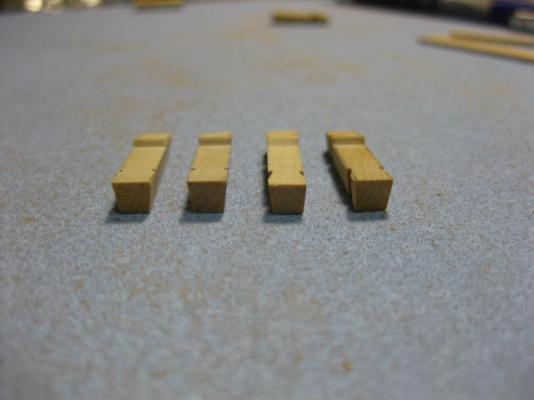
After cutting them all to length I set the saw blade to protrude just 0.25mm above the bed. I carefully marked the positions of two of the Chock Scarphs in one each of the Upper and Lower Whelps (there is a slight difference in them), set the fence to the first cut and did all of them. Then I reset the fence for the other 3 measurements and cut all the remaining ones :
The two on the left in the pic above have only been cut on the saw. The two on the right have had the Mortices cut into them. I used a #11 Xacto to cut the angles - they were quite easy to do, owing to the saw cuts.
Another pic showing the wedge-shapes of the whelps :
 Danny
Danny -
Thanks John, it's a lot of fun
 .
.Which is a pity because some of our best learning comes from those mistakes.
Michael
Michael, we have a Topic devoted to this very subject : How I fix Boo-Boos and Oopsies by Dan Vadas - Share your own "Fixes" here
 Danny
Danny -
Capstans
The start of the Capstans. There are two of them - the Lower Capstan on the Upper Deck, and the Upper Capstan on the Quarterdeck above it. They are joined together between decks to work as one. I'm using English Box for all the components - some of them are quite small and require a very good timber.
The Lower Capstan Barrel has 10 flats milled into it to take 5 Whelps, and the Upper Capstan has 12 flats and 6 whelps. I decided to turn and mill both together for ease of setting up. They will be separated between decks for installation purposes.
I used the Dividing Attachment on my Sherline mill to cut the flats :
Then I turned down the centre portion :
I've also started making the Whelps. The ones for the Upper and Lower Capstans are of different sizes, there is also a corresponding difference in angles. I'm also using the Mill to cut the angles, with the aid of the Tilting Table :
 Danny
Danny- dvm27, aykutansin, garyshipwright and 4 others
-
 7
7
-
Don't you just love it when you THINK you've got something wrong .... and it turns out you are right after all ?
 :D
:DMy apparent problem with the Aft Hatch being too short turns out to be just a discrepancy between TFFM and the NMM plan - Vulture has an Aft Hatch EXACTLY the same length as I've built it. Somewhere along the line (and it was a while ago) I'd actually used the NMM plans to set it out. Yeeeehah
 .
. Danny
Danny -
I will be working on Royal Caroline at least another year and i am going to bring tutorials, how to create various things on the model.
YES PLEASE - all your Tutorials on how you make those (words fail me - brilliant, superb, etc etc) Carving moldings were lost in the Crash. We'd love to see your method again - along with all the other great tips you had on before.
By the way - your English is very good ... a lot better than my Czech (I don't know one word of Czech
 ).
). Danny
Danny -
Just make sure you've got everything else under the quarterdeck set up before you find the need to add any more beams!
All under control John - there's not much aft of here until I get to the Lower Capstan (my next job, and one I've been looking forward to
 .
.Janos - your methods may well work, but they sound like too much hard work for this situation (and I'm with John - I'd probably set MY ship on fire as well
 ). Thanks for the tips, and I'll use them if I have to - these ones drilled FAIRLY easily, although a couple are done on a bit of an angle ... easily corrected when I fit the eyebolts.
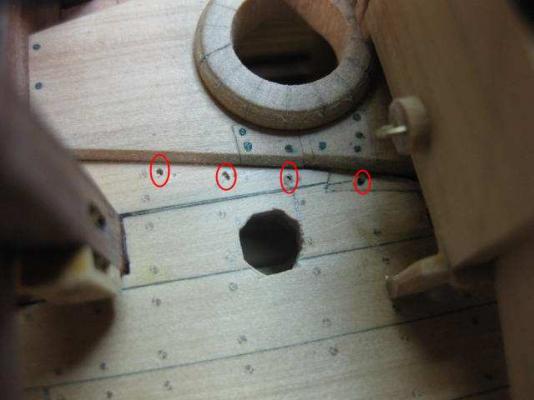
Christian (et al Swan Builders) - here are the eyebolts holes I mentioned earlier. TFFM mention them a few steps further down the track (9.33 and 9.34 - would have been a lot better earlier on before the Pumps
 ) :
) :The ones adjacent to the Main Mast Partners will be "sort of" the same on all the other Swans - Vulture's partners are on an angle rather than parallel to the centre line. I've done a bit of my own "shipwrighting" here - the eyebolts would have to be drilled into the Partner Carlings, which is what I've done. I've also placed each one on a Ledge.
 Danny
Danny -
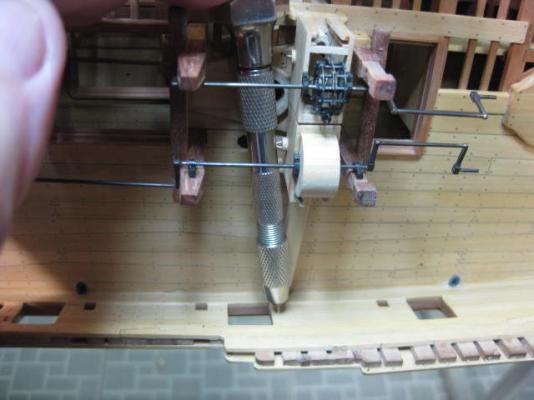
Thanks for looking in Christian. BTW - there are four eyebolts immediately either side of the Main Mast and three on each side adjacent to it that should also be drilled and fitted before any work begins on the Pump Cranks. I'll drill these now and show you the updates later.
Hi all,
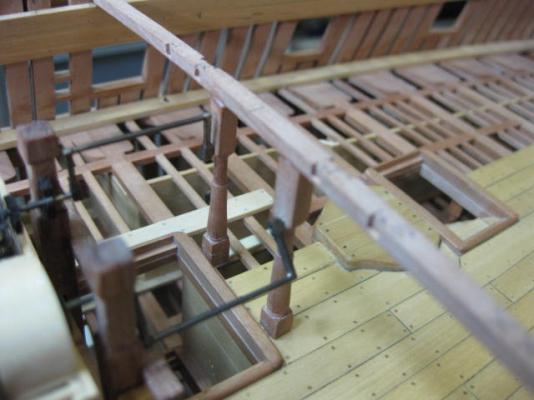
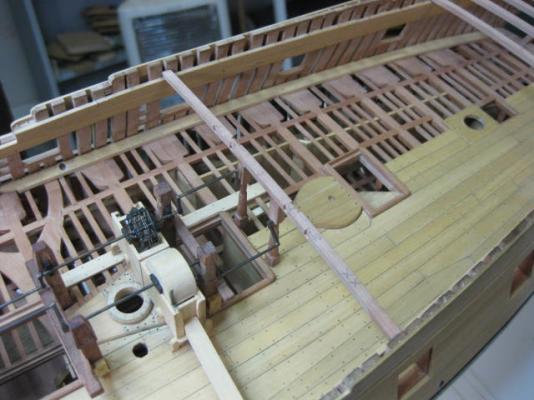
The final part of the Chain Pump setup - I've glued in the Pillars at the aft ends of the cranks. I was bumping and bending the aft ends of the cranks quite a bit, so I figured it was time to stabilize the whole structure. This meant fitting the 3rd Quarterdeck Beam as well :
My Aft Hatch is a little out of alignment - it's actually 2mm too short. I knew this a while ago - the problem is much further down. The Lower Well was slightly too far forward (2mm to be precise) and things further upwards had to be shifted to accommodate this. I'm not about to rip up two decks to fix an otherwise minor error properly
 .
. Danny
Danny -
Thanks to Ben, Geoff, Adrieke, David, John and Shaz
 .
.anybody want to invent a drill that drills at 90 degree angle

They already have
 : Proxxon Right-Angle Drill . Unfortunately, I don't own one - yet.
I shudder to think of the bits you must have broken.
In round figures - NONE
 . The last time I can remember breaking a drill bit was when I tried to go just a bit too far up a piece of round bar in my lathe - that was about 6 months ago
  .
.Dan, I have to ask...what do you do, or did, in the real world?
Concretor (32 years), Industrial Painter, Forklift Driver and Truck Driver (last 13 years). Model building is my escape from all that
 .
.You said it is easier for you to build from scratch than a bad kit; therefore, your knowledge of ships must be quite extensive. I am forced at the moment to just bash a kit since I really know nothing about ships but what I have picked up in my short time here.
Shaz, I'm coming from the exact same place as you - I knew nothing about REAL ships either until I joined MSW. I started out with just making Kits as per instructions (some a bit better than others), found MSW and all the guys who REALLY know ships, bought a few books recommended by them and went on from there to Kit-bashing and now Scratchbuilding. It's been a great learning experience, and I'm STILL learning every day - and will be until the day comes when I can no longer do this hobby for whatever reason (death of old age probably
 ).
). Danny
Danny -
-
Thanks Janos and Joe
 .
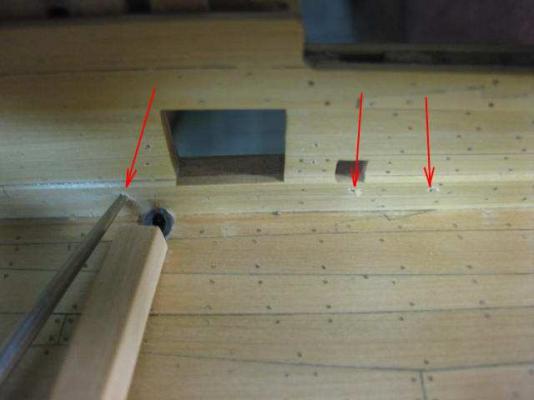
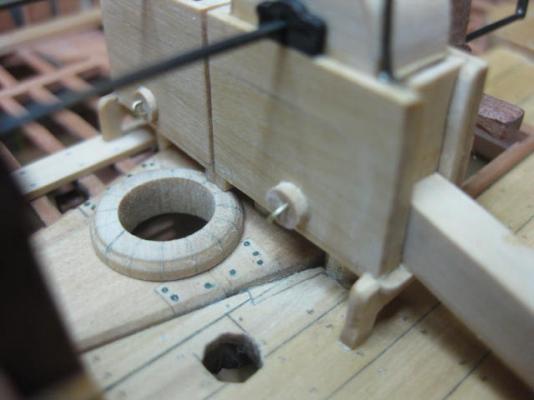
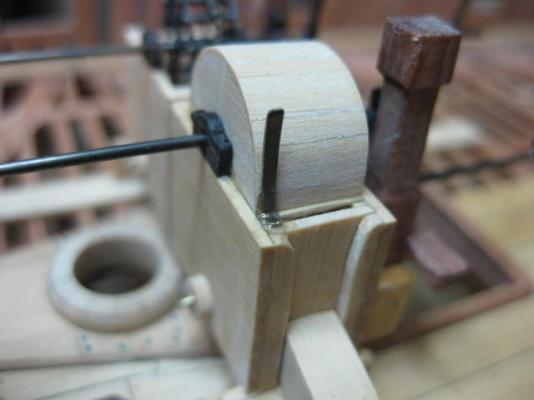
.To those other Swan builders (and anyone else for that matter) who intend fitting Guns to their ship I STRONGLY advise that you drill the holes for the Breeching Rope and Port Tackle Eyebolts BEFORE you add too much Upper Deck "furniture". This can get a bit awkward if you don't
 :
: Danny
Danny- sonicmcdude and mtaylor
-
 2
2
-



HMS Vulture 1776 by Dan Vadas - FINISHED - 1:48 scale - 16-gun Swan-class sloop from TFFM plans
in - Build logs for subjects built 1751 - 1800
Posted
Thanks very muchly Randy, Adrian, Russell, Mark, Sherry, Michael and Pat .
.
Geez Russell, does that mean I need to post something NEW every day? :D I'll do my best not to disappoint
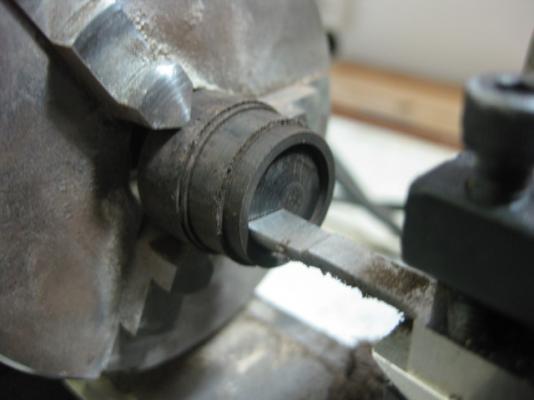
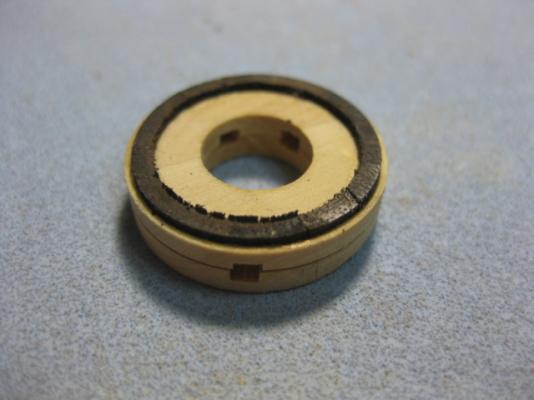
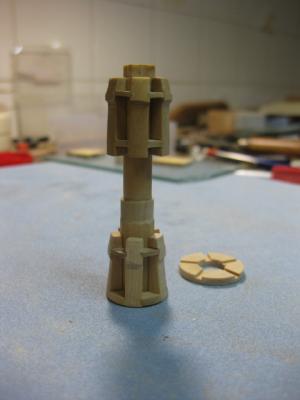
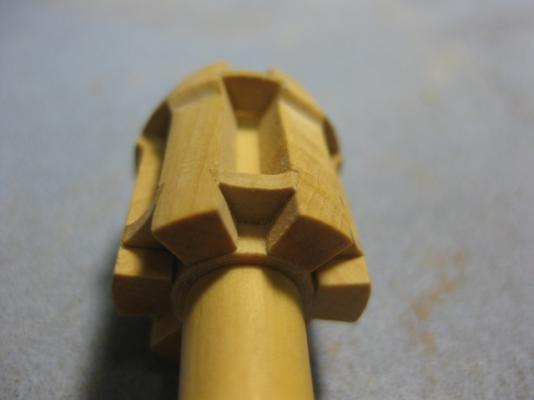
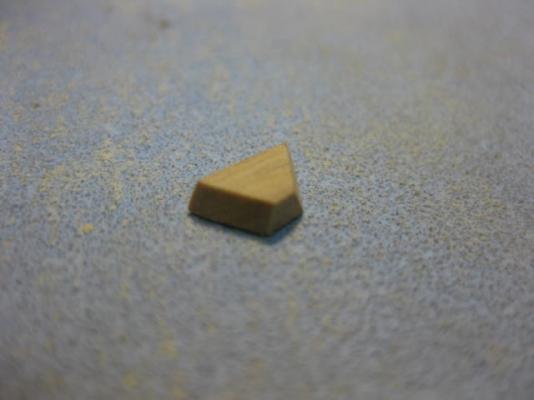
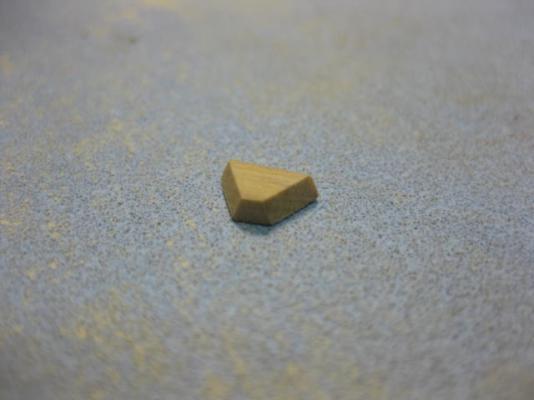
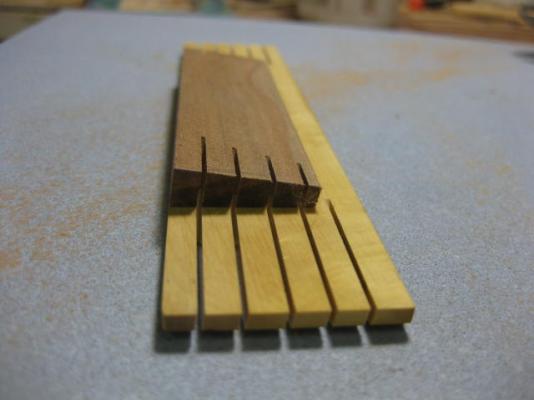
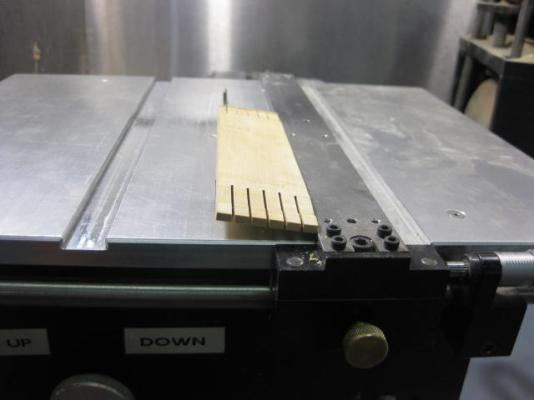
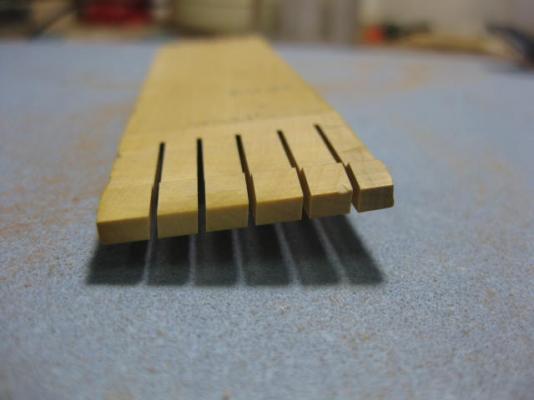
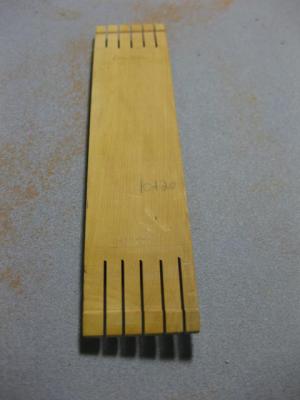
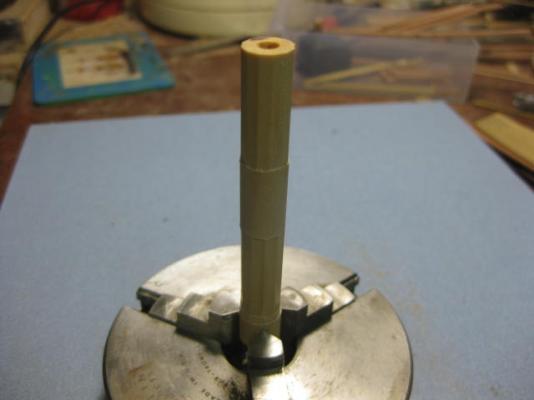
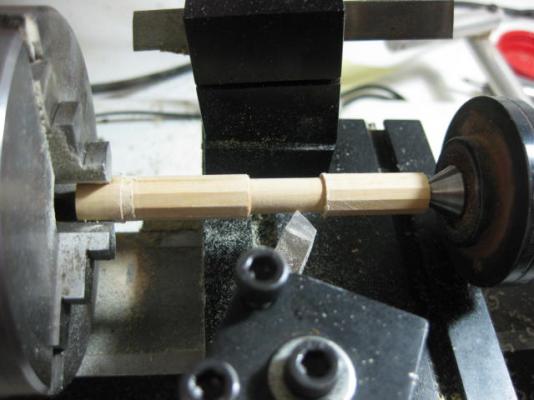
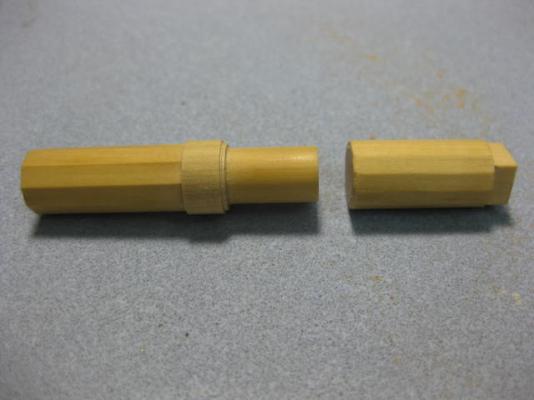
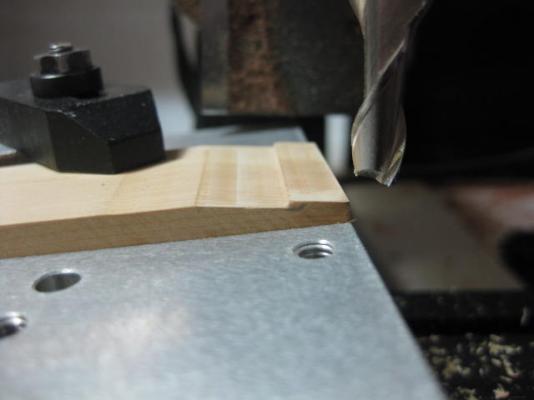
Pat, the only things I did differently with the Drumhead Ring was up the RPM to near Max and slow down the Feed to near Zero with the Cutoff Tool - that worked a lot better, as you can see below. The ring has only just been glued in and still needs finishing, but it came out IN ONE PIECE :
:
Note - the top face of the ring is straight off the Cutoff Tool. The bottom face has been machined to fit the groove.