HOLIDAY DONATION DRIVE - SUPPORT MSW - DO YOUR PART TO KEEP THIS GREAT FORUM GOING! (Only 75 donations so far out of 49,000 members - C'mon guys!)
×


ECK
-
Posts
640 -
Joined
-
Last visited
Content Type
Profiles
Forums
Gallery
Events
Everything posted by ECK
-
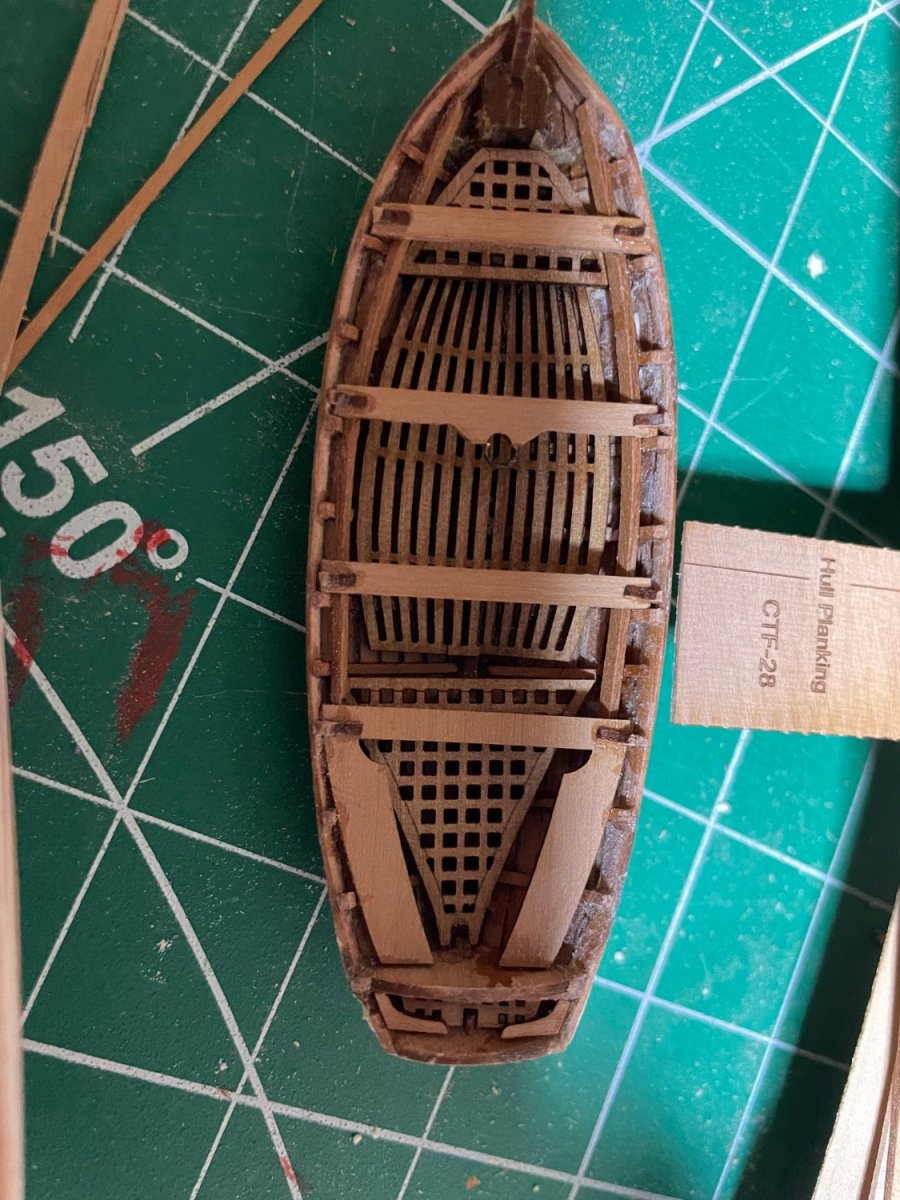
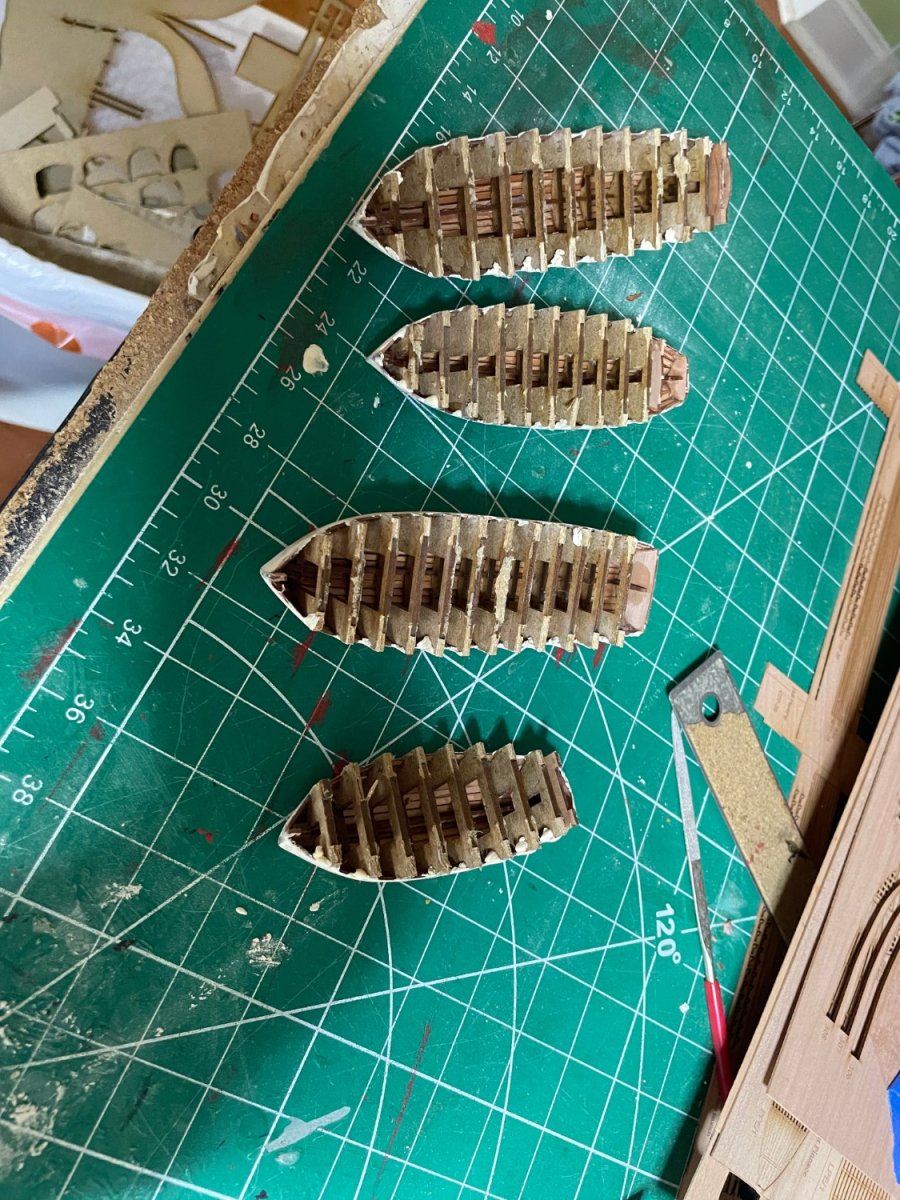
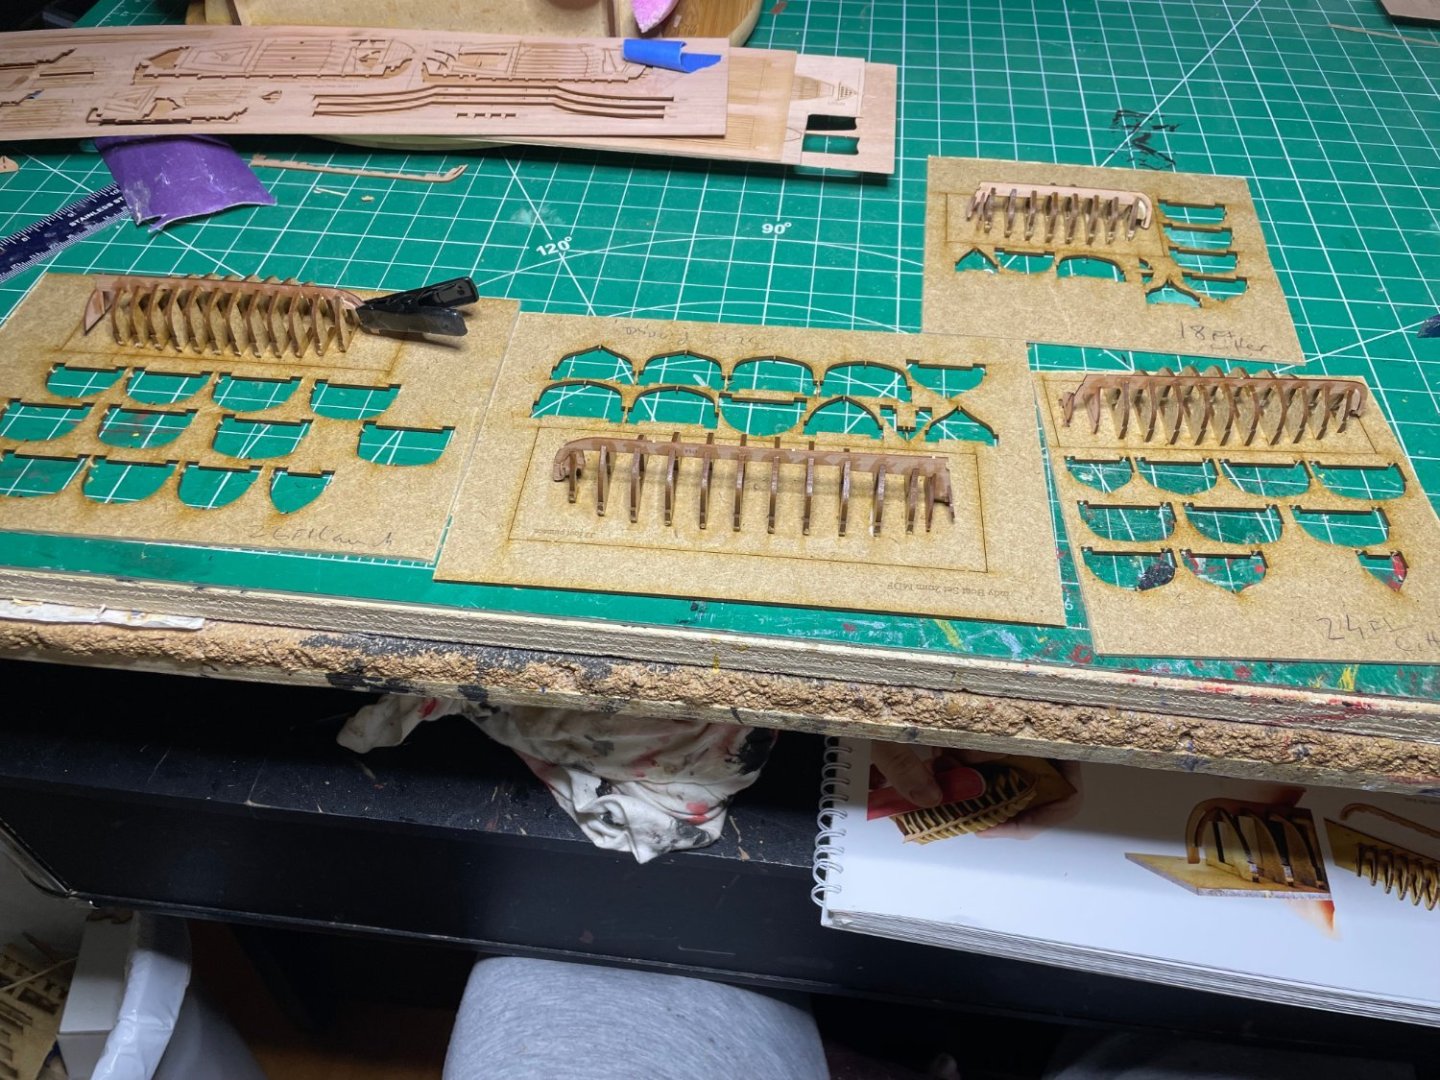
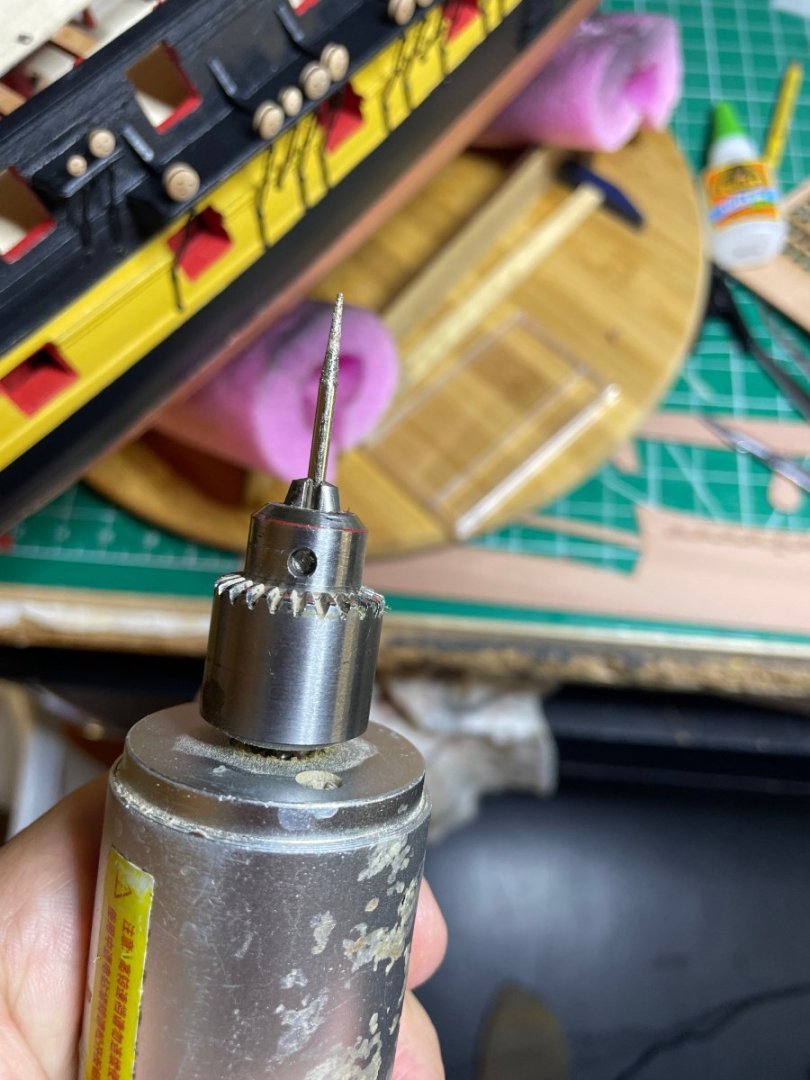
More progress today. Mots of the work done. Tomorrow will be painting day, then file out the our holes and then the boat equipment.


- 233 replies
-
- 12
-

-
- Indefatigable
- Vanguard Models
- (and 1 more)
-
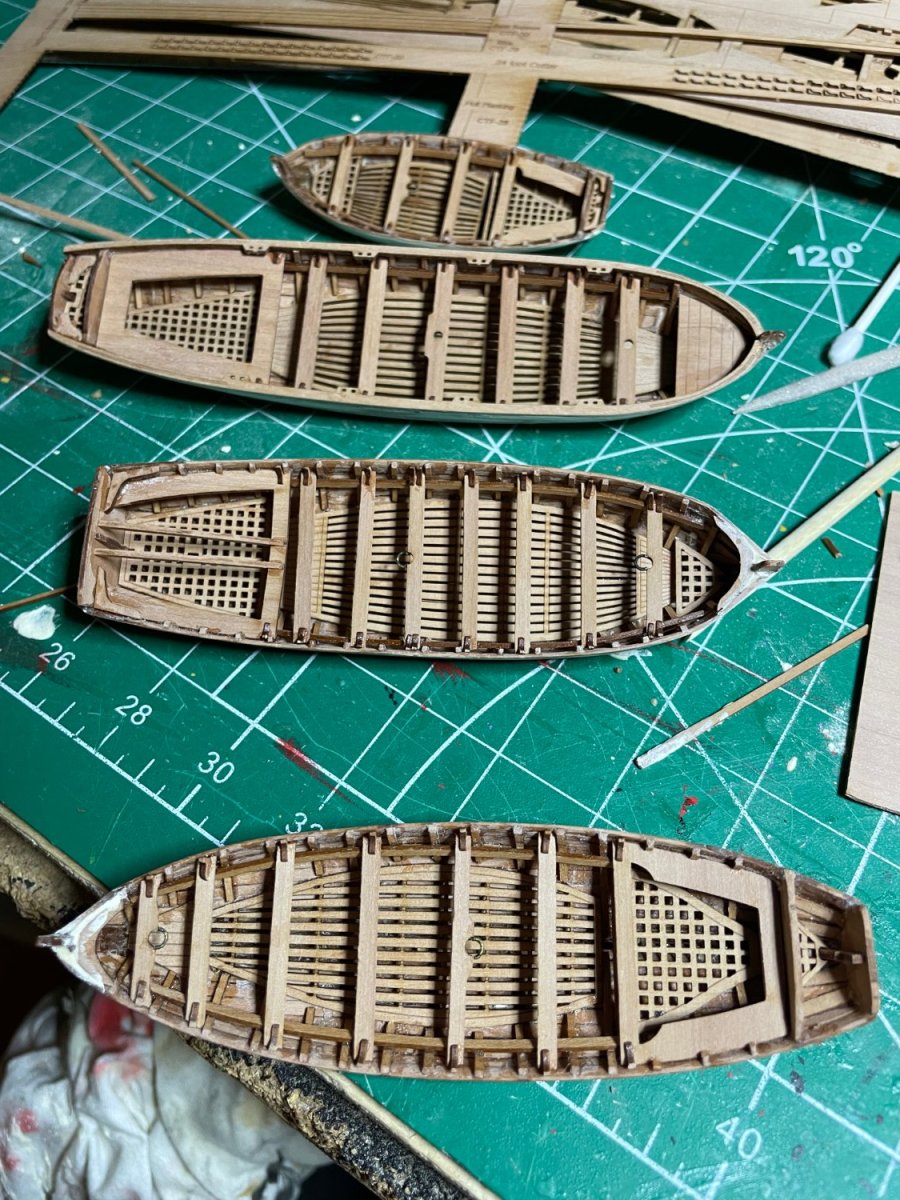
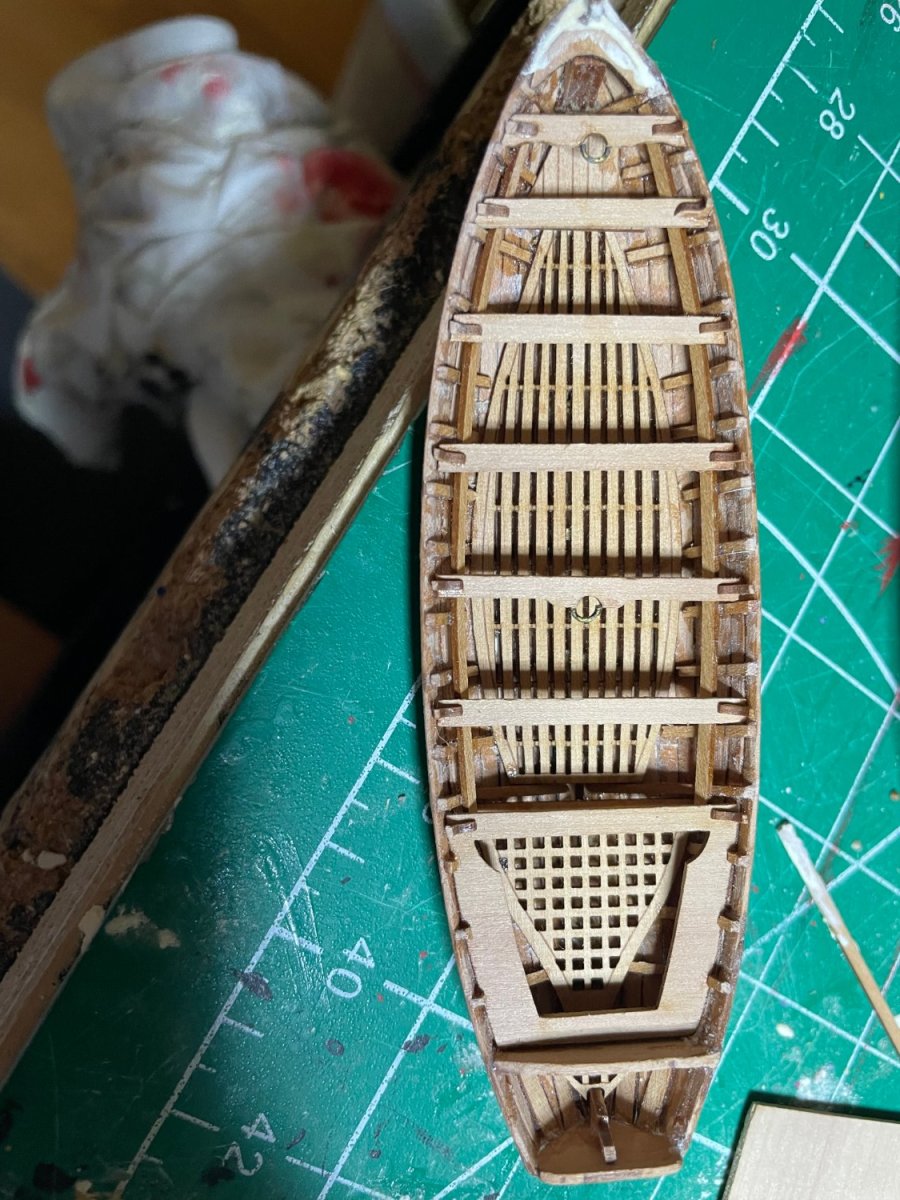
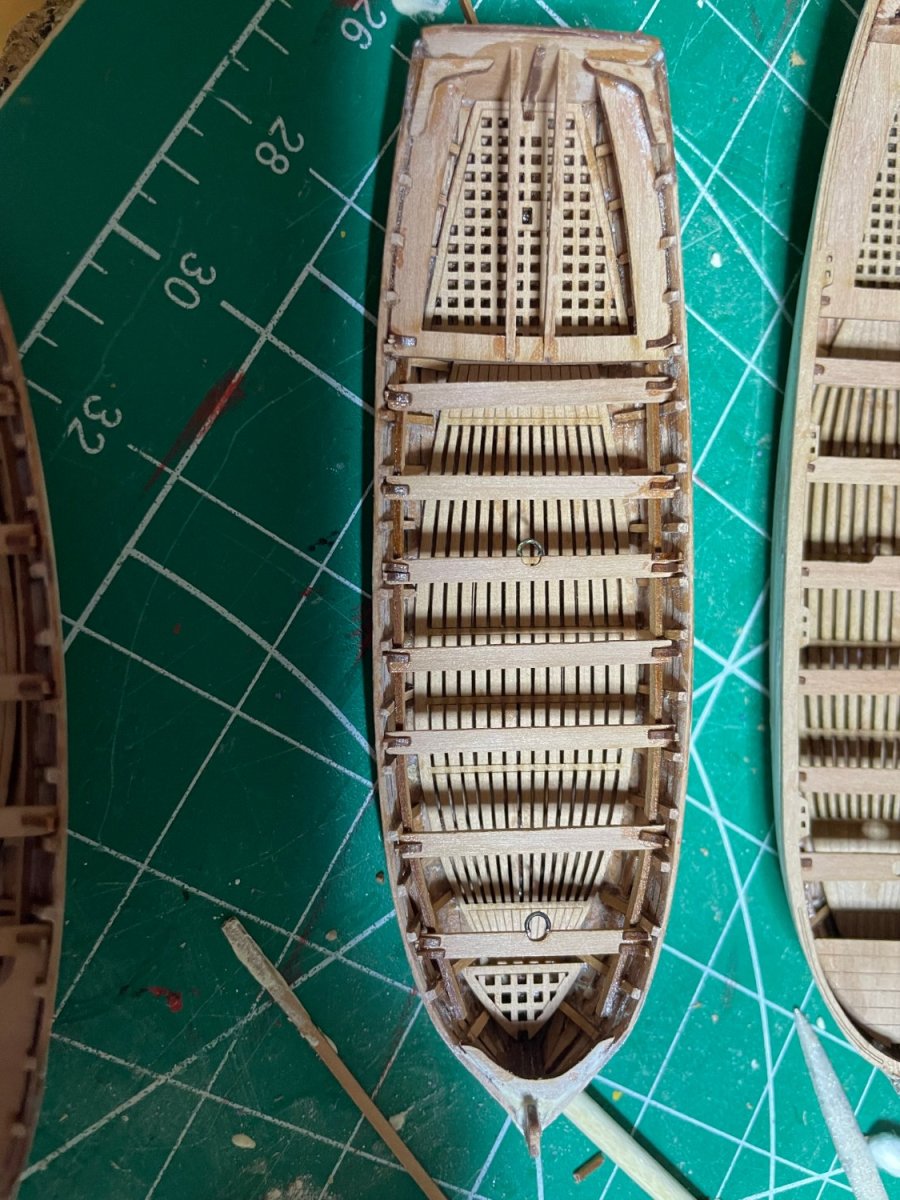
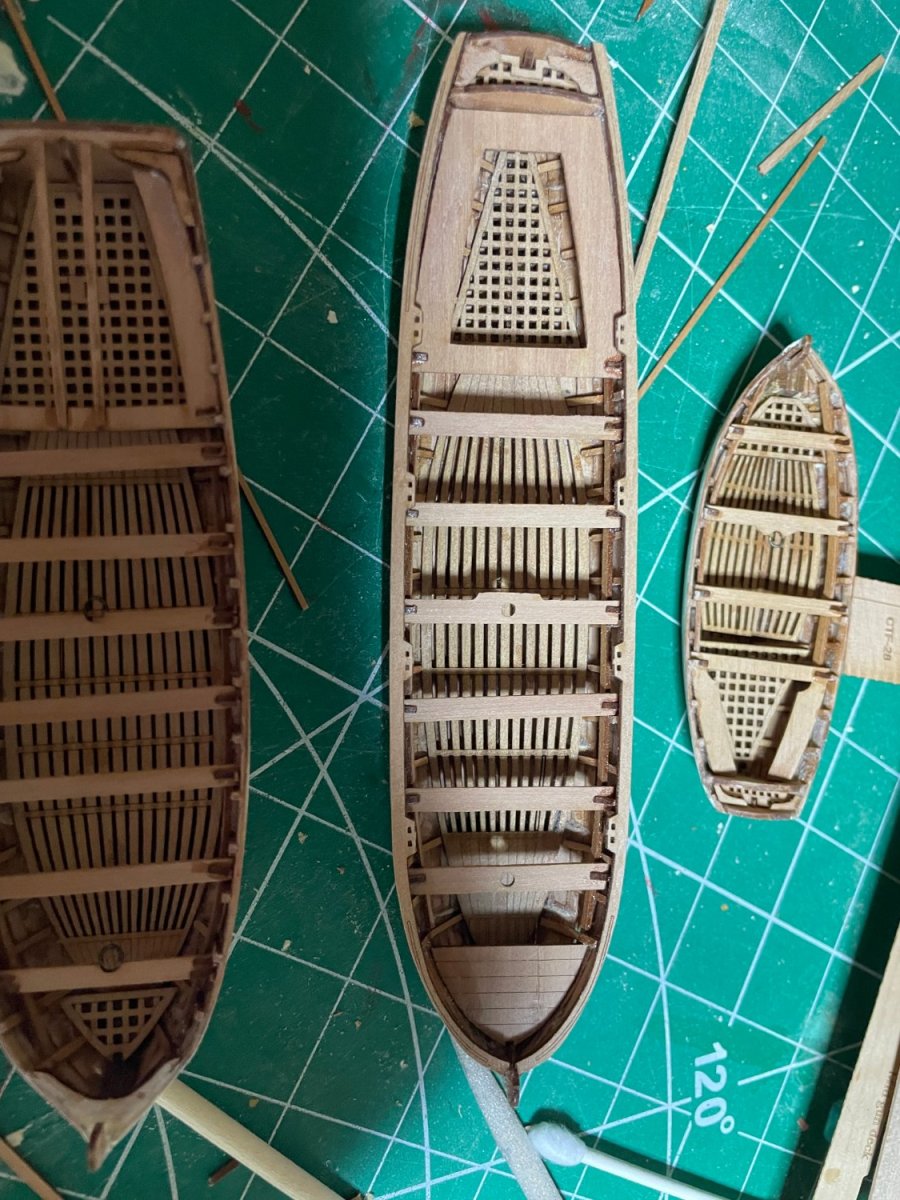
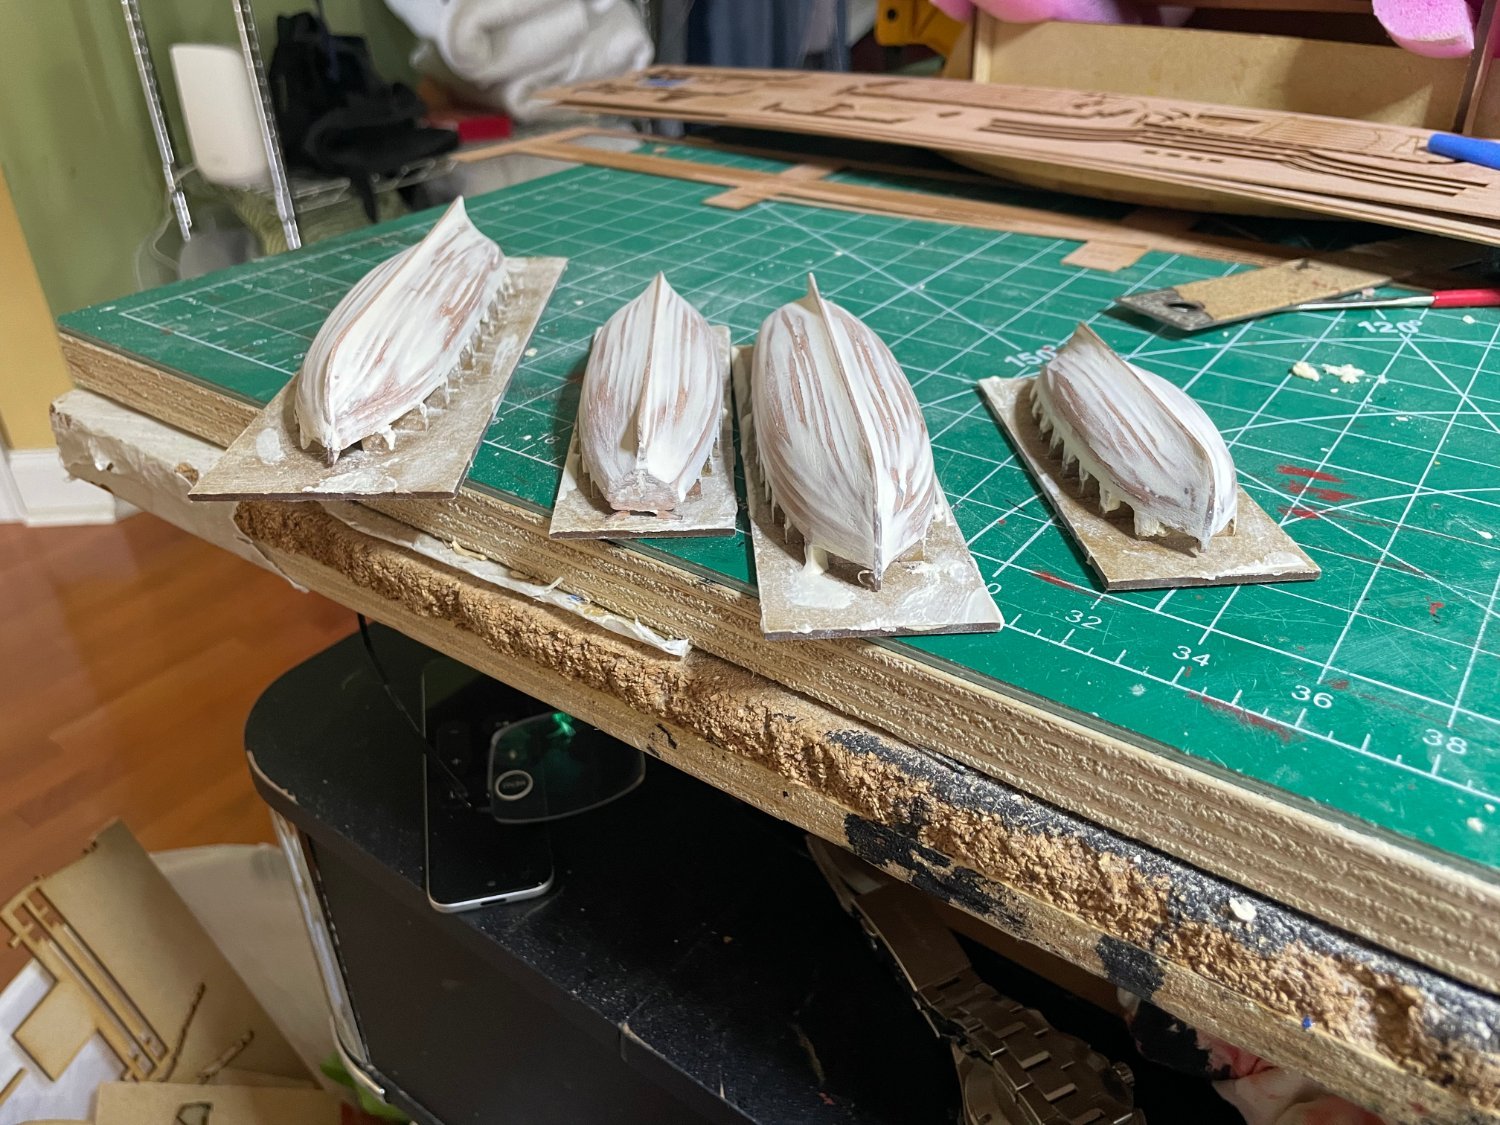
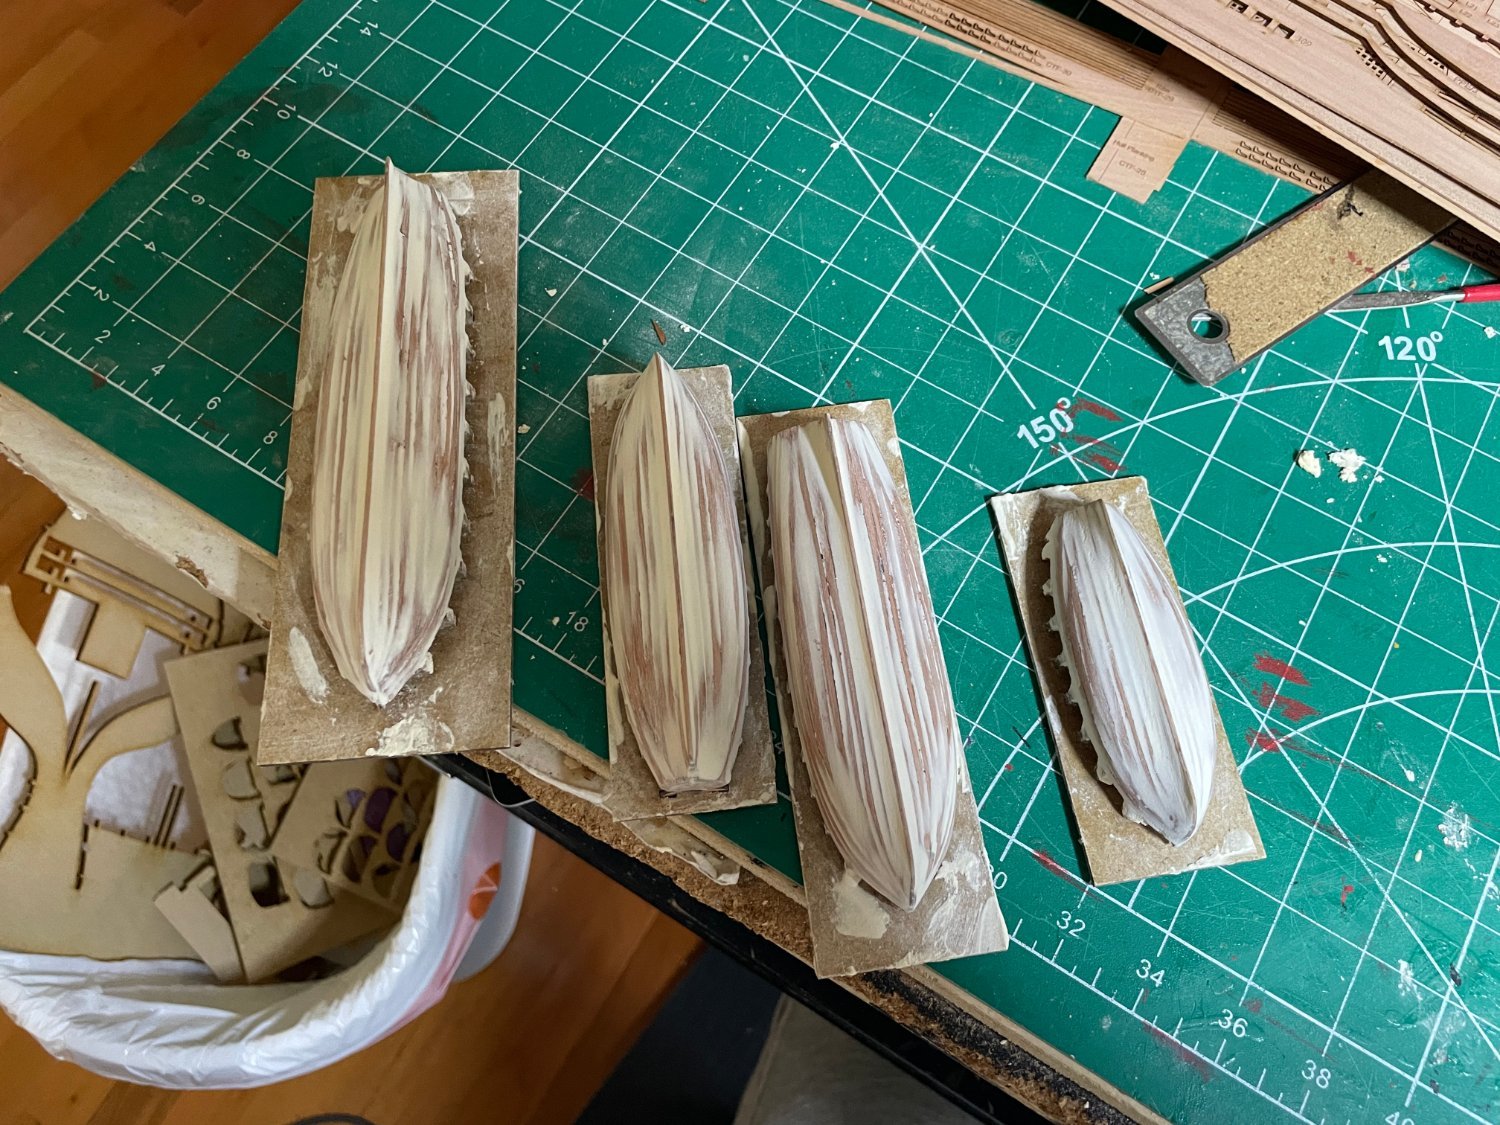
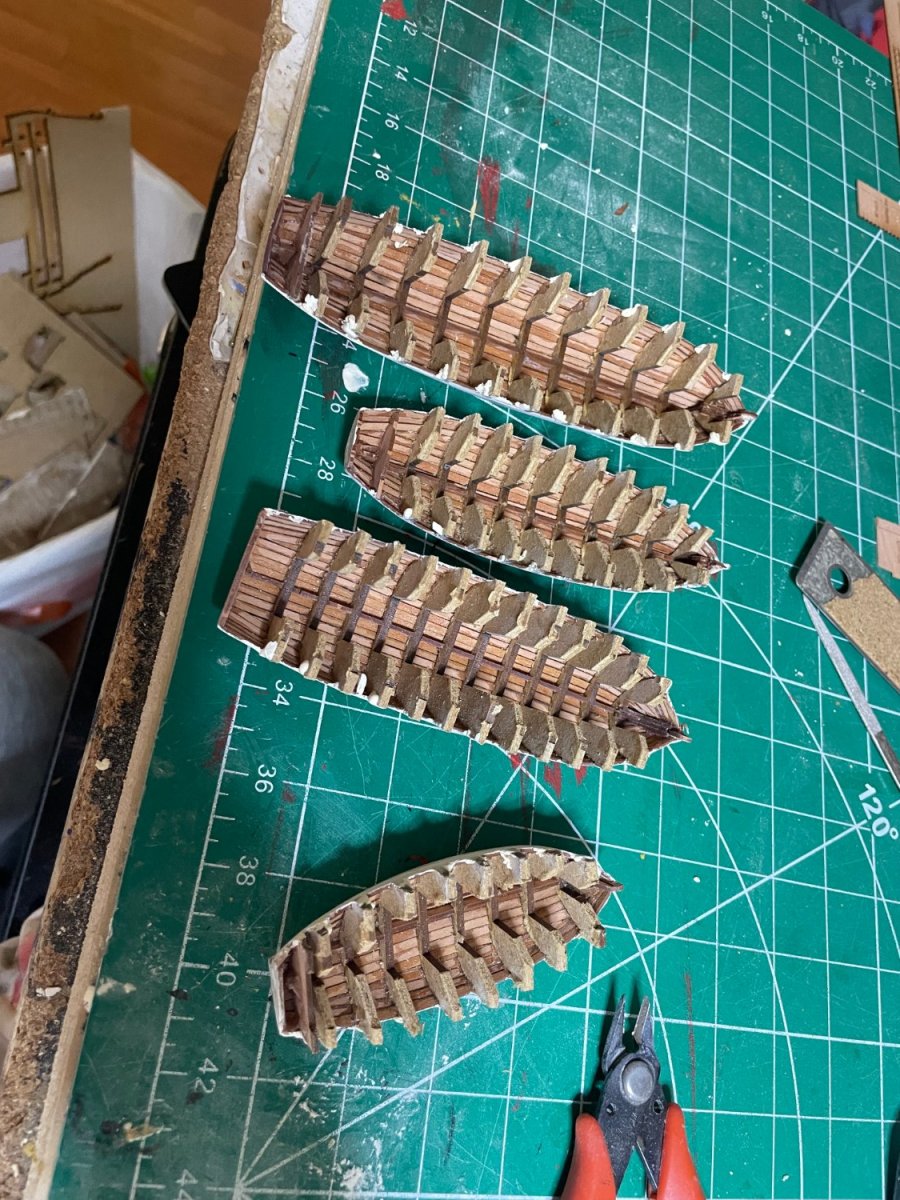
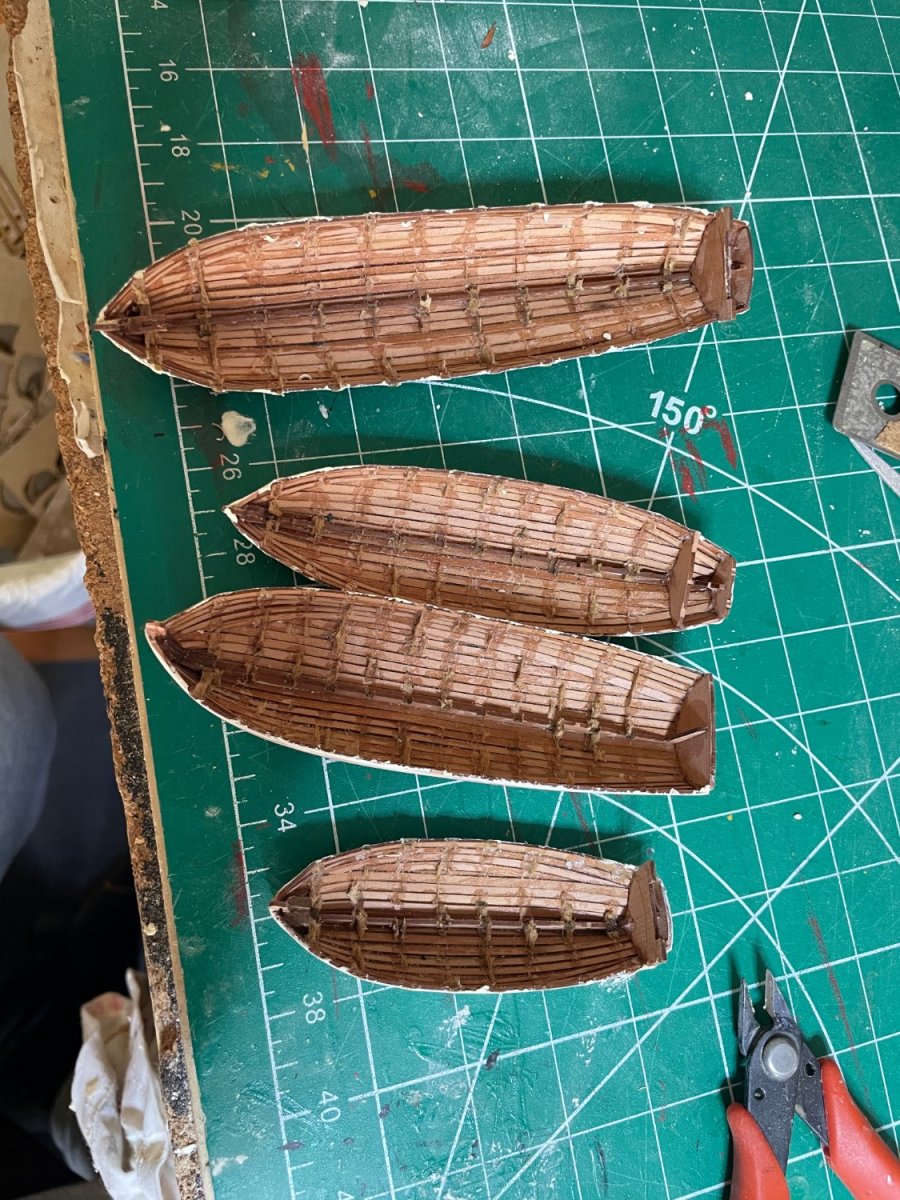
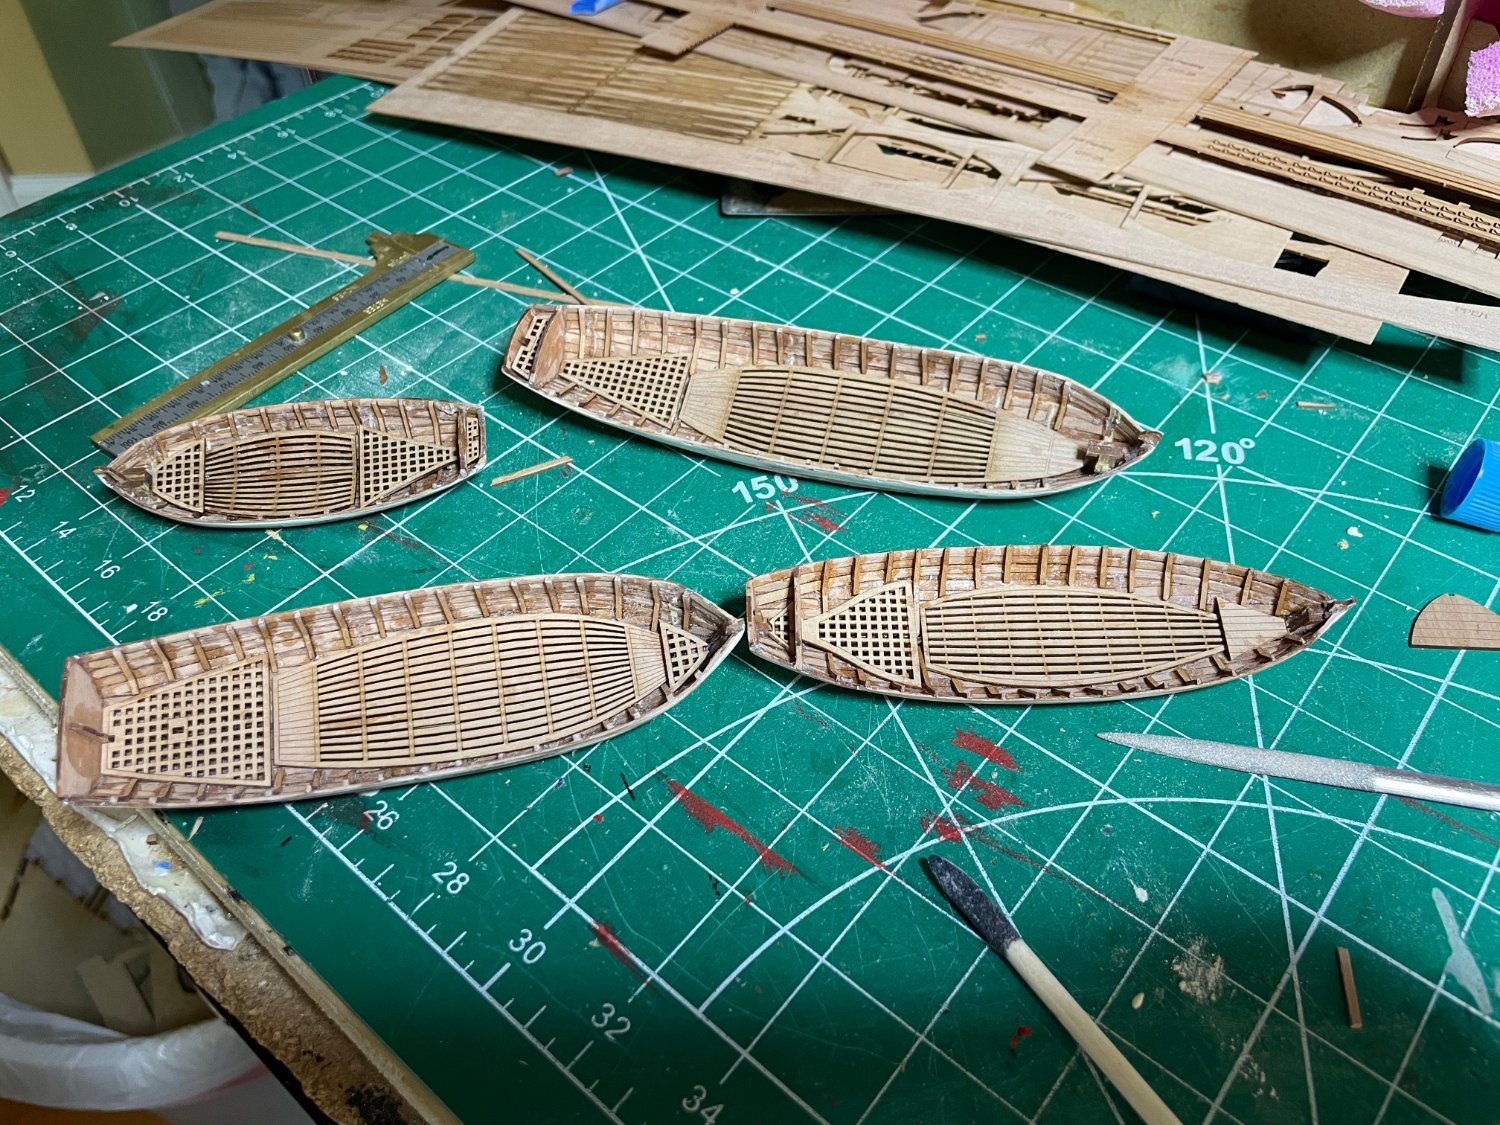
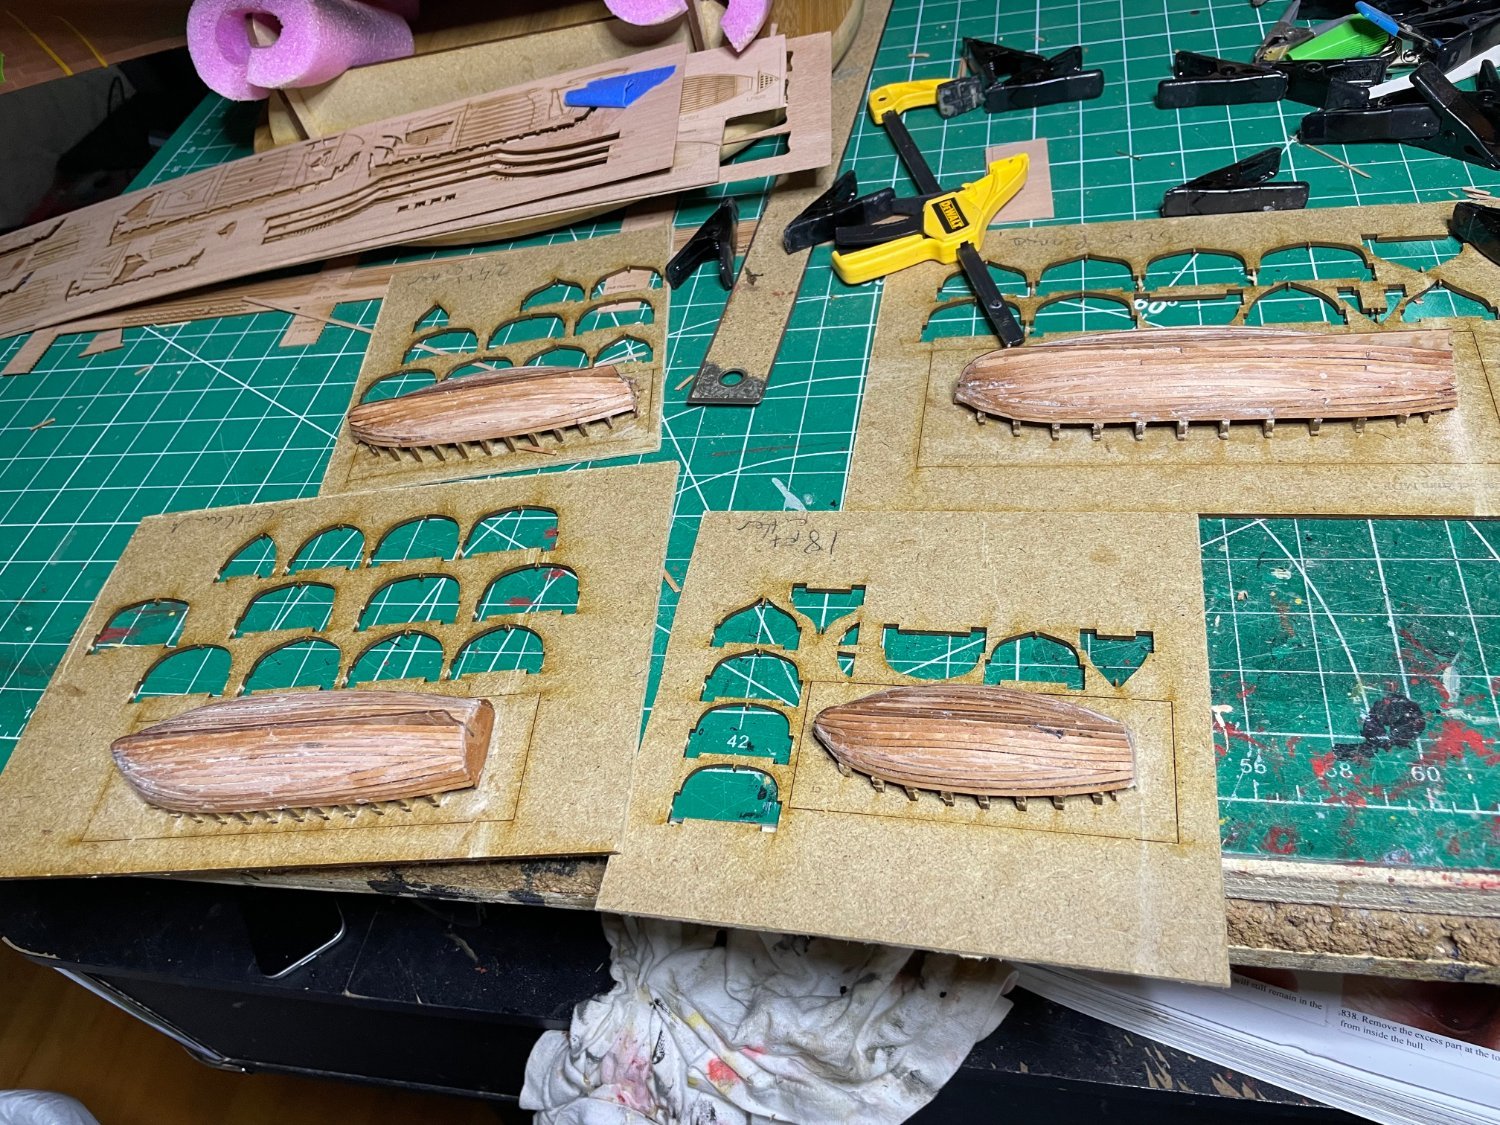
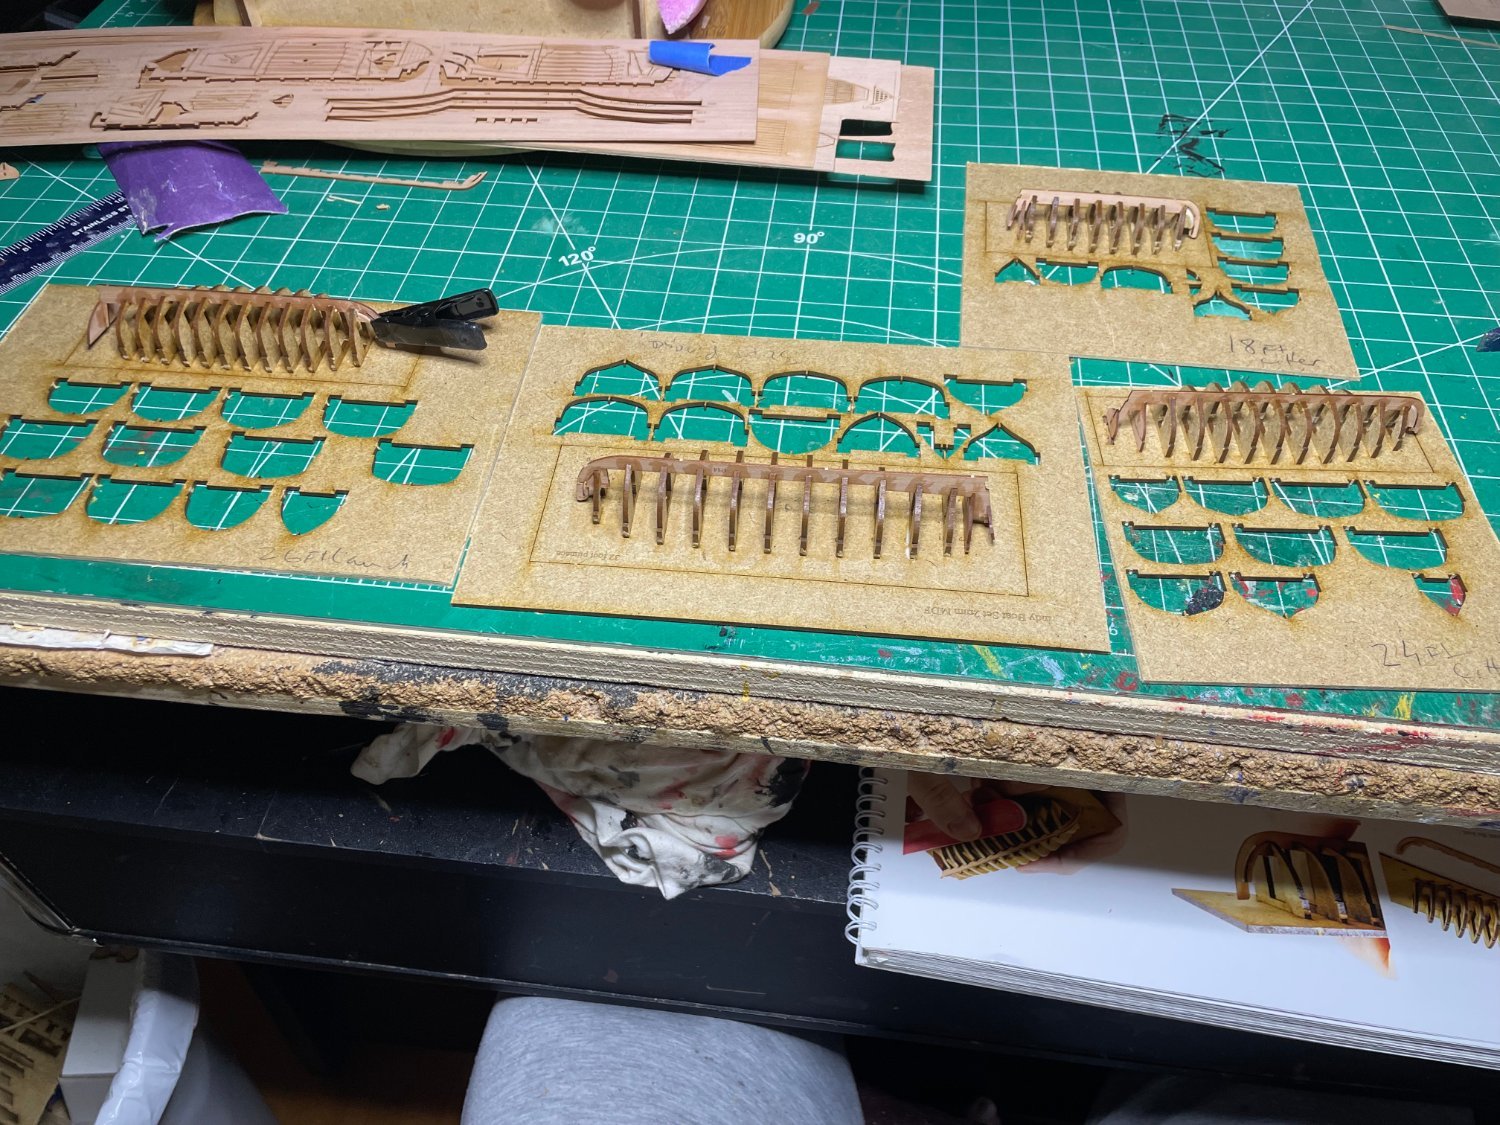
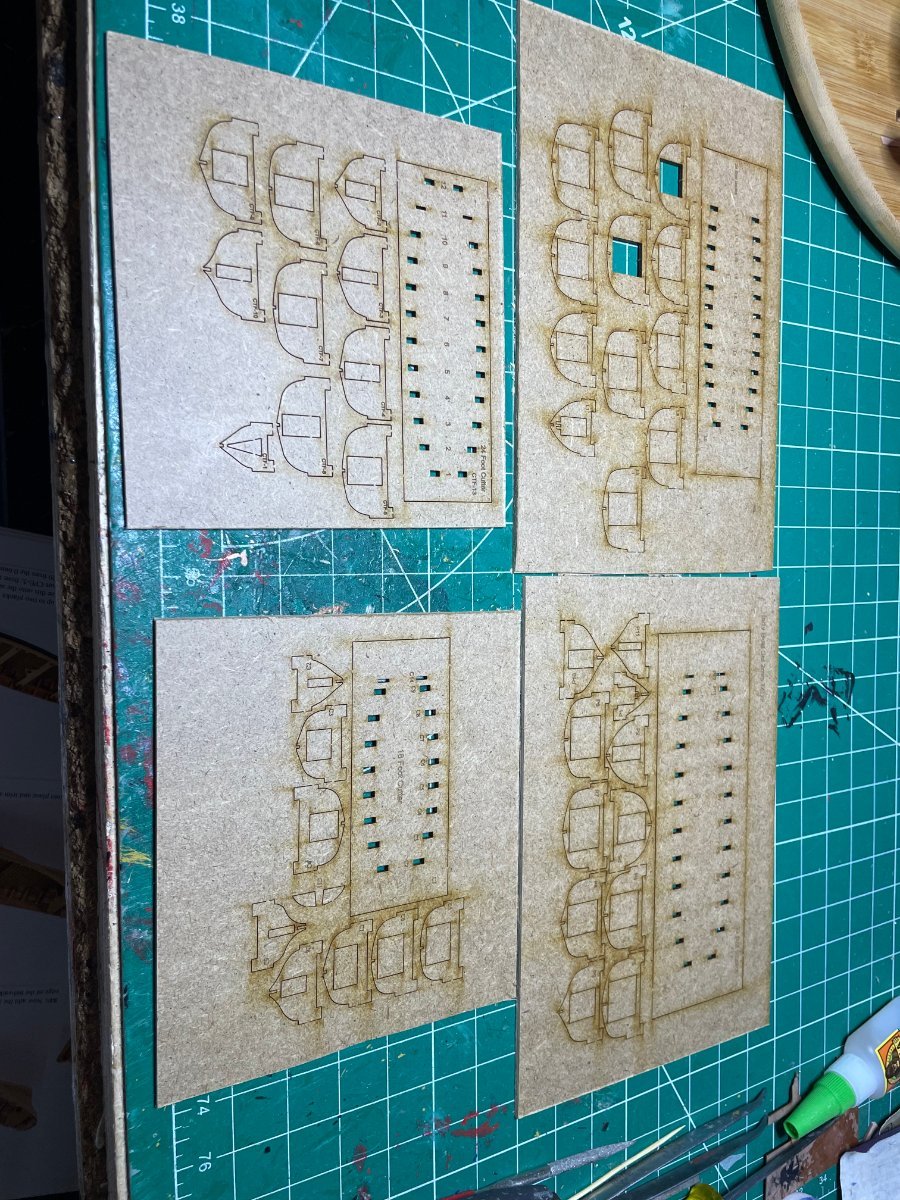
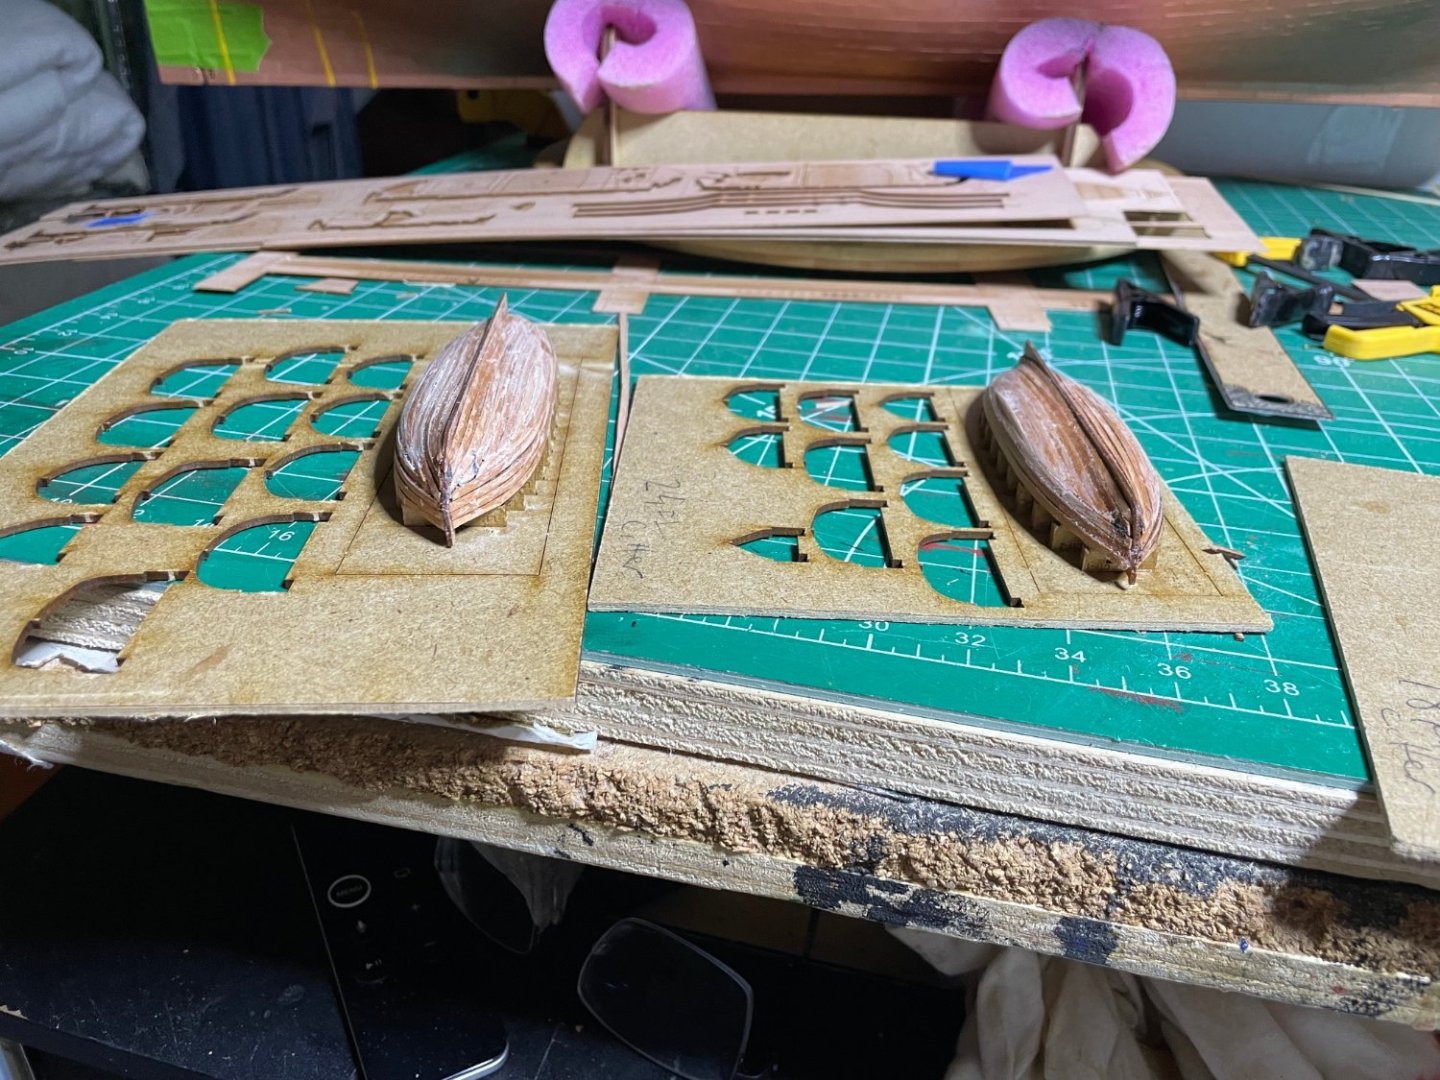
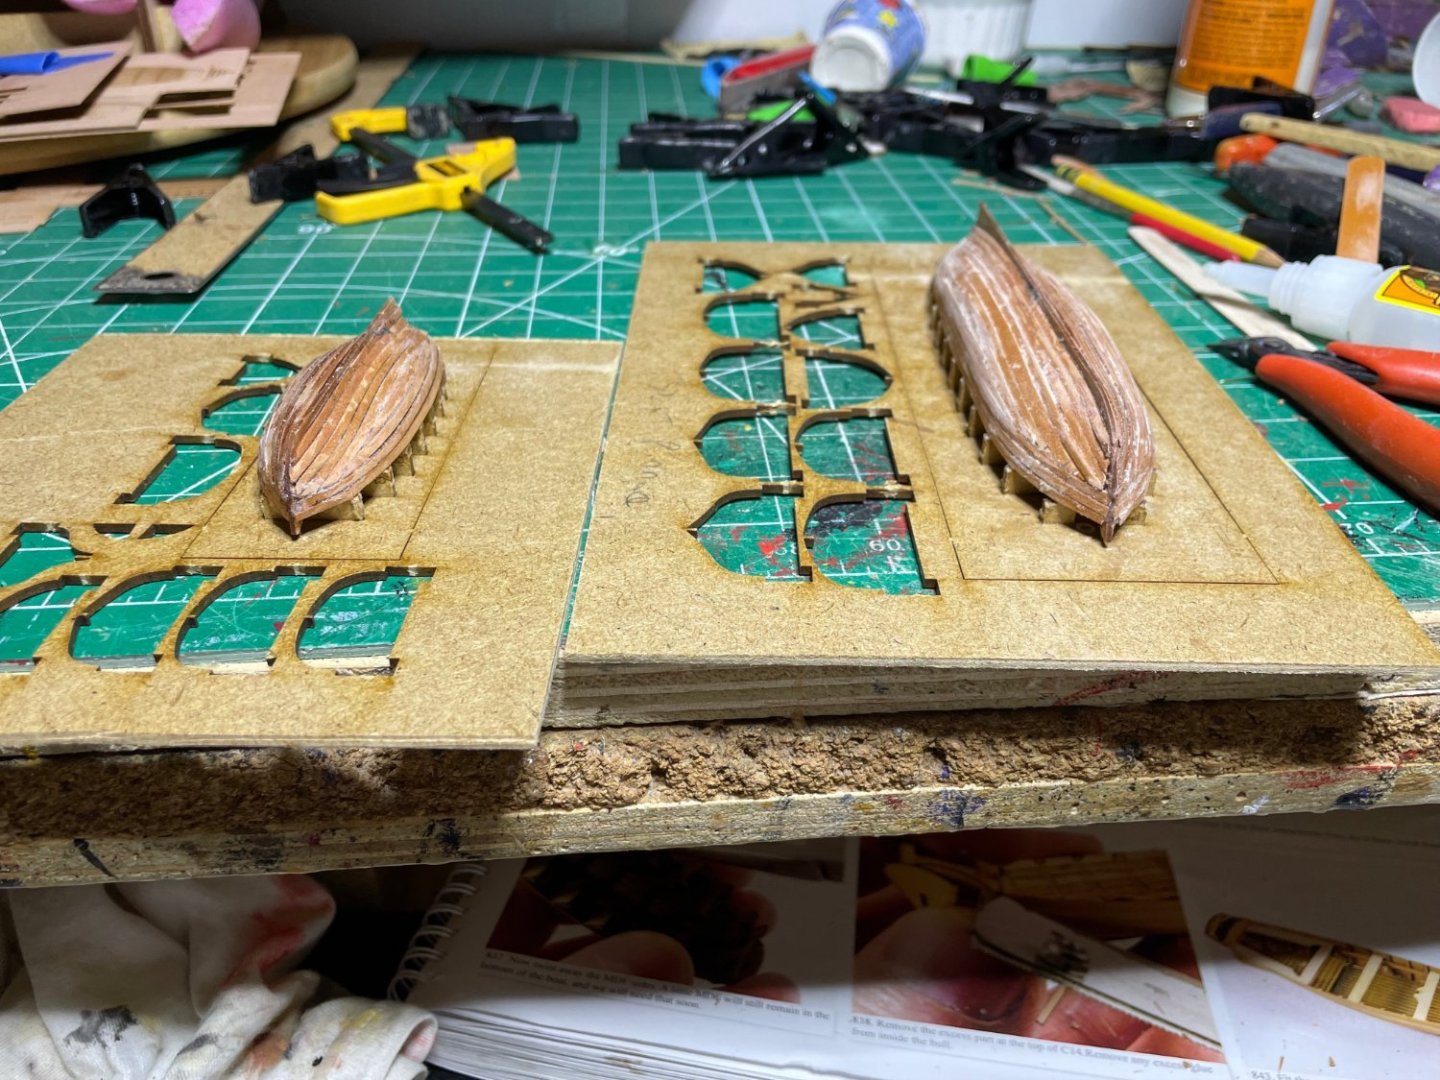
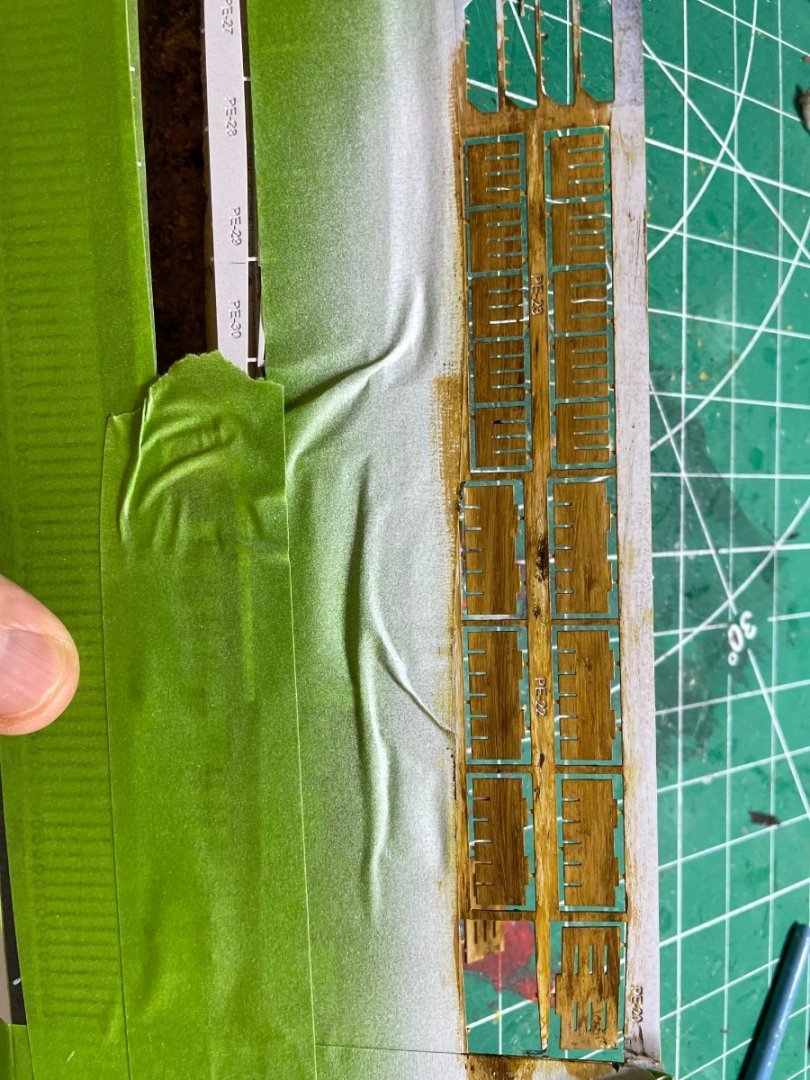
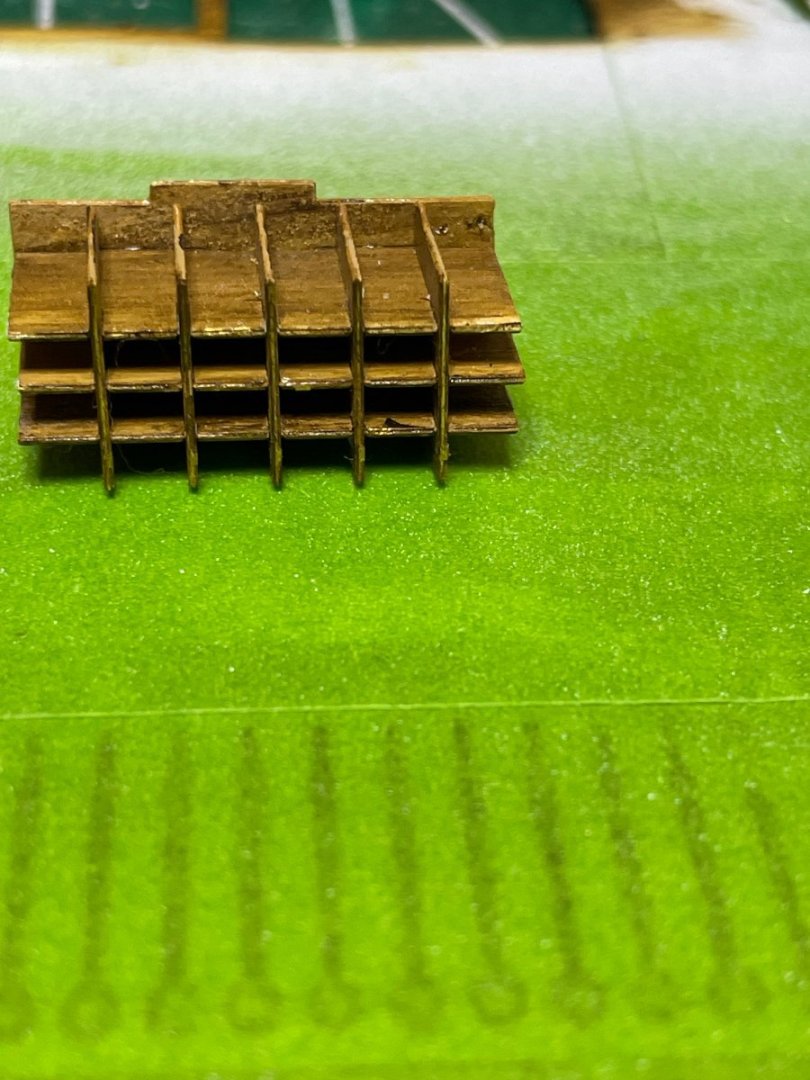
Finished planking the buggers. There are 5 ships boats provided, duplicate 24 ft boats but I had to much battle damage on one of them to continue. Have 1 each 32,26,24 and 18 footers. Will take a lot of sanding, filler and paint to get them into shape.


- 233 replies
-
- 12
-
-
- Indefatigable
- Vanguard Models
- (and 1 more)
-
Looks good. I had to fiddle quite a bit as well as taking measurements from the plans in that area not easy given the curve of the hull. I used a piece of wood the correct width as a spacer.
- 587 replies
-
- 2
-

-
-
- Indefatigable
- Vanguard Models
- (and 1 more)
-
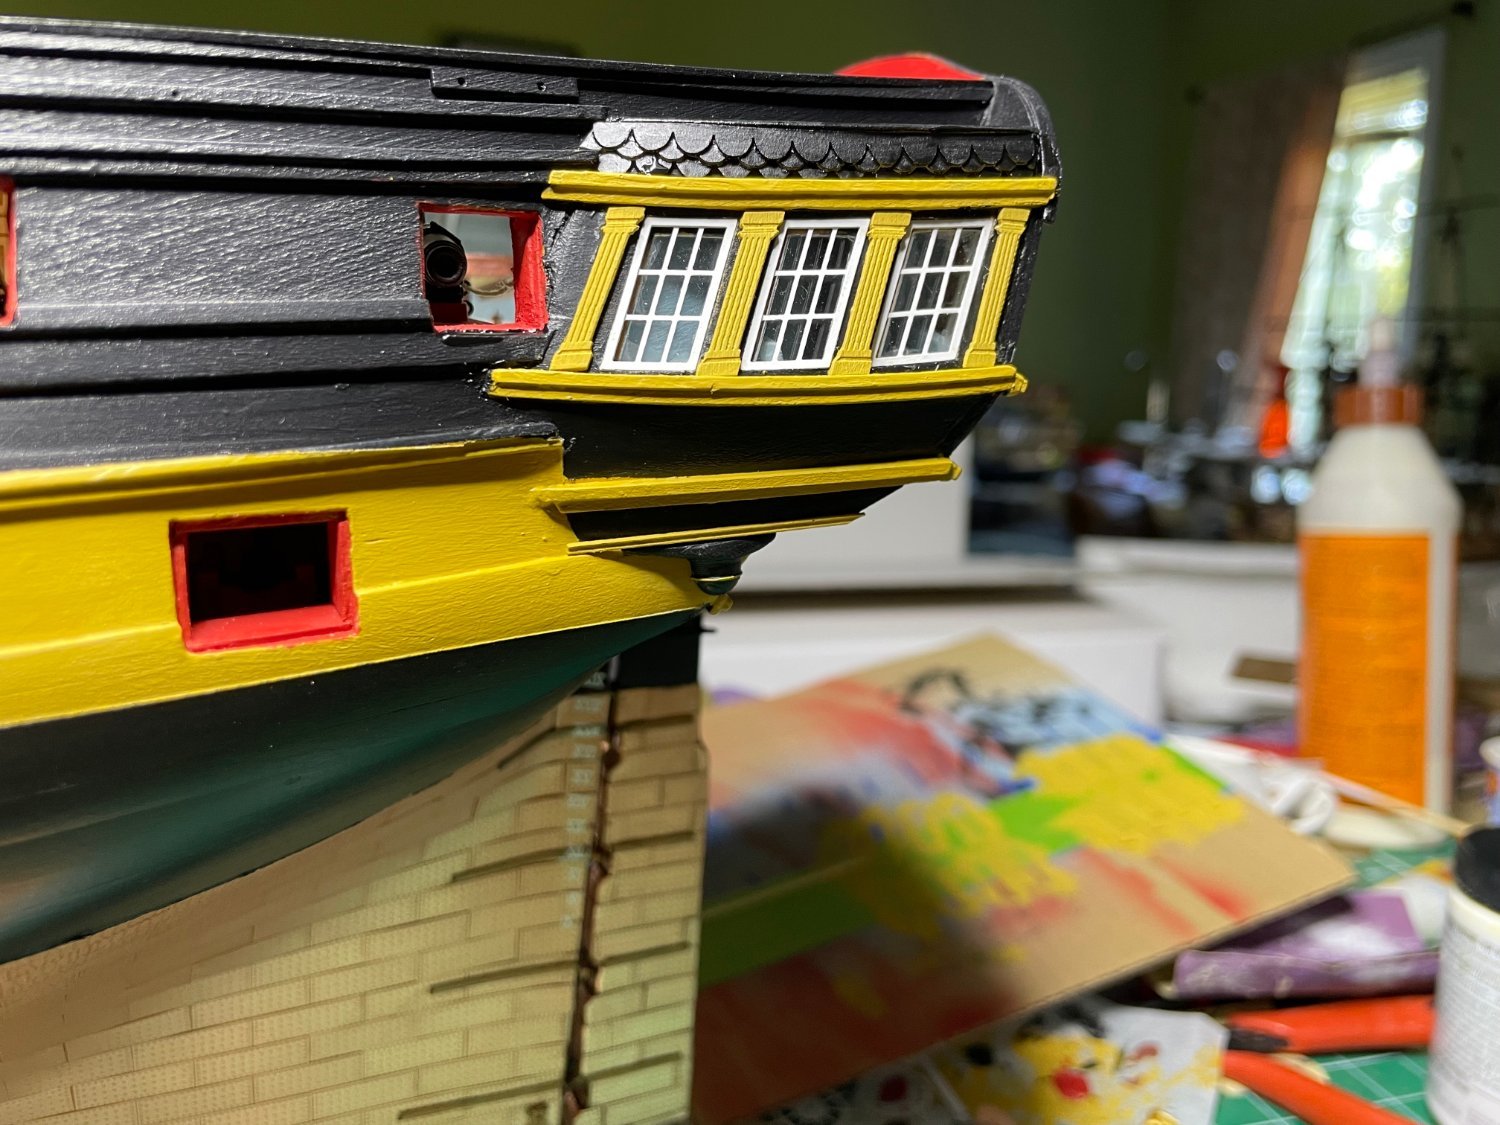
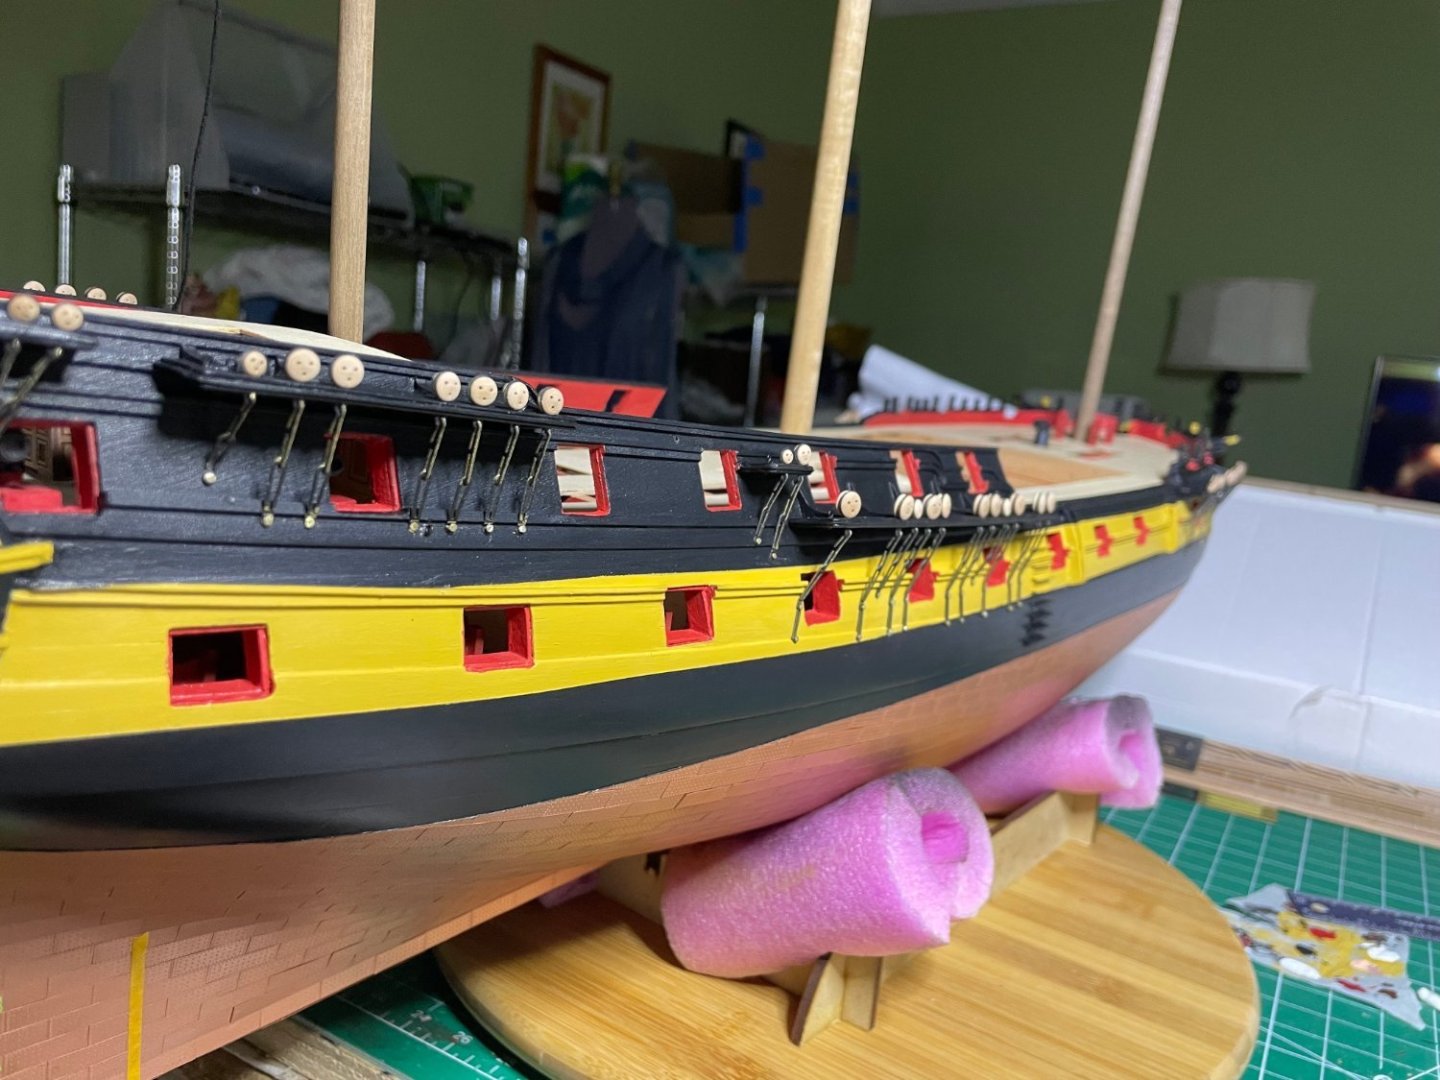
Except for the rails, the hull is done. I used left over gun ports to bring out the sternchasers' appearance. Also remembered to put in the main stun'sail booms by the Being a masochist, I think I will do the ship's boats next IMG_7334.heic IMG_7336.heic


- 233 replies
-
- 15
-
-

-
- Indefatigable
- Vanguard Models
- (and 1 more)
-
I found that paint heals all wounds. Looking good.
- 587 replies
-
- 2
-
-
-
- Indefatigable
- Vanguard Models
- (and 1 more)
-
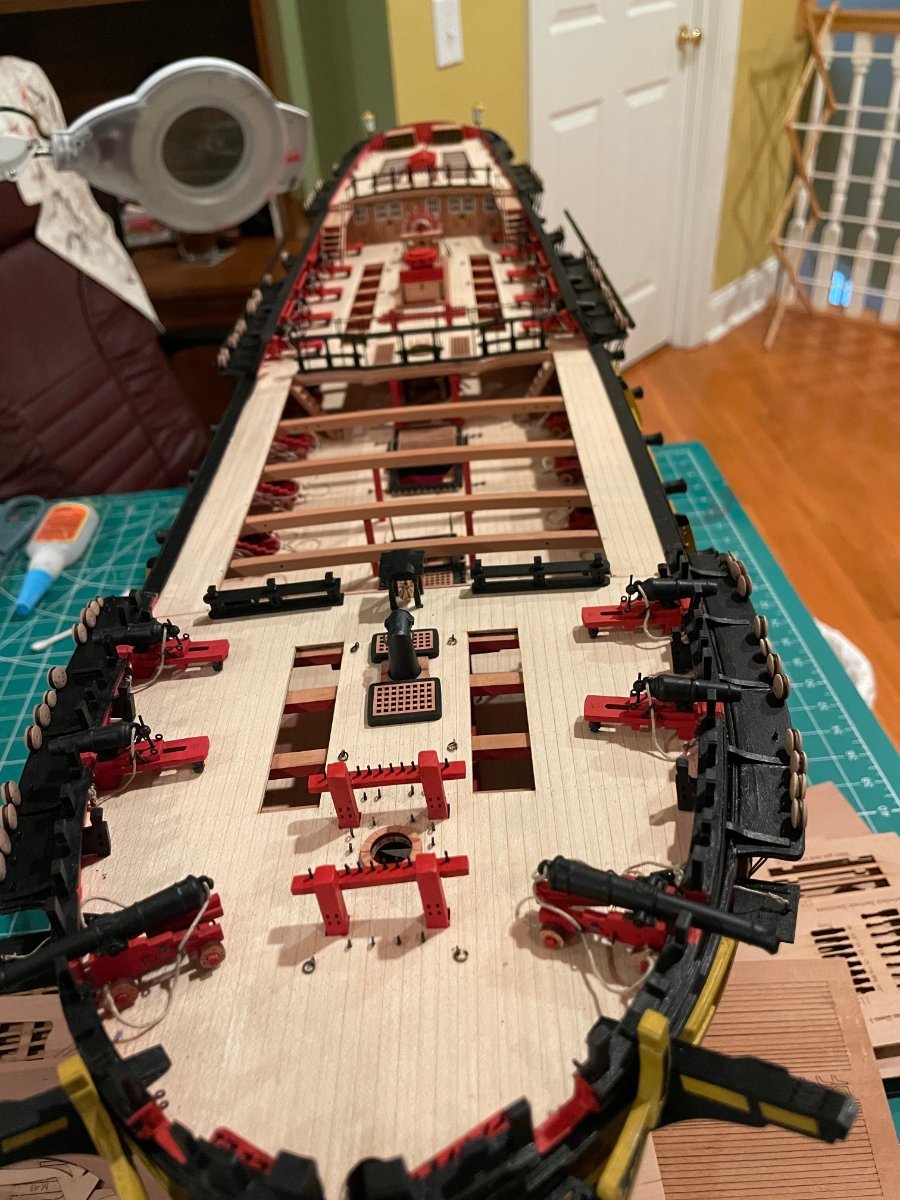
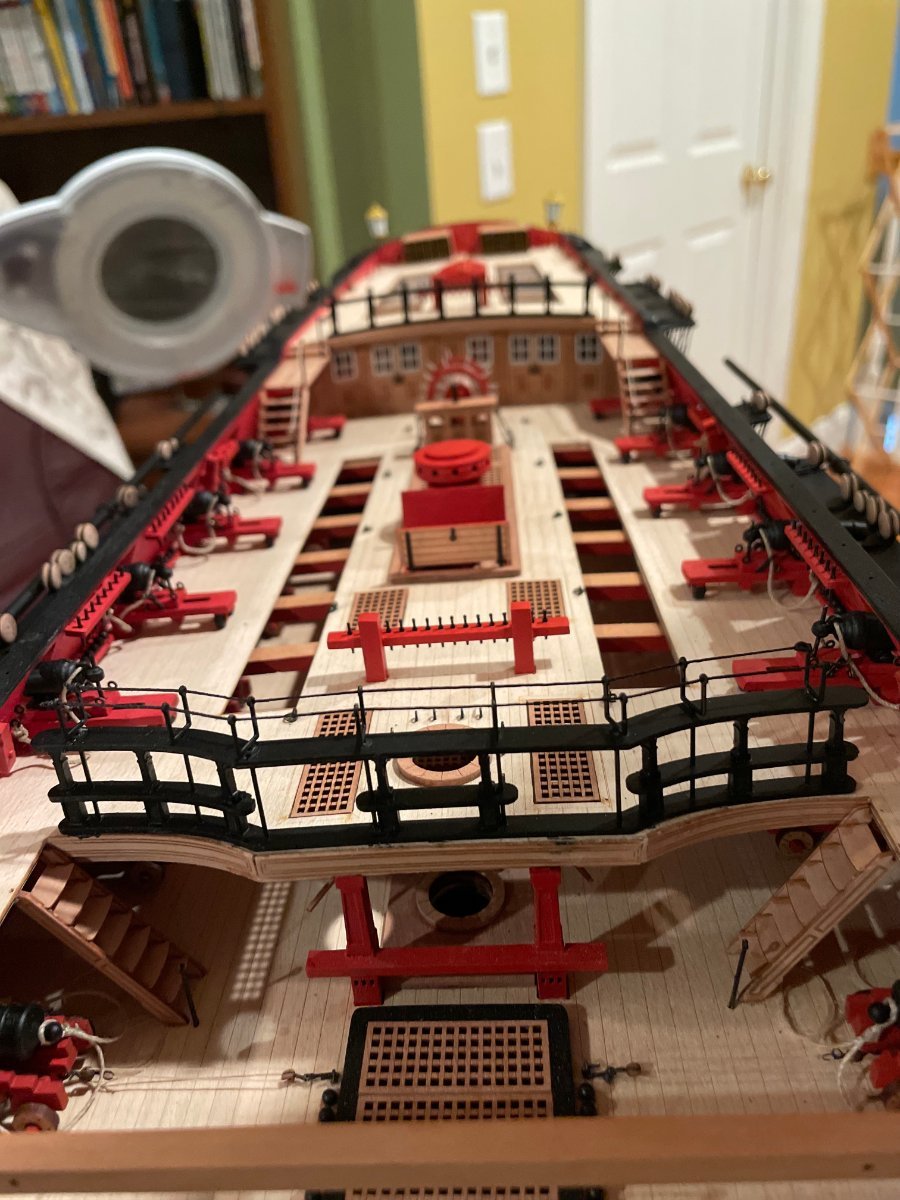
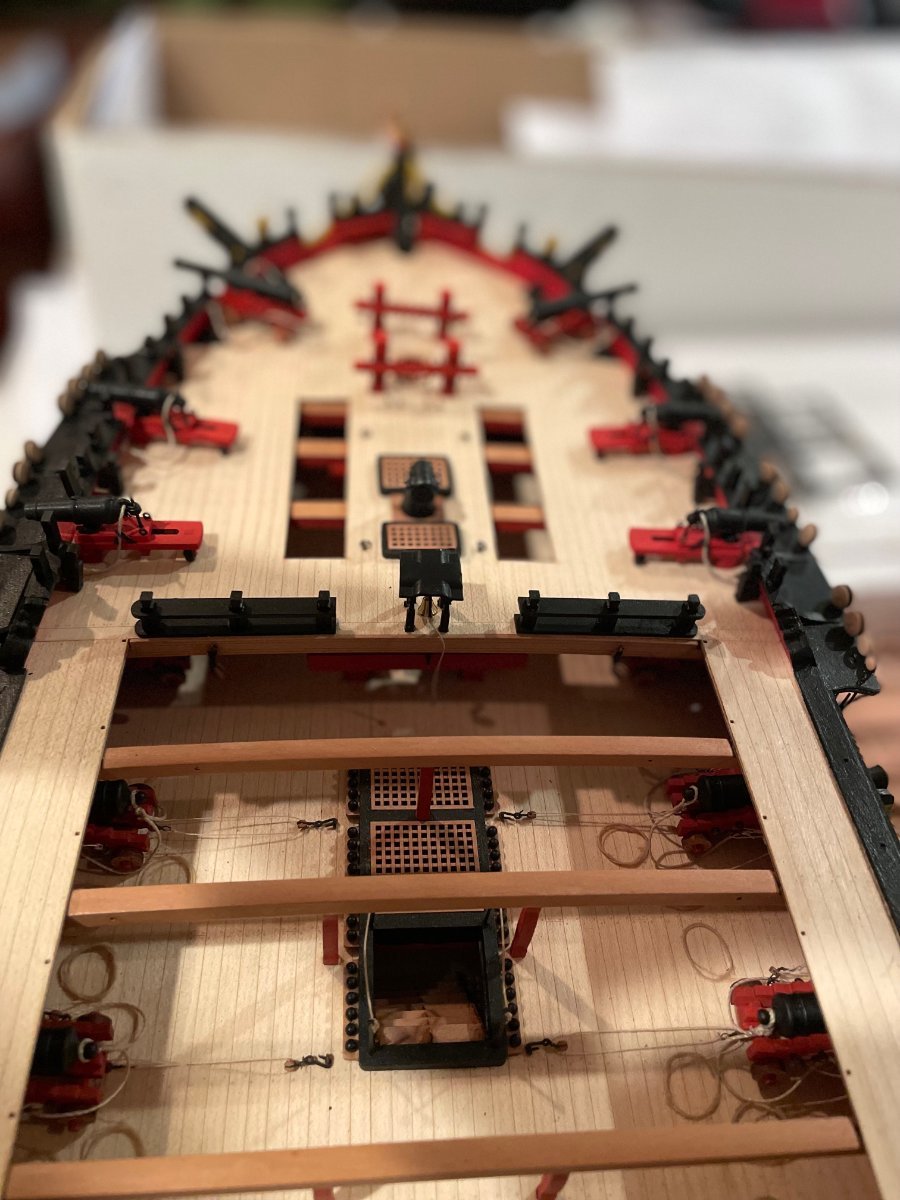
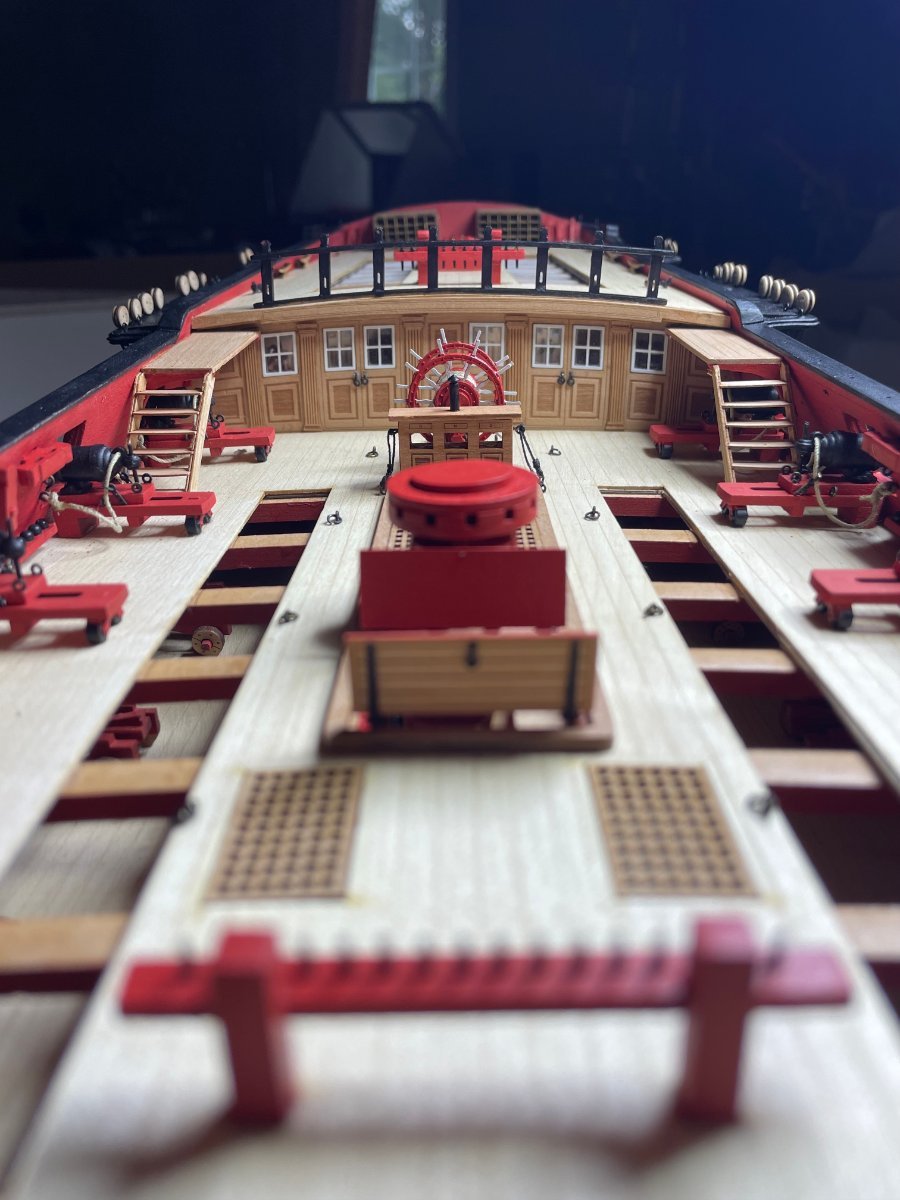
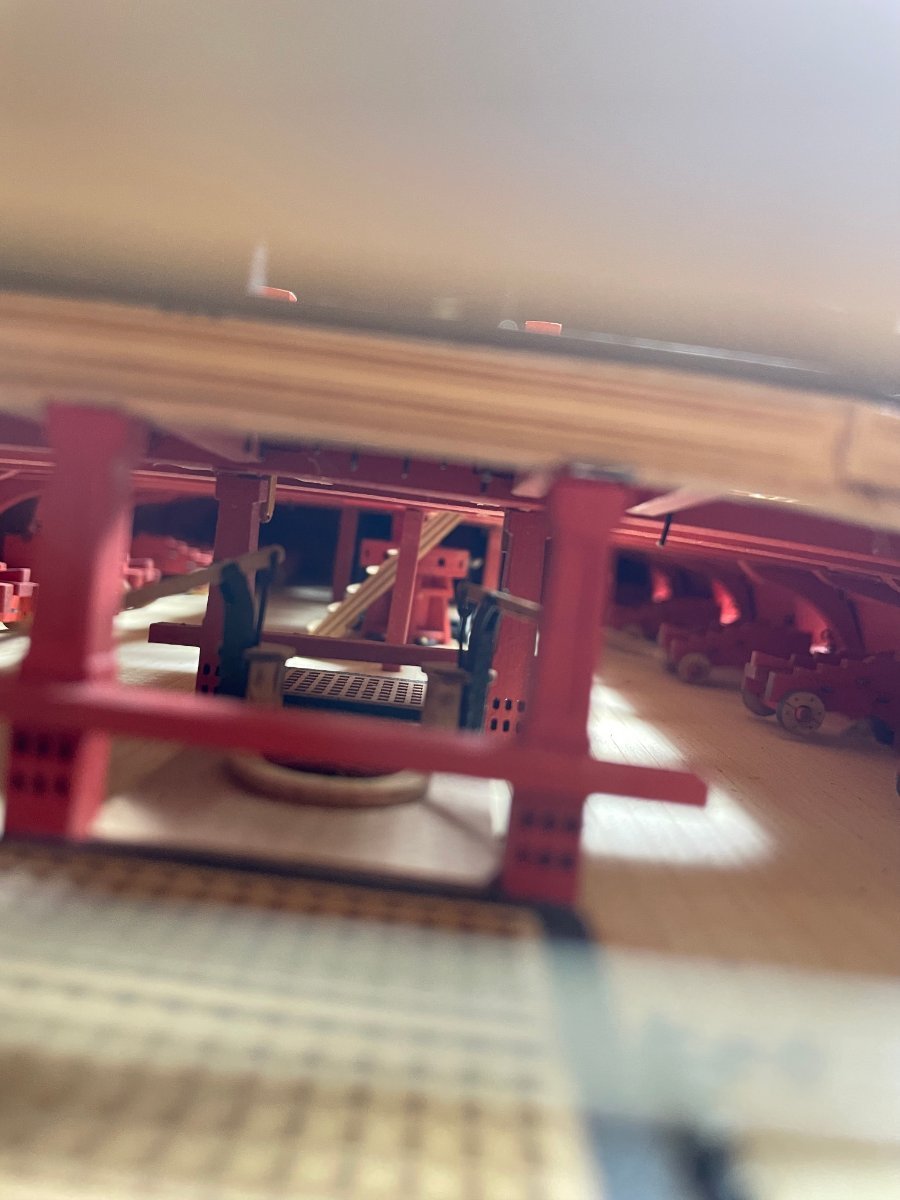
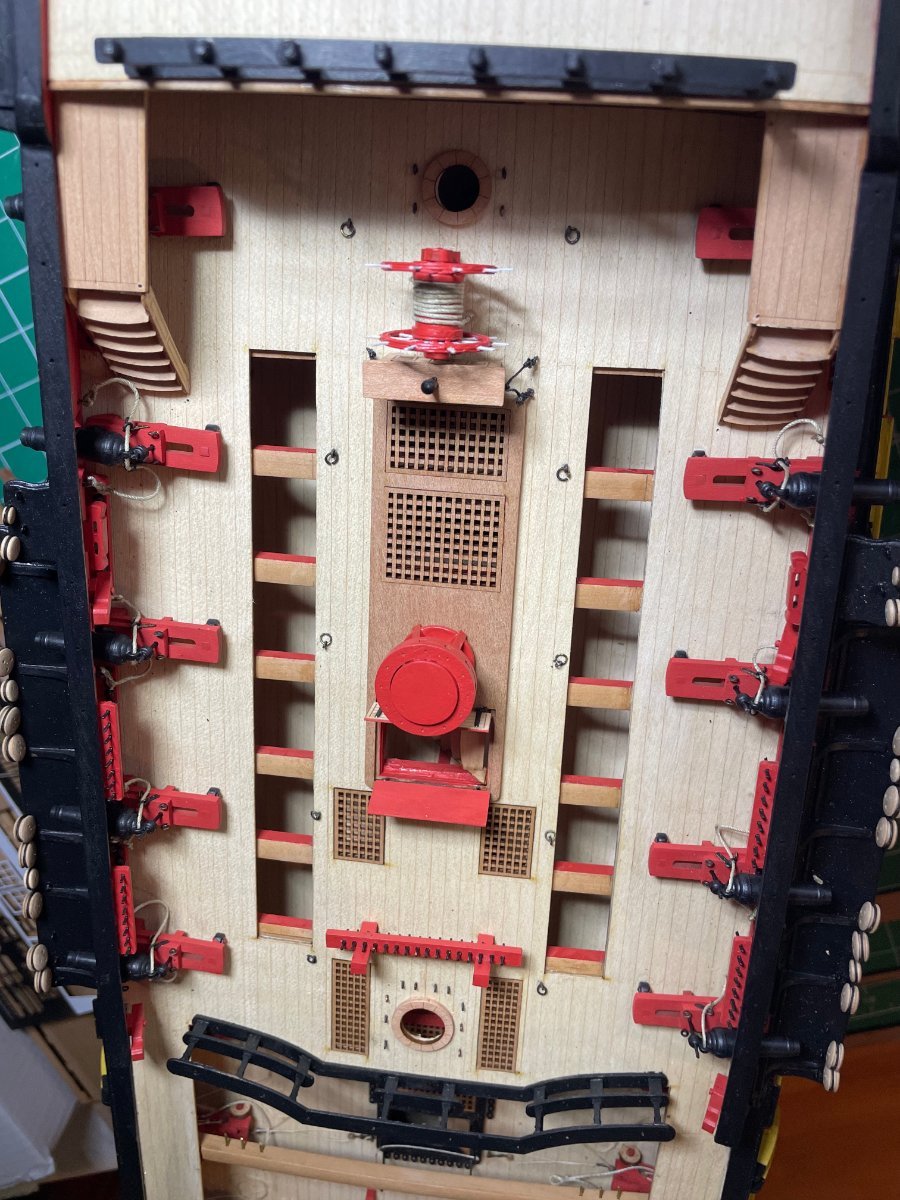
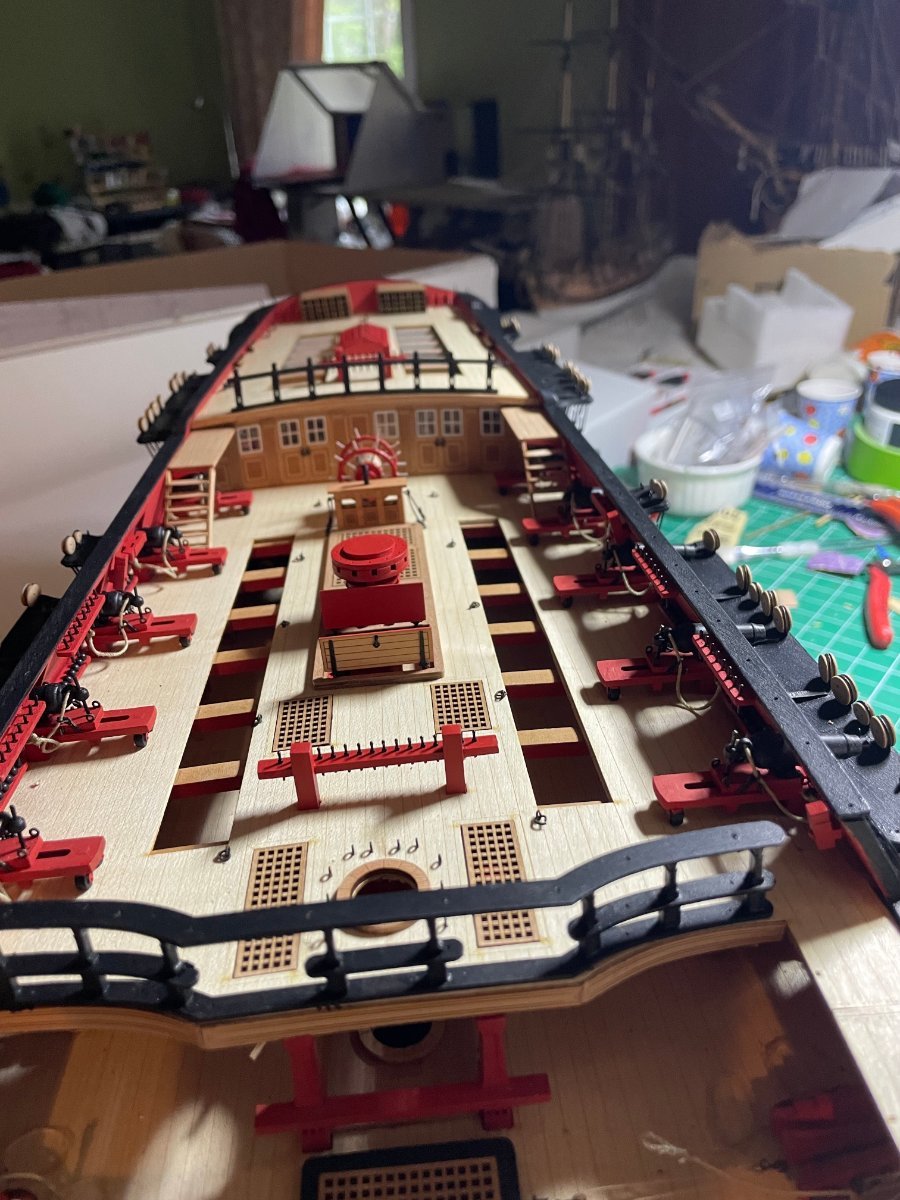
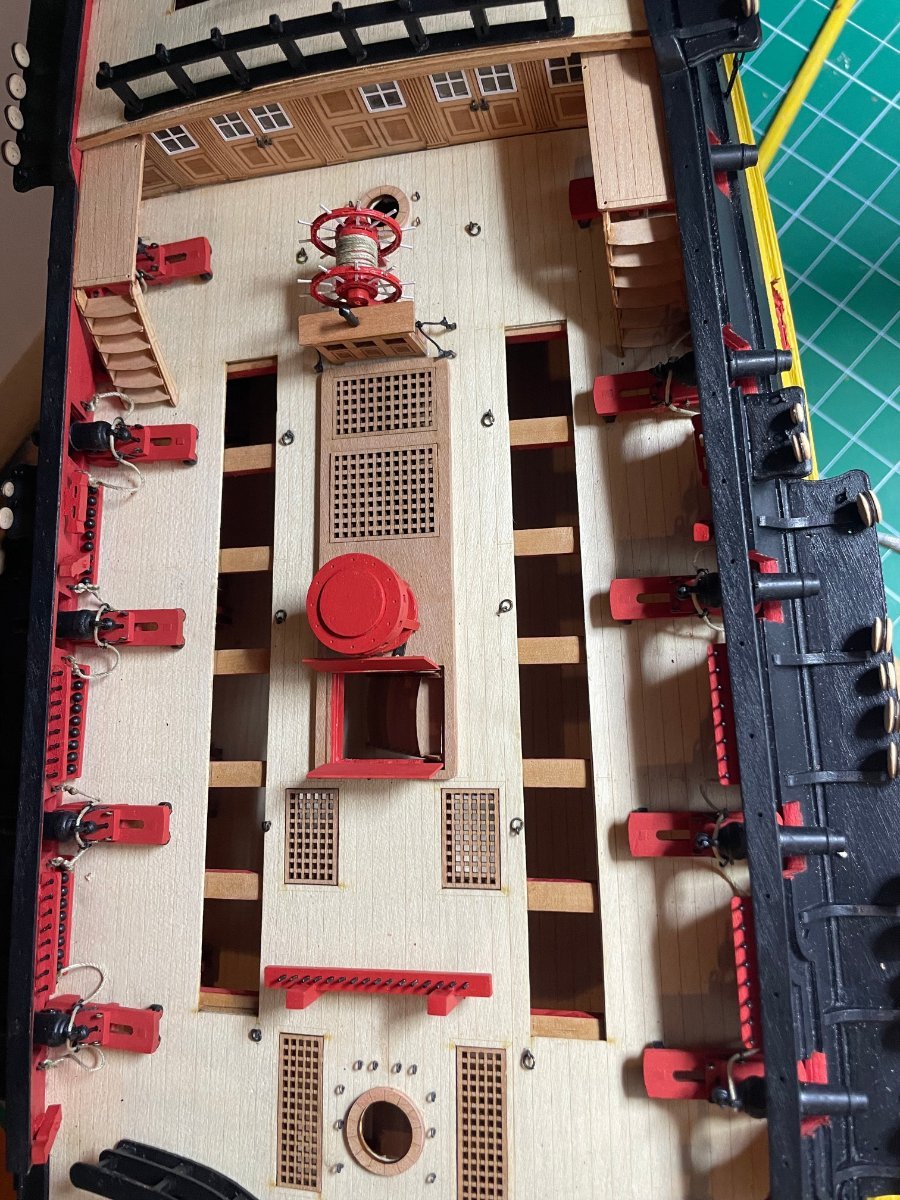
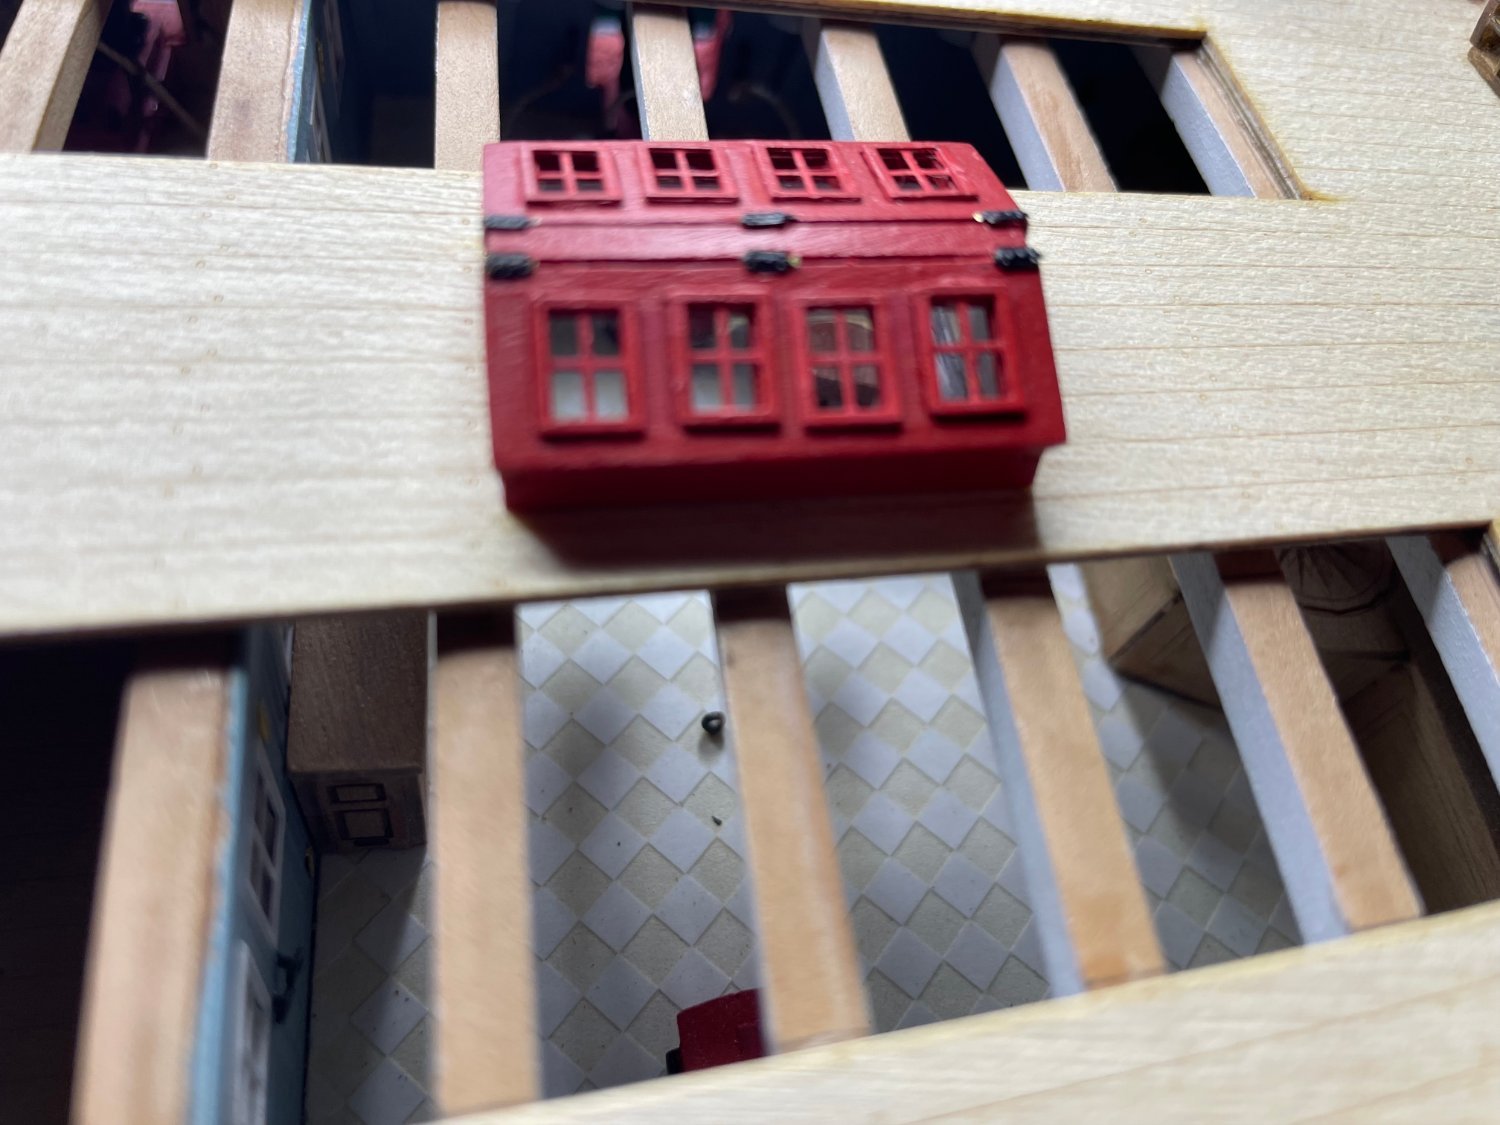
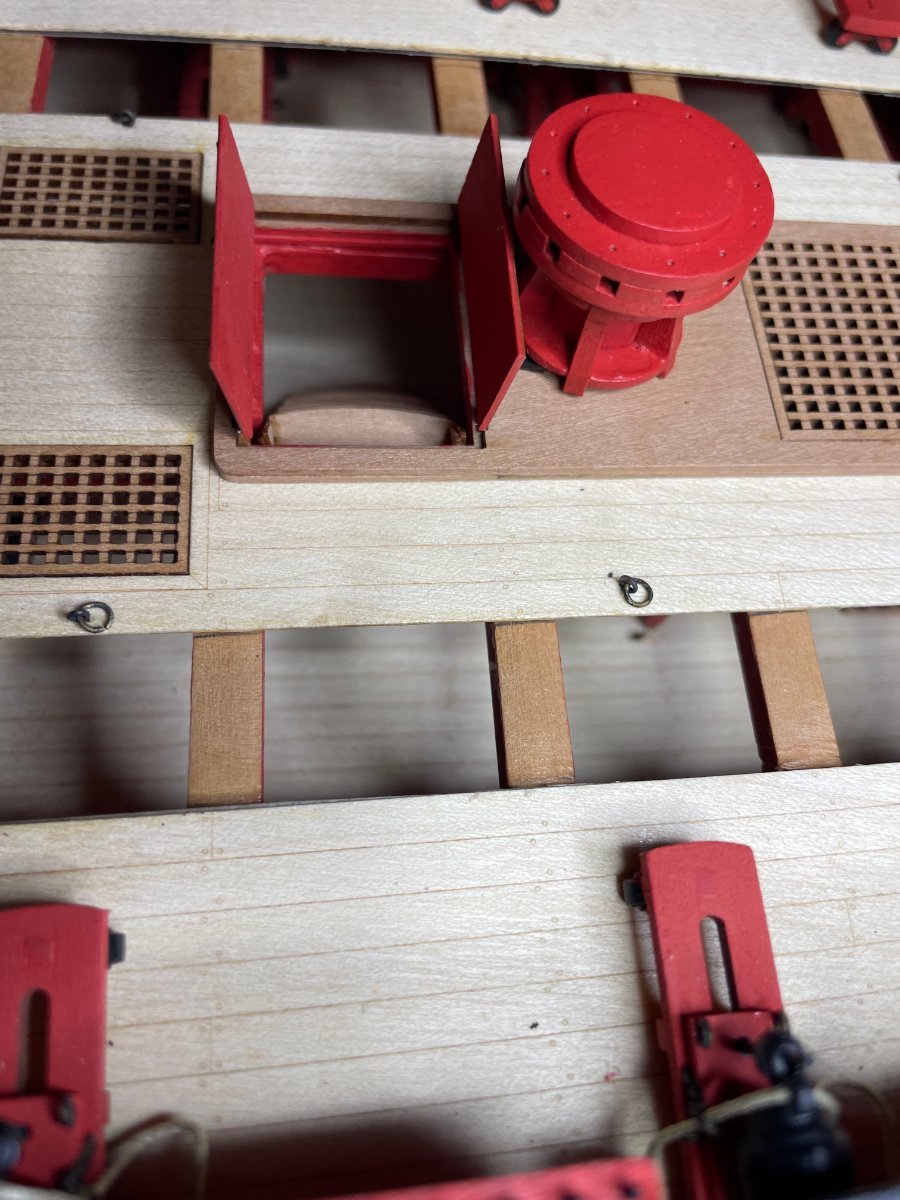
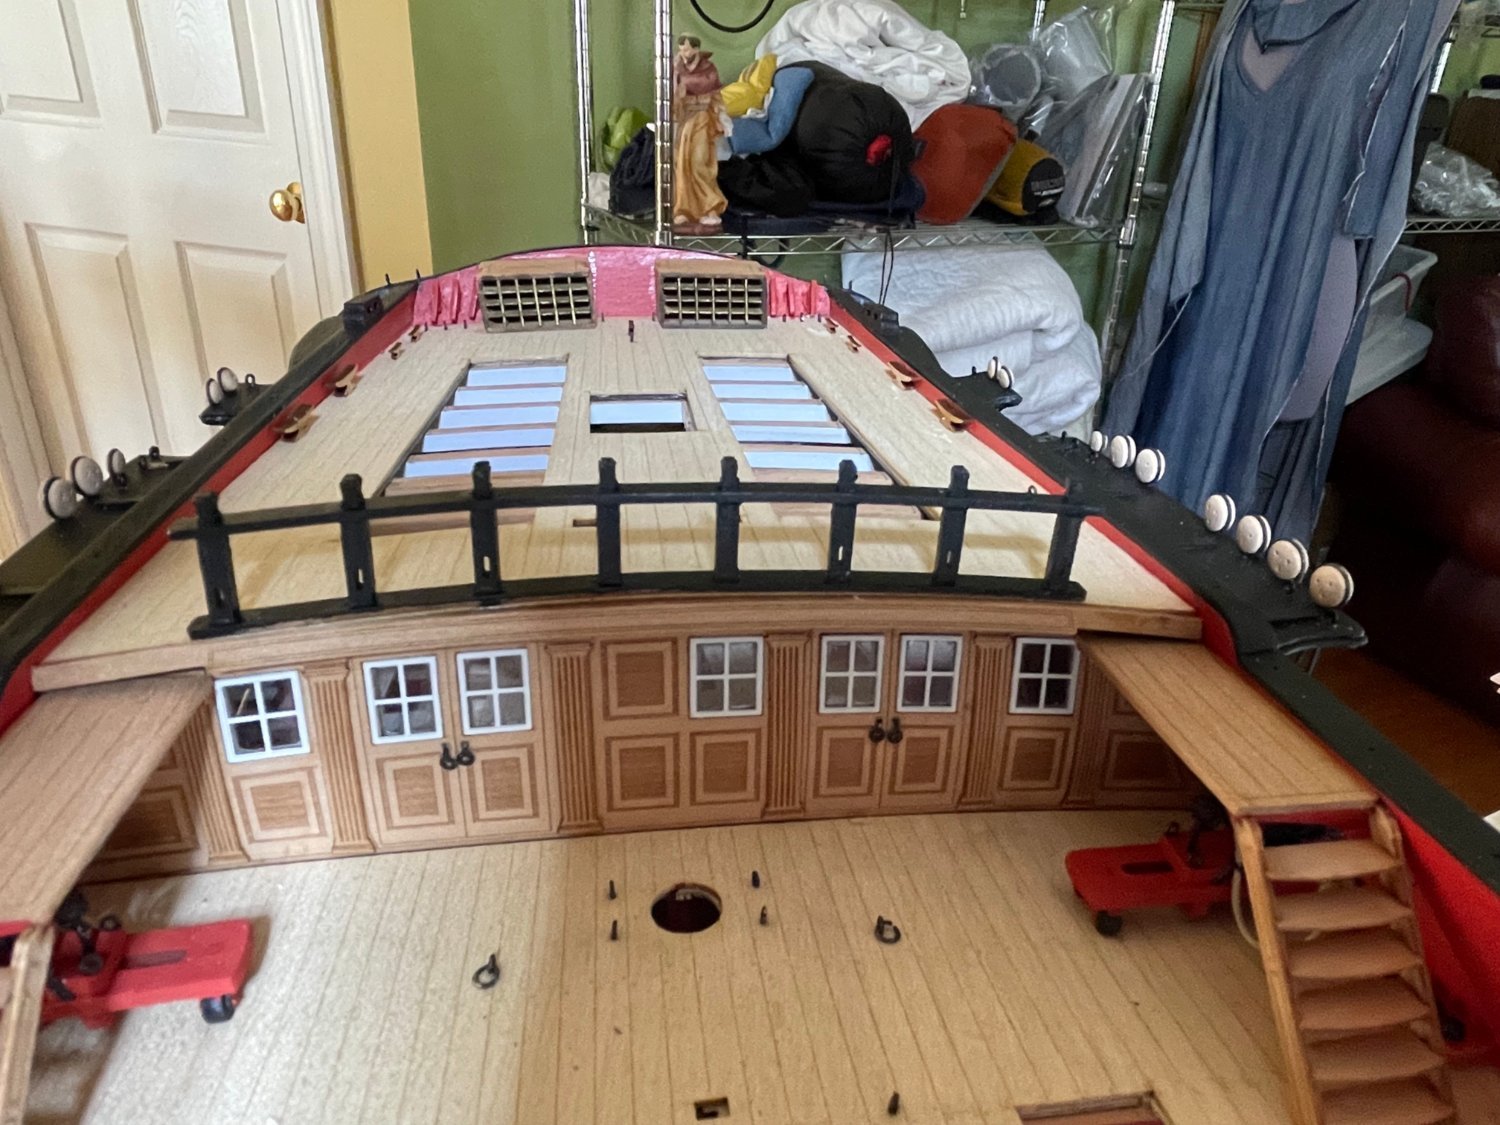
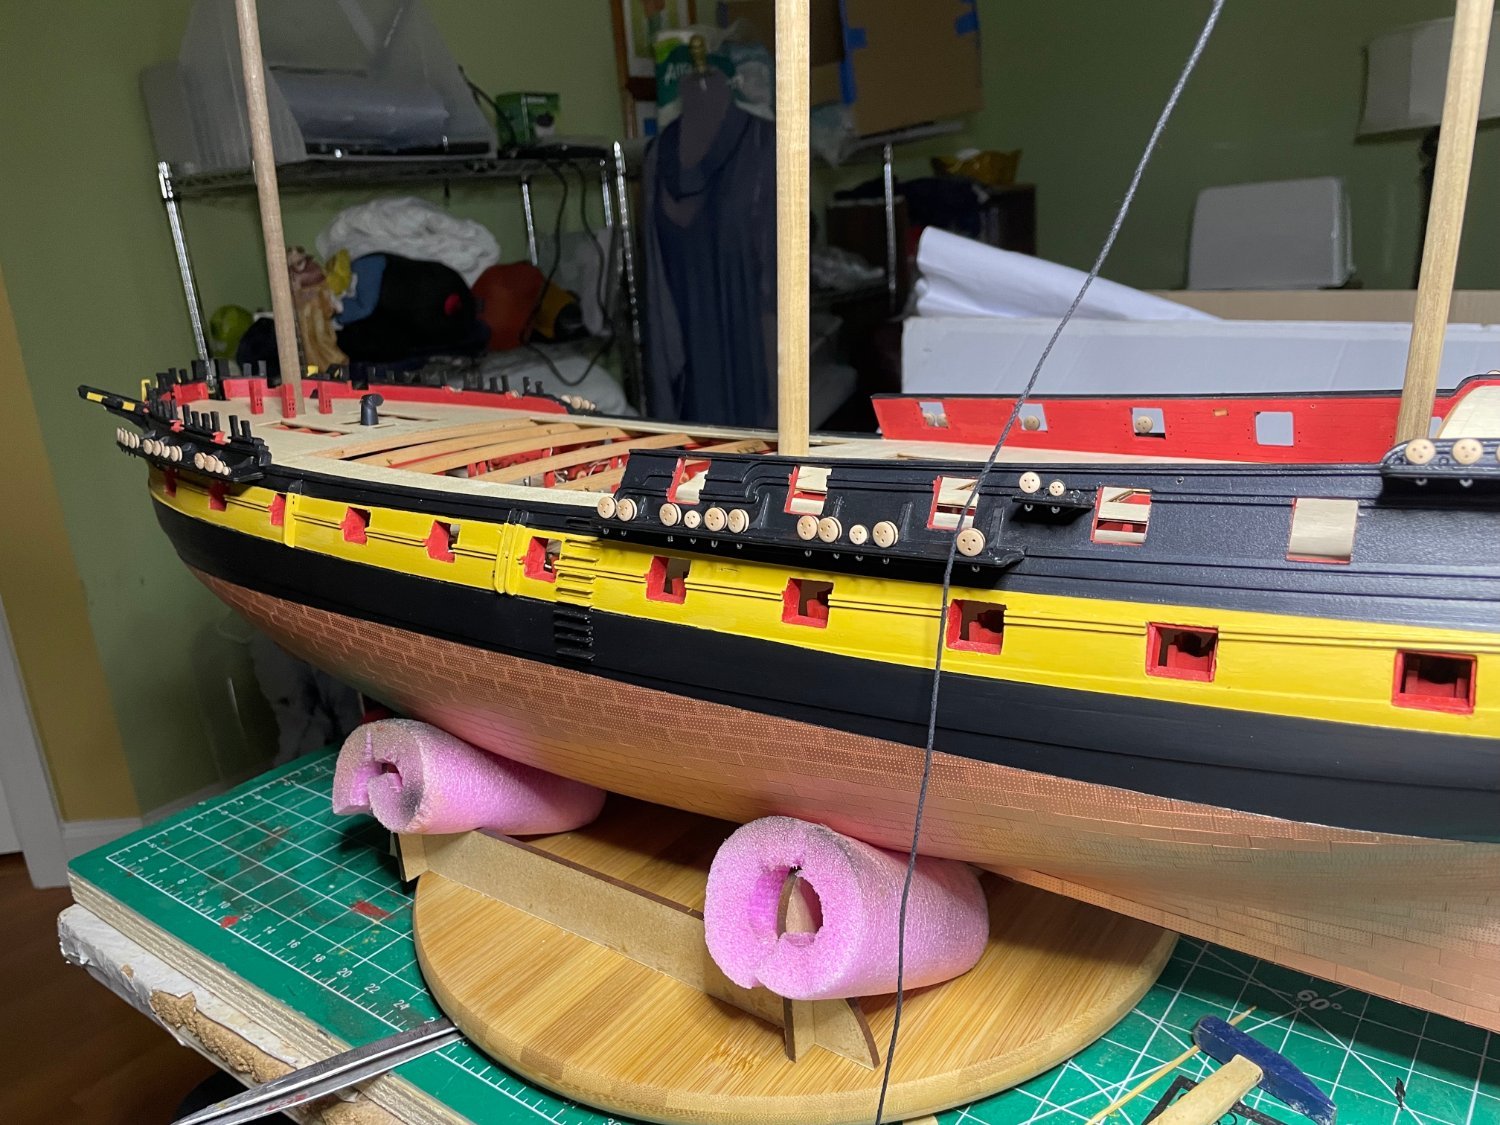
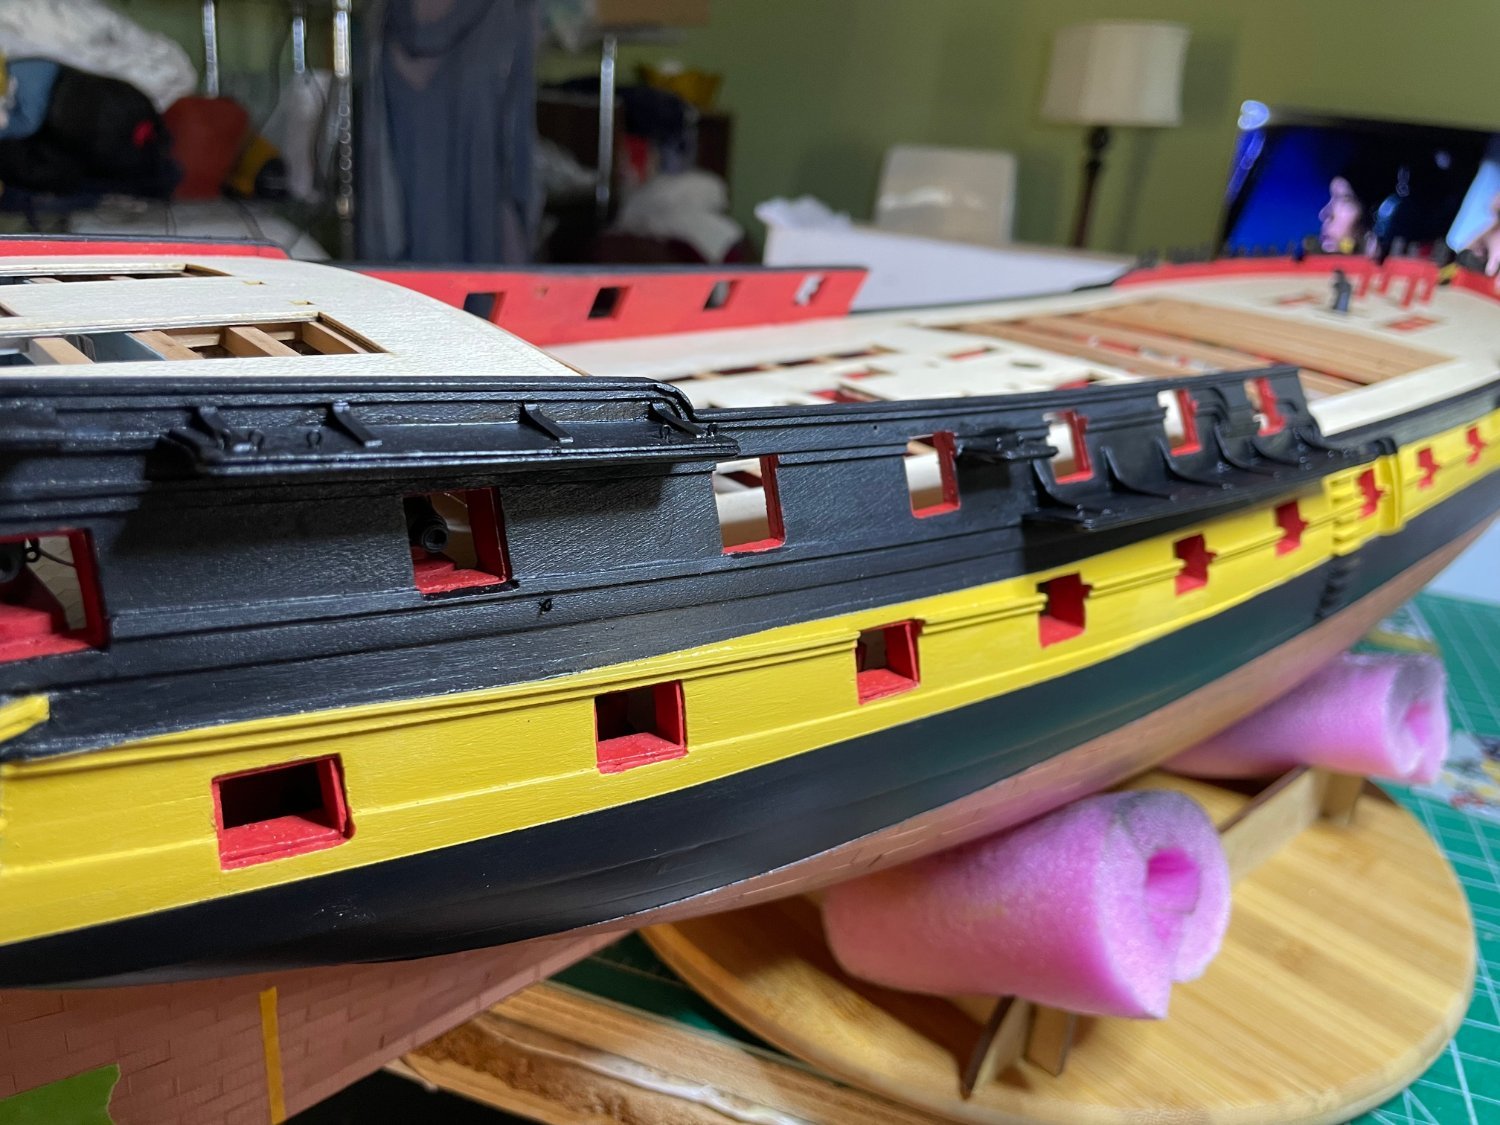
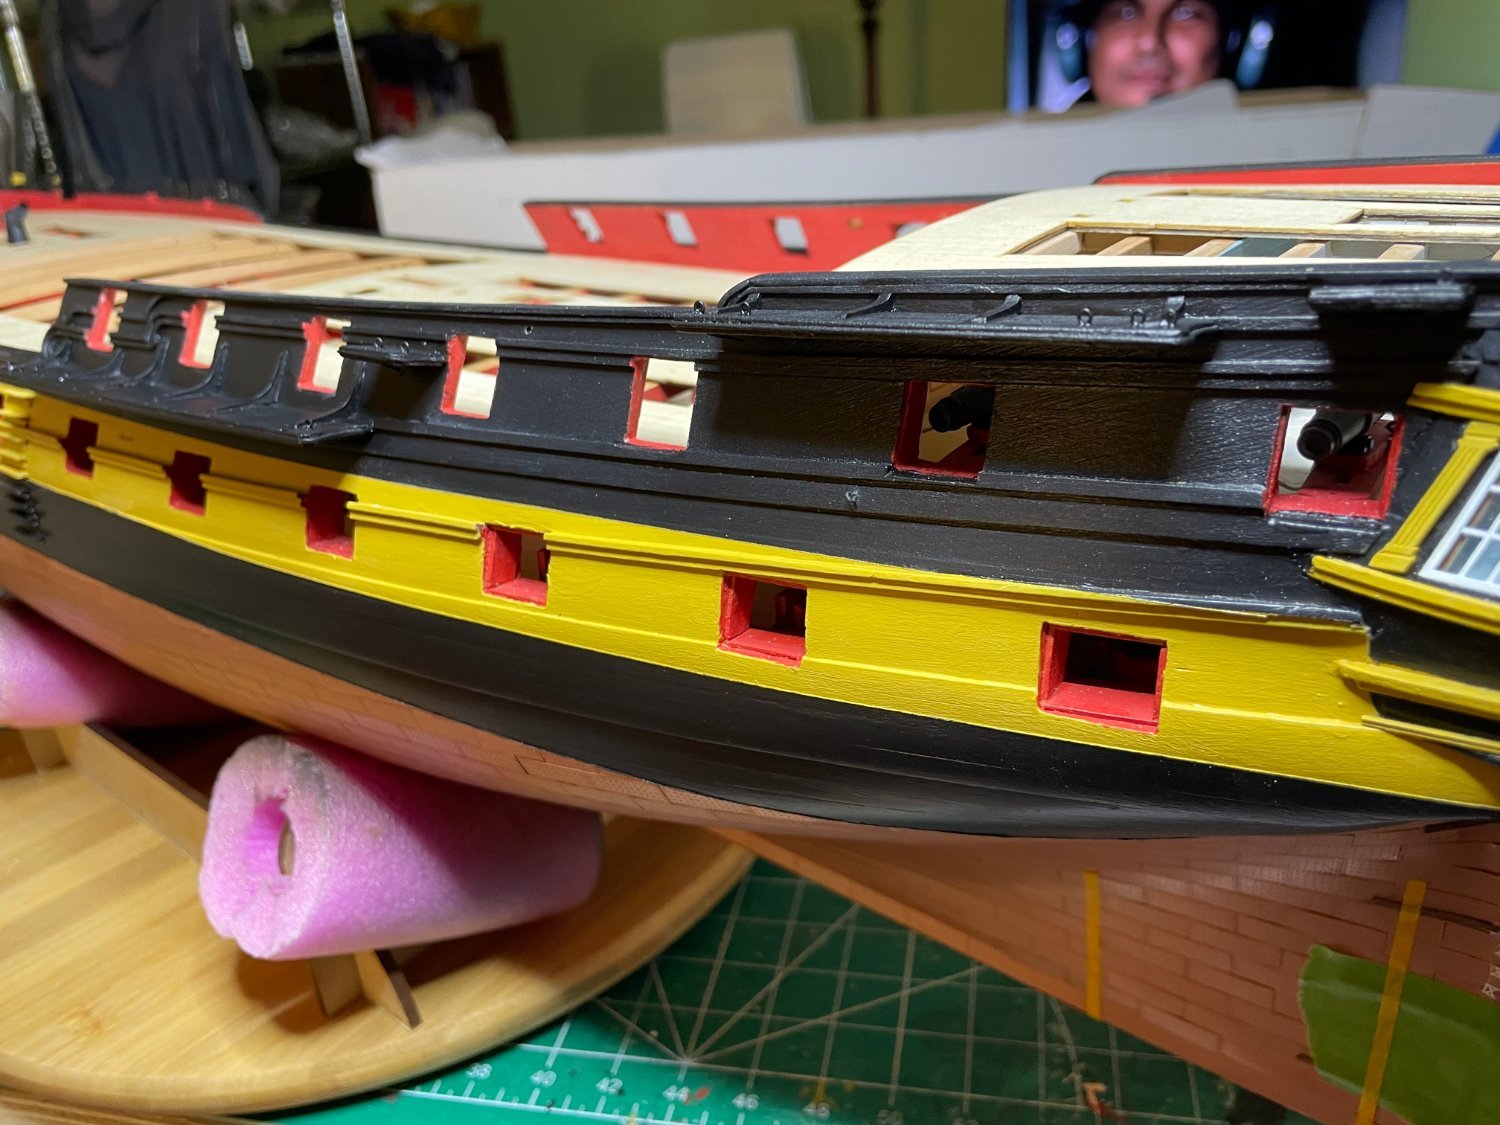
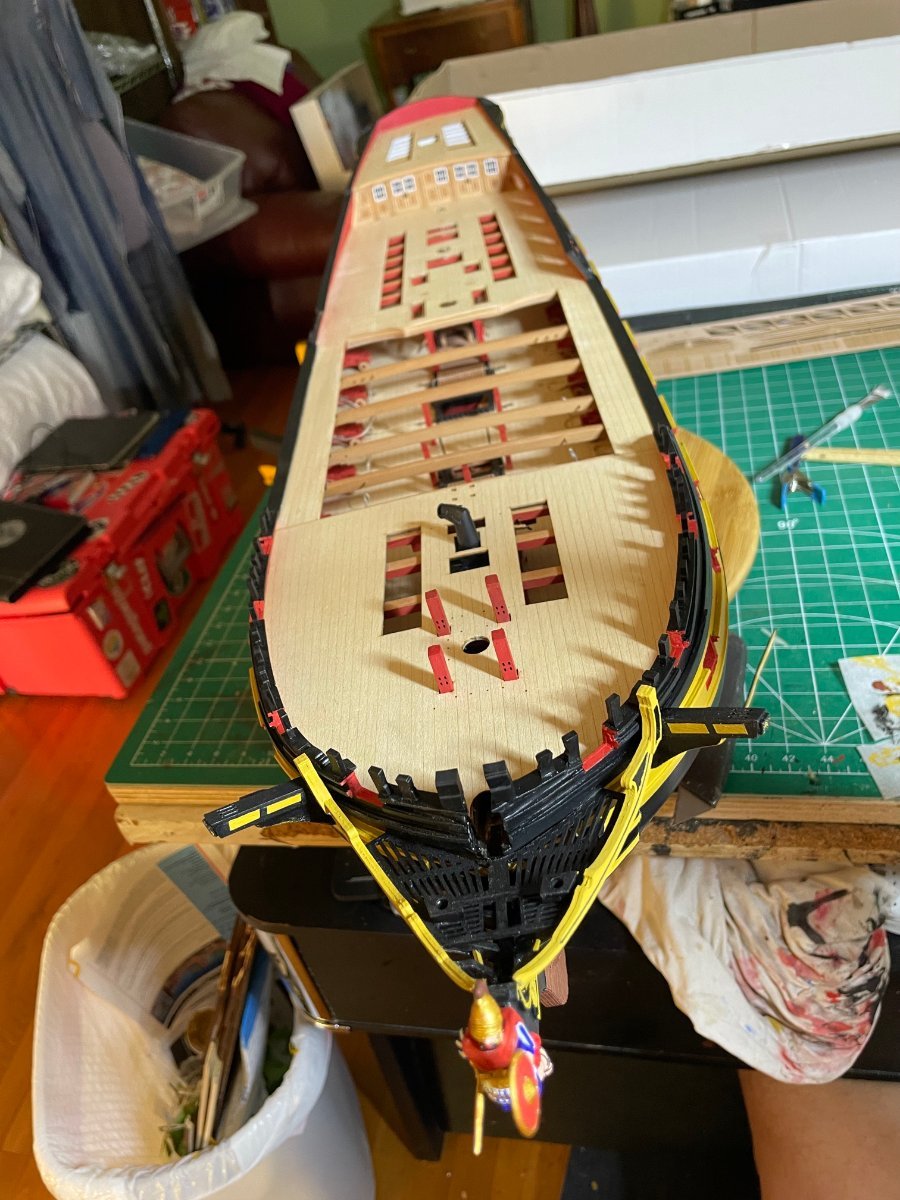
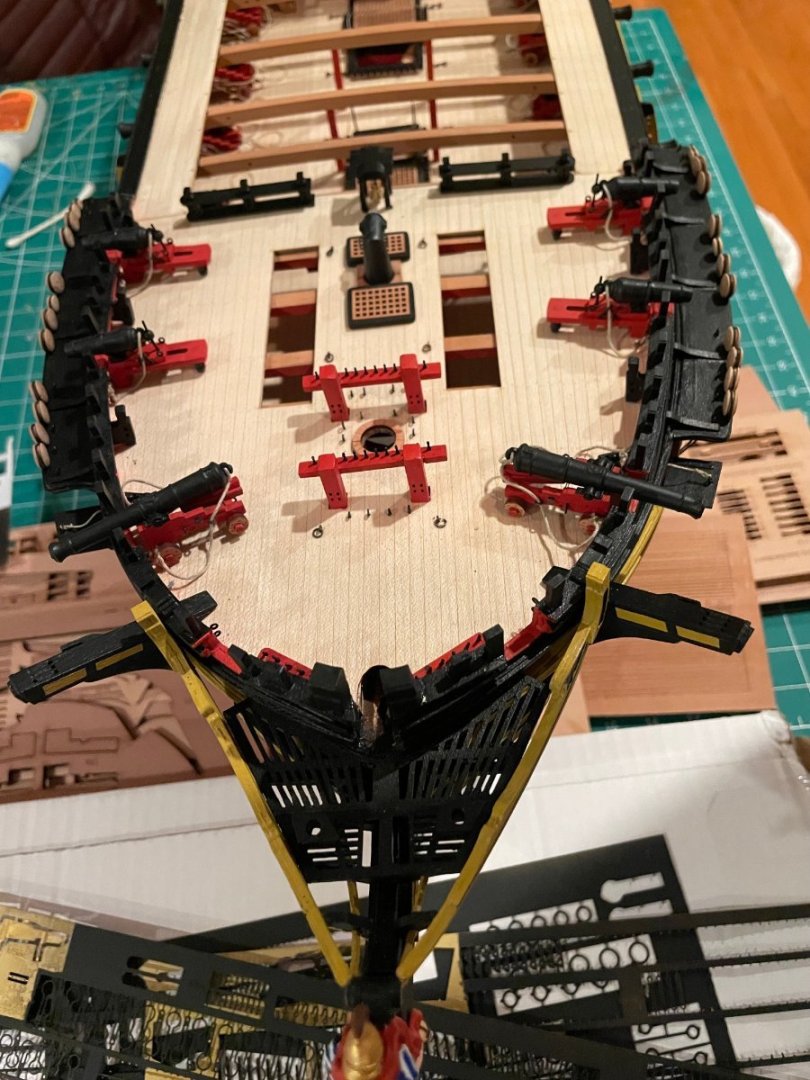
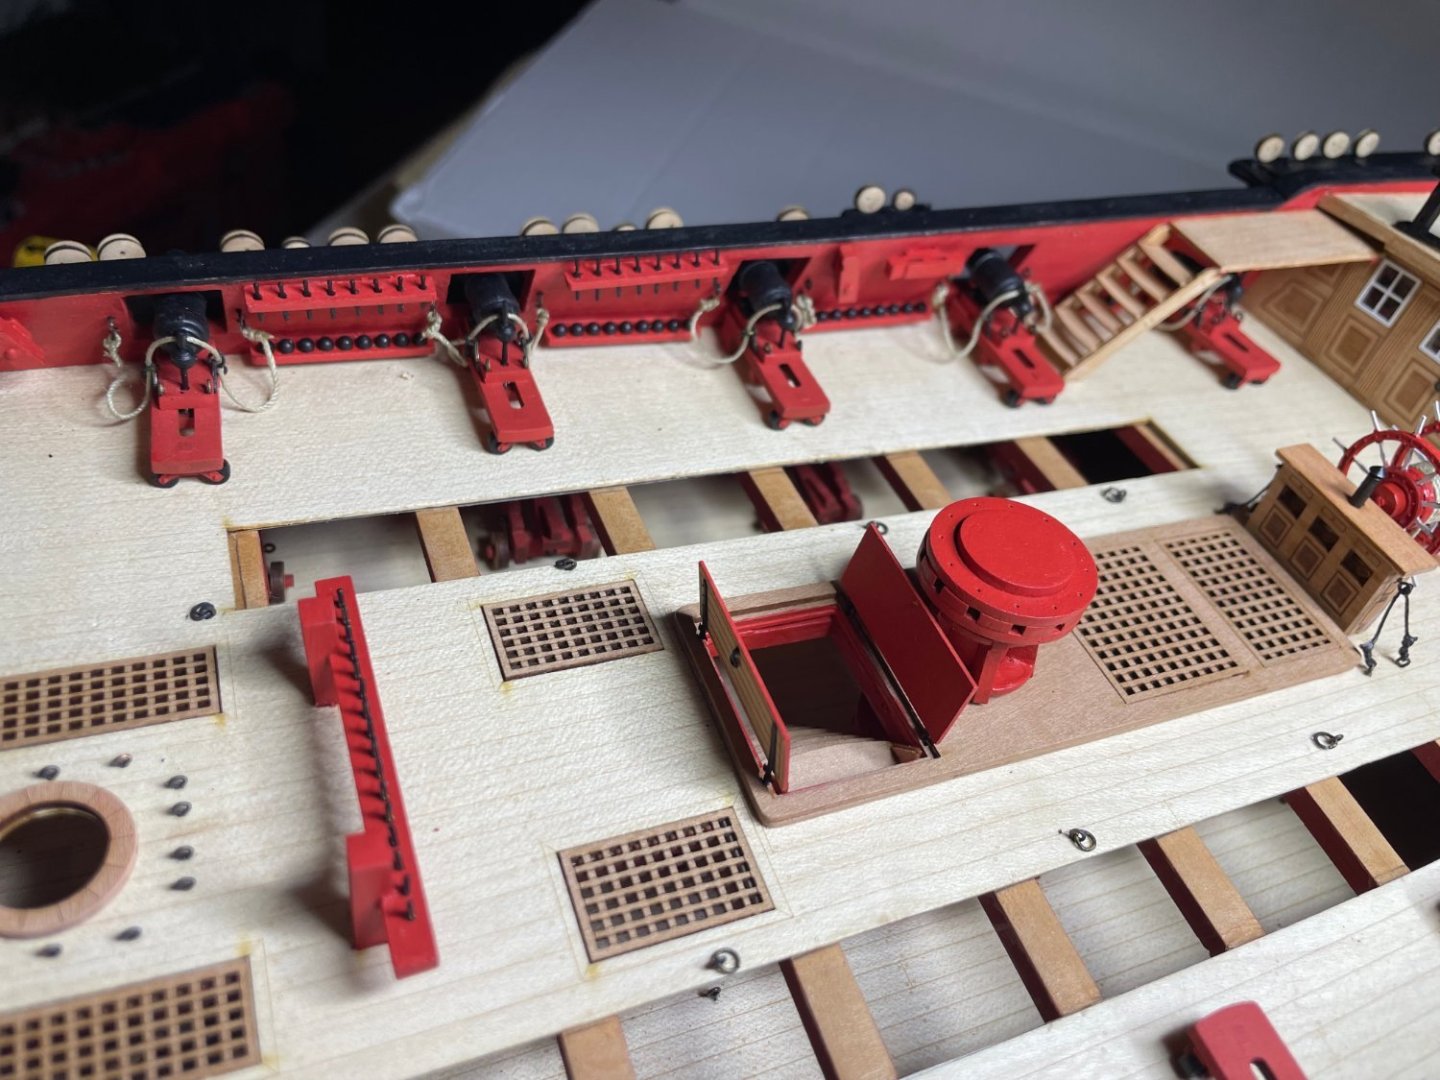
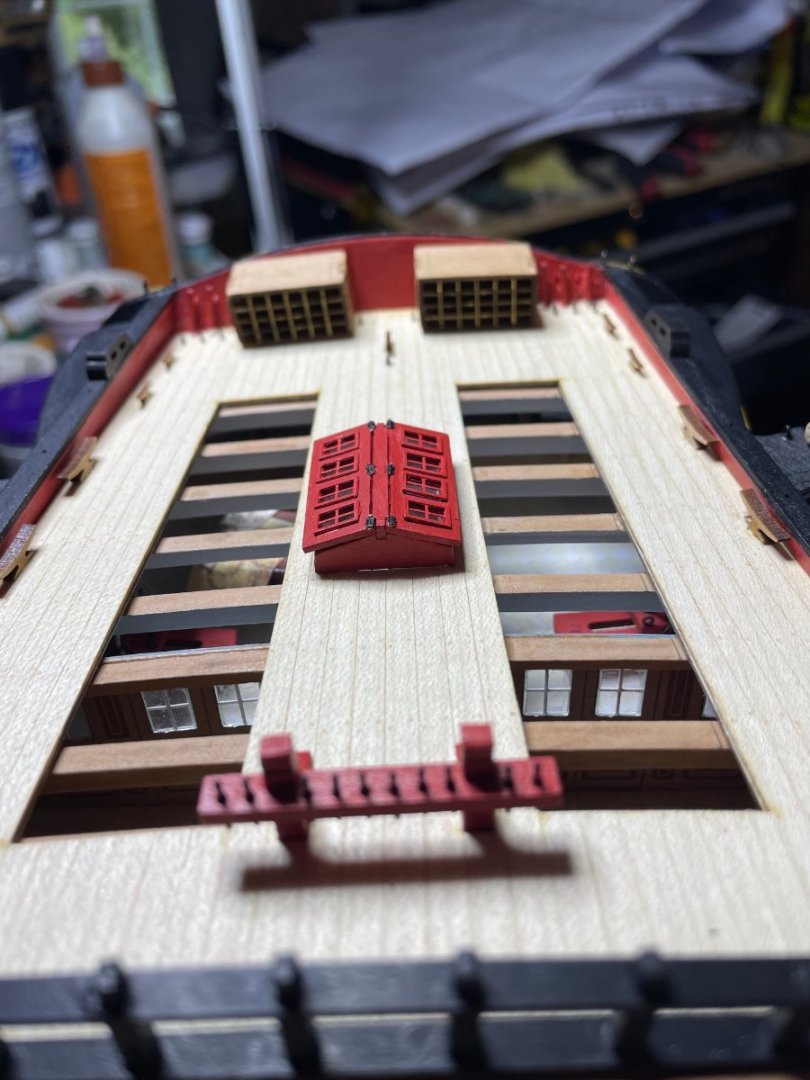
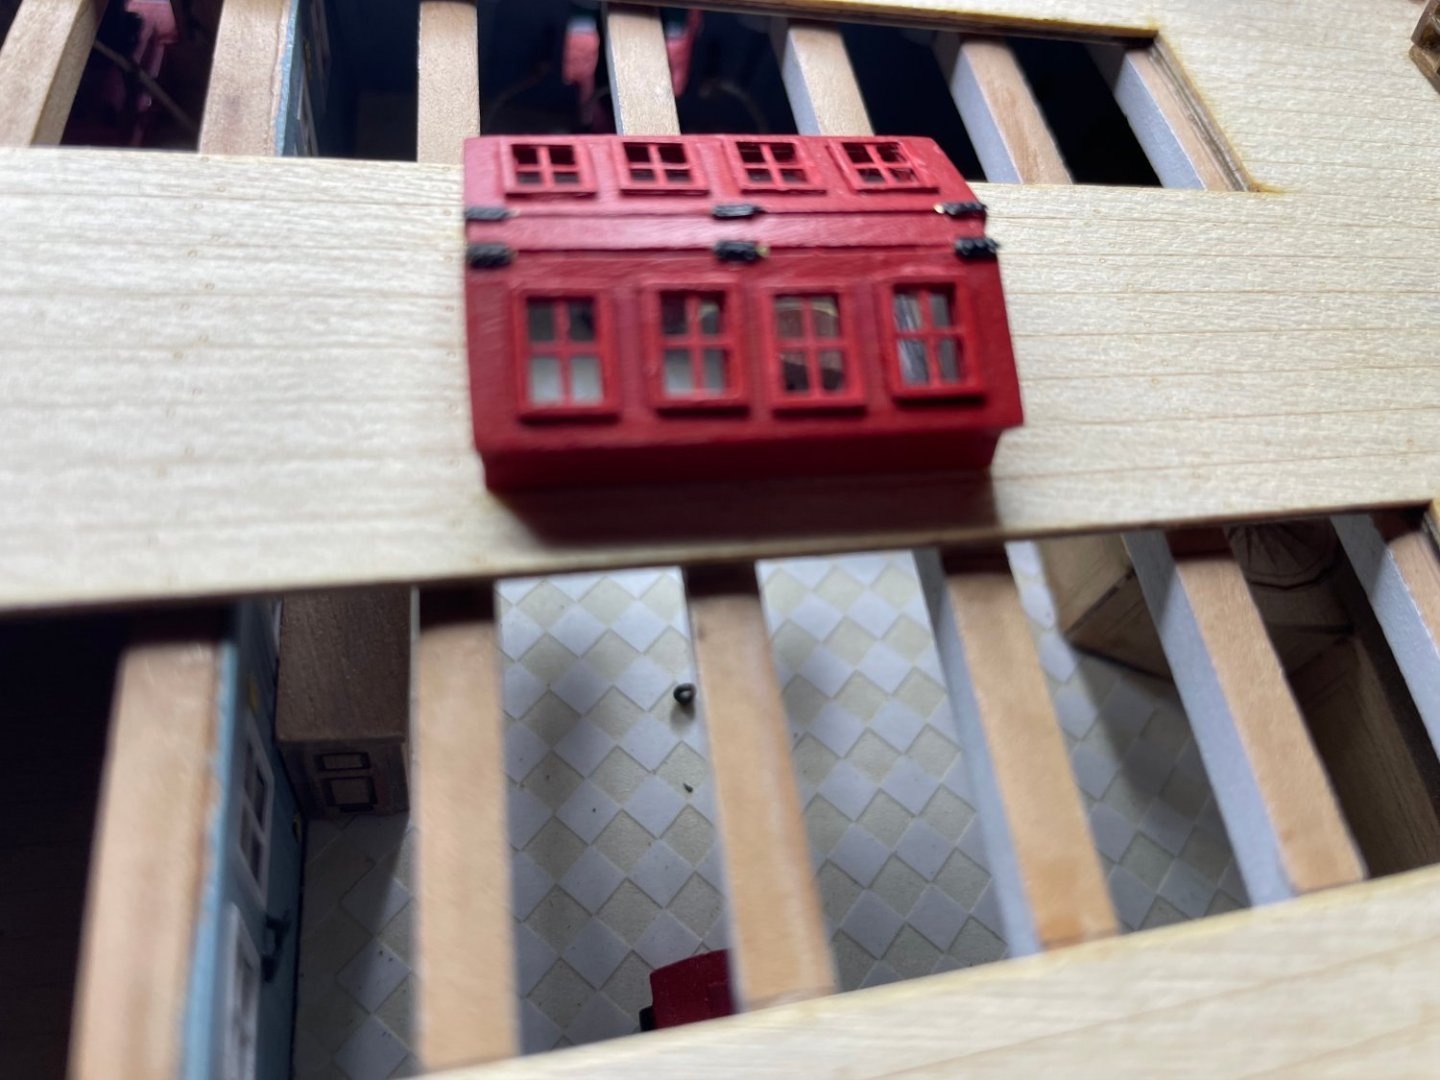
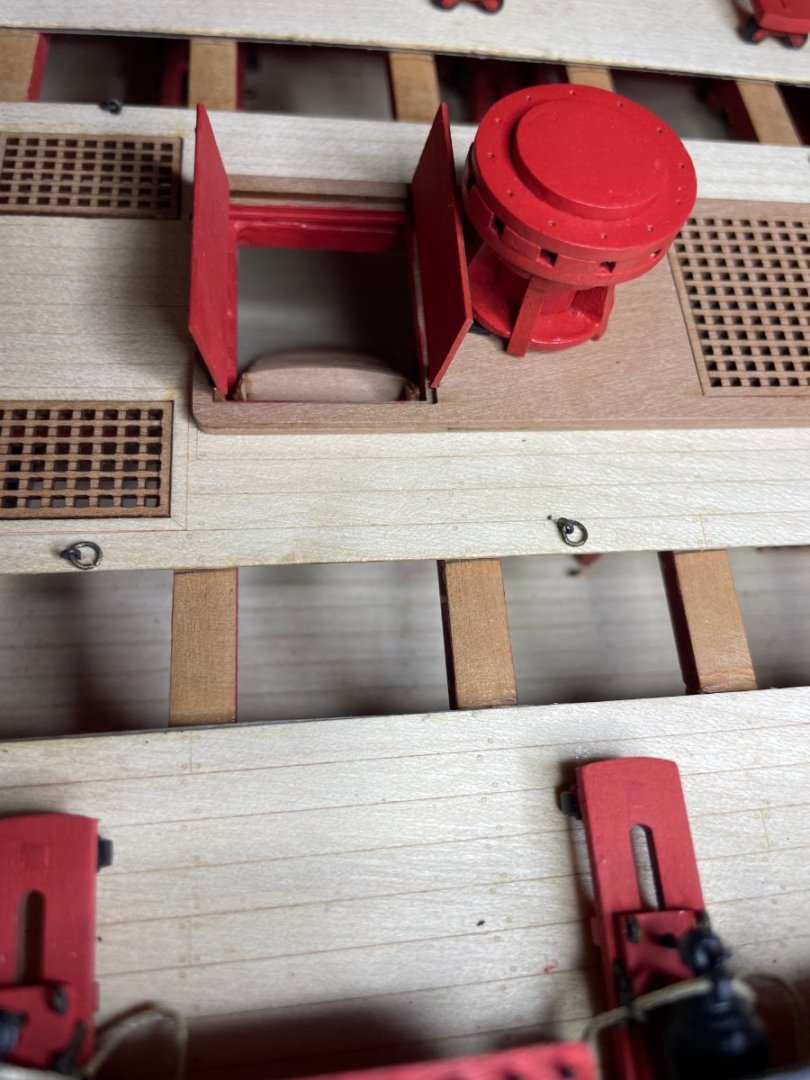
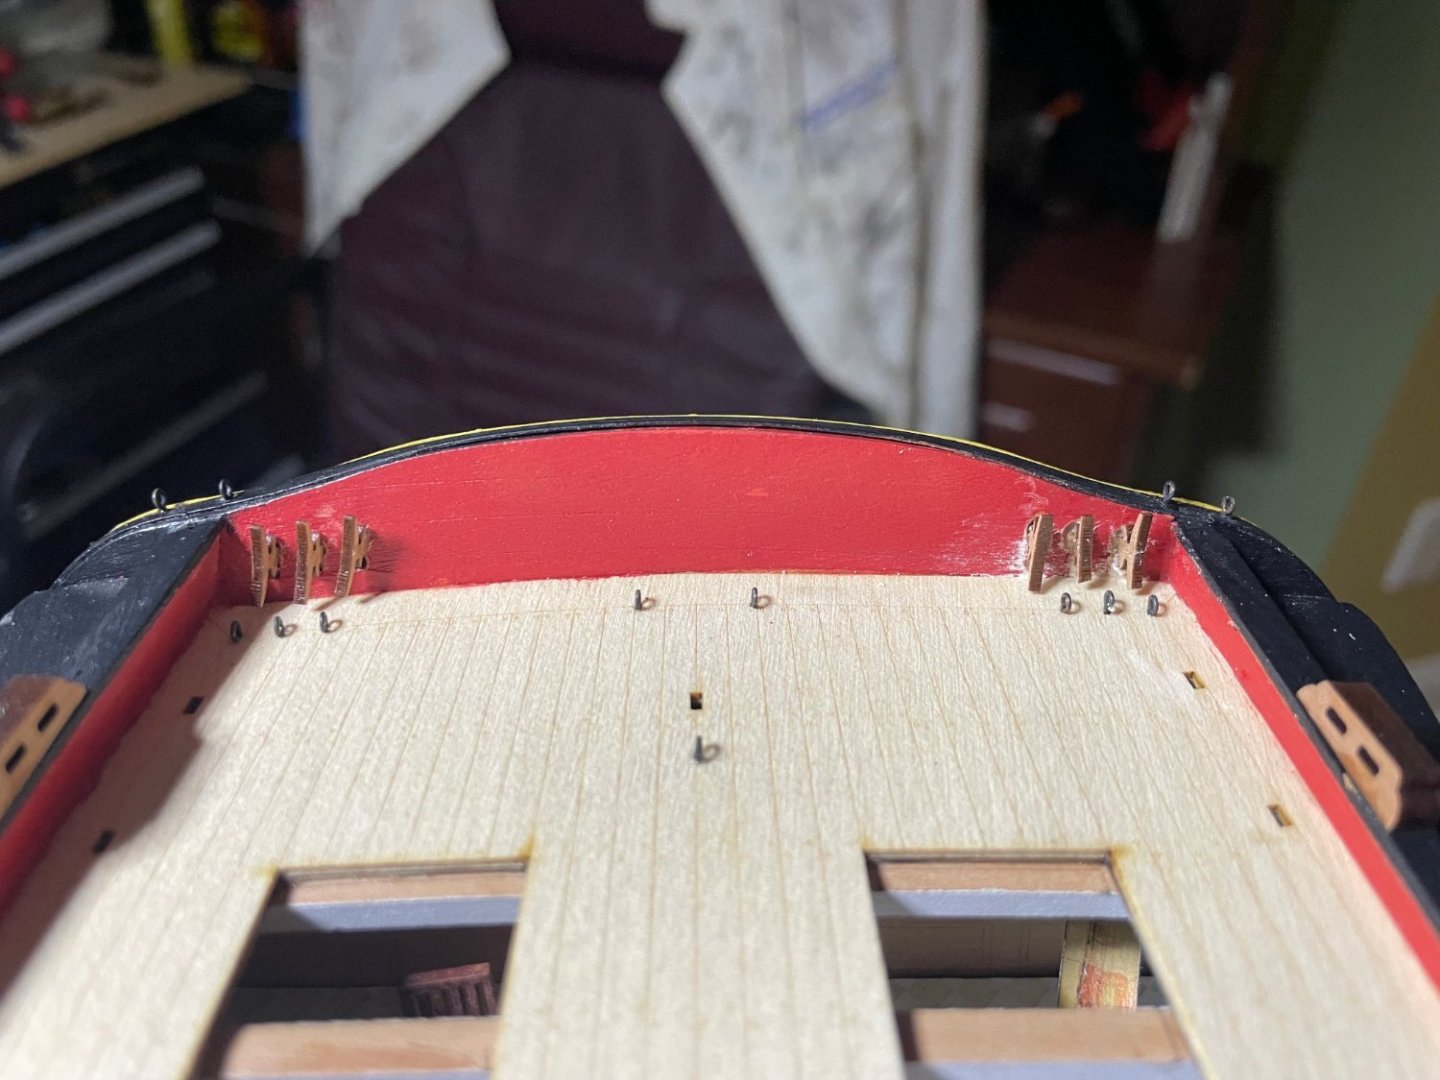
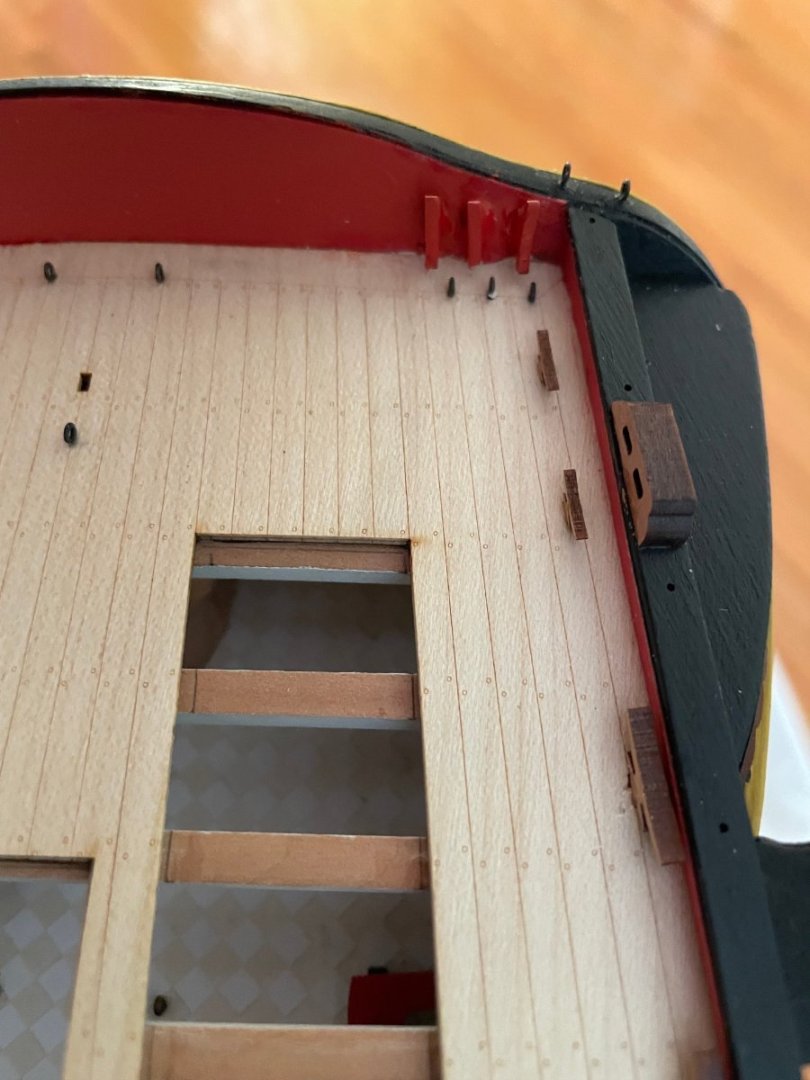
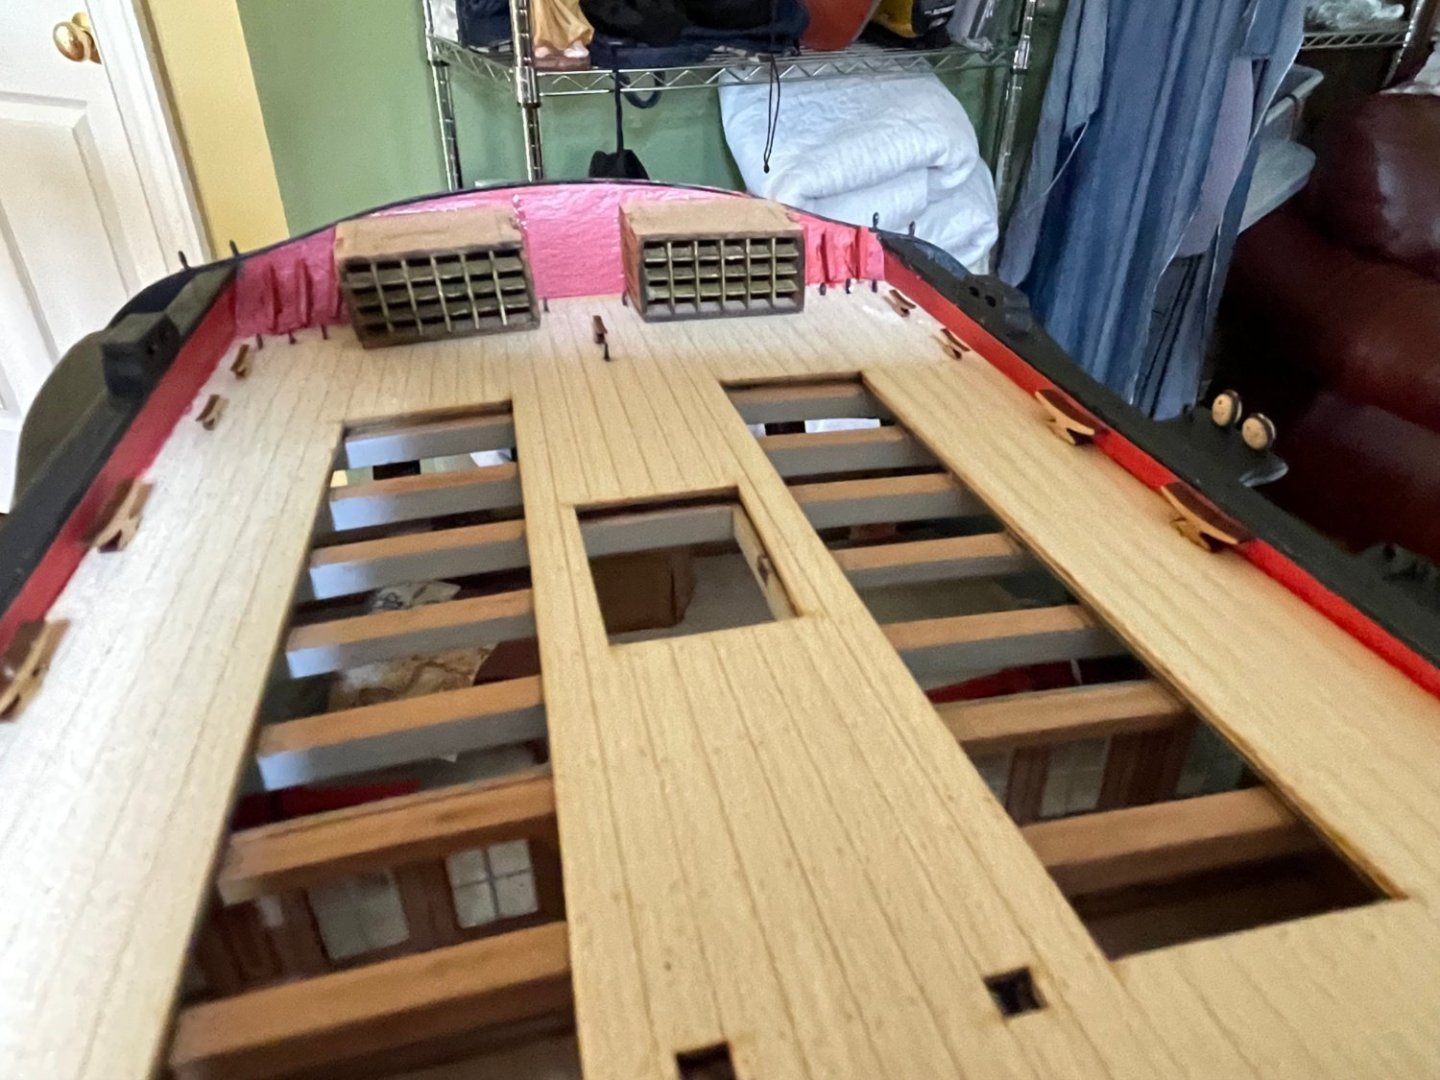
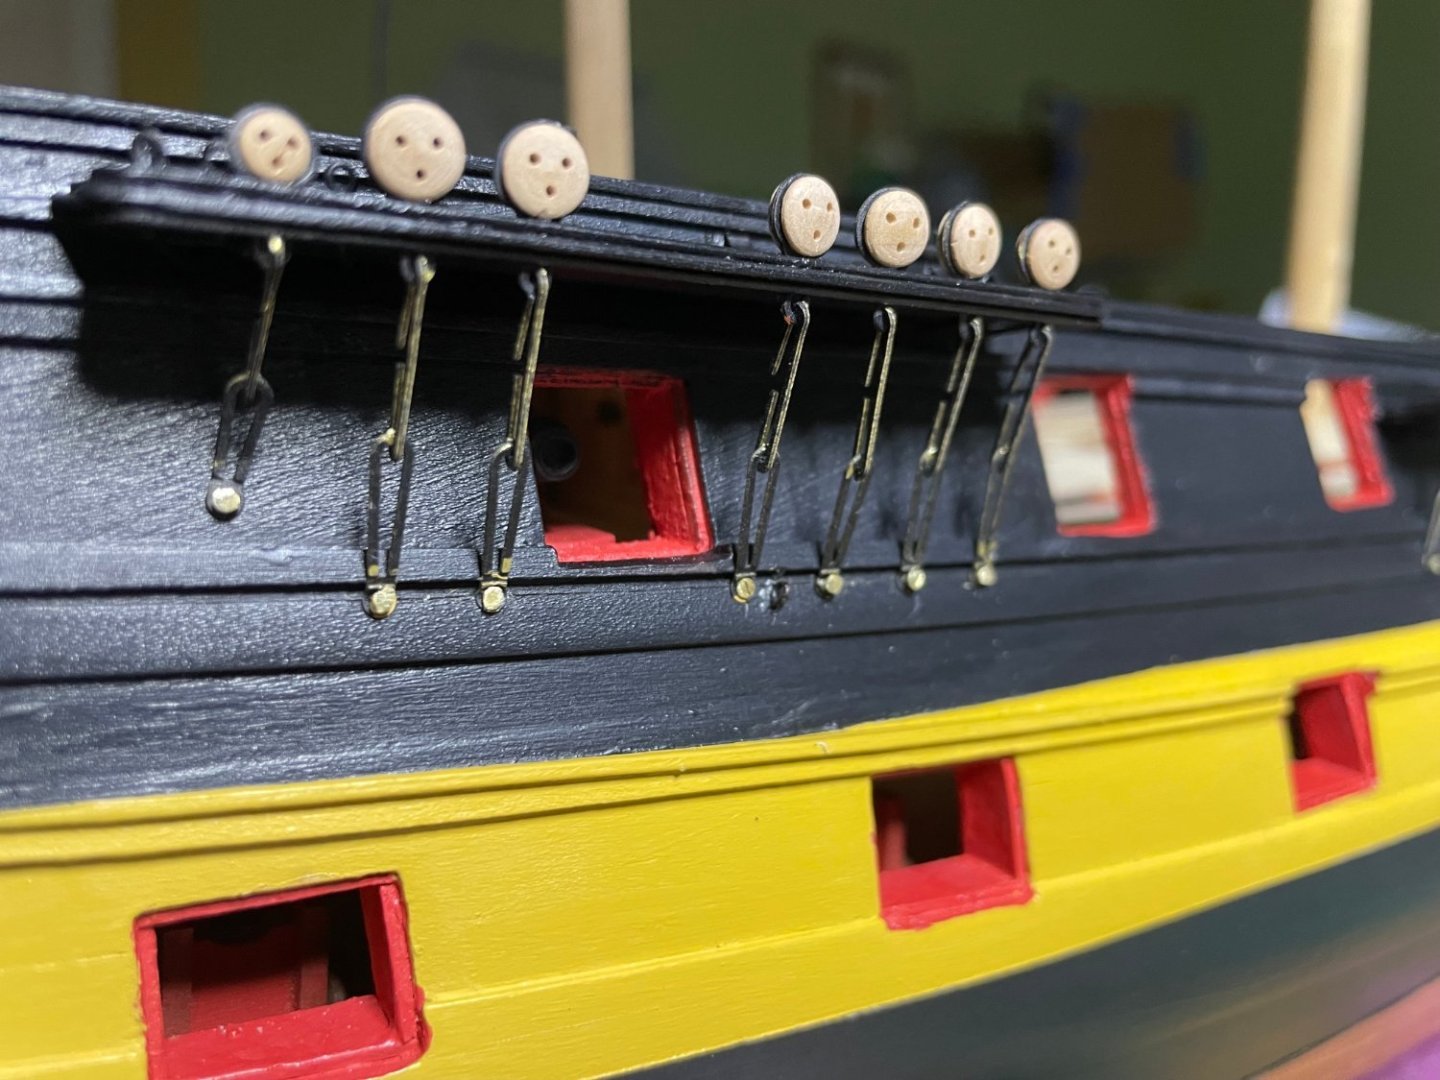
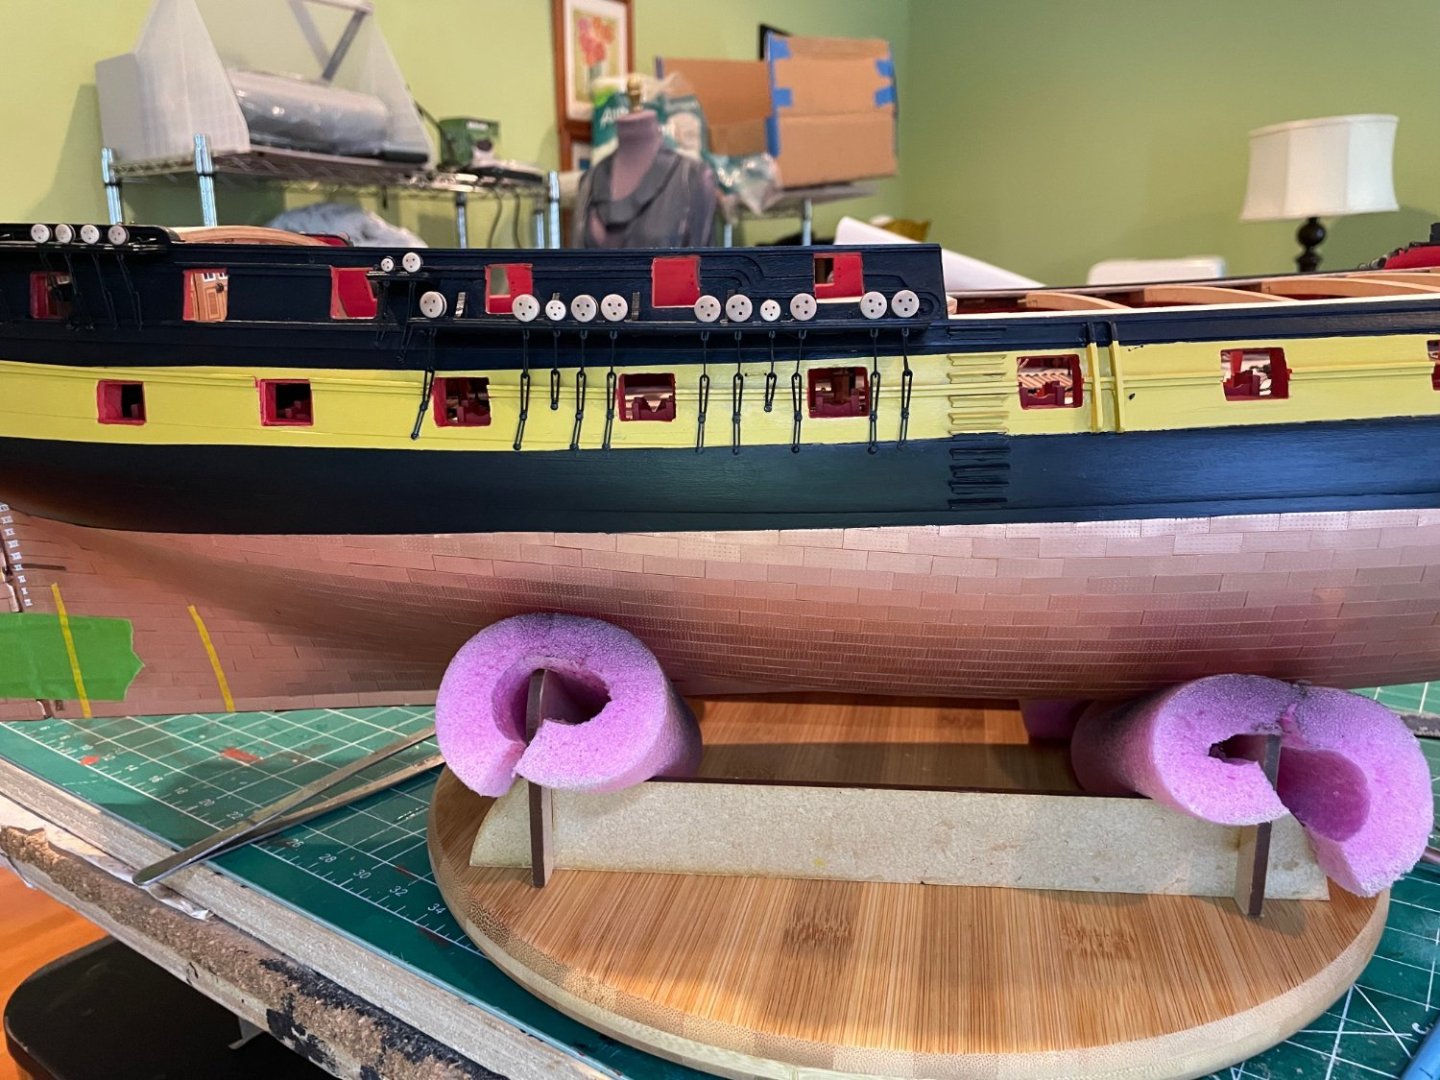
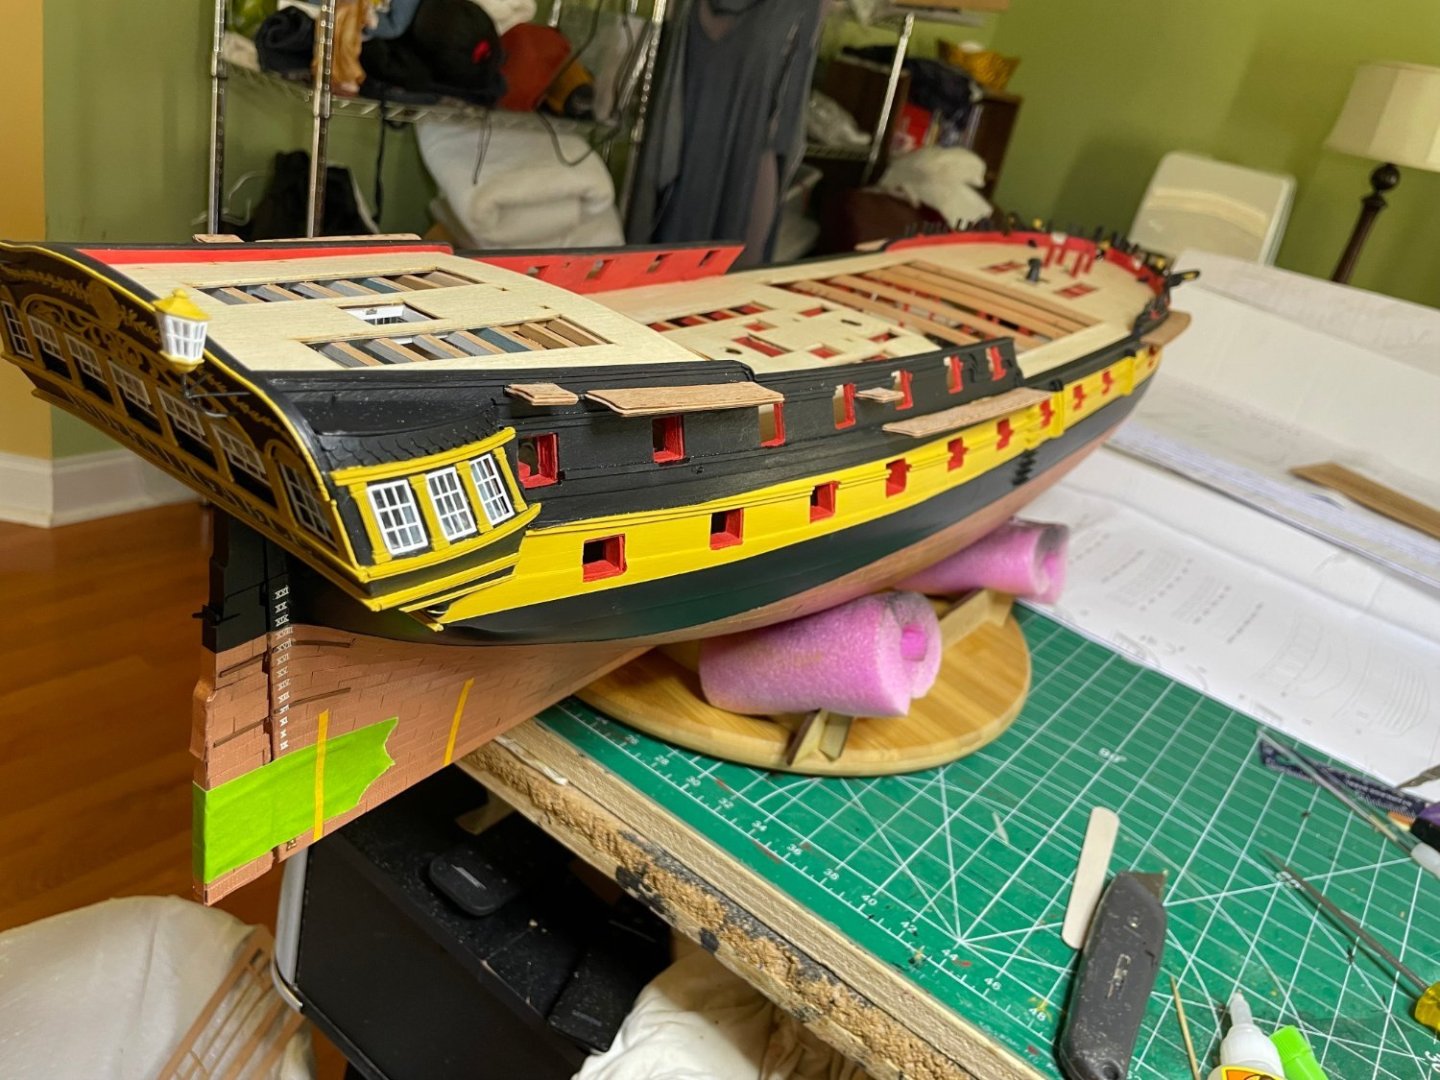
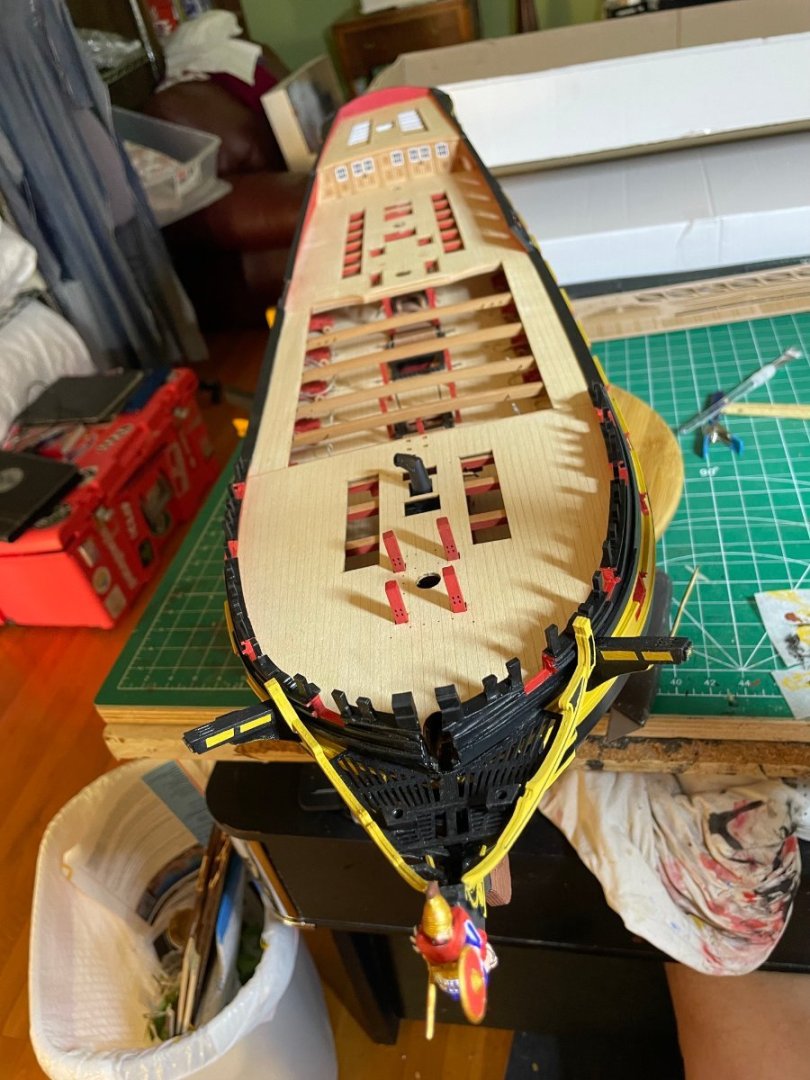
Continuing onward, finished the deck fittings for the stern of the ship. Can see nicely through the skylight. You may notice I removed the stern lanterns as I was always catching and bending them. Will put back at the end. Fitted the carronades You can see I wrapped the wheel with the steering tackle The Capstan lines up nicely and inserted into the lower deck one. Hopefully will finish by the end of the week. I will not install much of the railing as I usually bend it all out of shape when I am doing the rigging. Of course the anchors will also wait until the end. My debate is masts or the ships boats which are always a bugger to do.


- 233 replies
-
- 9
-
-
-
- Indefatigable
- Vanguard Models
- (and 1 more)
-
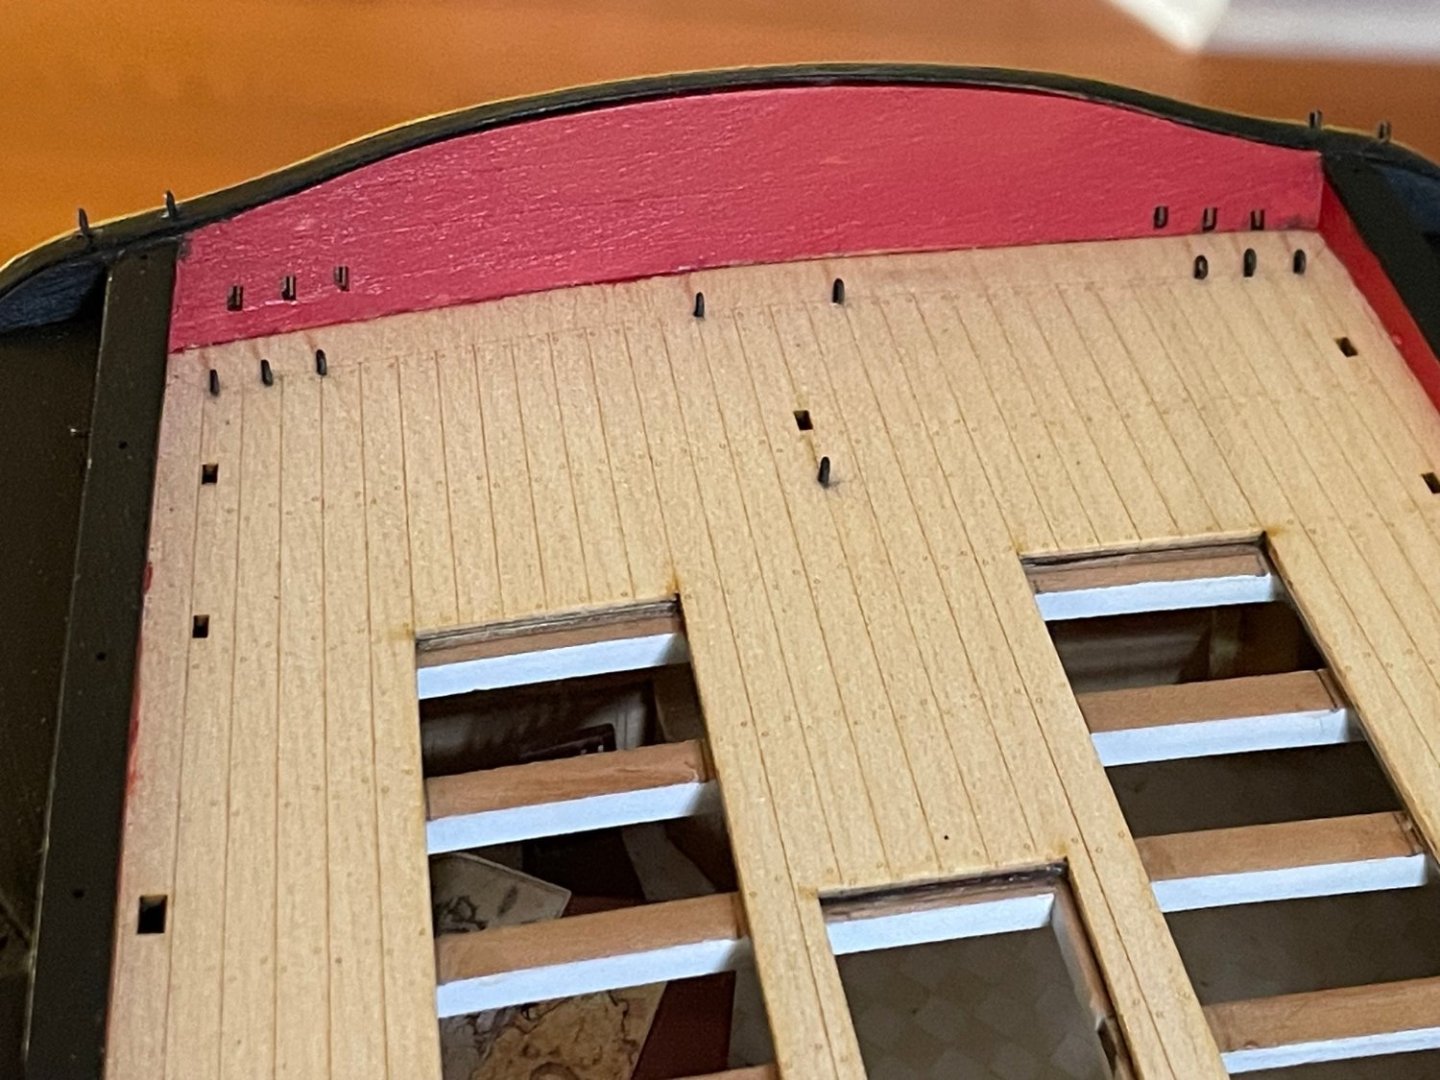
Had the same issue as Glen with the stern cleats, likely did not push edges down enough when gluing the deck. Used this to elongate. Then glue and filler Then paint Did the faux wood Final placement Unfortunately the glare makes the stern look a bit off but not in real life.


- 233 replies
-
- 8
-
-
- Indefatigable
- Vanguard Models
- (and 1 more)
-
Did same thing with filler. Will post pics later today.
- 587 replies
-
- 2
-
-
- Indefatigable
- Vanguard Models
- (and 1 more)
-
I just had the same issue yesterday with the stern cleats, followed your lead
- 587 replies
-
- 1
-
-
- Indefatigable
- Vanguard Models
- (and 1 more)
-
Thanks, that's what happens when the nest empty's out, have to do something while binging on various streaming services.
- 233 replies
-
- 2
-
-
- Indefatigable
- Vanguard Models
- (and 1 more)
-
Thanks. Agree with your post on being dogged in doing things. Hard to say good enough.
- 233 replies
-
- 2
-
-
- Indefatigable
- Vanguard Models
- (and 1 more)
-
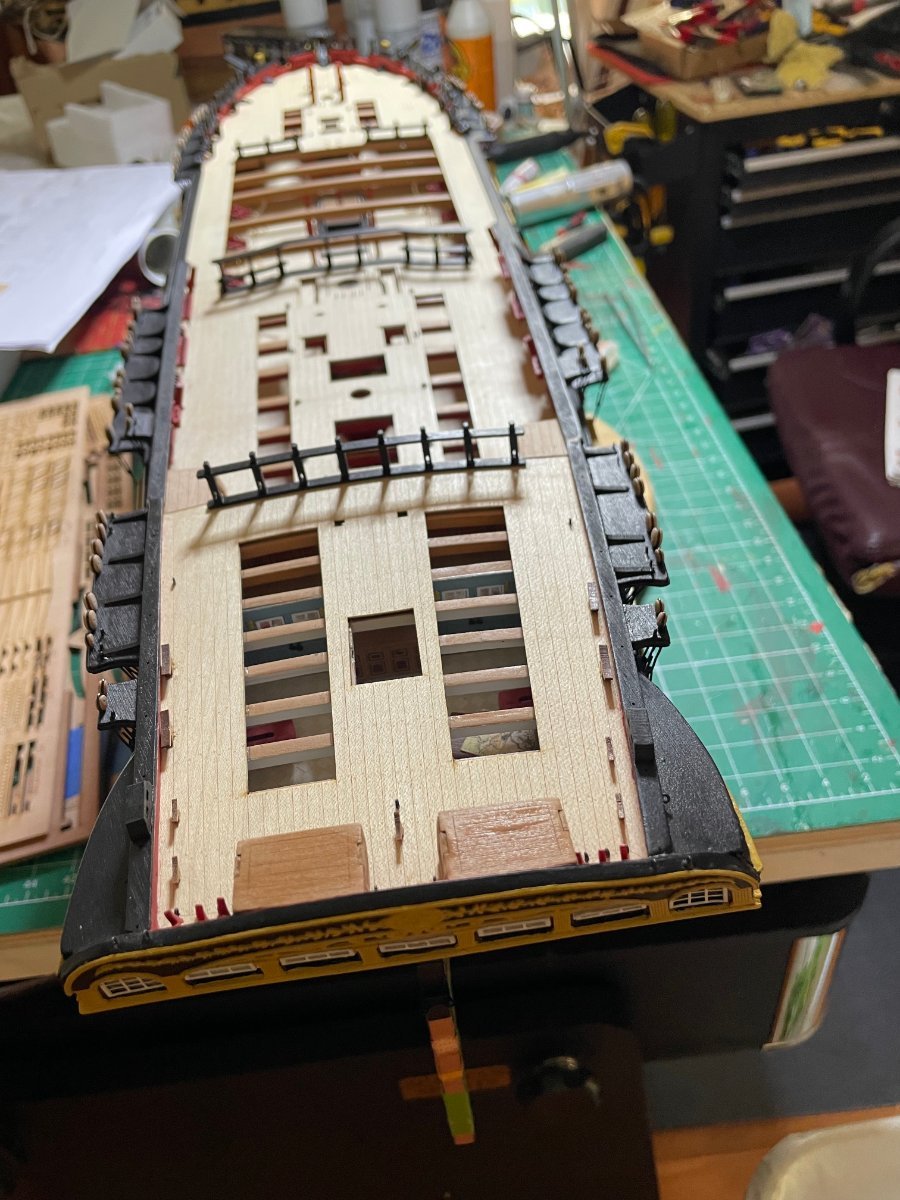
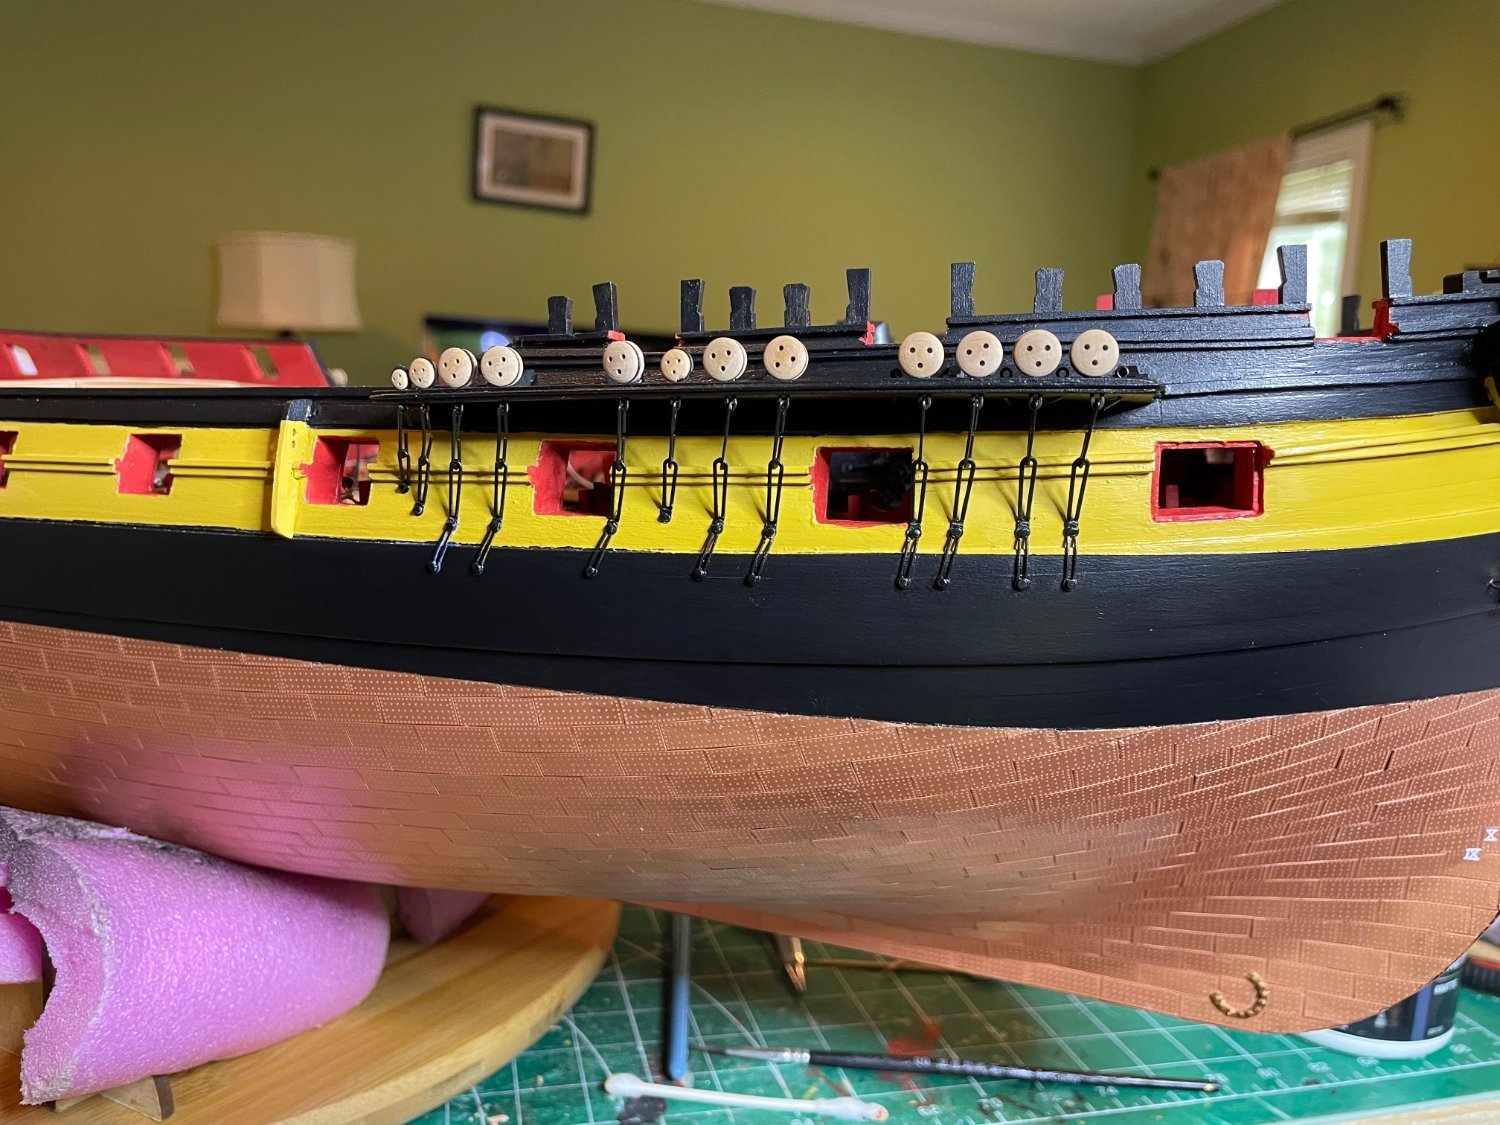
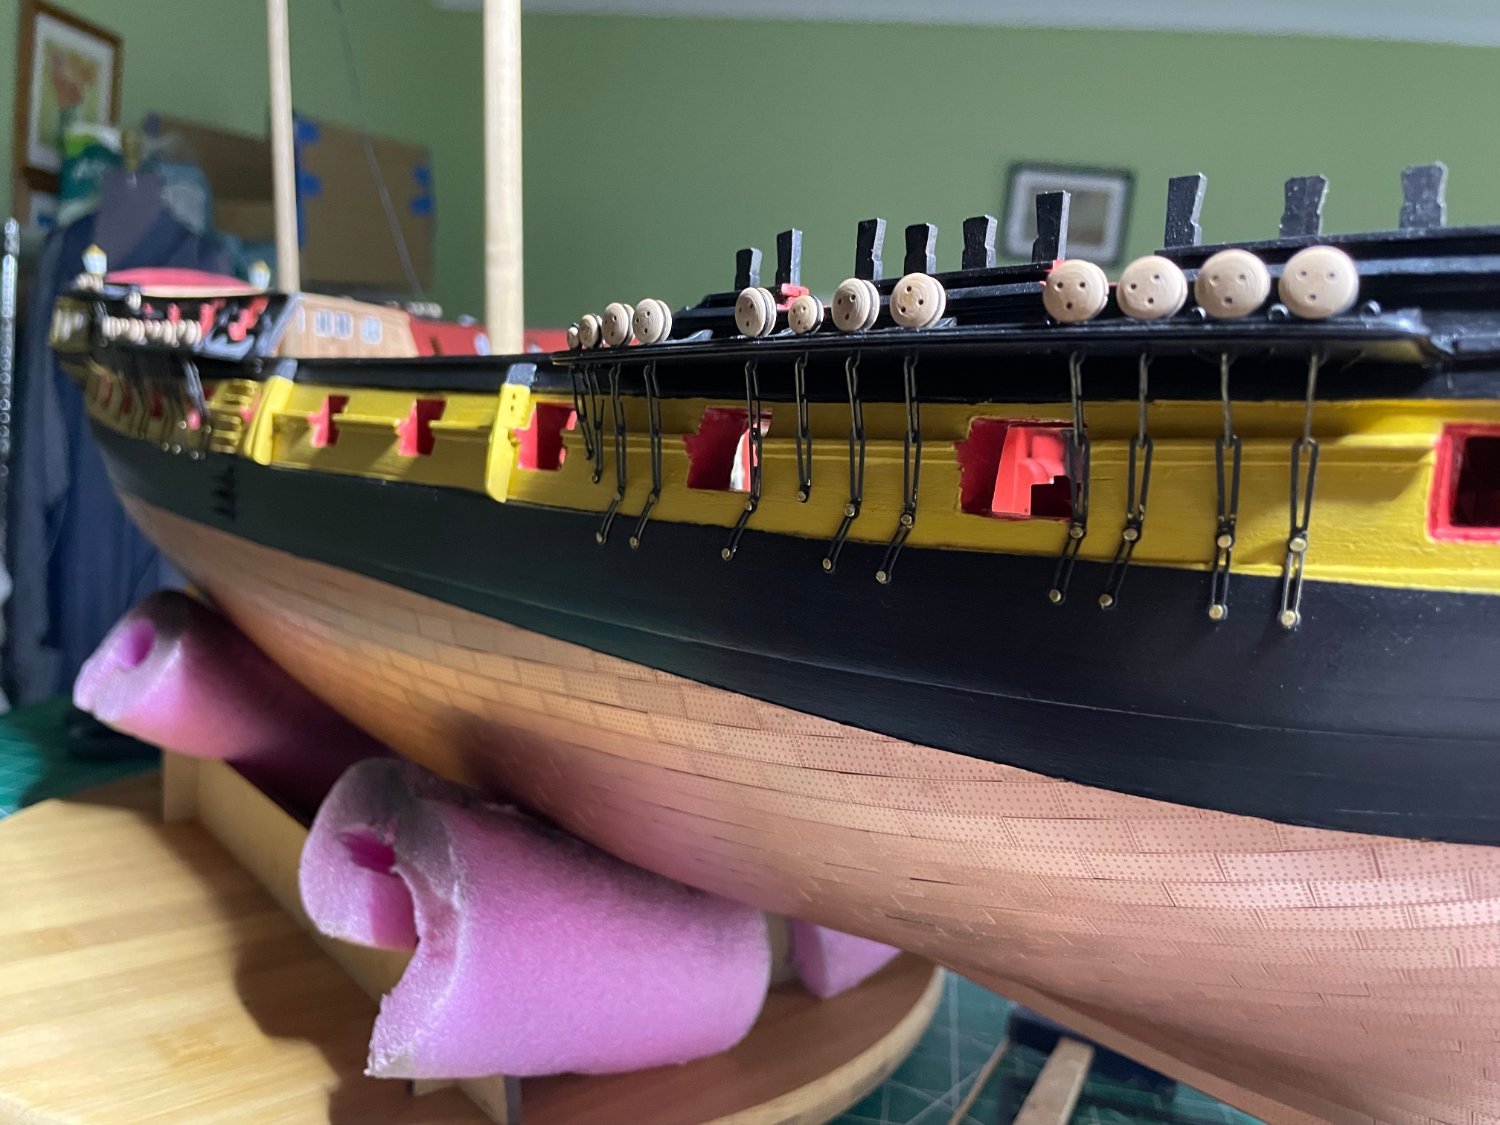
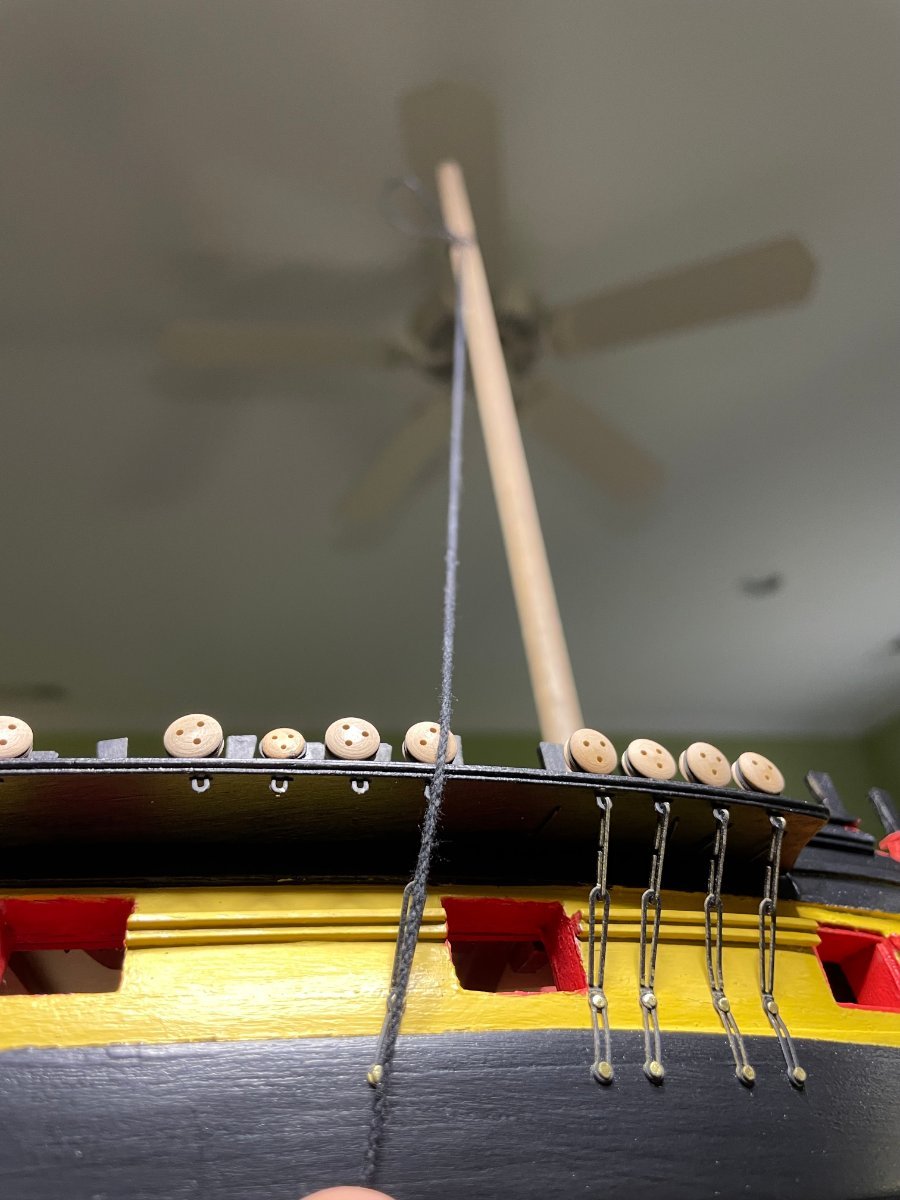
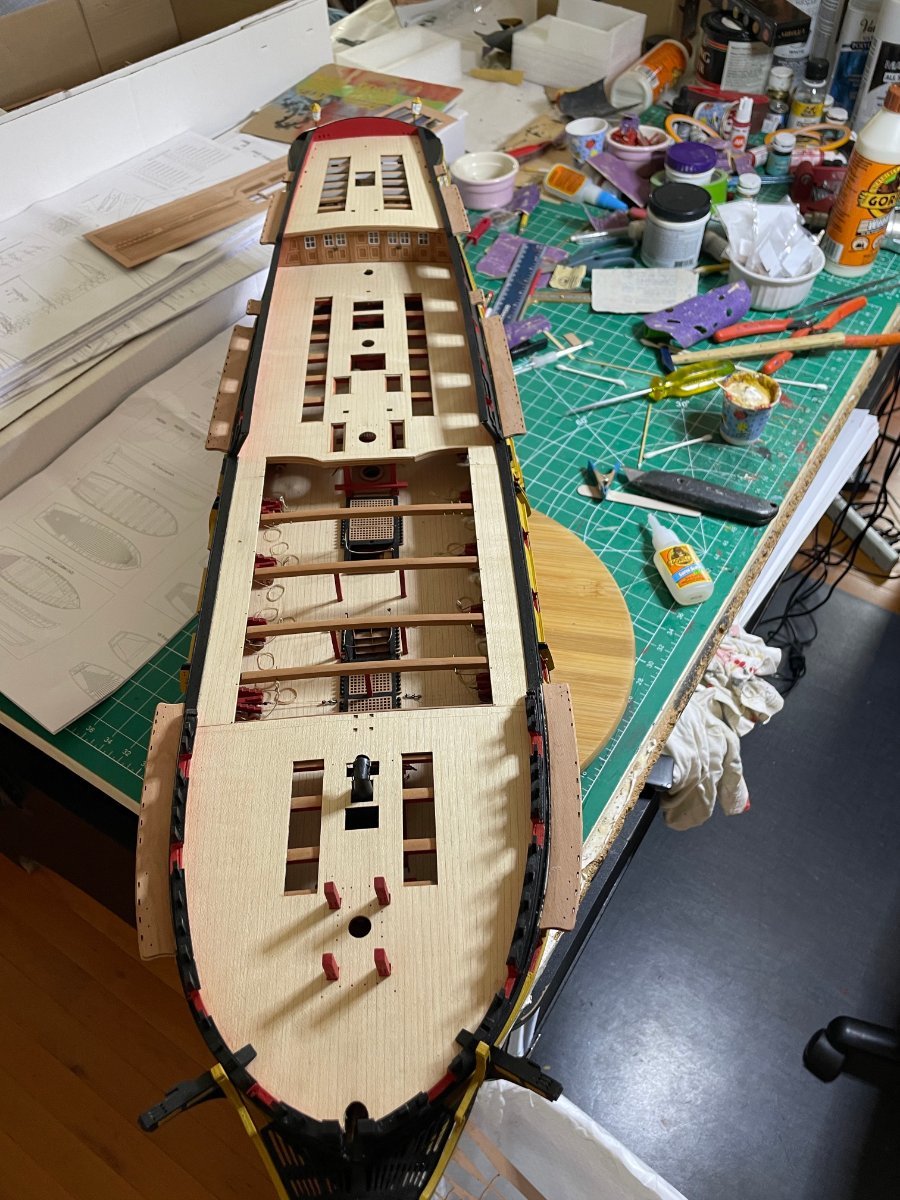
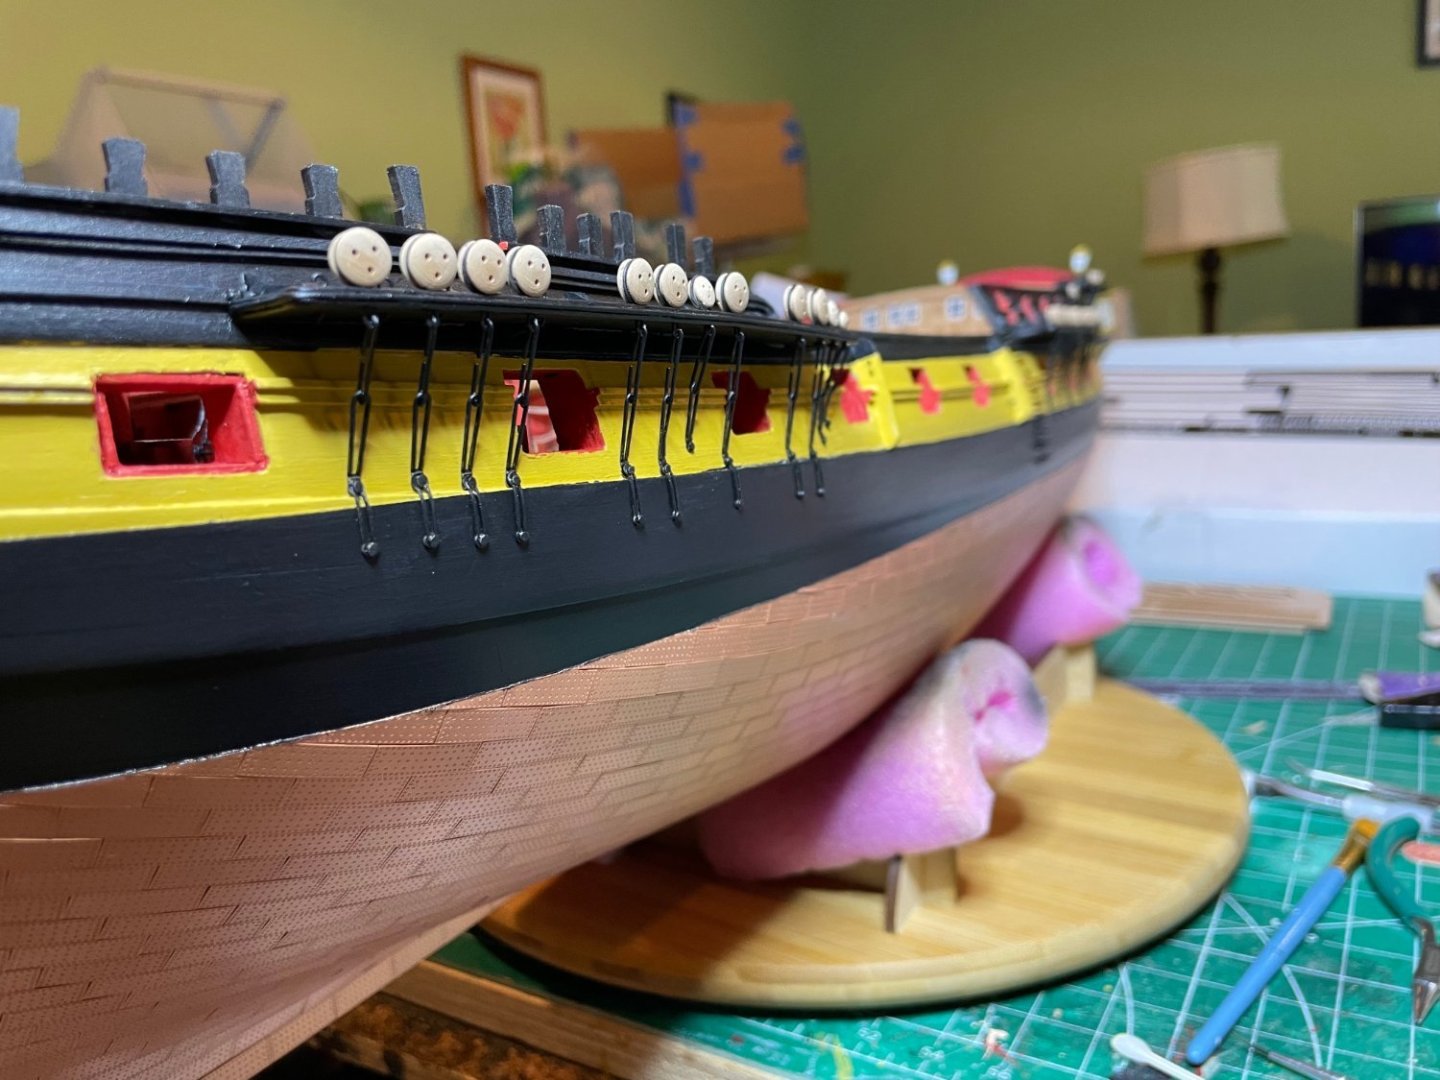
It took a few days but all the deadeyes and chains in. Used the string method from the mast to get the angles correct. Deadeyes in Chains on starboard side pre touch up Po Post paint touch up with iron black Next will be taking care of the deck pieces to complete the hull. Will leave anchors to the end and will also add the stunsail booms.


- 233 replies
-
- 15
-
-
-
- Indefatigable
- Vanguard Models
- (and 1 more)
-
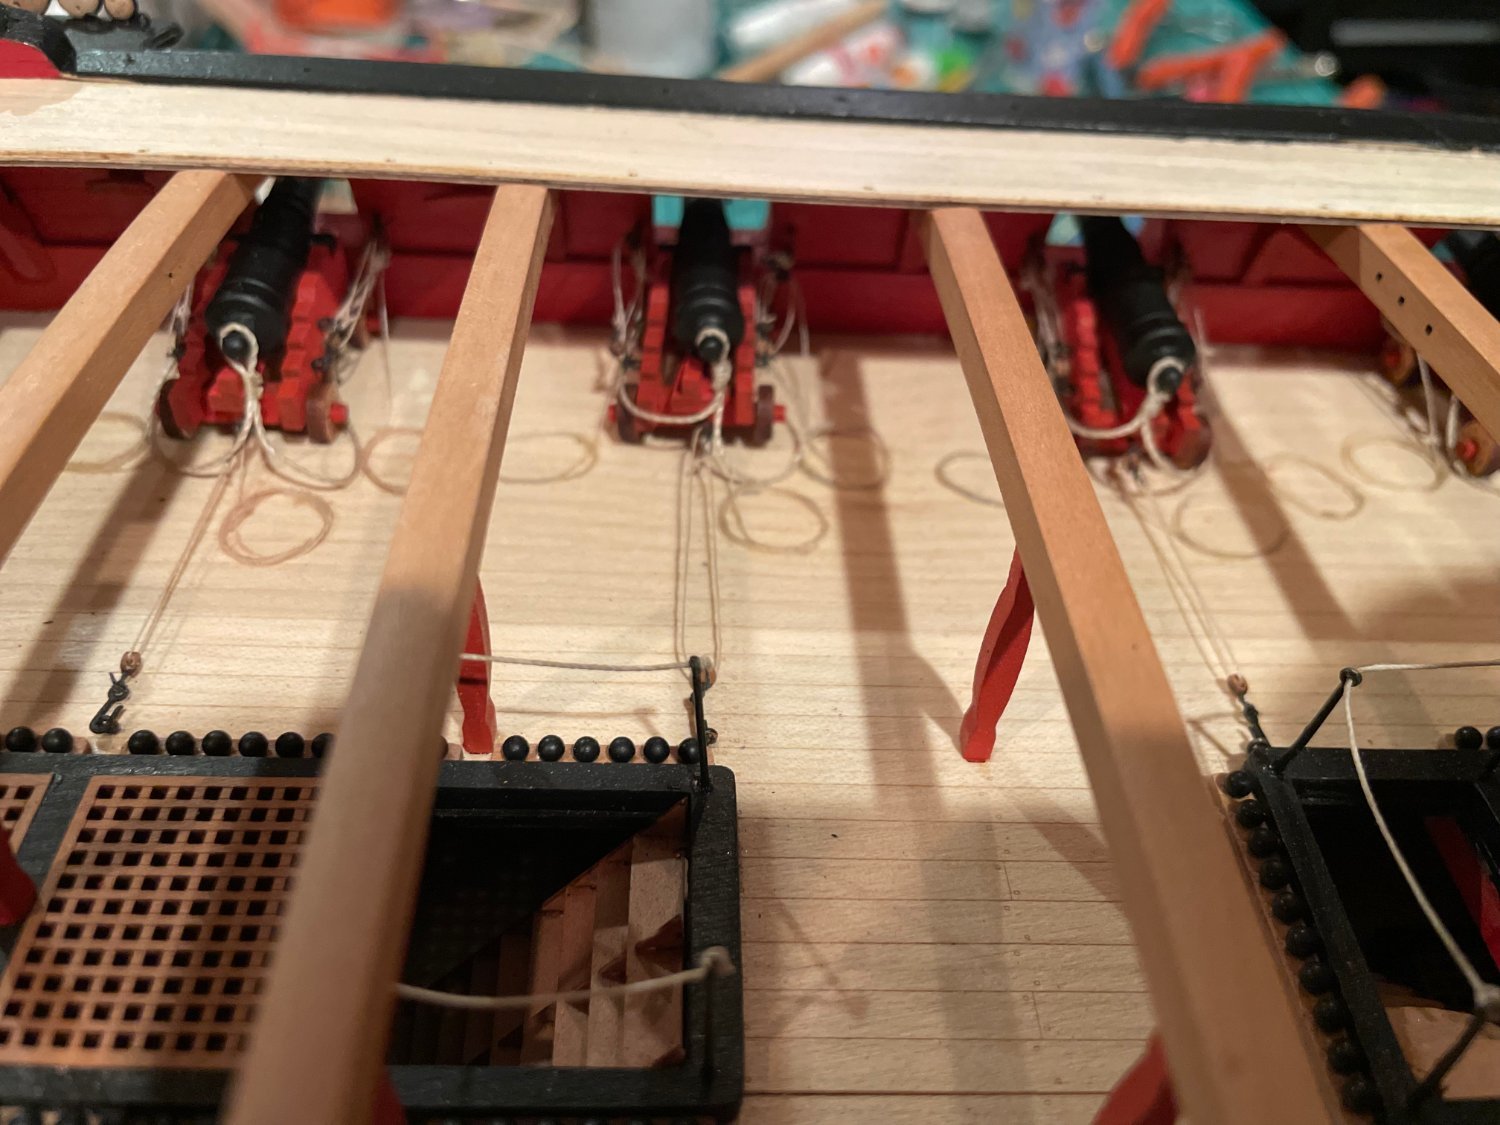
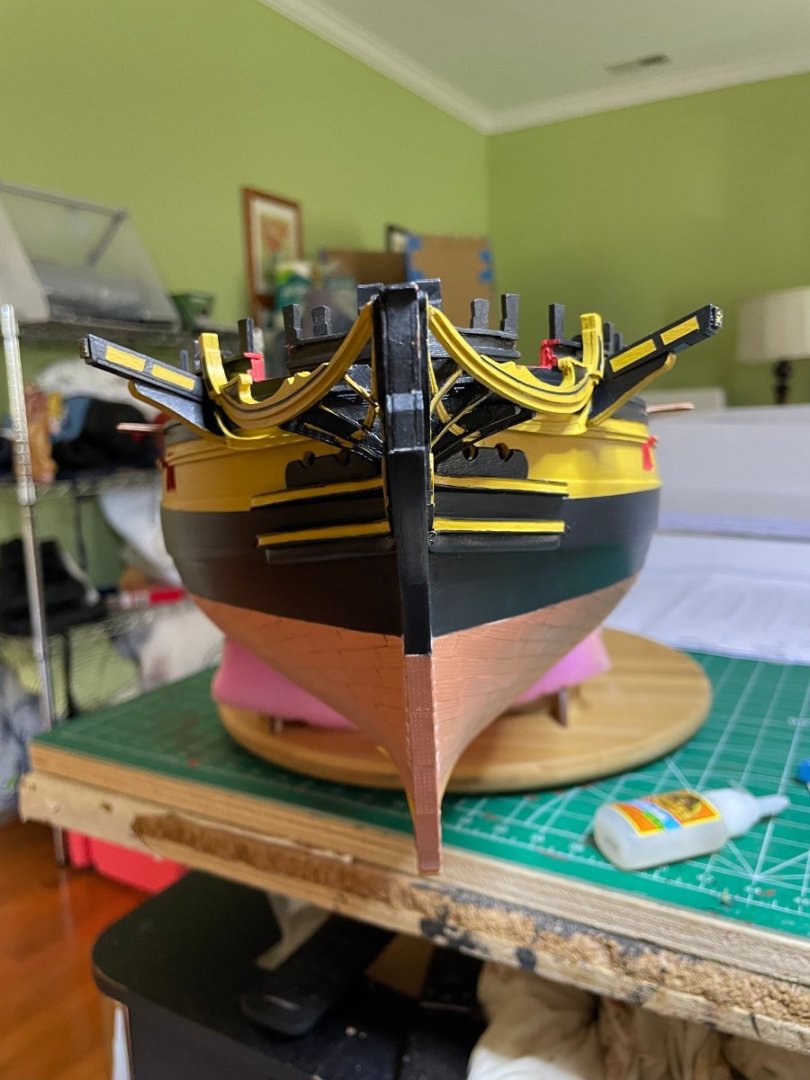
Today fitted the knees and eye-bolts then painted it up. You can see from underneath I bent the eye-bolts so they ill not pop out under the strain of the rigging.


- 233 replies
-
- 11
-
-
- Indefatigable
- Vanguard Models
- (and 1 more)
-
Thanks all. I am definitely a few months behind Kevin when it comes to masting, especially as those ship boats take some time and I tend to do them before the masts. Iphone 12 has a great camera.
- 233 replies
-
- 3
-
-
- Indefatigable
- Vanguard Models
- (and 1 more)
-
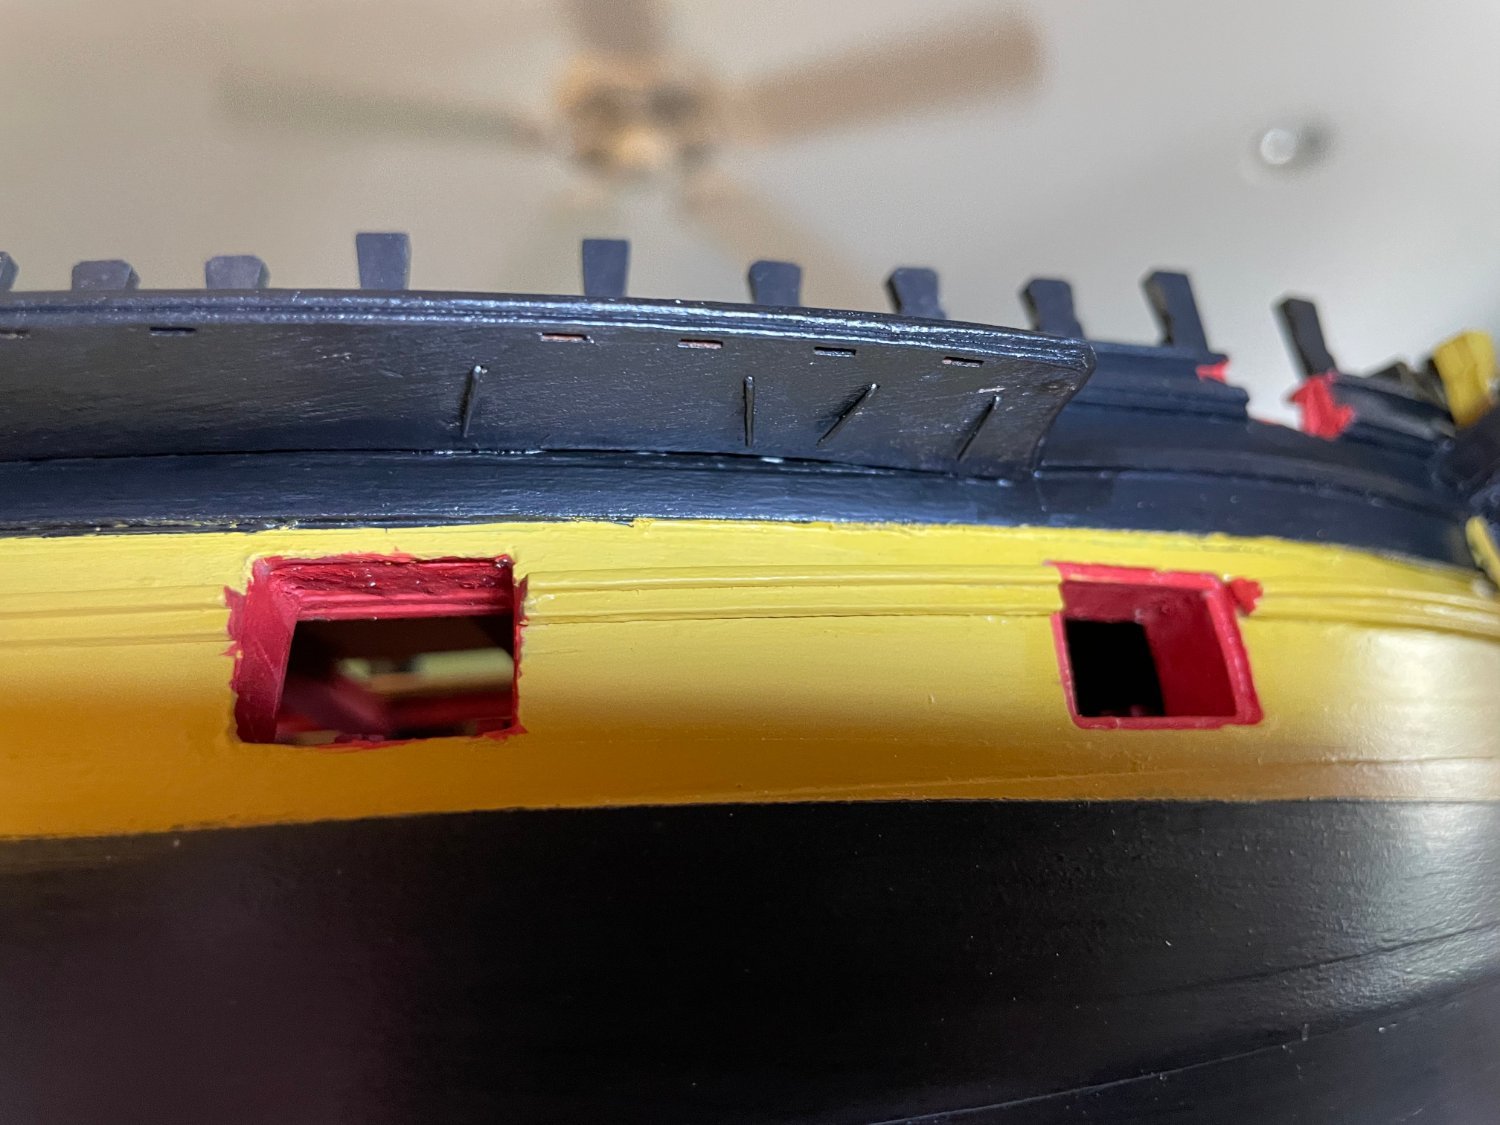
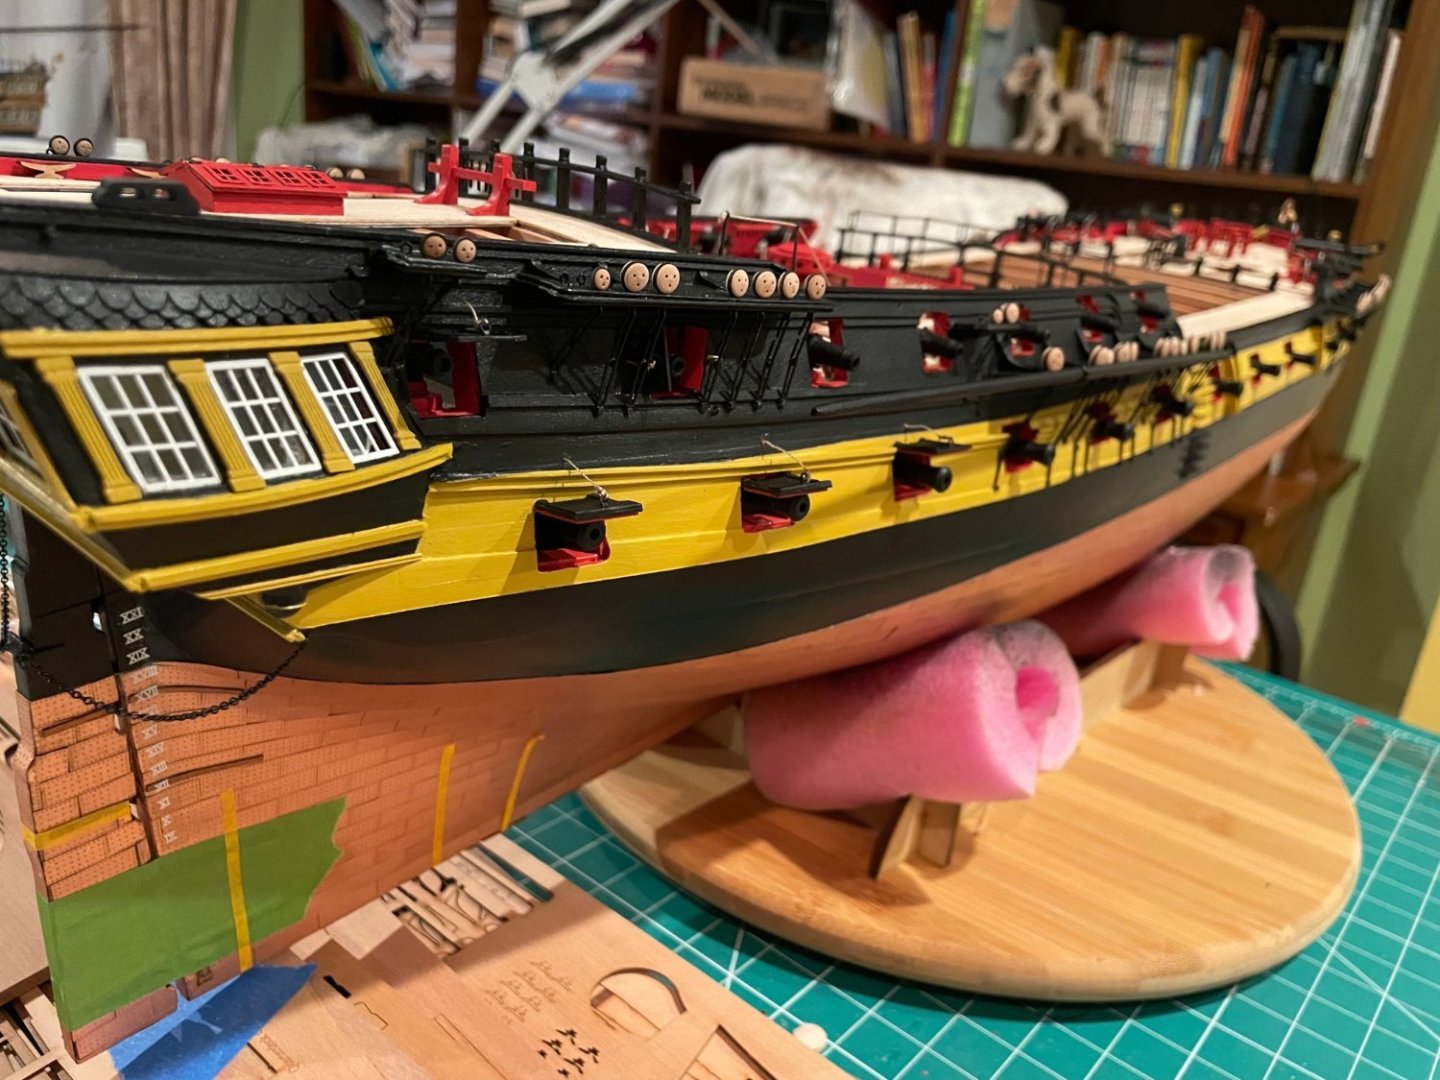
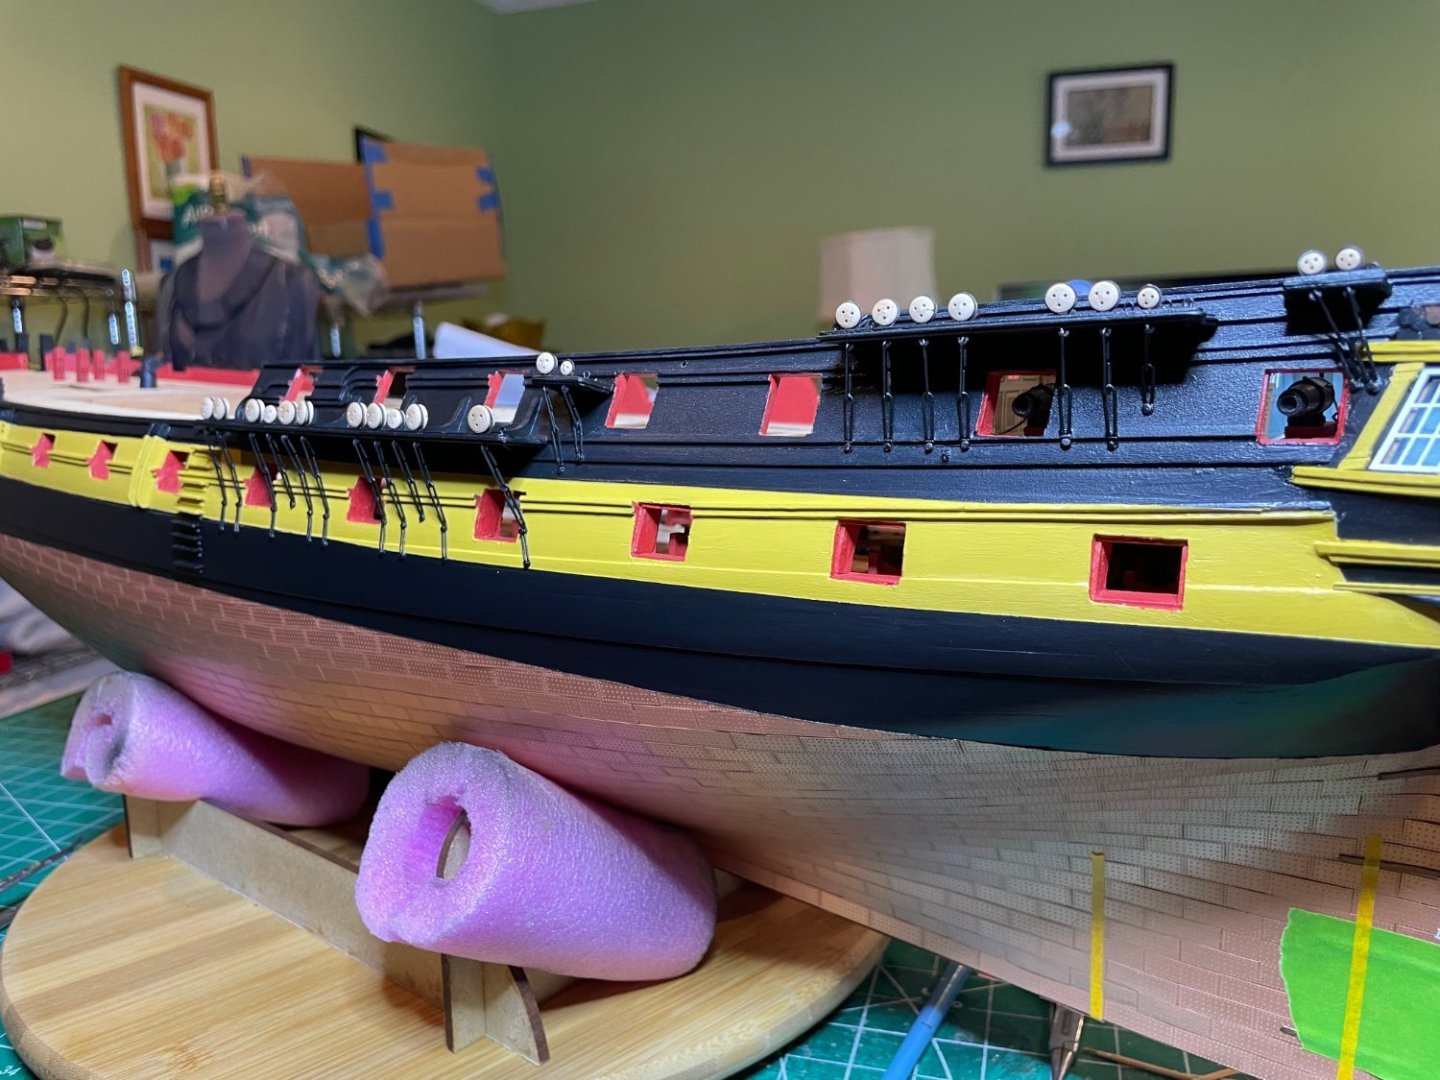
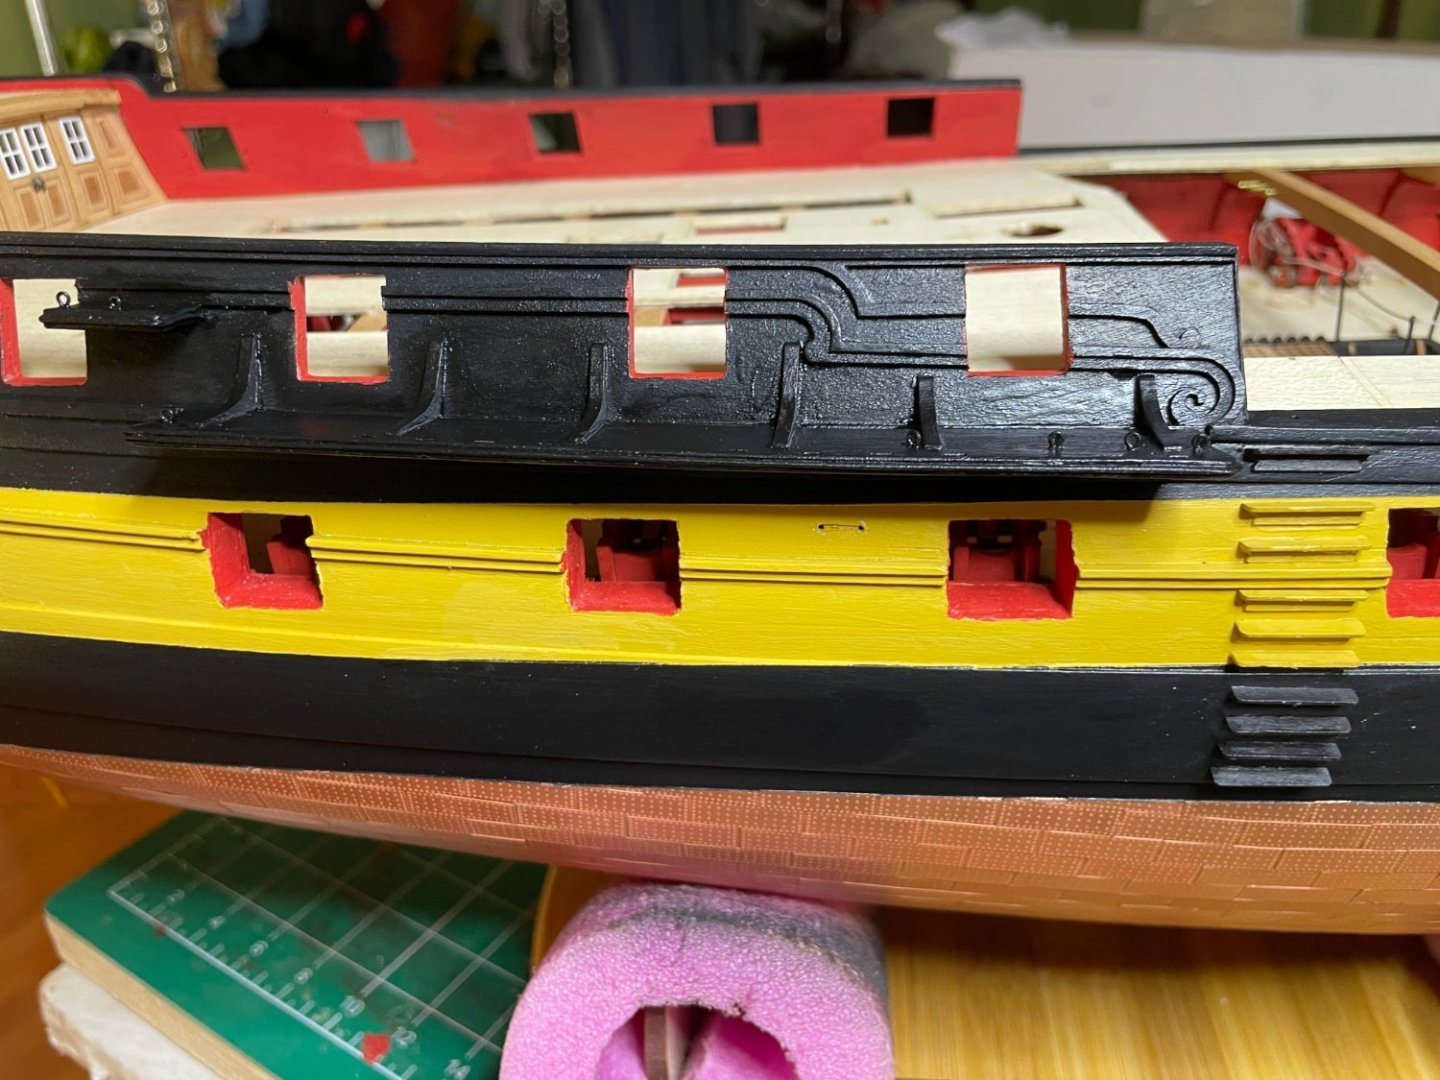
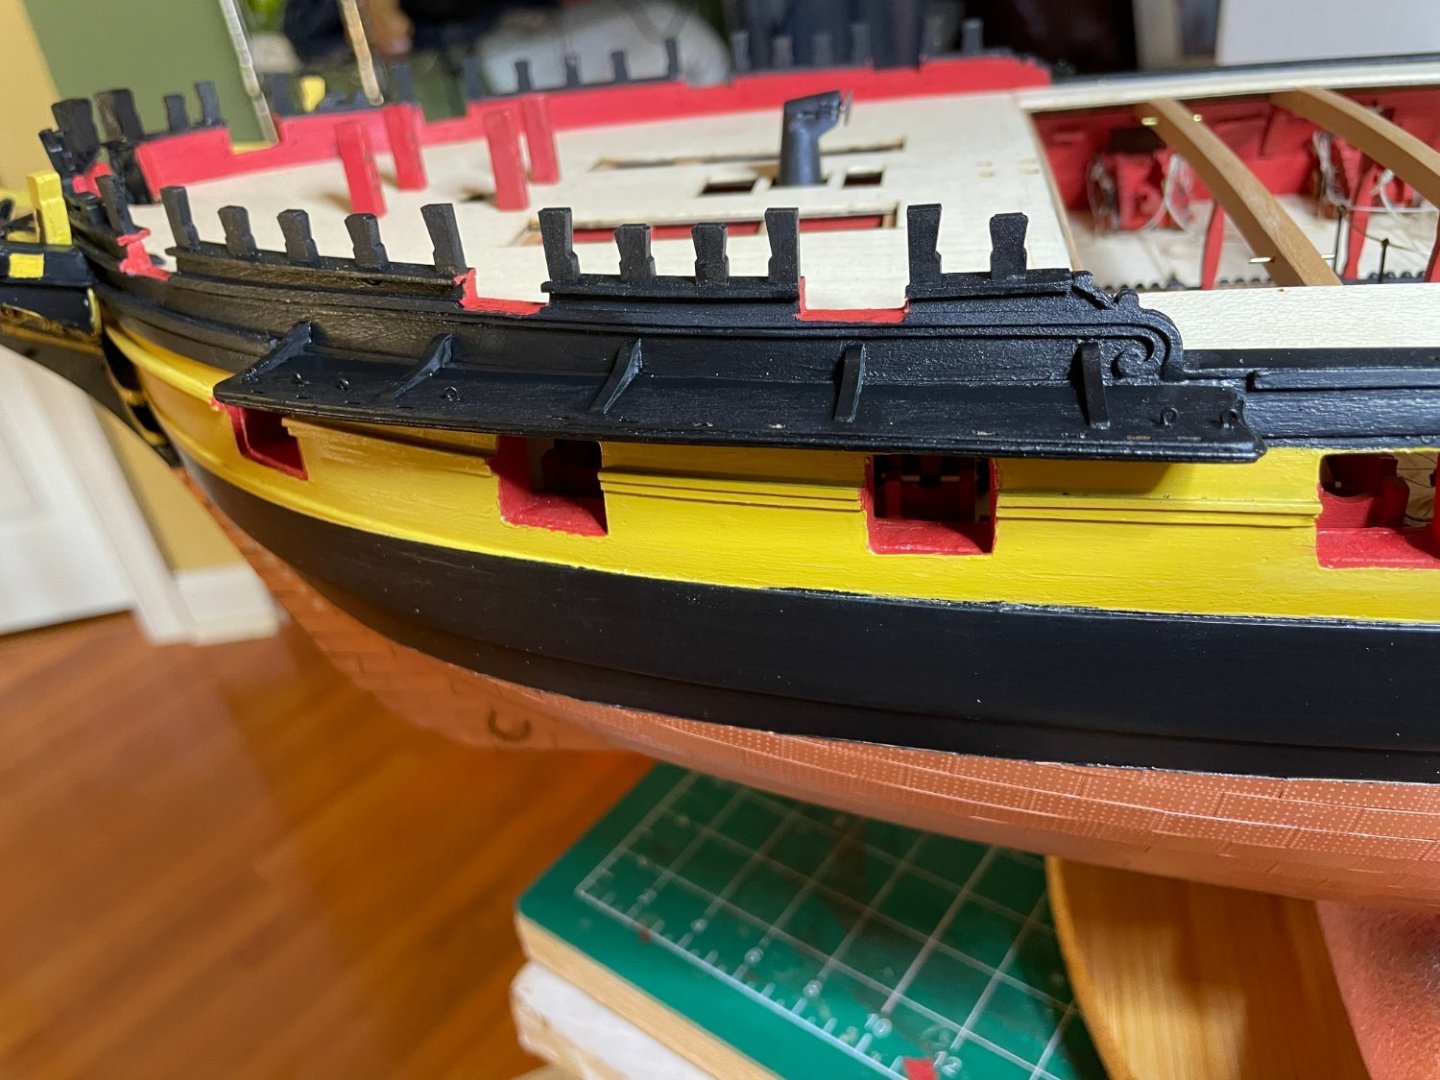
Completed the fenders, steps and lanterns. Also fitted the channels which went in pretty easily given the pre drilled pin holes and the marks on the channels. Edges have a nice reveal.

- 233 replies
-
- 10
-
-
- Indefatigable
- Vanguard Models
- (and 1 more)
-
Looks good. Had to use some filler as well but after painting will look perfect
- 587 replies
-
- 2
-
-
-
- Indefatigable
- Vanguard Models
- (and 1 more)
-
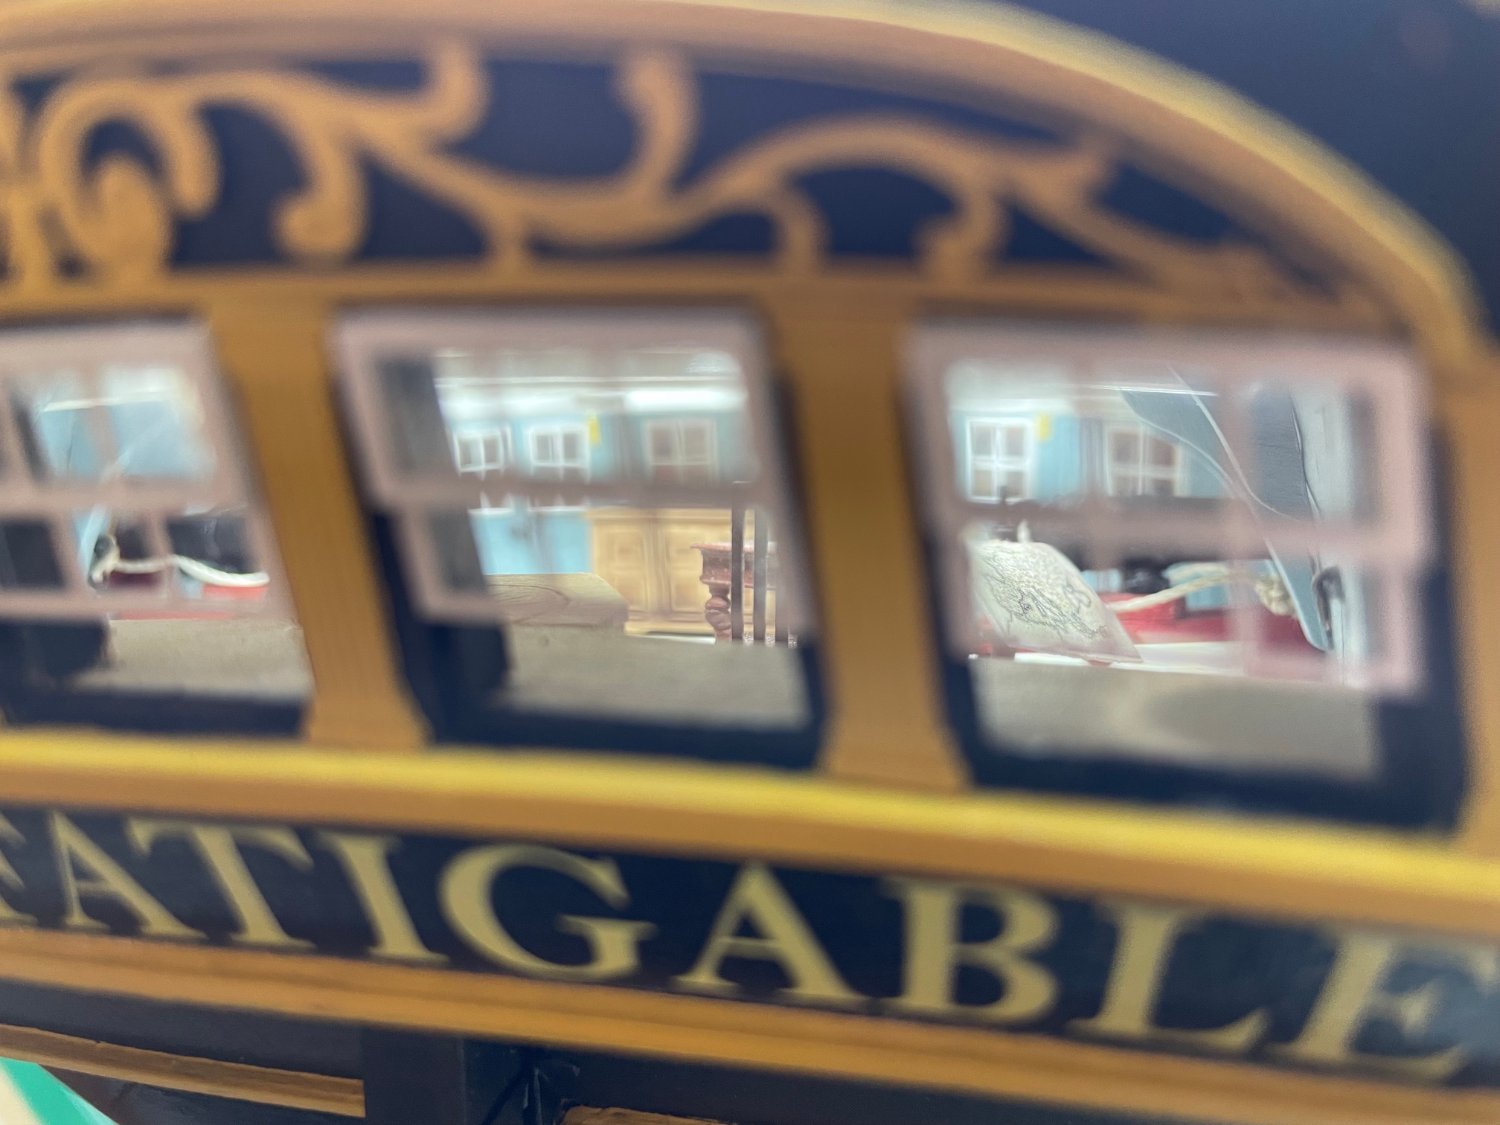
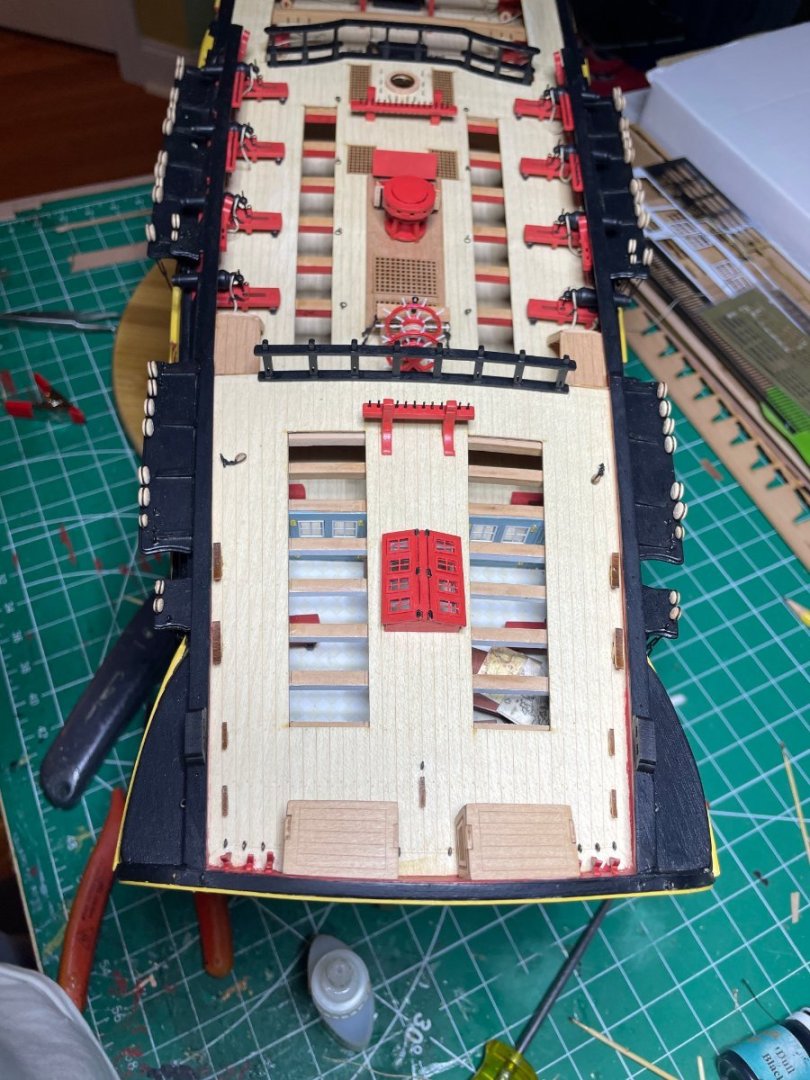
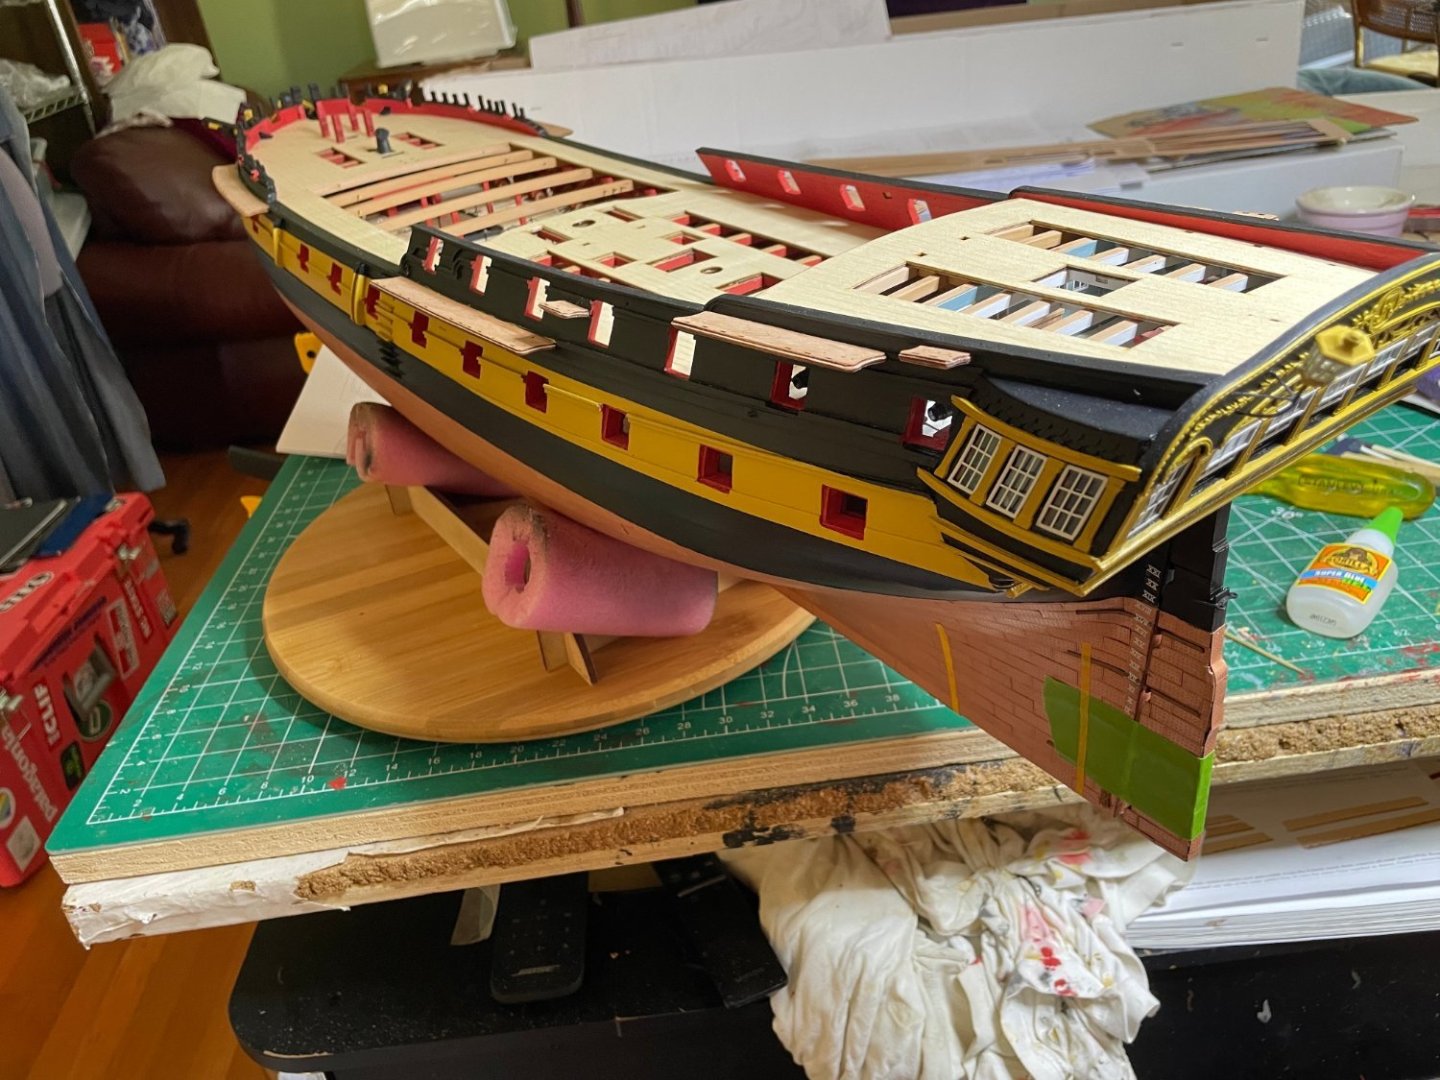
Stern area almost done, "glass" panes drove me nuts, kept flying off in all sorts of directions but fortunately did not lose any. Also put in depth markers.

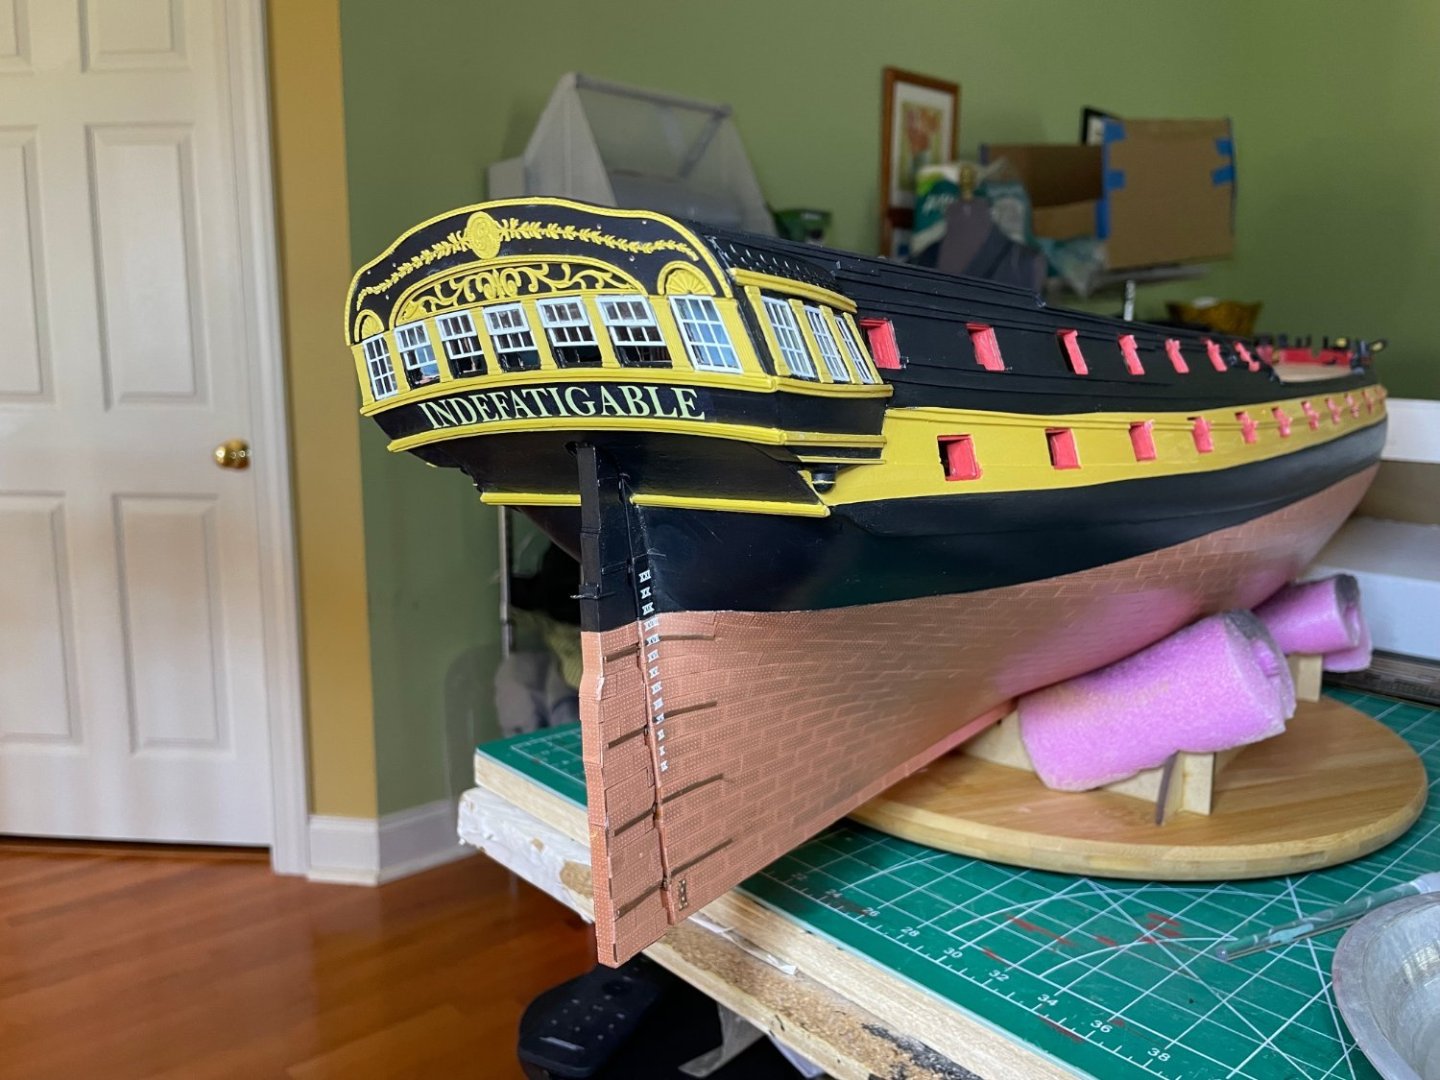
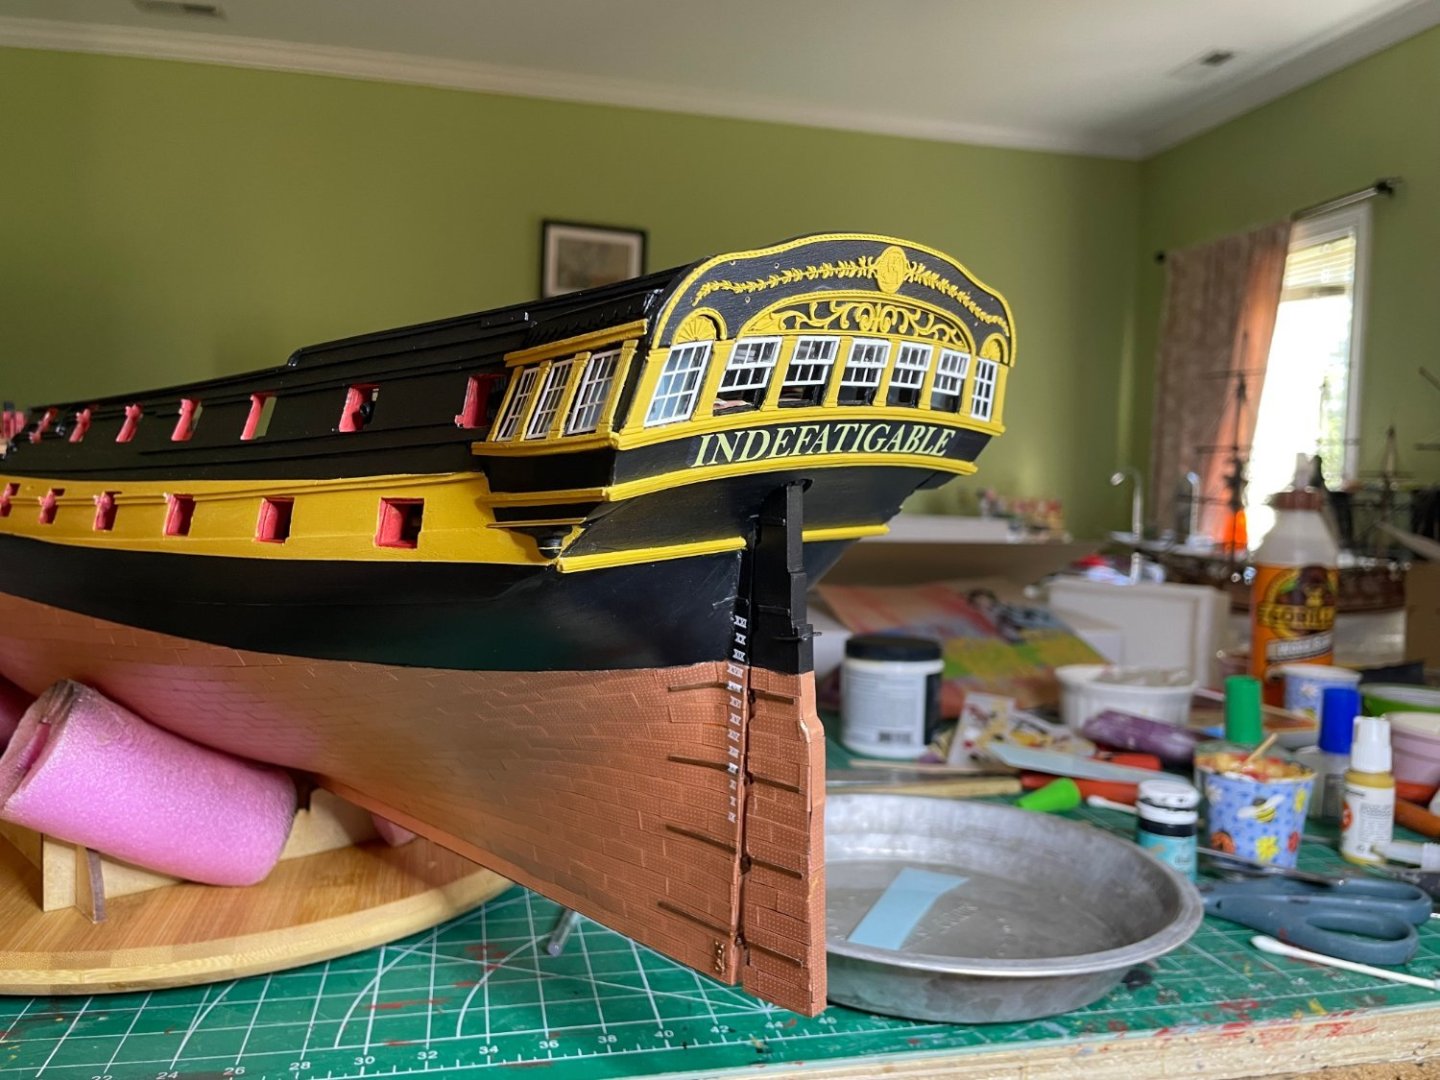
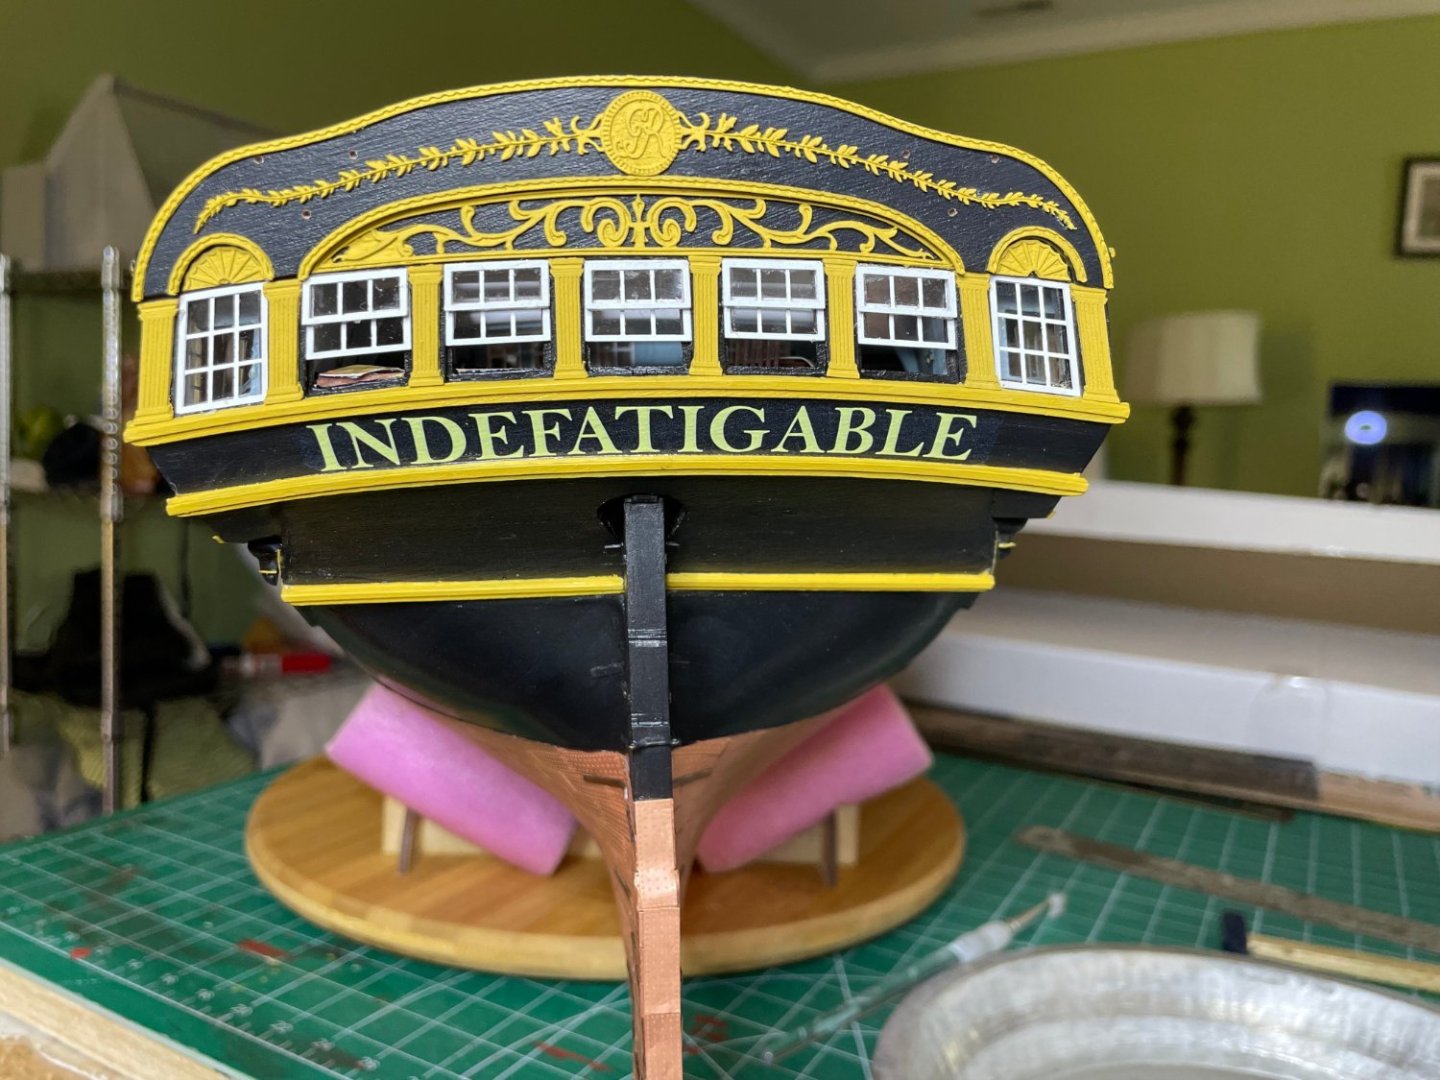


- 233 replies
-
- 15
-
-
-
- Indefatigable
- Vanguard Models
- (and 1 more)
-
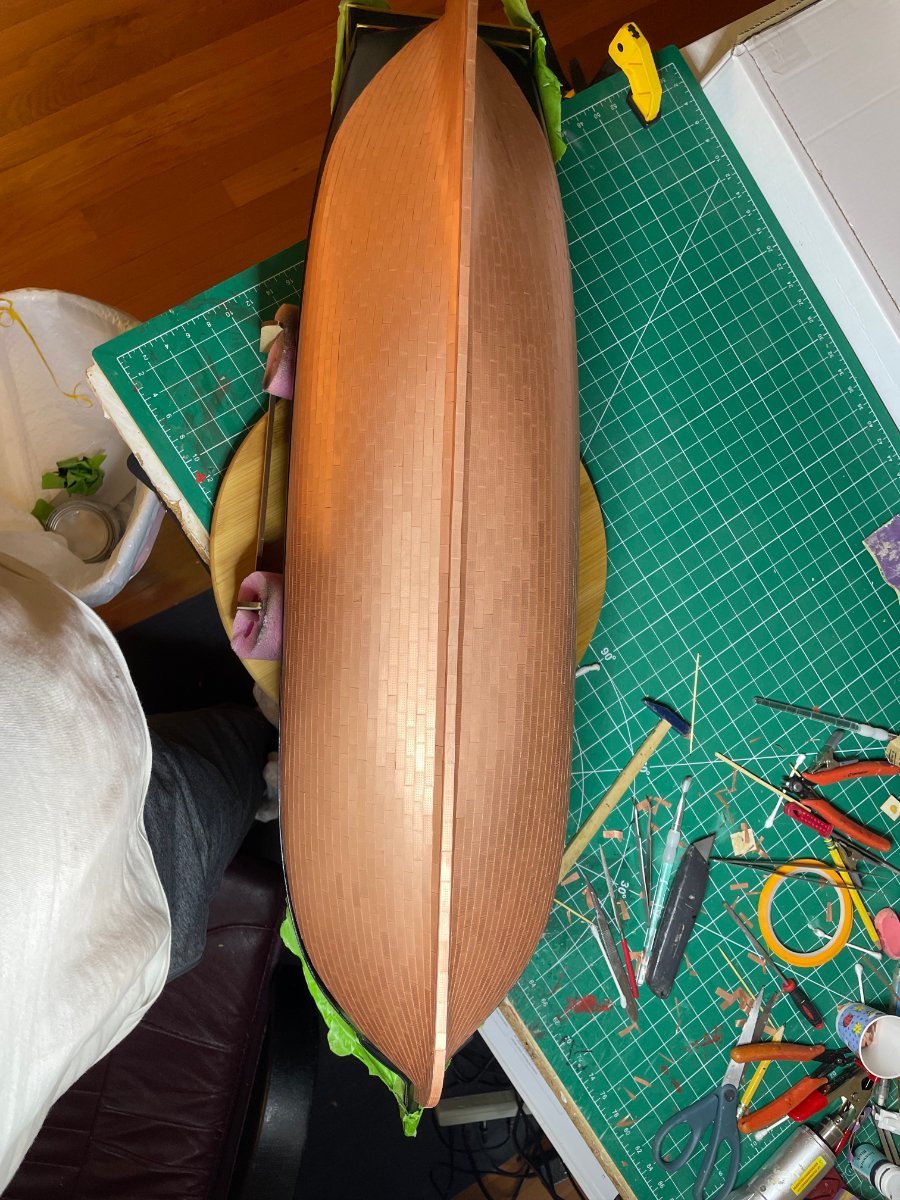
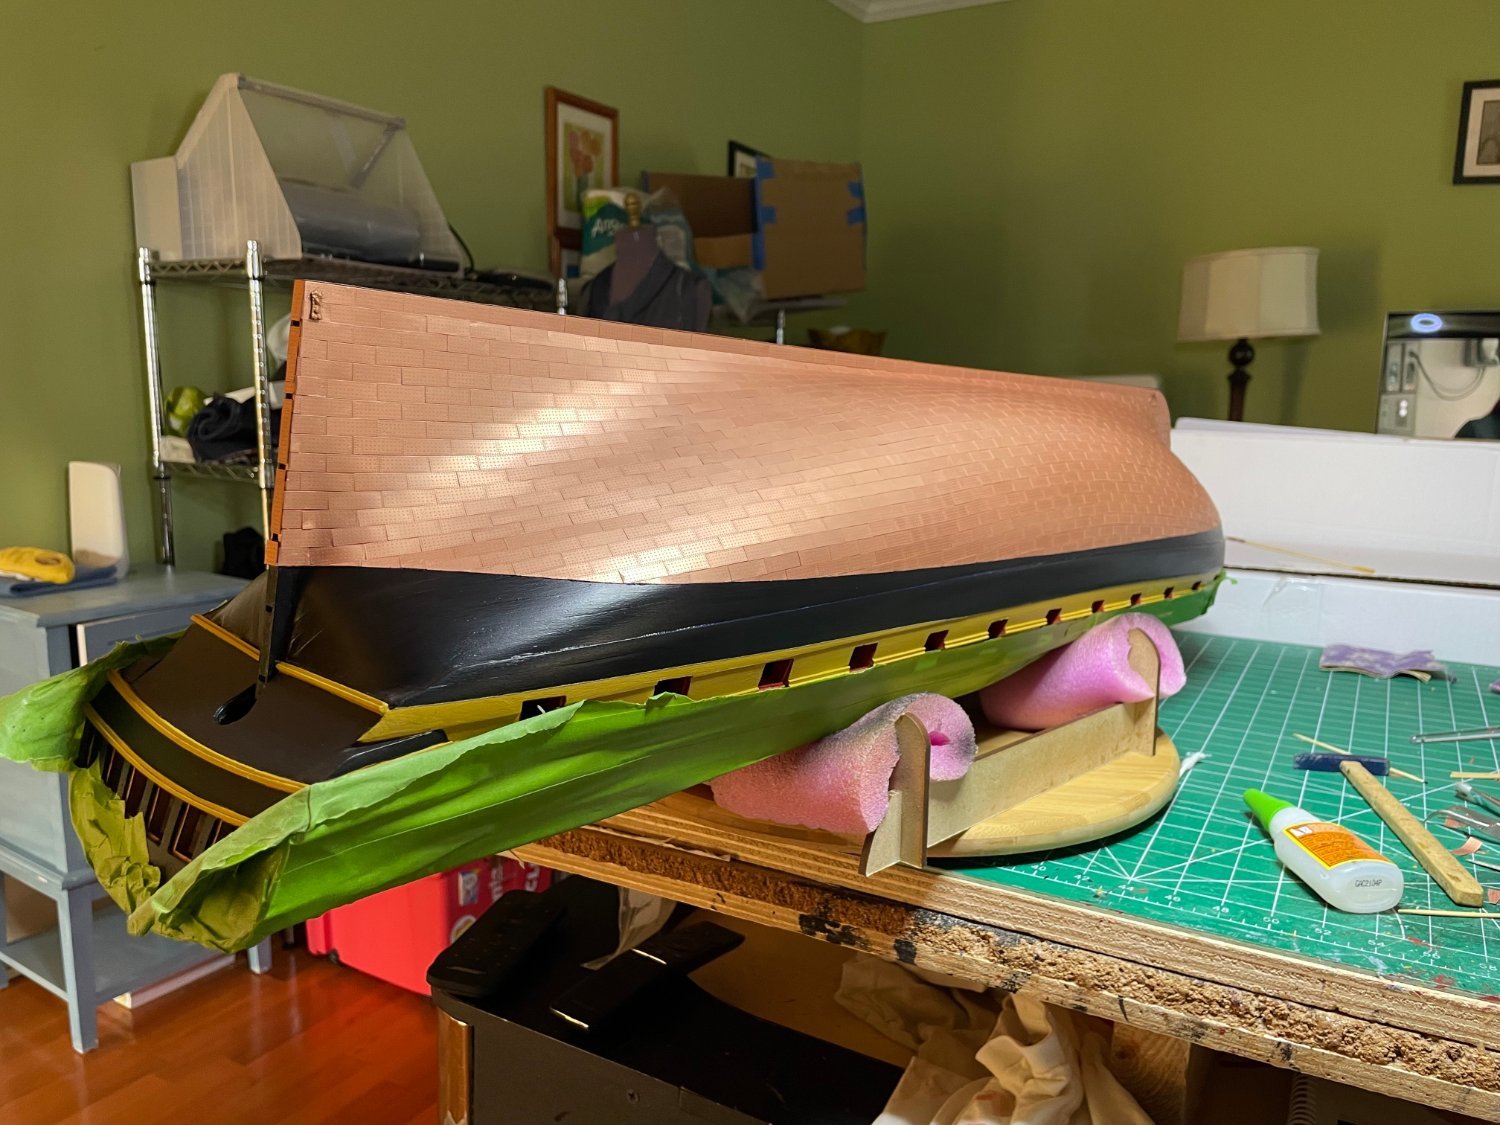
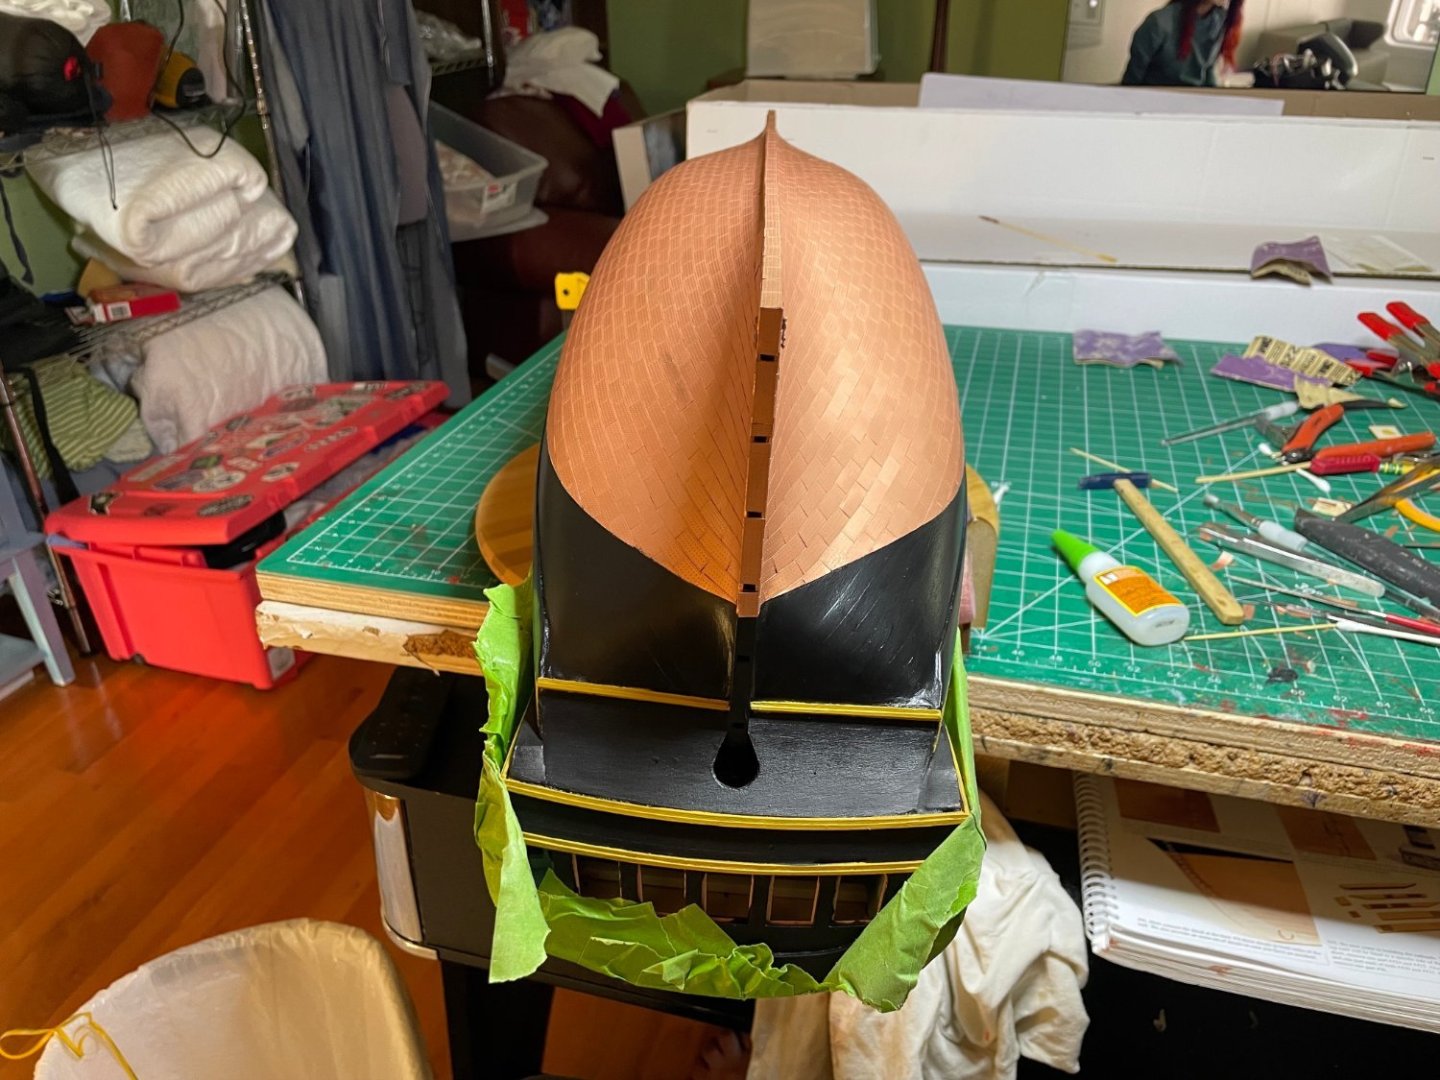
It is nice to see the subtle curves with the copper reflections/shadows, thanks !
- 233 replies
-
- 1
-
-
- Indefatigable
- Vanguard Models
- (and 1 more)
-
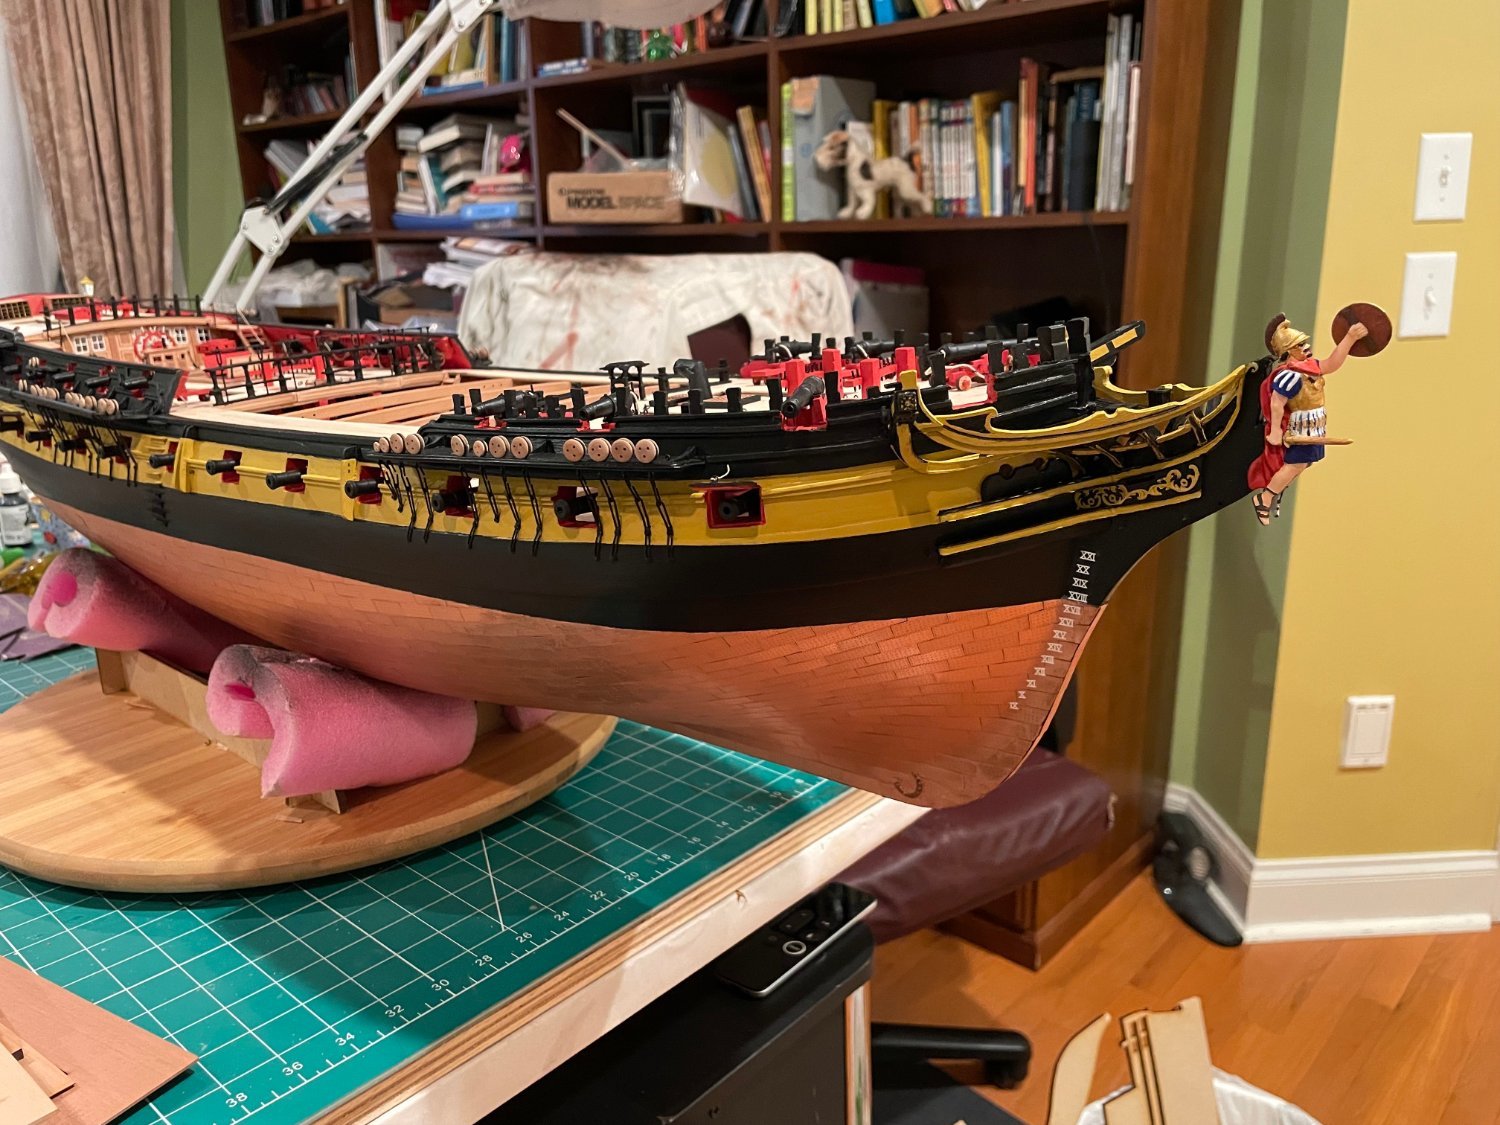
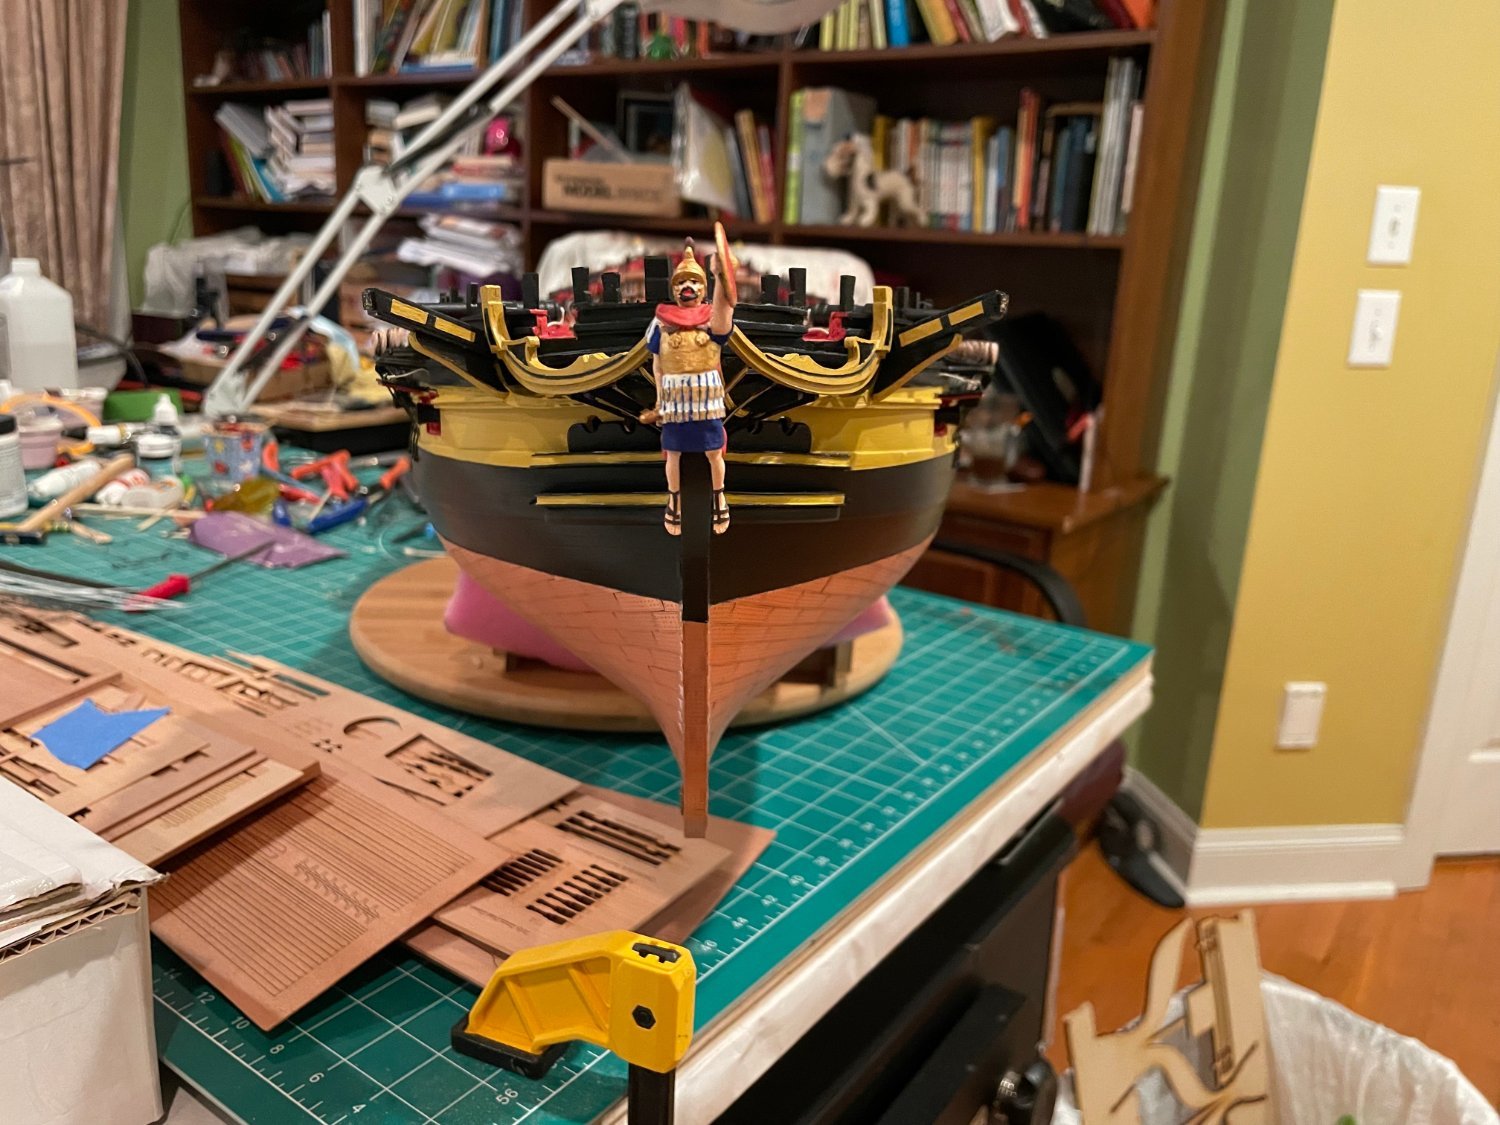
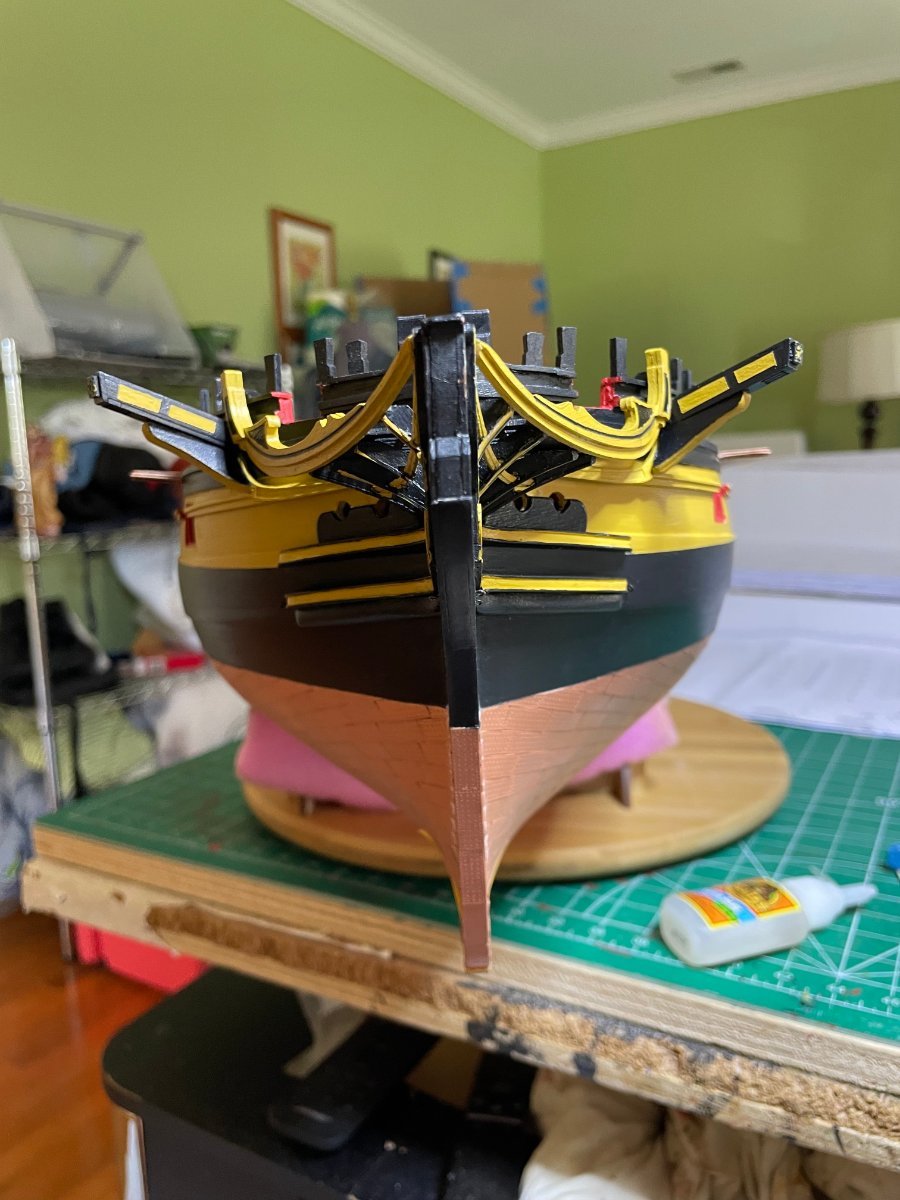
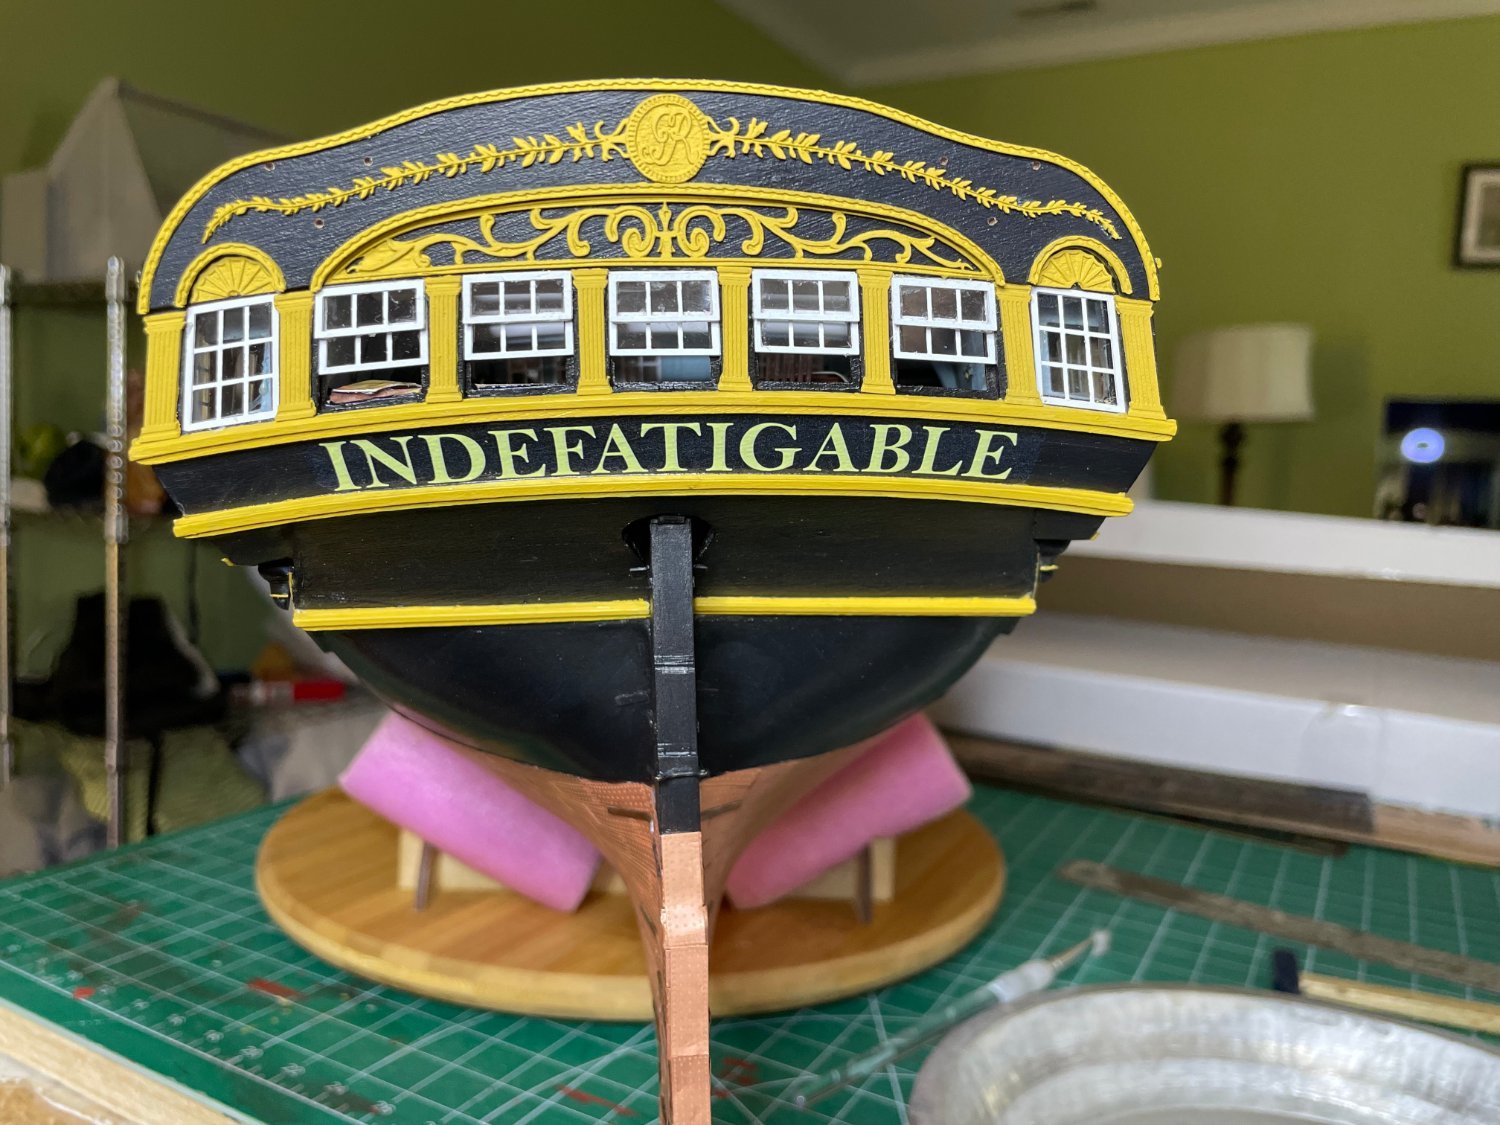
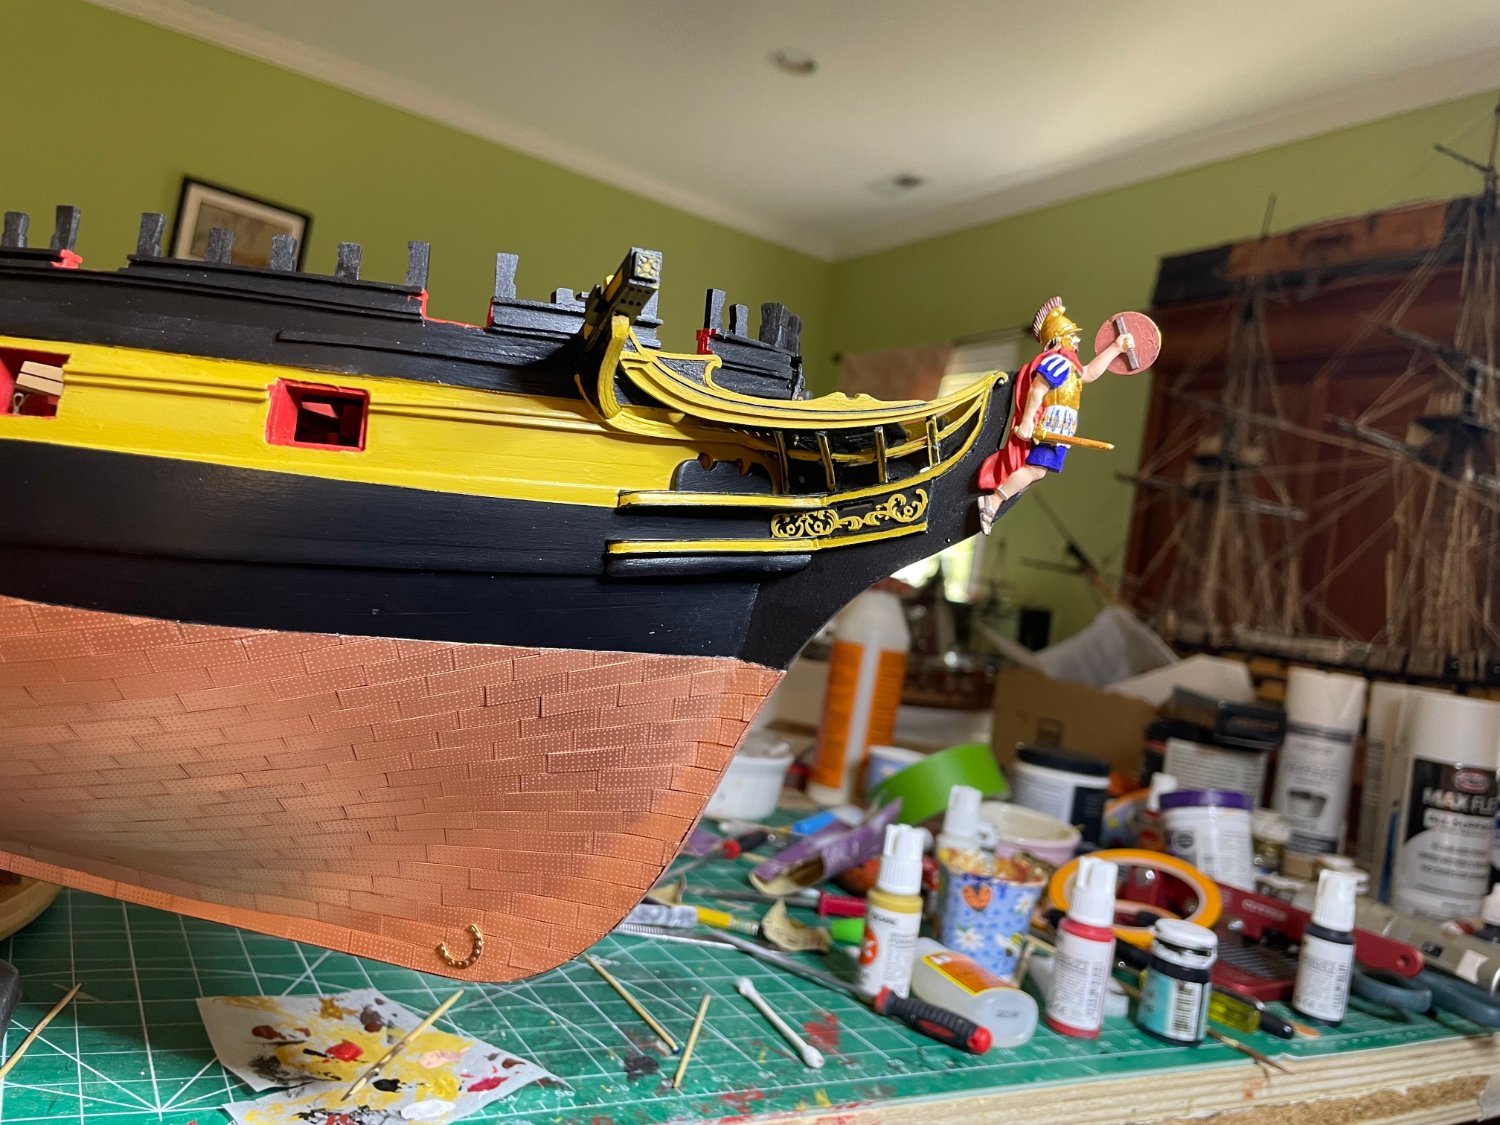
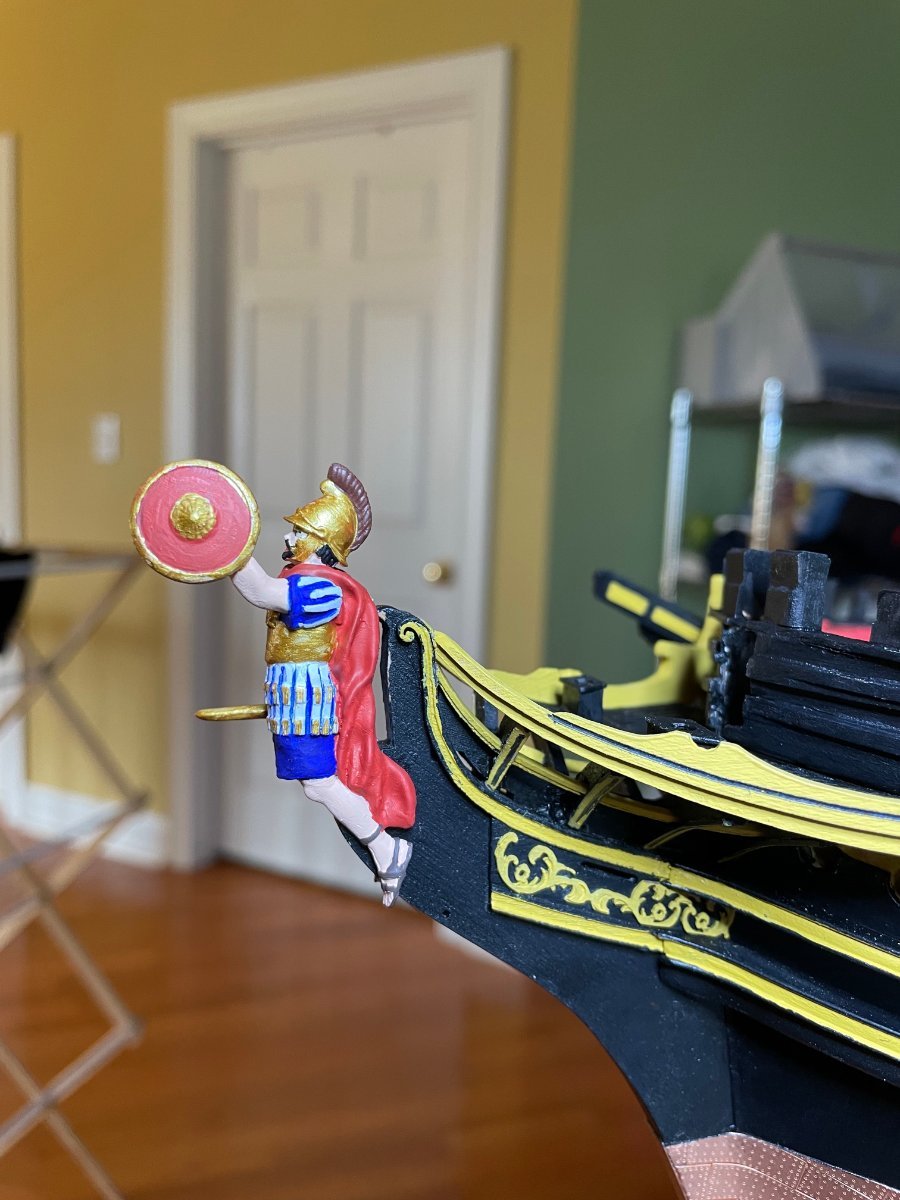
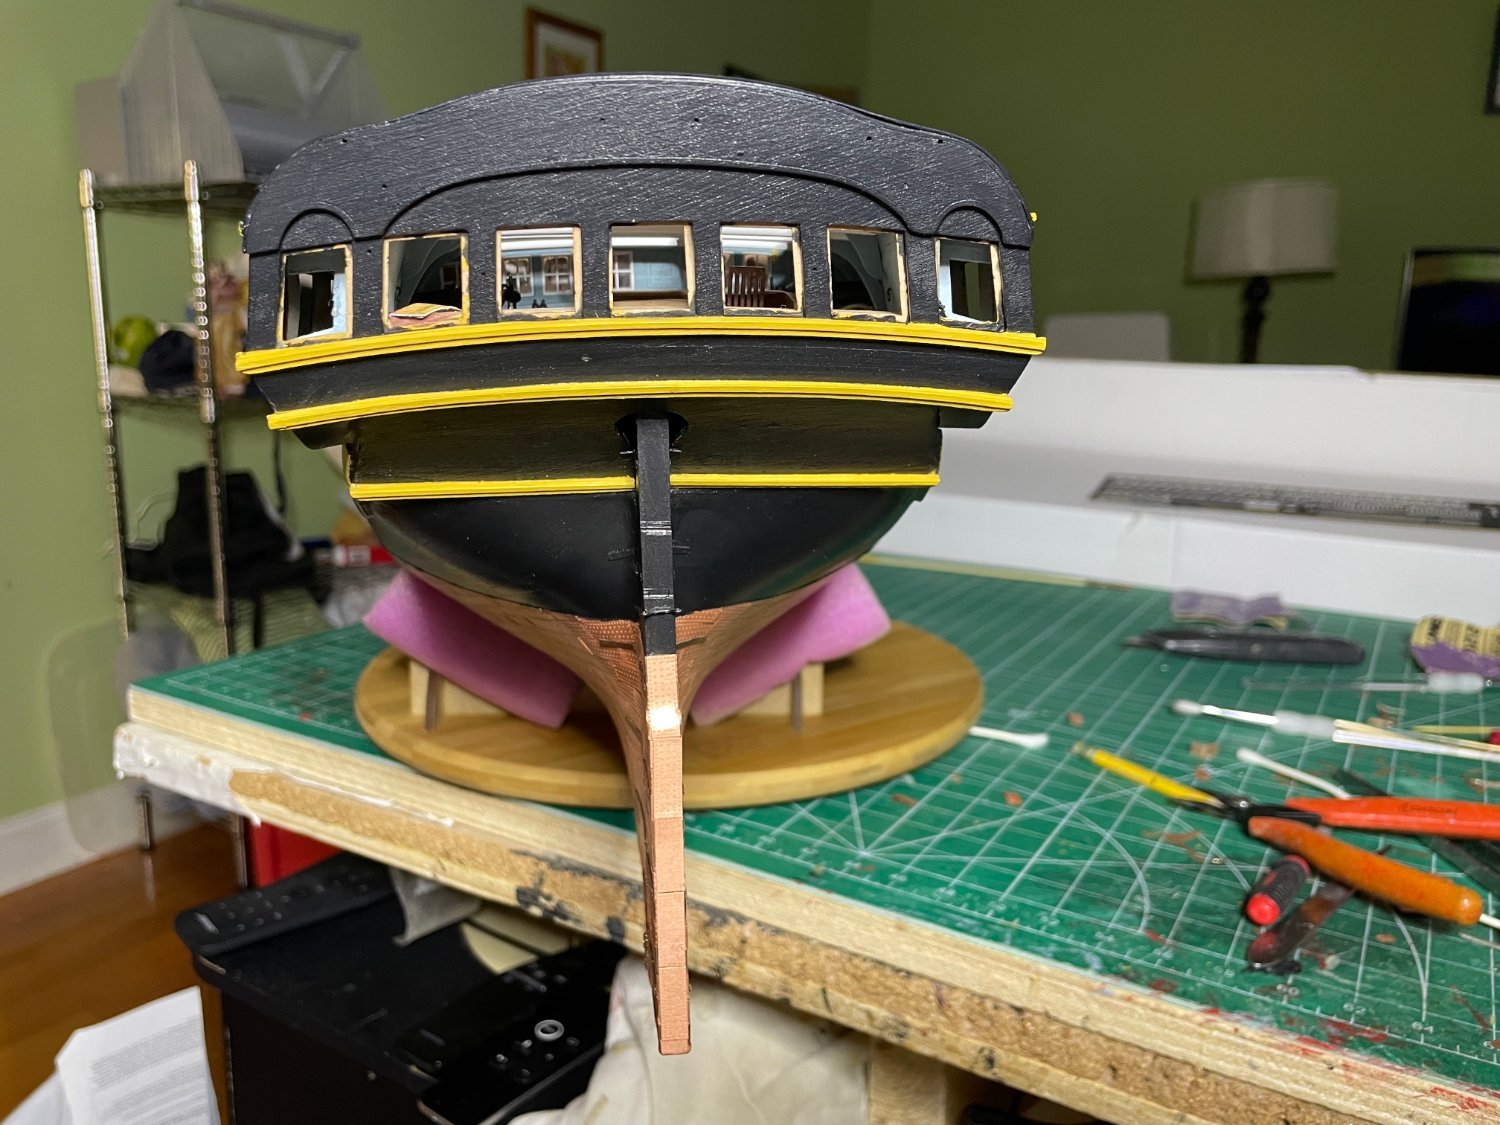
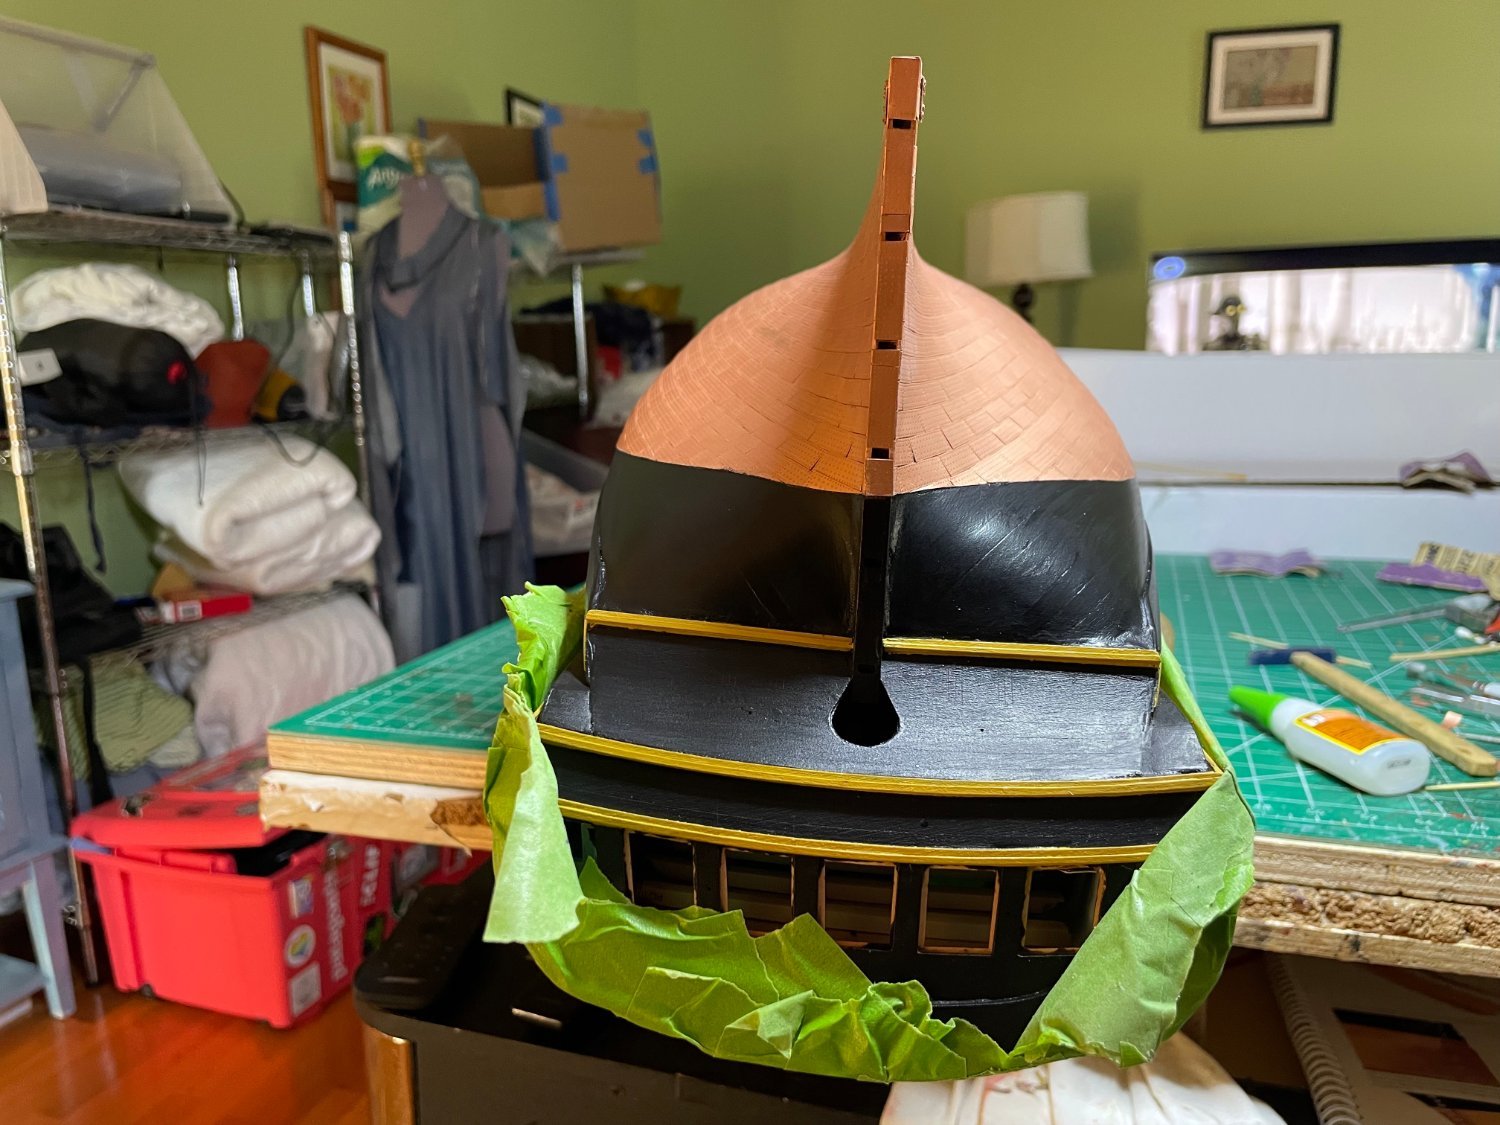
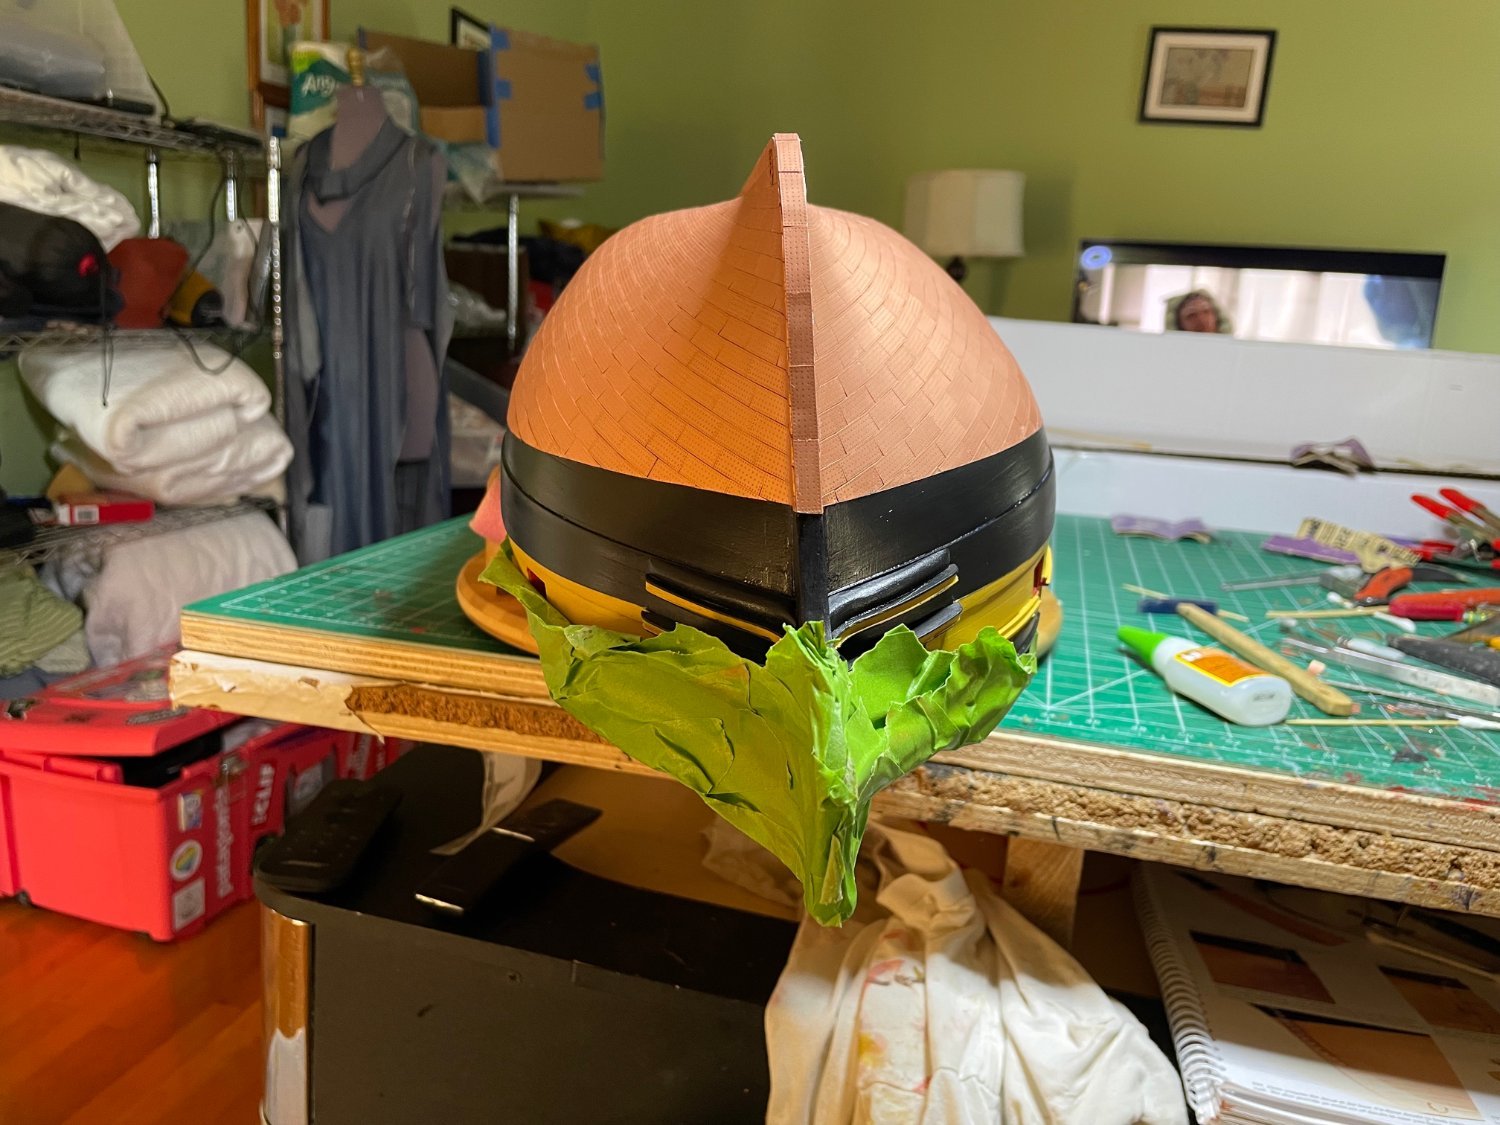
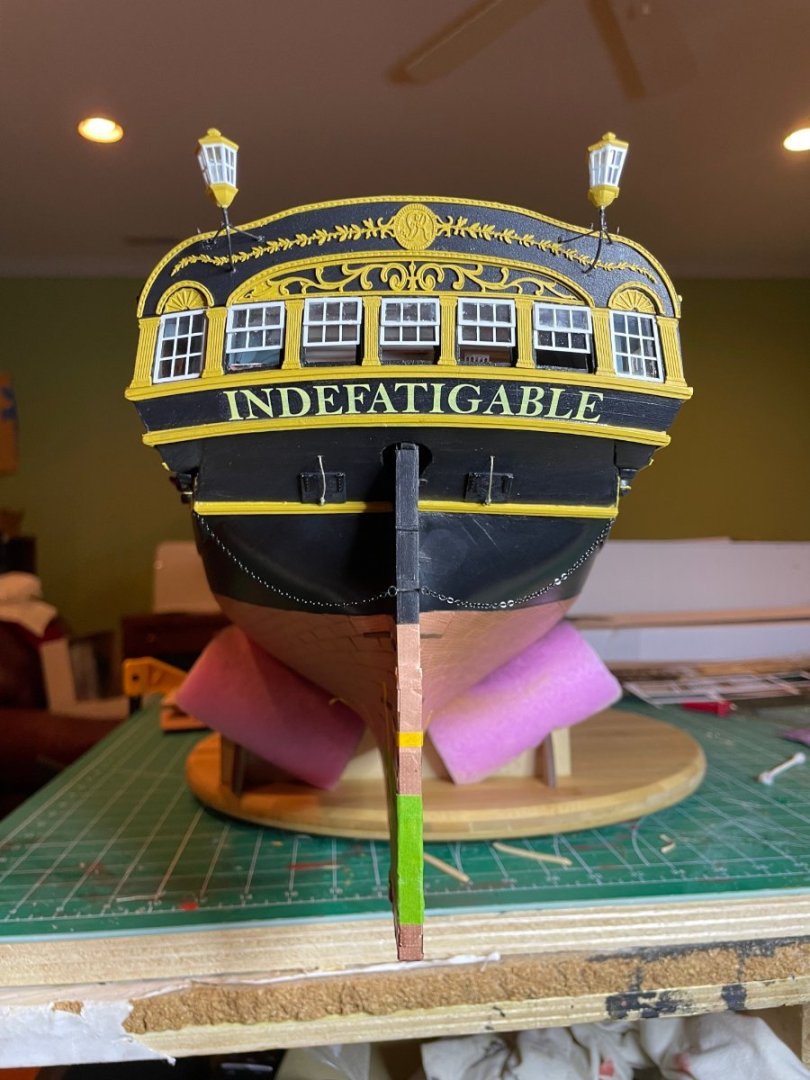
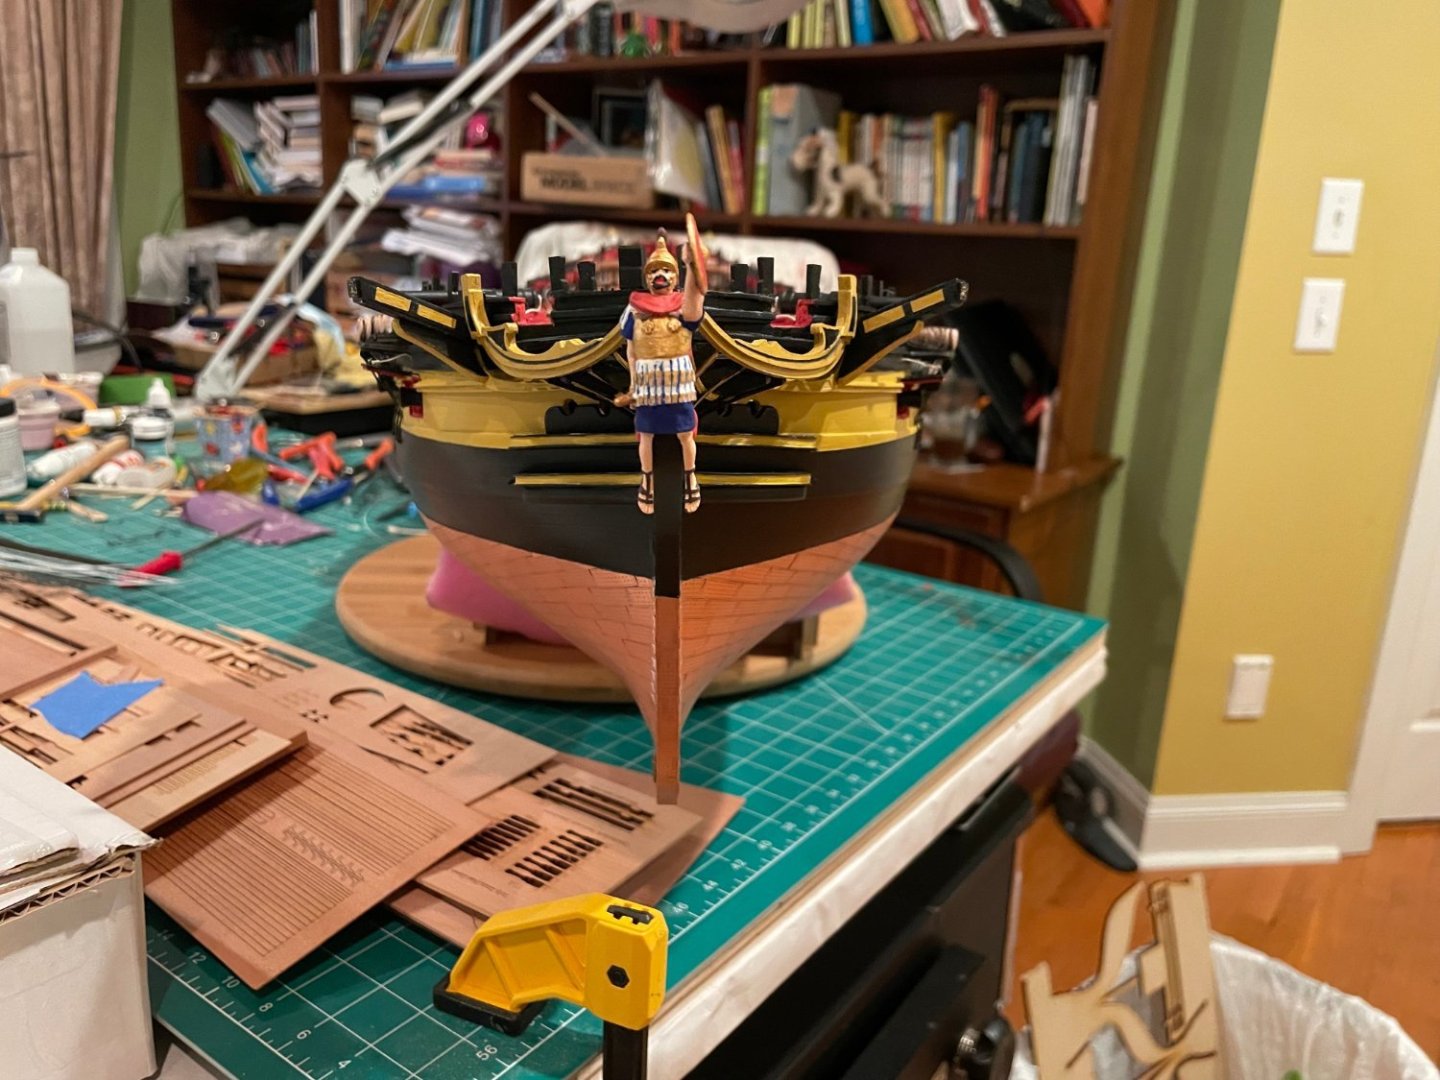
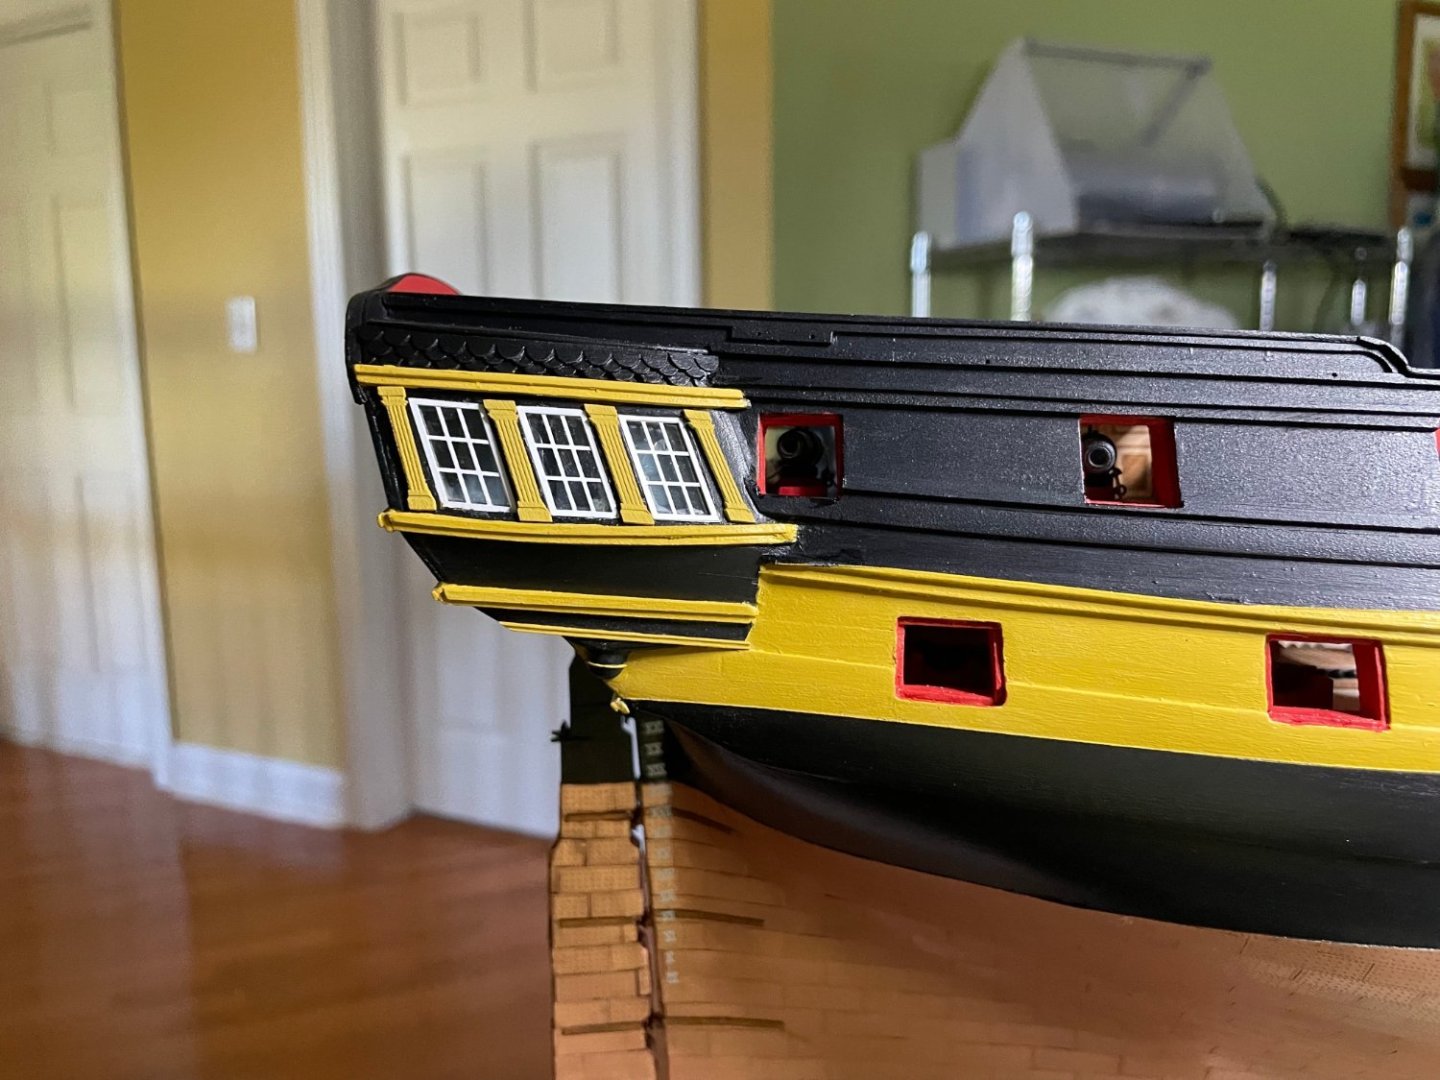
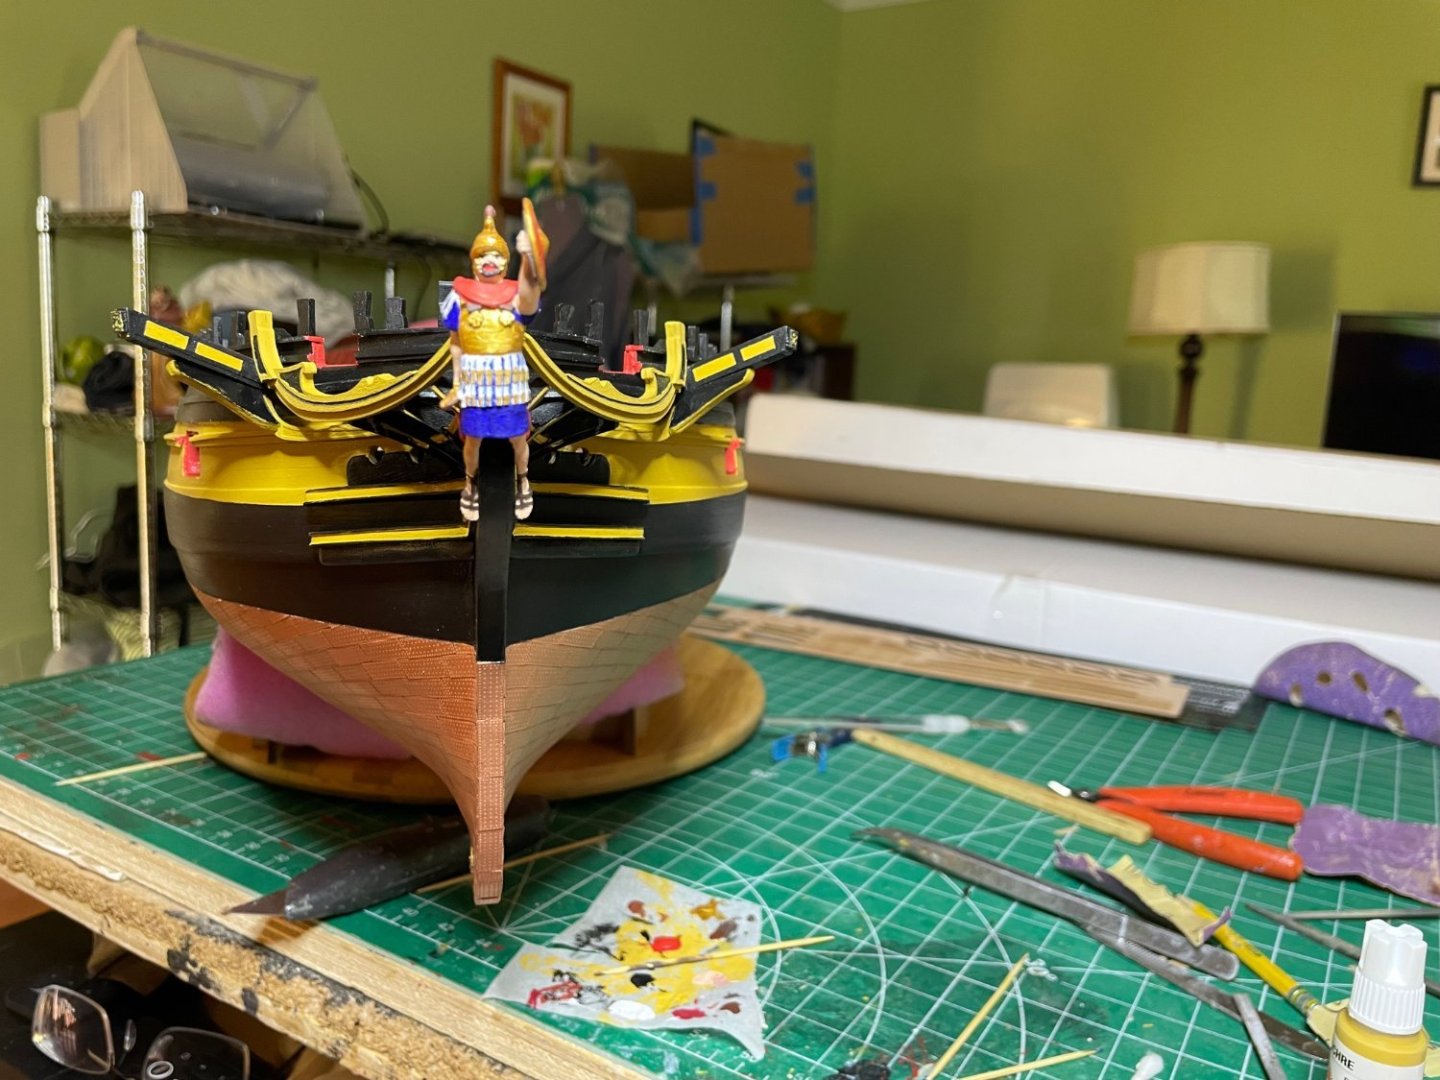
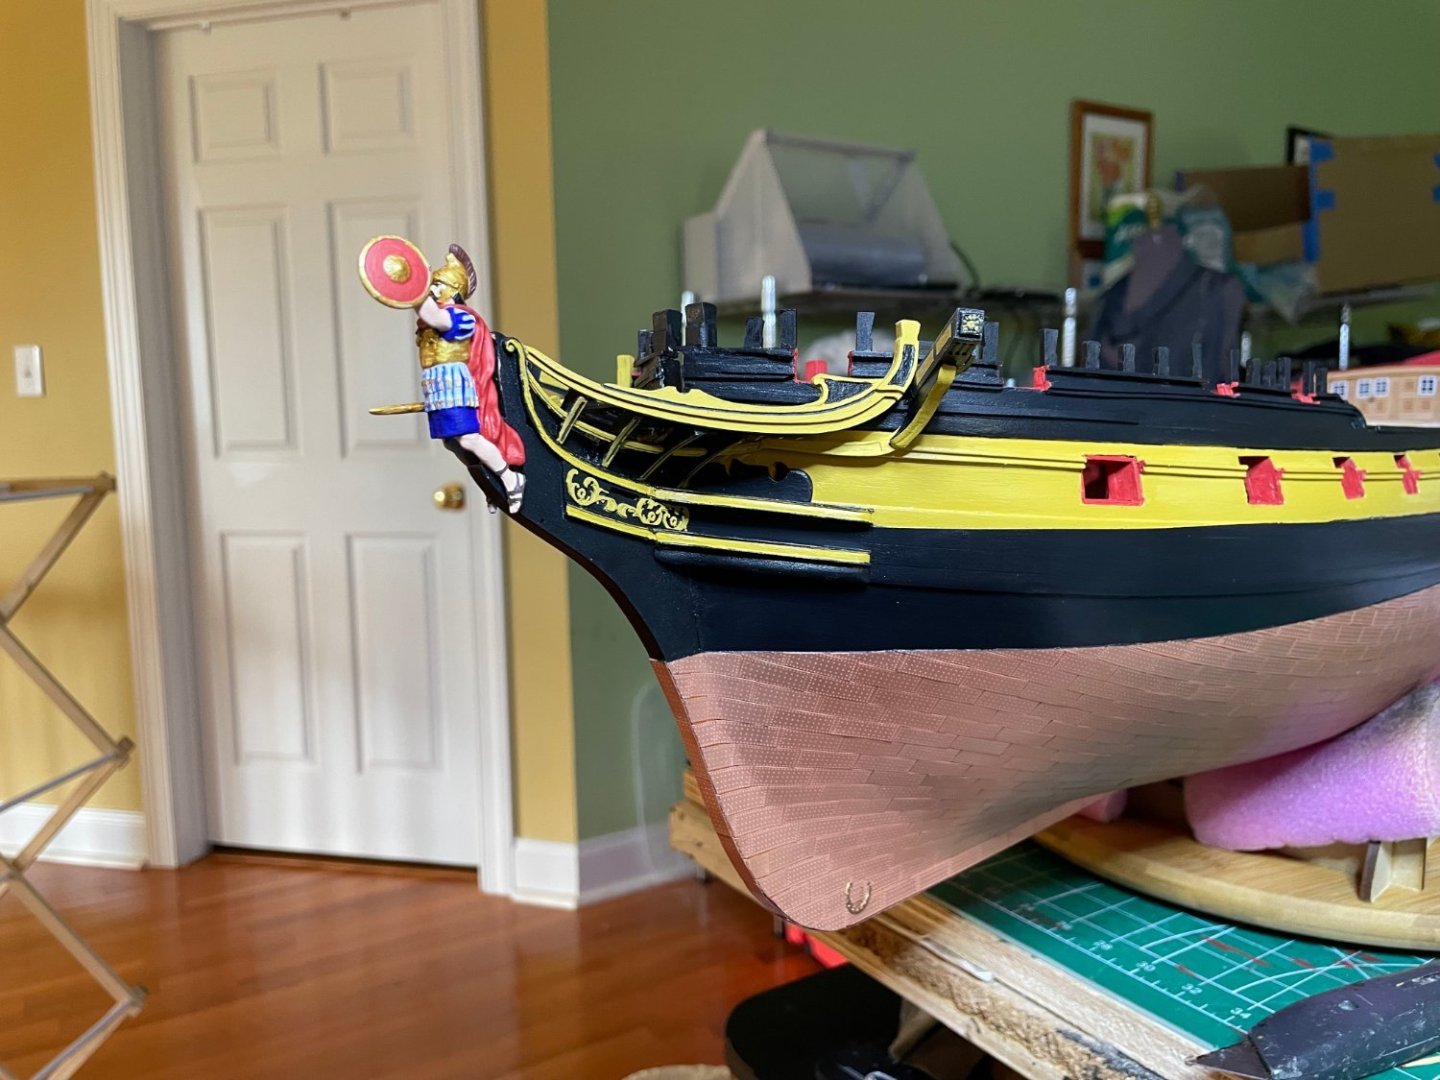
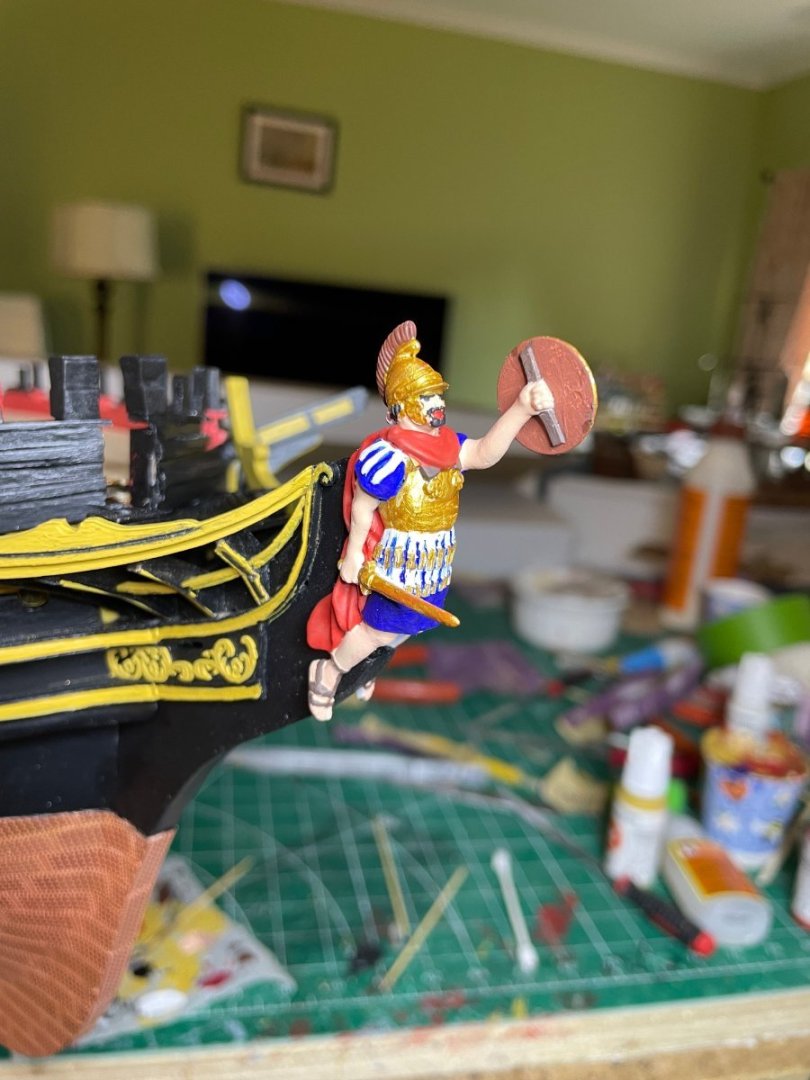
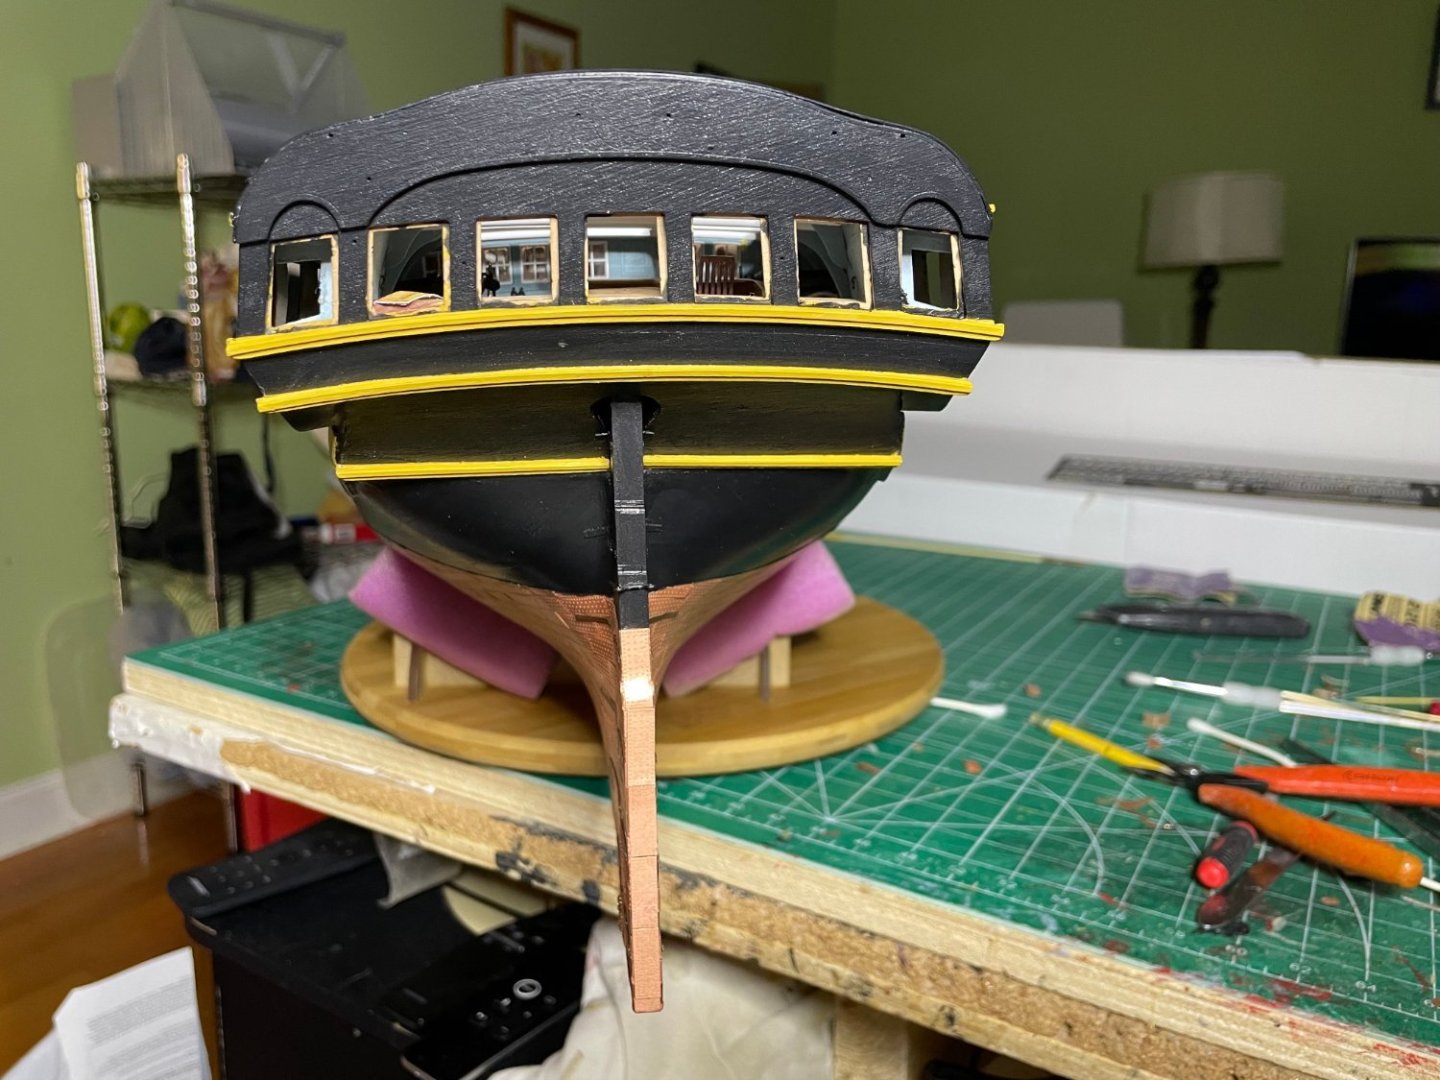
Bow done and figure painted and test fitted. Next will be the stern windows


- 233 replies
-
- 11
-
-
- Indefatigable
- Vanguard Models
- (and 1 more)
-
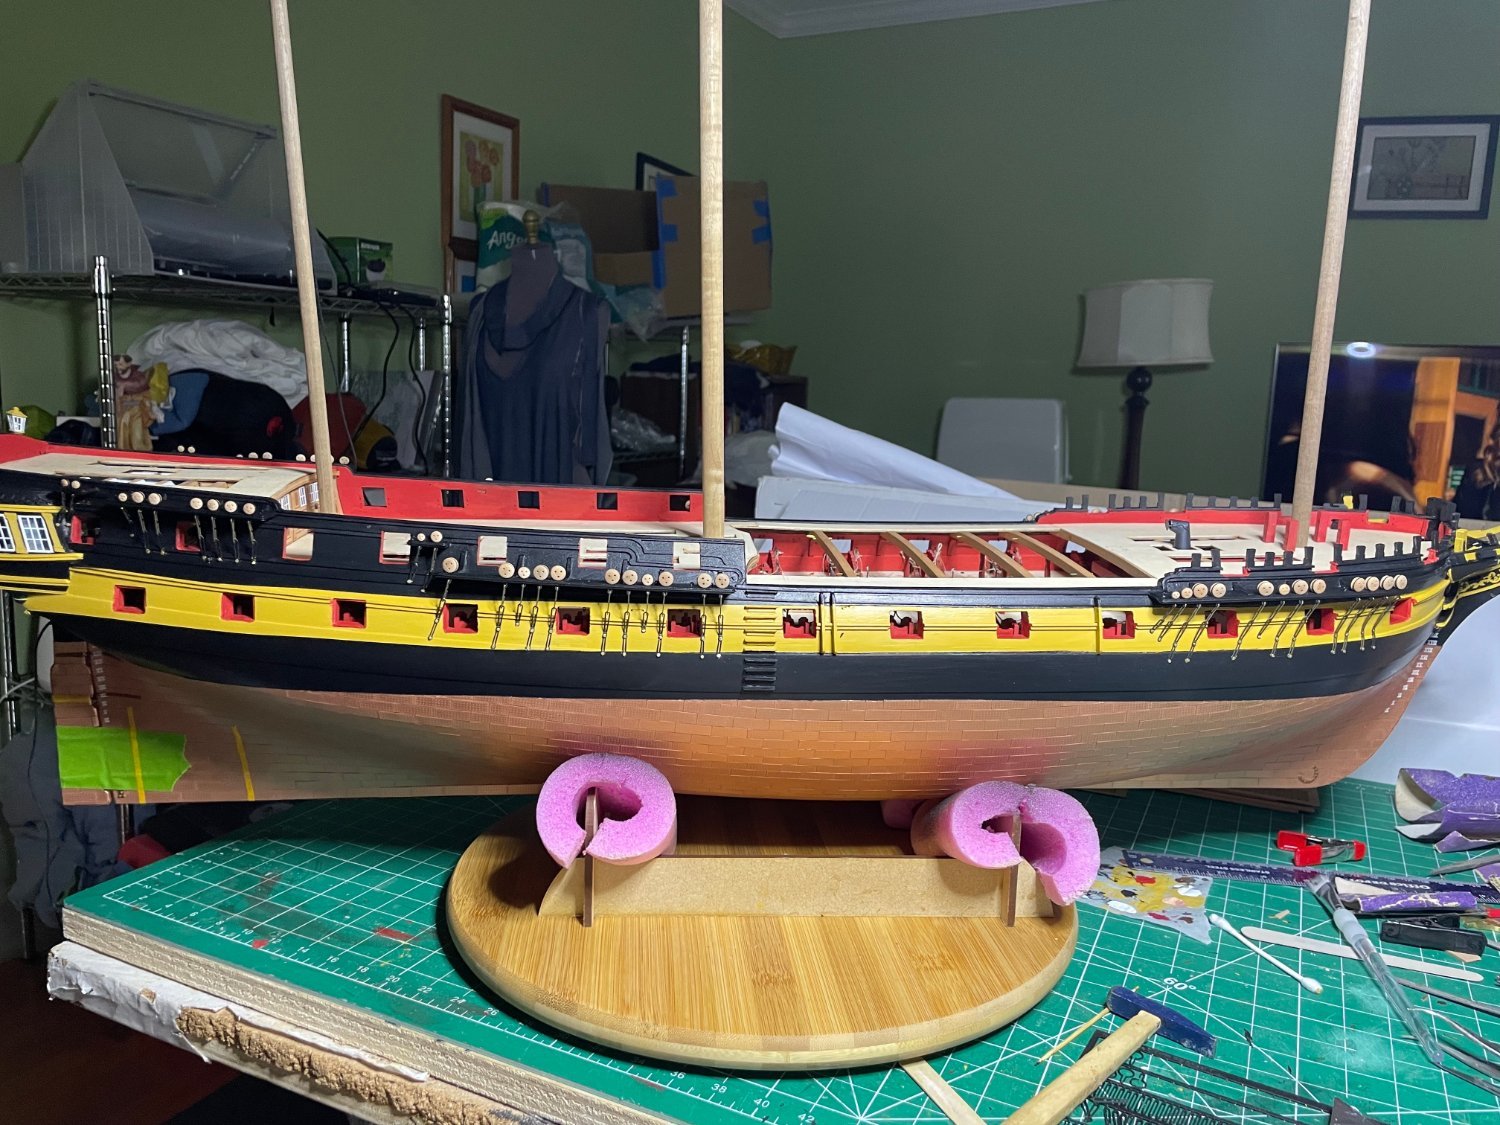
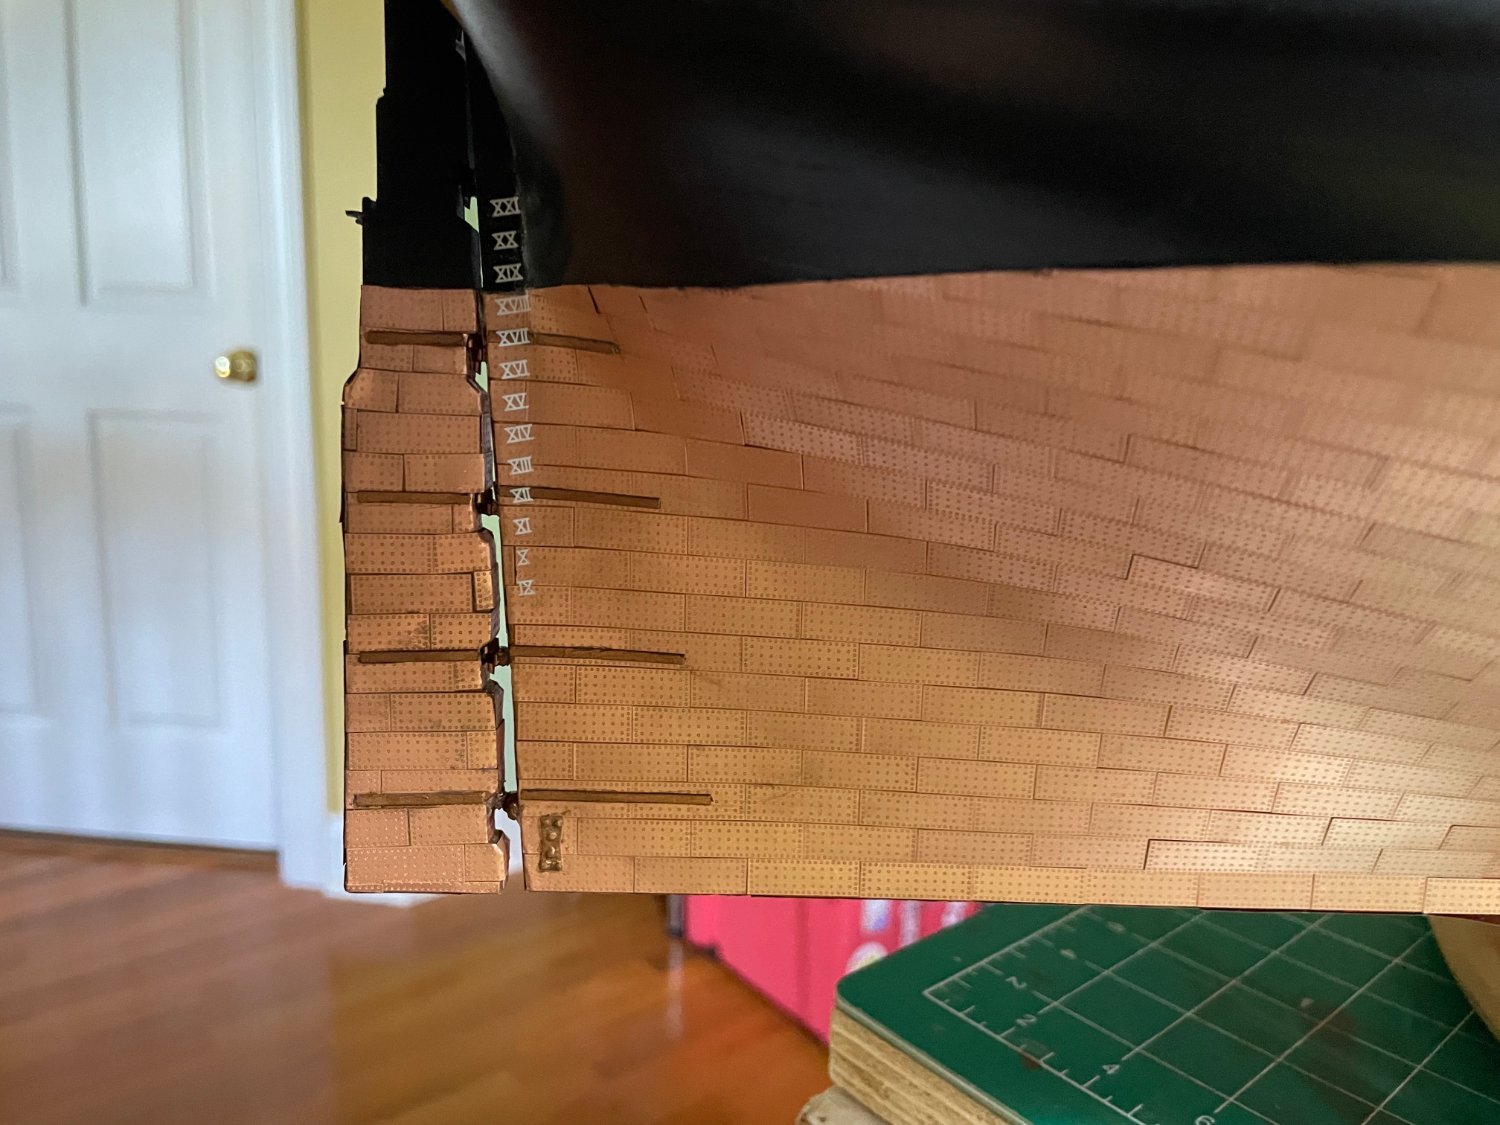
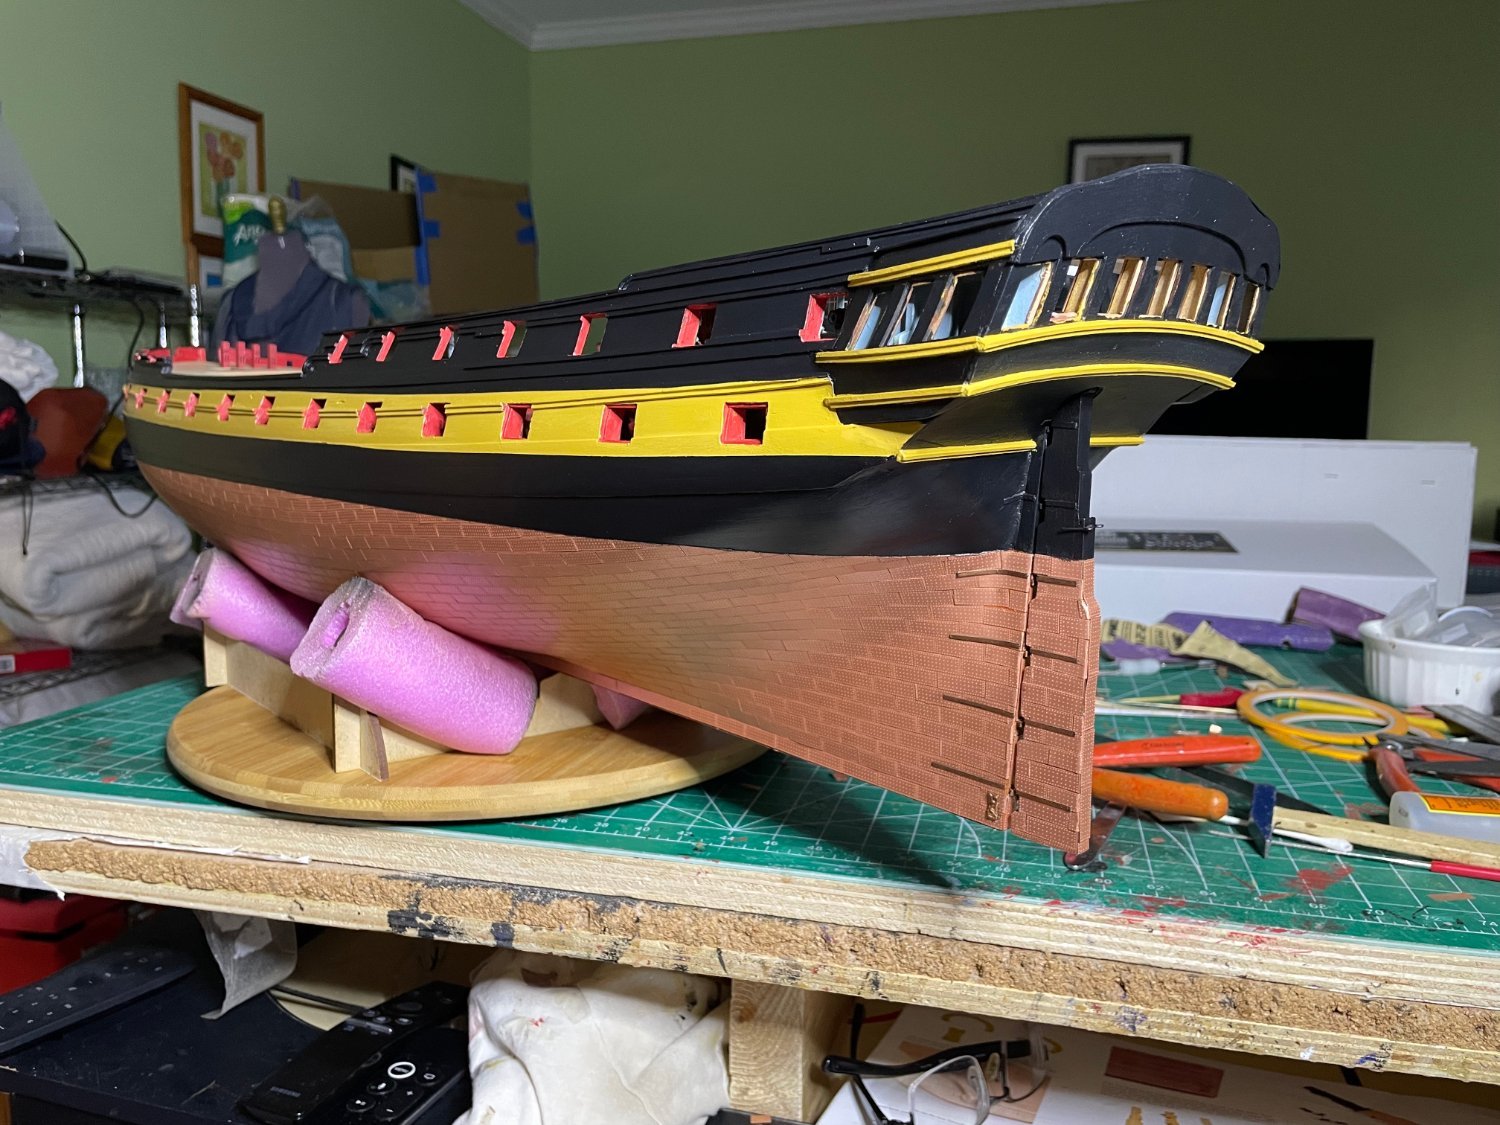
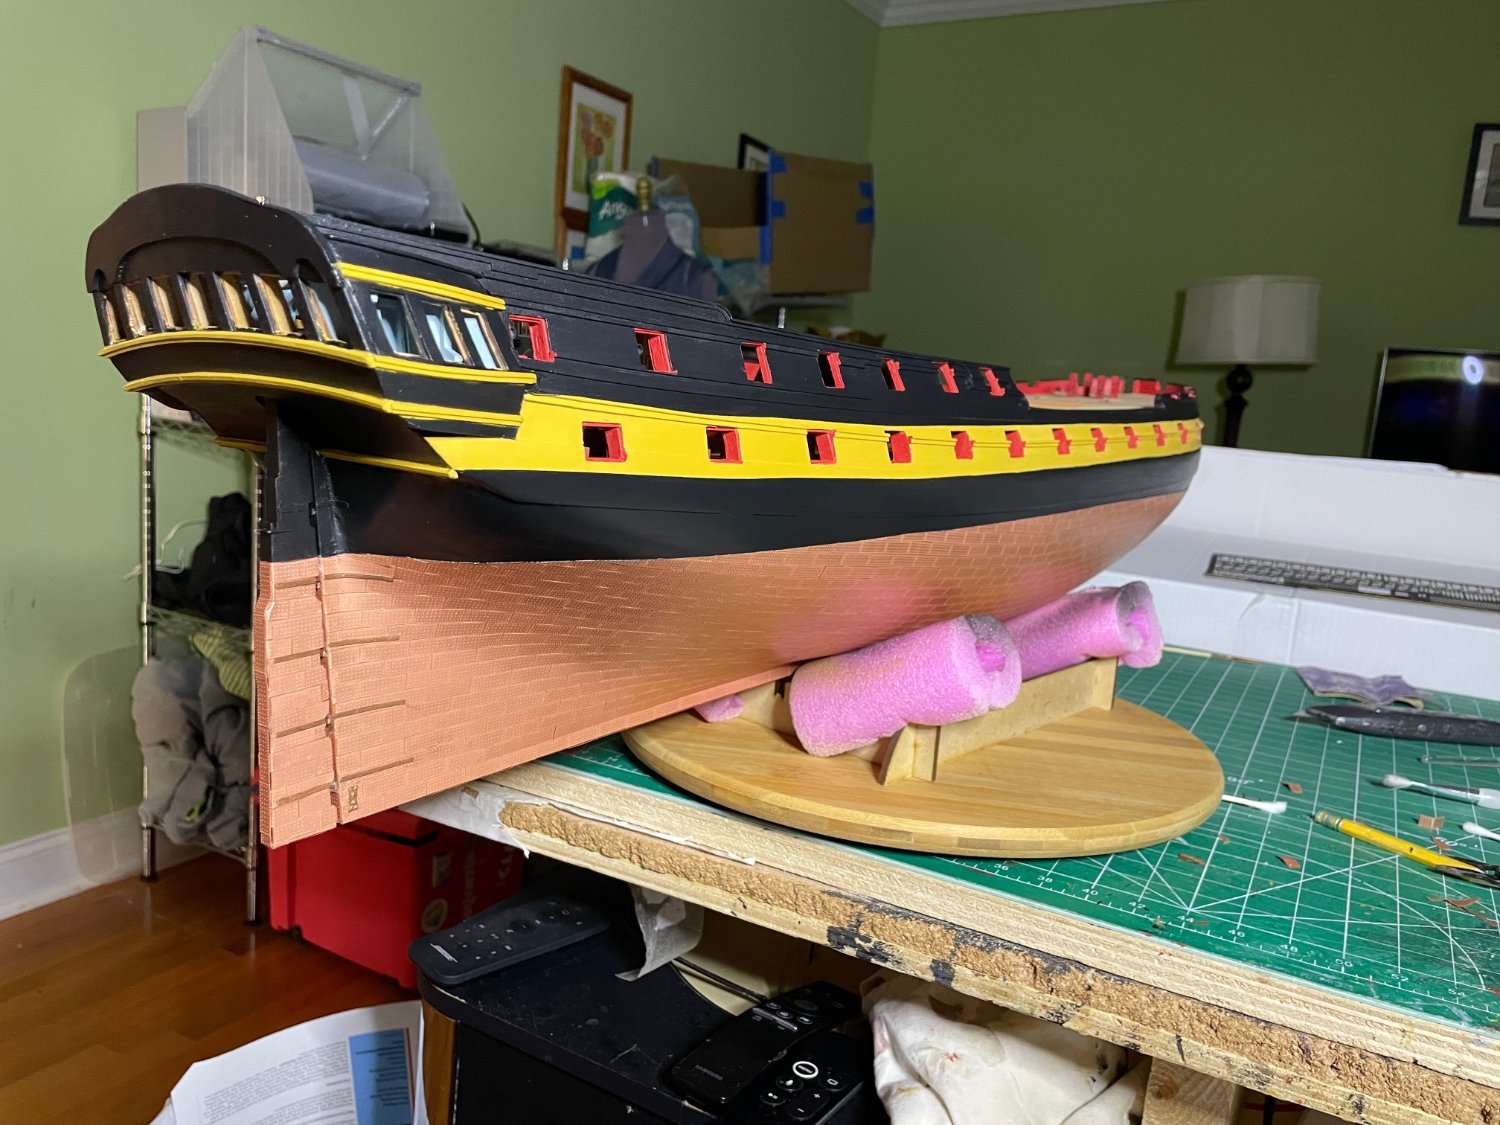
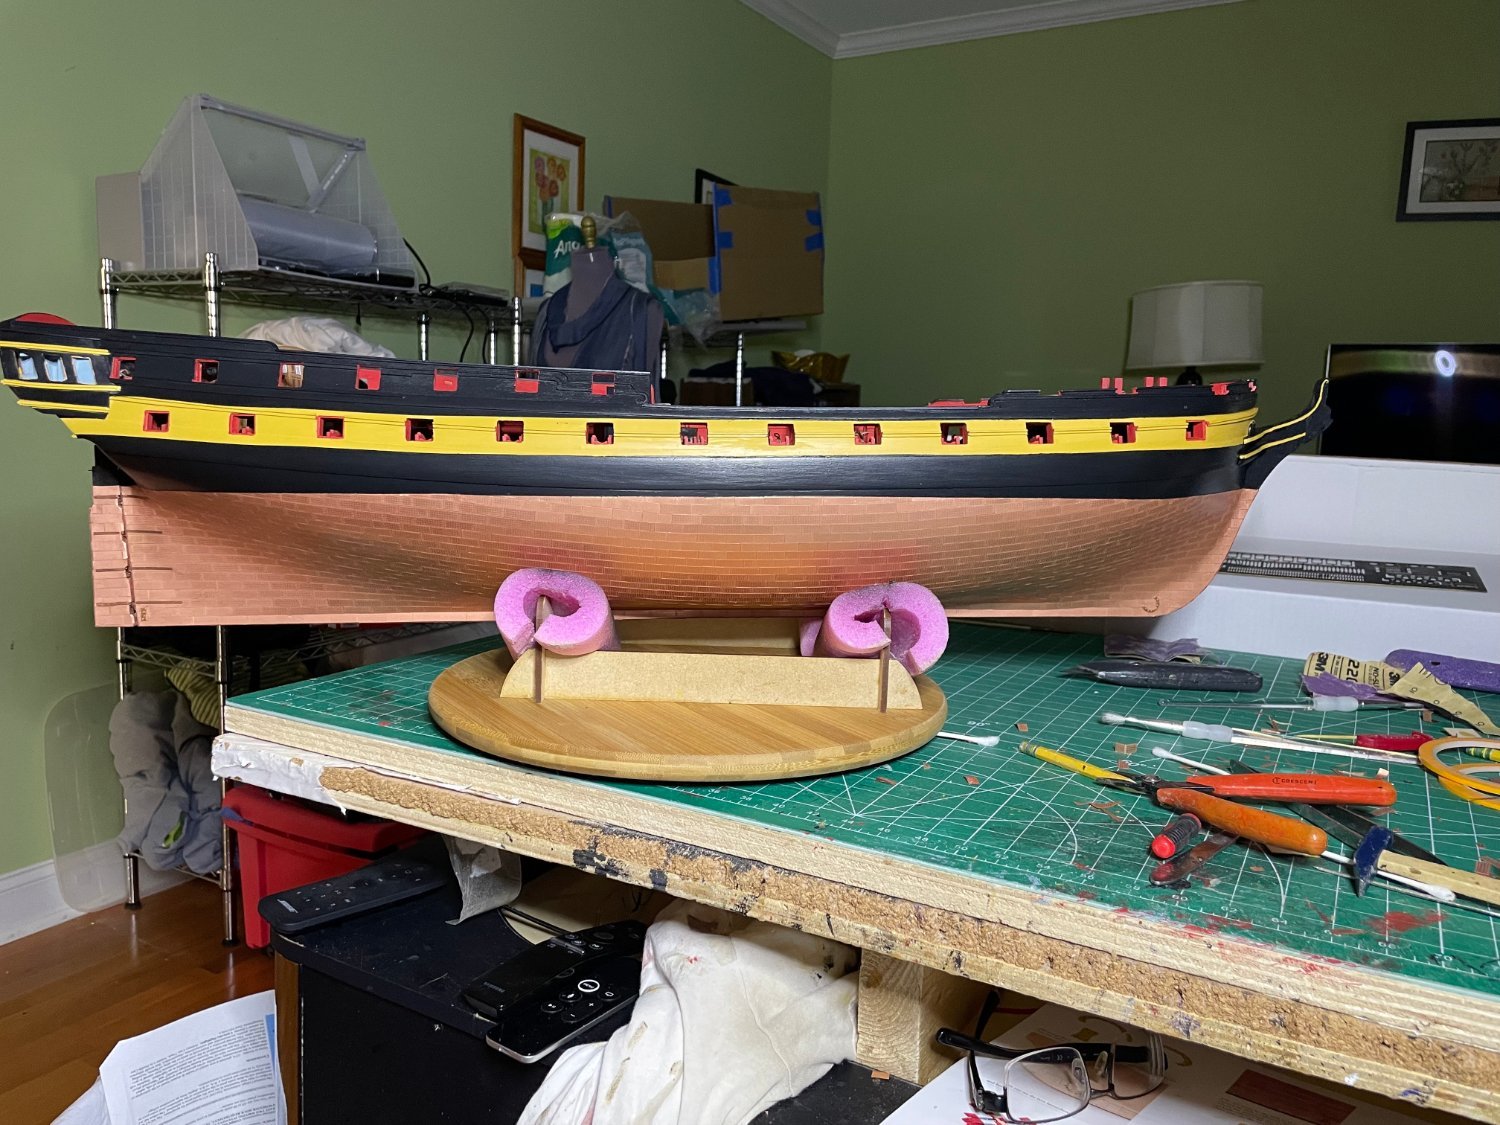
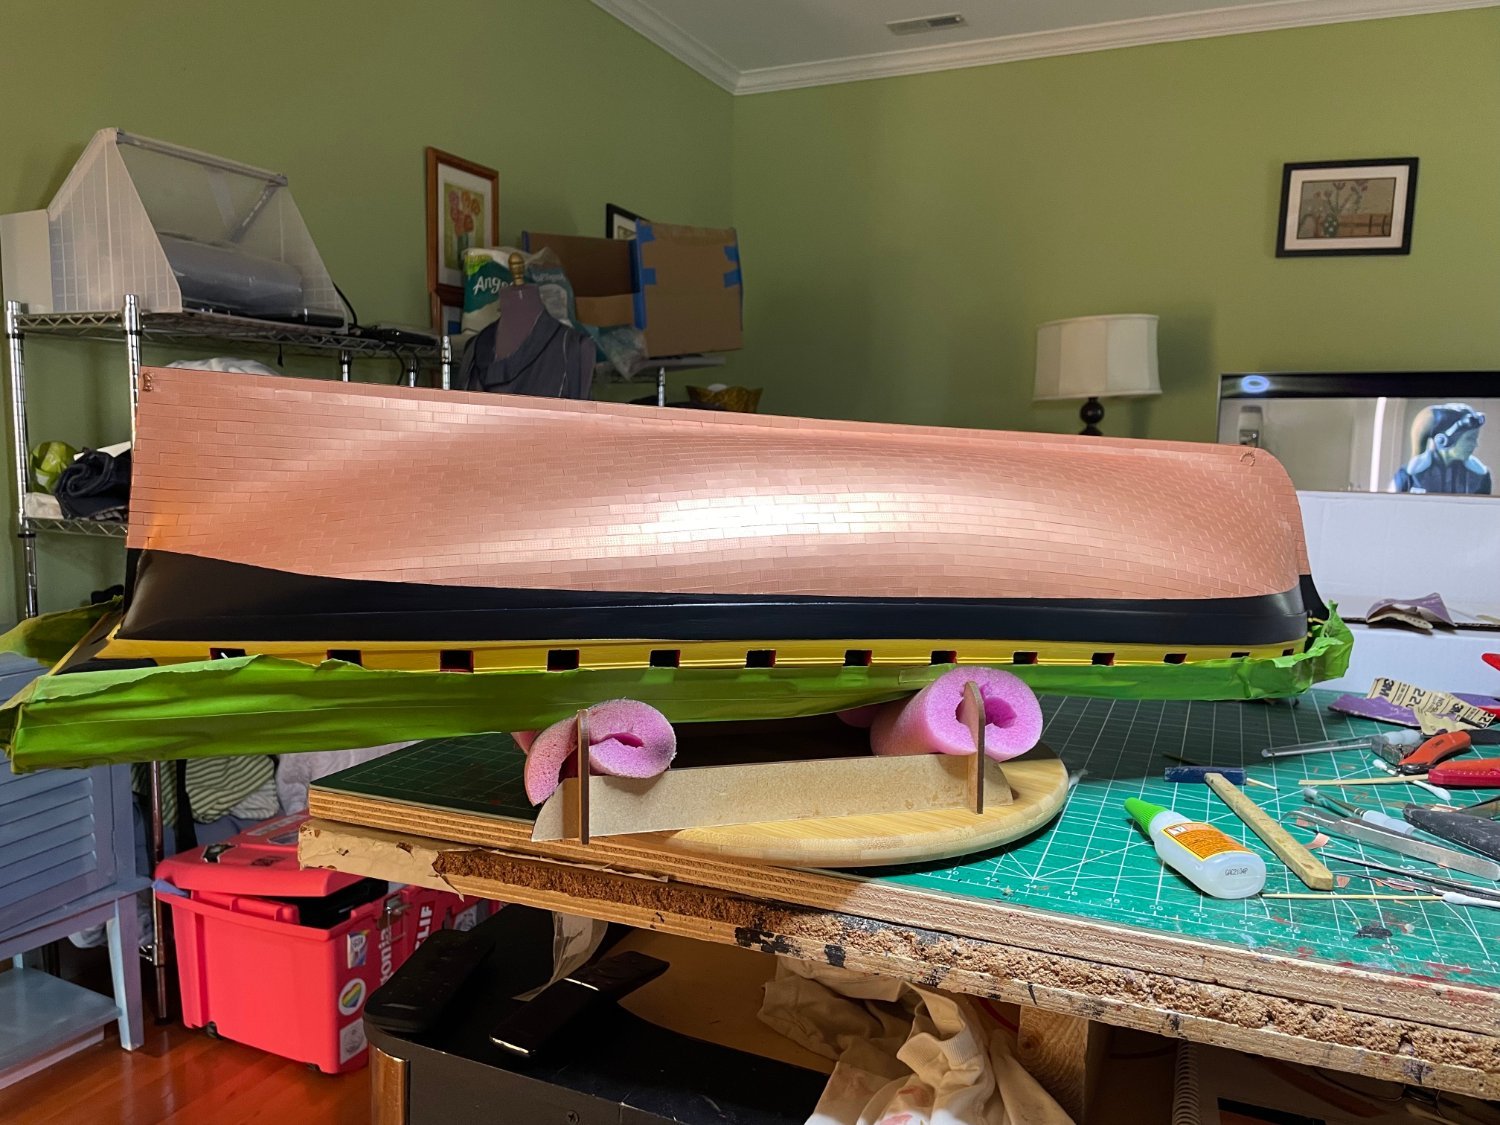
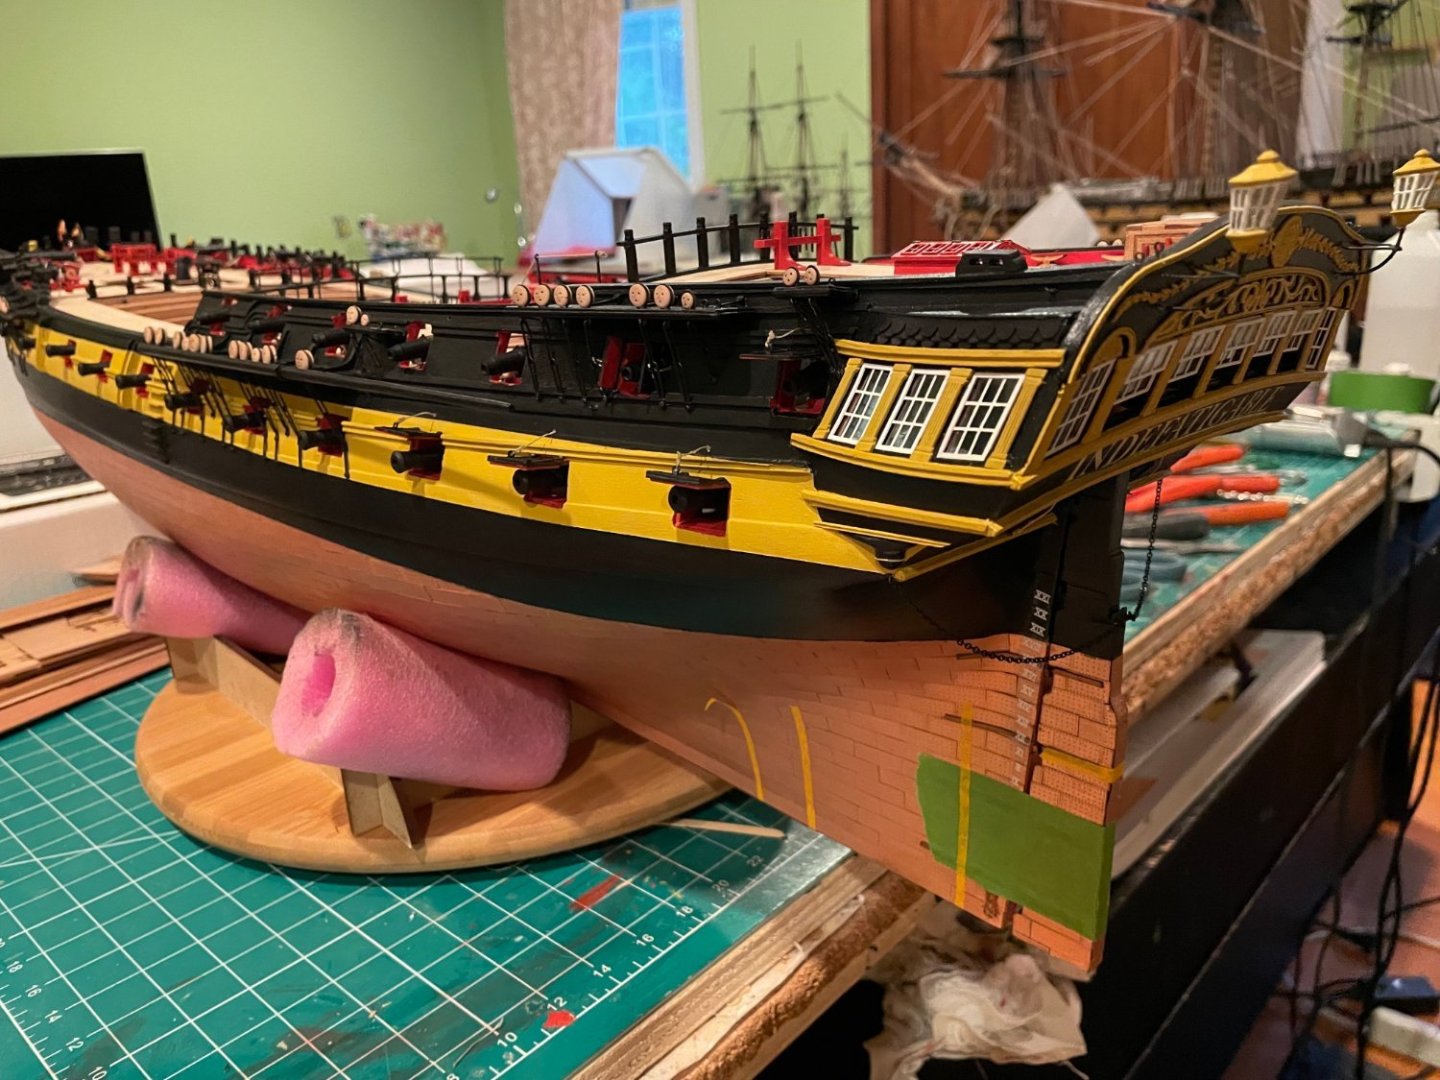
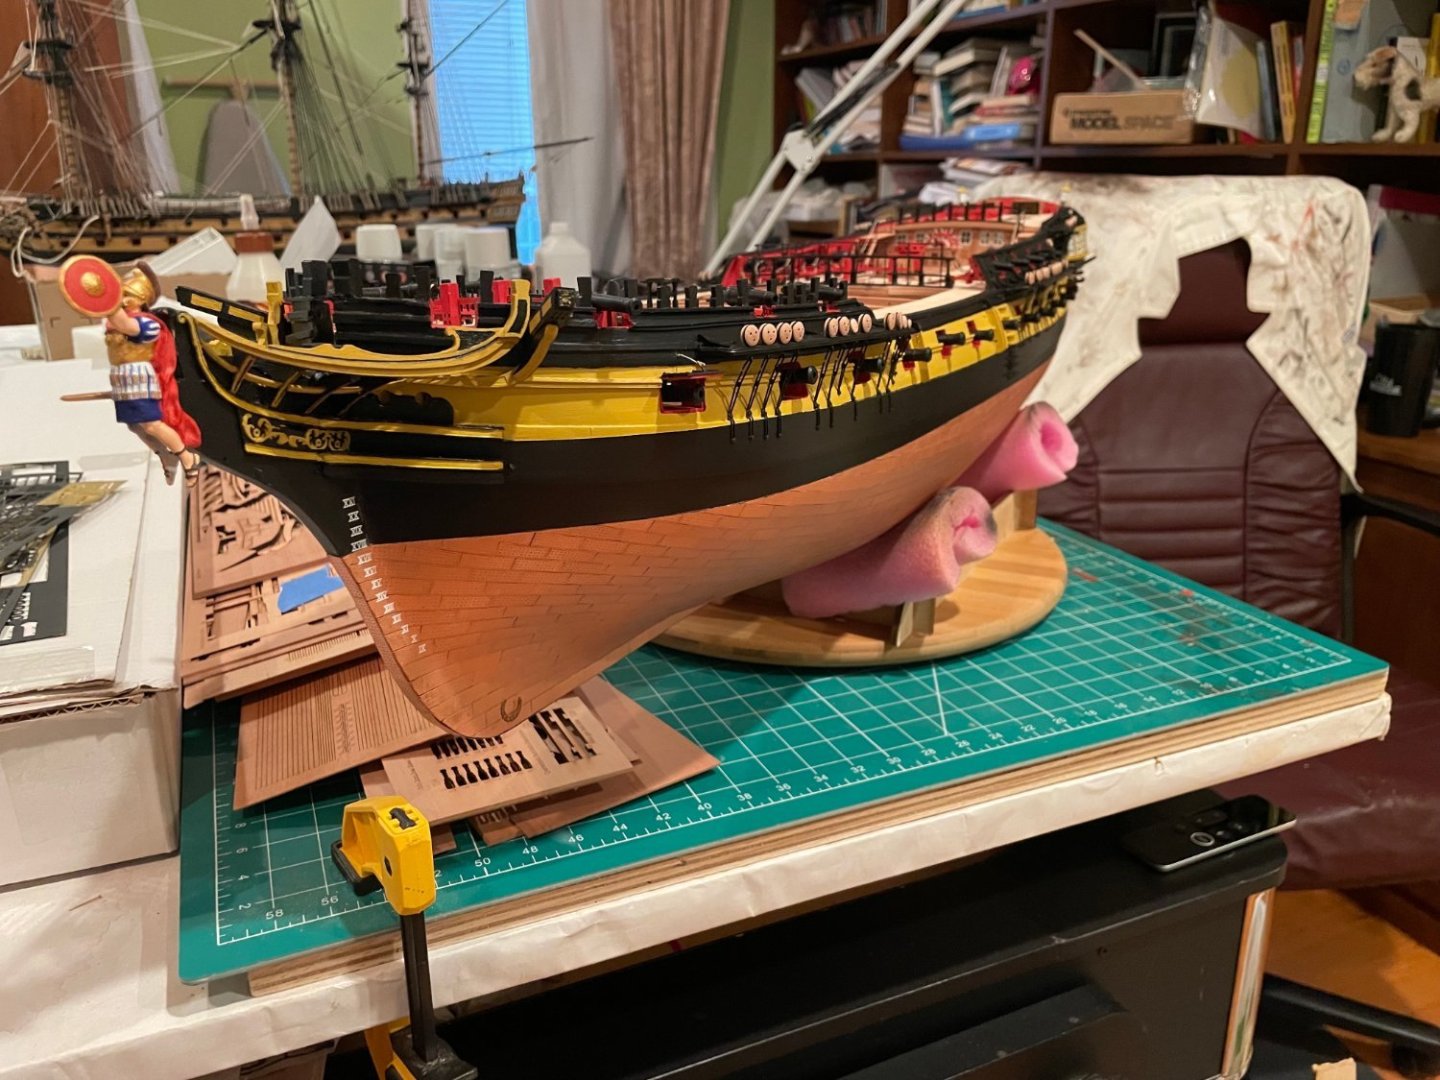
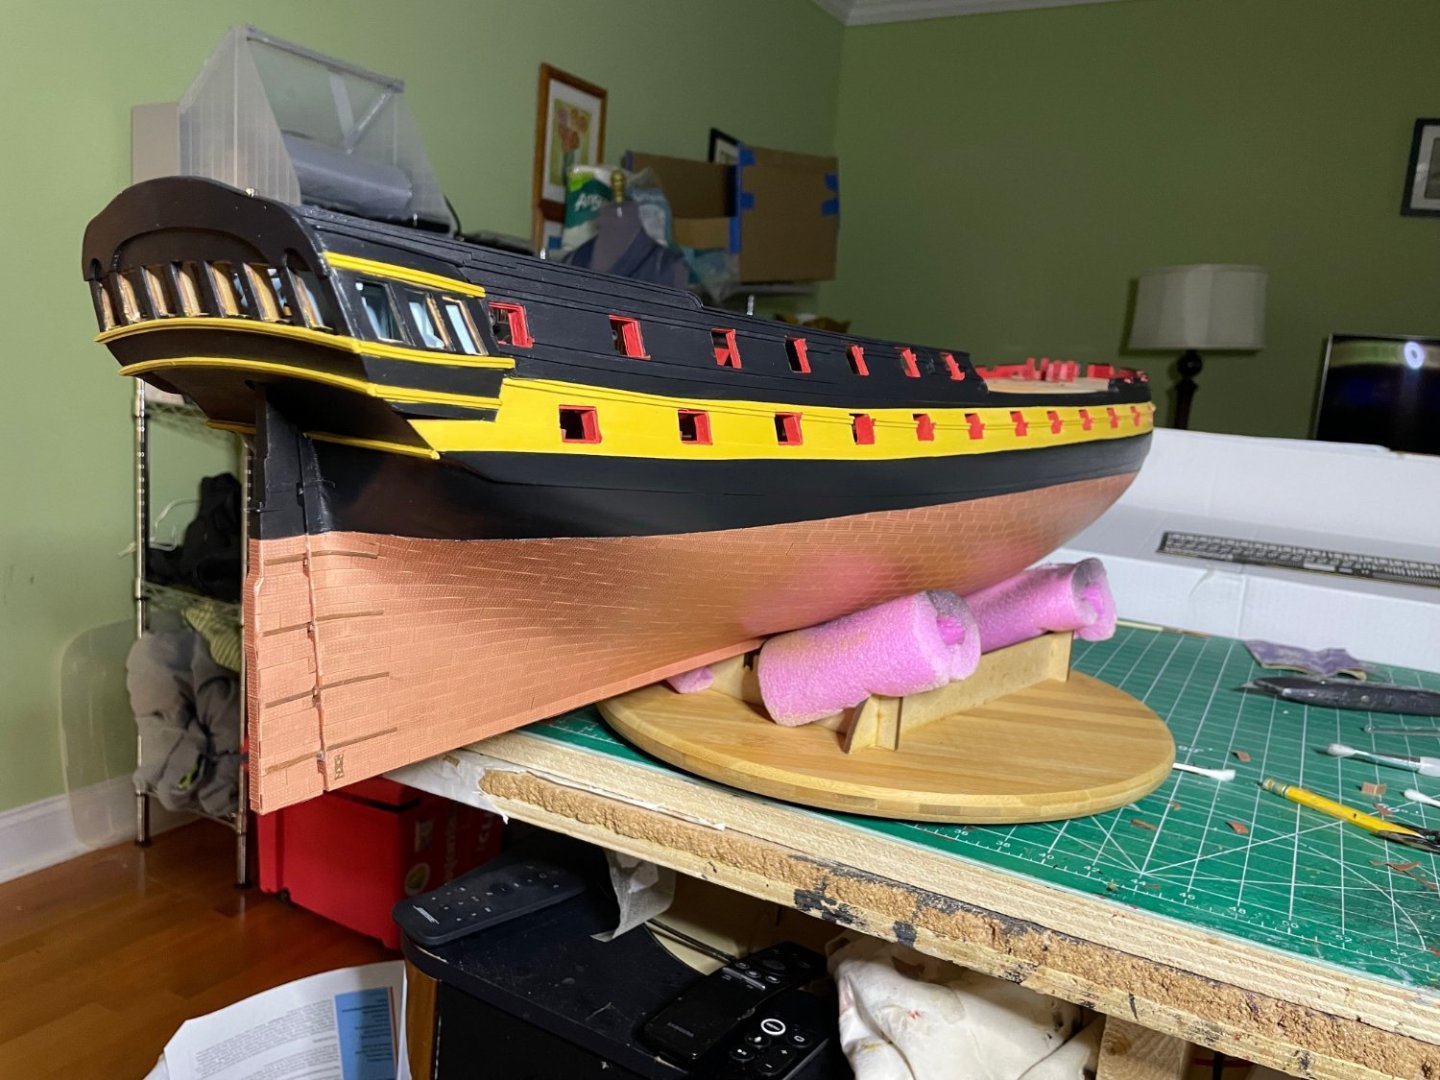
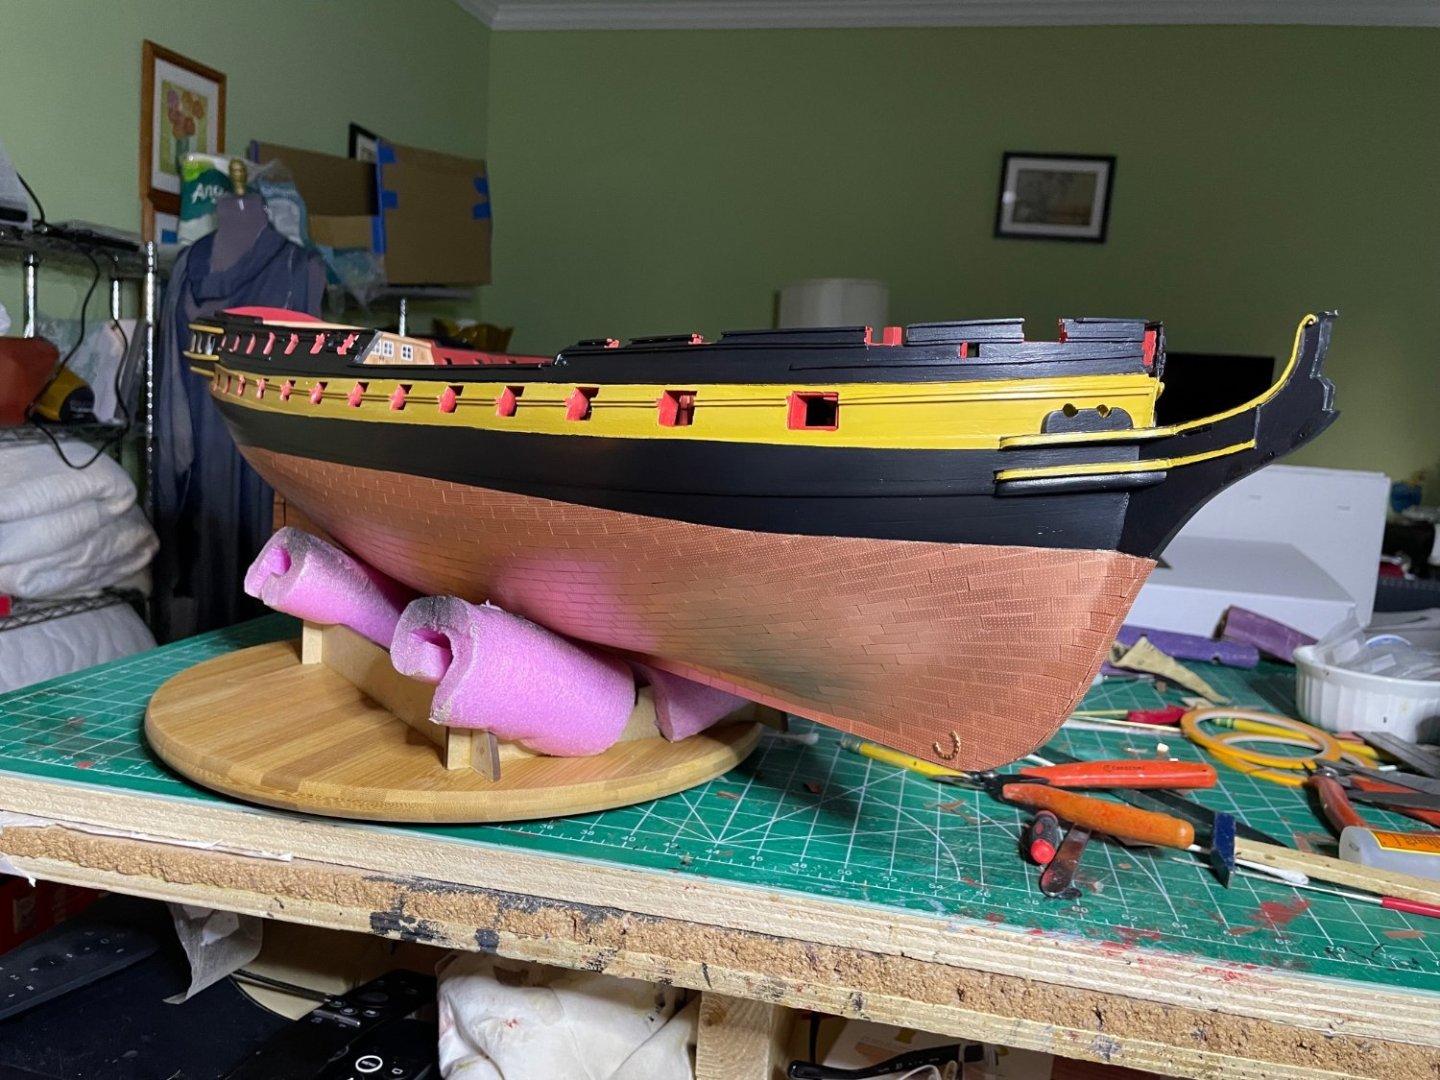
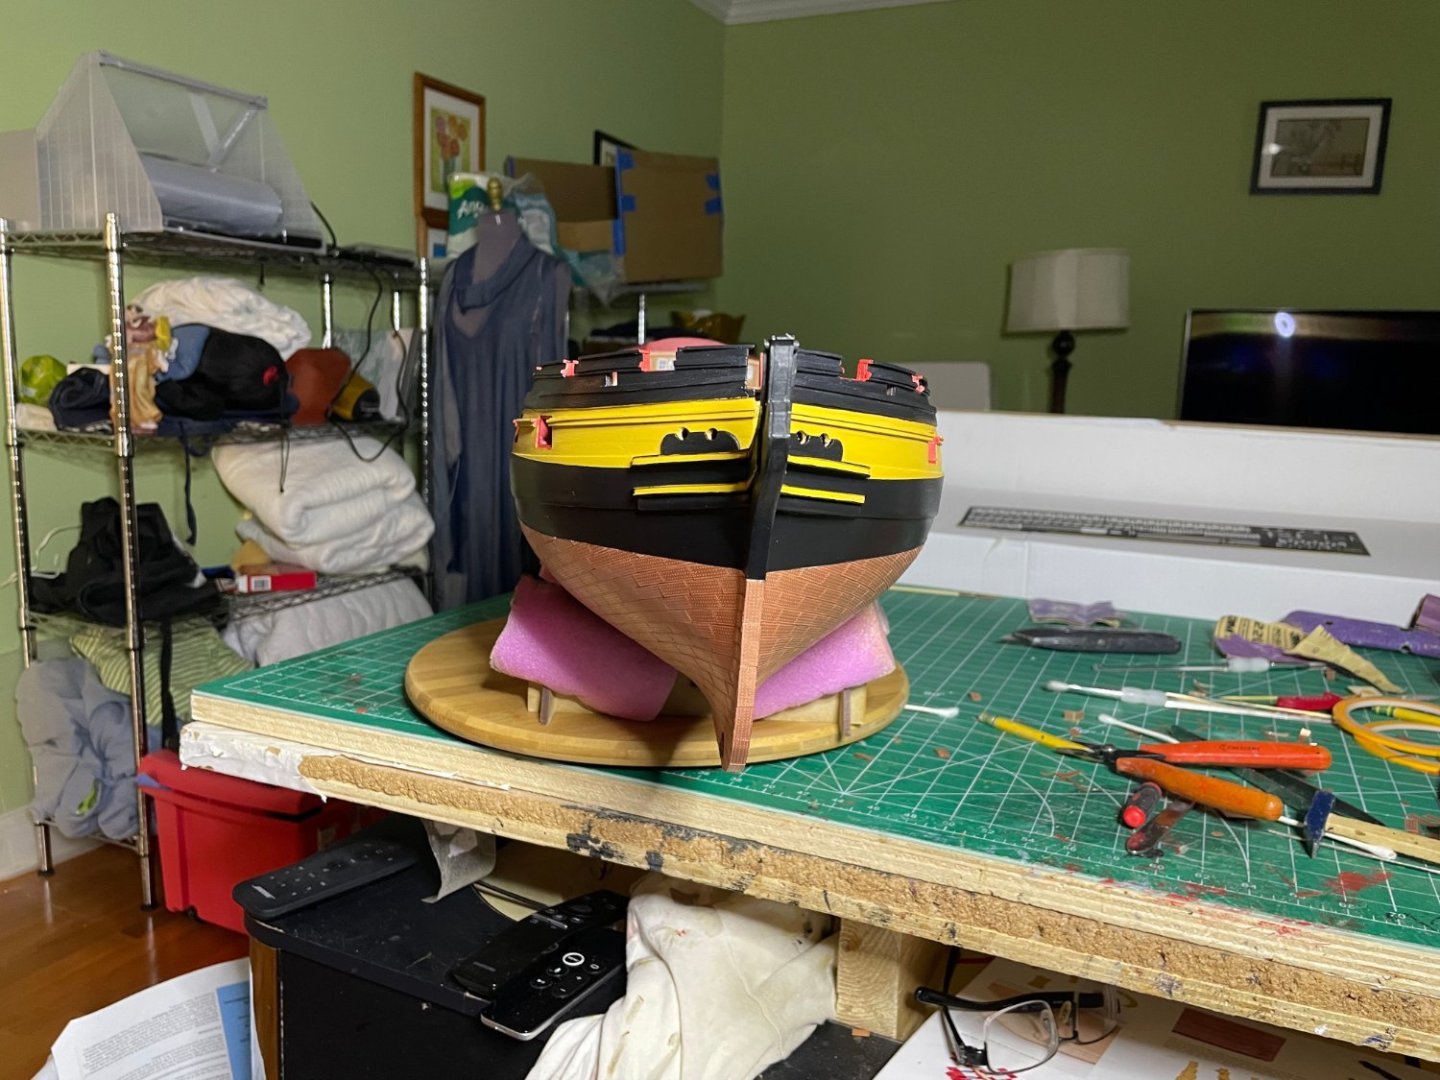
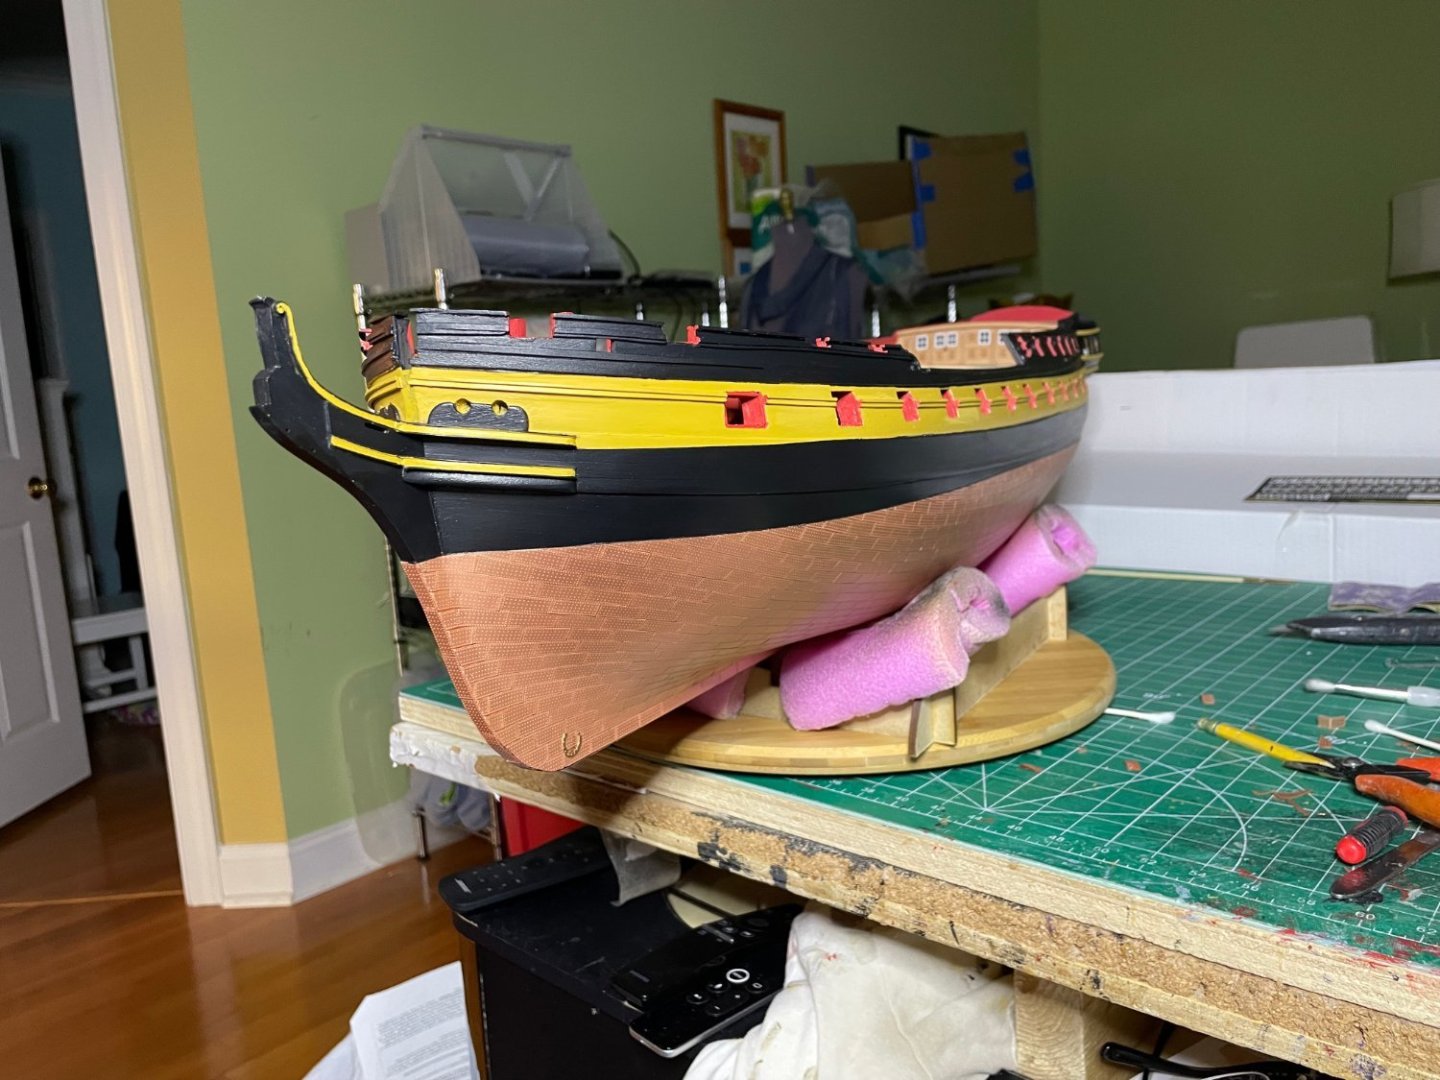
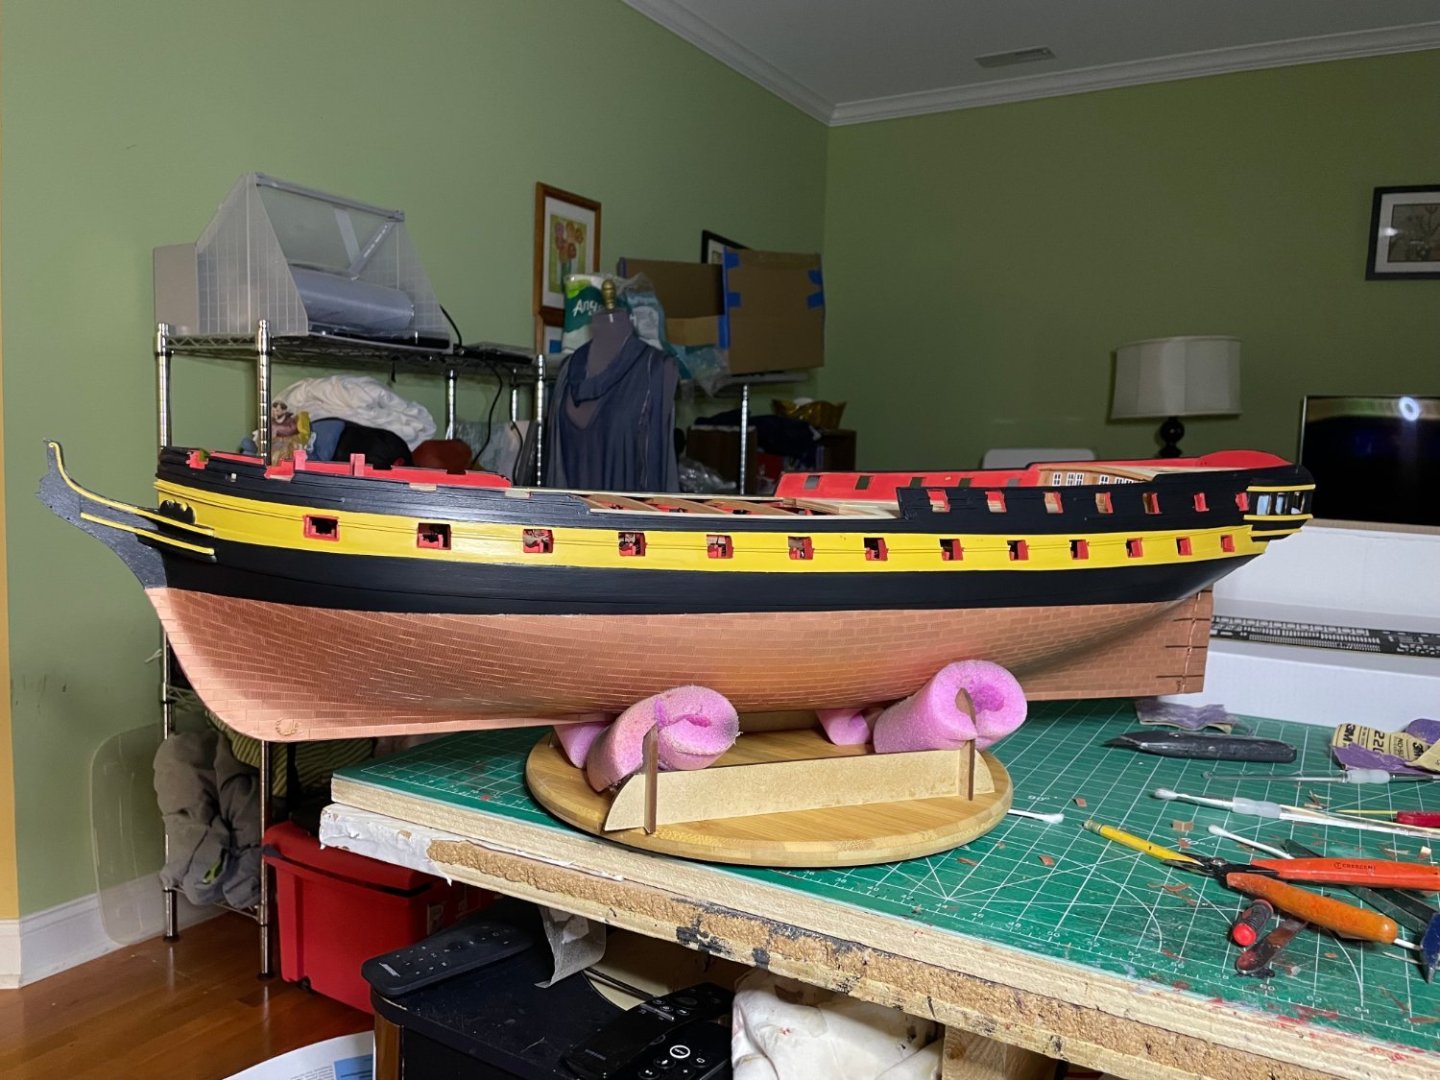
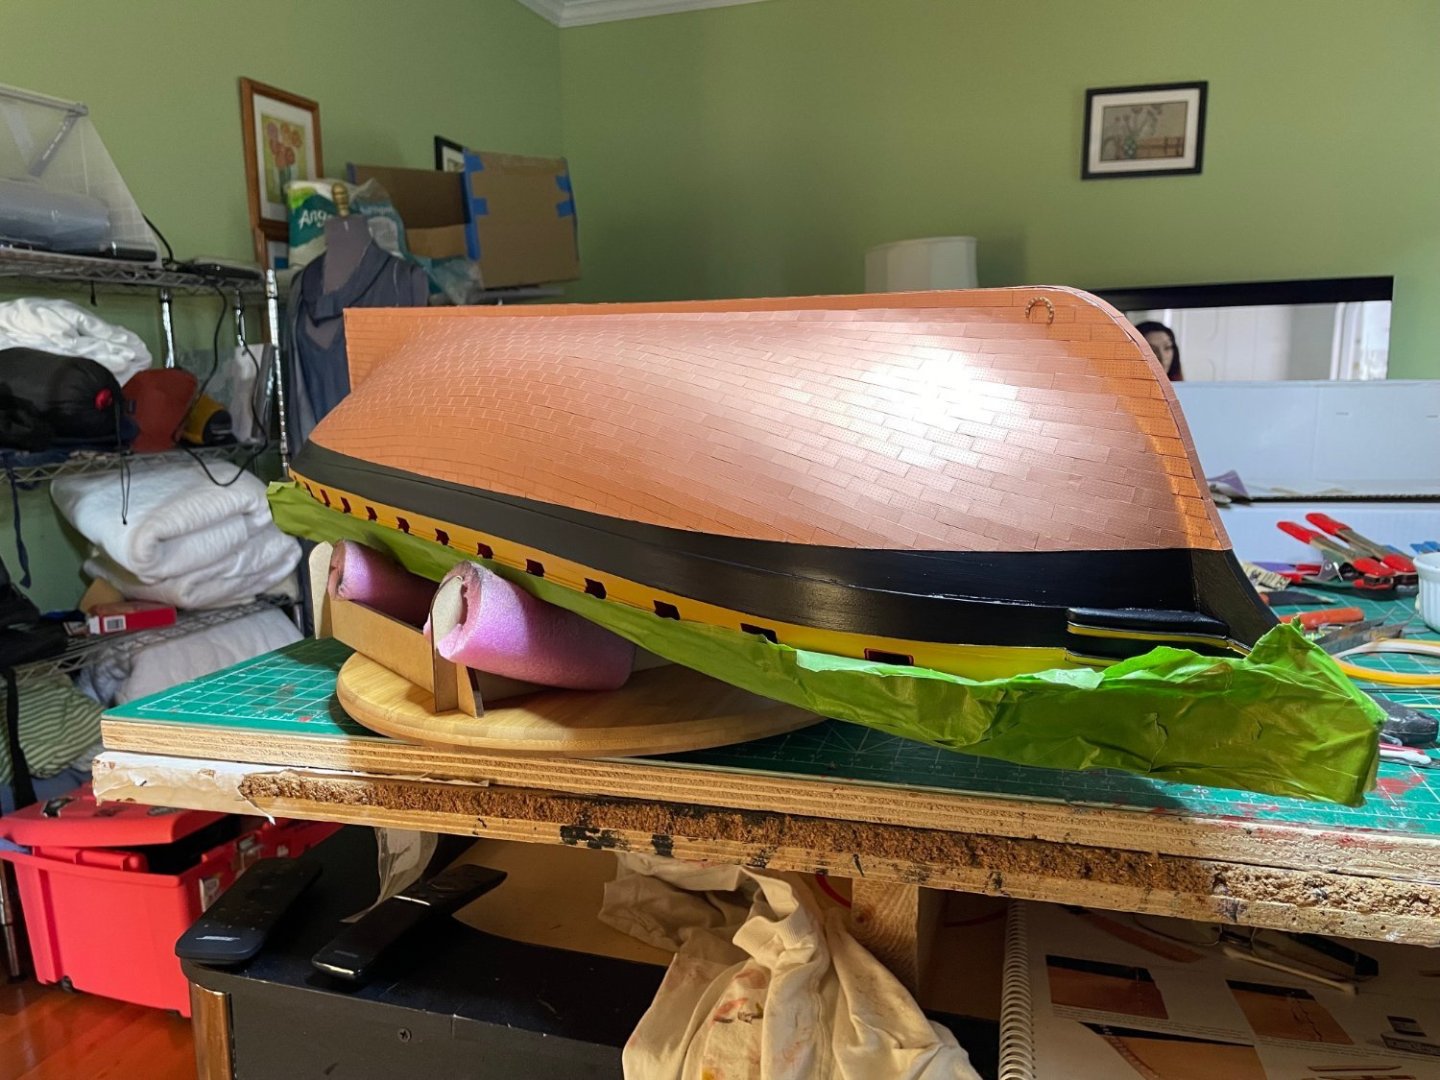
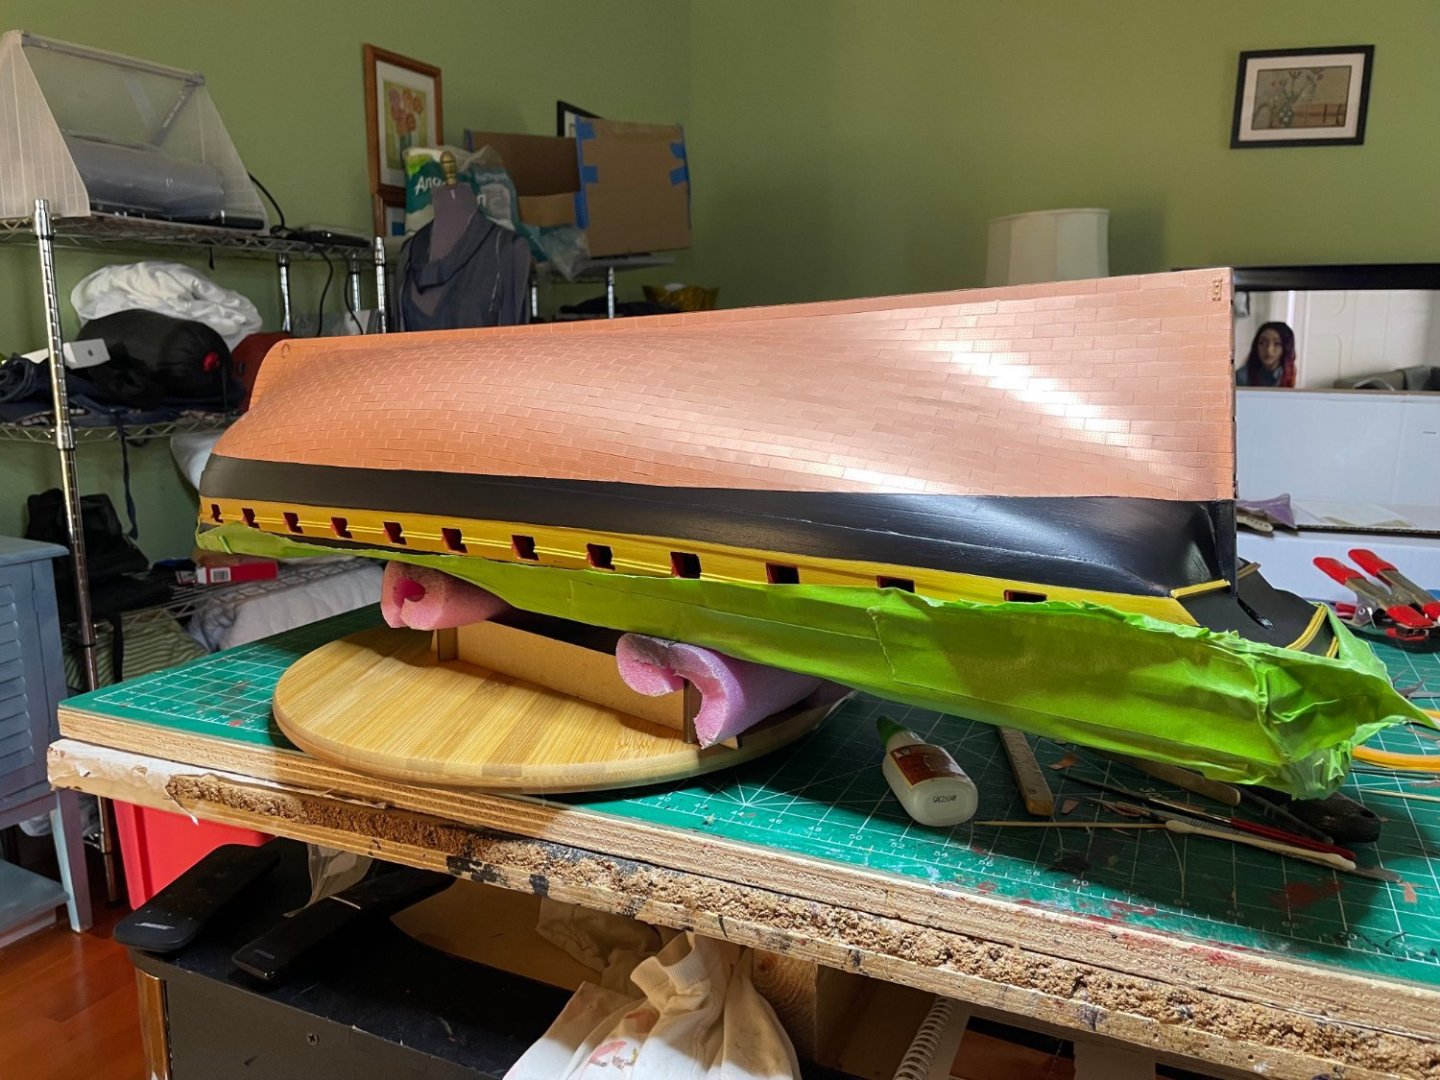
Finally finished coppering. The darn rudder took 5 hrs to do.Got to at last turn it right side up again. Taking a hint from another member, notice the lazy susan turn table I got. Makes moving it a lot easier.


- 233 replies
-
- 16
-
-
-
- Indefatigable
- Vanguard Models
- (and 1 more)
-
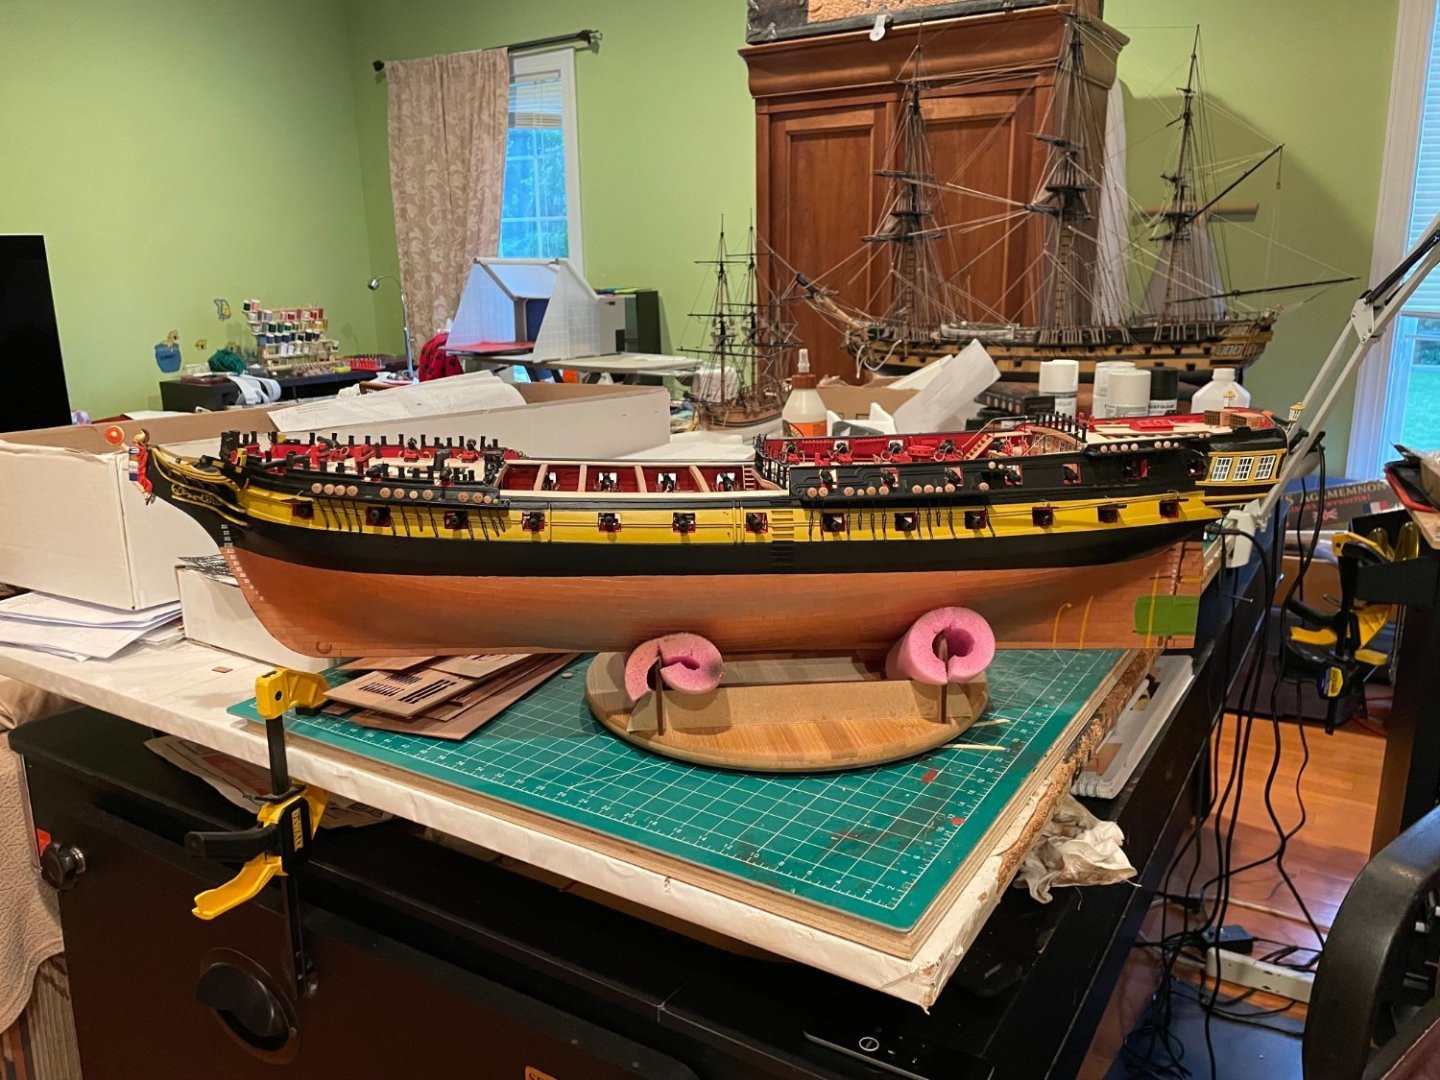
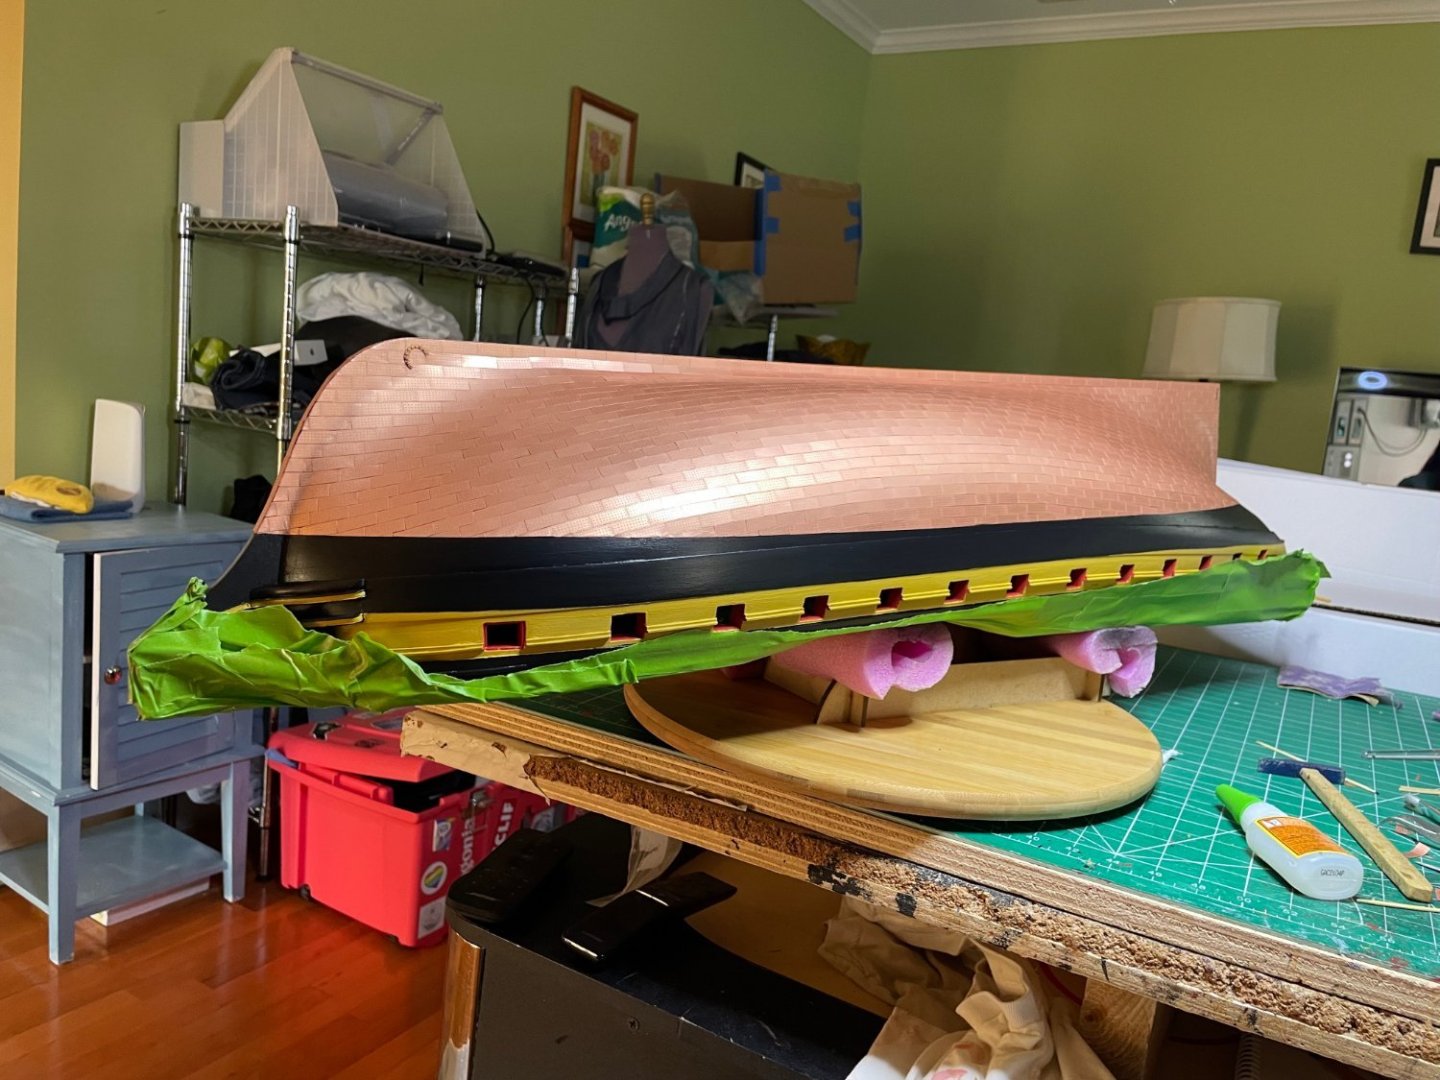
Finally done. I gave 3 coats of poly, taped the edges, poly'd the tape edge, repainted the black wale then re-coated with poly. Next is the rudder which will take at least a day to do given the coppering then fixing it in place. It is a shame that Chris could not get the single copper piece for the rudder, would have life much easier.


- 233 replies
-
- 12
-
-
-
- Indefatigable
- Vanguard Models
- (and 1 more)
-
Lovely work. I usually do not attach the bowsprit until I am doing the bow stays as I tend to otherwise snag it and break something.
- 443 replies
-
- 3
-
-
- Indefatigable
- Vanguard Models
- (and 1 more)
-
I usually add 3-4 coats of polyurethane over the copper and seems to keep in looking ok.
- 443 replies
-
- 3
-
-
- Indefatigable
- Vanguard Models
- (and 1 more)