Thukydides
-
Posts
1,363 -
Joined
-
Last visited
Content Type
Profiles
Forums
Gallery
Events
Everything posted by Thukydides
-
 They both show fore and aft as opposed to what was done on the model. The image is designed to correct the problem of the holes right by the coming. In other words the image is designed to illustrate a different problem, but in this case it also shows how they should run fore and aft. In any case the model is looking great 😃.
- 346 replies
-
- 2
-

-
- Sophie
- Vanguard Models
- (and 1 more)
-
It’s looking good. I particularly like the work on the wales.
- 648 replies
-
- 3
-
-
- Indefatigable
- Vanguard Models
- (and 1 more)
-
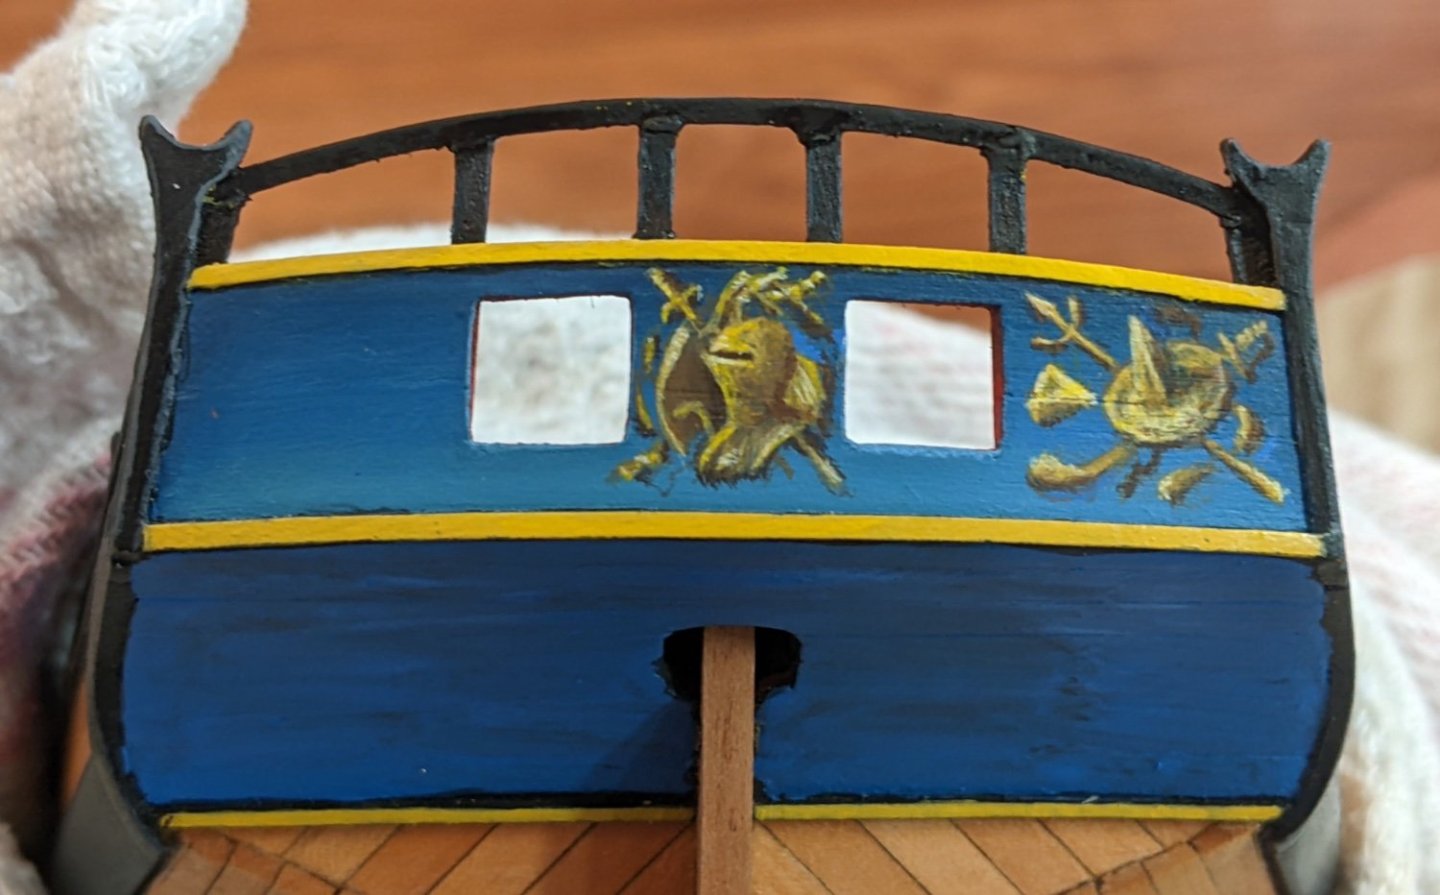
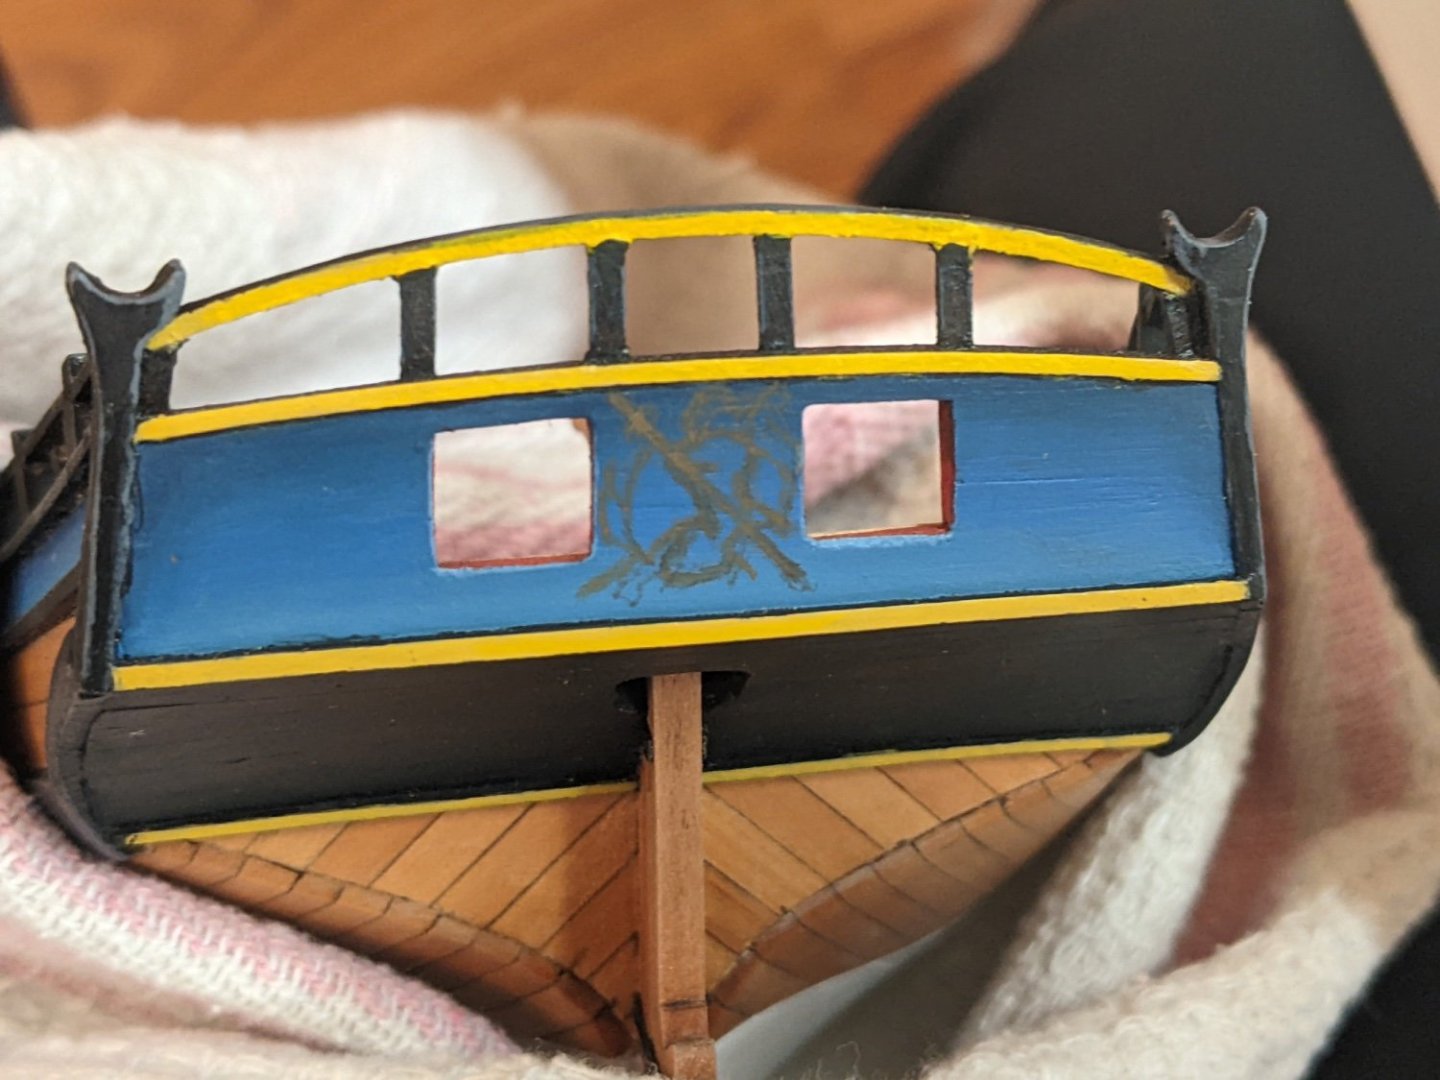
Time for another minor update. I have not had a lot of time to work on the model lately so progress has been slow. However I was feeling confident enough in the right side of the transom mockups to attempt it on the model. I also made the decision to take the plunge and commit to painting the lower counter. I have only done the first coat on the counter (hence why it looks patchy and doesn’t have the gradient). I also made the decision to paint the top rail of the transom (not sure what it is called) black instead of the ochre in line with the marshall painting.
- 562 replies
-
- 12
-
-

-
- vanguard models
- alert
- (and 2 more)
-
Waterline looks good to me eye. Good job. You are trucking along pretty quick and will catch up to me before long.
-
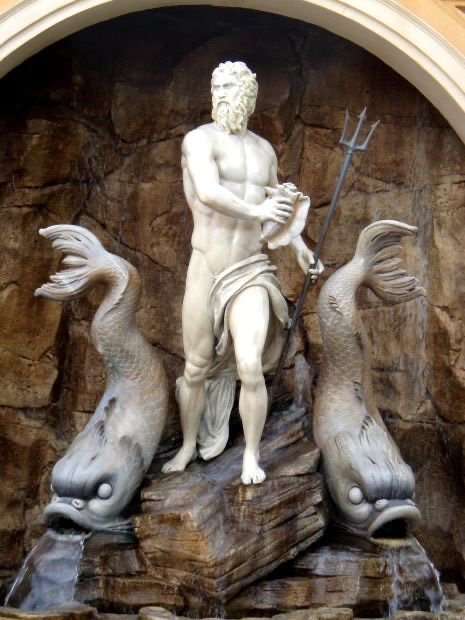
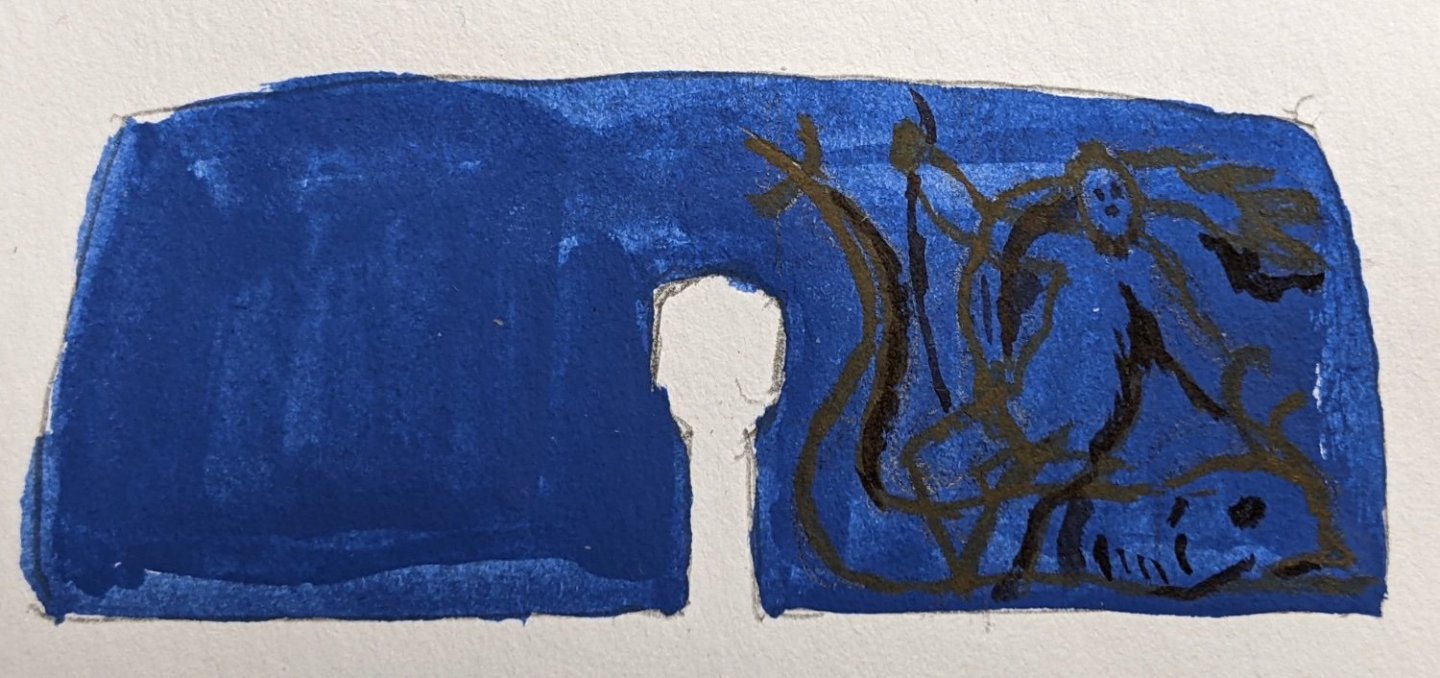
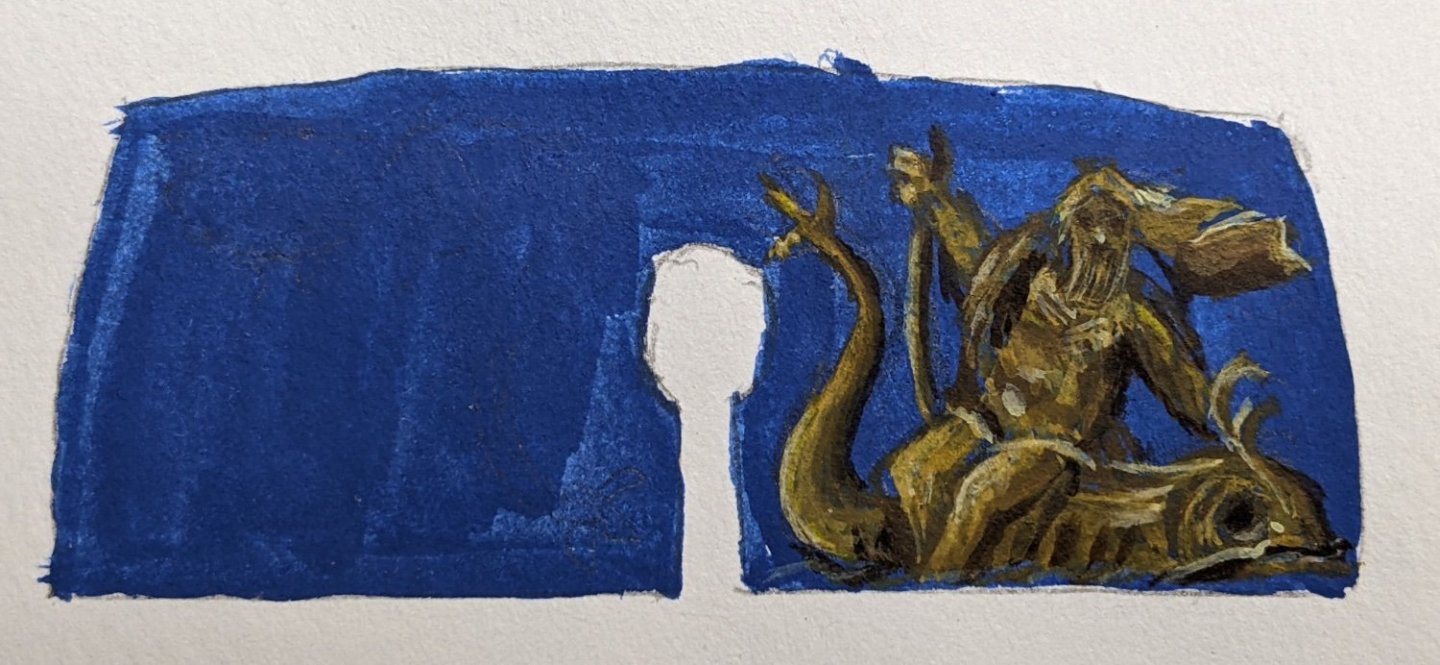
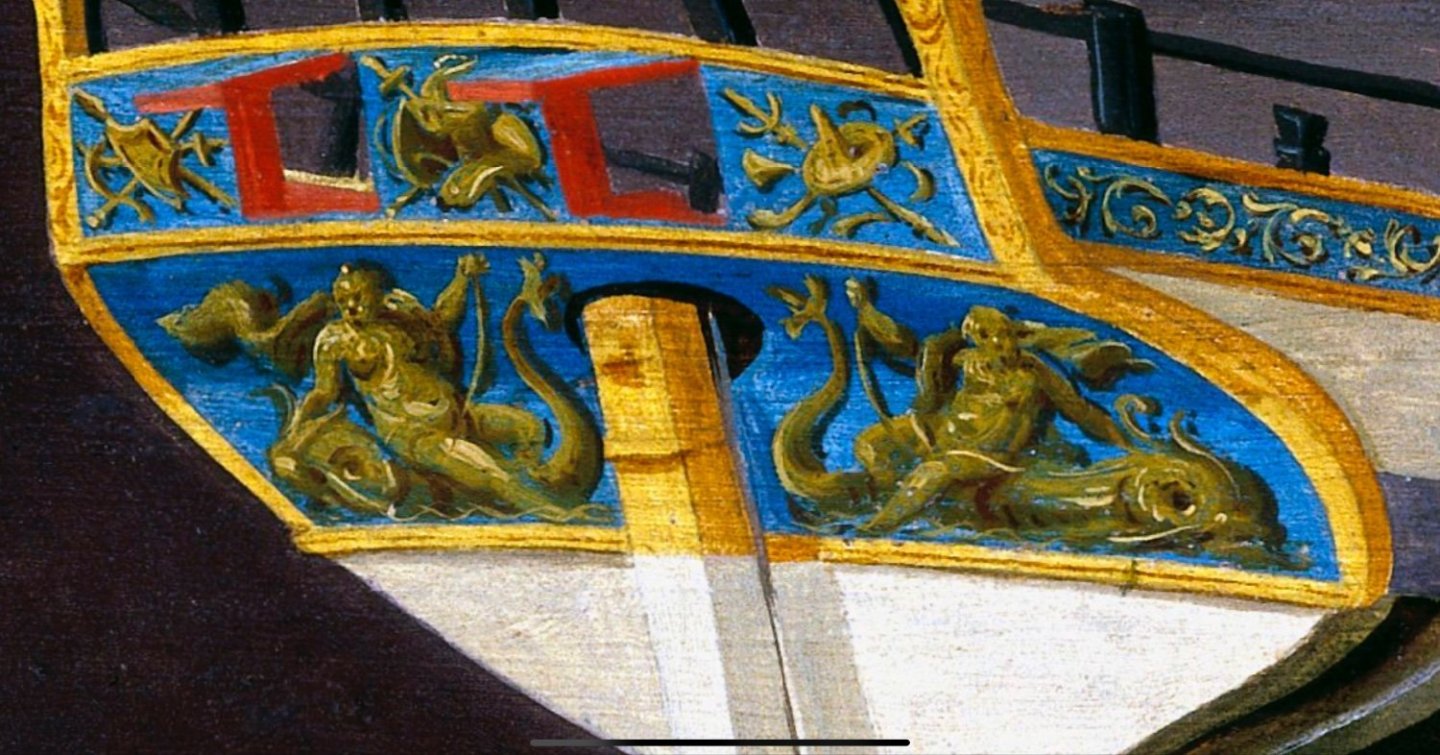
Log #38: Mockups of the lower counter I have continued to work on draft versions of the various images I hope to paint on the ship and given my success with the first one I gave in to feature creep and decided to make some attempts at the lower counter. These are much more complicated images and they are made more difficult by the perspective in which they are painted. I can’t just copy them as they are since the space they are painted on in the painting are two very different shapes from the actual counter. Below you can see my first mockup. This one did not get very far before I decided I did not like the way I had drawn it. I stopped after outlining the shape and blocking in some of the shadows. This next one I largely painted trying to replicate the marshall painting. At this point I am not trying to get perfectly smooth transitions, I am just trying to prove that I can largely produce what I want. Though I was happier than this one, I discovered through this attempt however that the perspective stretching was not working very well and the dolphin leaves something to be desired. At this point I decided that I needed to bring in some other sources to help better define the images and to allow me to deviate a bit more from the painting. I discovered that these are likely Neptune and Salacia and I found this lovely image of neptune with two “dolphins” looking very similar to the ones on the Alert. I noticed that he is generally depicted as very muscular so I decided to try and incorporate this more into the illustration. So here is the final attempt (up to this point). I am much happier with the proportions and the dolphin does look much more like what is depicted in the painting. I also feel that doing my own interpretation of the toga or or whatever piece of cloth is going over his shoulder was probably going to be better than exactly replicating what Marshall did. Finally I made the decision to add his trident to solve some of my space issues. I stopped where I did as though I feel this is better than the previous, I wanted to scale up the image to make sure it fills a little more of the counter. Hopefully the next one will be my final mockup before trying it on the actual ship.

- 562 replies
-
- 11
-
-
- vanguard models
- alert
- (and 2 more)
-
This is very impressive. Working at this scale it is wild how much detail you are getting in there.
-
As a general rule it is better to remove the masking tape while the paint is still wet. You can also try to prevent the edge from happening by doing several very thin layers. If the edge is already there you can use a very fine grit sandpaper to lightly sand it down. Then you can use a paintbrush to carefully fix up any parts that got sanded too far or the edge got messed up by the sanding process. The key is to have a very light touch and go slowly.
-
Welcome aboard. This is a great place to get help and on your journey into ship modeling. Two things I would suggest that will help you succeed: 1) Start simple - pick a relatively simple model to start with. 2) Start a build log - I cannot articulate how much help and advice I have gotten through people commenting on my build log. All the best.
-
You are making good progress. It is looking good.
-
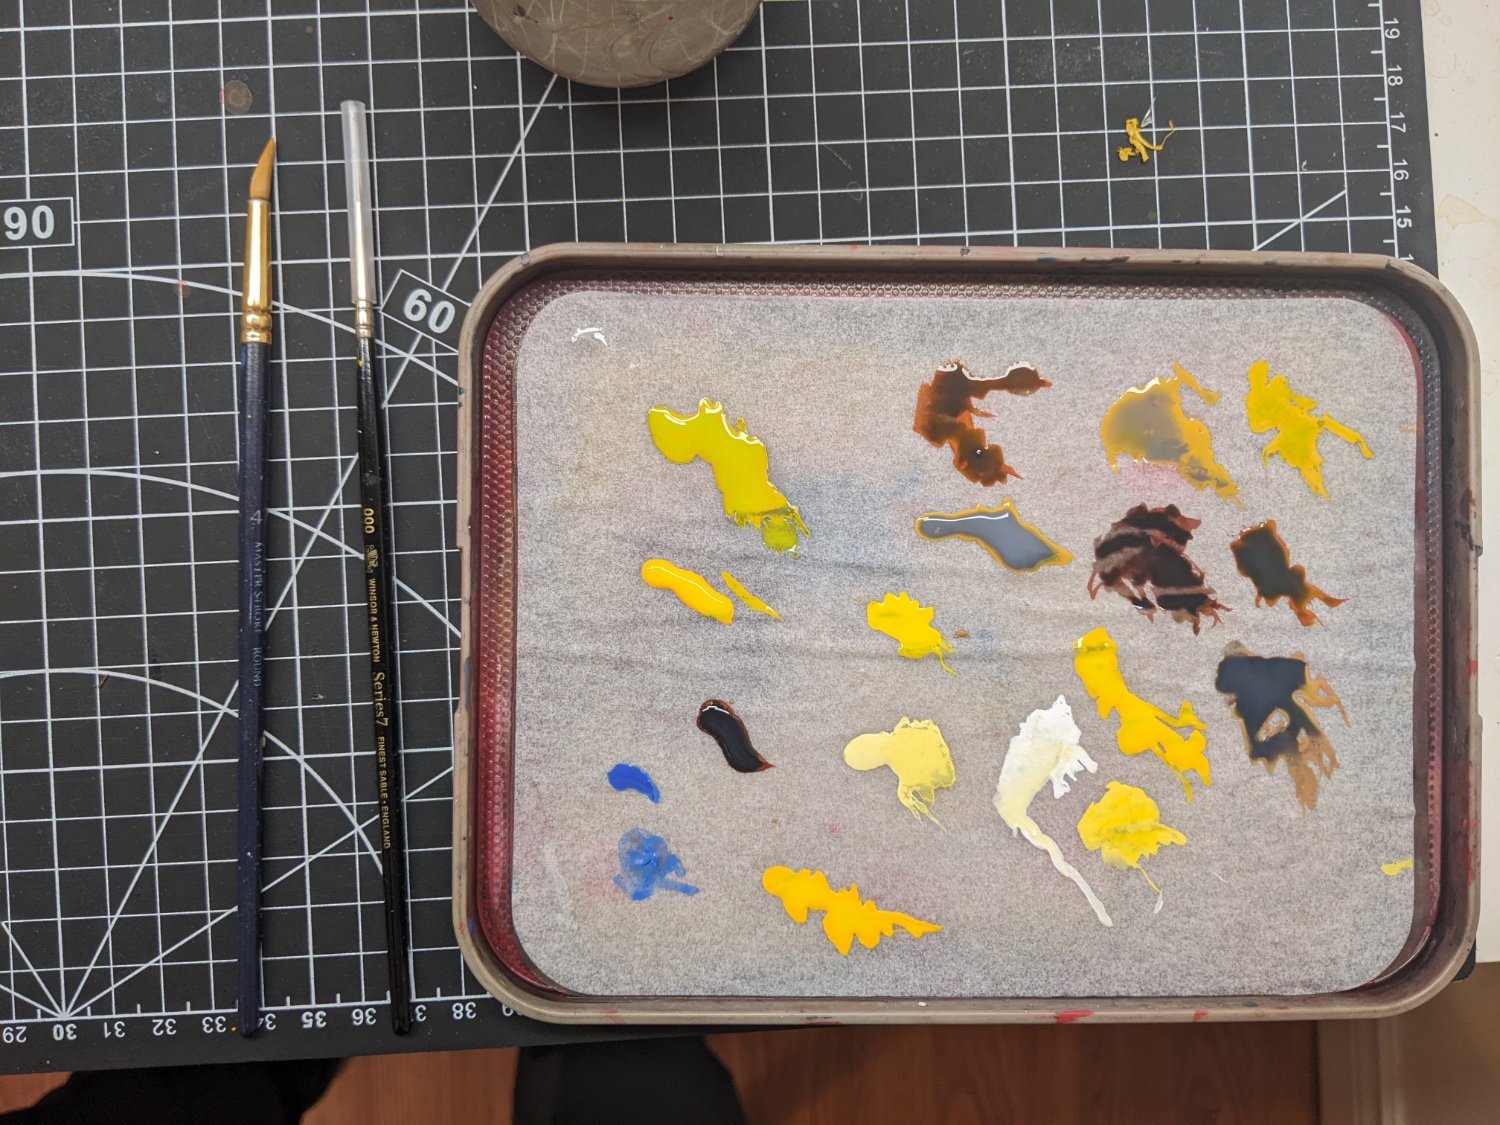
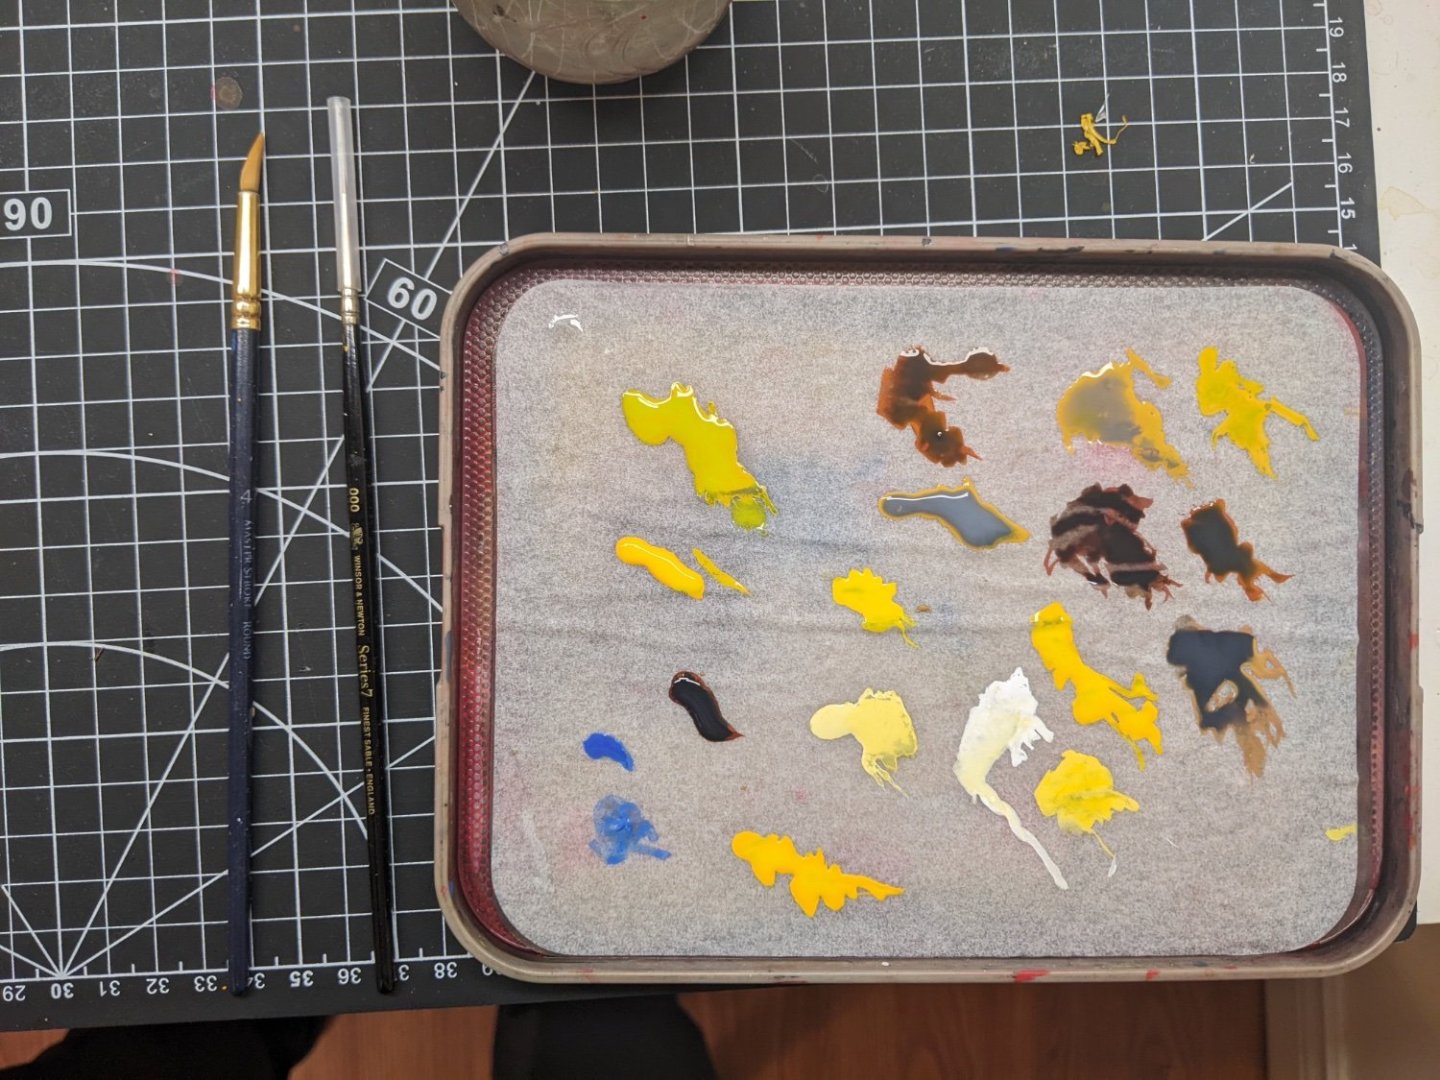
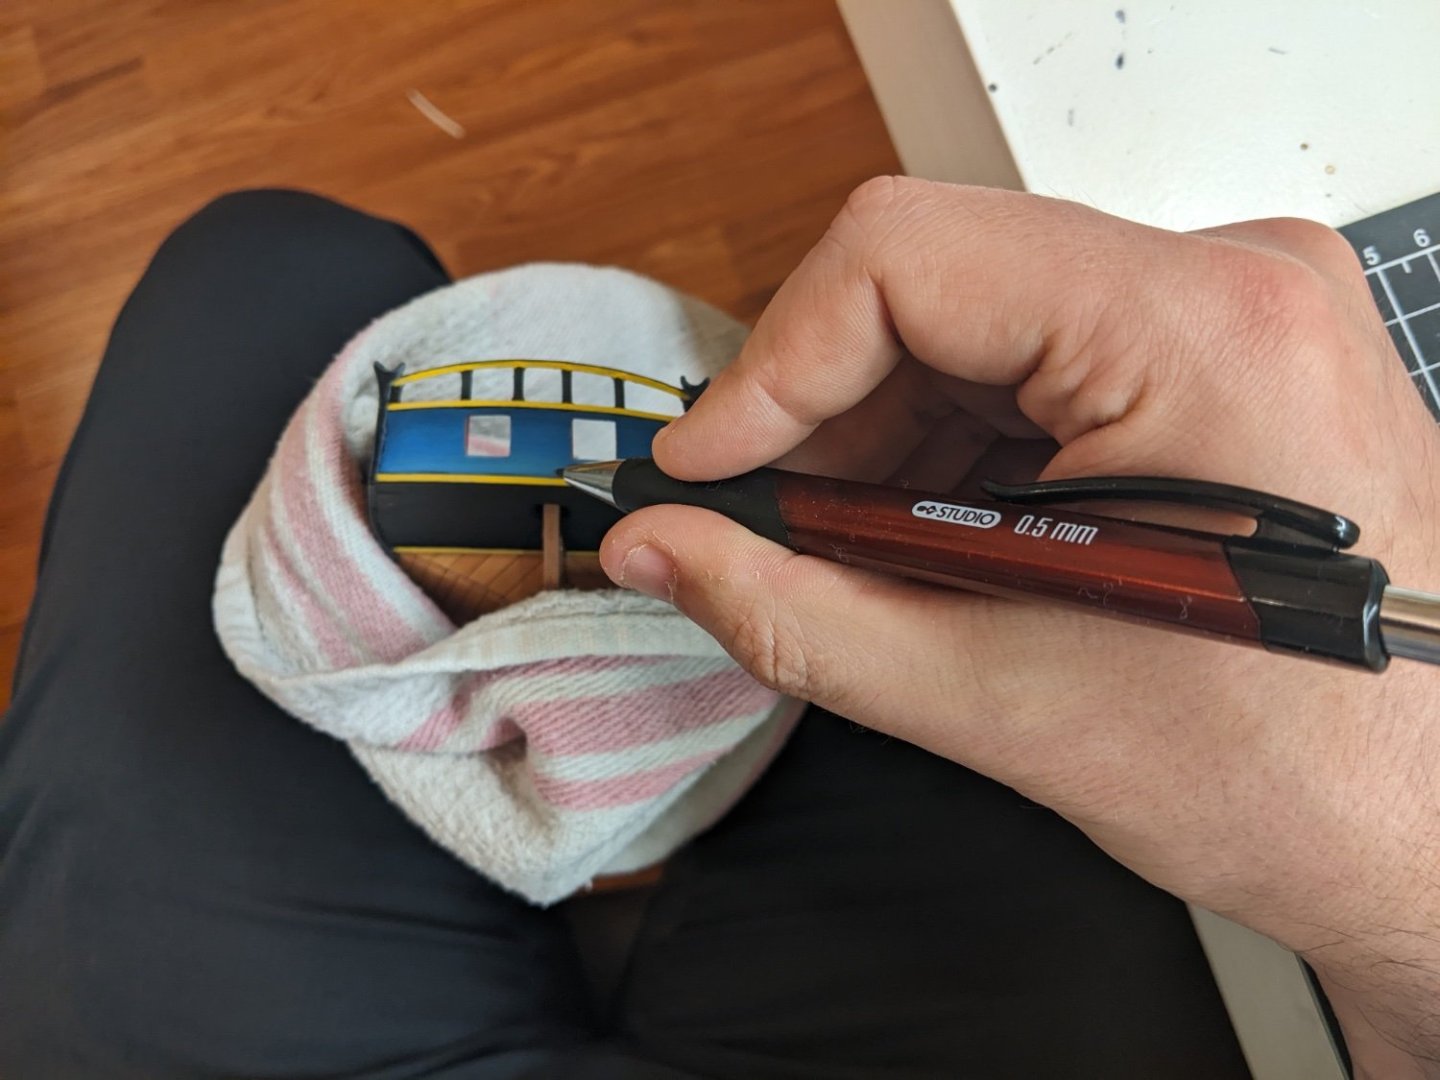
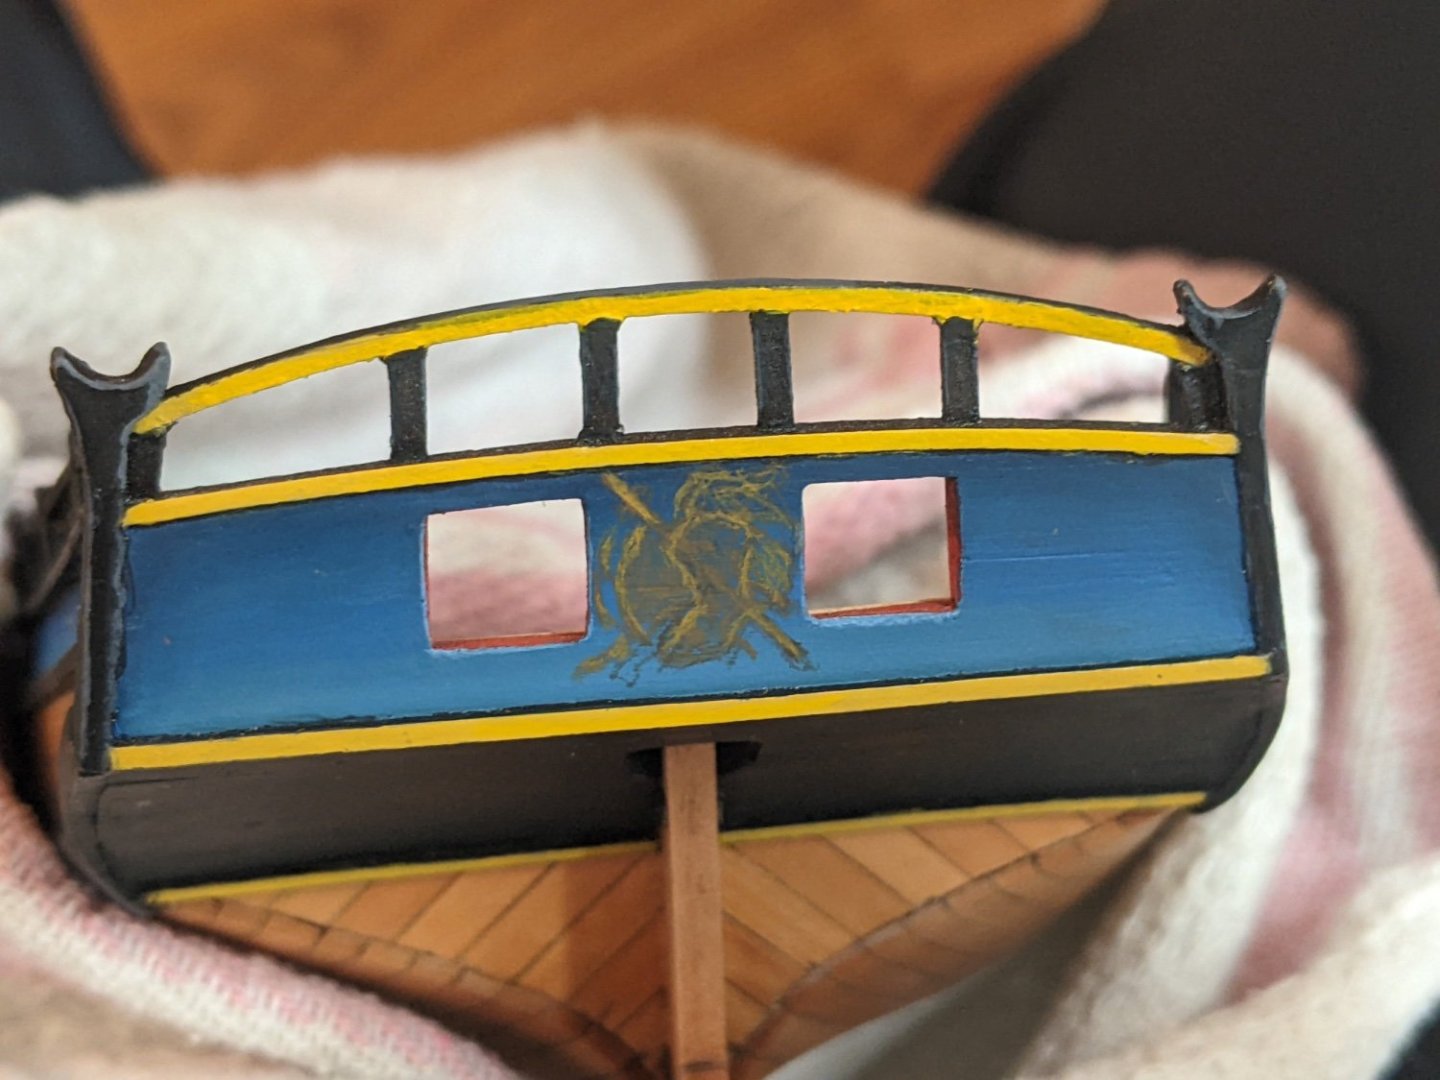
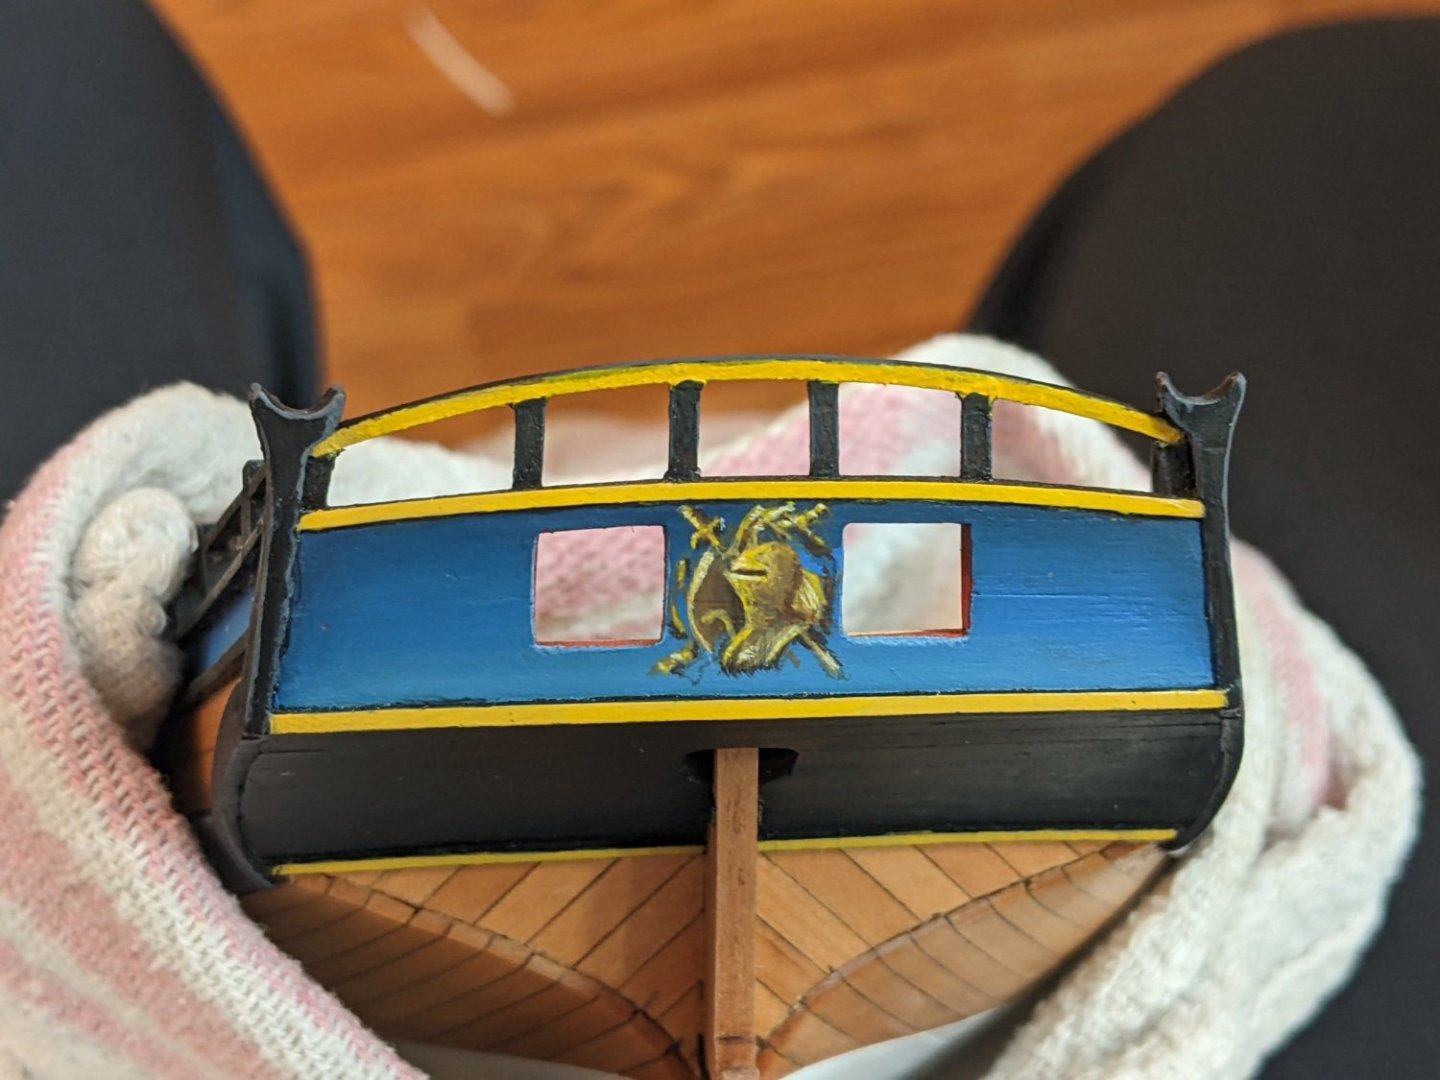
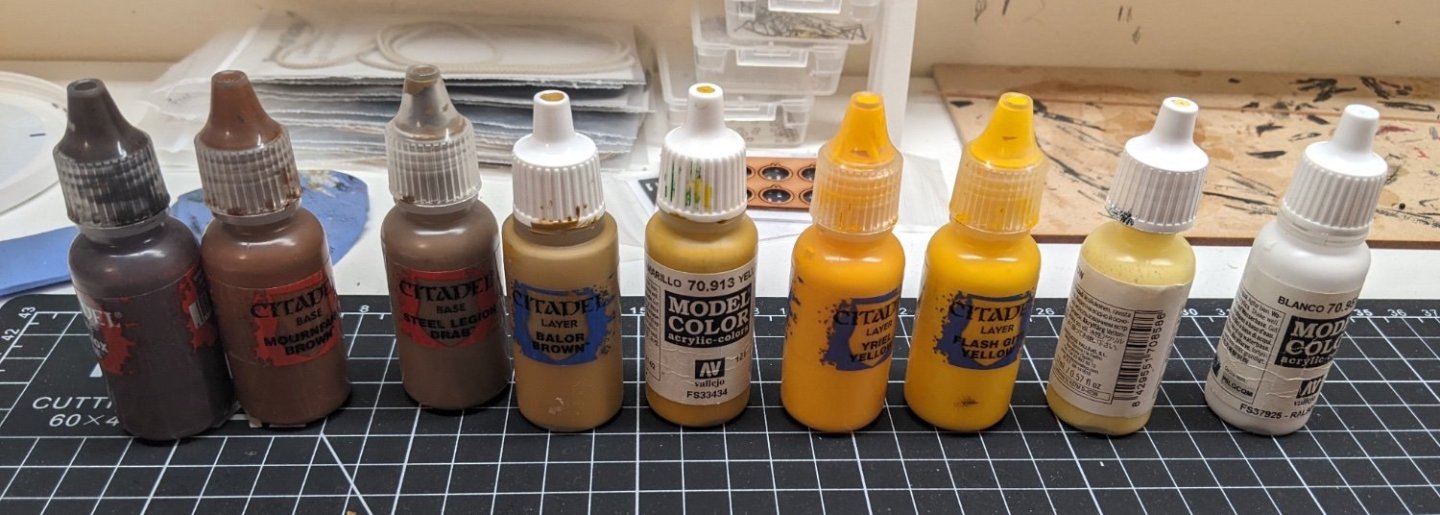
Log #37: Painting the Transom Images Having done a bunch of practice versions I decided it was time to take the plunge and try putting some paint on the model. I still need to do more practice on certain elements, but I felt confident enough in the centre element to give it a try. In case anyone else ever wants to try this I figured I will document the process for this one in detail and subsequent ones I will just show the final result. For the painting I am using acrylic paint. You can see all the colours I used for reference below. I also used a wet pallet (mine is a fancier one, but you can make one with a plastic tub and a bit of parchment paper). I highly recommend the use of the wet pallet for painting with acrylics as it stops the paints drying out too quickly and you can mix the colour easily as needed. I also primarily used a W&N series 7 000 brush. It has a very fine point which helps with the detail we are trying to get here, but if you are a new painter I would recommend using a cheap synthetic brush until you learn not to ruin them. I also have a cheap walmart brush I use for blocking in larger colours if needed. Step 1 is to find a good position to paint in. I wrapped the model in a dish towel and lightly held it between my knees level with my table. That way I could rest my wrist on the table to steady it as I painted. I used a mechanical pencil to lightly map out the shape. Then using my main shadow colour I blocked in a rough outline of the shapes. I then filled in the areas to be covered with this shadow colour and then outlined some of the brighter highlights with a slightly darker ochre colour. Then it was time to place the darkest shadows so now the highest highlights and lowest shadows have been sketched in. Note the highlights are not very bright at this point, I just am marking where they will go. Unfortunately I got absorbed and didn’t take any pictures after this point. However it was mostly following the same process, just with increasingly higher highlights, refining the shapes as I went. I constantly shift colours going lighter then back to may shadows again trying to blend the transitions. It still probably needs some miner refinements, but I think it holds up well.

- 562 replies
-
- 19
-
-
-
- vanguard models
- alert
- (and 2 more)
-
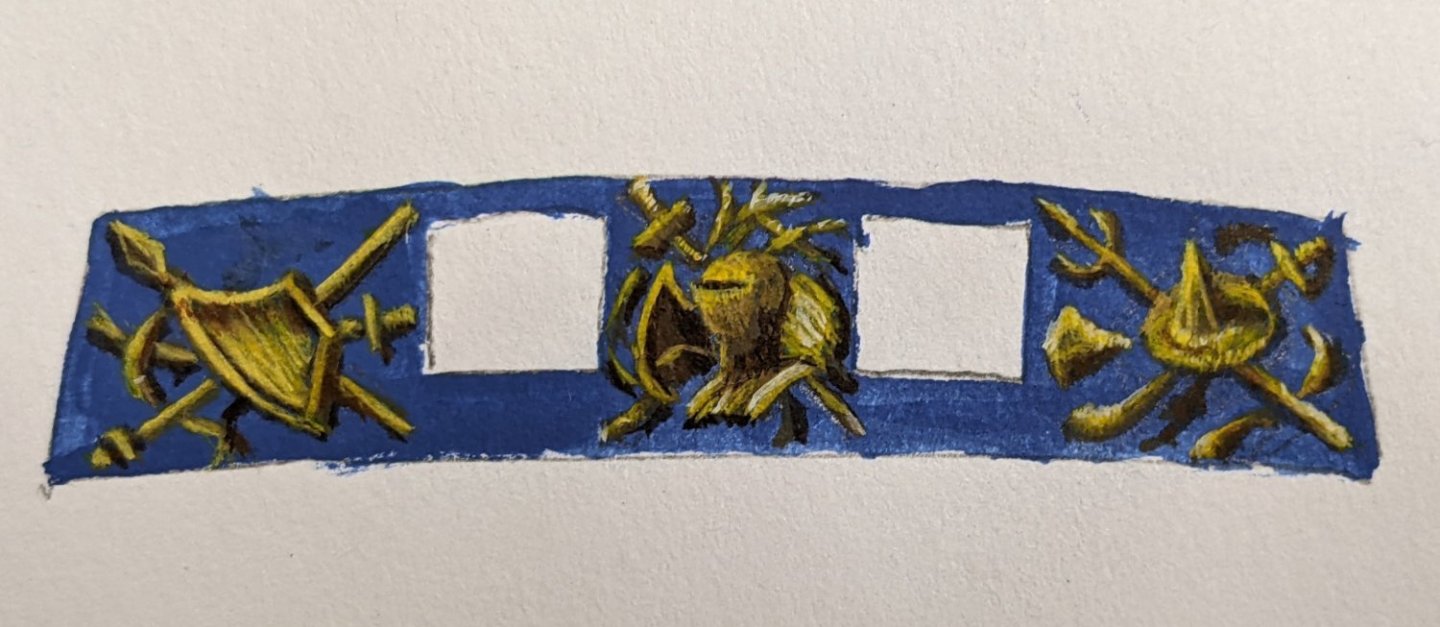
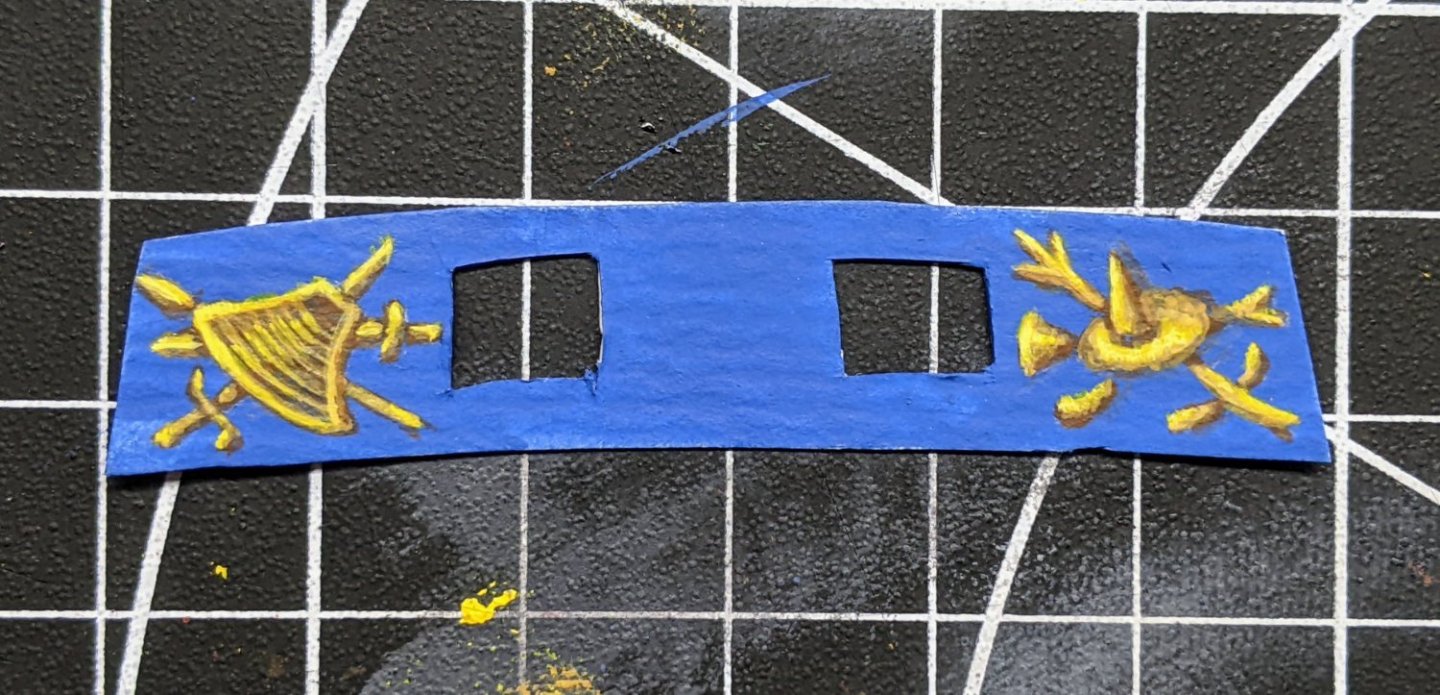
Another quick update. I have finished a mock up of the right hand side of the transom and though I am not entirely sure what everything in it is, I think it is a reasonable representation of what is in the painting. I am least pleased with the left side as in the marshall painting that side of the transom appears smaller and I have to "stretch" the art to make it fill the area.
- 562 replies
-
- 15
-
-
-
- vanguard models
- alert
- (and 2 more)
-
As a cutter the stern drags a bit so the waterline is not parallel to the keel. You can see this if you look at the plans. You want to place it on the stand (this will put it at the right angle) and then use the plans to figure out how high to put the waterline. If you look at this post from my log you can see how the white is higher at the stern than the bow. https://modelshipworld.com/topic/29520-hm-cutter-alert-by-thukydides-vanguard-models-164/?do=findComment&comment=894531 Is it just me or does the wale on one side look higher than the other. It may just be a quirk of the picture but it looks to me like you need to lower the left hand wale a little where it meets the stem.
- 59 replies
-
- 2
-
-
- Alert
- Vanguard Models
- (and 1 more)
-
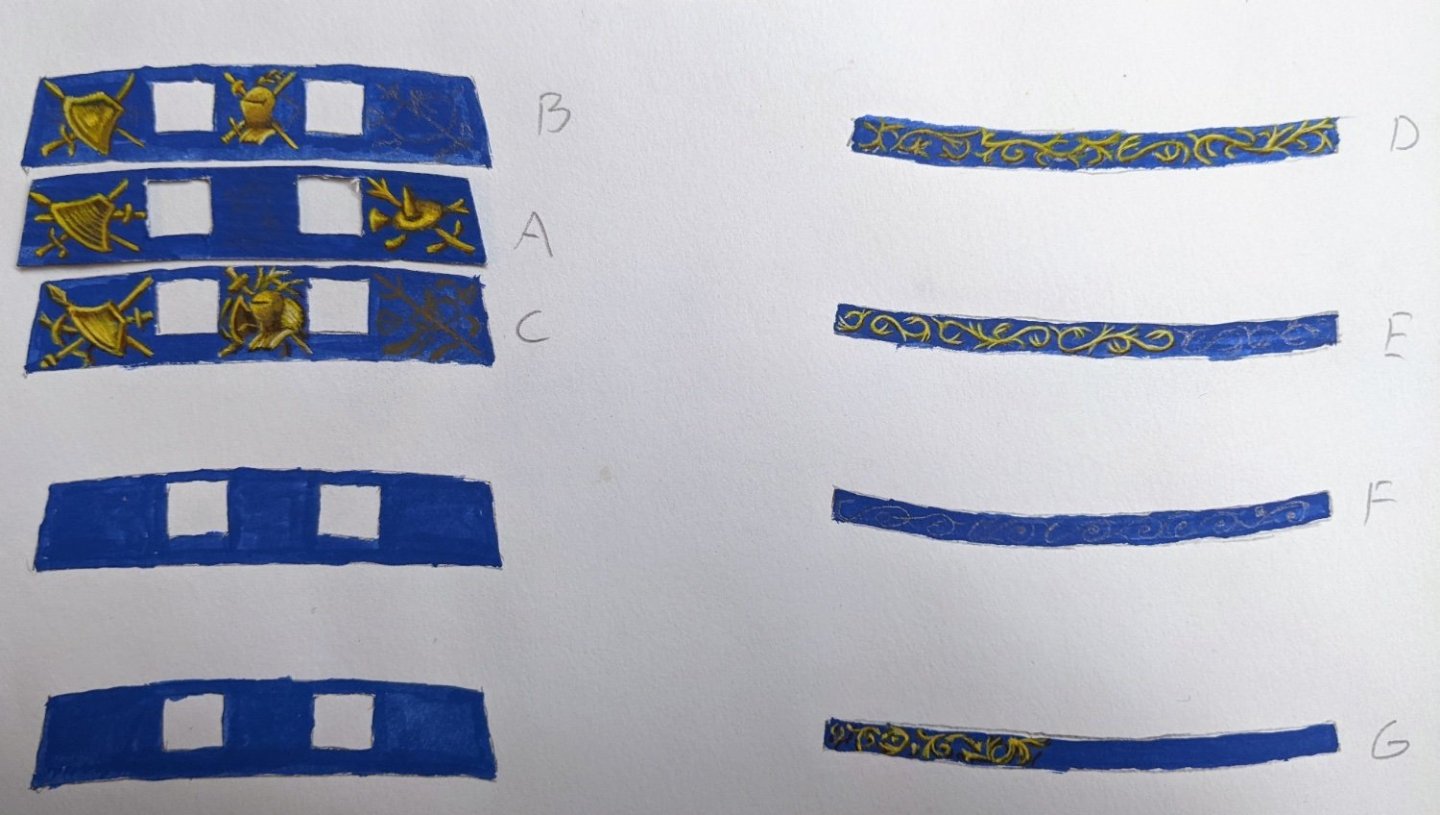
Another minor update. I have been working on trying to get down the painting style. All your comments and suggestions have been a huge help. In the picture you can see a number of my attempts, you may notice a common theme of them not being good enough, but I think they are slowly getting better: A - My first attempt at the transom which I have already shown. B - My second attempt, still pretty far from what is depicted in the painting. This was my first attempt at the tilting helmet. C - My latest attempt. The shield on the left I didn’t get the shape of quite right. My transom is a little different shape than in the painting so I have to adjust the items a bit. I am more pleased with the middle which though I am not sure what some of the stuff is, it looks much closer to the painting. On the right you can see me starting to block out the shapes for the right hand item. D - This was my first attempt at the freize E - My second attempt, better than the first, but still not very good. F - Another failed attempt. G - This is the first time I feel like I have sort of hit the style and flow. It still has some significant issues, but this is good enough that I am beginning to think I may be able to actually do this with enough practice versions.
- 562 replies
-
- 10
-
-
- vanguard models
- alert
- (and 2 more)
-
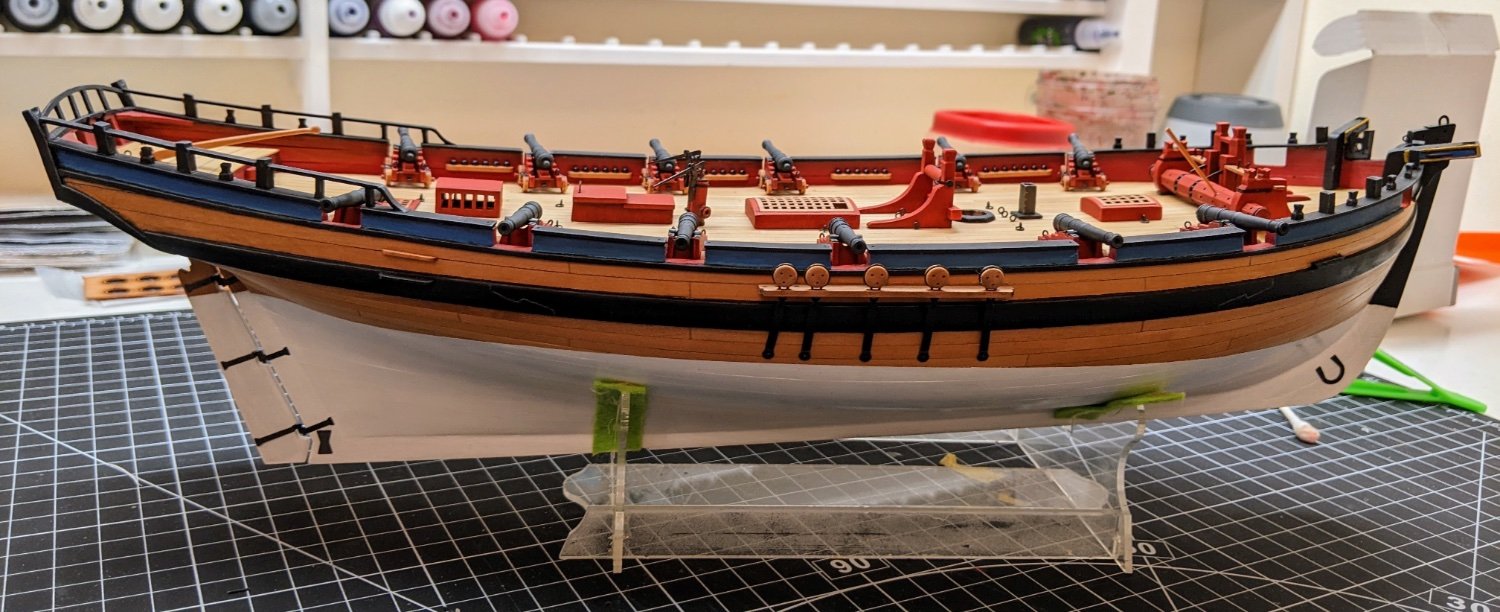
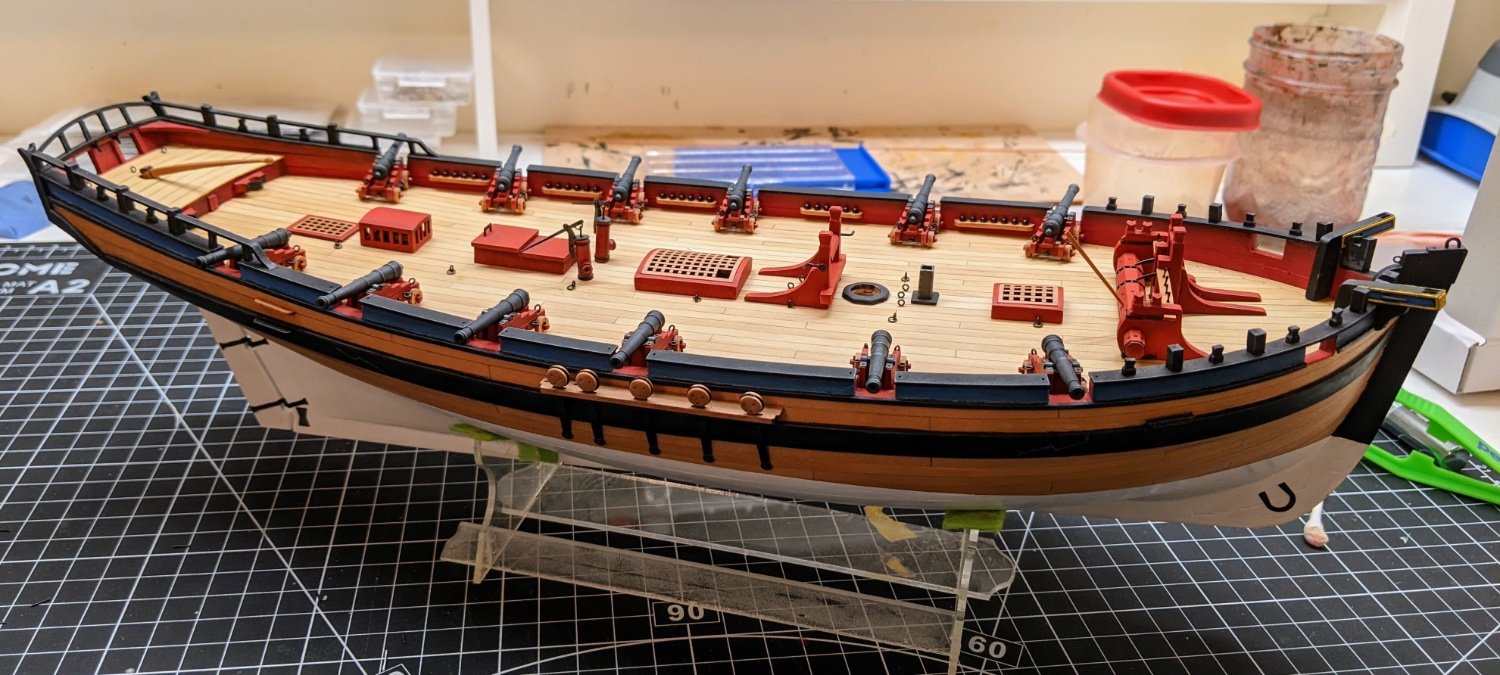
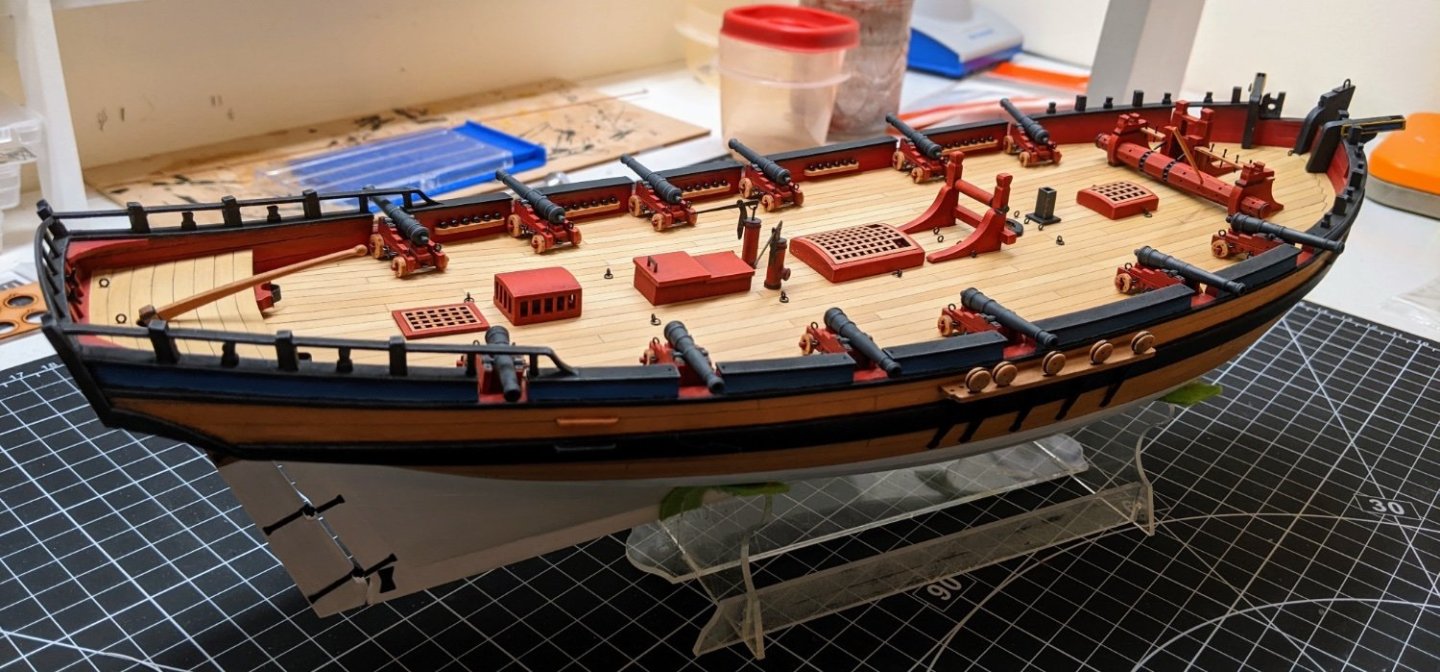
Thanks everyone for all the comments and help. I have been practicing on some paper and will share some of my attempts with you once I get closer to something I am happy with. I the meantime I have finished the cannons and so decided to take some shots of Alert with all the deck fittings temporarily in place before I have to remove them all in preparation for rigging the cannons and potentially painting the freiz. Lots of work left to go, but she is starting to look like a ship. EDIT: I realized after I took the pictures that I placed the jeer backwards :). Good there is no glue involved here.


- 562 replies
-
- 16
-
-
-
- vanguard models
- alert
- (and 2 more)
-
The gun ports are a bit fiddly and as you discovered it is easy to cut a bit too far or at the wrong angle. Remember they are perpendicular to the keele. I didn’t realize this when i was doing mine and so one or two of them don’t look quite right.
- 59 replies
-
- 1
-
-
- Alert
- Vanguard Models
- (and 1 more)
-
Good to see you back at it. I also had a period where I made very little progress due to a combination of lack of inspiration and no free time. The planking looks great, you are now getting to the stage where it starts to actually look like a ship 🙂.
- 59 replies
-
- 1
-
-
- Alert
- Vanguard Models
- (and 1 more)
-
where did you get this drill press? How accurate do you find it to be? i am always on the lookout for small tools as i don’t have the space for many of the toys that are usually recommended by people.
- 122 replies
-
- 1
-
-
- Artesania Latina
- Pen Duick
- (and 1 more)
-
Looks fantastic. It has been quite interesting to see how your designs have matured over time.
- 57 replies
-
- 5
-
-
- Trial
- Vanguard Models
- (and 1 more)
-
Thanks so much, You are right it is a helmet and that may be a jousting lance going through it diagonally. The one on the right is the strangest one as you may be right it is an ottoman shield, but that is a big spike.
- 562 replies
-
- 2
-
-
- vanguard models
- alert
- (and 2 more)
-
Welcome to MSW, make sure you start a build log. I have found it a great help as a first time builder, especially when I hit problems I wasn't sure how to solve.
-
Congrats, she looks awesome. Great work.
-
Here is attempt number 2. I think I am getting closer, but even with the higher resolution photo, it is hard to tell what exactly the art on the transom is depicting. Part of my problem is my transom is not exactly the same shape as the one in the painting so I can't just do an exact 1 to 1. And I have no idea what the middle is meant to be where the port is partially covering it. Maybe a few more practice versions...
- 562 replies
-
- 6
-
-
- vanguard models
- alert
- (and 2 more)