Thukydides
-
Posts
1,363 -
Joined
-
Last visited
Content Type
Profiles
Forums
Gallery
Events
Everything posted by Thukydides
-
 In most depictions I have seen the quarter deck doesn't seem to have these only the main deck. Is that just a modelling convention or was that actual practice and do you know why?
- 648 replies
-
- 2
-

-
- Indefatigable
- Vanguard Models
- (and 1 more)
-
You are not wrong and actually the only primary source I could find on this matter (but it was from the late 1800s) made this very point. Go up to the thread I linked and scroll down the last post in it. That being said, for the reasons I articulated I used a double and a single, but if I was to do it all over again I would probably use two singles as I am around 60-40 that this was the case.
- 562 replies
-
- 2
-
-
- vanguard models
- alert
- (and 2 more)
-
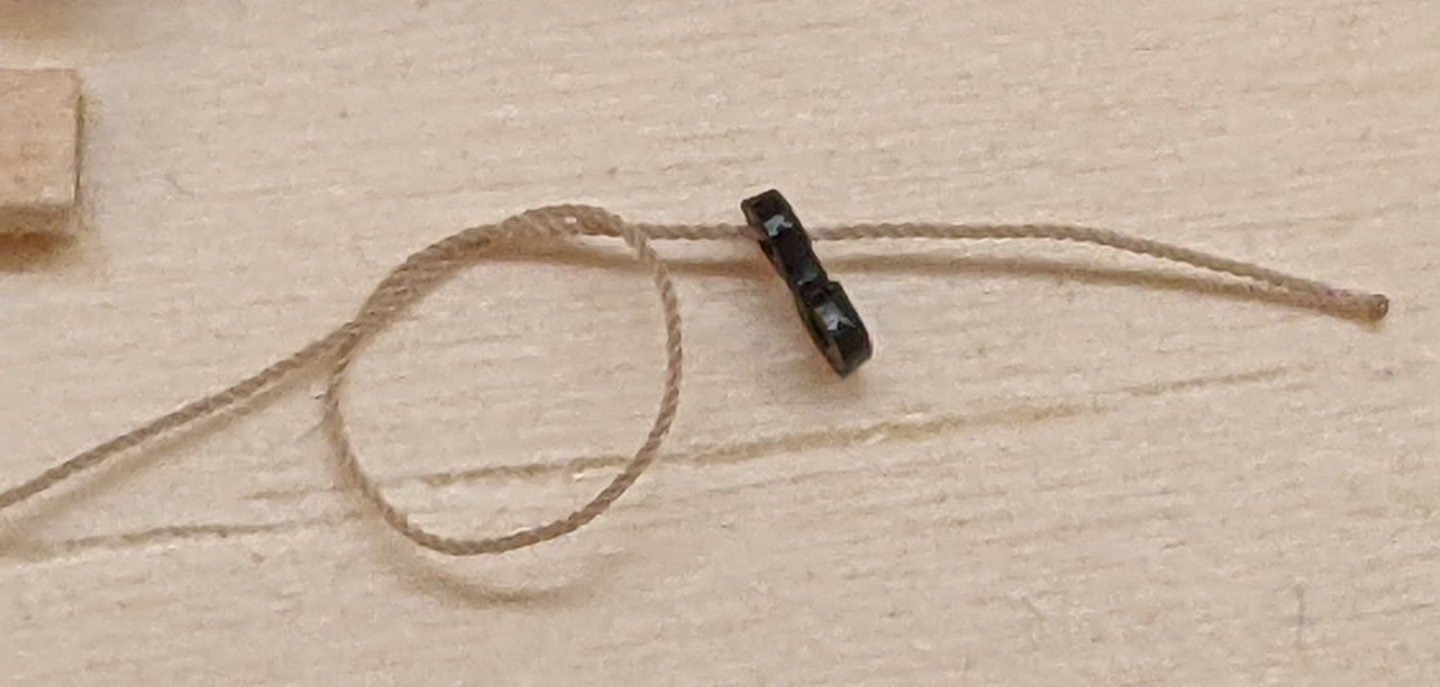
Do you have anywhere in your build logs you describe this in more detail. I looked up figure 8 knots, but I am having trouble understanding how they would be of help with a block for some reason.
-
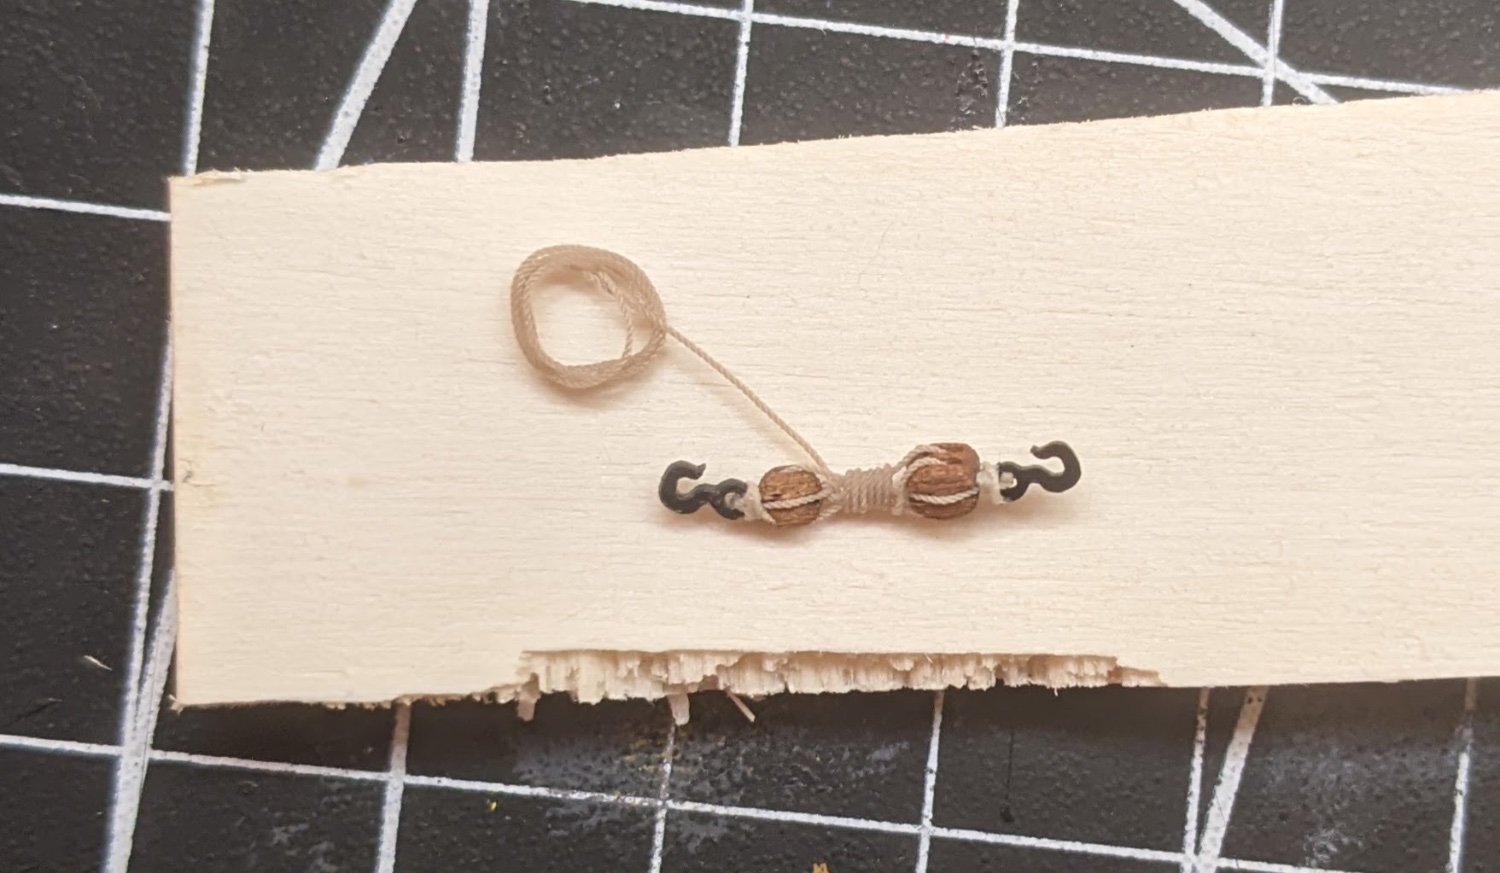
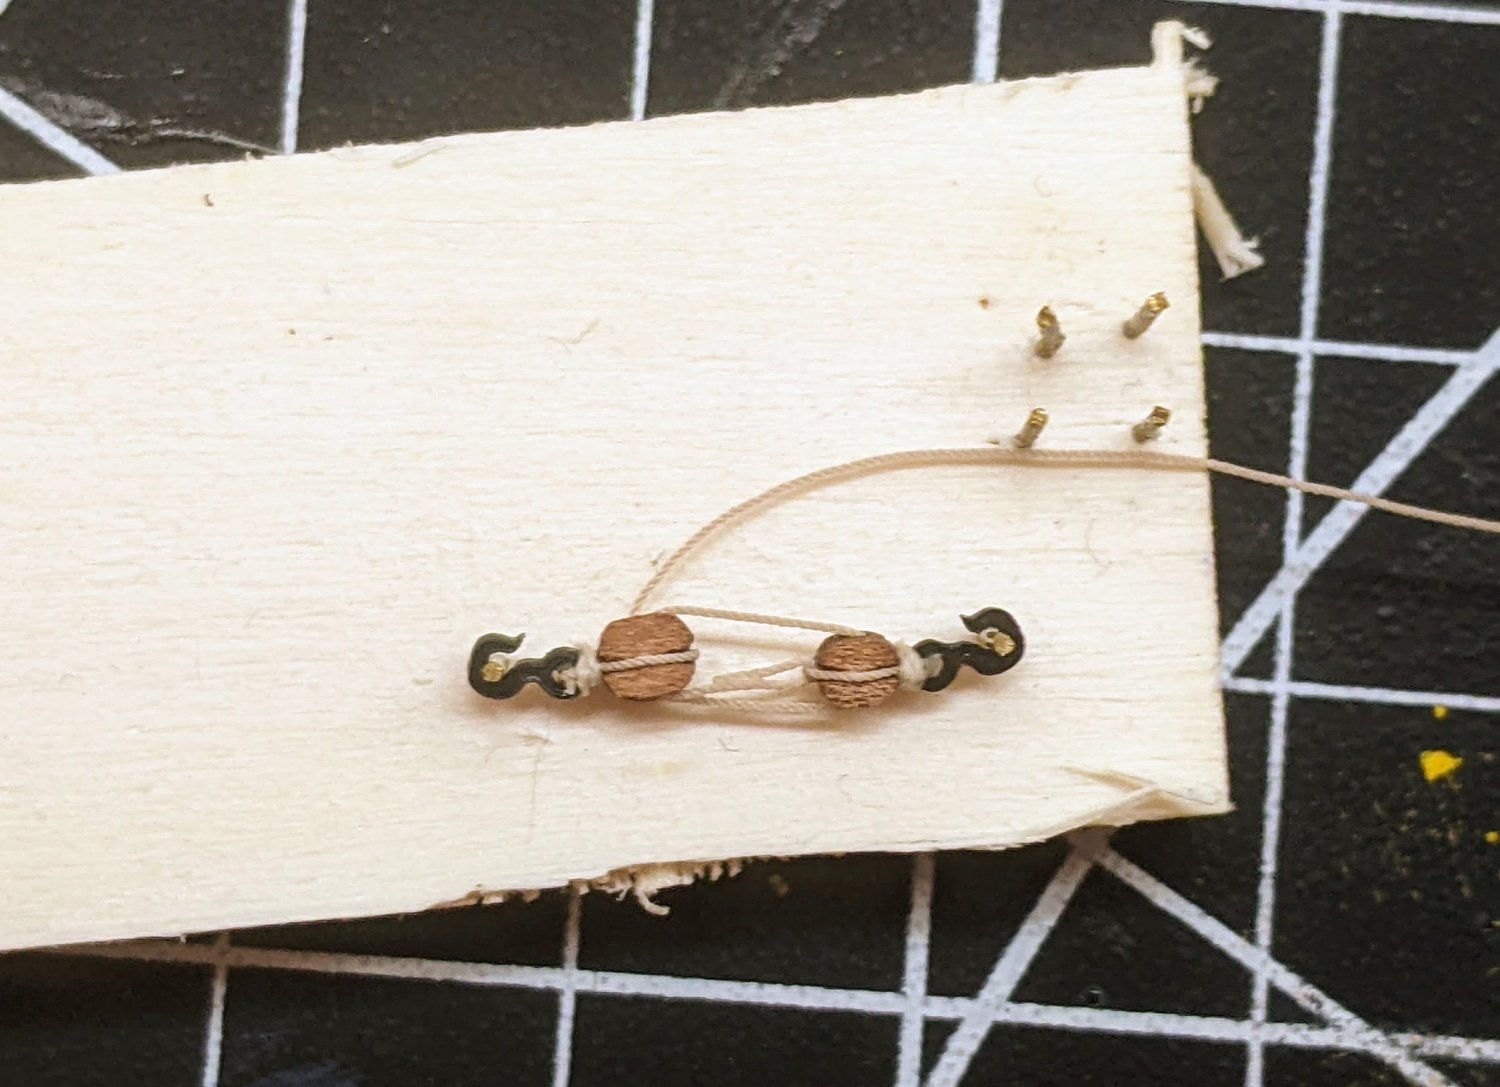
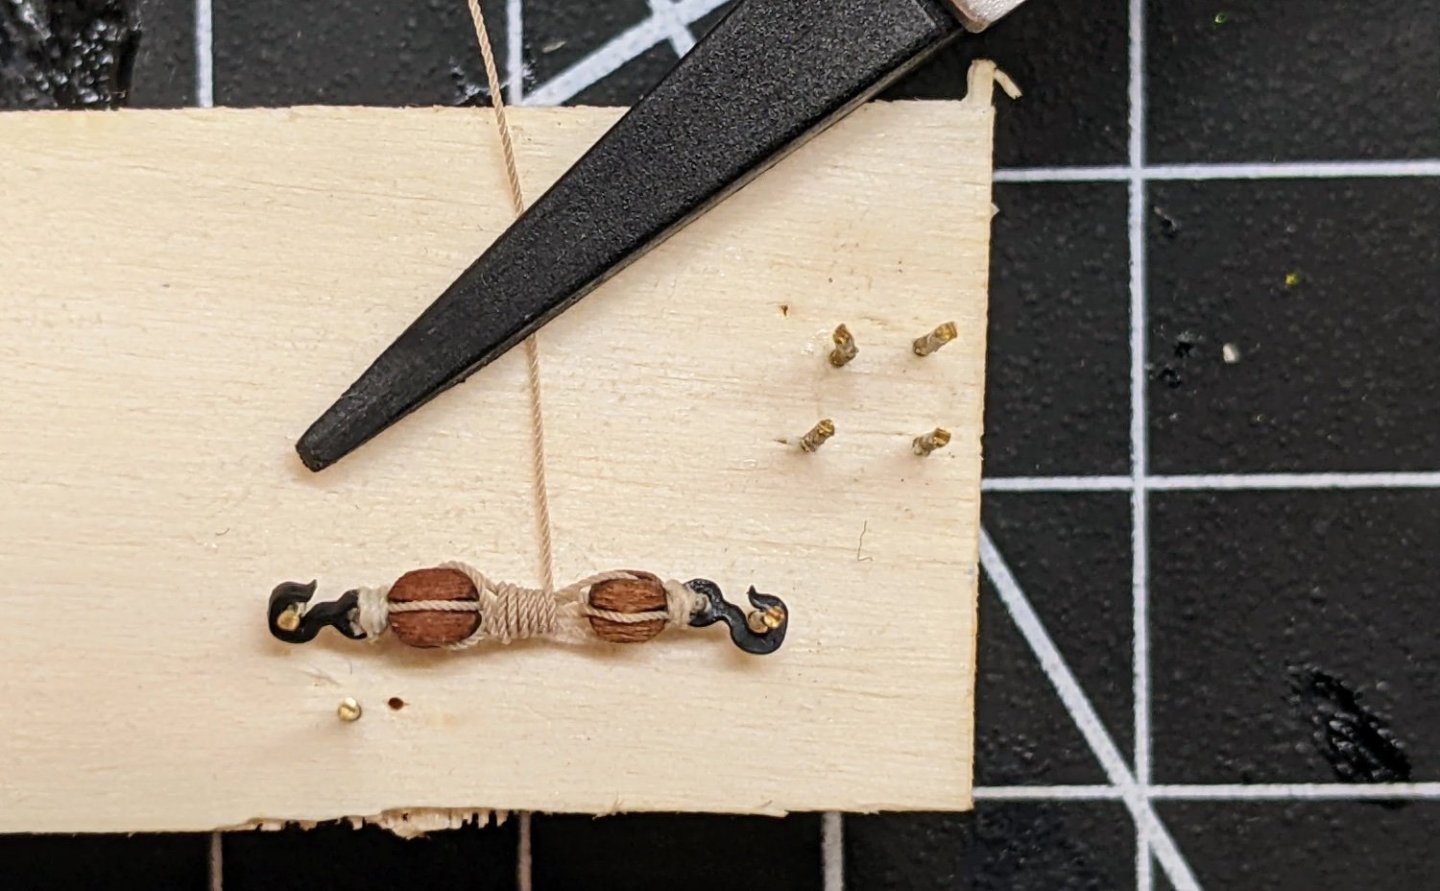
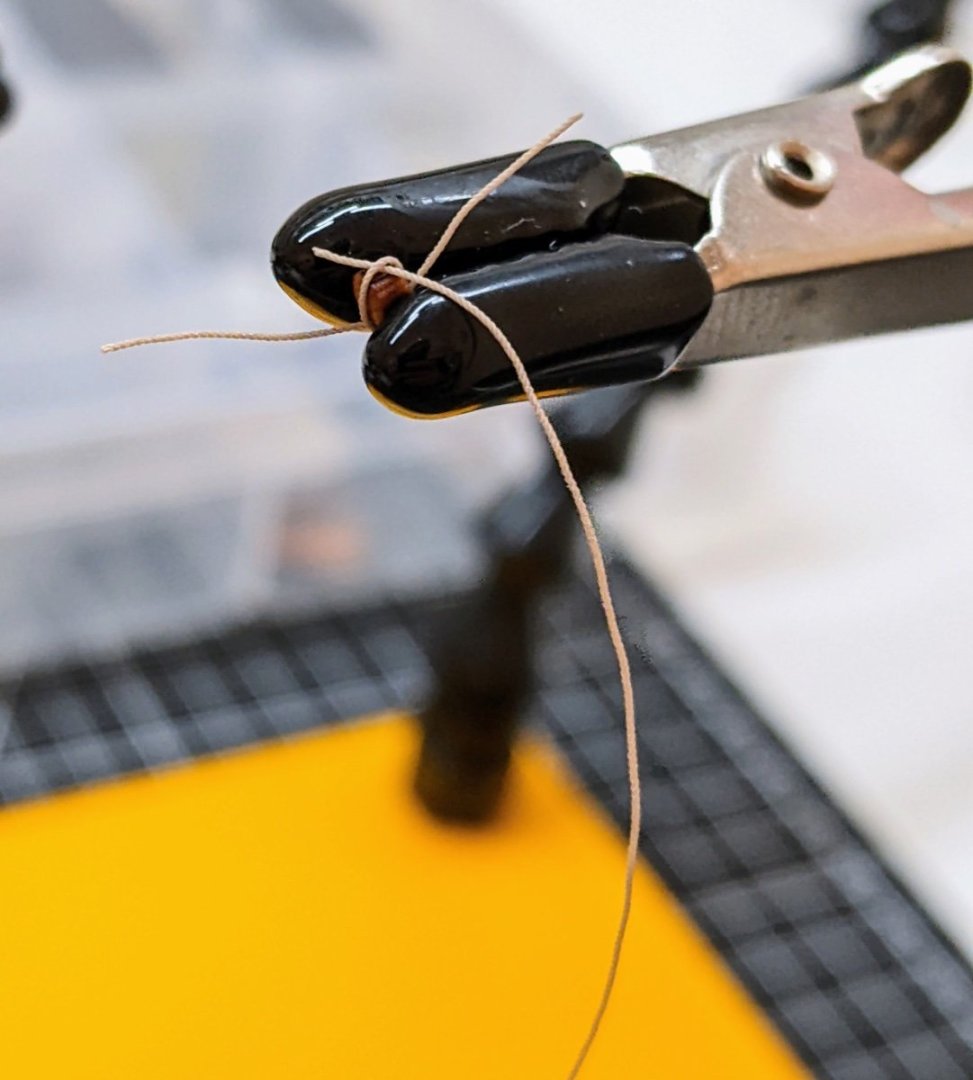
Log #47: The Gun Tackle I have finally completed tying all the gun tackle blocks. So now it is time to get started on the tackle itself. A while back I constructed a jig to hold a cannon in and used it to rig a single side of the gun. I had originally planned to use this jig to do all of the tackle, but I realized that this made matters unnecessarily complicated. Having made one gun tackle I then used it to make a jig that I could use to mass produce them. I started the process by running the rope through the blocks and then sliding the hooks onto the two pins. Then I wrapped the rope around and used a tiny touch of super glue to hold it in place. I then finished the wrapping again using a small dot of super glue to hold things together at the end. Notice in this picture I also have a second pin at a shorter distance. This is to do the slightly shorter tackles which hook onto the eyebolts that are attached to the shot racks. I then used the four pins to form the rope coil. This is held in place by a few strategically placed dots of glue. Then once the coil is formed I cover it all in matt varnish to hold it together. In the picture below you can see the rope looks wet because the varnish has not yet dried. Once everything is dry I pop it off the pins. I then hook the tackle onto the cannon and use small dots of super glue to hold the rope coil in the correct place. Everything is then given a thin coat of diluted matt varnish to take the shine off of it and hold it secure. Once it is dry I need to check for any shiny spots from the super glue and use matt varnish to get rid of them. In the picture below you can see that not everything is perfectly dry and there are a few spots I will have to deal with.


- 562 replies
-
- 15
-
-

-
- vanguard models
- alert
- (and 2 more)
-
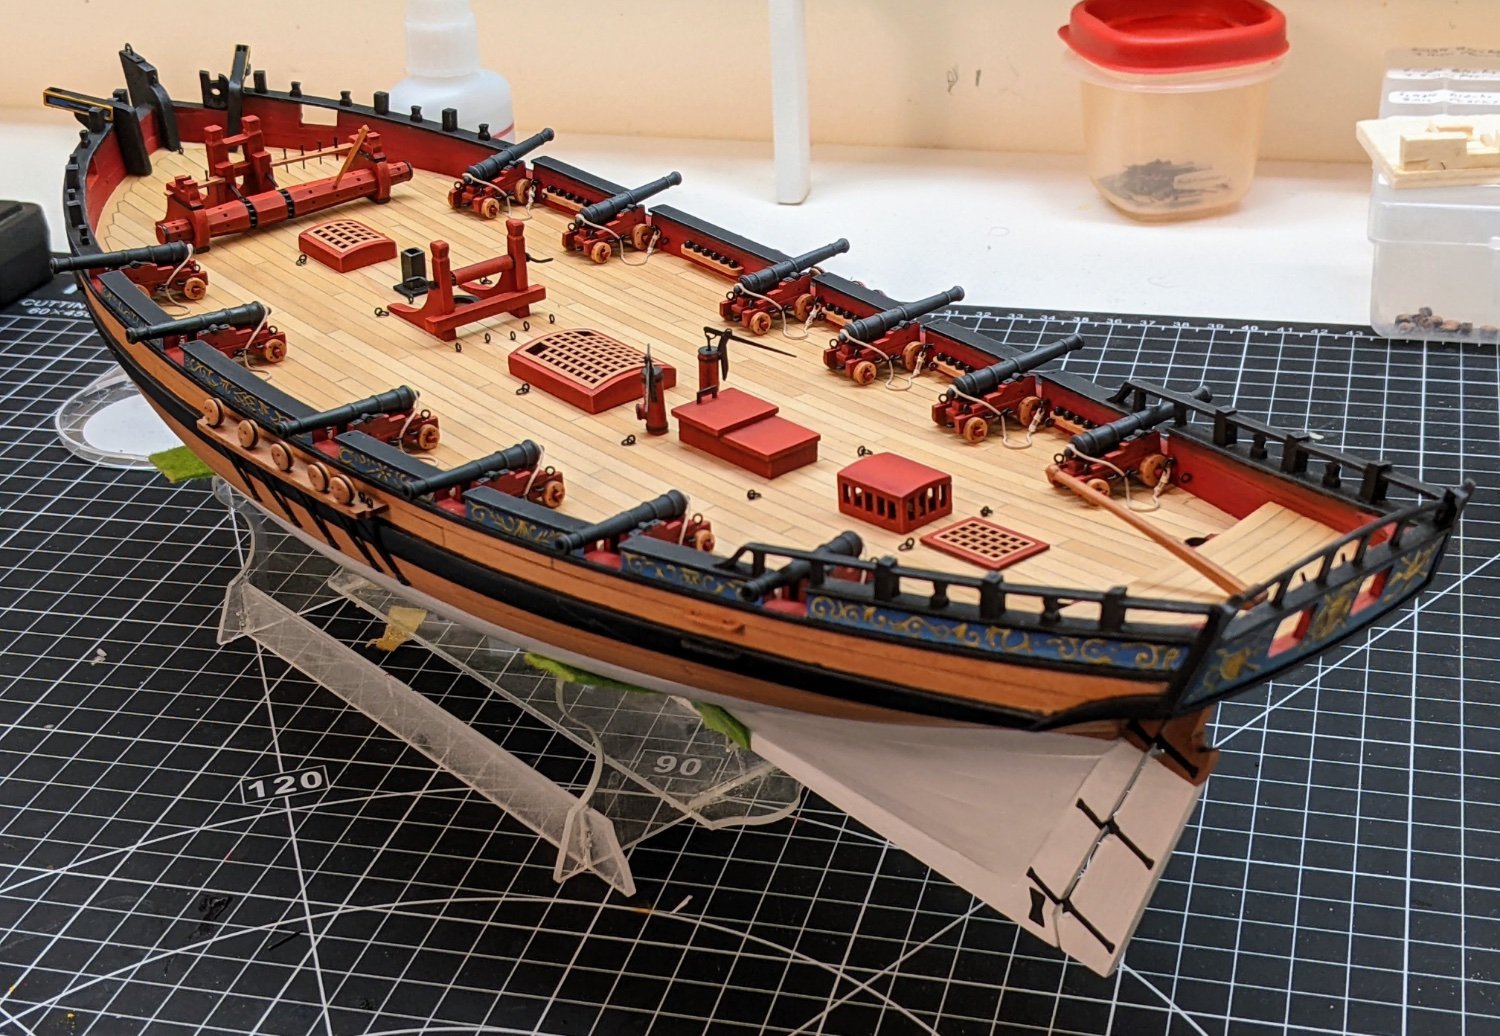
Thanks to everyone for stopping by. I am really getting close to having all the deck fittings done now and I am looking forward to getting started on the mainmast and the shrouds. If for nothing else i am glad I rigged the guns for the practice it has given me with rigging materials before I get to the stuff that people are really going to notice. The thread I was using is Mara, I have ordered some fly tying thread and will see if that goes better for some of these smaller details. I suspect Mara will be fine for most of the rigging as the rope I will be seizing is much larger. But in this case where I am only using .25mm rope for the gun tackle, it proved a little over sized. Thanks, to be honest it gets easier the more times you do it. The problem with doing it in sequence is it is not very exciting :).
- 562 replies
-
- 2
-
-
- vanguard models
- alert
- (and 2 more)
-
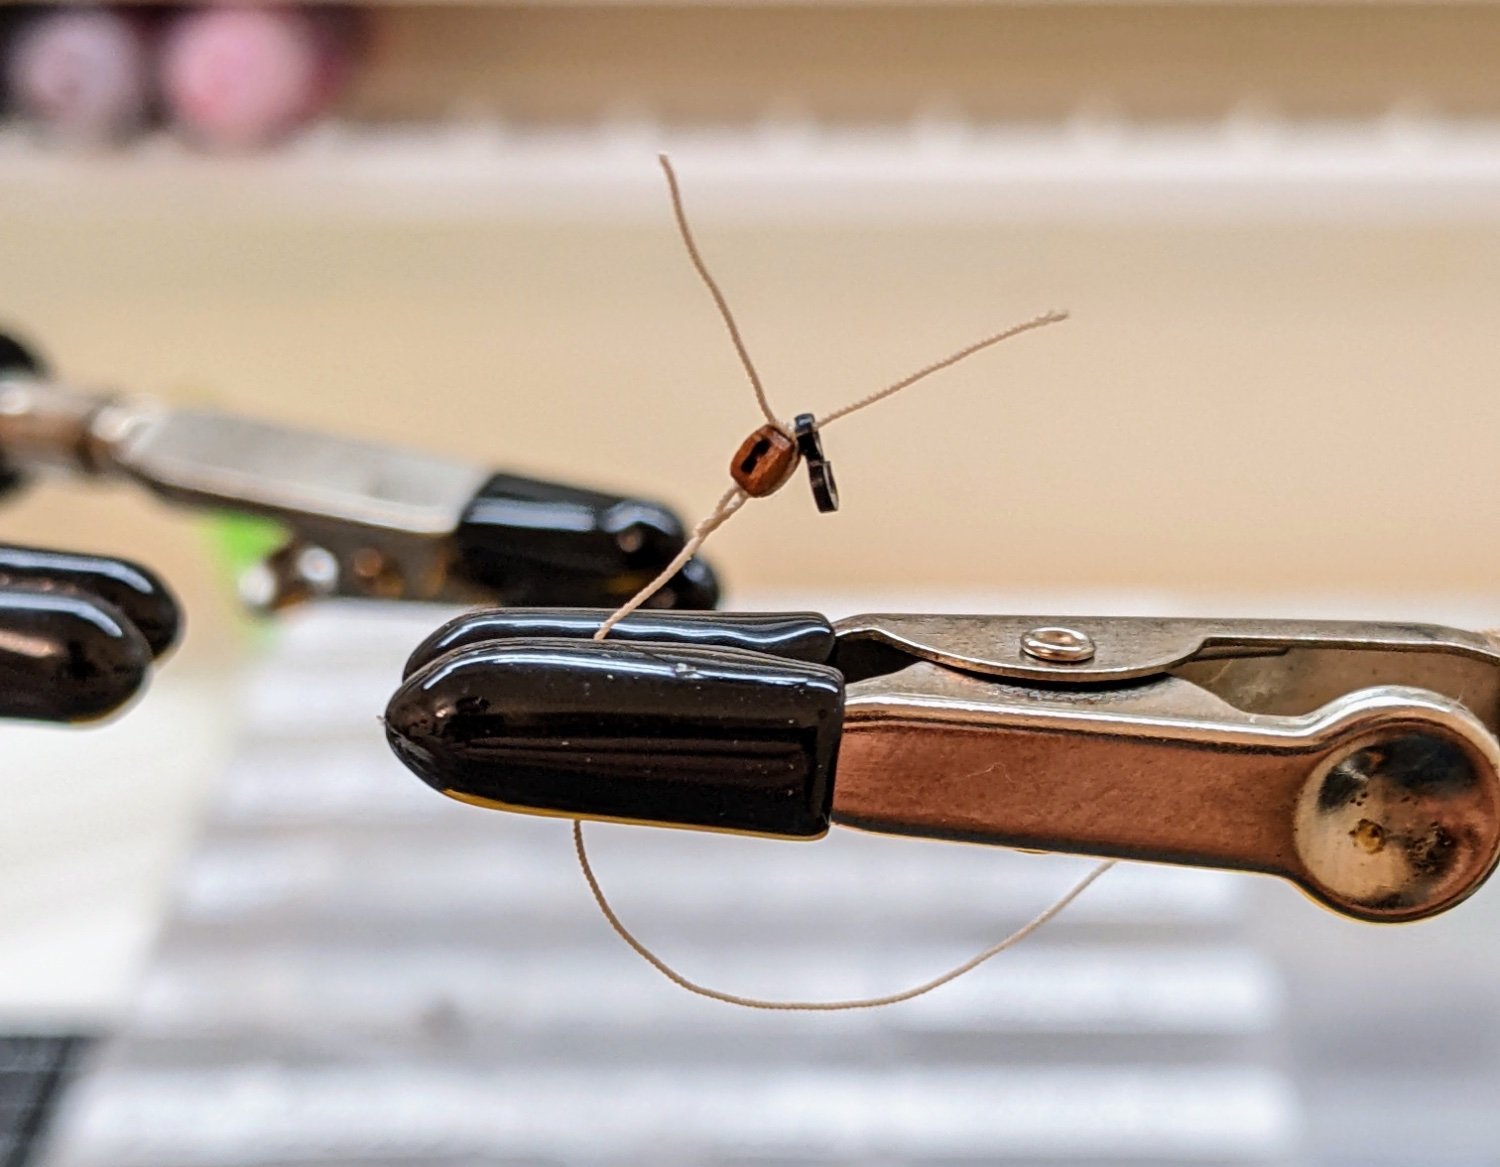
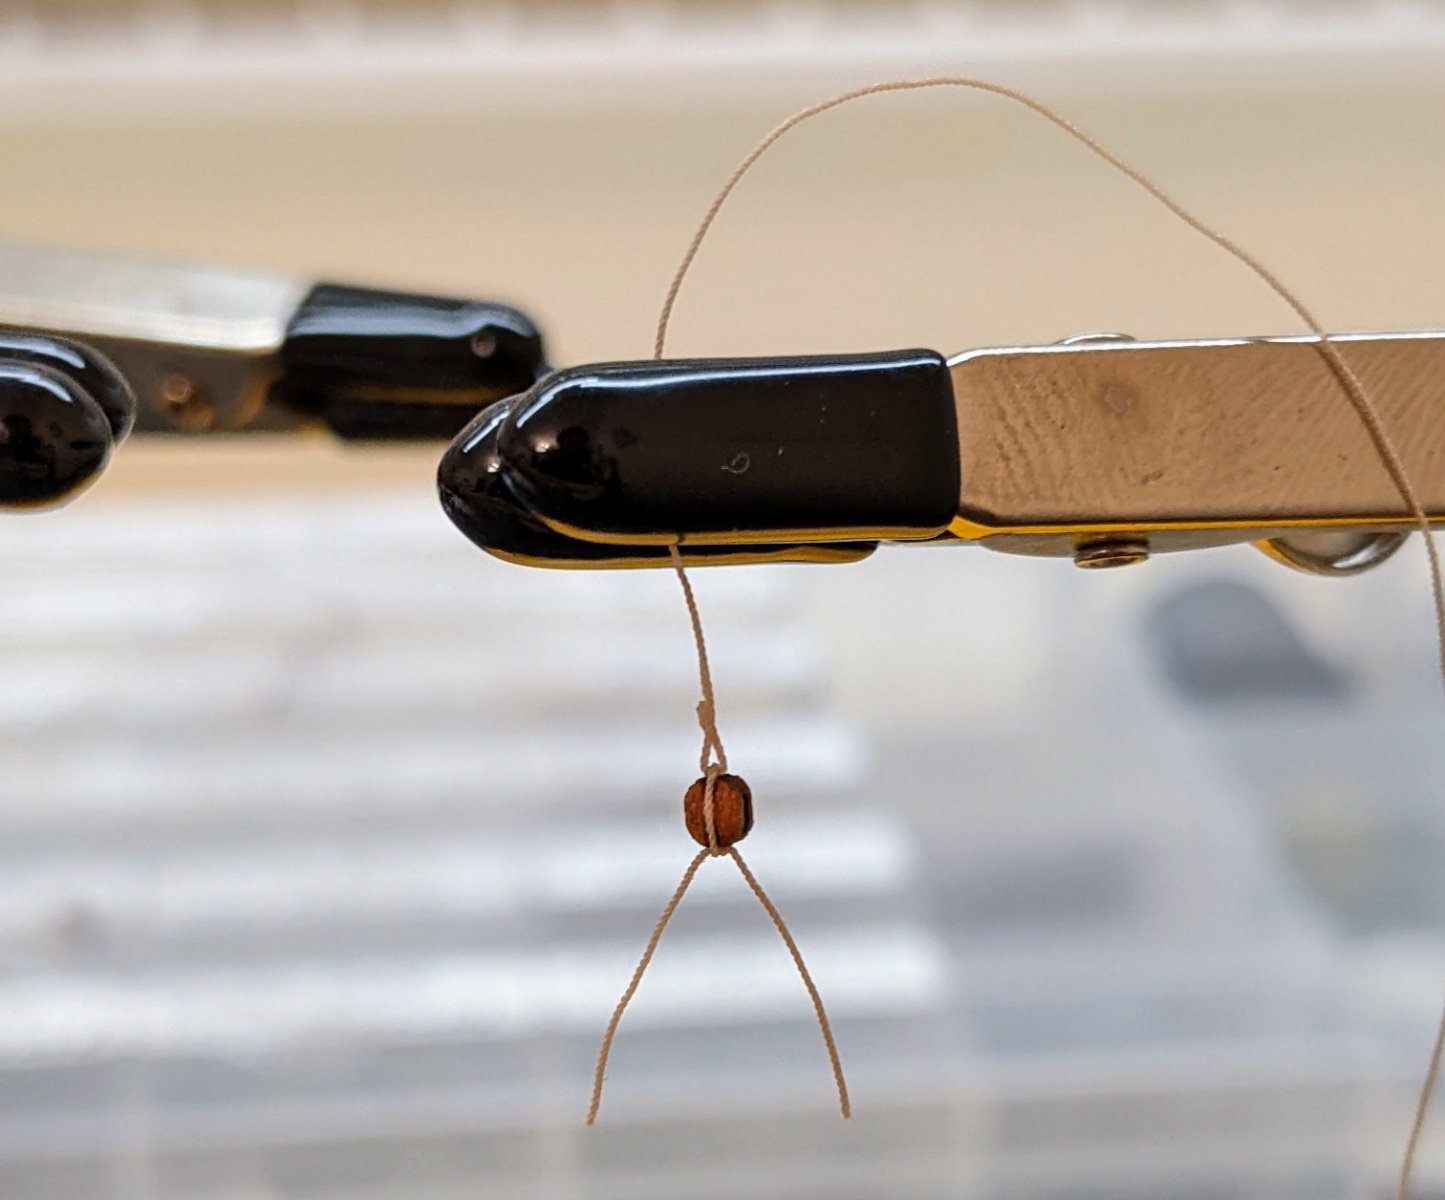
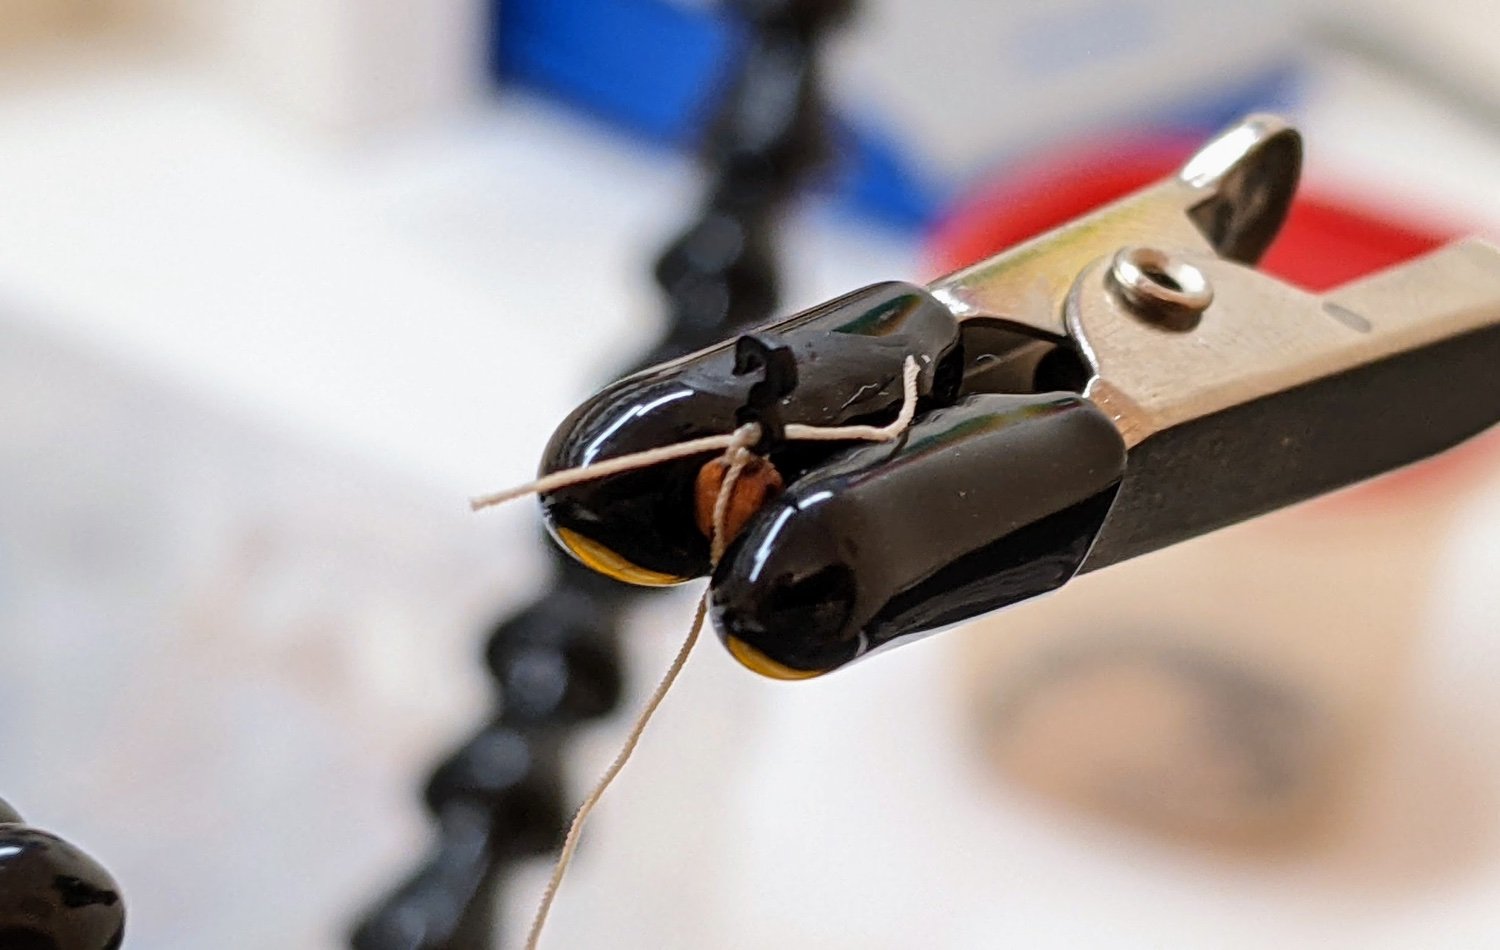
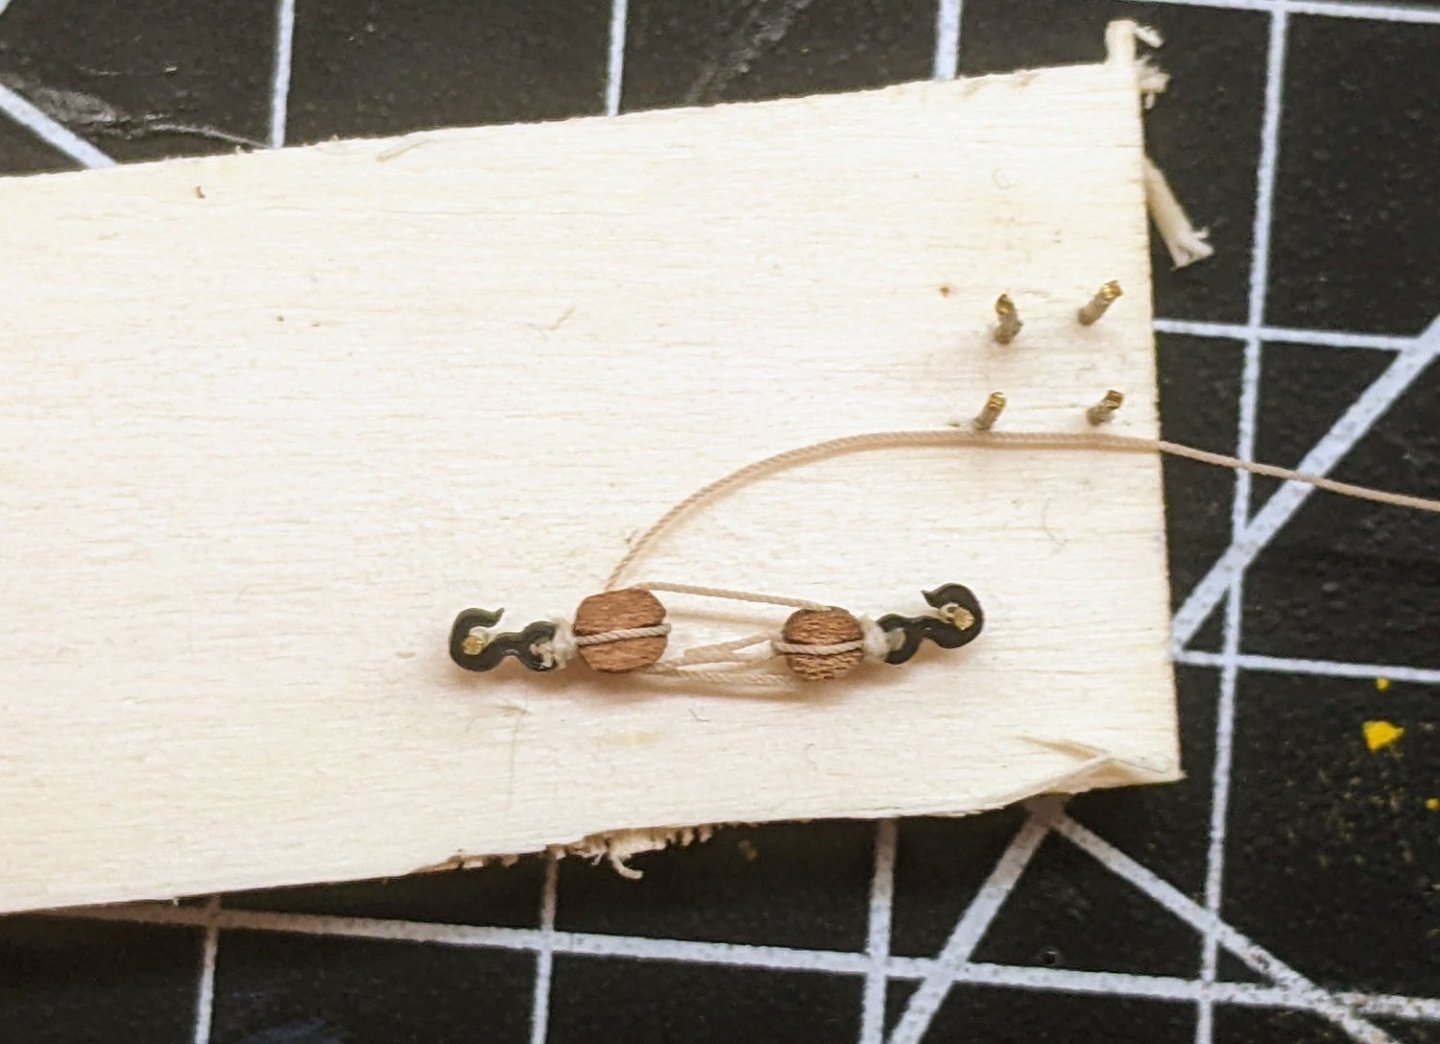
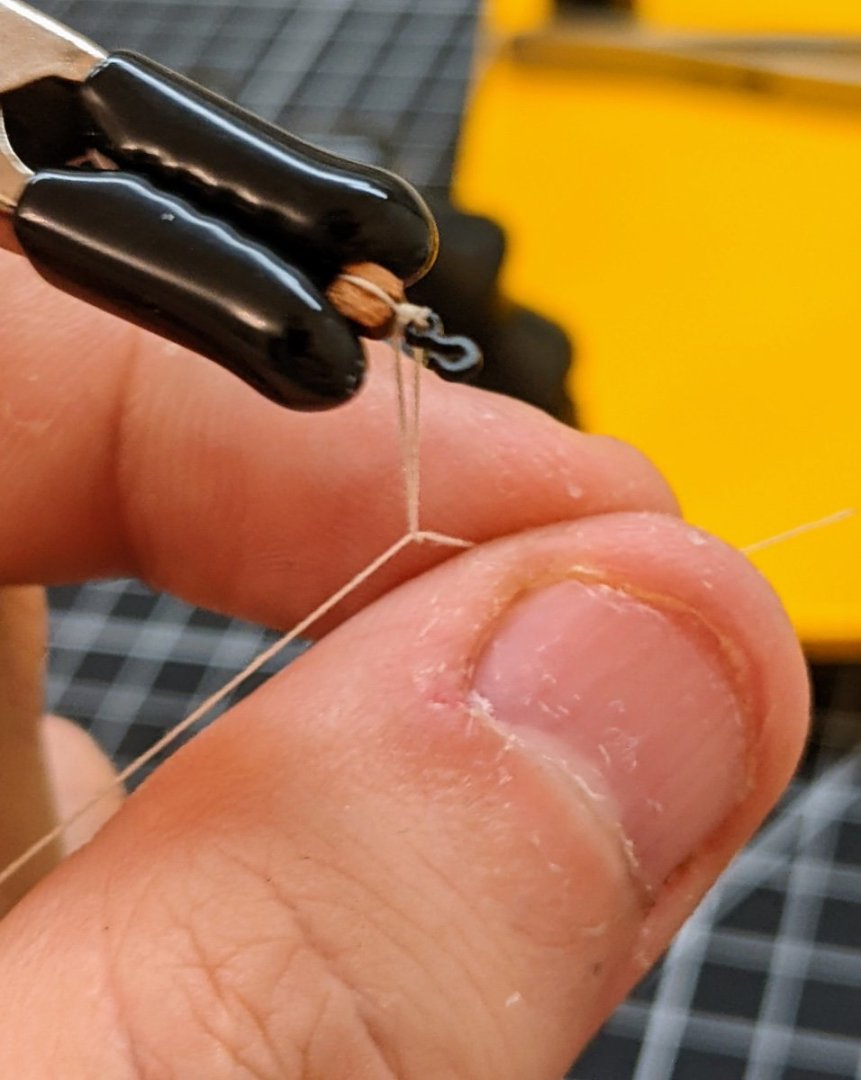
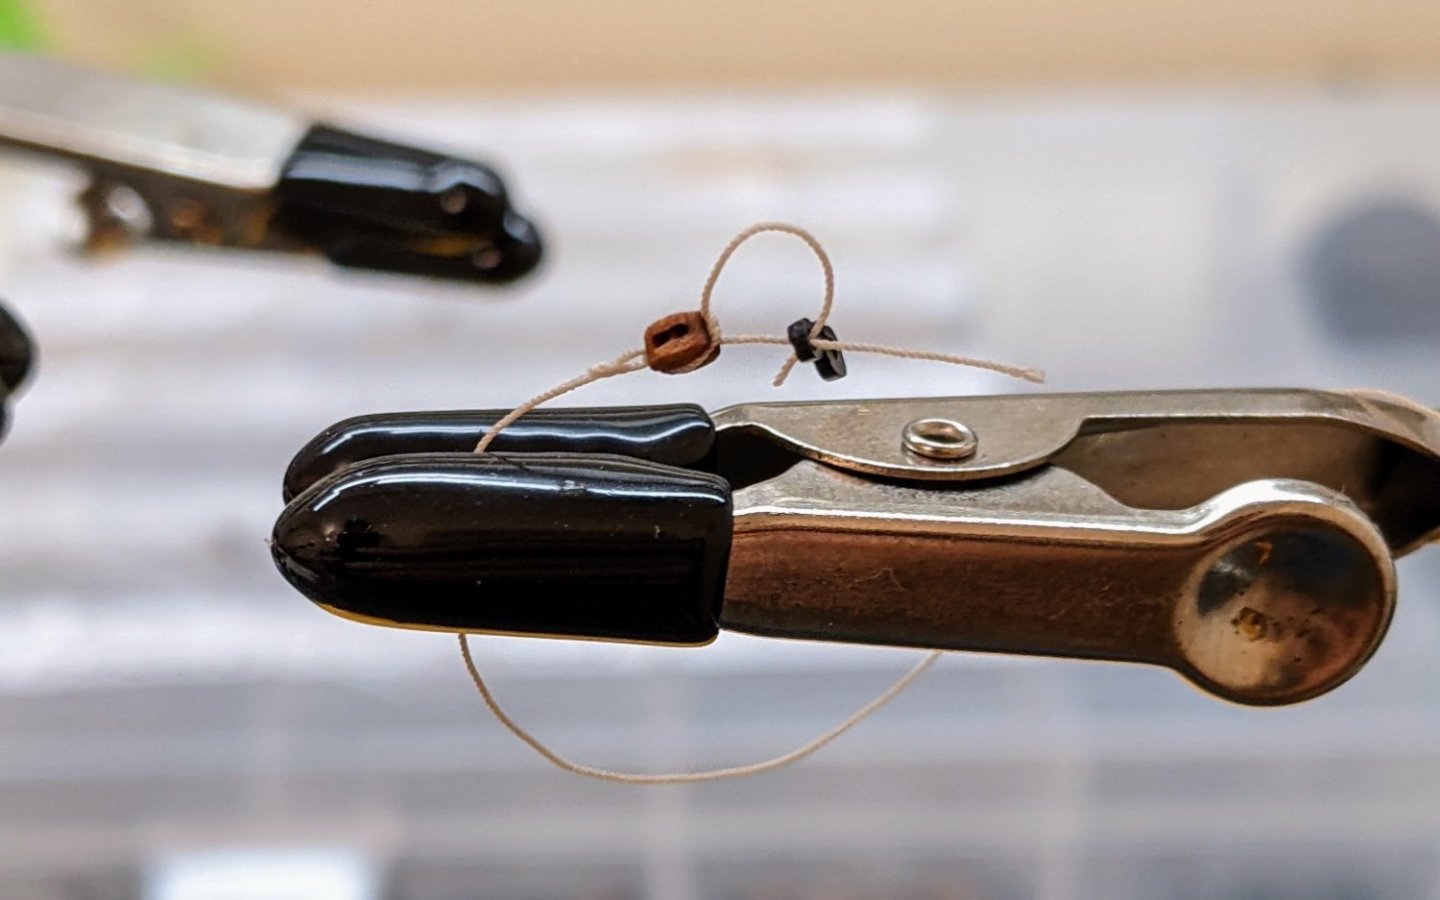
Log #46: Blocks for the Gun Tackle Continued I have finally completed tying all the gun tackle blocks. I put a fresh blade on my craft knife and carefully cut off the loose ends. You may notice that I am using a combination of one double and one single block for the gun tackle. I had planned to discuss this in this log entry, but as it was pretty much covered over the last few post I suggest reading through those if you are interested in the reasoning. To hide the knots and give the impression that it was secured by seizing, I wrapped some thread around the gap between the block and the hook. This was accomplished by first wrapping the string around three times. I then tied a knot to hold it all in place (sorry for the slightly out of focus picture, it is hard to do this while holding the knot in such a way that you can see). Once this was tied off I added a small spot of super glue to hold everything in place. When this had all dried I cut off the ends and gave the whole area a coat of varnish to make sure it wouldn’t come loose. The process worked better for some blocks than others, but since you can hardly see these once they are on the model I am going to say it is good enough. In retrospect I think I needed a finer thread, I may look into silk thread for when I do the rigging as I have noticed some people mentioning they used it and the results do seem to look nice.


- 562 replies
-
- 8
-
-
- vanguard models
- alert
- (and 2 more)
-
That is looking pretty good. One thing you could consider is that most British ships had a drop plank right below the Wales. This would give you both a more authentic look and also more space. If you look back through my alert build log, I discussed the making of this in detail.
- 152 replies
-
- 4
-

-
-
- Vanguard Models
- Cutter
- (and 2 more)
-
I believe it is pronounced thew-kid-i-days. Though we don't actually know for sure as no-one speaks classical Greek anymore 😃.
- 290 replies
-
- 4
-
-

-
-
- Quinquereme
- Finished
- (and 1 more)
-
HMS SUSSEX by KarenM - FINISHED - 1:48
Thukydides replied to KarenM's topic in - Build logs for subjects built 1501 - 1750
This is an unbelievable build. I can't even begin to imagine ever reaching this level of craftsmanship. Well done -
I appreciate the compliment, and I don't feel that this is a distraction, it is a discussion of an issue I am currently working through and even though in this case it is ultimately too late to change course (unless I want to do all the blocks over again), I consider it all useful information for the next model. I appreciate that both you and @allanyed took the time to stop by and give this some thought. That being said, your thoughts largely mirror mine and I was going to summarize pretty much what you just said on my next log (my internal notes look very much like this post) To be fair in this case I went into this with eyes wide open, I knew the evidence was inconclusive (though if I had to guess I suspect that for something as small as a 6lb gun two singles is more likely) before I started tying any of the blocks. Part of this relates to the fact that when I started this build I had not planned on deviating much from the kit arrangement and so there are already a plethora of minor "inaccuracies" from earlier in the build. I decided that I would continue down this path (which to be honest I am not sure is actually an inaccuracy) as at least a number of people seem to thing that the double plus single could have been a thing. Ultimately the issue is that in all of these cases (Caruna included as far as I can tell, I don't own that book) there is no reference to what primary source was used to inform these specific statements. So we just have to rely on whether we trust that they have indeed the knowledge to back up these things. This doesn't mean we blindly trust them (I have found instances of what I suspect are inaccuracies in another AOTS book I have been looking at for a potential future build), but in some cases if there is not a lot of primary evidence it is hard to know what is the correct answer. Edit: if anyone is interested in the original discussion I referenced that was had a while back you can find it towards the end of this thread:
- 562 replies
-
- 7
-
-
- vanguard models
- alert
- (and 2 more)
-
Outstanding and very unique build. You have done a great job.
- 290 replies
-
- 4
-
-
-
- Quinquereme
- Finished
- (and 1 more)
-
I was planning to discuss this in my upcoming post when I start rigging the gun tackle. Basically there was a post I made a long time ago asking about this and the results were inconclusive. Goodwin depicts the double blocks in the aots book on alert, but as you pointed out caruna seems to contradict this. Lavery also mentions the blocks, but only makes vague statements. On the balance is suspect single blocks were likely used, but as I had already acquired the double blocks, I decided to go with Goodwin. Also I like the look of the double blocks a bit better and since this build is a bit of a compromise between accuracy and aesthetic (for example the decorations I painted are highly unlikely to have been on the actual ship), I figured it wasn't too big of a sin.
- 562 replies
-
- 8
-
-
- vanguard models
- alert
- (and 2 more)
-
It is looking really good. You can really see the depth in it which gives it a very realistic feel.
- 290 replies
-
- 5
-
-
-
- Quinquereme
- Finished
- (and 1 more)
-
Yes I have had this problem with resin before. It is particularly problematic when you have a small space and can actually give the impression of the water "rising" in that spot. The more edges the resin has to "grab on to" the higher it will rise. You can mitigate this somewhat by pouring in multiple thin layers, but that has its own set of problems.
- 290 replies
-
- 4
-
-
-
- Quinquereme
- Finished
- (and 1 more)
-
Tying ropes to endless tiny blocks is maybe not my favorite activity, but it is part of the process. I have always enjoyed making the prototype version more than mass production. This is particularly true in that the best way to produce a consistent result once you have your process down is to do each step in sequence to a whole bunch of blocks at once (cut all the gun tackle ropes then cut all the ropes for wrapping round the block, then do the loops for all the gun tackle ropes etc...). This can get a bit boring as you don't actually produce anything until you get the entire batch done. However I find this also keeps me motivated as I don't want to get up from the desk until the whole batch is finished. If I did them each one at a time I am tempted to stop after doing 2 or 3 and I also produce them much more slowly. So I just throw a podcast on in the background and pick away it. I suspect I can probably get the rest of the blocks done in two more sessions (2 sets of 10). Then I can move on to the more interesting part of the gun tackle.
- 562 replies
-
- 7
-
-
- vanguard models
- alert
- (and 2 more)
-
That is the beaty of painting larger wooden surfaces. You can even go part way and just sand a bit to get it smooth and then add another coat. Lots of thin coats is the way to go. It takes longer, but will look much nicer.
- 122 replies
-
- 1
-
-
- Artesania Latina
- Pen Duick
- (and 1 more)
-
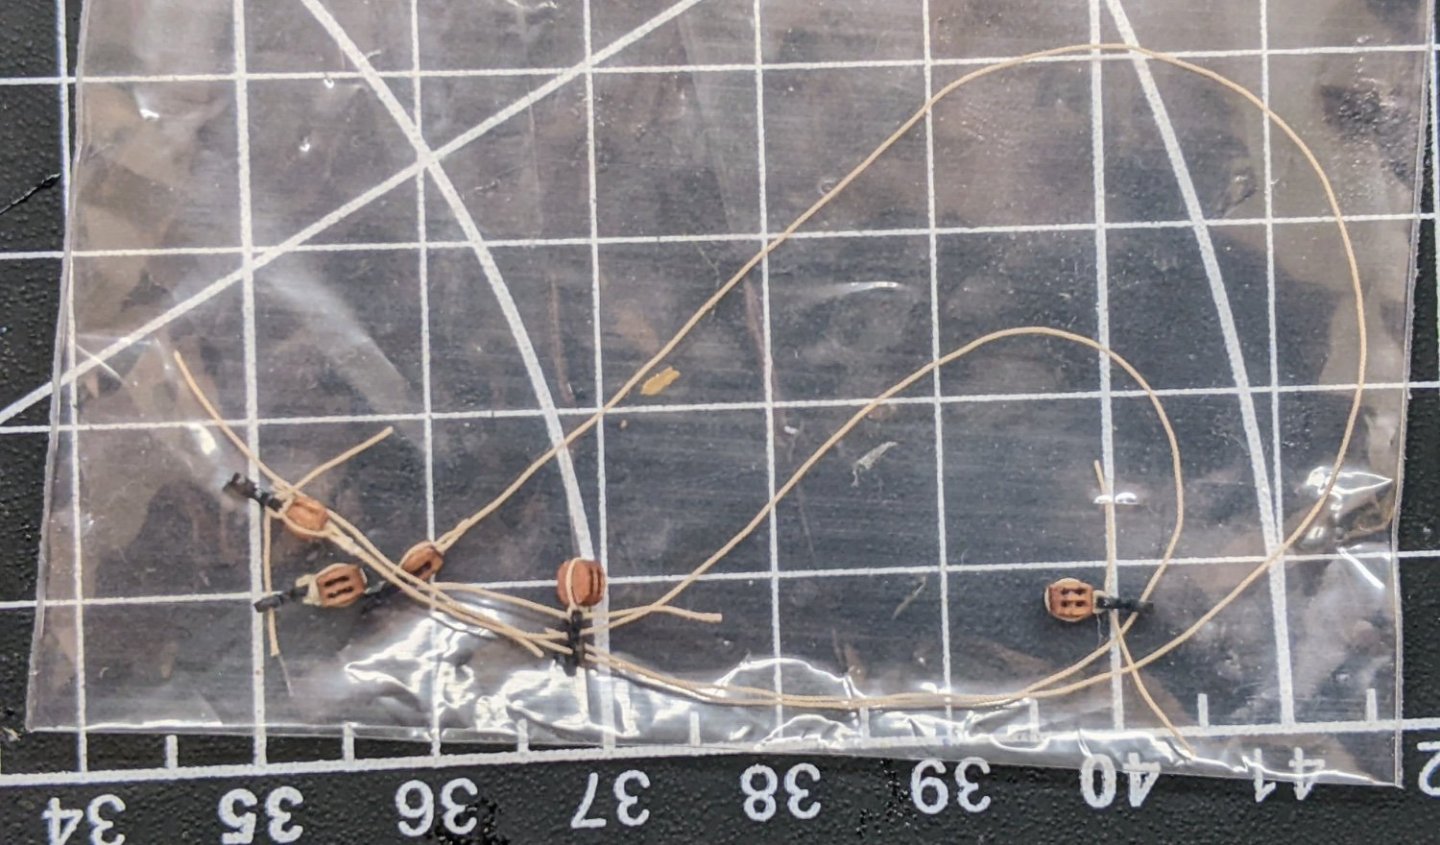
I have been slowly picking away at the blocks and now have all the single blocks with the gun tackle ropes attached to them done. Now just 20 more double blocks to be done. They should take less time as I am much faster at doing these than when I started and not having to attach the rope does speed things up a bit.
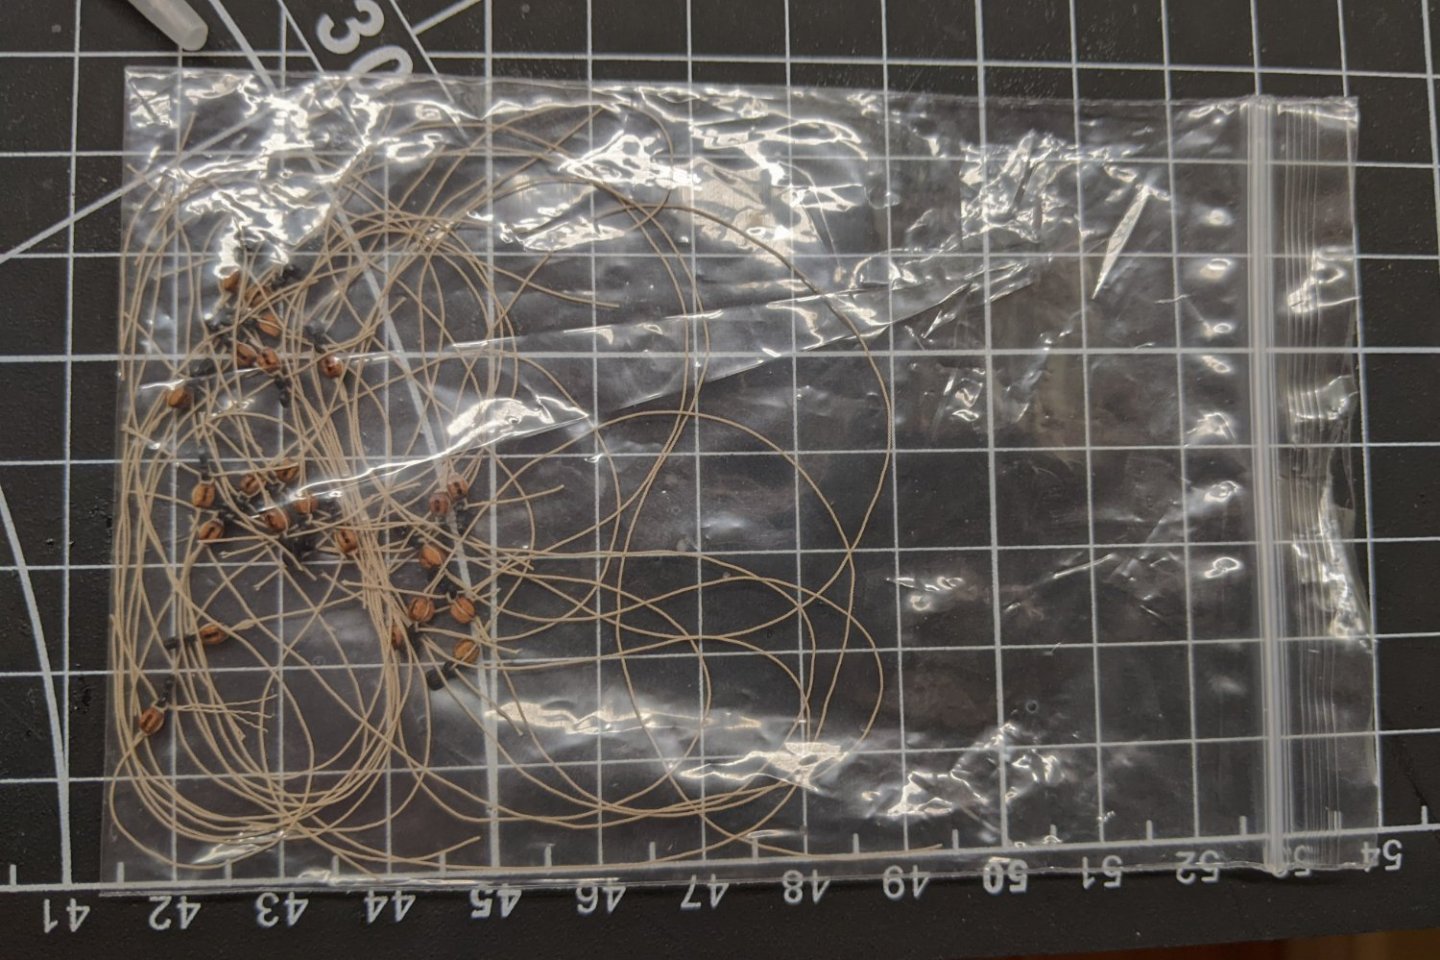
- 562 replies
-
- 10
-
-
-
- vanguard models
- alert
- (and 2 more)
-
Do you mean taper the planks? If so i just used an exacto knife. If you look at glenn’s build log he likely detailed the process. If not you can take a look at my build log. Not the same kit, but also a cutter and the process is pretty much the same.
- 19 replies
-
- 1
-
-
- Lady Nelson
- Amati
- (and 2 more)
-
Welcome to MSW. As for a recommendation, I am enjoying alert (first time builder), it is a great model and there are lots of build logs to follow along with.
-
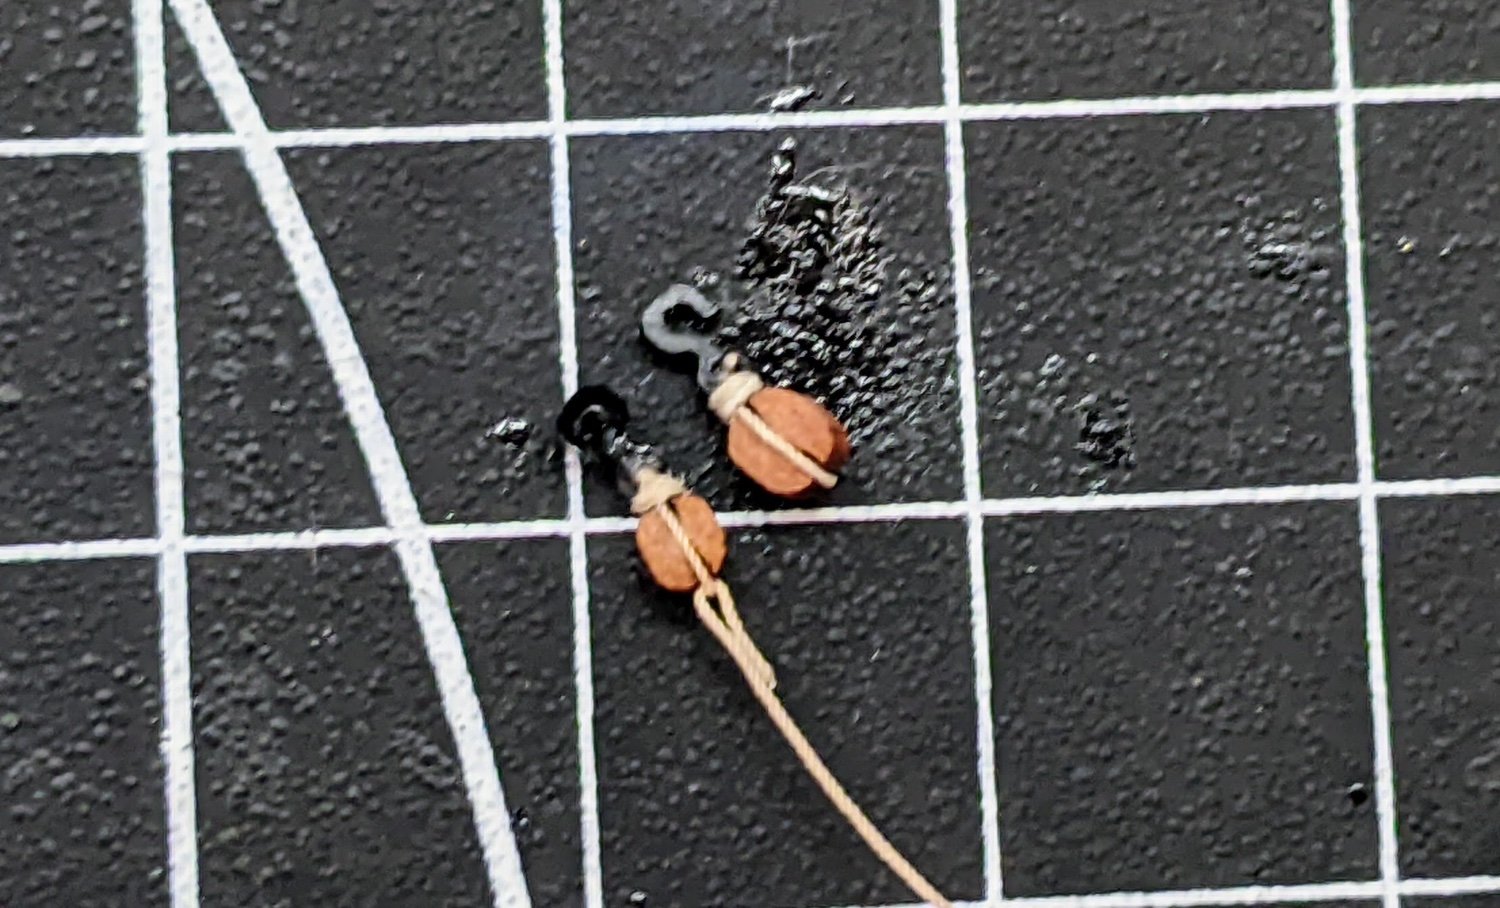
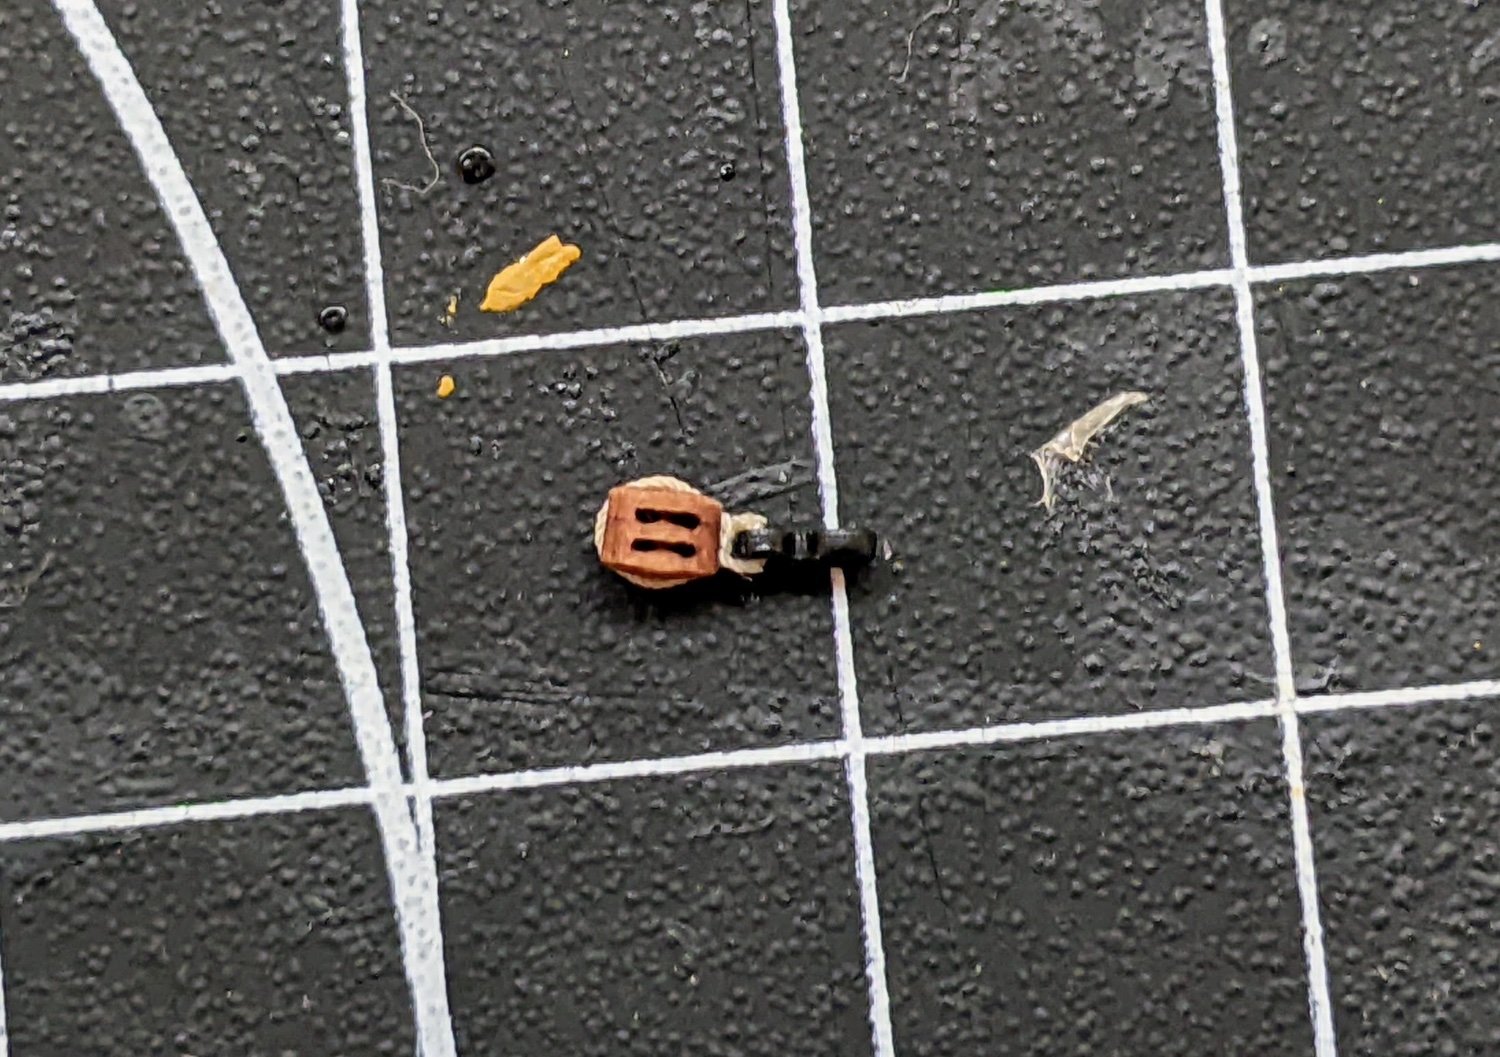
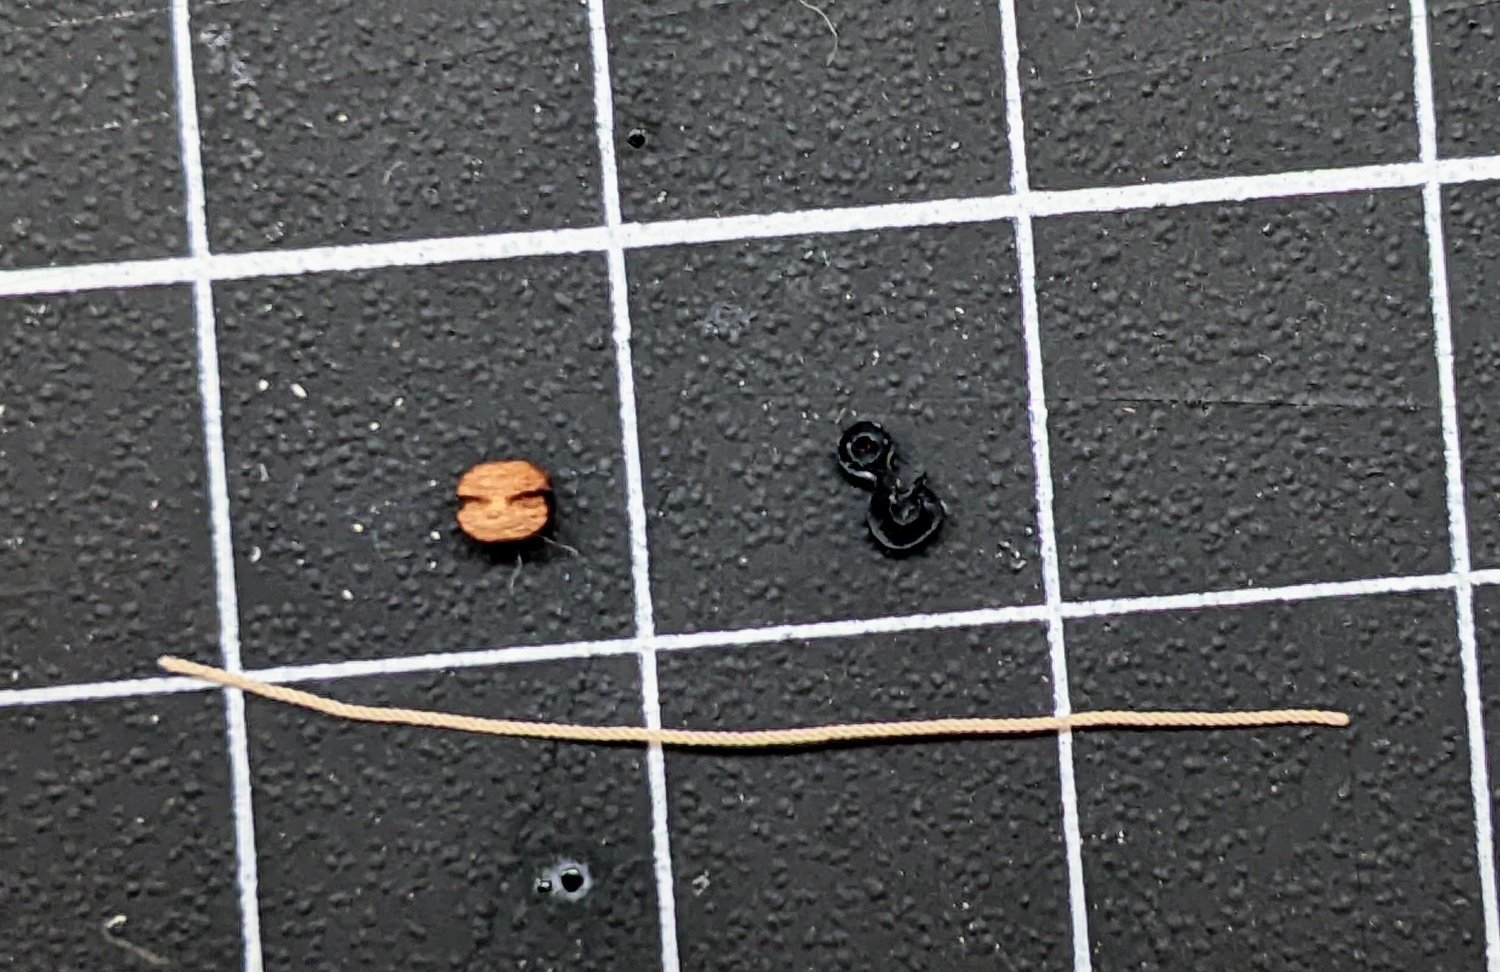
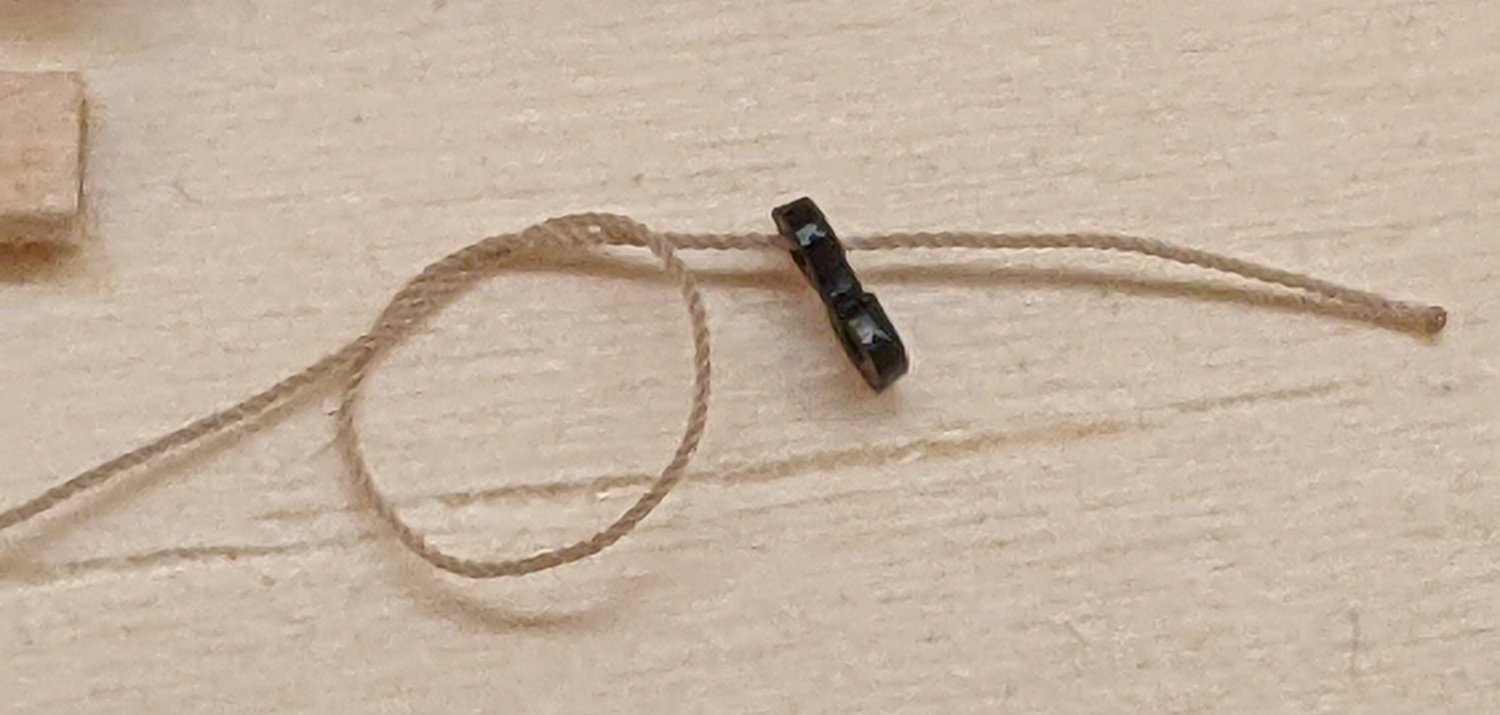
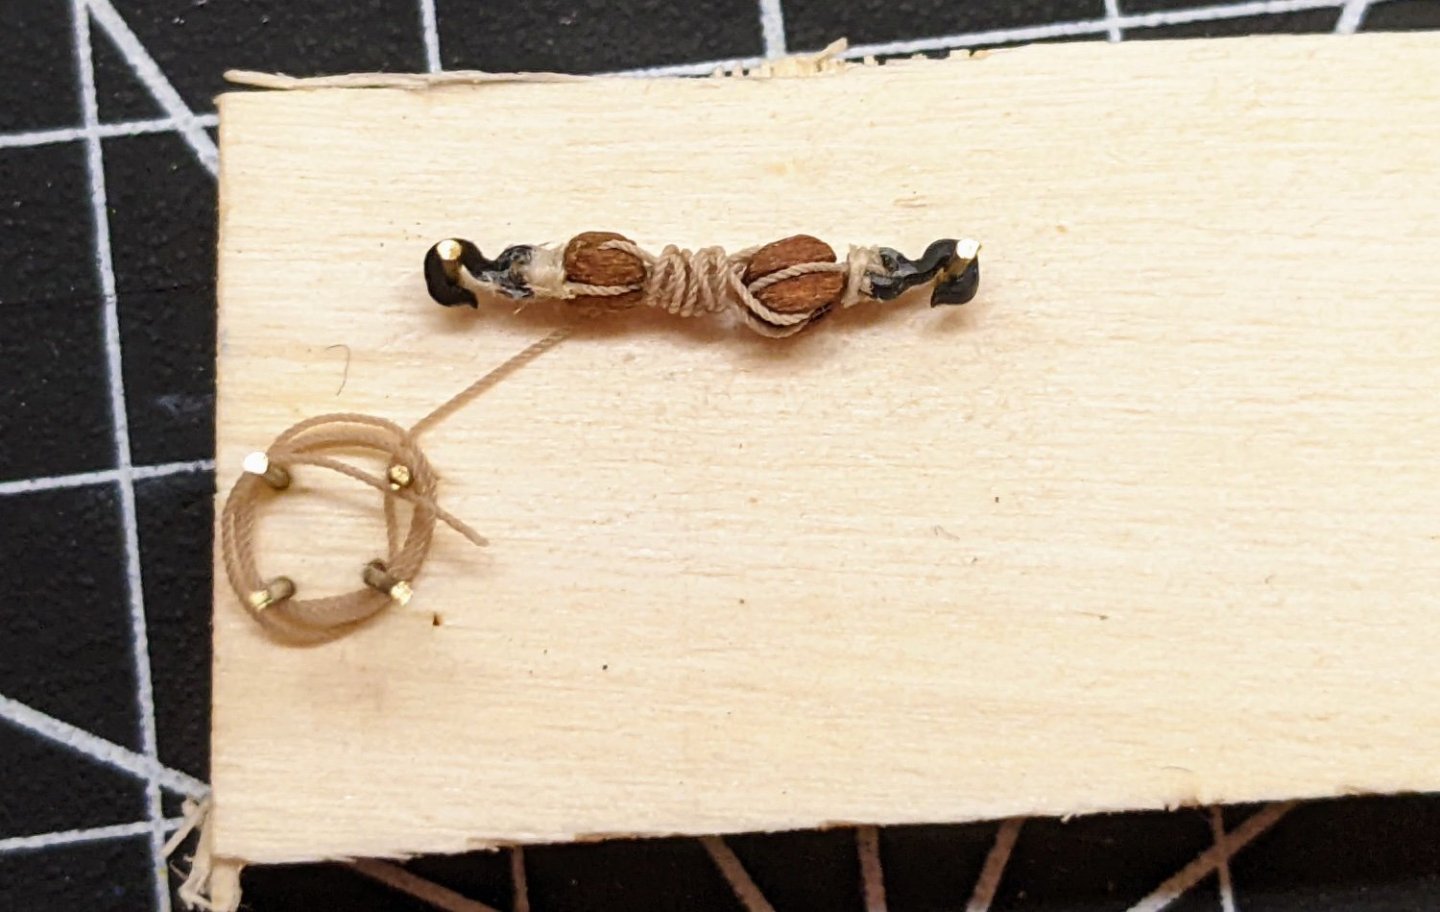
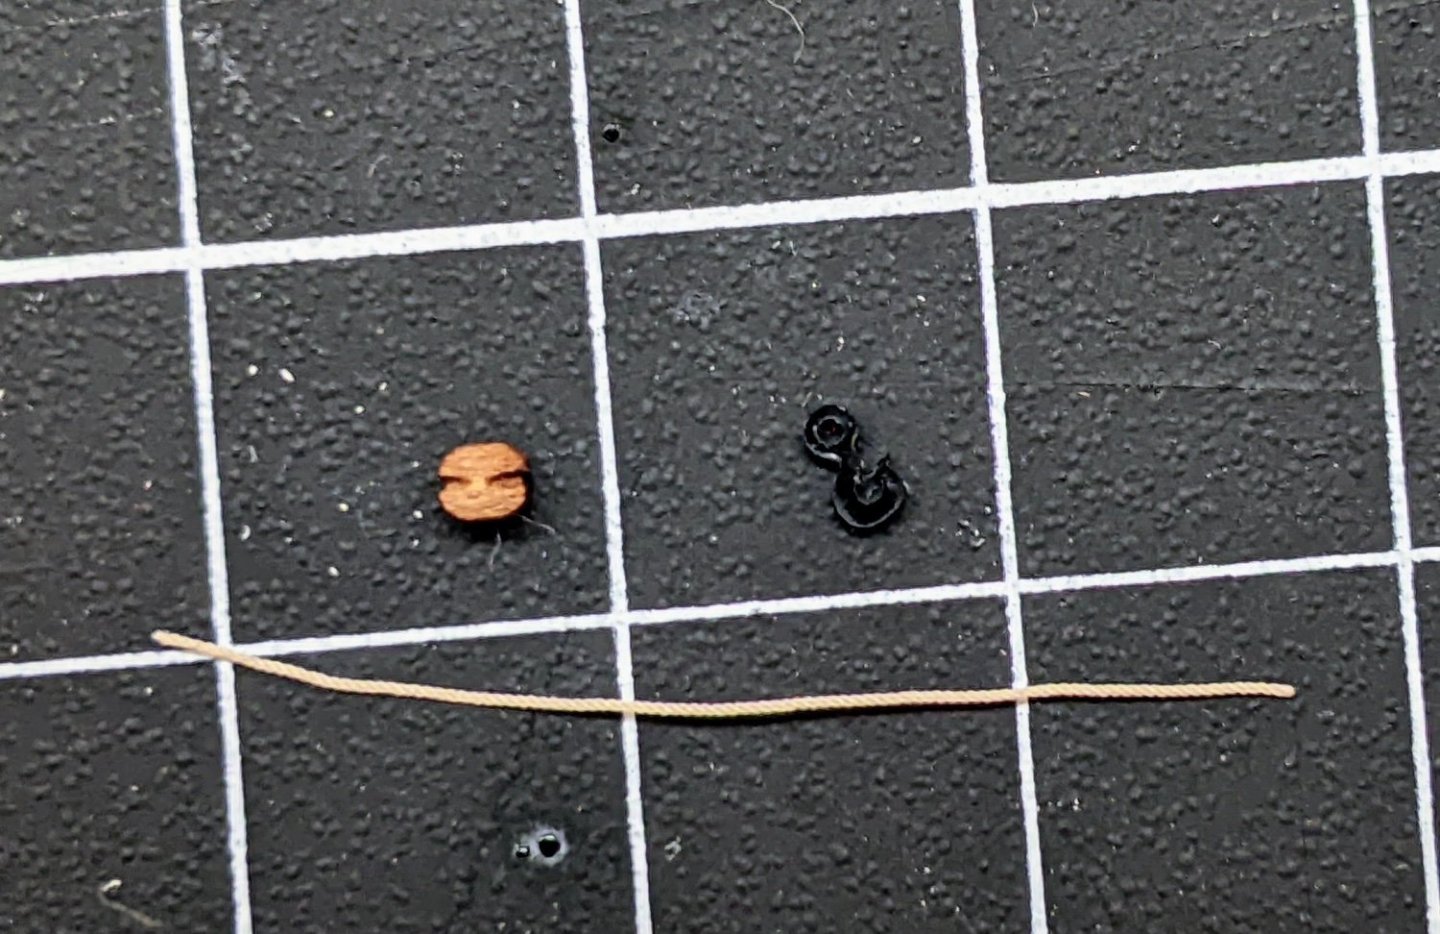
Log #45: Blocks for the Gun Tackle Thanks to everyone who has stopped by. I am beginning to understand why some people hate rigging the guns. Even for a ship as small as Alert I need to prep 48 very tiny blocks :). That being said I really do prefer the look of cannons that have been rigged and so having done a few test version, I have moved into mass production. Step 1 is to get the block, hook and cut off a 30mm piece of 0.25mm rope. I experimented a bit and found that any less than 30mm made life very hard. I then made a small knot in the rope (this picture is an older one, I forgot to take a picture of this step). I found doing the knot and then pulling it tight around the block was easier than trying to do the knot afterwards. I then pulled the knot mostly closed, but left a small gap. Into this I inserted the end of the gun tackle. A small dot of super glue was added with a sewing pin and then I pulled the knot tight. Once this dried I used some matt varnish and secured the end of the gun tackle to itself. I did not attempt to do more than a cursory imitation of a splice as this will all be hidden once the tackle is on the model. Then with the line secure I flipped the block over and slipped the hook onto one of the two ends of the rope running around the block. At this time I also used a small dot of super glue to secure the knot on the top of the block. Then using tweezers I inserted the other end of the rope into the hook from the opposite side. Once it was through the hook I looped it through the gap at the bottom to make another knot. Another small dot of super glue was applied to the inside of the hook and the knot was bulled tight. Once dry I also covered all the knots with varnish both to hide the super glue shine and also to make sure that everything was secure. Then into the bag with the other finished blocks. Half of them have the gun tackle attached and the other half do not. The process for those that don’t is pretty much the same, just the first few steps are a bit easier. I still need to cut off the ends and add a little bit of seizing, but I don’t like doing this until I am sure everything is fully dry so I will wait till I have them all done before doing this step. Seven done, fourty-one to go.


- 562 replies
-
- 18
-
-
- vanguard models
- alert
- (and 2 more)
-
Looks fantastic. I agree a bit more colour variation may help. Try to make things a bit wavy. Water distorts light. Also consider making the transition less of a straight line. Notice how in your reference photo some of the lighter bits extend deeper into the water. If you want to further break things up you could add a rock or two sticking up just off the shore. Again see your reference photo for inspiration. I like what you did with the rocks. I think they look just right now. Overall great job with the painting.
- 290 replies
-
- 5
-
-
-
- Quinquereme
- Finished
- (and 1 more)
-
Wow this is fantastic, I would have never have guessed this was card from the photos. Fantastic job!
-
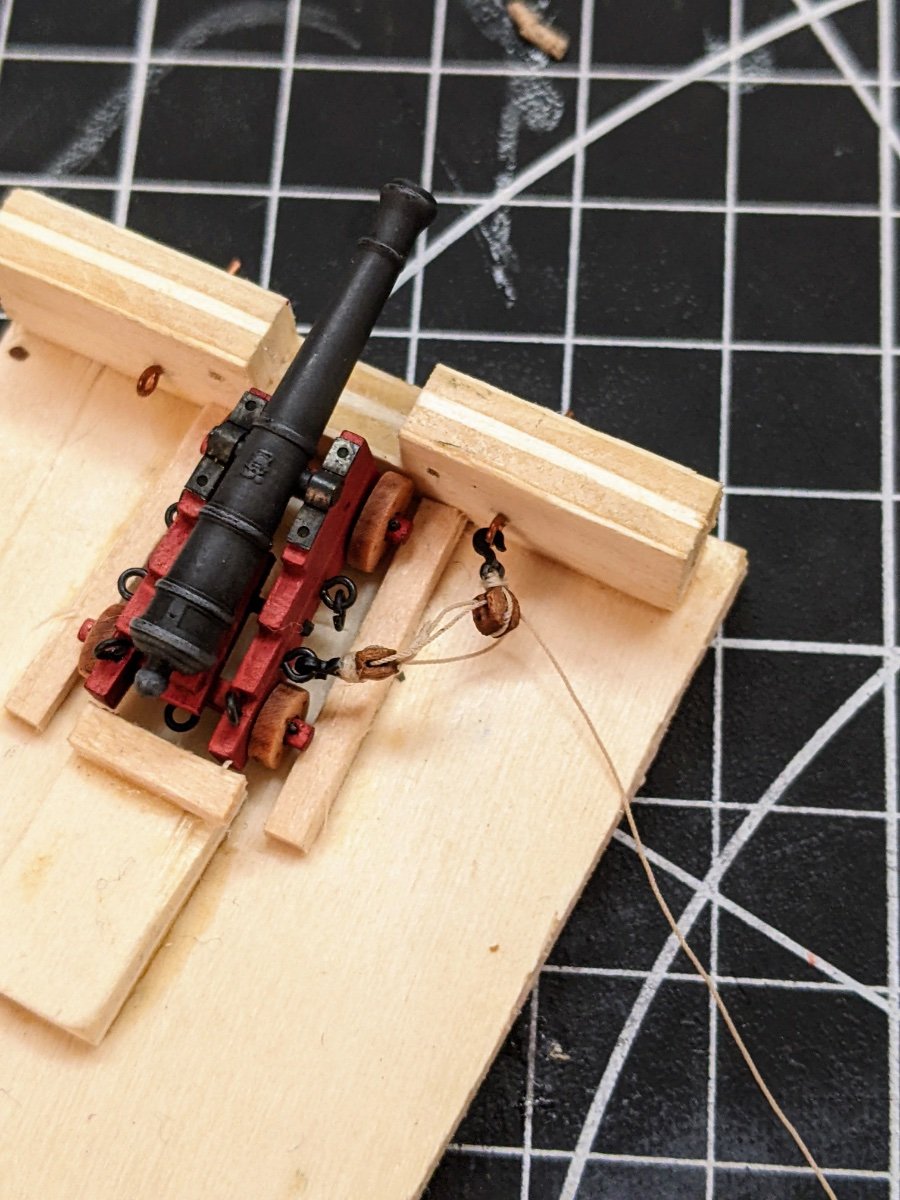
Time for another minor update. I am making faster progress than I thought and have all the breaching ropes done. I then attached all the deck fittings as the gun tackle will be done on a jig and then just hooked in so I am not as worried about things getting in the way.

- 562 replies
-
- 21
-
-
-
-
- vanguard models
- alert
- (and 2 more)