Thukydides
-
Posts
1,363 -
Joined
-
Last visited
Content Type
Profiles
Forums
Gallery
Events
Everything posted by Thukydides
-
 Yes I have found that very small amounts of CA seem to hold it well. Also I am happy to take these problems to avoid the issue of fuzz. I always worry about using thin CA as I have trouble controlling it. Also I would worry it would make the rope too brittle.
- 562 replies
-
- 2
-

-
- vanguard models
- alert
- (and 2 more)
-
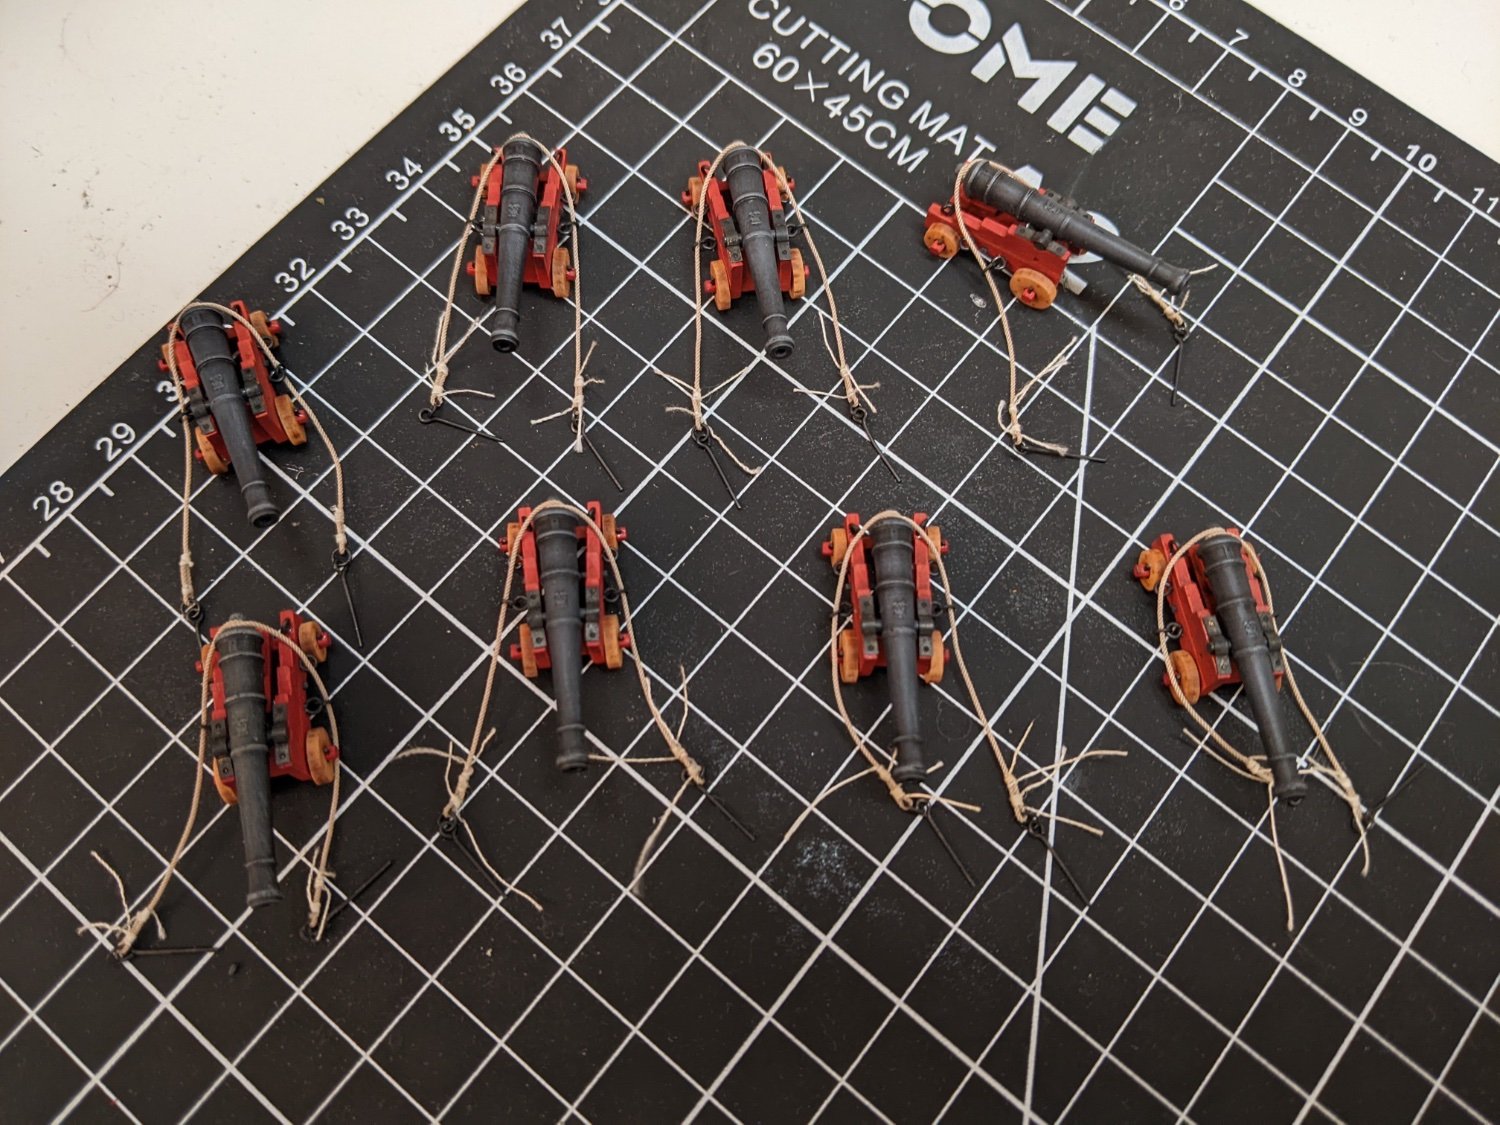
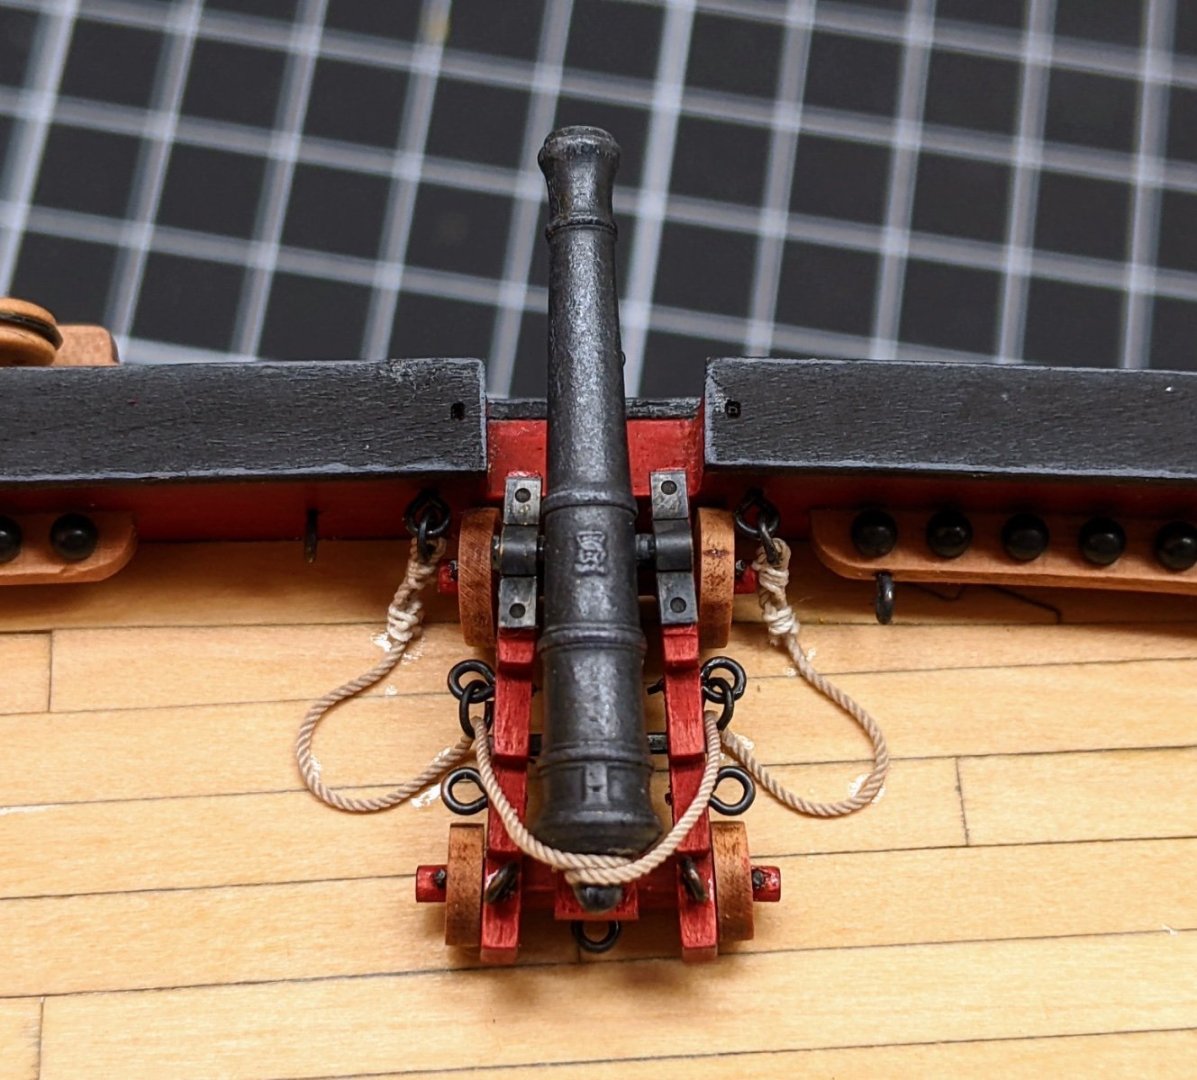
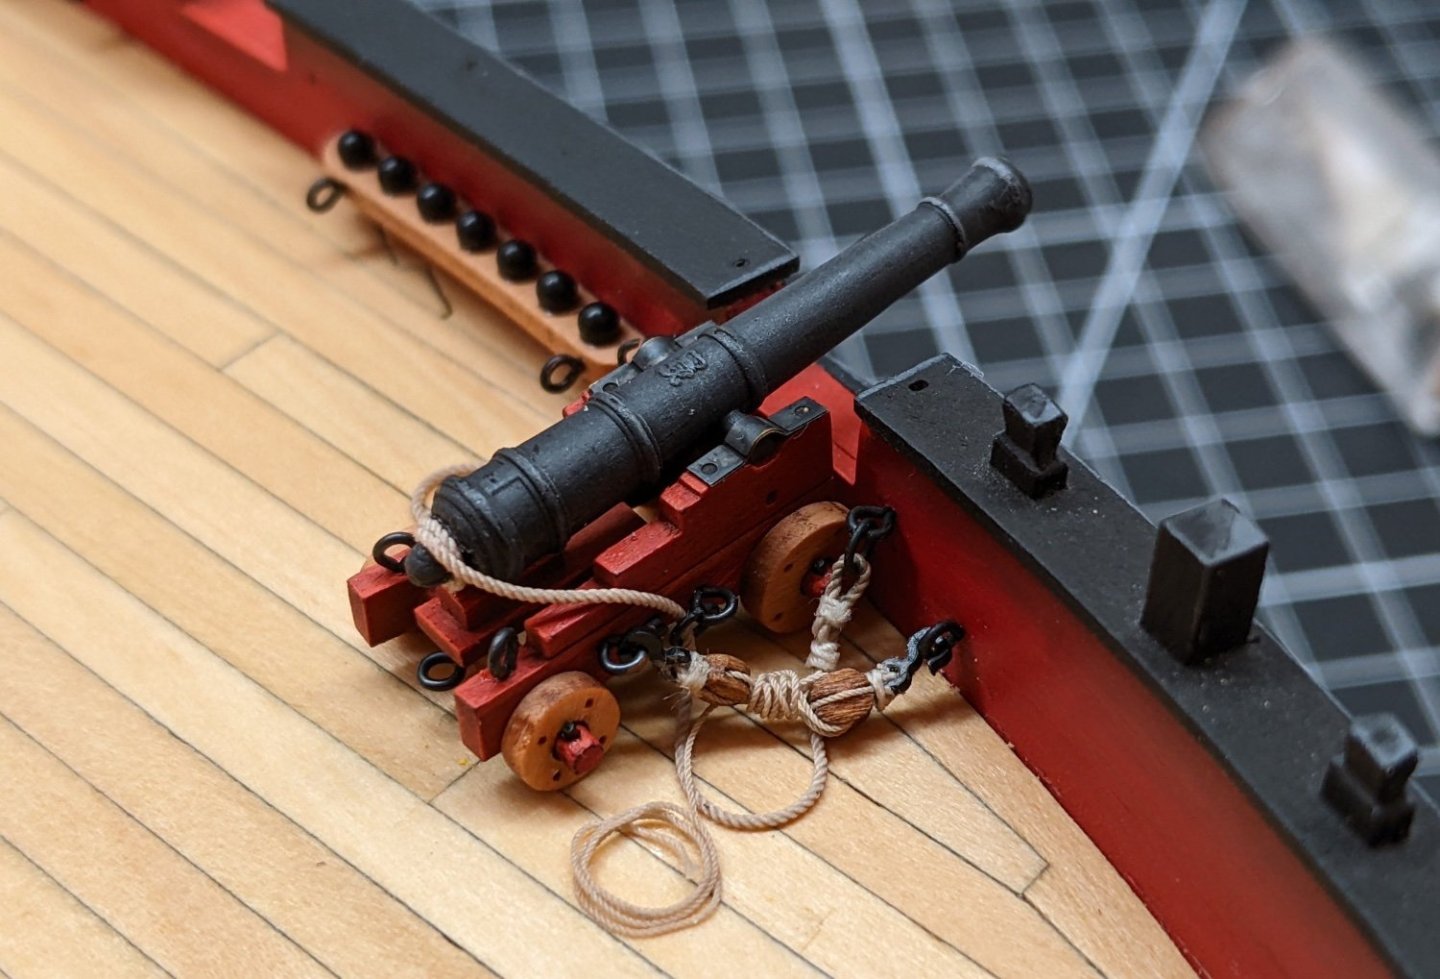
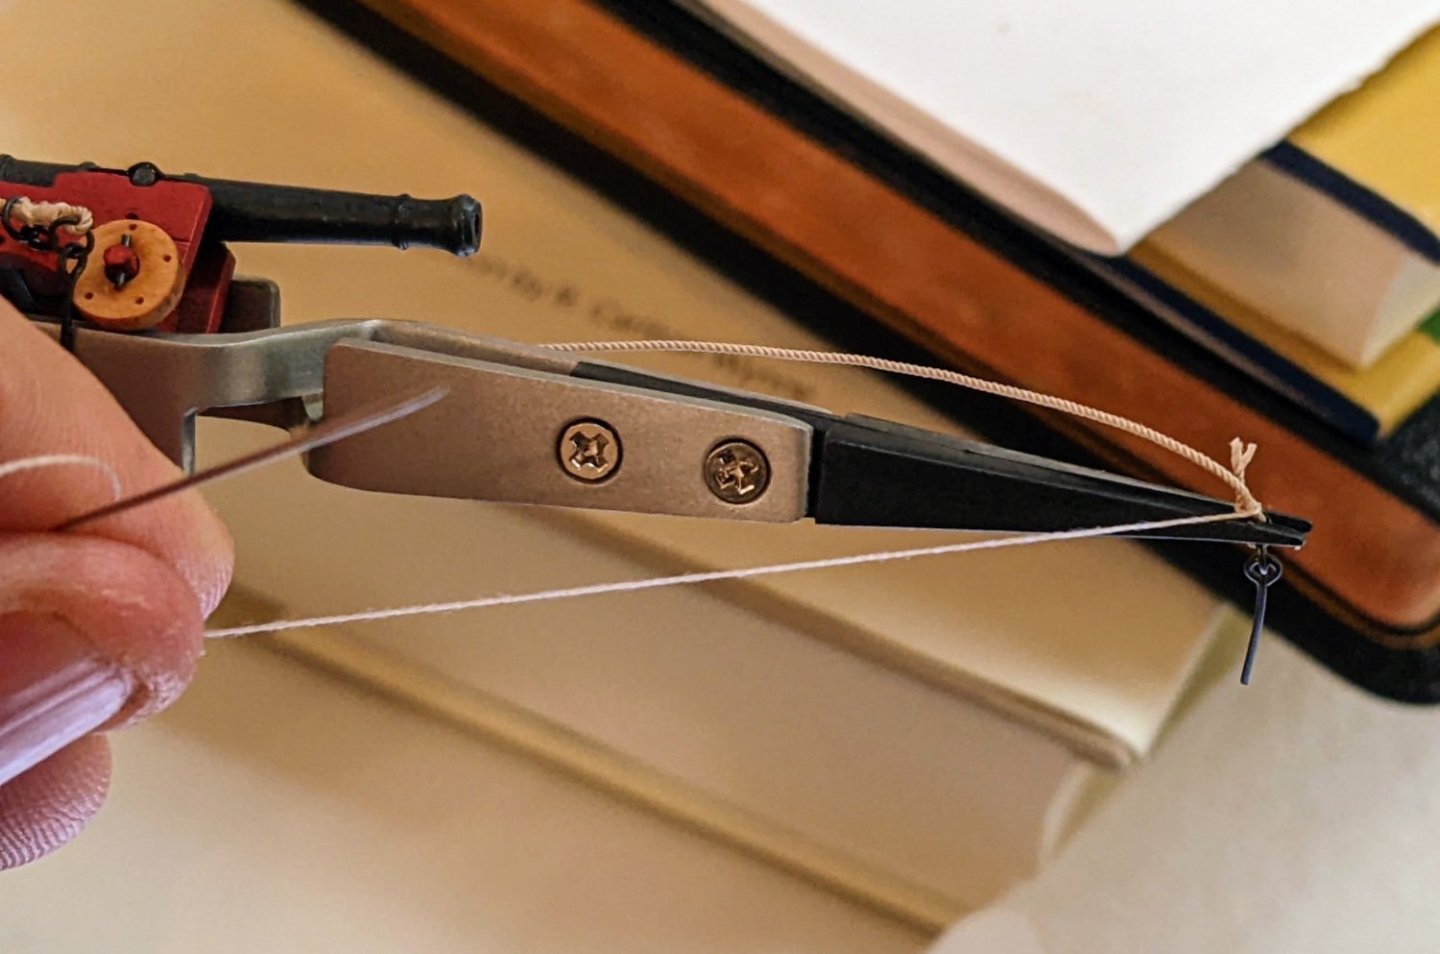
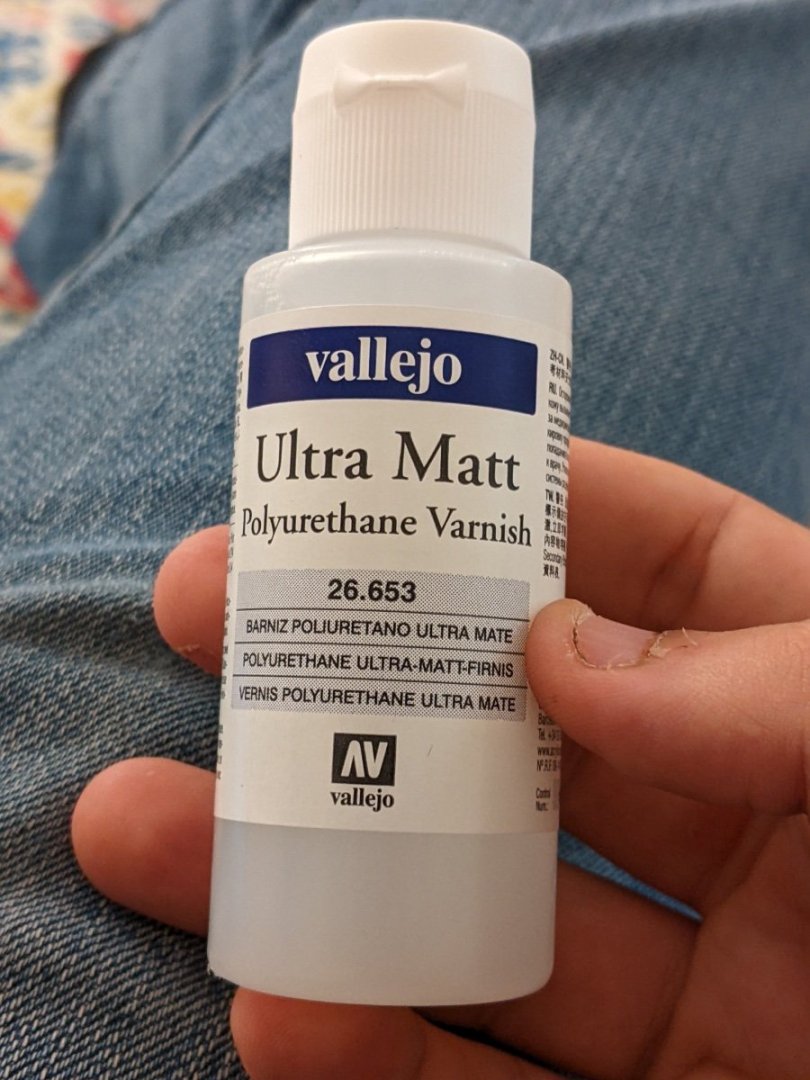
Log #44: Hiding the Super Glue Spots I managed to get a bunch of work done on the model today and so I figured I do another short update expanding on how I went about making the breaching ropes lie properly. The polyester rope has many of advantages, but there are two big disadvantages to it that i have found. It is very stiff and doesn’t like to be shaped unless you want to use heat (which I don’t want to bring near the model itself). It doesn’t adhere very well to white glue. The combination of these two issues mean I need a way of tacking it in place, but with a glue that adheres quickly and well. I have not been able to come up with an alternative to super glue for this. However, as you can see in the picture below, even if i am neat you can see the spots of super glue. The solution to this is to use ultra matt varnish to help cover over these shiny spots and to apply the final shape to the rope. The varnish can’t be used right from the beginning because it doesn’t adhere super well to the deck (where I applied the oil based wipe on poly) and it takes a while to dry. But you can see below the same cannon after I used the varnish to apply the final shaping to the rope and to cover over the spots. It sometimes takes several tries to get it to hide the super glue as you need to apply it in thin layers and you can’t tell if it worked till it dries. I have managed to accomplish this process for half of the guns and will hopefully finish the other half next week.

- 562 replies
-
- 11
-
-
- vanguard models
- alert
- (and 2 more)
-
It is looking really good. If I may make a small suggestion the rocks probably need some sea scum too. It looks a bit odd them being so clean and the base of the wall so dirty. It is probably fine, but in the future you might want to make sure you treat anything you get from outside before you add it to a model. I have used many outdoor items as basing materials, but I have known people to have mould start growing on their models which is not ideal. I tend to bake outdoor items in the oven for a couple hours to make sure I kill anything that came in with the stones.
- 290 replies
-
- 7
-
-

-
- Quinquereme
- Finished
- (and 1 more)
-
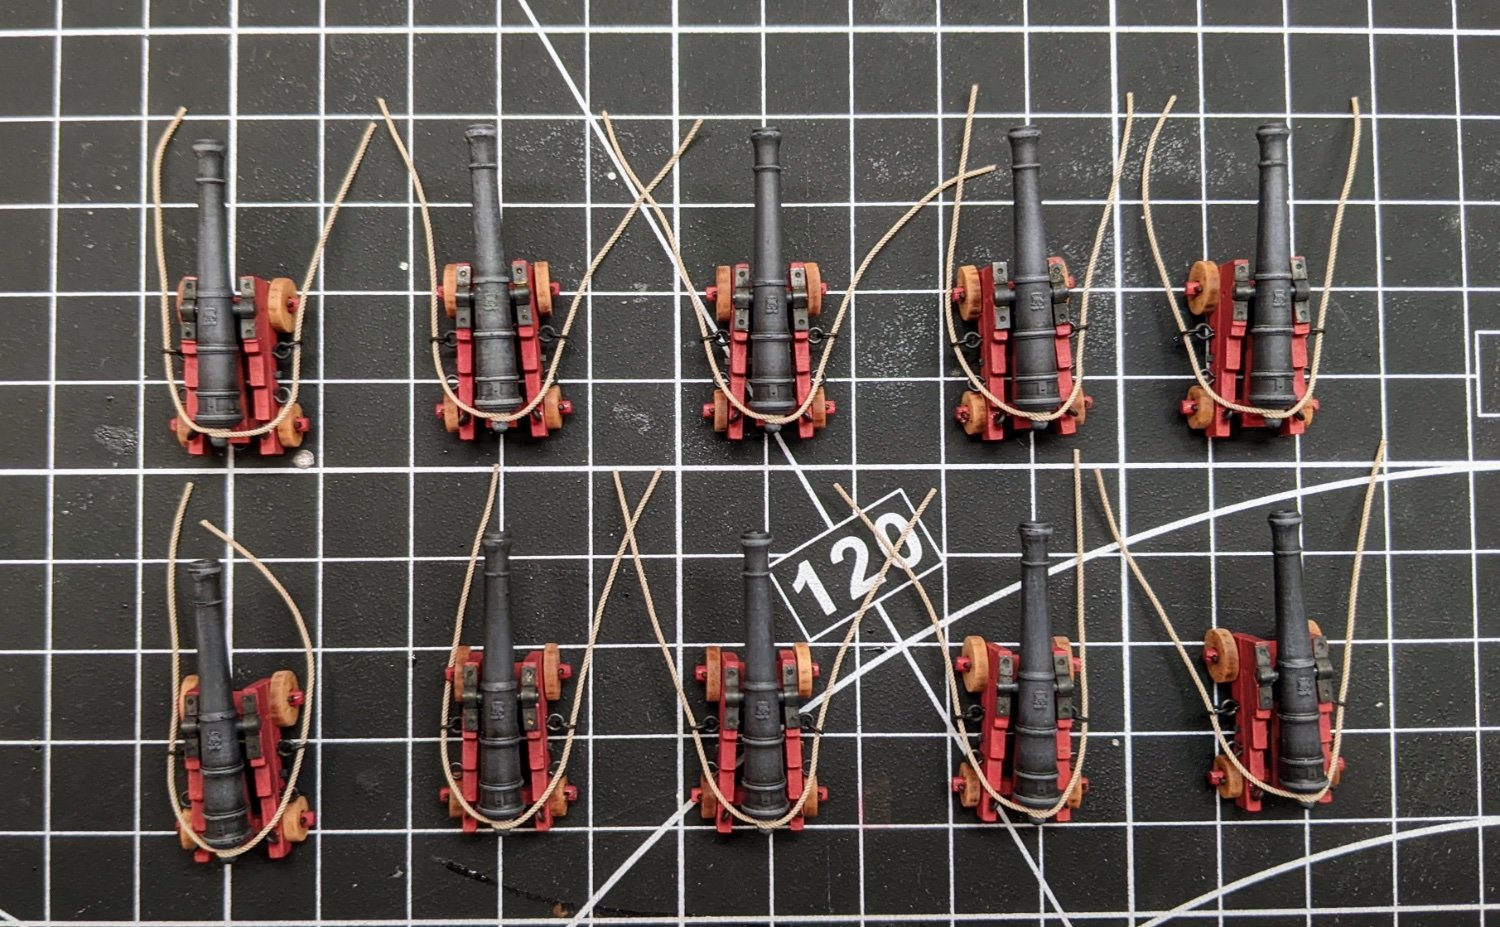
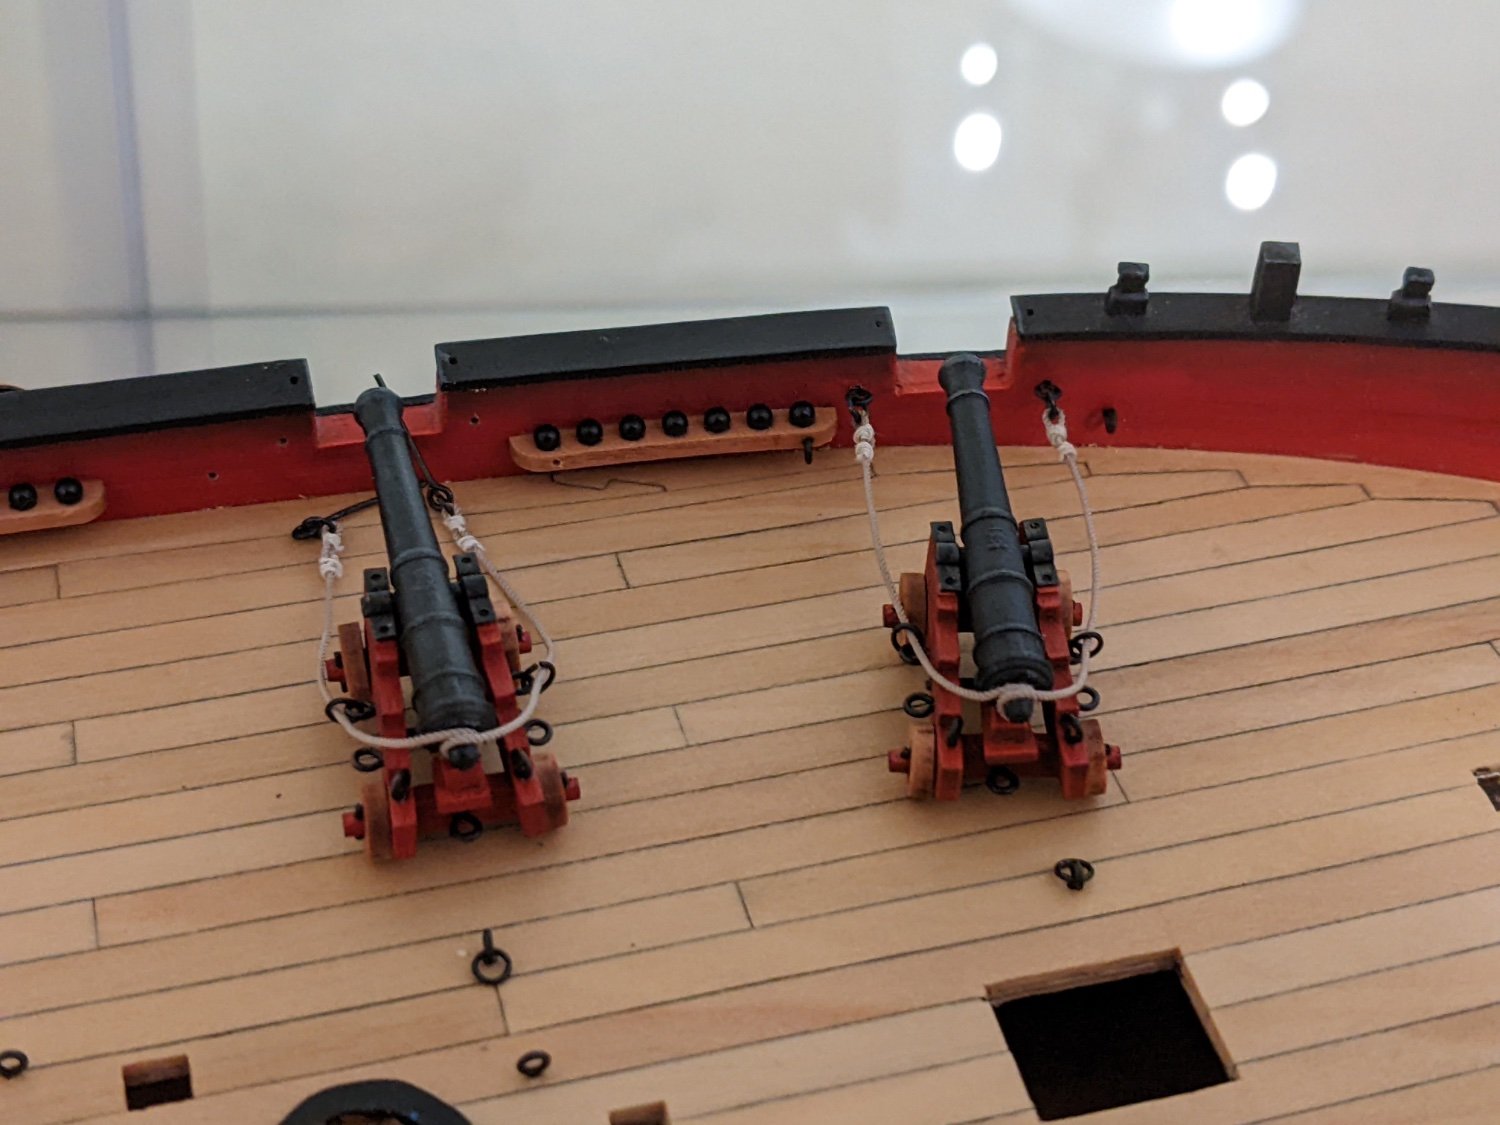
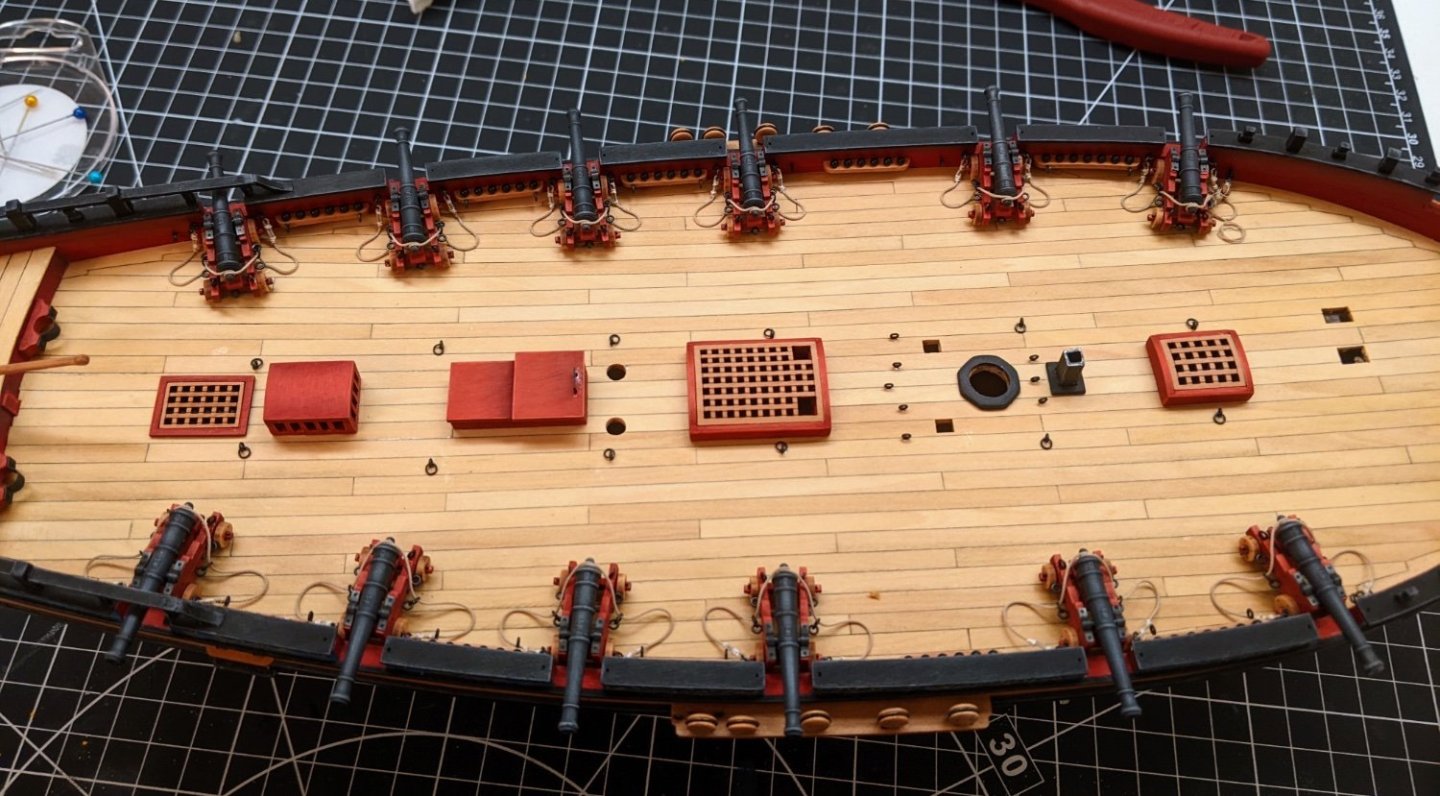
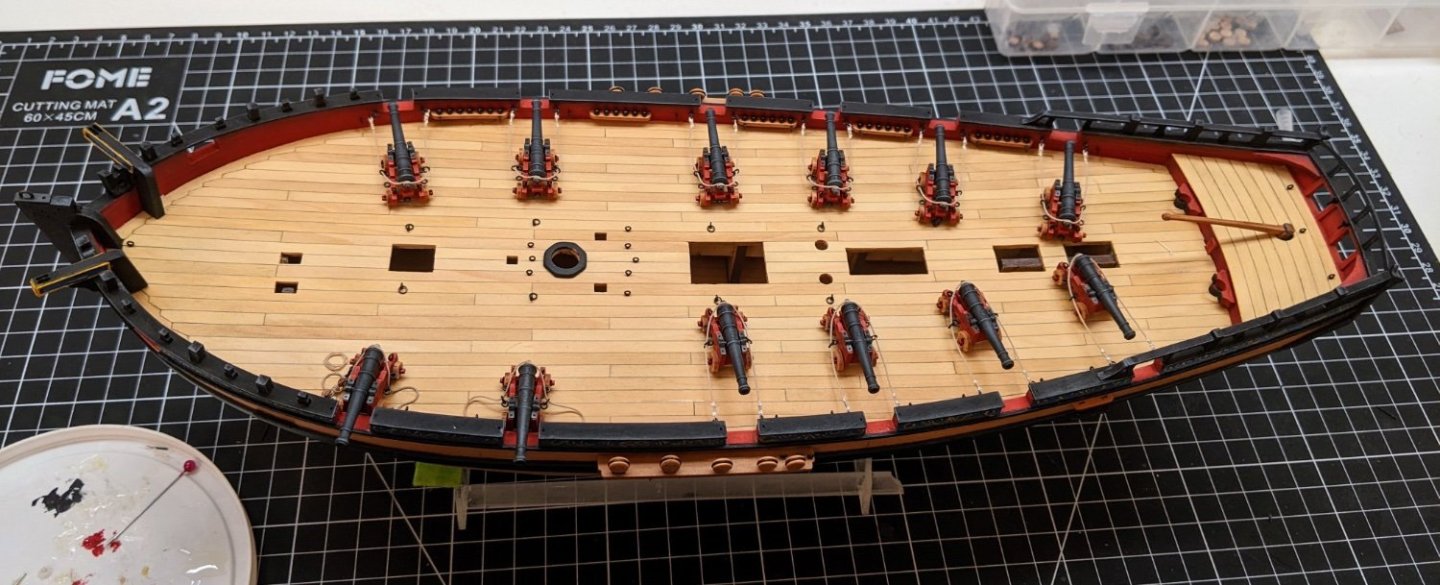
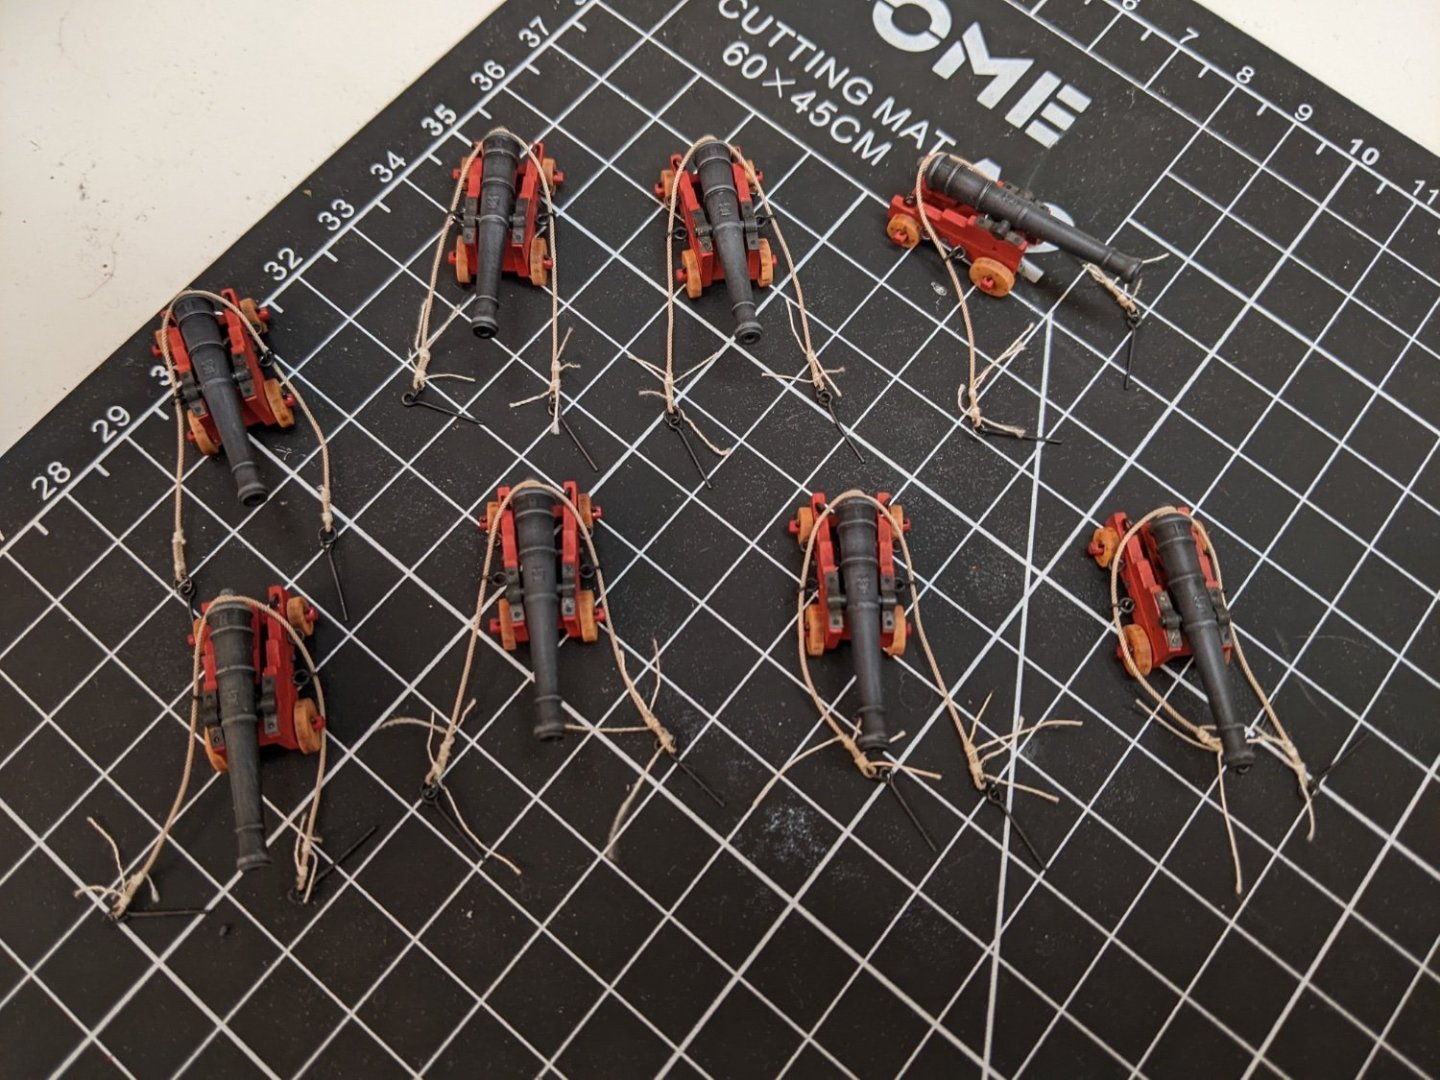
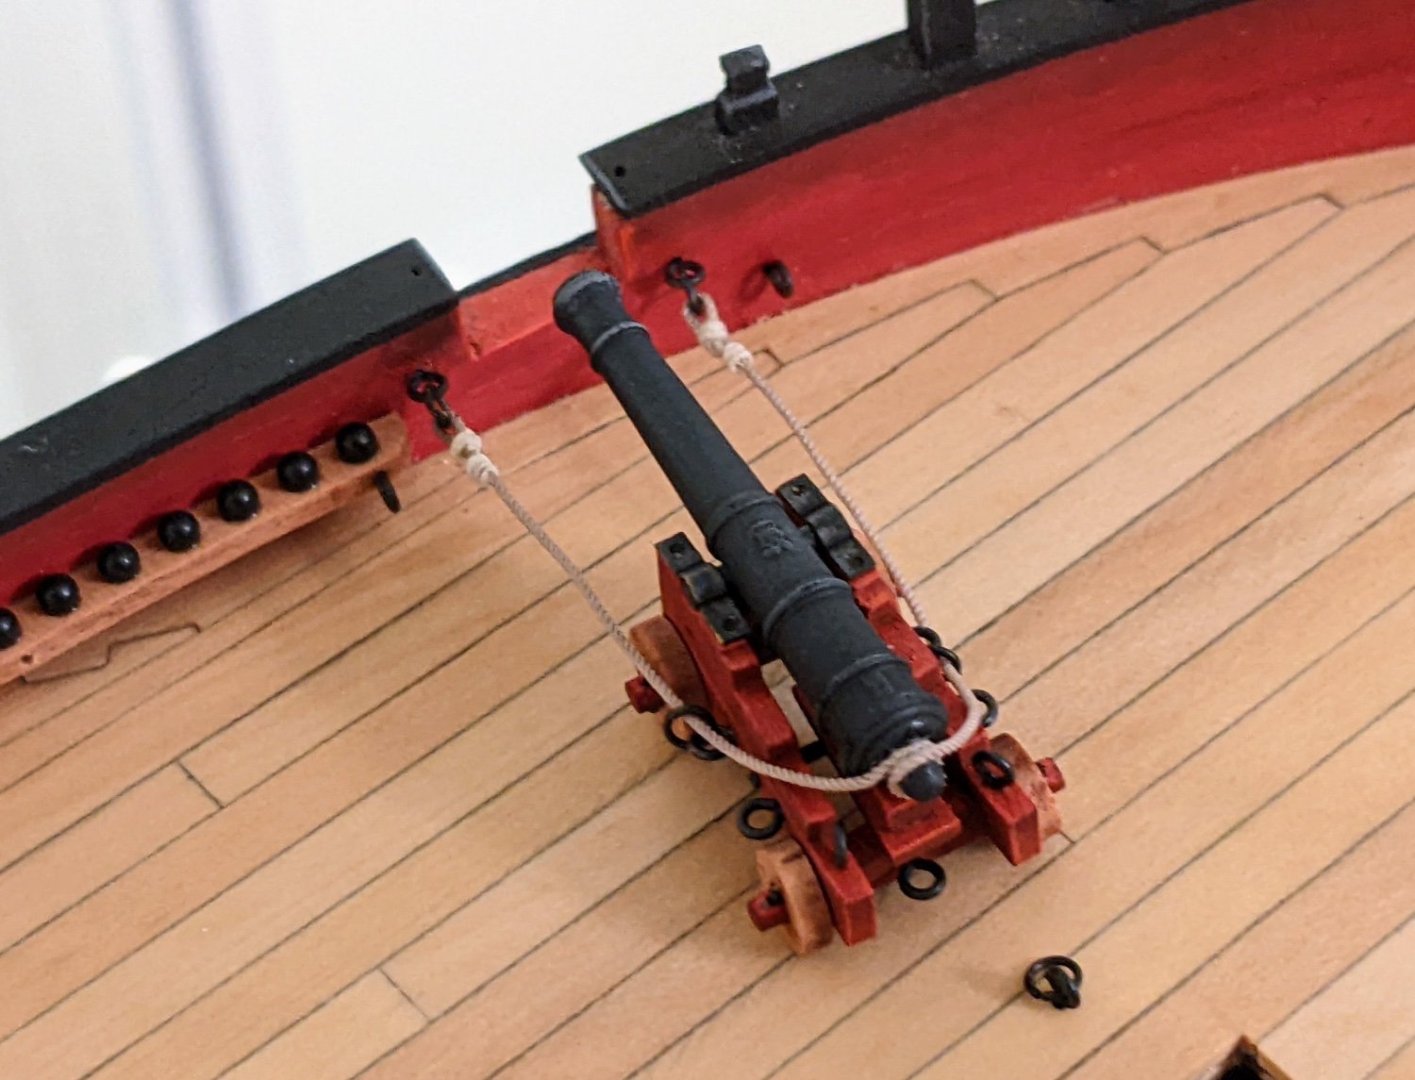
Log #43: Rigging the Guns Continued Thanks for all the comments and likes. I am getting excited to get to the point where everything is in place on the deck. I am glad you found it helpful. I find that one of the benefits of documenting the process is it keeps me motivated to keep moving forward. I have learned so much from all the build logs I have read and I hope others can also learn from me muddling through the process of figuring this stuff out. With the breaching ropes all attached to the cannons, the next step was to attach them to the ship. I found in my experimentation with the first two guns that it was easier to attach the ropes before fixing the cannons in place. There is nothing particularly complicated about this process, just patience, a bit of epoxy and a pair of fine tweezers. Then using a small bit of super glue on the bottom of each wheel I attached the cannons in place. I also at this time decided to add in the deck fittings that did not stick up too much. The rest will have to wait till I have finished the gun tackle so as not to get in the way. The next step is to get all the breaching ropes to lie properly. You can see I have done this with the cannon on the top right, but the others don’t look very natural as the rope is not flexible enough to lie naturally. To fix this I use a combination of small dots of super glue to hold specific parts of the rope in place and ultra matt varnish to help hold it in place as I shape it. This is a fairly time consuming process as you need to use very small amounts of glue and varnish to avoid getting it in places you don’t want it to be.

- 562 replies
-
- 12
-
-
- vanguard models
- alert
- (and 2 more)
-
Congrats, this really is an amazing model and you should be proud of it. I particularly like the sheer amount of detail you managed to get into the rigging work. Well done!
- 208 replies
-
- 3
-
-
- kitbashing
- Woodcarving
- (and 4 more)
-
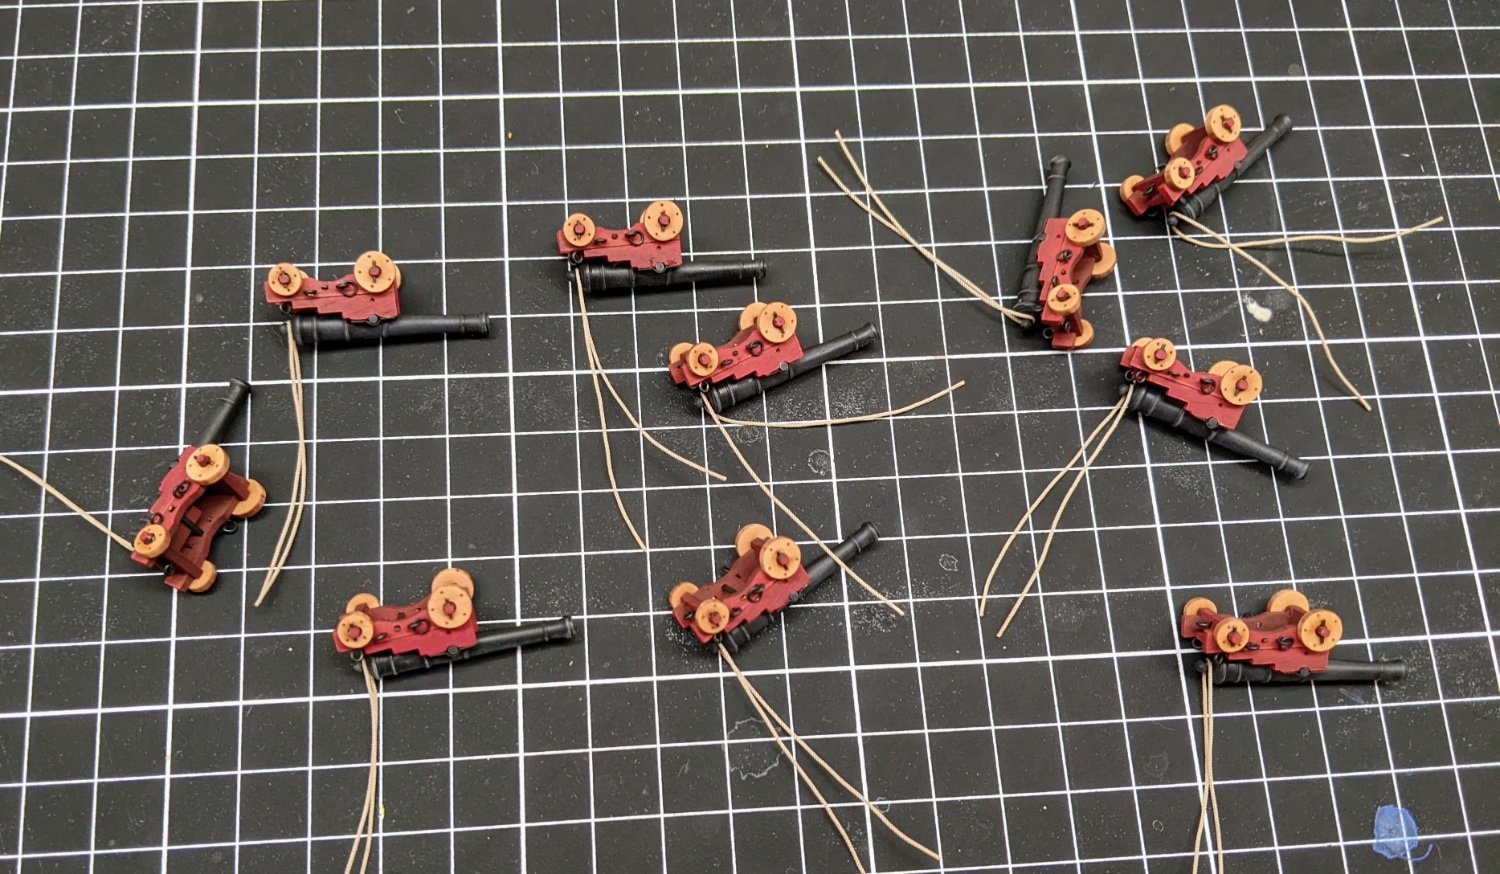
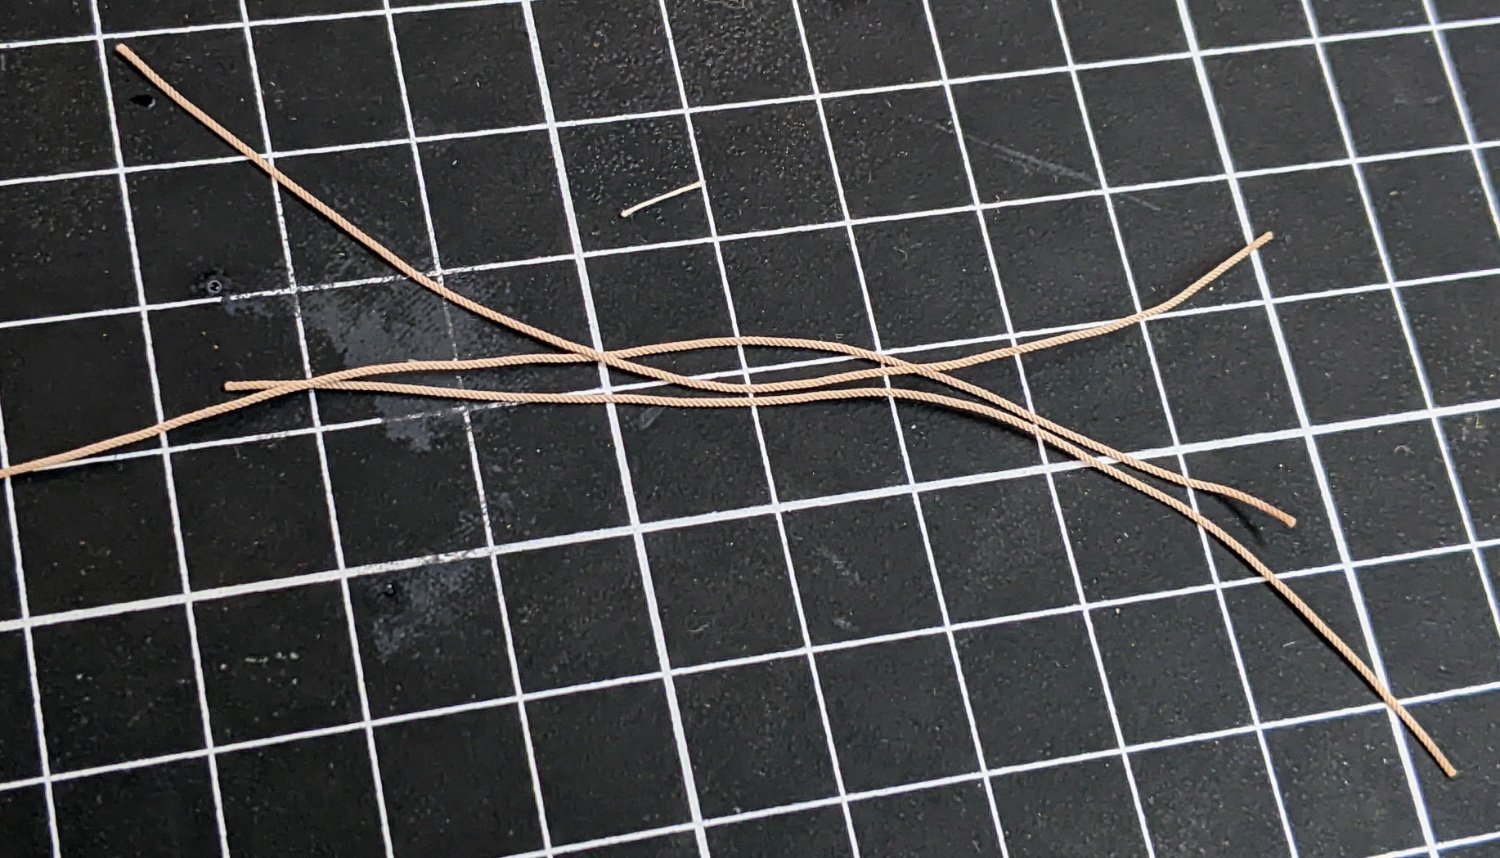
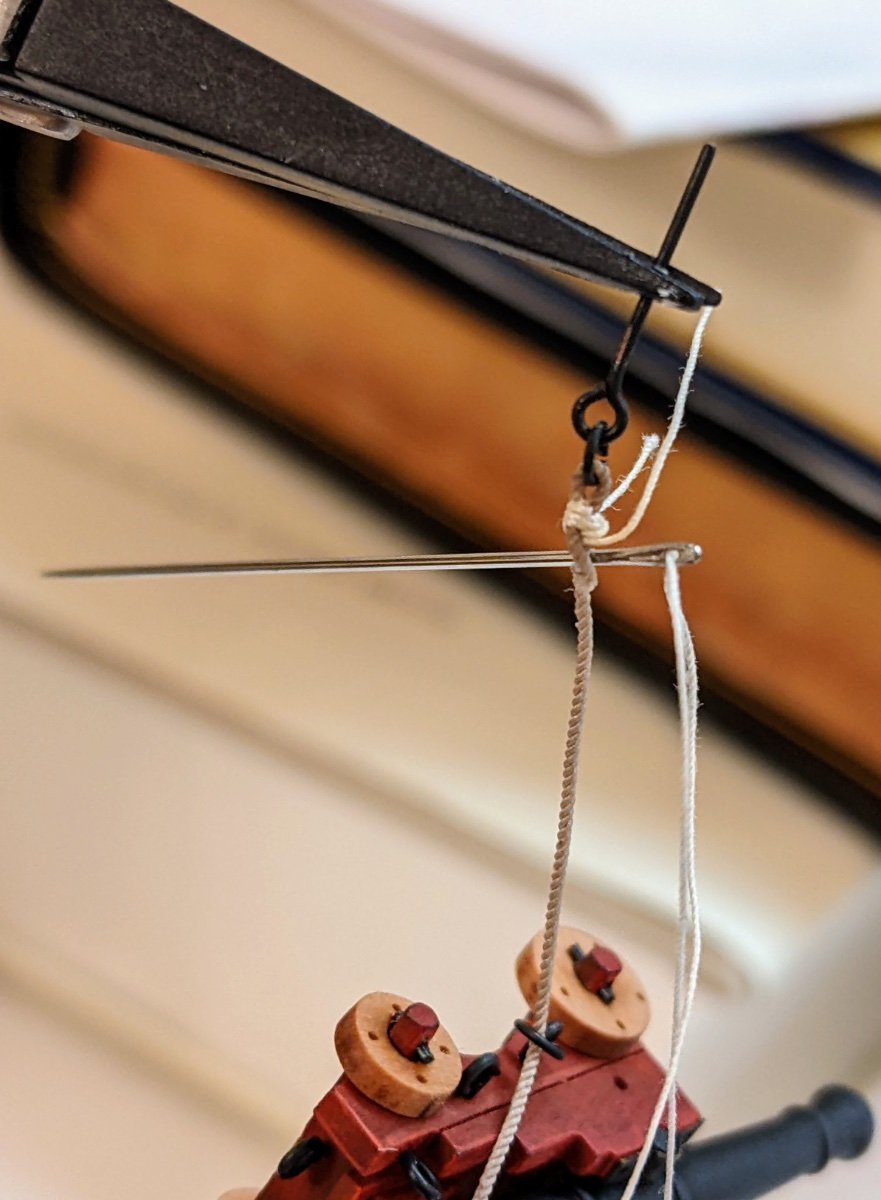
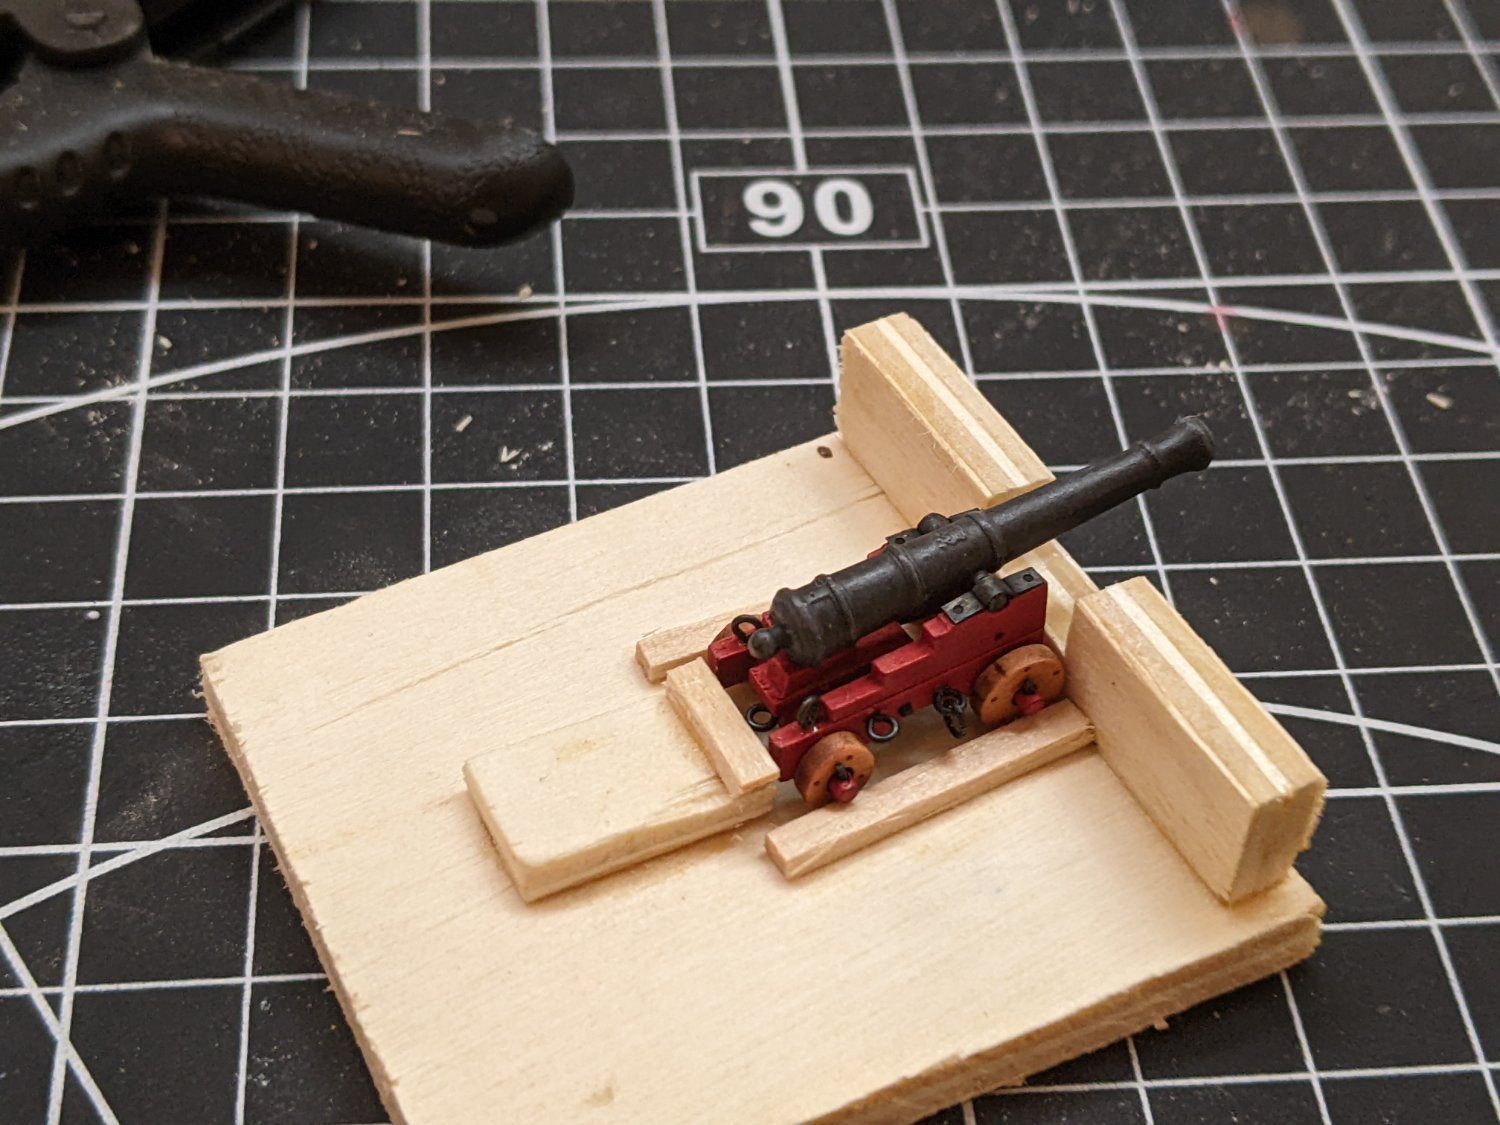
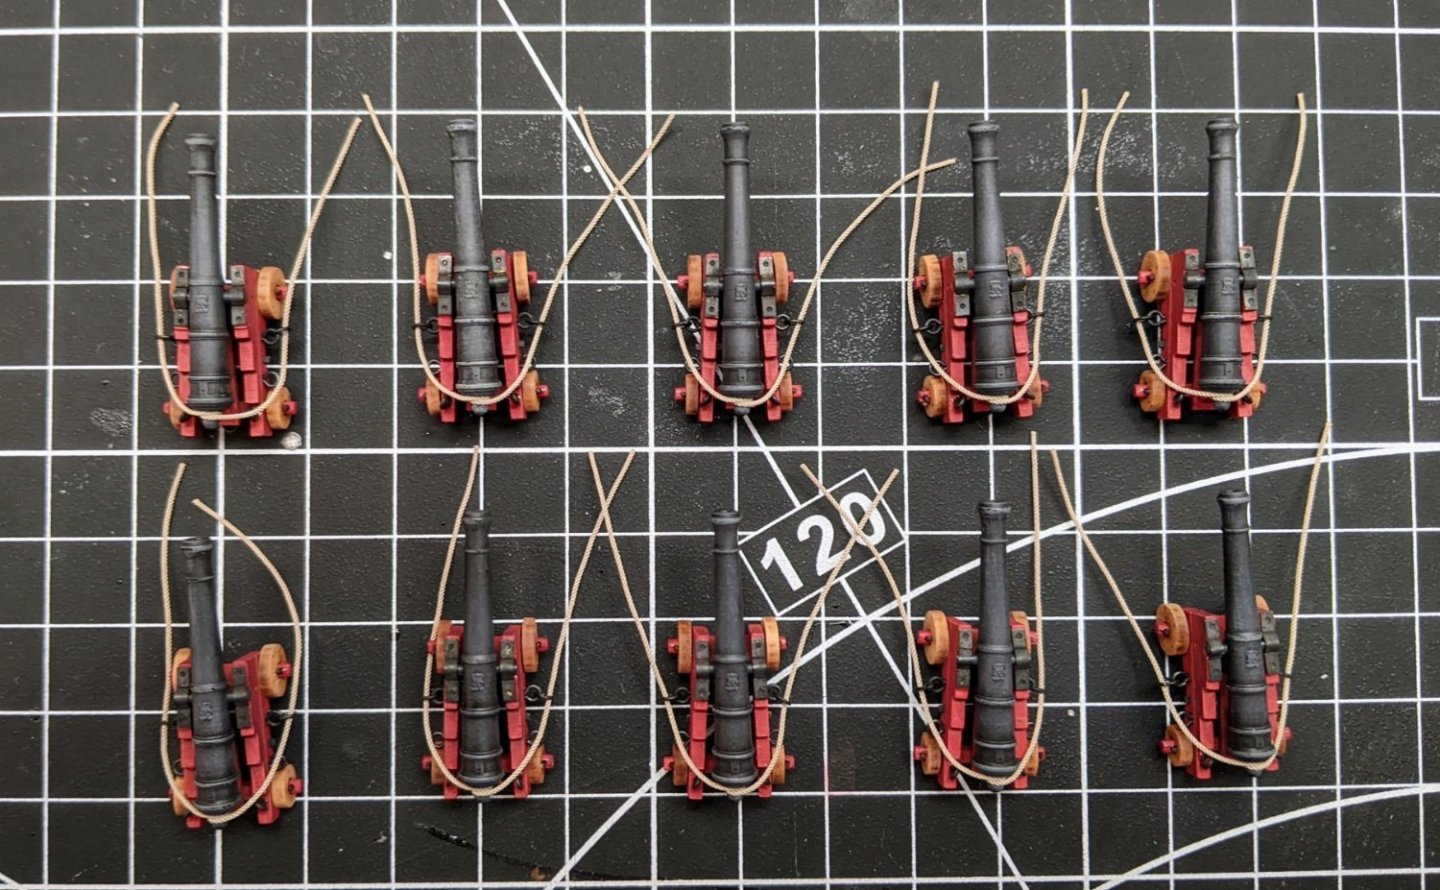
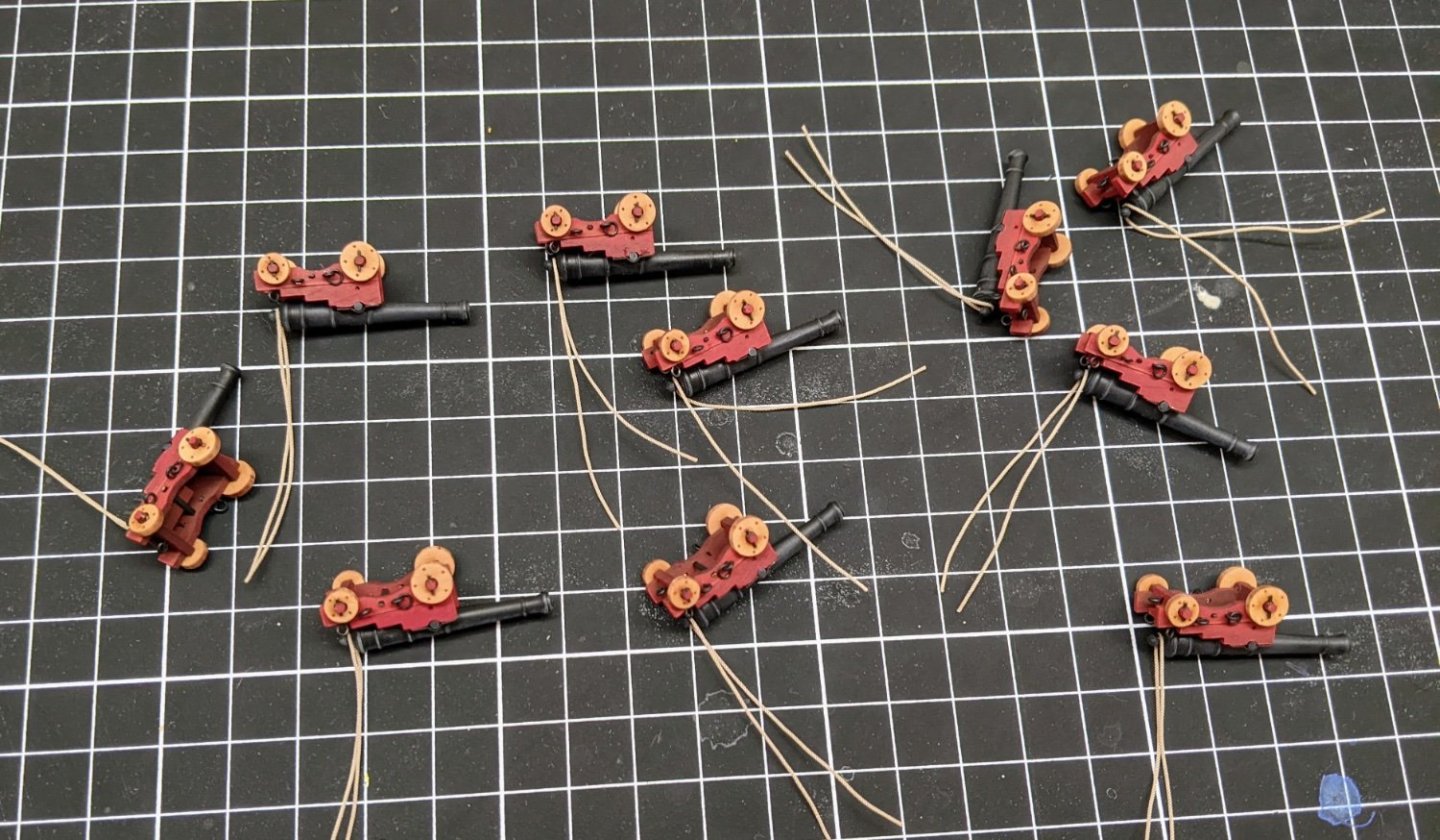
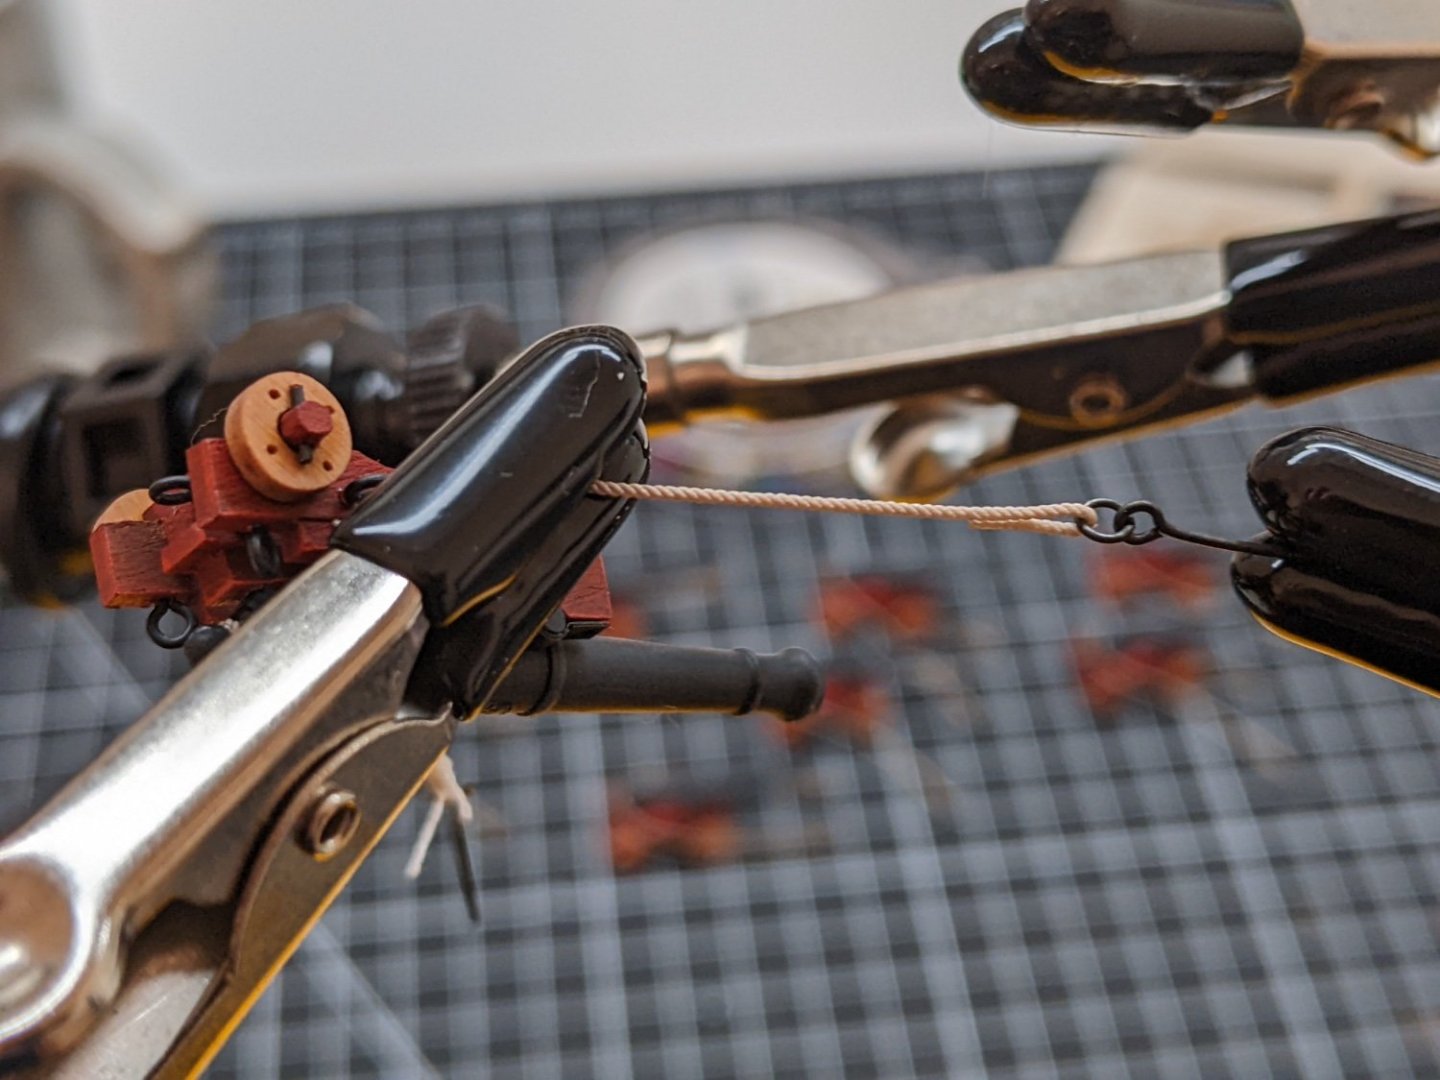
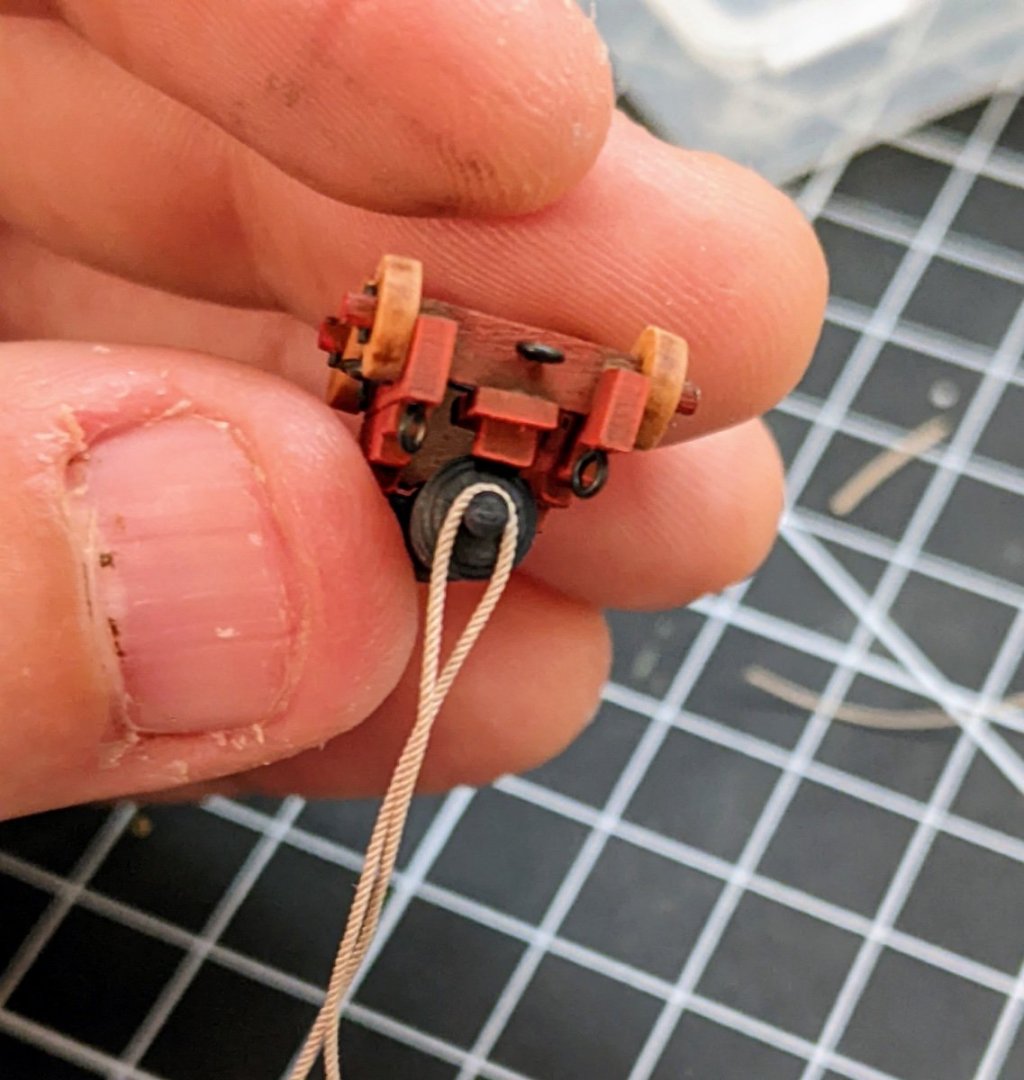
Log #42: Mass Production With two of the breaching ropes attached and the problems ironed out, I have moved to simultaneous production of the remaining guns. This is a general principal that I like to follow. Do an initial test, often redoing it until I am happy. Then do a second to get the process down and then move to mass production. The first step was to cut all of the breaching ropes to size (as I have already noted 95mm) Next I attached it at the mid point with a small drop of super glue to the bottom of the cannons. Once this had dried I wrapped the rope around the and secured it in place with another small drop of super glue. I then attached the ring bolts to the end of each breaching rope using a small drop of super glue to hold the folded rope in place. To control the super glue I place it on a plastic lid and apply it using sewing pins. I didn’t take any pictures of this part of the process, but what I did was to set my micrometer to 4.5mm and then would place one end of the breaching rope in the gap. Using the micrometer as a guide I then pinched with a pair of small tweezers at the 4.5mm distance and folded the rope over attaching it in place using the super glue. You can see the result of this below. I had found that the thread I used for the first two cannons was a bit thick so I made it thinner by removing one of the three strands that it was made of. I then used a sewing needle to secure one end of the thread before wrapping it around the breaching rope. After 4 loops, I tied off the 5th to secure the thread in place. Once both seizings were in place I secured them with some ultra matt varnish. In the picture below the varnish is still wet and looks a bit shiny, but it dries to a clear matt finish. And below you can see the final result. I still need to trim the ends and once I have done so I can attach them to the ship. I have also been playing around with the gun tackle and have my first one done. I will discuss my plans for mass producing gun tackle more in a later post.

- 562 replies
-
- 16
-
-

-
- vanguard models
- alert
- (and 2 more)
-
Looking good. You might want to put some masking tape on your keel. It looks like you may have caught it a bit when you were sanding near where it meets the stern post. I made the mistake of failing to do this for the stern post and ended up thinning it a bit by accident.
- 34 replies
-
- 2
-
-
- Alert
- Vanguard Models
- (and 1 more)
-
It really is amazing how much bigger indy is. I am currently working on Alert’s guns and I don’t think it really occurred to me till I saw this picture how much smaller they are.
- 648 replies
-
- 3
-
-
- Indefatigable
- Vanguard Models
- (and 1 more)
-
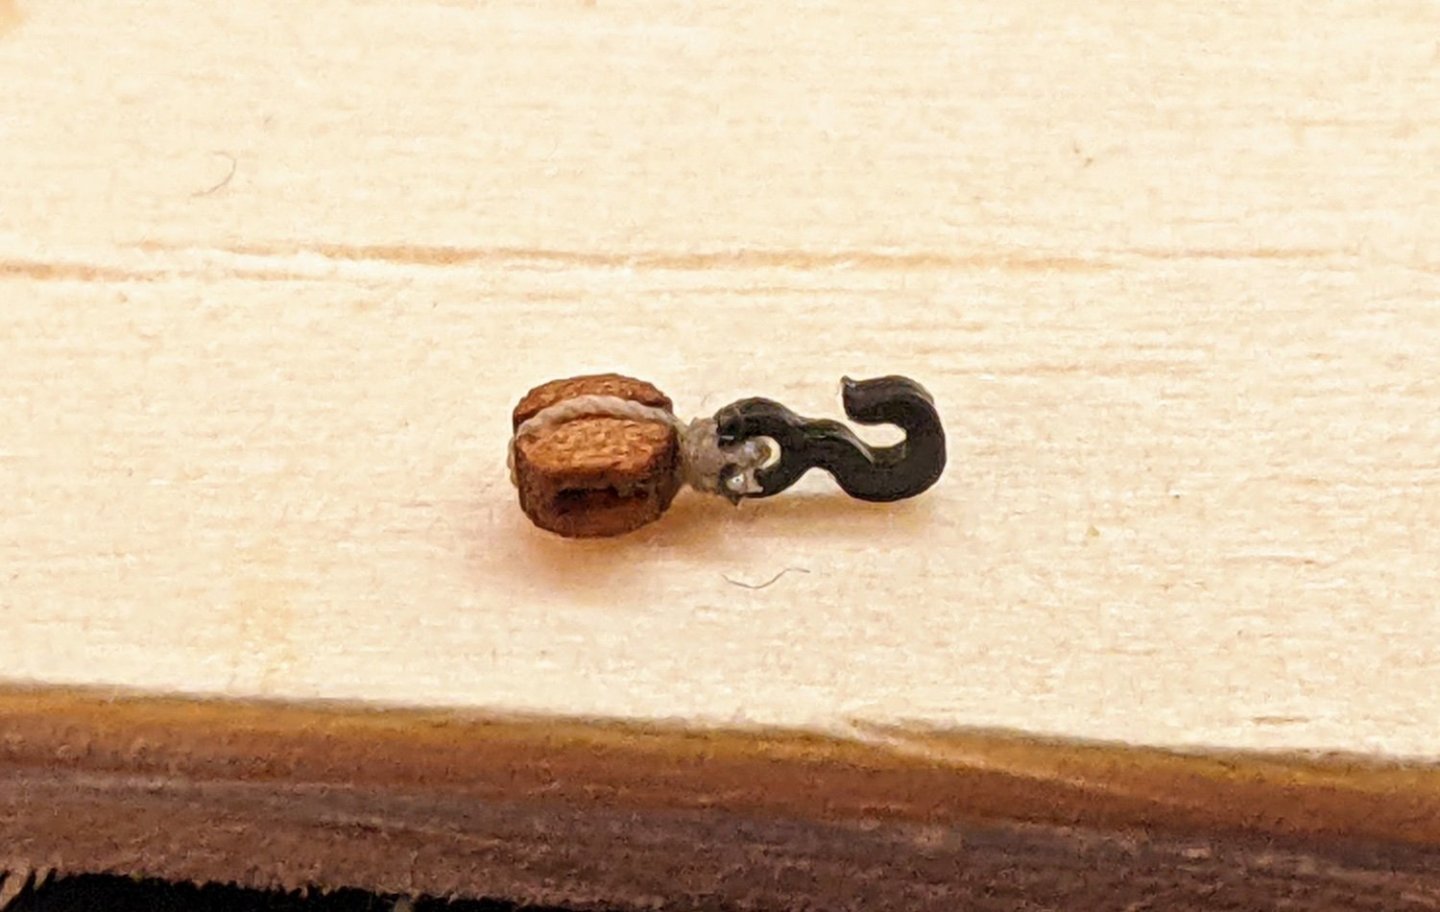
Time for another minor update as it might be a little while before I have enough progress to justify a full post. I have most of the breaching lines still to do and since I am planning on fully rigging the guns, a lot of hooks to attach to blocks. See below for a preview. I am using Chuck’s 3mm hooks. I also having done another blackening session managed to get enough eyebolts done to finish off the bulwarks. However for some reason none of the brass worked despite the copper eye bolts coming out perfect. The blackening just came right off, something I have never had happen before. I have had blotchiness and parts that didn’t get fully covered, but never every single piece not working out. I currently have them all soaking in acetone just in case there is some sort of coating stoping the blackening from adhering and then I will give them another dip in the pickering solution and try again.
- 562 replies
-
- 16
-
-
- vanguard models
- alert
- (and 2 more)
-
If you want to go a bit cheaper, but stick with vanguard, alert is a great kit. Also the new cutter Chris just released (Trial) also looks very interesting.
-
Trying to do it right with the first layer of planking will also allow you to get the necessary experience to make the second planking much better. I learned a lot by following Chuck's method on the first planking that helped me when I came to the part that actually shows. Make sure you get the fairing right, it will make the subsequent planking much easier. I ran into a number of issues which were a direct result of my poor fairing job.
- 8 replies
-
- 2
-
-
- Lady Nelson
- Amati
- (and 2 more)
-
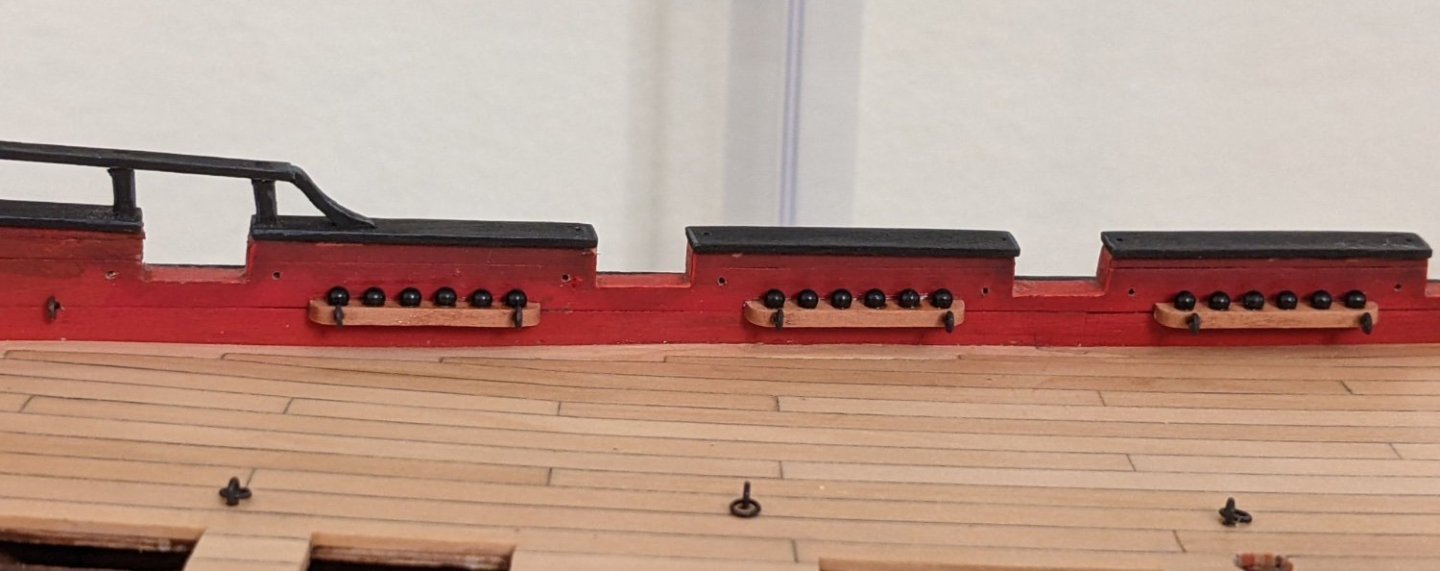
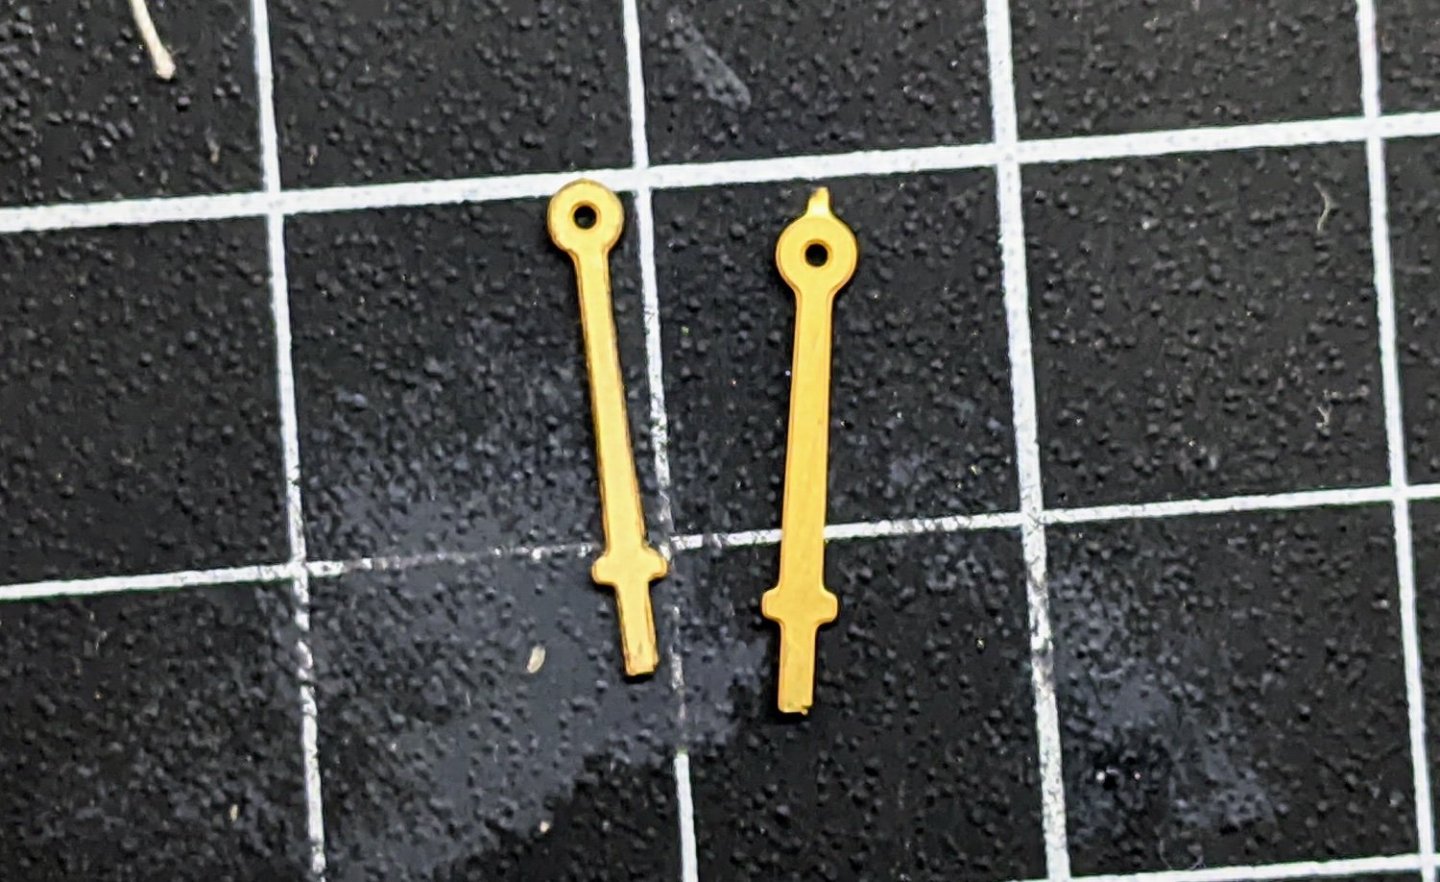
Log #41: Odds and Ends @jpalmer1970 I have noticed a number of nice looking tools that various people on the forums have used for rigging (fly tying vices, quad hands etc…). I have been tempted, but at this point I am managing to make do with what I have, likely just at a slower pace than I could achieve if I had a more comprehensive setup. I have considered that it shouldn’t be too hard to make something like the quad hands with some alligator clips and shrink tube I have on hand. I may investigate that. @Theodosius thanks and also thanks to everyone else for all the encouragement. I am really motivated to get these guns done as I am looking forward to seeing what she looks like when I have all the fittings in place. I continue to pick away at the guns and have completed a second. Now that I have my process down I have switched to mass producing each stage. So first up I am cutting all of the breaching ropes to size. You may have also noticed that the 2nd cannon is not attached in the first picture. That is because I ran out of blackened eye bolts and I don’t want to attach the ring bolts the breaching ropes are tied to until the eye bolts are installed. So this necessitates another batch of blackening and while I am at it I am also going to blacken a bunch of other items that need to be done in the near future. For the metal posts that the railing rope (not sure what this is called) is attached to I decided to file them a bit to try and make them look less flat. This involved filing the sides to make them less thick and then also rounding the corners. You can see how much of a difference even just this little bit of cleaning up does to them below.


- 562 replies
-
- 16
-
-
- vanguard models
- alert
- (and 2 more)
-
It’s looking good. You are making brisk progress.
- 587 replies
-
- 2
-
-
-
- Indefatigable
- Vanguard Models
- (and 1 more)
-
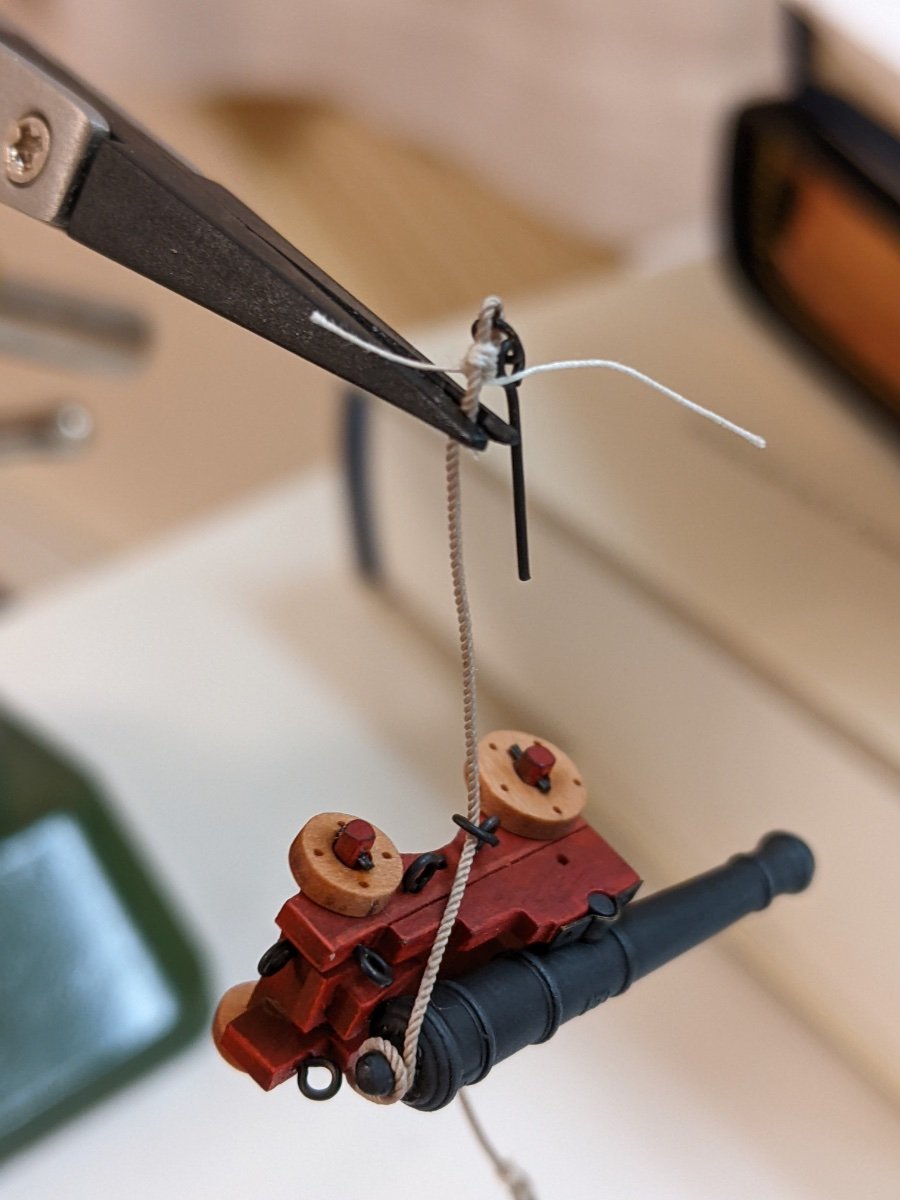
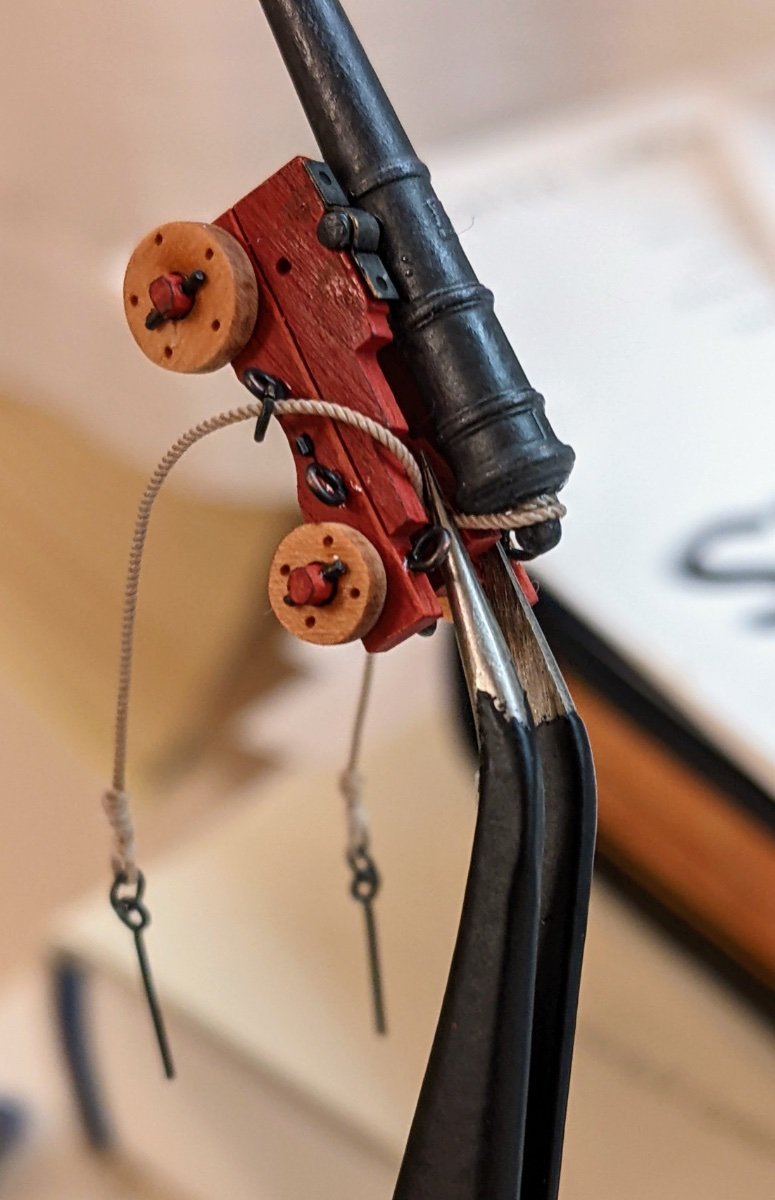
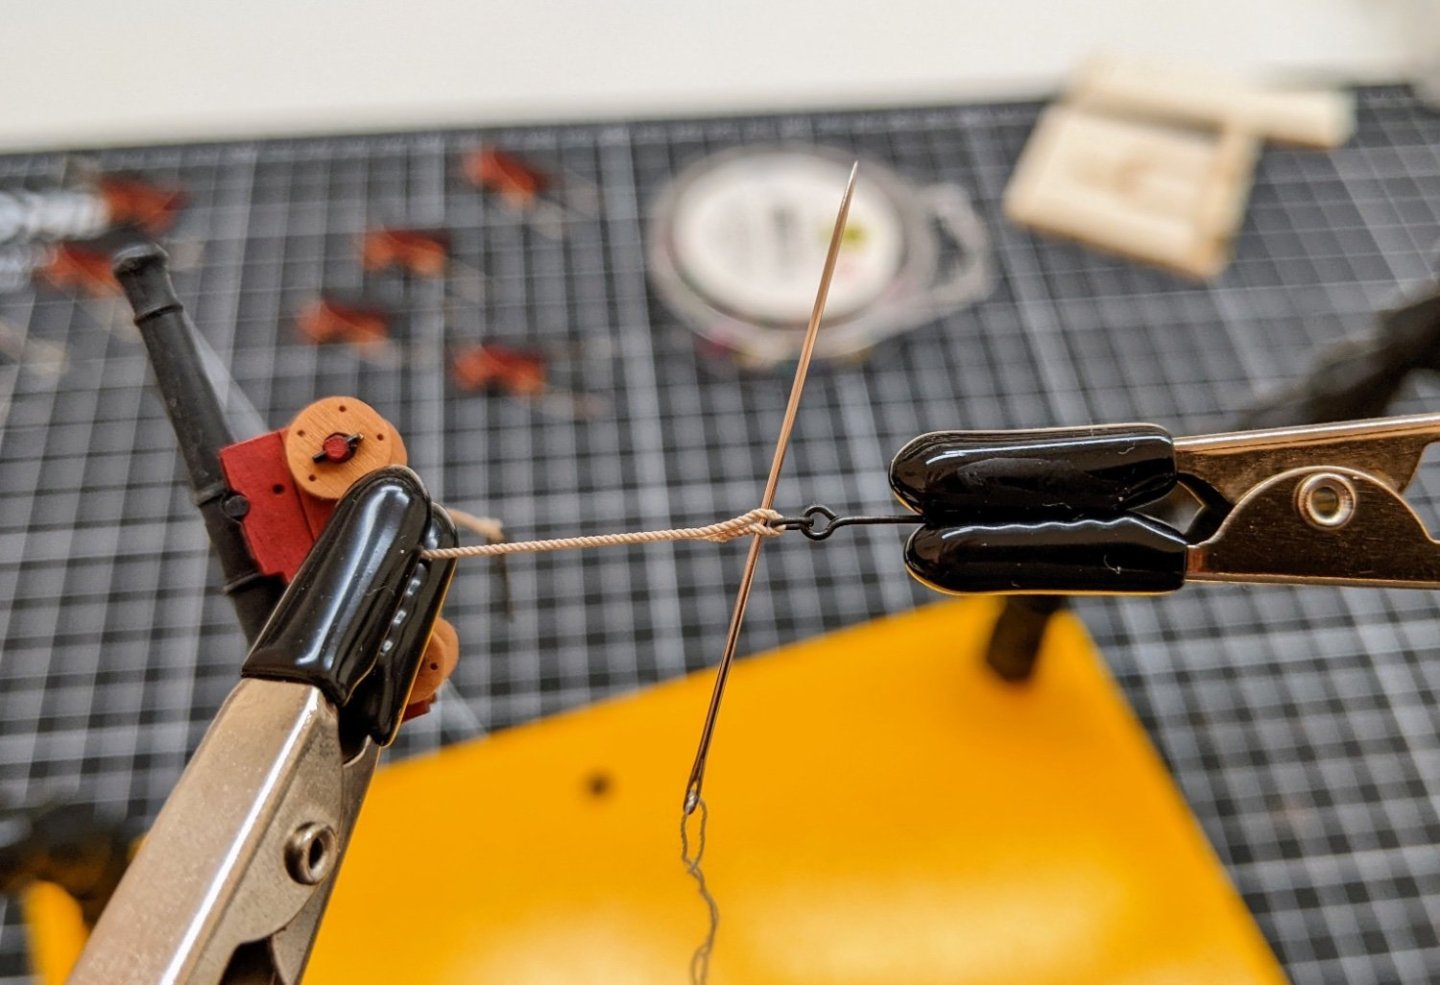
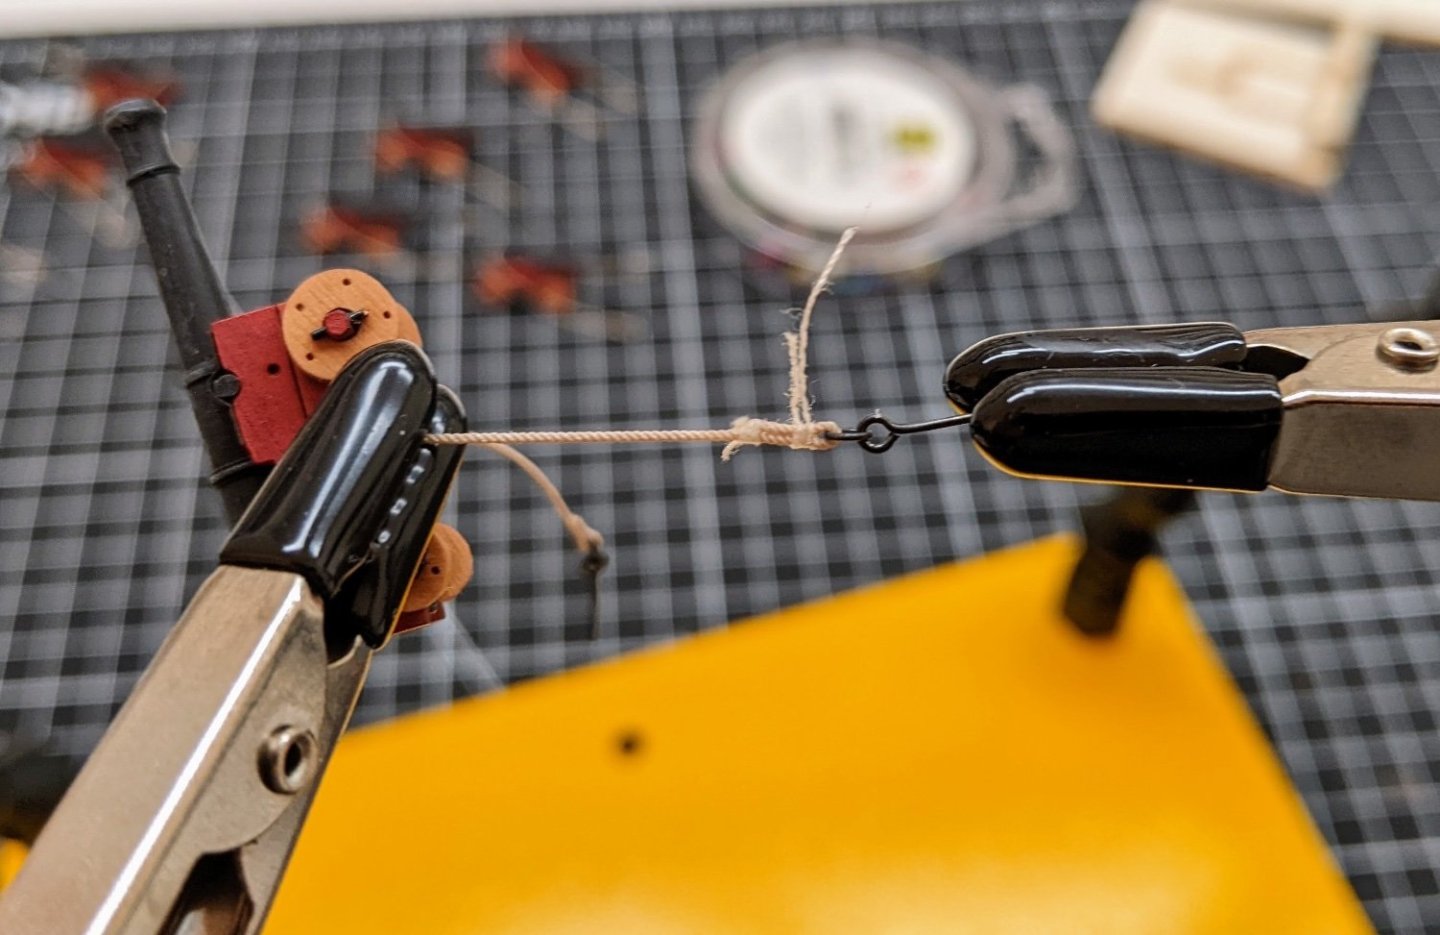
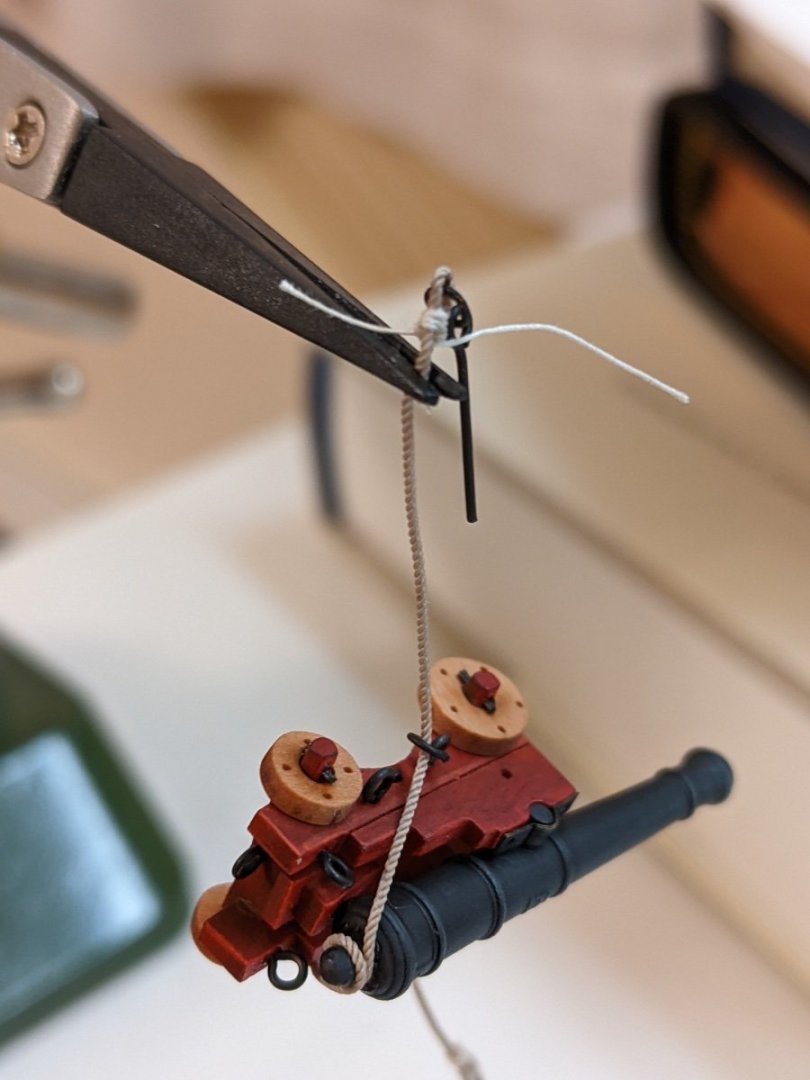
Log #40: Rigging the Guns Part II Part II of my adventure rigging the guns is largely concerned with scrapping what I did in part I and starting again. This seems to be a common occurrence with this whole project so I am used to it at this point. @Marcus.K. had a great suggestion which really should have occurred to me. In any case when I tested the length against the available room I found that at a number of the ports, the guns would hit the deck fittings when recoiling which is obviously not an ideal scenario. After a bit of experimenting I decided on a revised length of 95mm which is about as long as I can make them and still have some reasonable clearance. One upside to redoing things is I have a much better process having done it once already and so I figured I would document the steps for the benefit of those who have never attempted this sort of thing before. Step 1 was to use a small bit of super glue to fix the breaching rope to the bottom of the cascable. I did consider some alternative methods of attaching the rope (see here for a discussion on it), but in the end I decided to stick with the arrangement as shown in the Goodwin drawings for two main reasons: Attempting something like a cut splice seemed a bit beyond me until I have more experience with ropes at this scale. I might attempt such a thing on a future model, but it seemed wise to set my sites on manageable goals. Doing it this way is very easy. Asthetically I like the look and I suppose I can imagine in my head there is some sort of seizing holding it in place. I again used a small drop of super glue and let it sit for a few minutes with a small clamp pulling the ropes into place. For the seizing I decided to use a slightly lighter thread to help it stand out more. I held things in place with a pair of revers tweezers (the kind you squeeze to open) held in my vice. When doing the seizing, I started by running the thread through the rope using a needle to help hold it in place. Then I wrapped it around and ran the need through again to close it off. I then gave it all a coat of ultra matt varnish to hold it in place before cutting off th ends. To try and simulate the splicing of the end of the breach road into itself I clipped an angle off of the end to make it appear like it merged in when it was covered by the seizing and attached using varnish. I wanted to take a picture of this, but I was unable to get a good enough image to demonstrate what I did. And you can see below the finished cannon attached to the model to demonstrate how far it can go back. The breach rope no longer allows the cannon to hit the deck furniture and the lighter thread I think better highlights the way the cannon is attached to the bulwark. Once the glue for the ring bolts has dried I can fix the cannon in its proper place and try and arrange the breach rope properly. Now I just need to do this 11 more times :).


- 562 replies
-
- 18
-
-
-
- vanguard models
- alert
- (and 2 more)
-
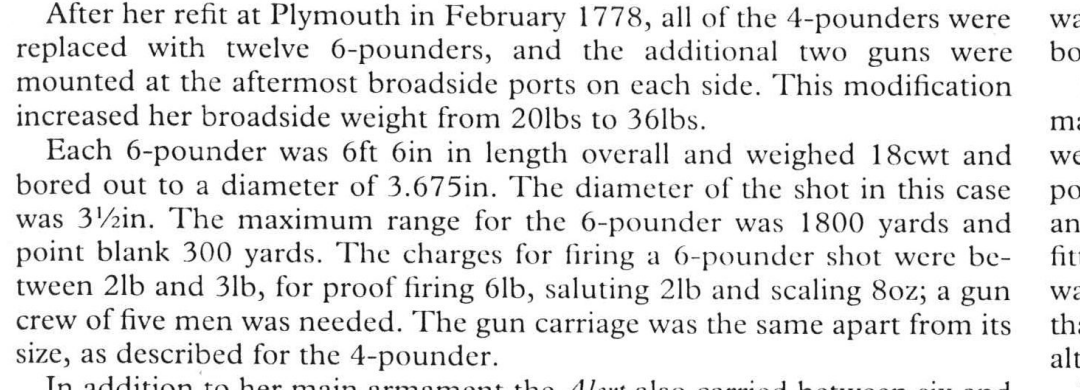
He doesn't really say much apart from describing the characteristics of the 6 pounders which were installed in 1778 replacing the old 4 pounders.
-
Yes they are six pounders. I had a post on this topic about a year ago and I think the answers were inconclusive. I was not ultimately able to determine why Goodwin shows double blocks in his AOTS Alert book. If I remember correctly from the discussion Lavery makes some mention of double blocks being used sometimes (but he doesn't elaborate, I will have to double check when I get home) and someone in the thread said Caruna mentions only the larger guns had double blocks. I still havn't really decided what I am going to do to be honest. I bought the double blocks based on Goodwin before the question arose, but I may go back and get some single blocks instead. Still on the fence on this one.
-
Thanks so much @allanyed for the response. Alert was launched in 1777 so I guess that would imply one of the latter two methods. However, I am not entirely sure I understand what you mean by them. I am having trouble picturing what you mean by thimbles attached to the neck of the button. By spliced eye are you referring to something like the example I cited from glbarlow?
-
I have been doing some looking around and I haven’t been able to find a clear answer as to how the breaching rope was attached to the cascable in cases where there was no ring to run it through. I am currently building the alert and the goodwin book depicts it as simply wrapped around with the crossing of the ropes occurring at the top. The problem with this I it doesn’t seem to me that this would hold unless it was tied in place by some sort of seizing, but goodwin doesn’t mention anything about this. Many here on MSW have slipped the cascable into the rope by “untwisting” the rope. For example see this done by @glbarlow for his flirt build. Another example I have found is this where two lines are spliced together to create the loop. Basically I am wondering if anyone can point me towards what the practice actually was at the time.

-
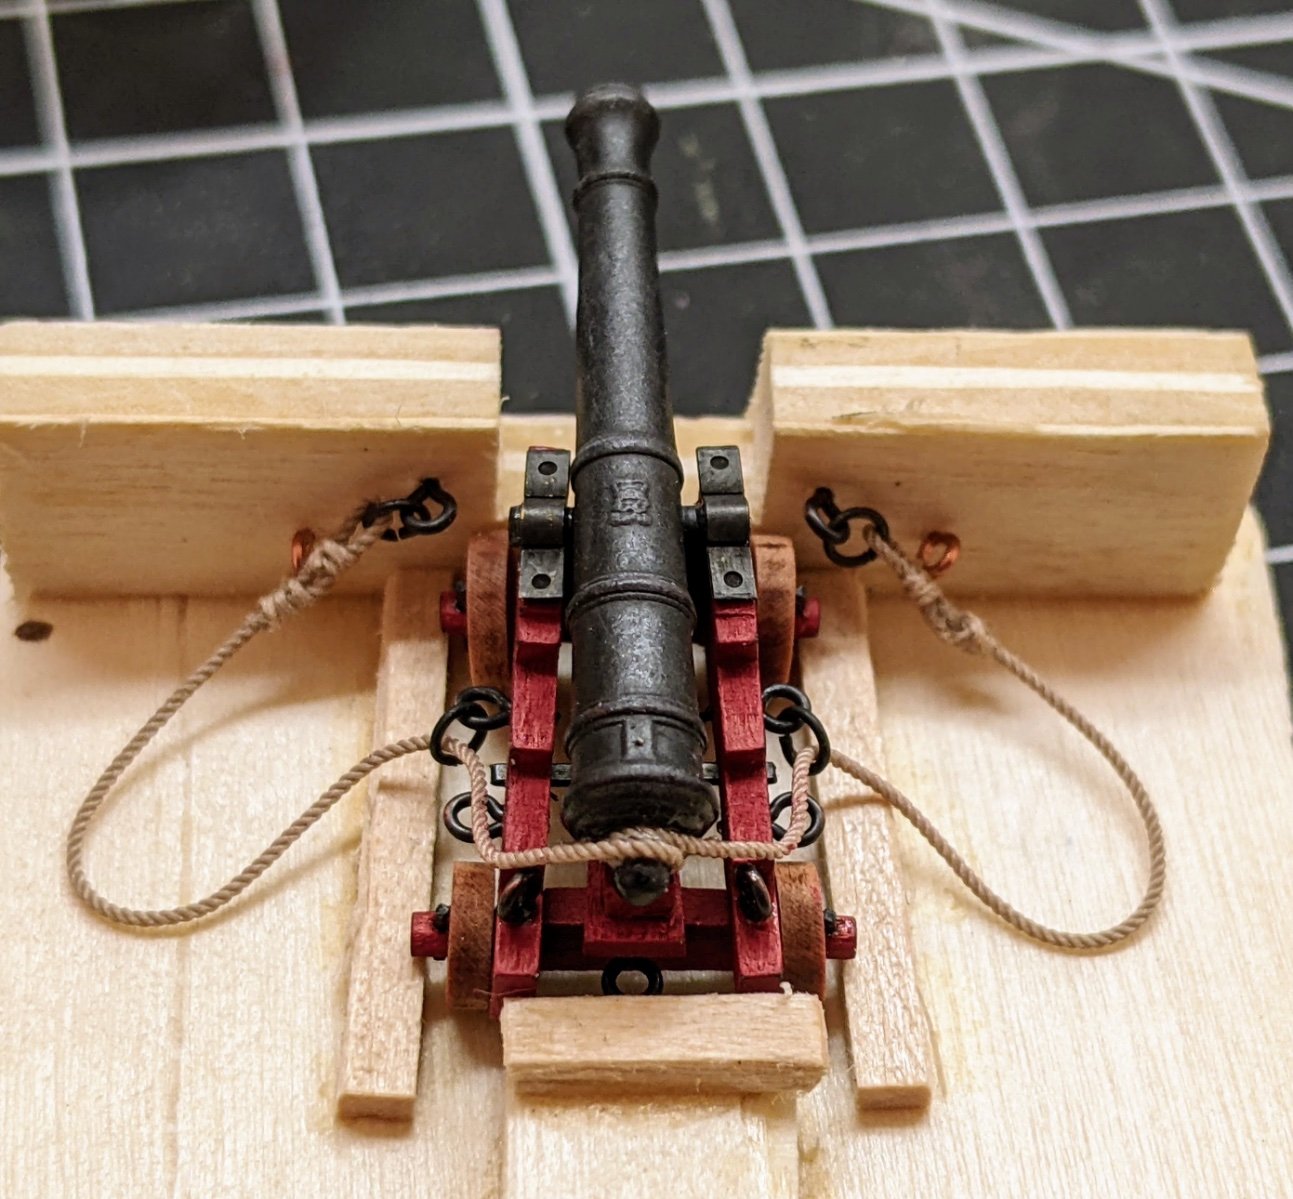
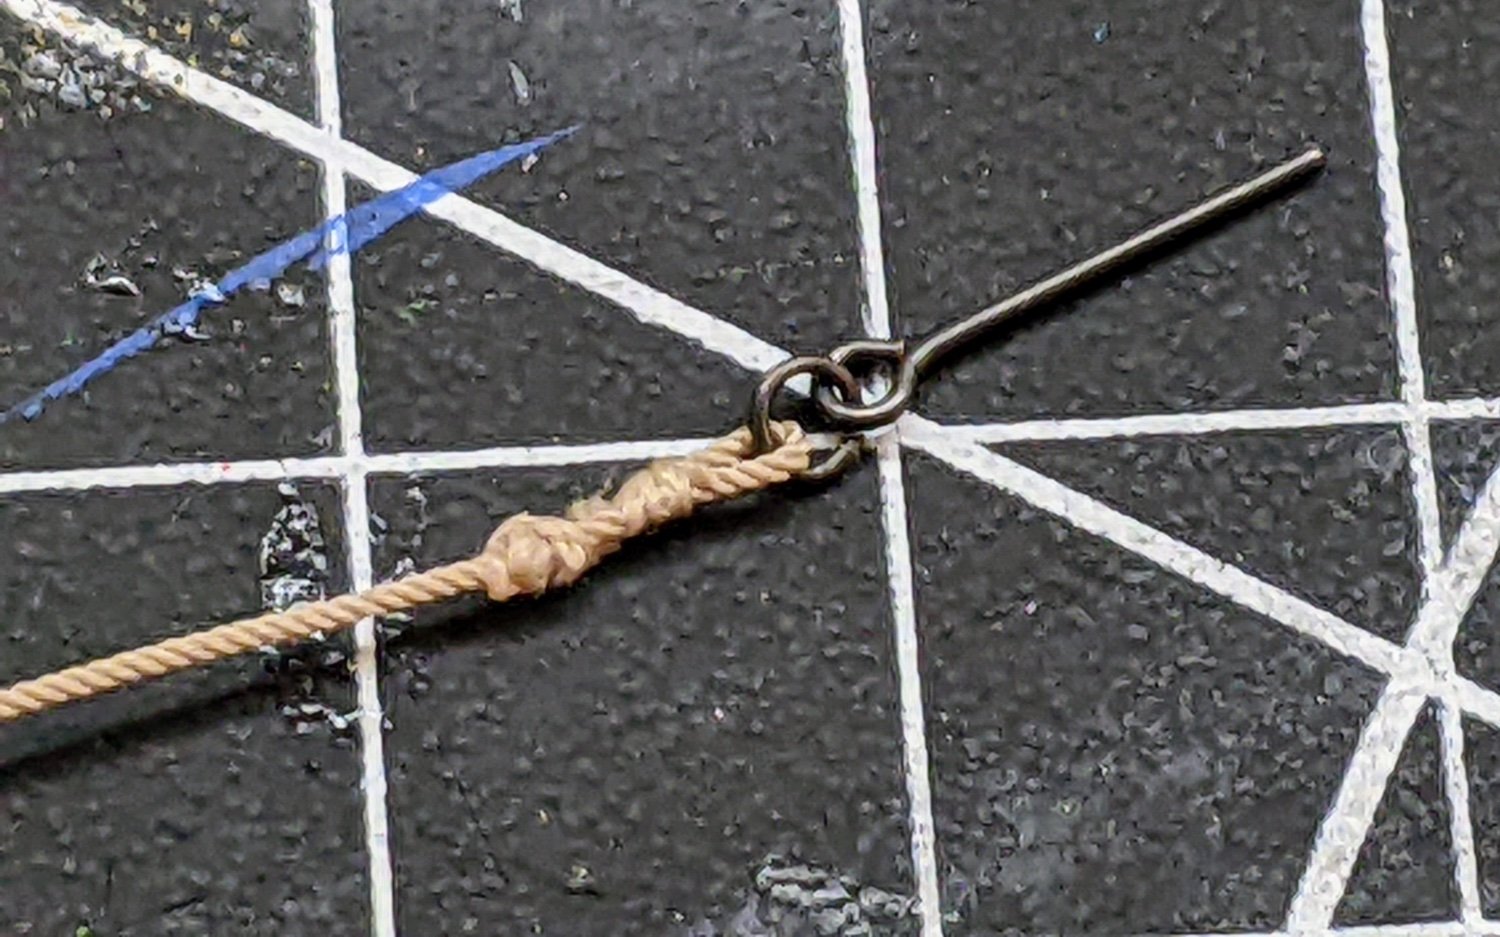
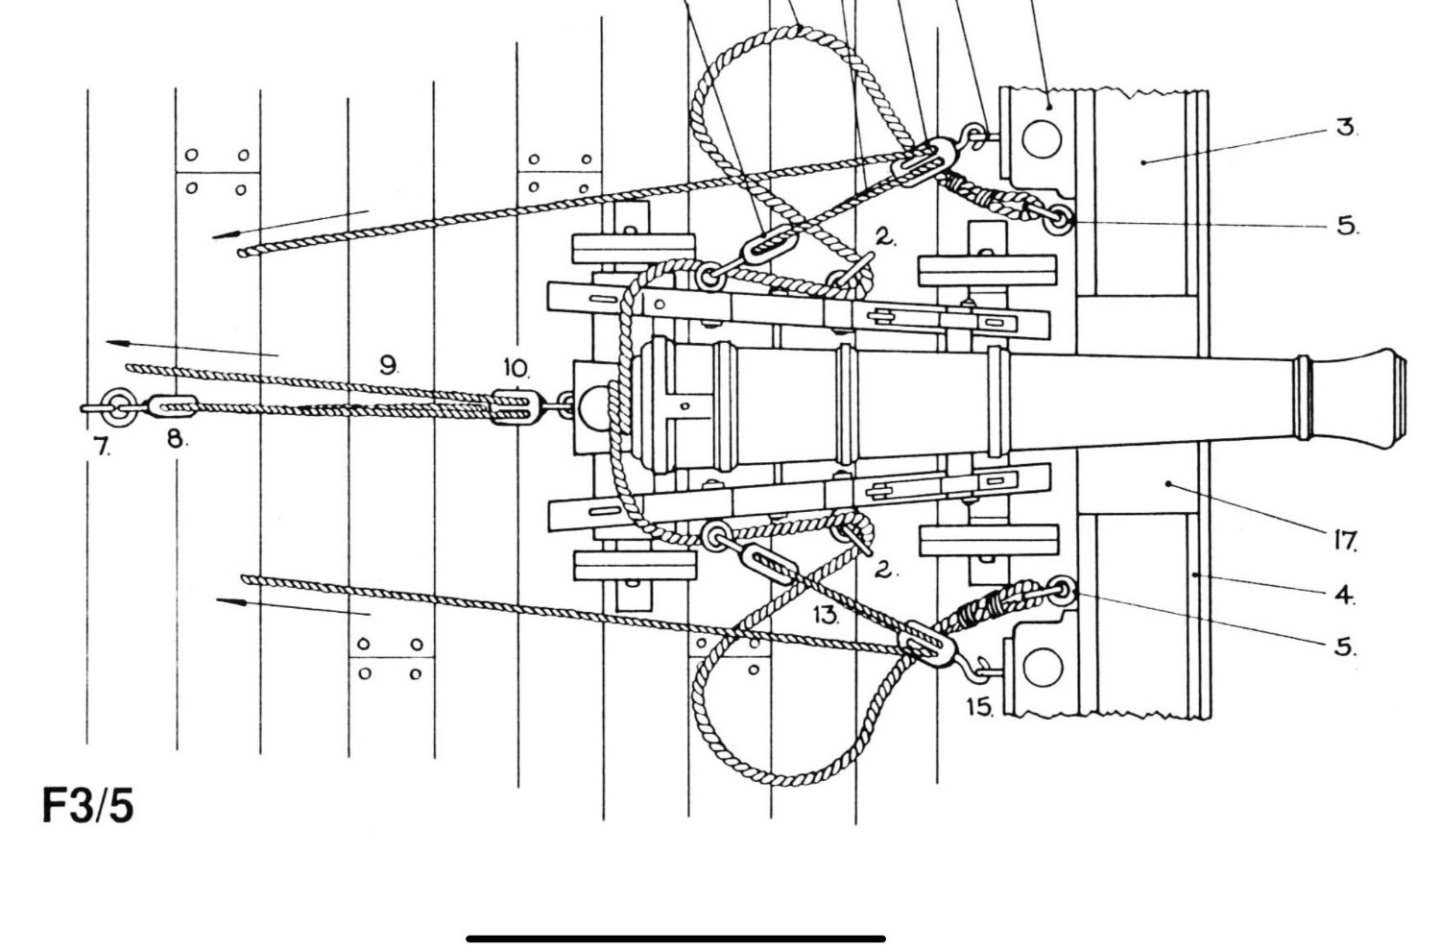
Log #39: Rigging the Guns Part I I have finally started on rigging the guns. The first thing I have been doing is getting the breaching ropes ready. The breaching line should be 0.54mm in diameter and 114mm long. I used 0.5mm line from ropes of scale. I had considered shortening the line as per blue ensign’s log, but I decided I would go for an arrangement where I used the full length and lay them similar to the illustration from Goodwin’s Alert book. Seizing the loop which attaches to the ring bolt was a very fiddle process and I was forced to come up with some creative ways to hold everything steady. I put a set of reverse tweezers (the kind you pinch to open) in my vice and used that to hold things steady while I used a needle and the thread from the kit to do the seizing. To hold everything in place I used ultra matt varnish as it doesn’t leave a shiny residue like super glue. Here was my first attempt. It leaves a bit to be desired, but the other side turned out much better and I figured I wouldn’t bother to redo. To attach the breaching rope to the back of the gun simply looped it around and used varnish to secure it while holding it in place with tweezers. Though I suspect that there should be seizing around the top of this, I thought it would be too tangly to do and you wouldn’t really be able to see it very much. And here is the final result. I will have to use varnish to make the rope lay a bit flatter when I attach it to the ship, but all in all I feel it looks good enough for a first try. I have some ideas about how to do it a bit better next time and ff after I finish all the rest of them I feel that this one does not hold up well enough I can go back and redo it at that point.


- 562 replies
-
- 17
-
-
-
- vanguard models
- alert
- (and 2 more)
-
Thanks everyone for all the encouragement. I have started work on rigging the cannons. A little preview of the jig I wiped up to assist with this is below

- 562 replies
-
- 10
-
-
- vanguard models
- alert
- (and 2 more)
-
Nice to see you back at it. The guns do look nice.
-
It is a thinner used for oil paints, not sure why they would list it as something you need. I think you will find the build logs more useful than those videos. Just make sure you are reading ahead to see what problems they encountered. Take your time and you will do fine. Good luck.
- 8 replies
-
- 2
-
-
- Lady Nelson
- Amati
- (and 2 more)
-
Ouch, I had a flooded basement last year (though that was due to a major failure of a water heater). Hope the damage is not too bad 😬.
-
It really is amazing how much detail you get into such a tiny project. Great job.