HOLIDAY DONATION DRIVE - SUPPORT MSW - DO YOUR PART TO KEEP THIS GREAT FORUM GOING!
×

Stevinne
-
Posts
333 -
Joined
-
Last visited
Content Type
Profiles
Forums
Gallery
Events
Everything posted by Stevinne
-
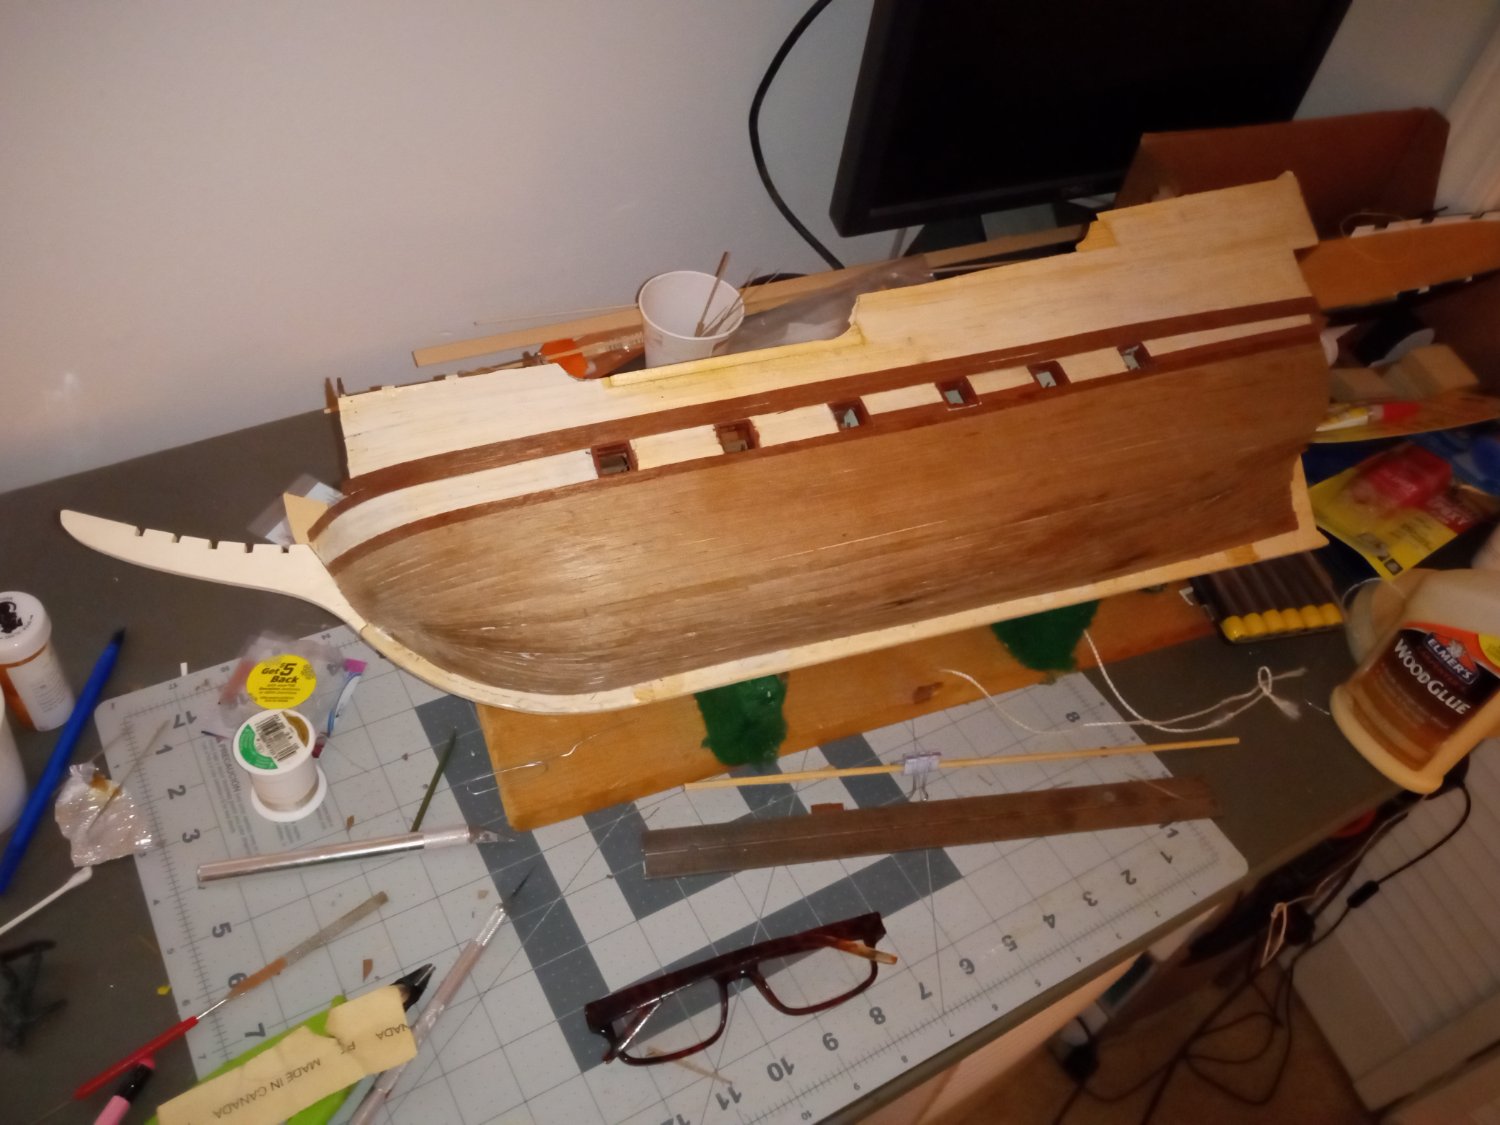
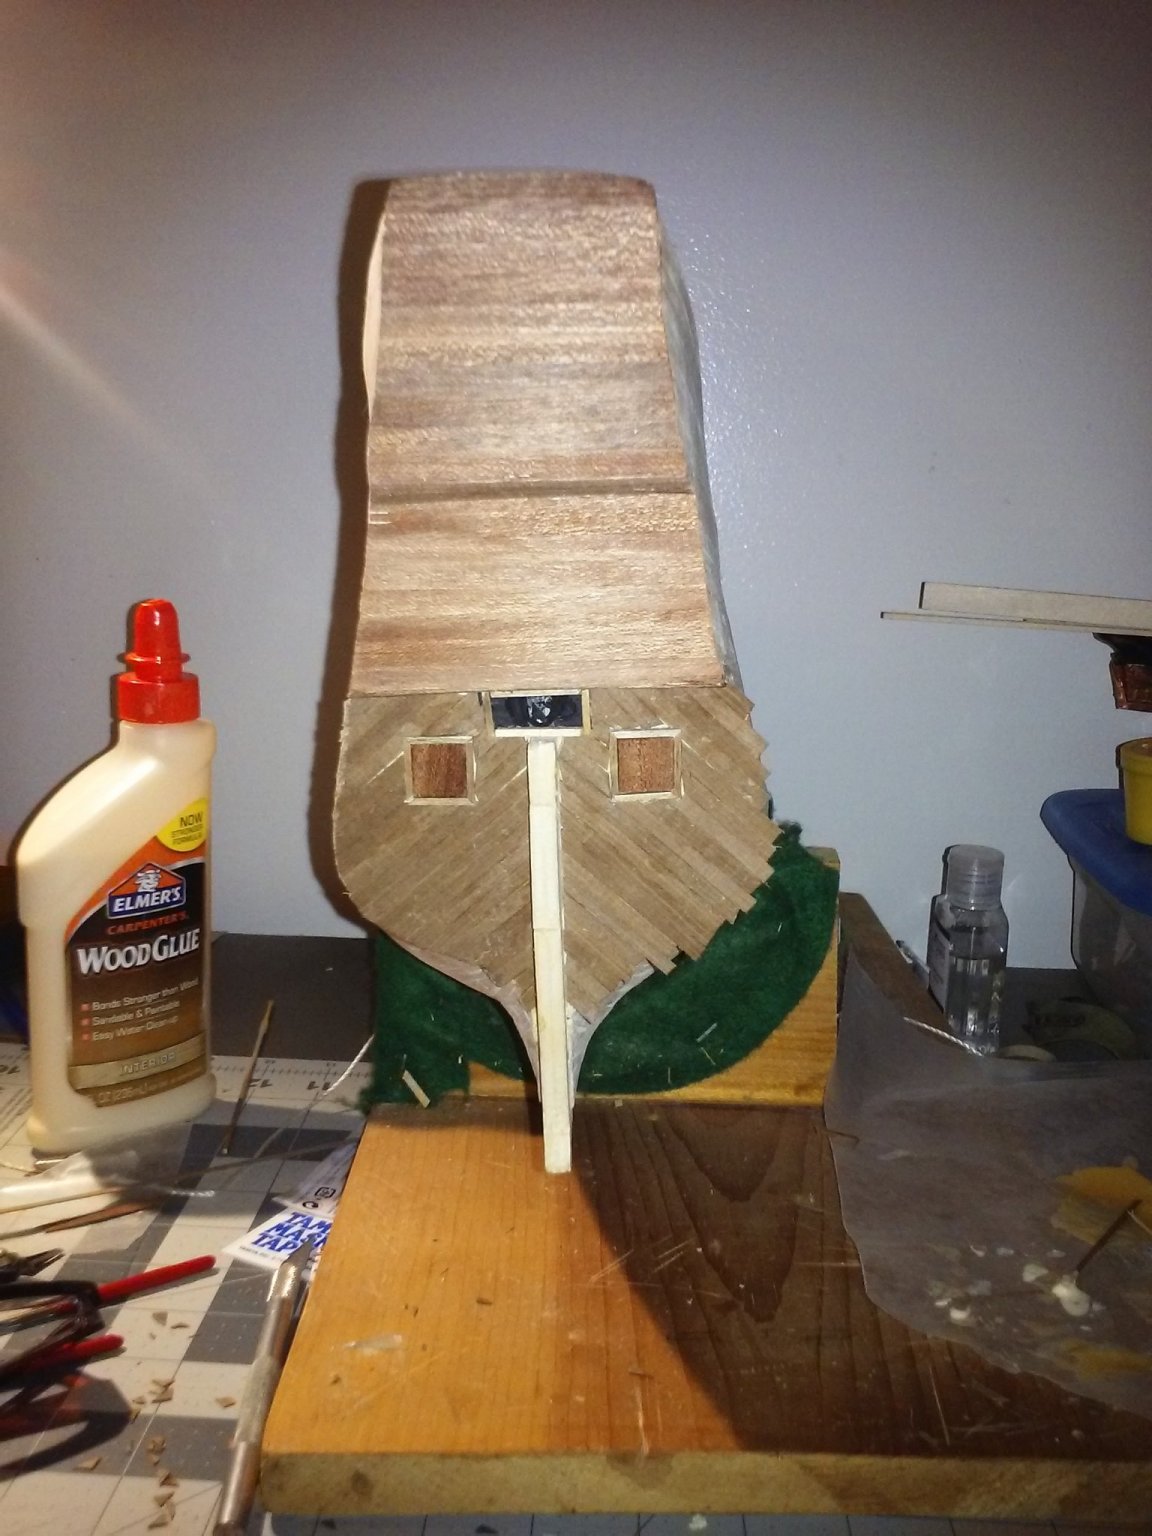
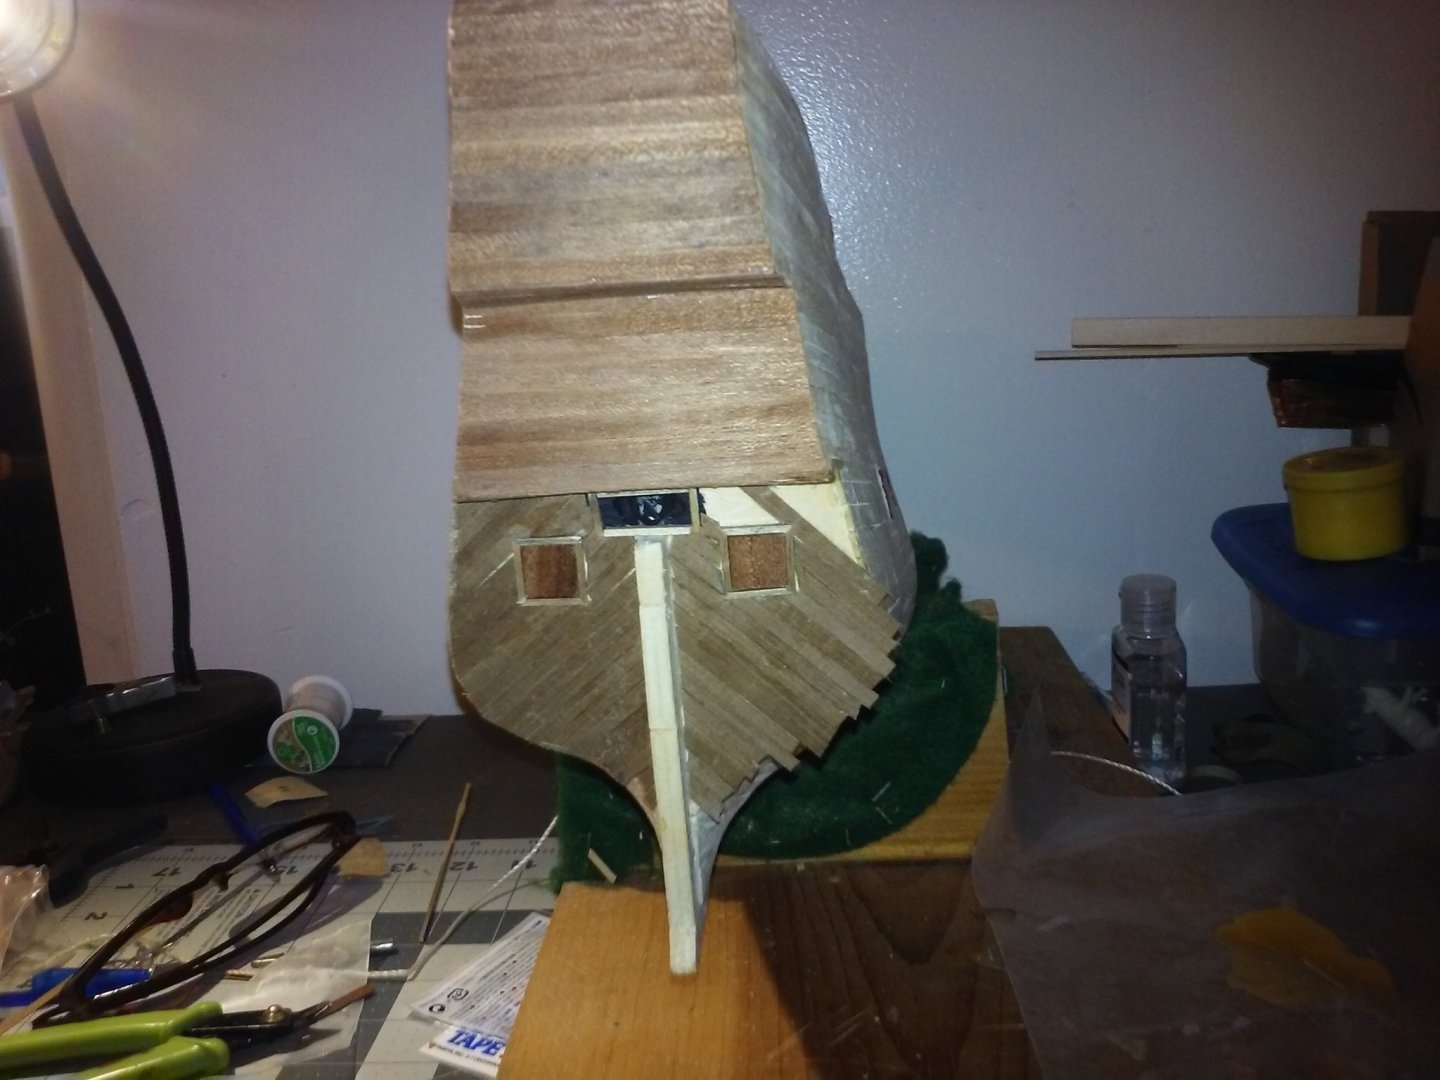
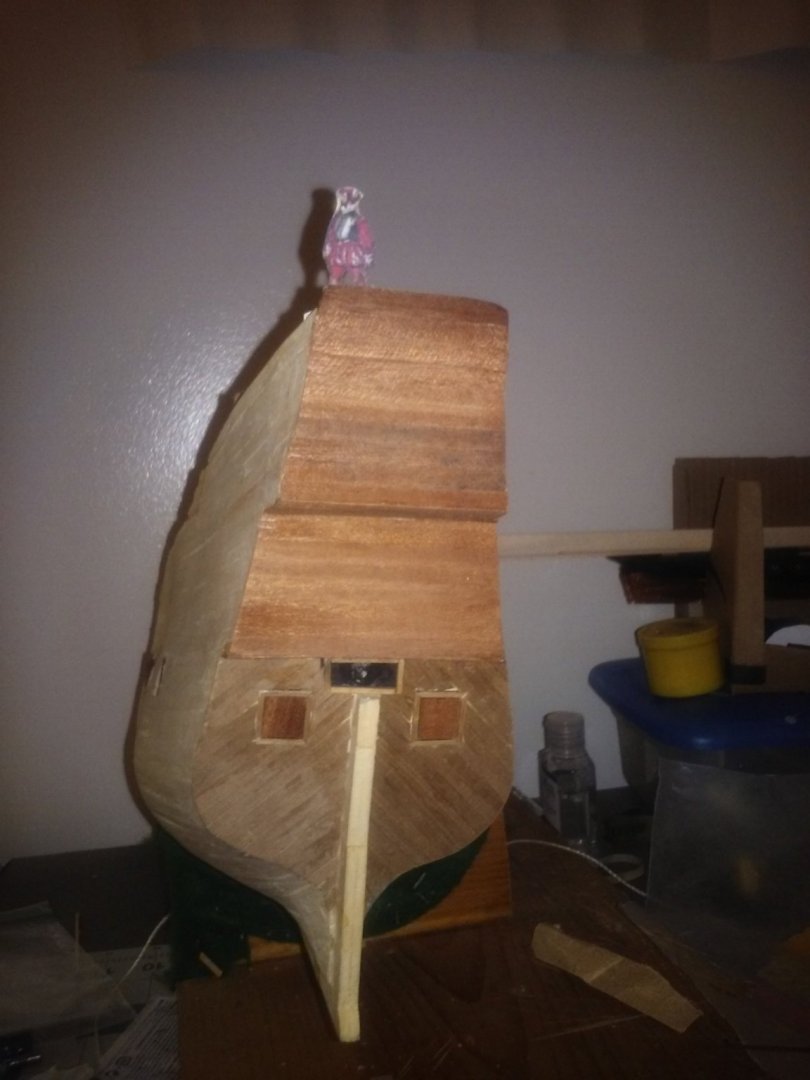
 Have a little time on my hands, so did some more work on the second layer of planking. Not as tight as I would have liked, but this is my first time working on this type of hull shape and it gave me trouble. I also need to clean up some stray wood glue (those white patches about 3/4s of the way down the bow). My next ship is going to require me to really school myself on planking technique. You also can't see it in this photo, but the second layer of planking has also shown me the necessity of really making sure I do a good job of fairing the bulkheads. This ship has more lumps and bumps than my 62-year-old frame, which is depressing. I had a question about the beakhead. I always imagined that on real ships, this was compass wood pretty much made of a single piece, but the photo on the kit box appears to show the beakhead either planked or with faux plank lines drawn. Not sure how to approach it.
-
Mamoli makes a line of small, solid-wooden hull kits called Mini Mamoli. It looks like they have a Bounty at about 1:135. I imagine the detail is pretty sparse, but it could be the basis for some scratch work and would be a relatively easy introduction to the hobby.
-
I've got Hasegawa's full-hull 1/700 Akagi waiting in the wings with the basic IJN photoetch to add to her. I've seen some amazing builds of the 1/350 kit. The PE really does help make it a beauty, though I imagine the build time for such a kit is probably at least equal to a wooden ship. I've been meaning to try "Shattered Sword" since I've been fascinated with Midway since reading "Incredible Victory" by Walter Lord as a kid. I recently picked up this memoir of a Kate pilot for my Kindle. My biggest problem is that books I'm interested in, like models I want to build, pile up faster than my free time expands. https://www.amazon.com/gp/product/B00THSCSS8/ref=kinw_myk_ro_title
-
I'm currently building Hasegawa's 1:48 B5N2 "Kate" torpedo bomber. The plane has the markings of that flown by Lt. Jouichi Tomonaga, strike leader from the Hiryu at the battle of Midway. Her tail number is BI-310 in standard western letters and numbers. I'd say you can't go wrong trusting Hasegawa on a detail like that. Tomonaga was the guy whose plane had its fuel tanks damaged on the initial morning strike on Midway. He was able to return and land on Hiryu. When the Americans put the Akagi, Soryu and Kaga out of action and took out a large part of the Japanese strike aircraft, Tomonaga led the Hiryu's strike against the Yorktown, though the damage to the plane meant he didn't have enough fuel for the round trip flight. He managed to launch a topedo at Yorktown, though it missed, and was shot down by Jimmy Thach. I've always thought the B5N2 was one the best-looking WWII planes, and the Hasegawa kit has been a great build.

-
I remember reading somewhere that when she got to England, she had to be taken out of the water to repair damage to her copper.
-
Saw this today on Amazon for 99cts on my Kindle. Picked it up along with "Catastrophe at Spithead." I don't know anything about the sinking of the Royal George, so that alone was well worth the amount spent.

-
- 3
-

-

-
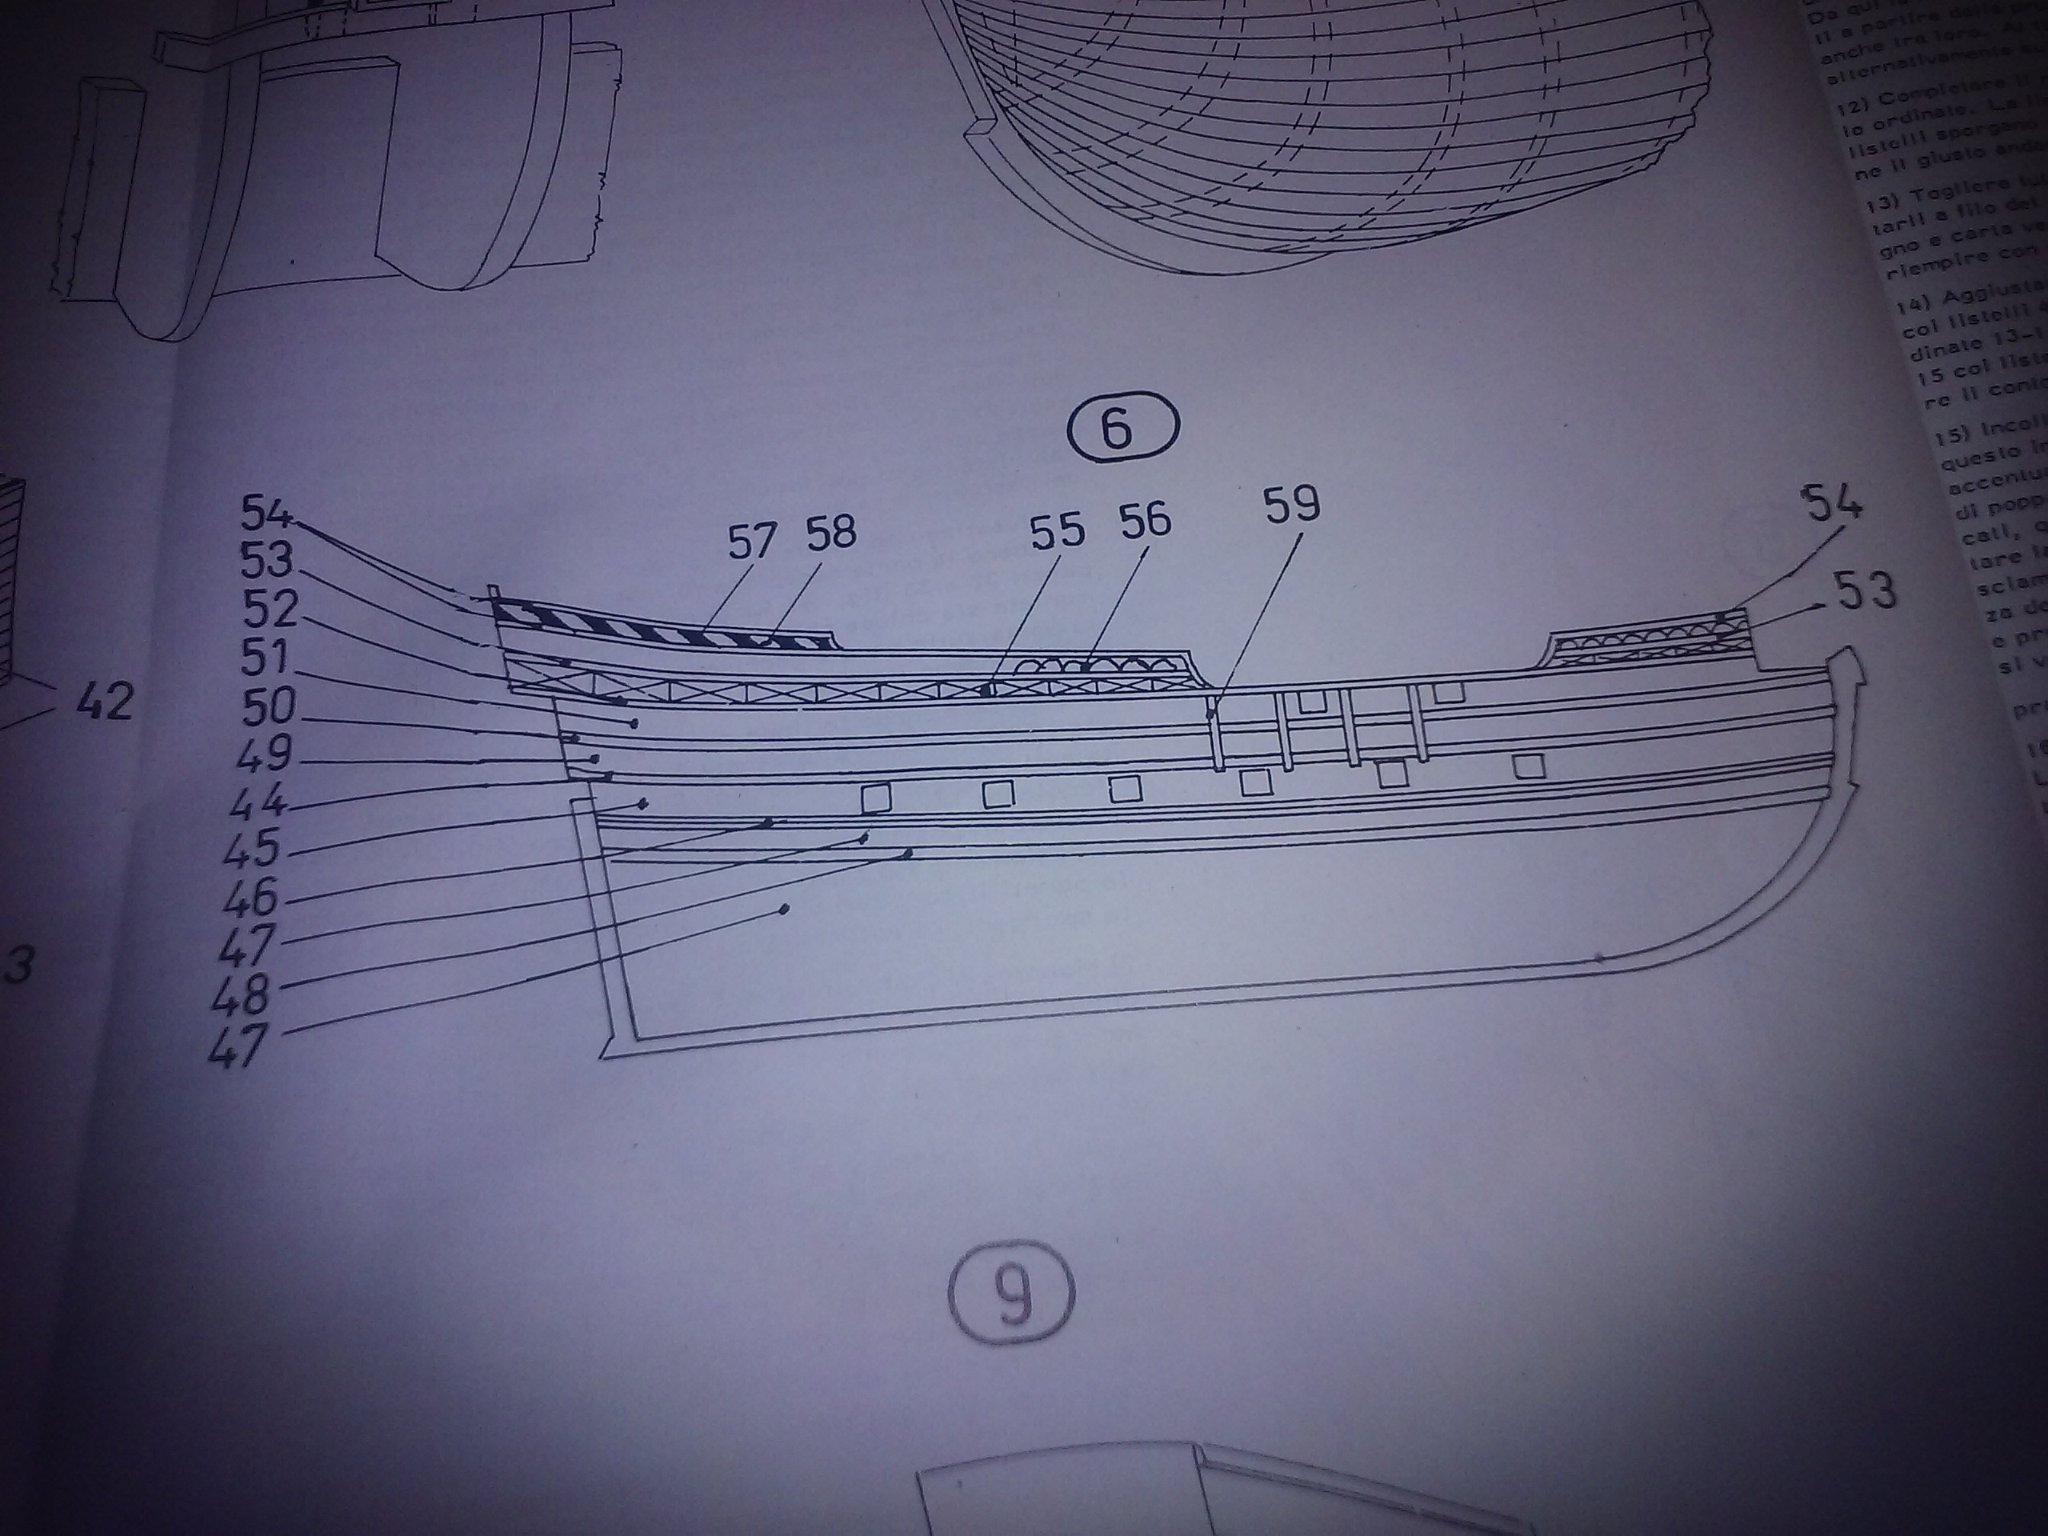
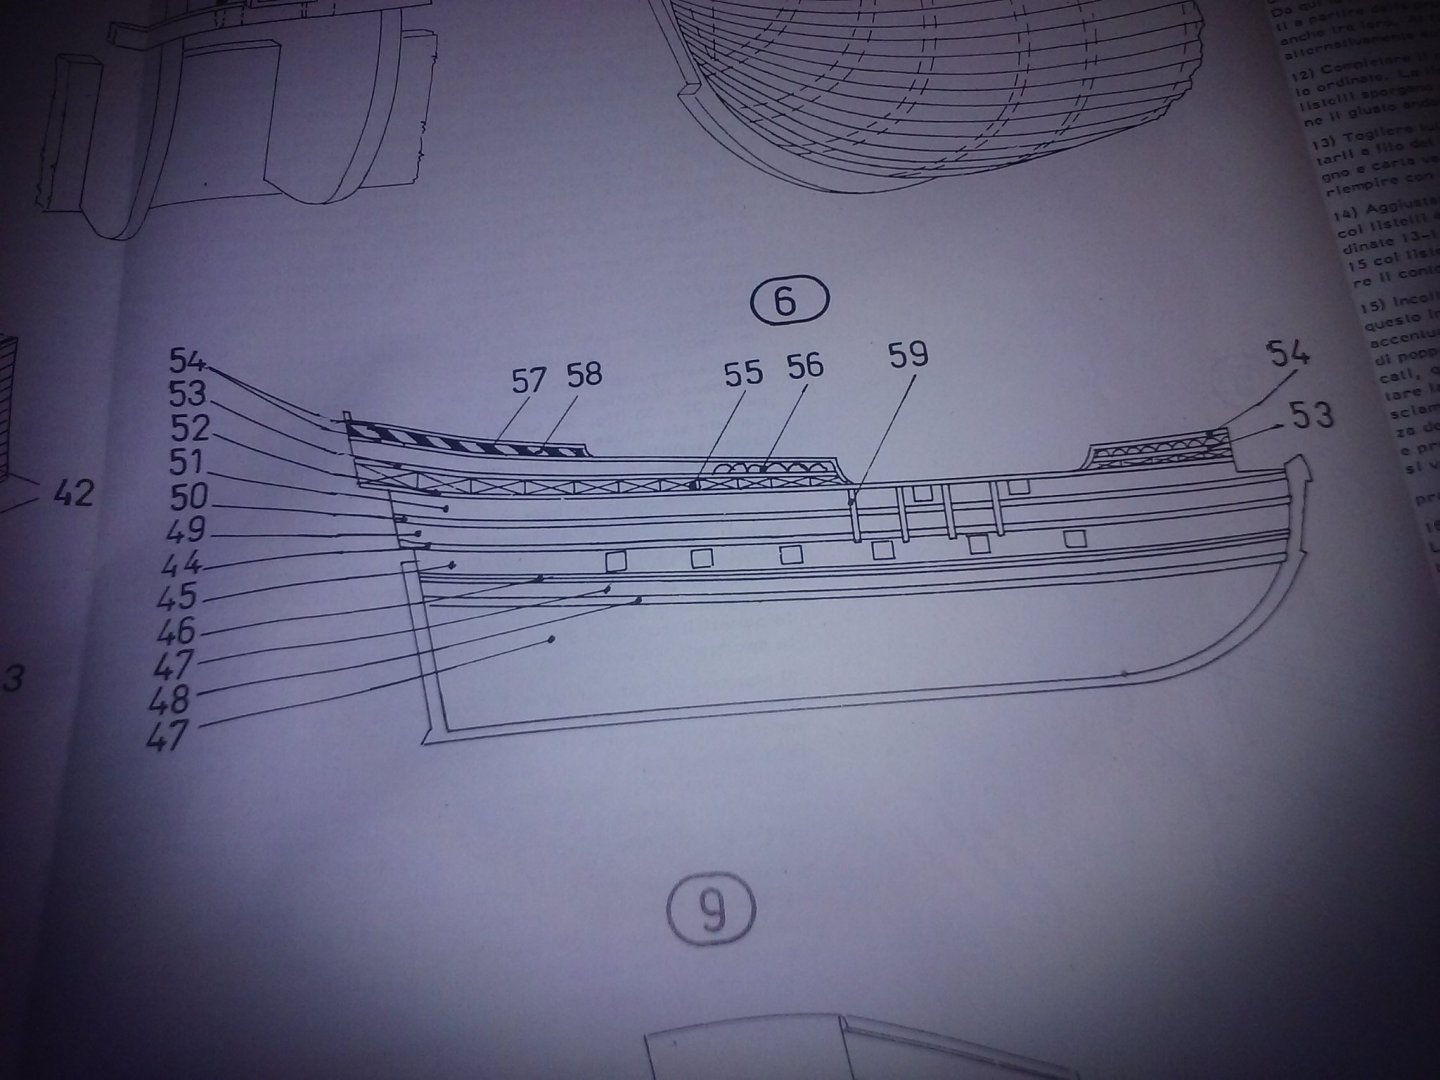
I know folks like Mamoli kits. Here's my problem with them. I find the instructions very complicated, requiring me to jump to multiple sheets and the box top to figure out what materials I should be using.
-
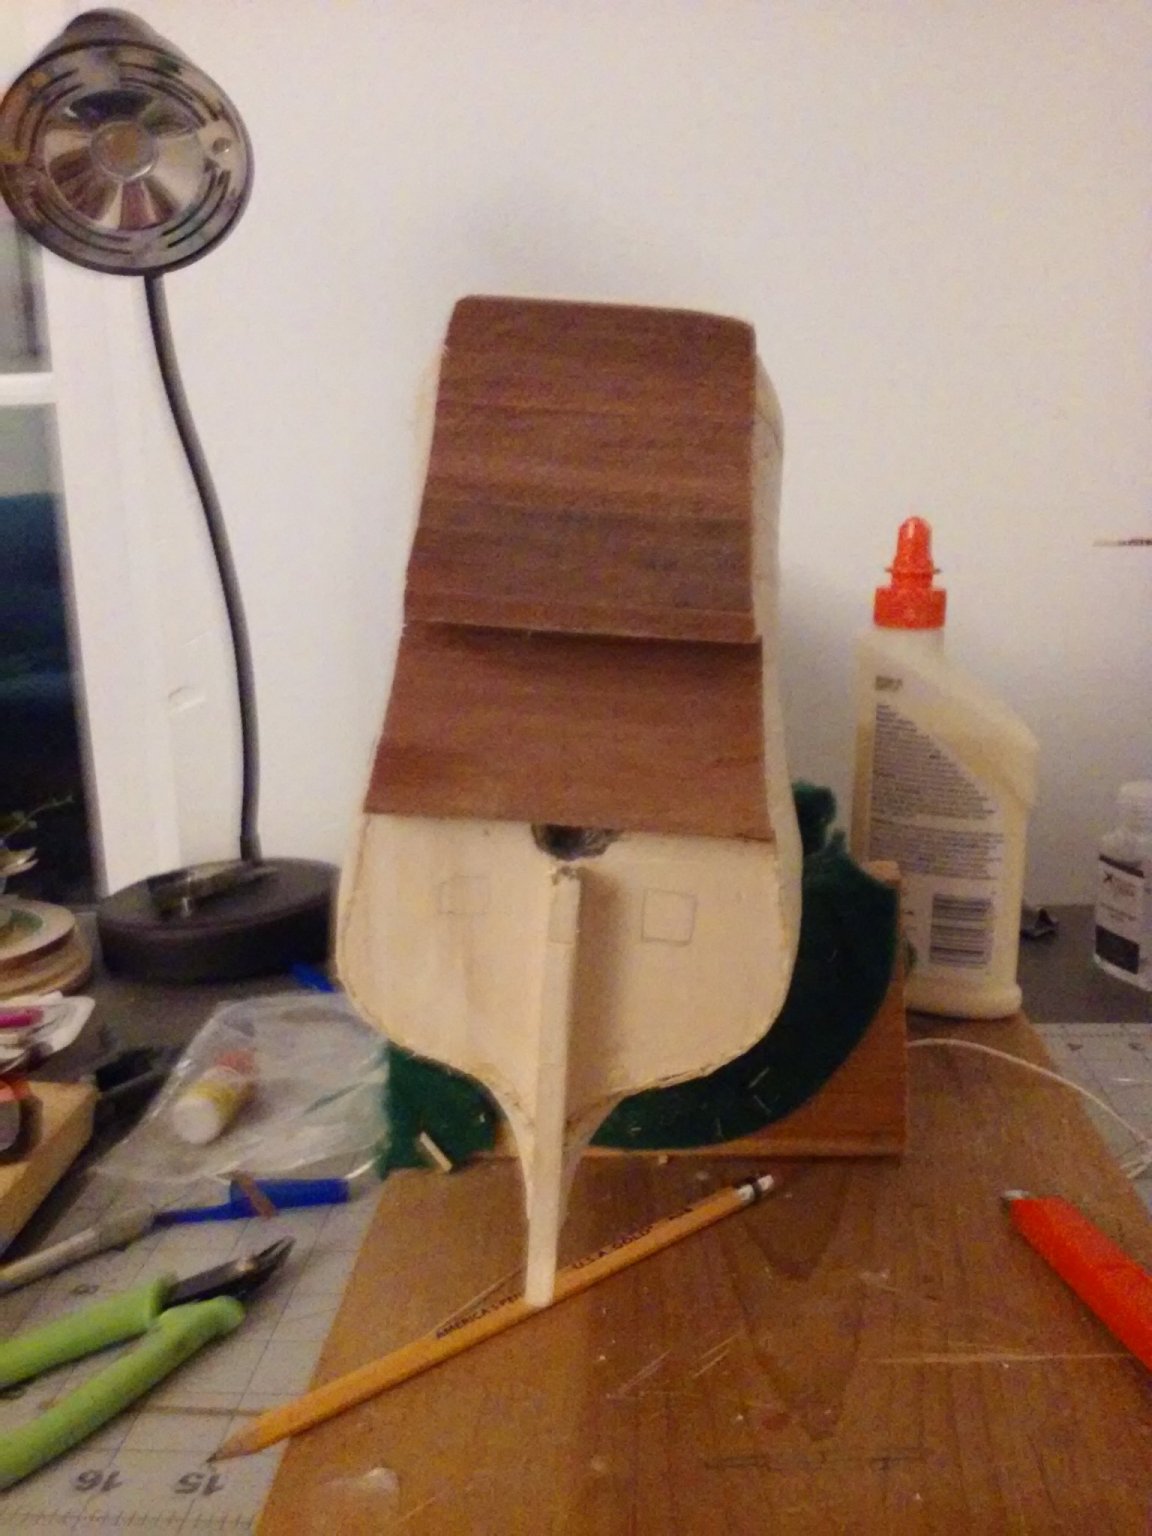
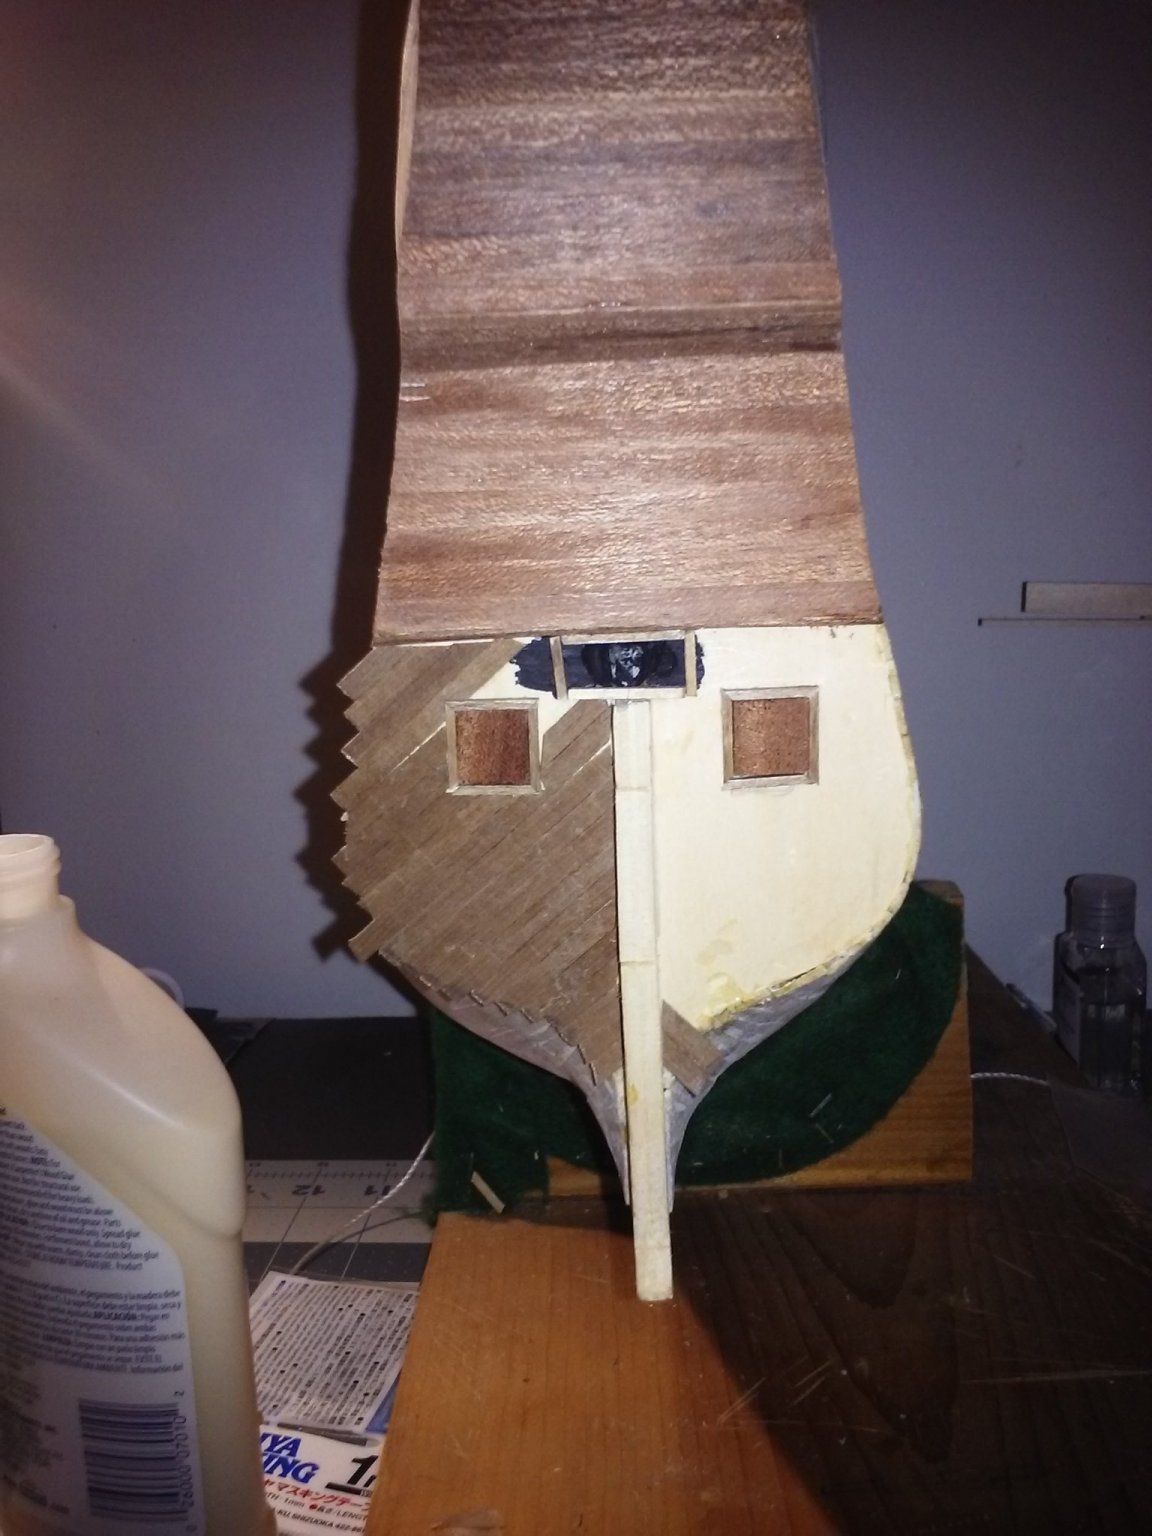
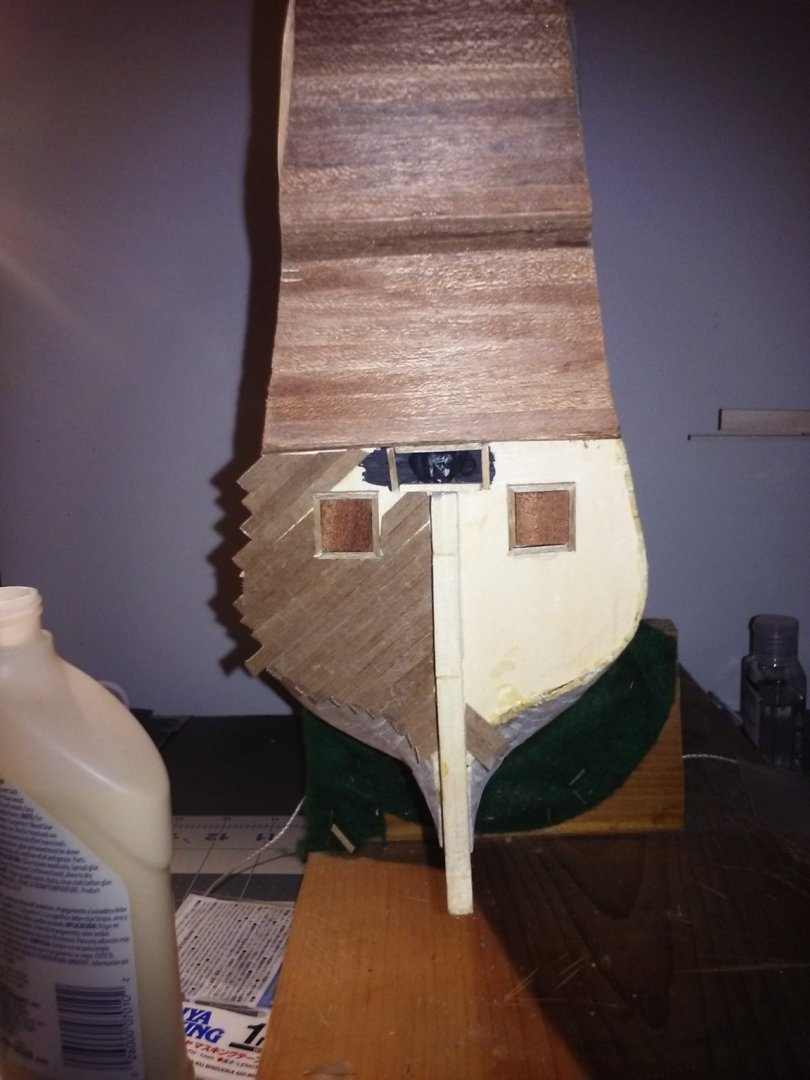
Finally got back to work. I'd tried planking the stern earlier, but for some reason the glue didn't hold very well and I had some loose planks. I wound up pulling off everything I'd done, giving the plywood back plates a good sanding and starting over. This time it seemed to work. The kit comes with pre-cut gunport lids. I didn't cut the plywood backplate to accomodate them, since trying to cut a hole for the tiller proved difficult. Instead, I decided to glue them on, then plank around them to try to give them less of a "pasted on" feel. Now that I've done it, I really can't tell the difference and it probably wasn't worth the extra work. I will place the hinges and the line used to open the port later on, as I'm afraid they'll get knocked loose in the building. Once I complete second planking the rest of the hull, I will sand everything and use a little watery glue to help hide spots where the plywood shows through.


-
"Cheating" with alternative materials?
Stevinne replied to Brewerpaul's topic in Wood ship model kits
Over the years, lots of people have given me old-school ship modeling books. Most of the techniques are outdated, but the one thing that has stood out for me is the wide variety of "alternative material" they include in their tips. I suspect that back in the day before packaged kits, modelers would use whatever material was at hand that worked well. I'm not sure about museum standards, but I think this is likely the approach folks took for hundreds of years. -
Planking Question
Stevinne replied to Malazan's topic in Building, Framing, Planking and plating a ships hull and deck
This is the way I've always done it. Not sure if I saw it in Frank Mastini's book or if it is just something I figured out for myself, since cutting a rabbet was always too intimidating. I've been happy with the way things turned out. -
Nice work. A beautiful cutter.
-
I just wish that there was a standard for model instructions. I've put my third kit - the Mamoli Roter Lowe - on the shelf for a while because the instructions are so bad. I built the Constructo Enterprise (not great instructions, but I could work through them), the AL Reynard (at least they came with nice pictures to show me what to do) and dozens of plastic airplanes and ships with pretty complicated photo etch. I recently turned the mini Mamoli America into a New York pilot boat and am now finishing up the Model Expo Harriet Lane since they have relatively easy instructions and give me an excuse to try tackling the Mamoli instructions.
-
I'm starting out on my own HL build, so I'm following along to learn what I can. Good work so far.
-
Welcome
-
Cutting pre-scored deck
Stevinne replied to Stevinne's topic in Building, Framing, Planking and plating a ships hull and deck
I made the template from the ship itself. The Harriet Lane has a pre-carved hull, with the bulwarks thicker than they should be, so the first step is to thin them down - I did that with my rotary tool and sandpaper. It looks good so far, but I imagine my job is nothing like what is shown on the plans. My plan is what you suggest - Give myself a little extra width and sand the deck so it slides in snug, though one of my concerns is that the plank lines might then wind up a little off the center line. -
Cutting pre-scored deck
Stevinne replied to Stevinne's topic in Building, Framing, Planking and plating a ships hull and deck
She's 1:144 and the planks look to be about 1.5mm wide apiece. It looks like I might be able to cut individual strips, but man - that's a lot of small individual strips -
Cutting pre-scored deck
Stevinne replied to Stevinne's topic in Building, Framing, Planking and plating a ships hull and deck
I hadn't thought to look at other logs. I did search "scored deck" and "scored sheet." I'll take a look and see what I can see. My plan is sort of what you recommend. I'd really like to just ditch the sheet and use planks, but at that scale, I don't know if it's feasible. -
I'm working on the MS Harriet Lane and my model has a sheet of pre-scored deck. I've made a paper template, but I'm wondering if there is a trick for cutting it without the wood splintering or getting raggedy? Any help will be appreciated.
-
I like little torpedo boats and early destroyers, but the key word is little. In 1/350 they are cool but small.
- 53 replies
-
- 5
-
-
- photo etch
- resin
- (and 3 more)
-
You should definitely check your library - they might have online access to the journal for patrons. It amazes me all the online resources my library has - every thing from language lessons to newspaper archives to obscure movie services, there's a chance yours will have access to this one.
-
Sorry, as a former newspaper employee who has seen what "free" information has done to outlets, I can't agree. I now work for a company that charges a bundle for the information we provide. I'm better paid, have better benefits and our customers seem happy, since our profits are rising. Meanwhile, take a look at your local newspaper and compare it to the size and amount of news that had been provided 20 or 30 years ago. That's the impact of everyone wanting everything for free. Gathering and publishing credible information costs money. There is an amazing amount of free information available on the Web, we are extraordinarily lucky to have access to it. But generating information isn't free. I think I should be able to walk into my local Mercedes dealership and drive off with what I want, but unfortunately, Mercedes won't let me. Information is just as valuable. You're lucky - even though the Post & Courier has cut back a bit, it still has high aspirations and a good amount of content.
- 22 replies
-
- 11
-
-
https://modelexpo-online.com/assets/images/documents/MS2260-SYREN-Addendum-CopperJig.pdf
-
We had circuit boards before we had plastic? You learn something new every day.
-
I'd never thought much about coppering before, so I'm enjoying this discussion. While nails in the weathered copper are definitely hard to see, the nails in the fresh copper in this photo are easily apparent and definitely have that "ponce-wheel effect" to my eyes. I wish there was a wider view to see what it looks like from a distance, but, when fresh, the dimples in the copper make the nails stand out. I'm interested because, at some point, I'm going to need to do something with the hull of the Harriet Lane.

-
This is a good example of a great kit built with care and attention. It is beautiful. Good work!
- 950 replies
-
- 1
-
-
- syren
- model shipways
- (and 1 more)